When you click on links to various merchants on this site and make a purchase, this can result in this site earning a commission. Affiliate programs and affiliations include, but are not limited to, the eBay Partner Network.
I finally got around to putting on my $260 craigslist special suspension, but ran into the seemingly normal issue of janky hardware on the Racing Beat front bar (1.125" flavor).
I wasn't terribly happy with the hardware the clamps that came with the bar - poorly bent, and not even height matched to the bushing.
Rather than cut the bushing down to fit in the crappy RB clamp, I took some quick measurements and my friend designed and CNC'd some new ones out of aluminum on his homemade machine.
Beauty shot for the ‘gram, fresh after machining.
I could have bolted them on then, but I decided prettying up a part that would be immediately hidden under the car was a good use of time. So we sanded them down smooth, and broke out our state of the art anodizing equipment.
One after sanding, one that’s also been anodized. It felt just like the FSAE days of using tiny scraps of sandpaper to remove stress risers off machined parts.
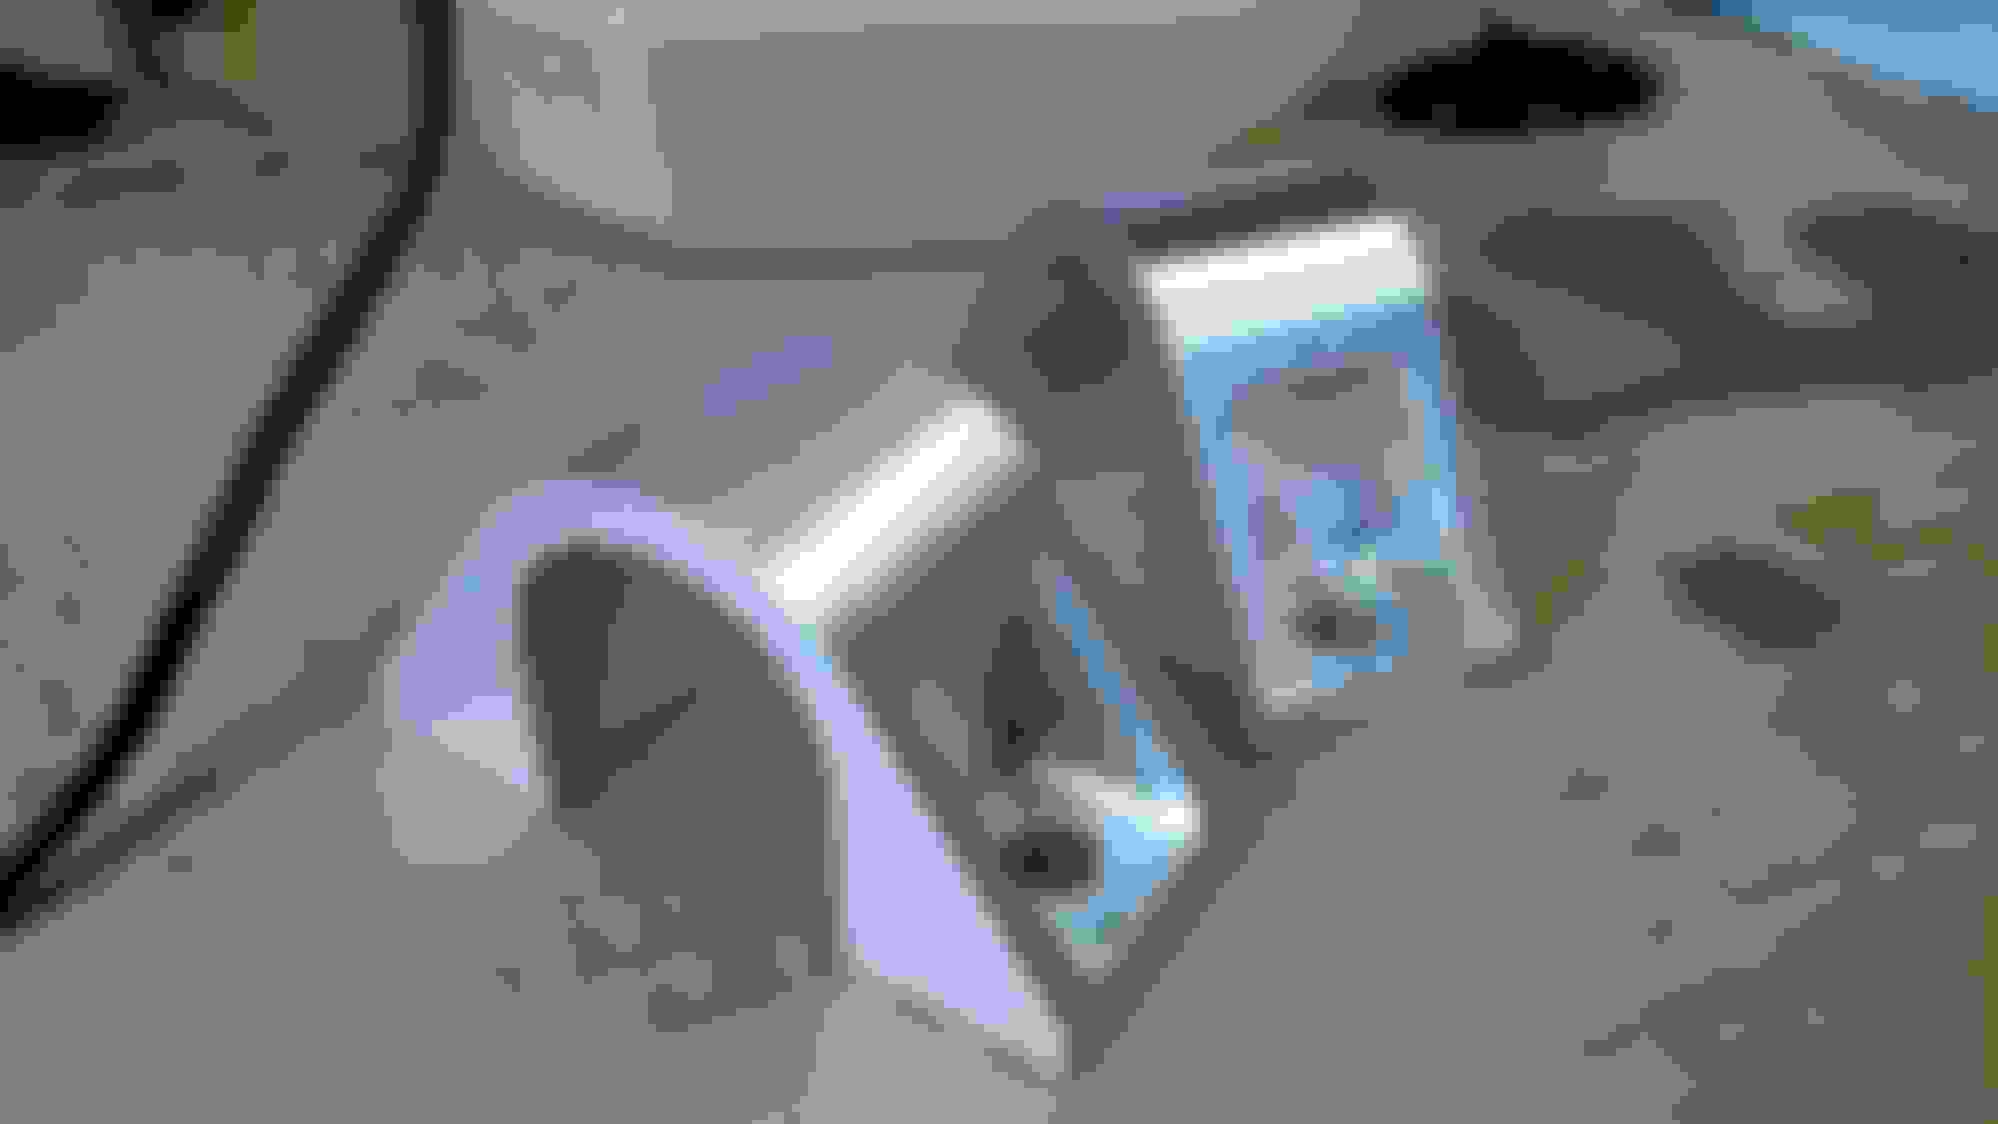
And it’s a perfect fit!
But there’s still more to be done for a proper install. The bar didn't include the universally recommended brace blocks to keep from tearing off the stock ARB mounting brackets., so we cut a set of blocks out from 1” square aluminum bar stock. All that was done was facing off the ends and machining two blind holes 60mm center-to-center.
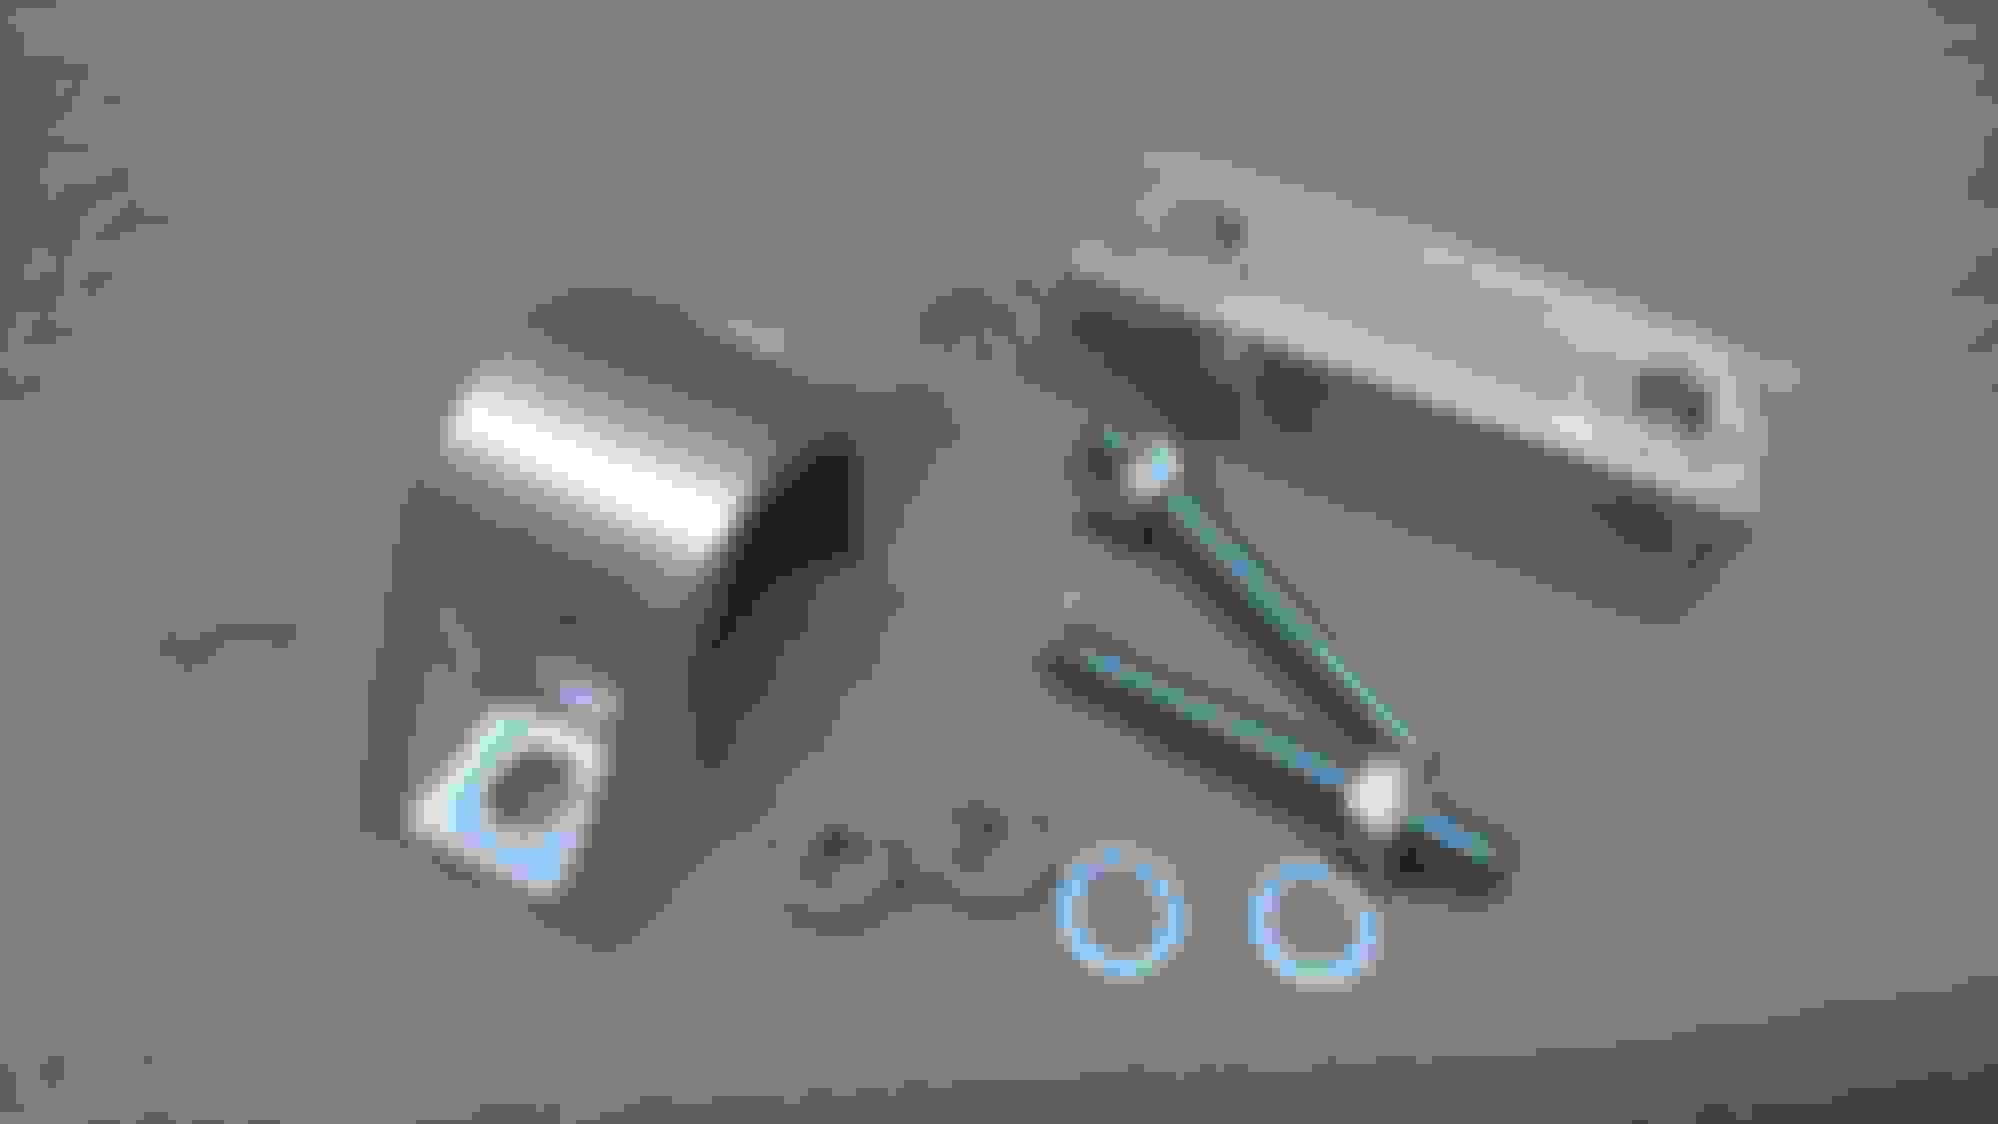
I also don't care for how the blocks are held in place as sold by Racing Beat - you can't remove the bar without having to deal with the blocks as well. So I made some studs out of long bolts to take their place. Designing for serviceability is an underappreciated concept!
The complete kit for one side.
How the blocks mount on the car. A bit of loctite on both the flange nuts and the chassis nuts should keep everything in place.
Lastly, the swaybar mounted in place, greased and with a few wraps of teflon tape.
I've got some other details to sort out such as installing split collars to keep the bar centered, but the only tool involved in making that show up on my car will be a credit card and a hex key.
I'mot sure about the forum rules on selling new, fabricated items without being a sponsor. Either way, I doubt anyone would be interested at the price he would want. He charges normal machine shop rates for anyone he doesn't know.
Looks like he did nice work but honestly, adding 3 flat washers under each side of the bracket spaces it out enough to work great and not bind the bar.
I contacted tech support at Racing Beat quite a while back to discuss the fitment (or lack thereof) of the poly swaybar bushings. The nice young man told me they have as many issues with them being too short as they do too long, as in the first pic with the arrow. I shaved mine down to be flush. However, it looks like you went to all that trouble, and THEN added the Teflon tape so that the bushing now has a gap. That gap will fill with all kinds of nastiness.
I'd be interested as well, these look tight. Throw out a number and let us balk
$150 for a pair of machined, unsanded, unanodized clamps was the number he gave me.
Originally Posted by poormxdad
I contacted tech support at Racing Beat quite a while back to discuss the fitment (or lack thereof) of the poly swaybar bushings. The nice young man told me they have as many issues with them being too short as they do too long, as in the first pic with the arrow. I shaved mine down to be flush.
This would be my main concern in making these for anyone else. If Racing Beat can't control what bushings they send out, I can't control whether you have the same one we designed for.
Originally Posted by poormxdad
However, it looks like you went to all that trouble, and THEN added the Teflon tape so that the bushing now has a gap. That gap will fill with all kinds of nastiness.
I noticed that, but the bar rotated quite freely so I moved on with the install. I'll be taking it off again soon enough anyways.
Originally Posted by bahurd
Looks like he did nice work but honestly, adding 3 flat washers under each side of the bracket spaces it out enough to work great and not bind the bar.
Jeez, tough crowd. I didn't think I'd have to justify making something cool just for the fun of it in the fabrication section.
I did use washers to adjust the fit on the rear bar bushings since the fitment wasn't egregiously bad.
I love these and I appreciate the quality work so I really hate to pick up on this one small thing.
I see this with 99% of home brew anodizing setups.
Not sealed. If it was and you opted to not to Include that I apologise. The anodizing just won't last without being sealed.
I see you're in SE Michigan. I would have totally bolted these up and ran through line, get ya some good hardcoat with PTFE for ultimate lubricity (raw anodize is actually a pretty rough surface especially when not sealed).
Jeez, tough crowd. I didn't think I'd have to justify making something cool just for the fun of it in the fabrication section.
I did use washers to adjust the fit on the rear bar bushings since the fitment wasn't egregiously bad.
Well I did say it was nice work and being in the machining industry I respect well done parts. Just offering another solution to a well documented problem.
A delrin bushing cut out for this bracket would be silly, I'd start with a clean sheet design.
As for the anodizing, I know its not as legit as it could be but if you have a link that could learn me good on how to seal the anodizing I'd like to read it.
A delrin bushing cut out for this bracket would be silly, I'd start with a clean sheet design.
As for the anodizing, I know its not as legit as it could be but if you have a link that could learn me good on how to seal the anodizing I'd like to read it.
NiF2 is probably the best way. IMO.
Our Nituff is REALLY awesome stuff. Military, medical, aerospace and hydroplane race boat parts seem to get this treatment the most.
And yes, case hardened steel. Carbide burrs have a hard time getting this stuff off.


 4
4