$2013 Lapping Zombie- Project Aftermath.
 11-10-2013, 07:05 PM
#81
Elite Member
Thread Starter
iTrader: (8)

Join Date: Dec 2008
Location: Kingston, Ontario
Posts: 2,910
Total Cats: 51
Thanks Ryan!
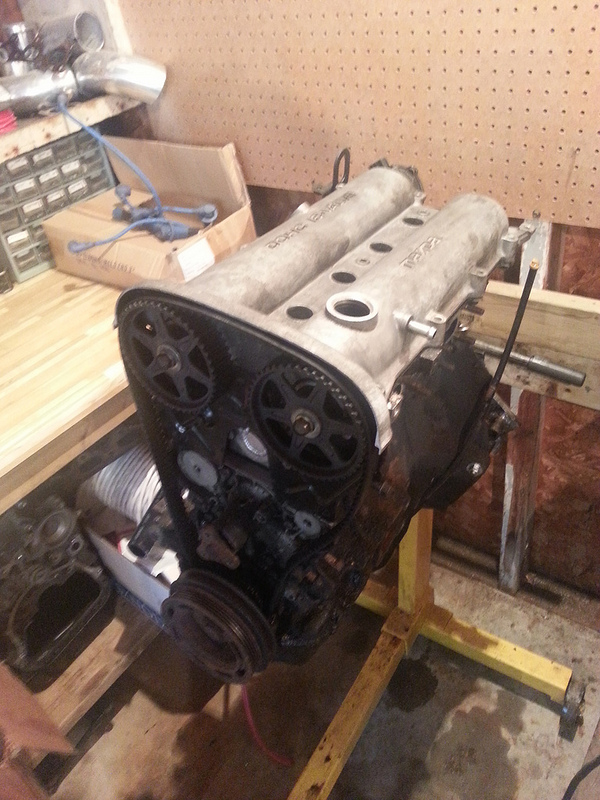
Did a little work to the engine today.... mostly just prepping and cleaning it up.
Cleaning up Miata B6 by Shlammed, on Flickr
Valve cover cleaned and cut, engine is stripped down to the bare long block. I will have cam gears at some point to be able to move my powerband around to whatever suits my gearing and turbo setup.
Water neck block off by Shlammed, on Flickr
Im doing a DIY reroute, so I blocked off the front coolant passage. This is the stock neck flange cut, filled with a press fit plug and welded shut as such so I still have the oring'd gasket to seal it up. Way cleaner way to do a reroute than the block off with the neck sticking out.
The engines rubber gaskets are all hard as a rock. Does anyone have a link to a full Miata 1.6 gasket kit? Preferably with piston rings.

Reply
 0
0

0
11-11-2013, 02:50 PM
#82
Elite Member
Thread Starter
iTrader: (8)
Join Date: Dec 2008
Location: Kingston, Ontario
Posts: 2,910
Total Cats: 51
Started building my custom intake manifold. I have the materials for the flange and the runners with me now.
The flange is drilled, I just need to cut the holes for the runners to taper them smoothly into the head.
I bought 1.5" schedule 40 aluminum pipe for the runner material. The pipe is larger than the intake ports on the 1.6, so I intend to cut the pipe lengthwise and taper the port from the floor of the plenum to the port diameter. this will promote more velocity of the air going into the engine. I just need to dig up the old calculations I made to figure out what runner length I want to cut it to.
I will have pictures of this shortly... I have to hook up the CRX im working on with a giant oil drain and I need to finish a turbo manifold Im Building for an NB with TiAL housing and wastegate.
Reply
0
0
11-22-2013, 11:30 AM
#83
Elite Member
Thread Starter
iTrader: (8)
Join Date: Dec 2008
Location: Kingston, Ontario
Posts: 2,910
Total Cats: 51
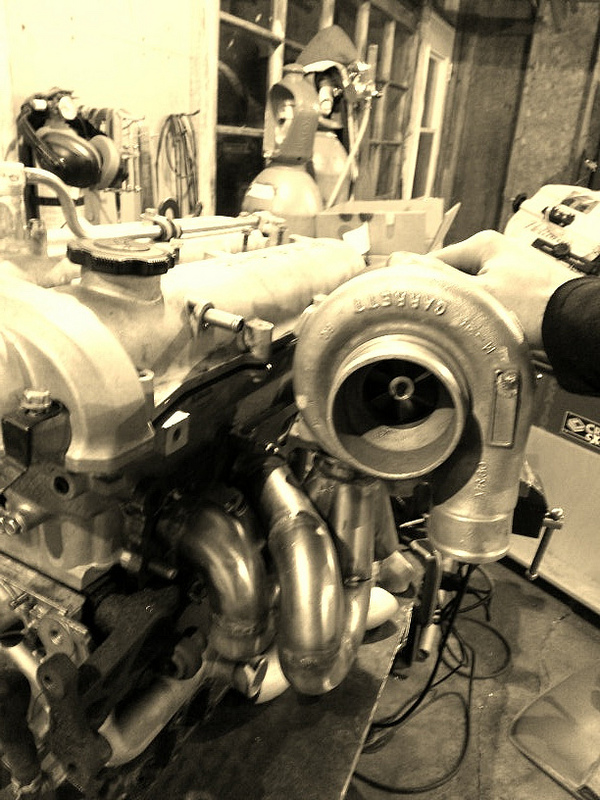
Granted its not the most accurate representation of the part im trying to show... you will know what I am showing if you look hard enough (or creep my other posts)
Miata engine #2. by Shlammed, on Flickr
Shown is my blown 2860 and a manifold I am building for a Miata.... but if you look deeper than that you can see a partially dissassembled BP- for which I have most of the parts to rebuild.
the 1.8 VVT has been acquired for my build!
Deets: it is dissassembled and is missing the pistons and rods. The head has been rebuilt with new oem spec valves, seals and has been decked (minor deck, i dont have the details on the amount its been decked though).
The engine has intake manifold and I still have the 2002 exhaust manifold from my old build. I am thinking that to get this together for the 2014 lapping season I might leave the boost off now that my engine should be able to make more than 90whp to get a season in with the budget within the $2013 that I was hoping to do it with.
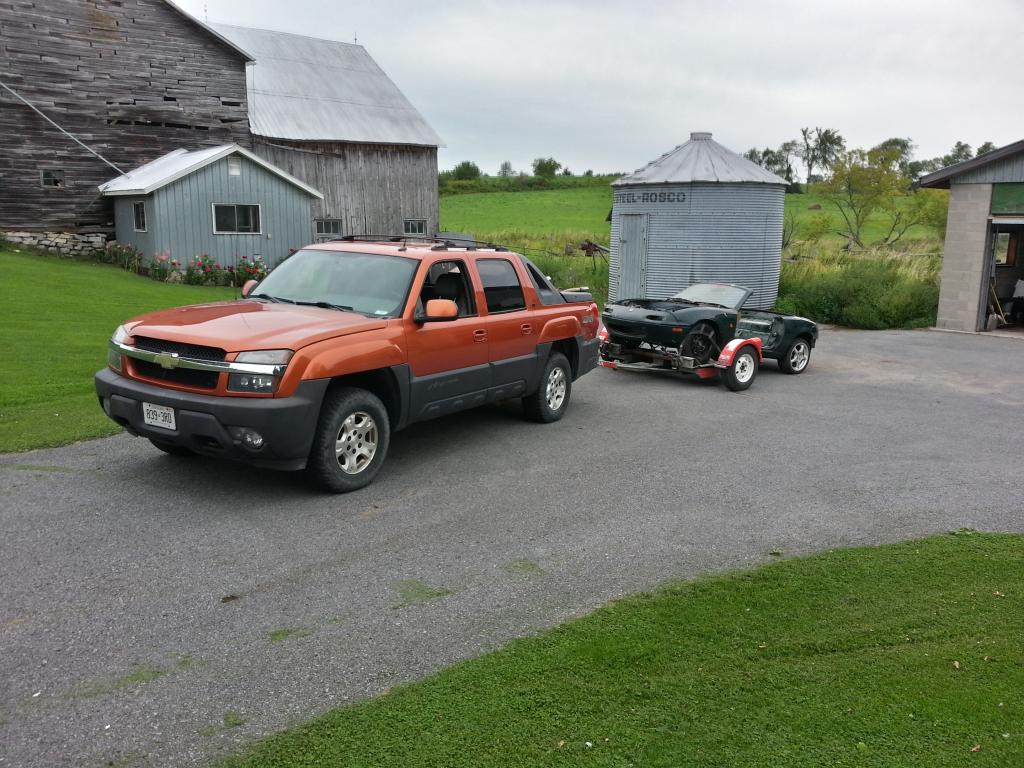
As far as progression: I have went to the shop that it is stored at, put it all together suspension wise besides suspension top hats and it is ready to be towed to my new garage. I have all of my parts that I need to build it sitting inside the car now and I just need to find a trailer to get it to me. I still need to bolt the body panels down though so they dont fly off on the highway. Thats not a big deal though.
Miata engine #2. by Shlammed, on Flickr
Shown is my blown 2860 and a manifold I am building for a Miata.... but if you look deeper than that you can see a partially dissassembled BP- for which I have most of the parts to rebuild.
the 1.8 VVT has been acquired for my build!
Deets: it is dissassembled and is missing the pistons and rods. The head has been rebuilt with new oem spec valves, seals and has been decked (minor deck, i dont have the details on the amount its been decked though).
The engine has intake manifold and I still have the 2002 exhaust manifold from my old build. I am thinking that to get this together for the 2014 lapping season I might leave the boost off now that my engine should be able to make more than 90whp to get a season in with the budget within the $2013 that I was hoping to do it with.
As far as progression: I have went to the shop that it is stored at, put it all together suspension wise besides suspension top hats and it is ready to be towed to my new garage. I have all of my parts that I need to build it sitting inside the car now and I just need to find a trailer to get it to me. I still need to bolt the body panels down though so they dont fly off on the highway. Thats not a big deal though.
Reply
0
0
 11-22-2013, 02:00 PM
#85
Elite Member
Thread Starter
iTrader: (8)
Join Date: Dec 2008
Location: Kingston, Ontario
Posts: 2,910
Total Cats: 51
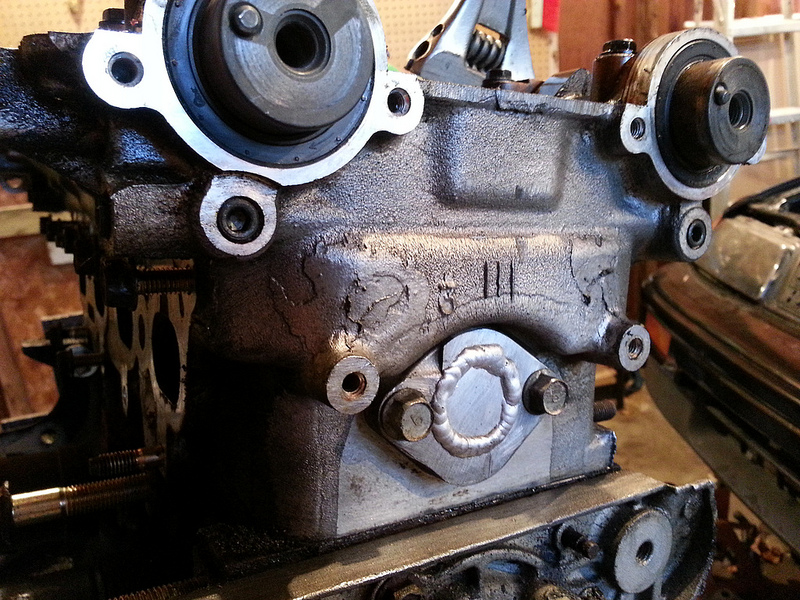
It happens.
There are minor vertical scratches in my block, so im going to take it to the machine shop next week to have him give me an idea of if it needs to be bored or if a hone will get rid of it.
I cant feel it with my fingernail so I am optimistic.
There are minor vertical scratches in my block, so im going to take it to the machine shop next week to have him give me an idea of if it needs to be bored or if a hone will get rid of it.
I cant feel it with my fingernail so I am optimistic.
Reply
0
0
 11-23-2013, 03:36 PM
#87
A freeze plug fits in there fine.
Water neck block off by Shlammed, on Flickr
Im doing a DIY reroute, so I blocked off the front coolant passage. This is the stock neck flange cut, filled with a press fit plug and welded shut as such so I still have the oring'd gasket to seal it up. Way cleaner way to do a reroute than the block off with the neck sticking out.
Reply
0
0
12-02-2013, 08:11 PM
#90
Elite Member
Thread Starter
iTrader: (8)
Join Date: Dec 2008
Location: Kingston, Ontario
Posts: 2,910
Total Cats: 51
Ordered a Microsquirt EMS from DIY while they had their black friday sale on.
Im trading the VVT head for an NB1 head for simplicity sake. No VVT to worry about needing an MS3x for, less wiring and it should be a much more simple wire job... oh and the micro comes pre-assembled.
Going to run the car N/A (at least) for the start of the year while I worry about other things like the car not exploding or needing something else and to pay for track days.
Reply
0
0
12-14-2013, 12:09 PM
#91
Elite Member
Thread Starter
iTrader: (8)
Join Date: Dec 2008
Location: Kingston, Ontario
Posts: 2,910
Total Cats: 51
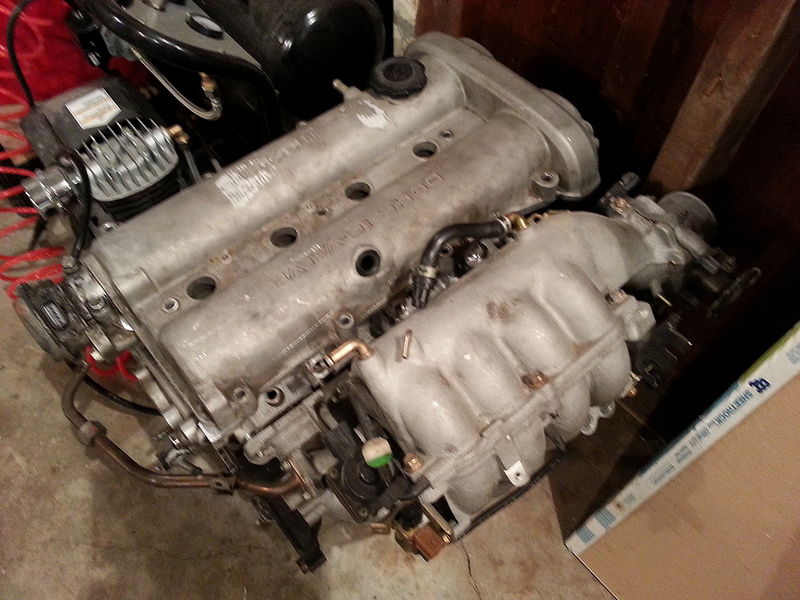
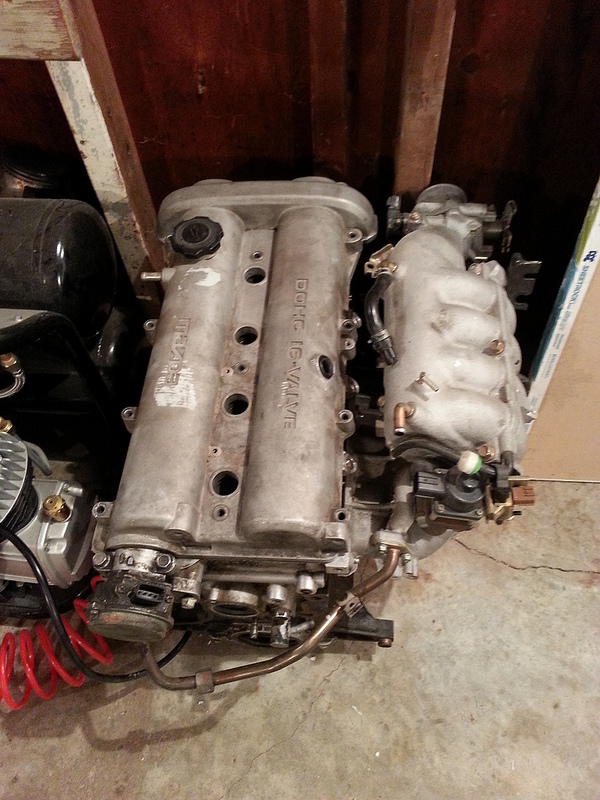
The BP4 head is in for my project.... ('99 head)
It looks good, but the valve cover is cracked opposite of the cam sensor on the front of the engine.
Miata BP. 99 head is in. by Shlammed, on Flickr
Miata BP. 99 head is in. by Shlammed, on Flickr
Microsquirt should be in relatively soon.
Just need to find some pistons to get the engine build rolling. I may have found some on here, but we will see when the time comes.
Going to run the '93 CAS for the time being for both cam and crank sensor. Im not sure if there is any advantage of running the VVT crank sensor with a 12-1 and the '93 CAS just for the cam sensor since I will be running a cut valve cover (cracked VC) but provisions will be there when the time comes.
Reply
0
0
 12-20-2013, 02:22 PM
#93
Elite Member
Thread Starter
iTrader: (8)
Join Date: Dec 2008
Location: Kingston, Ontario
Posts: 2,910
Total Cats: 51
Cross post.
ECU came in. Just need to build the engine and wire it up... I have 99% of the electronics (coils being what I need).
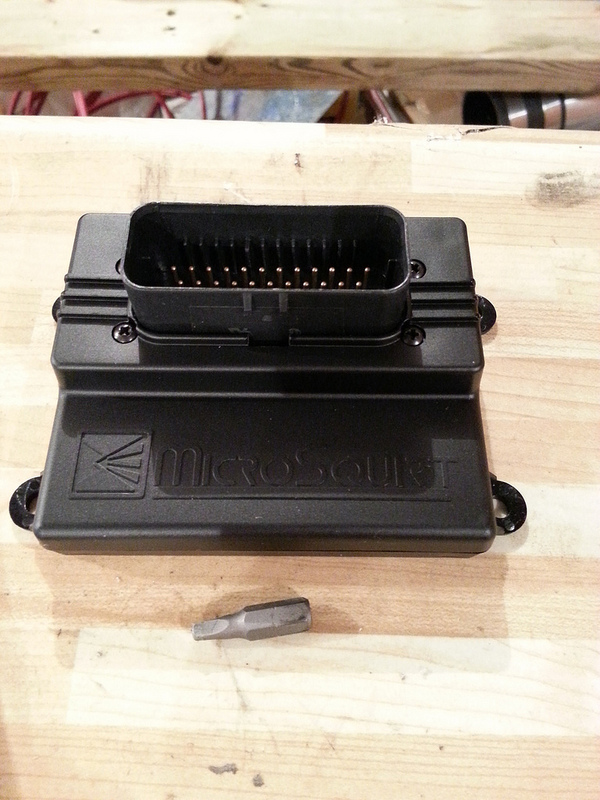
Microsquirt v3 by Shlammed, on Flickr
Surprised at the size and weight of it. the wiring harness is almost as big as the whole ECU! There is a #2 Robertson short bit to show you the size of the ECU itself. pretty cool!
ECU came in. Just need to build the engine and wire it up... I have 99% of the electronics (coils being what I need).
Microsquirt v3 by Shlammed, on Flickr
Surprised at the size and weight of it. the wiring harness is almost as big as the whole ECU! There is a #2 Robertson short bit to show you the size of the ECU itself. pretty cool!
Reply
0
0
 12-20-2013, 02:36 PM
#95
DIY likes to recommend this unit for other-than-car-usage for the most part. Looks like it'll drive 4 high impedance injectors just fine, though in batch.
Is there any other real obstacle to running this on a car? Seems on the surface to be about as capable as MS2...
I like the idea of treating it as an "MS3-Pro Lite."
Always banana to mouth, never mouth to banana.
Is there any other real obstacle to running this on a car? Seems on the surface to be about as capable as MS2...
I like the idea of treating it as an "MS3-Pro Lite."
Always banana to mouth, never mouth to banana.
Reply
0
0
12-20-2013, 02:44 PM
#96
Elite Member
Thread Starter
iTrader: (8)
Join Date: Dec 2008
Location: Kingston, Ontario
Posts: 2,910
Total Cats: 51
DIY likes to recommend this unit for other-than-car-usage for the most part. Looks like it'll drive 4 high impedance injectors just fine, though in batch.
Is there any other real obstacle to running this on a car? Seems on the surface to be about as capable as MS2...
I like the idea of treating it as an "MS3-Pro Lite."
Is there any other real obstacle to running this on a car? Seems on the surface to be about as capable as MS2...
I like the idea of treating it as an "MS3-Pro Lite."
I started a thread on here about the Micro vs the mega.
Basically the Micro is a self contained, pre packaged megasquirt minus the oversized heatsync for the injector drivers and it requires an external MAP sensor. besides that it is a MSPNP which is a variant of the megasquirt 2.
There is something else in the thread about some circuitry being the same as the new MS3 pro and that MS3 copied the micro being that it works so well.
For what I need, its going to be best. Pre-built, with flying lead wire harness, small and easy to mount and very basic.
Sure I wont have electronic boost control, launch control, etc etc functions that never really get used but im not worried about that. The micro is keeping costs down and is the same basic system. excited about it actually! more simple is more better for me with this-which is why I decided to get rid of my VVT head even though it may have been able to make a few more HP through the rev range than my NB1 head/NB2 bottom end hybrid.

Reply
0
0
 12-20-2013, 03:03 PM
#98
Elite Member
Thread Starter
iTrader: (8)
Join Date: Dec 2008
Location: Kingston, Ontario
Posts: 2,910
Total Cats: 51
Same software... apparently when you open TS for the first time on it you just choose Microsquirt to do the first setup.
ignition is the same too, just need to do pullup mods for cam/crank externally since its not done within the case...(I believe... I don't have my spreadsheet in front of me with my notes on it)
ignition is the same too, just need to do pullup mods for cam/crank externally since its not done within the case...(I believe... I don't have my spreadsheet in front of me with my notes on it)
Reply
0
0
09-04-2014, 09:51 AM
#99
Elite Member
Thread Starter
iTrader: (8)
Join Date: Dec 2008
Location: Kingston, Ontario
Posts: 2,910
Total Cats: 51
I haven't updated this thread in a bit more than 9 months... but its finally here and getting attention.
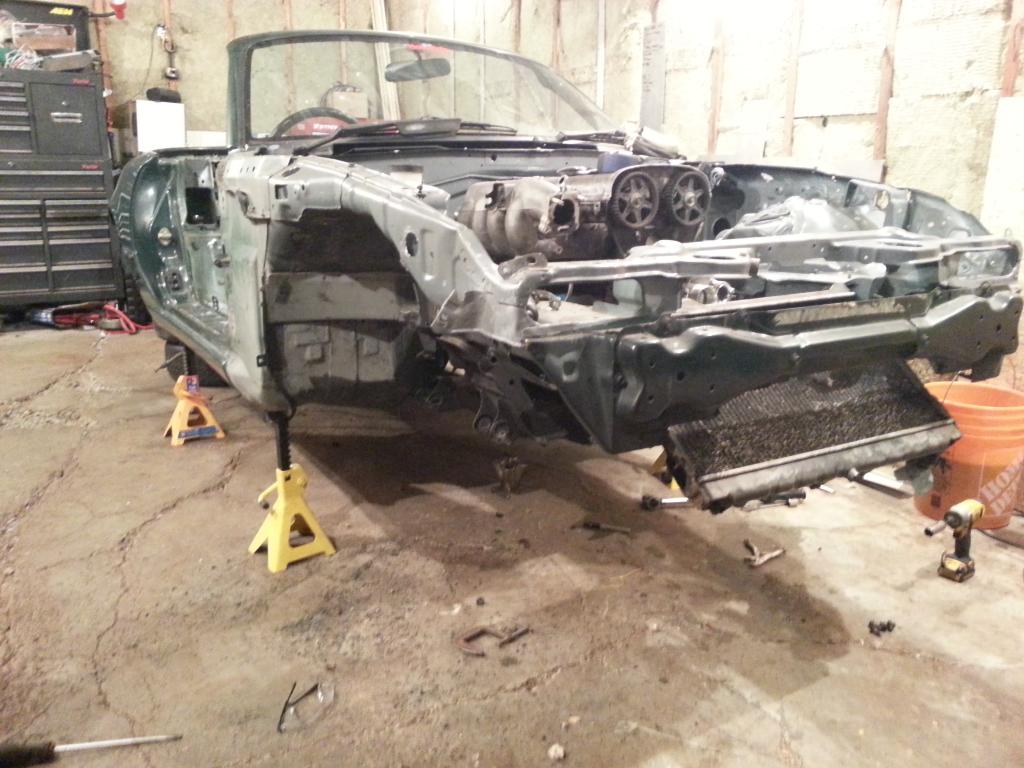
Build Staging
This is the plan for my staged build, so that focus is given in stages to prevent extra work and to ensure that it is completed in a timely nature.
1. Chassis prep.
basically take it all apart as far as I possibly can. its pretty close now, but there are lots of parts on it still, mostly suspension. remove them all, disassemble, clean, verify things like bushings, bearings, etc, maybe paint and then reassemble.
2. Brake system prep.
Get the brakes in, with new lines and up to a working state. Once the car runs I can experiment with pads and stuff, I have some front HP+ pads that should hold me off for a few days once its together with stock rear pads. All will be upgraded once running.
3. Engine prep.
This will probably kind of happen along step 1 and 2 being that its basically the expensive part of getting this project back together and where I will be building custom parts to make this more or less a shop car.
Custom inlet manifold, that I will be doing some development and tuning on.
Stock header for the 1.8, which I have and is trimmed back to where the collector is 3". Im going to do a little work to it to make a nice long choke point to taper into a 3" aluminum exhaust with the same flange position my exhaust systems will have, so I can toss one of my turbo kits into it later with no exhaust changes. This will be used for engine break in. Full turbo kit will be implemented when I determine what power goals I need to achieve to be competitive once the car is together with full drivetrain for wet weight measurements.
4. Drivetrain prep
Coupled with the engine build, the drivetrain will be getting addressed. Going to try to find a 1.8 rear end swap to use (can be open diff for the time being, just to keep it cheap since I plan to run a nicer diff than a torsen)
Small diameter twin plate clutch -fast shifting will be needed to get this thing going.
5. Wiring
Wire the engine to the microsquirt with the pre-made, labeled engine harness. Having both the Miata and the microsquirt together for the first time, it will be easy enough to build the harness as one piece and forgo the bulkhead connector. the microsquirt plug is 2-2.5" wide by an inch tall, which will be easy to find a hole in the firewall with a grommet for. Then wire in main, essential and accessory wires/relays.
6. Paint
At this time, I will be going over the entire chassis with a fine tooth comb. Determining whats needed, whats not and how to maximize all performance based aspects of the chassis package as well as aesthetics so that all modifications are done before paint.
Once its all together and finished, take it apart and paint the car. This will keep me from drilling holes, filling holes, etc after the paint is done to install engine/brakes/wiring.
7. Tuning
By this point the car should be ready to start. It will be a very bare bones car, but the exciting part comes now.
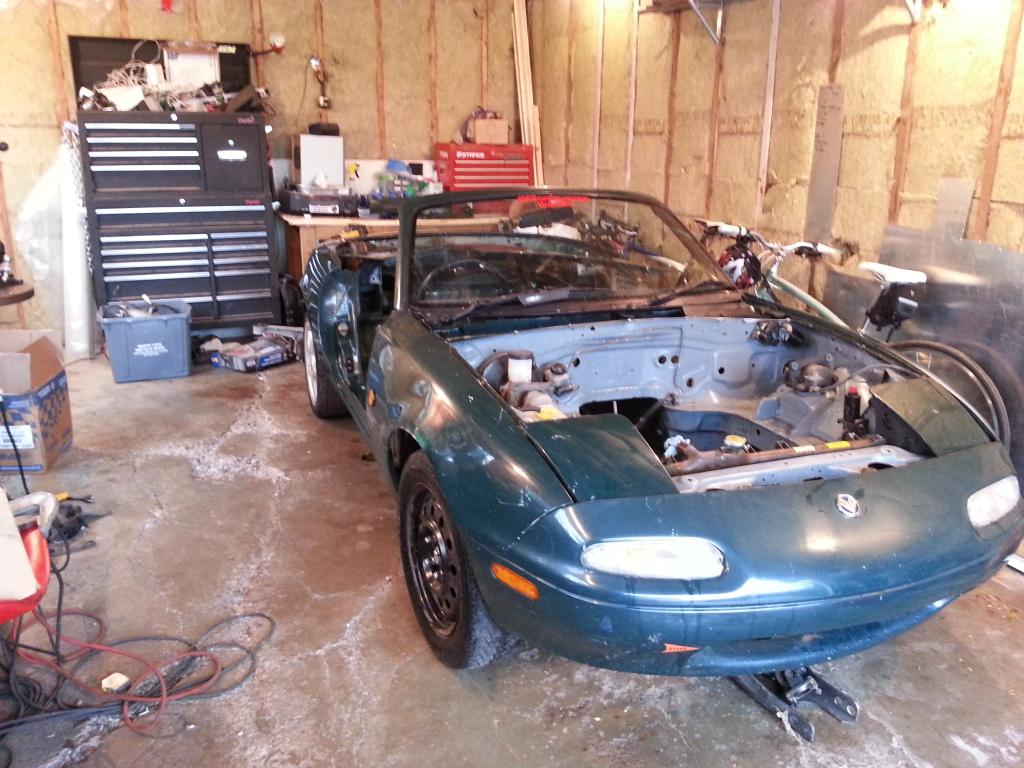
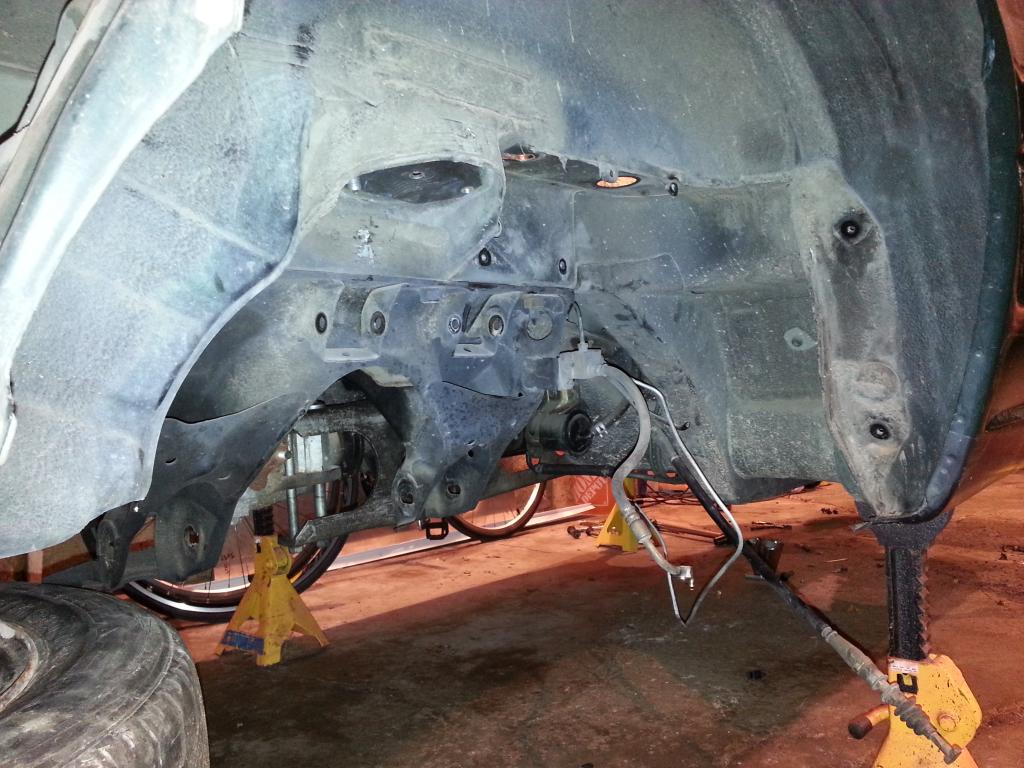
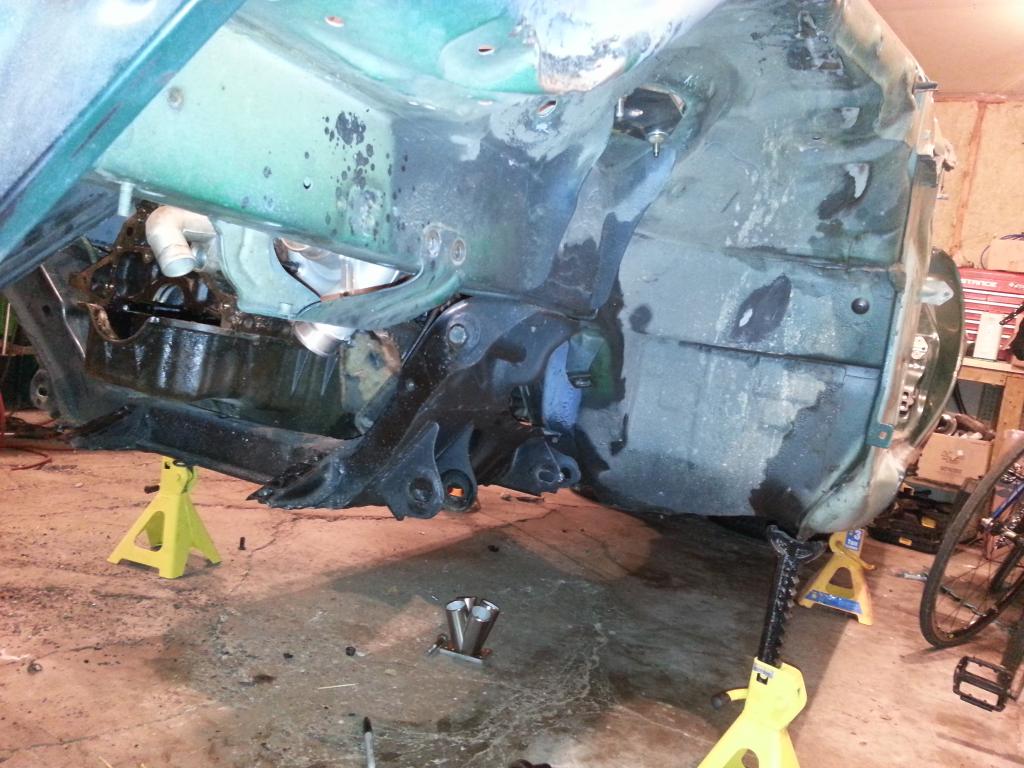
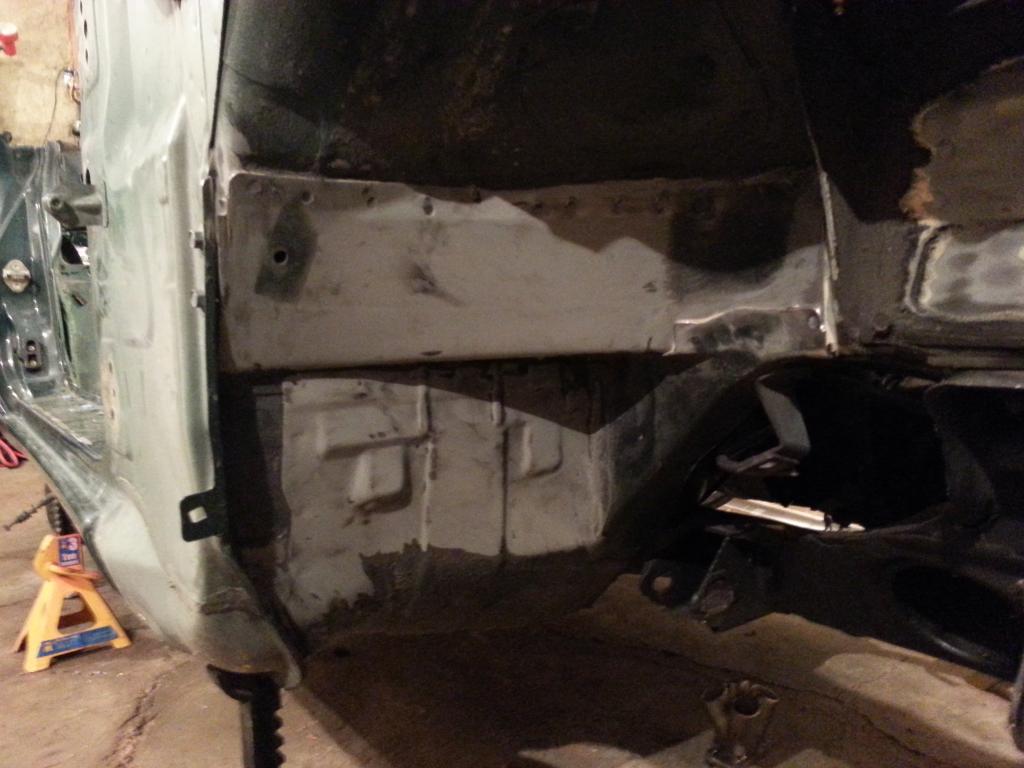
Immediate plans for the car are to get it down to a very bare shell and continue to remove the factory tar from the underside of the chassis.
From there I will go all Jeffbuc and paint all of the suspension components, poly/delrin the bushings and replace some parts that I noticed needed attention while I was removing them.
Notes from suspension disassembly
-The front driver side lower control arm eccentrics were a bit mangled for some reason. The nut side eccentric washers were stripped of the D shape and probably would have made alignment a problem on that corner. Those will be replaced.
-The front outer tie rods and front balljoints will be replaced with new R package parts... the ultra angle steering knuckles I had on this car before didn't do them any favors.
-The front wheel bearings are fine on it right now, but the rear wheel bearings, upon inspection, didn't like what drifting and low offsets/high spring rates did to them. The rear wheel bearings will be replaced. They would probably be OK, but im not willing to risk it.


Build Staging
This is the plan for my staged build, so that focus is given in stages to prevent extra work and to ensure that it is completed in a timely nature.
1. Chassis prep.
basically take it all apart as far as I possibly can. its pretty close now, but there are lots of parts on it still, mostly suspension. remove them all, disassemble, clean, verify things like bushings, bearings, etc, maybe paint and then reassemble.
2. Brake system prep.
Get the brakes in, with new lines and up to a working state. Once the car runs I can experiment with pads and stuff, I have some front HP+ pads that should hold me off for a few days once its together with stock rear pads. All will be upgraded once running.
3. Engine prep.
This will probably kind of happen along step 1 and 2 being that its basically the expensive part of getting this project back together and where I will be building custom parts to make this more or less a shop car.
Custom inlet manifold, that I will be doing some development and tuning on.
Stock header for the 1.8, which I have and is trimmed back to where the collector is 3". Im going to do a little work to it to make a nice long choke point to taper into a 3" aluminum exhaust with the same flange position my exhaust systems will have, so I can toss one of my turbo kits into it later with no exhaust changes. This will be used for engine break in. Full turbo kit will be implemented when I determine what power goals I need to achieve to be competitive once the car is together with full drivetrain for wet weight measurements.
4. Drivetrain prep
Coupled with the engine build, the drivetrain will be getting addressed. Going to try to find a 1.8 rear end swap to use (can be open diff for the time being, just to keep it cheap since I plan to run a nicer diff than a torsen)
Small diameter twin plate clutch -fast shifting will be needed to get this thing going.
5. Wiring
Wire the engine to the microsquirt with the pre-made, labeled engine harness. Having both the Miata and the microsquirt together for the first time, it will be easy enough to build the harness as one piece and forgo the bulkhead connector. the microsquirt plug is 2-2.5" wide by an inch tall, which will be easy to find a hole in the firewall with a grommet for. Then wire in main, essential and accessory wires/relays.
6. Paint
At this time, I will be going over the entire chassis with a fine tooth comb. Determining whats needed, whats not and how to maximize all performance based aspects of the chassis package as well as aesthetics so that all modifications are done before paint.
Once its all together and finished, take it apart and paint the car. This will keep me from drilling holes, filling holes, etc after the paint is done to install engine/brakes/wiring.
7. Tuning
By this point the car should be ready to start. It will be a very bare bones car, but the exciting part comes now.
Immediate plans for the car are to get it down to a very bare shell and continue to remove the factory tar from the underside of the chassis.
From there I will go all Jeffbuc and paint all of the suspension components, poly/delrin the bushings and replace some parts that I noticed needed attention while I was removing them.
Notes from suspension disassembly
-The front driver side lower control arm eccentrics were a bit mangled for some reason. The nut side eccentric washers were stripped of the D shape and probably would have made alignment a problem on that corner. Those will be replaced.
-The front outer tie rods and front balljoints will be replaced with new R package parts... the ultra angle steering knuckles I had on this car before didn't do them any favors.
-The front wheel bearings are fine on it right now, but the rear wheel bearings, upon inspection, didn't like what drifting and low offsets/high spring rates did to them. The rear wheel bearings will be replaced. They would probably be OK, but im not willing to risk it.
Reply
0
0


