90 FE-dohc (FE3) Turbo


 02-16-2014, 11:32 AM
#145
Elite Member
Thread Starter
iTrader: (5)
Join Date: Jan 2005
Location: Atlanta
Posts: 7,486
Total Cats: 372
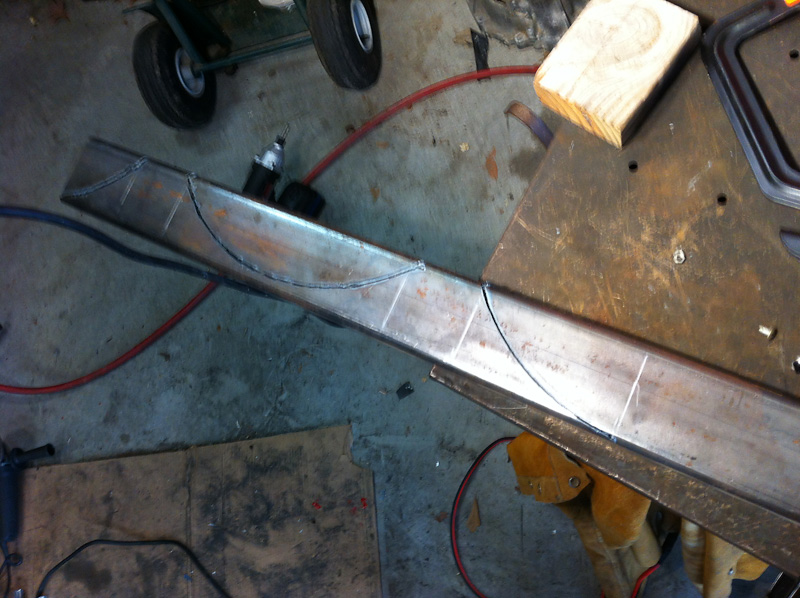
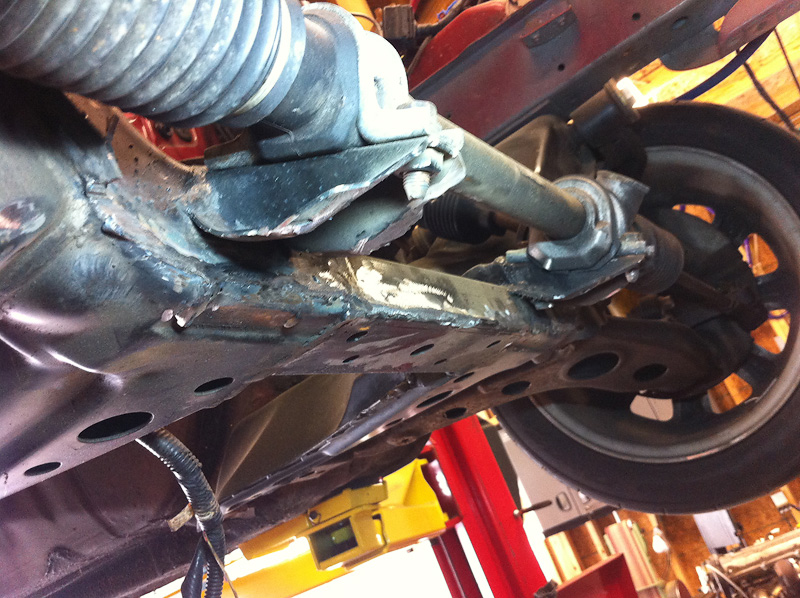
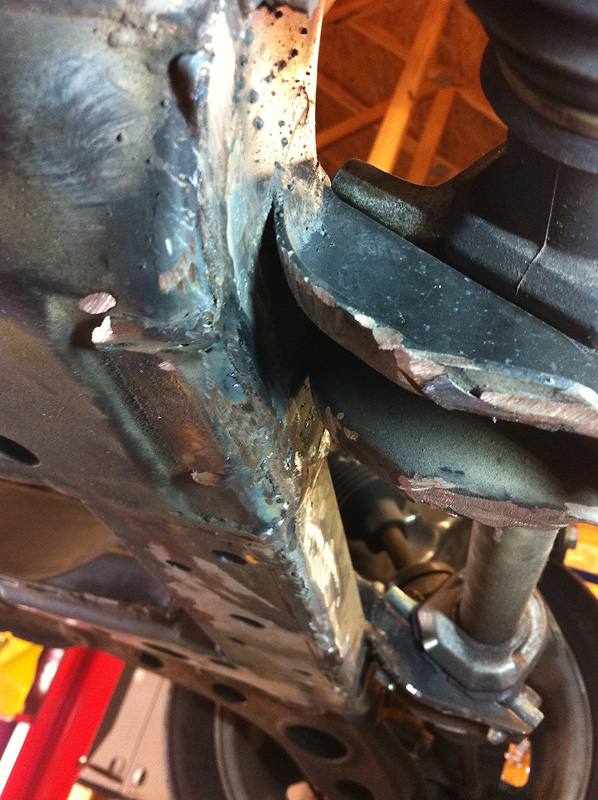
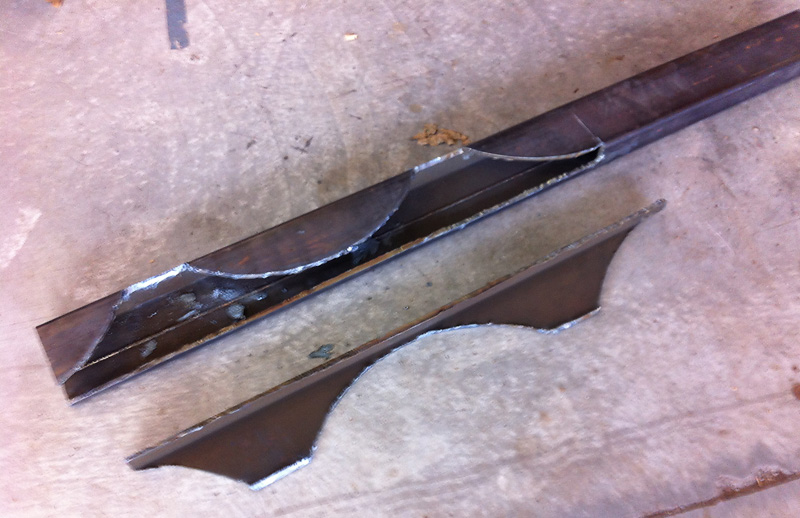
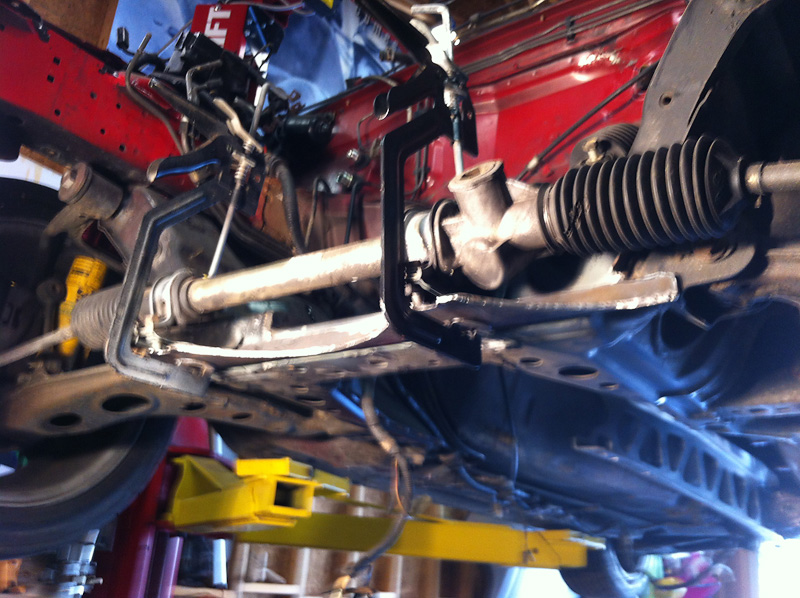
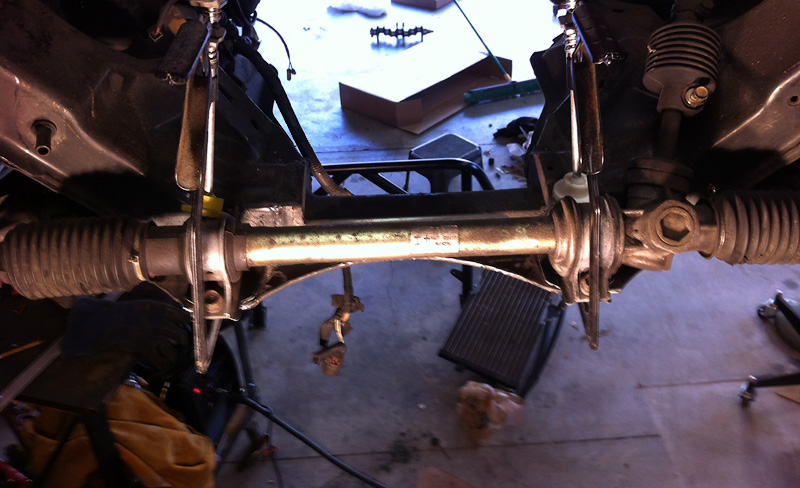
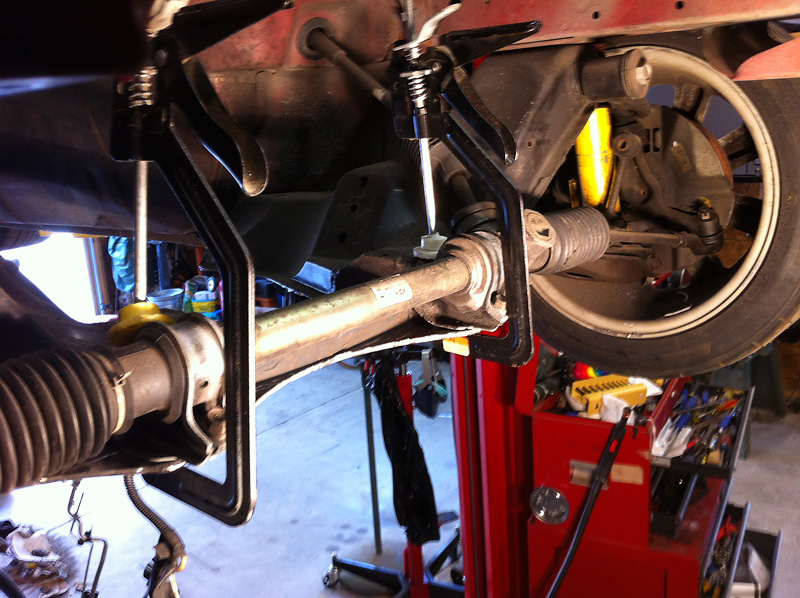
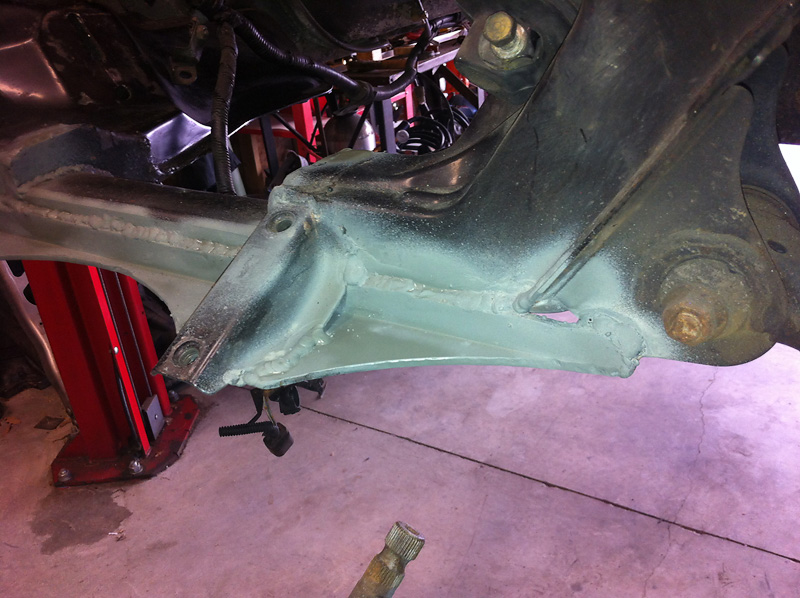
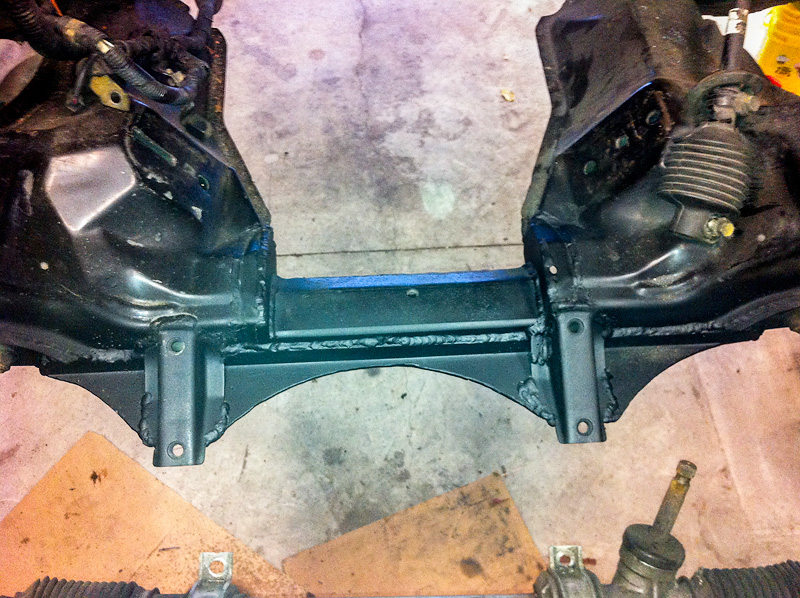
Realized I never did a completed subframe post. This shows the addendum - (cut from the same box steel I dropped into the sectioned area) which spans across the original subframe and new section, from LCA mount on each side. I cut out everything under the steering rack tabs and removed the seam weld on the subframe. Welded up the seam and then ground it flat. Slipped the newly cut piece from the box in front of the subframe and behind/under the steering rack mounts, then welded it up. This created a unified member for the subframe and steering rack.

Reply
 0
0

0
02-17-2014, 08:58 AM
#146
Elite Member
Thread Starter
iTrader: (5)
Join Date: Jan 2005
Location: Atlanta
Posts: 7,486
Total Cats: 372
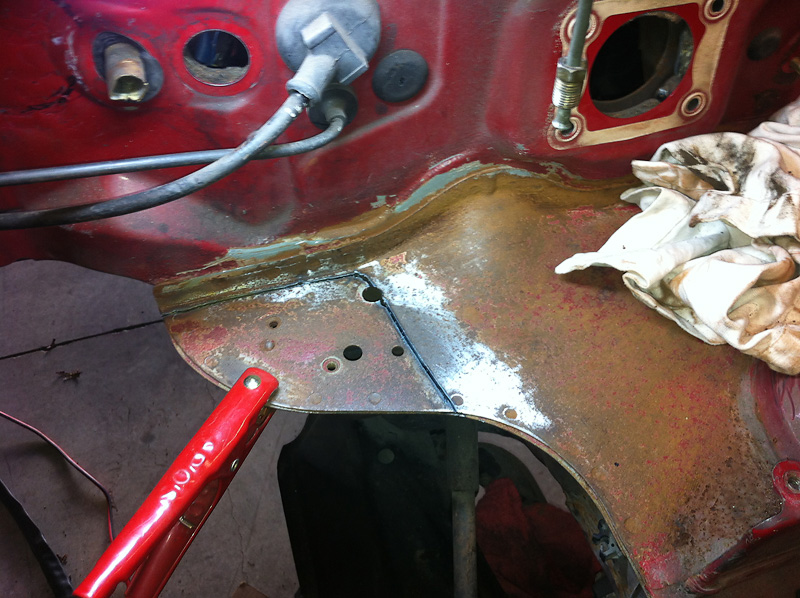
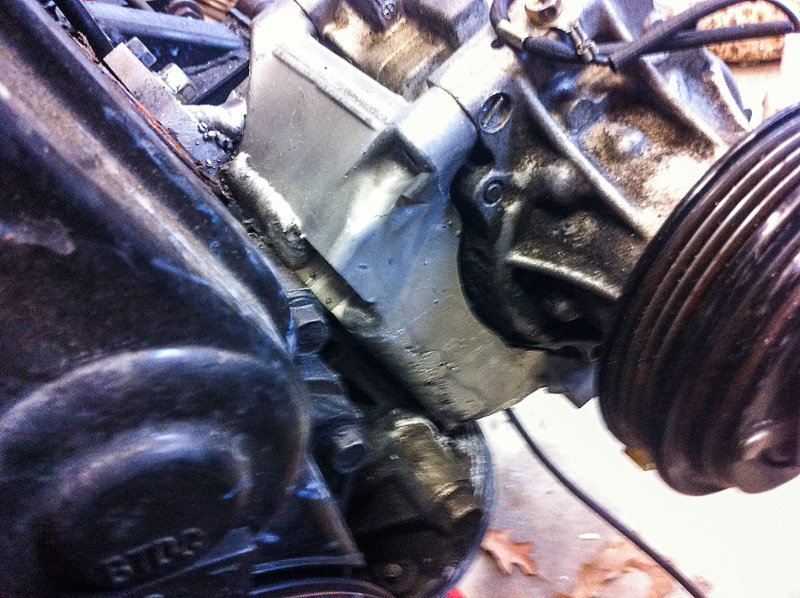
Got the ledge under the brake booster sectioned (plasma cutter win- again) and welded up with some L shaped plate - now have a place to run the down pipe.

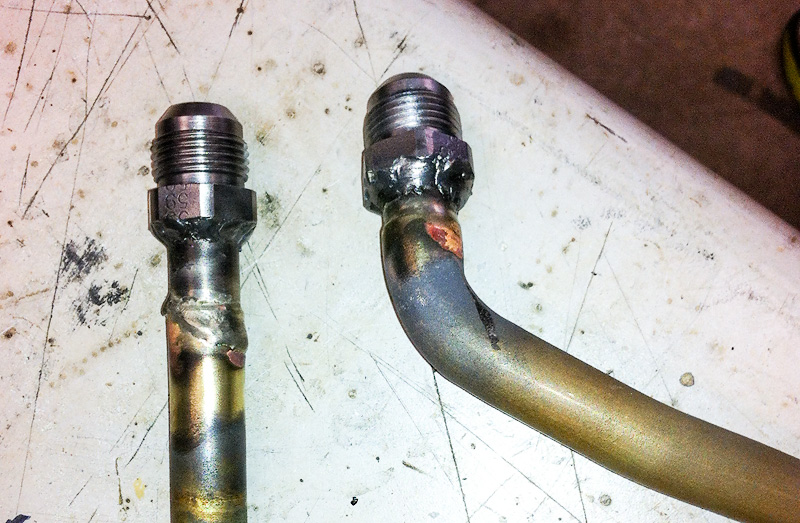
Also got -10AN fittings brazed to the stock heater core tubes. Welded steel tubes (salvage from an old bike frame) to the steel AN fittings and then swaged the brass heater tubes for a slip fit. Then went to work with some silver solder and heat- just like sweating copper pipes. I'll weld some tabs on the fittings so they anchor to the firewall for support.
Also got -10AN fittings brazed to the stock heater core tubes. Welded steel tubes (salvage from an old bike frame) to the steel AN fittings and then swaged the brass heater tubes for a slip fit. Then went to work with some silver solder and heat- just like sweating copper pipes. I'll weld some tabs on the fittings so they anchor to the firewall for support.
Reply
0
0
 04-17-2014, 08:36 AM
#150
Elite Member
Thread Starter
iTrader: (5)
Join Date: Jan 2005
Location: Atlanta
Posts: 7,486
Total Cats: 372
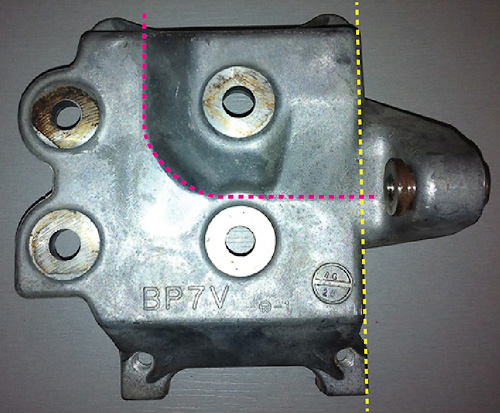
04-05 AC bracket mod is complete. Bathroom scale says this will save 10+ lbs over the 90 compressor and bracket. Started by cutting up the OE aluminum bracket. Bolted it up to a wood block jig so I could cut that "dip" (red line) off the back and removed the front boss (yellow) using a metal cutting miter/circular saw. Then put it to the belt sander for a good flat to mate to a half inch aluminum plate.
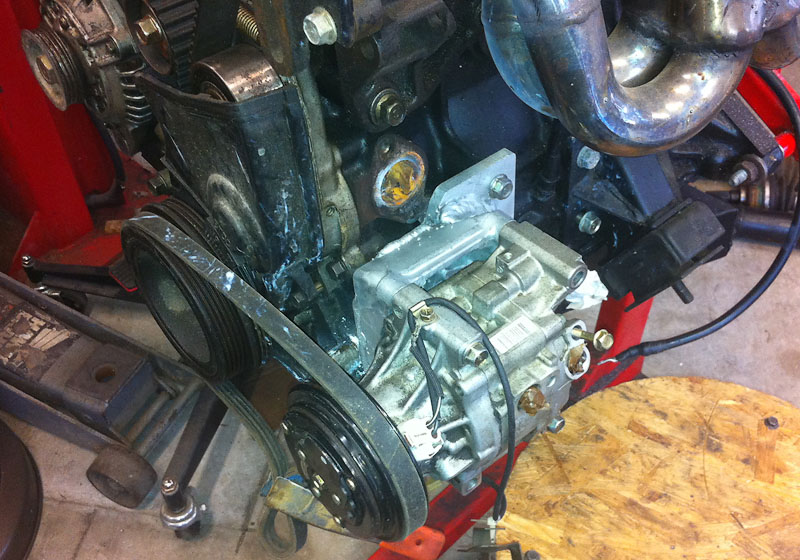
Next I went to work on it and the aluminum plate with a saw, drill and welder to make this:

Final installation has five motor-mount-sized bolts to the block. It will include a tensioner pulley hung from stock armature above, bolted to block (visible just above wp port.) I'll use an 04-05 condenser and cut/bend/swage/braze lines to work with this compressor location. But for the time being the AC stuff is done until the car is running/driving. Just needed to get this done while the engine was out since I pulled a stupid and removed the crank/pulley from my spare block in a rush to get it off the floor, on a shelf and out of the way.
Next I went to work on it and the aluminum plate with a saw, drill and welder to make this:
Final installation has five motor-mount-sized bolts to the block. It will include a tensioner pulley hung from stock armature above, bolted to block (visible just above wp port.) I'll use an 04-05 condenser and cut/bend/swage/braze lines to work with this compressor location. But for the time being the AC stuff is done until the car is running/driving. Just needed to get this done while the engine was out since I pulled a stupid and removed the crank/pulley from my spare block in a rush to get it off the floor, on a shelf and out of the way.
Reply
2
2
04-29-2014, 09:06 AM
#151
Elite Member
Thread Starter
iTrader: (5)
Join Date: Jan 2005
Location: Atlanta
Posts: 7,486
Total Cats: 372
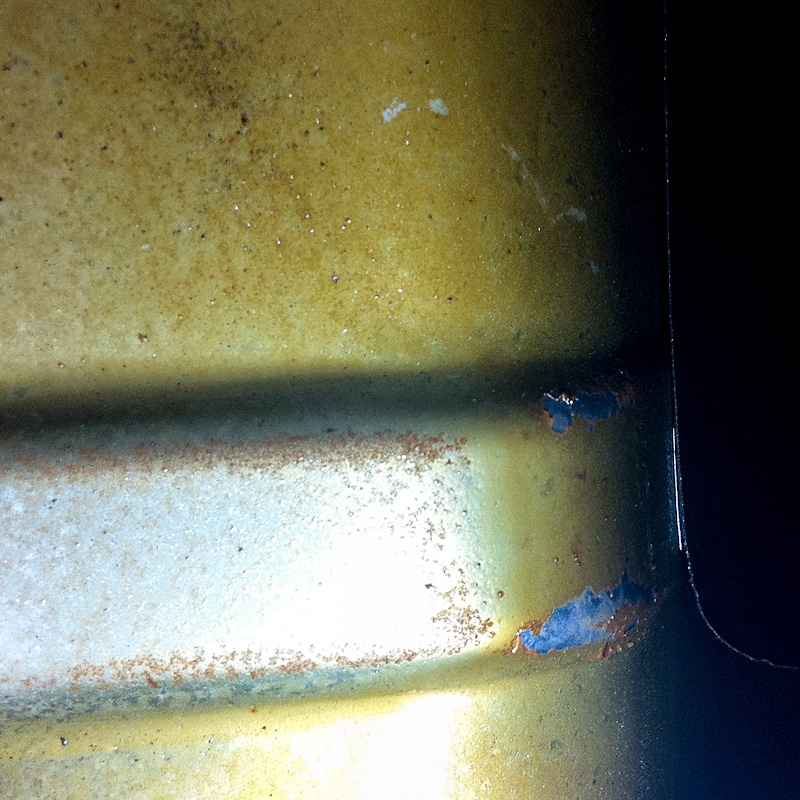
I found a nice layer of varnish in my gas tank when I went to swap in the big fuel pump. Since it scraped off easy enough, I figured it wise to swap in my other clean gas tank now rather than finding out later I had an issue. I suspect it was this way while drove the car in stock form since it sat for nearly four years unused and I drained the fuel in the tank before commencing on this swap. Also replaced the soft tank-to-hard line hoses and clamps since the old were cracked and rock hard. Fortunately the filler/vent hoses were in great shape and de/reinstalled easily.

Reply
0
0


 05-03-2014, 04:12 PM
#154
Elite Member
Thread Starter
iTrader: (5)
Join Date: Jan 2005
Location: Atlanta
Posts: 7,486
Total Cats: 372
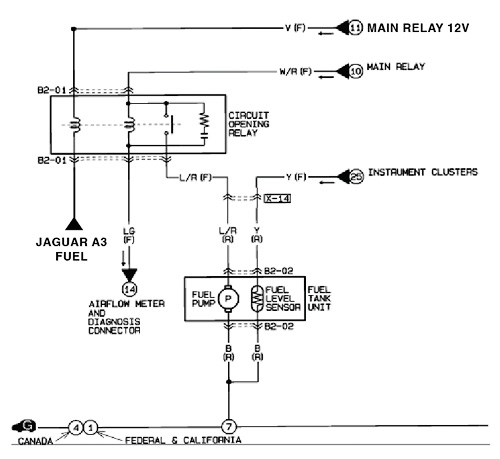
Below- Revised Miata fuel pump Circuit Opening relay wiring for my application, using an ecu ground trigger vs. the Miata's stock starter/ecu 12v signal.
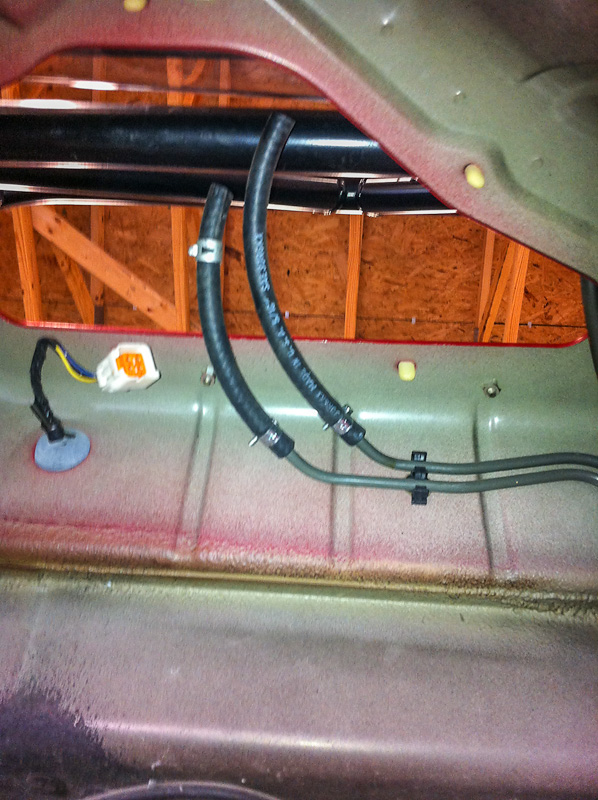
Upgraded the fuel pump leads.
Opening Circuit Relay (fuel pump) rewire is complete.
Jumper harness to provide main relay 12v to the stock starter/ecu 12v post.
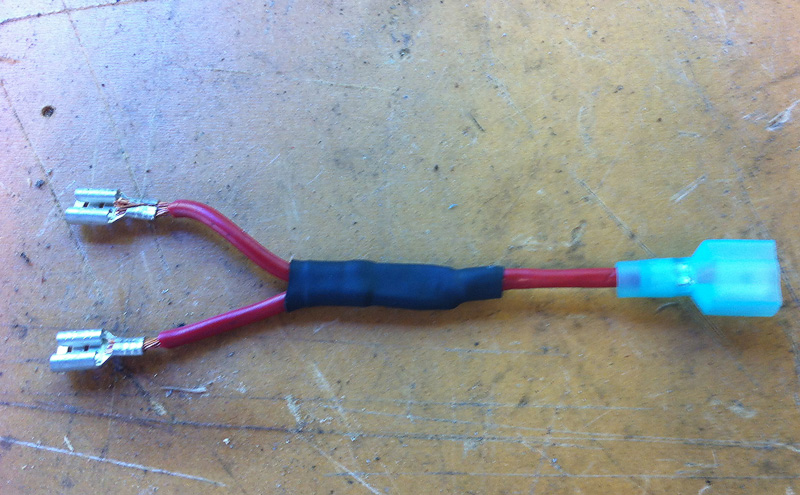
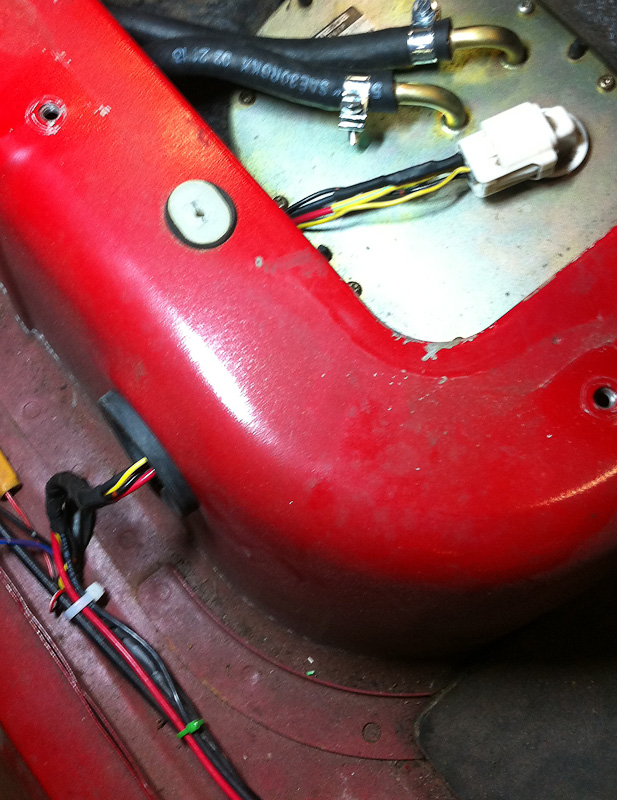
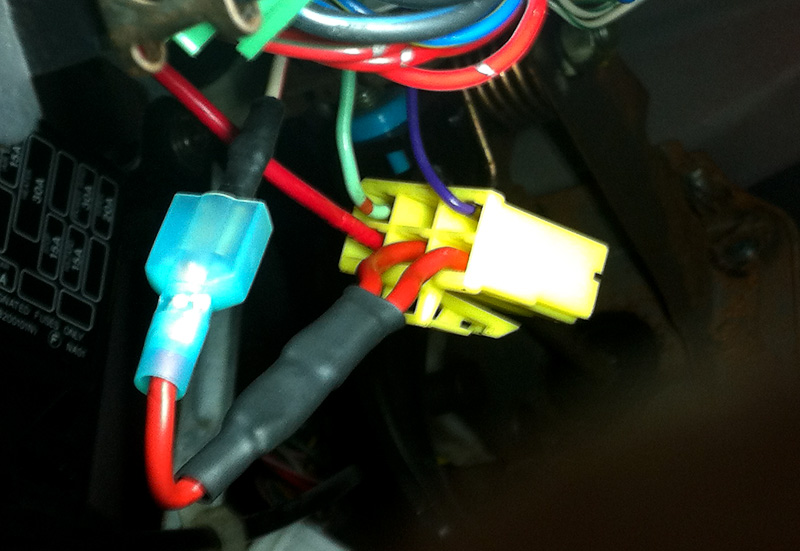
Revised connector with jumper in place. Jumper provides 12v to the original main relay post and the former starter/ecu post. The violet wire (ecu signal) is now moved to the ground slot as the Jaguar ECU sends a ground signal to turn on the fuel pump. New 14 ga. power feed to the fuel pump is lower/back. Green/red is the safety ground that runs to the air flow meter. Which I plan to run to an oil pressure switch (at this time.)
Upgraded the fuel pump leads.
Opening Circuit Relay (fuel pump) rewire is complete.
Jumper harness to provide main relay 12v to the stock starter/ecu 12v post.
Revised connector with jumper in place. Jumper provides 12v to the original main relay post and the former starter/ecu post. The violet wire (ecu signal) is now moved to the ground slot as the Jaguar ECU sends a ground signal to turn on the fuel pump. New 14 ga. power feed to the fuel pump is lower/back. Green/red is the safety ground that runs to the air flow meter. Which I plan to run to an oil pressure switch (at this time.)
Reply
0
0


 05-06-2014, 12:30 PM
#159
Elite Member
Thread Starter
iTrader: (5)
Join Date: Jan 2005
Location: Atlanta
Posts: 7,486
Total Cats: 372
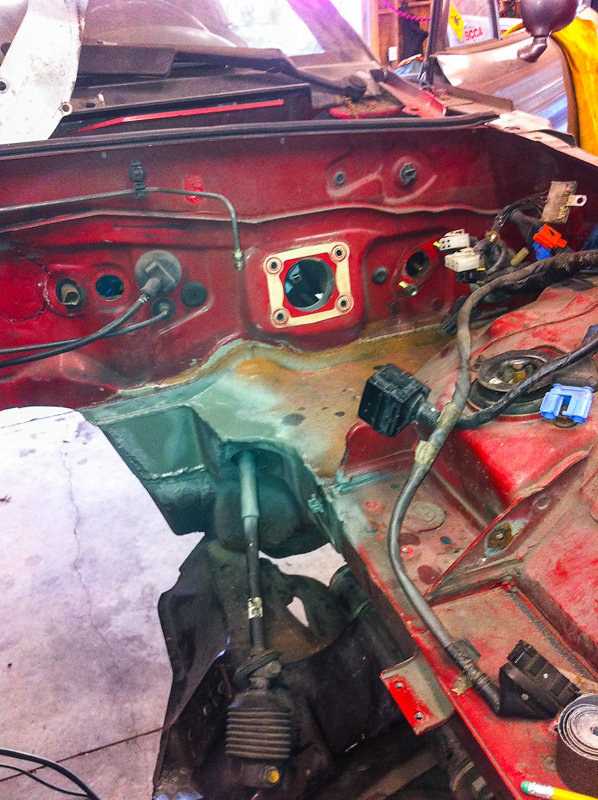
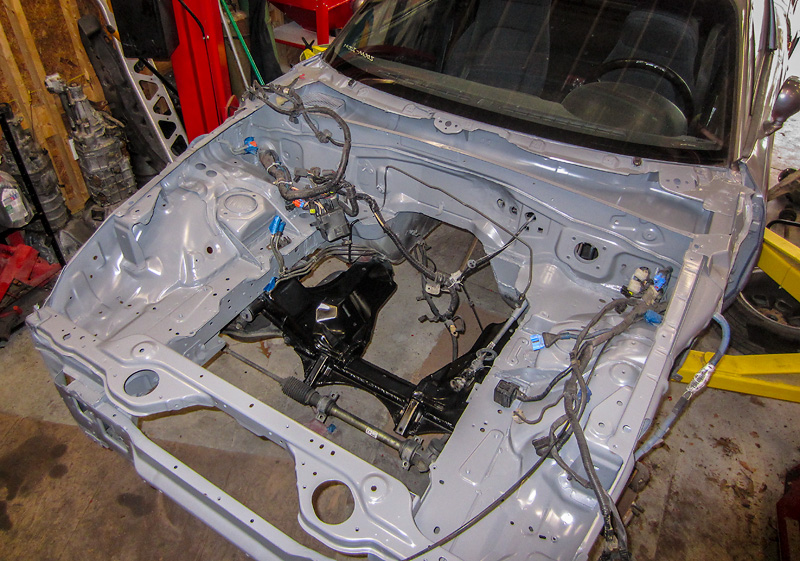
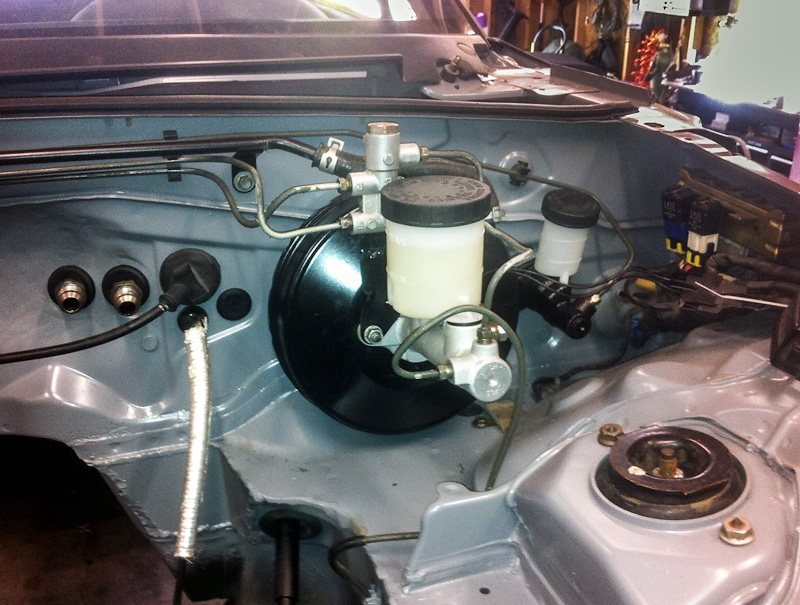
New brake and clutch master installed. Prices on these have come down so much that rebuilding just isn't worth the time imo. Also got the brake lines reworked (no cutting, flaring or junctions) to put my proportioning valve up and away from the down pipe. It never gave me problems before, but I never stopped thinking about it. This is probably one of the bigger issues with top mount turbo manifolds- putting the down pipe up high in the engine bay. New location works with hood (for reference check out how the wiper motor sits on the other side.) New heater core stubs with AN fittings installed and leak checked. That was a tough job but they're tightly anchored as stock, and I used a SBC PCV grommet (referenced on m.net) that provides some serious support at the firewall.
Reply
0
0


