93' Miata stolen and flipped build thread
 02-05-2014, 05:53 AM
#1061
Elite Member

Join Date: Oct 2013
Location: Cedar City, UT
Posts: 2,764
Total Cats: 951
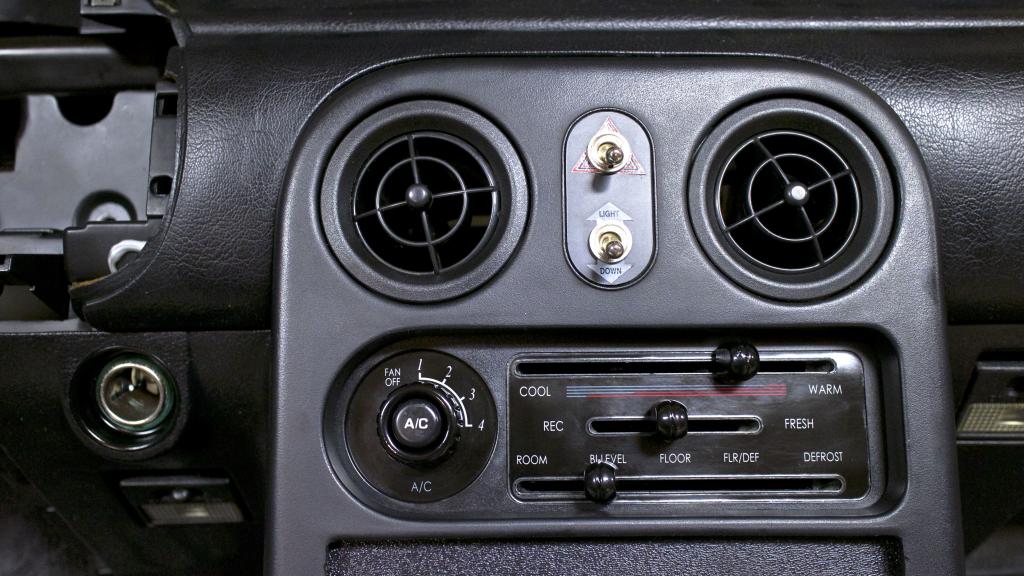
Forgot to upload this before I fell asleep.
Revlimiter makes an amazing product.
I was worried that "Barcode" wasn't going to look good but I'm really happy I went with it since it matches the hazard switches absolutely perfect.
I am undecided if I want to paint the line in the slider buttons white again, looks great gloss black, but we'll see. Also installed 3 LED's in place of the old yellow dim lights. I hear there are issues with bleeding that are hard to address but I'm not really too worried about it.
The cigarette lighter trim turned out really good too.
Mad props to Adam for making my dash perfectly restored...in my eyes at least.


Reply
 4
4

4
02-05-2014, 06:03 AM
#1062
Elite Member
iTrader: (21)

Join Date: Jun 2007
Location: Rochester, NY
Posts: 6,601
Total Cats: 1,264
Not sure what kind of lubricant you used, but I have had very good results with white lithium grease. I use Permatex brand, but they're pretty much all the same.
Won't harm plastic parts, doesn't dry out. For things like that heater panel, it's my go to stuff.
Won't harm plastic parts, doesn't dry out. For things like that heater panel, it's my go to stuff.
Reply
0
0


 Just kidding, soooo nice!

 02-06-2014, 12:54 AM
#1069
Elite Member
Join Date: Oct 2013
Location: Cedar City, UT
Posts: 2,764
Total Cats: 951
Thanks Stein!
As in, that girl is so attractive it is disgusting right??

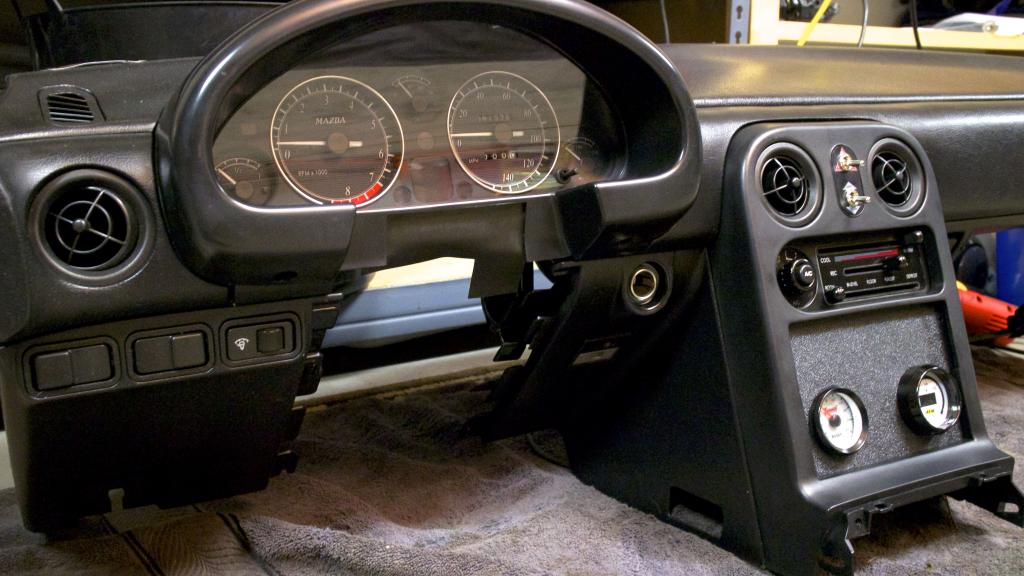
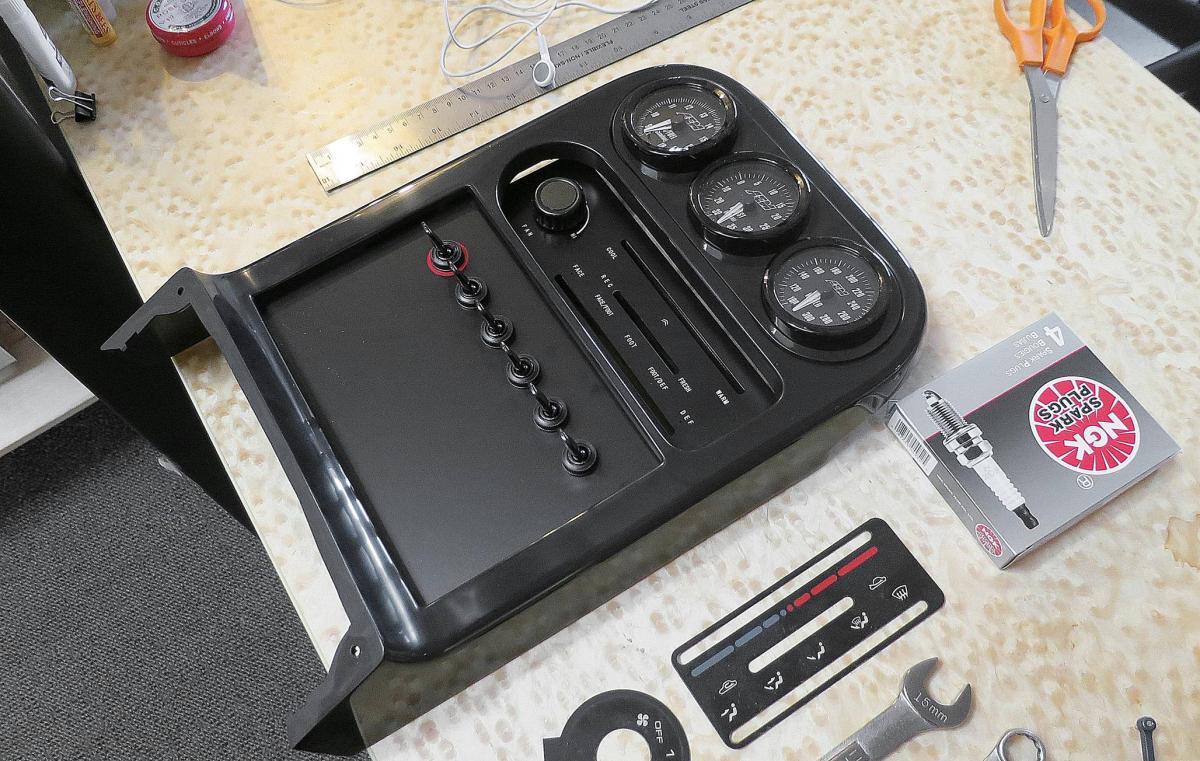
OK got the second part of Revlimiters gauge panel refresh done.
The before shot of the gauges. Pretty ugly in my opinion, and don't get me started on how scratched up the plastic shrouding was.

Revlimiter and his sense of humor, I figured I'd put the little guy to good use.

The after shot. The gauges were actually really really easy to put together, added more so due to the insane attention to detail Adam has. Let just say this, I hope he factors in the cost of his shipping materials & packaging into his prices but a small bomb could hit the packaging and it would remain unscathed.
I also put his Center Indicator panel in to move the pop up light and airbag light to the center area since the aftermarket gauges don't have it.
Also I spent an hour polishing all the scratches the plastic had accumulated over many years. look at the before picture at the top of this post and then look at the after image and you can see how much of a difference it makes. I used Menzerna FG400 for the deep scratches and marring and since it is a clear plastic I followed it up with the Menzerna IF4000(jewelers) finish which takes all the micro marring out of the plastic. Then to ensure it wouldn't oxidize again I sealed it with 2 layers of Menzerna Powerlock Sealant.

Happy camper I am.
Also my professional detailer guy(whom I turn to for things I don't want to think about doing. I'm good, but he is better) called and said that the permanent ceramic wheel coating came in(think p21s/opticoat but better) and had just gotten finishing up coating them. I was excited to go pick them up but he quickly said no saying since he knows me all too well he is going to put a second coating on them tomorrow.
If you don't know anything about what I'm talking about, think of a sealant or wax.... but permanent. Brake dust or any other road crap won't affect your wheels at all anymore. A little soap and everything washes off lickity split.

Reply
4
4


 02-06-2014, 07:12 AM
#1073
Elite Member

iTrader: (2)

Join Date: Jun 2009
Location: Istanbul, Turkey
Posts: 3,214
Total Cats: 1,687
Jeff, do not just assume the hardtop will fit perfectly when you install it on the car.
Best way to ensure the front seam is airtight is to loosen the mounting bolts on the front latch hardware (by the sun visors). You then install the hardtop, lock the rear buckles, and put some weight on the very front center of the hardtop. Like, 80-100 lbs heavy. I used a couple of blankets, and a bag of sand for that. You lock the front buckles with the bolts loose, and then apply pressure - like you are trying to push the buckle to the side - as you tighten the bolts, and then repeat for the other side.
I got rid of a very annoying whistling noise that used to come on at 100-110 mph that way.
Just wanted to have some input besides giving props to your amazing work.
Reply
2
2
02-06-2014, 08:22 AM
#1074
Elite Member
Join Date: Oct 2013
Location: Cedar City, UT
Posts: 2,764
Total Cats: 951
Thanks Commie, I have learned things don't fit perfectly the first time so I wasn't too hopeful.
I didn't know the best way to get a good seal though so I'm going to copy that into a word document for later, thanks!
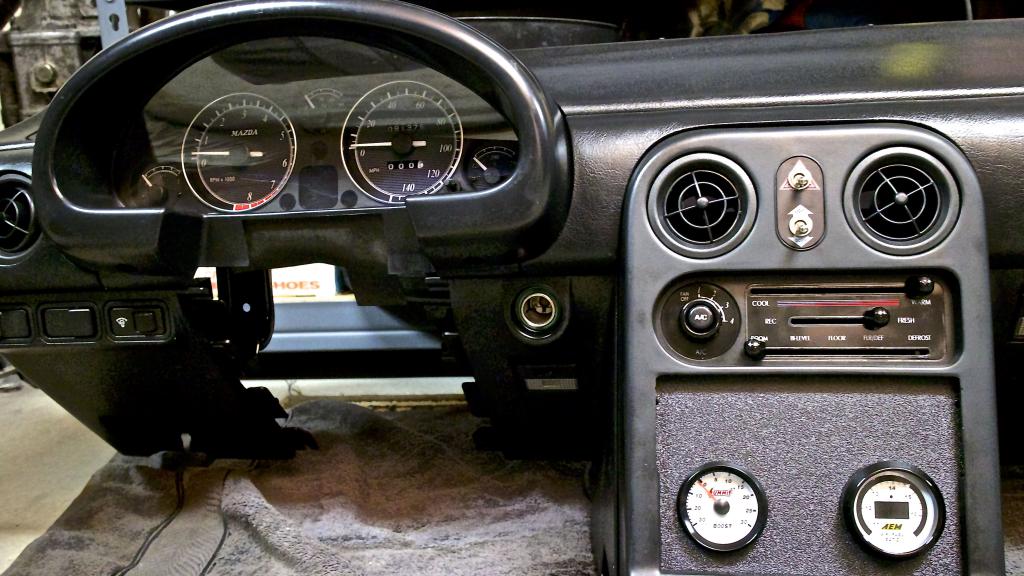
Well the work for the morning is the boost and AFM
Thank goodness for geometry....or at least making sure both circles dead center were on the same line. I suck at cutting correctly, so it takes me forever due to having to measure so much...essentially stupid checking myself.
Not sure If I am happy with it or not...just doesn't look..great? Luckily I have a ton of ABS plastic to play around with stuff.

Also put the gauges and hood back on just to see what it looks like all together.
I didn't know the best way to get a good seal though so I'm going to copy that into a word document for later, thanks!
Well the work for the morning is the boost and AFM
Thank goodness for geometry....or at least making sure both circles dead center were on the same line. I suck at cutting correctly, so it takes me forever due to having to measure so much...essentially stupid checking myself.
Not sure If I am happy with it or not...just doesn't look..great? Luckily I have a ton of ABS plastic to play around with stuff.

Also put the gauges and hood back on just to see what it looks like all together.


Reply
3
3
02-06-2014, 08:56 AM
#1075
Junior Member

Join Date: Jan 2014
Location: Finland
Posts: 79
Total Cats: -9
I'm astonished by your work, but...
Place your gauges so you can see them while you drive
That placement doesn't look good and it doesn't serve the purpose.
Unless you have a midget as your co-driver who observes the gauges.
Place your gauges so you can see them while you drive
That placement doesn't look good and it doesn't serve the purpose.
Unless you have a midget as your co-driver who observes the gauges.
Reply
-1
-1
02-06-2014, 09:03 AM
#1076
Elite Member

Join Date: Mar 2006
Location: Schwarzenberg, Germany
Posts: 1,554
Total Cats: 101
Hi Jeff,
have a look at the Jassperformance site:
Stainless Bottom Panels 2.5 DIN - MK1 - By Model - Mazda MX5 - Jass Performance
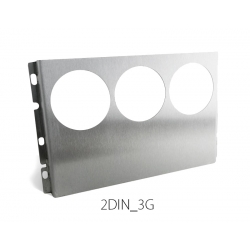

He is doing great products - you can get a specifically made panel with your needed holes... the panel sits flush and could be powder coated black...
have a look at the Jassperformance site:
Stainless Bottom Panels 2.5 DIN - MK1 - By Model - Mazda MX5 - Jass Performance
He is doing great products - you can get a specifically made panel with your needed holes... the panel sits flush and could be powder coated black...
Reply
0
0
02-06-2014, 09:05 AM
#1077
Cpt. Slow
iTrader: (25)
Join Date: Oct 2005
Location: Oregon City, OR
Posts: 14,224
Total Cats: 1,145
Pair of needle nose pliers works great to snap the gauge hood pins off too, once you're finished with reinstalling the gauge scratches. /sarcasm
Edit: what Vuti said. Raise them to the top at least. You'd be surprised what a shifter hides, and how long it really takes your eyes off the road/track to glance down.
The aftermarket gauges appear to be different diameters, which is probably what is triggering your OCD eye. I'm guessing you have the black back for the AFR gauge? That'll help draw your eye away from the circumference a little.
That, or you could disassemble both gauges and send the face plates to Rev for him to copy and match your other gauges...But, only if you want a really CLEAN look...
Reply
0
0

 02-06-2014, 10:19 AM
#1079
Elite Member
Join Date: Oct 2013
Location: Cedar City, UT
Posts: 2,764
Total Cats: 951

Edit: what Vuti said. Raise them to the top at least. You'd be surprised what a shifter hides, and how long it really takes your eyes off the road/track to glance down.
The aftermarket gauges appear to be different diameters, which is probably what is triggering your OCD eye. I'm guessing you have the black back for the AFR gauge? That'll help draw your eye away from the circumference a little.
That, or you could disassemble both gauges and send the face plates to Rev for him to copy and match your other gauges...But, only if you want a really CLEAN look...
Hence why I tried to center both gauges on a common line, ahh well. Thinking of a solution. The nice thing is, is that both gauge bodies are 2" across so if I could find matching "rings" both in diameter and height I'd be happier.
Not a huge issue though, just something I noticed.
Little bit more done this morning before I call it a day and catch up on some paperwork I've been overlooking.
So the original owner of the car brought this issue up when I bought it. The ignition switch would occasionally not work and it would act like a dead battery since nothing would happen when you'd turn the key.
It happened to me once or twice on the drive back from AL-UT and I didn't remember it till this morning.
Cut a slot in the stupid security bolts(hate these things) so you can remove the key cylinder along with 4 other screws.

Disassembled

A guide I read didn't mention these contacts but I cleaned them anyways.

Nasty old grease that may be the root of the problem.

Clean these as well

Be careful removing this body. There are 2 ball bearings triggered in the bottom that will fly away never to be found again if lost.

Ignition head lightly polished with Mag Aluminum Polish.

Along with the rest of the lock assembly

Cleaned with electrical contact cleaner and ready to be put back together once I buy a small tube of di-electric grease, apparently you don't want to use normal grease on these parts?

This is super easy to do, literally took me an hour.
Reply
3
3


