99mx5 EFR build
 01-26-2012, 02:25 PM
#21
Elite Member
Thread Starter
iTrader: (16)

Join Date: Oct 2006
Location: Las Cruces, NM
Posts: 1,647
Total Cats: 524
I'm getting close to receiving this kit from Abe. I know that there will be lot of small parts that I'll need to install it. To those who have done this before, what are those small parts that I need that's missing from my list?
I have the following:
-wideband (I forgot to put it in the first post)
-intercooler piping with clamps and couplers/elbows
-GM temp sensor
-intercooler
-oil and coolant lines and hose
I'll need:
-mount intercooler
-temp sensor bung
-duct airflow
-make oil/coolant line bulkhead bracket
-heat shields for brake booster/manifold
-tubing for the blowoff valve
-wastegate actuator tubing
-larger fuel injectors
-drill oil pan (need drill bit and tap)
-oil catch can ?
-intake hose routing
-boost control ?
-??

Reply
 0
0

0
01-26-2012, 03:24 PM
#23
Tour de Franzia

iTrader: (6)
Join Date: Jun 2006
Location: Republic of Dallas
Posts: 29,085
Total Cats: 375
I'm getting close to receiving this kit from Abe. I know that there will be lot of small parts that I'll need to install it. To those who have done this before, what are those small parts that I need that's missing from my list?
I have the following:
-wideband (I forgot to put it in the first post)
-intercooler piping with clamps and couplers/elbows
-GM temp sensor
-intercooler
-oil and coolant lines and hose
I'll need:
-mount intercooler
-temp sensor bung
-duct airflow
-make oil/coolant line bulkhead bracket
-heat shields for brake booster/manifold
-tubing for the blowoff valve
-wastegate actuator tubing
-larger fuel injectors
-drill oil pan (need drill bit and tap)
-oil catch can ?
-intake hose routing
-boost control ?
-??
I have the following:
-wideband (I forgot to put it in the first post)
-intercooler piping with clamps and couplers/elbows
-GM temp sensor
-intercooler
-oil and coolant lines and hose
I'll need:
-mount intercooler
-temp sensor bung
-duct airflow
-make oil/coolant line bulkhead bracket
-heat shields for brake booster/manifold
-tubing for the blowoff valve
-wastegate actuator tubing
-larger fuel injectors
-drill oil pan (need drill bit and tap)
-oil catch can ?
-intake hose routing
-boost control ?
-??
Reply
0
0
 01-27-2012, 02:14 AM
#30
Tour de Franzia
iTrader: (6)
Join Date: Jun 2006
Location: Republic of Dallas
Posts: 29,085
Total Cats: 375
Make sure to get the silicone tape too, or the job is not finished. I used the -10 size sleeve for the heater hoses too.
You can slide the sleeve over the hose too so you don't have to jack with putting the sleeve on during assembly.
You can slide the sleeve over the hose too so you don't have to jack with putting the sleeve on during assembly.
Reply
1
1
01-27-2012, 11:37 AM
#31
mkturbo.com

iTrader: (24)
Join Date: May 2006
Location: Charleston SC
Posts: 15,177
Total Cats: 1,681
Sliding over only works for straight fittings. For the other fittings you have to have the fire sleeve on first. I am extremely happy with the lines I got from Bat Inc. They also charge next to nothing to assemble the lines to which is awesome.
Reply
1
1
01-28-2012, 11:29 PM
#32
Elite Member
Thread Starter
iTrader: (16)
Join Date: Oct 2006
Location: Las Cruces, NM
Posts: 1,647
Total Cats: 524
Here is my PC delete:
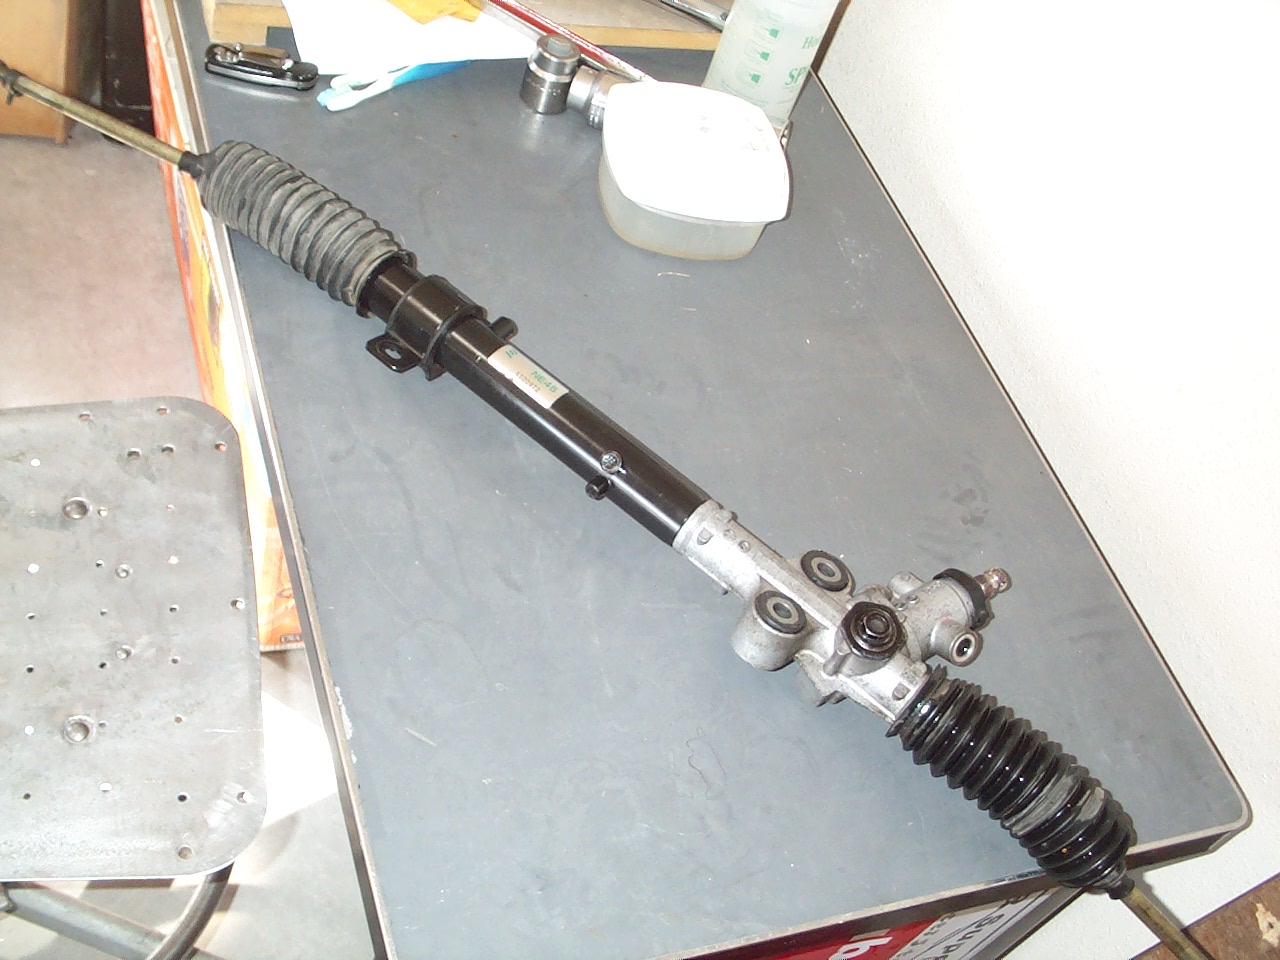
Here's how I made my PS delete. I scored a MS steering rack to depower for a sweet deal. The Mazdaspeed rack has a faster turning ratio than the regular power rack. Thanks to Tom at The Parts Group. Here is a pic of the rack after removing the hard lines.
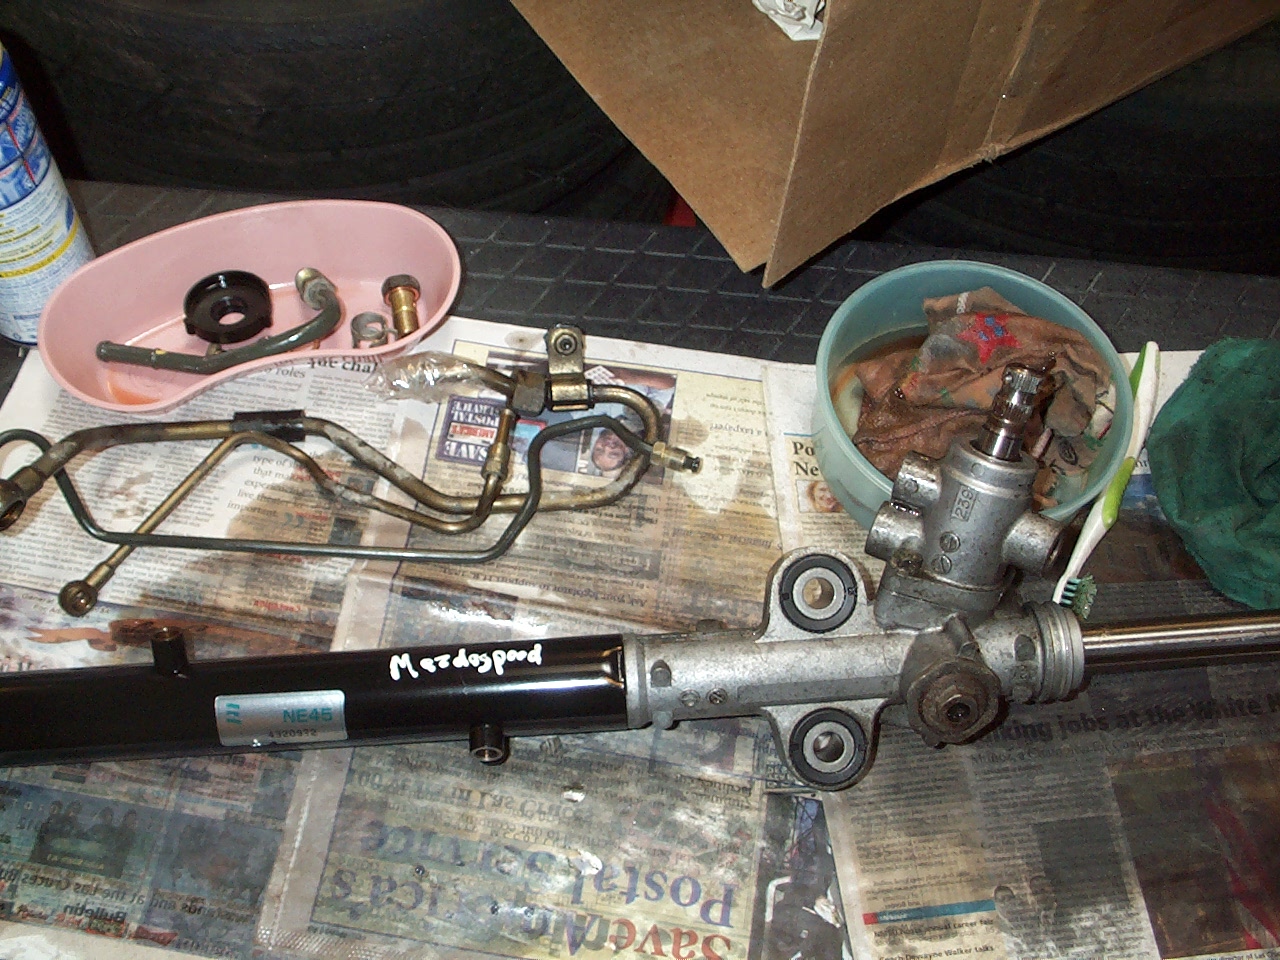
I first removed the tensioner assembly.
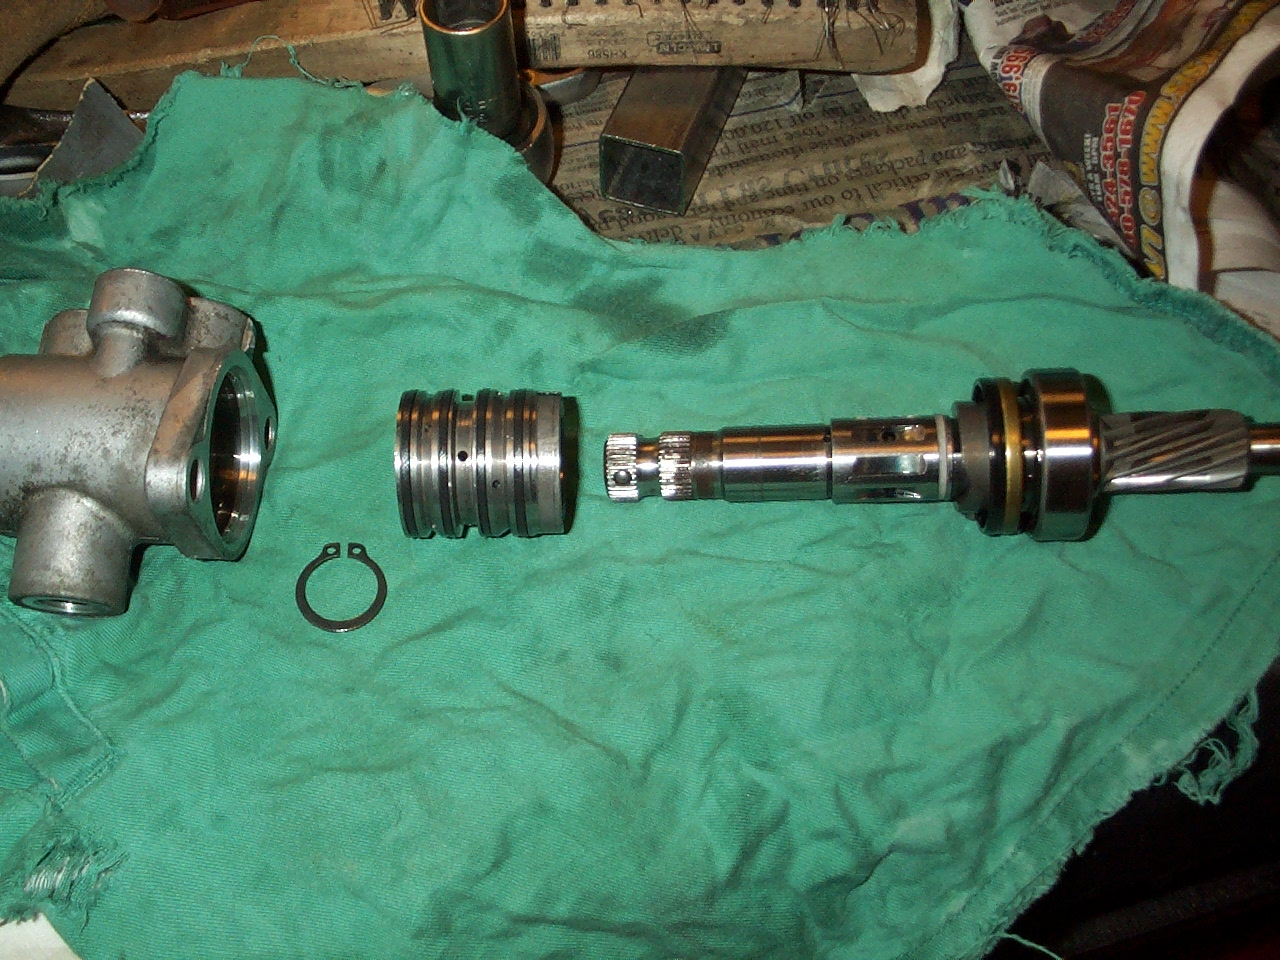
Here are the parts in order.

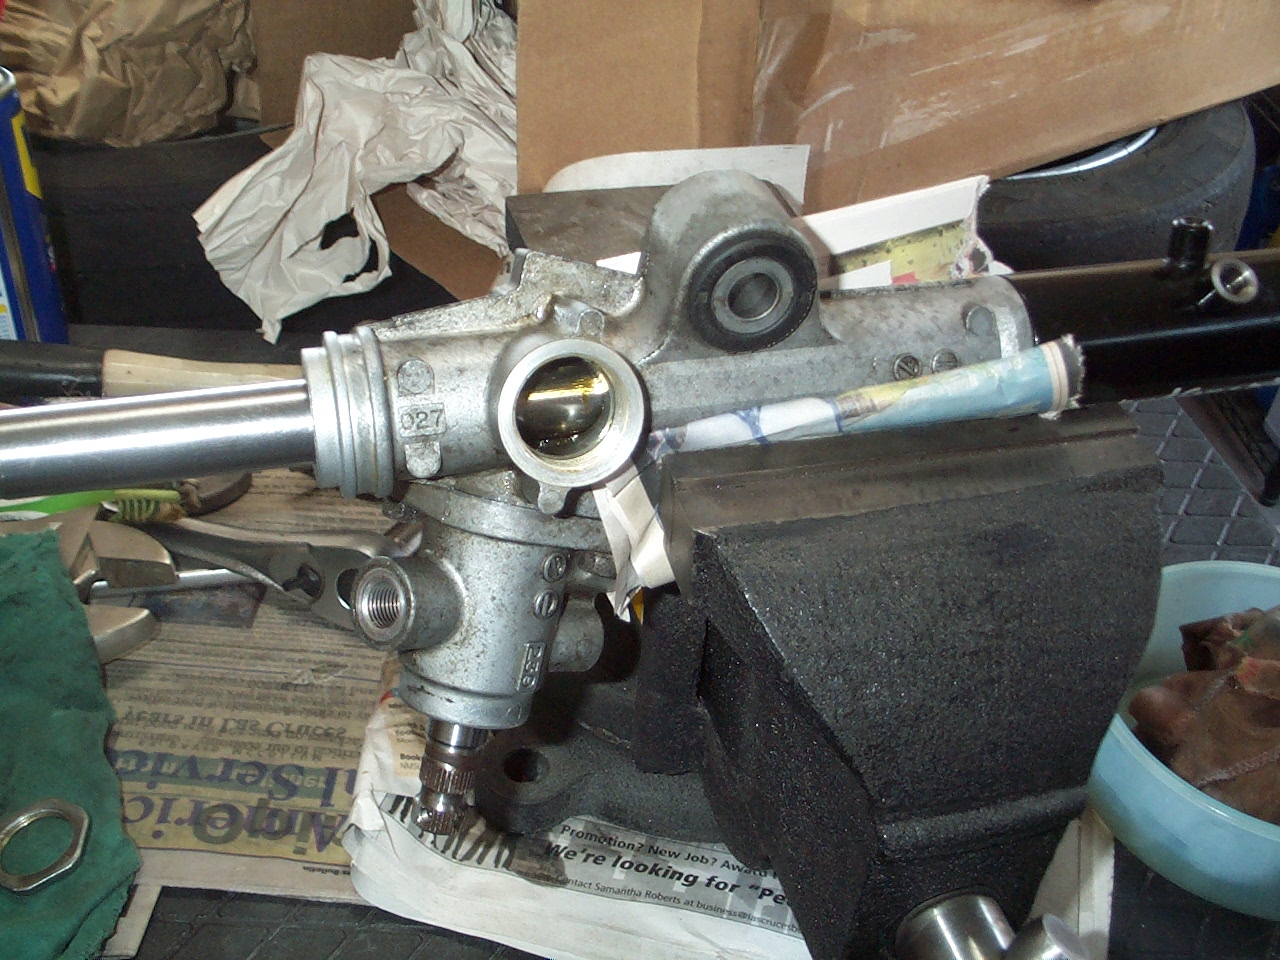
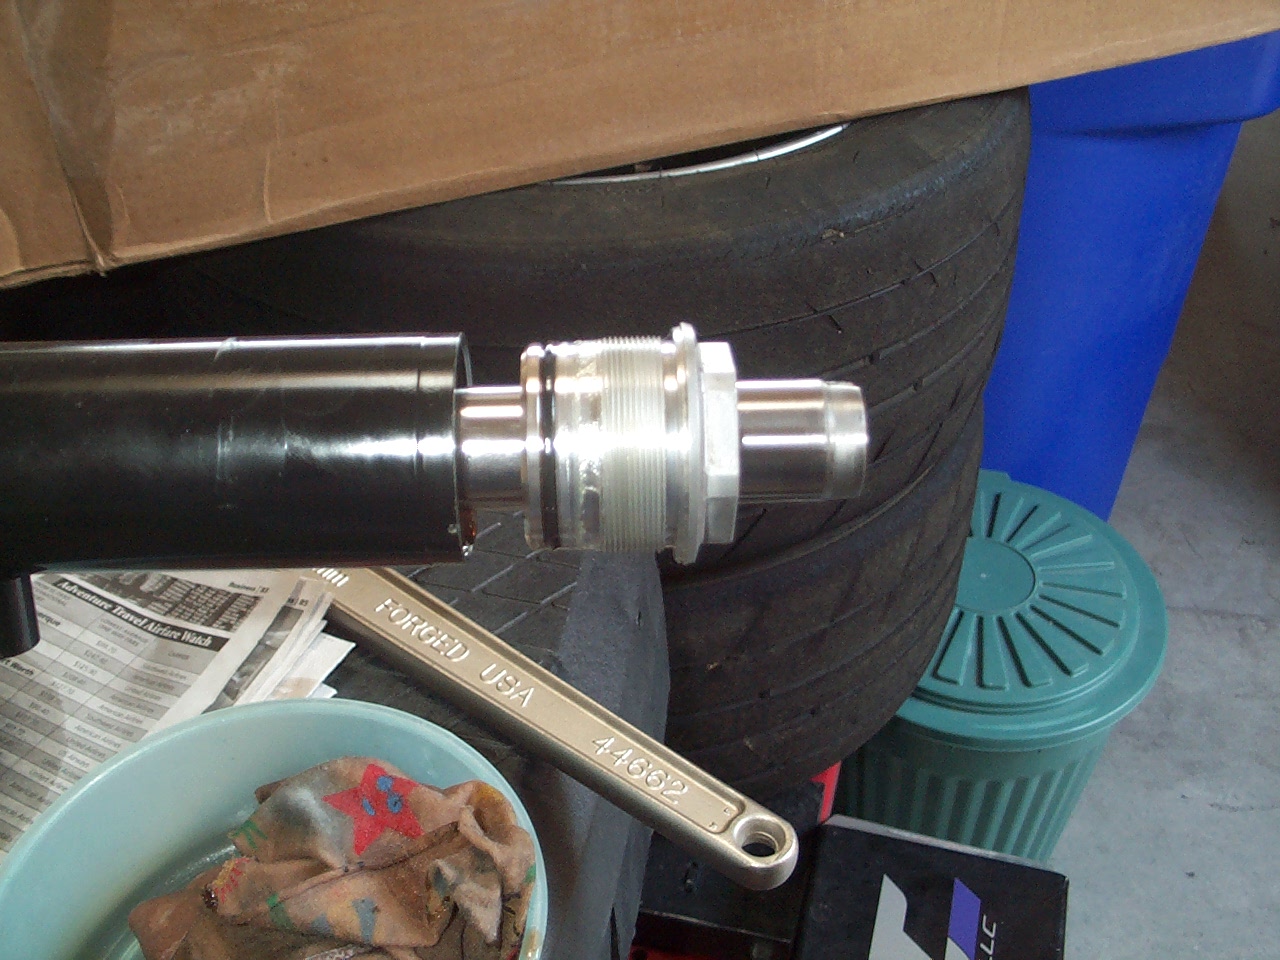
I then removed the end cap to remove the rack from the housing. There is a dent from a punch used in to lock it in place. I didn't know about it but it did not mess up the threads when I disassembled it. you may have to grind it before removing the end cap.
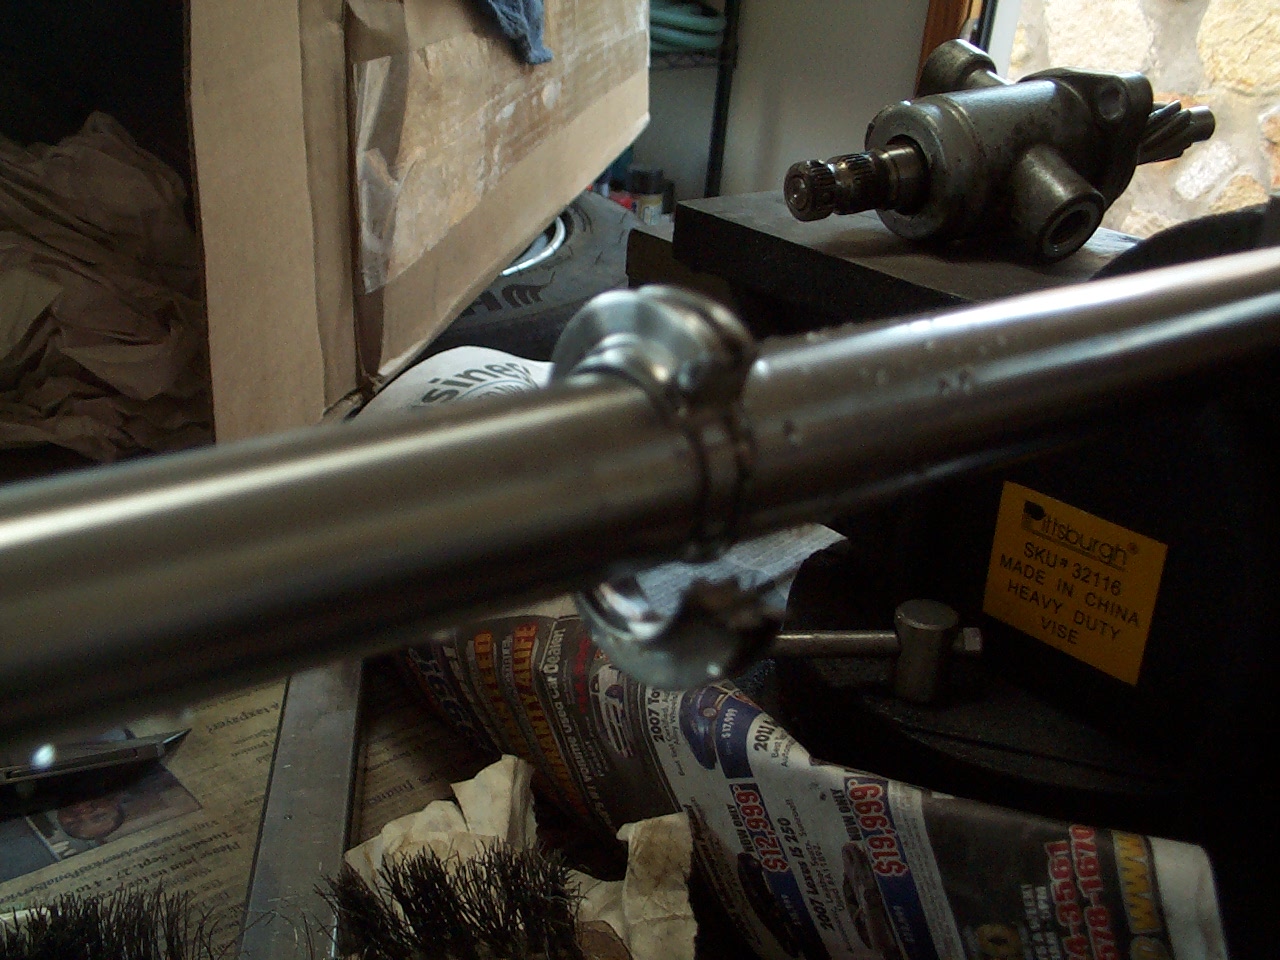
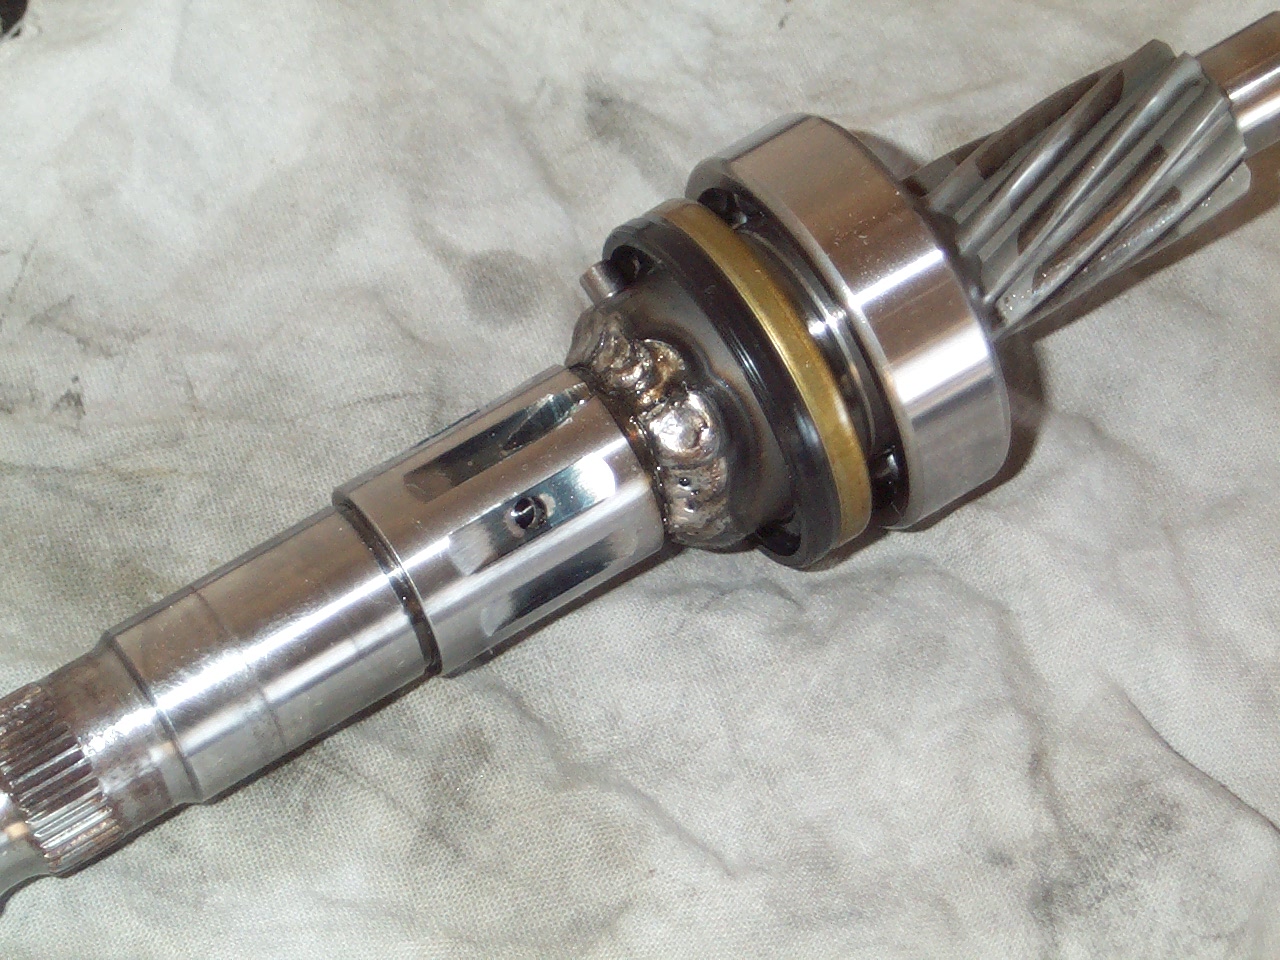
To remove the input shaft from the housing, you have to tap it out from the top and it pops out. The seal collar is not needed after depowering the rack.
Here is a pic of the seal on the rack rod.
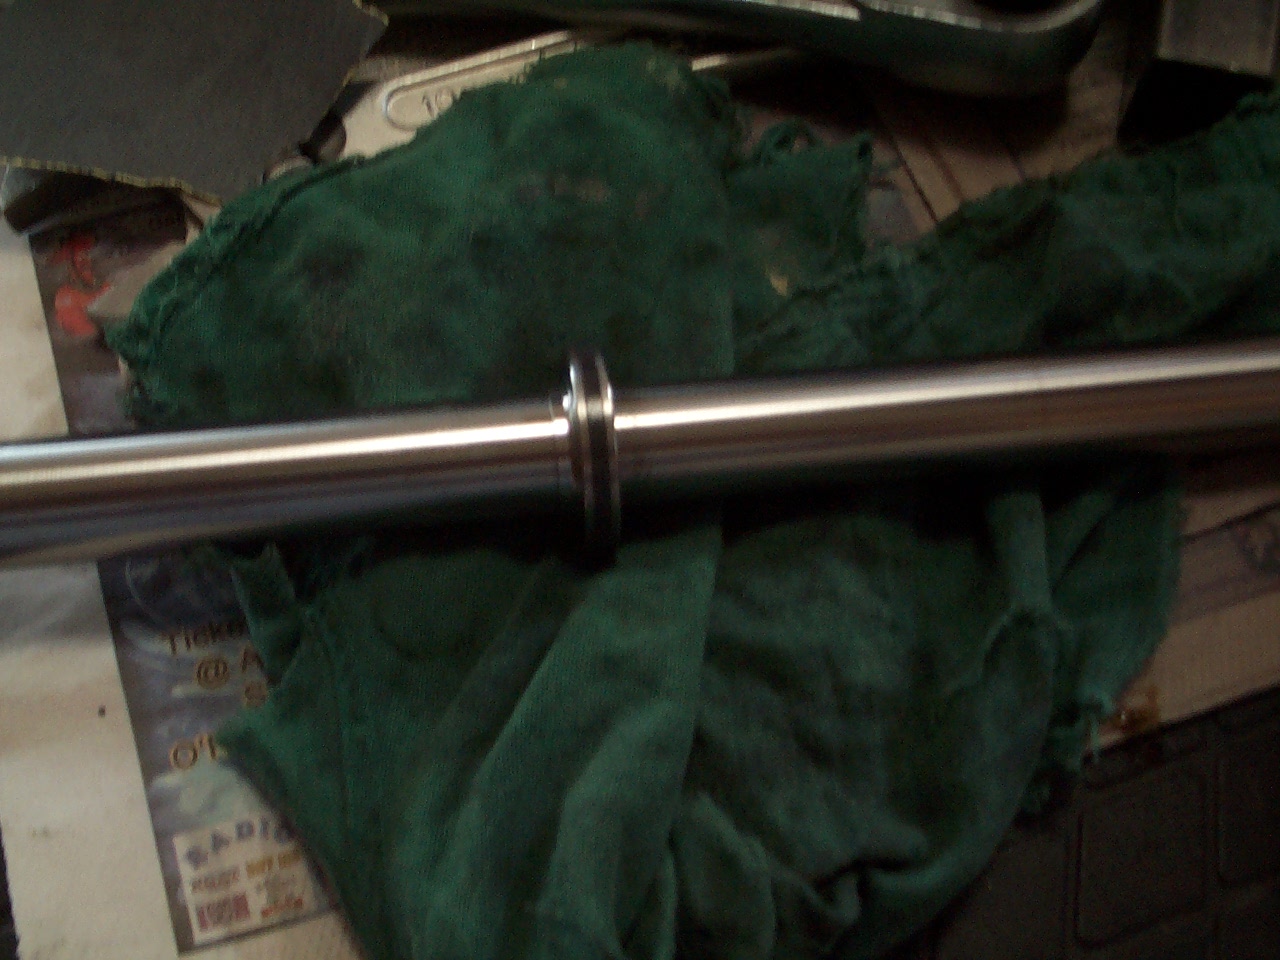
I used a grinder to cut it then hammered it to split it and separate it from the rod. I also removed the clip.
I used silicone to seal the hard line ports. There is no pressure after depowering the rack so all that is needed is to seal it from dirt.
I then covered the bearings and bearing surfaces with tape to protect them from welding the input shaft. I started with spot welds.
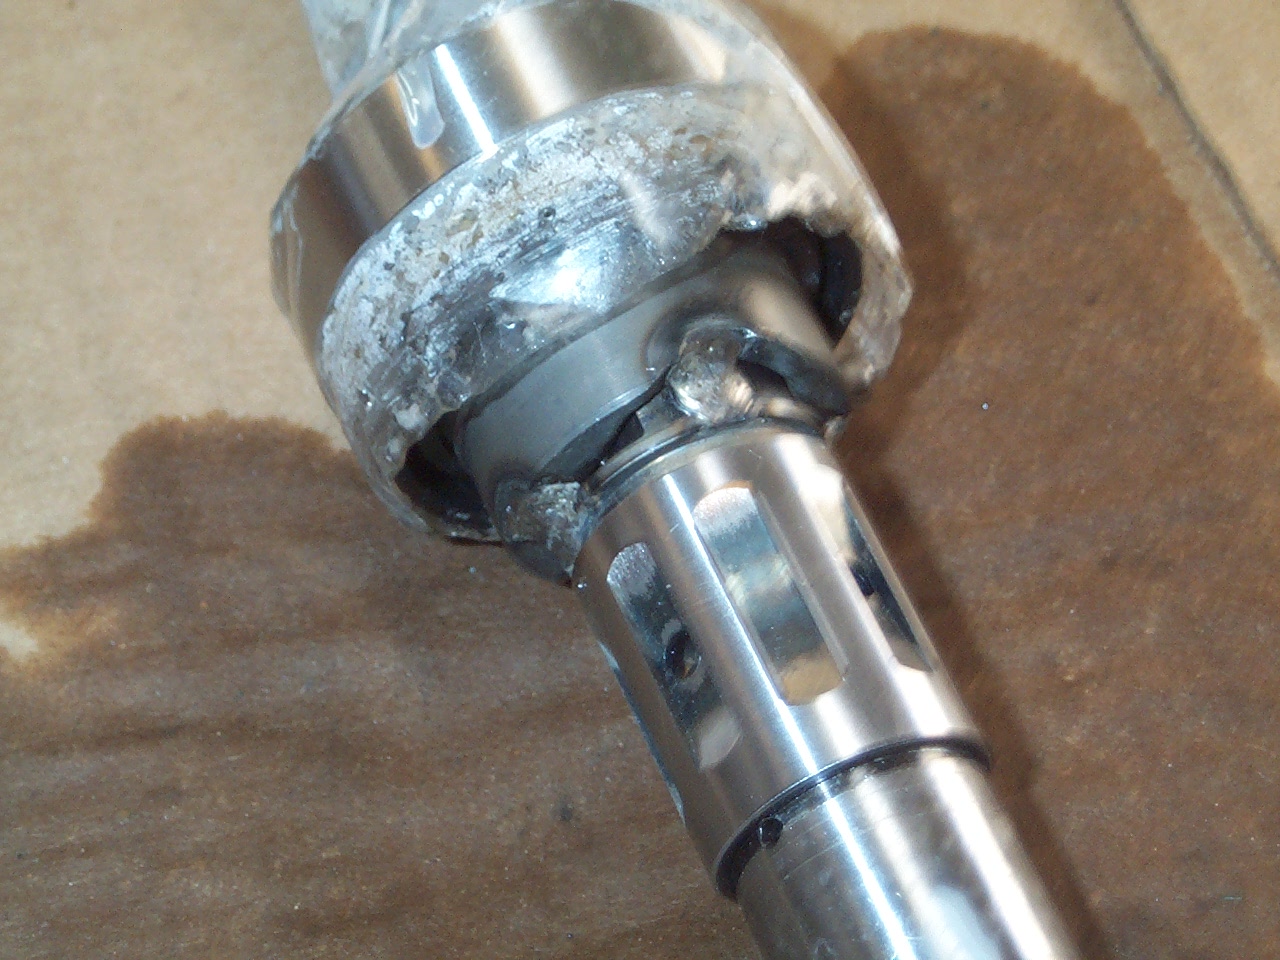
I then worked my away around by adding more spot welds while checking for straightness. I cooled the part after each weld to minimize heat distortion. I used a feeler gauge and spun it to check for straightness after each weld. If it did warp, I straightened it before the next weld. Yes, I used a hammer and some creativity.
I packed it with grease and reassembed the rack in reverse order. I tightened the tensioner nut according to the factory service manual. Tighten the tensioner bolt to 4.9 N/m then loosen 25 degrees then tighten the locknut while holding the tensioner nut in place.
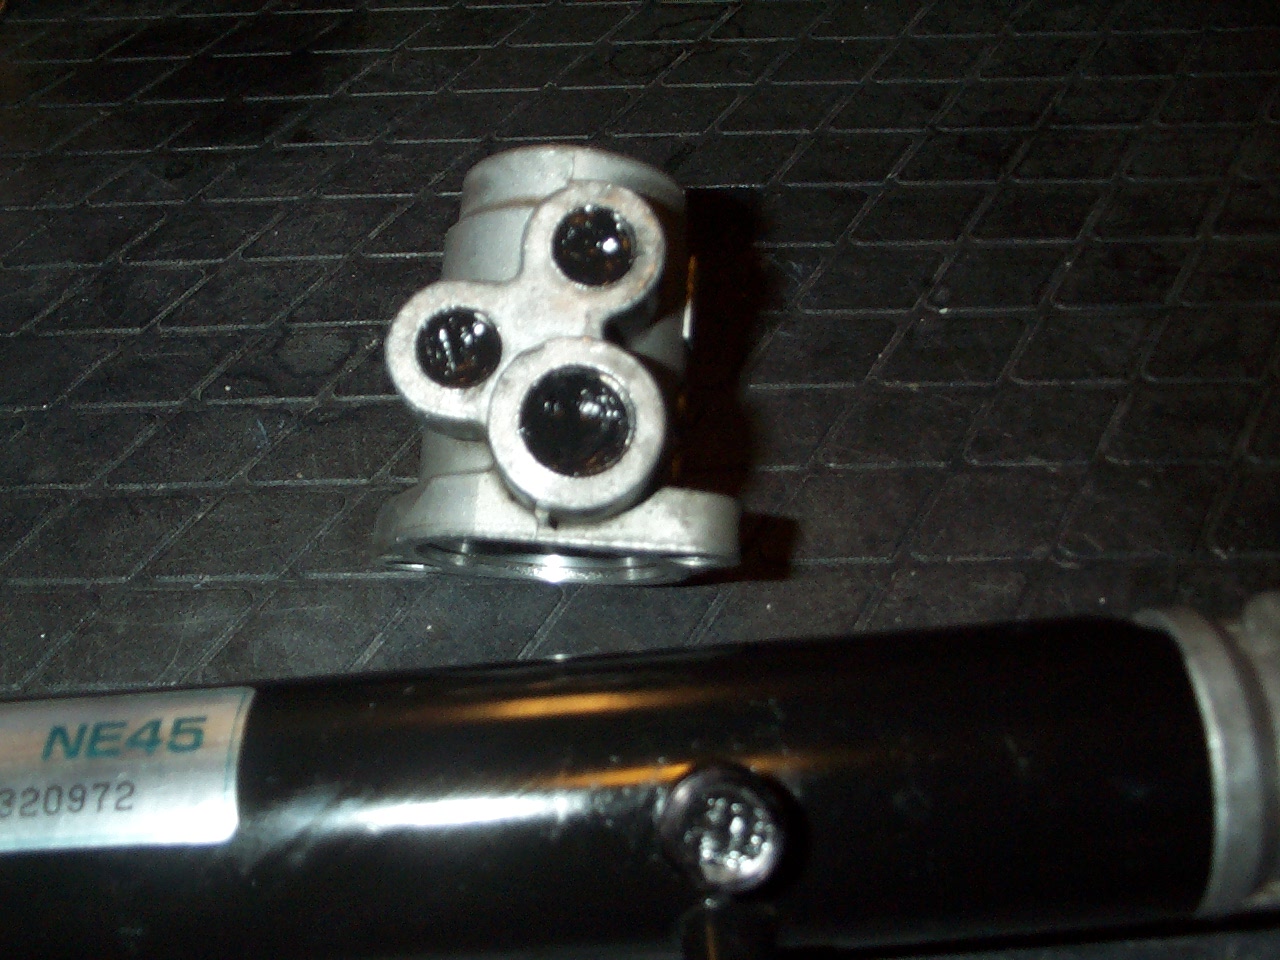
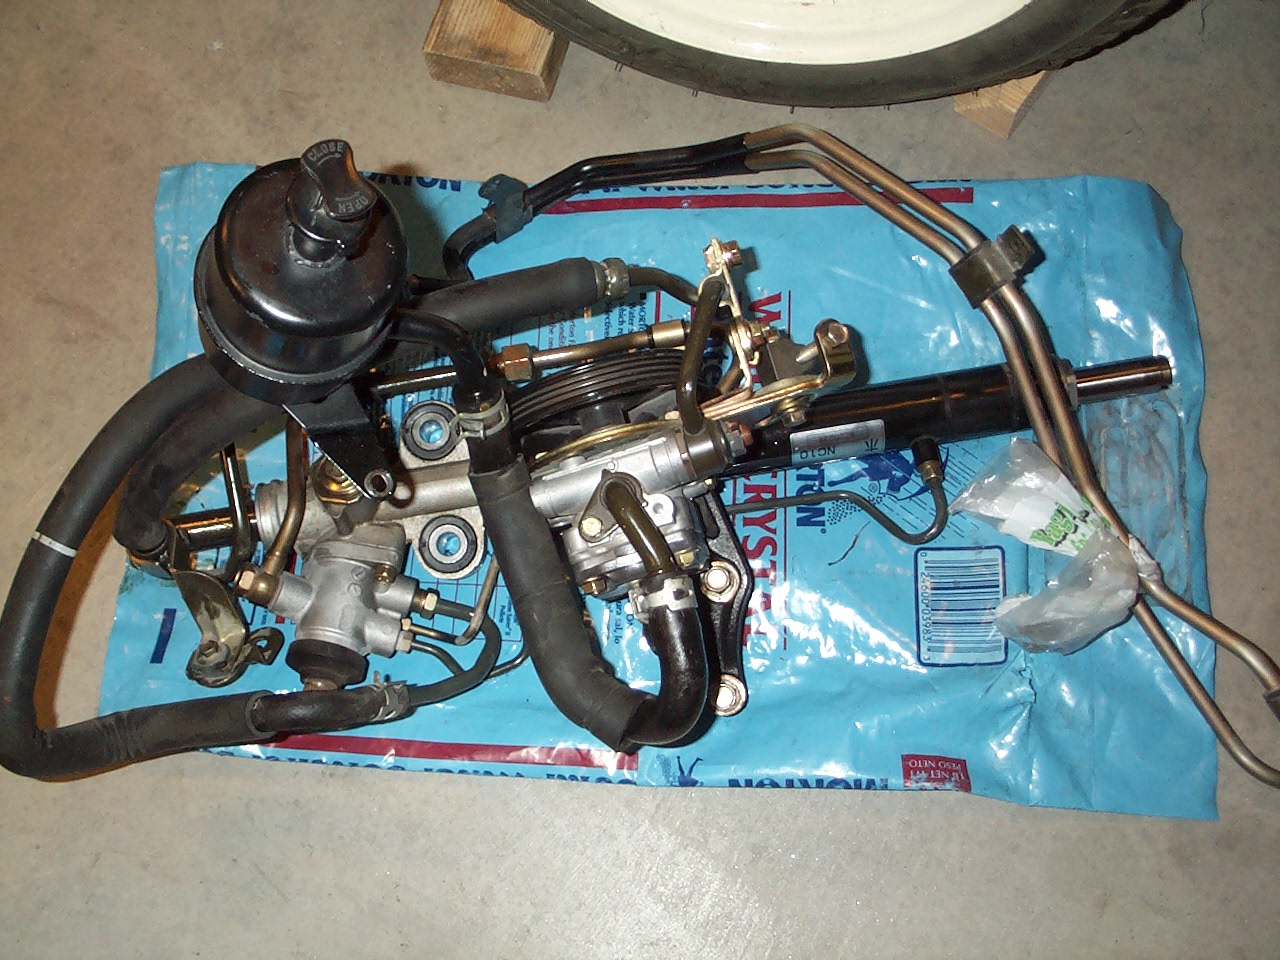
Here is what was removed after depowering the rack. I kept the old one just in case.
Here's how I made my PS delete. I scored a MS steering rack to depower for a sweet deal. The Mazdaspeed rack has a faster turning ratio than the regular power rack. Thanks to Tom at The Parts Group. Here is a pic of the rack after removing the hard lines.
I first removed the tensioner assembly.
Here are the parts in order.
I then removed the end cap to remove the rack from the housing. There is a dent from a punch used in to lock it in place. I didn't know about it but it did not mess up the threads when I disassembled it. you may have to grind it before removing the end cap.
To remove the input shaft from the housing, you have to tap it out from the top and it pops out. The seal collar is not needed after depowering the rack.
Here is a pic of the seal on the rack rod.
I used a grinder to cut it then hammered it to split it and separate it from the rod. I also removed the clip.
I used silicone to seal the hard line ports. There is no pressure after depowering the rack so all that is needed is to seal it from dirt.
I then covered the bearings and bearing surfaces with tape to protect them from welding the input shaft. I started with spot welds.
I then worked my away around by adding more spot welds while checking for straightness. I cooled the part after each weld to minimize heat distortion. I used a feeler gauge and spun it to check for straightness after each weld. If it did warp, I straightened it before the next weld. Yes, I used a hammer and some creativity.
I packed it with grease and reassembed the rack in reverse order. I tightened the tensioner nut according to the factory service manual. Tighten the tensioner bolt to 4.9 N/m then loosen 25 degrees then tighten the locknut while holding the tensioner nut in place.
Here is what was removed after depowering the rack. I kept the old one just in case.
Reply
1
1
 01-30-2012, 03:25 PM
#36
Elite Member
Thread Starter
iTrader: (16)
Join Date: Oct 2006
Location: Las Cruces, NM
Posts: 1,647
Total Cats: 524
As for the studs, it seems that I'll have to get the FM inconel studs. FM is the only place to get them in M8.
Reply
0
0
01-30-2012, 05:22 PM
#37
Elite Member
iTrader: (37)

Join Date: Apr 2010
Location: Very NorCal
Posts: 10,441
Total Cats: 1,899
Found this looking for rack depowering goodness, thanks for posting up! Going to tackle this project in the spring.
You should PM me when you are ready to sell off all that RB stainless exhaust stuff, seeing how it won't work with your turbo...
You should PM me when you are ready to sell off all that RB stainless exhaust stuff, seeing how it won't work with your turbo...
Reply
0
0
01-30-2012, 05:51 PM
#38
Elite Member
Thread Starter
iTrader: (16)
Join Date: Oct 2006
Location: Las Cruces, NM
Posts: 1,647
Total Cats: 524
Check out the full PS depower how to at miataforumz. http://www.miataforumz.com/showthread.php?t=542 I has three 99 NBs, it may go to #2
Reply
2
2
01-30-2012, 06:01 PM
#39
Elite Member
iTrader: (37)
Join Date: Apr 2010
Location: Very NorCal
Posts: 10,441
Total Cats: 1,899
Even better! +1 for you! I'm guessing that's just mild steel? As soon as I get access to a welder, the spare rack in my garage is getting some molestation.
Looking forward to your build progress, not a lot of people playing with the EFRs yet and that manifold is just sexy as hell.
Looking forward to your build progress, not a lot of people playing with the EFRs yet and that manifold is just sexy as hell.
Check out the full PS depower how to at miataforumz. http://www.miataforumz.com/showthread.php?t=542
Reply
0
0
02-03-2012, 01:45 PM
#40
Elite Member
Thread Starter
iTrader: (16)
Join Date: Oct 2006
Location: Las Cruces, NM
Posts: 1,647
Total Cats: 524
Thanks for the props!  And thanks everyone for the feedback.
I just ordered the Bat Inc fire sleeves and silicone tape and FM Inconel studs with stage 8 hardware.
And thanks everyone for the feedback.I just ordered the Bat Inc fire sleeves and silicone tape and FM Inconel studs with stage 8 hardware.
Reply
0
0


