Bird's NA Turbo Track Build
 01-22-2012, 04:09 PM
#1
Junior Member
Thread Starter
iTrader: (2)

Join Date: Nov 2010
Location: Los Angeles
Posts: 65
Total Cats: 1
Decided it was finally time to put up a build thread. Here's my intro thread:
https://www.miataturbo.net/meet-greet-40/new-guy-turbo-track-build-socal-61750/
I'll post the pictures here too so you don't actually have to click through...
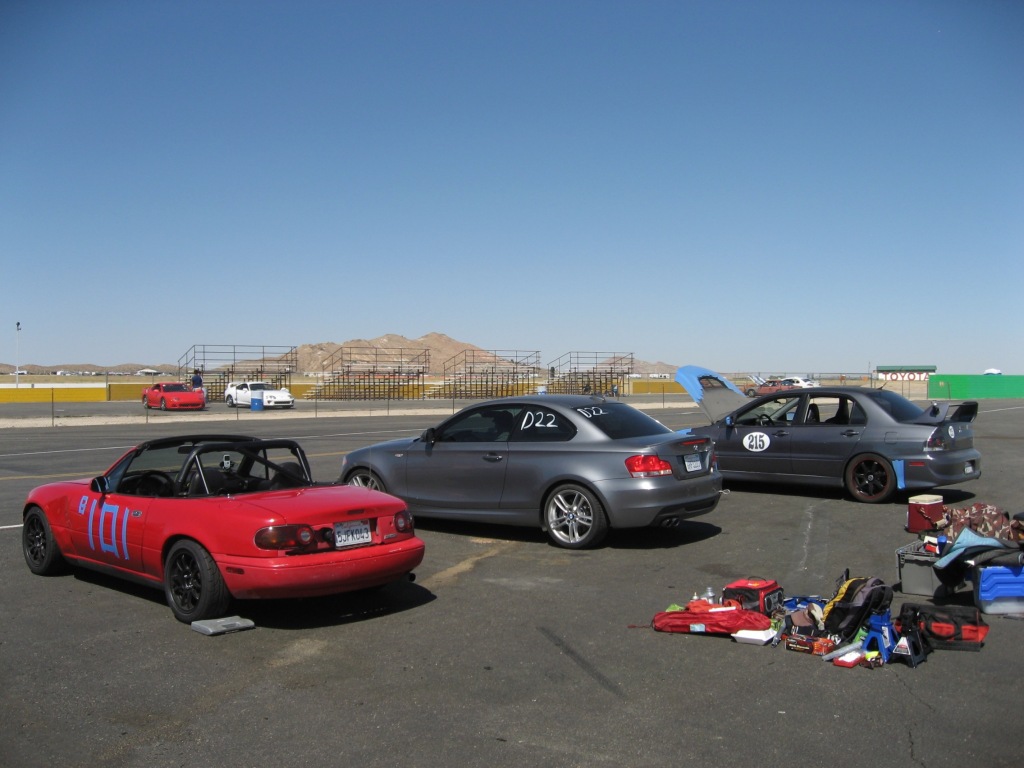
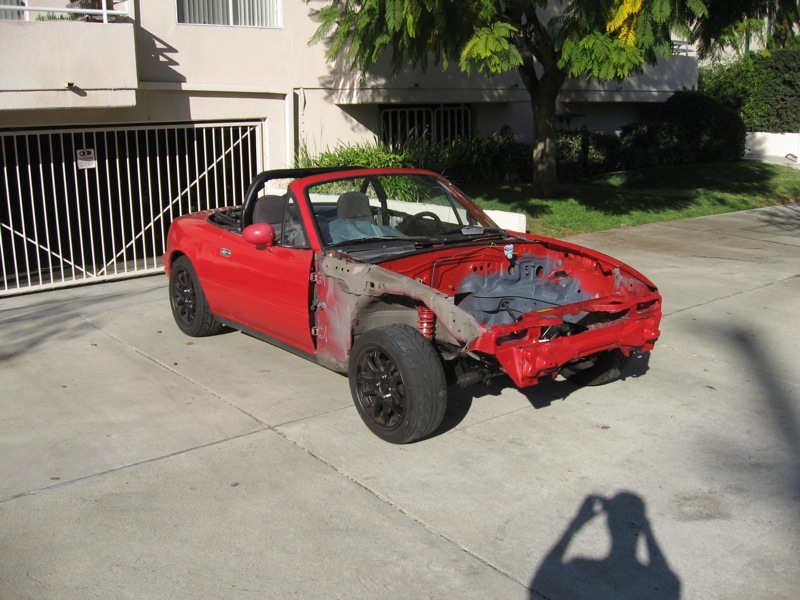
Here's the car I started with, a 1991 with 185,000. Bought it cheap with the intention of making it a track car. I've got another daily driver so this car is just a toy. I started out by doing basic safety/maintenance stuff. It got rebuilt calipers, master cylinder, stainless steel lines. Then Energy suspension bushings, and FM V-Maxx coilovers, cheap wheels, and Dunlop Direzza Tires...
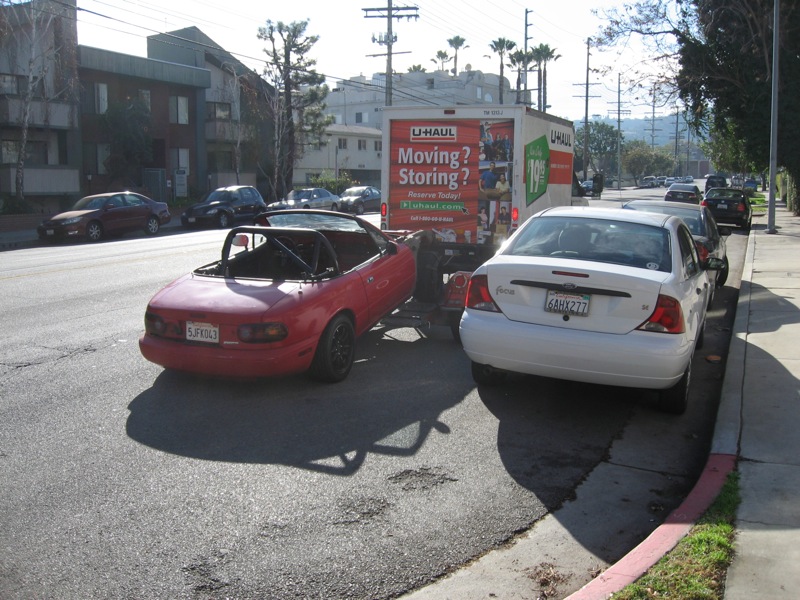
After that I got in a few track days NA, I had planned to do a lot more before turbo'ing, but after a day at California Motor Speedway, I came home with no compression in cylinder 3...
So new plan:
2000 1.8 Longblock (purchased, but turned out to be bad, so will need rebuild)
6 speed from same car as motor
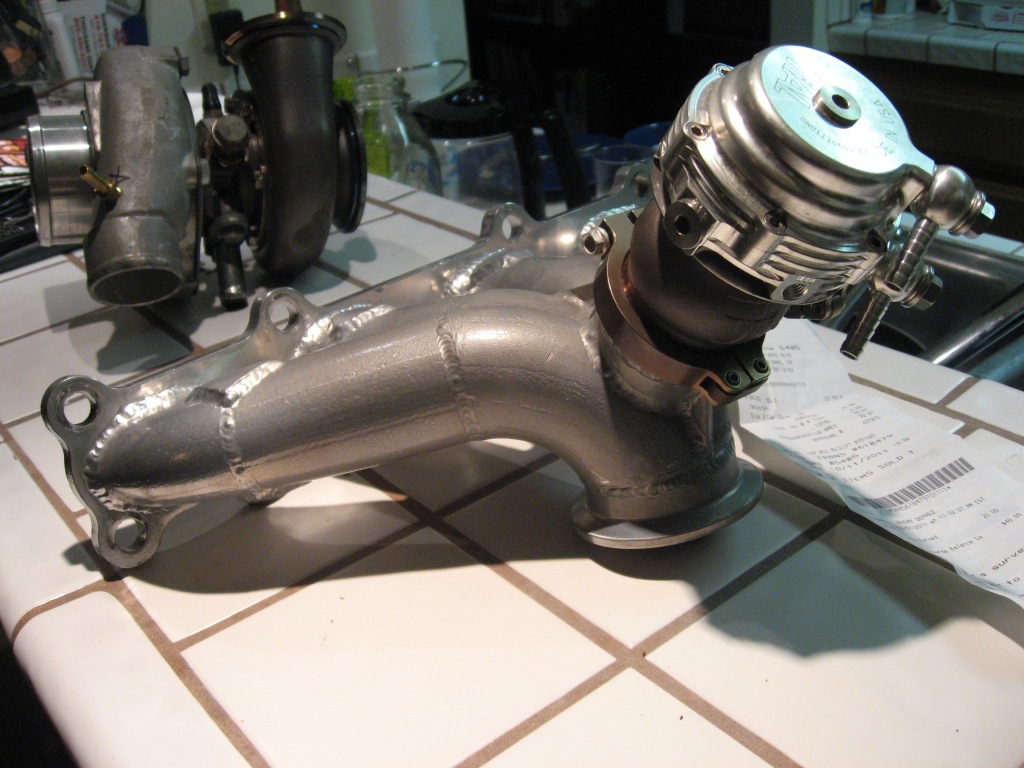
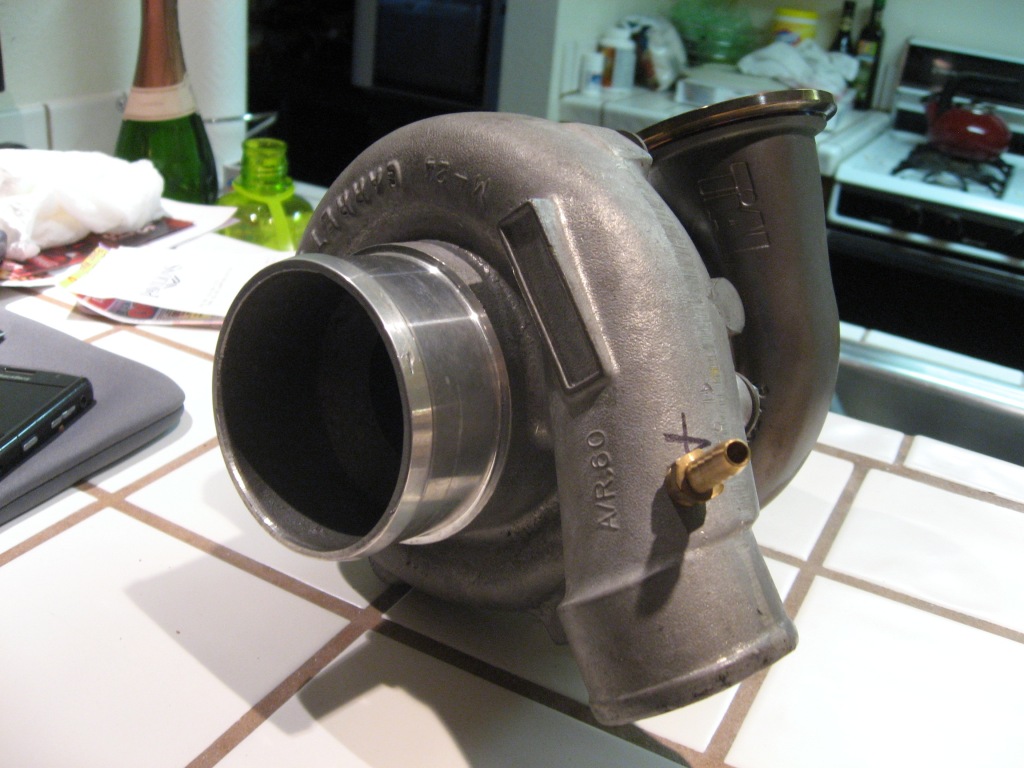
GT2860
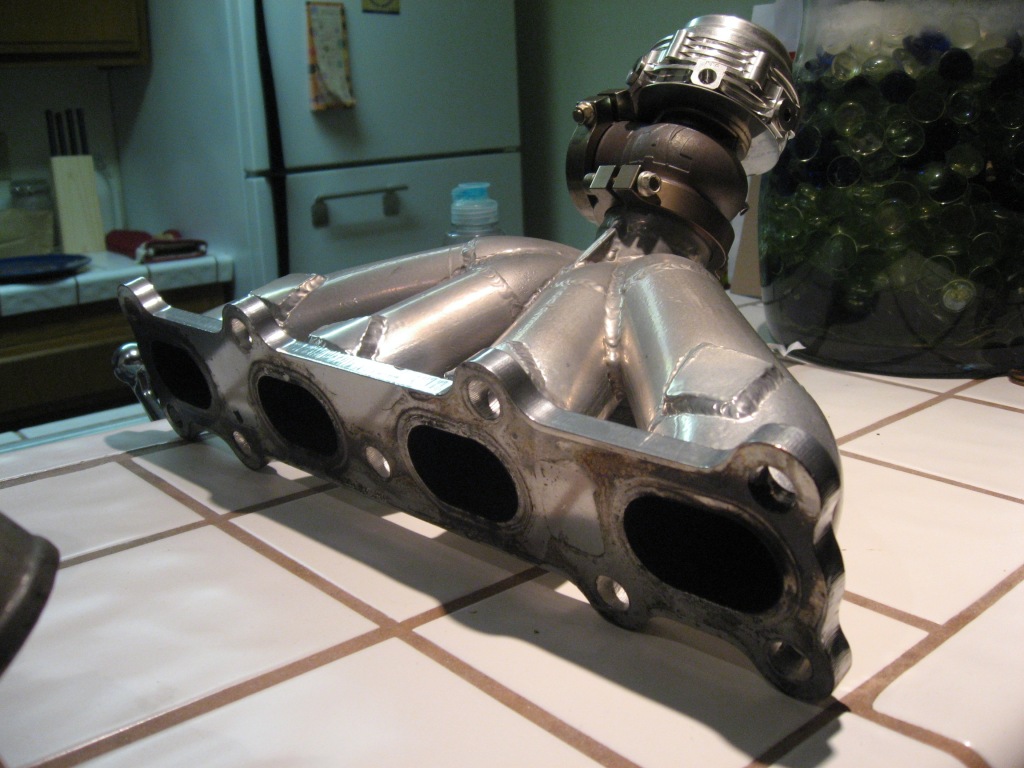
Absurdflow Manifold
Tial EWG
Ebay Intercooler Kit
Megasquirt DIYPNP
550cc Injectors
ACT Clutch
Lightweight Flywheel
and other stuff i'm sure i'm forgetting...all of the above has already been purchased. I'm trying to buy as much used as possible to help the budget for the car.
Here's a pic of what it looked like at the track (at willow springs in this photo):
After the motor crapped out I decided to go all out turbo build, and picked up a GT 2860, Absurdflow low mount manifold, and Tial EWG off the forum here. Original intention was to do a quickie, yank old motor out, put new turbo motor in job....but that plan changed...
Here's the turbo goodies:
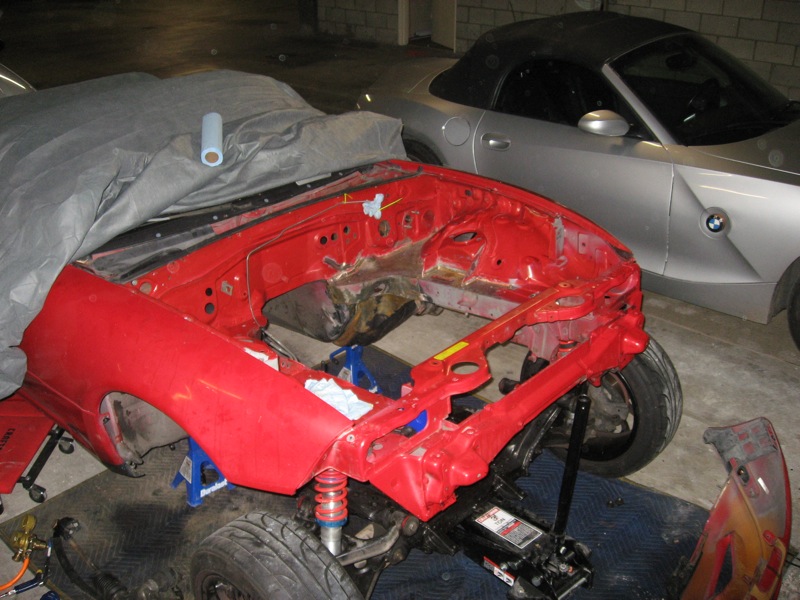
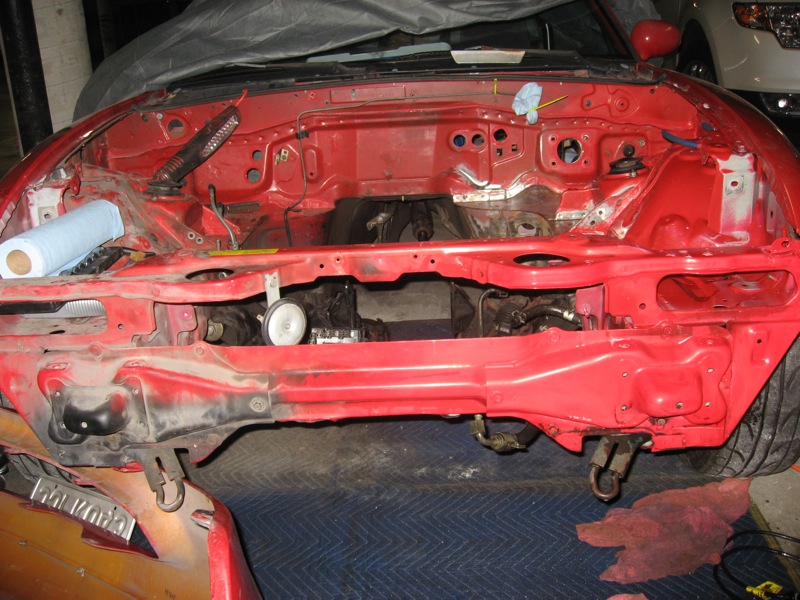
After getting to work, I started to realize there was going to be nothing quick about this, so I decided to take my time and take care of some surface rust issues from the previously leaky brake master cylinder, and paint the bay.
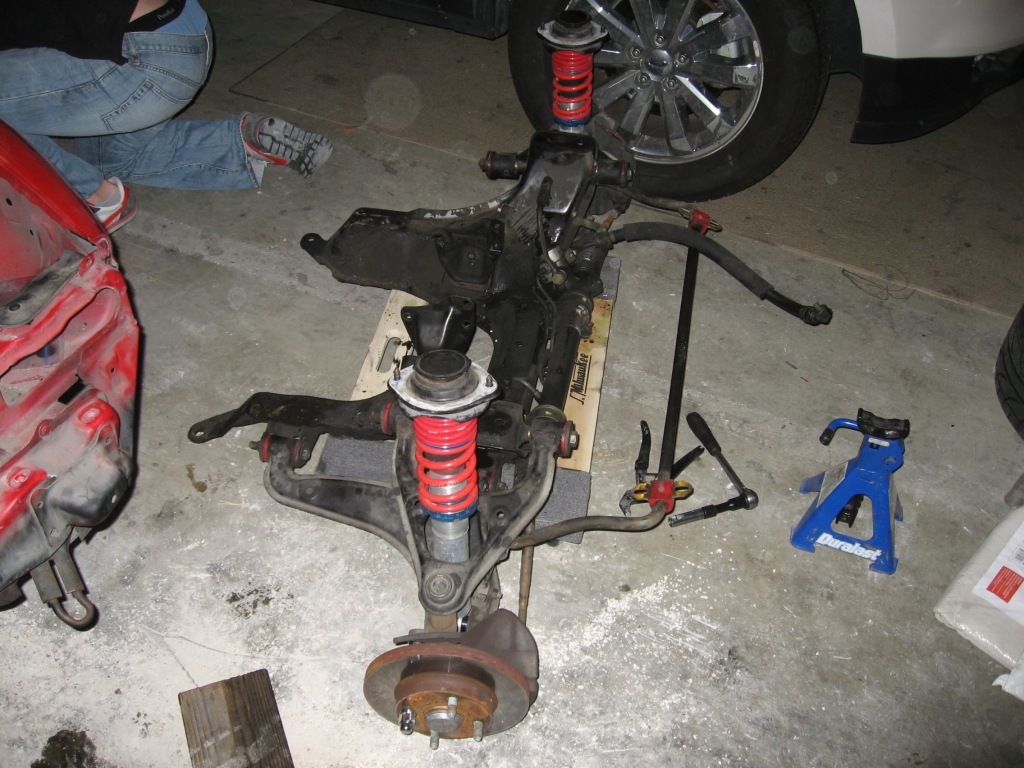
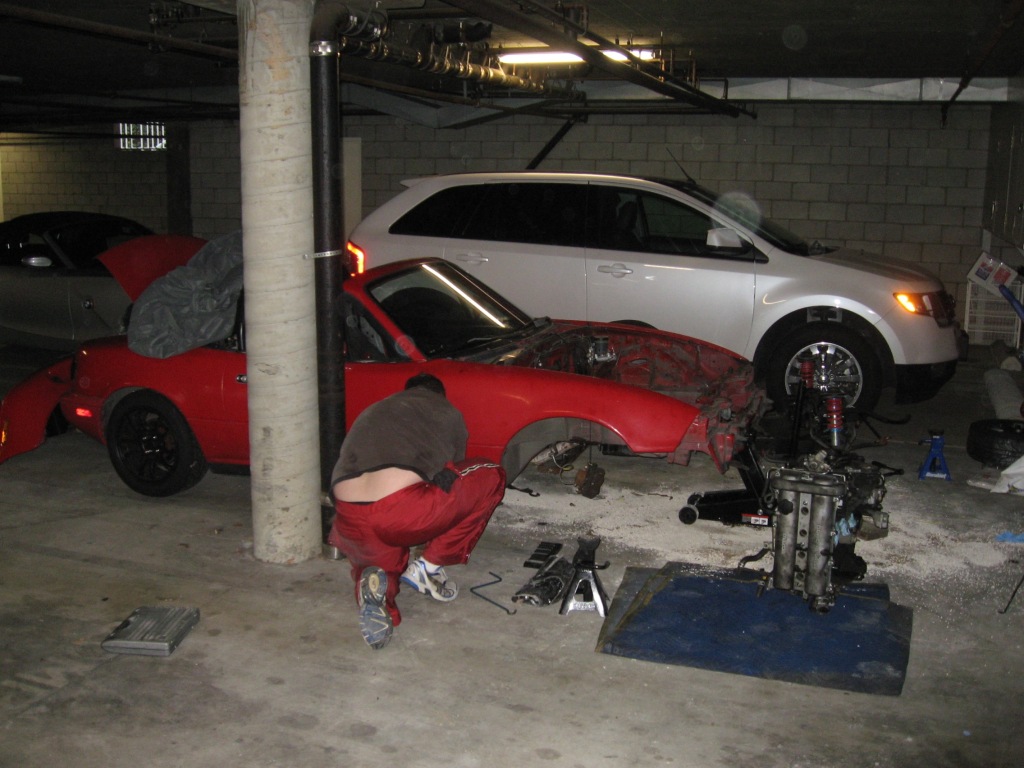
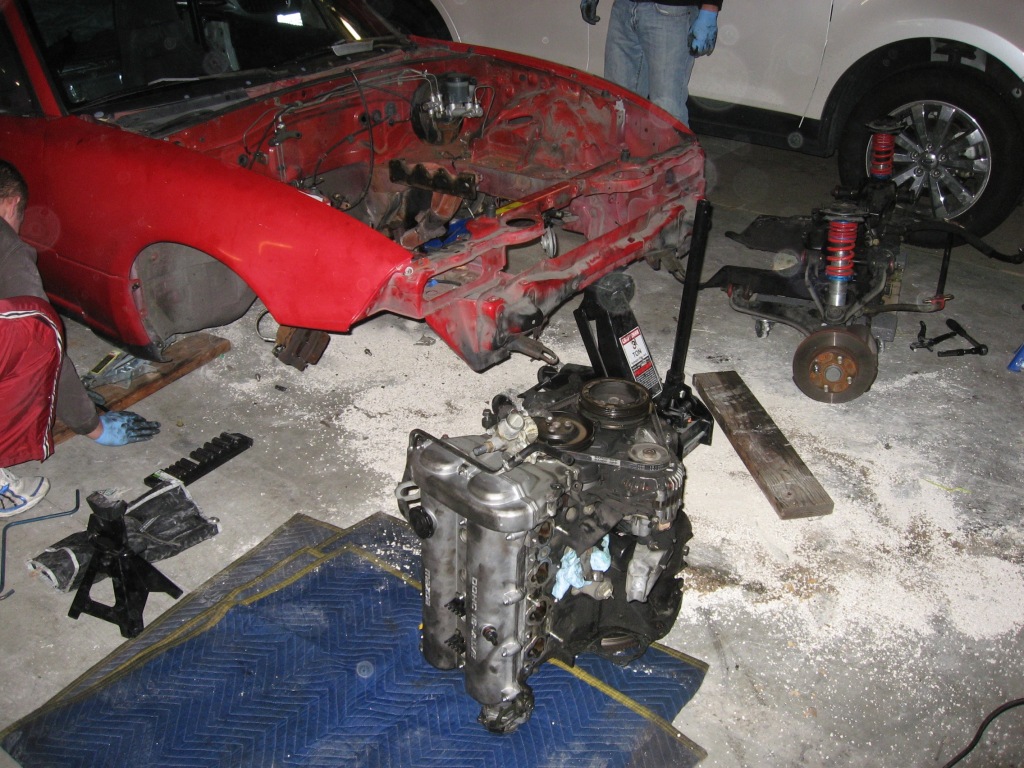
Pics of the motor coming out:
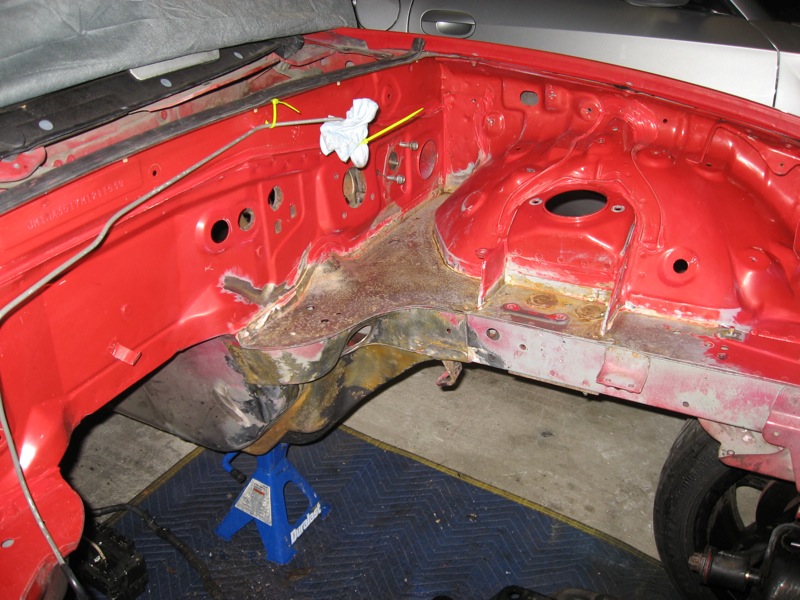
Or rather the car being lifted off the motor. We sat the car down with the subframe sitting on a furniture dolly, undid the subframe bolts, jacked the car up then slid the motor out.
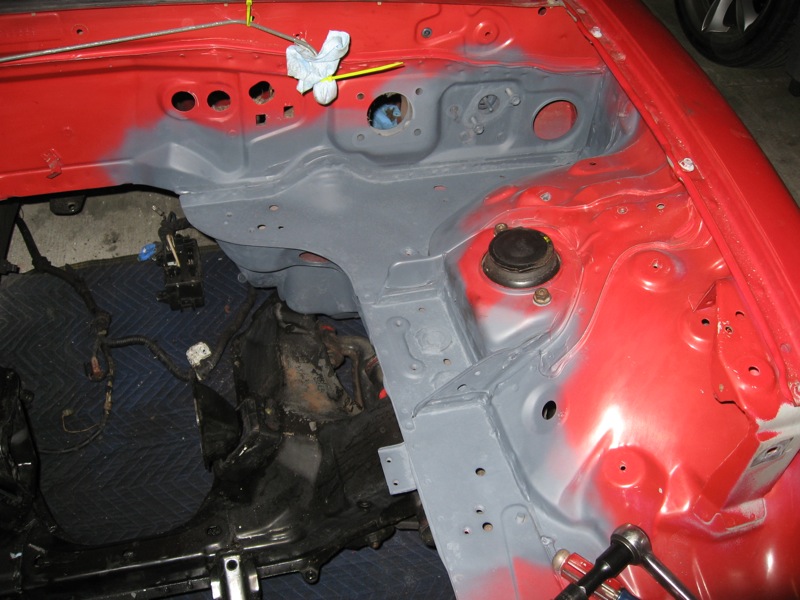
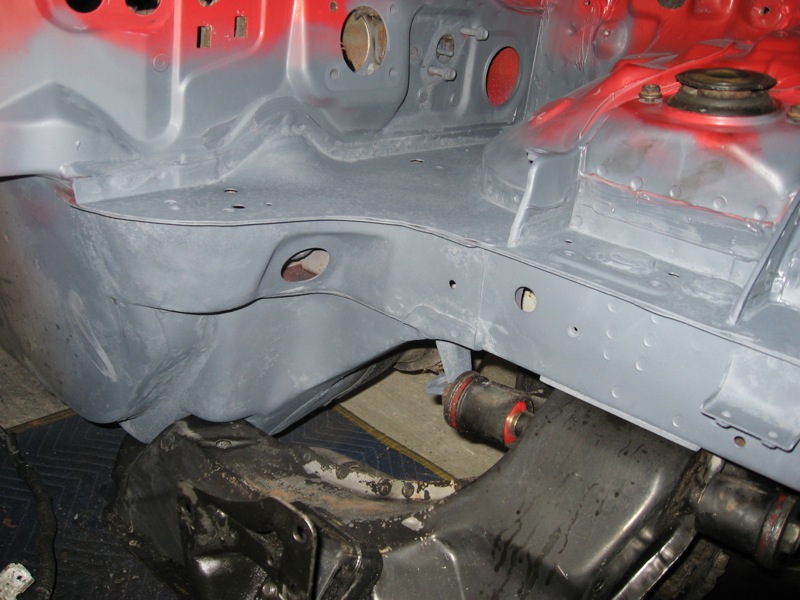
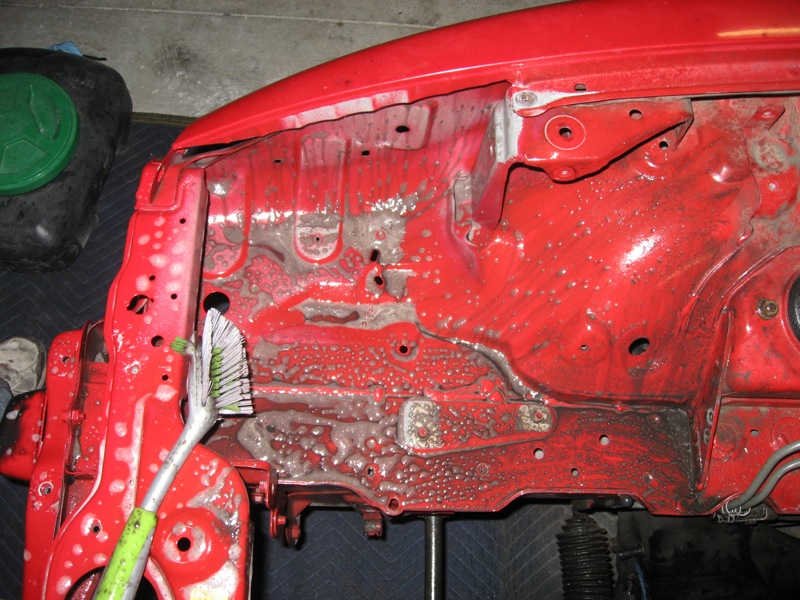
Now on to the rust removal...The master cylinder had leaked causing the paint to bubble all around the master cylinder and down through the trans tunnel.
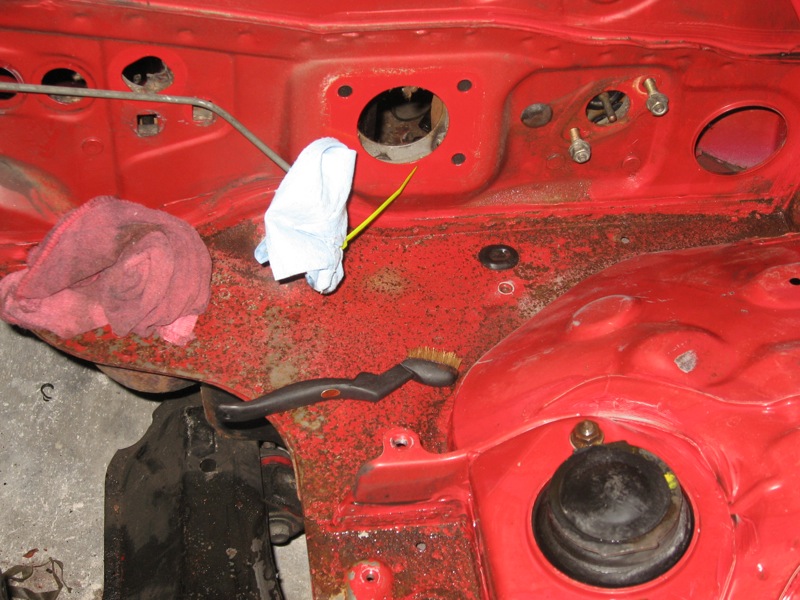
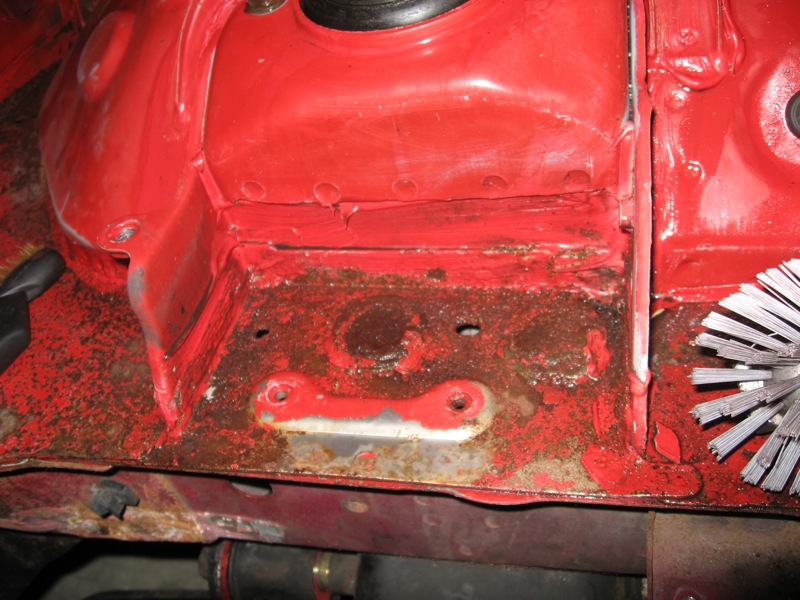
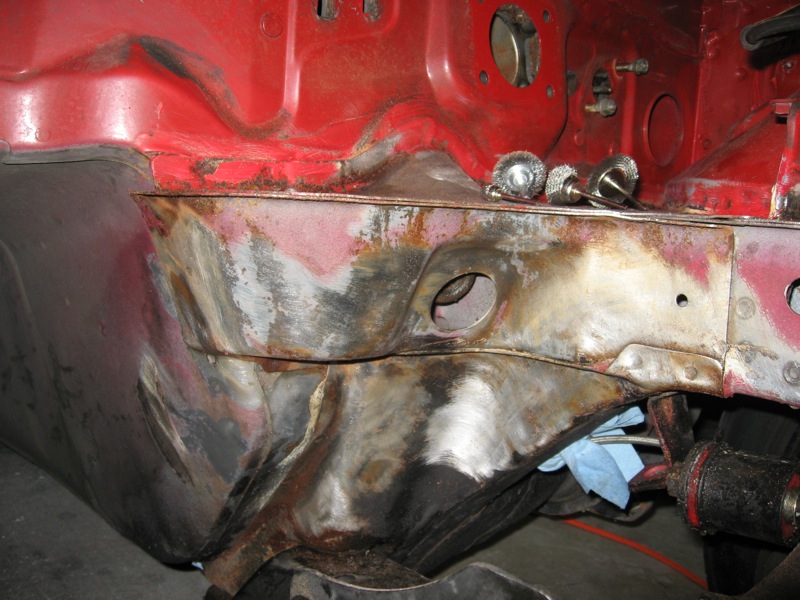
So I got to work cleaning up the rust. Used wire brushes on my dremel and drill to make pretty quick work of it.
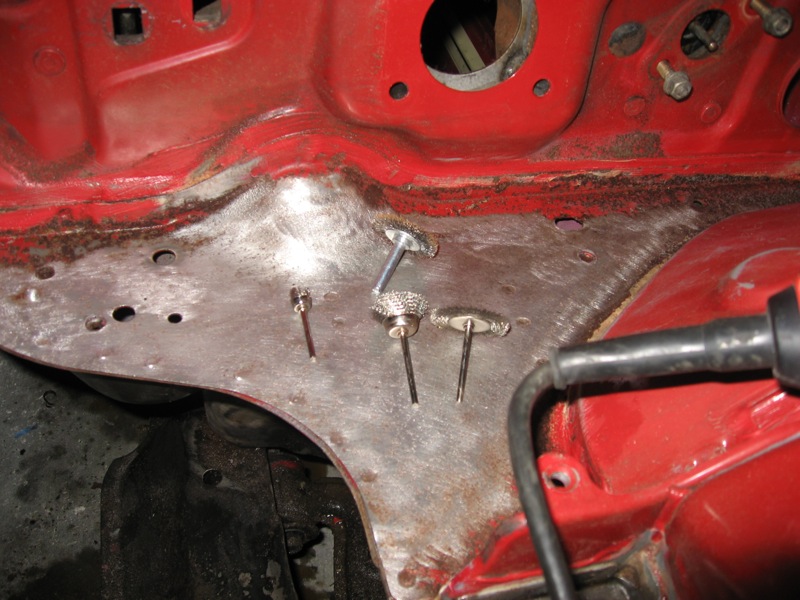
After I got all the rust and peeling undercoat out, I primed.
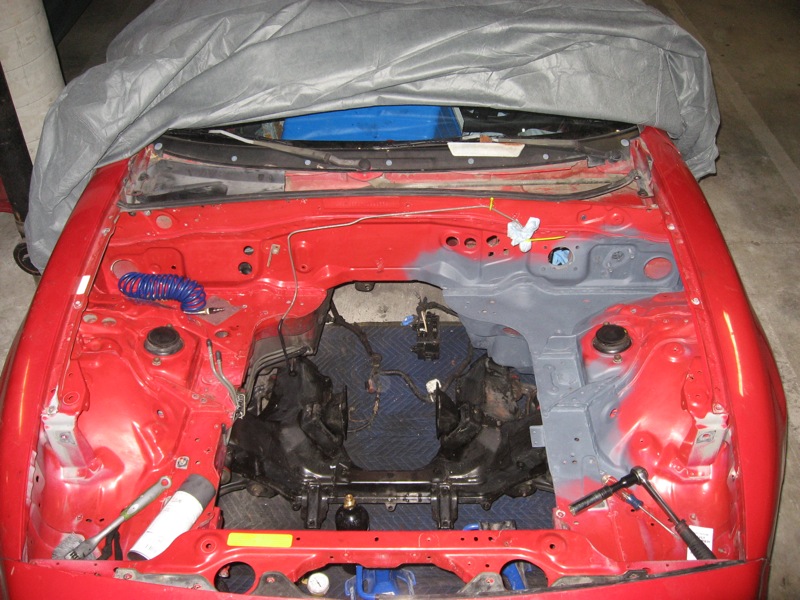
Stay tuned...Next step, engine bay painting.
https://www.miataturbo.net/meet-greet-40/new-guy-turbo-track-build-socal-61750/
I'll post the pictures here too so you don't actually have to click through...
Here's the car I started with, a 1991 with 185,000. Bought it cheap with the intention of making it a track car. I've got another daily driver so this car is just a toy. I started out by doing basic safety/maintenance stuff. It got rebuilt calipers, master cylinder, stainless steel lines. Then Energy suspension bushings, and FM V-Maxx coilovers, cheap wheels, and Dunlop Direzza Tires...
After that I got in a few track days NA, I had planned to do a lot more before turbo'ing, but after a day at California Motor Speedway, I came home with no compression in cylinder 3...
So new plan:
2000 1.8 Longblock (purchased, but turned out to be bad, so will need rebuild)
6 speed from same car as motor
GT2860
Absurdflow Manifold
Tial EWG
Ebay Intercooler Kit
Megasquirt DIYPNP
550cc Injectors
ACT Clutch
Lightweight Flywheel
and other stuff i'm sure i'm forgetting...all of the above has already been purchased. I'm trying to buy as much used as possible to help the budget for the car.
Here's a pic of what it looked like at the track (at willow springs in this photo):
After the motor crapped out I decided to go all out turbo build, and picked up a GT 2860, Absurdflow low mount manifold, and Tial EWG off the forum here. Original intention was to do a quickie, yank old motor out, put new turbo motor in job....but that plan changed...
Here's the turbo goodies:
After getting to work, I started to realize there was going to be nothing quick about this, so I decided to take my time and take care of some surface rust issues from the previously leaky brake master cylinder, and paint the bay.
Pics of the motor coming out:
Or rather the car being lifted off the motor. We sat the car down with the subframe sitting on a furniture dolly, undid the subframe bolts, jacked the car up then slid the motor out.
Now on to the rust removal...The master cylinder had leaked causing the paint to bubble all around the master cylinder and down through the trans tunnel.
So I got to work cleaning up the rust. Used wire brushes on my dremel and drill to make pretty quick work of it.
After I got all the rust and peeling undercoat out, I primed.
Stay tuned...Next step, engine bay painting.

Reply
 0
0

0
01-22-2012, 04:09 PM
#2
Junior Member
Thread Starter
iTrader: (2)
Join Date: Nov 2010
Location: Los Angeles
Posts: 65
Total Cats: 1
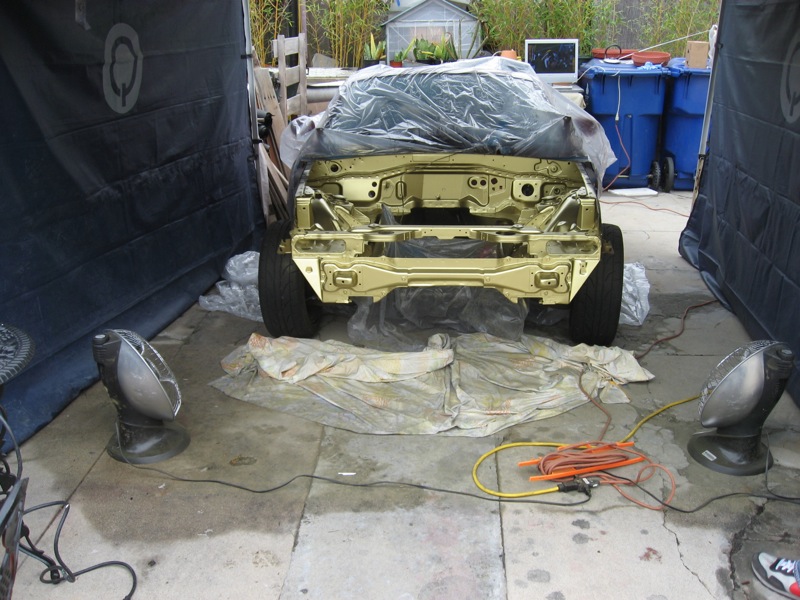
So now on to painting the engine bay.
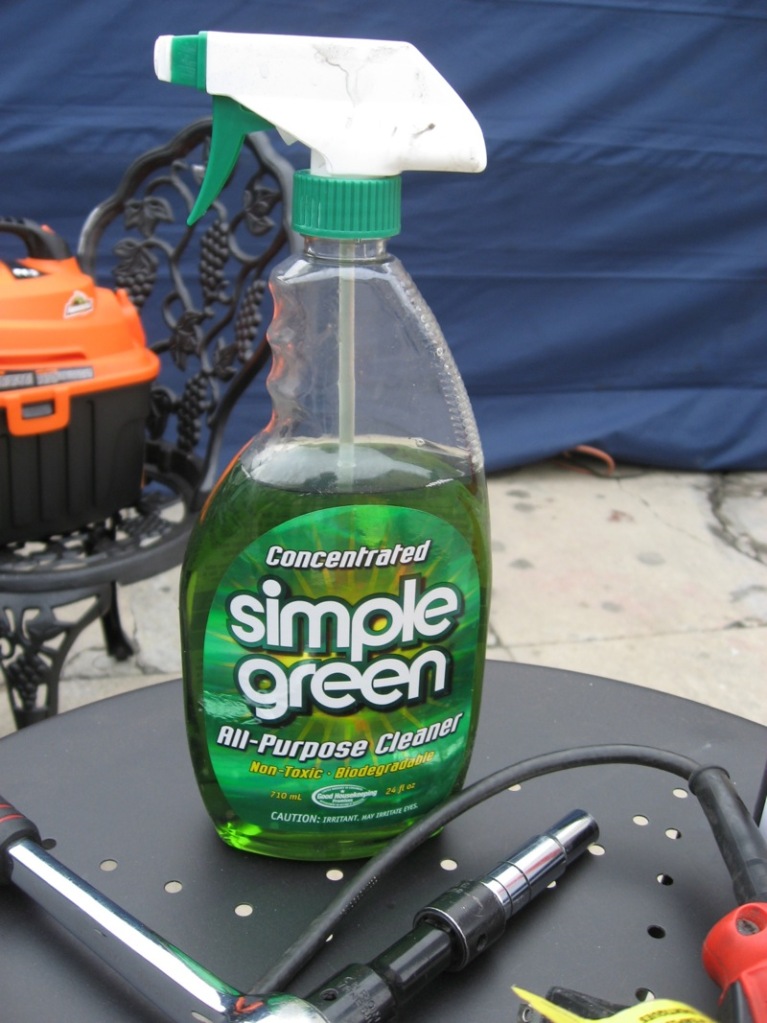
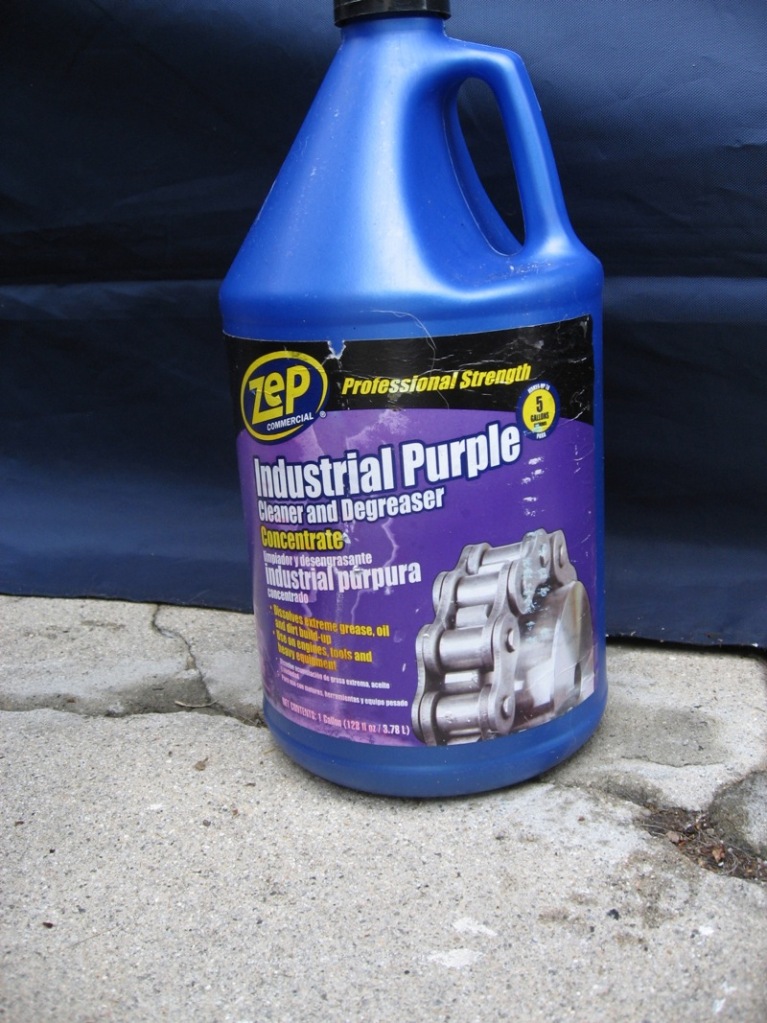
First step was to clean 20 years of ---- out...I had started using Simple Green, but later ended up using Industrial Purple to clean...Purple ---- works way better.
Step two:
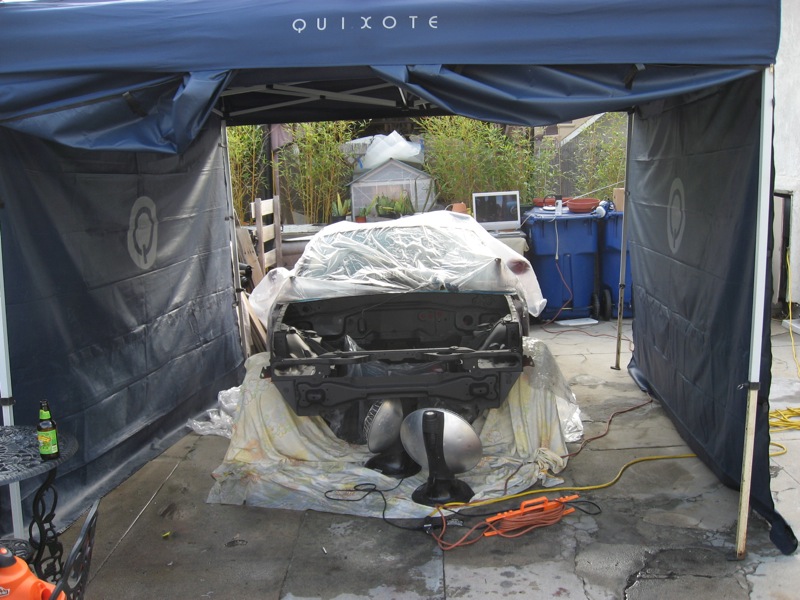
I'm doing most of the work in the tandem parking spot of my shared apartment garage...my landlord is great and let's me get away with doing all this, so I try to be conscientious of everybody else and not do smelly stuff down there. That meant no painting down there. So i drug the car out to see the light of day, and took it over to a friends place where we st up a makeshift paint booth.
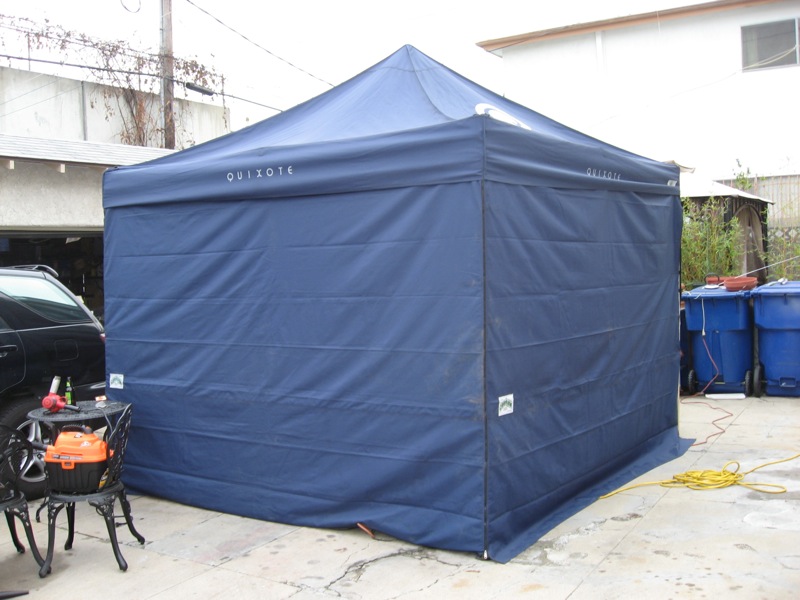
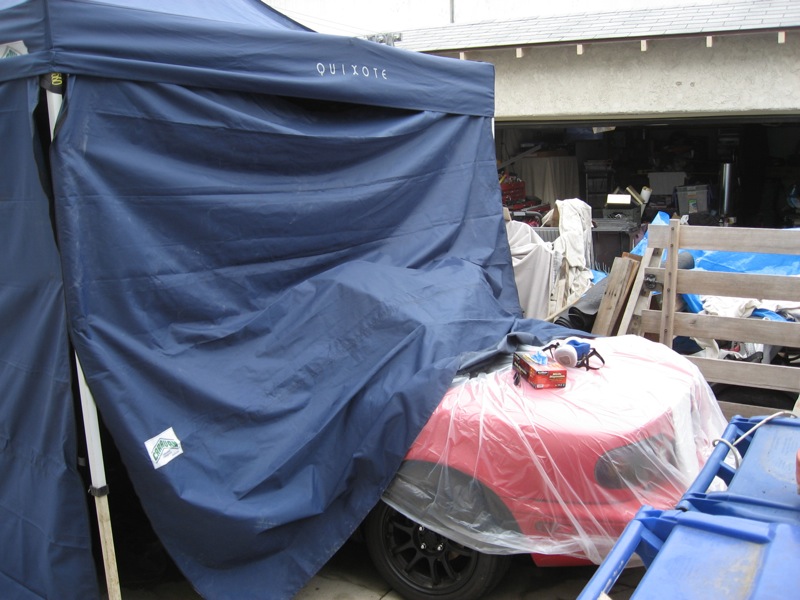
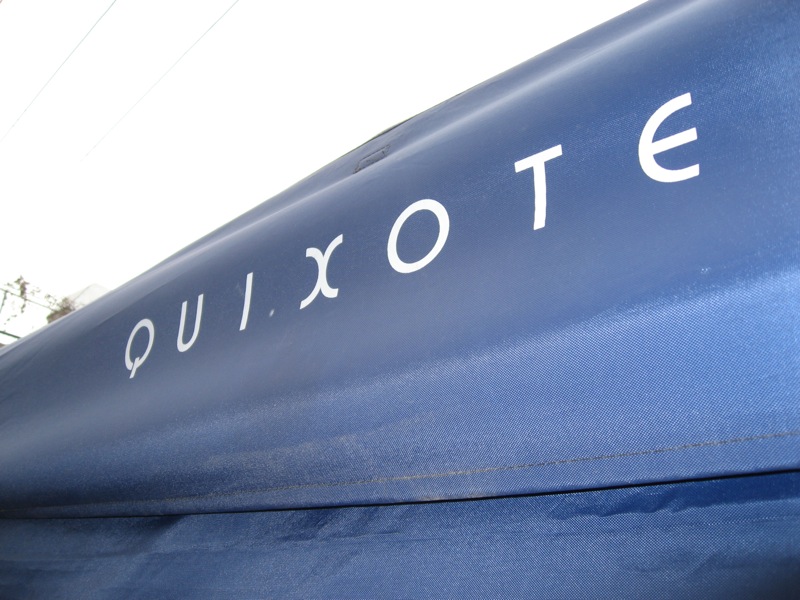
Paintbooth courtesy of Quixote Studios.
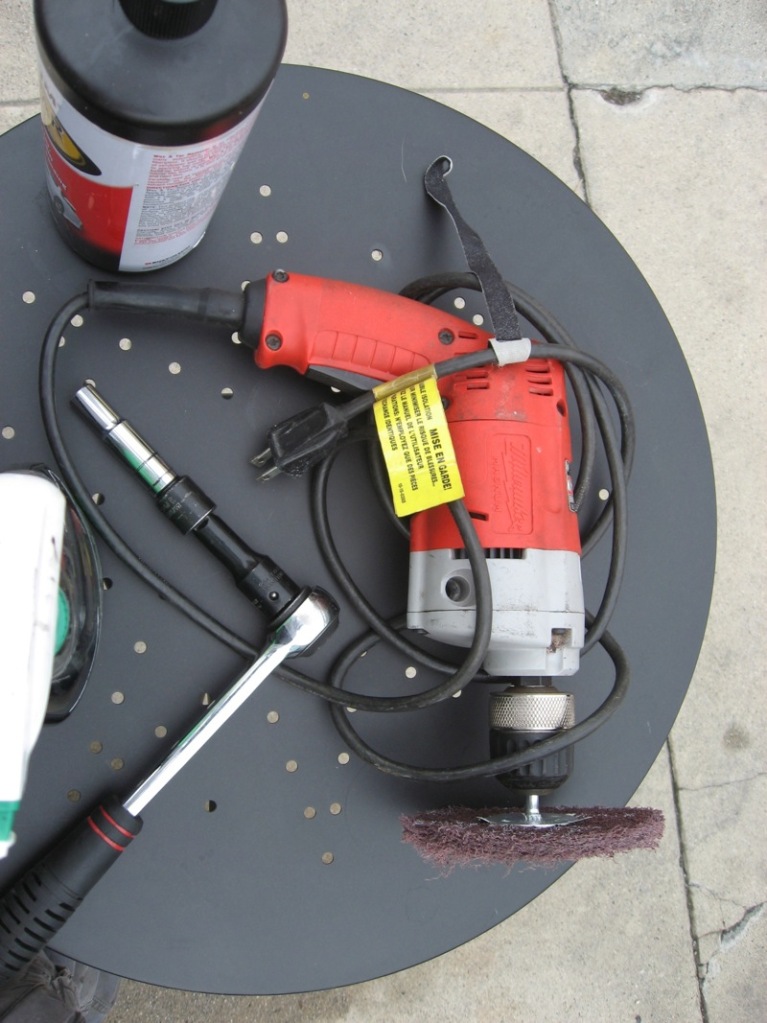
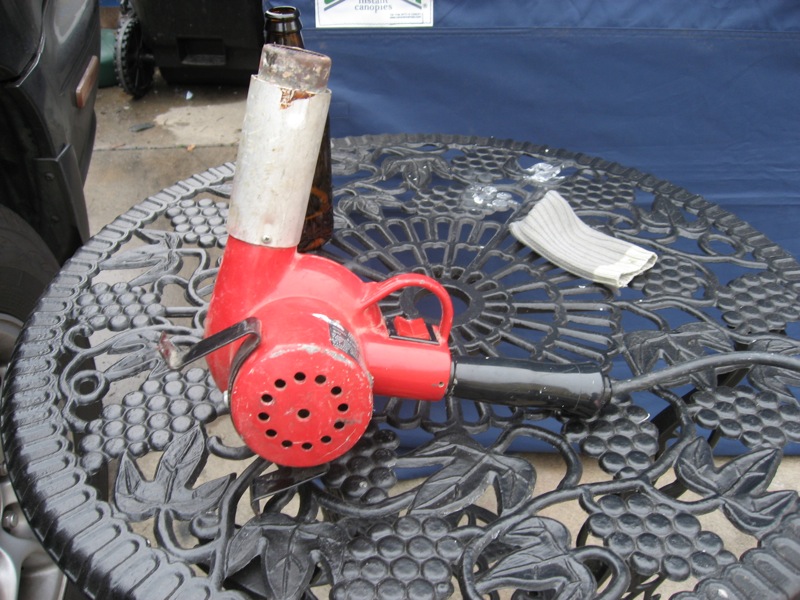
Some of the tools needed for the job:
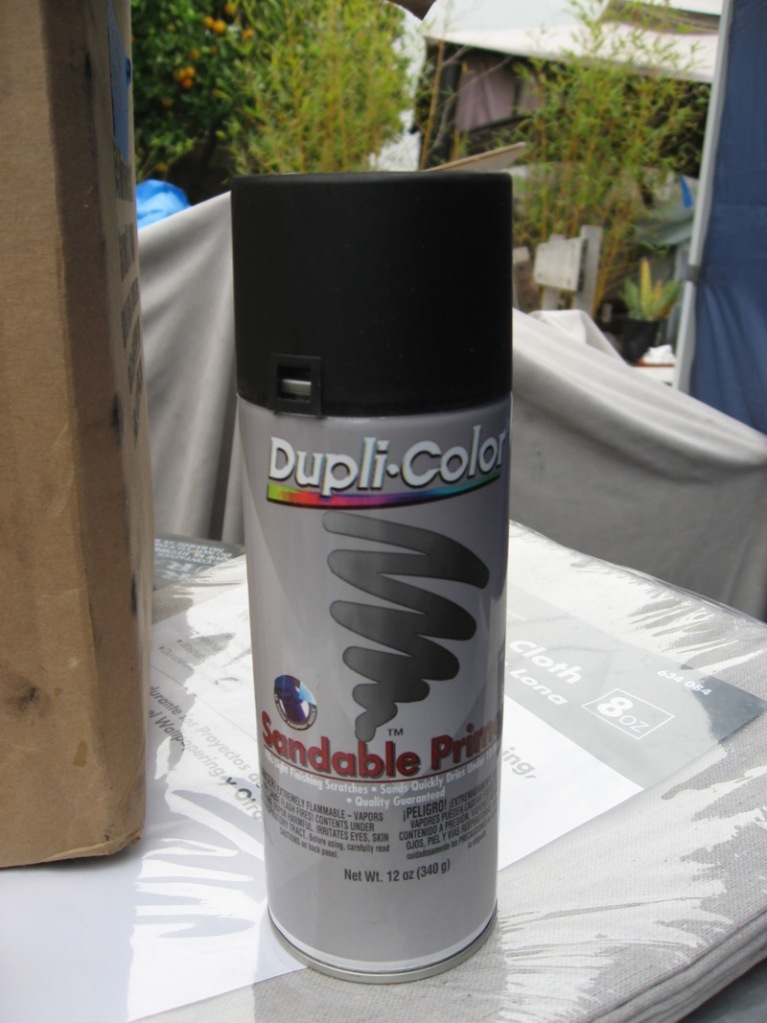
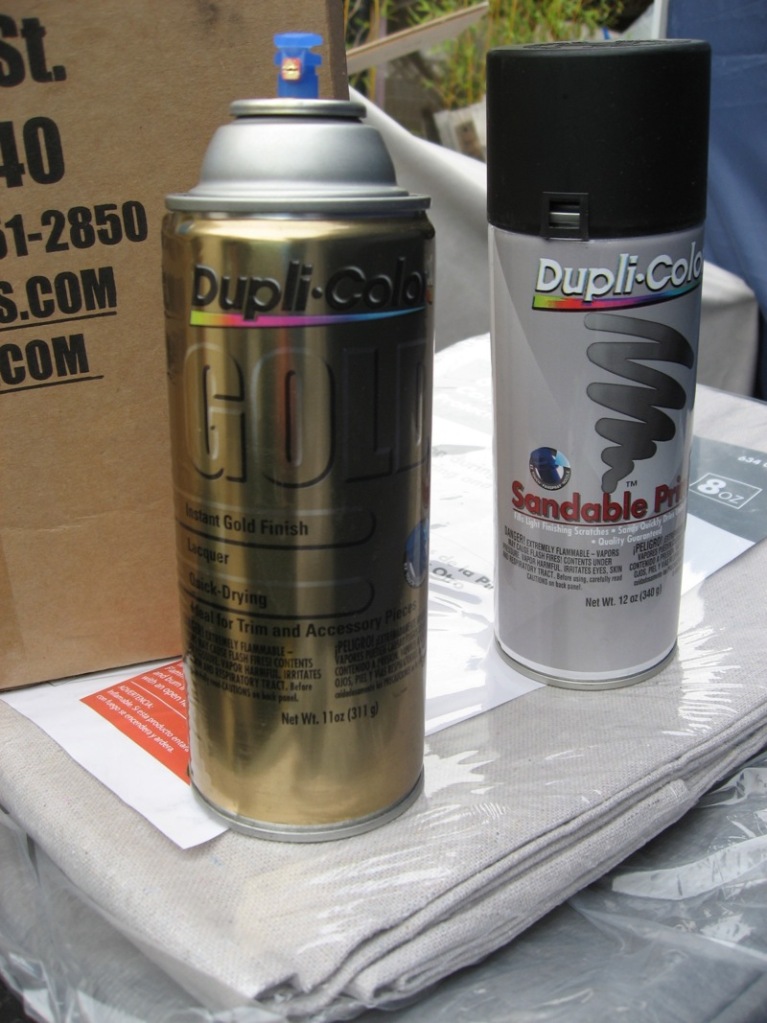
I used Dupli-Color rattle cans for the primer and base coat....I didn't get a shot of the clear coat, but I used Spraymax 2k Glamour Clear. The clear is actually a two part in a rattle can. You have to press an activator button on the bottom of the can before you shake to inject the hardner. The clear coat is totally amazing...OEM quality clear out of spray can. It's also supposed to be fuel resistant, and all the motorcycle guys rave about it for rattle canned tanks.
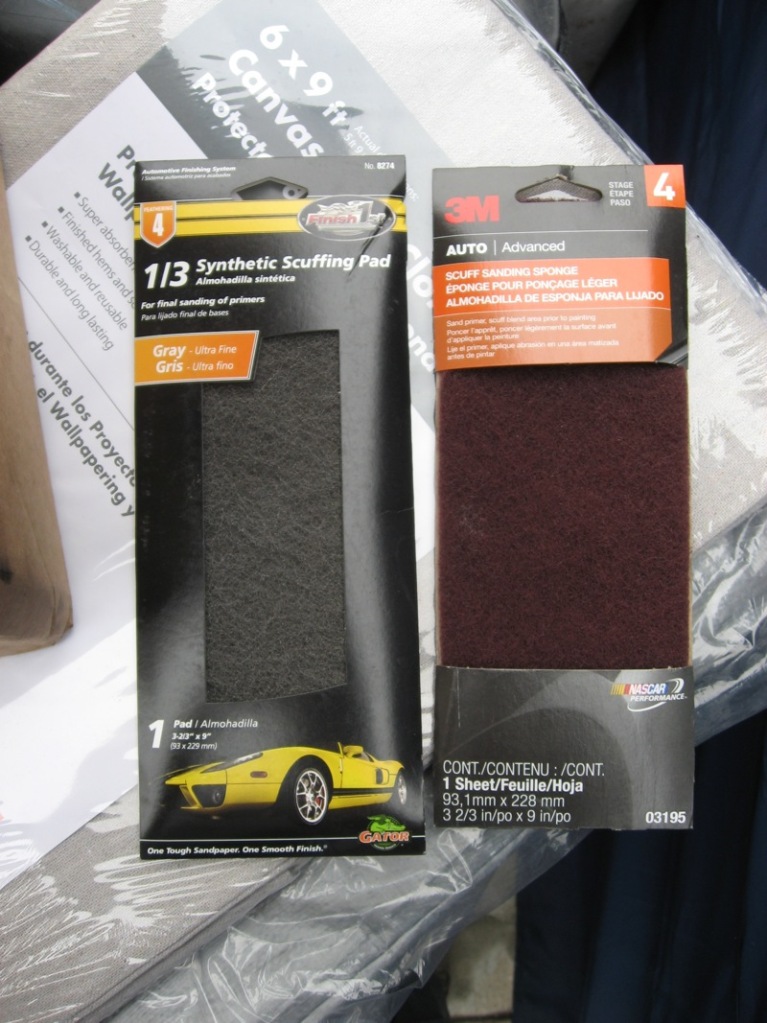
And now on to the priming, after being scuffed with the 3m pads:
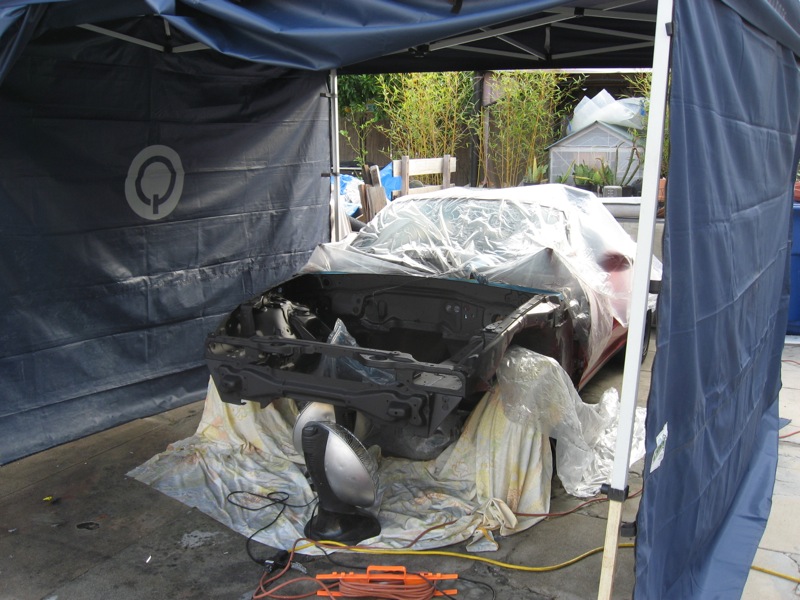
After a good scuff, we put down the first coats of base...these pics don't really show the true color. The last photos after clear are a more accurate representation.
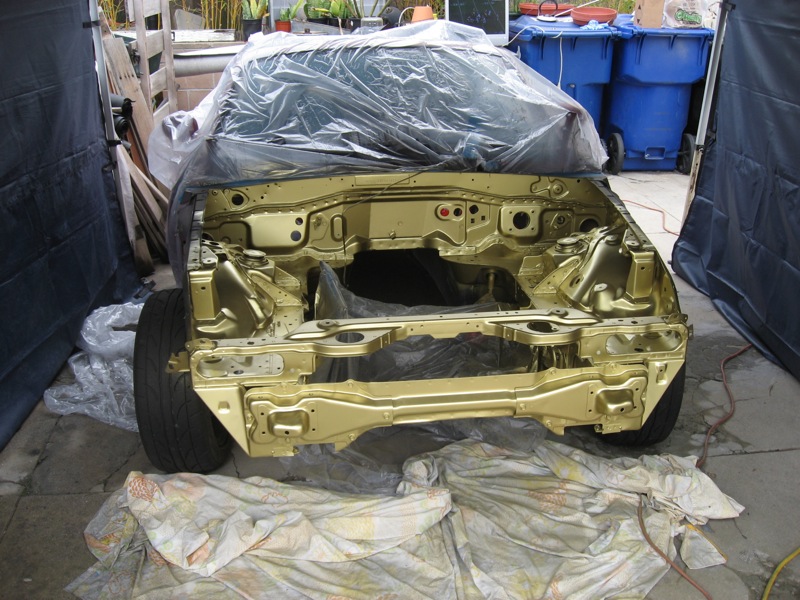
And now the clear:
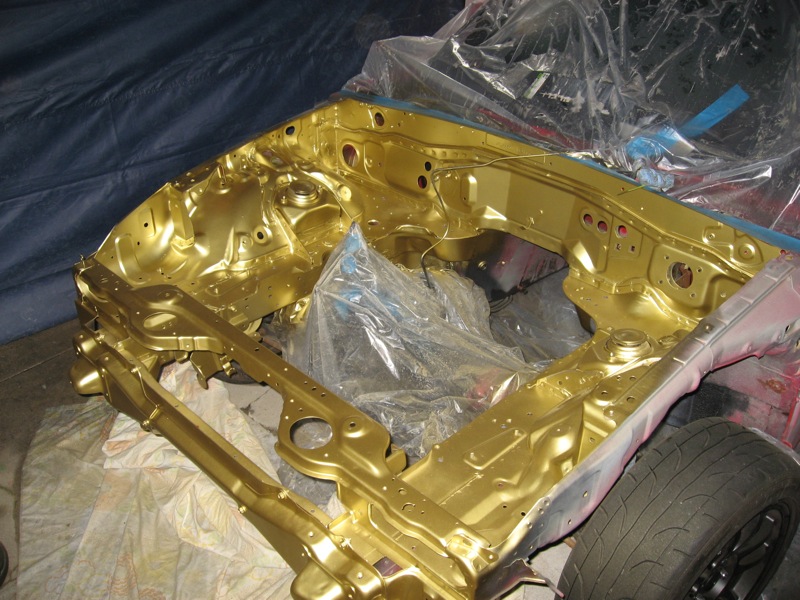
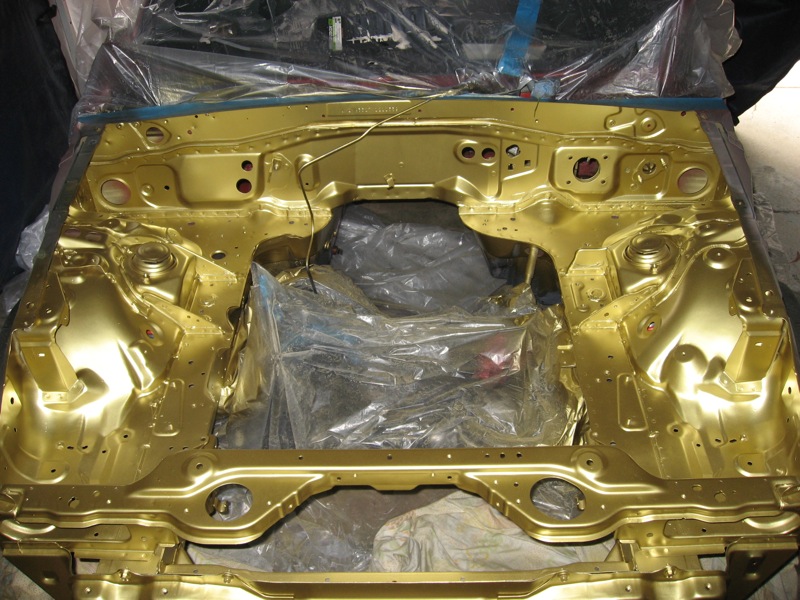
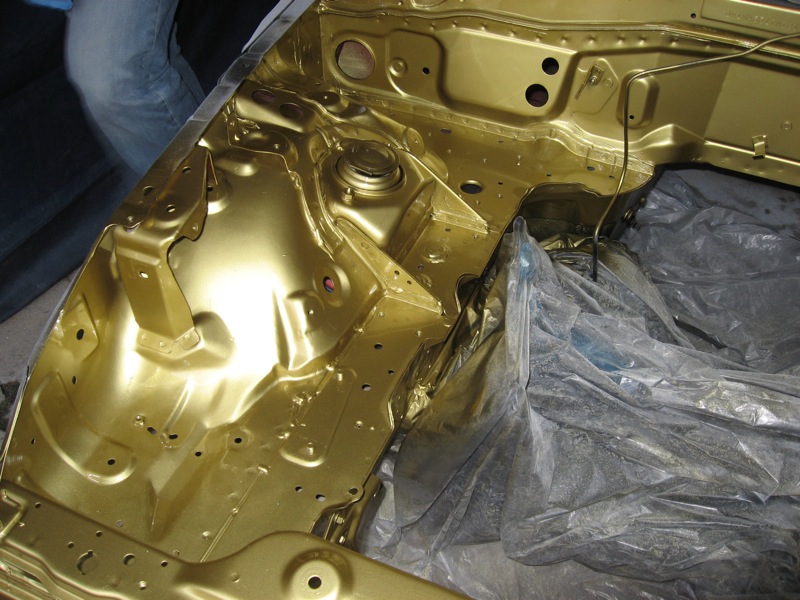
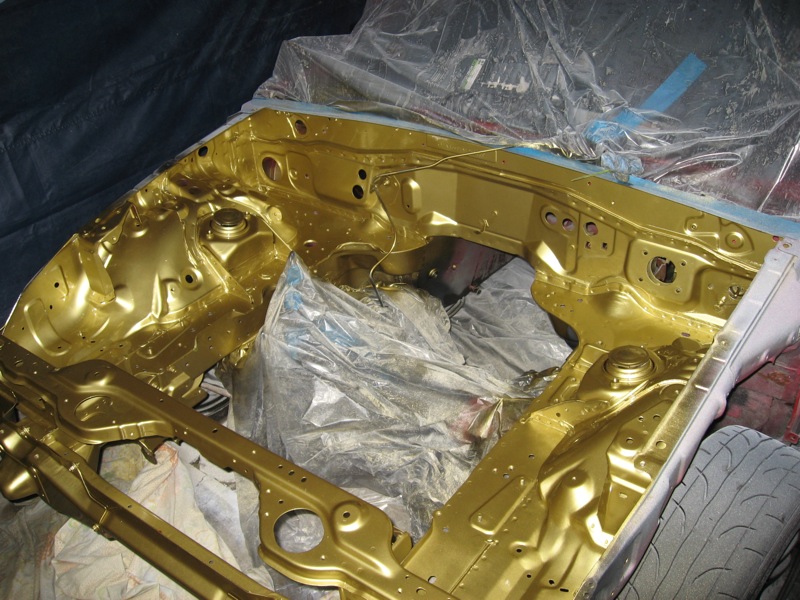
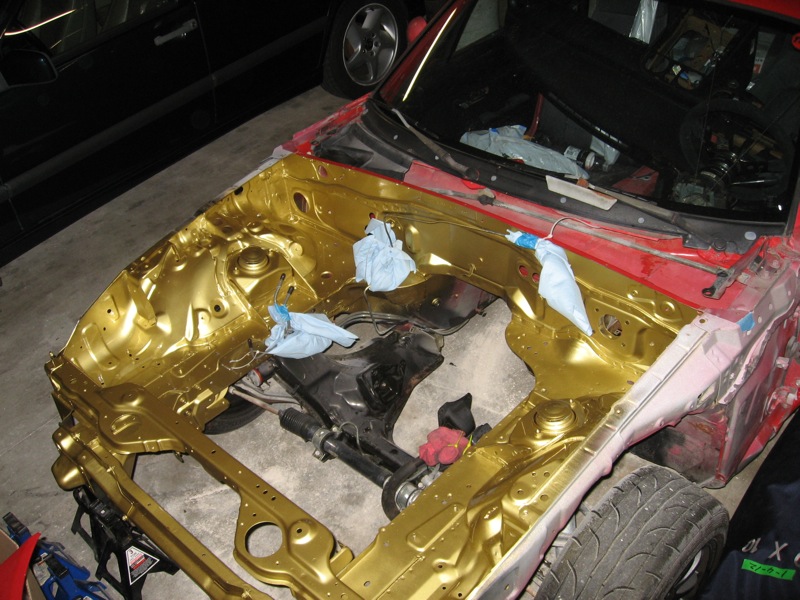
It came out great, It's not show quality in the least, but it will do for a race car. Eventually I'm going to paint the car dark blue, and the interior gold as well. After seeing the dark car, bright bay combo on Savingtons car I knew I wanted something like that.
But that basically brings me up to date. I'm working pretty crazy hours right now, so I doubt progress will happen too quickly....hopefully I'll have more to add soon.
Bird
First step was to clean 20 years of ---- out...I had started using Simple Green, but later ended up using Industrial Purple to clean...Purple ---- works way better.
Step two:
I'm doing most of the work in the tandem parking spot of my shared apartment garage...my landlord is great and let's me get away with doing all this, so I try to be conscientious of everybody else and not do smelly stuff down there. That meant no painting down there. So i drug the car out to see the light of day, and took it over to a friends place where we st up a makeshift paint booth.
Paintbooth courtesy of Quixote Studios.
Some of the tools needed for the job:
I used Dupli-Color rattle cans for the primer and base coat....I didn't get a shot of the clear coat, but I used Spraymax 2k Glamour Clear. The clear is actually a two part in a rattle can. You have to press an activator button on the bottom of the can before you shake to inject the hardner. The clear coat is totally amazing...OEM quality clear out of spray can. It's also supposed to be fuel resistant, and all the motorcycle guys rave about it for rattle canned tanks.
And now on to the priming, after being scuffed with the 3m pads:
After a good scuff, we put down the first coats of base...these pics don't really show the true color. The last photos after clear are a more accurate representation.
And now the clear:
It came out great, It's not show quality in the least, but it will do for a race car. Eventually I'm going to paint the car dark blue, and the interior gold as well. After seeing the dark car, bright bay combo on Savingtons car I knew I wanted something like that.
But that basically brings me up to date. I'm working pretty crazy hours right now, so I doubt progress will happen too quickly....hopefully I'll have more to add soon.
Bird
Last edited by TheBirdmanJD; 01-22-2012 at 04:30 PM.
Reply
0
0

 01-22-2012, 05:12 PM
#5
Junior Member
Thread Starter
iTrader: (2)
Join Date: Nov 2010
Location: Los Angeles
Posts: 65
Total Cats: 1
The original plan was to drop the motor in as is...but since it's going for the rebuild I'm thinking forged. No sense in not doing right.
Only problem there is the cost...hence the original plan to go used motor for the time being.
I actually just found out yesterday that the motor needed rebuild. It seemed ok, but I found out the story of the motors history wasn't really true...and I found some shiny specs in the oil...
Story I got was that it was the original motor, pulled working, from the guys car I bought it from. But when you look really close at the valve cover, you can see some traces of yellow and pink from the junkyard numbers...It's not 'blown' but I'm guessing it's got a few more miles than I was told, and the bearings may not be in great shape.
It looks like someone started to take it apart to swap the timing belt, and found the same specs I did, buttoned it back up and then sold it to me.
It also just worries me in general that the guy lied about where the motor came from...even in worse shape than I thought it was it wasn't really a bad price...
So now I'm researching motor options...I'm not too far from Trackspeed, so I'm probably going to give them a call.
Bird
Reply
0
0


 01-28-2012, 12:41 PM
#13
Elite Member
iTrader: (8)

Join Date: Dec 2008
Location: Kingston, Ontario
Posts: 2,910
Total Cats: 51
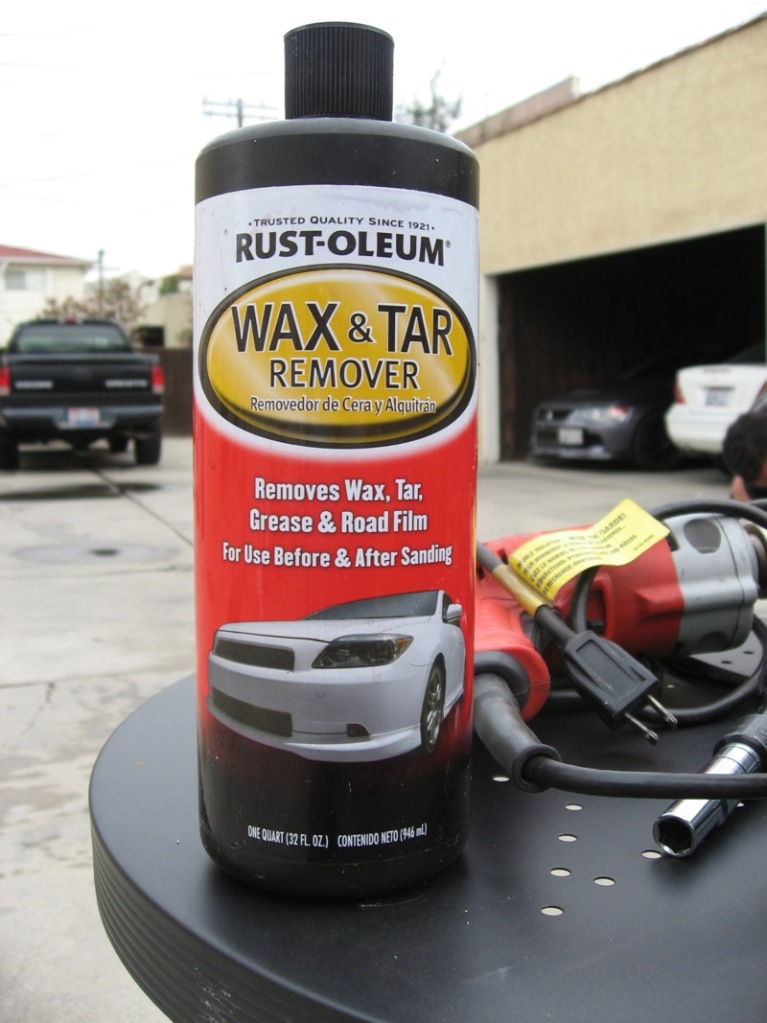
Just an FYI for future.... an autobody shop has a wax and grease remover that requires zero scrubbing.
put it on a grey scotchbrite pad and wipe the surface with little pressure, wipre dry and then you are ready for paint. no need to sand.
put it on a grey scotchbrite pad and wipe the surface with little pressure, wipre dry and then you are ready for paint. no need to sand.
Reply
0
0
02-27-2012, 11:50 PM
#14
Junior Member
Thread Starter
iTrader: (2)
Join Date: Nov 2010
Location: Los Angeles
Posts: 65
Total Cats: 1
Time for an update. I picked up another motor, this one's a used 95 built motor from FM. It was originally put together in 2002, and I bought it with the hope that all it would need was rings...maybe a new piston for #3 which I knew had issues. I checked all the cylinders out with a video scope before I bought it, and didn't see any carnage anywhere. I got a decent deal on it, so it was worth a shot.
Basic Specs:
Wiseco 9:1 84mm
Carillo H-beam Rods
Billet Center main cap
SS +1mm valves
Port and Polish Head
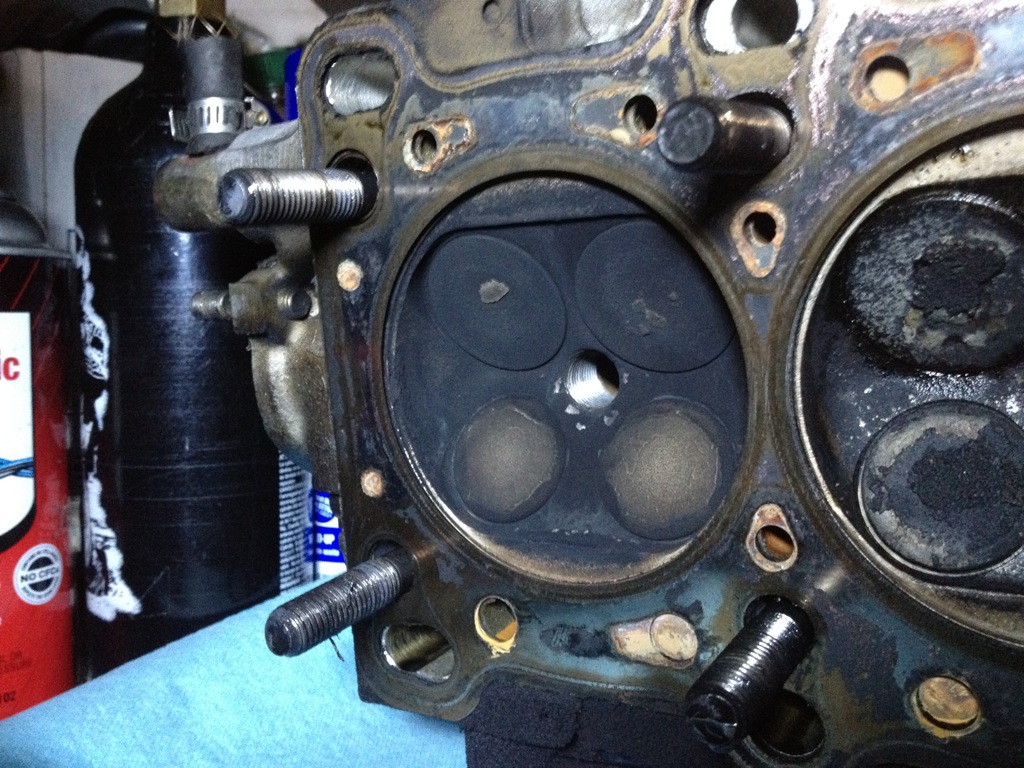
So here's the head, starting with cylinder #1...(the nicks around the spark plug hole are from the scope and just scraped the carbon off)
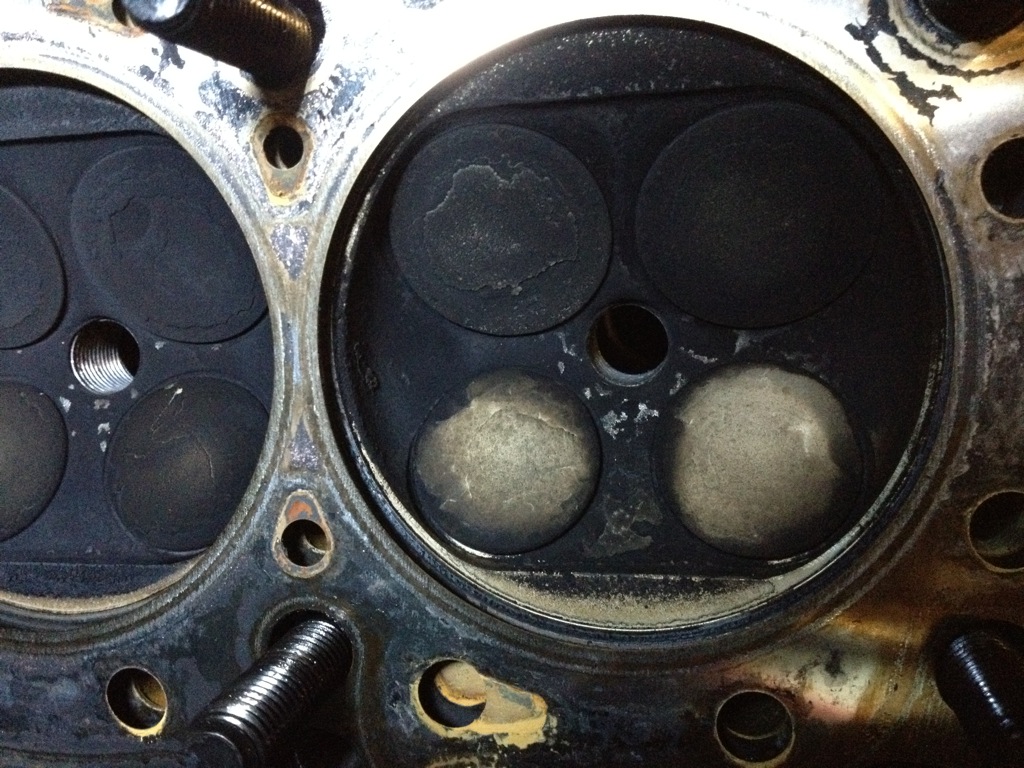
#2
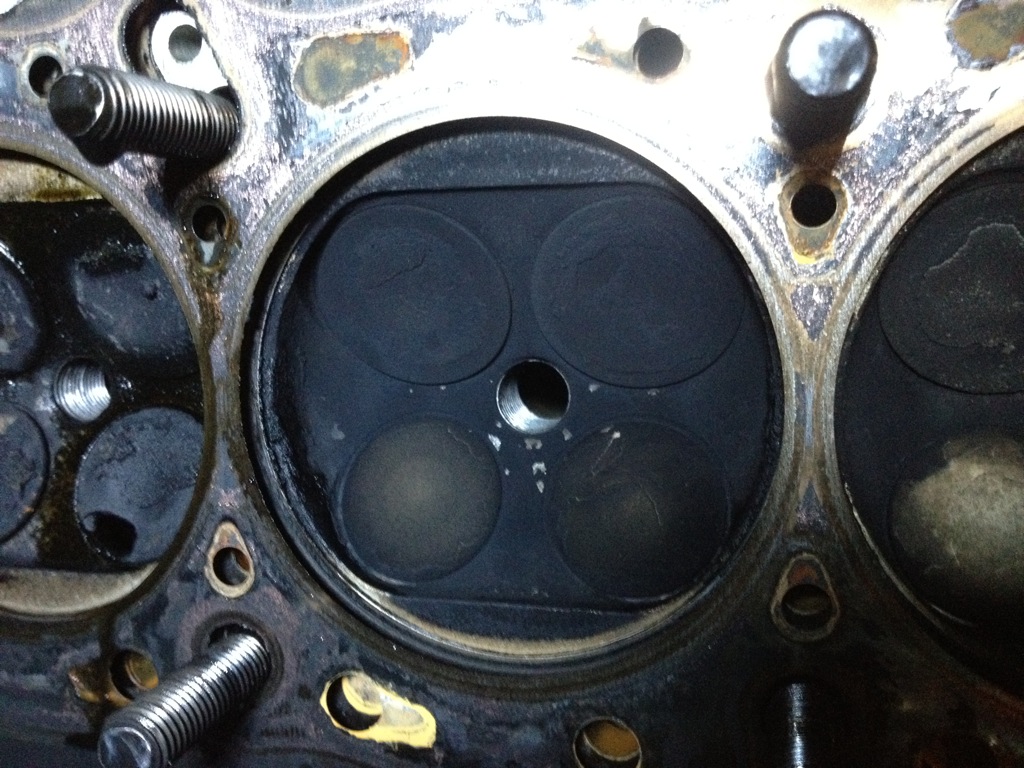
#3...guess I missed that with the scope...
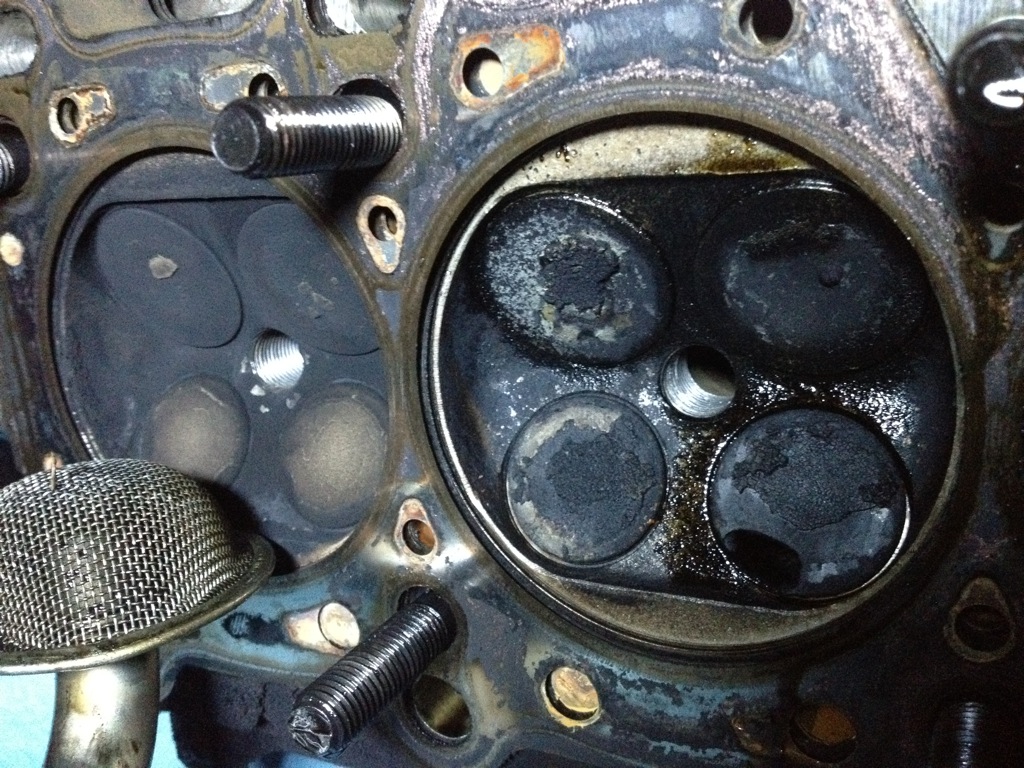
#4
And now some pics of the bottom end:

Crank:
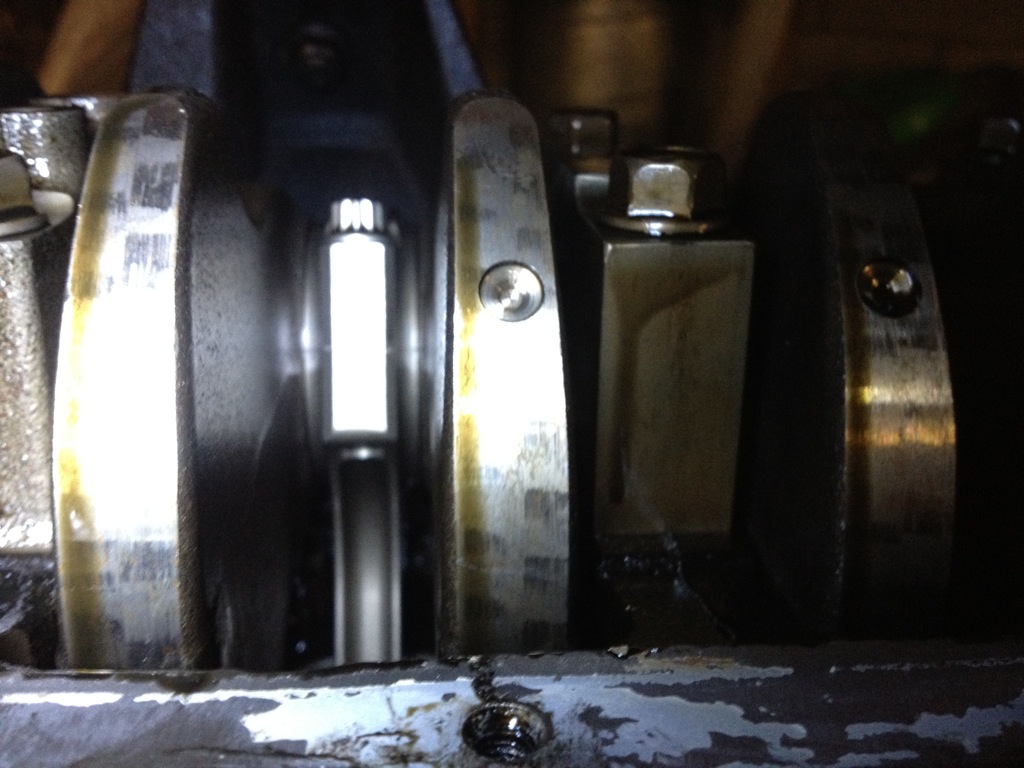
Billet Center Main:
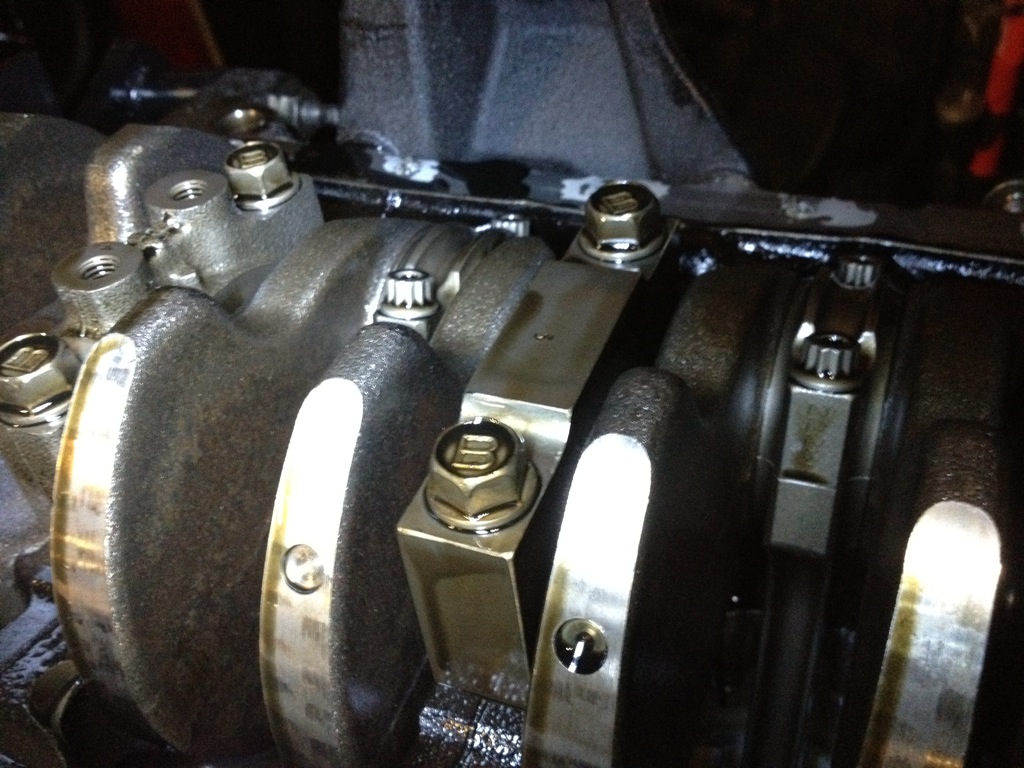
I forgot to take pics of the cylinder walls, but there are still faint crosshatches from the hone, and each cylinder has a little scoring, ranging from visible but smooth to enough to catch a fingernail.
Pistons from the top look great, just carbon build up. I'm guessing that chunk of exhaust valve just flew out the exhaust because there is no indication any metal pieces went flying around the combustion chamber.
So now I need to decide where to go from here. I guess my options range from backyard style fixing the one valve and slapping it back together, to an all out rebuild. Thoughts?
I've still got the other motor that I bought, a bone stock 2000. Haven't torn it open yet, but it seems like a high mileage motor in need of a refresh. So I can use that block for a core to have machined for the oversize pistons if needed. Then the question is what head to go with. Do you think a 95 head with a good bit of work and oversized valves, or the stock 2000 head will flow better?
I'll freely admit that I'm completely inexperienced with engine internals. This is my first time cracking a motor open, so I'd love some input from some more experienced people.
Bird
Basic Specs:
Wiseco 9:1 84mm
Carillo H-beam Rods
Billet Center main cap
SS +1mm valves
Port and Polish Head
So here's the head, starting with cylinder #1...(the nicks around the spark plug hole are from the scope and just scraped the carbon off)
#2
#3...guess I missed that with the scope...
#4
And now some pics of the bottom end:
Crank:
Billet Center Main:
I forgot to take pics of the cylinder walls, but there are still faint crosshatches from the hone, and each cylinder has a little scoring, ranging from visible but smooth to enough to catch a fingernail.
Pistons from the top look great, just carbon build up. I'm guessing that chunk of exhaust valve just flew out the exhaust because there is no indication any metal pieces went flying around the combustion chamber.
So now I need to decide where to go from here. I guess my options range from backyard style fixing the one valve and slapping it back together, to an all out rebuild. Thoughts?
I've still got the other motor that I bought, a bone stock 2000. Haven't torn it open yet, but it seems like a high mileage motor in need of a refresh. So I can use that block for a core to have machined for the oversize pistons if needed. Then the question is what head to go with. Do you think a 95 head with a good bit of work and oversized valves, or the stock 2000 head will flow better?
I'll freely admit that I'm completely inexperienced with engine internals. This is my first time cracking a motor open, so I'd love some input from some more experienced people.
Bird
Reply
0
0
02-28-2012, 12:11 AM
#15
Elite Member
iTrader: (13)

Join Date: Dec 2006
Location: Taos, New mexico
Posts: 6,606
Total Cats: 566
Cool build thread. You should get us more pictures of the built FM motor, as in piston/bore pics. Then get us some pics of your other motor that you suspect needs refreshing, and we can give much better advise.
Also, quit buying fckd up motors!
Also, quit buying fckd up motors!
Reply
0
0
02-28-2012, 01:26 PM
#17
Junior Member
Thread Starter
iTrader: (2)
Join Date: Nov 2010
Location: Los Angeles
Posts: 65
Total Cats: 1
So whats the consensus on that...anybody else have any input on the 10yr old Wiseco pistons and Carrillo H-beams?
I'll get some pics of the piston tops and cylinder walls today so you guys can see that. I don't want to pop the pistons out yet in case I do use the bottom end as is.
Bird
Reply
0
0
02-28-2012, 01:38 PM
#18
well, think how much money you would put towards re-using old pistons - rings are at least $100, getting the tools to measure them for roundness (do you have a 3-4" micrometer? I don't!) or paying someone to do it, etc.
think how much you'd spend on making them work. then decide if it might be just worth it to buy a new set of supertechs, take them to a shop with your 2000 block and say "here, bore for these".
think how much you'd spend on making them work. then decide if it might be just worth it to buy a new set of supertechs, take them to a shop with your 2000 block and say "here, bore for these".
Reply
0
0
02-28-2012, 01:53 PM
#19
Junior Member
Thread Starter
iTrader: (2)
Join Date: Nov 2010
Location: Los Angeles
Posts: 65
Total Cats: 1
What's your thoughts on the rods? If I swap those out, I would be swapping lighter rods for heavier China rods...no way I can afford new Carrillos...
Bird
Reply
0
0
02-28-2012, 01:56 PM
#20
Elite Member
iTrader: (13)
Join Date: Dec 2006
Location: Taos, New mexico
Posts: 6,606
Total Cats: 566
Honestly, just throw that built block together with the good head you have and run it, like someone else said. Unless of course the scoring in the cylinders is actually really bad.
Reply
0
0


