Crazyblackman's Brutus
 03-13-2016, 10:19 PM
#181
SADFab Destructive Testing Engineer


iTrader: (5)
Join Date: Apr 2014
Location: Beaverton, USA
Posts: 18,642
Total Cats: 1,866
Harbor freight is all SAE. I got this gun and I love it.
https://www.amazon.com/gp/aw/d/B004K...?ie=UTF8&psc=1
https://www.amazon.com/gp/aw/d/B004K...?ie=UTF8&psc=1

Reply
 0
0

0
03-14-2016, 12:07 AM
#182
Junior Member
Thread Starter

Join Date: Feb 2015
Location: Arizona
Posts: 223
Total Cats: 31
Harbor freight is all SAE. I got this gun and I love it.
https://www.amazon.com/gp/aw/d/B004K...?ie=UTF8&psc=1
https://www.amazon.com/gp/aw/d/B004K...?ie=UTF8&psc=1
The one you linked seems a lot better over all from what I had for sure though.
Reply
0
0
03-23-2016, 08:58 PM
#183
Junior Member
Thread Starter
Join Date: Feb 2015
Location: Arizona
Posts: 223
Total Cats: 31
Got some stuff on order and got some stuff in the mail.
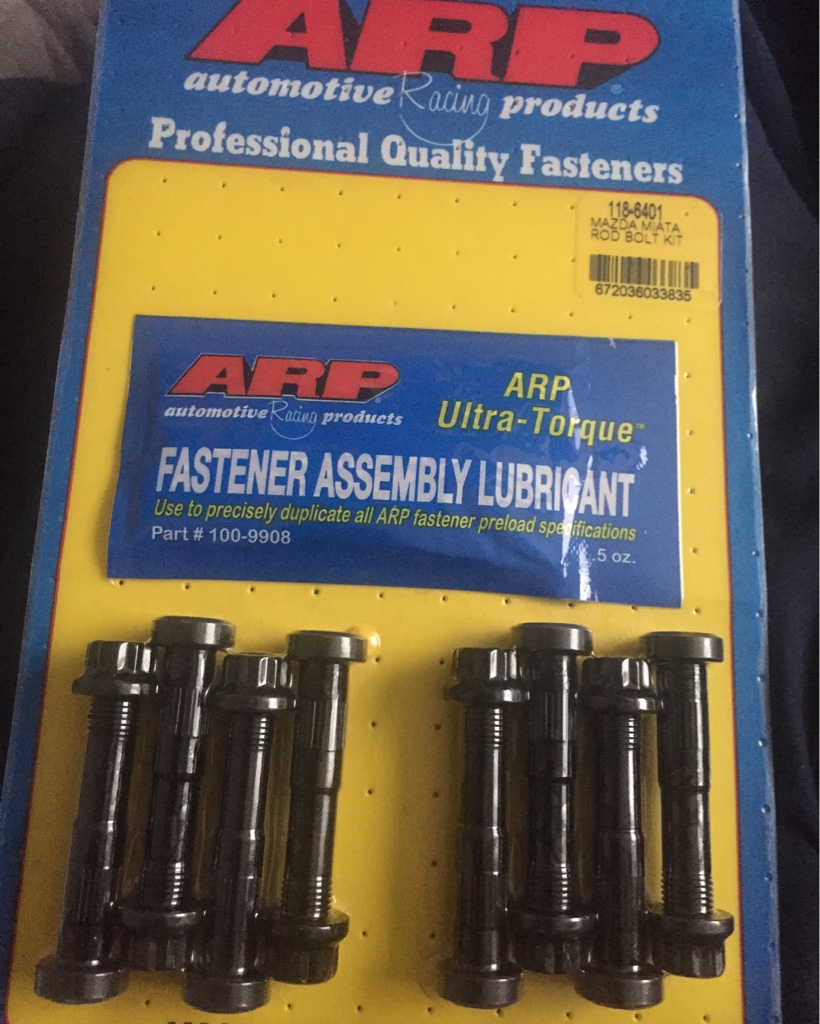
The engine builder recommended ARP Rod bolts, I didn't know they existed originally but bought those and kept going.
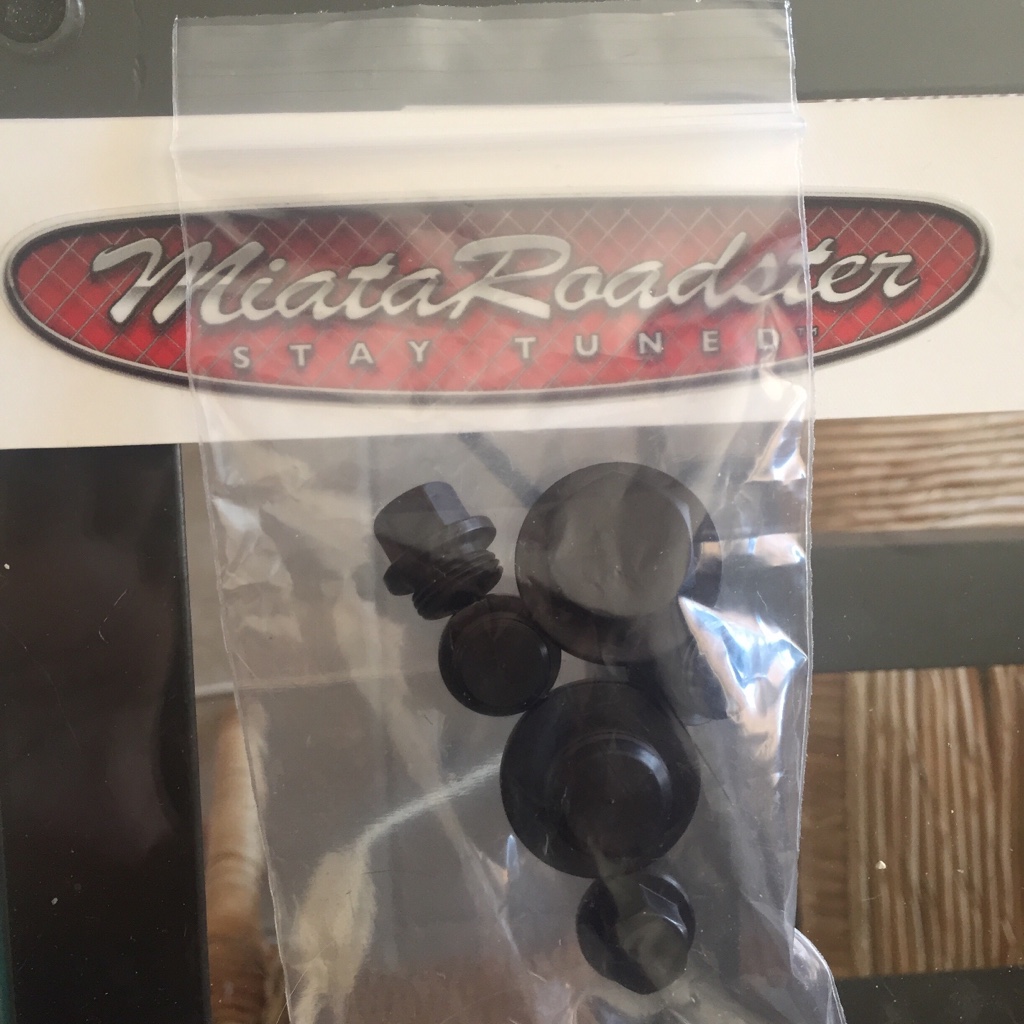
Also wanted to get rid of power steering so I shall be depowering the rack and got these from Miataroadster should be a good time.
Hopefully the engine work gets started and finished soon. I just want a running car and I'll put the old wheels on if I have to haha
End of the month is almost here so I should have the wheels here hopefully by the end of April.
The engine builder recommended ARP Rod bolts, I didn't know they existed originally but bought those and kept going.
Also wanted to get rid of power steering so I shall be depowering the rack and got these from Miataroadster should be a good time.
Hopefully the engine work gets started and finished soon. I just want a running car and I'll put the old wheels on if I have to haha
End of the month is almost here so I should have the wheels here hopefully by the end of April.
Reply
0
0
03-28-2016, 03:00 PM
#184
Junior Member
Thread Starter
Join Date: Feb 2015
Location: Arizona
Posts: 223
Total Cats: 31
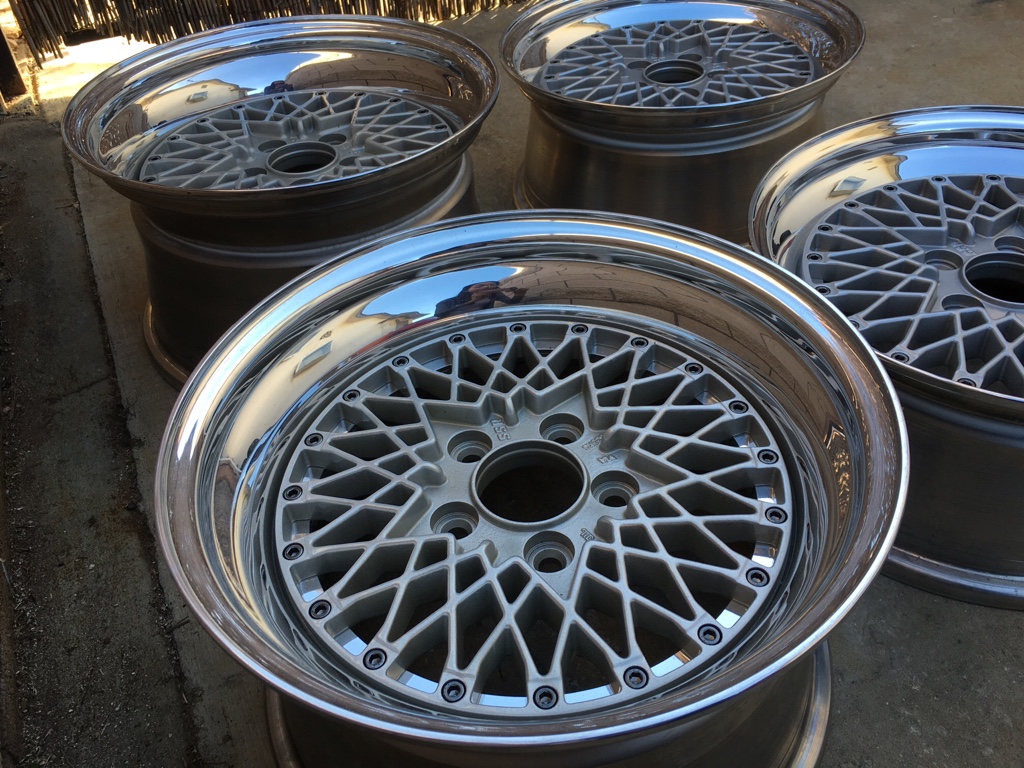
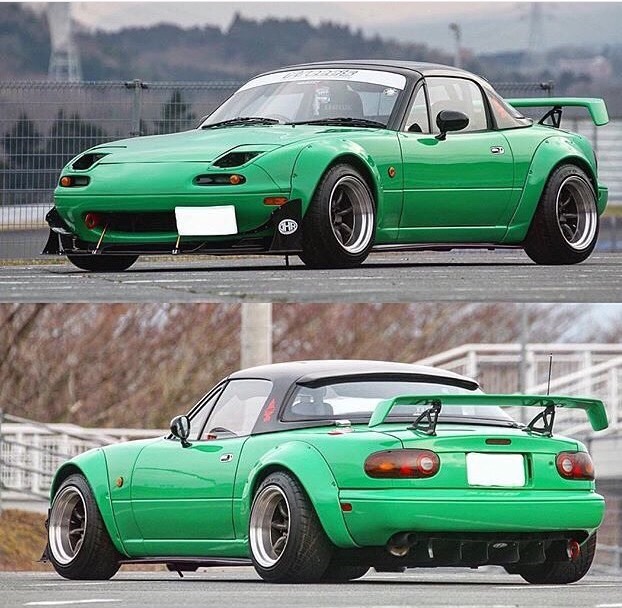
Well a little surprise the wheels were already ready for shipping so I guess now is a good time to at least show you what I just purchased.
I would like to thank Tetsuyagarage for helping find these beauties!
Some lovely Star Sharks!
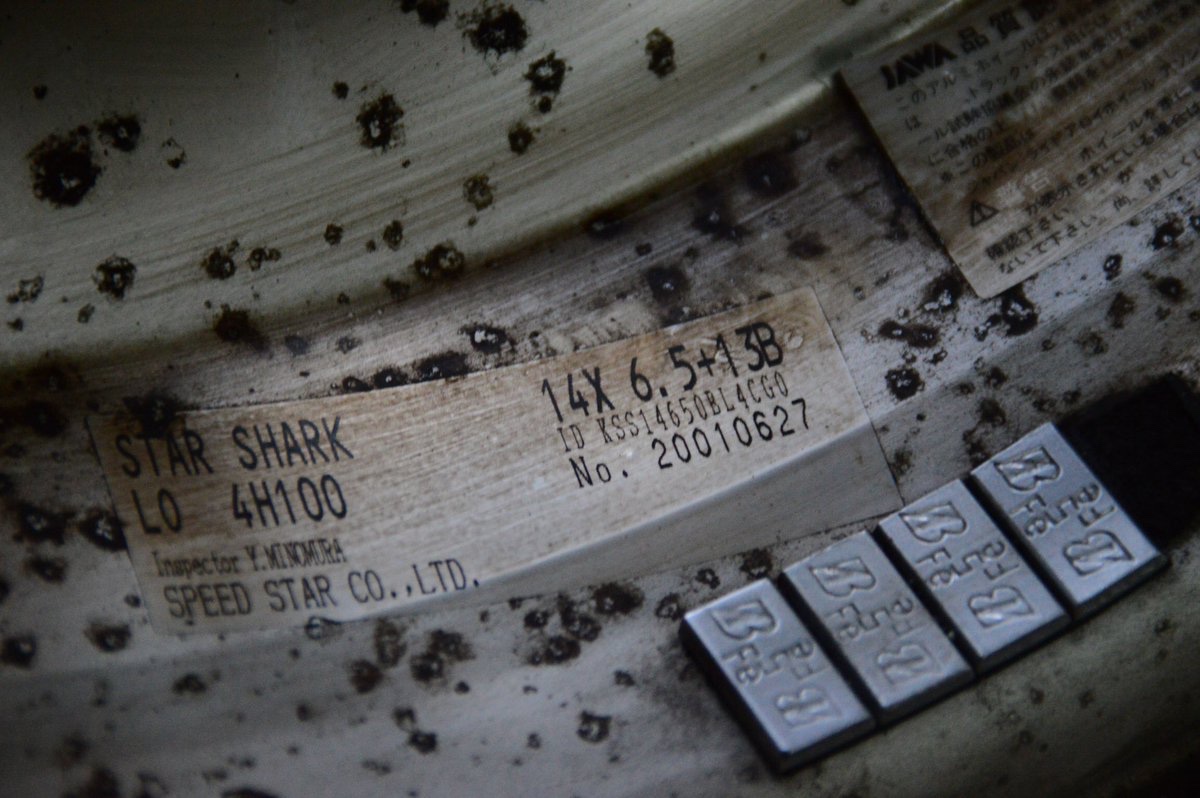
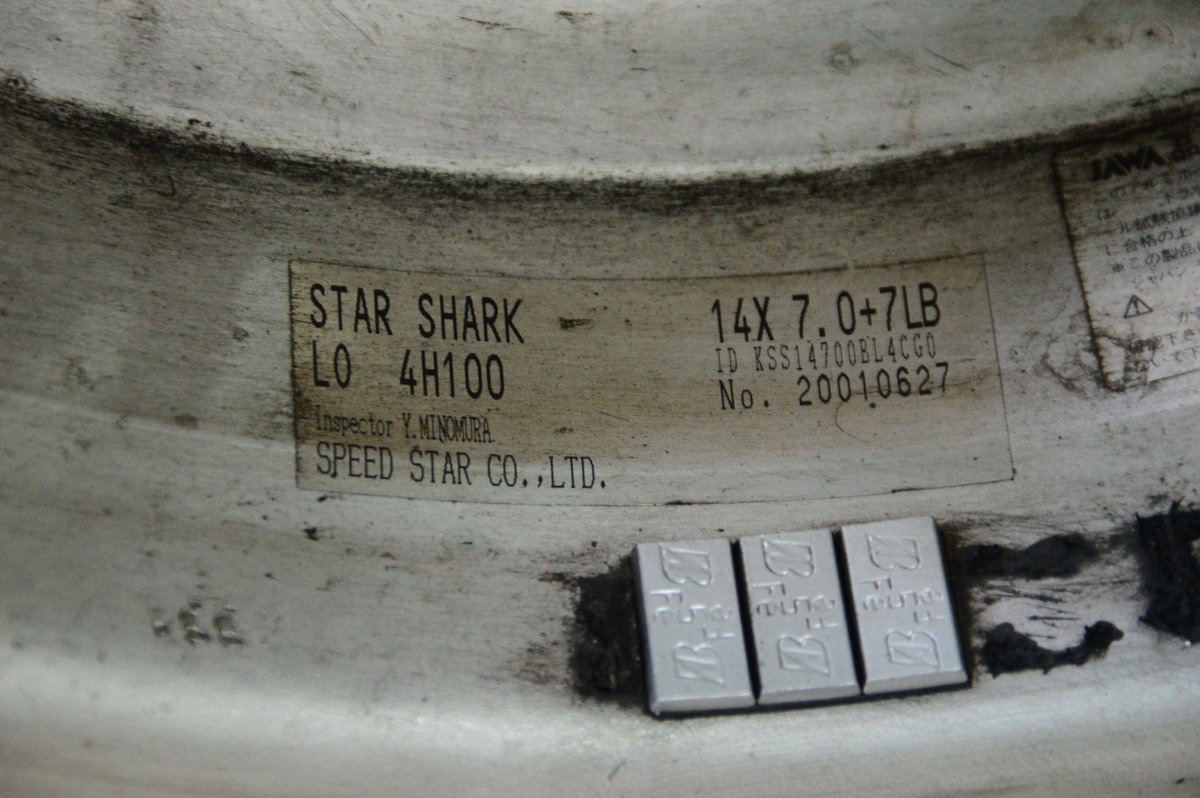
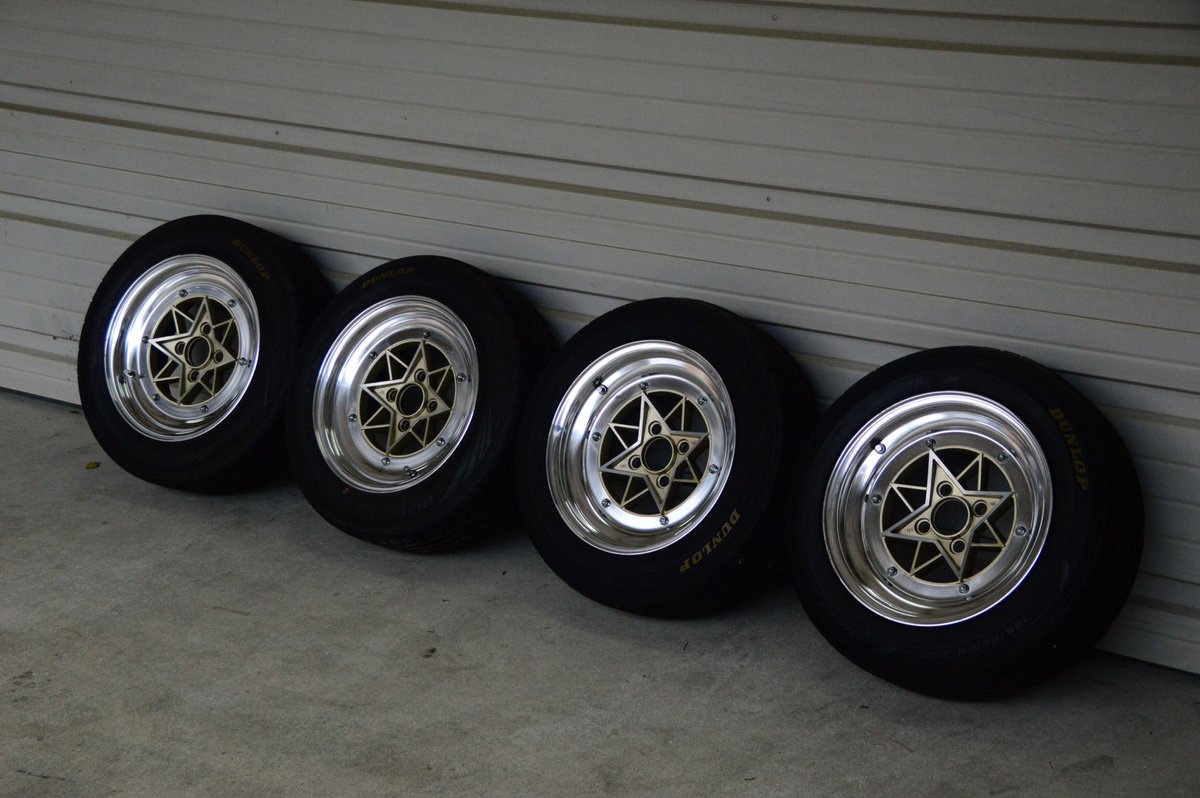
That's all I had. I plan on stepping them up to 16" and making them wide to fill the flares. My dream wheels with my dream flares it all is starting to become a reality!
Thanks for looking.
I would like to thank Tetsuyagarage for helping find these beauties!
Some lovely Star Sharks!
That's all I had. I plan on stepping them up to 16" and making them wide to fill the flares. My dream wheels with my dream flares it all is starting to become a reality!
Thanks for looking.
Reply
0
0
03-28-2016, 08:56 PM
#189
Elite Member
Join Date: Mar 2007
Location: Santa Clara, CA
Posts: 5,170
Total Cats: 856
--Ian
Reply
0
0
03-29-2016, 08:16 AM
#190
mkturbo.com

iTrader: (24)
Join Date: May 2006
Location: Charleston SC
Posts: 15,178
Total Cats: 1,681
Interesting to hear. I have reused the same forged m-tuned rods several times over the past 6 years. Never replaced or checked the length on the bolts. Never had an issue with the rods in any way.
Reply
0
0
03-29-2016, 01:05 PM
#191
Elite Member
Join Date: Mar 2007
Location: Santa Clara, CA
Posts: 5,170
Total Cats: 856
Are ARP bolts and studs re-usable?
Yes. As long as the fasteners have been installed and torqued correctly, and show no visible signs of damage, they can be re-used. If they show any signs of thread galling or corrosion, they should be replaced. In the case of rod bolts, if any of them have taken a permanent set and have stretched by .001� or longer, you should replace them immediately. See page 29 in the catalog for more detailed information on this critical measurement.
Yes. As long as the fasteners have been installed and torqued correctly, and show no visible signs of damage, they can be re-used. If they show any signs of thread galling or corrosion, they should be replaced. In the case of rod bolts, if any of them have taken a permanent set and have stretched by .001� or longer, you should replace them immediately. See page 29 in the catalog for more detailed information on this critical measurement.
I have read elsewhere that even when everything is perfect rod bolts can be torqued something like 8-10 times before they should be discarded, and you'll use up a couple of those on each install (one for checking the bearing clearances, one for final torque, sometimes more if you follow one of the "torque then release then torque again" procedures to burnish the threads).
--Ian
Reply
0
0
04-21-2016, 05:28 PM
#192
Junior Member
Thread Starter
Join Date: Feb 2015
Location: Arizona
Posts: 223
Total Cats: 31
So I have been buying little things here and there.
Got Kens radiator latchless piece!
I bought some canards a while back from Rod @Tetsuyagarage thanks again man
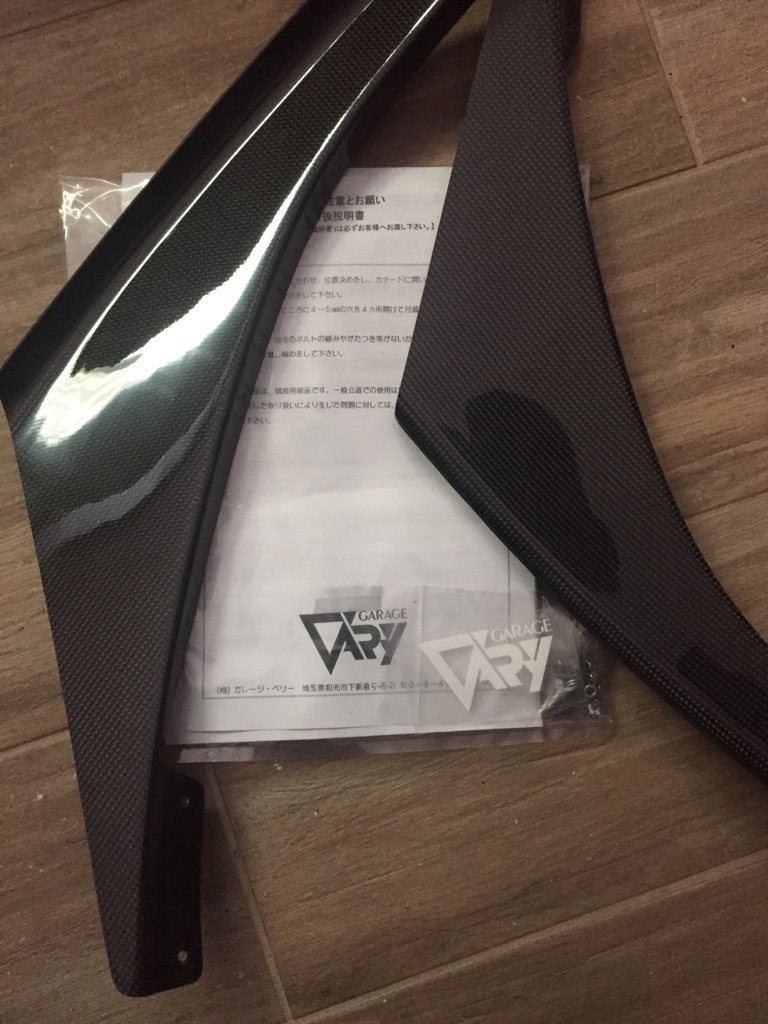
I really hope these fit like I'm thinking they will. With TUCKIN99 flares they take up a lot of the front end and bulge out. So it will be a tight fit but we'll come to that when we need to. For now I just stare and smile!
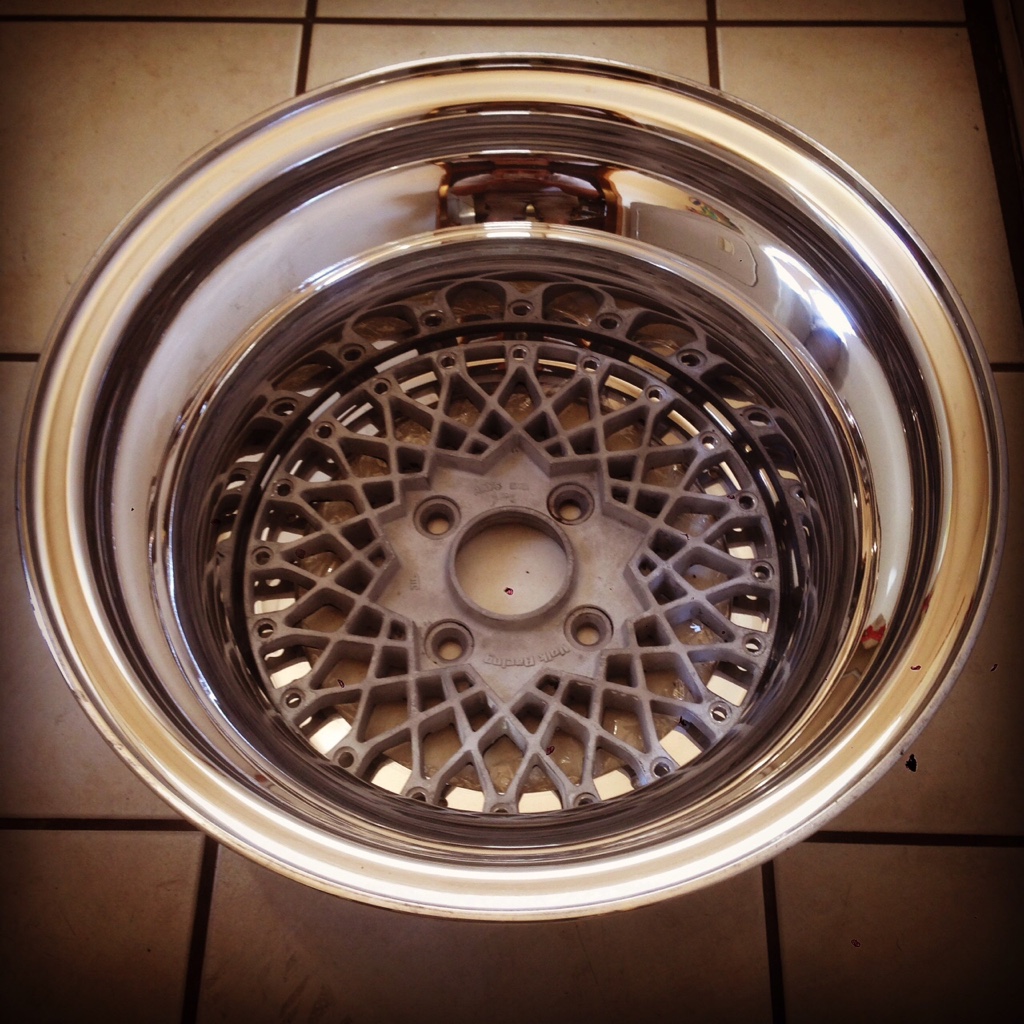
To give those an idea of what a double stepped lip can look like.
I think it looks better than expected. So I'm still on for doing 16's so far. Still have plenty of time to change if wanted.
As far as brakes go, I've been looking around and it seems like FM has something for everything.
The little big brake kit has 10" rotors setup that will fit 14" factory wheels. Now by no means will the Sharks be factory however I will give them a call to discuss more with them about the possibilities. I have been looking around and can't find much but still not dead set on anything yet.
And a little picture of the Texas trip a buddy took **** was it 2 years ago already.
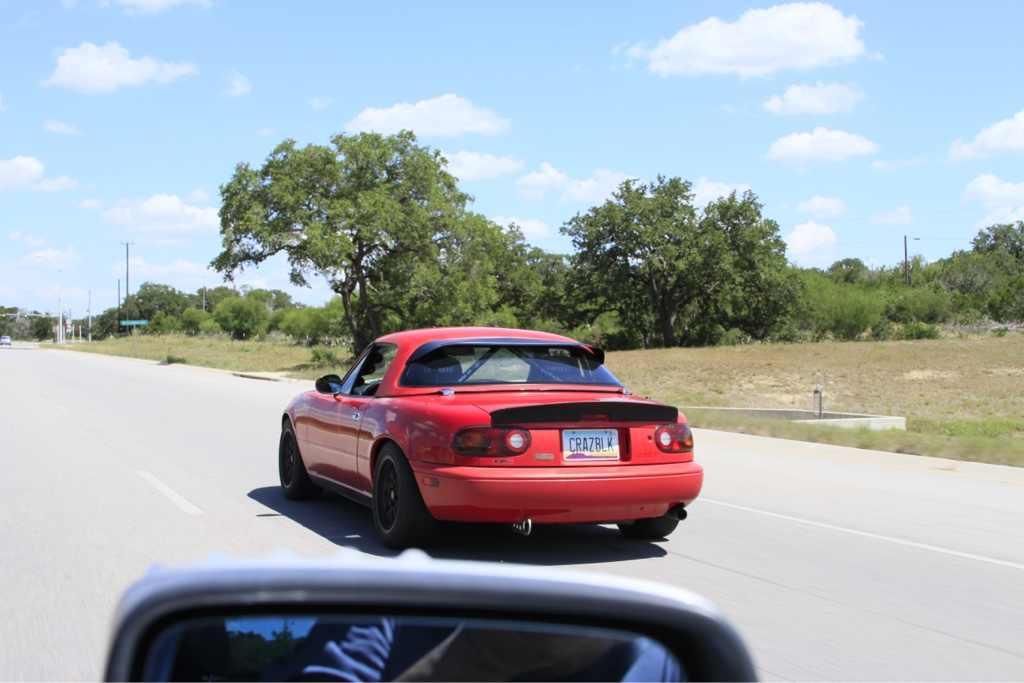
I miss driving Brutus but sometime this year that will happen I gave up on a deadline so it will be done when it's done.
Oh and before I forget the engine builder has started the process. I need to order the thing from FM to get it going so I can at least get the engine put in the car again one day.
That's all for now!
Got Kens radiator latchless piece!
I bought some canards a while back from Rod @Tetsuyagarage thanks again man
I really hope these fit like I'm thinking they will. With TUCKIN99 flares they take up a lot of the front end and bulge out. So it will be a tight fit but we'll come to that when we need to. For now I just stare and smile!
To give those an idea of what a double stepped lip can look like.
I think it looks better than expected. So I'm still on for doing 16's so far. Still have plenty of time to change if wanted.
As far as brakes go, I've been looking around and it seems like FM has something for everything.
The little big brake kit has 10" rotors setup that will fit 14" factory wheels. Now by no means will the Sharks be factory however I will give them a call to discuss more with them about the possibilities. I have been looking around and can't find much but still not dead set on anything yet.
And a little picture of the Texas trip a buddy took **** was it 2 years ago already.
I miss driving Brutus but sometime this year that will happen I gave up on a deadline so it will be done when it's done.
Oh and before I forget the engine builder has started the process. I need to order the thing from FM to get it going so I can at least get the engine put in the car again one day.
That's all for now!
Reply
0
0
04-23-2016, 07:05 PM
#193
Junior Member
Thread Starter
Join Date: Feb 2015
Location: Arizona
Posts: 223
Total Cats: 31
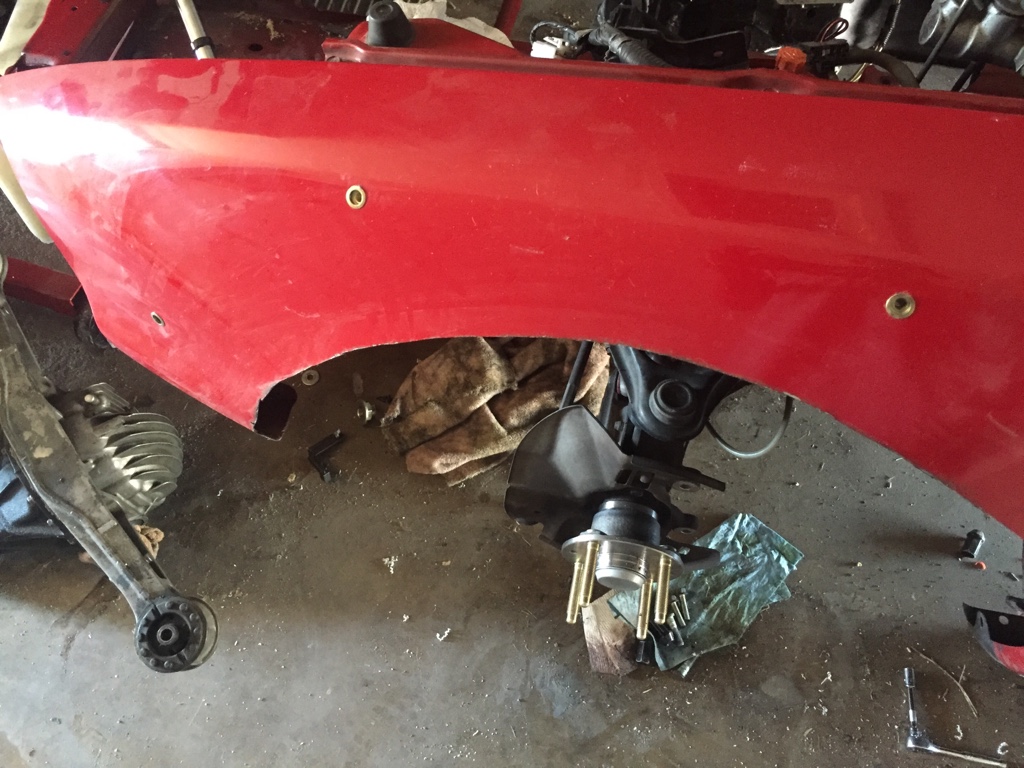
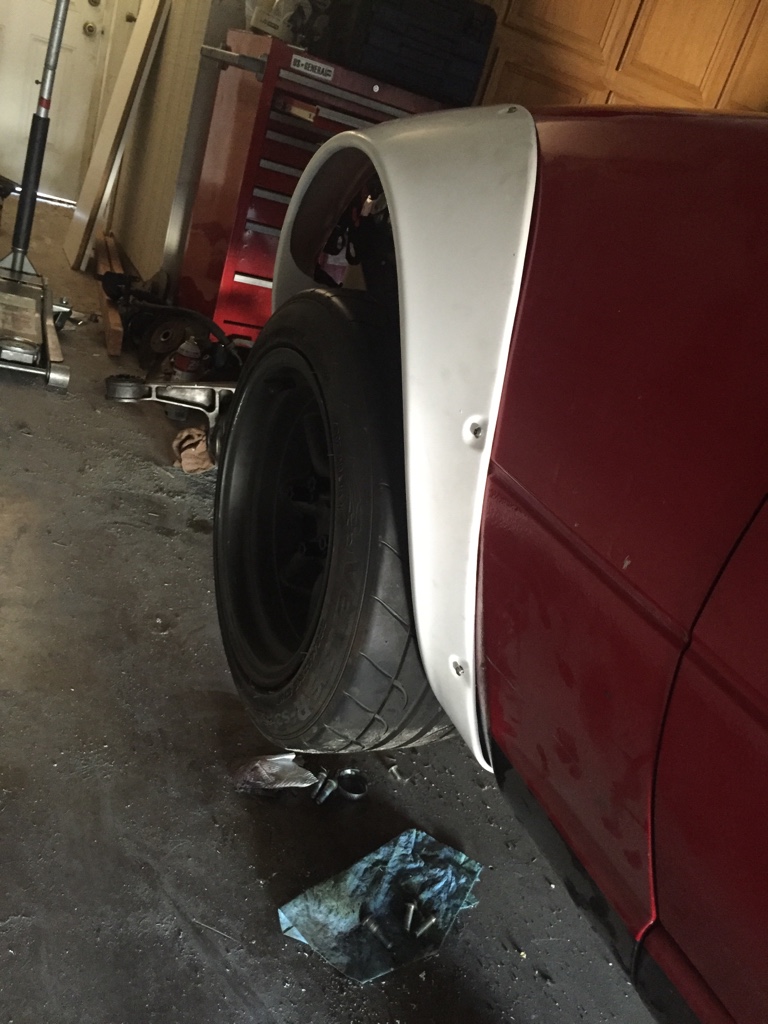
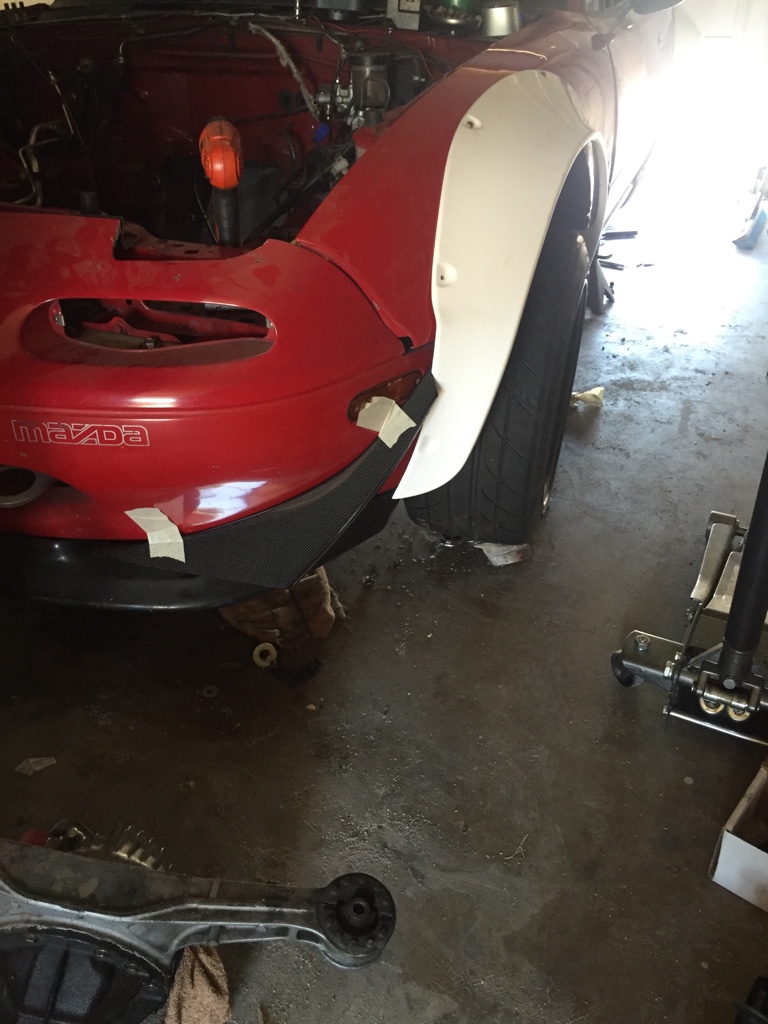
So I actually found time to get out in the garage to put the flares on. I had already drilled the holes for the rear so the hard part was already out of the way, just needed to do the fronts.
For some reason I was having a hell of a time switching the rivnut gun adapters. Apparently lefty loosey righty righty didn't work. It's clock wise to loosen it and counterclockwise to tighten. Once I got that I put the rivnuts in there place it was pretty straight forward from there.
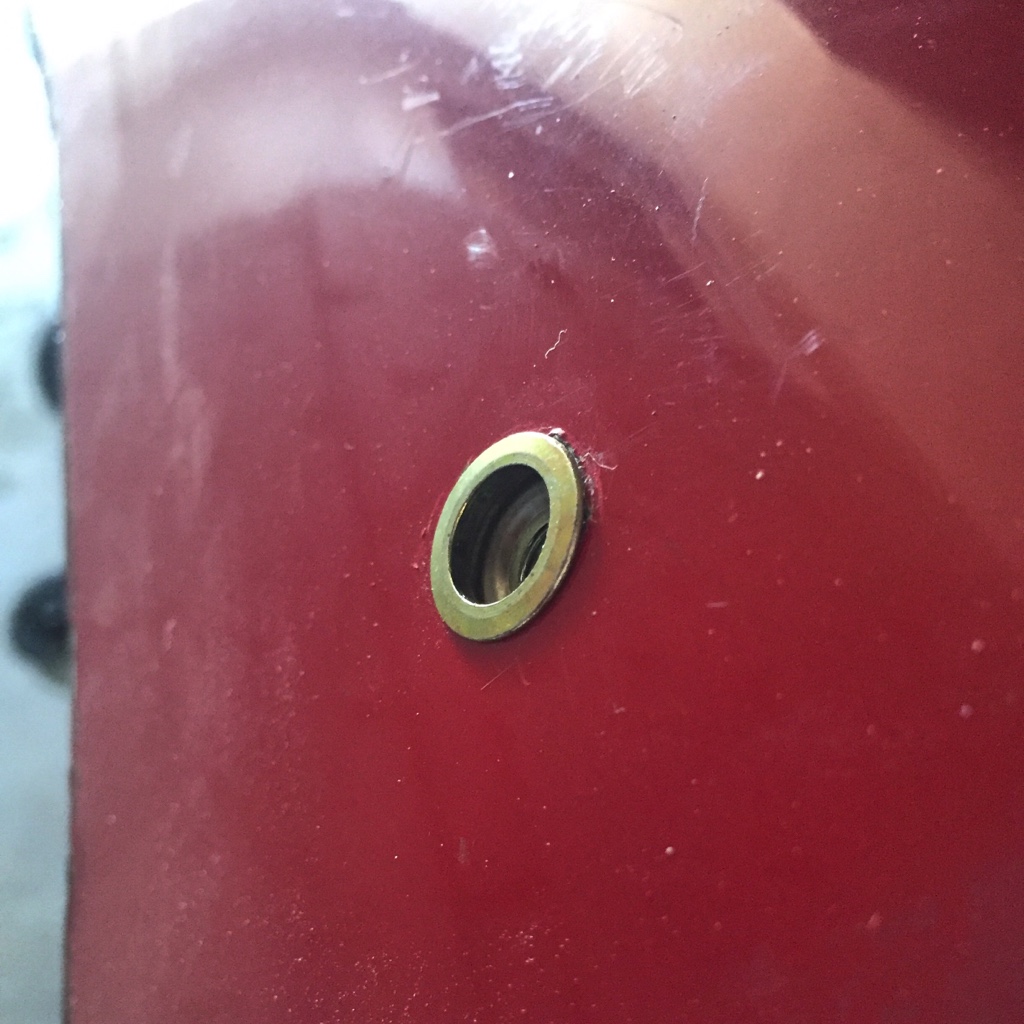
I may or may not drill holes in the bumper to secure the front but from what I've seen around most don't seem to do that. I can always do it later if needed but they are very secure as is.
Takes about 30 seconds to take each flare off if wanted which is exactly what I wanted.
I just need to get some gaskets for inbetween the flares and the body and the bolts and the flare as well.
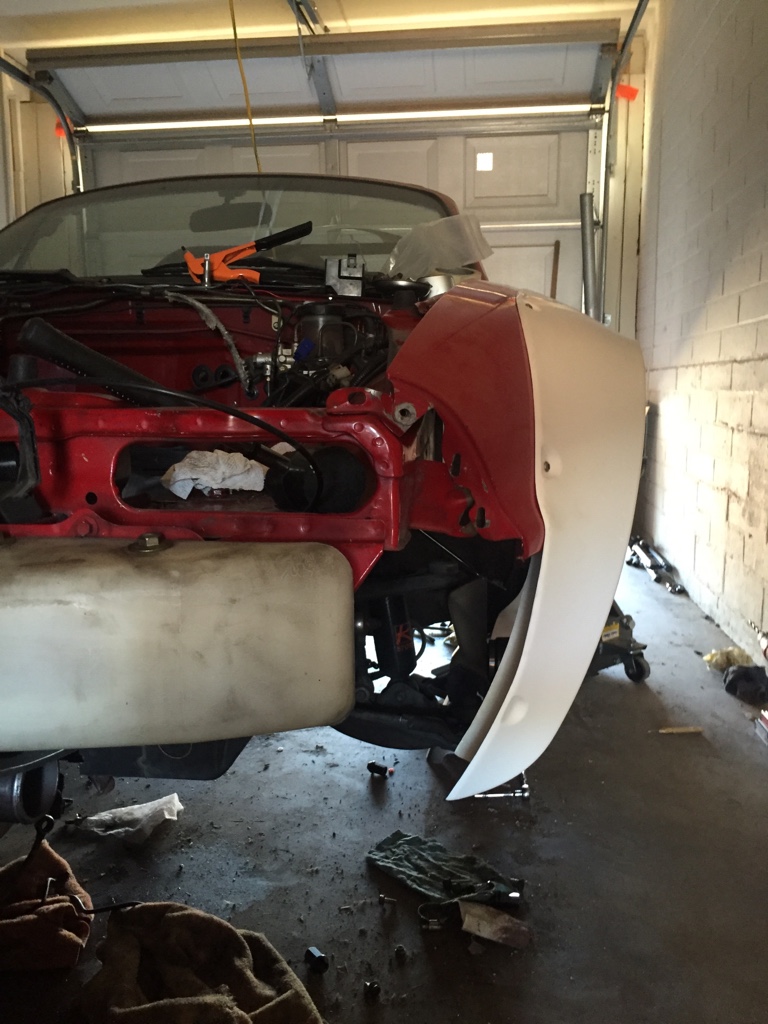
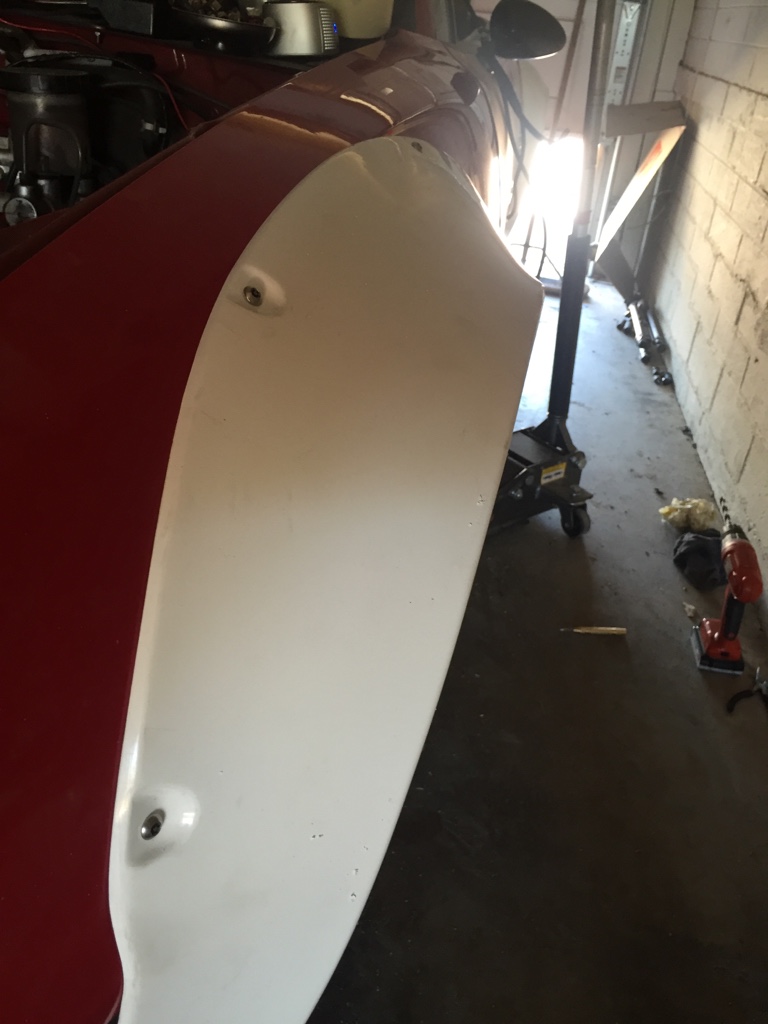
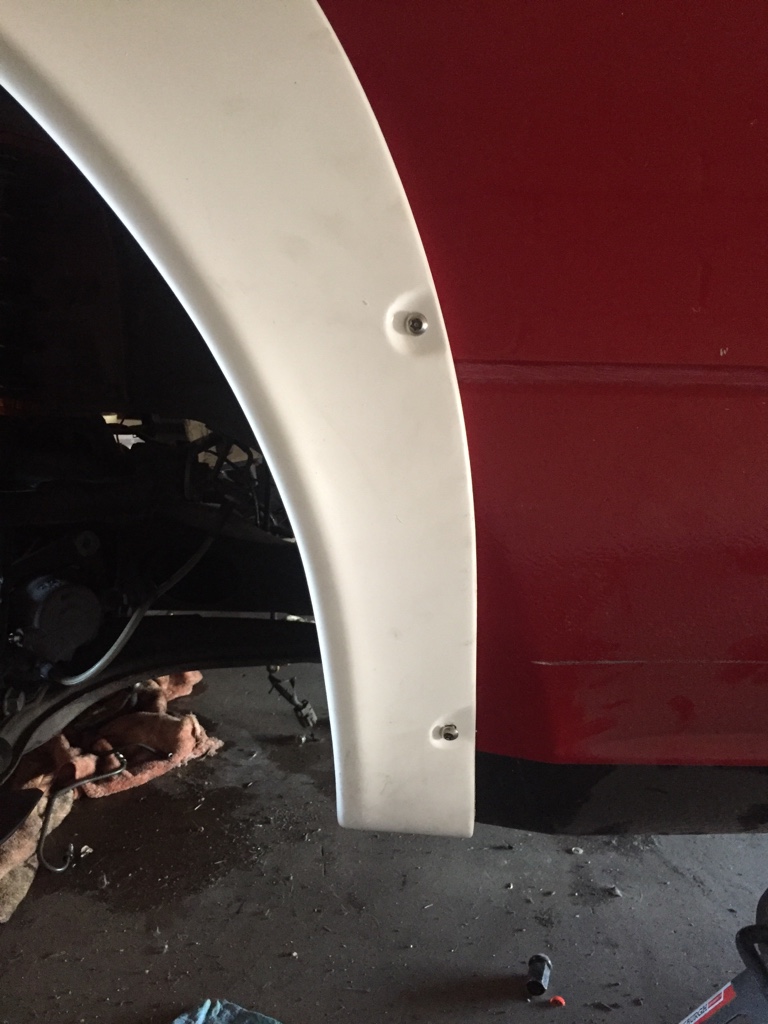
Fitment feels really snug and looks really good. Very small gaps in some places but not many and not big enough to care about.
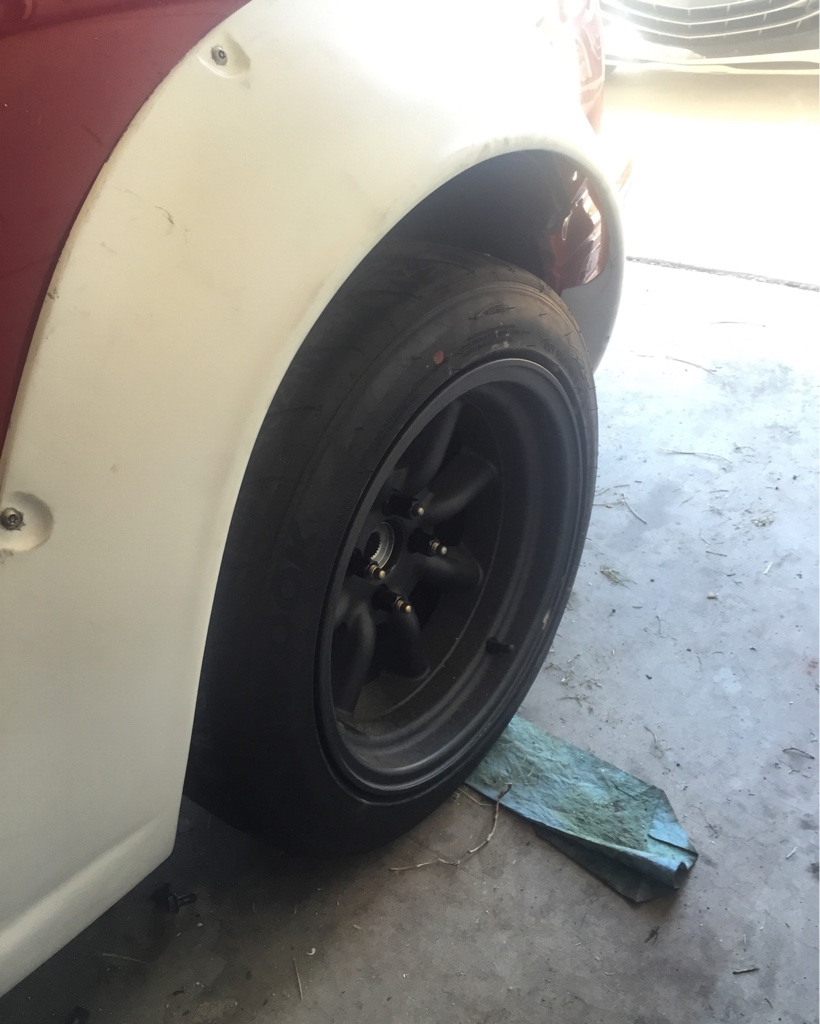
I put the wheels I have for sell with rs3 225/45/15 with rota RKR 15x9 0 offset on just to see how they would look, and they actually don't look that bad. If I don't sell them I'll just keep them and use a spacer for a bit till I get the Sharks where I want them.
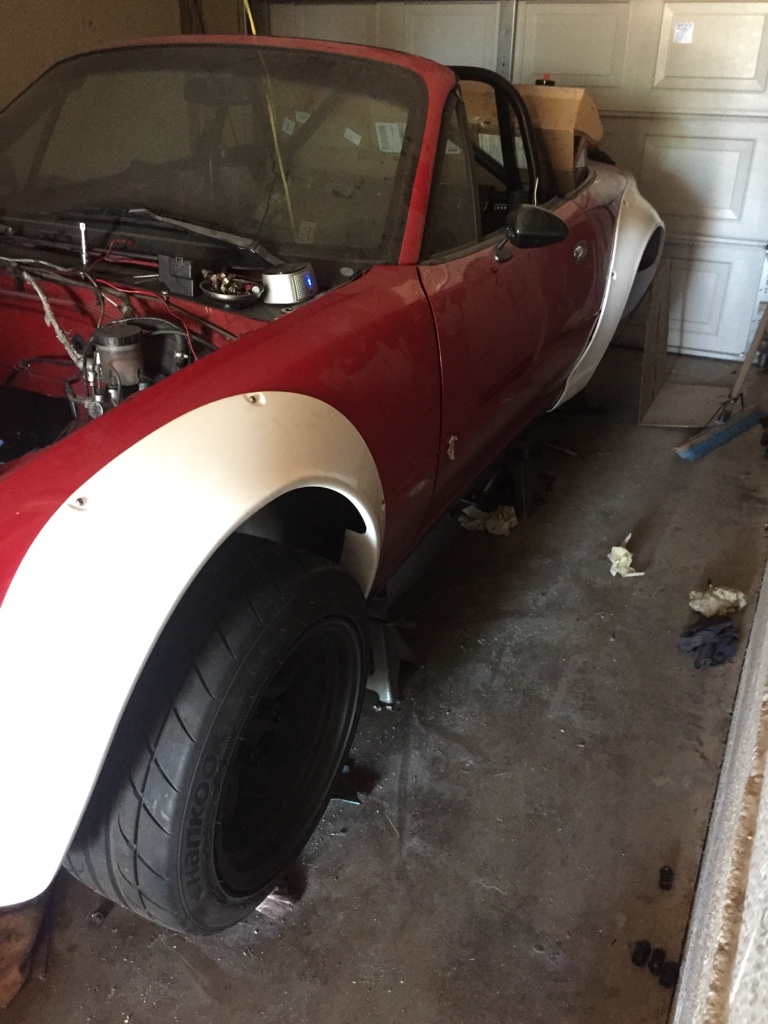
Can't wait till I can put them all on and have the car on all 4's again to see how they will look. Unless someone buys them first of course.
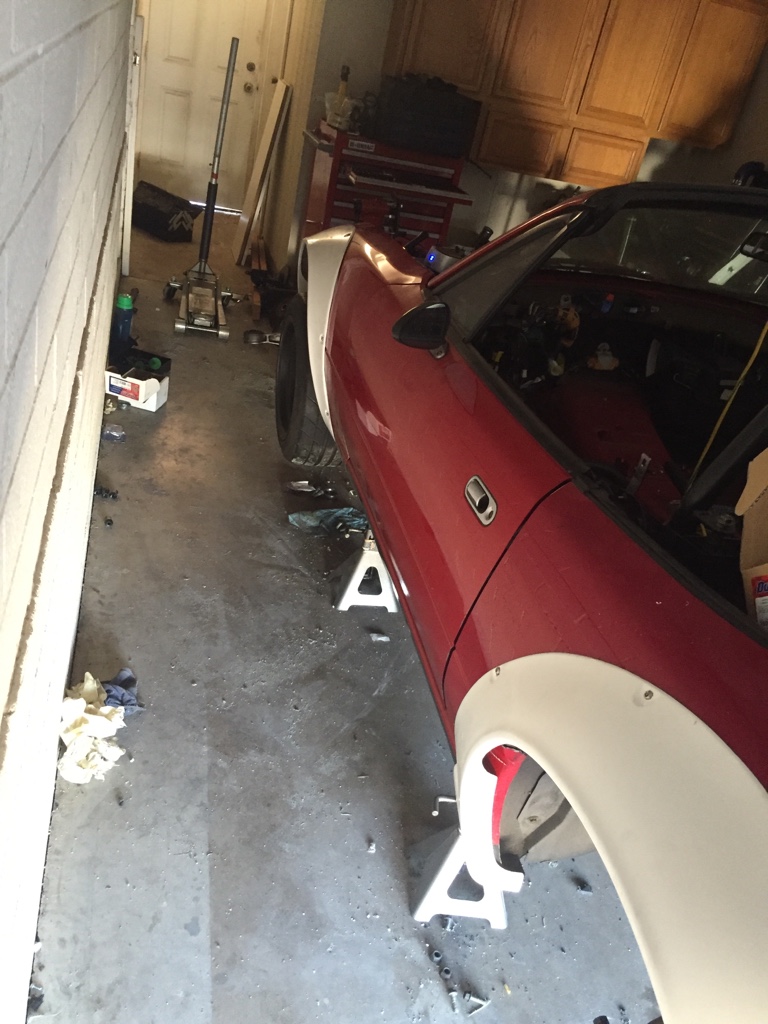
Then I put the front bumper on just to see how much I would need to trim off and it's a decent amount but it's kind of what I expected so I'll get to that soon.
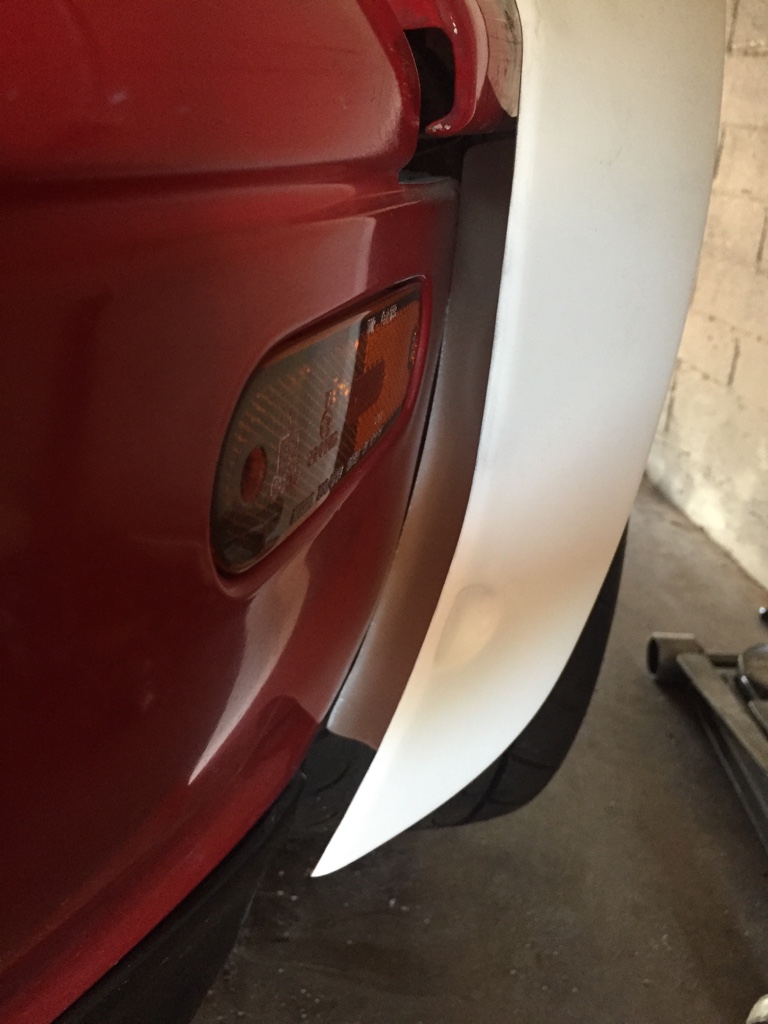
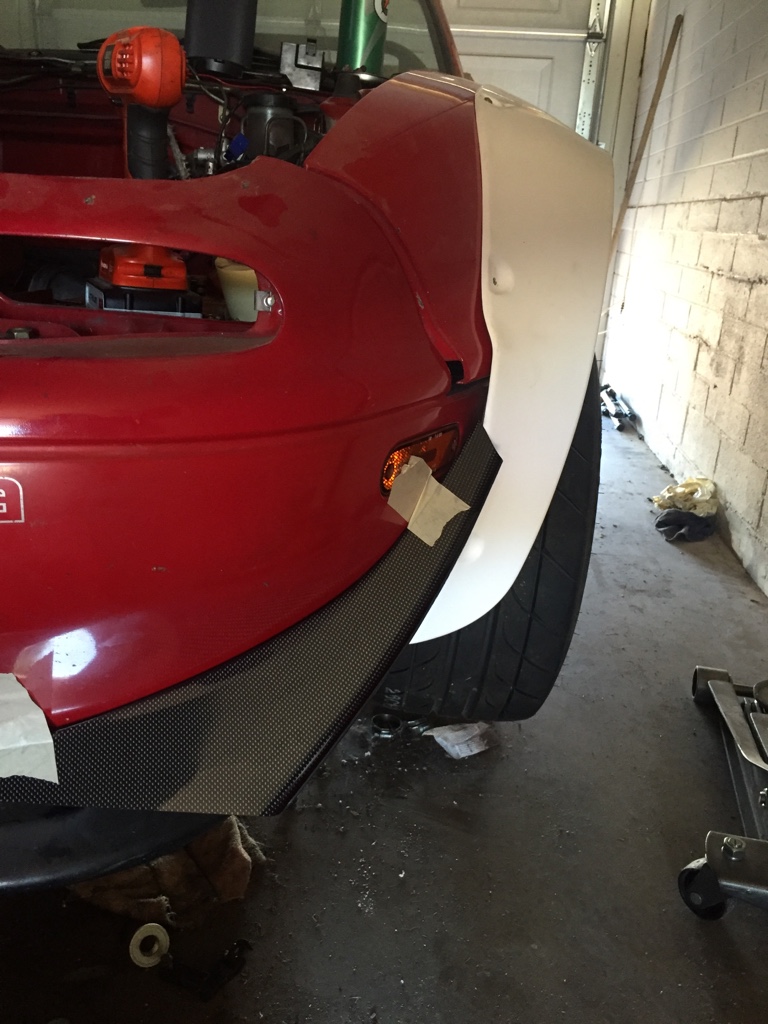
Then of course since I just got my garagevary canards in I needed to see if they fit right? I won't have a clear answer yet until I trim the flares but looking at a couple pictures I believe they will fit with a little modification if needed to the flares.
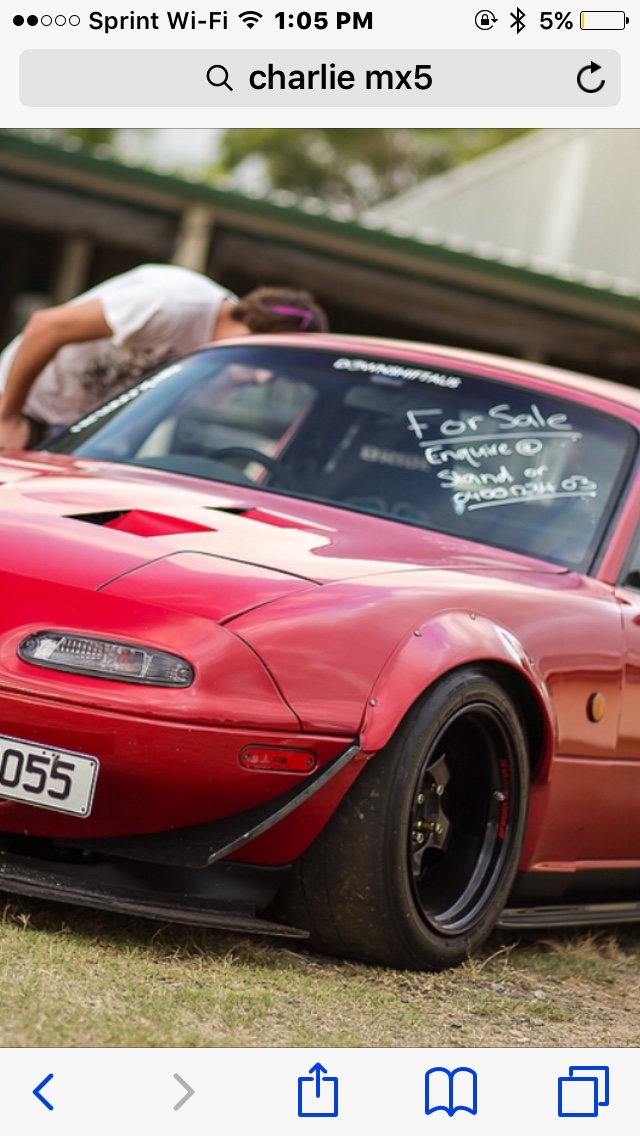
I used Charlie's car and Hiroki.yui's Miatas to kind of blend the front end together.
As you can see in both pictures the canard goes right below the reflector, and so does the flares.
So once I trim the flare it may fit easily or it may not we shall see. I think the canards have a little lip on the end which may be the issue if anything.
Very rough mockup
So that's been my weekend so far. Hopefully everything continues to go smooth!
For some reason I was having a hell of a time switching the rivnut gun adapters. Apparently lefty loosey righty righty didn't work. It's clock wise to loosen it and counterclockwise to tighten. Once I got that I put the rivnuts in there place it was pretty straight forward from there.
I may or may not drill holes in the bumper to secure the front but from what I've seen around most don't seem to do that. I can always do it later if needed but they are very secure as is.
Takes about 30 seconds to take each flare off if wanted which is exactly what I wanted.
I just need to get some gaskets for inbetween the flares and the body and the bolts and the flare as well.
Fitment feels really snug and looks really good. Very small gaps in some places but not many and not big enough to care about.
I put the wheels I have for sell with rs3 225/45/15 with rota RKR 15x9 0 offset on just to see how they would look, and they actually don't look that bad. If I don't sell them I'll just keep them and use a spacer for a bit till I get the Sharks where I want them.
Can't wait till I can put them all on and have the car on all 4's again to see how they will look. Unless someone buys them first of course.
Then I put the front bumper on just to see how much I would need to trim off and it's a decent amount but it's kind of what I expected so I'll get to that soon.
Then of course since I just got my garagevary canards in I needed to see if they fit right? I won't have a clear answer yet until I trim the flares but looking at a couple pictures I believe they will fit with a little modification if needed to the flares.
I used Charlie's car and Hiroki.yui's Miatas to kind of blend the front end together.
As you can see in both pictures the canard goes right below the reflector, and so does the flares.
So once I trim the flare it may fit easily or it may not we shall see. I think the canards have a little lip on the end which may be the issue if anything.
Very rough mockup
So that's been my weekend so far. Hopefully everything continues to go smooth!
Reply
0
0
04-26-2016, 08:36 PM
#194
Junior Member
Thread Starter
Join Date: Feb 2015
Location: Arizona
Posts: 223
Total Cats: 31
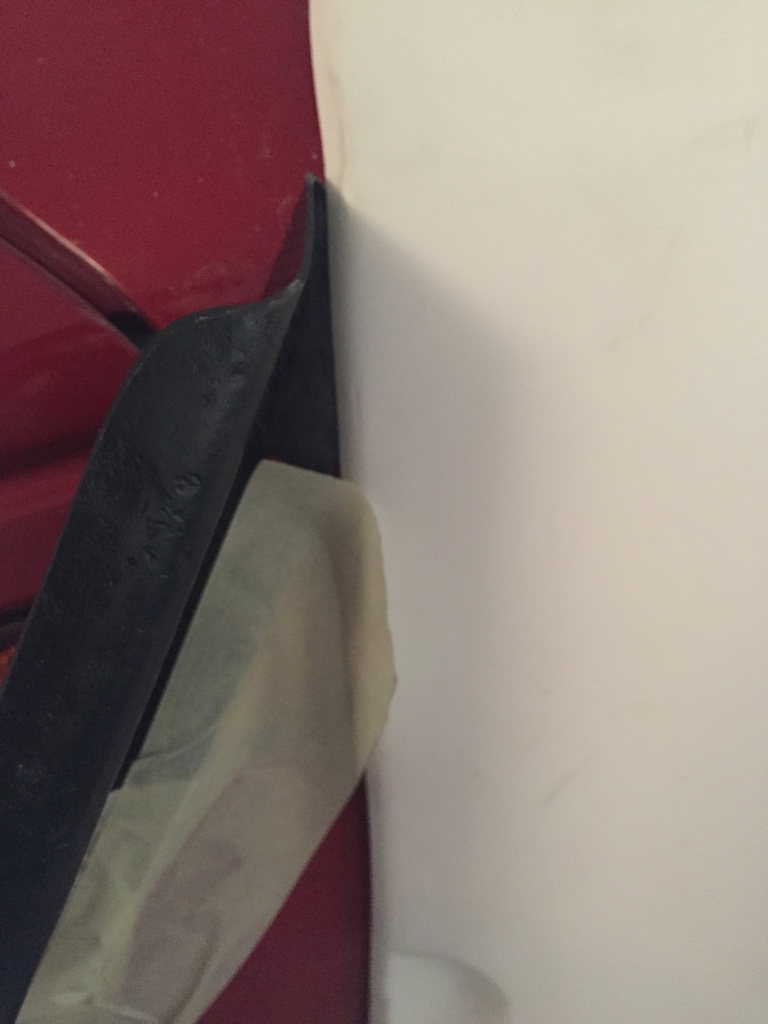
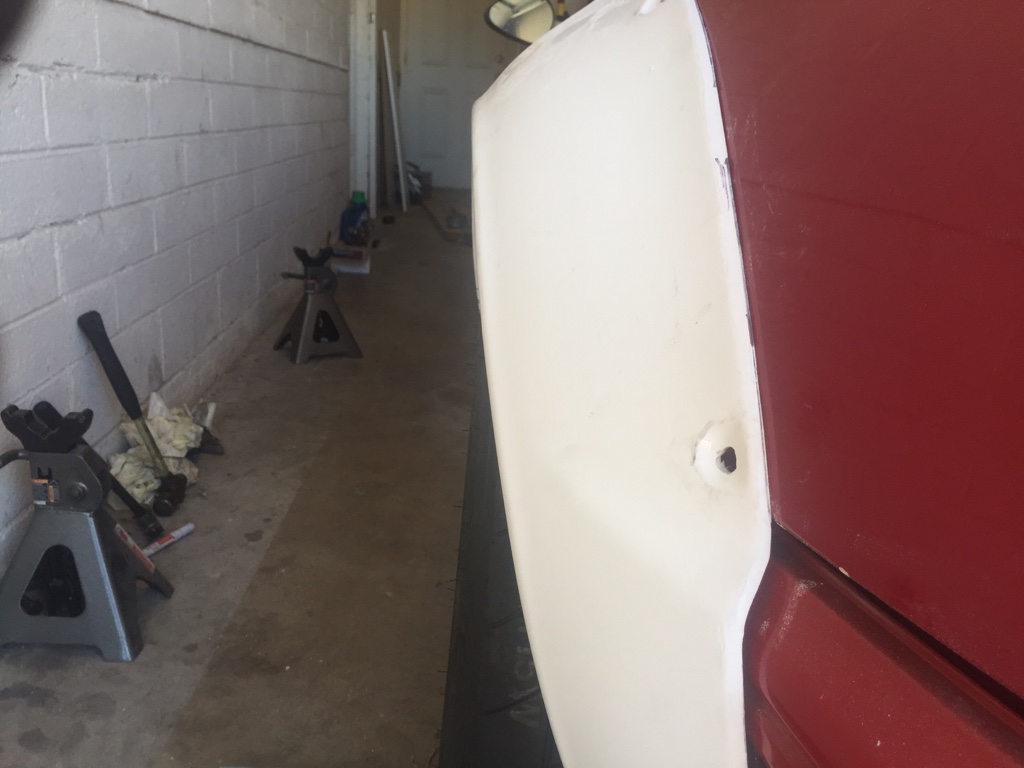
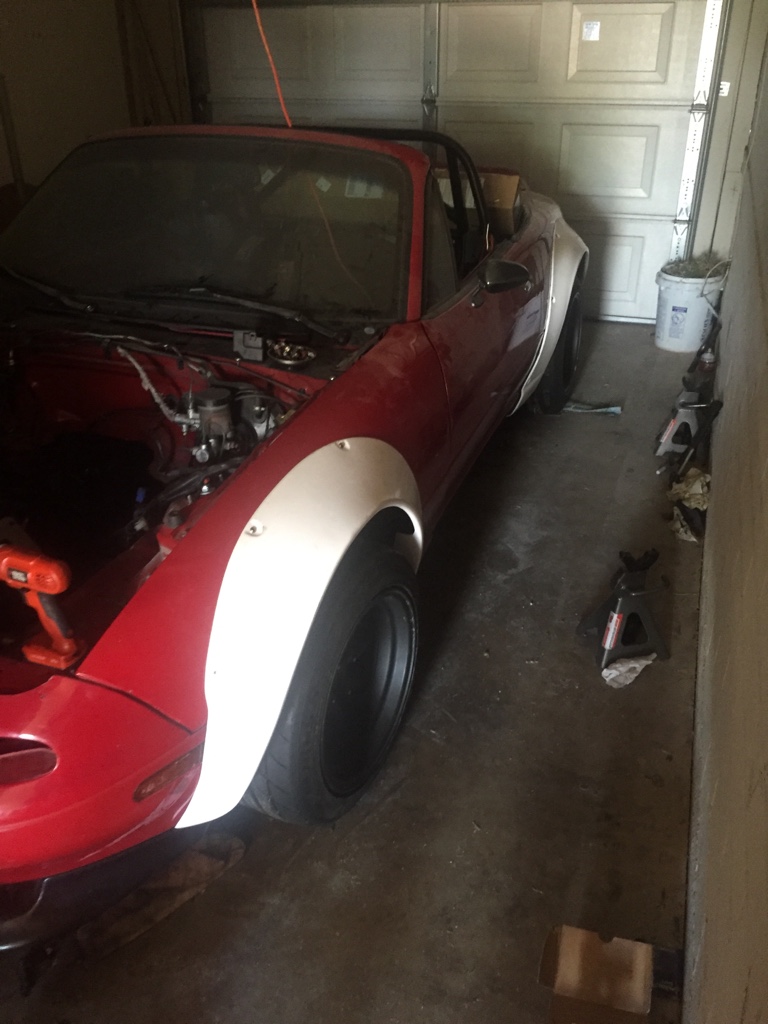
Went out today and trimmed the front flares up. Just used my dremel and slowly cut away until it was the perfect fit. Still need to put some rubber to fill the gaps in between the flares and the body but no rush there.
I cut about an inch and a half off to make it fit correctly.
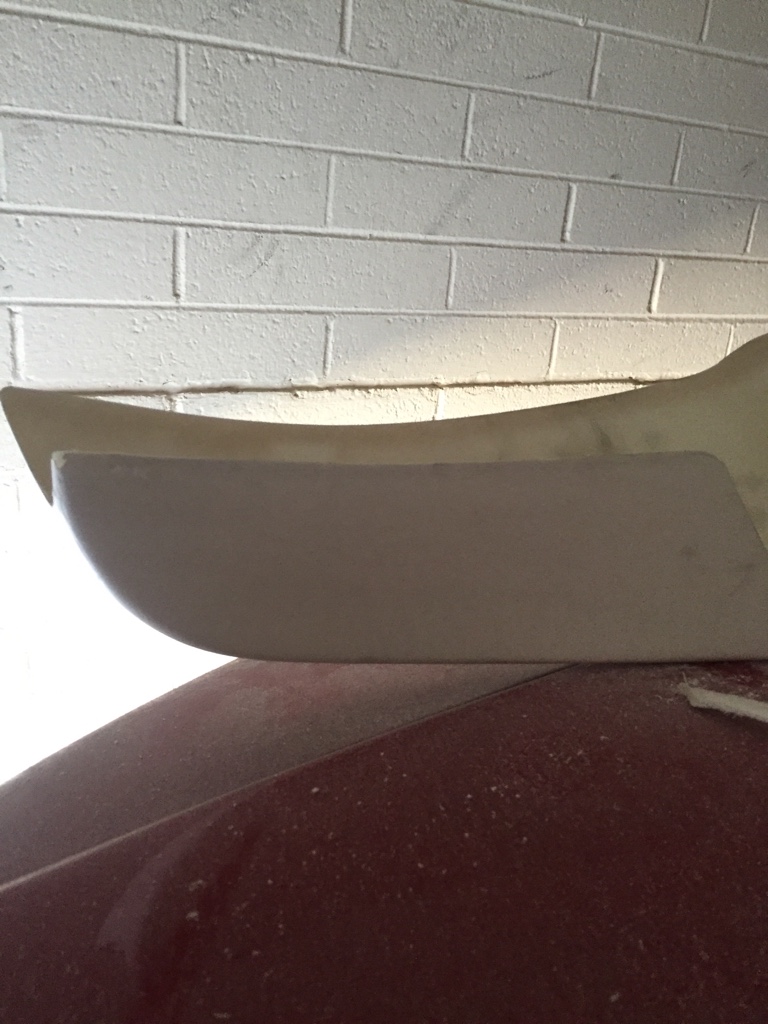
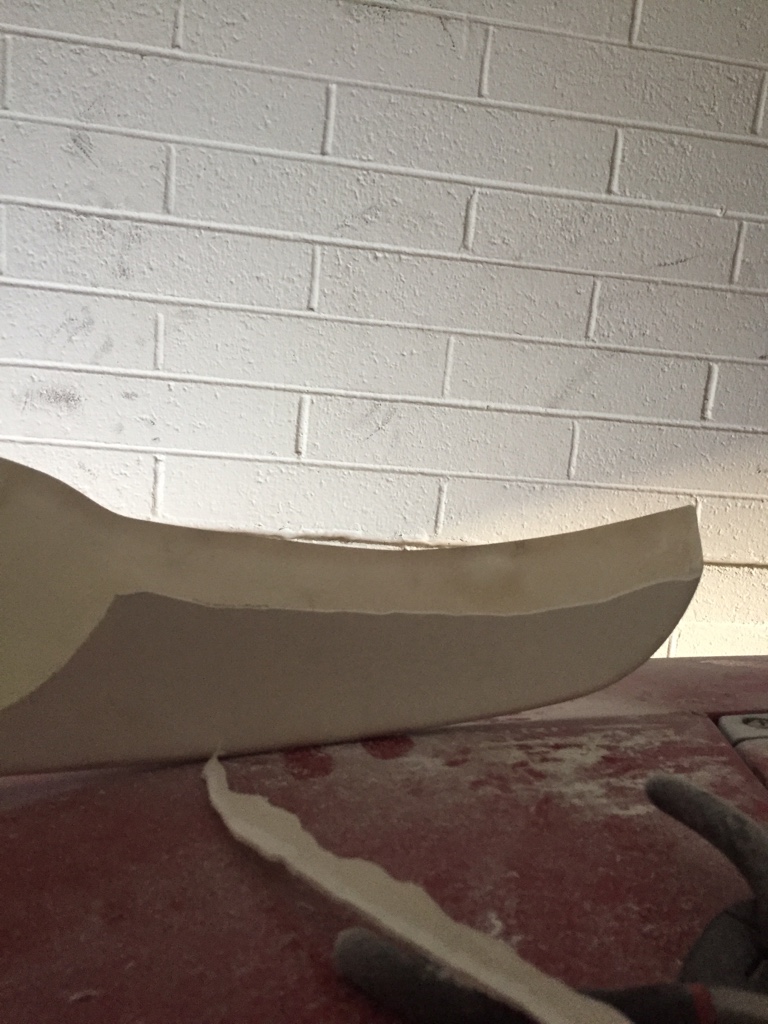
I put the flares back on to test fit and then dremel then test fit then dremel.
Came out to this on both sides.
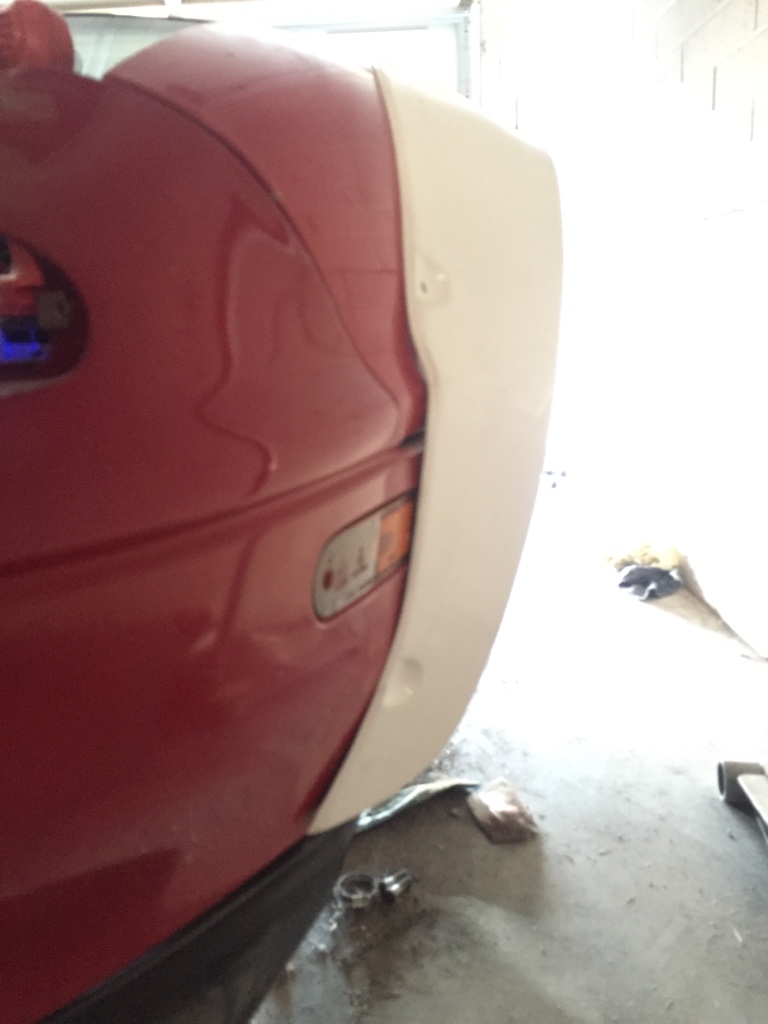
Looks pretty good in my mind, I'll wait to bolt it all down till I'm ready to put the flare on full time.
So I got the canards fitted on and they fit! Very very close to the flares themselves. I had to tuck a little but under the flare itself but they aren't going anywhere once secured. I was nervous with how far the flares went it just didn't seem possible but they fit!
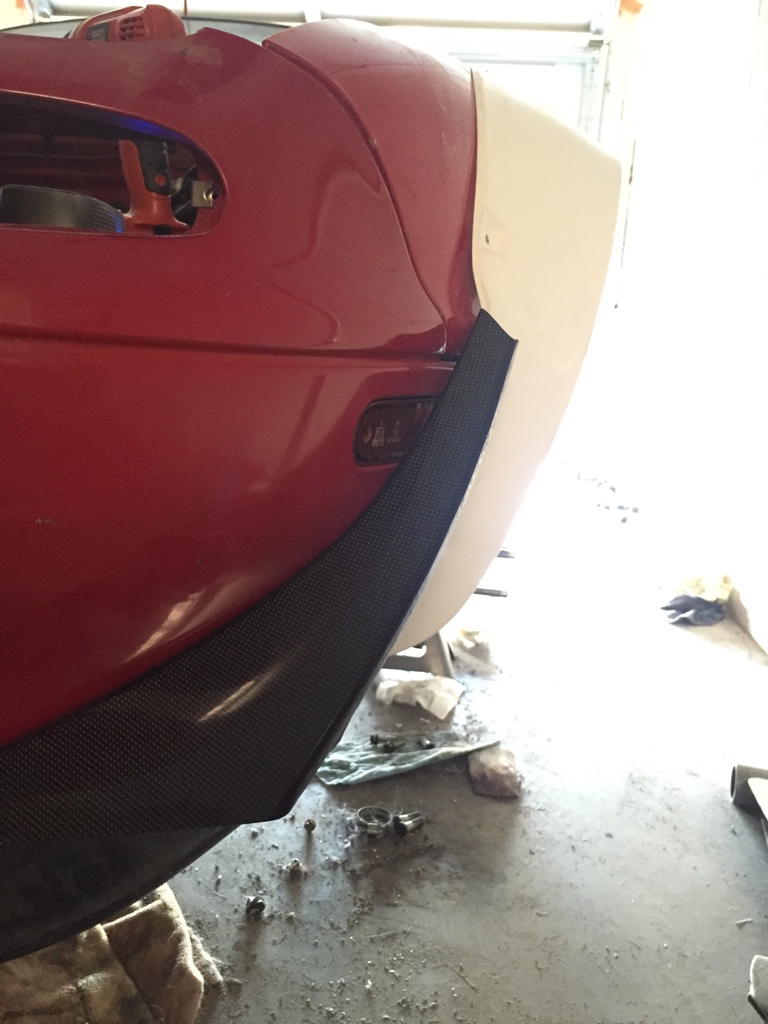
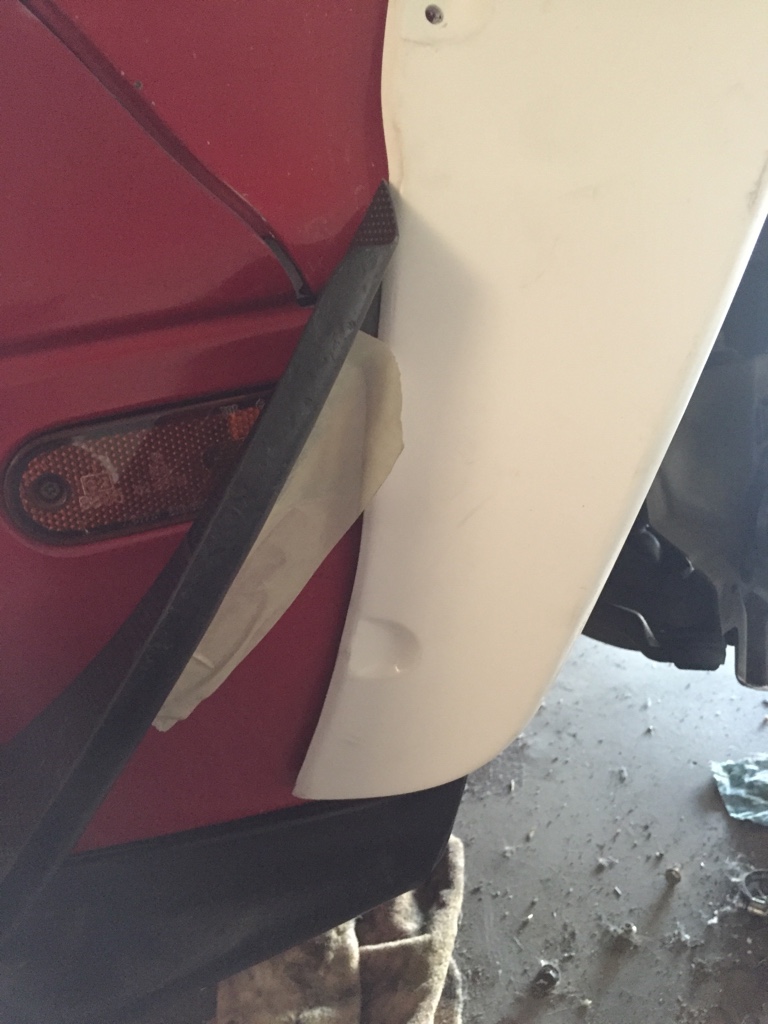
I will most likely use rivnuts through the bumper to secure them so I can take them on and off easily but we'll see. Just very glad that they actually fit. I see them as more of air deflectors than anything but they look good nevertheless.
I cut about an inch and a half off to make it fit correctly.
I put the flares back on to test fit and then dremel then test fit then dremel.
Came out to this on both sides.
Looks pretty good in my mind, I'll wait to bolt it all down till I'm ready to put the flare on full time.
So I got the canards fitted on and they fit! Very very close to the flares themselves. I had to tuck a little but under the flare itself but they aren't going anywhere once secured. I was nervous with how far the flares went it just didn't seem possible but they fit!
I will most likely use rivnuts through the bumper to secure them so I can take them on and off easily but we'll see. Just very glad that they actually fit. I see them as more of air deflectors than anything but they look good nevertheless.
Reply
0
0
 05-01-2016, 12:56 PM
#196
Junior Member
Thread Starter
Join Date: Feb 2015
Location: Arizona
Posts: 223
Total Cats: 31
Thanks man!
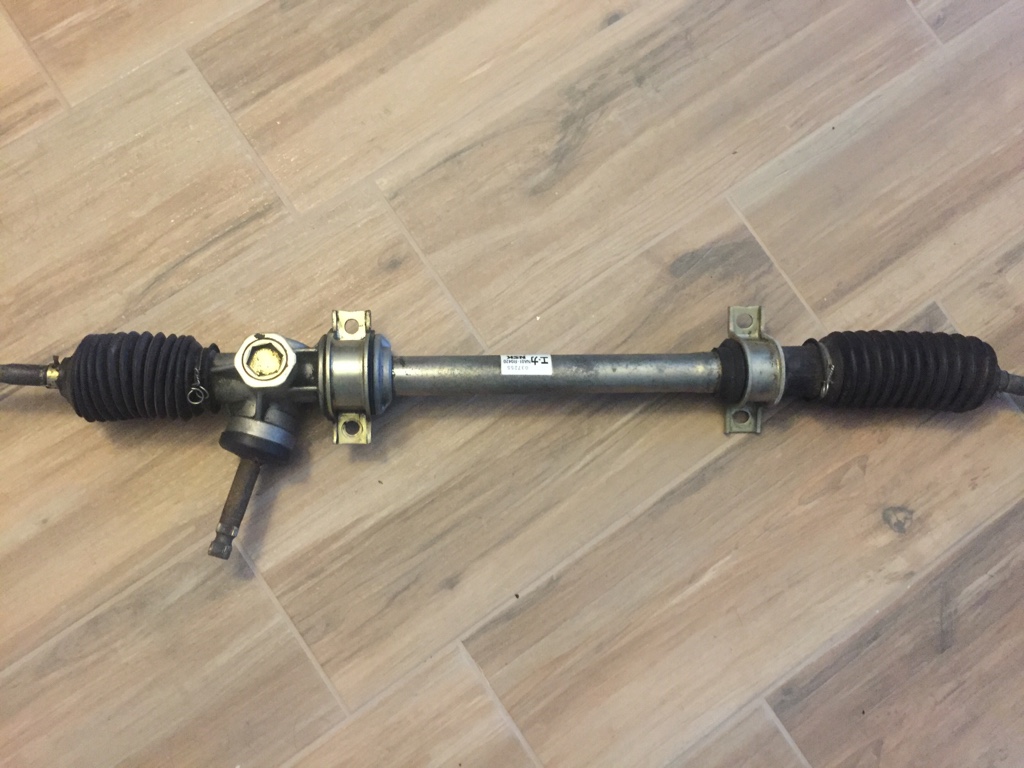
So I got my manual rack in from Evan. Thanks again man! I will get that in probably next weekend.
Also now have full possession over the StarSharks and they look like they were taken care of decently well. Some random chips here and there but none in the faces. Very excited to get things started one day.
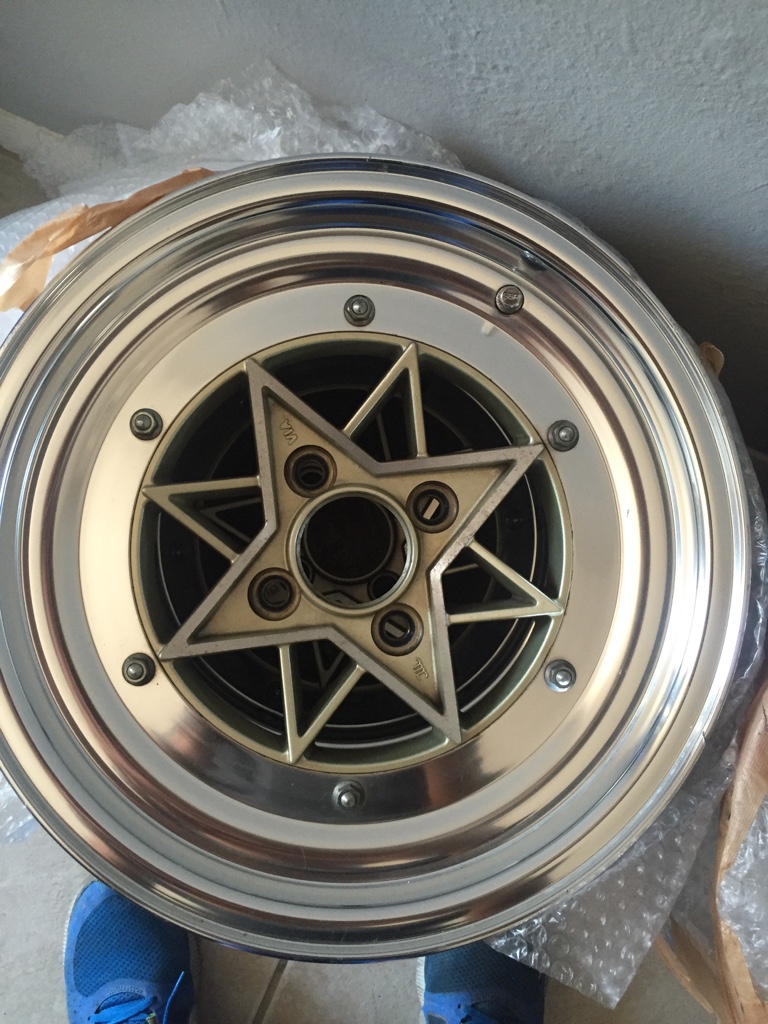
I just need to find some center caps now!
Regardless the order of things will be the motor build needs to get finished up then ill continue with the wheel build. This is where things start to slow down due to expenses. Remember I have a wedding coming up too that I need to save for as well.
So I'll see you guys around with some shark photos every now and then!
So I got my manual rack in from Evan. Thanks again man! I will get that in probably next weekend.
Also now have full possession over the StarSharks and they look like they were taken care of decently well. Some random chips here and there but none in the faces. Very excited to get things started one day.
I just need to find some center caps now!
Regardless the order of things will be the motor build needs to get finished up then ill continue with the wheel build. This is where things start to slow down due to expenses. Remember I have a wedding coming up too that I need to save for as well.
So I'll see you guys around with some shark photos every now and then!
Reply
0
0
05-07-2016, 10:05 PM
#197
Junior Member
Thread Starter
Join Date: Feb 2015
Location: Arizona
Posts: 223
Total Cats: 31
Decided to head into the garage this weekend. I took my normal rack out and put my manual rack in.
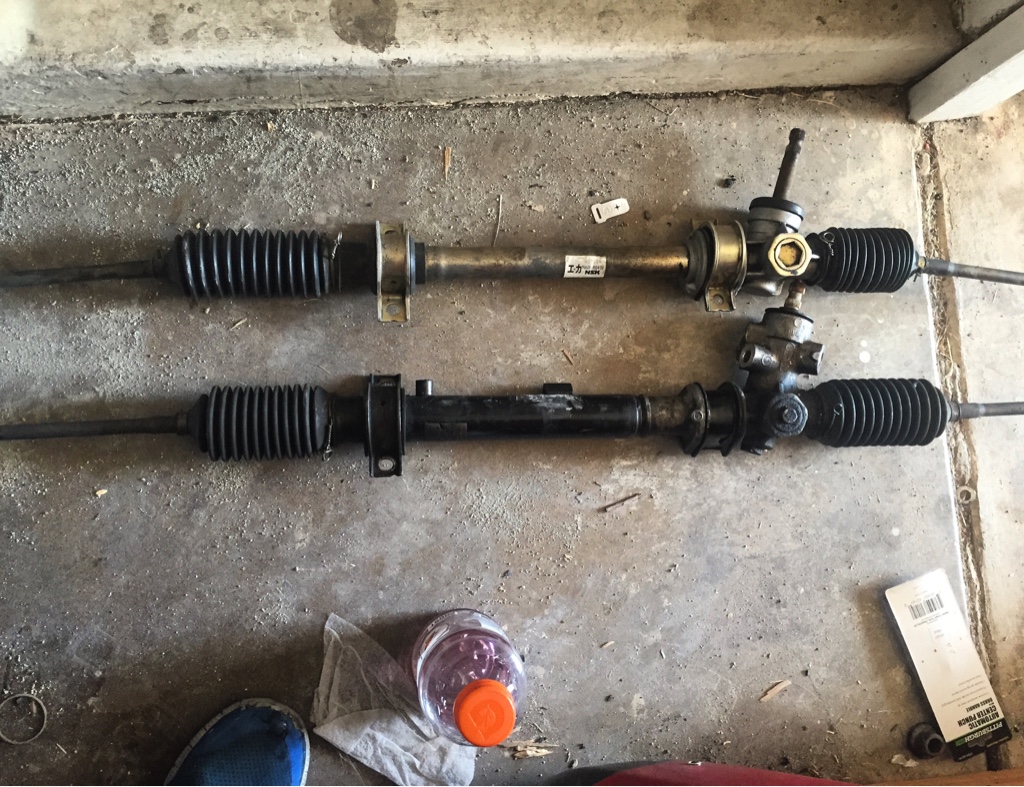
Fairly quick process nothing crazy.
Few bolts here and there.
Today I went out and decided to tackle the rear hubs. My hope was to be able to put the car on the ground and move it to the back yard so I could put the speed in the garage. Not quite there yet but minor things left.
I went to Autozone and got a slide hammer.
I put it on hubs and started going at the driver side first. Took me an hour to get this side out. I'm assuming it was really time to do this. I felt bad for my neighbors with how load this thing was. Just sliding and slamming sliding and slamming until it finally came out
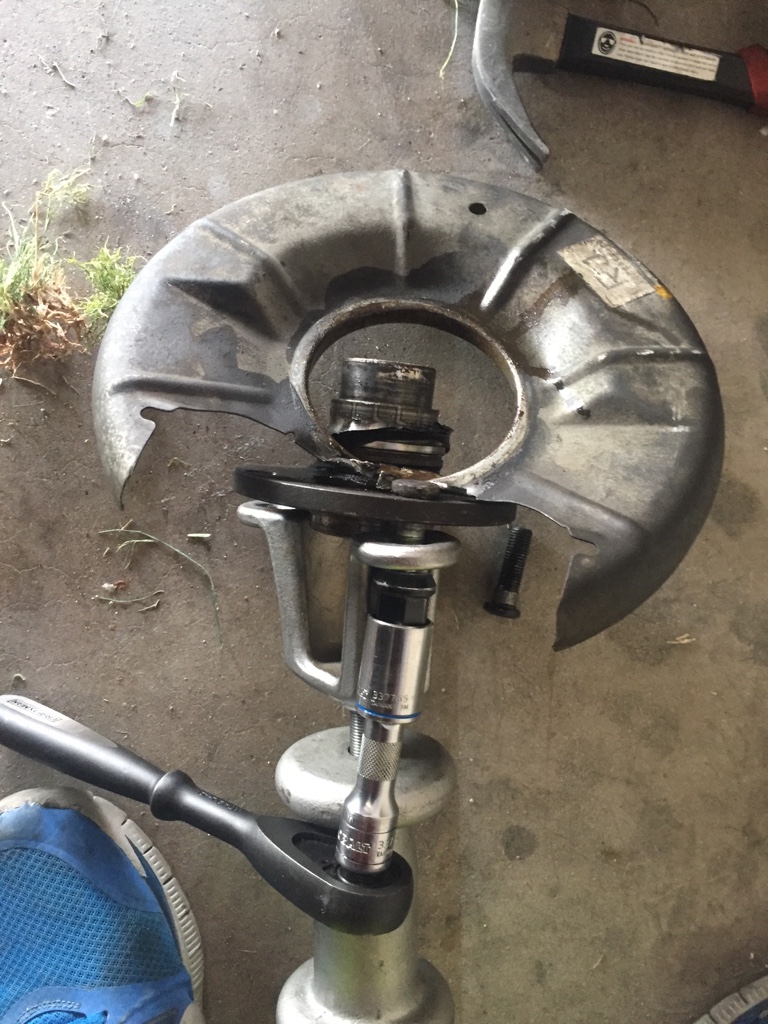
Fearing this would be the same story for the other side I began that. That one came out in one felt slide!

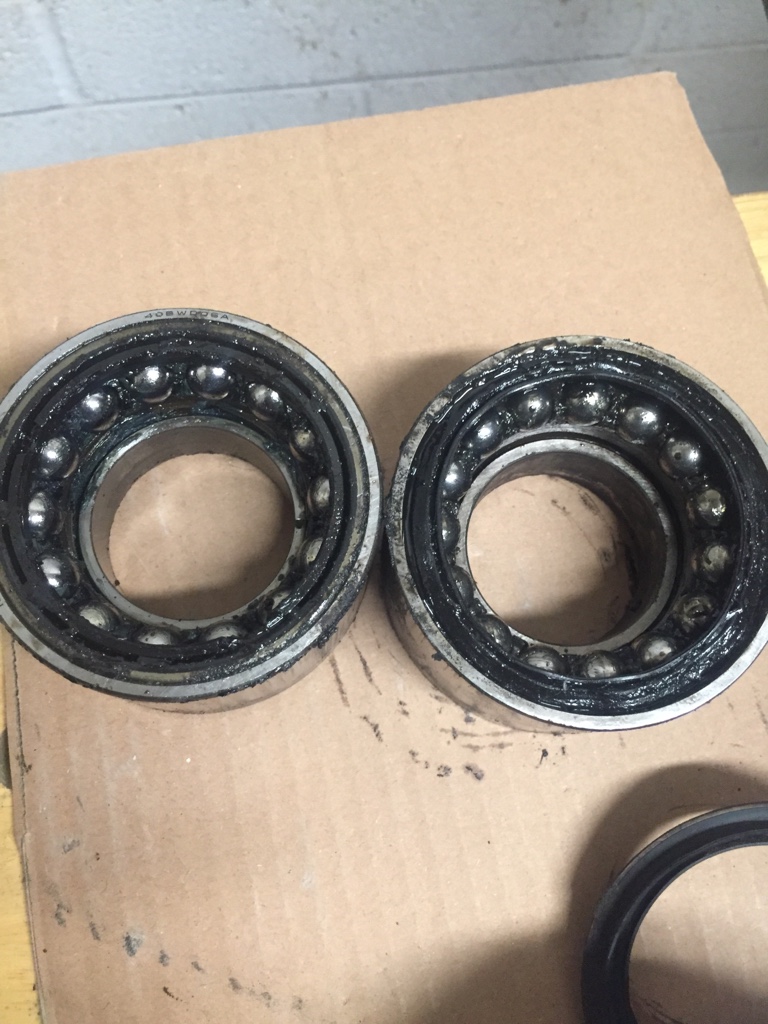
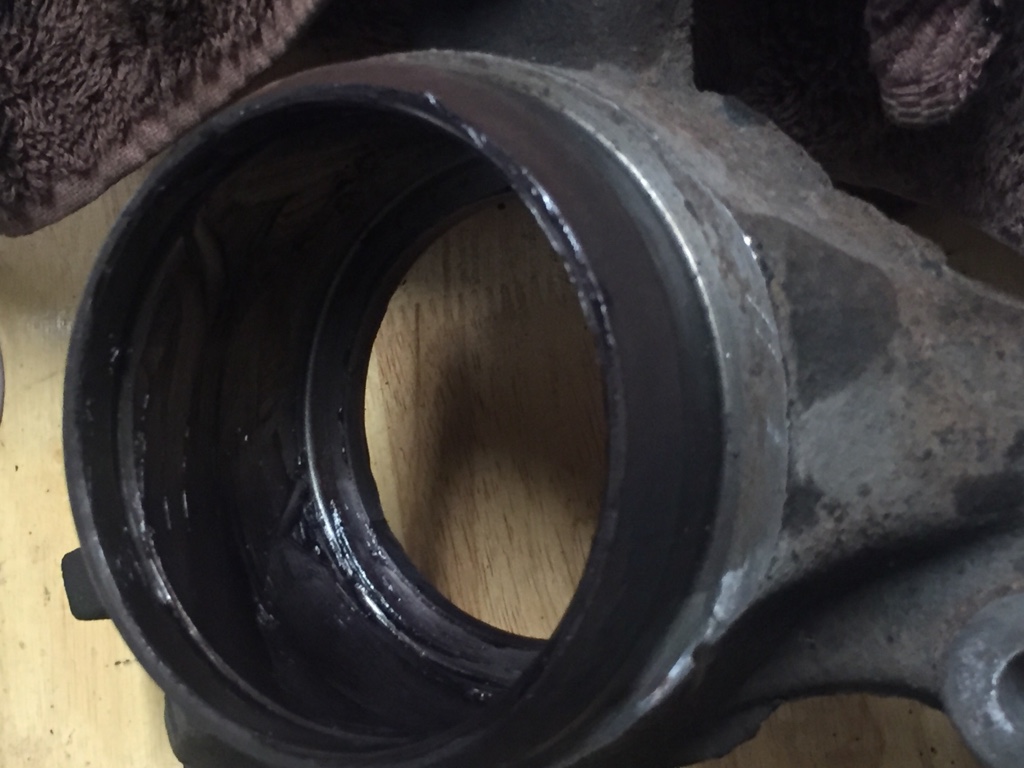
The old bearings.
Once I cleaned out the old grease I put in new grease all over!
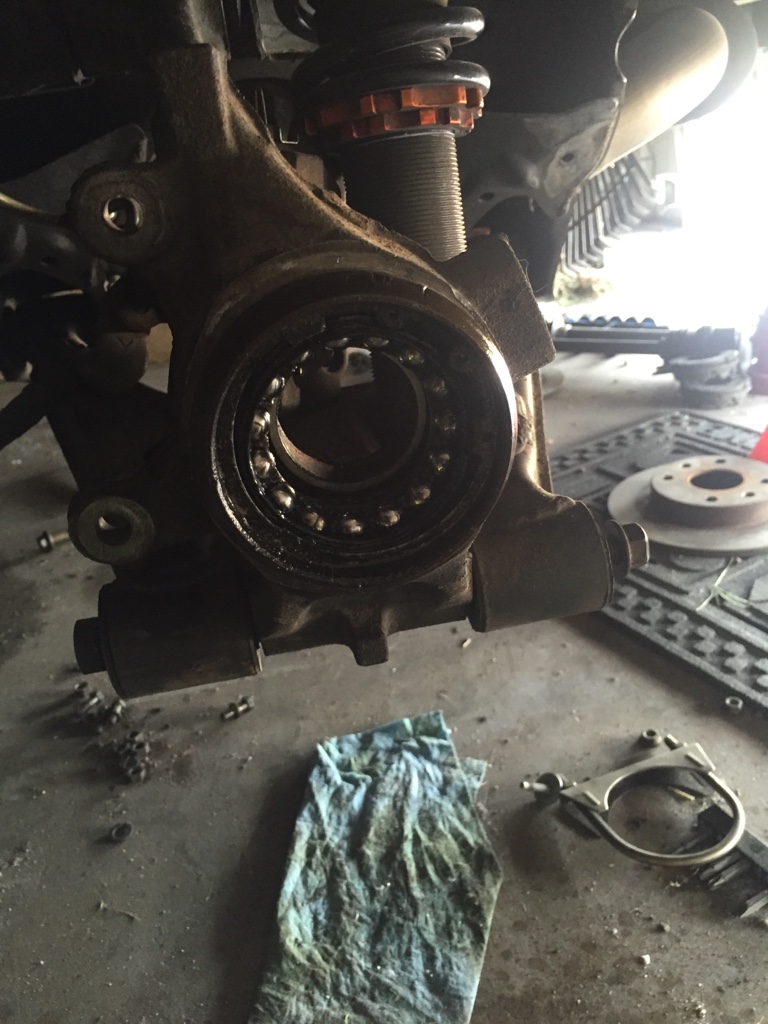
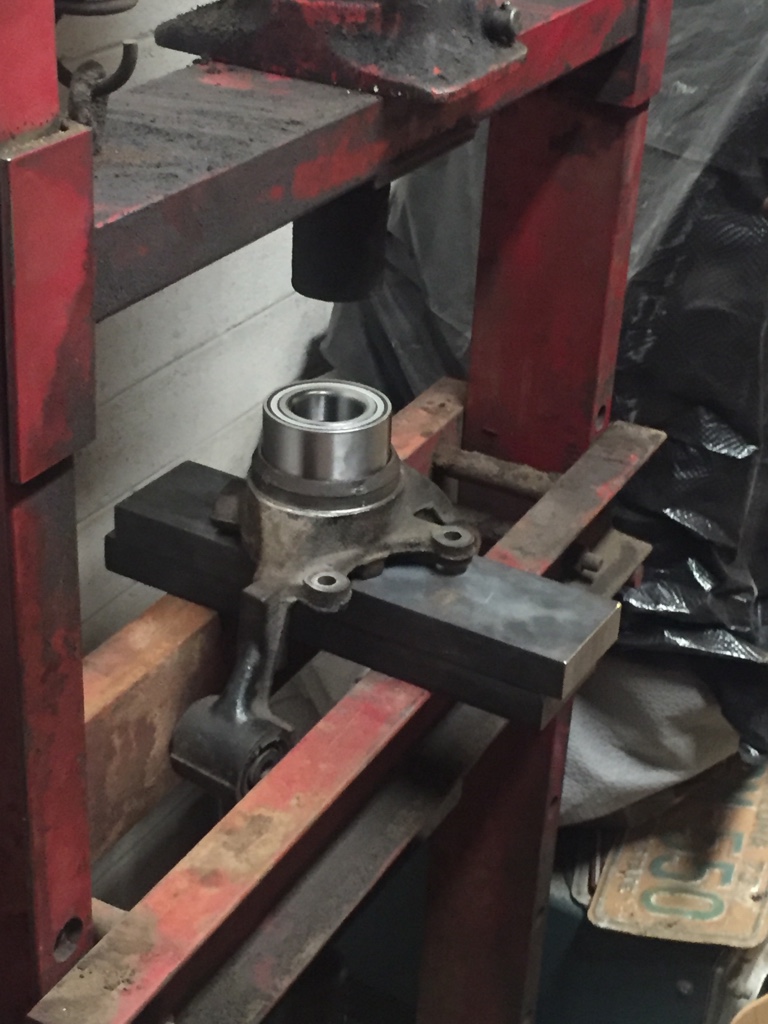
As soon as I got them out I went over to Rob's (aka Humming) house, for the second time. I love that press man! Thanks again for the second time helping out.
Got the old bearings pressed out and got the new ones pressed in with the new hubs.
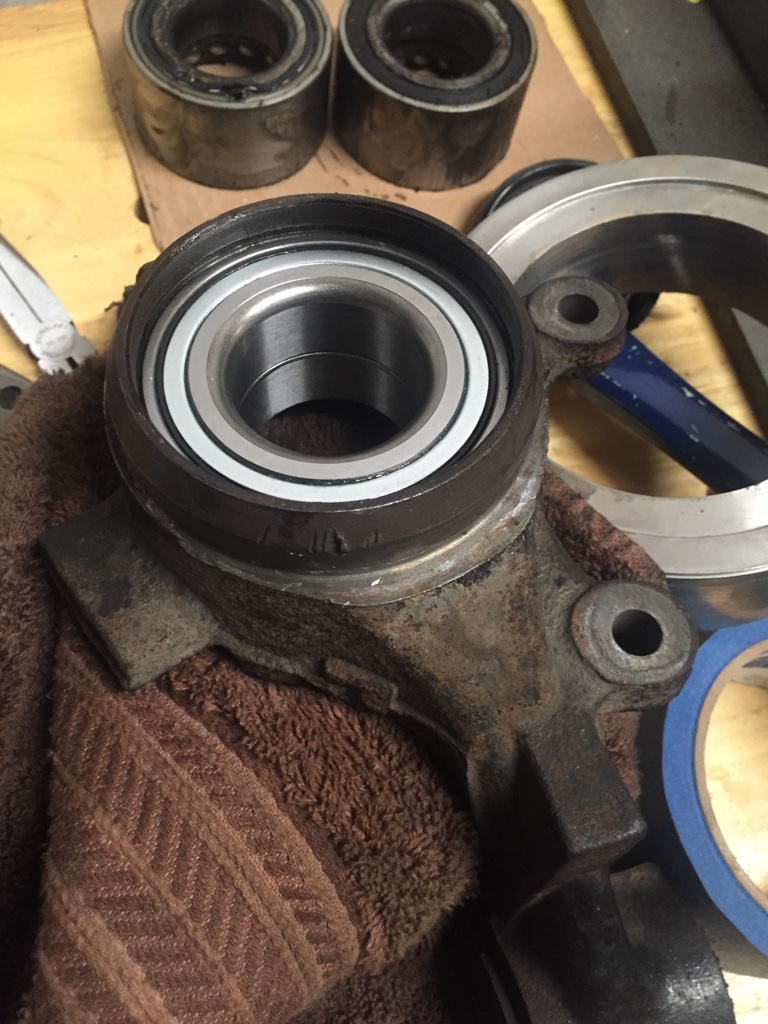

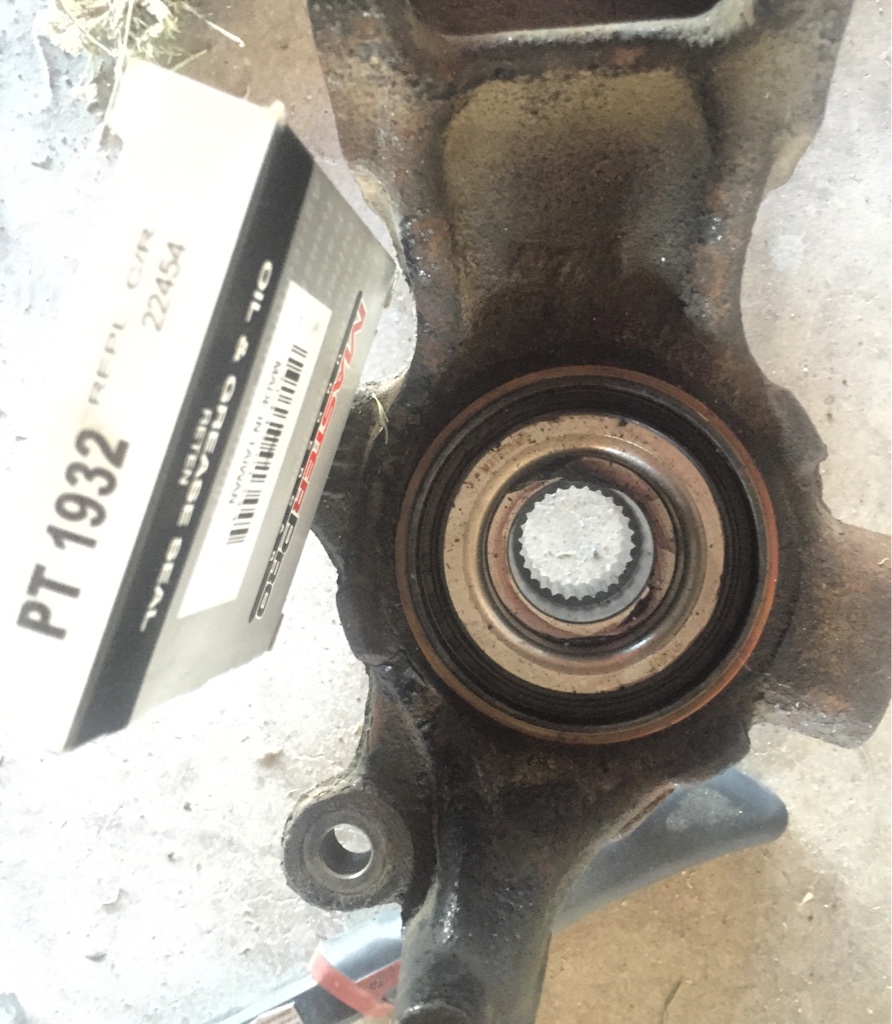
I just need the new rear seal to lock that up.
The only question I have is is the dust shield required to real snug up the feel or it's not required?
Thanks for the help again Rob I owe you one!
Fairly quick process nothing crazy.
Few bolts here and there.
Today I went out and decided to tackle the rear hubs. My hope was to be able to put the car on the ground and move it to the back yard so I could put the speed in the garage. Not quite there yet but minor things left.
I went to Autozone and got a slide hammer.
I put it on hubs and started going at the driver side first. Took me an hour to get this side out. I'm assuming it was really time to do this. I felt bad for my neighbors with how load this thing was. Just sliding and slamming sliding and slamming until it finally came out
Fearing this would be the same story for the other side I began that. That one came out in one felt slide!
The old bearings.
Once I cleaned out the old grease I put in new grease all over!
As soon as I got them out I went over to Rob's (aka Humming) house, for the second time. I love that press man! Thanks again for the second time helping out.
Got the old bearings pressed out and got the new ones pressed in with the new hubs.
I just need the new rear seal to lock that up.
The only question I have is is the dust shield required to real snug up the feel or it's not required?
Thanks for the help again Rob I owe you one!
Reply
0
0

 05-15-2016, 01:15 AM
#199
Junior Member
Thread Starter
Join Date: Feb 2015
Location: Arizona
Posts: 223
Total Cats: 31
Got curious put the wheels on and dropped it down. Got the seals I needed for the rear bearings. Snugged things up right away, put those on and put the rota wheels on.

Could definitely use some type of spacer to fill out that flare. Geez they are wider than I expected. They really just need bigger wheels and tires and they would fill on up.
I just need to adjust the height a bit I actually love the height I'm at, so when I get to fill the flare I can hopefully raise it back up to where I'm at currently.
Hoping I can get the stuff that piece from FM to drop off at the builders place so I can get it started! I'll hopefully be getting the diff in there tomorrow with the new bushings.
Reply
0
0
05-15-2016, 10:25 PM
#200
Junior Member
Thread Starter
Join Date: Feb 2015
Location: Arizona
Posts: 223
Total Cats: 31
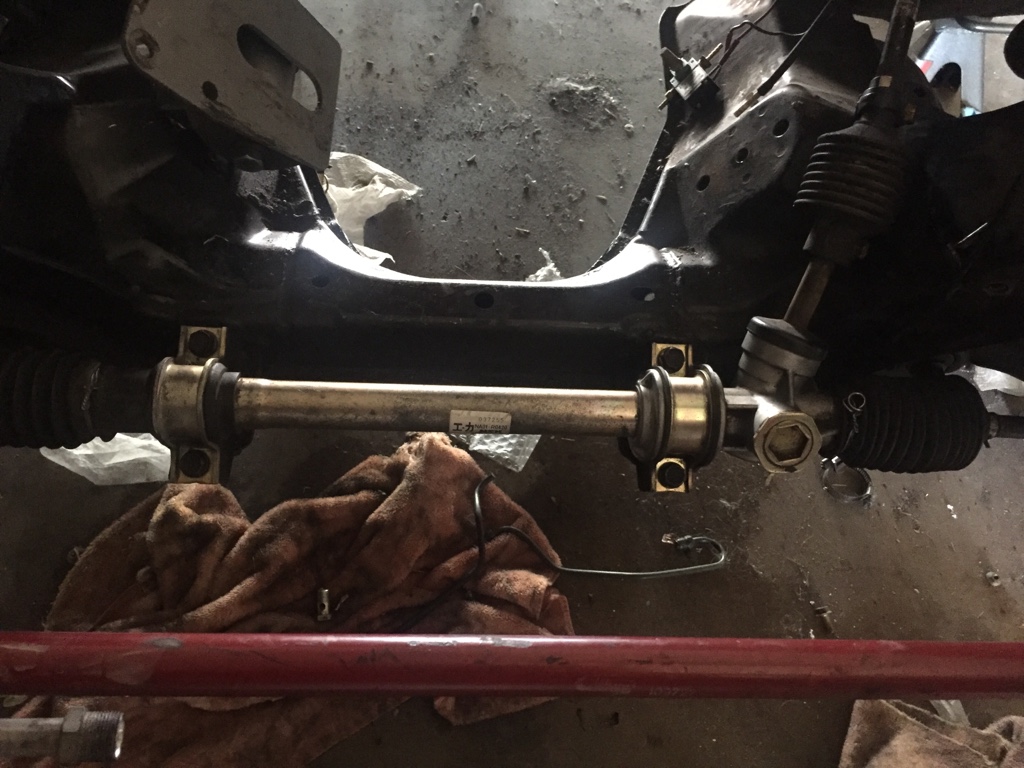
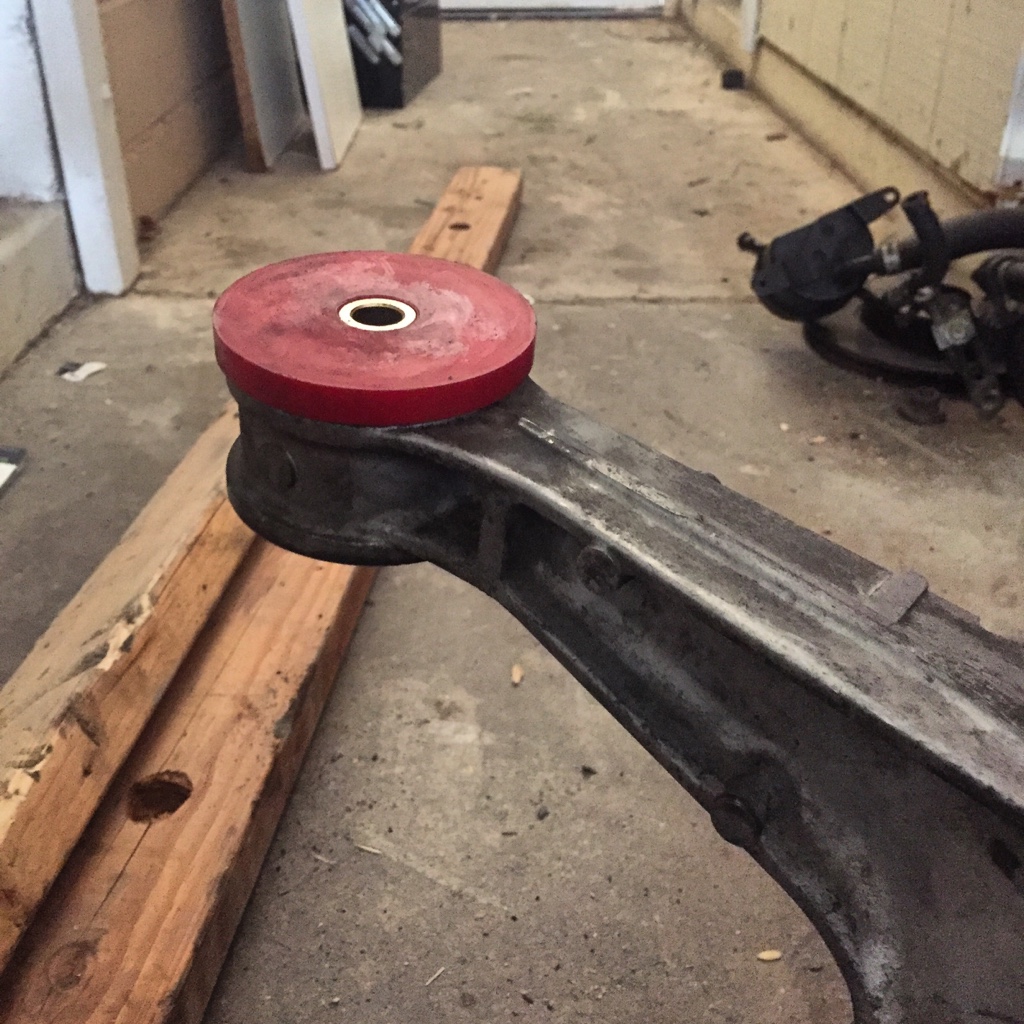
Went outside and got into the garage and started going to town with the Torsen bushing.
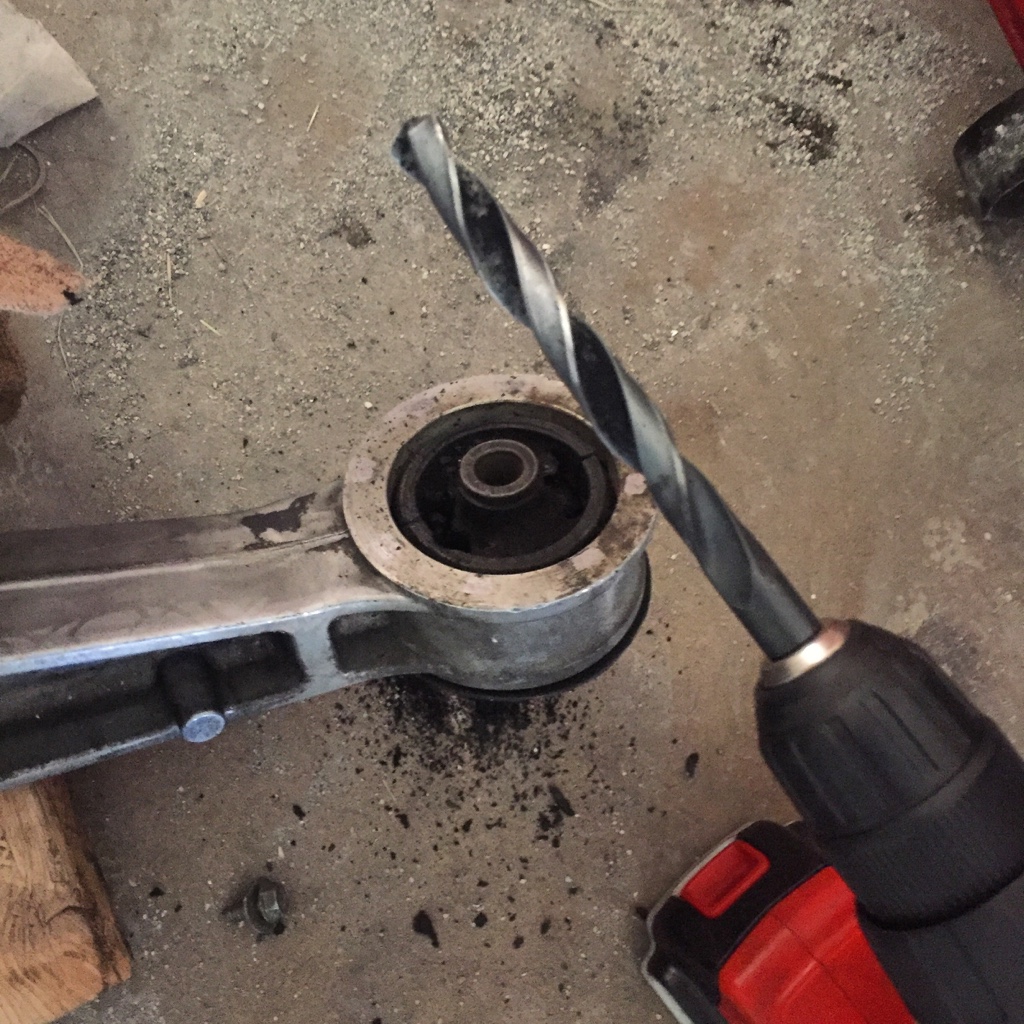
I used the drill a few holes until I could get the center piece out.
Once that was out I started hitting the edges with a chisel and hammer. Since the metal piece is actually 2 I just hit the one side until it came out. The other side followed rather quickly.
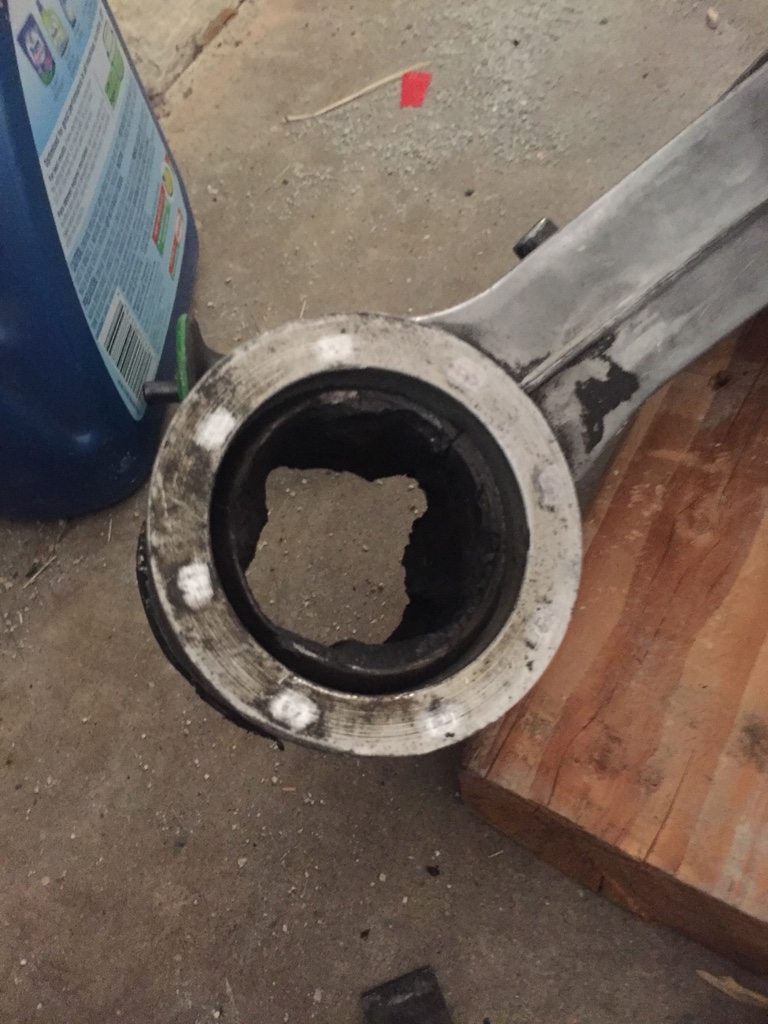
After hitting for a few minutes it came out to this.
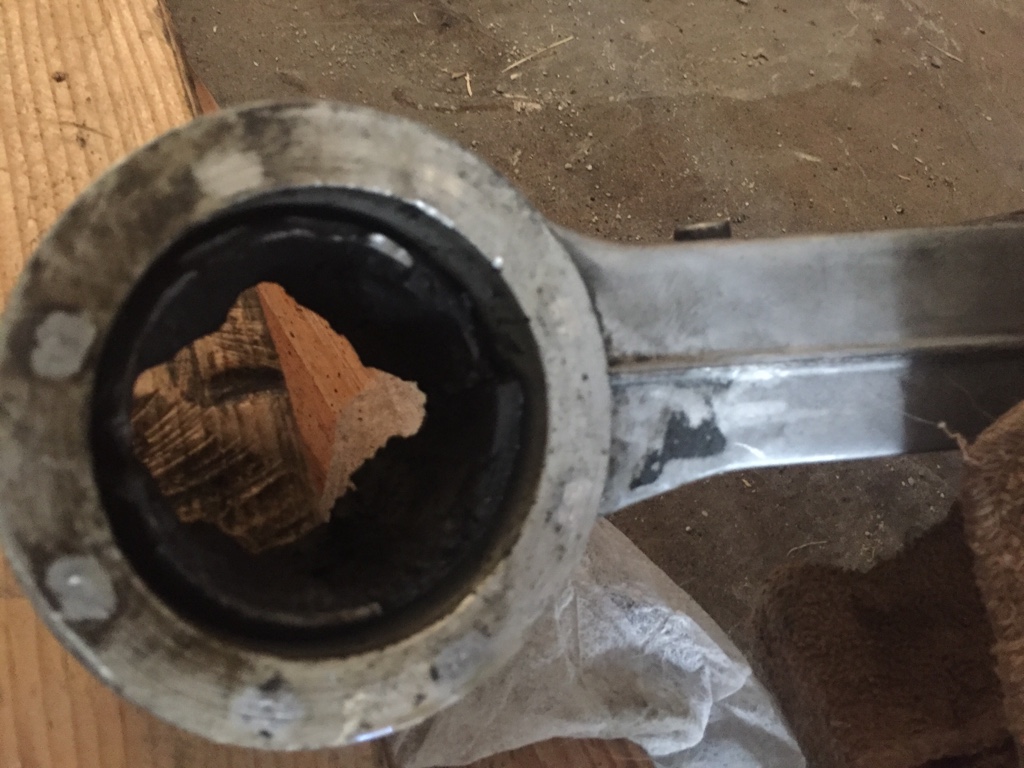
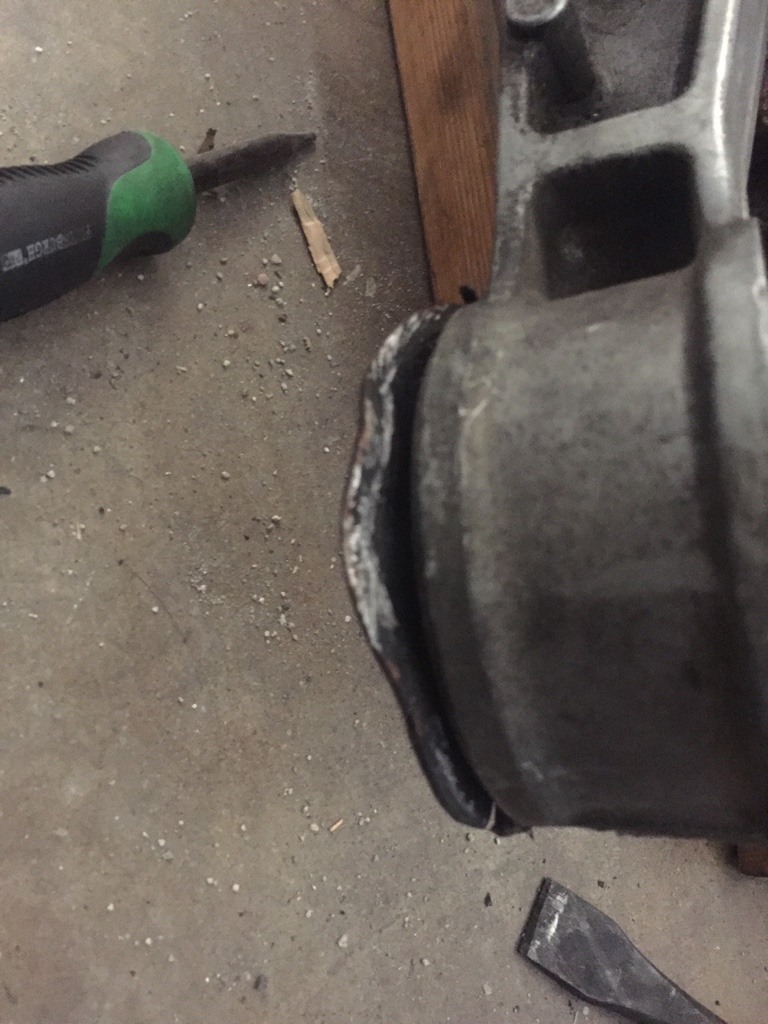
Then it eventually popped out.
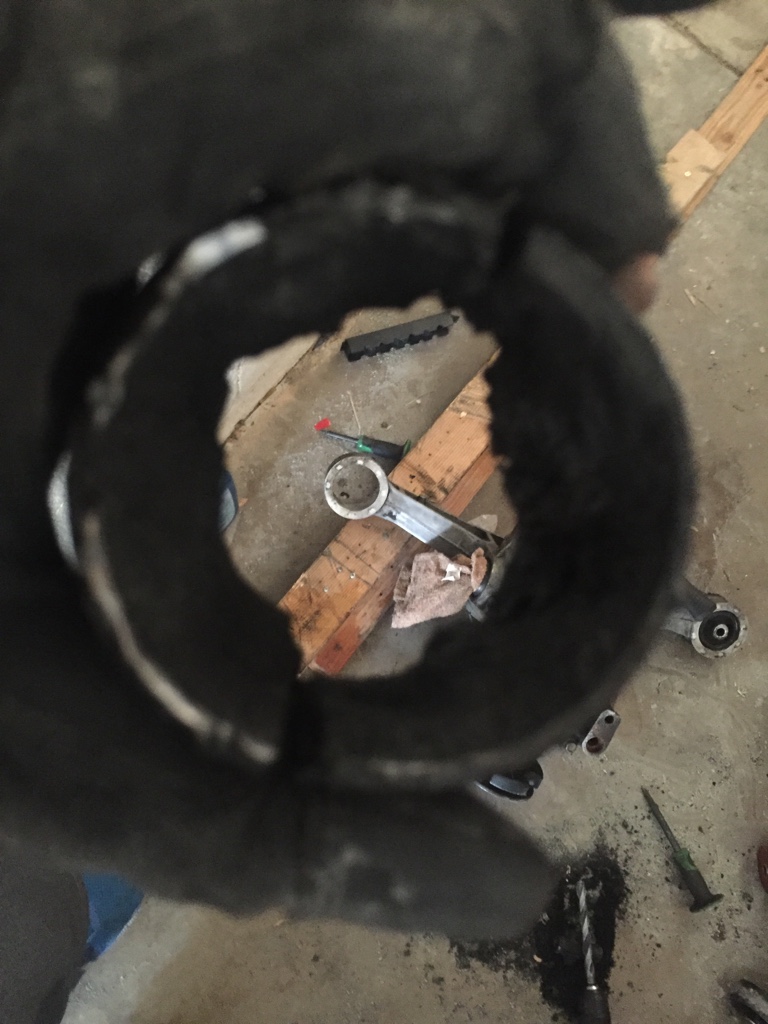
I hit the sides a bit so I cleaned that up and greased up the new bushings and greased the arm itself, and hit it a few times with a hammer.
That went a lot quicker than expected.
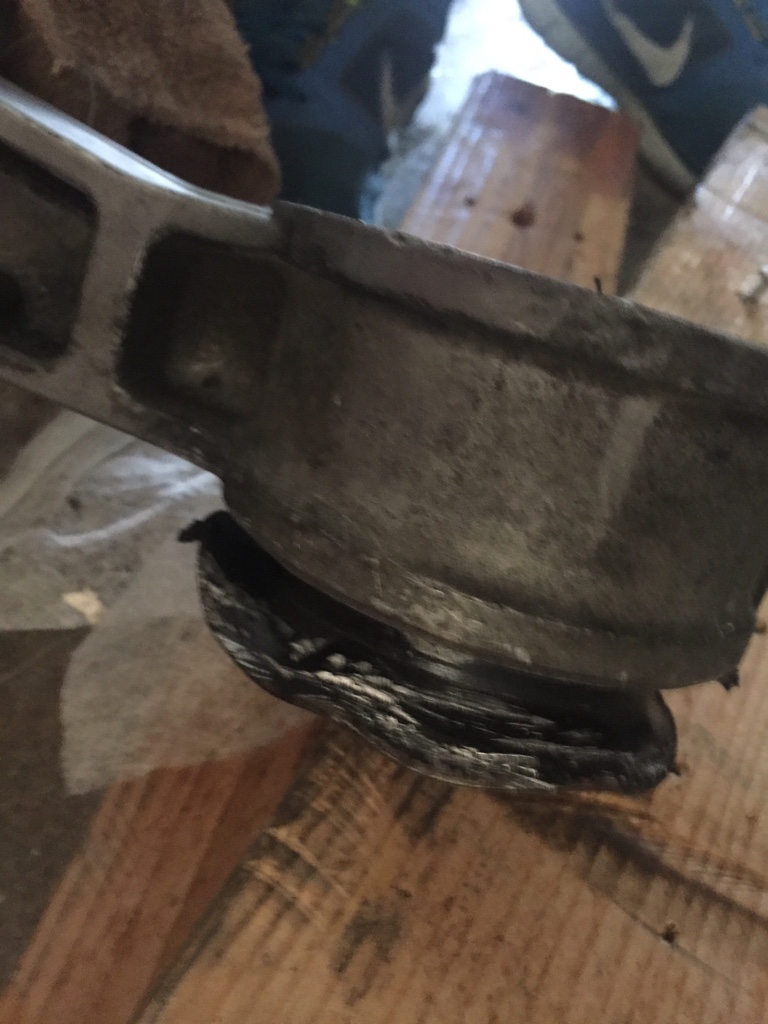
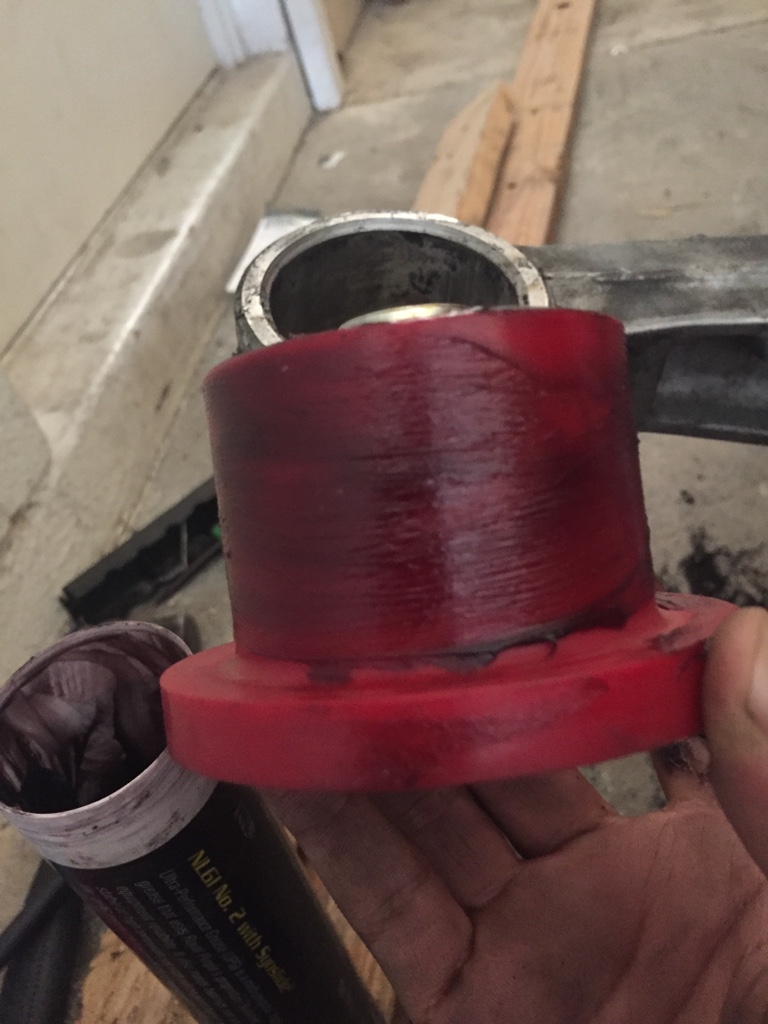
I was debating doing the other part of the bushings. After a few minutes of looking I found a way to involved heat to take the rubber off the other pieces but I didn't have anything to do that with. So I just made something up, takes a few minutes to get right but it's basically just clamped to some wood so I could hit it with a hammer and chisel at an angle to scrape it off.
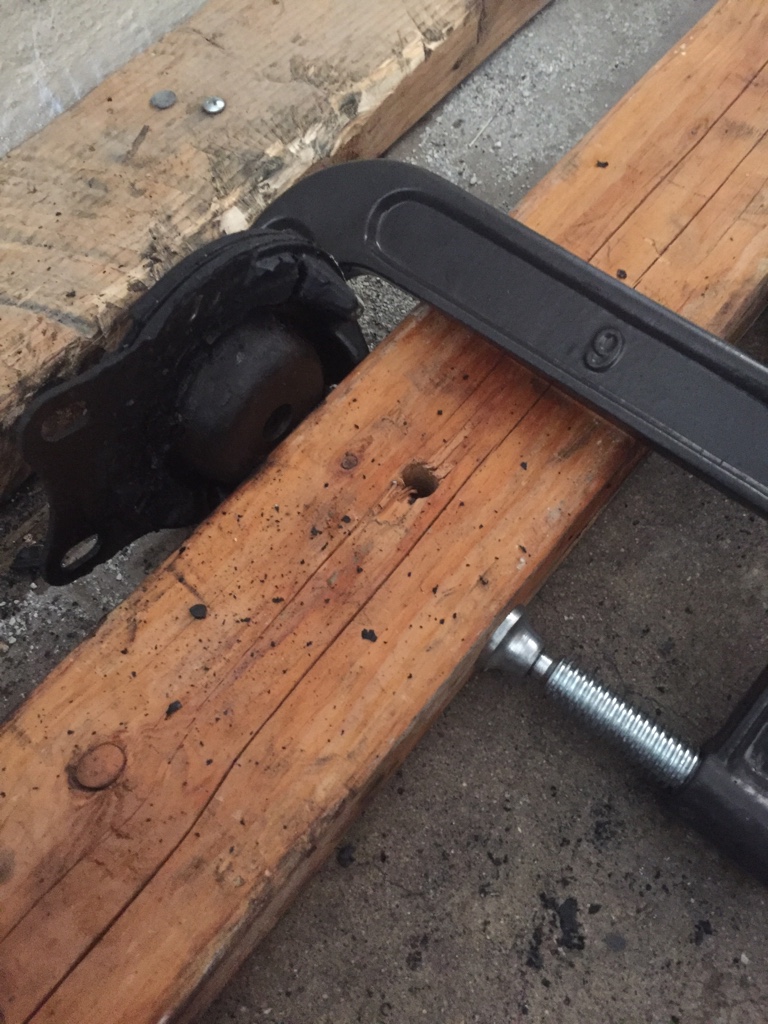

Took maybe 30 minutes to do both the. Just used a dremel to clean up the little bits of rubber that were left.
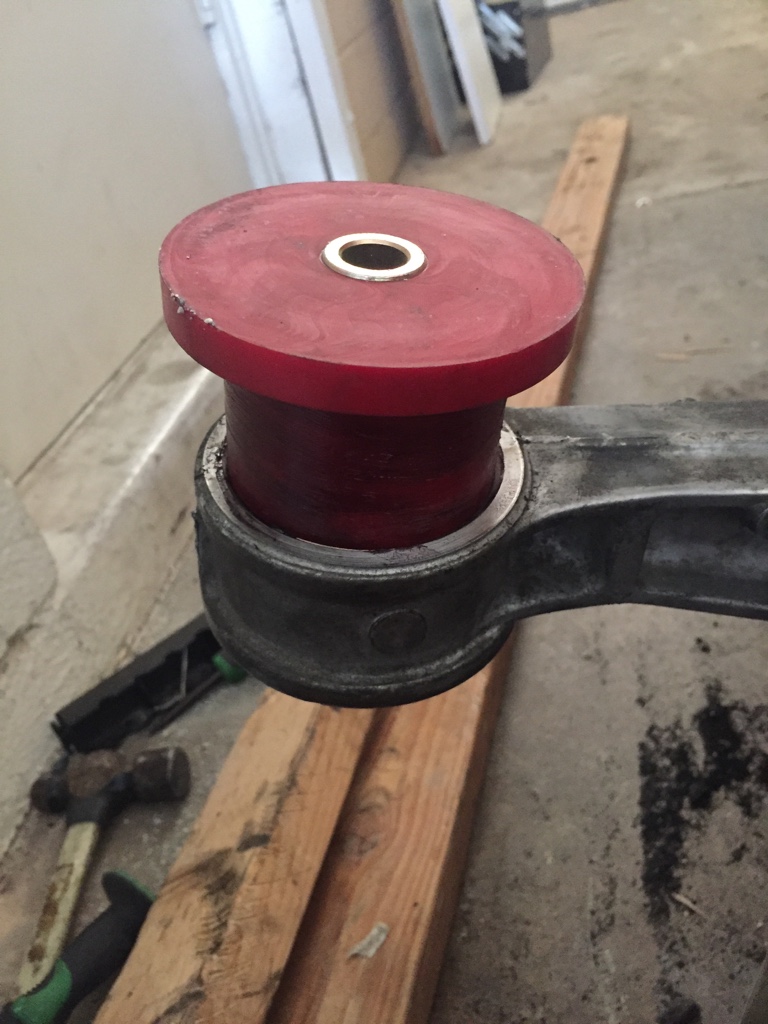
Then i greased it up so avoid noise and got to it.

I did the same to the other side and began going to put it into the car.
This is where I just didn't think it through and put the diff in first before the axels so I'll drop it and do it again tomorrow.
I should be able to button the rear end up fully tomorrow. Then I'll just have the interior and the motor left.
I used the drill a few holes until I could get the center piece out.
Once that was out I started hitting the edges with a chisel and hammer. Since the metal piece is actually 2 I just hit the one side until it came out. The other side followed rather quickly.
After hitting for a few minutes it came out to this.
Then it eventually popped out.
I hit the sides a bit so I cleaned that up and greased up the new bushings and greased the arm itself, and hit it a few times with a hammer.
That went a lot quicker than expected.
I was debating doing the other part of the bushings. After a few minutes of looking I found a way to involved heat to take the rubber off the other pieces but I didn't have anything to do that with. So I just made something up, takes a few minutes to get right but it's basically just clamped to some wood so I could hit it with a hammer and chisel at an angle to scrape it off.
Took maybe 30 minutes to do both the. Just used a dremel to clean up the little bits of rubber that were left.
Then i greased it up so avoid noise and got to it.
I did the same to the other side and began going to put it into the car.
This is where I just didn't think it through and put the diff in first before the axels so I'll drop it and do it again tomorrow.
I should be able to button the rear end up fully tomorrow. Then I'll just have the interior and the motor left.
Reply
0
0


