HornetBall's Build #2: Meet Red
 02-25-2014, 08:32 AM
#41
 The best thing I ever did for myself was leave my car stock- from autocross all the way to wheel-to-wheel. Slow car forced the driver to learn IMO.
Fwiw- the SCCA GCR is actually a free PDF download now, so there's really no excuse for not following a sanctioned safety build any more. And most of the harness manufacturer's also offer their installation guides as free downloads.
Schroth Current Instructions PDF

Reply
 1
1

1
02-25-2014, 09:30 AM
#42

You seem like an honest guy and I suspect until your beating Spec Miata times, you won't be looking for more (boosted) power. Of course I'm making this call from your posts. The best thing I ever did for myself was leave my car stock- from autocross all the way to wheel-to-wheel. Slow car forced the driver to learn IMO.
Fwiw- the SCCA GCR is actually a free PDF download now, so there's really no excuse for not following a sanctioned safety build any more. And most of the harness manufacturer's also offer their installation guides as free downloads.
Schroth Current Instructions PDF
The best thing I ever did for myself was leave my car stock- from autocross all the way to wheel-to-wheel. Slow car forced the driver to learn IMO.Fwiw- the SCCA GCR is actually a free PDF download now, so there's really no excuse for not following a sanctioned safety build any more. And most of the harness manufacturer's also offer their installation guides as free downloads.
Schroth Current Instructions PDF
This is Rick we are talking about. Im sure the car will end up with a decent little turbo set up that doesn't overheat on the track and makes over 200. Dude knows everything miata turbo. He understands from what Ive heard and seen how to build a proper safe car. It would be a shame to let all that knowledge go to waste on a N/A. Not to mention he already tracks his 1.6 turbo. I think he needs to take advantage of the newly acquired 1.8 and run with it.
Reply
0
0
02-25-2014, 09:43 AM
#43
Elite Member
iTrader: (13)

Join Date: Dec 2006
Location: Taos, New mexico
Posts: 6,606
Total Cats: 566
I'm going to chime in on that, and say that I think he should leave it N/A for at least a season or two and drive the **** out of it. Once he starts pushing the limits of the N/A car, then he should apply boost via the form of a mild turbo setup.
Or just k swap this thing down the road, it looks like that is going to become a "thing"
Or just k swap this thing down the road, it looks like that is going to become a "thing"
Reply
0
0
02-25-2014, 09:50 AM
#44
I'm going to chime in on that, and say that I think he should leave it N/A for at least a season or two and drive the **** out of it. Once he starts pushing the limits of the N/A car, then he should apply boost via the form of a mild turbo setup.
Or just k swap this thing down the road, it looks like that is going to become a "thing"
Or just k swap this thing down the road, it looks like that is going to become a "thing"
Haha
Reply
0
0
02-25-2014, 10:34 AM
#45
Elite Member
Thread Starter
iTrader: (4)

Join Date: Mar 2008
Location: Granbury, TX
Posts: 6,301
Total Cats: 696
What Rob said!! Great links Rob. Thanks.
I want to just be on track as much as possible with this car. So, I'm emulating Emilio's 95R and shooting for as much reliability and safety as I can. I've got the manufacturer's harness mounting sheets and they will be followed to a T. I am grateful the PO never had an accident with this car, because it was unsafe.
I got into the 1:29s on MSR-C's 1.7CCW Sunday AM with the Silver car (it was hard -- lots of traffic including some that just didn't want to give a point-by to a Miata). Then I came home and pulled the engine on the Red car. I mentioned to the wife that it was a manly day. She laughed.
Reply
0
0
03-16-2014, 06:51 PM
#46
Elite Member
Thread Starter
iTrader: (4)
Join Date: Mar 2008
Location: Granbury, TX
Posts: 6,301
Total Cats: 696
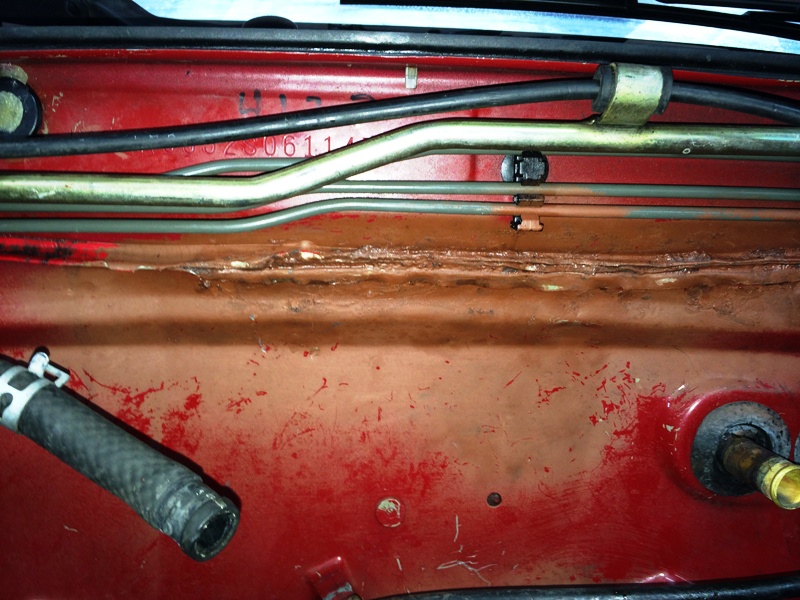
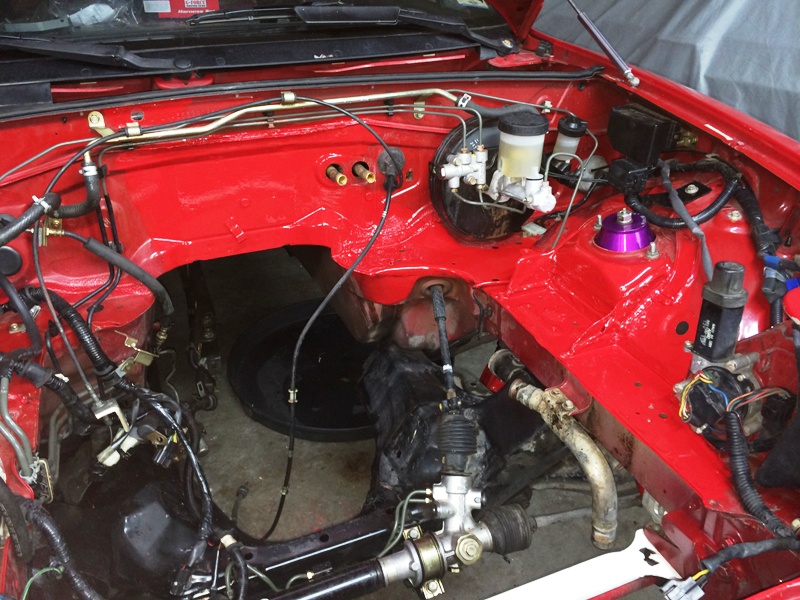
We're all born with the right to wield a BFH. However, when you do this to a Miata . . . I think that right should be revoked.
Firewall:
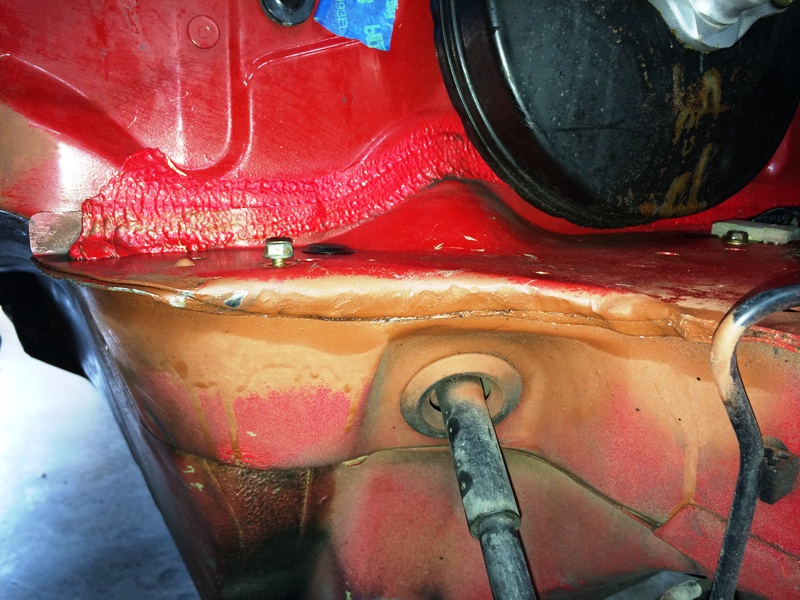
Driver's Side Shelf:
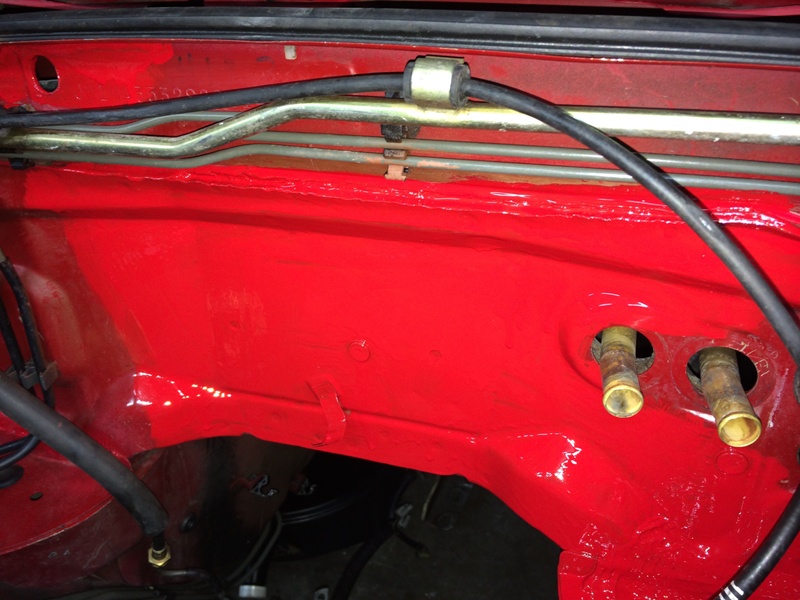
Driver's Side Shock Tower (I think this was done to fit an M45):

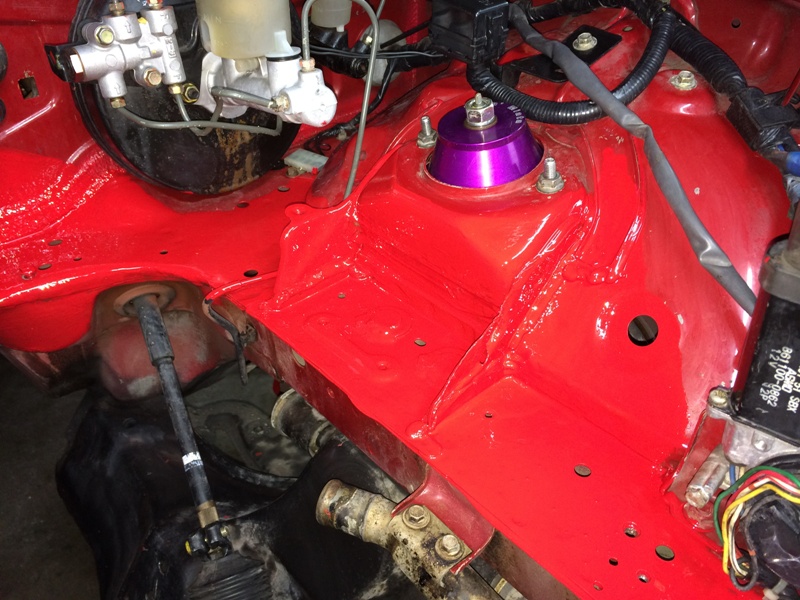
So, I spent the better part of a day in awkward yoga positions trying to straighten this out with my BFH. Some cursing ensued. Here's where I ended up . . . it's not Jeffbucc caliber, but better than what I started with (frustrating):
Also cleaned up the IAT wiring. PO had a Jackson Racing CAI installed, which is why there was an extension installed. I'm going to fabricate my own CAI. I left the butt connectors on the IAT wires for later (no, the butt connectors won't stay). BTW, I'm selling the Jackson Racing CAI. It's the 1.8 model (for a MAF). Asking $200 + shipping? Before:
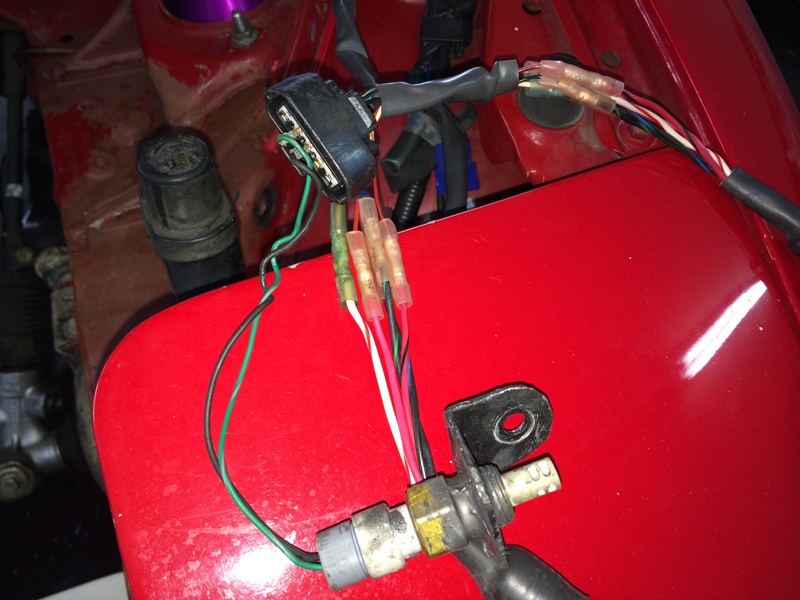
After:

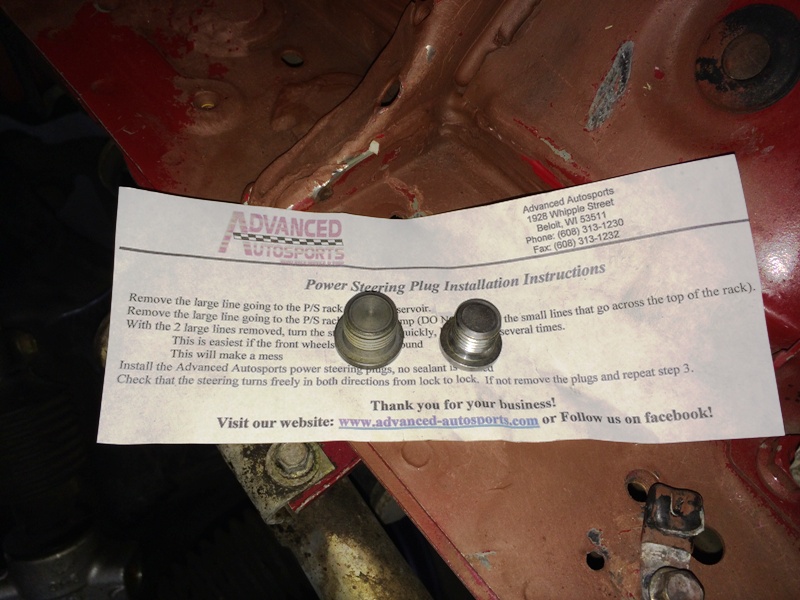
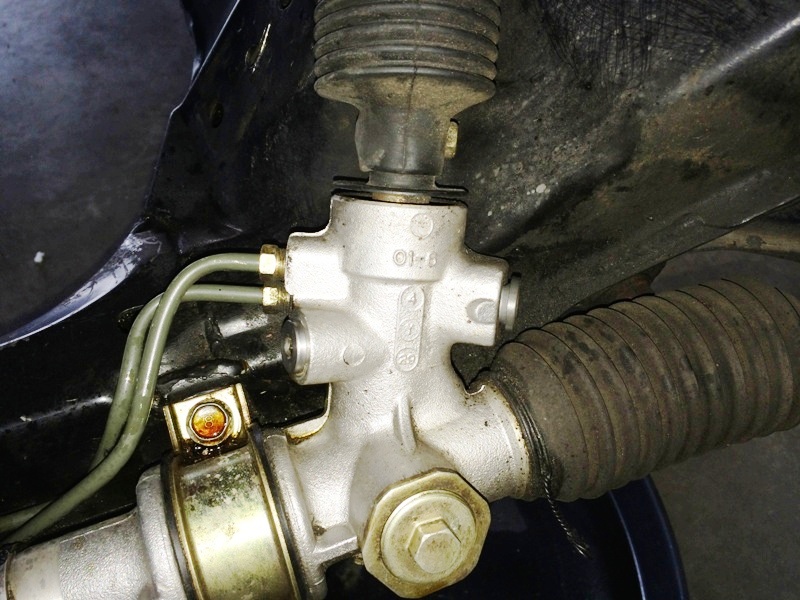
Cleaned up the manual steering conversion using a couple of plugs from Advanced Autosports. Before:
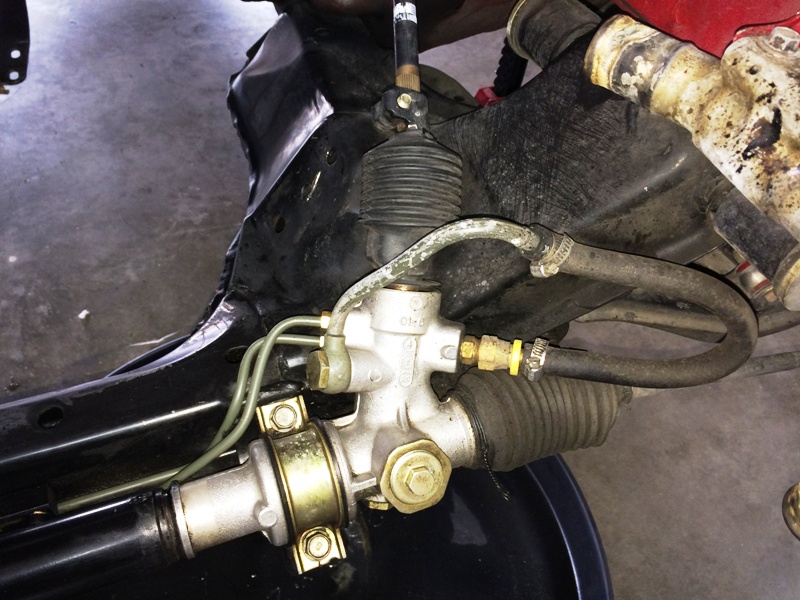
After:
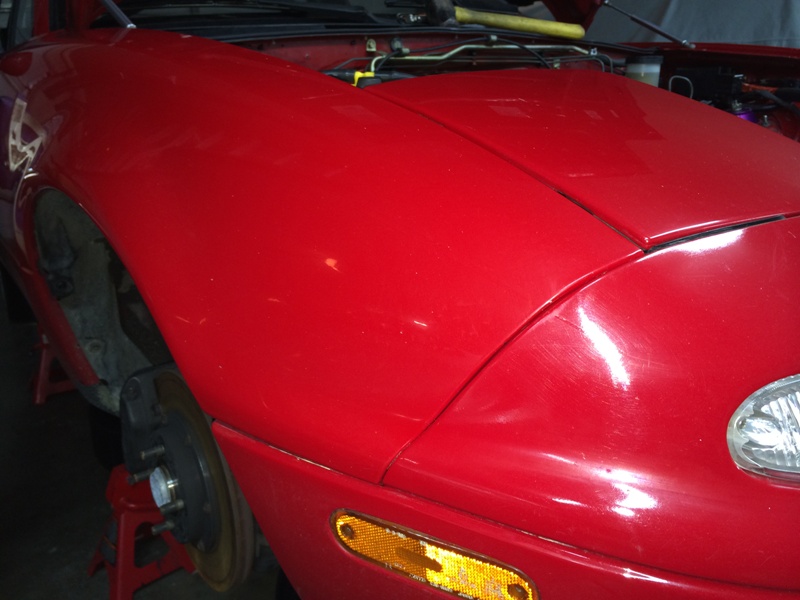
Also, removed the pinstripes. Who puts pinstripes on a Miata? This car will get some stripes, but they won't be pinstripes. Before:
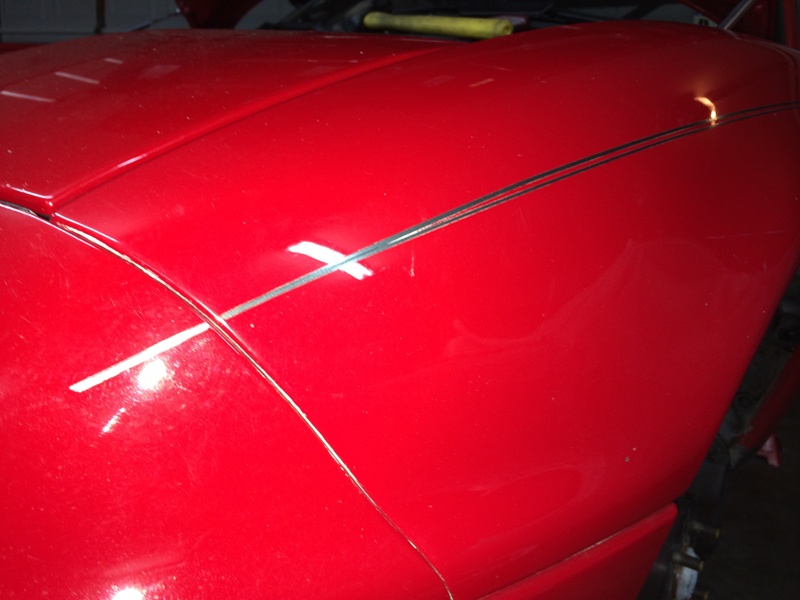
After:
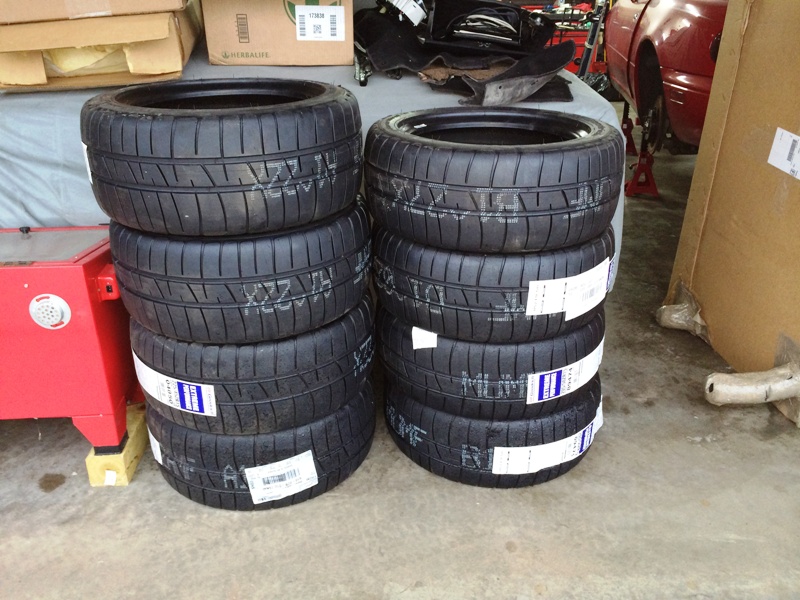
Got some tires in. 225/45R15 Rivals for the Red car on the left. 205/50R15 Rivals for the Silver car on the right (the ones I have now are just about done). Man, I can't wait to get those 225's on track. MEAT!
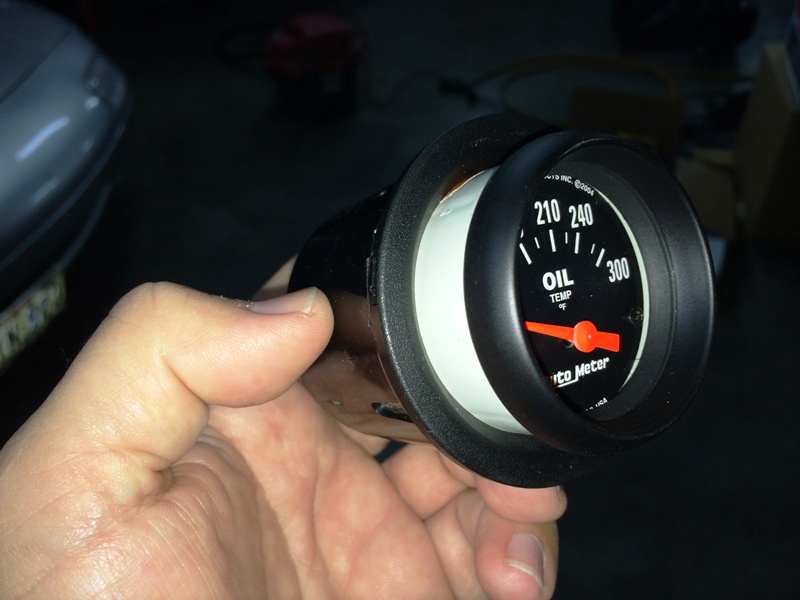
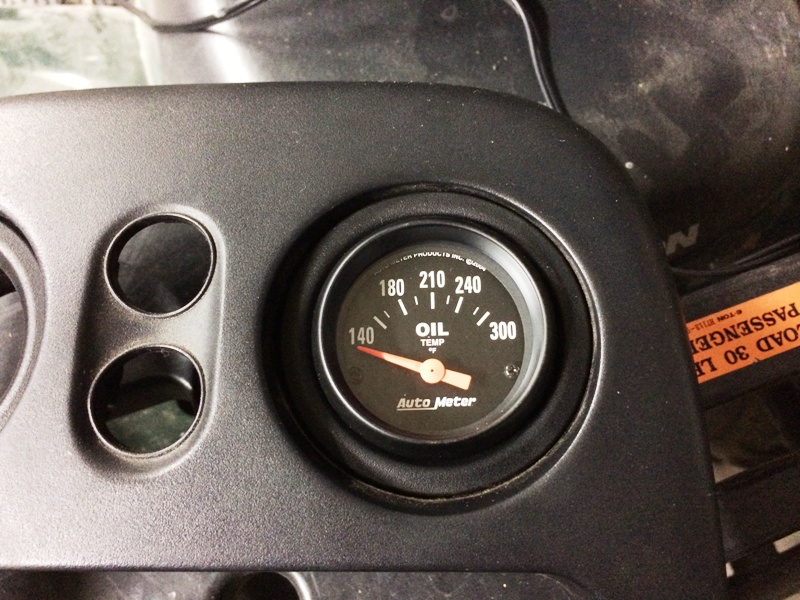
I'm going to run dedicated oil and water temperature gauges. I gutted my center eyeball vents and did a test fit. All I can say is that Mazda MUST have designed the eyeball vents for this purpose. They couldn't fit better:
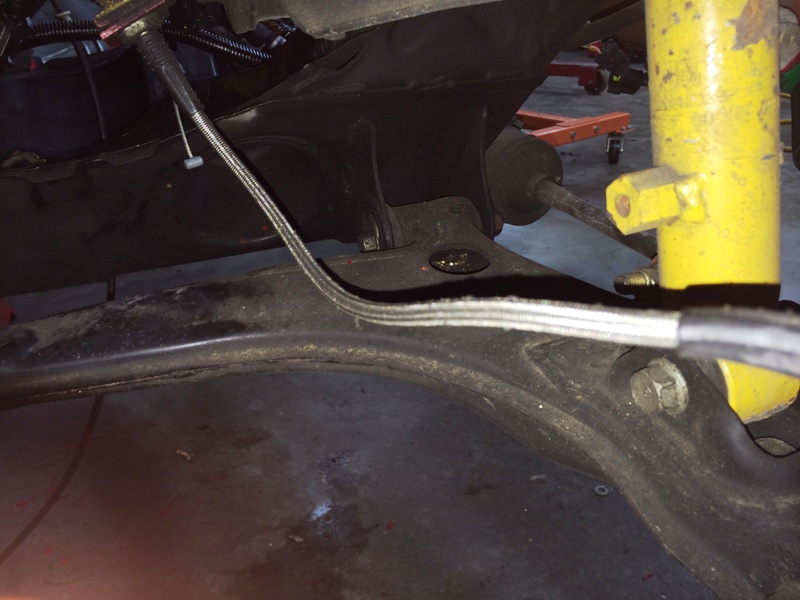
Also noticed that the braided SS brake lines on the car were unsheathed. Surprising, I've never seen unsheathed brake line before. Without sheathing, dust and grit gets into the braid and grinds away at the lines. There is no way to inspect for this . . . the lines always look fine until they suddenly let go. I have no idea how old these lines are. I'll be calling 949 first thing Monday for replacements.
Firewall:
Driver's Side Shelf:
Driver's Side Shock Tower (I think this was done to fit an M45):
So, I spent the better part of a day in awkward yoga positions trying to straighten this out with my BFH. Some cursing ensued. Here's where I ended up . . . it's not Jeffbucc caliber, but better than what I started with (frustrating):
Also cleaned up the IAT wiring. PO had a Jackson Racing CAI installed, which is why there was an extension installed. I'm going to fabricate my own CAI. I left the butt connectors on the IAT wires for later (no, the butt connectors won't stay). BTW, I'm selling the Jackson Racing CAI. It's the 1.8 model (for a MAF). Asking $200 + shipping? Before:
After:
Cleaned up the manual steering conversion using a couple of plugs from Advanced Autosports. Before:
After:
Also, removed the pinstripes. Who puts pinstripes on a Miata? This car will get some stripes, but they won't be pinstripes. Before:
After:
Got some tires in. 225/45R15 Rivals for the Red car on the left. 205/50R15 Rivals for the Silver car on the right (the ones I have now are just about done). Man, I can't wait to get those 225's on track. MEAT!
I'm going to run dedicated oil and water temperature gauges. I gutted my center eyeball vents and did a test fit. All I can say is that Mazda MUST have designed the eyeball vents for this purpose. They couldn't fit better:
Also noticed that the braided SS brake lines on the car were unsheathed. Surprising, I've never seen unsheathed brake line before. Without sheathing, dust and grit gets into the braid and grinds away at the lines. There is no way to inspect for this . . . the lines always look fine until they suddenly let go. I have no idea how old these lines are. I'll be calling 949 first thing Monday for replacements.
Last edited by hornetball; 03-16-2014 at 10:58 PM.
Reply
0
0
03-16-2014, 07:38 PM
#47
Elite Member
Thread Starter
iTrader: (4)
Join Date: Mar 2008
Location: Granbury, TX
Posts: 6,301
Total Cats: 696
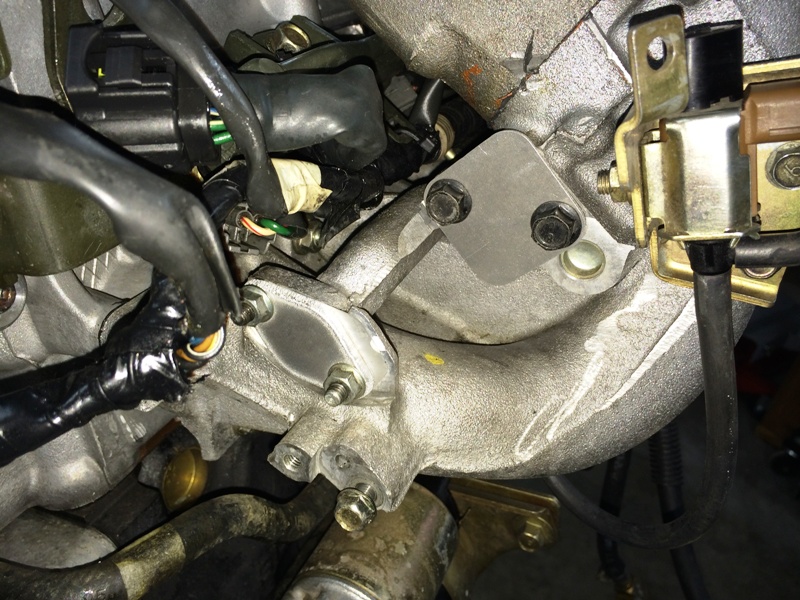
Started working on the engine. First, some cleanup. EGR delete courtesy of TrackSpeed (keeping VICS solenoid on right -- will control from the MS):
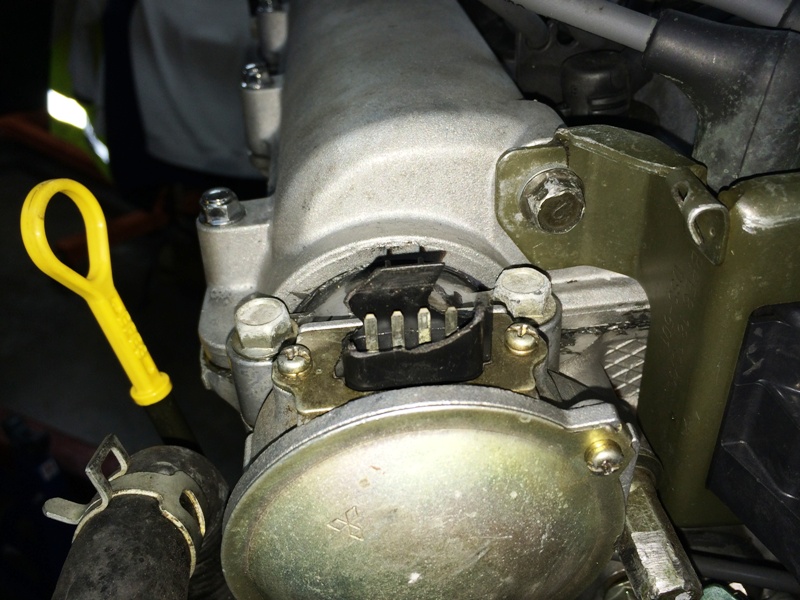
Who does this to a perfectly good CAS?!? Why?!? Used CAS on order.
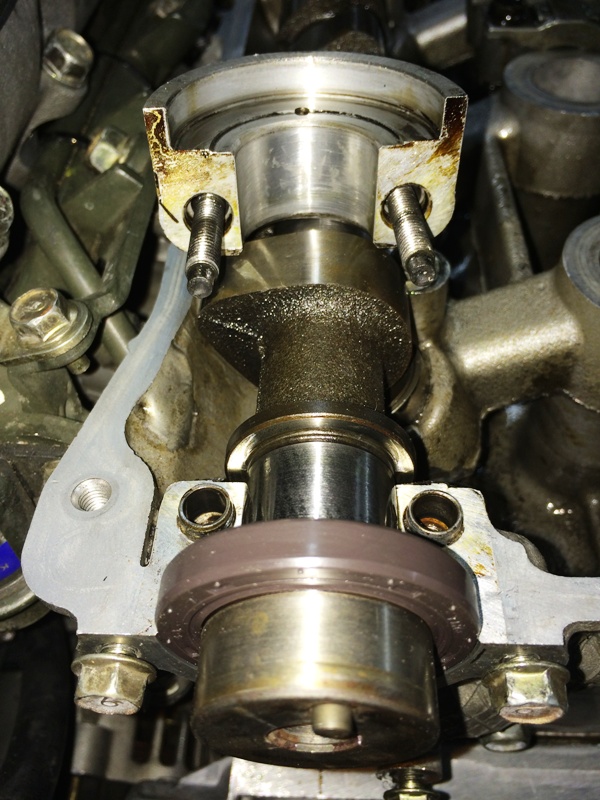
Inspected the rear main seal. No issues here, it was dry:

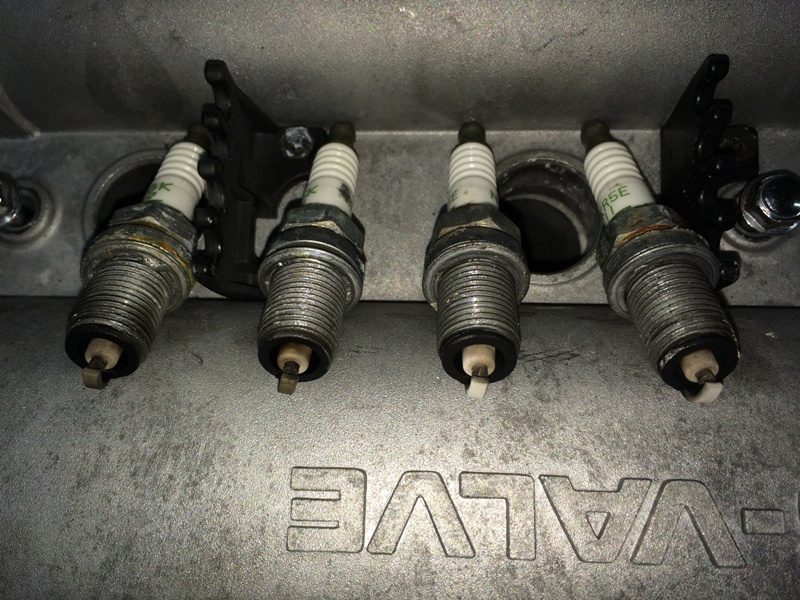
Pulled the plugs. They look good.
Pulled the valve cover. It looks like someone didn't get the memo on where to apply RTV. It was slathered all over the front and rear edges, not just in the external cam cap corners. Despite all the excess RTV on the cam cover, I discovered that there was no RTV at all under the external cam caps. And the bolts holding the rear cam cap for the CAS weren't tightened! I undid them with my fingers. Mystery solved, that's the oil leak.
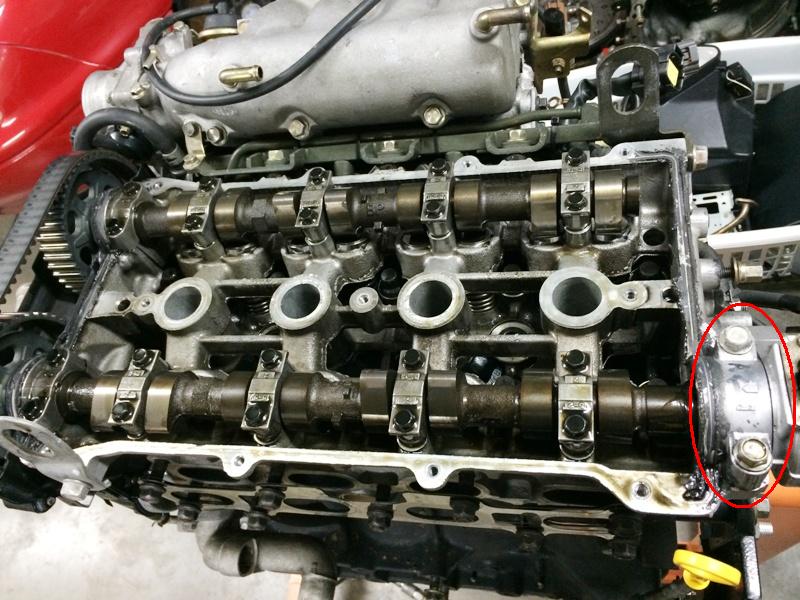
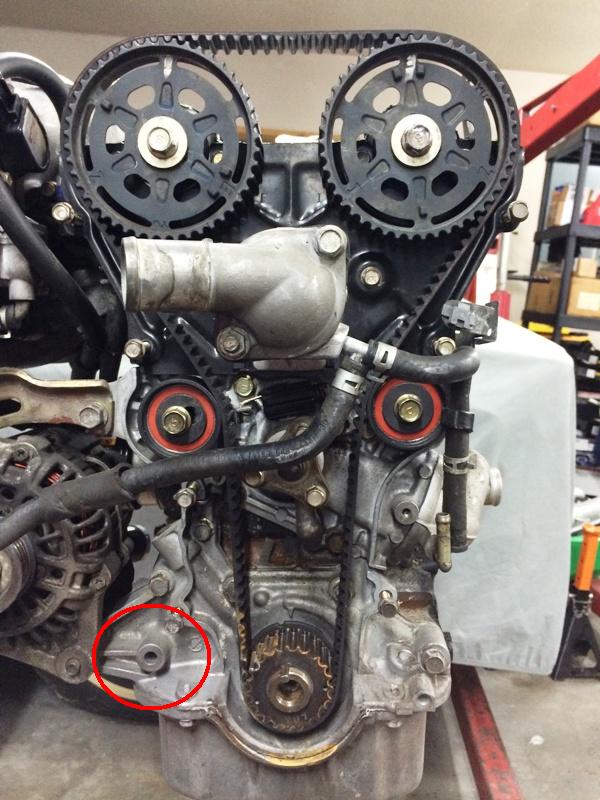
Tore down the front of the engine to put in the waterneck block-off. Other than a missing oil pump bolt (circled), everything looked good up here.
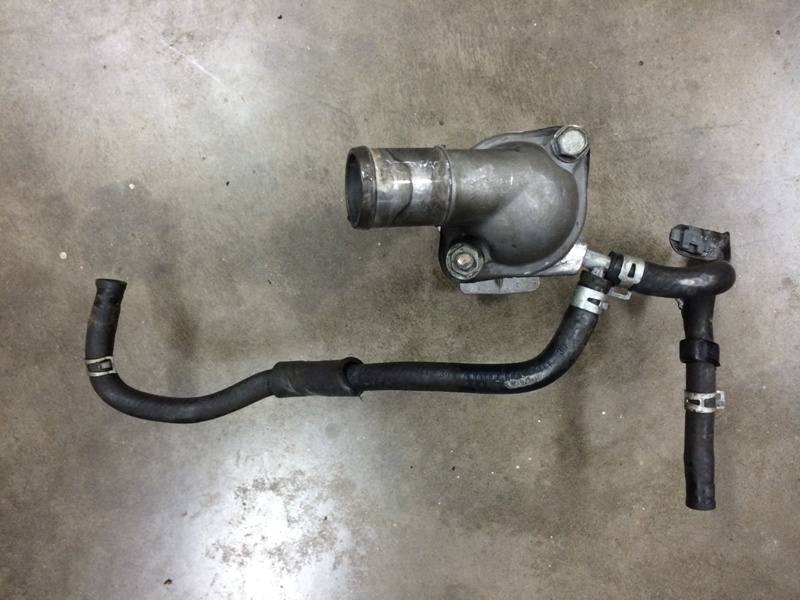
Adios waterneck and stupid, little coolant hoses:
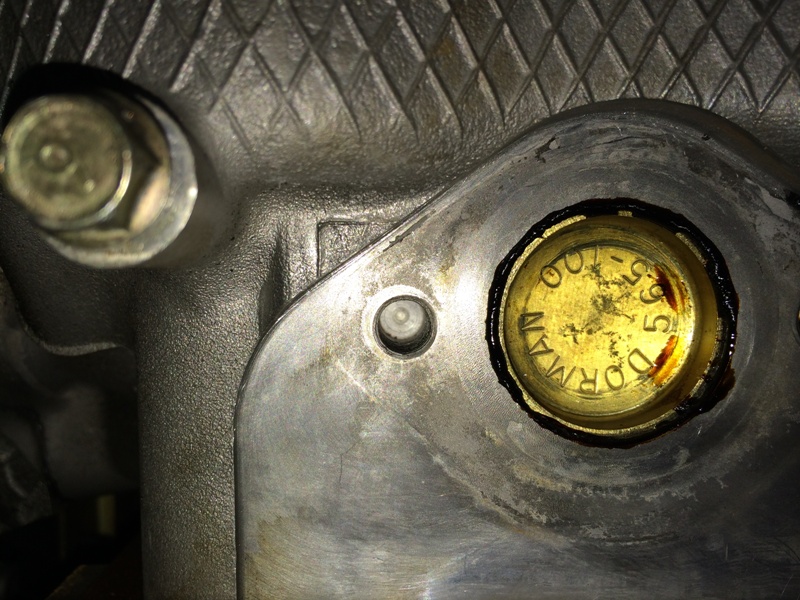
Waterneck block-off courtesy of TrackSpeed. Freeze plug drove in easily with a 19mm deep socket and a bit of old-school Indian Head shellac. Note that the bolt holes for the waterneck are blind. You need to take that into account when re-using the OEM waterneck bolts so you don't bottom them out. Three flat washers per side shimmed them up nicely for me.
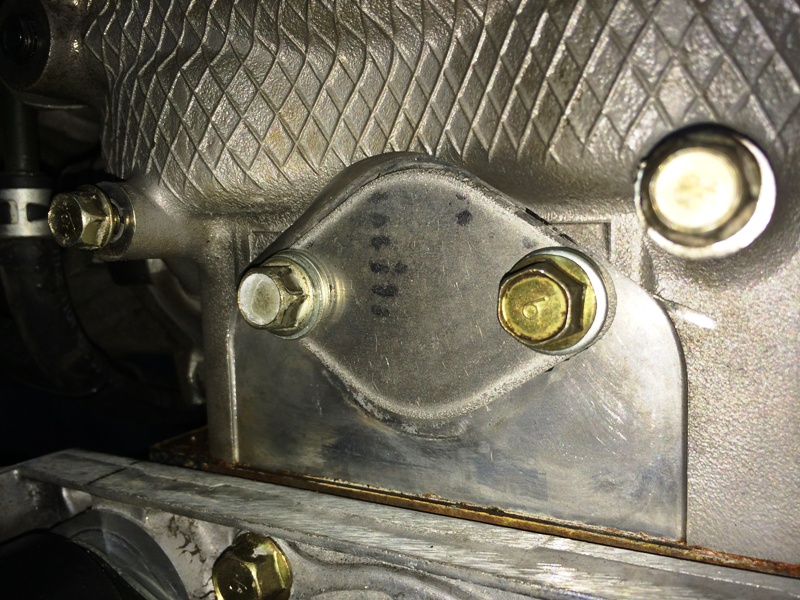
Pulled the little L nipple from the waterpump inlet pipe. I'll be tapping this and putting in a brass plug. No more little coolant hoses.
Pulled the OEM BP4W intake cam and installed the new BP05 cam. Checked valve clearances. I need to swap a couple of shims and buy one new shim. Got off pretty easy on that one.
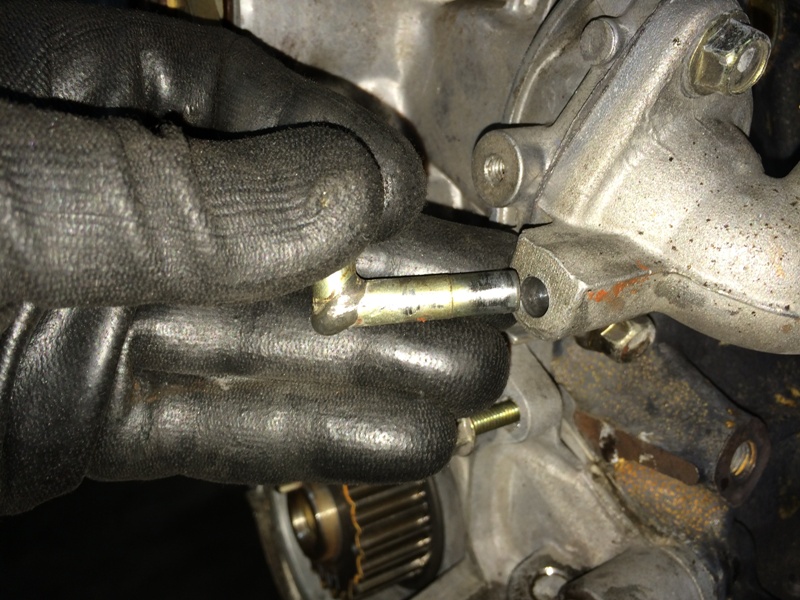
Question for you guys . . . in my quest to delete little coolant hoses, I'm removing the water-oil heat exchanger hoses (the car will get an air-cooled heat exchanger for the oil). Before I mess with this nipple on the back of the head, does anyone know how it attaches? Is it pressed or threaded in?
All in all, good progress this weekend. I'll take engine work over body work any day.
Who does this to a perfectly good CAS?!? Why?!? Used CAS on order.
Inspected the rear main seal. No issues here, it was dry:
Pulled the plugs. They look good.
Pulled the valve cover. It looks like someone didn't get the memo on where to apply RTV. It was slathered all over the front and rear edges, not just in the external cam cap corners. Despite all the excess RTV on the cam cover, I discovered that there was no RTV at all under the external cam caps. And the bolts holding the rear cam cap for the CAS weren't tightened! I undid them with my fingers. Mystery solved, that's the oil leak.
Tore down the front of the engine to put in the waterneck block-off. Other than a missing oil pump bolt (circled), everything looked good up here.
Adios waterneck and stupid, little coolant hoses:
Waterneck block-off courtesy of TrackSpeed. Freeze plug drove in easily with a 19mm deep socket and a bit of old-school Indian Head shellac. Note that the bolt holes for the waterneck are blind. You need to take that into account when re-using the OEM waterneck bolts so you don't bottom them out. Three flat washers per side shimmed them up nicely for me.
Pulled the little L nipple from the waterpump inlet pipe. I'll be tapping this and putting in a brass plug. No more little coolant hoses.
Pulled the OEM BP4W intake cam and installed the new BP05 cam. Checked valve clearances. I need to swap a couple of shims and buy one new shim. Got off pretty easy on that one.
Question for you guys . . . in my quest to delete little coolant hoses, I'm removing the water-oil heat exchanger hoses (the car will get an air-cooled heat exchanger for the oil). Before I mess with this nipple on the back of the head, does anyone know how it attaches? Is it pressed or threaded in?
All in all, good progress this weekend. I'll take engine work over body work any day.
Reply
0
0
 03-16-2014, 11:05 PM
#49
Elite Member
Thread Starter
iTrader: (4)
Join Date: Mar 2008
Location: Granbury, TX
Posts: 6,301
Total Cats: 696
Yeah, RTV everywhere except where it's actually needed.
Opinions on carpet . . . pull . . . keep? I'm putting in some tunnel mat so not too concerned about exhaust heat.
Opinions on carpet . . . pull . . . keep? I'm putting in some tunnel mat so not too concerned about exhaust heat.
Reply
0
0
03-16-2014, 11:12 PM
#50
Elite Member
Thread Starter
iTrader: (4)
Join Date: Mar 2008
Location: Granbury, TX
Posts: 6,301
Total Cats: 696
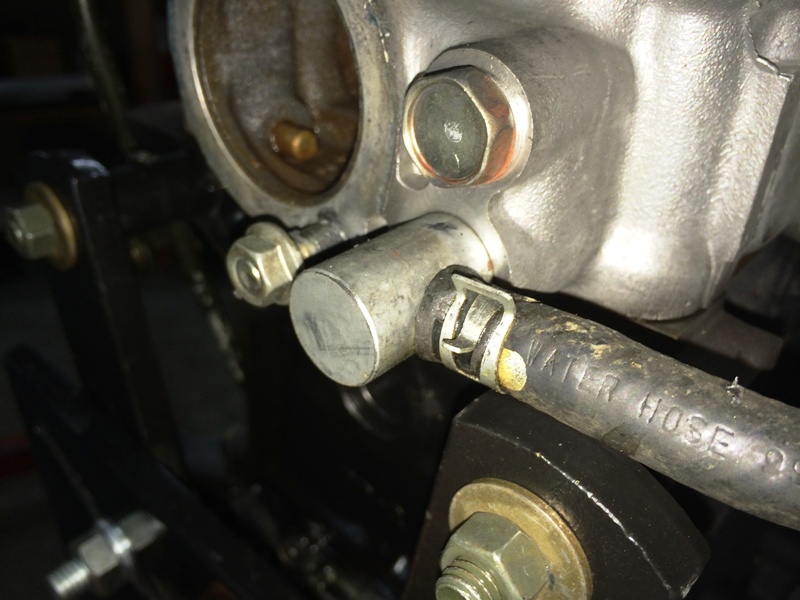
Found the answer on the nipple . . . https://www.miataturbo.net/engine-pe...le-head-73402/.
Bottom line, don't mess with it. Planning to just plug it with JB Weld, put a 1.6 "cursed water plug" over it and move on. If I ever decide to use it again the JB Weld will be easy to drill out.
Bottom line, don't mess with it. Planning to just plug it with JB Weld, put a 1.6 "cursed water plug" over it and move on. If I ever decide to use it again the JB Weld will be easy to drill out.
Reply
0
0
03-17-2014, 12:06 AM
#51
Elite Member

Join Date: Oct 2013
Location: Cedar City, UT
Posts: 2,764
Total Cats: 951
The answer always is the nipple...at first.
Also, I don't know how hard it would be to do but I have the old 1.6 engine sitting in the corner of my garage if you want the head off it.
If you have a pressure washer it makes it a cinch to clean the carpet and then stain it black again. Thing about going carpetless(not sure if this car is a track car, can't remember) is the massive amount of work it takes to remove the exposed paint/metal/rust/sound proofing and make it look good.
Reply
0
0
03-17-2014, 12:33 AM
#52
Elite Member
Thread Starter
iTrader: (4)
Join Date: Mar 2008
Location: Granbury, TX
Posts: 6,301
Total Cats: 696
It is a track car -- HPDE and maybe time trials (not W2W). I do have a pressure washer. The OEM carpeting is actually pretty light. An experienced guy I know who did strip the carpeting says he wishes he hadn't -- more because of insulation/heat resistant properties than anything else. OTOH, the carpet is flammable.
If I did delete the carpeting, I would basically just clean things up and brush paint the interior a light color for heat. Because racecar (I love saying that)!
If I did delete the carpeting, I would basically just clean things up and brush paint the interior a light color for heat. Because racecar (I love saying that)!
Reply
0
0
03-17-2014, 12:38 AM
#53
Elite Member
Join Date: Oct 2013
Location: Cedar City, UT
Posts: 2,764
Total Cats: 951
Tear the padding off the back of it, pressure wash it, and throw it in then. Far less work then even basic painting.
I laid my carpet in the drive way, soaked it in water, add a ton of soap and degreaser, and let it bake/soak for several hours. Then literally everything came out. I didn't even really need to stain it it looked so good. Yet, we both know that isn't enough for me...
It may be flammable but if there is a fire, it probably won't start in the interior, and I'm sure that will be the least of your worries(engine bay/running in terror).
Reply
0
0
03-17-2014, 11:00 AM
#57
Elite Member
Thread Starter
iTrader: (4)
Join Date: Mar 2008
Location: Granbury, TX
Posts: 6,301
Total Cats: 696
I've got some of that good DEI stuff coming. Plus, my header is ceramic coated. Between those two, heat control should be in good shape.
I need to pull the carpet to fab up my seat mounts anyway (welding + carpet = fire). I think I'll just leave it out and see how it goes. I can alway put it back in.
LOL.

Believe me, the pictures make it look much better than it is.
Reply
0
0


