Hornetball's Build
 08-19-2015, 01:21 PM
#201
Elite Member
Thread Starter
iTrader: (4)

Join Date: Mar 2008
Location: Granbury, TX
Posts: 6,301
Total Cats: 696
Dunno' about procuring rides. All the flying I do now is work-related -- always in experimental-category aircraft doing instrumentation evaluations with lots of oversight from those paying the bills.
But -- you guys are both young enough to get your own rides. I know what I'd be doing if I were your age.
But -- you guys are both young enough to get your own rides. I know what I'd be doing if I were your age.

Reply
 0
0

0
 08-19-2015, 01:26 PM
#203
Elite Member
Thread Starter
iTrader: (4)
Join Date: Mar 2008
Location: Granbury, TX
Posts: 6,301
Total Cats: 696
Not as sexy as it sounds. It just means limited crew and predefined/scripted flight profiles to test specific engineering points.
With the occasional low-level through the Alps thrown in . . .
With the occasional low-level through the Alps thrown in . . .
Reply
0
0
08-19-2015, 01:28 PM
#204
SadFab CEO

iTrader: (3)
Join Date: Sep 2012
Location: your mom's house phoenix, AZ
Posts: 4,560
Total Cats: 1,142
Quick thought. When you do the A-B test for intake plumbing, could you also do a C test that uses a straight piece right out the front of the car. That will test how much the bends play a role.
I have about 3 hours in a Cessna. I was told I was really good for a beginner (flight sims since i was 5, and RC airplane help). So can I experimental now?
I have about 3 hours in a Cessna. I was told I was really good for a beginner (flight sims since i was 5, and RC airplane help). So can I experimental now?
Reply
0
0
 08-19-2015, 02:13 PM
#207
Elite Member
Thread Starter
iTrader: (4)
Join Date: Mar 2008
Location: Granbury, TX
Posts: 6,301
Total Cats: 696
FCFs got pretty old -- except for when they turned exciting!
Reply
0
0
08-20-2015, 09:38 PM
#209
Quick thought. When you do the A-B test for intake plumbing, could you also do a C test that uses a straight piece right out the front of the car. That will test how much the bends play a role.
I have about 3 hours in a Cessna. I was told I was really good for a beginner (flight sims since i was 5, and RC airplane help). So can I experimental now?
I have about 3 hours in a Cessna. I was told I was really good for a beginner (flight sims since i was 5, and RC airplane help). So can I experimental now?
A: air filter on turbo inlet, car fully warmed up, hood shut.
B: your cold air intake, hood shut
C: open hood and do the straight pipe as you mentioned (same as cold air intake, but no bends)
Nice work BTW. I looked at my NB and just can't find as easy of a way to route my hotside pipe as you did. I ended up poking a hole just behind the head light, but your setup is very nice. Good work.
Reply
0
0
08-21-2015, 09:10 AM
#210
Have you pressure tested any joints formed with the HTS rod? I know it's not critical with the IC pipes. But I used alumiweld (HF) on several AC tubes and there was excessive porosity. I sprayed the joint with soapy water and had bubbles coming from the entire joint were there were no discernible pin holes. I moved to some HVAC-specific aluminum brazing alloy and had 100% success on pressure checked joints from the start.
Reply
0
0
08-21-2015, 10:12 AM
#211
Elite Member
Thread Starter
iTrader: (4)
Join Date: Mar 2008
Location: Granbury, TX
Posts: 6,301
Total Cats: 696
Yes. If you do the a/b/c testing, I would basically do this with the car fully warmed up
A: air filter on turbo inlet, car fully warmed up, hood shut.
B: your cold air intake, hood shut
C: open hood and do the straight pipe as you mentioned (same as cold air intake, but no bends)
Nice work BTW. I looked at my NB and just can't find as easy of a way to route my hotside pipe as you did. I ended up poking a hole just behind the head light, but your setup is very nice. Good work.
If I had an NB, I would have done the hole behind the headlight thing both hotside and coldside I think. I love symmetry.
Have you pressure tested any joints formed with the HTS rod? I know it's not critical with the IC pipes. But I used alumiweld (HF) on several AC tubes and there was excessive porosity. I sprayed the joint with soapy water and had bubbles coming from the entire joint were there were no discernible pin holes. I moved to some HVAC-specific aluminum brazing alloy and had 100% success on pressure checked joints from the start.
Reply
0
0
08-21-2015, 10:33 AM
#213
Elite Member
Thread Starter
iTrader: (4)
Join Date: Mar 2008
Location: Granbury, TX
Posts: 6,301
Total Cats: 696
Ah, damn the timing. I was just up your way (Astoria) doing some GPS approach testing back in February. Those flights were actually pretty exciting because of the weather even though I was in a Beech Baron. Big winds -- like 70 knot crosswinds on the final approach segment. Crazy.
Reply
0
0
08-27-2015, 10:53 PM
#215
Junior Member

Join Date: May 2005
Location: Tampa, FL
Posts: 150
Total Cats: -6
I was excitedly reading through this entire thread over the last day, basically just performing a search on coolant reroutes. A few things piqued my interest:
[1] I am currently going through my second GReddy build and there is a lot of great information in your thread
[2] I really enjoyed your custom fab work
[3] Your nickname...I'm familiar with the term 'HornetBall'. I'm the son of a USAF combat pilot and my son is a Navy midshipmen with a goal of becoming a naval aviator - preferably in an F-18.
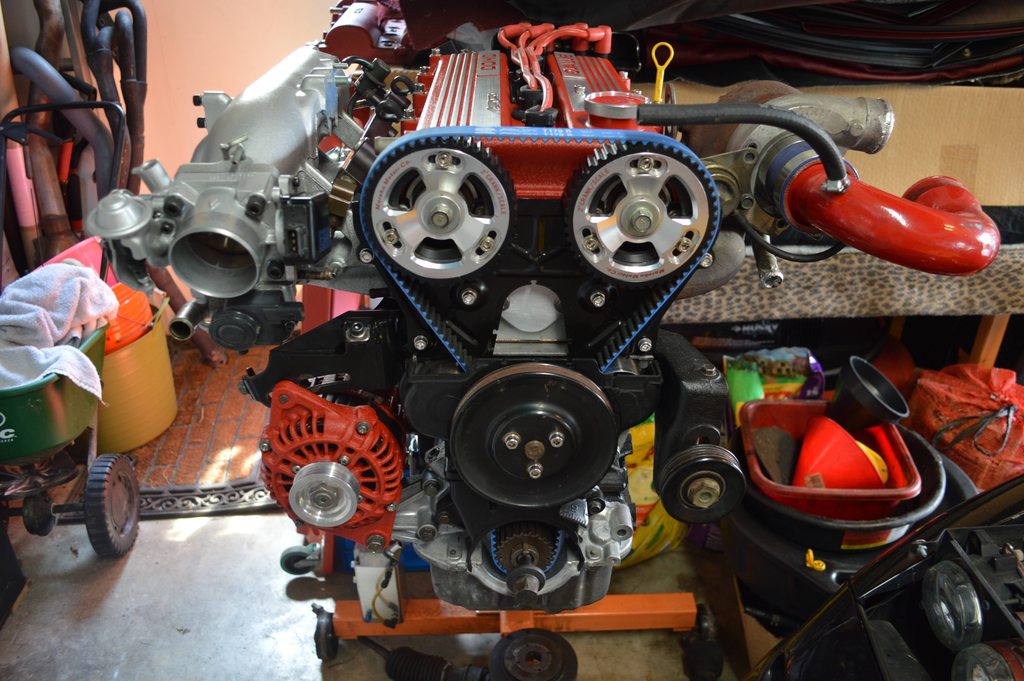
I had a motor built last year. It's been decked, slightly bored with Wiseco pistons, Eagle rods, race bearings and ARP studs. To that I've added a 1.6L Protege cam cover (custom powdercoated) and Maruha cam gears. I have gone to socket cap fasteners for the exposed front and topside bolts, but there are still some I have to replace, such as the cam gear bolts.
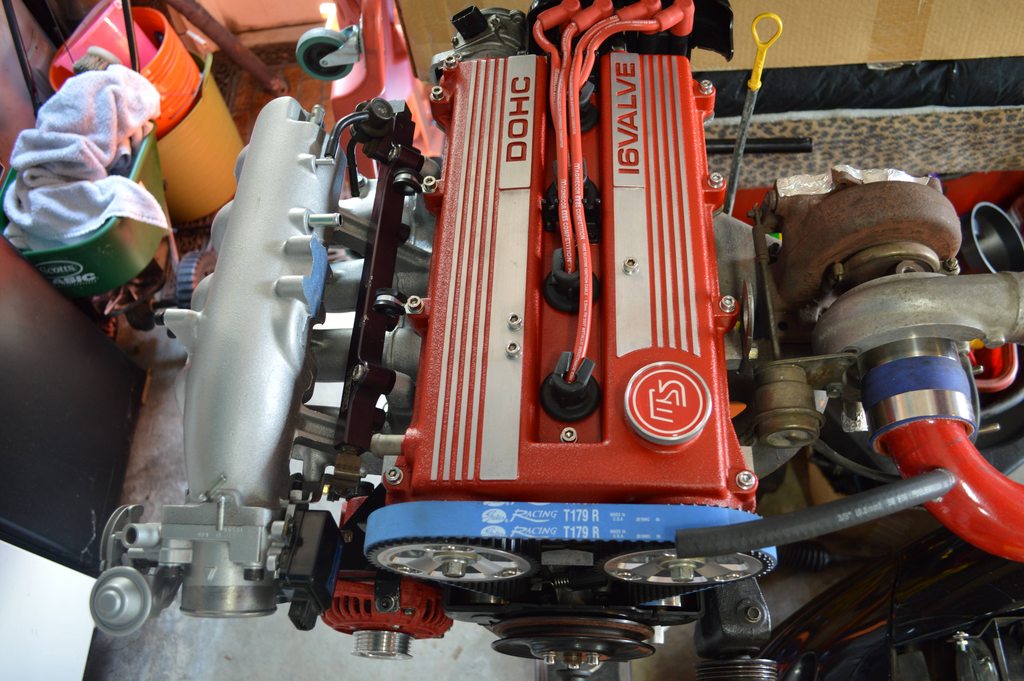
I've installed the Speedstar coolant reroute kit and plugged & capped the front water neck outlet. I'm also removing the air valve on the intake manifold and will cap it with a custom cover.
I'm adding a SuperMiata harmonic damper which requires going to the NA 1.8L water pump and alternator pulley. I contacted GarageStar, but they are currently out of stock of silver billet water pump pulleys. They were, however, able to provide an alternator pulley.
[1] I am currently going through my second GReddy build and there is a lot of great information in your thread
[2] I really enjoyed your custom fab work
[3] Your nickname...I'm familiar with the term 'HornetBall'. I'm the son of a USAF combat pilot and my son is a Navy midshipmen with a goal of becoming a naval aviator - preferably in an F-18.
I had a motor built last year. It's been decked, slightly bored with Wiseco pistons, Eagle rods, race bearings and ARP studs. To that I've added a 1.6L Protege cam cover (custom powdercoated) and Maruha cam gears. I have gone to socket cap fasteners for the exposed front and topside bolts, but there are still some I have to replace, such as the cam gear bolts.
I've installed the Speedstar coolant reroute kit and plugged & capped the front water neck outlet. I'm also removing the air valve on the intake manifold and will cap it with a custom cover.
I'm adding a SuperMiata harmonic damper which requires going to the NA 1.8L water pump and alternator pulley. I contacted GarageStar, but they are currently out of stock of silver billet water pump pulleys. They were, however, able to provide an alternator pulley.
Reply
0
0
08-27-2015, 10:57 PM
#216
Junior Member
Join Date: May 2005
Location: Tampa, FL
Posts: 150
Total Cats: -6
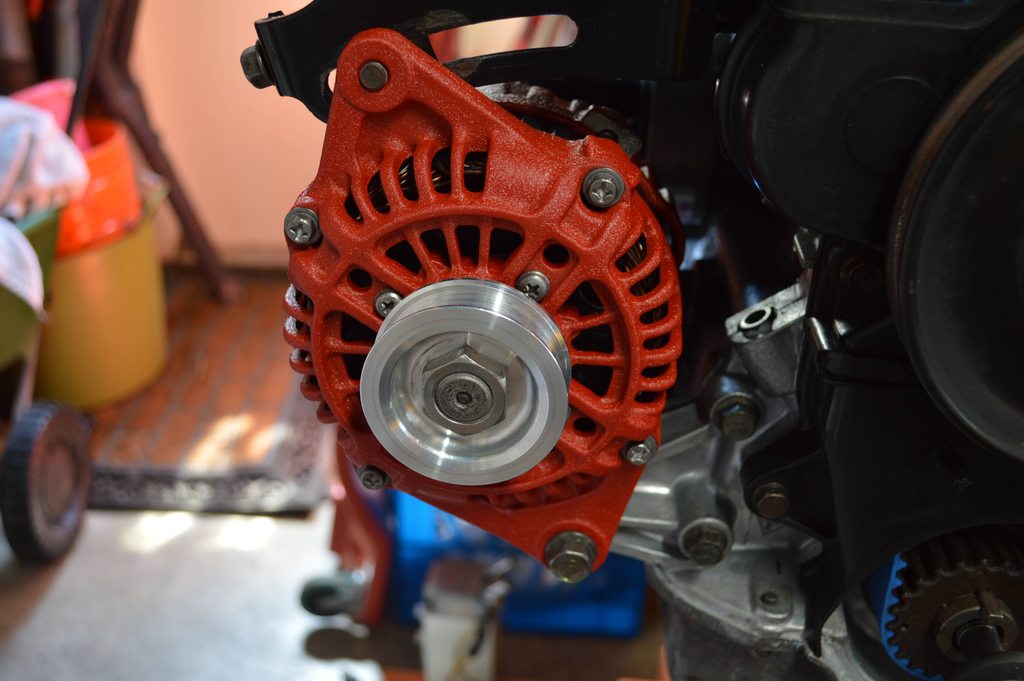
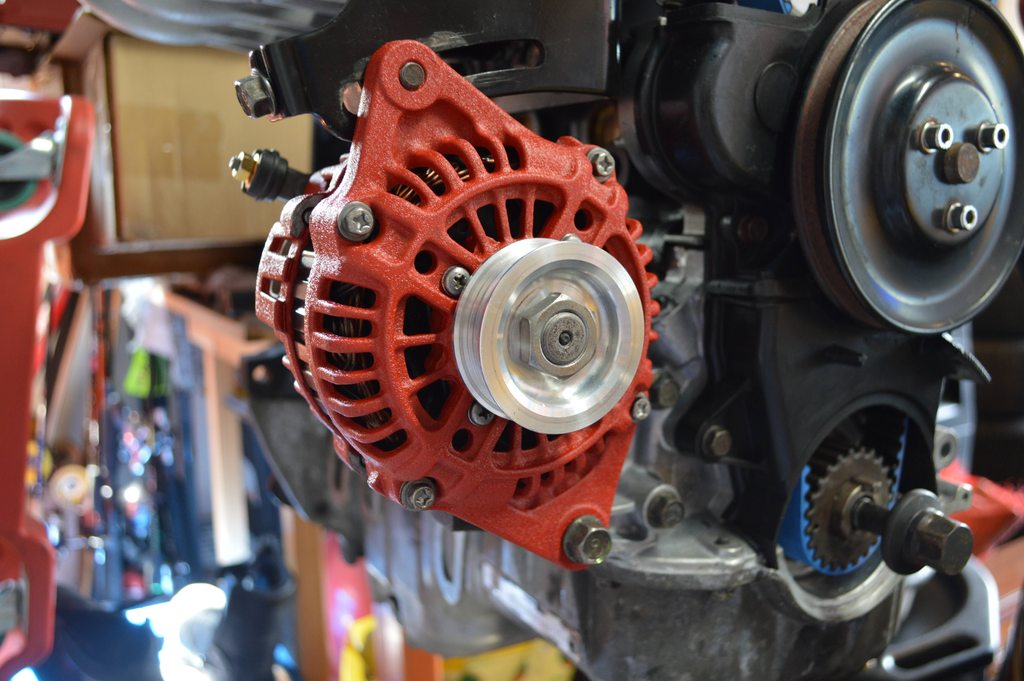
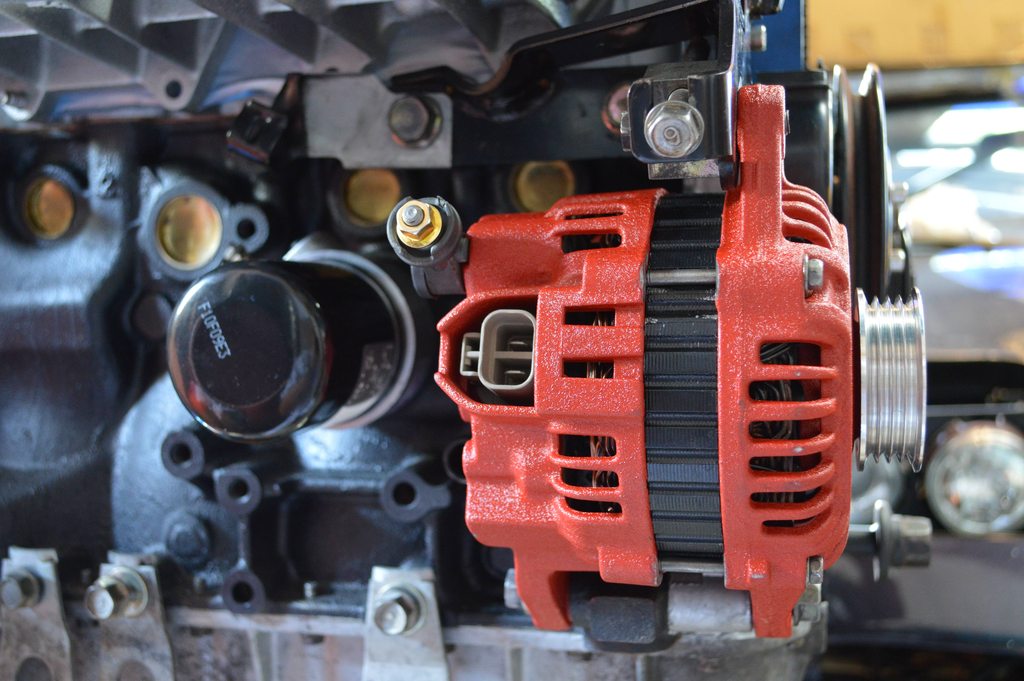
I hated the appearance of the alternator - looked like it had been submerged in salt water for years - so, I took it to a local alternator/starter shop and had them disassemble it. I took the end caps to my powdercoater and he put the same red crinkle on them as he had done to the valve cover. Once done, I took the caps and the new pulley back to the alternator/starter shop for reassembly. A few hours later they called me to say that it would be a shame to reassemble it because the exposed internals and bolts were pretty shitty looking and that they could easily media blast everything and repaint the coil assembly. I'd have to say they did a great job!
Reply
0
0
08-27-2015, 10:58 PM
#217
Junior Member
Join Date: May 2005
Location: Tampa, FL
Posts: 150
Total Cats: -6
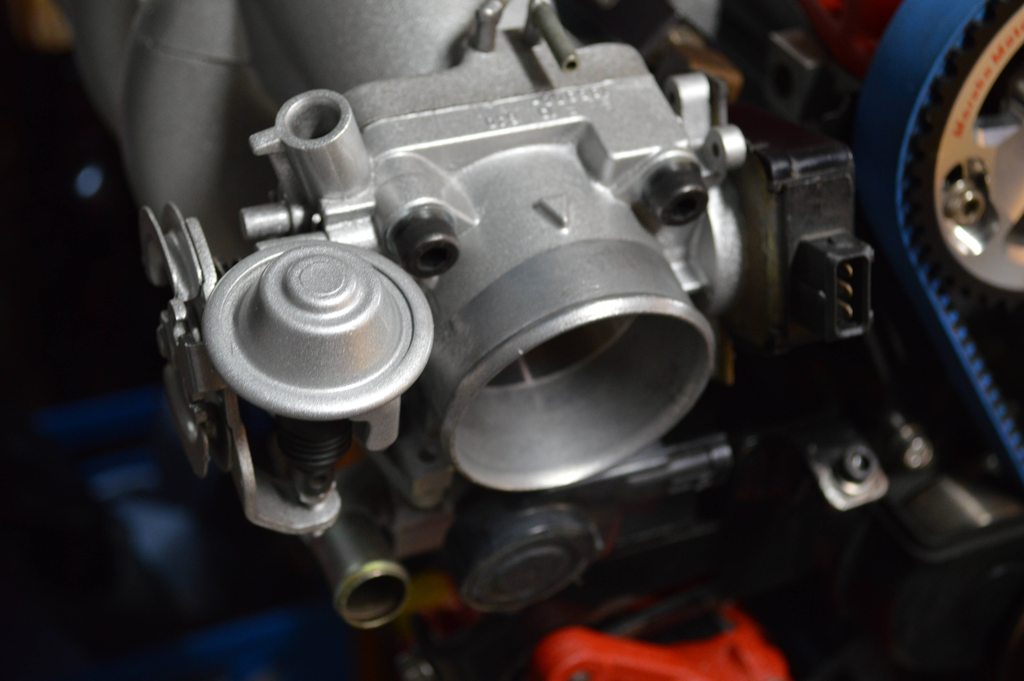
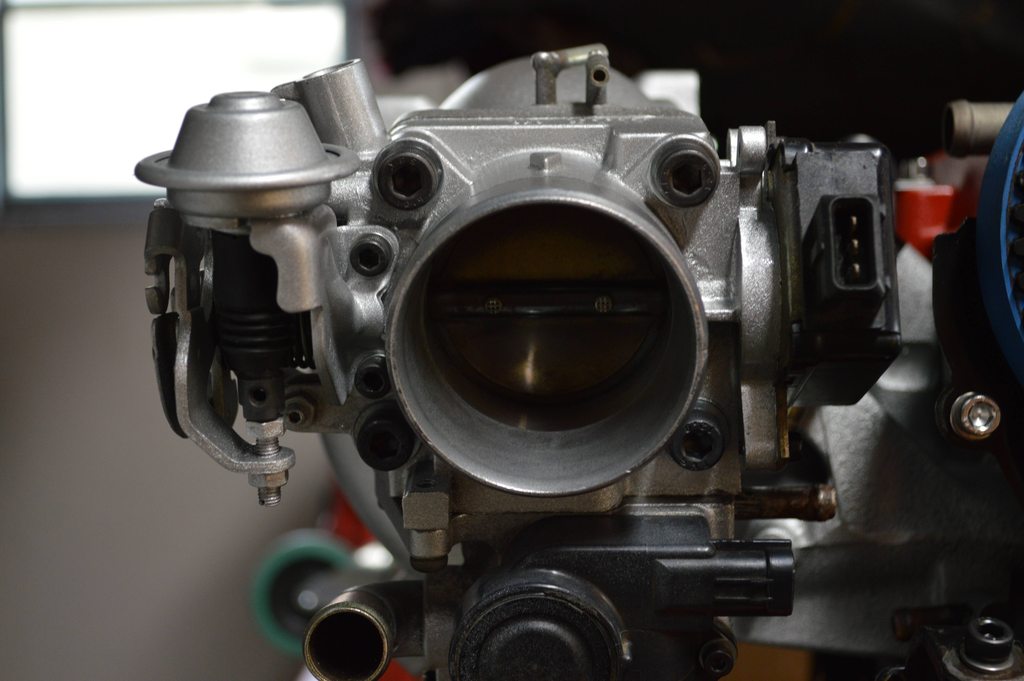
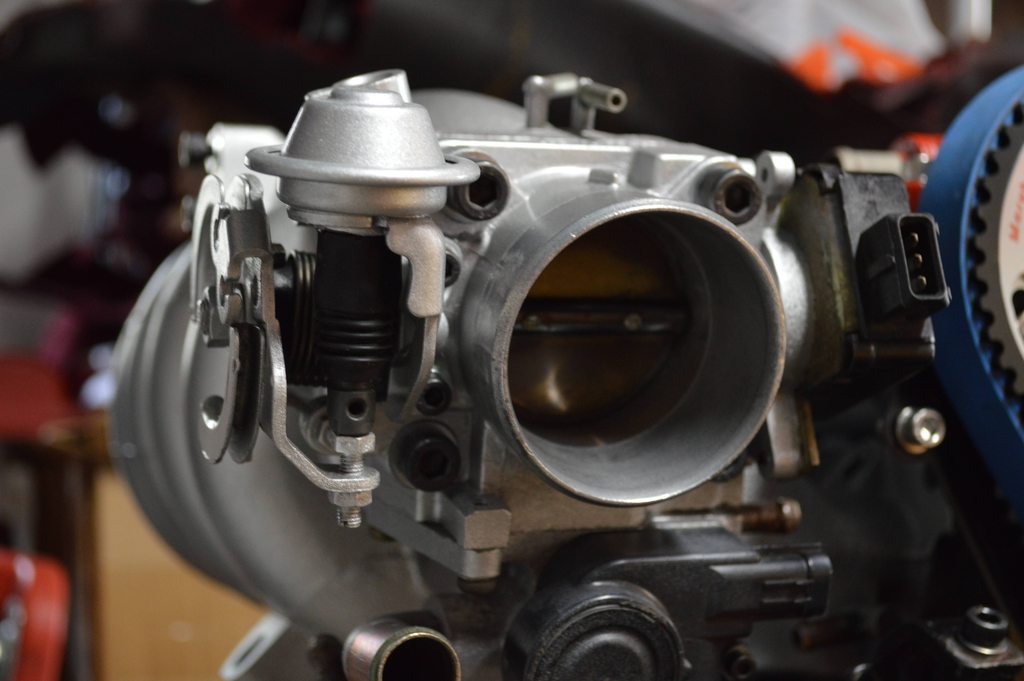
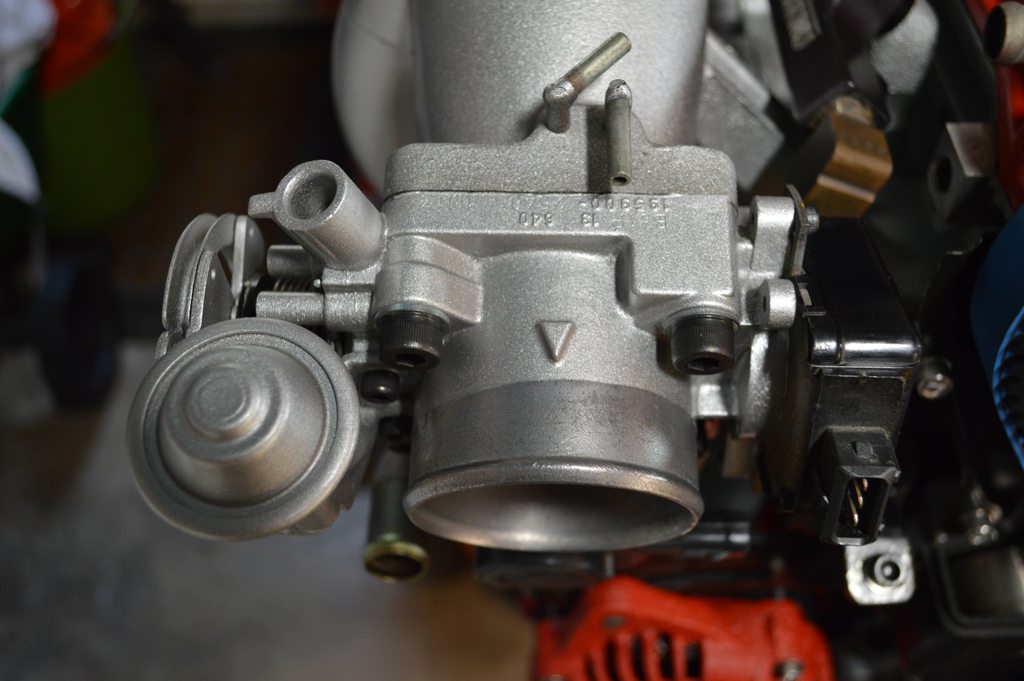
I thoroughly cleaned, painted and clear coated the intake manifold and when I got around to putting on the throttlebody, it looked nearly as bad as the alternator - gray, pittted and just plain ugly. So, I took an afternoon and disassembled the TB and it's components and took a wire brush and steel wool to it. After a good cleaning, I masked off the individual components and the mating surfaces before painting and clear coating them. Once dry, I reassembled everything and replaced the stock bolts with socket cap fasteners.
I won't threadjack you any longer, but I wanted to share what I was doing.
I won't threadjack you any longer, but I wanted to share what I was doing.
Reply
0
0
08-27-2015, 11:02 PM
#218
Elite Member
Thread Starter
iTrader: (4)
Join Date: Mar 2008
Location: Granbury, TX
Posts: 6,301
Total Cats: 696
It seems like these days, as long as you can make it into the strike pipeline you're going to be flying Hornets. Maybe the F-35 in a few more years. It's weird thinking of a Hornet being used as a tanker. LOL.
Back in my day, there were all kinds of different types in the air wing, Tomcats, Hornets, Intruders, Vikings. A7s, F4s and even A3Ds (all 3 dead) were still around!
Good luck to your son. I'm heading back to my 30th reunion (Annapolis '85) in about a month. Looking forward to it.
You need a link to your build thread in your sig.
Reply
0
0
08-31-2015, 03:17 PM
#220
Elite Member
Thread Starter
iTrader: (4)
Join Date: Mar 2008
Location: Granbury, TX
Posts: 6,301
Total Cats: 696
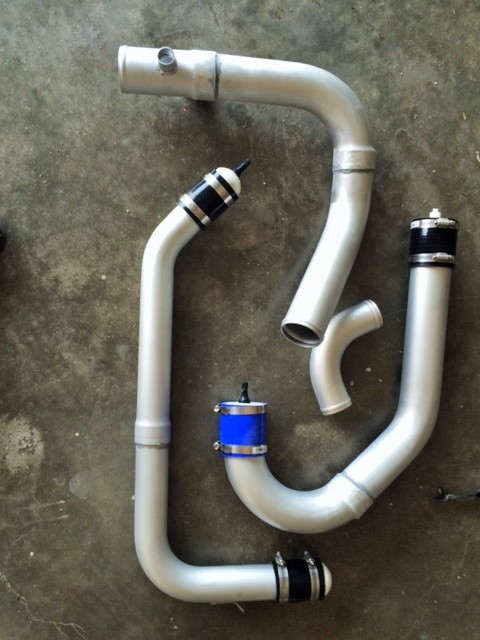
Finished intercooler pipes. You can see my pressure testing jigs on them. The 2" piping was airtight. The 2.5" piping had some porosity/leaks that I sealed with JB Weld. You really need to apply a lot of heat for leak-free brazing.
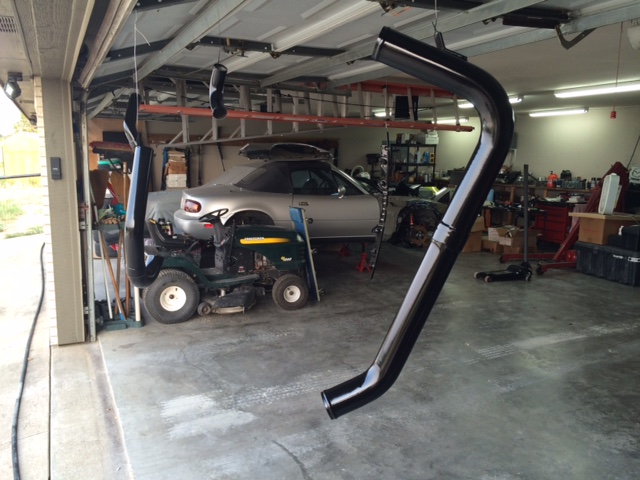
Painted up in gloss black:
Yesterday, I put everything together on the front of the car. IC pipes in place, fenders and front bumper cover mounted up. Didn't take pictures, but looks OEM.
Painted up in gloss black:
Yesterday, I put everything together on the front of the car. IC pipes in place, fenders and front bumper cover mounted up. Didn't take pictures, but looks OEM.
Reply
0
0


