Mazdaspeed-ing your NB
 01-05-2012, 01:27 PM
#1
Junior Member
Thread Starter

Join Date: Oct 2010
Location: Turin (Italy)
Posts: 91
Total Cats: -1
Finally it's time to post some pictures of the first turbo project I'm following as full technical support!
The car belongs to a friend of mine (Pit). He works in a garage, so he has great skills in mechanics.
I'm helping, learning, giving back some technical tips.
His idea is to build a daily driving Miata starting from his stock 1.8L NB. As in Italy we are not allowed to tune our engines, the aim of this build is to keep as much as possible the OEM-like look.
The car, as we said, will continue circulating on streets but will be more and more track-oriented. Target is ~200 hp
Actually the setup is the following:
Chassis:
- Rollbar GP by TRLane Fabs
- Underbody frame, custom made -- too heavy! It will be replaced soon by a lighter one
Suspension:
FM Stage II suspension
Tyres:
Toyo R1-R 225/45 R15 for the moment on nothing (6UL will come soon)
Let's build!!!
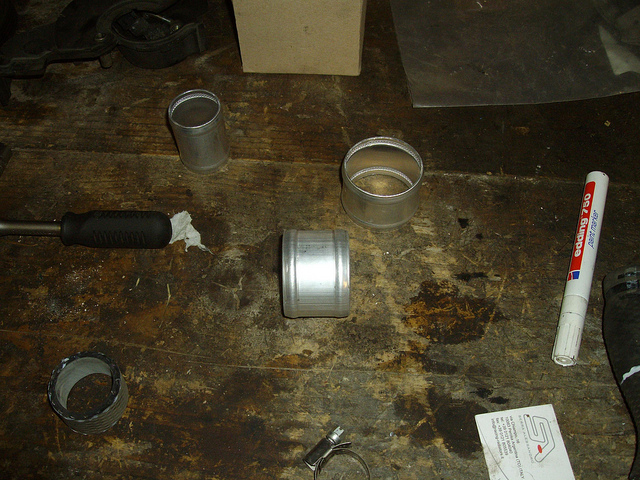
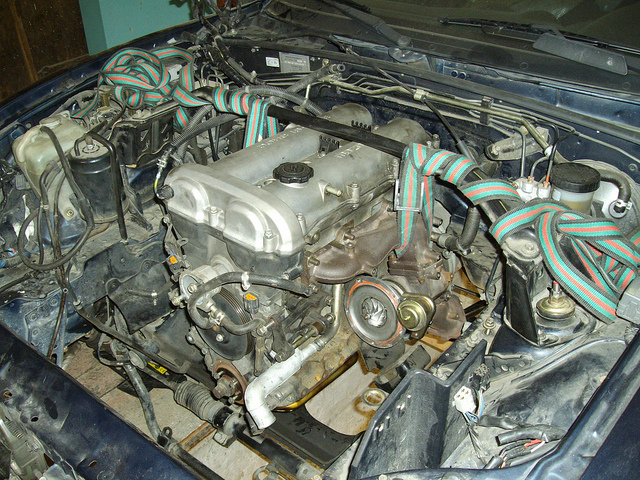
So the first step was to buy Mazdaspeed used components, carters, etc

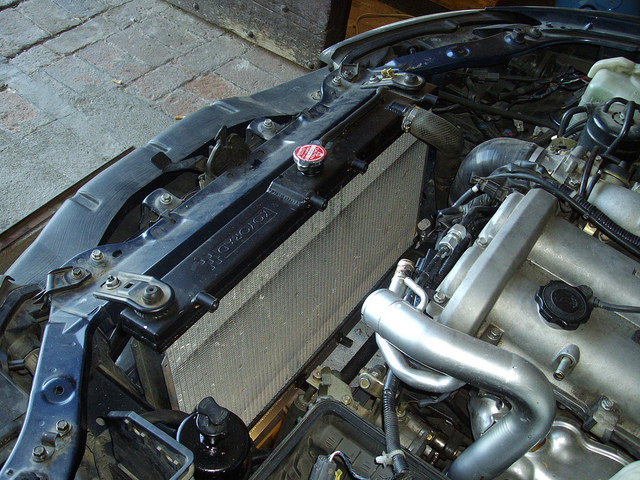
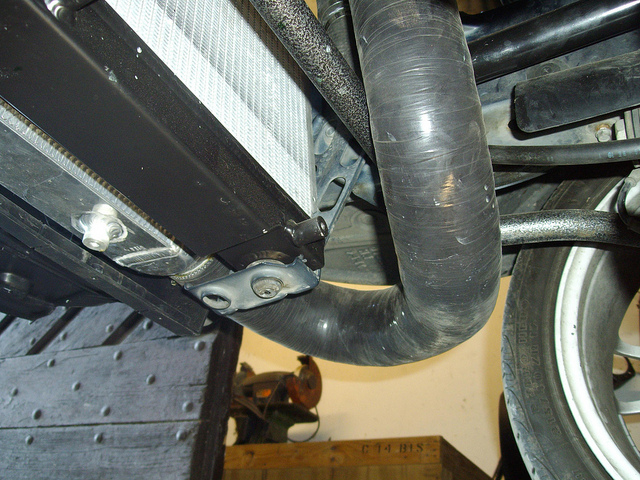
Then, everything starts with DIY reroute, with aluminum re-welded components, by http://www.racing-radiators.it/ (professional radiator maker located in our city (Turin)):
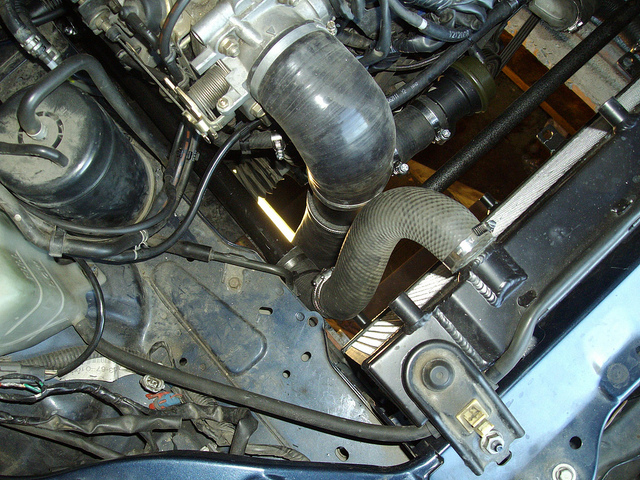
And finally what will go on the front area (with derivation for turbo cooling)
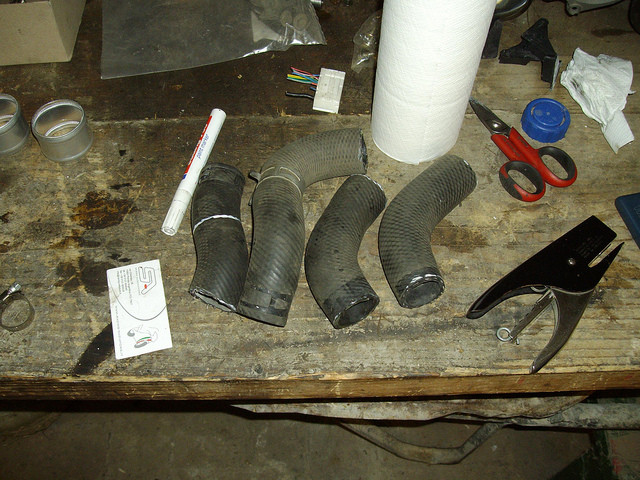
It's time for creating the piping!
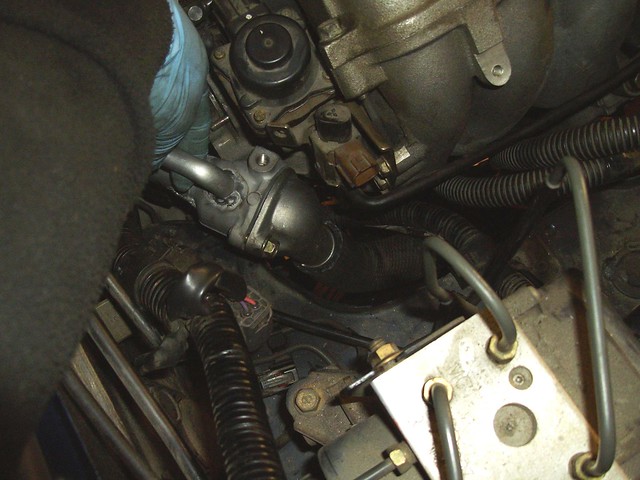
OEM outlet completely closed
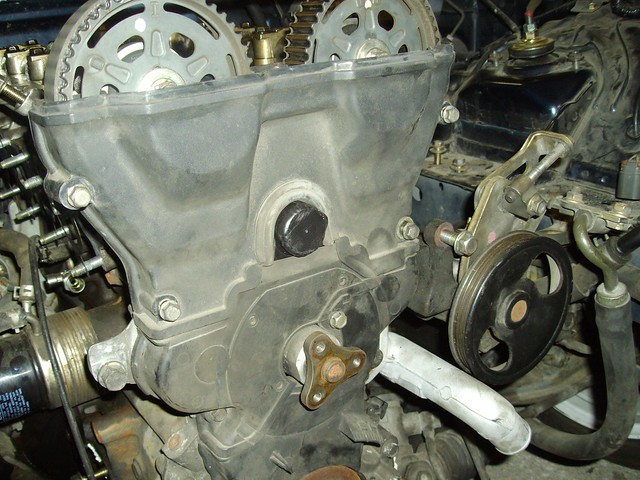
New thermostat location
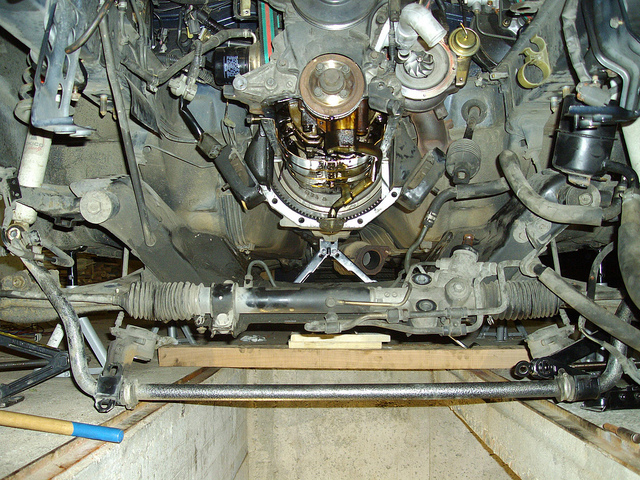
Let's go on with the REAL work:
Oil pan disassembling.... notice the home-made engine lifter
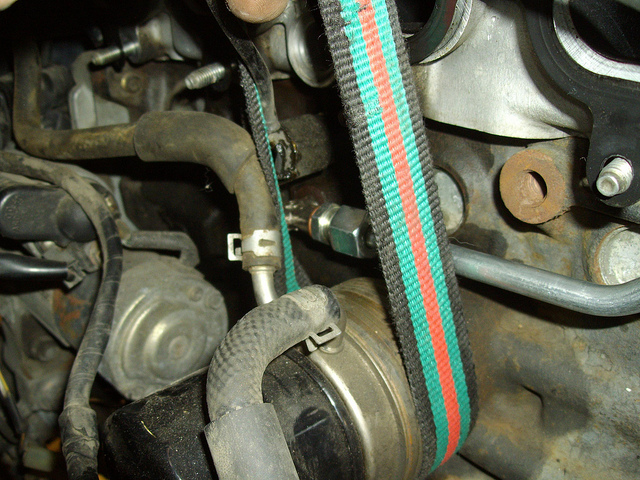
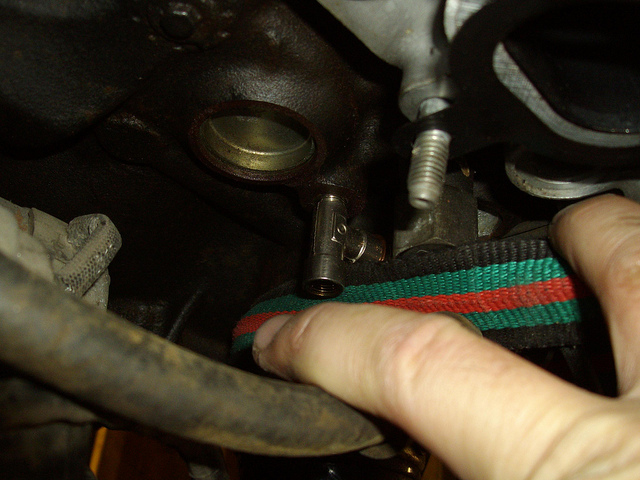
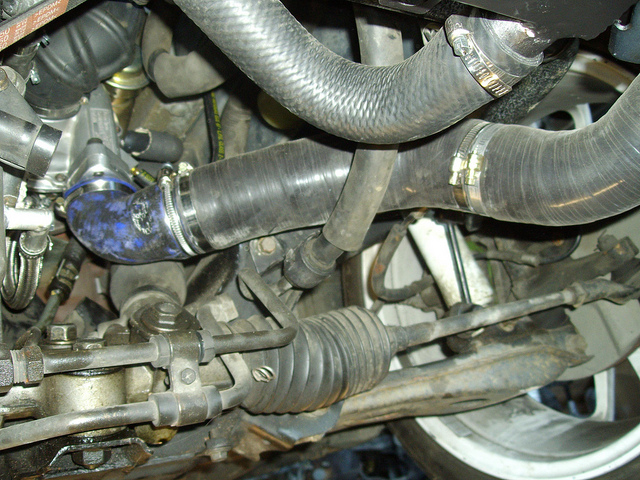
Again it has been decided not to follow what Mazda did for the oil lines:
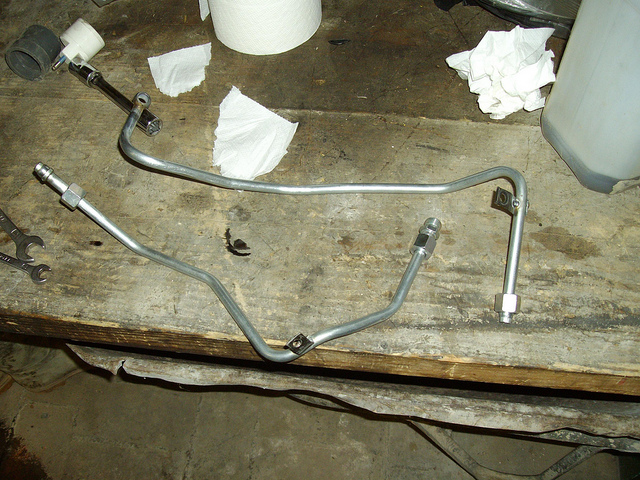
Custom bended hard lines has been made by Pit (the owner of the car) using:
- 10mm - 1.5 meters hard-line pipe tube (standard hydraulic component)
- Standard 1/4 plug for 10 mm pipe (standard hydraulic component)
- T 1/8 female - 1/8 female - 1/8 male conical (standard compressed air compoent)
- 1/8 plug - round junction 10mm (not so common, but availlable on order)
- junction 10mm - junction 10mm
- copper spacer int. diameter = 10mm
These lines are following entirely the engine block!


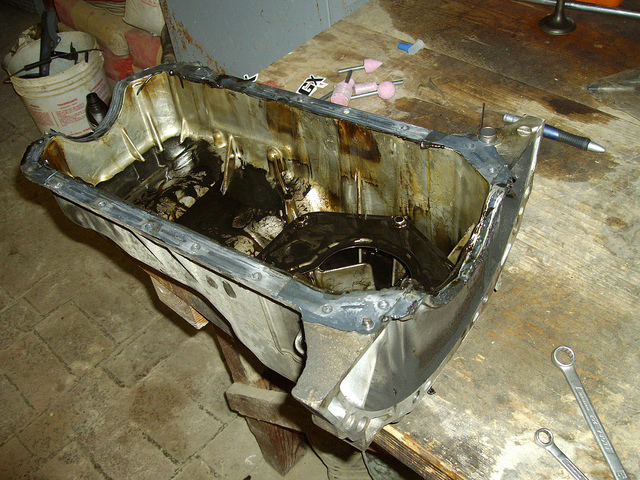
It's time to re-assemble the oil pan:

He used white VW gasket silicon, that he experienced to be much better than the Mazda one (but the cost is more or less double....)
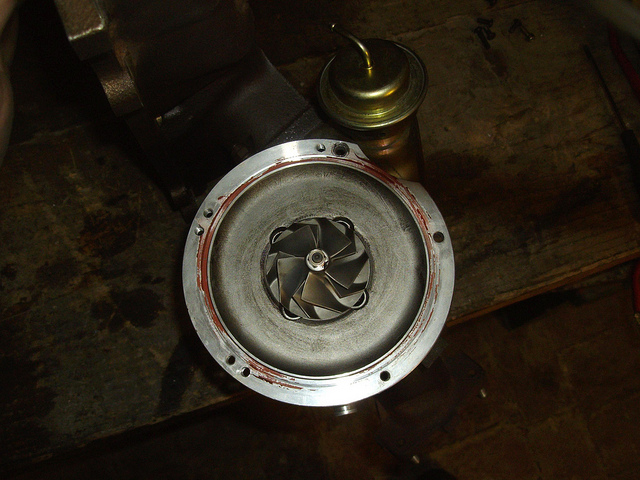
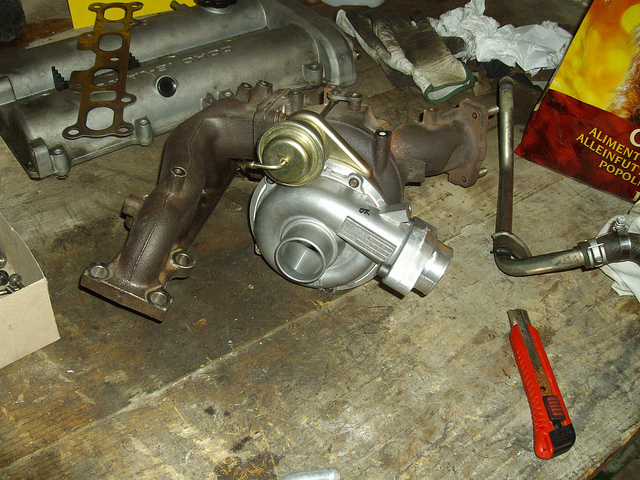
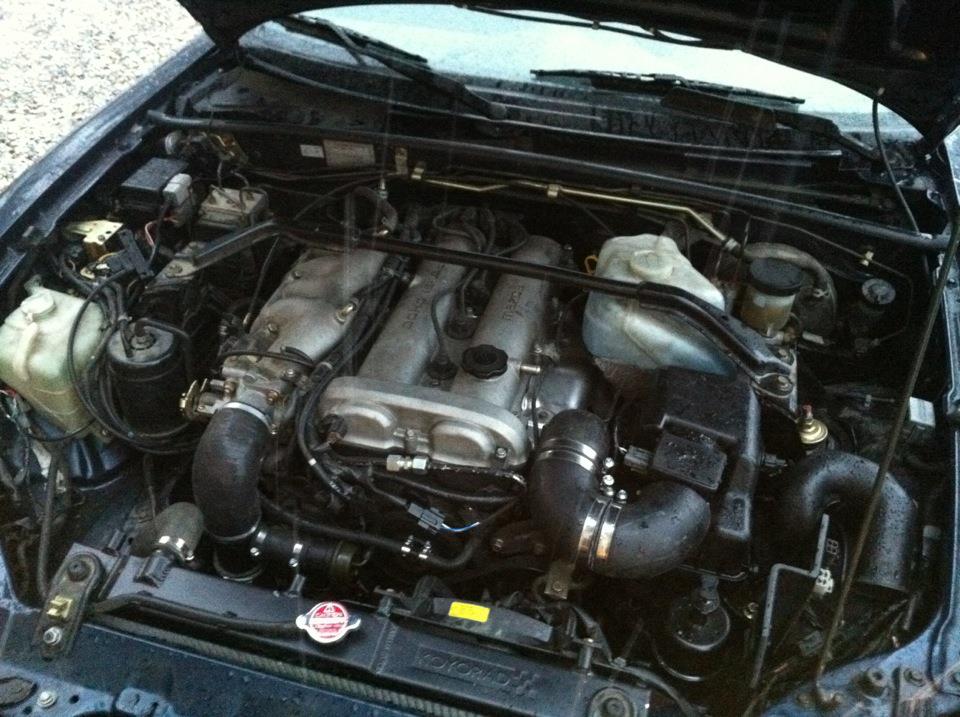
The oil feed on turbo side is brand new, CNC made from a block of steel:
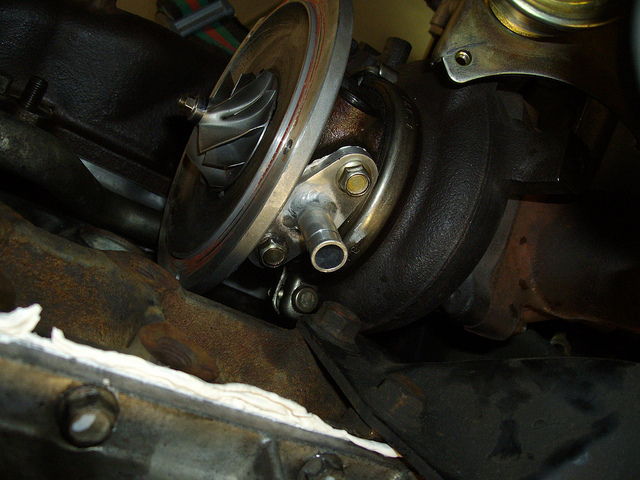
(the one in the photo is made of aluminum, but a friend of us strongly suggested to make it in steel... obvious but smart consideration due to high temperatures of the turbocharger unit!)
In the photos above you can see that the cold side of the turbo is not plugged: originally MSM has the outlet going up, passing into a small pipe and going back down to IC.
My friend decided to get rid of this stupid pipe length and to go for the down mounted outlet. Of course the drilling is not coinciding perfectly, but we re-drilled a couple of holes.
Yesterday night he finished assembling the engine and the piping (pictures of IC bracket etc will follow in the next days) while we started working on electronics.
The unit will be a Greddy eManage Blue, maybe with autotune in future.
Wireharness has been prepared by MaD, a friend of us which works in Magneti Marelli for engine ECUs. Great job, very very clean!
We are solving some small software/tuning issues.... but we hope to be able to give back to street and track the car within 2-3 weeks!
Next steps:
- new -lighter- frame rails (dedicated post will come.... it's my personal small project) for replacing the underbody frame
- 6UL
- bigger turbocharger from subaru IHI (this is not scheduled, but I think will come soon anyhow)
Stay tuned!
Full build thread (in Italian)
The car belongs to a friend of mine (Pit). He works in a garage, so he has great skills in mechanics.
I'm helping, learning, giving back some technical tips.
His idea is to build a daily driving Miata starting from his stock 1.8L NB. As in Italy we are not allowed to tune our engines, the aim of this build is to keep as much as possible the OEM-like look.
The car, as we said, will continue circulating on streets but will be more and more track-oriented. Target is ~200 hp
Actually the setup is the following:
Chassis:
- Rollbar GP by TRLane Fabs
- Underbody frame, custom made -- too heavy! It will be replaced soon by a lighter one
Suspension:
FM Stage II suspension
Tyres:
Toyo R1-R 225/45 R15 for the moment on nothing (6UL will come soon)
Let's build!!!
So the first step was to buy Mazdaspeed used components, carters, etc
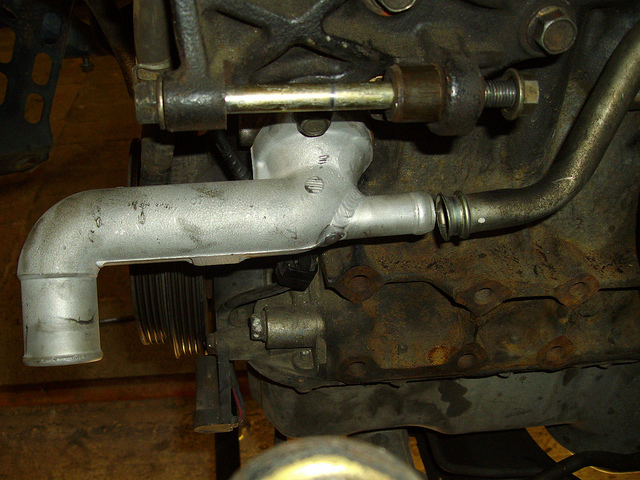
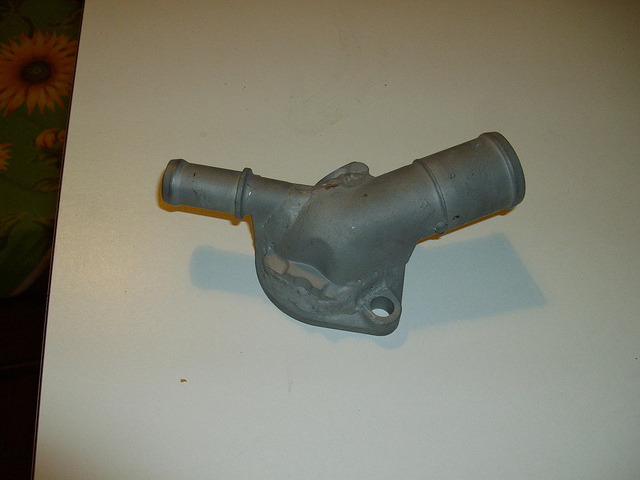
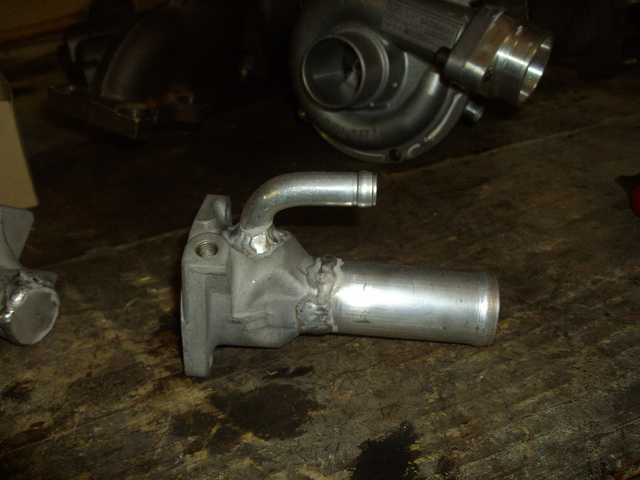
Then, everything starts with DIY reroute, with aluminum re-welded components, by http://www.racing-radiators.it/ (professional radiator maker located in our city (Turin)):
And finally what will go on the front area (with derivation for turbo cooling)
It's time for creating the piping!
OEM outlet completely closed
New thermostat location
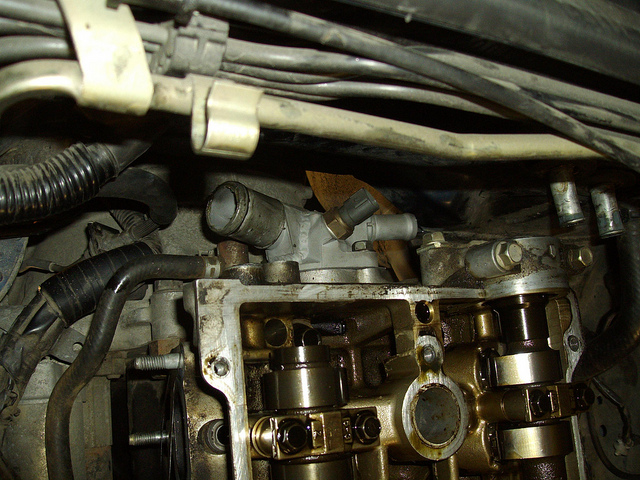
Let's go on with the REAL work:
Oil pan disassembling.... notice the home-made engine lifter
Again it has been decided not to follow what Mazda did for the oil lines:
Custom bended hard lines has been made by Pit (the owner of the car) using:
- 10mm - 1.5 meters hard-line pipe tube (standard hydraulic component)
- Standard 1/4 plug for 10 mm pipe (standard hydraulic component)
- T 1/8 female - 1/8 female - 1/8 male conical (standard compressed air compoent)
- 1/8 plug - round junction 10mm (not so common, but availlable on order)
- junction 10mm - junction 10mm
- copper spacer int. diameter = 10mm
These lines are following entirely the engine block!
It's time to re-assemble the oil pan:
He used white VW gasket silicon, that he experienced to be much better than the Mazda one (but the cost is more or less double....)
The oil feed on turbo side is brand new, CNC made from a block of steel:
(the one in the photo is made of aluminum, but a friend of us strongly suggested to make it in steel... obvious but smart consideration due to high temperatures of the turbocharger unit!)
In the photos above you can see that the cold side of the turbo is not plugged: originally MSM has the outlet going up, passing into a small pipe and going back down to IC.
My friend decided to get rid of this stupid pipe length and to go for the down mounted outlet. Of course the drilling is not coinciding perfectly, but we re-drilled a couple of holes.
Yesterday night he finished assembling the engine and the piping (pictures of IC bracket etc will follow in the next days) while we started working on electronics.
The unit will be a Greddy eManage Blue, maybe with autotune in future.
Wireharness has been prepared by MaD, a friend of us which works in Magneti Marelli for engine ECUs. Great job, very very clean!
We are solving some small software/tuning issues.... but we hope to be able to give back to street and track the car within 2-3 weeks!
Next steps:
- new -lighter- frame rails (dedicated post will come.... it's my personal small project) for replacing the underbody frame
- 6UL
- bigger turbocharger from subaru IHI (this is not scheduled, but I think will come soon anyhow
)Stay tuned!
Full build thread (in Italian)
Last edited by Miata.SharK; 01-05-2012 at 02:37 PM.

Reply
 0
0

0


 01-06-2012, 06:33 AM
#5
Junior Member
Thread Starter
Join Date: Oct 2010
Location: Turin (Italy)
Posts: 91
Total Cats: -1
Here you can see it
https://www.miataturbo.net/attachmen...ine=1325788079
Reply
0
0
01-07-2012, 02:58 PM
#6
Junior Member
Thread Starter
Join Date: Oct 2010
Location: Turin (Italy)
Posts: 91
Total Cats: -1
Let's go ahead!
Koyo radiator from the backside
And IC assembled behind OEM bumper plastics!

Turbo to IC:
IC to TB:
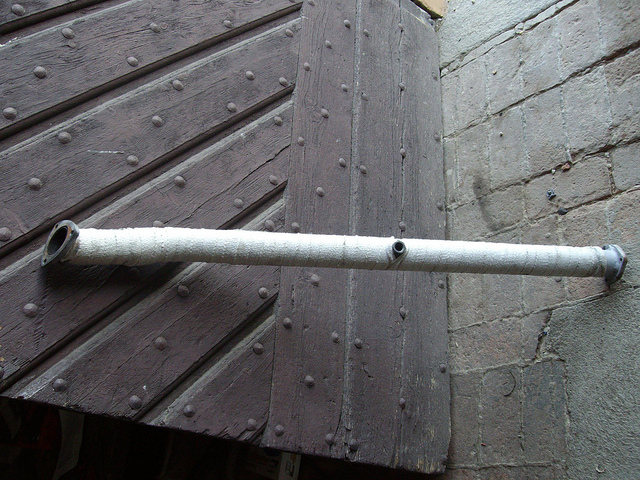
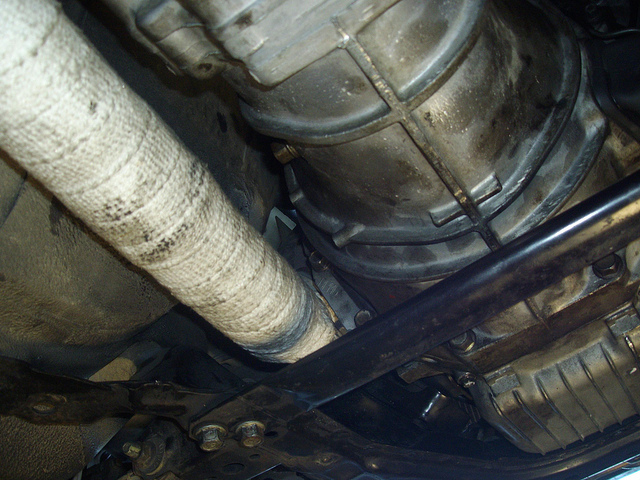
Exhaust: here you can see the mid pipe with thermo strips on (not installed for increasing performances, but for reducing heat while driving, as it's still a daily)

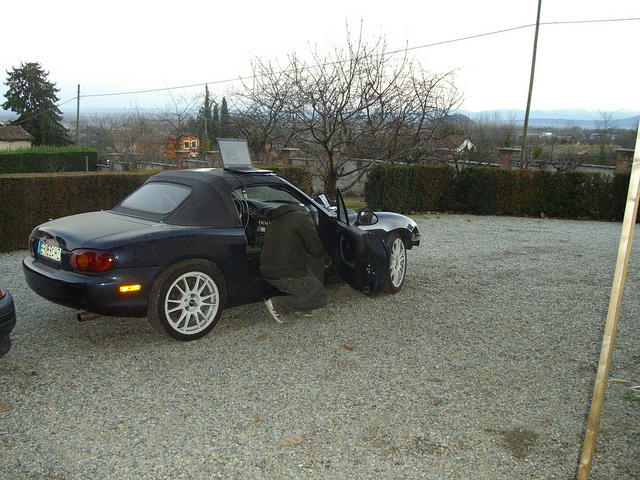
Out of garage, finally:
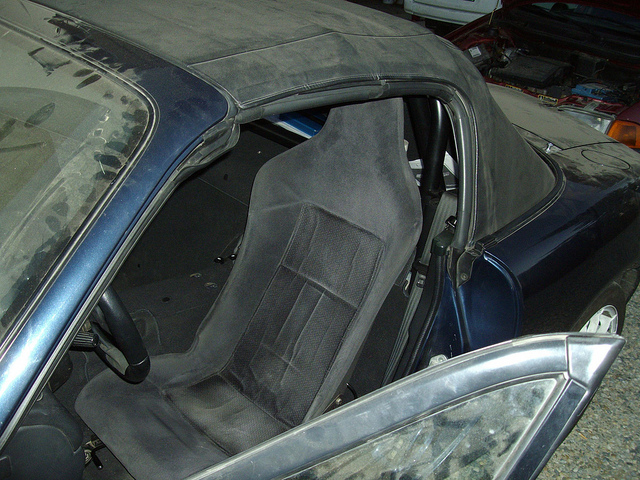
Here a shot of the interior (Momo steering wheel + Elise seats):
And let's go to the "out of project" pictures
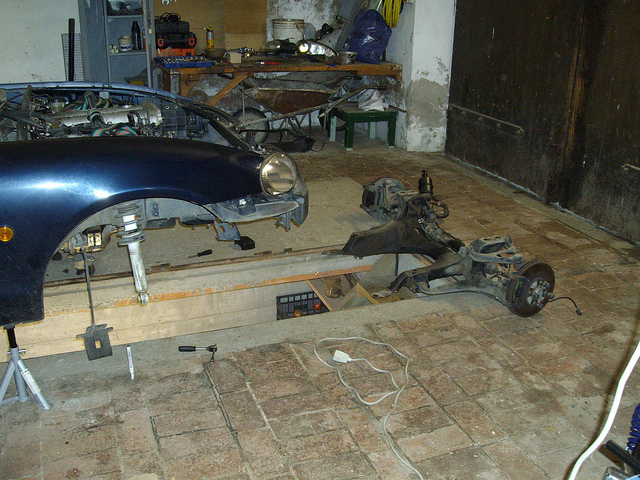
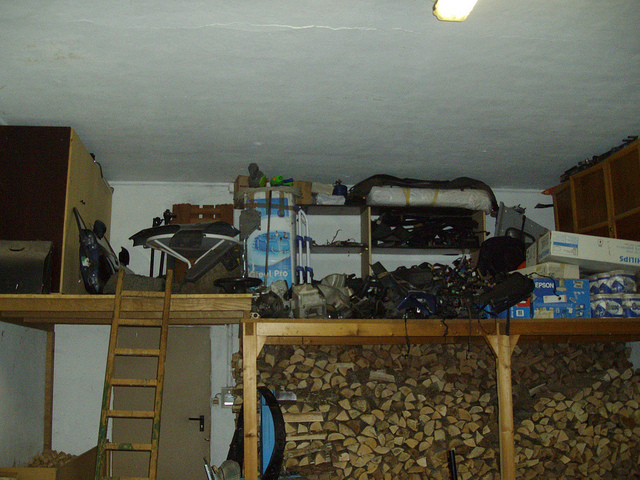
A shot of the box:
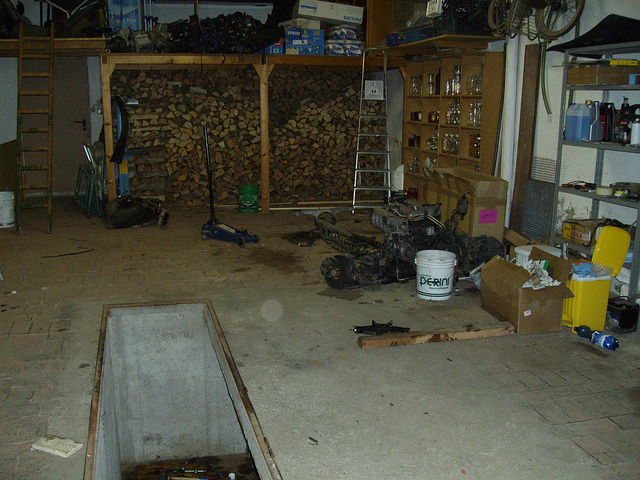
The "hole" on the bottom was born as a storage for wine.... but it's perfect for working on the car!
On the LH you can see a 1.6 NB FL.... ehm, just a part of....
The rest is here (in SUV version):
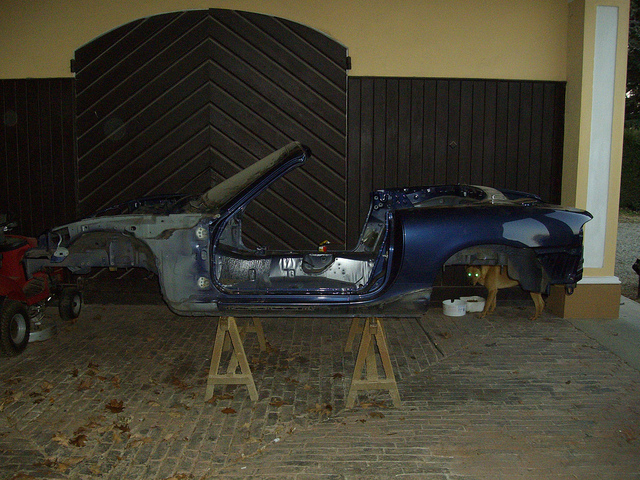
or here:
First startup => PERFECT!
Now we still have an headache on EMB wiring (but should be solved right now) and next weekend it's time for tuning
Koyo radiator from the backside
And IC assembled behind OEM bumper plastics!
Turbo to IC:
IC to TB:
Exhaust: here you can see the mid pipe with thermo strips on (not installed for increasing performances, but for reducing heat while driving, as it's still a daily)
Out of garage, finally:
Here a shot of the interior (Momo steering wheel + Elise seats):
And let's go to the "out of project" pictures
A shot of the box:
The "hole" on the bottom was born as a storage for wine.... but it's perfect for working on the car!
On the LH you can see a 1.6 NB FL.... ehm, just a part of....
The rest is here (in SUV version):
or here:
First startup => PERFECT!
Now we still have an headache on EMB wiring (but should be solved right now) and next weekend it's time for tuning
Reply
0
0
01-29-2012, 12:55 PM
#7
Junior Member
Thread Starter
Join Date: Oct 2010
Location: Turin (Italy)
Posts: 91
Total Cats: -1

Finished
Tuning of EMB was ongoing yesterday, but it started snowing a lot, so it was impossible to use torque.... (5th gear, car going anywhere if pressing on throttle over 3000rpm!)
Reply
0
0


 02-01-2012, 03:36 AM
#14
Elite Member

iTrader: (2)
Join Date: May 2008
Location: Portland, Oregon
Posts: 3,468
Total Cats: 365
I really wish I had the Norman man-cave of a garage, with combo wine cellar / maintenance pit, multi-cord wood storage, and loft space !
Which is not to say I am not thankful to have the space I have now (which, although leaning a bit and possessed of a concrete floor of the shattered and heaved variety, does not leak and is still (mostly) structurally sound)
And the welder skillz.
Edit: crap! thought you were in France ... but now I see you are in Germany/Italy. So I should call it a Teutonic man-cave of a garage then? heh
Reply
0
0


