Peodi's Build Thread
 10-12-2013, 11:41 AM
#1
Newb
Thread Starter

Join Date: Sep 2010
Location: Minneapolis, MN
Posts: 15
Total Cats: 0
Greetings, finally got around to finishing up my initial turbo build this past spring/summer. Got lots of the information that I applied to the build from this site so thought I would share back some of the results.
Car started out as a stock 95' with all the options that I got several years ago. Replaced all the suspension bits with a FM suspension kit, replaced all the bushing with new energy suspension bits, FM frame rails, rollbar, and a set of AST wheels with some Azenis on them.
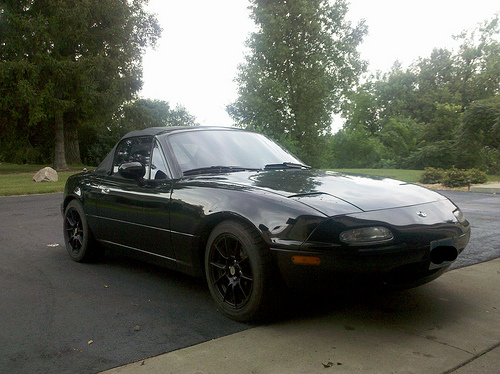
The car handles great and was fun to drive for a few years. Just needed some more power. Which brings us to the fun stuff.
Some metal tube ****
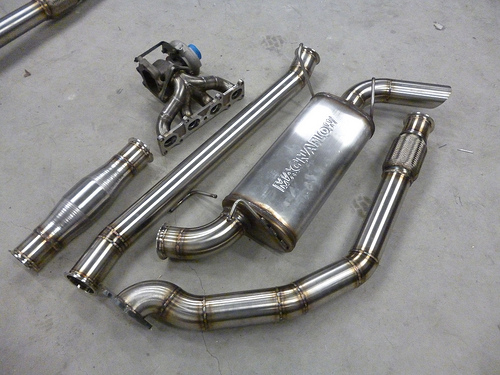
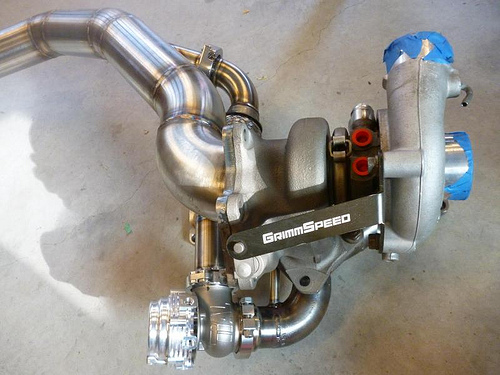
Artech made me this wonderful 3" exhaust system. Everything went in nicely with no need to do any cutting on the car.
Moved on to setting up the intercooler and piping. Got a great deal on a used FM intercooler so just went with most of their piping to keep the install easy and reliable. Pretty standard and didn't take much for pictures, just had a bung welded in for the AIT sensor.
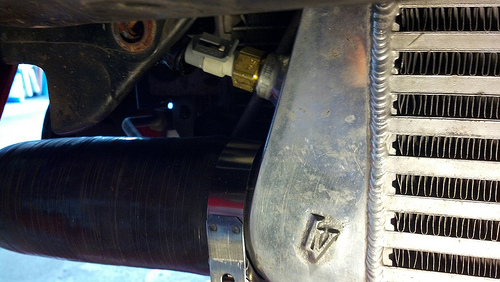
Hardest part of this whole build was probably getting the damn intercooler brackets bolted to the hood latch. Bumper support appears to have been slightly tweaked so not sure if that contributed to the pain the assery it was to get the bolts and the latch all together and lined up again. However after lots of swearing and prying on things the two support straps got bolted in.
Final steps to get it running where to install the new injectors (ID 725) and MegaSquirt. The megasquirt is pretty boring looking so no pics but here is comparison of the stock injectors to the injector dynamic units.
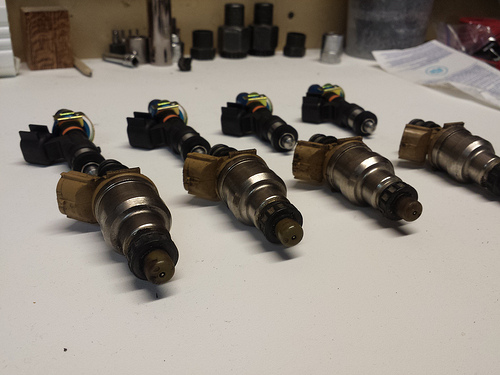
Will jump back to fill in some more details in later posts, but after getting everything together the car fired right up on the first turn of the key and idled perfectly.
Car started out as a stock 95' with all the options that I got several years ago. Replaced all the suspension bits with a FM suspension kit, replaced all the bushing with new energy suspension bits, FM frame rails, rollbar, and a set of AST wheels with some Azenis on them.
The car handles great and was fun to drive for a few years. Just needed some more power. Which brings us to the fun stuff.
Some metal tube ****
Artech made me this wonderful 3" exhaust system. Everything went in nicely with no need to do any cutting on the car.
Moved on to setting up the intercooler and piping. Got a great deal on a used FM intercooler so just went with most of their piping to keep the install easy and reliable. Pretty standard and didn't take much for pictures, just had a bung welded in for the AIT sensor.
Hardest part of this whole build was probably getting the damn intercooler brackets bolted to the hood latch. Bumper support appears to have been slightly tweaked so not sure if that contributed to the pain the assery it was to get the bolts and the latch all together and lined up again. However after lots of swearing and prying on things the two support straps got bolted in.
Final steps to get it running where to install the new injectors (ID 725) and MegaSquirt. The megasquirt is pretty boring looking so no pics but here is comparison of the stock injectors to the injector dynamic units.
Will jump back to fill in some more details in later posts, but after getting everything together the car fired right up on the first turn of the key and idled perfectly.

Reply
 0
0

0

 10-12-2013, 01:56 PM
#4
Newb
Thread Starter
Join Date: Sep 2010
Location: Minneapolis, MN
Posts: 15
Total Cats: 0
Thanks! Car is mostly just something fun to drive in the short summer months. Hopefully will get a few more things wrapped up this winter (better heat shielding, reroute, ...) so I can feel comfortable to try a track day or two with it next summer.
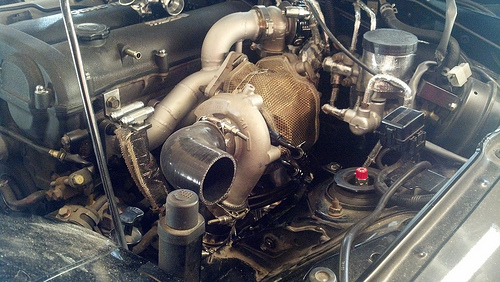
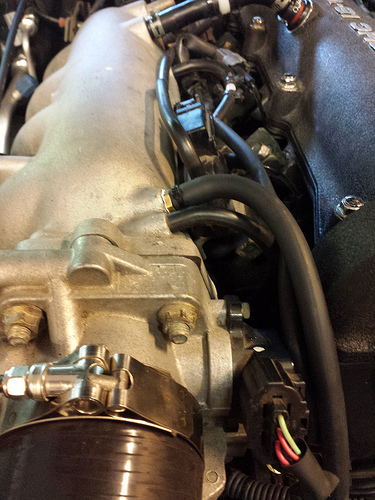
Anyway no build is complete without a little fail. So on the third test drive after getting it put together I noticed a fair puddle of oil after letting it idle in the driveway for awhile. Find out that the oil return line had come partially loose because of this oversite...

Did not notice when tightening it down from above the first time due to the awkward position to get a wrench down there. The collar on the fitting was hitting up against the turbo so it wasn't fully seated. So had to pull that apart and was luckily able to clearance it enough by filing down the edge on the turbo a little bit.
With that fixed got into tuning a bit and the car was really rapey, suffering from a fair amount of compressor surge, and a slipping clutch anywhere near half throttle or above.
So then had to make a few configuration changes.
To correct the surge, as the instructions for the Tial BOV clearly state it requires a 1/4" vacuum signal line. So drilled out and tapped the manifold to run the larger line where the cruise control line used to be. Also went from the 11psi to 10psi spring, even though by their chart my car which pulls 21psi of vacuum at idle should take the 11psi spring but I guess I can live with a little air leaking at idle.
This fixed the surge issues almost completely, still a little bit occasionally when feathering off of at part throttle, not sure what to do about that other than change driving style a bit.
Also then decided to back the wastegate down to 5psi until I get motivated enough to pull the tranny out to put in the clutch this winter sometime. The car feels surprisingly strong even at just 5psi.
Anyway no build is complete without a little fail. So on the third test drive after getting it put together I noticed a fair puddle of oil after letting it idle in the driveway for awhile. Find out that the oil return line had come partially loose because of this oversite...
Did not notice when tightening it down from above the first time due to the awkward position to get a wrench down there. The collar on the fitting was hitting up against the turbo so it wasn't fully seated. So had to pull that apart and was luckily able to clearance it enough by filing down the edge on the turbo a little bit.
With that fixed got into tuning a bit and the car was really rapey, suffering from a fair amount of compressor surge, and a slipping clutch anywhere near half throttle or above.
So then had to make a few configuration changes.
To correct the surge, as the instructions for the Tial BOV clearly state it requires a 1/4" vacuum signal line. So drilled out and tapped the manifold to run the larger line where the cruise control line used to be. Also went from the 11psi to 10psi spring, even though by their chart my car which pulls 21psi of vacuum at idle should take the 11psi spring but I guess I can live with a little air leaking at idle.
This fixed the surge issues almost completely, still a little bit occasionally when feathering off of at part throttle, not sure what to do about that other than change driving style a bit.
Also then decided to back the wastegate down to 5psi until I get motivated enough to pull the tranny out to put in the clutch this winter sometime. The car feels surprisingly strong even at just 5psi.
Reply
0
0
 10-12-2013, 05:12 PM
#6
Newb
Thread Starter
Join Date: Sep 2010
Location: Minneapolis, MN
Posts: 15
Total Cats: 0
Could be wrong but other than the hissing noise from the valve being partially cracked at idle I don't think there is much of an issue with it since it doesn't affect the amount measured air (yeah for no MAF).
Reply
0
0
 10-20-2013, 02:17 PM
#10
Newb
Thread Starter
Join Date: Sep 2010
Location: Minneapolis, MN
Posts: 15
Total Cats: 0
I do have one issue remaining that I could use some reassuring hand holding to resolve.
When ordering my megasquirt I screwed up and said I had an early 95 (mostly due to the manufacturing date being in February 95) but apparently that was wrong as it does have the 3 wire coils. So I have had a non functional tach, the diagnostic box pullup mod didn't work.
Have read several posts about this but am not clear enough on what needs to be done to restore the tach.
I have seen the above diagram brought up a few times but am unsure of the circuit it is describing, looks like it uses 2 resistors and a diode to bridge ignition signal wire to the tach line and ground?
Does this circuit need to be built into the megasquirt or in the harness wires?
Running a Reverant MS2E.
Reply
0
0
 10-20-2013, 03:04 PM
#12
Newb
Thread Starter
Join Date: Sep 2010
Location: Minneapolis, MN
Posts: 15
Total Cats: 0
My other car is a WRX and lots of subies around here so pretty good supply of take off turbos available.
Reply
0
0
04-12-2014, 05:05 PM
#13
Newb
Thread Starter
Join Date: Sep 2010
Location: Minneapolis, MN
Posts: 15
Total Cats: 0
I do have one issue remaining that I could use some reassuring hand holding to resolve.
When ordering my megasquirt I screwed up and said I had an early 95 (mostly due to the manufacturing date being in February 95) but apparently that was wrong as it does have the 3 wire coils. So I have had a non functional tach, the diagnostic box pullup mod didn't work.
Have read several posts about this but am not clear enough on what needs to be done to restore the tach.
I have seen the above diagram brought up a few times but am unsure of the circuit it is describing, looks like it uses 2 resistors and a diode to bridge ignition signal wire to the tach line and ground?
Does this circuit need to be built into the megasquirt or in the harness wires?
Running a Reverant MS2E.
When ordering my megasquirt I screwed up and said I had an early 95 (mostly due to the manufacturing date being in February 95) but apparently that was wrong as it does have the 3 wire coils. So I have had a non functional tach, the diagnostic box pullup mod didn't work.
Have read several posts about this but am not clear enough on what needs to be done to restore the tach.
I have seen the above diagram brought up a few times but am unsure of the circuit it is describing, looks like it uses 2 resistors and a diode to bridge ignition signal wire to the tach line and ground?
Does this circuit need to be built into the megasquirt or in the harness wires?
Running a Reverant MS2E.
Finally resolved this issue!
Issue was that my Miata (95.5?) had the Tach Output on Pin IF of the engine harness instead of 2I where it is most often shown (B/W wire).
Tach out from the my Megasquirt is on Pin 19 of the upper plug which was mapped to 2I on the cars harness. Repinning IF to 2I in the stock harness got the tach operating correctly again.
Now, just need to get the new FM clutch in so I can run more than 5 psi.
Reply
0
0

Thread
Thread Starter
Forum
Replies
Last Post
stoves
Suspension, Brakes, Drivetrain
5
04-21-2016 03:00 PM


