Onyxyth 2.0 - Trackspeed EFR6258 Build
 02-27-2015, 10:42 PM
#21
Senior Member
Thread Starter
iTrader: (2)

Join Date: May 2013
Location: Boyertown, PA
Posts: 735
Total Cats: 62
Minor updates..
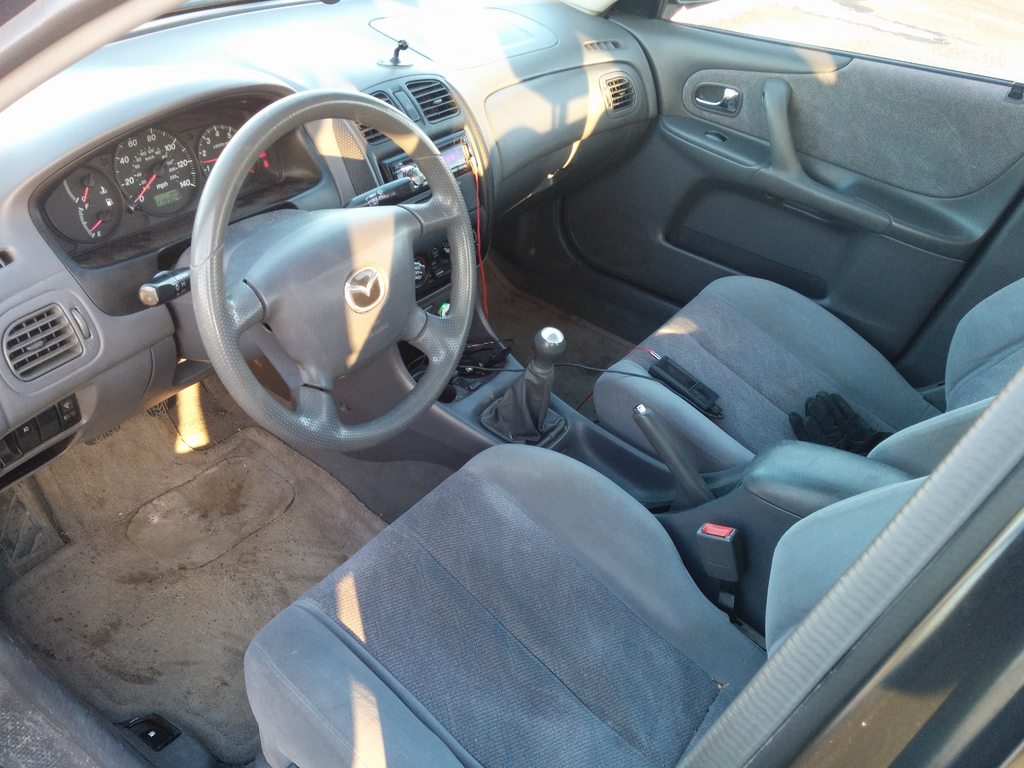
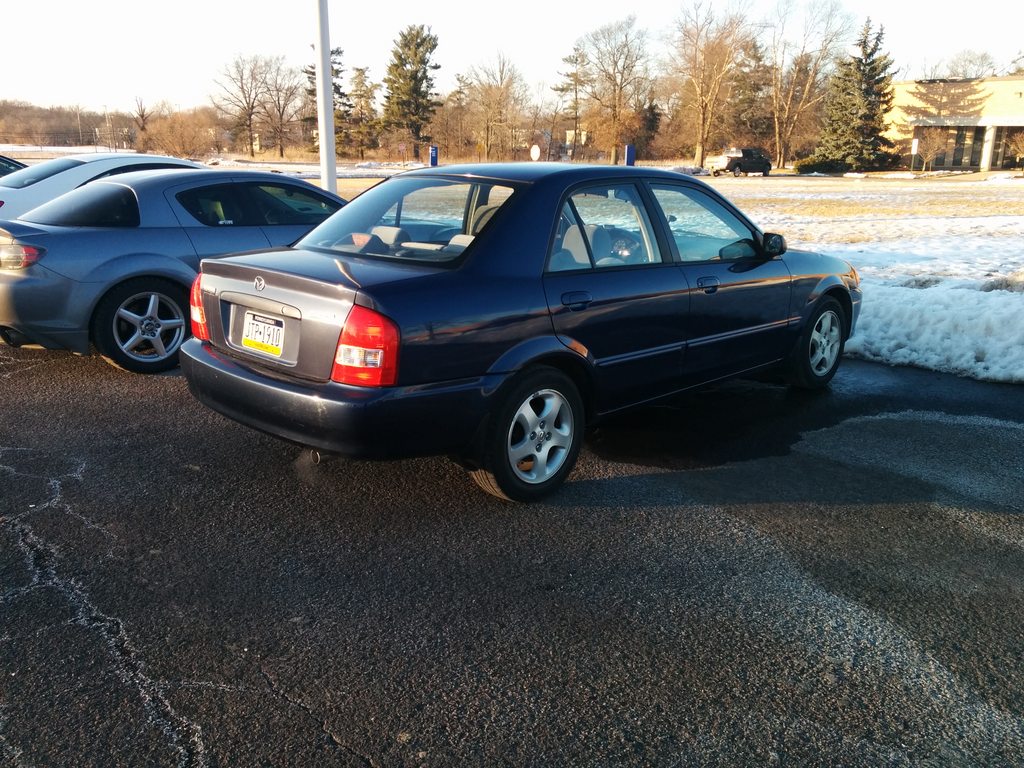
I bought a daily! No more driving that red Celica. I get to putt around in a 2000 Mazda Protege.
119k, 5 speed - pretty good condition, some rust on the wheel well but that's not uncommon, it'll need a clutch soon too so I'll have to look into that. Pics:
Hopefully I can start to tear into the new Miata this weekend to start on the timing belt. I got the parts almost a month ago. It's finally going to be above 30 degrees for the first time in weeks.

Reply
 0
0

0
04-29-2015, 08:59 PM
#22
Senior Member
Thread Starter
iTrader: (2)
Join Date: May 2013
Location: Boyertown, PA
Posts: 735
Total Cats: 62
Some updates. Things are moving along slowly. I did the timing belt I mentioned above and...
Well, it ran ok. Smokes like hell, smelled like coolant. Tons of top end tick. Probably a HG issue. Whatever, I don't really feel like digging into it, I was going to drive this in stock form while building the engine but I'll have to be patient.
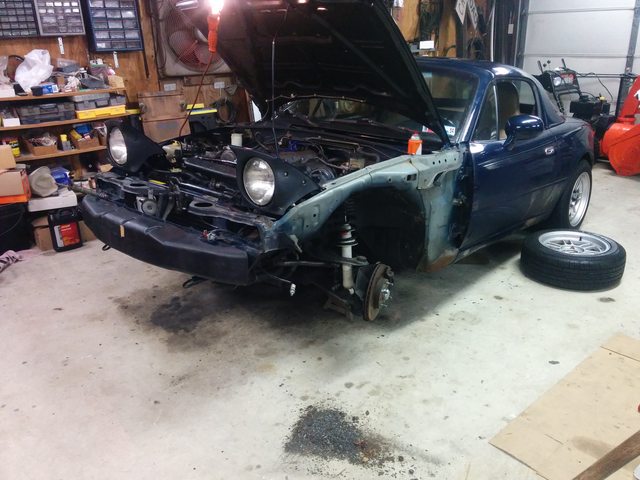
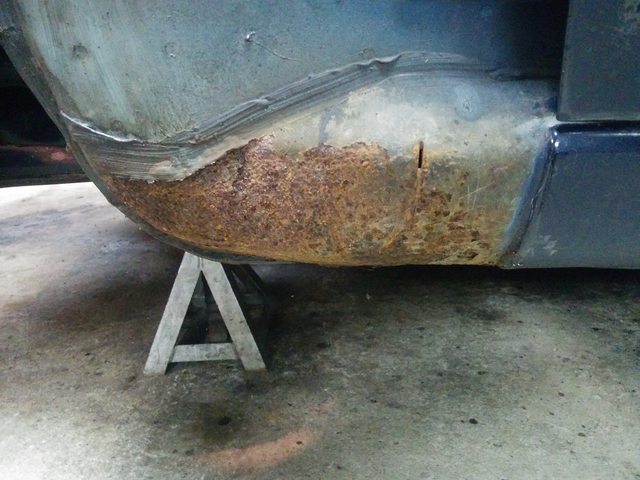
Popped the fenders and bumper off to reroute some wires, and clean up the engine bay. Found some rust but it should be fairly easy to fix.

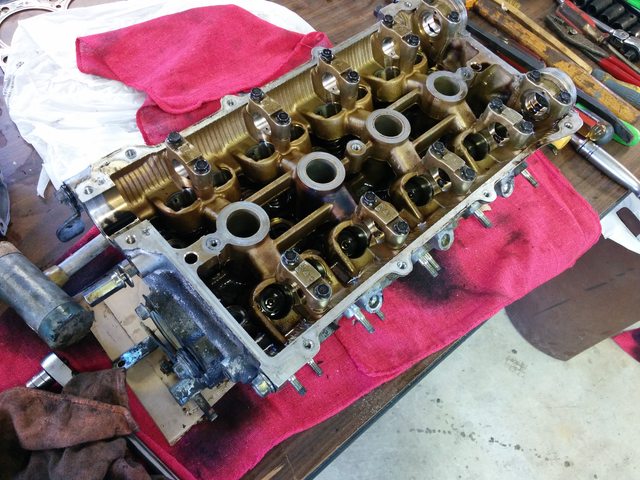
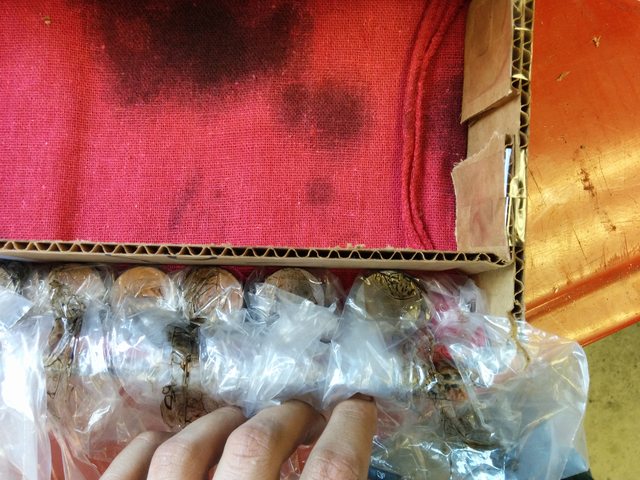
Tore apart the head. It looks pretty good for ~130k miles. Made a box inside a box to keep everything organized.
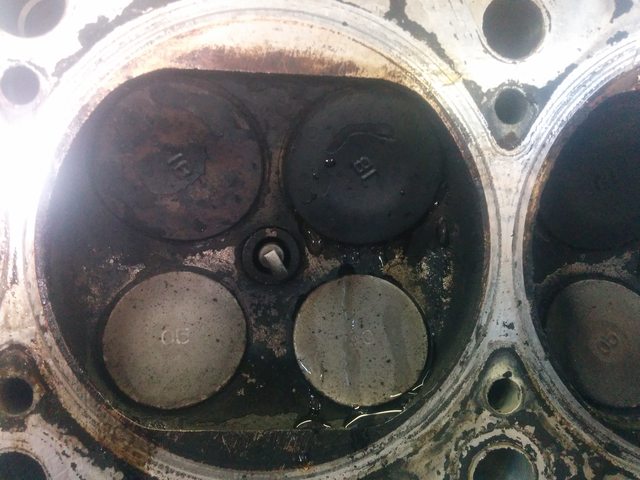
Ghetto testing the valves with water. Basically filling the runners with water and seeing if it makes it past the valves. Almost every valve leaked, so I'll be getting a 3 angle valve job at the machine shop.
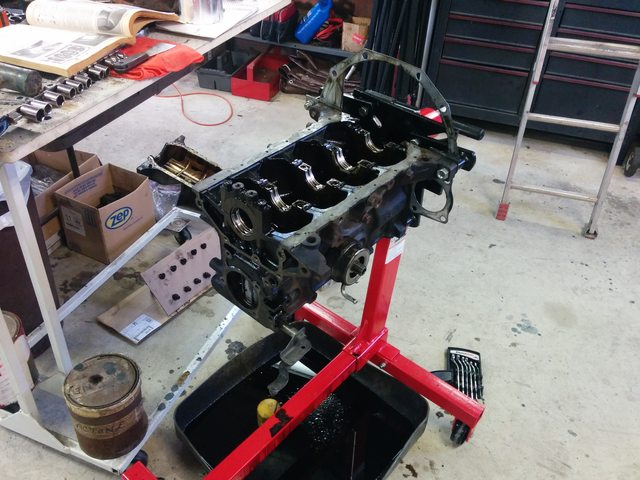
Annnnnnnd block is bare. I bent the main bearing support plate a bit removing the oil pan.. the oil pump was stuck more than I was expecting. It should be easy enough to fix, I didn't grab pictures of that though.
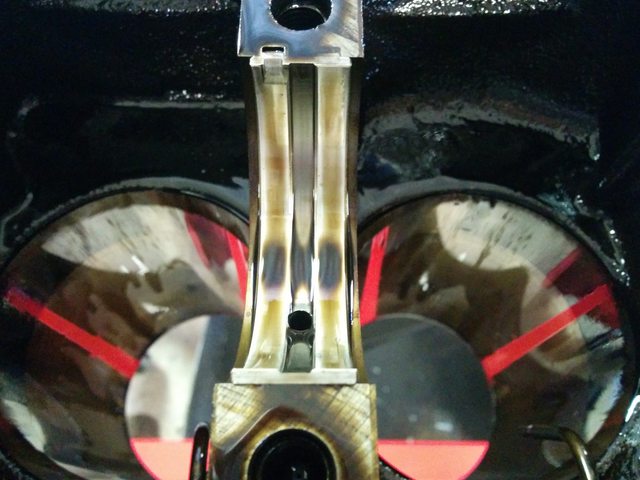
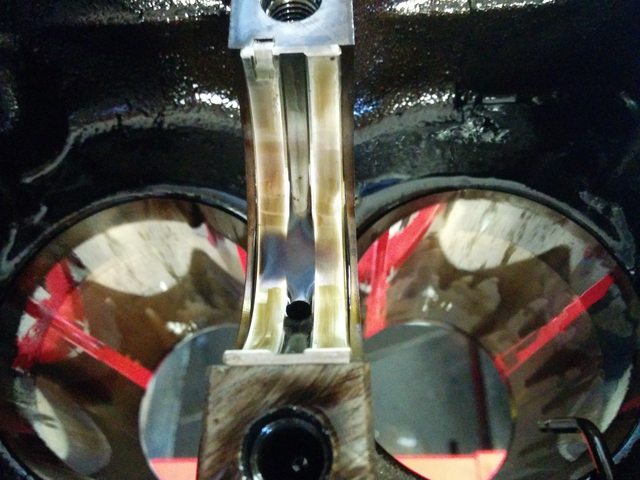
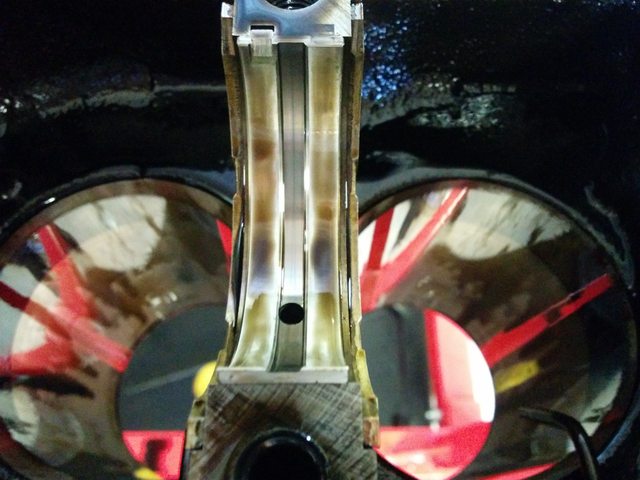
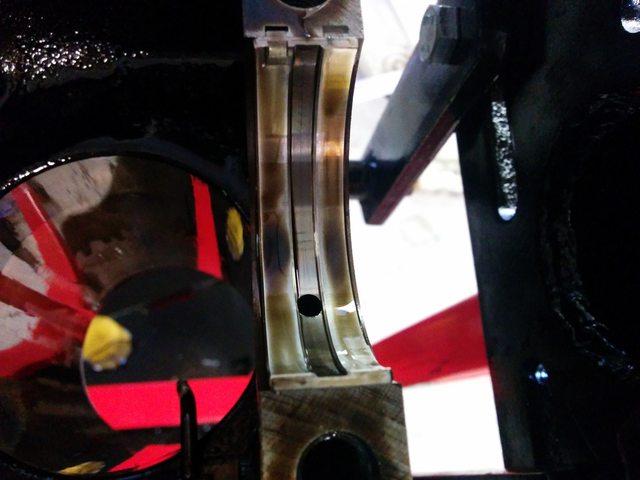
Here's how the main bearings looked. I guess I forgot to take a picture of one. Either way they're in pretty good shape and I expect to be able to use standard size bearings. Machine shop will tell me for sure. pictures of the crank side, I'll get some this weekend.
Next up: Find proper machine shop, get pistons and fasteners, bring everything to the machine shop for cleanup/boring/valve job. Then build.
Well, it ran ok. Smokes like hell, smelled like coolant. Tons of top end tick. Probably a HG issue. Whatever, I don't really feel like digging into it, I was going to drive this in stock form while building the engine but I'll have to be patient.
Popped the fenders and bumper off to reroute some wires, and clean up the engine bay. Found some rust but it should be fairly easy to fix.
Tore apart the head. It looks pretty good for ~130k miles. Made a box inside a box to keep everything organized.
Ghetto testing the valves with water. Basically filling the runners with water and seeing if it makes it past the valves. Almost every valve leaked, so I'll be getting a 3 angle valve job at the machine shop.
Annnnnnnd block is bare. I bent the main bearing support plate a bit removing the oil pan.. the oil pump was stuck more than I was expecting. It should be easy enough to fix, I didn't grab pictures of that though.
Here's how the main bearings looked. I guess I forgot to take a picture of one. Either way they're in pretty good shape and I expect to be able to use standard size bearings. Machine shop will tell me for sure. pictures of the crank side, I'll get some this weekend.
Next up: Find proper machine shop, get pistons and fasteners, bring everything to the machine shop for cleanup/boring/valve job. Then build.
Last edited by Onyxyth; 04-29-2015 at 09:12 PM.
Reply
0
0
05-03-2015, 08:46 PM
#23
Senior Member
Thread Starter
iTrader: (2)
Join Date: May 2013
Location: Boyertown, PA
Posts: 735
Total Cats: 62
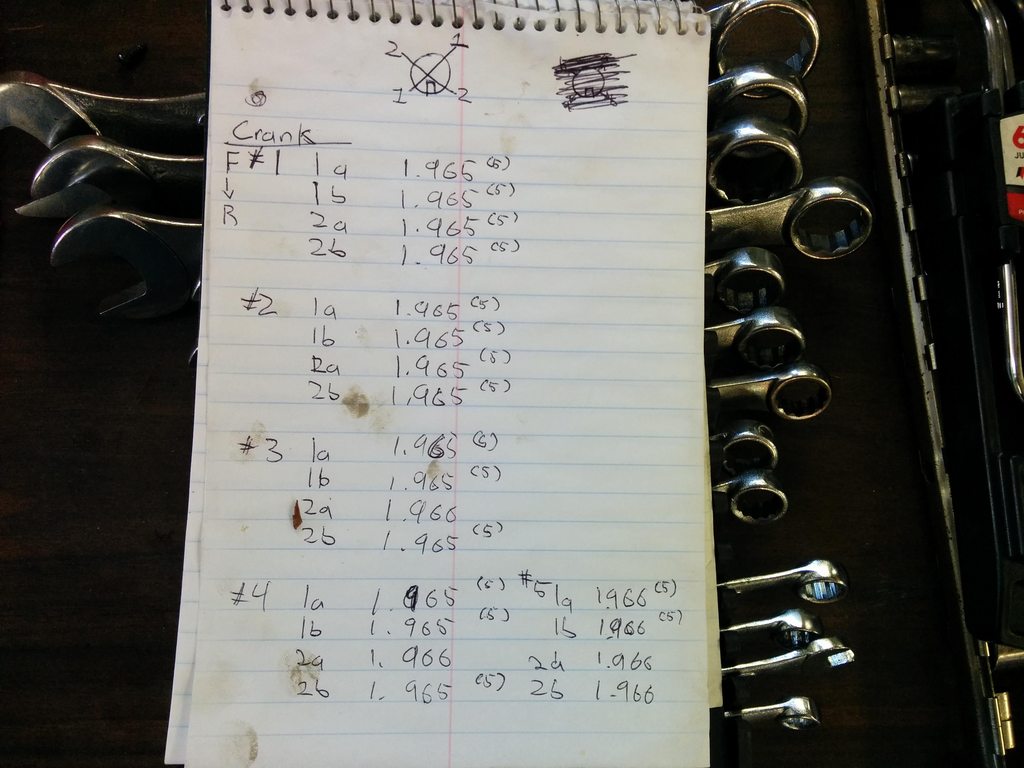
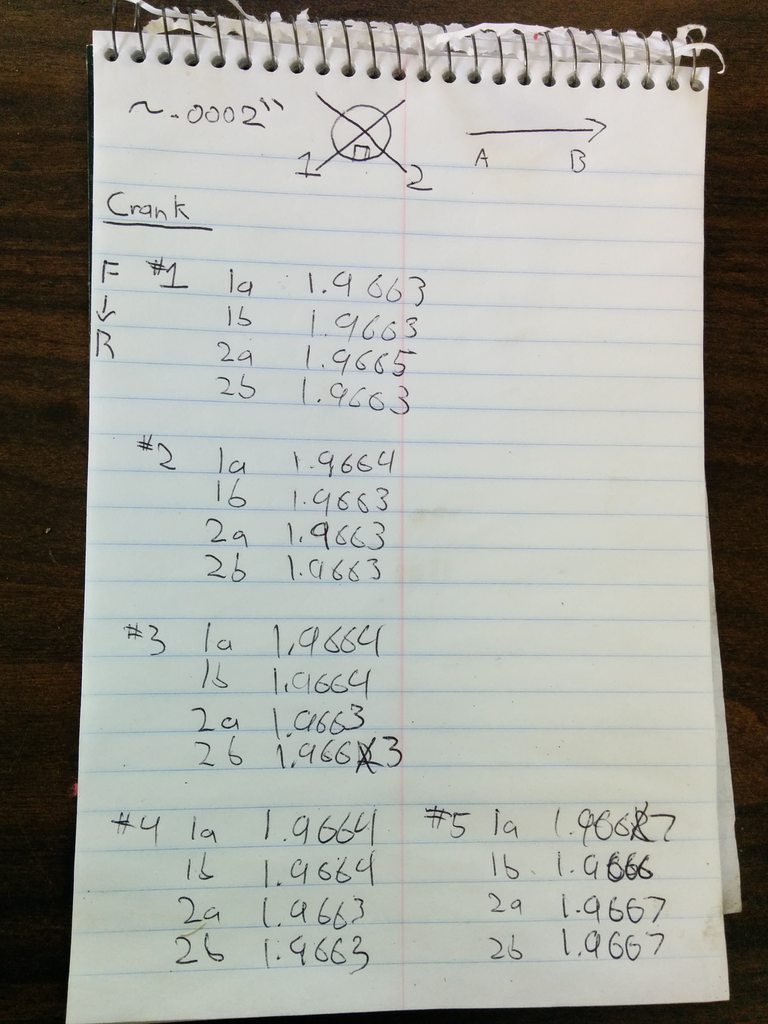
I briefly went over the crank today with a digital caliper (haven't bought a micrometer yet). This thing can only measure to the thousandths place, but will put a "5" when it's in between thousandths. Almost all journals measured 1.965(5)".
#1 and 2 were dead on, but 3, 4 and 5 I'll have to check again with a mic as there may be some taper/ovality.
Service manual says standard spec is 1.9661-1.9667. This is below that by a thousandth or so (or .0006 if you believe the (5) the caliper spits out).
Next spec for oversized bearings is 1.9569-1.9570 which I'm pretty far away from.
Obviously these are rough measurements since it's not measuring the ten thousandths place, but does anything look worrysome here?
I should be able to use standard size bearings, yah? Just might be about a thousandths loose?
Reply
0
0
05-13-2015, 07:05 PM
#25
Senior Member
Thread Starter
iTrader: (2)
Join Date: May 2013
Location: Boyertown, PA
Posts: 735
Total Cats: 62
Ordered a 1"-2" micrometer to get solid crank measurements.
Spoke with the machine shop which I have some questions about but I'll throw that in my other thread.
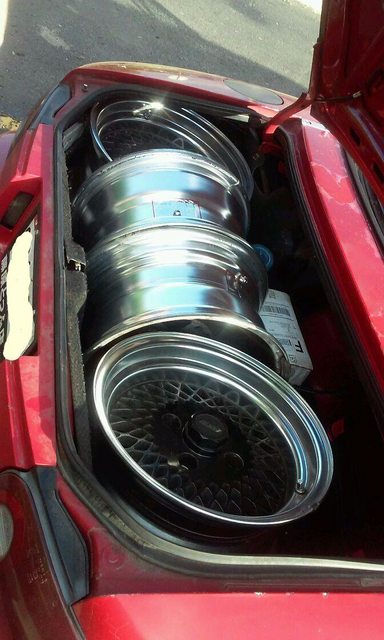
Sold the wheels from my old Celica - Enkei 92's 14x7 +/- 0 4x114.3. Made some cash from that. The guy and his buddy drove 2 hours up from Delaware in a Miata to pick them up - they're going on a Celica Supra.
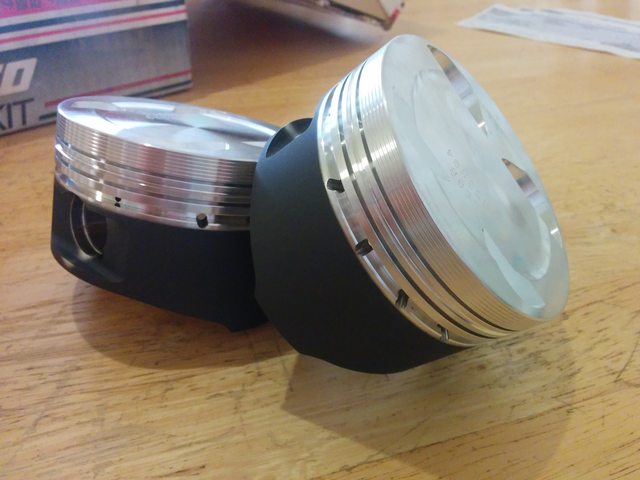
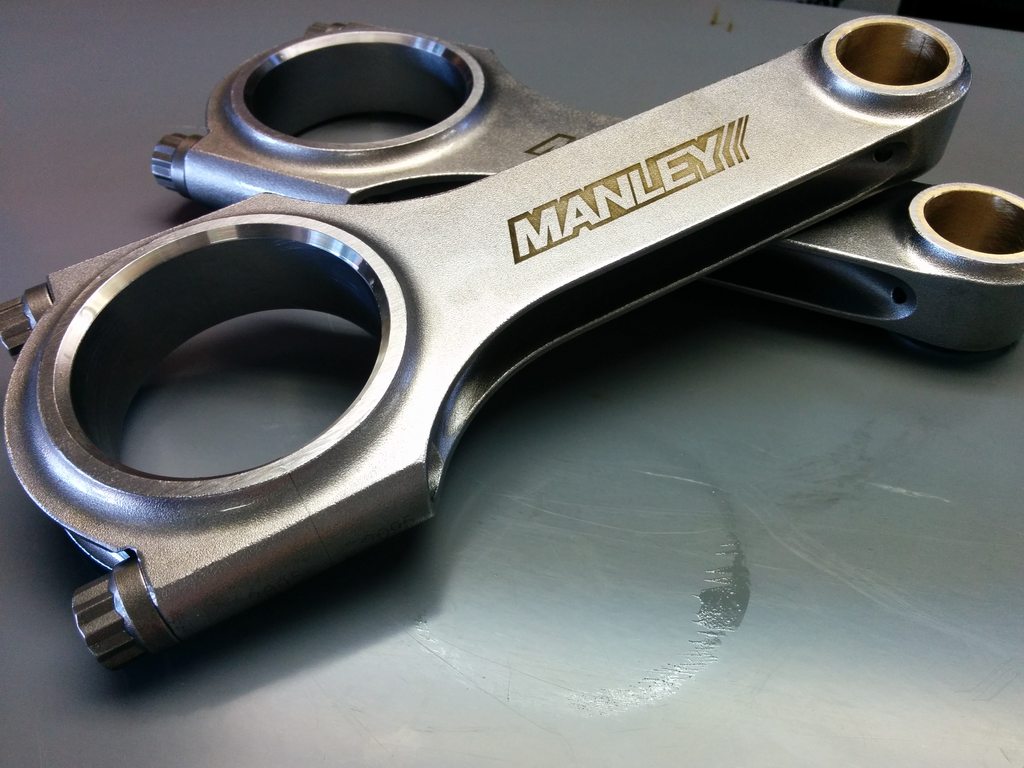
Part collection is starting... These came today thanks to mrryanbaker. BNIB Wiseco 8.5:1 CR 84mm pistons.
Spoke with the machine shop which I have some questions about but I'll throw that in my other thread.
Sold the wheels from my old Celica - Enkei 92's 14x7 +/- 0 4x114.3. Made some cash from that. The guy and his buddy drove 2 hours up from Delaware in a Miata to pick them up - they're going on a Celica Supra.
Part collection is starting... These came today thanks to mrryanbaker. BNIB Wiseco 8.5:1 CR 84mm pistons.
Reply
0
0
05-29-2015, 10:02 PM
#26
Senior Member
Thread Starter
iTrader: (2)
Join Date: May 2013
Location: Boyertown, PA
Posts: 735
Total Cats: 62
Parts..
Next up: order bearings. ACLs have been out of stock and after reading this thread it looks like KINGs may be a good option.
Then I need to get my *** to the machine shop.
Next up: order bearings. ACLs have been out of stock and after reading this thread it looks like KINGs may be a good option.
Then I need to get my *** to the machine shop.
Reply
0
0
05-30-2015, 01:26 PM
#27
Cpt. Slow

iTrader: (25)
Join Date: Oct 2005
Location: Oregon City, OR
Posts: 14,184
Total Cats: 1,135
Bolt the crank on with clean dry bearings and plasti gauge. It's the best way to check oil clearances. If your mic measurements come out similar to your caliper measurements, you're fine.

Reply
0
0
06-06-2015, 05:52 PM
#28
Senior Member
Thread Starter
iTrader: (2)
Join Date: May 2013
Location: Boyertown, PA
Posts: 735
Total Cats: 62
Measurements:
#5 (closest to trans) ended up being a bit bigger than all the other journals. Does that say anything about how the motor was running?
Either way the engine build is on halt for a few weeks because I hopped on the group buy for the Trackspeed EFR kit (Awesome!). So I'll be doing chassis/wiring (read: cheap things) in the meantime. Mostly cleaning and painting things.
Got the harnesses out of the engine bay today and removed the interior. This will make wiring for the WBO2/MS/gauges a ton easier. I also need to get a new speedo cable, trim up the harnesses since I'm removing things, and clean the **** out the dirty *** carpet.
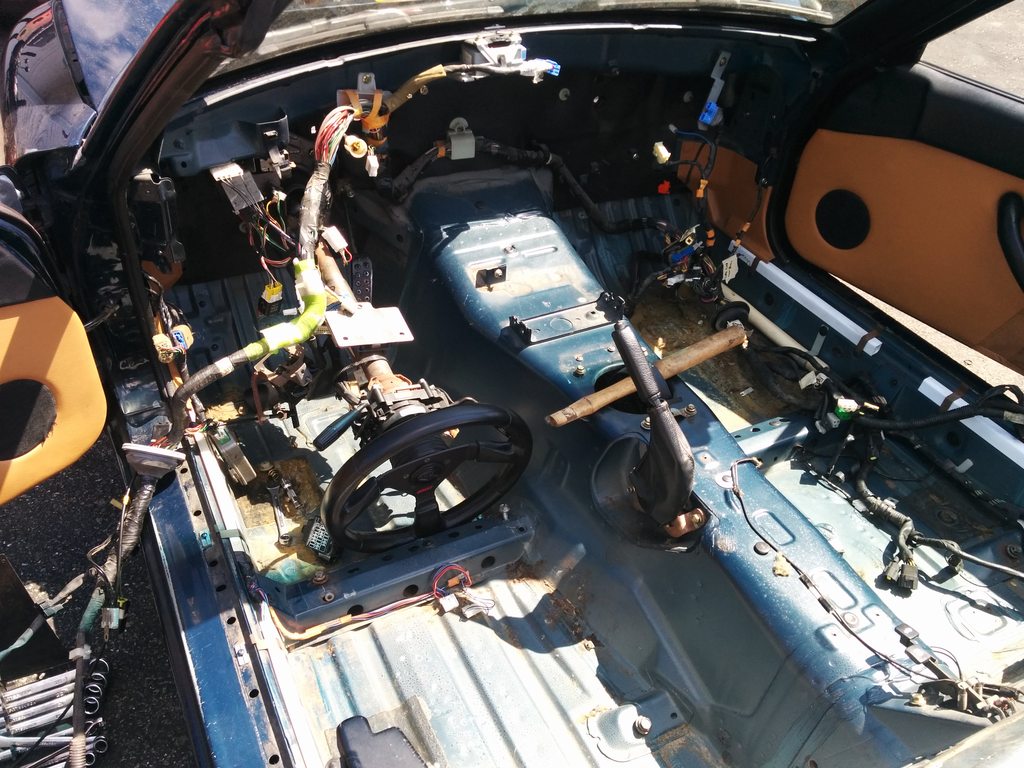
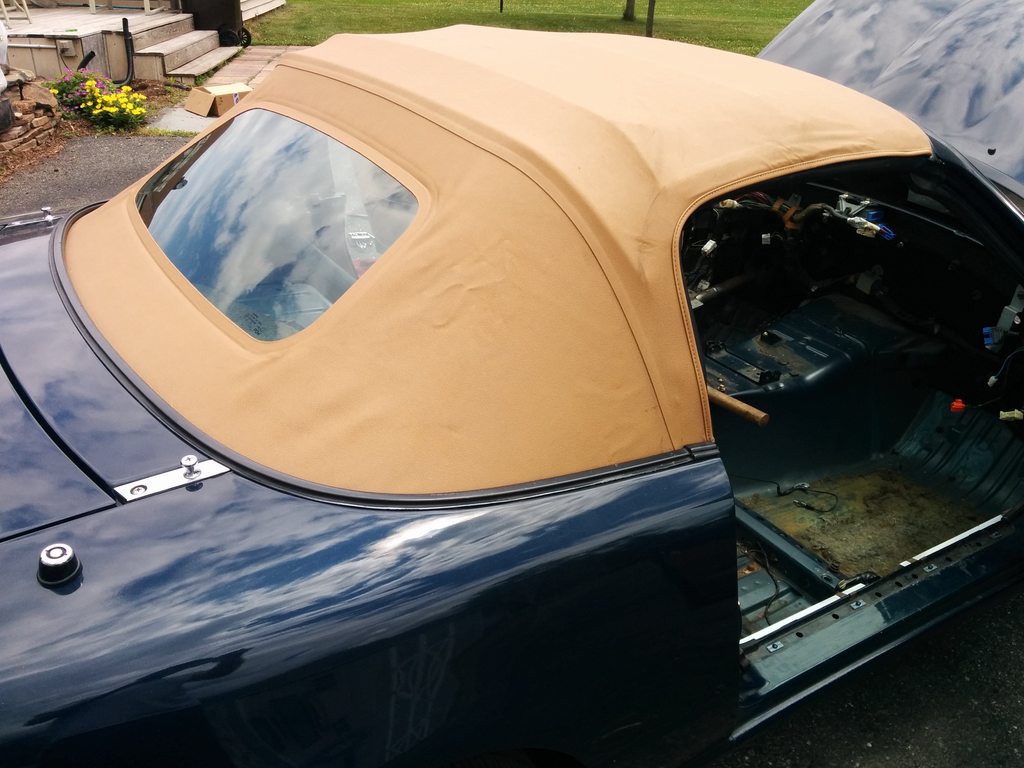
I also pulled the top up on this thing for the first time ever.. real happy with the condition of this. PO wasn't lying when he said it was recently replaced.
Reply
0
0
06-07-2015, 12:45 PM
#29
Senior Member
Thread Starter
iTrader: (2)
Join Date: May 2013
Location: Boyertown, PA
Posts: 735
Total Cats: 62
Any suggestions for cleaning/degreasing the engine bay? I have access to a power washer, any ideas on how to seal up the firewall holes?
Maybe that's overkill and some spray degreaser and a brush would be fine..
Maybe that's overkill and some spray degreaser and a brush would be fine..
Reply
0
0
 06-08-2015, 12:07 AM
#31
Senior Member
Thread Starter
iTrader: (2)
Join Date: May 2013
Location: Boyertown, PA
Posts: 735
Total Cats: 62
Oh sweet! cool you saw the post.
Definitely considering it. It's either him or the guys at r/t tuning which also have a really good reputation. That's down the line quite a bit though, I don't even have an MS for the new chassis yet. 96-97 ms2 from the wrecked chassis won't PnP and I want to step to ms3 anyway.
Definitely considering it. It's either him or the guys at r/t tuning which also have a really good reputation. That's down the line quite a bit though, I don't even have an MS for the new chassis yet. 96-97 ms2 from the wrecked chassis won't PnP and I want to step to ms3 anyway.
Reply
0
0
06-08-2015, 09:03 AM
#32

Oh nice, I didn't realize that you were around somewhat local, I'm in Lancaster. I can definitely vouch for myself and a few friends that were tuned by Ken and he did top notch work. I'd recommend him hands down.
Also if you want some black carpet while you have it out I can dig that out of my parts car
Also if you want some black carpet while you have it out I can dig that out of my parts car
Last edited by darkcambria; 06-08-2015 at 09:04 AM. Reason: derp
Reply
0
0
06-08-2015, 01:21 PM
#33
<p>
</p><p> </p><p><br />Haha yeah you have a little bit before you have to worry about getting tuned. <span>@Mazdaspeeder</span> was tuned by Ken also and I know he is also extremely happy with his car.</p>
Oh sweet! cool you saw the post. Definitely considering it. It's either him or the guys at r/t tuning which also have a really good reputation. That's down the line quite a bit though, I don't even have an MS for the new chassis yet. 96-97 ms2 from the wrecked chassis won't PnP and I want to step to ms3 anyway.
Reply
0
0
07-01-2015, 03:06 PM
#34
Newb

Join Date: Jul 2015
Posts: 11
Total Cats: 0
Hey dude, I found your build thread after meeting you on reddit! The build looks awesome so far, it has really inspired me to start fresh on a new shell as soon as I can. I'll be sure to start a build thread for my car, albeit a bit less involved than this one.
Reply
0
0
07-08-2015, 06:55 PM
#35
Senior Member
Thread Starter
iTrader: (2)
Join Date: May 2013
Location: Boyertown, PA
Posts: 735
Total Cats: 62
Updates!
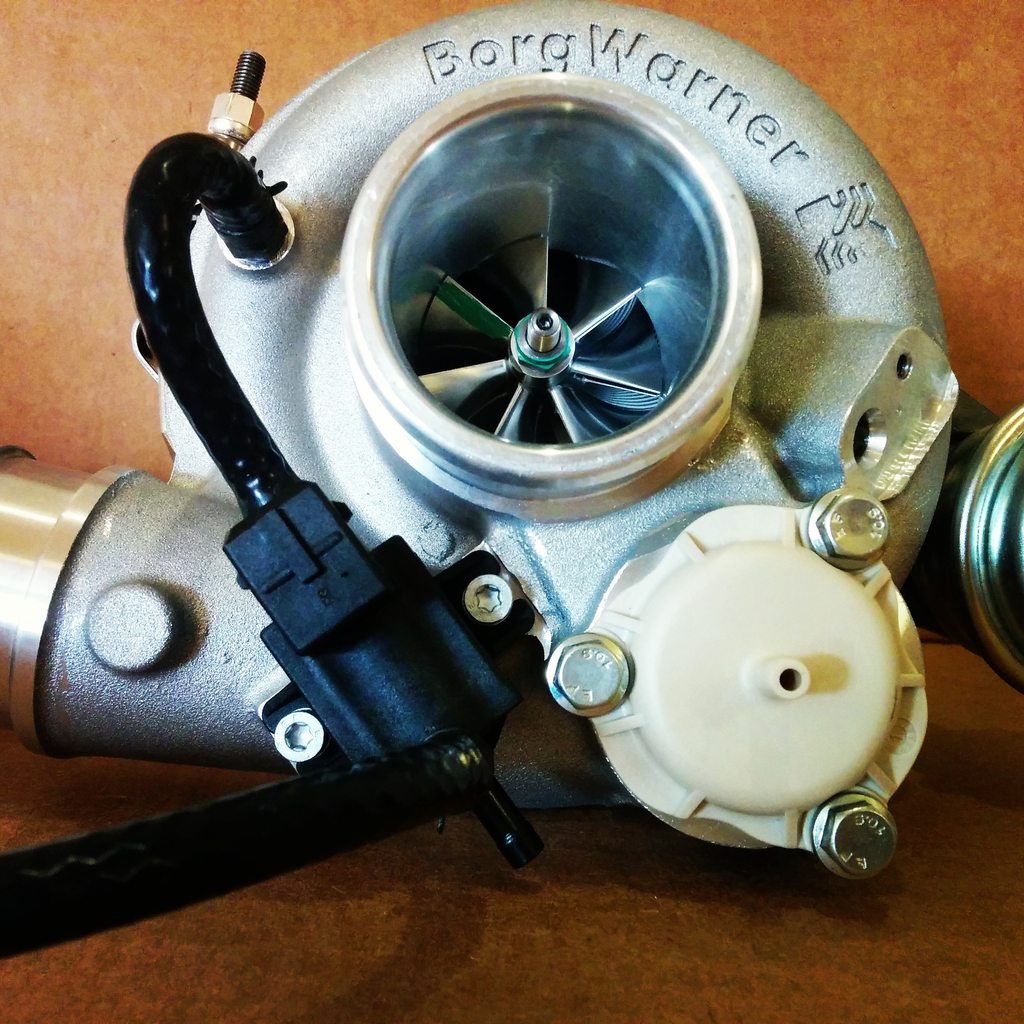
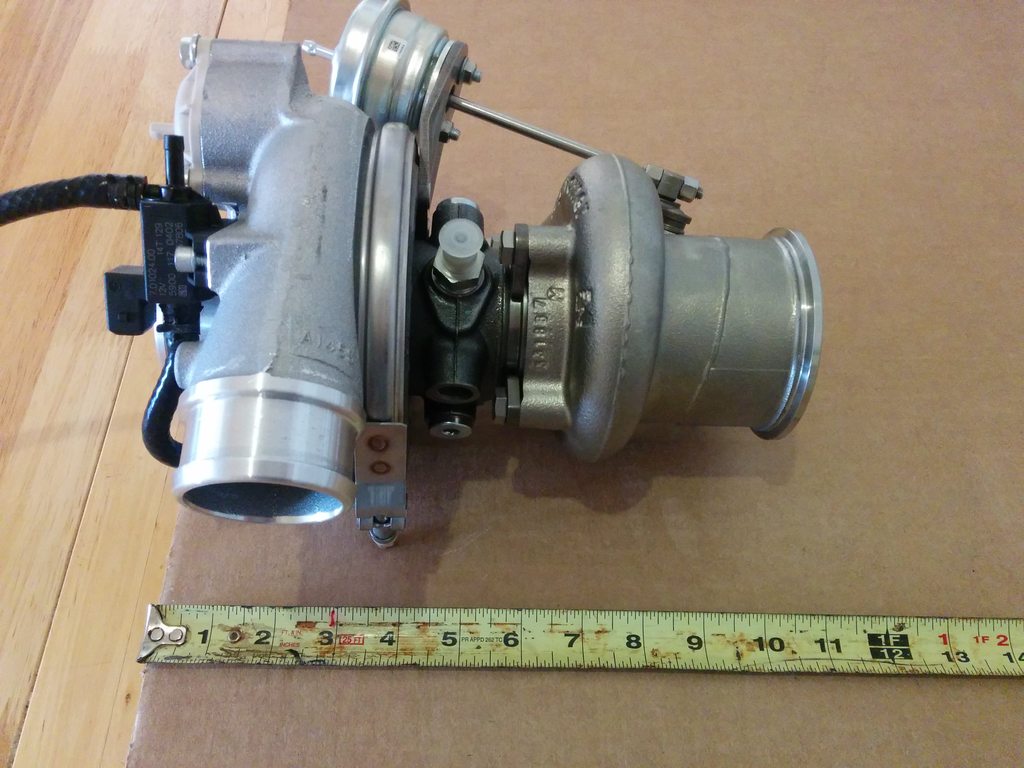
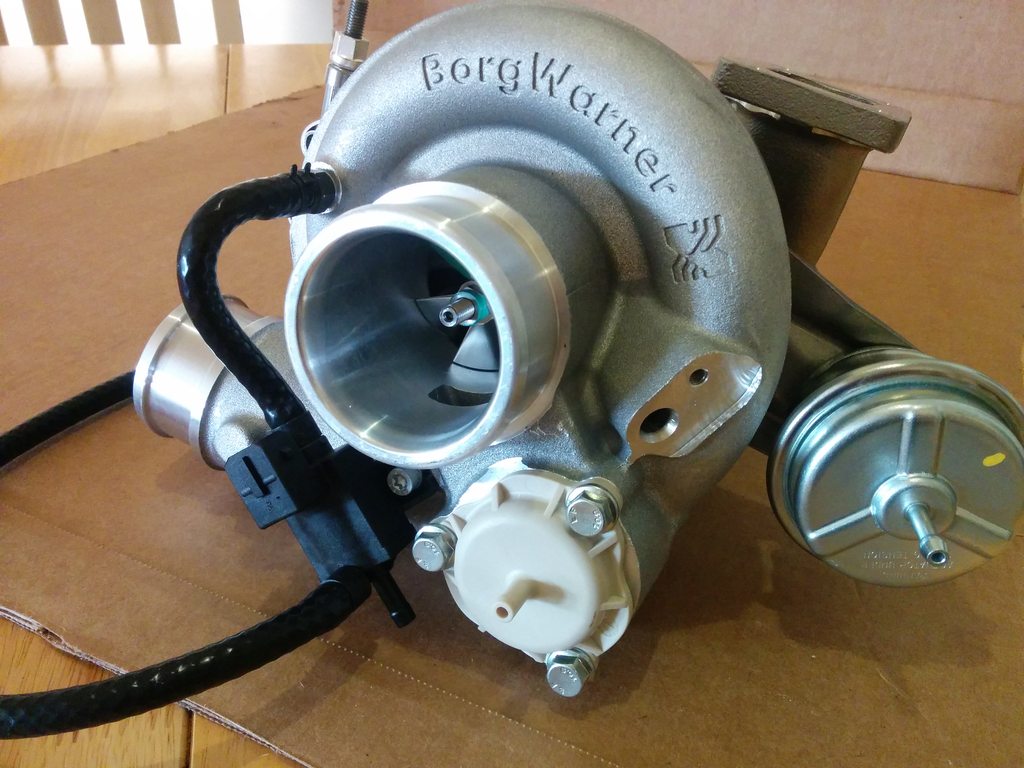
This arrived. EFR 6258. It's glorious, and much bigger physically than I was expecting.
This is from the Trackspeed group buy so I'll have a manifold as well when they get finalized.
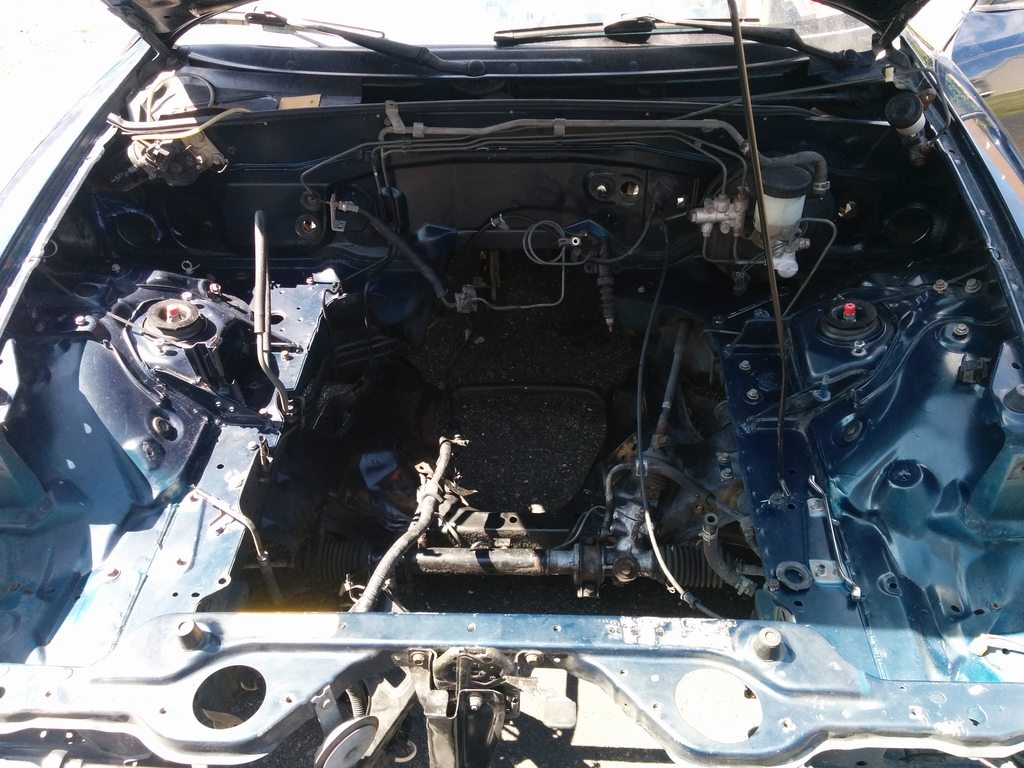
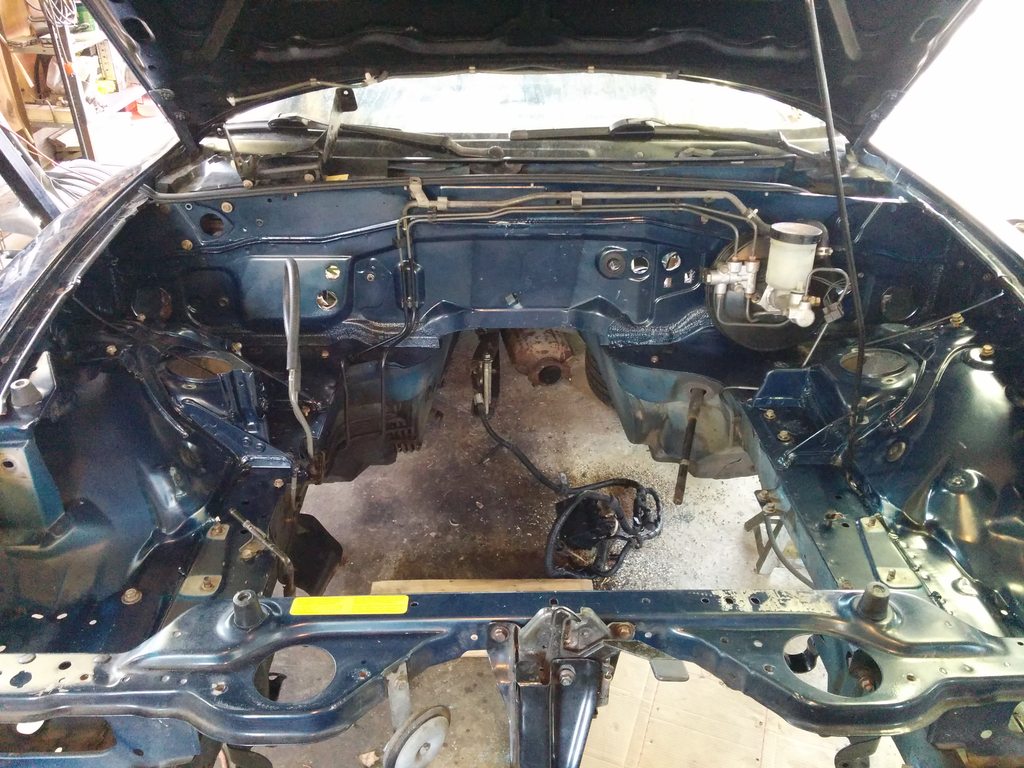
More engine bay cleaning. I used Turtle Wax's "Bug and Tar Remover" - it worked really, really well.
It sprays on thick and seeps into all the little crevices. Scrub as needed and rinse off.
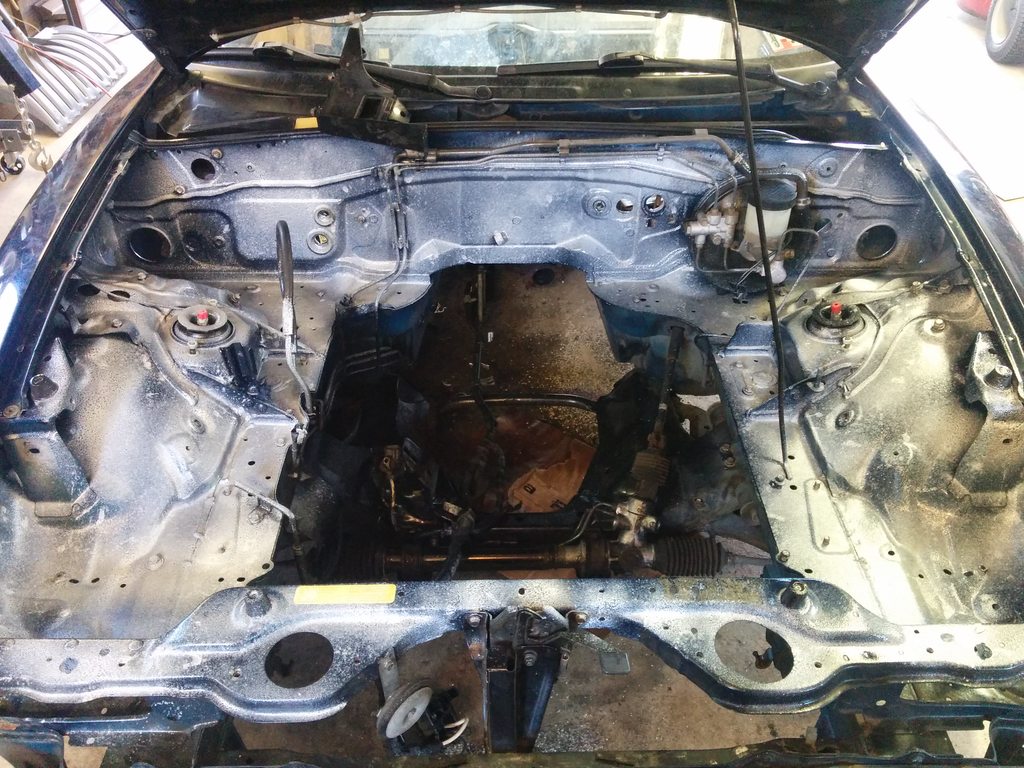
Results:
Next thing on the list was refurbishing the front subframe and suspension. I started by dropping it totally out of the car.
I chocked the wheels and used an engine hoist to lift the car up by the bumper, and drug the whole shabang out from under.
This was moderately sketchy but I figured the engine and interior are out, the subframe isn't going to be lifted, and the hoist is rated for 1 ton. At the very least I'm ~500 lbs under that.
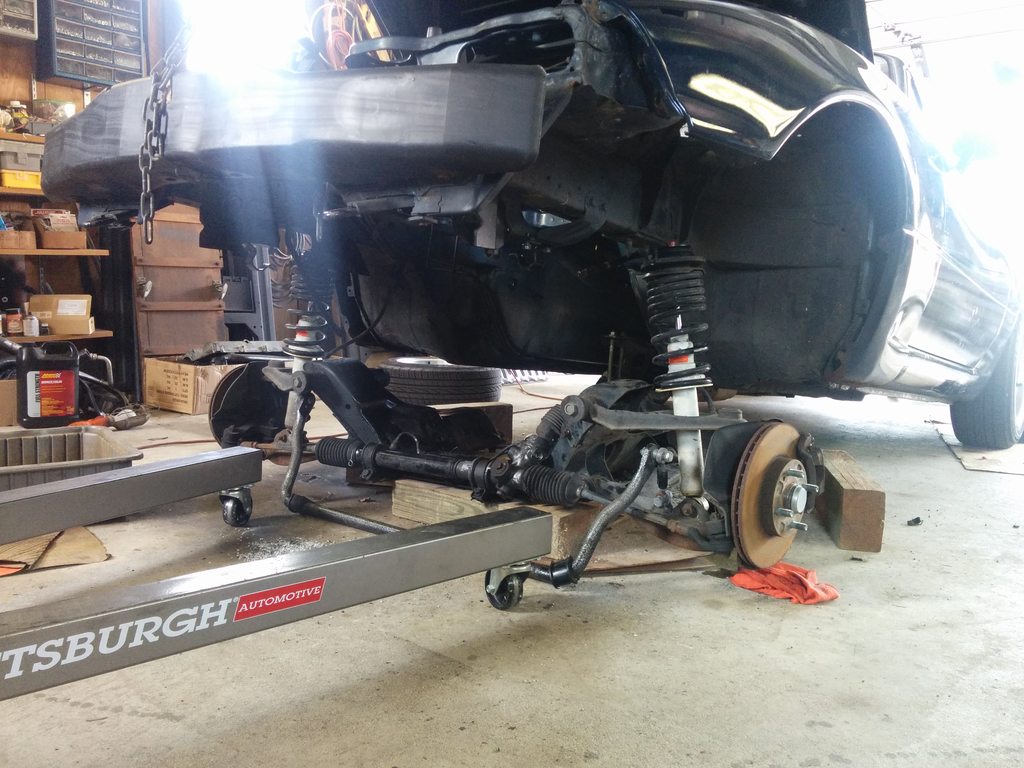
In hindsight there was probably a few things I should have loosened while it was still attached to the car, particularly the ball joints.
It's hard to get a solid hit to pop them when the whole assembly just slides across the floor when smacked.
Oh well - I got everything apart:
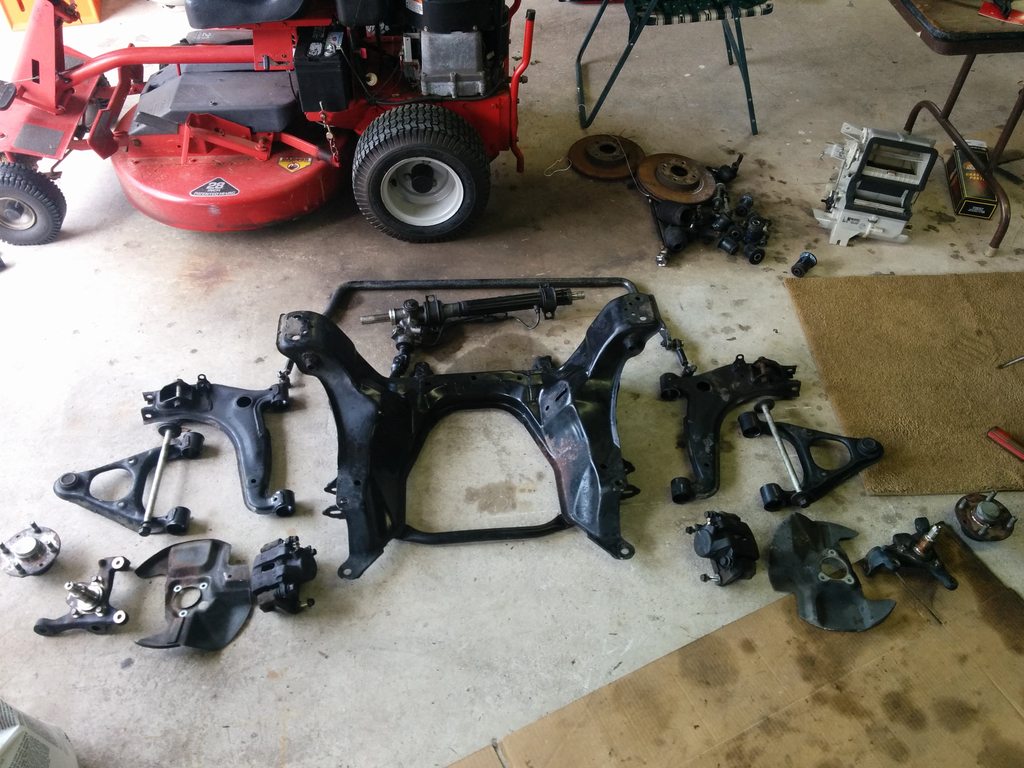
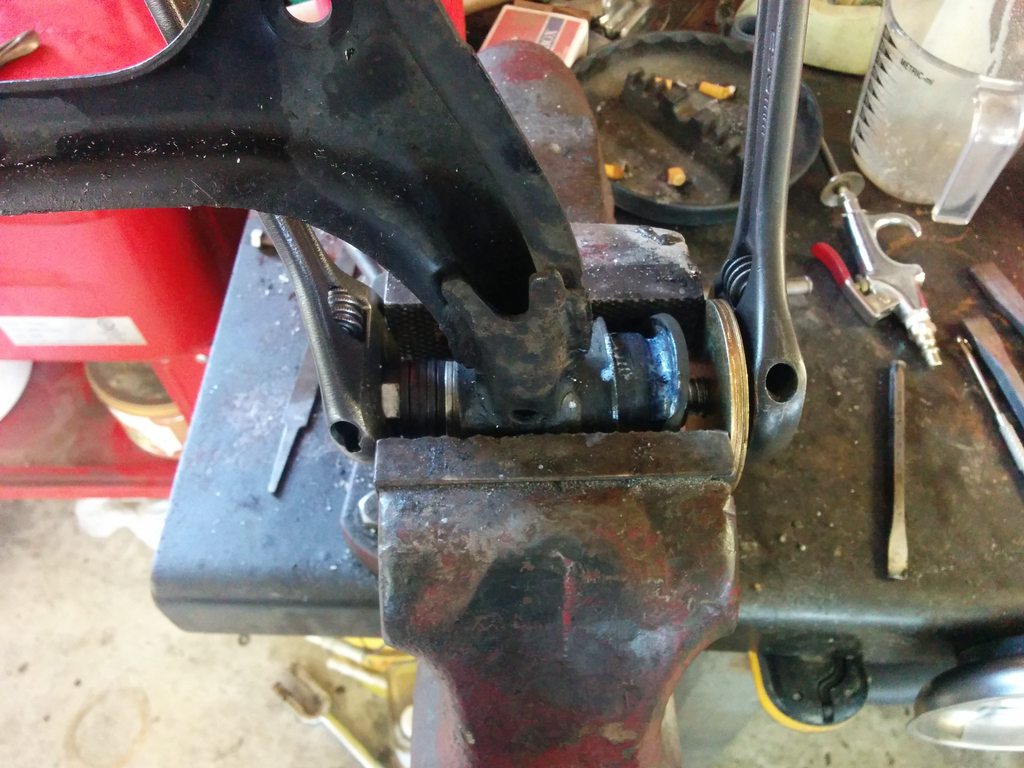
To remove the bushings I used a long bolt, a shitload of washers, two metric adjustable wrenches, and some white lithium grease.
This method worked pretty damn well. Just make sure you're not crushing the control arm with the vice - and probably most importantly, it needs to be sitting perfectly level in the vice otherwise it'll just bind up.
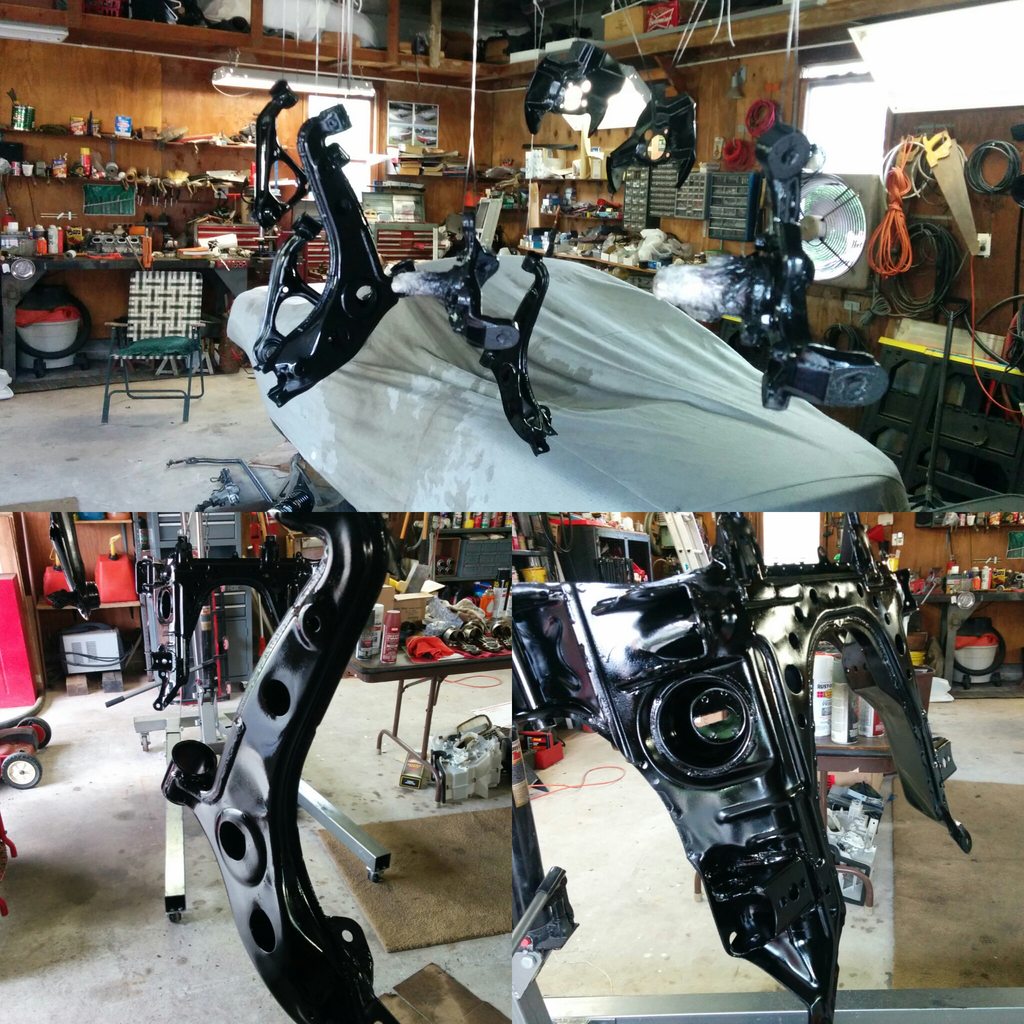
Next was getting all the parts prepped for paint. This took forever. Probably 15-20 hrs of wire wheeling across 4 days.
The lower control arms are a bitch. The dugout part where the shock bolts to is pretty difficult to get cleaned up.
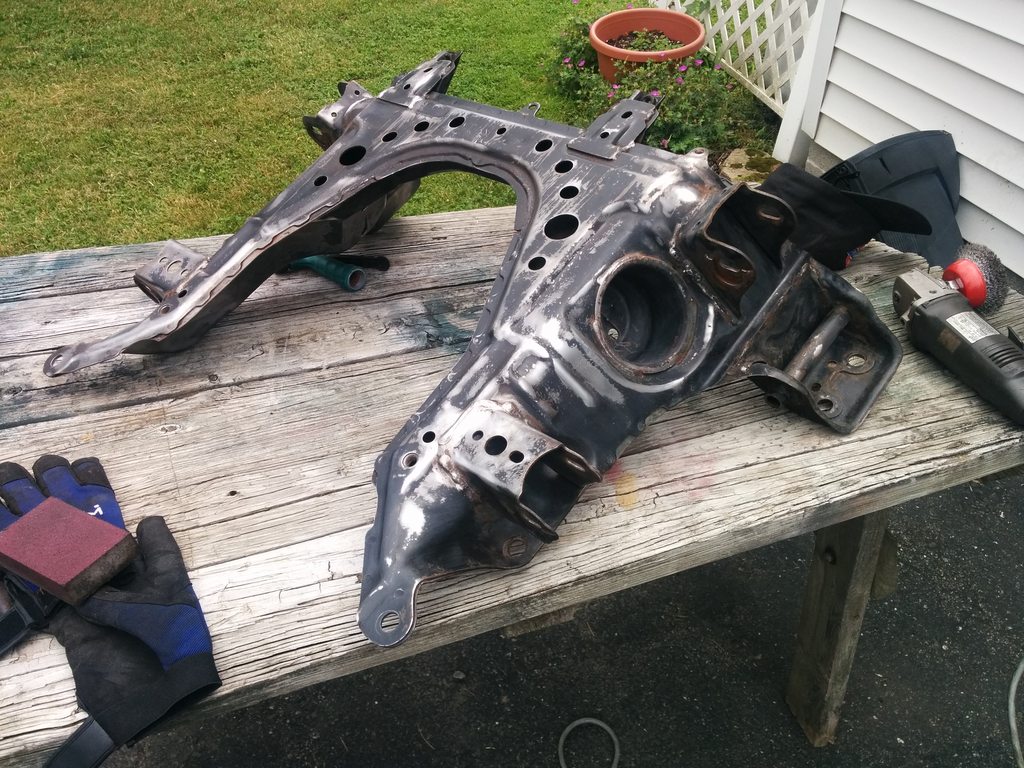
No pictures of that, but here's a quick one of the subframe itself.
It was humid that day too, so as I cleaned up one side, the other side was starting to rust almost immediately.
I primed these two parts with Rustoleum "Bare Metal" Primer.
I ended up doing the rest with Krylon's Red Oxide primer as I felt it sprayed better, and might give me some protection for spots I missed / couldn't clean as well as I wanted (lower control arms..)
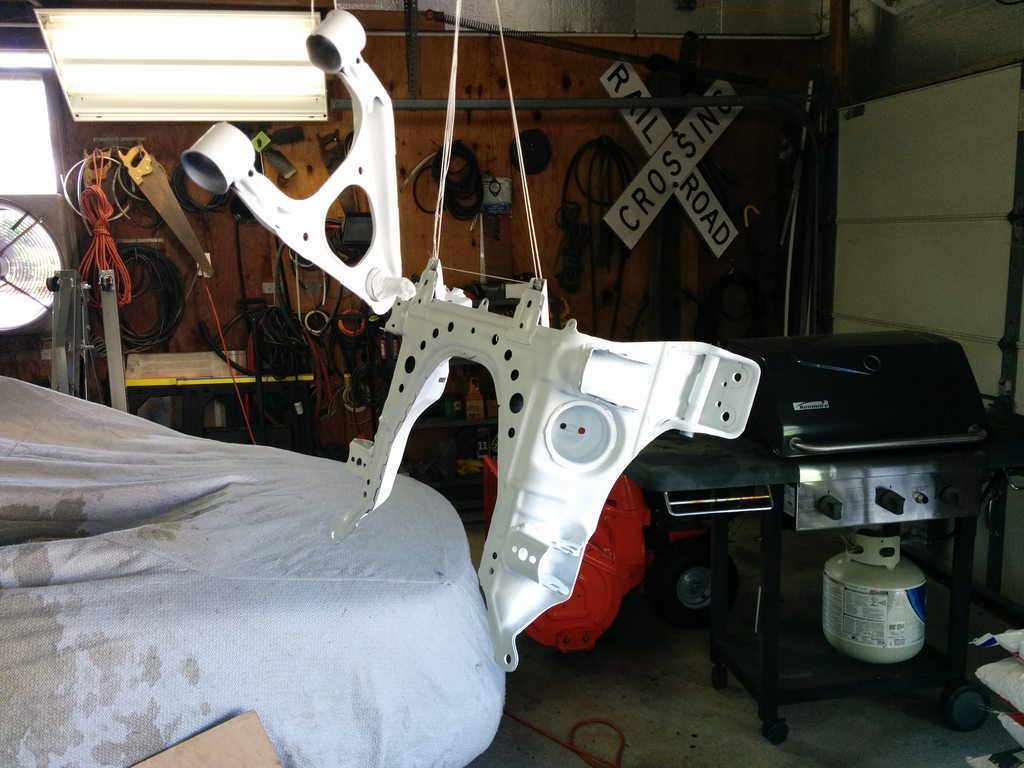
Painting. Shiny.
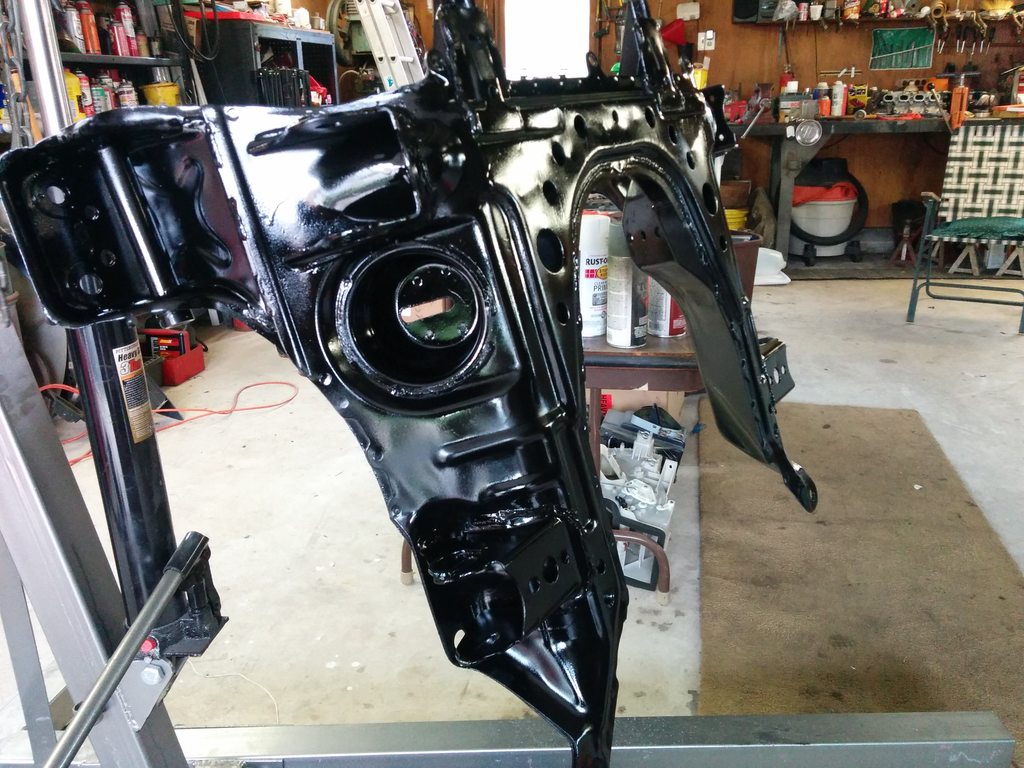
That's where we're at now. I'll be ordering a boatload of things to get this all back together fairly soon. Bushings, ball joints, tie rods, rotors, dust caps, etc etc etc
Next project will be de-powering the rack.
This arrived. EFR 6258. It's glorious, and much bigger physically than I was expecting.
This is from the Trackspeed group buy so I'll have a manifold as well when they get finalized.
More engine bay cleaning. I used Turtle Wax's "Bug and Tar Remover" - it worked really, really well.
It sprays on thick and seeps into all the little crevices. Scrub as needed and rinse off.
Results:
Next thing on the list was refurbishing the front subframe and suspension. I started by dropping it totally out of the car.
I chocked the wheels and used an engine hoist to lift the car up by the bumper, and drug the whole shabang out from under.
This was moderately sketchy but I figured the engine and interior are out, the subframe isn't going to be lifted, and the hoist is rated for 1 ton. At the very least I'm ~500 lbs under that.
In hindsight there was probably a few things I should have loosened while it was still attached to the car, particularly the ball joints.
It's hard to get a solid hit to pop them when the whole assembly just slides across the floor when smacked.
Oh well - I got everything apart:
To remove the bushings I used a long bolt, a shitload of washers, two metric adjustable wrenches, and some white lithium grease.
This method worked pretty damn well. Just make sure you're not crushing the control arm with the vice - and probably most importantly, it needs to be sitting perfectly level in the vice otherwise it'll just bind up.
Next was getting all the parts prepped for paint. This took forever. Probably 15-20 hrs of wire wheeling across 4 days.
The lower control arms are a bitch. The dugout part where the shock bolts to is pretty difficult to get cleaned up.
No pictures of that, but here's a quick one of the subframe itself.
It was humid that day too, so as I cleaned up one side, the other side was starting to rust almost immediately.
I primed these two parts with Rustoleum "Bare Metal" Primer.
I ended up doing the rest with Krylon's Red Oxide primer as I felt it sprayed better, and might give me some protection for spots I missed / couldn't clean as well as I wanted (lower control arms..)
Painting. Shiny.
That's where we're at now. I'll be ordering a boatload of things to get this all back together fairly soon. Bushings, ball joints, tie rods, rotors, dust caps, etc etc etc
Next project will be de-powering the rack.
Reply
2
2
07-10-2015, 04:04 AM
#36
Junior Member

Join Date: Sep 2012
Location: New Zealand Christchurch
Posts: 208
Total Cats: -3
nice work  subbed
I'm glad I got my suspension powder coated now sanding/cleaning up is one of the most tedious jobs, you must have lots of patience. Bet that turbo is going to be awesome too
subbedI'm glad I got my suspension powder coated now sanding/cleaning up is one of the most tedious jobs, you must have lots of patience. Bet that turbo is going to be awesome too
Reply
0
0
 Just zerking off in the garage
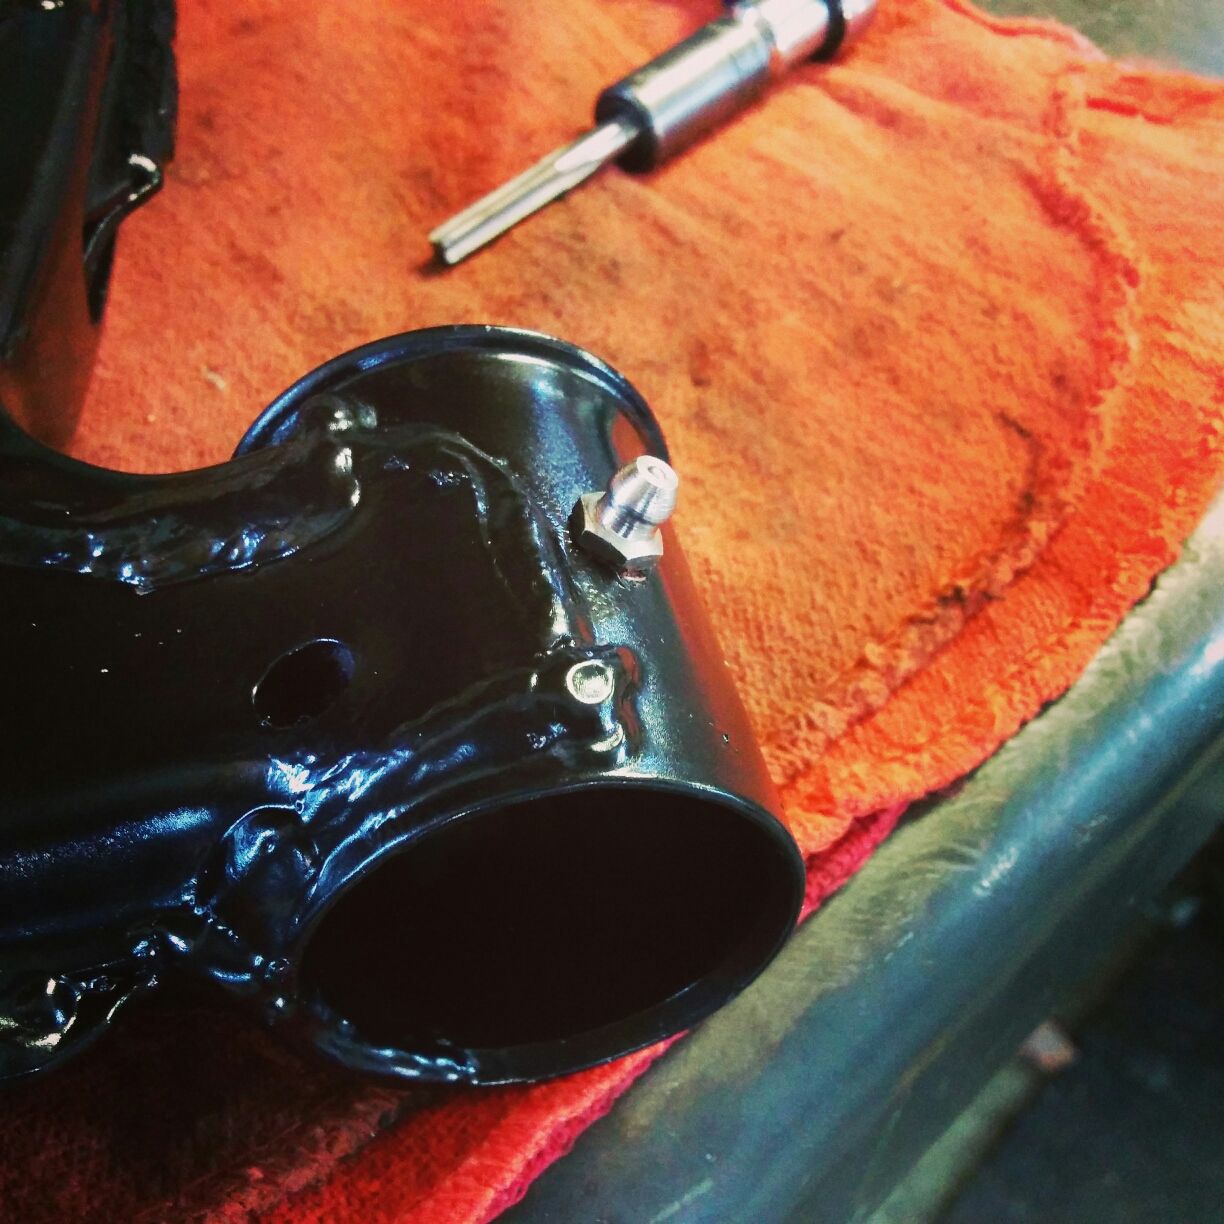 07-11-2015, 07:13 PM
#38
Senior Member
Thread Starter
iTrader: (2)
Join Date: May 2013
Location: Boyertown, PA
Posts: 735
Total Cats: 62
I was going to powder coat originally but I went with the cheaper option. It's definitely tedious but it's an awesome feeling to see everything clean and shiny now. I had the upper control arms so clean I considered for a second just putting clear coat on the bare metal haha
Reply
0
0
07-19-2015, 05:44 PM
#39
Senior Member
Thread Starter
iTrader: (2)
Join Date: May 2013
Location: Boyertown, PA
Posts: 735
Total Cats: 62
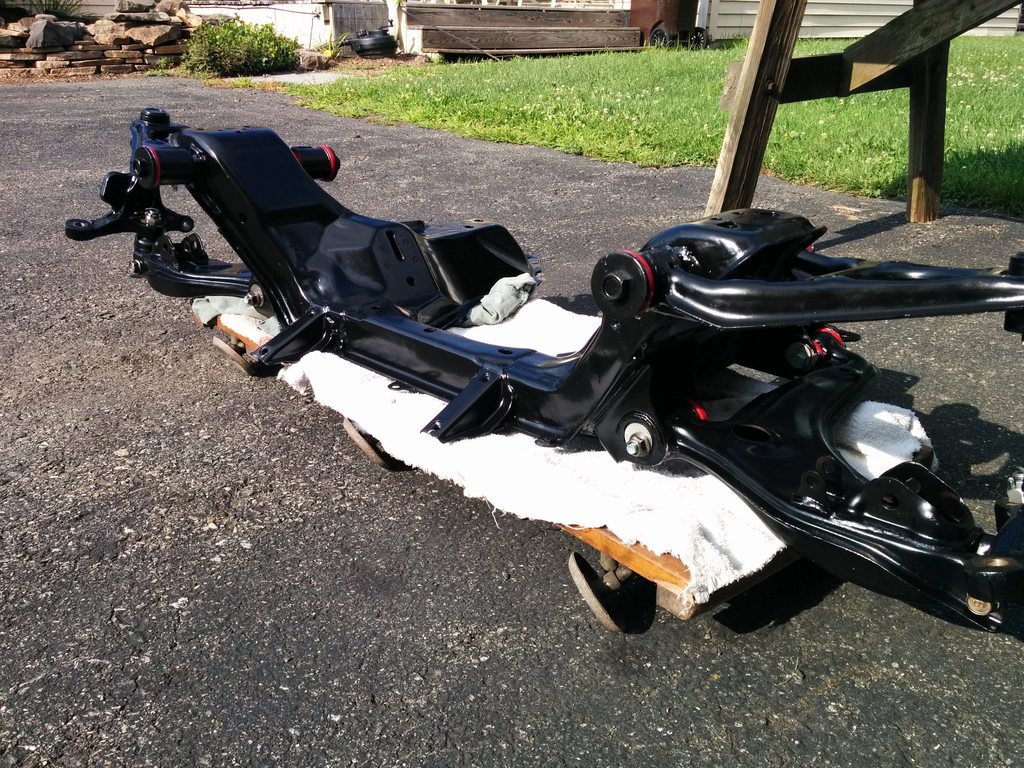
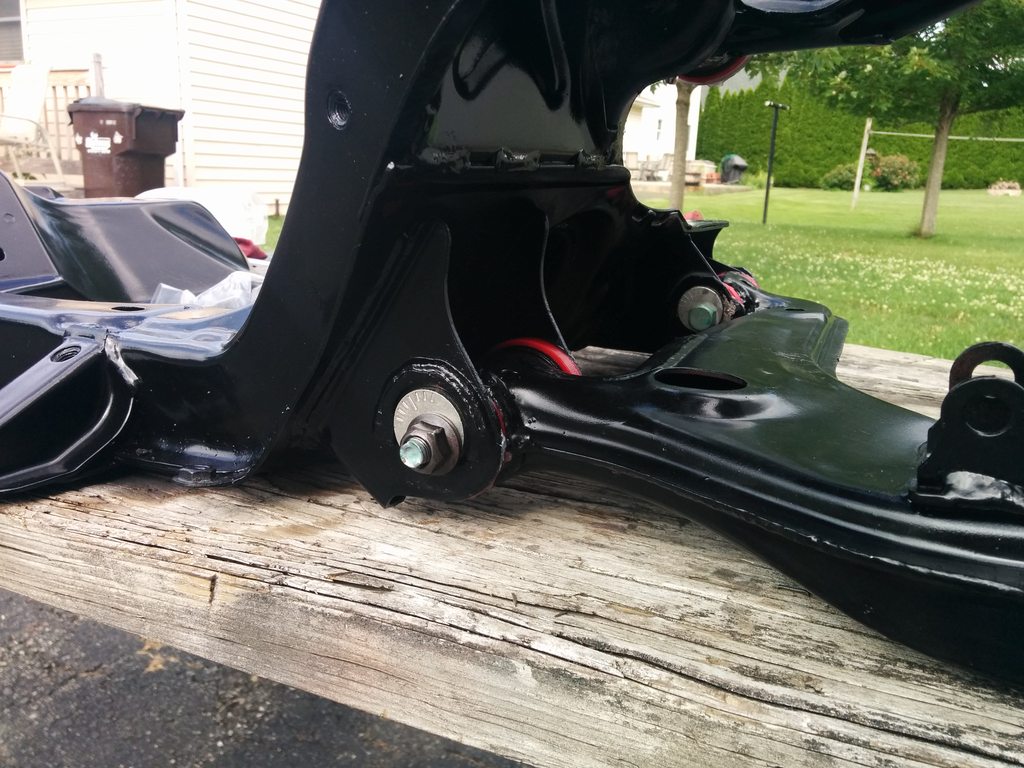
I finished the bushing install and the subframe is mostly back together. I just need to decide on paint for the calipers (probably silver or black) and then get the hubs and everything together.
Love how fresh everything looks.
By the way, the included poly lube is a ******* pain in the ***. It's so sticky and it's a bitch to get off your hands/gloves/rags.
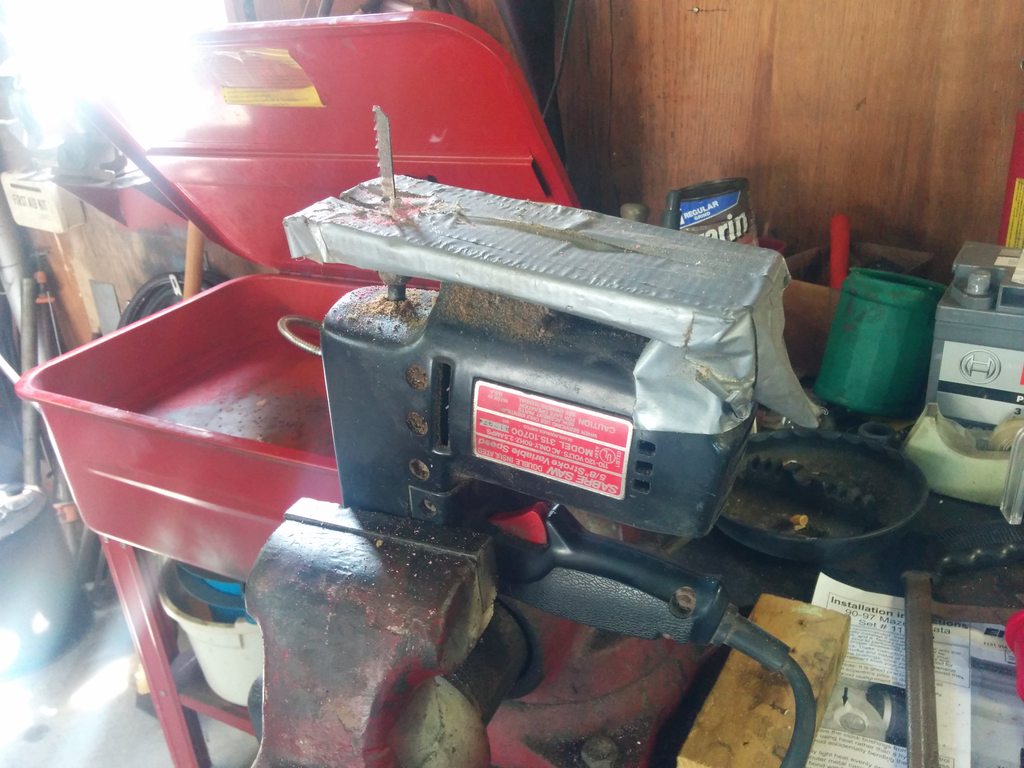
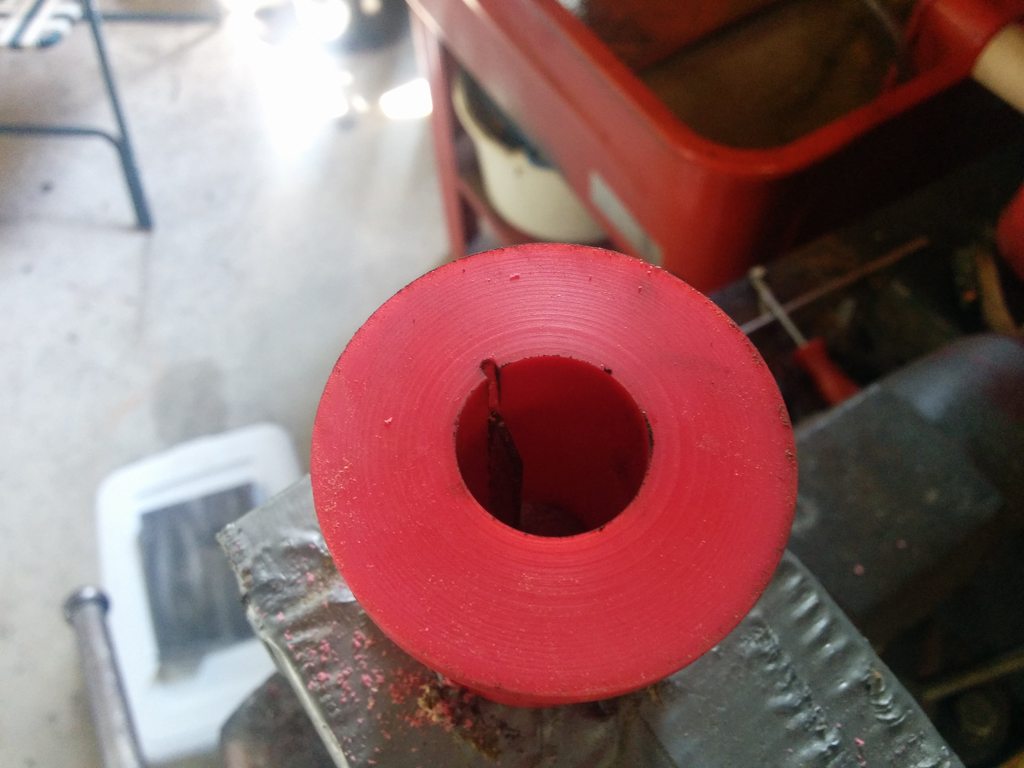
So I installed zerk fittings as seen above, but the upper arm bushings don't have the "channels" like the lower arm bushings do. I rigged this up and cut some small channels to grease the outside flange of the bushing (which I think is the "working" edge of the bushing on all of these?)
That's where I'm at now. I'll likely be in a holding pattern for a few weeks while some other things get straightened out.
Love how fresh everything looks.
By the way, the included poly lube is a ******* pain in the ***. It's so sticky and it's a bitch to get off your hands/gloves/rags.
So I installed zerk fittings as seen above, but the upper arm bushings don't have the "channels" like the lower arm bushings do. I rigged this up and cut some small channels to grease the outside flange of the bushing (which I think is the "working" edge of the bushing on all of these?)
That's where I'm at now. I'll likely be in a holding pattern for a few weeks while some other things get straightened out.
Reply
0
0
07-25-2015, 09:26 PM
#40
Senior Member
Thread Starter
iTrader: (2)
Join Date: May 2013
Location: Boyertown, PA
Posts: 735
Total Cats: 62
De-powered the rack today, didn't weld the pinion though, It seemed like there wasn't a strong argument for doing it.
Welded the fittings closed to plug the lines, also found some pipe threaded plugs for the larger lines.
Edit: you can't rearrange the order of pictures on mobile?
Welded the fittings closed to plug the lines, also found some pipe threaded plugs for the larger lines.
Edit: you can't rearrange the order of pictures on mobile?
Reply
0
0


