Pats Whipple W100AX Street/Track '99 Build Thread
 02-16-2015, 01:12 PM
#42
Senior Member

Join Date: Dec 2007
Location: ATL
Posts: 1,348
Total Cats: 128
There is a relationship between the front and rear O2 that allows the monitors to run and become "ready for test". I forget the details but it's something about the ratio of swinging from rich-to-lean in the two sensors and also that the max, min, and average voltages must be in a certain window. I made a thread about it here somewhere.
FWIW I built an electronic box (based on some specs I found online) that plugged into the rear O2 sensor connector and was tapped into the front sensor signal wires. It basically took the voltage from the front sensor, time-delayed it and reduced the amplitude to simulate what a rear sensor would output. There was a pot in the circuit so that you could "tune" the simulated signal and make the stock ECU happy (and not throw a CEL). I ran that when I had a M45 SC with a PowerCard and it worked like a boss once adjusted.
Of course, when I went to a turbo, my "magic box" went bye-bye and the plans for it went away as well. I'm just saying this 'cause I know it can be done, and it's not terribly difficult.

Reply
 0
0

0
02-16-2015, 04:46 PM
#43
Senior Member

iTrader: (2)

Join Date: Oct 2013
Location: Goleta, Southern California
Posts: 520
Total Cats: 27
You can also run a O2 spacer with a reduced orifice in it which also works.
Oxygen Sensor Spacers & Isolators
Oxygen Sensor Spacers & Isolators
Reply
0
0
02-16-2015, 10:00 PM
#44
Elite Member
Thread Starter
iTrader: (16)
Join Date: Aug 2007
Location: Houston, TX
Posts: 9,297
Total Cats: 477
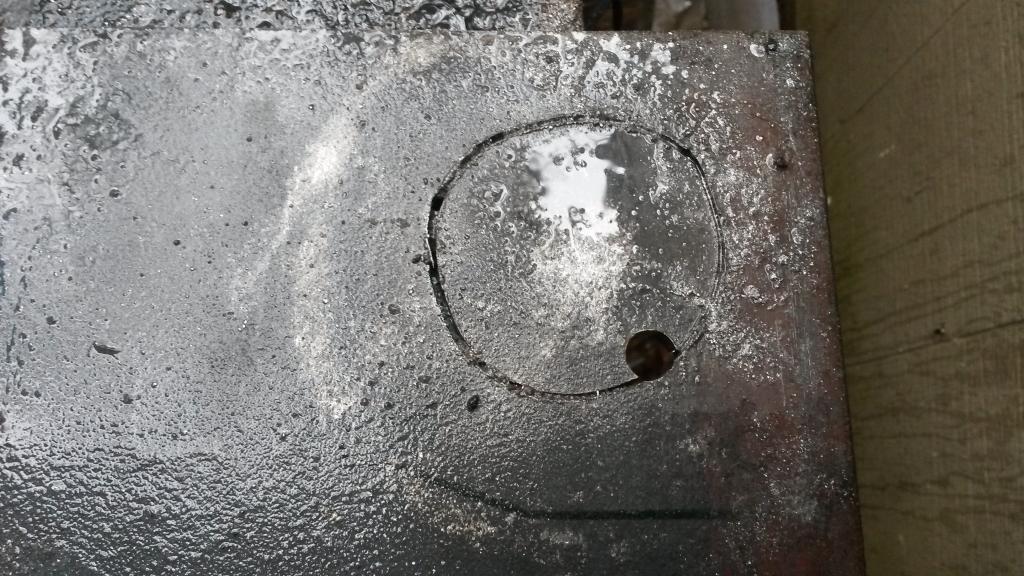
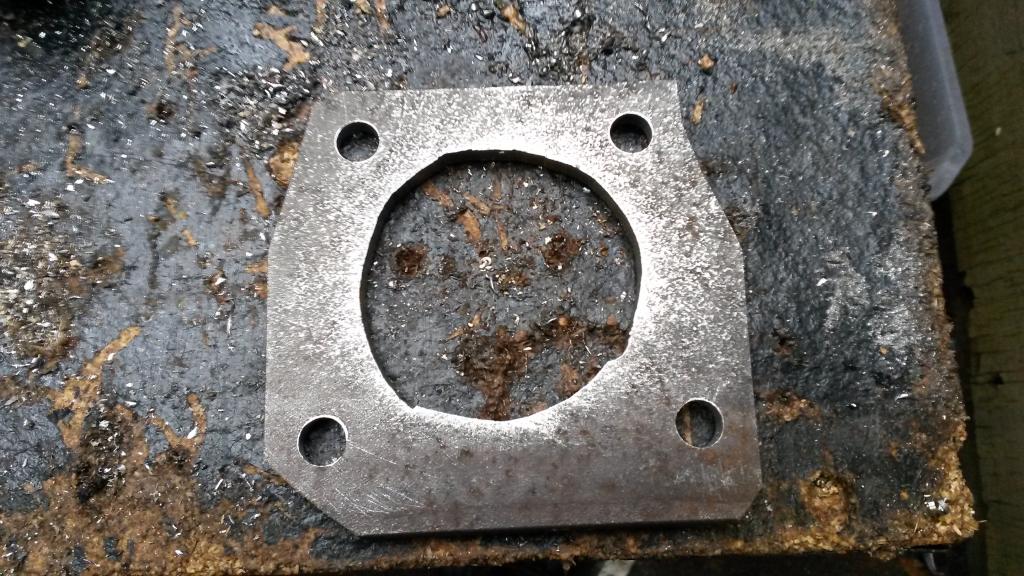
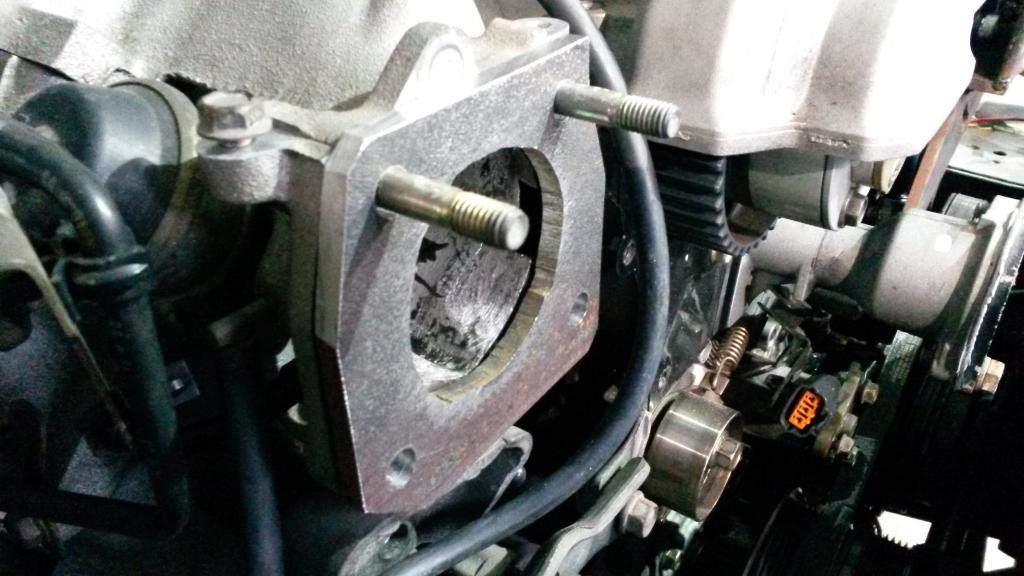
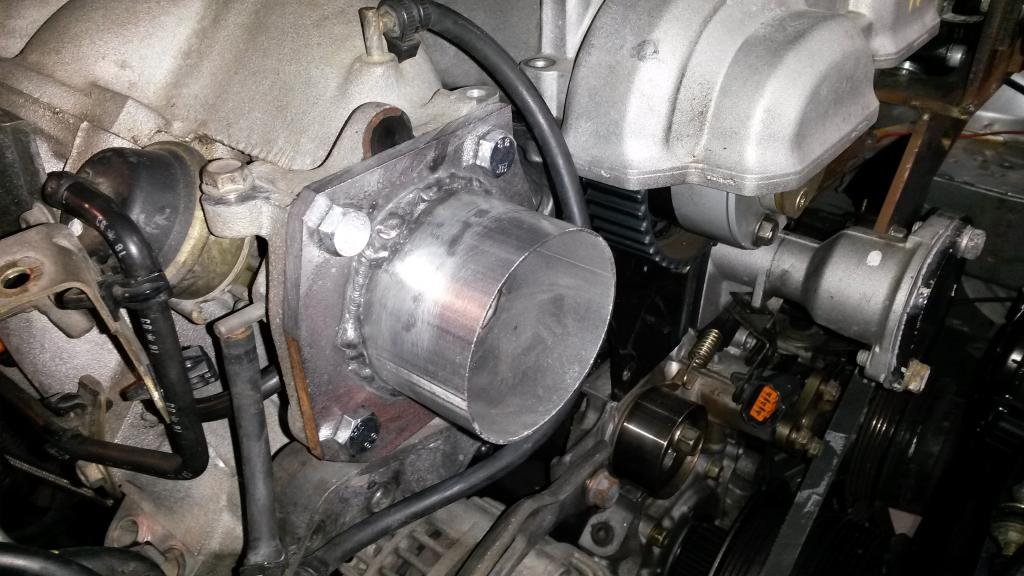
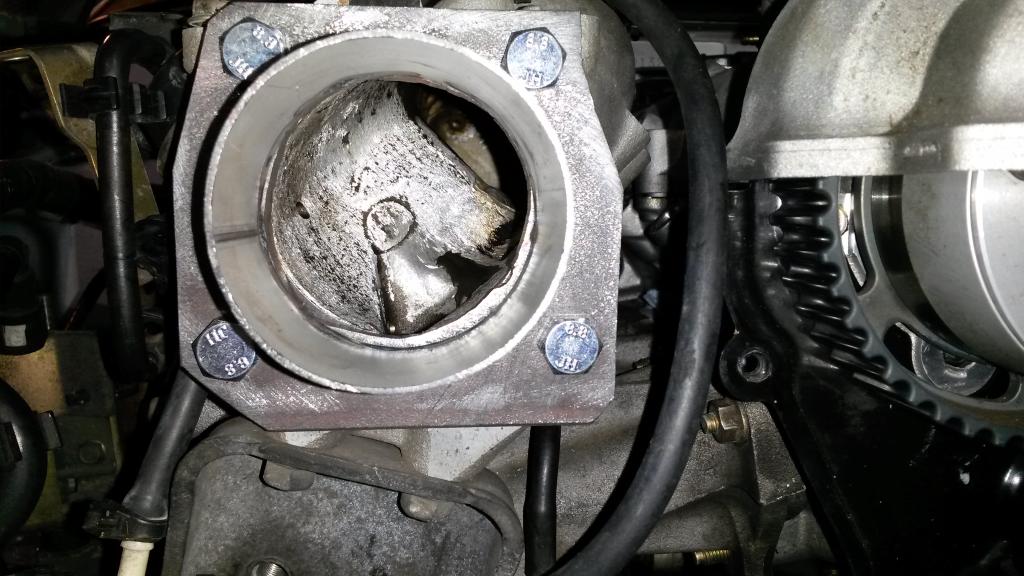
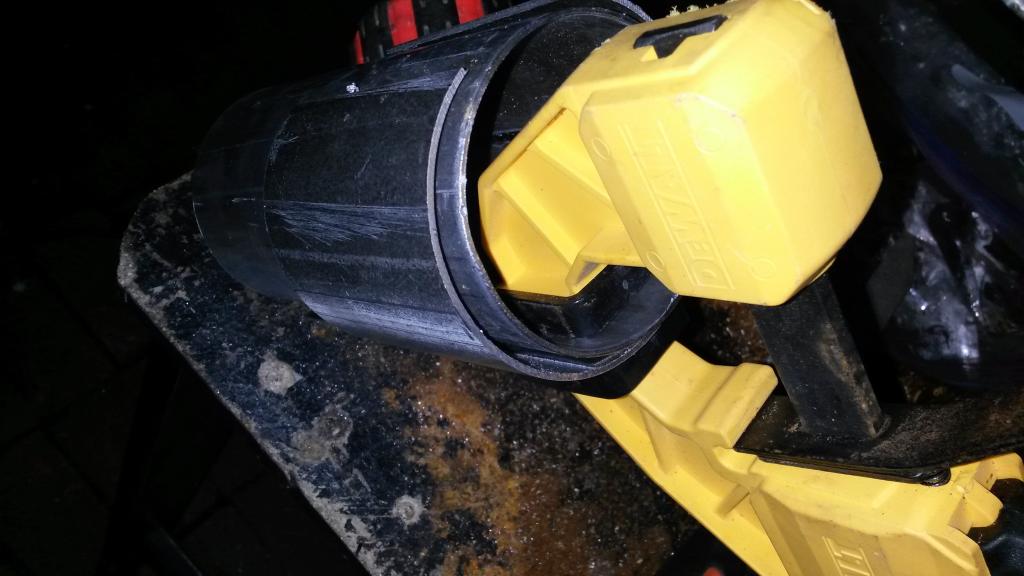
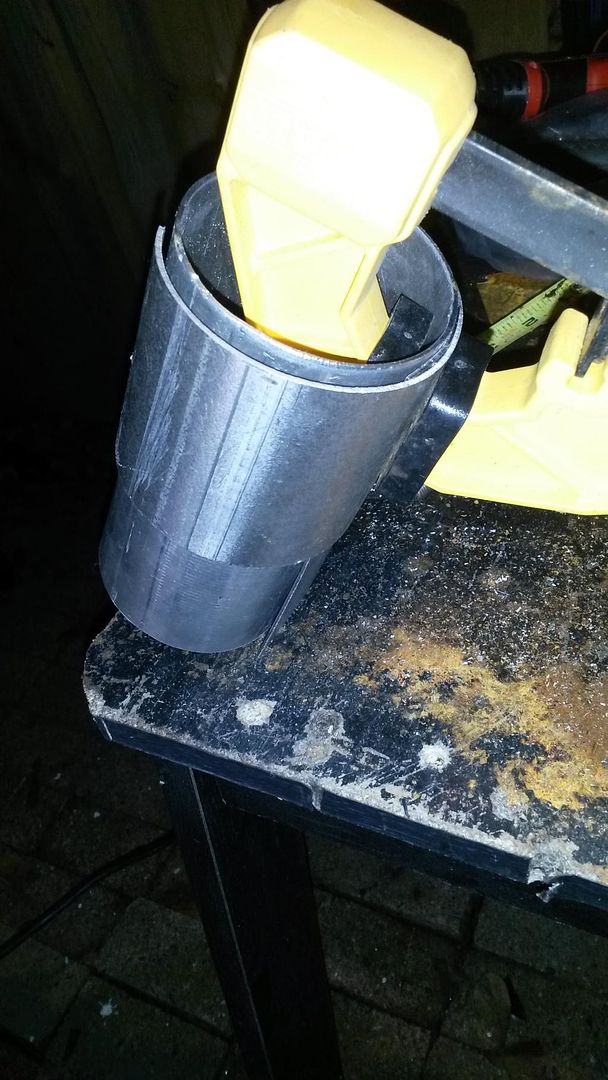
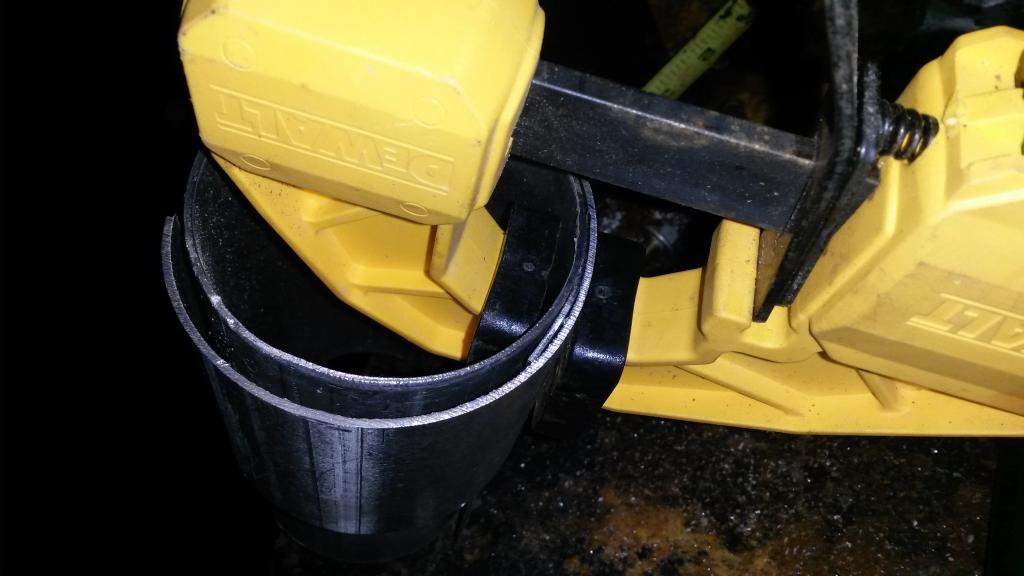
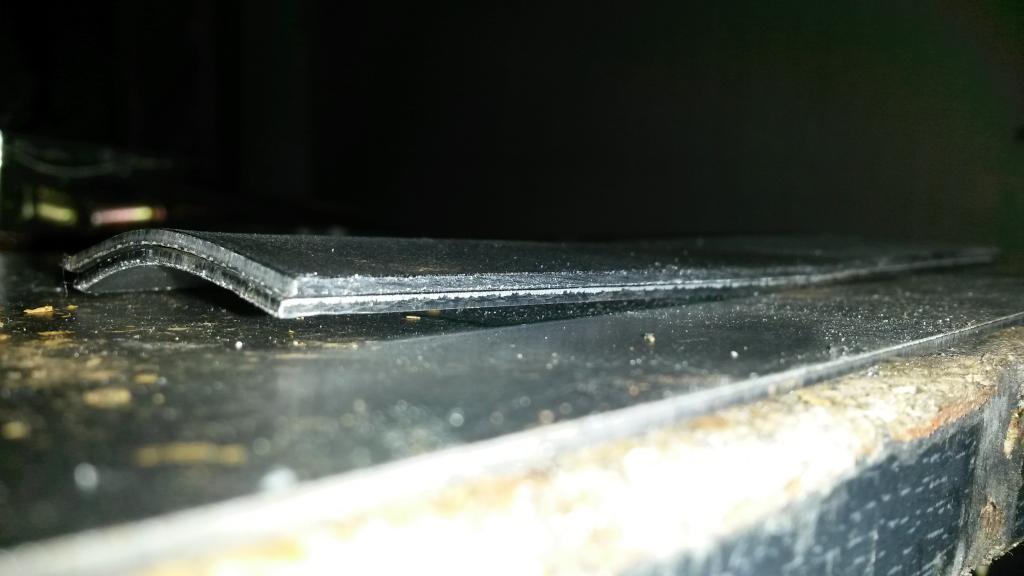
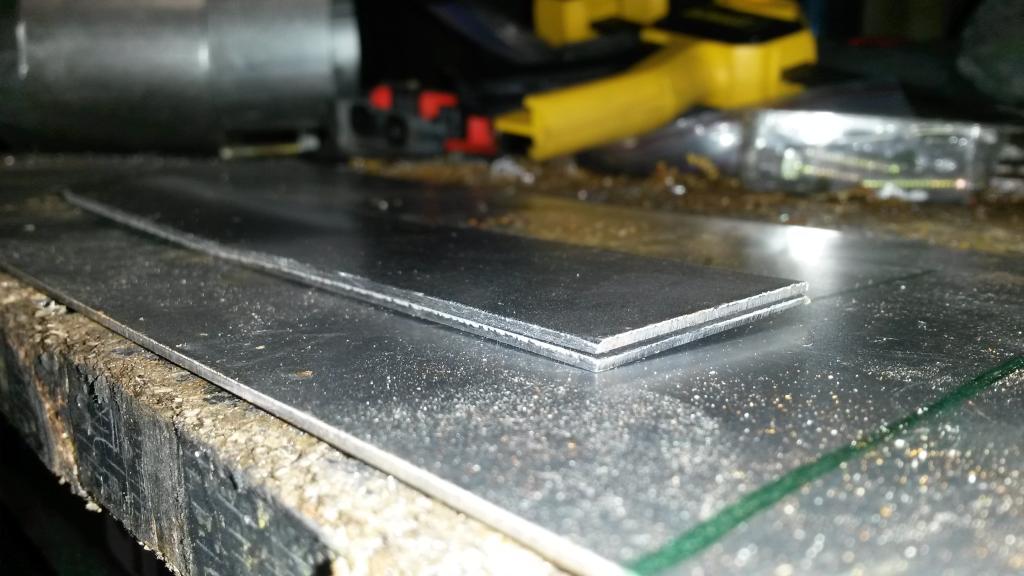
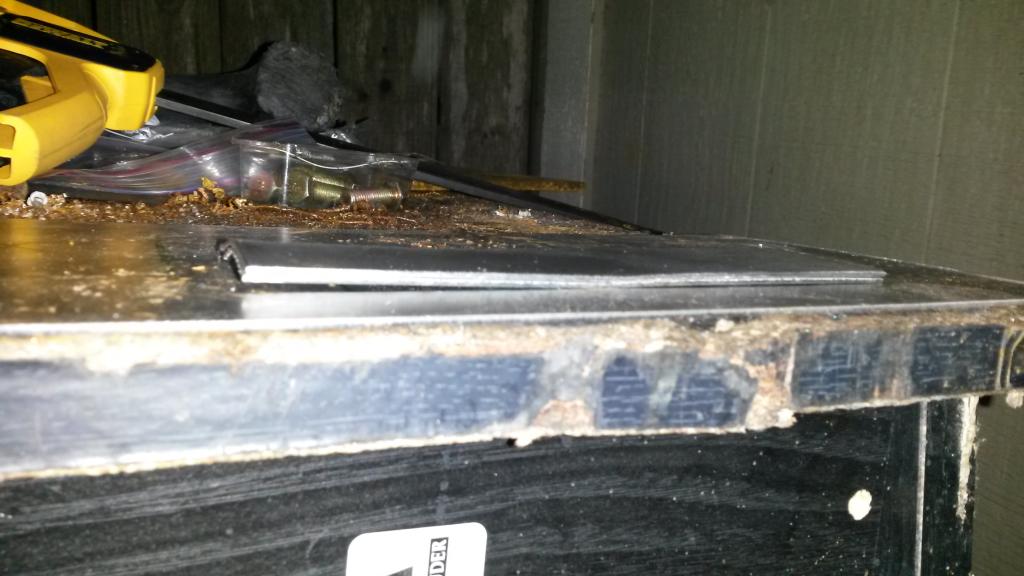
Todays small bit of progress.... Made a dummy throttle body.

Started gathering components to figure out where everything is going to go, found out EGR tube does not fit my reroute, so after researching, looks like I need to build a custom egr tube. Stock on is 1/2" OD Tubing, biggest I could find localy is 3/8" tubing. May work on this tonight, otherwise tomorrow, as it's cold outside....
If I use 3/8" for part of the EGR tube, will it flow enough to not throw an EGR code? Can a 99' miata even throw a code for low egr flow?
Reply
0
0
02-16-2015, 10:08 PM
#45
Senior Member
iTrader: (2)
Join Date: Oct 2013
Location: Goleta, Southern California
Posts: 520
Total Cats: 27
Yes it can throw a code. Mine did and required cleaning out the ports in the intake manifold.
I don't think you'll have a problem with a 3/8" tube as long as the rest of the EGR system is cleaned out.
I don't think you'll have a problem with a 3/8" tube as long as the rest of the EGR system is cleaned out.
Reply
0
0
02-16-2015, 10:31 PM
#46
Elite Member
Thread Starter
iTrader: (16)
Join Date: Aug 2007
Location: Houston, TX
Posts: 9,297
Total Cats: 477
Ok thanks. I think tomorrow I'm going to cut the stock one and connect it back with 3/8 tube. If it does indeed throw a low flow code in the future I'll have to order some 1/2" tube and redo it.
Lucky me it's cold and raining outside. I'll get back to work tomorrow! For now, going to work on some WI numbers.
Actually, I'll post what I'm thinking and see what you guys think.
Water Injection: So I have 2 goals for the water injection.
1. Supress knock/detonation.
2. Cool supercharger
Water has infinite knock index, and will reduce temps in the cylinder, the more I spray the more the temps go down.
My plan is to have 2 or 3 stages of water.
"Mains" will be 1 nozzle/cylinder, direct port. These will be sized to spray a good amount of water, probably around 100cc/min/nozzle into each port. Goal with these is to completely stop detonation during WOT driving from 5-8K, the expected RPM range for the engine to operate at between gear changes.
Secondary will be one nozzle, pre SC, that sprays some small amount of water into the SC to help keep it cool. I've been reading up, and it seems almost every SC failure is directly related to too much heat. Example, M62 on a miata dies, because it was pulleyed to make 20 PSI where it's inefficient (lots of wasted heat as rotors leak) and was running lots of booost (more heat) and spinning higher than it's rated (more heat) and sucking in underhood hot air (more heat!) and it overheats the SC (surprise!) and the rotors have a bad day and it dies.
I gotta do some math, but basically it will be a small amount of water, pre-sc, to keep the peak blower temps down. So this nozzle doesn't need to run all the time, only when at say 5-8K like the mains. Could come on sooner I suppose but probably only needed during high RPM when it's having to work hard to build lots of boost.
Possibly will be one more nozzle, that sprays into the motor before the plenum, after the intercoooler. If so, it will come on at a lower RPM so I can make more torque down low without knock.
Reply
0
0
 02-17-2015, 12:31 PM
#48
Elite Member
Thread Starter
iTrader: (16)
Join Date: Aug 2007
Location: Houston, TX
Posts: 9,297
Total Cats: 477
Thanks man! Yeah I'm just using what I got... Flux core, jig saw, drill, a portaband, bastard file, clamps, hammers... Kinda wish I had a mill right now, I need to machine the base of my SC bracket flat where the SC mounts to it.
Anybody got a creative way to get it flat? It's steel, so sanding it flat would take forever... It's probably 30 thousands warped from welding, and that's after straitening it with a press! Odd shape won't fit on a belt sander.
I can't think of anything reasonable other than setting it up in a mill and using an end mill to surface it, but I don't have a mill! Hate to spend the money/wait for someone else to mill it. Also not sure where I'd take it anyways.
Reply
0
0
02-17-2015, 01:04 PM
#49
First idea of implementing my warning system.
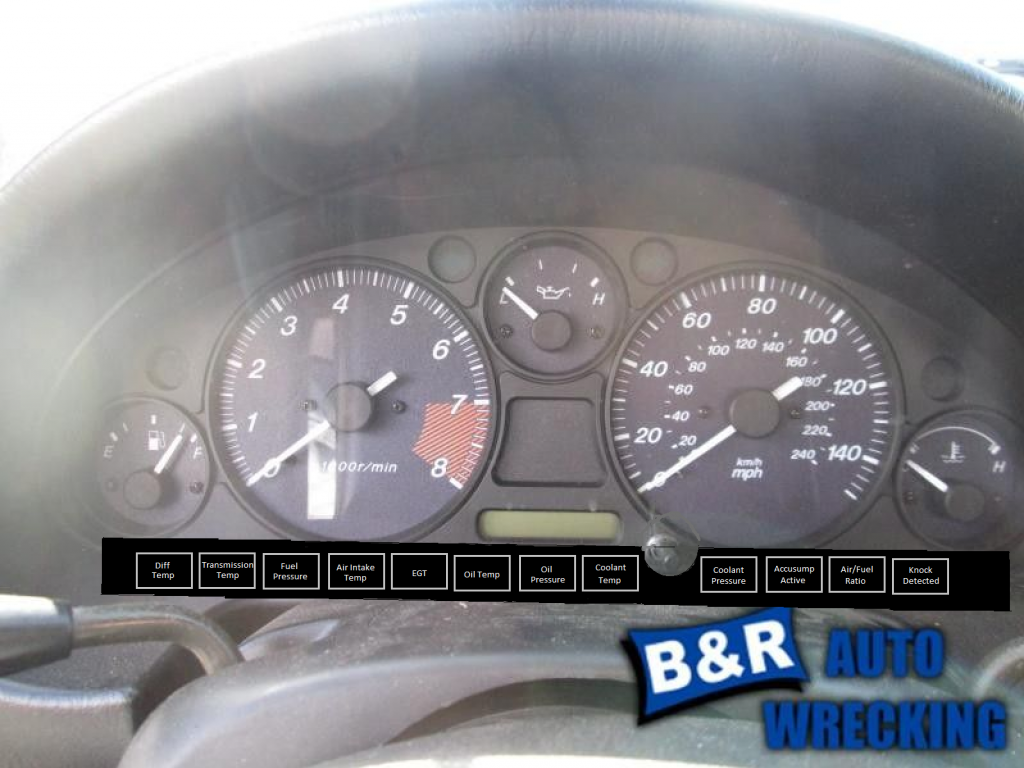
I don't have the hardware design all figured out, but what I'm thinking now is use plexiglass to build a little box there. Design a sticker that looks like the front of the box with all the warnings, have the text cut out of the sticker. Place sticker on front of plexiglass. Use LEDs behind plexiglass to light up the text green/yellow/red depending on if it's good/bad/oh-****-stop-now. Put dividers between sections so no bleed through. Still looking for LEDs that are bright enough, would prefer to use a RGB LED so I can do all colors with one LED.
I don't have the hardware design all figured out, but what I'm thinking now is use plexiglass to build a little box there. Design a sticker that looks like the front of the box with all the warnings, have the text cut out of the sticker. Place sticker on front of plexiglass. Use LEDs behind plexiglass to light up the text green/yellow/red depending on if it's good/bad/oh-****-stop-now. Put dividers between sections so no bleed through. Still looking for LEDs that are bright enough, would prefer to use a RGB LED so I can do all colors with one LED.
I would suggest looking into I2c 8 but I/O expanders or something similar.
each chip can control 8 digital lines so you will need 3 chips for the 24 digital outputs to get red, yellow, and green control for all 12 warning lights. These use I2C so you would only have to run 4 wire from your micro controller (2 digital, 5V, GND). You can just use a phone jack to transmit the signal between devices and make the install much cleaner.
http://www.nxp.com/documents/data_sheet/PCF8574.pdf
Reply
0
0
02-18-2015, 12:40 AM
#50
Elite Member
Thread Starter
iTrader: (16)
Join Date: Aug 2007
Location: Houston, TX
Posts: 9,297
Total Cats: 477
This would be a useful device. A couple notes. If you want red green and yellow lights then each RGB LED will need 2 digital leads and the ground pin. For the 12 warning lights you have shown that will require 24 digital ouputs as well as 24 wires running from your Arduino or whatever micro controller your using.
I would suggest looking into I2c 8 but I/O expanders or something similar.
each chip can control 8 digital lines so you will need 3 chips for the 24 digital outputs to get red, yellow, and green control for all 12 warning lights. These use I2C so you would only have to run 4 wire from your micro controller (2 digital, 5V, GND). You can just use a phone jack to transmit the signal between devices and make the install much cleaner.
http://www.nxp.com/documents/data_sheet/PCF8574.pdf
The warning system will be done in two stages. First is getting the sensors installled and working. THEN, after the car runs/drives, I'll tackle the hardware/display side of it. I have some ideas of how to implement the display that I think will be very very functional and not look to bad when completed.
Reply
0
0
02-18-2015, 01:00 AM
#51
Elite Member
Thread Starter
iTrader: (16)
Join Date: Aug 2007
Location: Houston, TX
Posts: 9,297
Total Cats: 477
Update:
So this morning I got the EGR tube made. What a pain in the *** that was! I actually didn't take any pics of it, but I basically cut and rotated/bent the stock on in no less than 10 spots, and got it to fit but it was missing about 2.5" to connect the two pieces back together. The factory EGR tube is .502" OD on mine, I ended up buying some 3/8" OD brake line and cutting/bending/installing/welding that into it to complete it. To be honest, it turned out shitty.
The brake lines are coated with something, and when I tried to weld them, it's messing up the metal, it fractures right where the weld stops. And by fracture, the first time I welded it, I set it down and it completely broke in half.... I ended up welding it a couple more times trying to make it better, it's crap, and I'm actually expecting it's going to break when I get some miles on it. I'll have to order some actual bare steel tubing to use to fix that spot next time. Oh well but for now egr tube is done till it cracks!
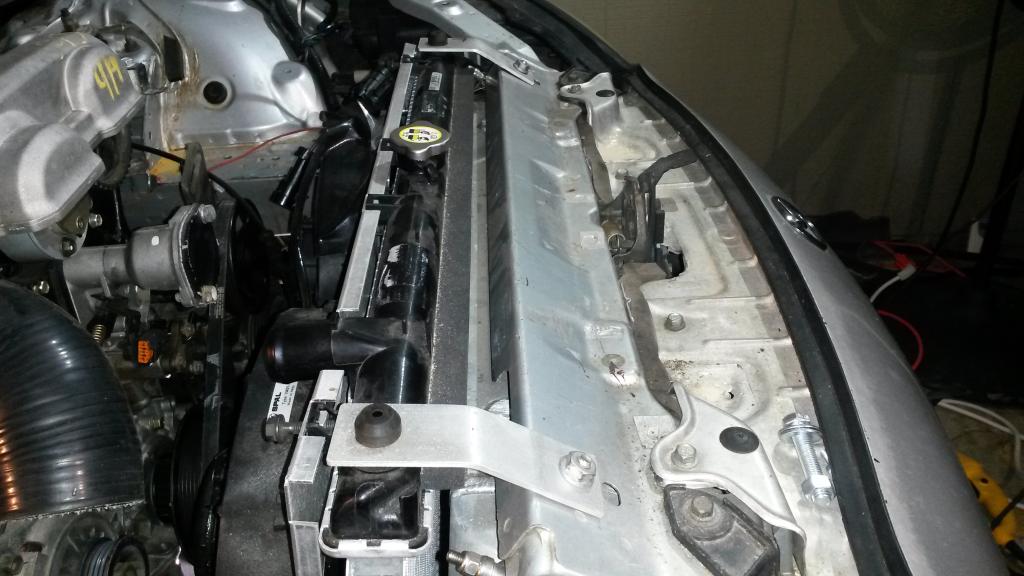
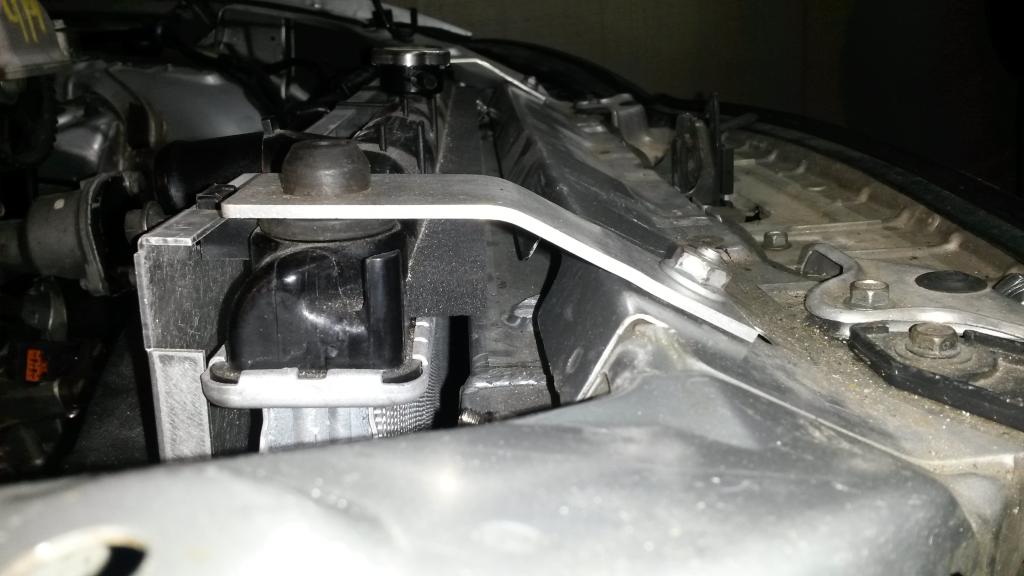
So then I made my radiator mounts, just found my old ones, hammered them flat, cut shorter, bent in new correct spot, done.
Then figured out more or less how I'm going to do the cooling hose from rear of head to radiator, with it connecting to a large mocal oil/water laminar flow heat exchanger/oil cooler. Gotta order some 45* silicone bends but that's going to work out ok, even clears most of the factory emmisions crap that goes on the passengers side fender area.
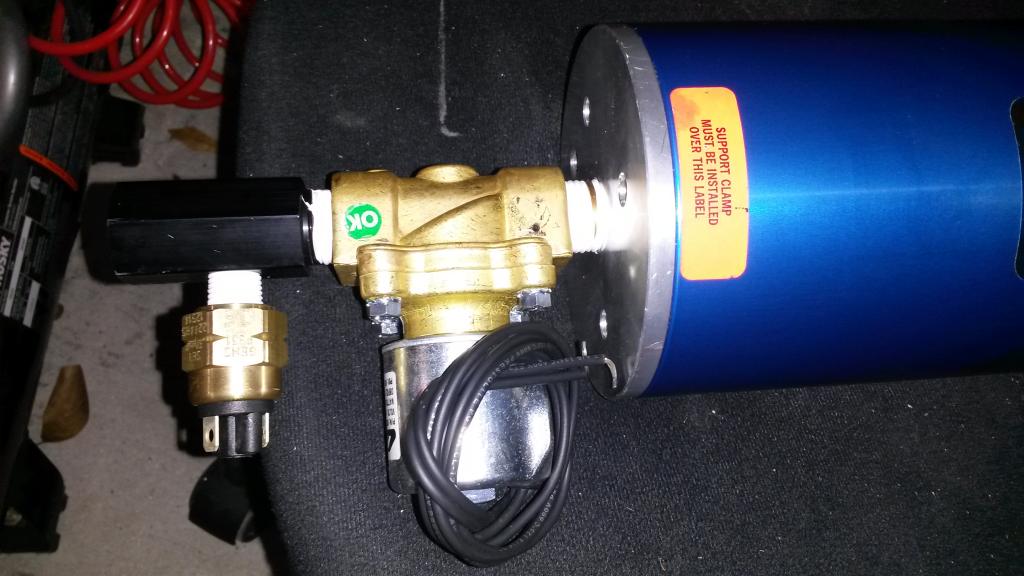
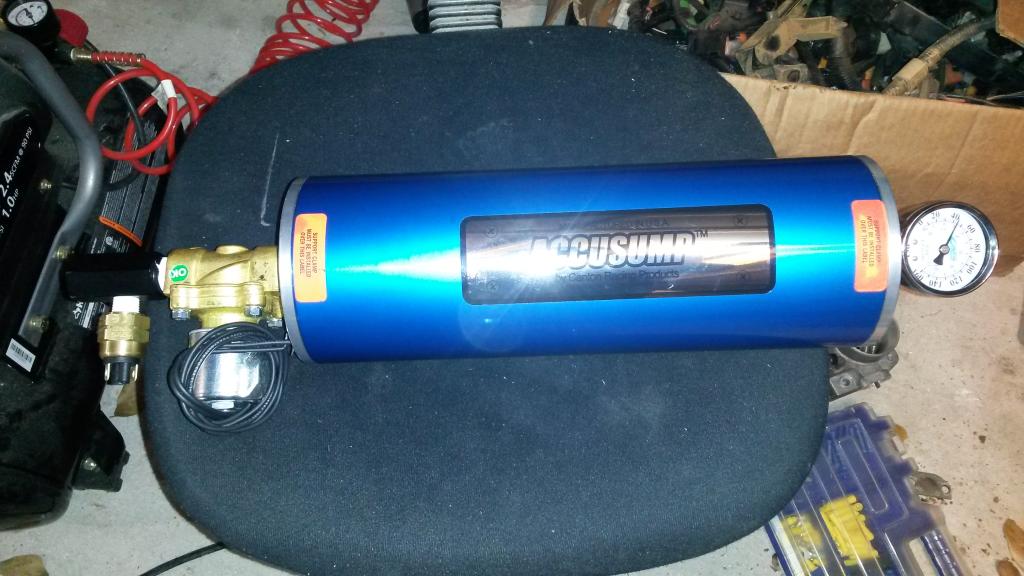
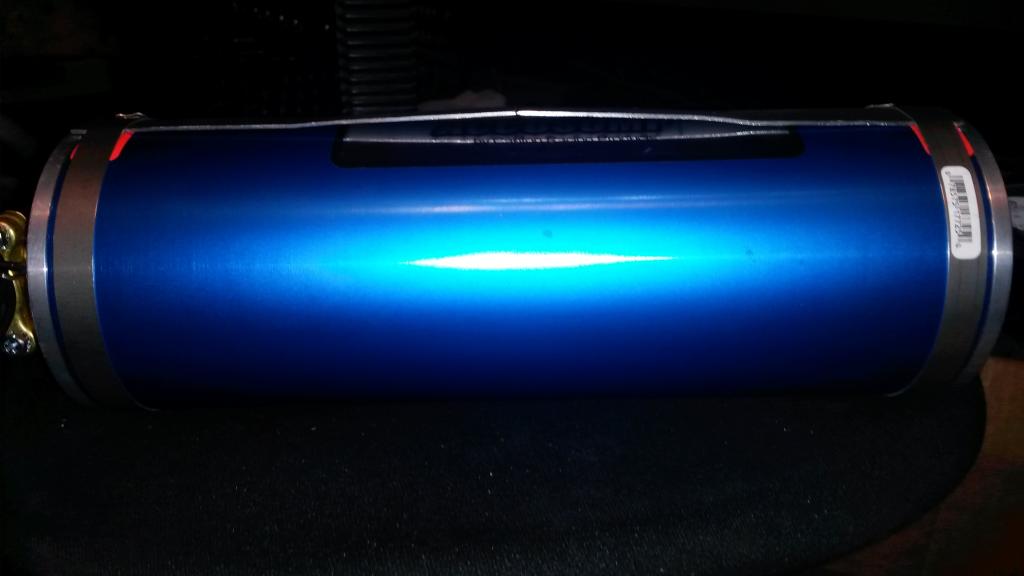
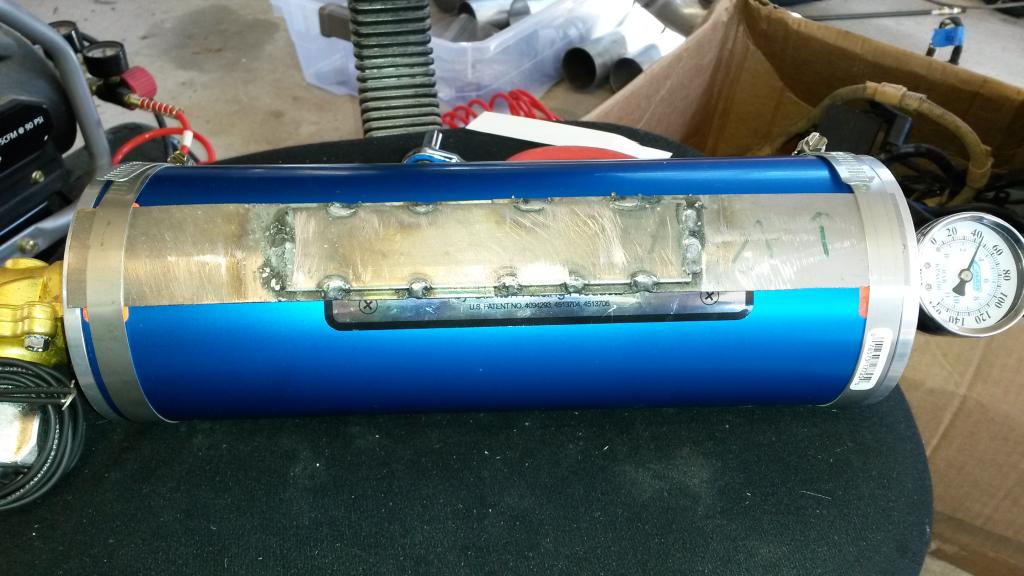
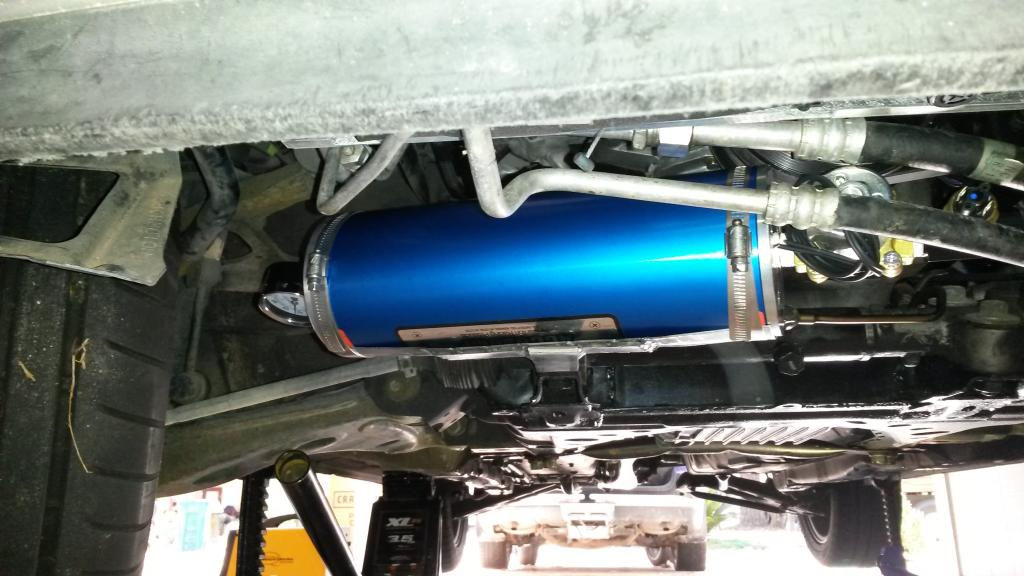
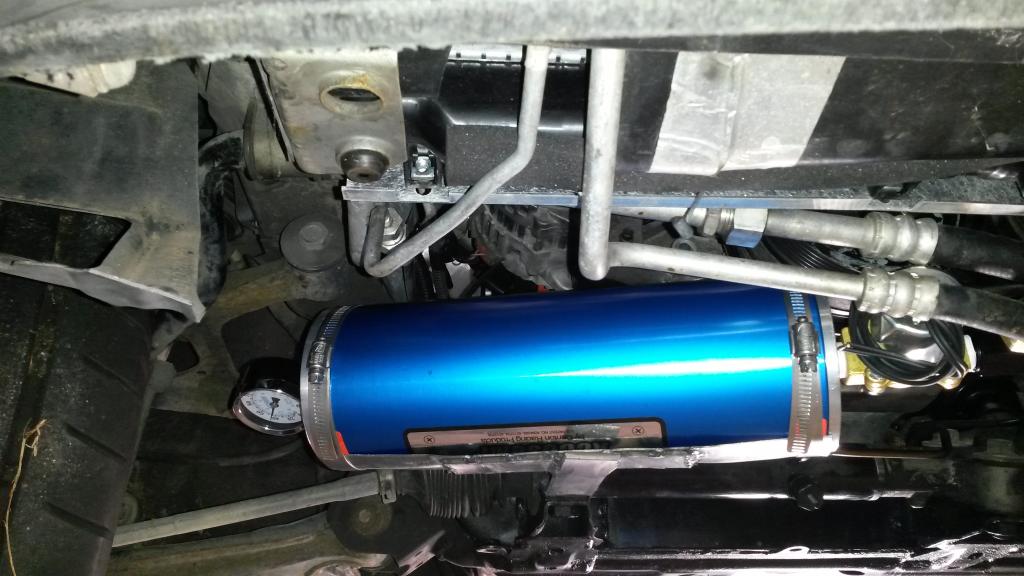
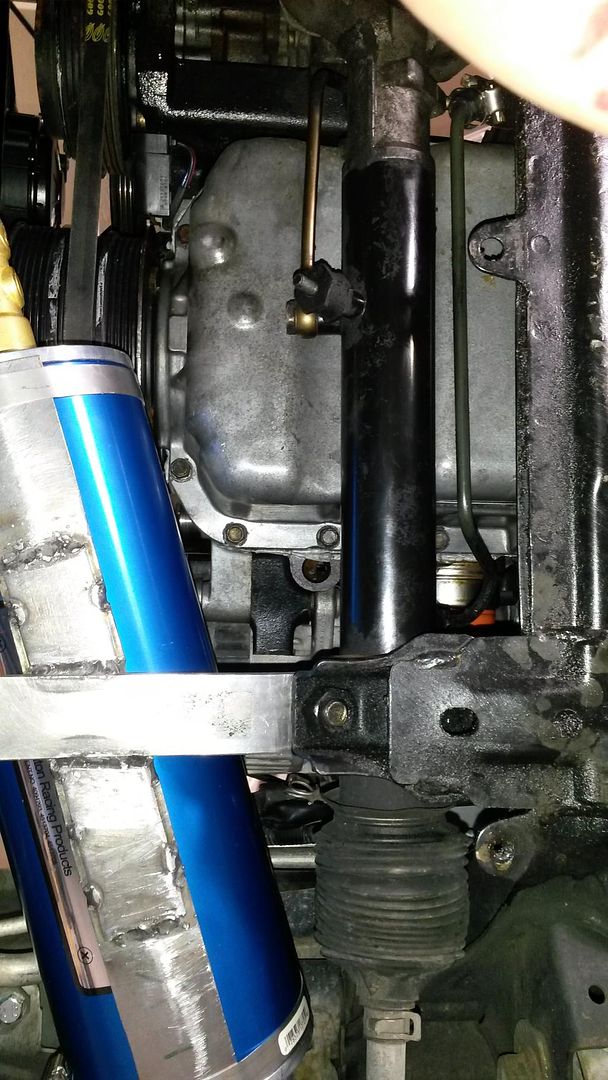
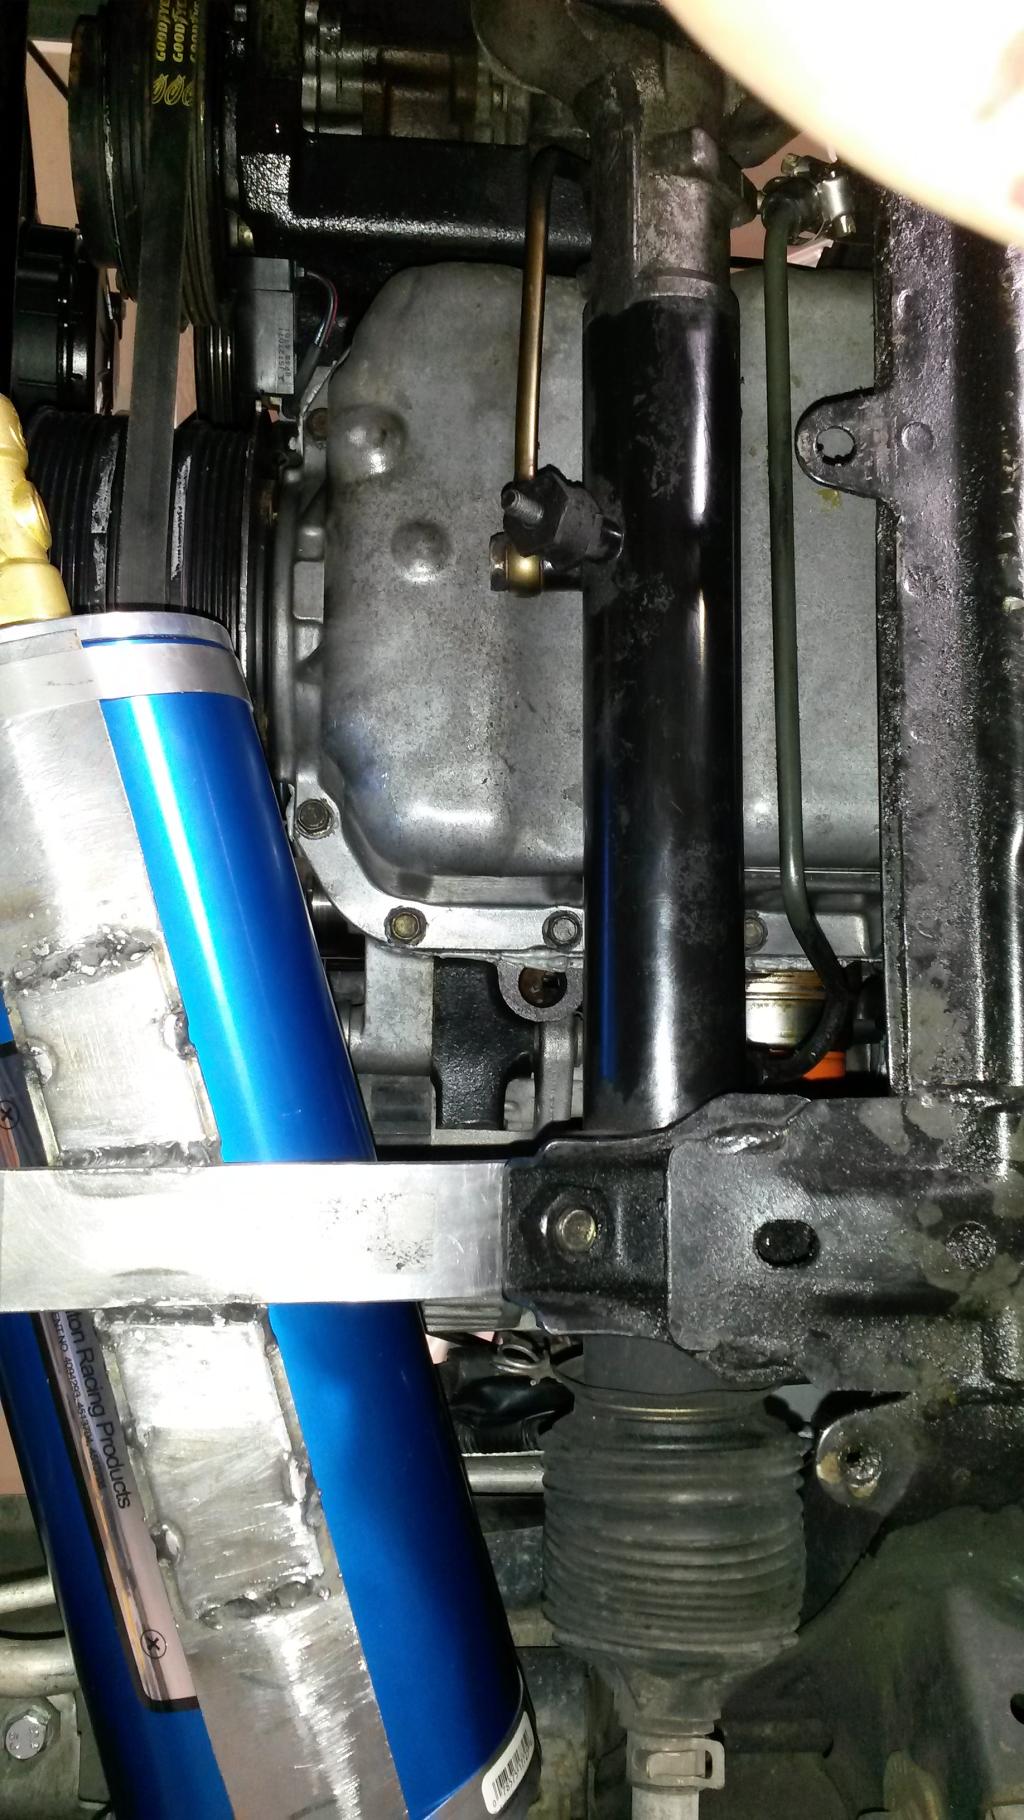
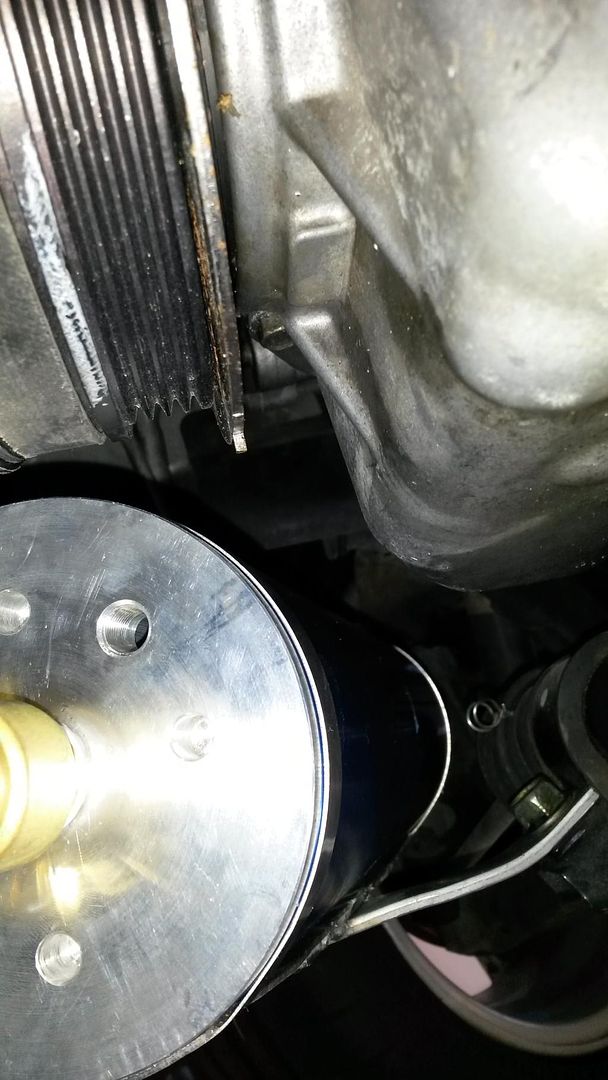
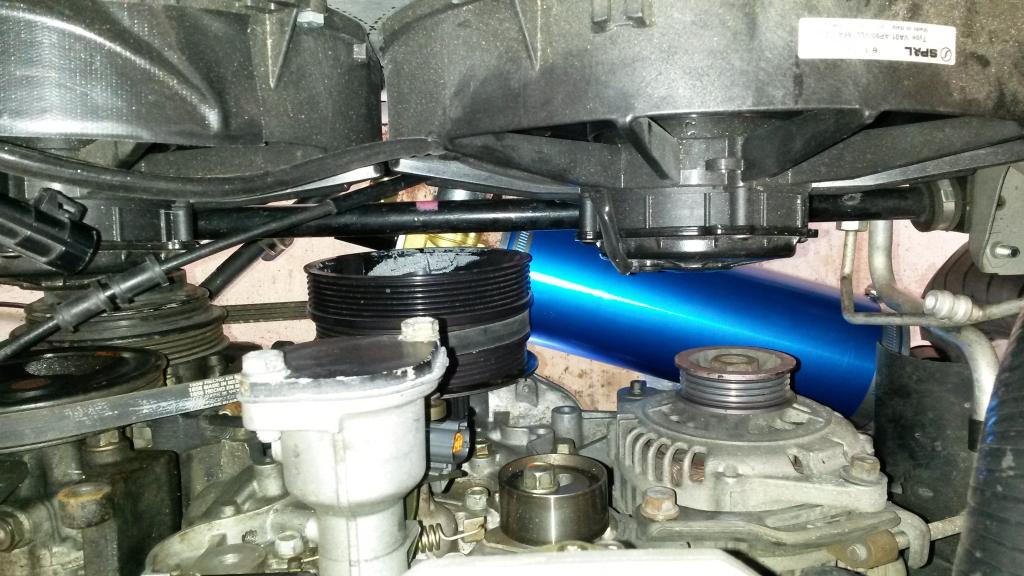
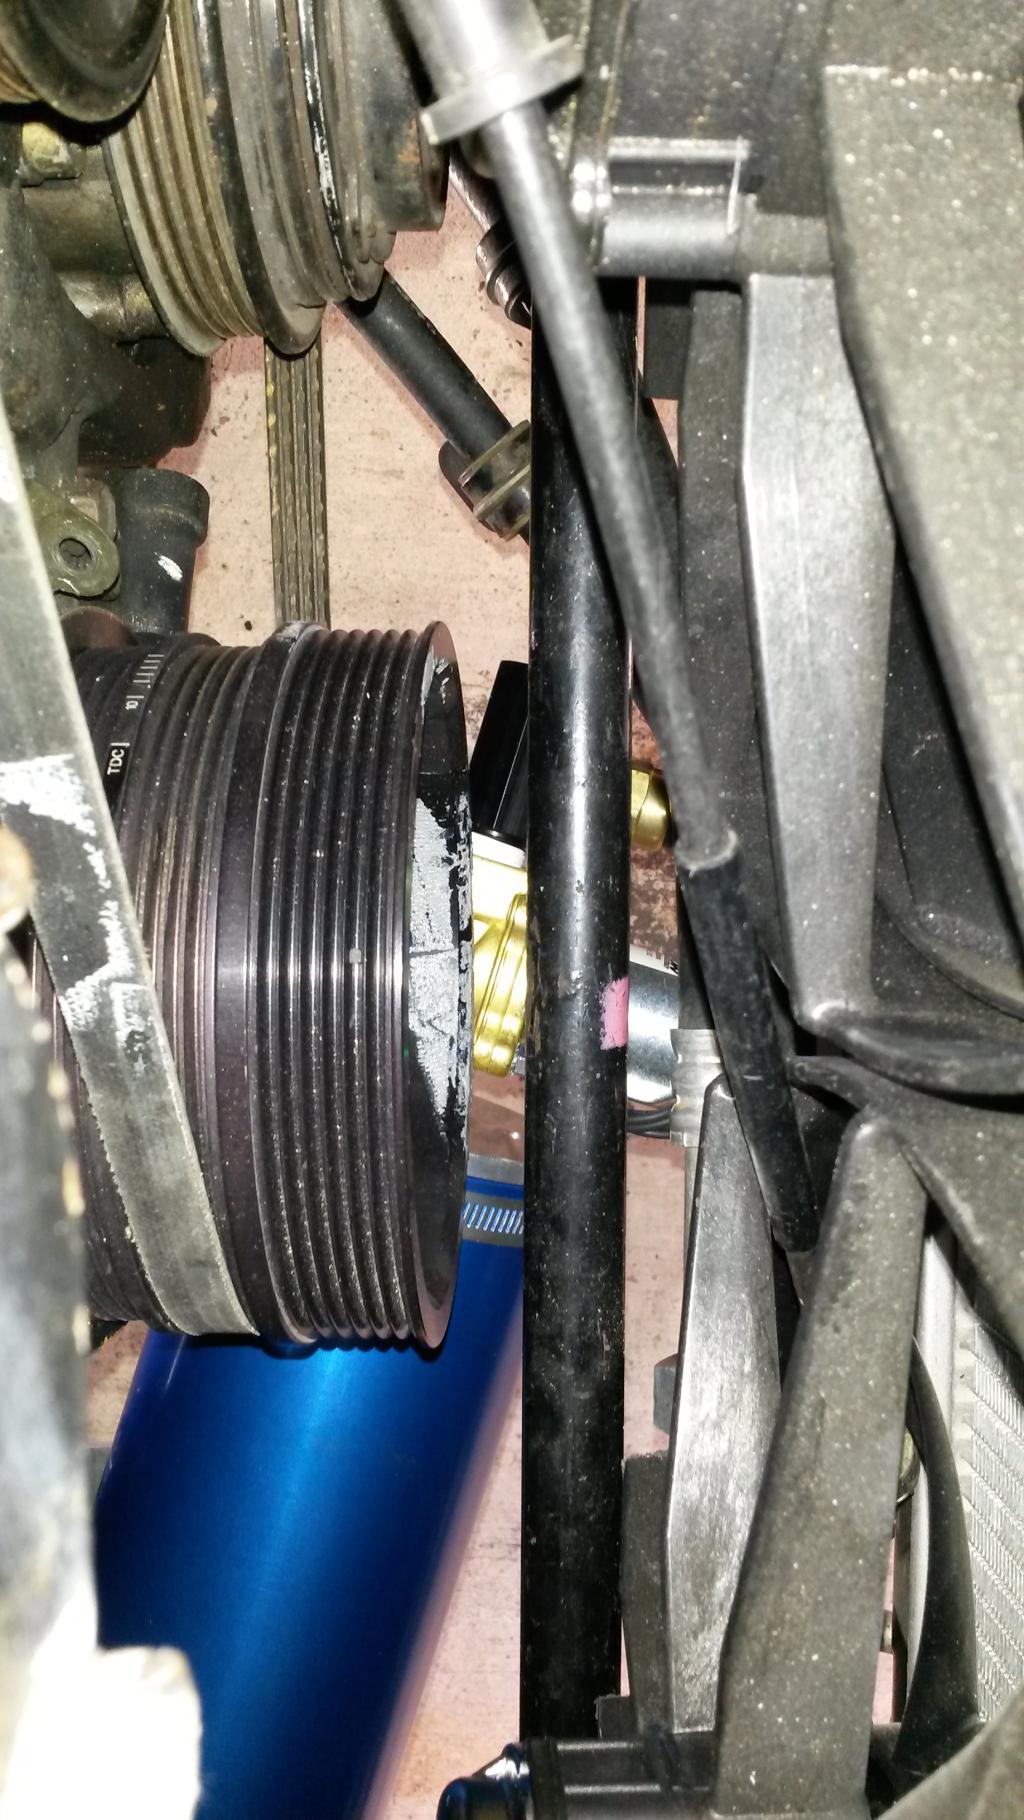
Then started on my 2 quart accusump. It's friggin 12" by 4.something with no fittings, about 16-17" long with fittings. Not many places that will fit. I finally found a home for it under the car, under the crank pulley, but almost touching it, with the gauge end pointing towards the passengers side wheel, angled forward a touch. Here, it almost hits the crank, alternator belt, steering rack, passengers side tie rod, factory undertray bottom and passengers side, passengers side lower control arm, both a/c lines, and sway bar. But it actually doesn't it any of them!
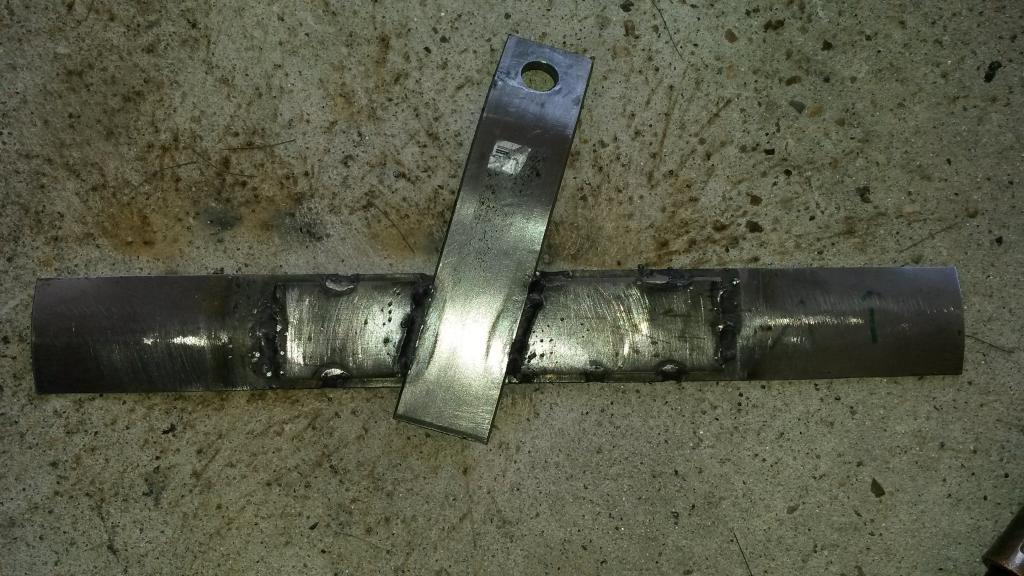
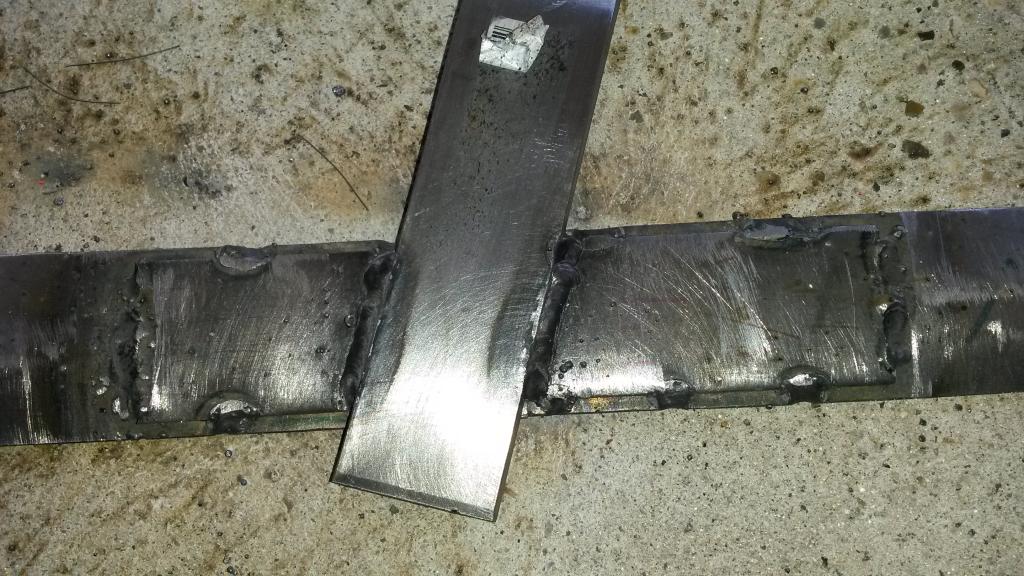
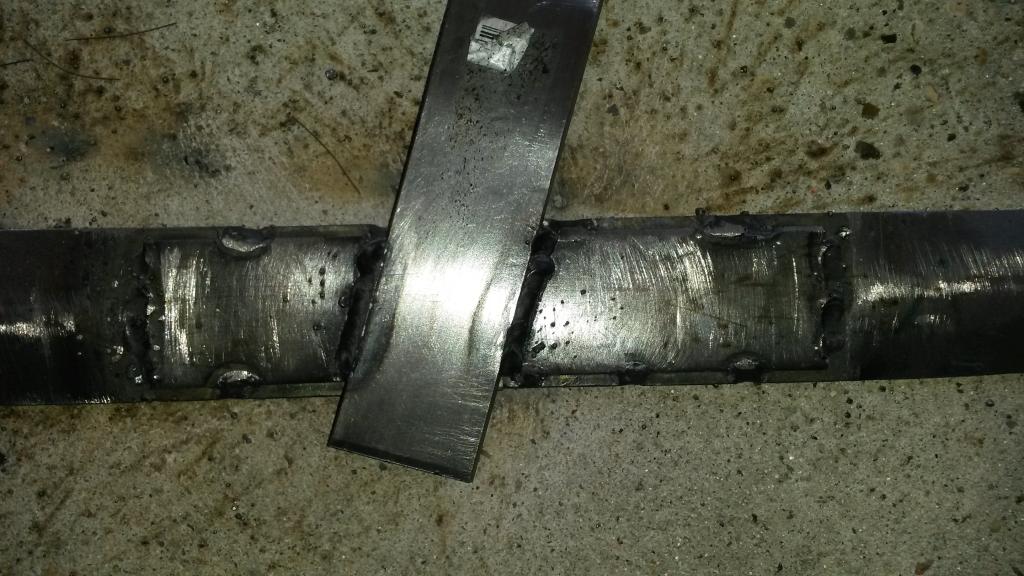
I started on the bracket for it, then changed my mind and started over with a better one. Basic design is two pieces of metal that are curved to fit against accusump, that are clamped to it, then weld these two pieces together, and weld them to a piece of metal that will go and bolt where a 17mm bolt is for the steering rack. I made the curved metal pieces, now need some 1/8" or better steel to build last piece. Tried to use factory engine hook, but it's too short...
Pics!
Accusump, 2 qt.
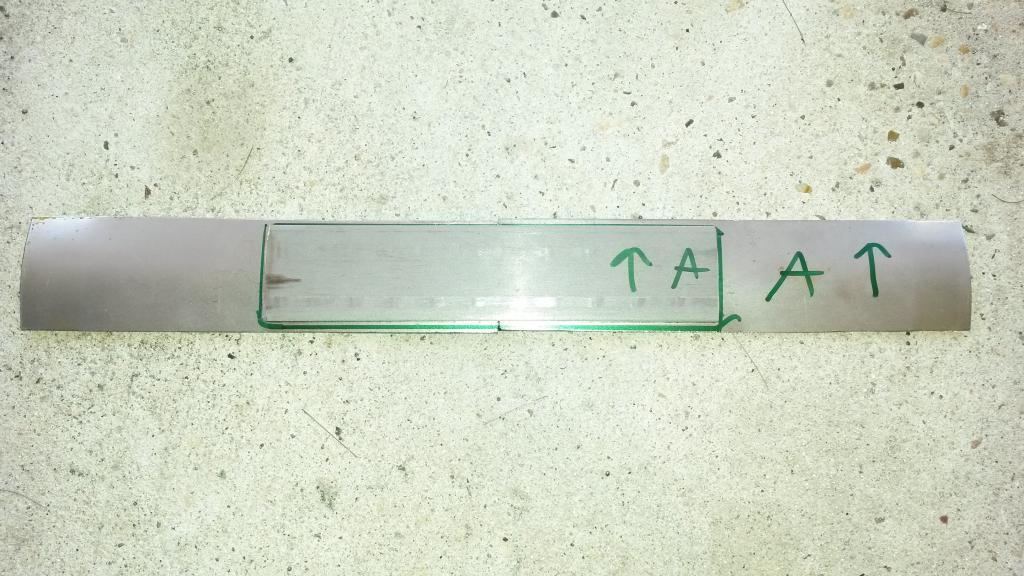
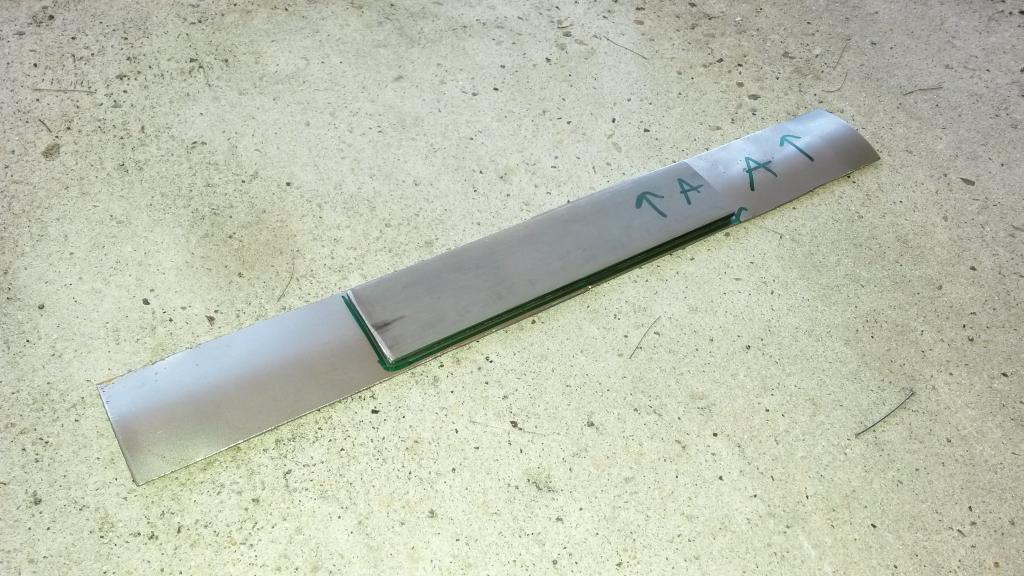
Basically just cut a strip of 16 gauge steel, cut a piece of 3" tubing down its' length, and sandwhiched the strip between the cut piece and a piece of 3" tubing, then clamped it to squish the strip to be curved. It worked!


Tomorrow, buy thicker steel, build lower bracket, weld, drill and bolt to P/S rack bolt. Order silicone 45's for cooling system. Mock up remote filter, start working on fuel system.
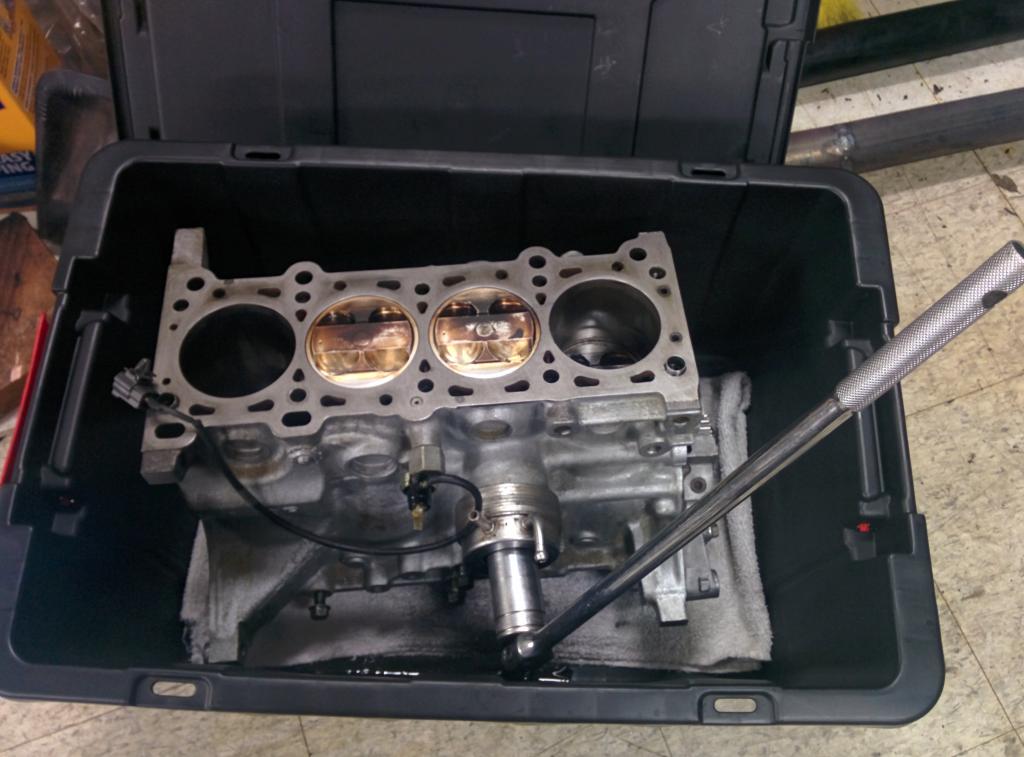
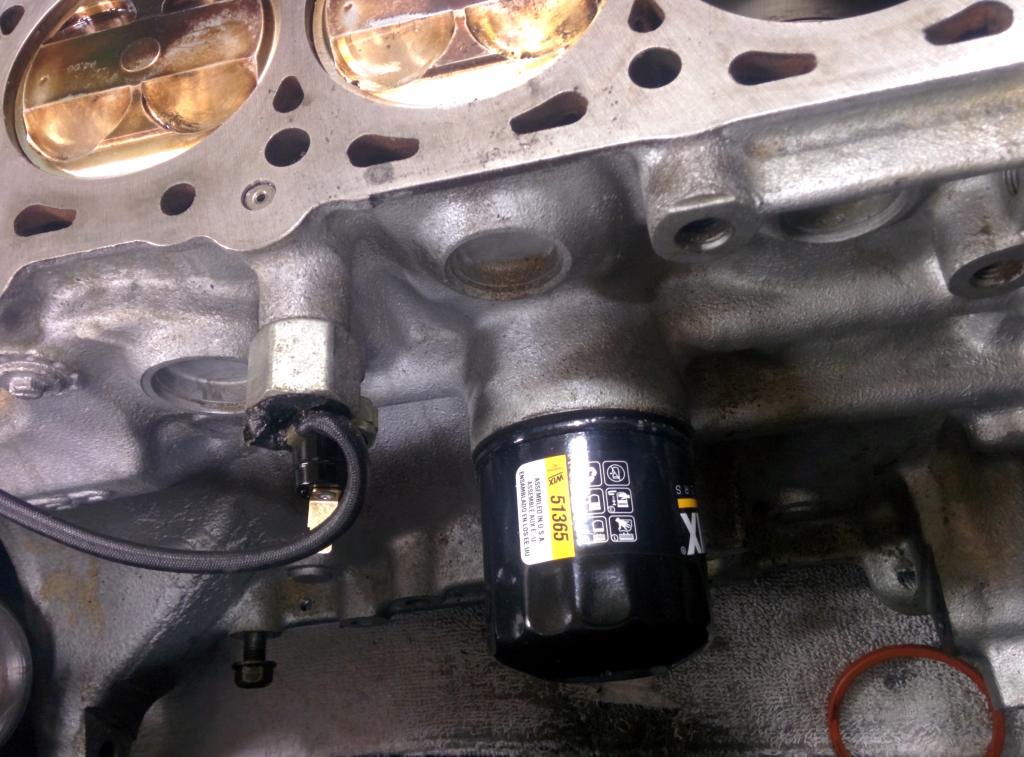
Question: Does anybody know where to buy the piece to delete the factory oil cooler? I basically need the little pipe nipple looking piece that's metric that will thread into the block and allow me to thread on my oil filter adapter.
So this morning I got the EGR tube made. What a pain in the *** that was! I actually didn't take any pics of it, but I basically cut and rotated/bent the stock on in no less than 10 spots, and got it to fit but it was missing about 2.5" to connect the two pieces back together. The factory EGR tube is .502" OD on mine, I ended up buying some 3/8" OD brake line and cutting/bending/installing/welding that into it to complete it. To be honest, it turned out shitty.
The brake lines are coated with something, and when I tried to weld them, it's messing up the metal, it fractures right where the weld stops. And by fracture, the first time I welded it, I set it down and it completely broke in half.... I ended up welding it a couple more times trying to make it better, it's crap, and I'm actually expecting it's going to break when I get some miles on it. I'll have to order some actual bare steel tubing to use to fix that spot next time. Oh well but for now egr tube is done till it cracks!
So then I made my radiator mounts, just found my old ones, hammered them flat, cut shorter, bent in new correct spot, done.


Then figured out more or less how I'm going to do the cooling hose from rear of head to radiator, with it connecting to a large mocal oil/water laminar flow heat exchanger/oil cooler. Gotta order some 45* silicone bends but that's going to work out ok, even clears most of the factory emmisions crap that goes on the passengers side fender area.
Then started on my 2 quart accusump. It's friggin 12" by 4.something with no fittings, about 16-17" long with fittings. Not many places that will fit. I finally found a home for it under the car, under the crank pulley, but almost touching it, with the gauge end pointing towards the passengers side wheel, angled forward a touch. Here, it almost hits the crank, alternator belt, steering rack, passengers side tie rod, factory undertray bottom and passengers side, passengers side lower control arm, both a/c lines, and sway bar. But it actually doesn't it any of them!
I started on the bracket for it, then changed my mind and started over with a better one. Basic design is two pieces of metal that are curved to fit against accusump, that are clamped to it, then weld these two pieces together, and weld them to a piece of metal that will go and bolt where a 17mm bolt is for the steering rack. I made the curved metal pieces, now need some 1/8" or better steel to build last piece. Tried to use factory engine hook, but it's too short...
Pics!
Accusump, 2 qt.


Basically just cut a strip of 16 gauge steel, cut a piece of 3" tubing down its' length, and sandwhiched the strip between the cut piece and a piece of 3" tubing, then clamped it to squish the strip to be curved. It worked!


Tomorrow, buy thicker steel, build lower bracket, weld, drill and bolt to P/S rack bolt. Order silicone 45's for cooling system. Mock up remote filter, start working on fuel system.
Question: Does anybody know where to buy the piece to delete the factory oil cooler? I basically need the little pipe nipple looking piece that's metric that will thread into the block and allow me to thread on my oil filter adapter.
Reply
0
0
 02-18-2015, 01:30 PM
#53
Elite Member
Thread Starter
iTrader: (16)
Join Date: Aug 2007
Location: Houston, TX
Posts: 9,297
Total Cats: 477
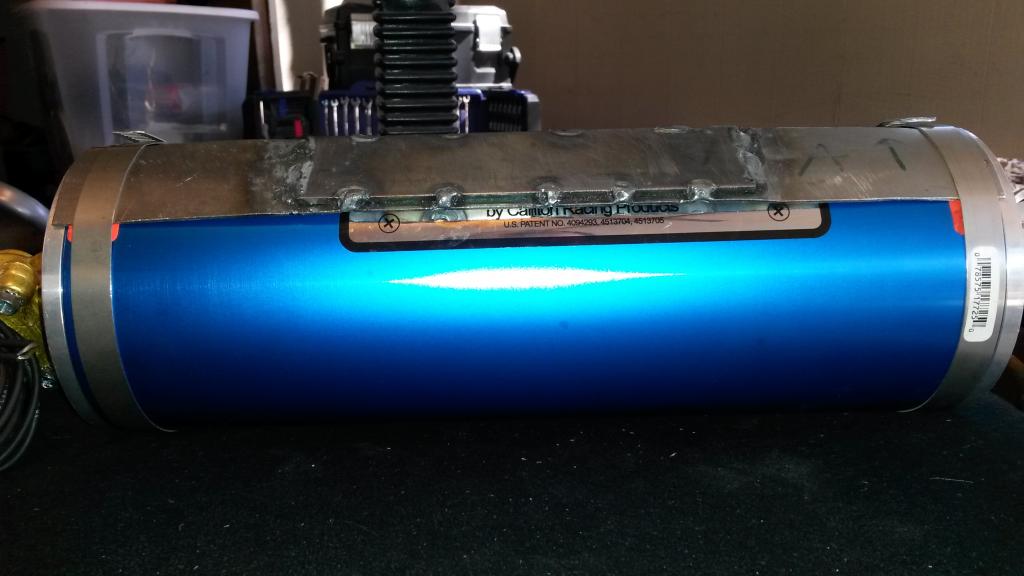
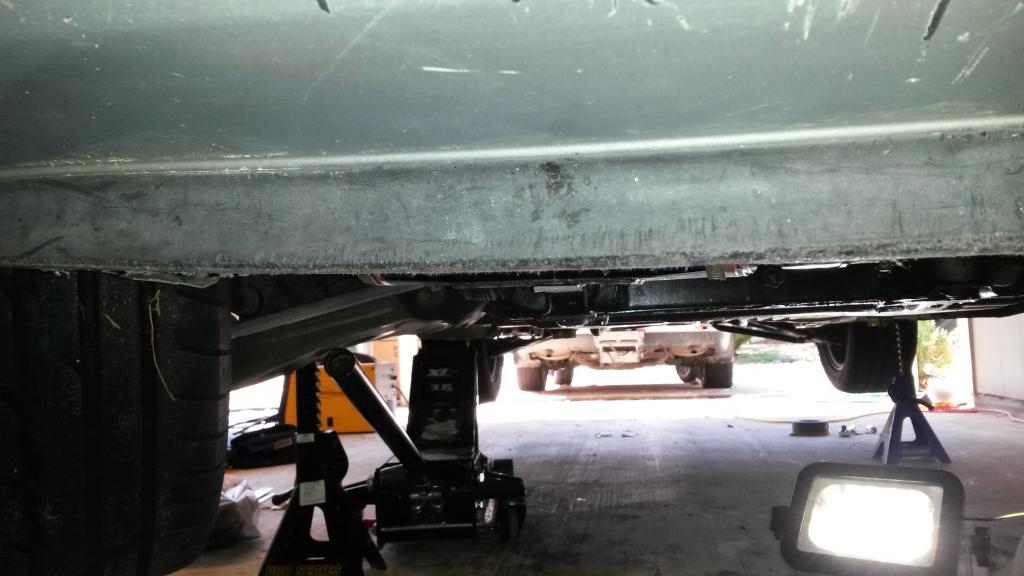
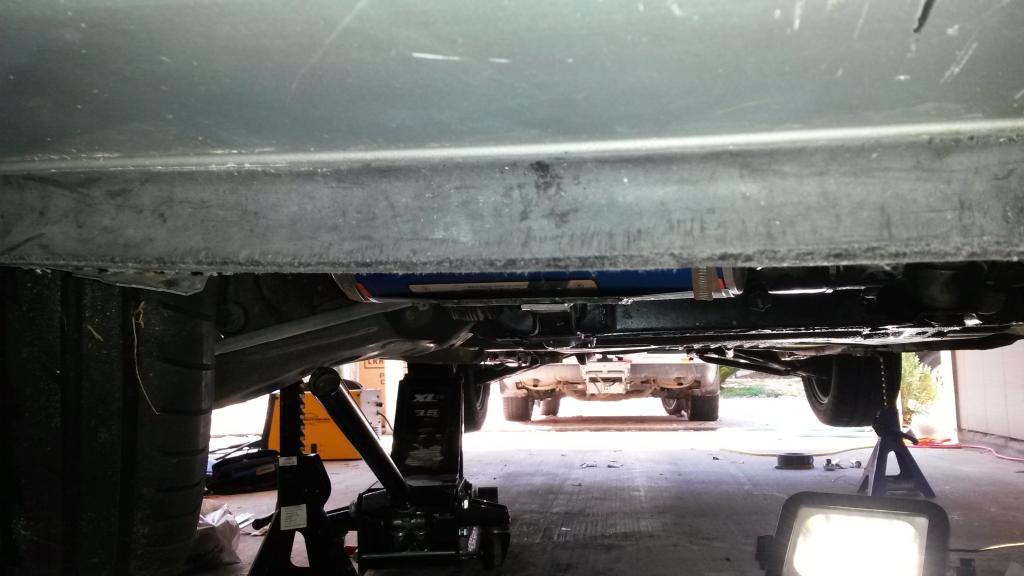
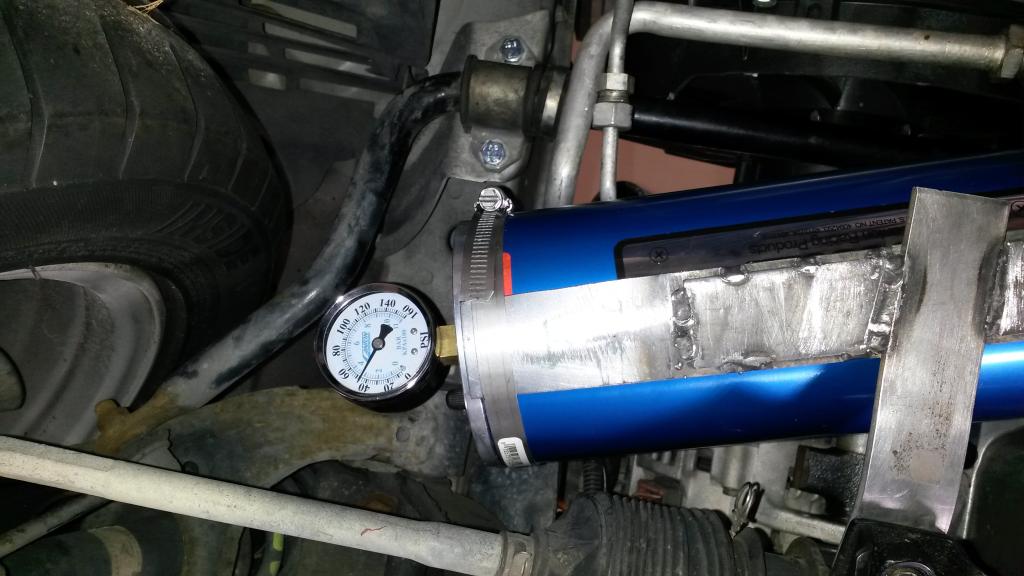
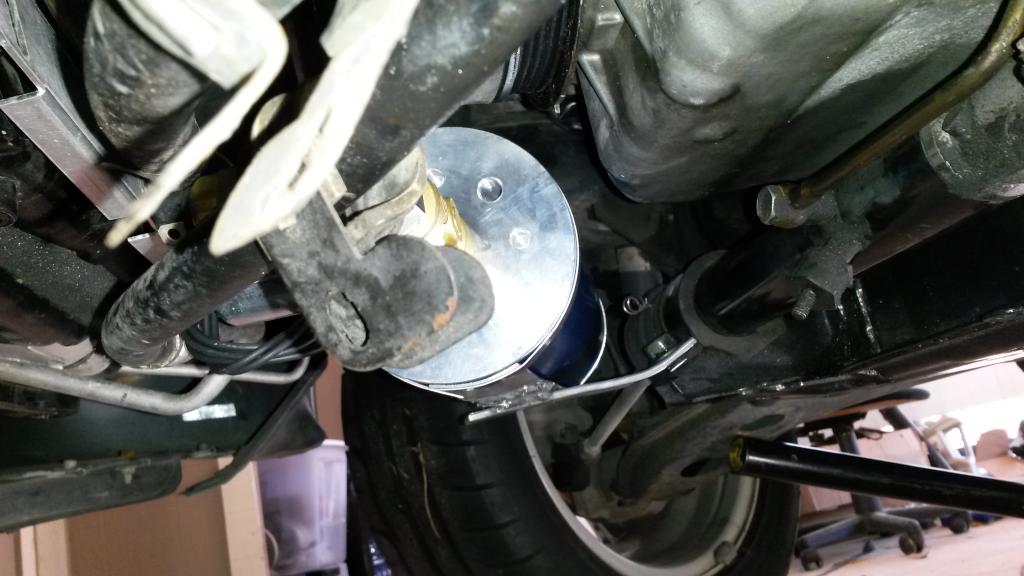
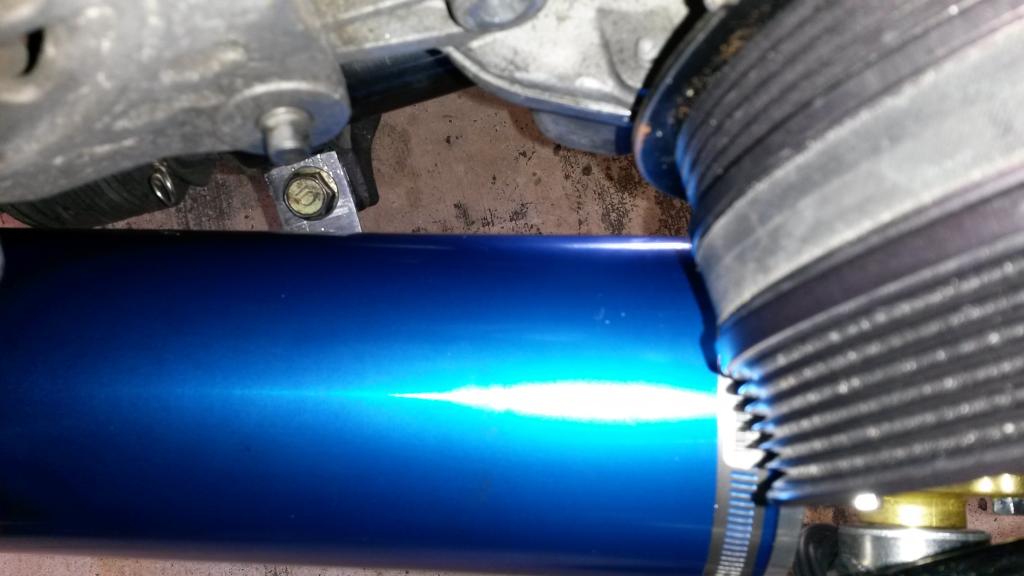
Accusump mounted! Wasn't as bad as I thought it would be, the mount turned out simple, I thought it was going to be a mess but this is pretty simple all things considered. Can adjust it a bit with the clamps too, though so far it's not needed.


Reply
0
0
02-18-2015, 10:49 PM
#54
Elite Member
Thread Starter
iTrader: (16)
Join Date: Aug 2007
Location: Houston, TX
Posts: 9,297
Total Cats: 477
Messed around a bit, looking at how to package the oil cooler/upper rad hose routing, a relay/fuse box I made, factory emmisions crap that goes on passengers side fender area, Passengers side IC pipes vs upper radiator hose, and fuel system. Also looked at how/where cold air intake will go. Ended up stopping and ordering a few things, now redoing my "to do" list to be a lot more accurate and up to date, and realizing I still need to order more stuff! So that's what I'm doing tonight, just getting a better plan together...
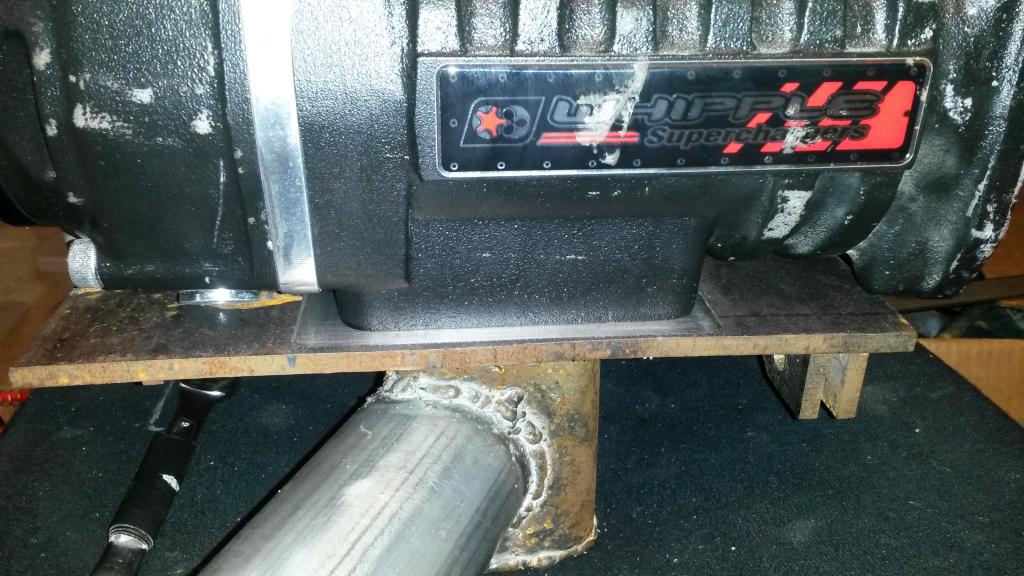
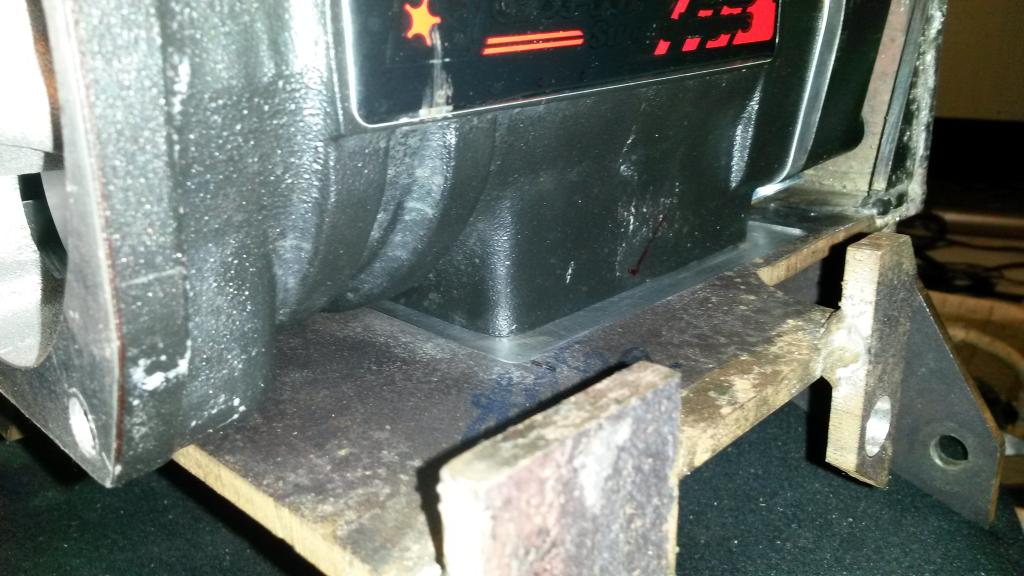
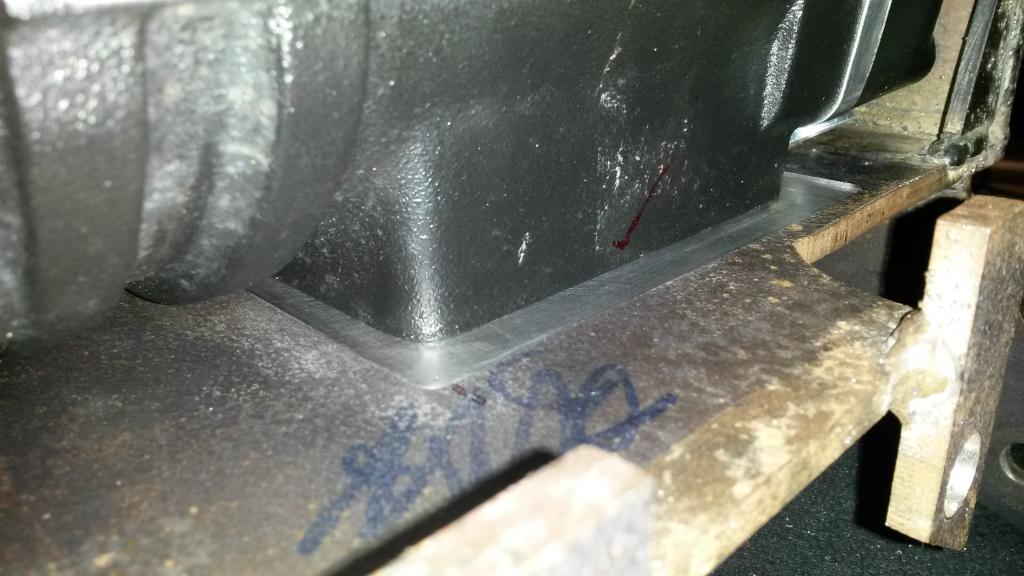
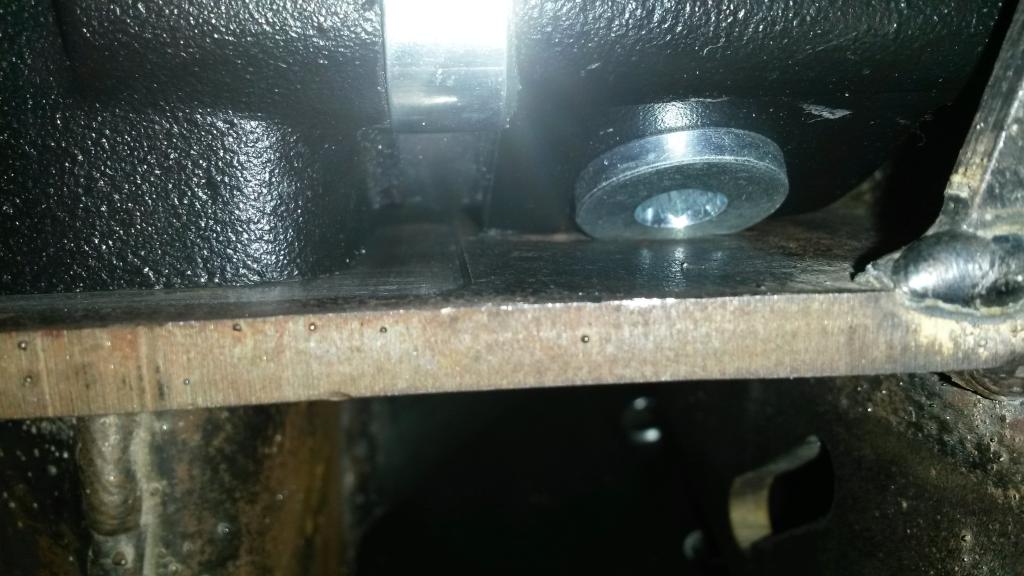
I did call a machine shop, going to bring my SC base to them in the AM, hopefully they can clamp it up and machine the base flat.
I guess slow progress is still progress! Wish it would go together quicker, but damn packaging all this crap is a pain! That and I'm slow at fabbing stuff. Plus I'm having to figure out most of this as I go! I'm REALLY hoping to have the car running/driveable by May 1st.
Reply
0
0
02-19-2015, 02:02 AM
#55
 ), but I checked it out anyways this evening.
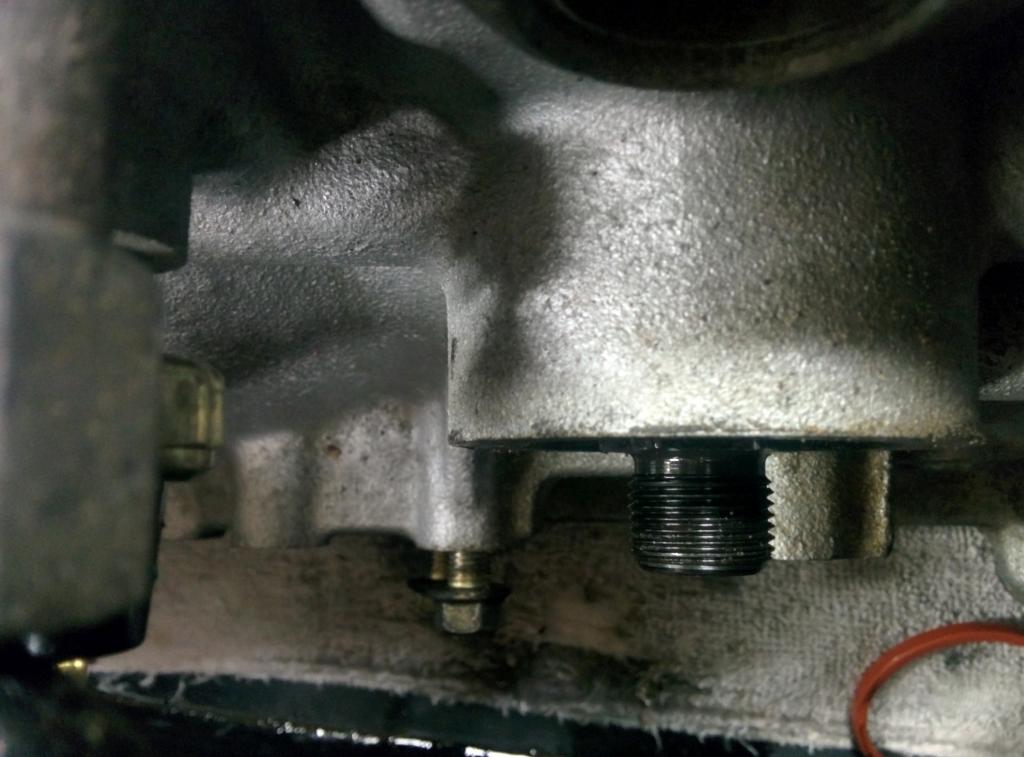
Subaru SOHC EJ25 oil filter nipple part number
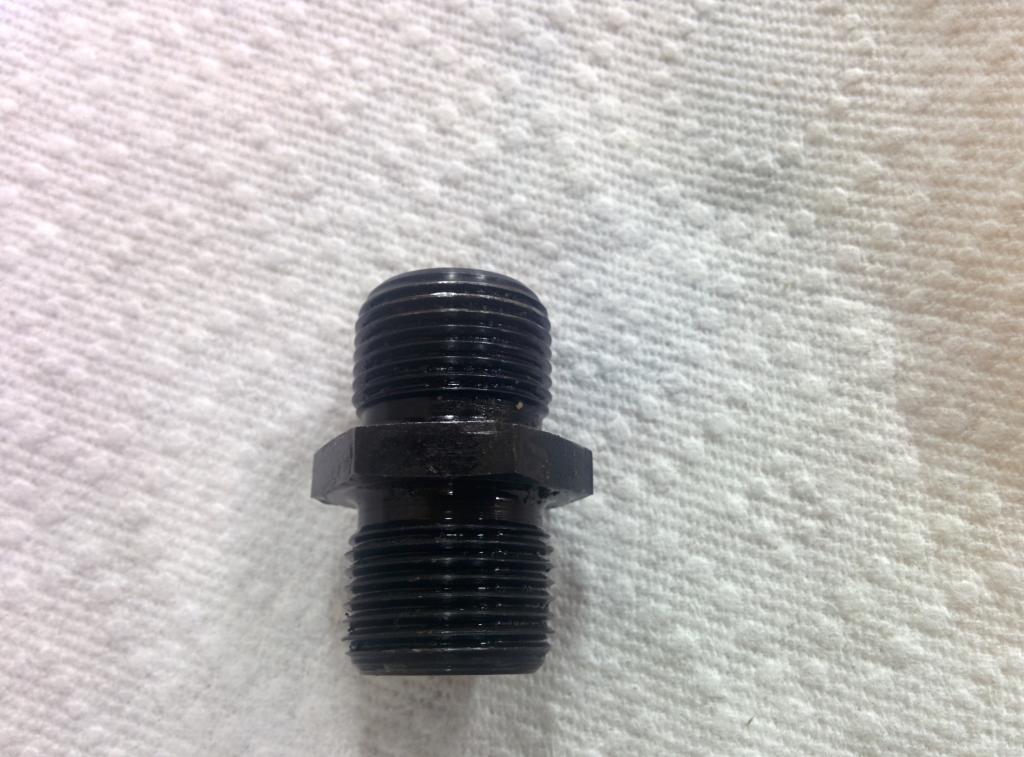
Remove the big *** nut from the oil cooler/heater
Remove the oil cooler/heater
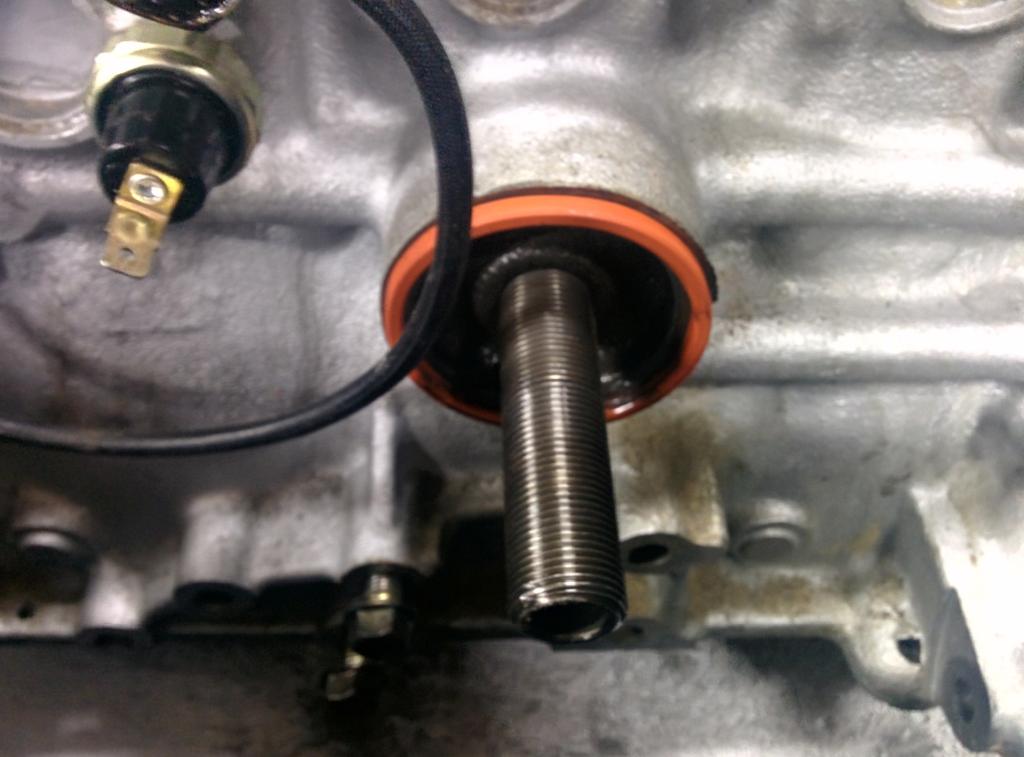
Remove the threaded pipe
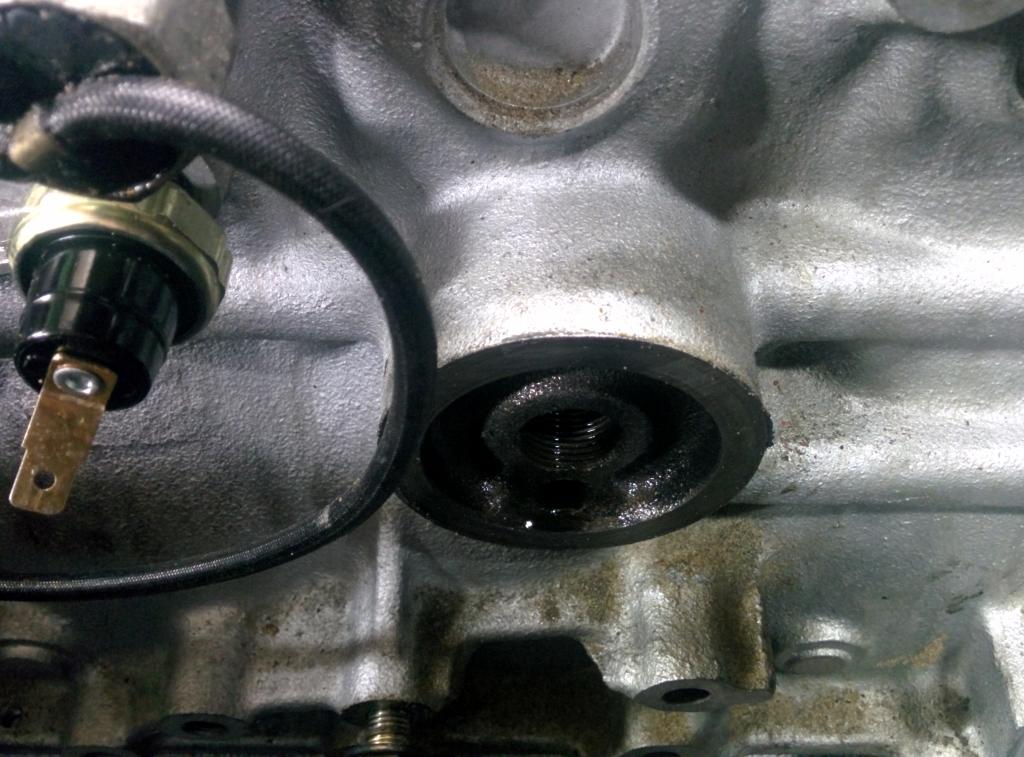
Install Subaru nipple
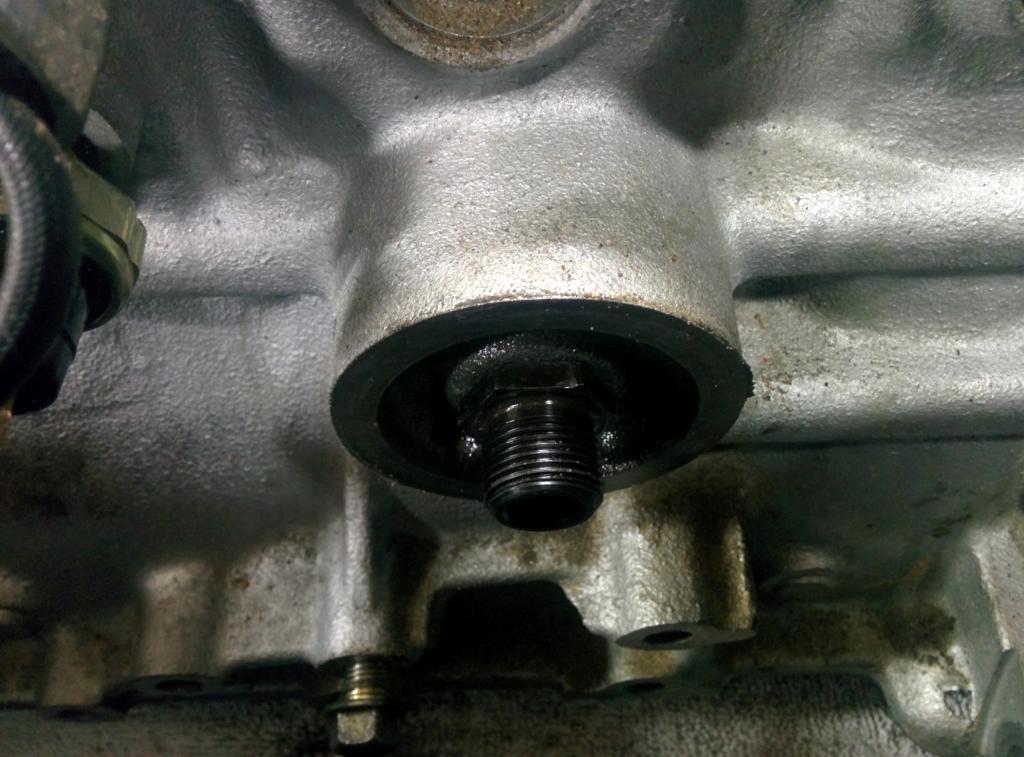
Profit!
The hex part of the nipple isn't quite below the filter mount surface. But I don't think it's an issue as the threads in the filter are recessed enough that there is no interference.
Reply
2
2
02-19-2015, 01:43 PM
#56
Elite Member
Thread Starter
iTrader: (16)
Join Date: Aug 2007
Location: Houston, TX
Posts: 9,297
Total Cats: 477
Thanks Gesso! I ordered that part, should have it Tuesday, I'll test it and double-verify it works on my FM Adapter thing. Props times 23! I do appreciate as I've looked and this info I have not found posted anywhere. You should start a thread (or I will) and put tags on it and the part number for future people to find!
Reply
0
0
02-19-2015, 01:46 PM
#57
Elite Member
Thread Starter
iTrader: (16)
Join Date: Aug 2007
Location: Houston, TX
Posts: 9,297
Total Cats: 477
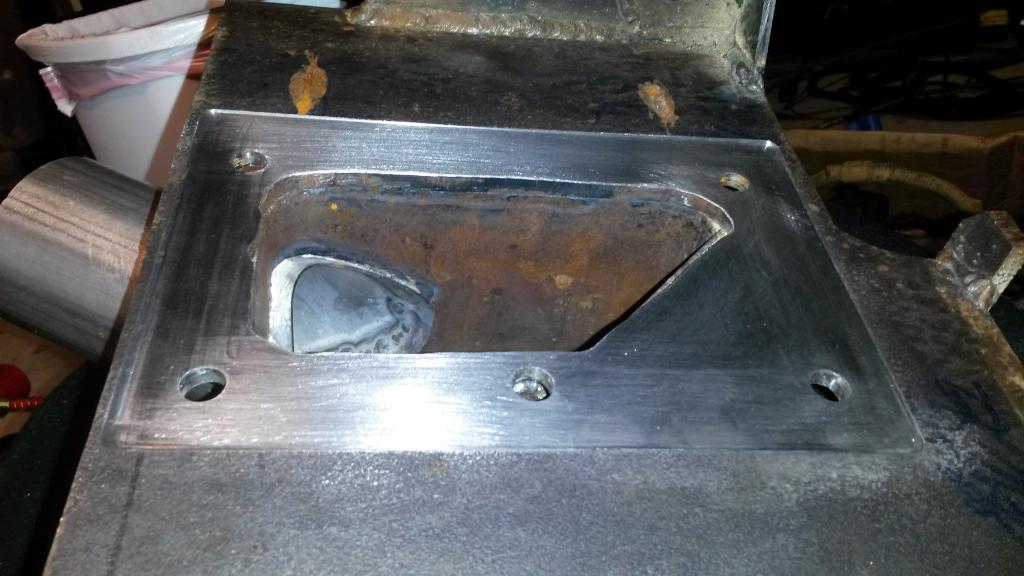
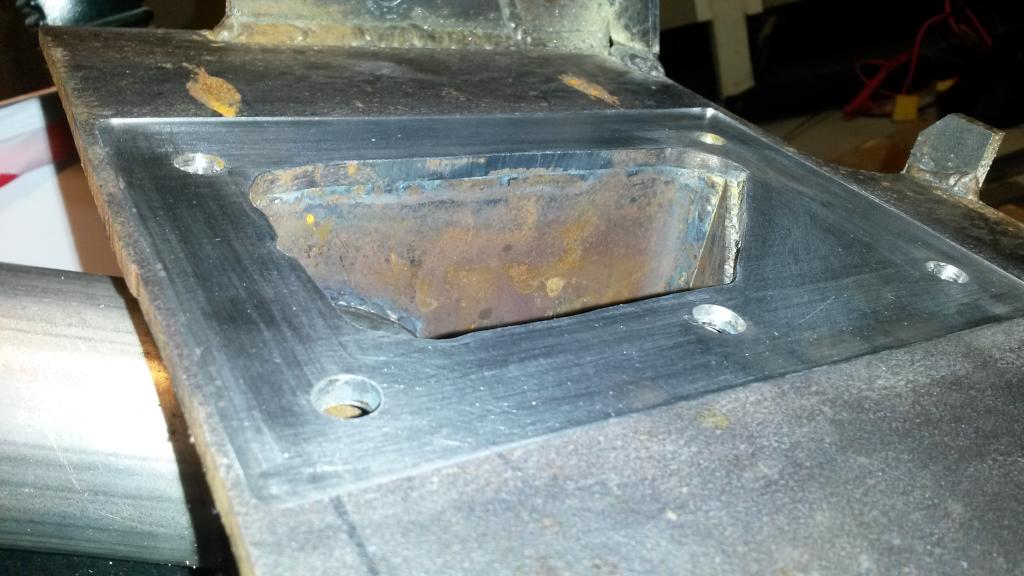
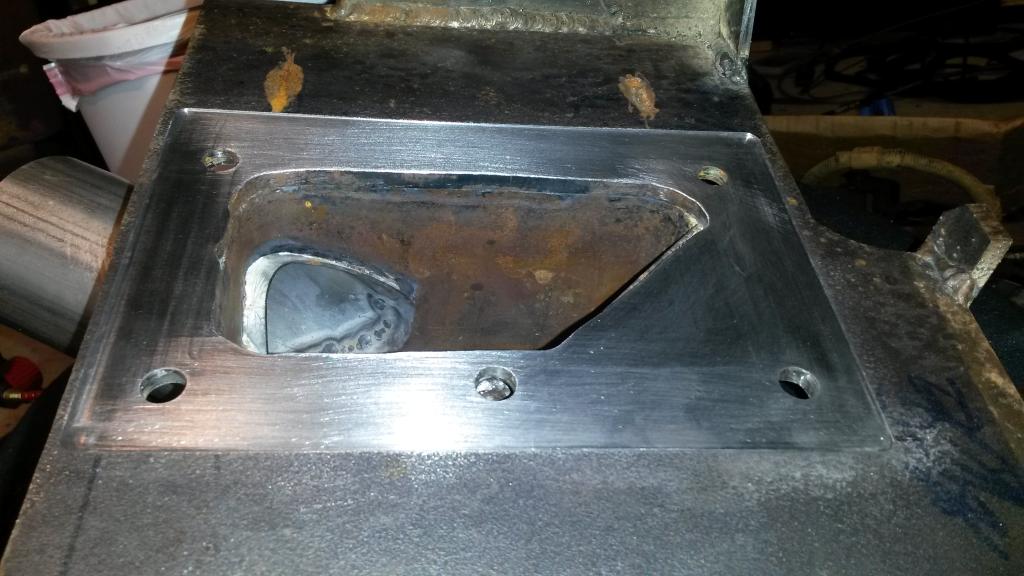
Also I brought the SC base to a machine shop this AM, they wouldn't/couldn't tool up to hold it, ended up going to another shop they recommended and after talking to 3 different people, one guy there said he'd do it, cost 1 hr and 125 dollars.......... Ouch! But he said he'd get it done today, so at least good turn around time! If I had a machine shop/mill and the clamps and tooling needed, I'd do it myself but I don't!
Reply
0
0
02-19-2015, 10:04 PM
#58
Elite Member
Thread Starter
iTrader: (16)
Join Date: Aug 2007
Location: Houston, TX
Posts: 9,297
Total Cats: 477
Made a little progress today. Brought the SC base to my machinist, he couldn't do it, went to another place, they did it, got it back today. It looks good, just wasn't cheap.
Also I made my 99 miata to GM HEI connector NGK sparkplug wires a while back, but they were too long, so I shortended them. Also discovered they wouldn't fit into the VVT head without adjusting them a bit, as the rubber was slightly too fat to go into the head. Anyways got those done.
ALSO, I've been making myself a list of things to do, and an est time/cost for each step. That helps a bit, as I'm kinda lost on "what's next" as there's like 1000 things I need to do it seems. Tonight I'm working on my list, as every time I start to do something, I'm missing a part/bolt/fitting/something so trying to identify everything I STILL NEED and get it ordered. So doing that again tonight! I should make a gantt chart really. Hell maybe I will.
Pics because who likes reading!
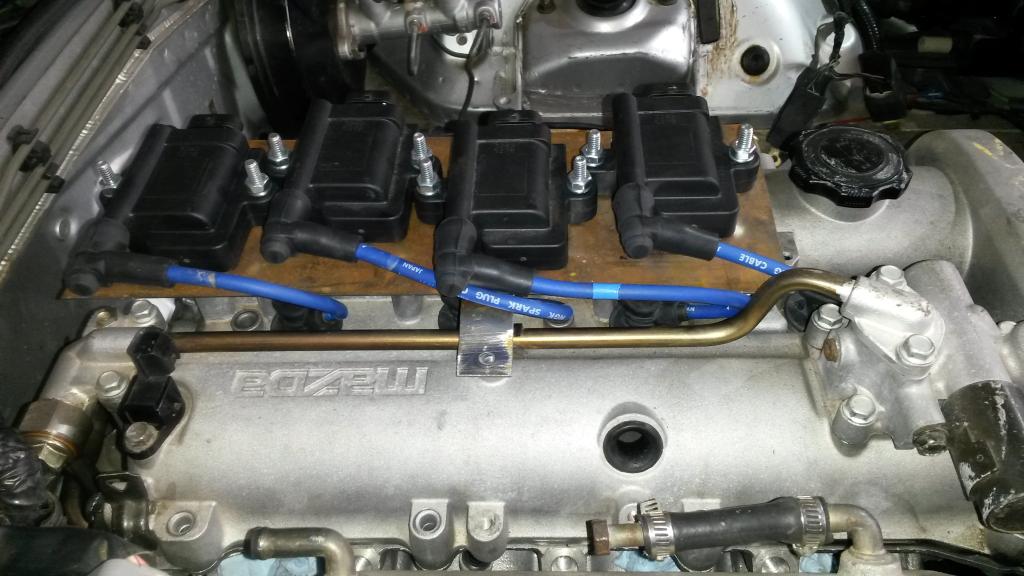
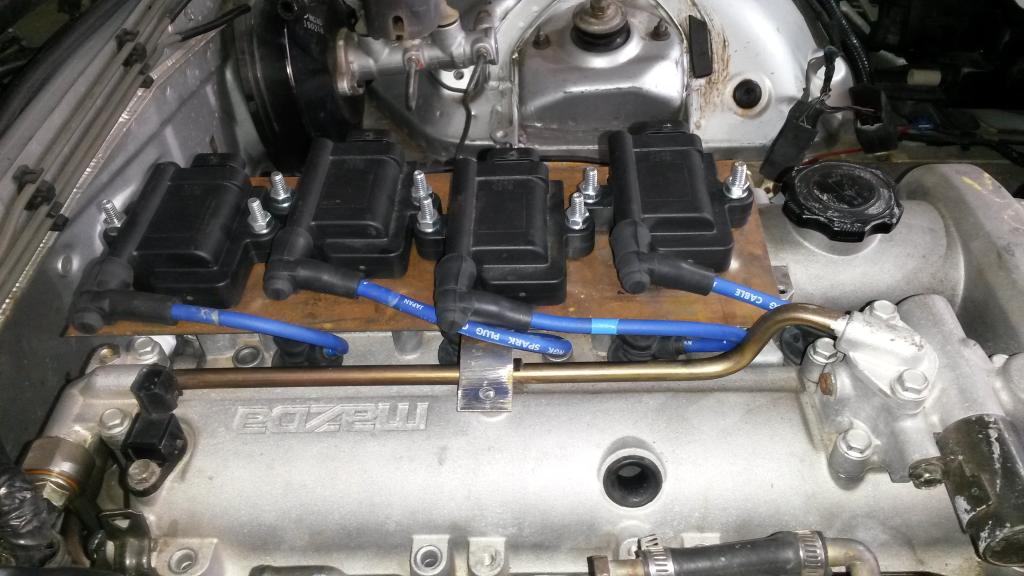


Reply
0
0
02-19-2015, 10:12 PM
#59
Elite Member
Thread Starter
iTrader: (16)
Join Date: Aug 2007
Location: Houston, TX
Posts: 9,297
Total Cats: 477
Also what do you guys think about this idea: Get it running with the engine already in the car.
Basically the motor in the car has 700 miles on it, rods only bottom end, 10:1 comp. Head is new new new, fully built. Bottom end has had a vibration since I first started it, no idea why, but it does. I think something is out of balance in the bottom end of the engine, as above say 7K, the engine vibrates with furry to the point that you could NOT hold the throttle body after about 6K. It's worn the bottom end out some (probably main bearings) to the point that when I crank it, you can hear it whirring a bit, and it takes a sec to get oil pressure, but no knocking.
I would have to put timing belt back on, that's about it.
Benefit would be that I could tune it/troubleshoot issues on an engine that I don't immediately need to go drive to break in. So I could idle it 12 times if I'm having issues when I first get it running, for example, or tuning it, etc. Also any trash from IC pipes, SC base, in general anything that COULD still be in the parts after cleaning will go through old engine, not new engine, though I don't expect this to be an issue. Main reason is to work out bugs and tune it as I've never tuned a SC car before.
Thoughts? Also would get it on the road sooner, so another plus! Could potentially get the thing running for a few weeks, then swap the bottom end one day. I also don't have means to pull the engine right now...., hate to buy Another engine hoist...
Reply
0
0


