Pouring life blood and $$ into my MSM build

 01-10-2014, 10:37 AM
#22
Senior Member
Thread Starter
iTrader: (10)

Join Date: Aug 2007
Location: Fredericton, NB
Posts: 1,186
Total Cats: 4
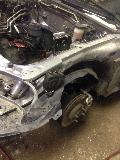
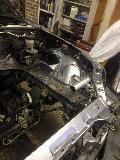
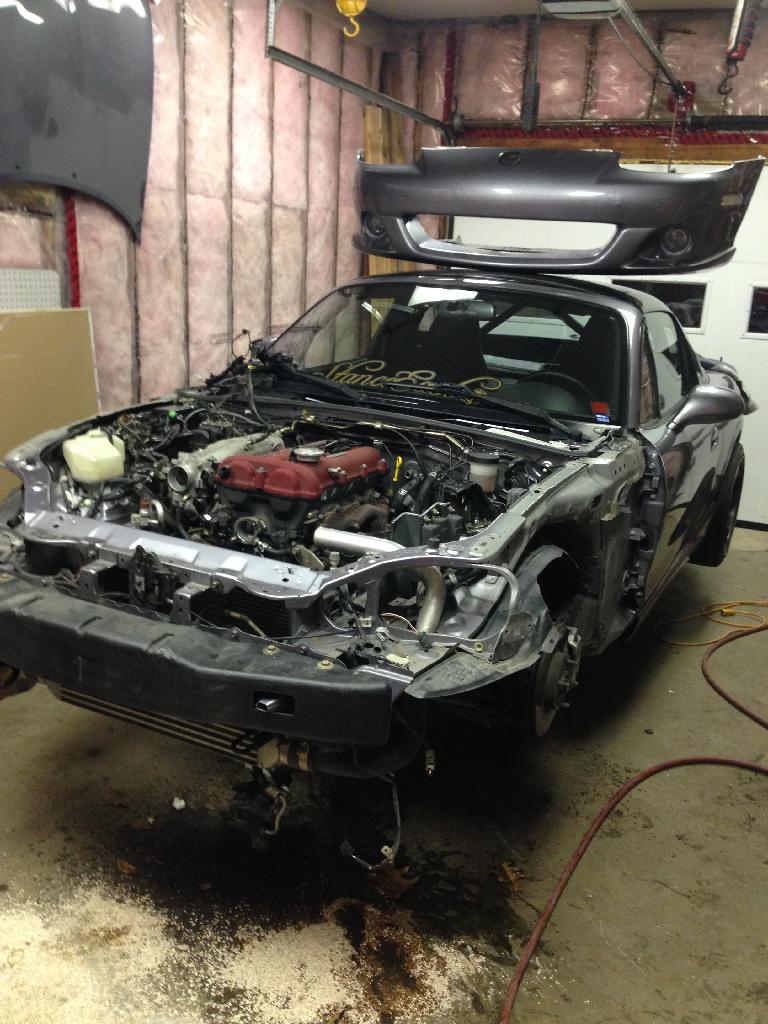
Not much going on....but it's almost ready to come out...Engine crane all hooked up. This car has WAY more wiring and connections then my old 97...I can't wait to plug in the Megasquirt and take out all the extras...

Reply
 0
0

0
01-13-2014, 10:13 AM
#23
Senior Member
Thread Starter
iTrader: (10)
Join Date: Aug 2007
Location: Fredericton, NB
Posts: 1,186
Total Cats: 4
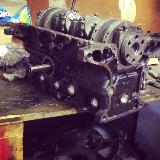
ENGINE IS OUT...I work slow and that's big progress for me...
The only snare I ran into along the way was the fuel lines...
My old Miata didn't have any frustrating quick connects so I had to make my own tool for them.
I cut the end off of a pouring spout, made a slit and inserted it under the connector to pop it out...wasn't that bad. It was my proud moment of the weekend.
The connector
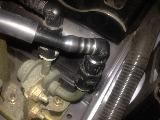
The "tool"
The tool in use
and tada! Engine is out
After I accomplished that task and went back to my old engine, which if your following this tale was decided that the block was too scratched up to use.
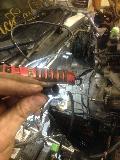
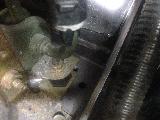
I pulled the rods/pistons out to be installed in the MSM engine. This is what I found...
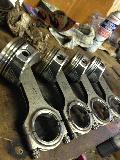
More specifically...take a look at piston #4 and #2(but not as bad). The ones that scratched the block up.
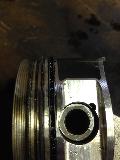
I'm not sure if this is apparent in the pictures but do you see the scratches between the rings of the piston itself?? Is this an issue?
The only snare I ran into along the way was the fuel lines...
My old Miata didn't have any frustrating quick connects so I had to make my own tool for them.
I cut the end off of a pouring spout, made a slit and inserted it under the connector to pop it out...wasn't that bad. It was my proud moment of the weekend.
The connector

The "tool"

The tool in use

and tada! Engine is out

After I accomplished that task and went back to my old engine, which if your following this tale was decided that the block was too scratched up to use.
I pulled the rods/pistons out to be installed in the MSM engine. This is what I found...

More specifically...take a look at piston #4 and #2(but not as bad). The ones that scratched the block up.

I'm not sure if this is apparent in the pictures but do you see the scratches between the rings of the piston itself?? Is this an issue?
Reply
0
0
01-16-2014, 12:18 PM
#25
Senior Member
Thread Starter
iTrader: (10)
Join Date: Aug 2007
Location: Fredericton, NB
Posts: 1,186
Total Cats: 4
Not too much progress...started taking apart the MSM engine.
Interesting finds:
-Found a double sprung clutch disk inside the MSM pressure plate. Exedy stamped on the clutch disk. Is this stock?? I have a FM2 Pressure Plate but the disk is rather worn to reuse. I may throw this one in as it looks brand new. The throwout bearing also fell right out of the flywheel which was odd.
Pondering the coolant re-route at the moment...blocked the front of the msm head off and made a easily removable timing mark check from the old plate to use when needed.

Realized the only 12point socket I have is a 1/2" for my old ARPs so picking up a 12mm 12pt socket today to be able to yank the head off completely.
Reply
0
0
01-20-2014, 02:23 PM
#26
Senior Member
Thread Starter
iTrader: (10)
Join Date: Aug 2007
Location: Fredericton, NB
Posts: 1,186
Total Cats: 4
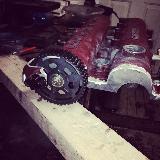
Dropped this off at machine shop this morning along with the Pistons and Rods. They are measuring and getting to me to order Bearings and a pistons ring set.
Will PM a sponsor to order ACL Bearing set and Weisco Rings once complete.
Since I had nothing to do for the rest of the weekend I started cleaning up engine bay. The Left side of bay is pretty messy from the solenoids..I was able to build a bracket and hide them just outside of way as well as relocate harness on the other side of the IC piping.
Will PM a sponsor to order ACL Bearing set and Weisco Rings once complete.

Since I had nothing to do for the rest of the weekend I started cleaning up engine bay. The Left side of bay is pretty messy from the solenoids..I was able to build a bracket and hide them just outside of way as well as relocate harness on the other side of the IC piping.


Reply
0
0
 01-24-2014, 03:36 PM
#28
Senior Member
Thread Starter
iTrader: (10)
Join Date: Aug 2007
Location: Fredericton, NB
Posts: 1,186
Total Cats: 4
Puttered around in the garage last night.
Finished the mini-tuck on the right side:
Then I got really bored and hacked up my valve cover. I don't plan on running front covers and and hope this works out ok...Only thing left now is getting some -AN fittings welded in place of the breather ports...then strip and powdercoat if there is time...
...flamesuit...on.
I took the flapper out and blocked the hole in the intake manifold as well. Tapped the hole and screwed a bolt in with some sealant. (Sorry no picture)
I plan on building plates for the EGR holes and then take the grinder to any unused bumps and imperfections in the cast that aren't needed....
All for now... Machine shop called and said they are starting with my block so hopefully engine assembly will begin next week.
Finished the mini-tuck on the right side:

Then I got really bored and hacked up my valve cover. I don't plan on running front covers and and hope this works out ok...Only thing left now is getting some -AN fittings welded in place of the breather ports...then strip and powdercoat if there is time...

...flamesuit...on.
I took the flapper out and blocked the hole in the intake manifold as well. Tapped the hole and screwed a bolt in with some sealant. (Sorry no picture)
I plan on building plates for the EGR holes and then take the grinder to any unused bumps and imperfections in the cast that aren't needed....
All for now... Machine shop called and said they are starting with my block so hopefully engine assembly will begin next week.
Reply
0
0
02-03-2014, 02:55 PM
#29
Senior Member
Thread Starter
iTrader: (10)
Join Date: Aug 2007
Location: Fredericton, NB
Posts: 1,186
Total Cats: 4
No huge updates other then my MEGASQUIRT is in and Rev is the man.
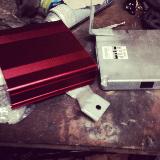
Getting the old ECU out turned out to be more of a pain then I figured...mounting this one nicely may be a challenge as well...
What do the NB2 people do??

Getting the old ECU out turned out to be more of a pain then I figured...mounting this one nicely may be a challenge as well...
What do the NB2 people do??
Reply
0
0
02-14-2014, 02:56 PM
#30
Senior Member
Thread Starter
iTrader: (10)
Join Date: Aug 2007
Location: Fredericton, NB
Posts: 1,186
Total Cats: 4
reused the lower bracket from my stock ECU and redrilled it for the MS bolts. ECU is mounted now in the same general area.
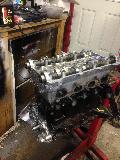
While waiting for my block at the shop I installed 74lb Dual Supertech Valve springs in the head.
Old vs New
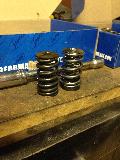
Can't see the springs here...but work in progress
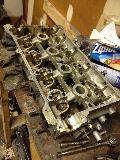
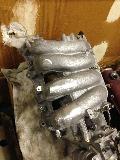
Since the intake manifold was off...I decided to make my oil changes a little easier by removing some of the cast in brackets on the intake manifold and block off the EGR while I was in there.
ALSO, Got the short block back from the shop. It's now bored out and I got them to install ACL race bearings (STD) and New weisco rings before installing the Pistons/Rods.
Brought it home and threw that back covers on along with the BE oil pump. After installing Oil Pump, I tapped an m6x1.0 for the bolt for the Crank Sensor. Threw the Head studs on and called it a night.

While waiting for my block at the shop I installed 74lb Dual Supertech Valve springs in the head.
Old vs New

Can't see the springs here...but work in progress

Since the intake manifold was off...I decided to make my oil changes a little easier by removing some of the cast in brackets on the intake manifold and block off the EGR while I was in there.


ALSO, Got the short block back from the shop. It's now bored out and I got them to install ACL race bearings (STD) and New weisco rings before installing the Pistons/Rods.
Brought it home and threw that back covers on along with the BE oil pump. After installing Oil Pump, I tapped an m6x1.0 for the bolt for the Crank Sensor. Threw the Head studs on and called it a night.

Reply
0
0
03-03-2014, 12:49 PM
#32
Senior Member
Thread Starter
iTrader: (10)
Join Date: Aug 2007
Location: Fredericton, NB
Posts: 1,186
Total Cats: 4
Been a while since I updated... so here we go.
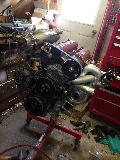
Threw the head on and installed the reroute manifold (M-tuned) as well:
Ordered some DW1000s and a DW300 fuel pump...waiting on them to arrive.
I was unaware but since I'm running the BegiS6 hot side. I needed to get their Water By Pass system as well. Currently waiting on a shipping notification for that along with other fittings for the block as well as return plate.
In the meantime worked on running oil/water lines (went to local shop to have steel lines made)
Here is how everything is currently sitting, intake manifold is hanging there right now
Threw the head on and installed the reroute manifold (M-tuned) as well:

Ordered some DW1000s and a DW300 fuel pump...waiting on them to arrive.
I was unaware but since I'm running the BegiS6 hot side. I needed to get their Water By Pass system as well. Currently waiting on a shipping notification for that along with other fittings for the block as well as return plate.
In the meantime worked on running oil/water lines (went to local shop to have steel lines made)

Here is how everything is currently sitting, intake manifold is hanging there right now

Reply
0
0
 03-17-2014, 08:49 AM
#34
Senior Member
Thread Starter
iTrader: (10)
Join Date: Aug 2007
Location: Fredericton, NB
Posts: 1,186
Total Cats: 4
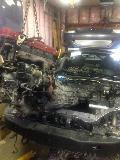
A little...well...a lot more progress...
Had some more parts some in from Begi and Fab9 so I was able to finish my Oil/water lines and finally install the engine.
A little bit of reflection time because pictures are easier to upload then typing...
From this:
to this:
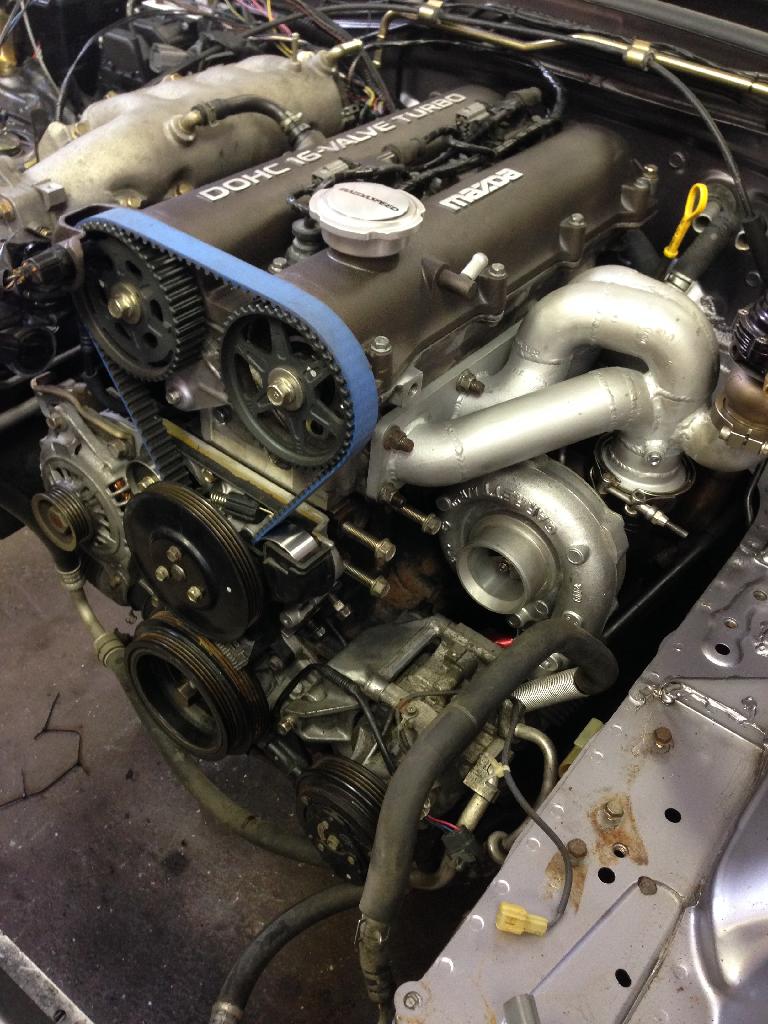
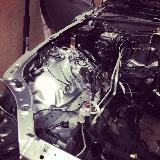
While the engine was out...I tried to get rid of some wiring...The stock harness in the MSM (or probably any NB miata) is BRUTAL...It comes out behind the intake manifold, runs all the way up the the front of the engine beside the timing belt and then proceeds to be split up going backwards towards all of the sensors...I wasn't liking this at all.
When the engine was out, I moved the onboard connectors to the rear of the intake manifold instead. Since the timing belt is open, having the least amount of wiring around that area is best...things got a little out of hand from there on...
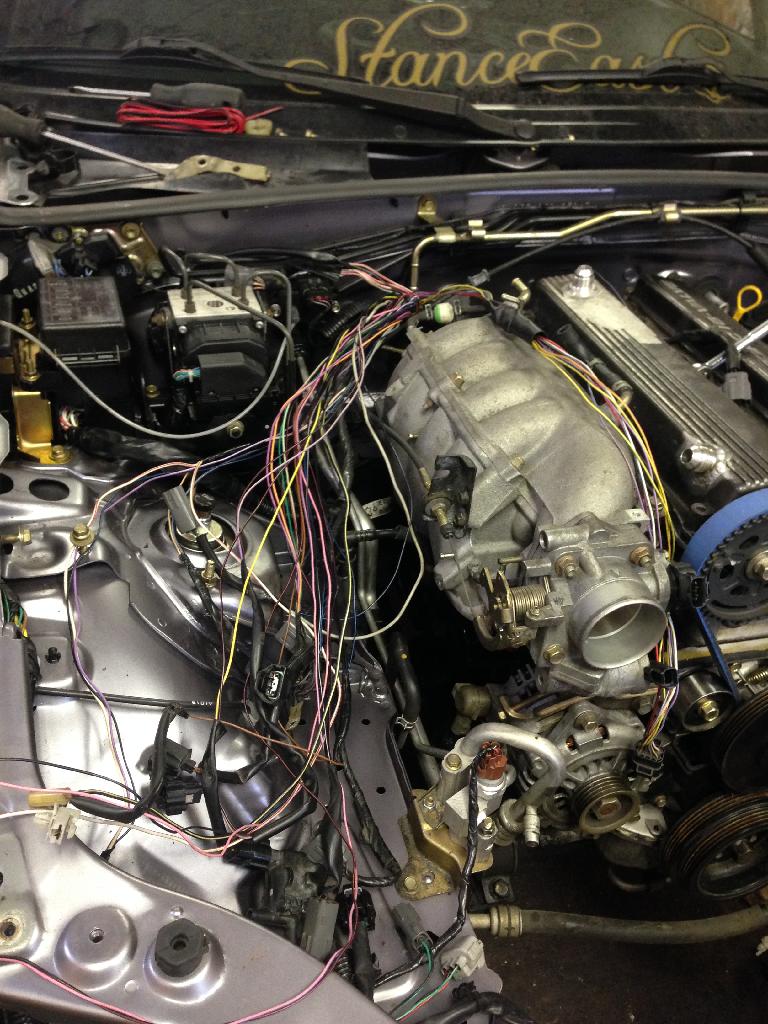
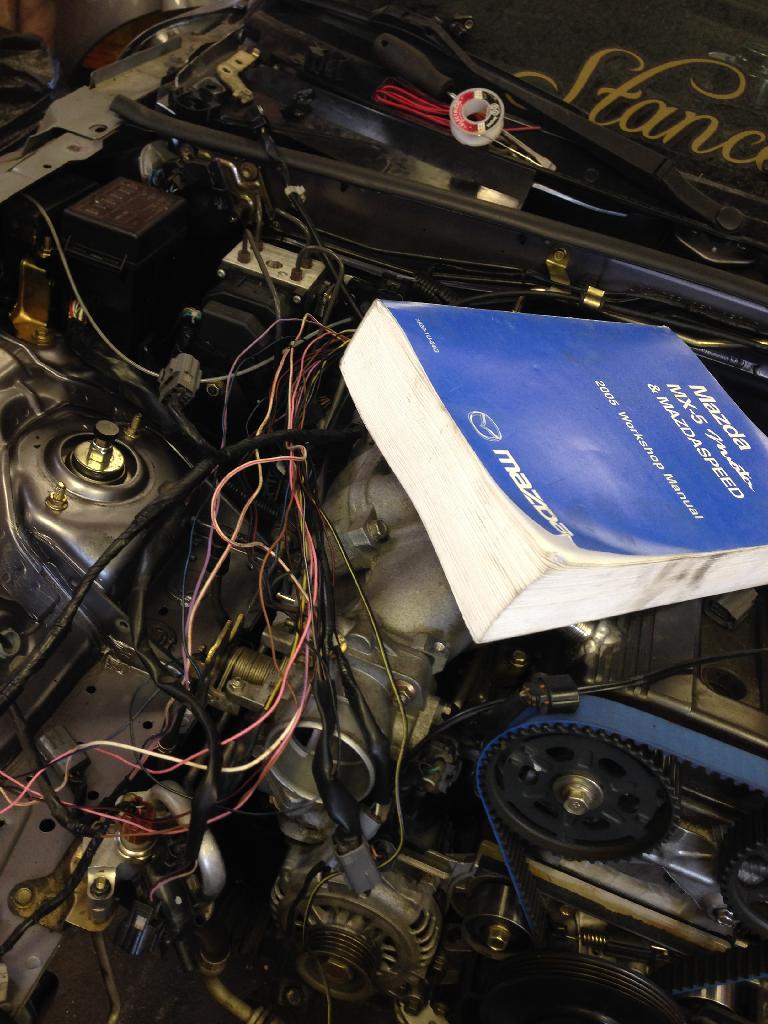
This manual is approx 2 billion pages...I couldn't find an actual color codes ECU wiring diagram anywhere in the whole thing!!!!
The second picture in this thread is how it looks now. The only wiring left is the Powersteering/AC/Crank Sensor that needs to be run to the other side of the car. I'm planning on going around the front behind the crash bar for these.
Then it's plumbing vacuum and reroute coolant lines and it's start time!
Had some more parts some in from Begi and Fab9 so I was able to finish my Oil/water lines and finally install the engine.
A little bit of reflection time because pictures are easier to upload then typing...
From this:

to this:

While the engine was out...I tried to get rid of some wiring...The stock harness in the MSM (or probably any NB miata) is BRUTAL...It comes out behind the intake manifold, runs all the way up the the front of the engine beside the timing belt and then proceeds to be split up going backwards towards all of the sensors...I wasn't liking this at all.
When the engine was out, I moved the onboard connectors to the rear of the intake manifold instead. Since the timing belt is open, having the least amount of wiring around that area is best...things got a little out of hand from there on...

This manual is approx 2 billion pages...I couldn't find an actual color codes ECU wiring diagram anywhere in the whole thing!!!!

The second picture in this thread is how it looks now. The only wiring left is the Powersteering/AC/Crank Sensor that needs to be run to the other side of the car. I'm planning on going around the front behind the crash bar for these.
Then it's plumbing vacuum and reroute coolant lines and it's start time!
Last edited by Preluding; 03-19-2014 at 12:26 PM.
Reply
0
0
 03-19-2014, 12:16 PM
#36
Cpt. Slow

iTrader: (25)
Join Date: Oct 2005
Location: Oregon City, OR
Posts: 14,190
Total Cats: 1,135
You really suck at photobucket.
Click the IMG code, it'll flash "copied". Then come here and press CTRL-V, and we'll get large images like what I fixed in your last post.
Good progress and gorgeous manifold.
Click the IMG code, it'll flash "copied". Then come here and press CTRL-V, and we'll get large images like what I fixed in your last post.
Good progress and gorgeous manifold.

Reply
0
0
03-25-2014, 09:50 AM
#38
Senior Member
Thread Starter
iTrader: (10)
Join Date: Aug 2007
Location: Fredericton, NB
Posts: 1,186
Total Cats: 4
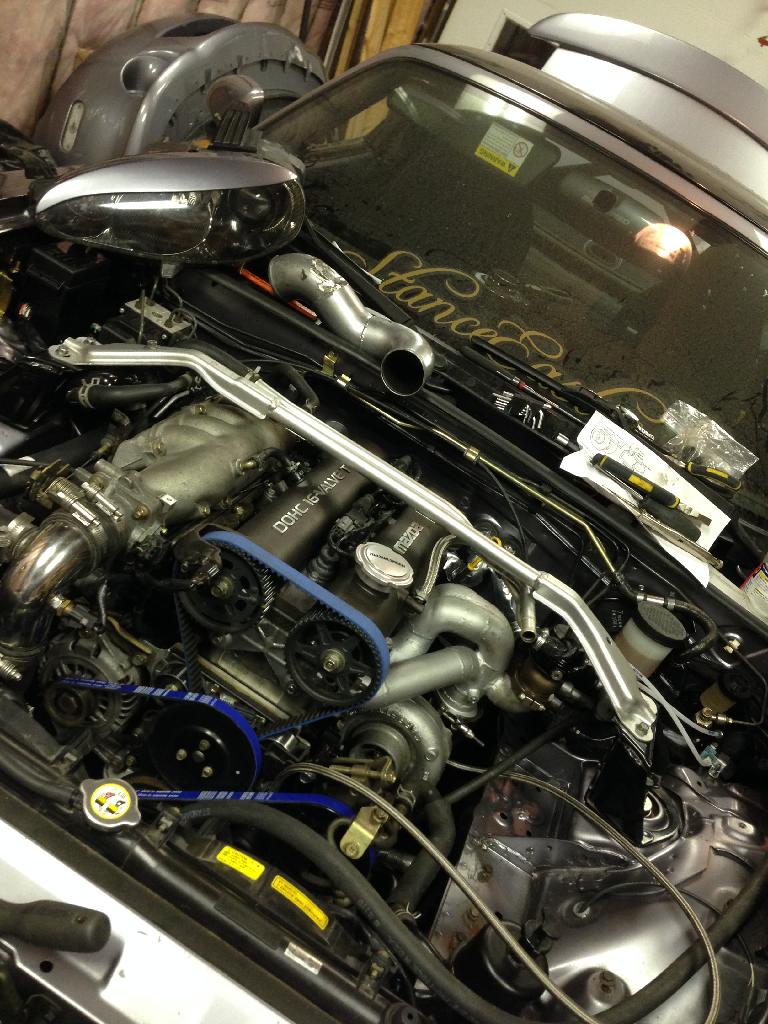
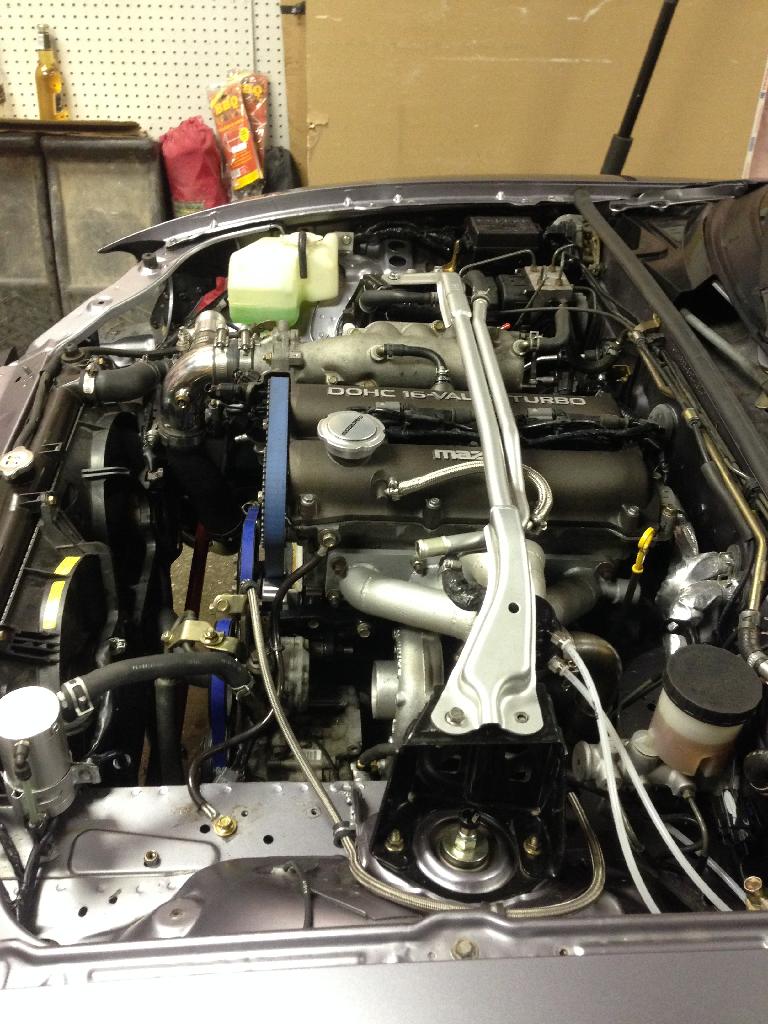
Finished up the wiring and mounted ECU....
Currently waiting on a 1-piece hot side intercooler pipe from FM and hoping I can make it work with the BEGI low mount setup I'm running along with the Corksport intercooler. It has all the bends needed, I just might have to cut/lengthen a couple things in it.
My First Start before any tuning...plugged ECU in and turned the key...(tuned for stock injectors). Pardon the hick speaking...the car STARTS
http://s72.photobucket.com/user/Prel...vnx8r.mp4.html
after messing around with the ReqFuel (now at 2.8 and Dead Time for the DW1000s at 1.62) ...I realized I have no sweet clue how to use TunerStudio as it is nothing like AEMpro was...but I'll get used to it, just have to find out where everything is located...this is my current idle...still does not like adjusting to anything when I press the gas...but once I figure out where the fuel map is...i'll have some fun there...it's close.
http://s72.photobucket.com/user/Prel...7aa71.mp4.html
Here are pics of it now (well...a couple days ago)
....and yes I fail at uploading videos through photobucket
Currently waiting on a 1-piece hot side intercooler pipe from FM and hoping I can make it work with the BEGI low mount setup I'm running along with the Corksport intercooler. It has all the bends needed, I just might have to cut/lengthen a couple things in it.
My First Start before any tuning...plugged ECU in and turned the key...(tuned for stock injectors). Pardon the hick speaking...the car STARTS
http://s72.photobucket.com/user/Prel...vnx8r.mp4.html
after messing around with the ReqFuel (now at 2.8 and Dead Time for the DW1000s at 1.62) ...I realized I have no sweet clue how to use TunerStudio as it is nothing like AEMpro was...but I'll get used to it, just have to find out where everything is located...this is my current idle...still does not like adjusting to anything when I press the gas...but once I figure out where the fuel map is...i'll have some fun there...it's close.
http://s72.photobucket.com/user/Prel...7aa71.mp4.html
Here are pics of it now (well...a couple days ago)

....and yes I fail at uploading videos through photobucket
Reply
0
0
03-26-2014, 07:40 AM
#39
Senior Member
Thread Starter
iTrader: (10)
Join Date: Aug 2007
Location: Fredericton, NB
Posts: 1,186
Total Cats: 4
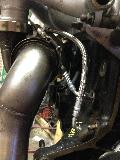
fastened down the longest turbo coolant line in the world last night so it looks a little better.....also had a little fun with the Power Steering.... Tapped another hole in the pump and rotated the PS nozzle up. I took an old hollow Catch can I bought on here a while back and connected it to use as a PS reservoir.

Reply
0
0
03-26-2014, 08:30 AM
#40
All-round "Good Guy"
Join Date: Dec 2009
Location: Brisbane, AUSTRALIA
Posts: 993
Total Cats: 245
(courtesy of mazda-speed.com).
Reply
0
0


