sean's cheap thrills, 90 1.6 with subaru td04
 07-14-2015, 08:22 AM
#401
SadFab CEO

Thread Starter
iTrader: (3)
Join Date: Sep 2012
Location: your mom's house phoenix, AZ
Posts: 4,560
Total Cats: 1,142
Zip ties definitely cant hurt. Would rather be safe than chase a minuscule boost/vacuum leak.
If leafy does indeed use poly vinyl, that is why they stay put. That stuff literally welds itself to pipe nipples and will push out any lube. Its super common on dirtbikes. Ive pulled nipples out of fittings with the stuff and always end up cutting it off with a razor.
If leafy does indeed use poly vinyl, that is why they stay put. That stuff literally welds itself to pipe nipples and will push out any lube. Its super common on dirtbikes. Ive pulled nipples out of fittings with the stuff and always end up cutting it off with a razor.

Reply
 0
0

0
 07-15-2015, 08:25 PM
#403
SadFab CEO
Thread Starter
iTrader: (3)
Join Date: Sep 2012
Location: your mom's house phoenix, AZ
Posts: 4,560
Total Cats: 1,142
i would imagine something like port area x boost pressure = force pushing the cap off.
4mm area is ~0.020 sq in x 12psi = about 1/4 lb. and that assumes the cap isnt pushed up again the port sealing it off making only the ID the effective area.
lol we(I) are(am) overthinking the **** out of this.
plastic
http://www.summitracing.com/parts/sum-g1390
buna-n!
http://www.summitracing.com/parts/ttn-45252
Reply
0
0
07-15-2015, 08:27 PM
#404
SadFab CEO
Thread Starter
iTrader: (3)
Join Date: Sep 2012
Location: your mom's house phoenix, AZ
Posts: 4,560
Total Cats: 1,142
no gay ebay seller in the states(****, north america even) has the silicone, slow boat from china and all that
4mm silicone cap | eBay
4mm silicone cap | eBay
Reply
0
0
07-16-2015, 11:31 PM
#405
SadFab CEO
Thread Starter
iTrader: (3)
Join Date: Sep 2012
Location: your mom's house phoenix, AZ
Posts: 4,560
Total Cats: 1,142
Its amazing what you find when you actually look.
Also got all my water lines, vacuum hose, heater hose, but I forgot to grab the one for the back of the head. And it turns out oreilly has gates silicone hose clamps. They dont stock them, but they had them in 2 hours.
Not a t-bolt, but whatever, theyre $3 each.
Also got all my water lines, vacuum hose, heater hose, but I forgot to grab the one for the back of the head. And it turns out oreilly has gates silicone hose clamps. They dont stock them, but they had them in 2 hours.
Not a t-bolt, but whatever, theyre $3 each.
Reply
0
0
07-21-2015, 11:42 PM
#406
SadFab CEO
Thread Starter
iTrader: (3)
Join Date: Sep 2012
Location: your mom's house phoenix, AZ
Posts: 4,560
Total Cats: 1,142
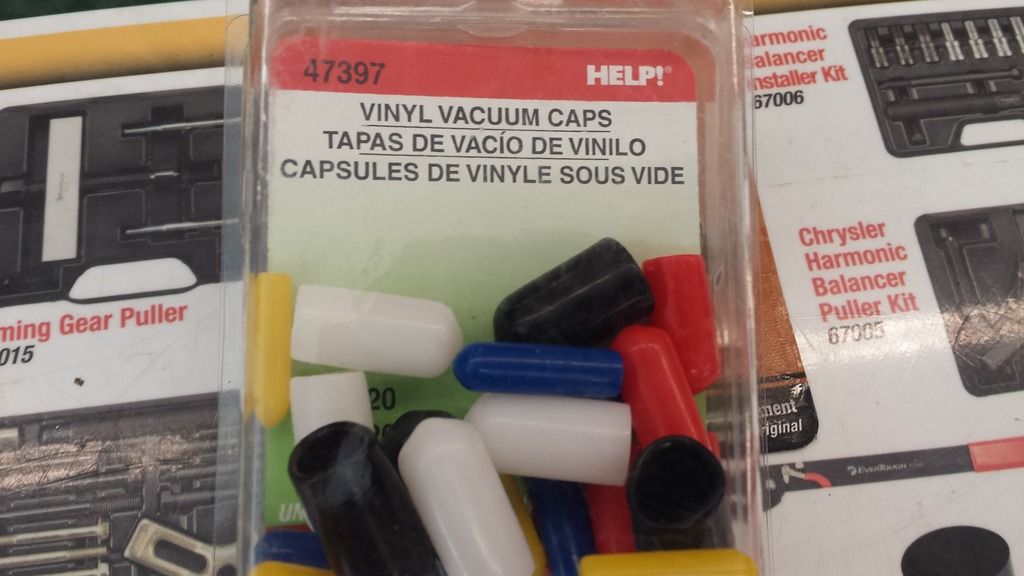
As it happens Aidan, the blue vac caps of the assortment pictured above were the correct size, they even almost match my intercooler couplers. I didnt get a pic to burn your eyes, but I will.
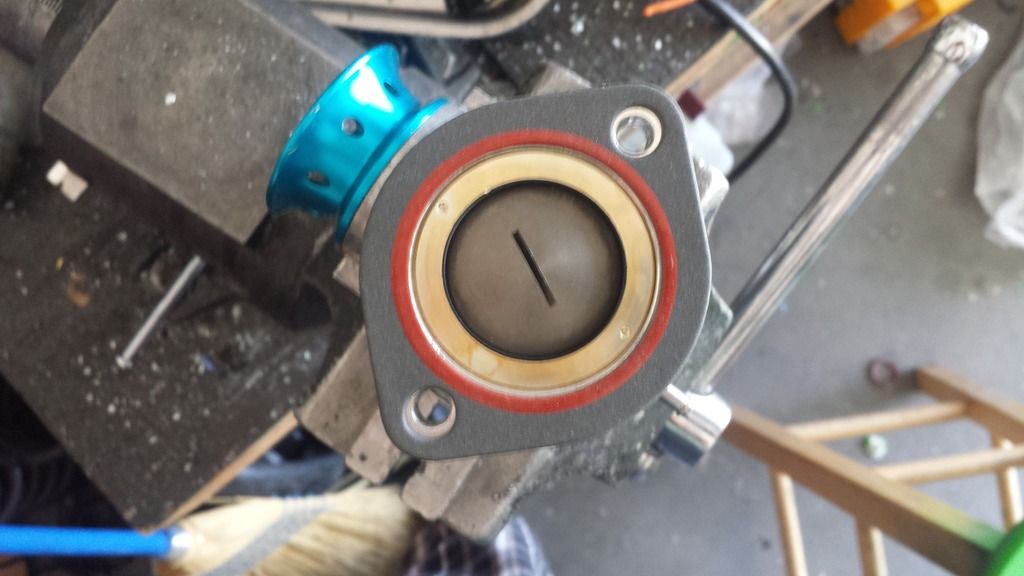
The thermostat gasket that came with the headgasket kit fits a greddy BOV flange almost perfectly! sorry for shitty pic
BOV needs new diaphragm soon, I cannot believe how expensive those are.
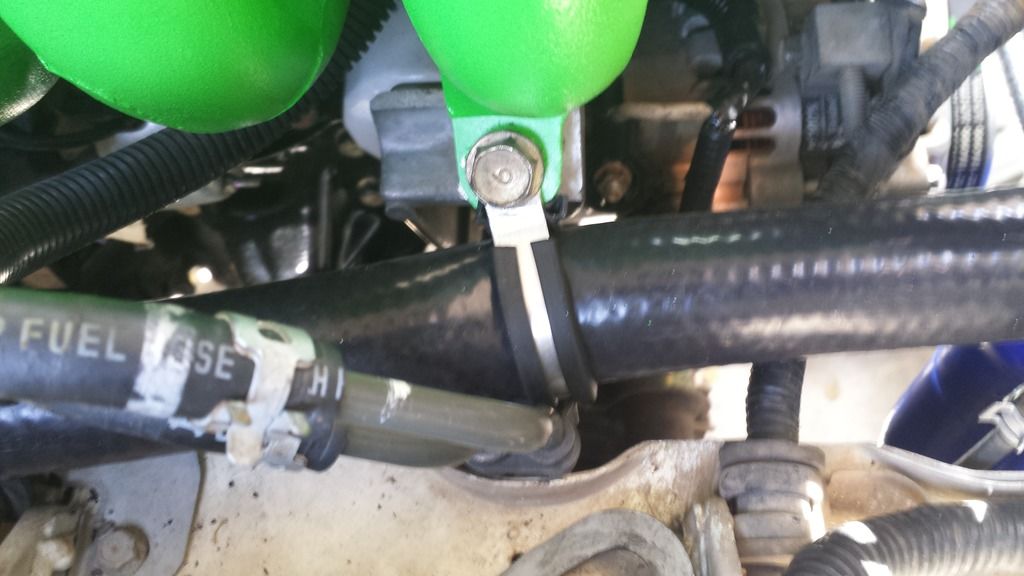
Installed this stuff in the suction side coolant hose. Bent the edges over for obvious reasons.
This idea didnt work out so well, so itll have to be woven sleeve(which would have been a good idea anyhow) and zip ties. The intake mani brace bolt was almost as thick as the band, so while I did get it drilled to size, its not pretty. It also pinched the hose since the clamp isnt perfectly round and the hose is larger than 1.5".
I stumbled across the begi reroute spacer drawing on here a while ago and had a friend whip one out without reviewing the drawing. It works, but i dont understand the slots as opposed to bolt holes and why its undercut for the thermostat on both sides, as well as the numerous extra NPT ports. I get the ability to flip it any which way and have a port in any direction, but i just ended up plugging half of them.
Also:

I didnt verify that my friend machined the temp sensor boss where the drawing said to do so, but he makes laser tag for jet fighters, so I trust him. In either case, its in the wrong spot.
So, 4.5 inches of angled persuasion later:
The coil pack itself just clears. Cops eventually.
Made a fancy handle for the bead roller.
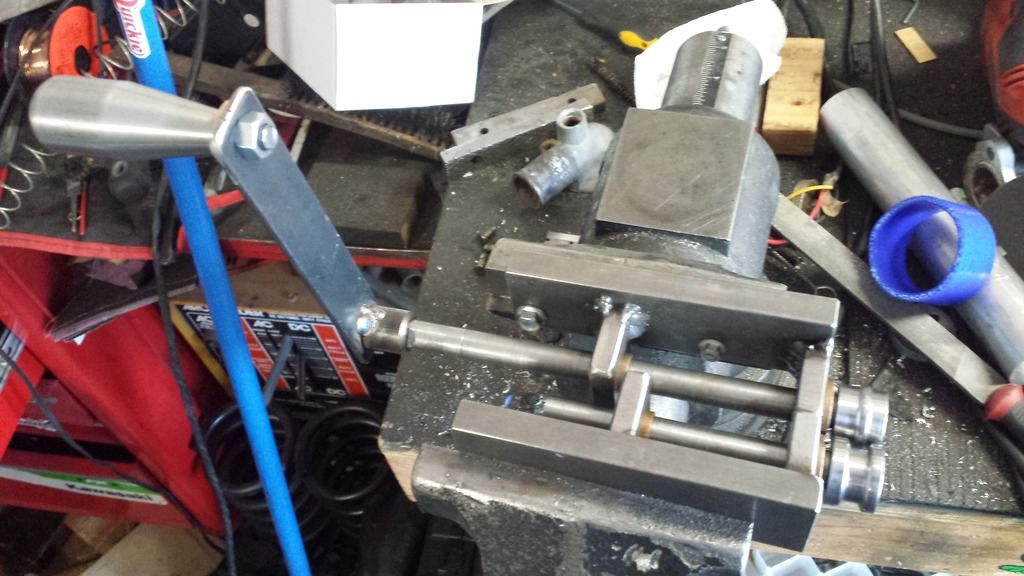
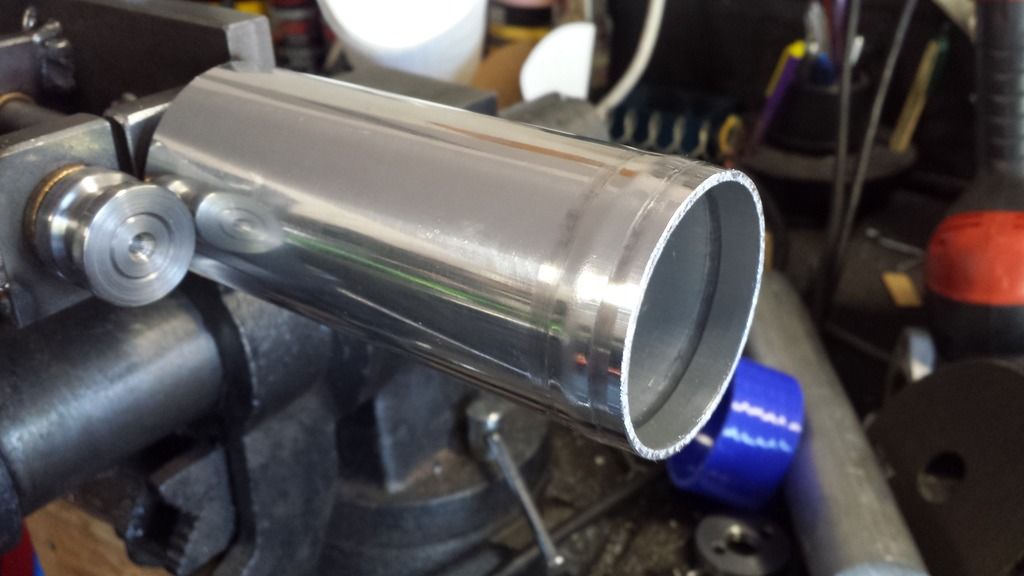
After final fitting of the drivers side tubing, I rolled all my beads and installed all the clamps.
Just need to drill and tap intercooler for IAT and wire it and cold side is done.
And this morning I wrapped up my latest build. Wife helped a little on this one: I laid about half the plans, she provided the garage, I brought my tool(s). Alignments came out perfect, corner weights are a little on the heavy side at 8-4.
Khloe Shoshanna

The thermostat gasket that came with the headgasket kit fits a greddy BOV flange almost perfectly! sorry for shitty pic
BOV needs new diaphragm soon, I cannot believe how expensive those are.
Installed this stuff in the suction side coolant hose. Bent the edges over for obvious reasons.
This idea didnt work out so well, so itll have to be woven sleeve(which would have been a good idea anyhow) and zip ties. The intake mani brace bolt was almost as thick as the band, so while I did get it drilled to size, its not pretty. It also pinched the hose since the clamp isnt perfectly round and the hose is larger than 1.5".
I stumbled across the begi reroute spacer drawing on here a while ago and had a friend whip one out without reviewing the drawing. It works, but i dont understand the slots as opposed to bolt holes and why its undercut for the thermostat on both sides, as well as the numerous extra NPT ports. I get the ability to flip it any which way and have a port in any direction, but i just ended up plugging half of them.
Also:
I didnt verify that my friend machined the temp sensor boss where the drawing said to do so, but he makes laser tag for jet fighters, so I trust him. In either case, its in the wrong spot.
So, 4.5 inches of angled persuasion later:
The coil pack itself just clears. Cops eventually.
Made a fancy handle for the bead roller.
After final fitting of the drivers side tubing, I rolled all my beads and installed all the clamps.
Just need to drill and tap intercooler for IAT and wire it and cold side is done.
And this morning I wrapped up my latest build. Wife helped a little on this one: I laid about half the plans, she provided the garage, I brought my tool(s). Alignments came out perfect, corner weights are a little on the heavy side at 8-4.
Khloe Shoshanna
Reply
0
0


 07-24-2015, 06:47 PM
#410
SadFab CEO
Thread Starter
iTrader: (3)
Join Date: Sep 2012
Location: your mom's house phoenix, AZ
Posts: 4,560
Total Cats: 1,142
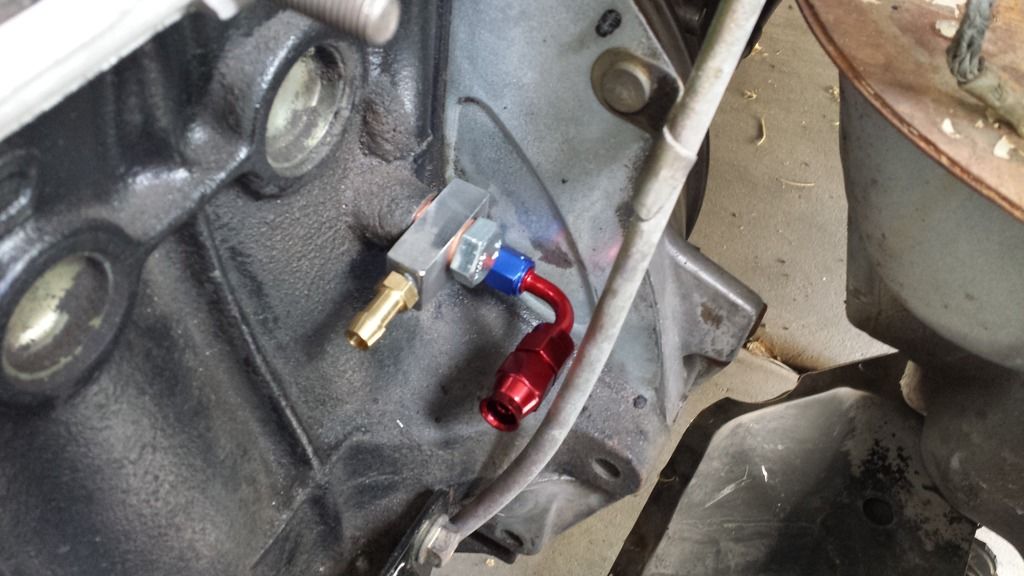
When I made the barb fittings for the turbo, I didnt realize they would be the same for the block. So I made another one of these things
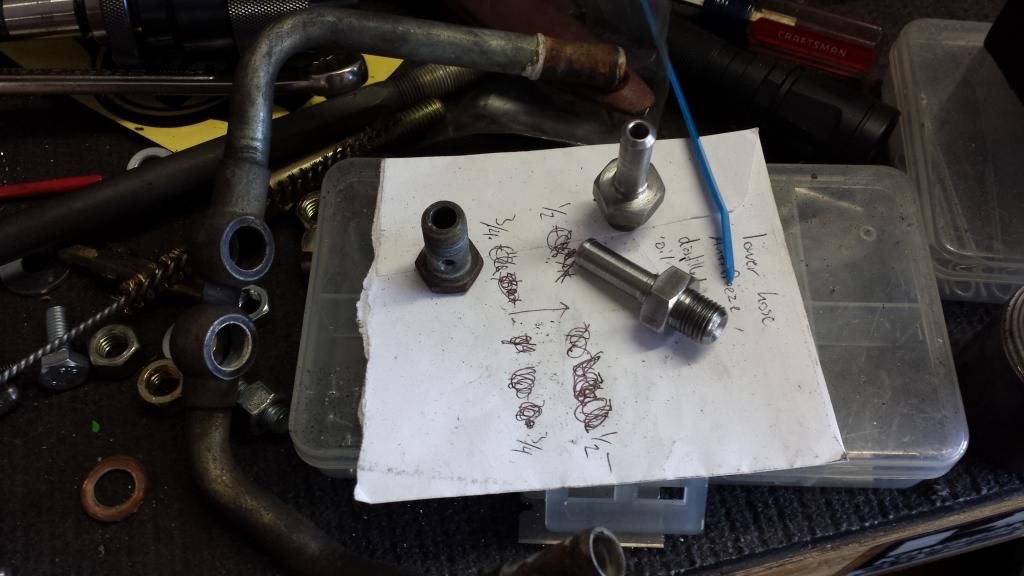
Installed it, only to find out it points right at the downpipe
As discussed earlier, m12 banjo to 8mm barb is unexpectedly rare. I found 2 sources, with shipping over $20 just for the fitting, would still need the bolt, which is also an odd size and isnt readily available and more $ than it should be. could have gone from m12, to an to barb, but that would have been $40 in parts and a 3 peice stack up. again
So *** this **** I made my own dam banjo fitting and bolt
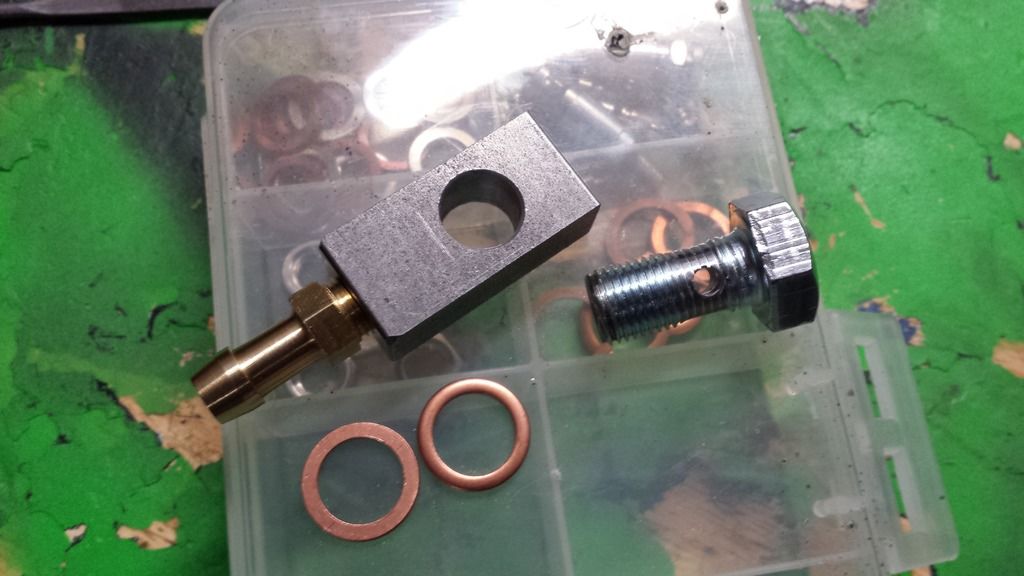
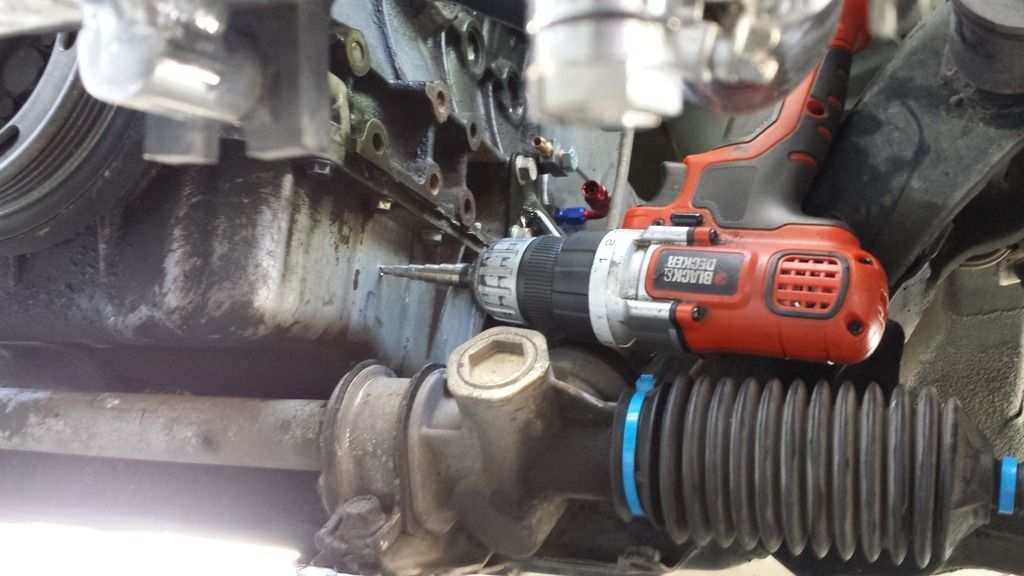
This didnt go very smooth, I drilled about a 3/8" hole in the scraper/windage tray thing. I went a little too high so the tap and fitting bottom out on the windage tray before I get the thread engagement I would like to see. meh
Installed it, only to find out it points right at the downpipe
As discussed earlier, m12 banjo to 8mm barb is unexpectedly rare. I found 2 sources, with shipping over $20 just for the fitting, would still need the bolt, which is also an odd size and isnt readily available and more $ than it should be. could have gone from m12, to an to barb, but that would have been $40 in parts and a 3 peice stack up. again
So *** this **** I made my own dam banjo fitting and bolt
This didnt go very smooth, I drilled about a 3/8" hole in the scraper/windage tray thing. I went a little too high so the tap and fitting bottom out on the windage tray before I get the thread engagement I would like to see. meh
Reply
0
0
 07-24-2015, 06:56 PM
#412
SadFab CEO
Thread Starter
iTrader: (3)
Join Date: Sep 2012
Location: your mom's house phoenix, AZ
Posts: 4,560
Total Cats: 1,142
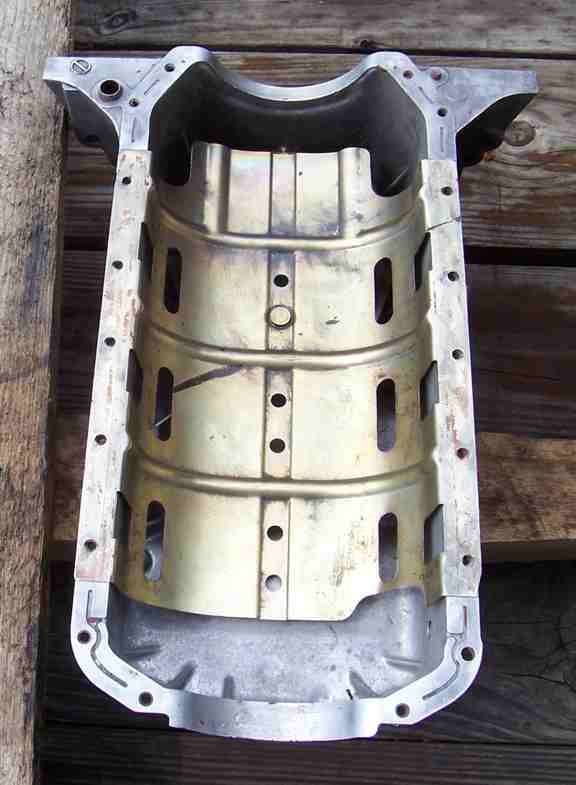
Im wondering if i can knock the tray back a little bit with a punch or something. The crank isnt that close to the tray along the oil pan rail right? or is this stupid?
Reply
0
0
07-24-2015, 06:59 PM
#413
SadFab CEO
Thread Starter
iTrader: (3)
Join Date: Sep 2012
Location: your mom's house phoenix, AZ
Posts: 4,560
Total Cats: 1,142
Based on this random google image, I should be able to do what im saying without much cause for concern? Or am i asking for a leak this way?
Reply
0
0
 07-24-2015, 07:36 PM
#416
If the fitting is hitting the windange tray, it's way too close and will block some of the flow when oil tries to flow out.
I would just cut some of the threads off the end of the fitting and then screw it in. I did this on my oil drain and every other NPT threaded fitting I've used so the fitting isn't blocking flow and threads in tight.
Also +1 on JB weld on bottom oil pan fitting threads, I did that in 2008, and in 2014 it was not leaking. I have cooling fittings also sealed with it for about 5 years and again, no leaks, just works. I did thread them in tight and then added JB on the outside of the threads around the metal it screws into.
Reply
0
0
 07-24-2015, 07:53 PM
#418
SadFab CEO
Thread Starter
iTrader: (3)
Join Date: Sep 2012
Location: your mom's house phoenix, AZ
Posts: 4,560
Total Cats: 1,142
It won't block the flow, the tray is at an angle not parallel with the face of the fitting. I'm also right next to one of those windows in the tray... and I drilled a 3/8" hole in it lol. I'll get a pic when I get a second, I'm picking up sushi right now.
Reply
0
0


