sean's cheap thrills, 90 1.6 with subaru td04
 03-14-2014, 10:54 PM
#41
SadFab CEO

Thread Starter
iTrader: (3)
Join Date: Sep 2012
Location: your mom's house phoenix, AZ
Posts: 4,560
Total Cats: 1,142
I run without any sort of IAC. It's ok, but definitely needs to be held at 2000rpms for a few seconds when stone cold. I might suggest keeping the coolant IAC only for a little help.
And depending on the ambient temperature, your idle will vary. On 80+ days, I generally have to turn it down from 1200. But then again, we usually have colder days, and it idles happily at 800 most of the time.
And depending on the ambient temperature, your idle will vary. On 80+ days, I generally have to turn it down from 1200. But then again, we usually have colder days, and it idles happily at 800 most of the time.

Reply
 0
0

0
04-02-2014, 11:11 PM
#42
SadFab CEO
Thread Starter
iTrader: (3)
Join Date: Sep 2012
Location: your mom's house phoenix, AZ
Posts: 4,560
Total Cats: 1,142
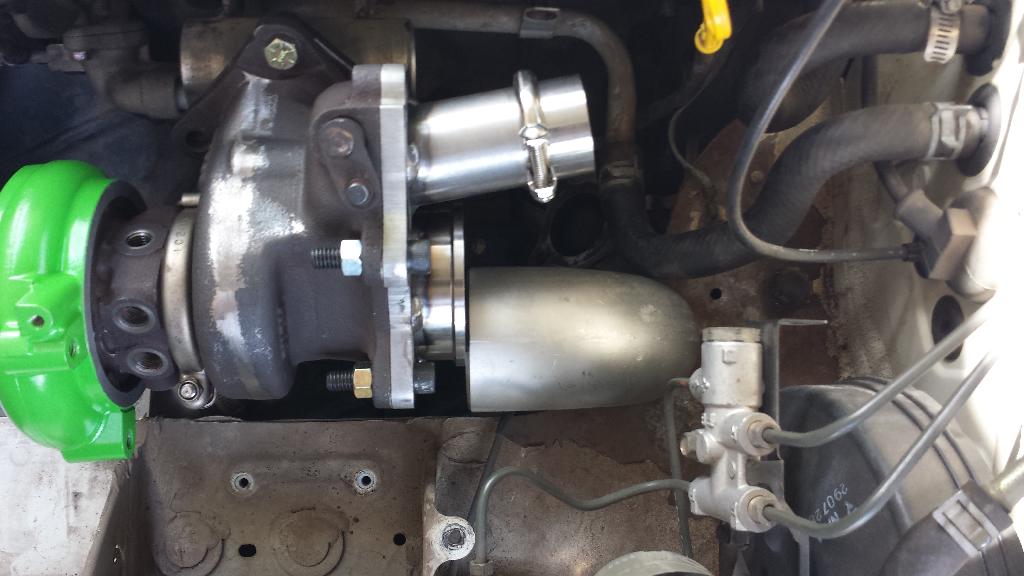
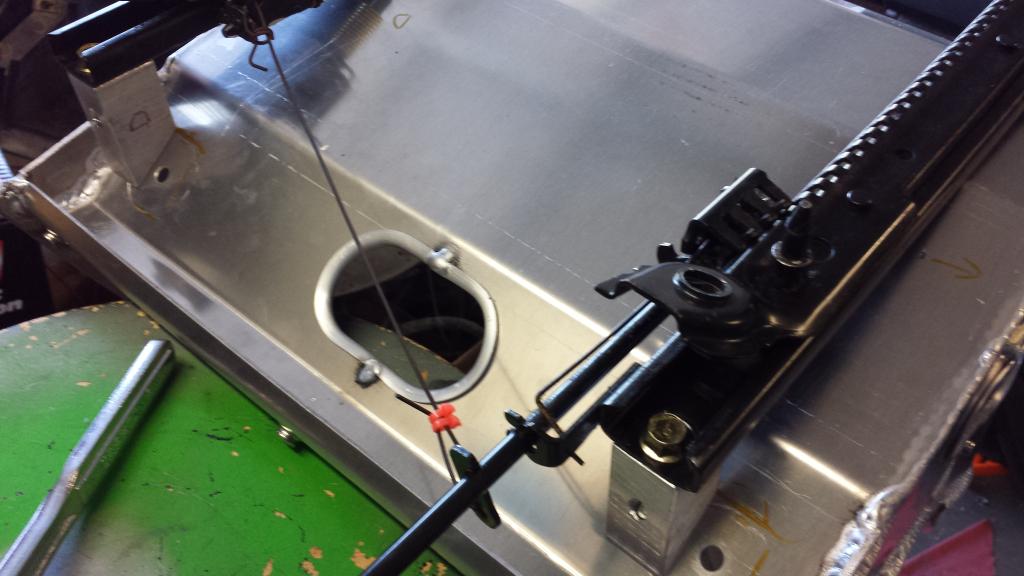
i started to mock up the manifold and turbo today.
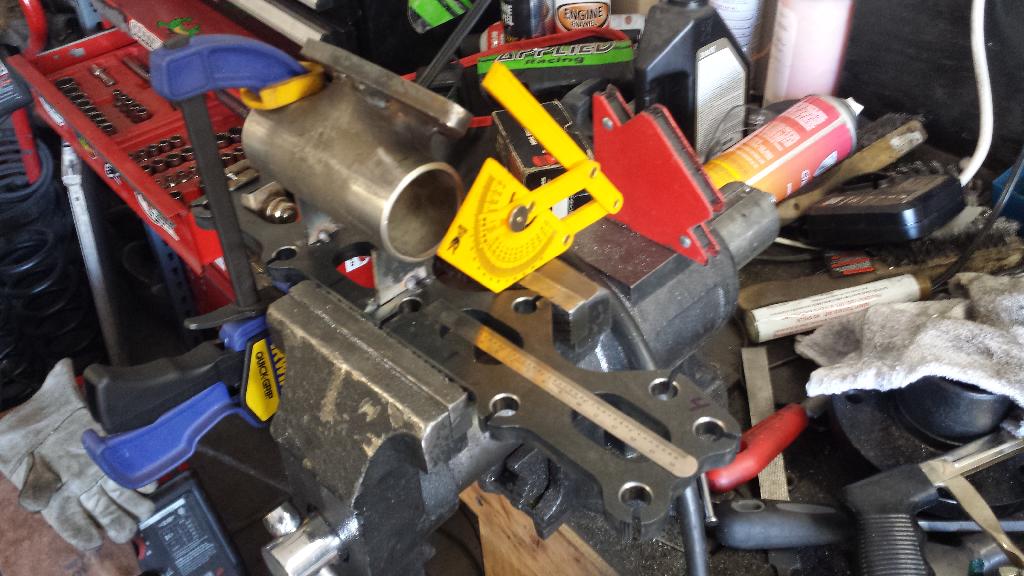
in just tacked the outlet flange on for testing.
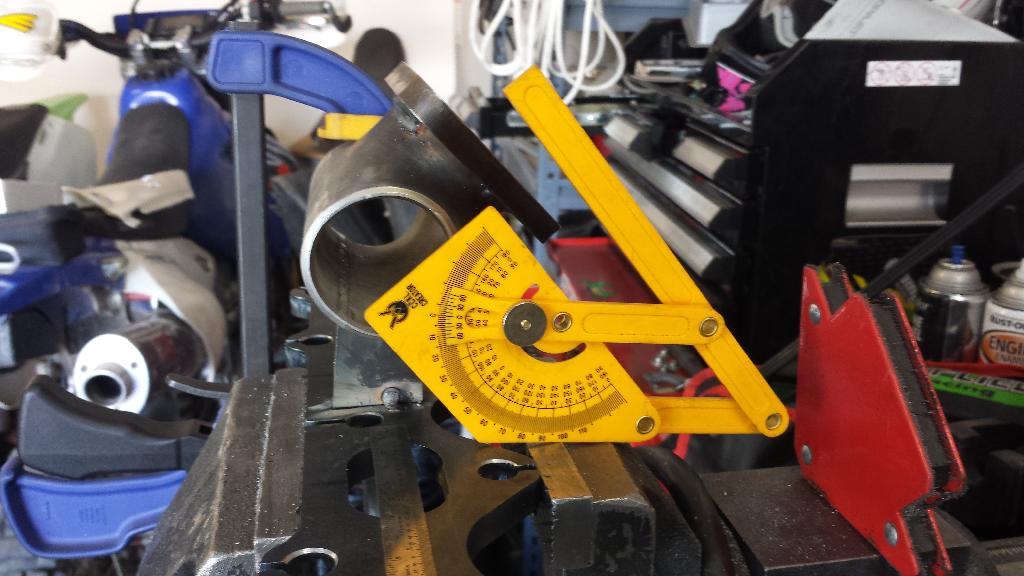
i had to reclock the turbo, so now i need to weld a bolt boss on to relocate the wastegate actuator. by sliding the actuator down to the next hole, the compressor outlet ends up at a nice angle.
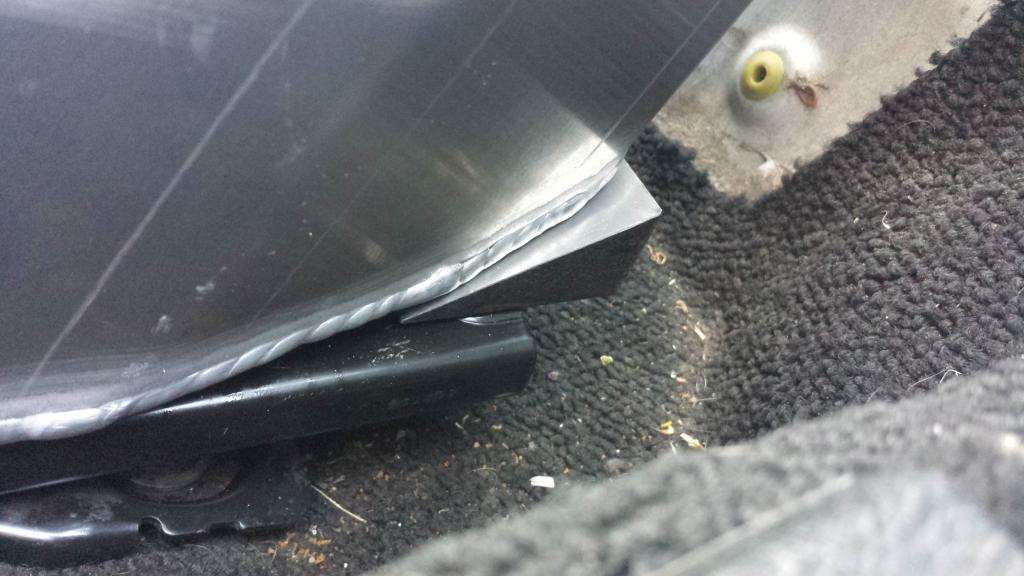
my downpipe flange is going to have to change due to clearance with the firewall lip. a short radius elbow($$$) may work, or welding the 90 directing to the flange and moving the v-band downstream. i might just pie cut some pipe into a tight radius, but i dont like that idea. i dunno
in just tacked the outlet flange on for testing.
i had to reclock the turbo, so now i need to weld a bolt boss on to relocate the wastegate actuator. by sliding the actuator down to the next hole, the compressor outlet ends up at a nice angle.
my downpipe flange is going to have to change due to clearance with the firewall lip. a short radius elbow($$$) may work, or welding the 90 directing to the flange and moving the v-band downstream. i might just pie cut some pipe into a tight radius, but i dont like that idea. i dunno
Reply
0
0
 04-16-2014, 08:38 PM
#44
SadFab CEO
Thread Starter
iTrader: (3)
Join Date: Sep 2012
Location: your mom's house phoenix, AZ
Posts: 4,560
Total Cats: 1,142
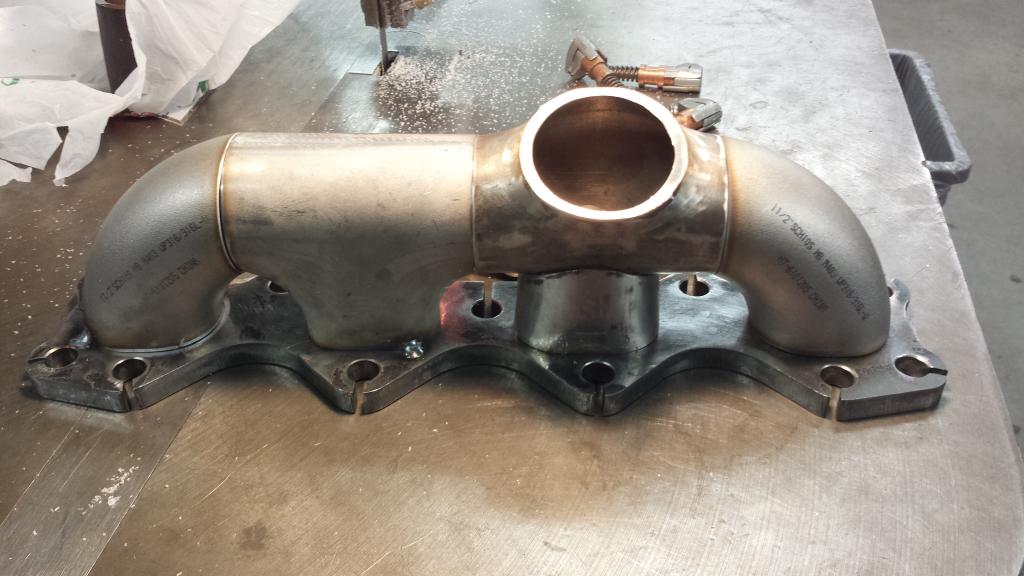
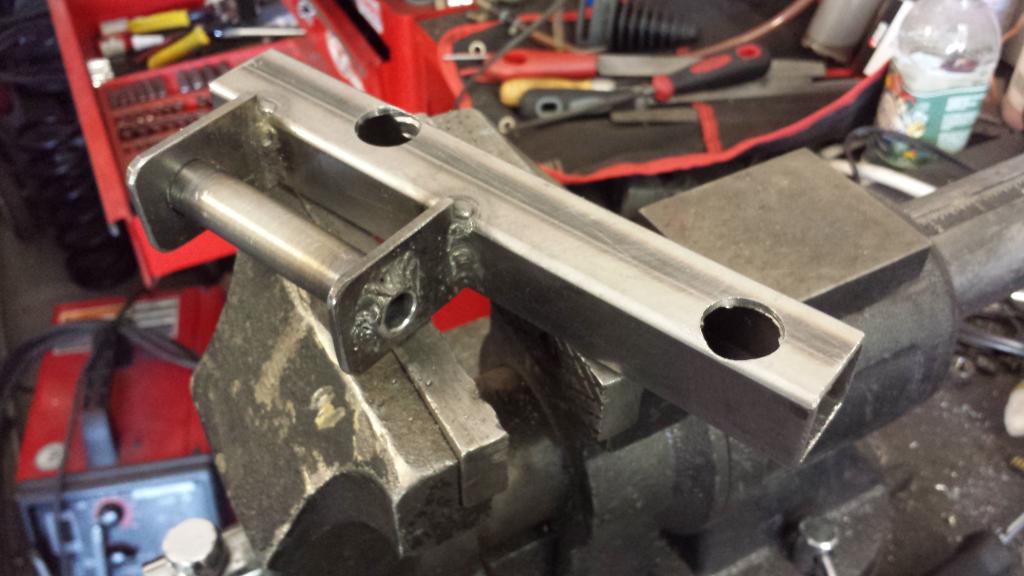
thanks for the props. but every now and then, im a moron. i got the mani all dry fitted, and was doing the last step before chamfering and welding the pieces, and i drilled the outlet hole on the wrong side of the tee  the only upside is that i used a 3/8" flange that warped pretty bad during welding and i milled it flat, so it was something less than 3/8". now i have the chance to go 1/2" like i should have in the first place. as far as the cylinder head flange side goes- i milled a piece of 1"x4" plate flat and drilled and tapped it to the flange bolt pattern, that should prevent any warping.
i cut he flange off to see if i could reweld it, but its already fuked
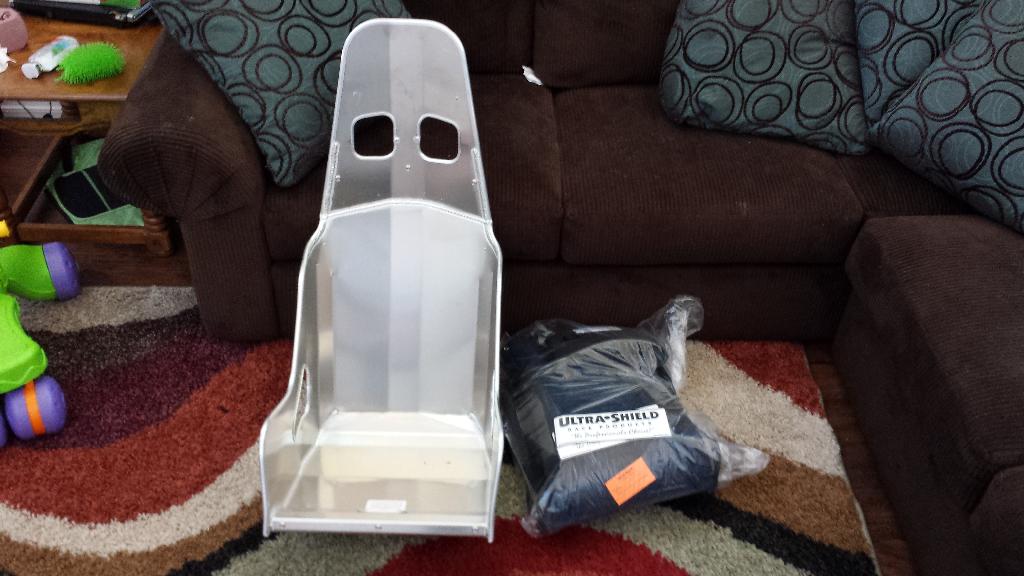
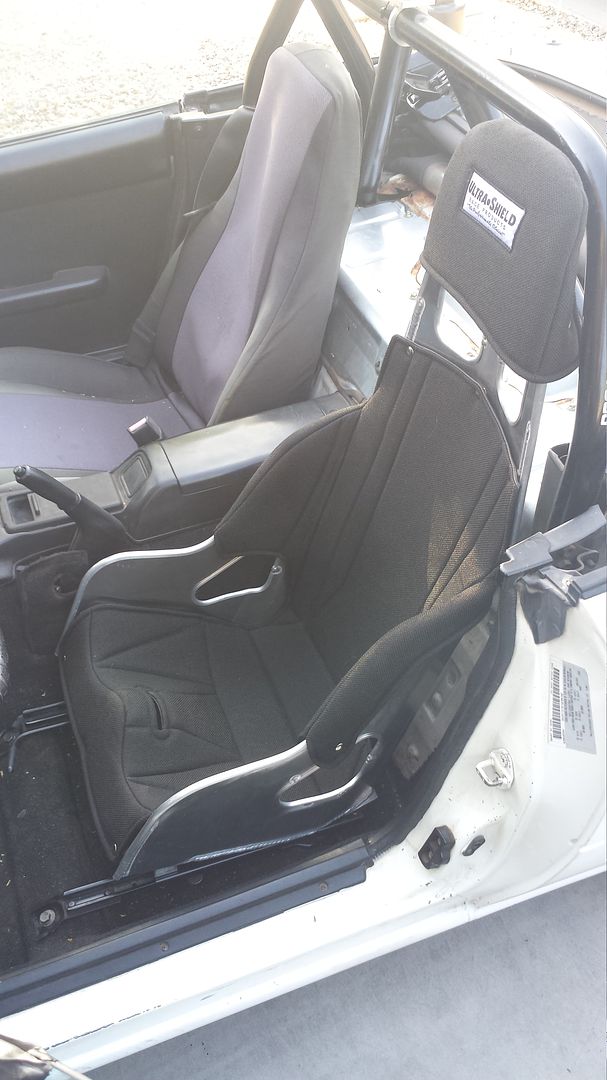
and my spec miata seat finally came in. i love it
the only upside is that i used a 3/8" flange that warped pretty bad during welding and i milled it flat, so it was something less than 3/8". now i have the chance to go 1/2" like i should have in the first place. as far as the cylinder head flange side goes- i milled a piece of 1"x4" plate flat and drilled and tapped it to the flange bolt pattern, that should prevent any warping.i cut he flange off to see if i could reweld it, but its already fuked
and my spec miata seat finally came in. i love it
Reply
0
0


 04-24-2014, 10:48 PM
#48
SadFab CEO
Thread Starter
iTrader: (3)
Join Date: Sep 2012
Location: your mom's house phoenix, AZ
Posts: 4,560
Total Cats: 1,142
thanks! its not a big deal, i just hate wasting money because of my stupid mistakes.
long, complicated story. this is actually my 2nd manifold attempt. i was embarrassed about the first one so i never posted, but in the interest of full disclosure:
i had done a lot of research on here before deciding what to do, i got ideas from sturovos thread and the "diy mani" thread. so i originally decided to go with a "mid" mount log similar to sturovos "flowish log" (sturovo i hope you dont mind).
here is sturvos 1.6 flowish log and details
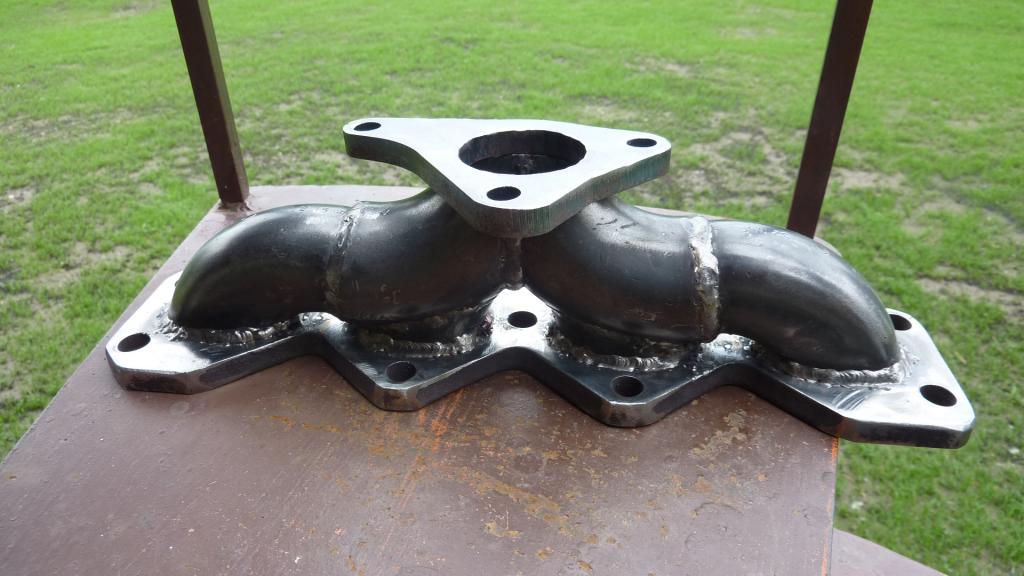
https://www.miataturbo.net/diy-turbo...4/#post1011246
after reading maximum boost and corkys article on down pipes, i am fixated on making it a divorced setup with the best transitions i am capable of. which at this point has probably become far more work than its worth. this is when i made my DP flange that im so proud of. with the flowish log having the outlet between cylinders 2 and 3, it left very little room for the DP. i figured if i moved the outlet up to cylinder 2, that would give me the room, while having the dual benefit of easier construction; it was going to be a true log using tees and not a flowish.
so i got the parts and started cutting and fitting... the first time. if you read sturovos post i linked above, youll see with a "mid"/"side" mount, using a TDO4-13T, the manifold cant exceed ~95mm in height, or the turbo hits the frame rail. i tend to get carried away while i fabricate, and only after i got all the pieces dry fitted with a perfect 95mm height did i realize this leaves no room for the nut between cylinders 2 and 3, let a lone the stud or a wrench, because i am joining 2 tees at that location and not 2 inverted and blended 90s. the area around that stud hole looked like the area between 1 and 2 or 3 and 4 on sturovos mani above. there goes 2 90s and 2 tees. i keep things like that as reminders, so ill have to get a pic of them for the lolz.
so back to the internets, and i noticed, with the exception of sturovo, that people using the 13t specifically all high mounted and inline with #2. i actually wanted to do a low mount so i could have as straight a dp as possible. i figured it would fit, if the high mount fit. thats when i ripped the exhaust apart and test fit the turbo on the car itself. the turbo had always been in pieces up until then and i had never actually done a mockup. i just couldnt see a way to fit it low. the waste gate actuator would hit the frame, and or the turbo outlet was pointing right at the block. i couldnt reclock the actuator because it would end up on the compressor outlet where it wouldnt fit nor could i weld a boss there. external is out of the question. it also seemed to hit other things that i dont recall, i think these issues are specific to the 13T.
so the high mount worked with the caveat that i still need to relcock the compressor side and therefore the actuator. and i have found a solution the the DP.
another thought that had occurred to me, but its already in front of #2 and i was unsure if there would be any detrimental effects to moving it even further forward. and regarding the DP: for no reason in particular i was bent on using butt weld fittings for the first few bends. theres no reason 16ga exhaust bends wont work that i can think of, and you can get some very tight radius 2.5" pre bends much cheaper than butt welds.
TL;DR
the 13T is weird and only fits(easily) high mount, or like sturovos and exhaust pre bends kick ***.
i had done a lot of research on here before deciding what to do, i got ideas from sturovos thread and the "diy mani" thread. so i originally decided to go with a "mid" mount log similar to sturovos "flowish log" (sturovo i hope you dont mind).
here is sturvos 1.6 flowish log and details
https://www.miataturbo.net/diy-turbo...4/#post1011246
after reading maximum boost and corkys article on down pipes, i am fixated on making it a divorced setup with the best transitions i am capable of. which at this point has probably become far more work than its worth. this is when i made my DP flange that im so proud of. with the flowish log having the outlet between cylinders 2 and 3, it left very little room for the DP. i figured if i moved the outlet up to cylinder 2, that would give me the room, while having the dual benefit of easier construction; it was going to be a true log using tees and not a flowish.
so i got the parts and started cutting and fitting... the first time. if you read sturovos post i linked above, youll see with a "mid"/"side" mount, using a TDO4-13T, the manifold cant exceed ~95mm in height, or the turbo hits the frame rail. i tend to get carried away while i fabricate, and only after i got all the pieces dry fitted with a perfect 95mm height did i realize this leaves no room for the nut between cylinders 2 and 3, let a lone the stud or a wrench, because i am joining 2 tees at that location and not 2 inverted and blended 90s. the area around that stud hole looked like the area between 1 and 2 or 3 and 4 on sturovos mani above. there goes 2 90s and 2 tees. i keep things like that as reminders, so ill have to get a pic of them for the lolz.
so back to the internets, and i noticed, with the exception of sturovo, that people using the 13t specifically all high mounted and inline with #2. i actually wanted to do a low mount so i could have as straight a dp as possible. i figured it would fit, if the high mount fit. thats when i ripped the exhaust apart and test fit the turbo on the car itself. the turbo had always been in pieces up until then and i had never actually done a mockup. i just couldnt see a way to fit it low. the waste gate actuator would hit the frame, and or the turbo outlet was pointing right at the block. i couldnt reclock the actuator because it would end up on the compressor outlet where it wouldnt fit nor could i weld a boss there. external is out of the question. it also seemed to hit other things that i dont recall, i think these issues are specific to the 13T.
so the high mount worked with the caveat that i still need to relcock the compressor side and therefore the actuator. and i have found a solution the the DP.
another thought that had occurred to me, but its already in front of #2 and i was unsure if there would be any detrimental effects to moving it even further forward. and regarding the DP: for no reason in particular i was bent on using butt weld fittings for the first few bends. theres no reason 16ga exhaust bends wont work that i can think of, and you can get some very tight radius 2.5" pre bends much cheaper than butt welds.
TL;DR
the 13T is weird and only fits(easily) high mount, or like sturovos and exhaust pre bends kick ***.
Reply
1
1
05-11-2014, 10:18 PM
#50
SadFab CEO
Thread Starter
iTrader: (3)
Join Date: Sep 2012
Location: your mom's house phoenix, AZ
Posts: 4,560
Total Cats: 1,142
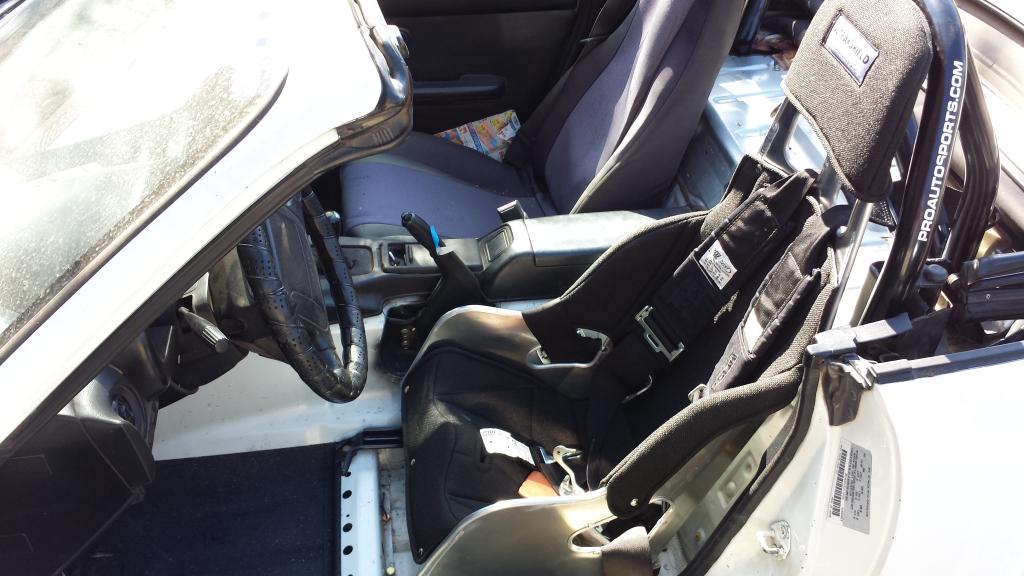
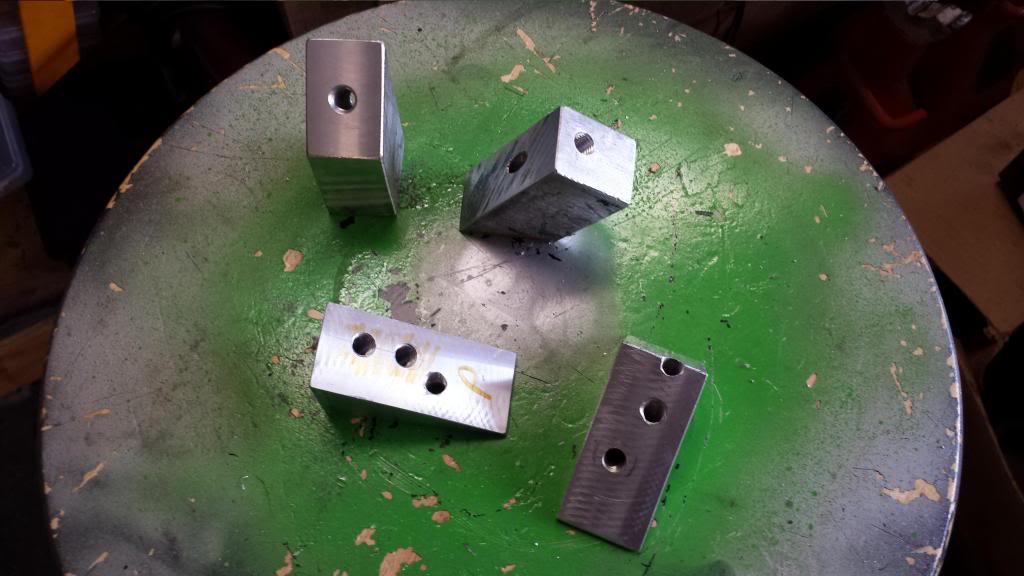
after 2 attempts i successfully installed the seat. i machined some blocks to adapt the sliders to the seat. on the first attempt, i set the back angle to 20 degrees, and put the seat right in the middle of the sliders. turns out the sliders are about 1.5" to the drivers side, and i needed more angle. with the seat mounted like that you were noticeably to close to the door and the shifter felt far away.
attempt 1
20140505_071156_zps10g5jivs.jpg?t=1399860750
i was only able to get about 2 more degrees out of it by reducing the height of the rear blocks. id like more lean back, but i dont want to raise the front, so ill see how this feels once i get it on the track. had to switch to steel on the rear because of reduced thread engagement, and was able to offset them and use the same mounting holes in the seat. i had to redrill the fronts, but was able to reuse the blocks and took 2 degrees off the top to match.
Reply
0
0
 05-13-2014, 12:37 PM
#52

Seat is 5052 T5 isnt it? I'm not sure you want to screw up the heat treating right where the seat mounts to the chassis.
I just used flat stock to adapt between the flat part of the seat and the holes on the sliders. It was easier, I made it with a hand drill and a hack saw with stuff from home depot. I'm going to make a better version that includes welding when I switch to a better kirkey, and bolt the current kirkey directly to the floor on the passenger's side.
I just used flat stock to adapt between the flat part of the seat and the holes on the sliders. It was easier, I made it with a hand drill and a hack saw with stuff from home depot. I'm going to make a better version that includes welding when I switch to a better kirkey, and bolt the current kirkey directly to the floor on the passenger's side.
Reply
0
0
05-13-2014, 01:21 PM
#54
SadFab CEO
Thread Starter
iTrader: (3)
Join Date: Sep 2012
Location: your mom's house phoenix, AZ
Posts: 4,560
Total Cats: 1,142
mainly becuase i dont have my mig currently setup for aluminum, but its not a bad idea although leafy brings up a good pint.
it is indeed 5052, althoguh im not sure on the heat treat spec.
Ultrashield Catalog - Road Race Seats - Standard Road Race Seats - Spec Miata Seat
i thought about a long piece of 1/4" strap to mount just like you explained. but i have a mill for a reason and i like to uneccesarily complicate things. i was also worried about the strength with it mouned like that.
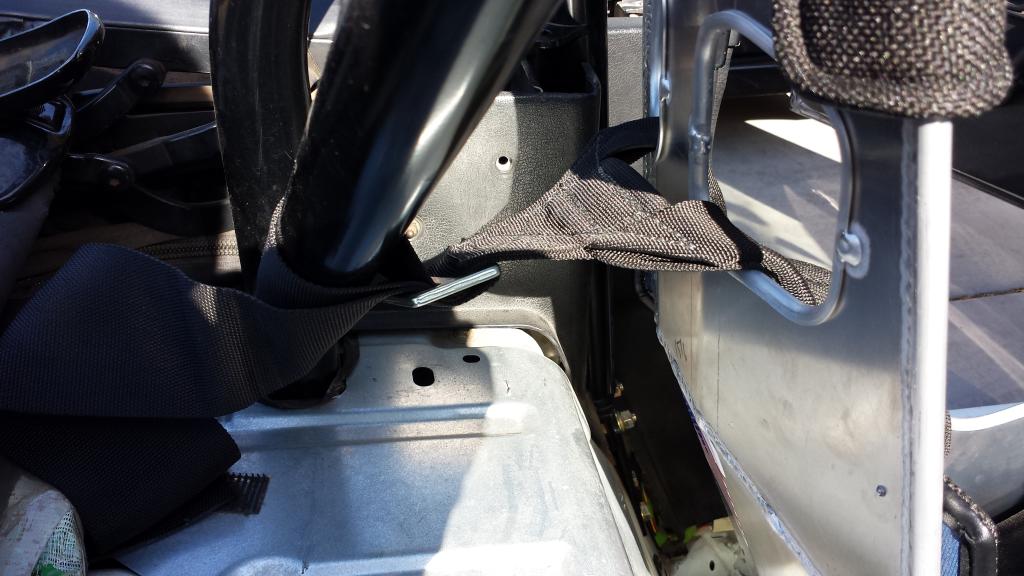
most definitely. i was working on getting my el cheapo harness mounted last night and determined it will be temporary and may find a permanant home on the pass side. none ajdustable submarine and Y-type shoulders. meh. i need to make a harness bar, then get a better individual shoulder straped, pull-up sub type belt harness, and then i can make a back brace. weve got about 3-4 months here with 110 degree weather, so the car will be parked most of that time (spirited cirlce K runs if anything, no track time during the suimmer) and i should have all this sorted by next season. i hope to have it mega squirted by then as well, as its been sitting on my desk assembled for a month now.
safety items/ergonimics on a dual driver car can be somewhat of a bitch and a comprimise at times.
Seat is 5052 T5 isnt it? I'm not sure you want to screw up the heat treating right where the seat mounts to the chassis.
I just used flat stock to adapt between the flat part of the seat and the holes on the sliders. It was easier, I made it with a hand drill and a hack saw with stuff from home depot. I'm going to make a better version that includes welding when I switch to a better kirkey, and bolt the current kirkey directly to the floor on the passenger's side.
I just used flat stock to adapt between the flat part of the seat and the holes on the sliders. It was easier, I made it with a hand drill and a hack saw with stuff from home depot. I'm going to make a better version that includes welding when I switch to a better kirkey, and bolt the current kirkey directly to the floor on the passenger's side.
Ultrashield Catalog - Road Race Seats - Standard Road Race Seats - Spec Miata Seat
i thought about a long piece of 1/4" strap to mount just like you explained. but i have a mill for a reason and i like to uneccesarily complicate things. i was also worried about the strength with it mouned like that.
safety items/ergonimics on a dual driver car can be somewhat of a bitch and a comprimise at times.
Reply
0
0
05-14-2014, 11:07 PM
#55
SadFab CEO
Thread Starter
iTrader: (3)
Join Date: Sep 2012
Location: your mom's house phoenix, AZ
Posts: 4,560
Total Cats: 1,142
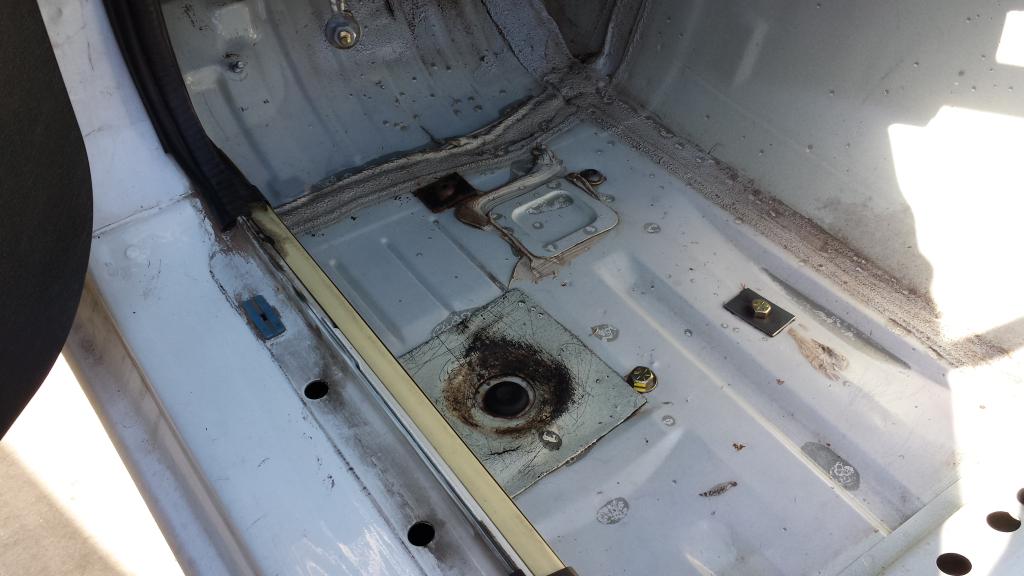
i decided to remove the carpet, at least on the drivers side for now.
after scraping all the spooge and insulation off and some wire brush action
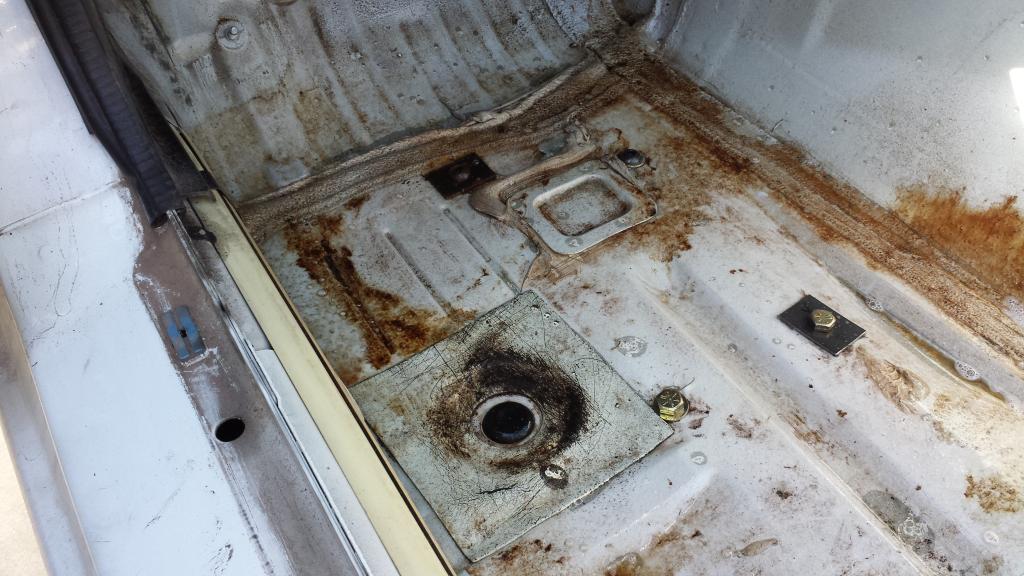
and after degreasing
scuffed it with 120, and masked off the footwell
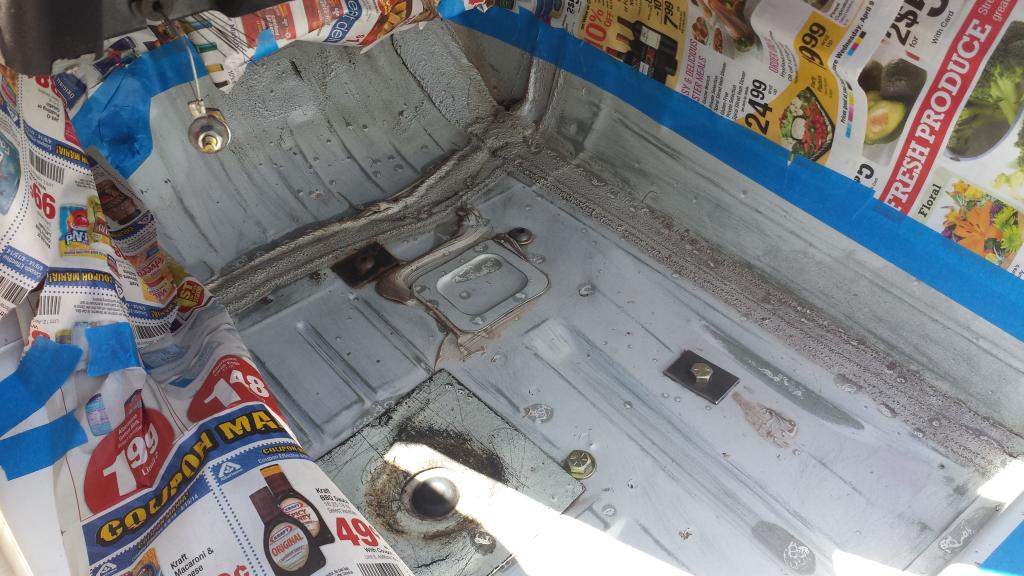
textured trunk paint
made a sub belt bracket that uses the existing hardware from the frog frame rails to mount it.
i broke a unibit making it
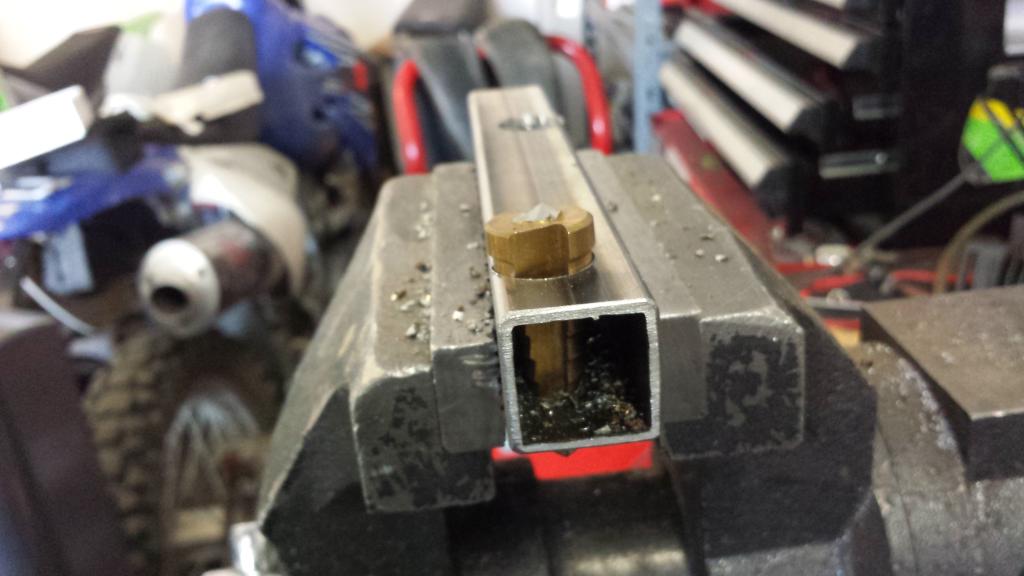
i machined a pieced of round stock down to 5/8 and drilled a hole to add lightness, some 1/8" plate-
blue because it was first can of paint i saw laying around in the garage
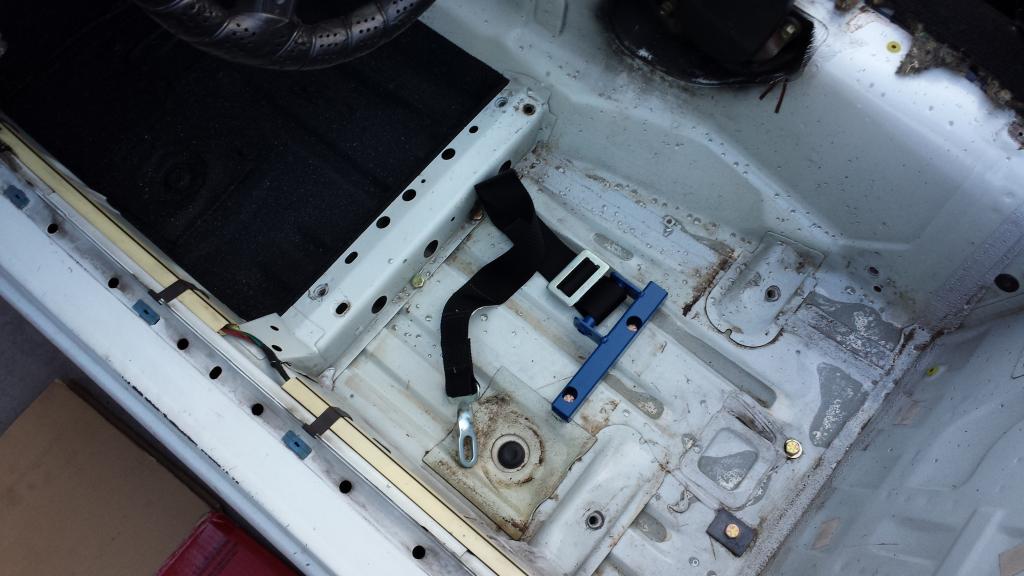
tied off to the diagonal for now, harnes br will be next
after scraping all the spooge and insulation off and some wire brush action
and after degreasing
scuffed it with 120, and masked off the footwell
textured trunk paint
made a sub belt bracket that uses the existing hardware from the frog frame rails to mount it.
i broke a unibit making it
i machined a pieced of round stock down to 5/8 and drilled a hole to add lightness, some 1/8" plate-
blue because it was first can of paint i saw laying around in the garage
tied off to the diagonal for now, harnes br will be next
Reply
0
0
05-14-2014, 11:16 PM
#57
SadFab CEO
Thread Starter
iTrader: (3)
Join Date: Sep 2012
Location: your mom's house phoenix, AZ
Posts: 4,560
Total Cats: 1,142
3 pack from harbor freight, i think it was on sale for $7 or something stupid. in its defense, i have beat the **** out of that bit, and was asking a lof of it at that moment with an interrupted side cut on the inside wall of the tubing.
Reply
0
0
05-16-2014, 12:29 AM
#58
Junior Member

Join Date: Apr 2013
Location: Va
Posts: 87
Total Cats: -4
Glad to see I'm not the only one round here with a lathe in the basement!
8x14 here. Man those machines come in handy! I've made so much random stuff the machine has probably paid for itself twice by now.
I'm really liking the progression of the build. Keep it up!
8x14 here. Man those machines come in handy! I've made so much random stuff the machine has probably paid for itself twice by now.
I'm really liking the progression of the build. Keep it up!
Reply
0
0
05-16-2014, 12:52 PM
#59
SadFab CEO
Thread Starter
iTrader: (3)
Join Date: Sep 2012
Location: your mom's house phoenix, AZ
Posts: 4,560
Total Cats: 1,142
thanks for the props!
Reply
0
0
06-01-2014, 03:00 PM
#60
SadFab CEO
Thread Starter
iTrader: (3)
Join Date: Sep 2012
Location: your mom's house phoenix, AZ
Posts: 4,560
Total Cats: 1,142
i have some mega squirt questions. ms3 v3.0
1. im running 440cc rx8 injectors in batch mode, should i keep the flyback pwm damping circuit, or can i use q9 and 12 for my fan circuit, etc?
2. since i wont be running iac, i dont need the s12 to js9 jumper right?
3. is there any reason i cant connect fuel pump output, pin 37 to miata harness pin 2p, and then short the wires together at the afm harness?
4. do you guys rip out the canister and purge valve? im going to try to register it a classic so it is emissions exempt next time it is due.
5. i forgot what 5 was
Reply
0
0


