TZ's build-a documentary of adequacy and hopes for more


 02-12-2014, 02:57 AM
#64
Elite Member
Thread Starter
iTrader: (6)

Join Date: May 2011
Location: Albuquerque, NM
Posts: 1,656
Total Cats: 64
Well my build got put on hold. Builder backed out/dumb ***. Started over on the engine build. Now VVT top and bottom block and forged blah blah. Going for +1 valves in/exh in VVT, so we'll see if he can do it. My old boss is doing the build and I should have gone to Greg in the first place. This is what I get for trying not to ship engines to California.
However, Jass performance mirror block off plates will fit an NB. Still hunting for mirror options. Trying to keep total price under the estimated $200 respray of the factory mirrors. I've been eyeballing these and the carbo actually turns me away. Nothing else on the car is carbon and I feel they may look out of place. Might commit a sin and plastidip them.

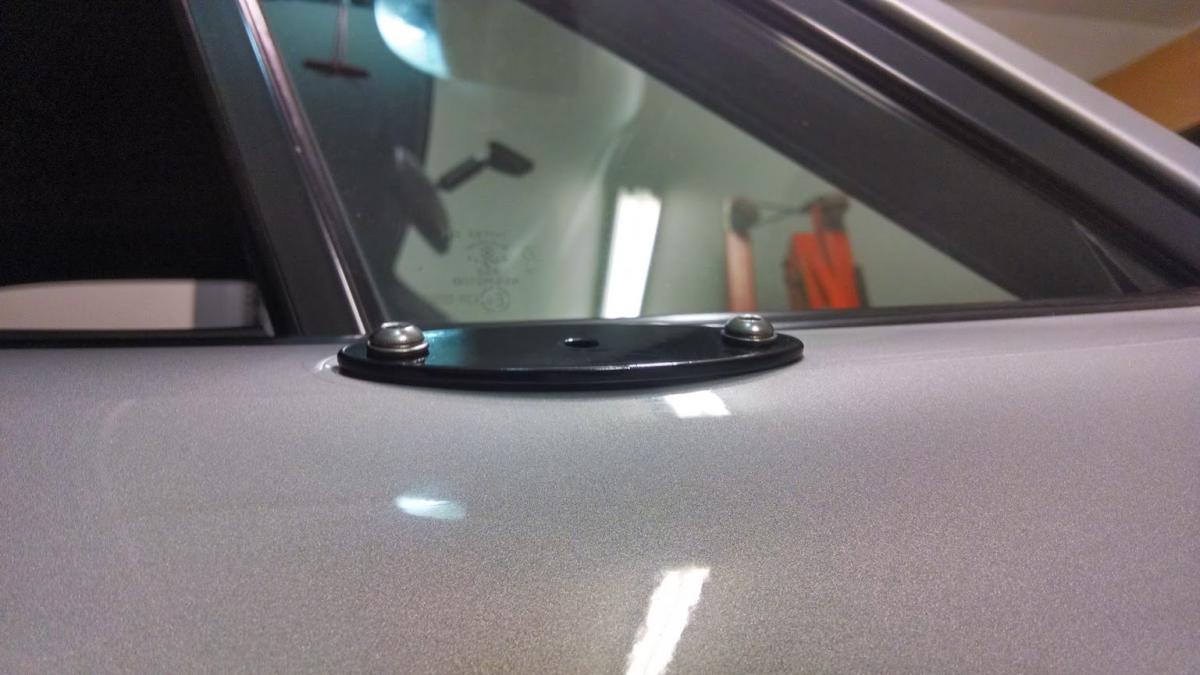
One of the other threads made me get off my *** and shave/polish these. +I finally got my buffing equipment in.
In anticipation to get a second motor done I sourced another VVT head and guess what kind of fun FedEx had.


ID1000's finally arrived. Well not to long after blackfriday sales. Just been awhile since I caught up on this thread.

Fun fact. An Optima will fit in a NA chassis with little work. Daily battery died and tired of having this sitting in the dead car in the garage. My '97 still had the factory battery in it. Finally gave up.


I'll be hammered with Calc this semester, but I'm going to try to make some updates 1: So I get a break from maths 2: So I get something done on the car 3: Without a motor I'm having a hard time doing anything to it (that isn't expensive).
However, Jass performance mirror block off plates will fit an NB. Still hunting for mirror options. Trying to keep total price under the estimated $200 respray of the factory mirrors. I've been eyeballing these and the carbo actually turns me away. Nothing else on the car is carbon and I feel they may look out of place. Might commit a sin and plastidip them.
One of the other threads made me get off my *** and shave/polish these. +I finally got my buffing equipment in.
In anticipation to get a second motor done I sourced another VVT head and guess what kind of fun FedEx had.
ID1000's finally arrived. Well not to long after blackfriday sales. Just been awhile since I caught up on this thread.
Fun fact. An Optima will fit in a NA chassis with little work. Daily battery died and tired of having this sitting in the dead car in the garage. My '97 still had the factory battery in it. Finally gave up.
I'll be hammered with Calc this semester, but I'm going to try to make some updates 1: So I get a break from maths 2: So I get something done on the car 3: Without a motor I'm having a hard time doing anything to it (that isn't expensive).

Reply
 0
0

0
 04-16-2014, 04:56 PM
#67
Elite Member
Thread Starter
iTrader: (6)
Join Date: May 2011
Location: Albuquerque, NM
Posts: 1,656
Total Cats: 64
Now I'm trying to prep things for getting the motor. Got fucked and finally got what was mine back . Not the aftermarket stuff and out a ton of money, but the show must go on. If I get screwed again I'll probably murder someone.
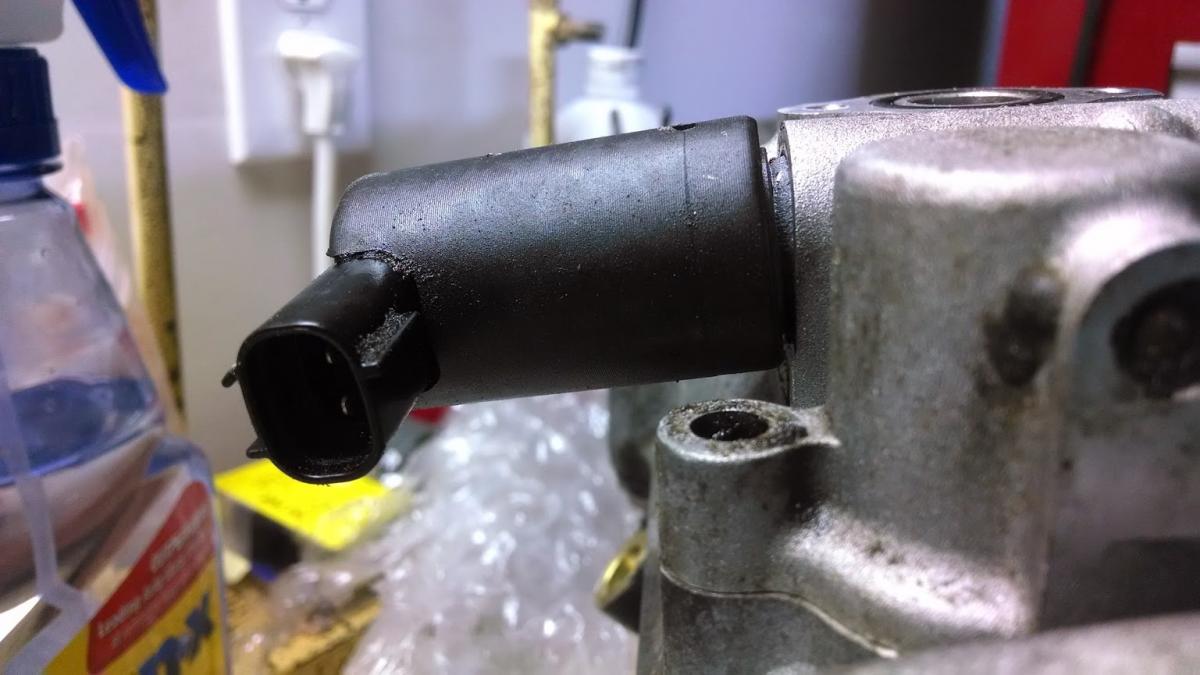
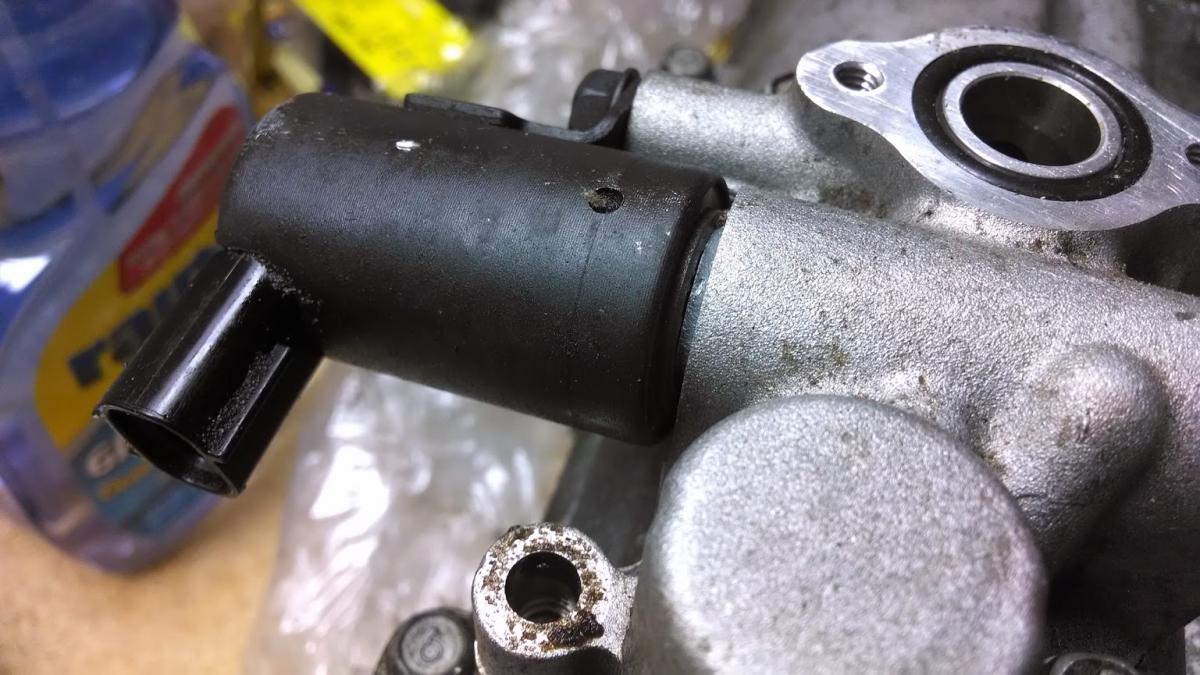
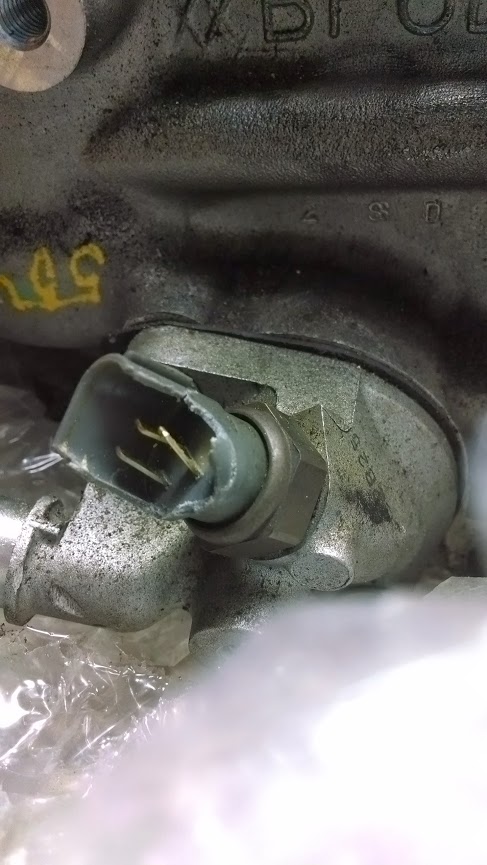
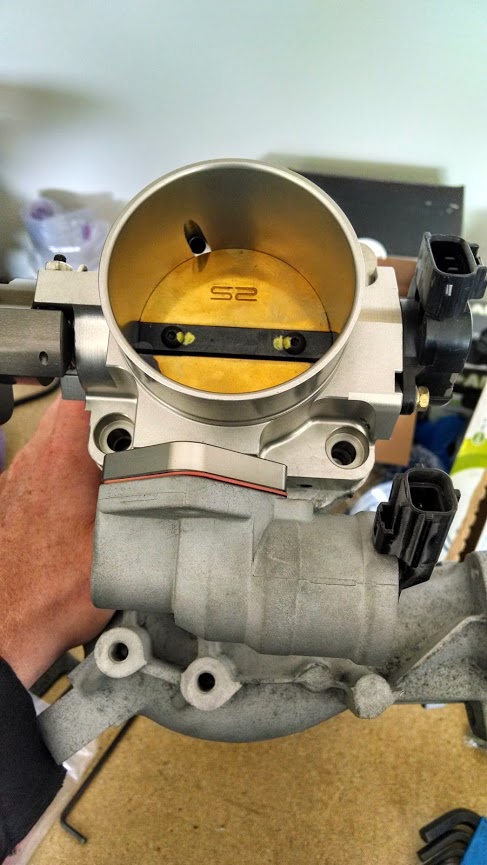
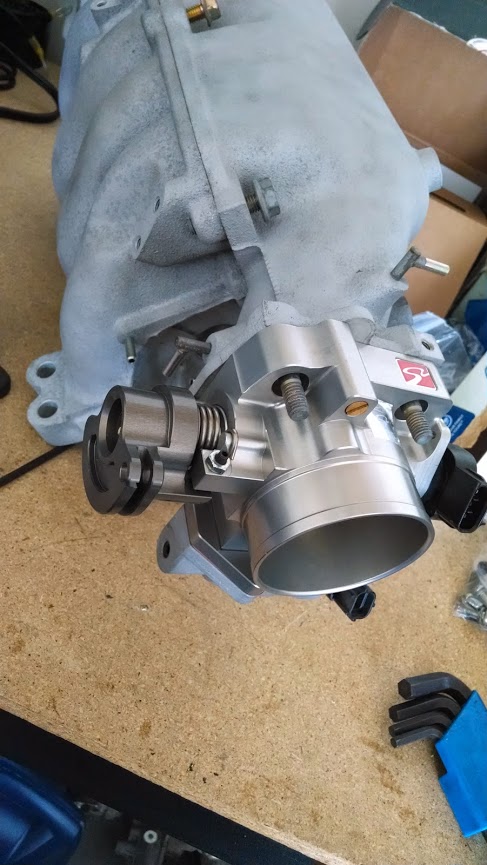
I have this throttle

And no matter how I line up the adapter for the IAC valve it either hits the intake manifold, or doesn't seal with the plate. I've flipped and rotated every direction I can think of. Do I have the dumb?
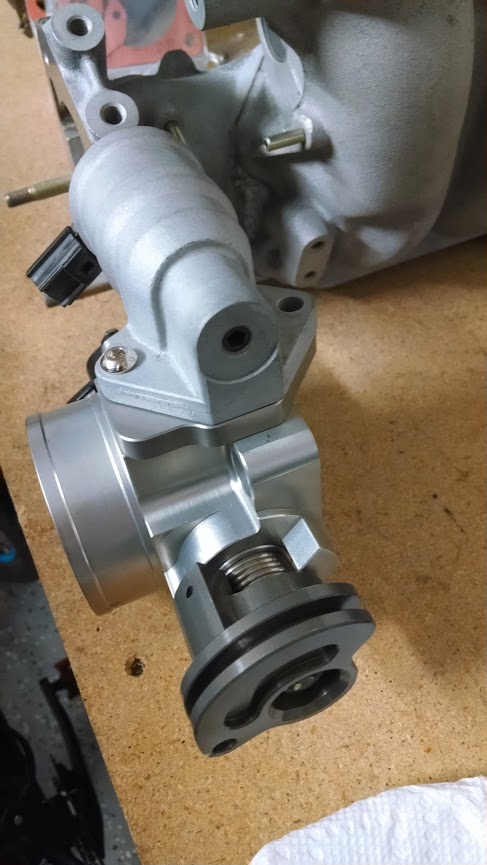
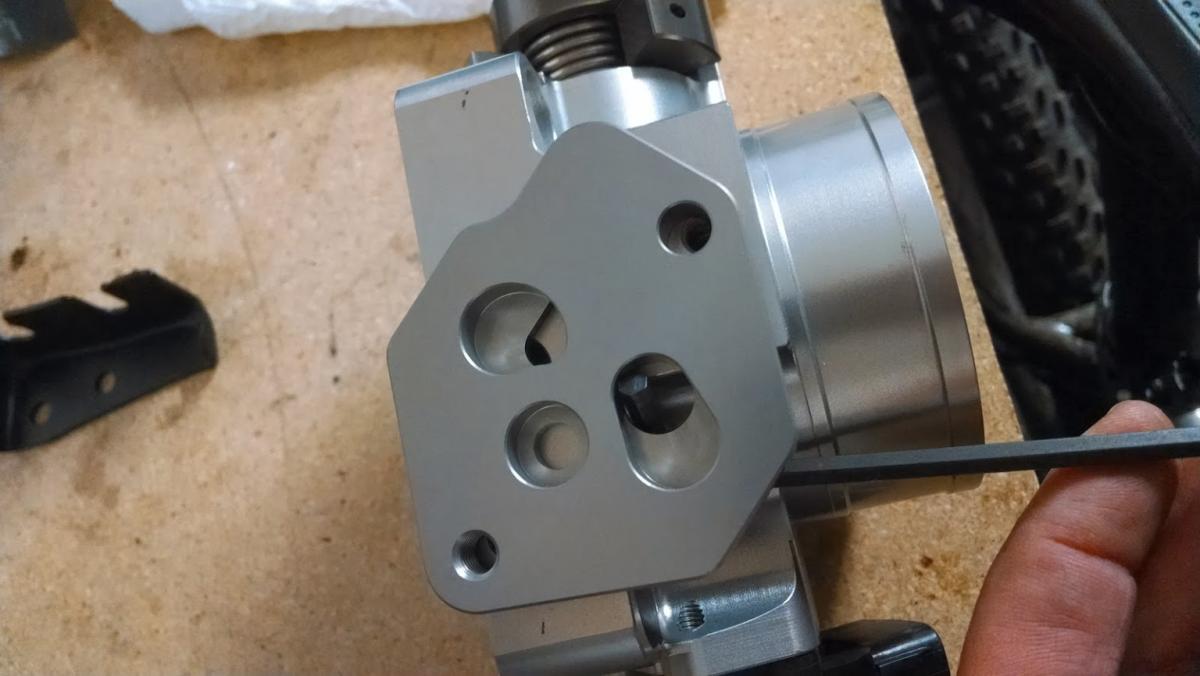
The gasket seems right, but the adapter plate doesn't.

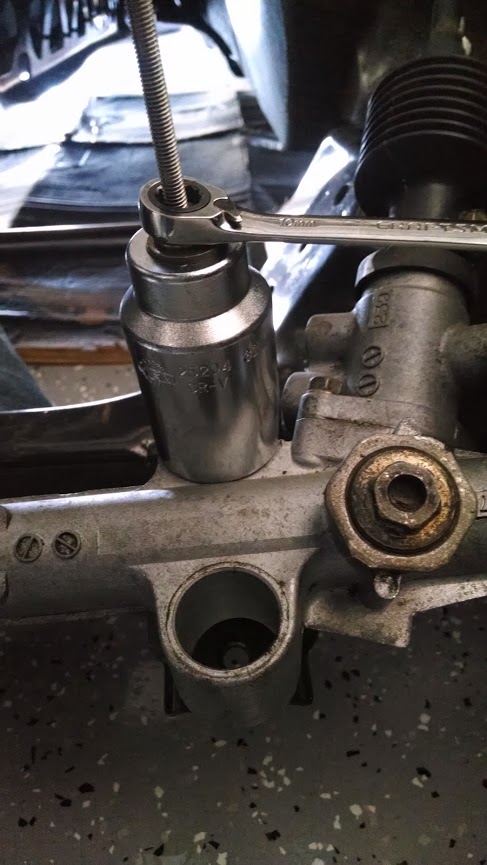
Some all thread makes great puller tools. Swapped to delrin steering mounts. No reason. Add it to the list of drunk "I wants" orders I've done.
Picked up this guy and waiting on a bracket. I just set it on the factory slider/rails and my hair hits the hard top. No way I'll fit with a helmet. THe should wings are too ide as well and hit the door. Was suggested to me to use a heat gun and some ratchets. We'll see how that goes
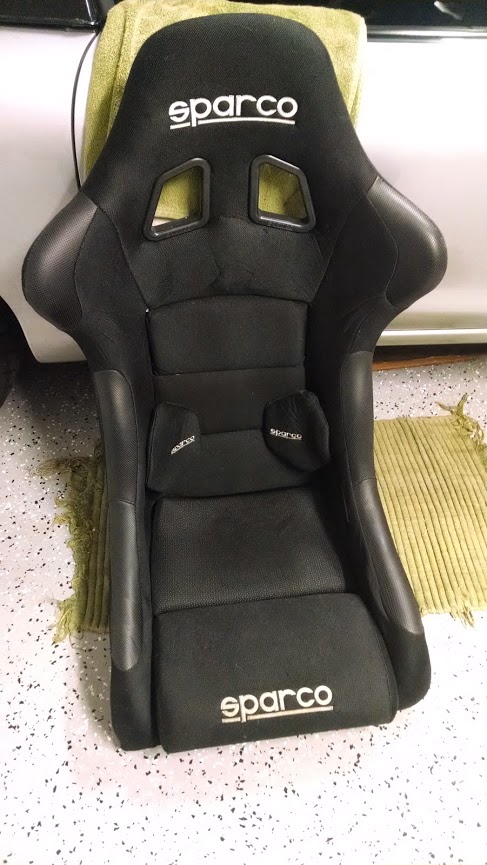
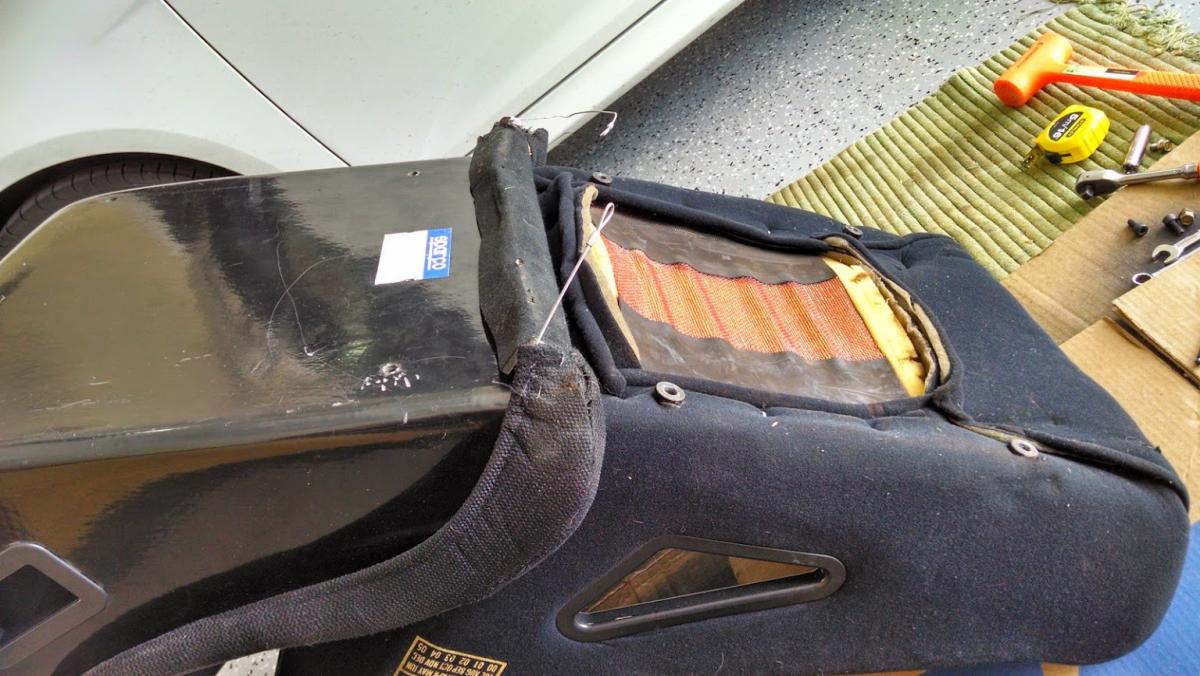
Difference between the really old Sparco Sprint and newer Fighter bottoms look like. The down lip on the fighter might prove to be a pain.
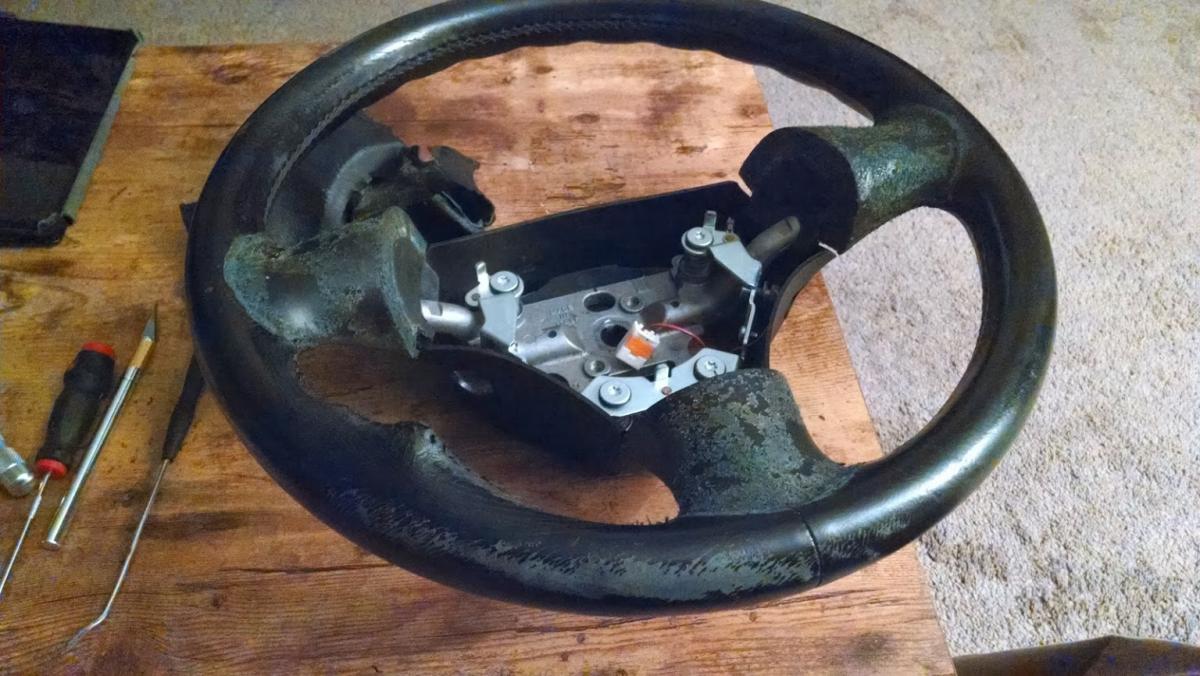
See my almost in okay shape Nardi wheel?
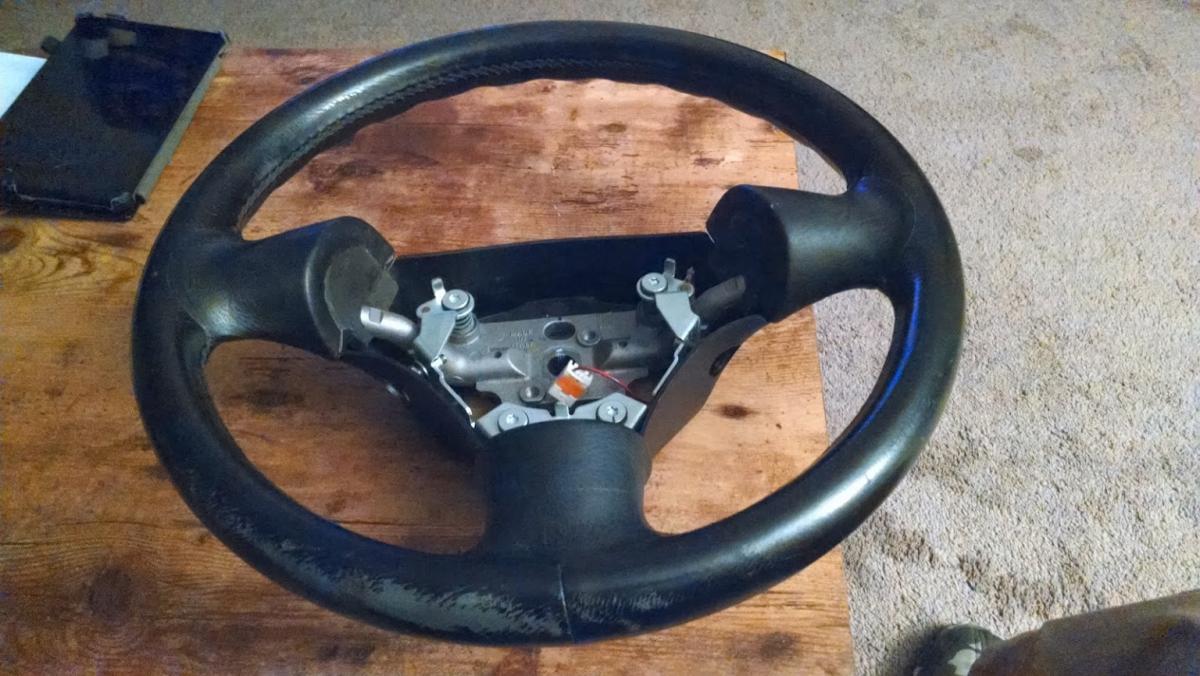
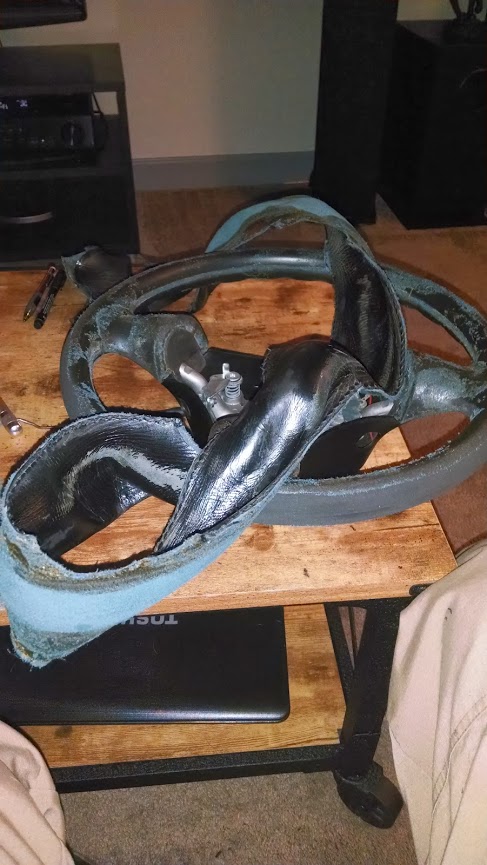
Oh noes!!
Peeled it like a grape.
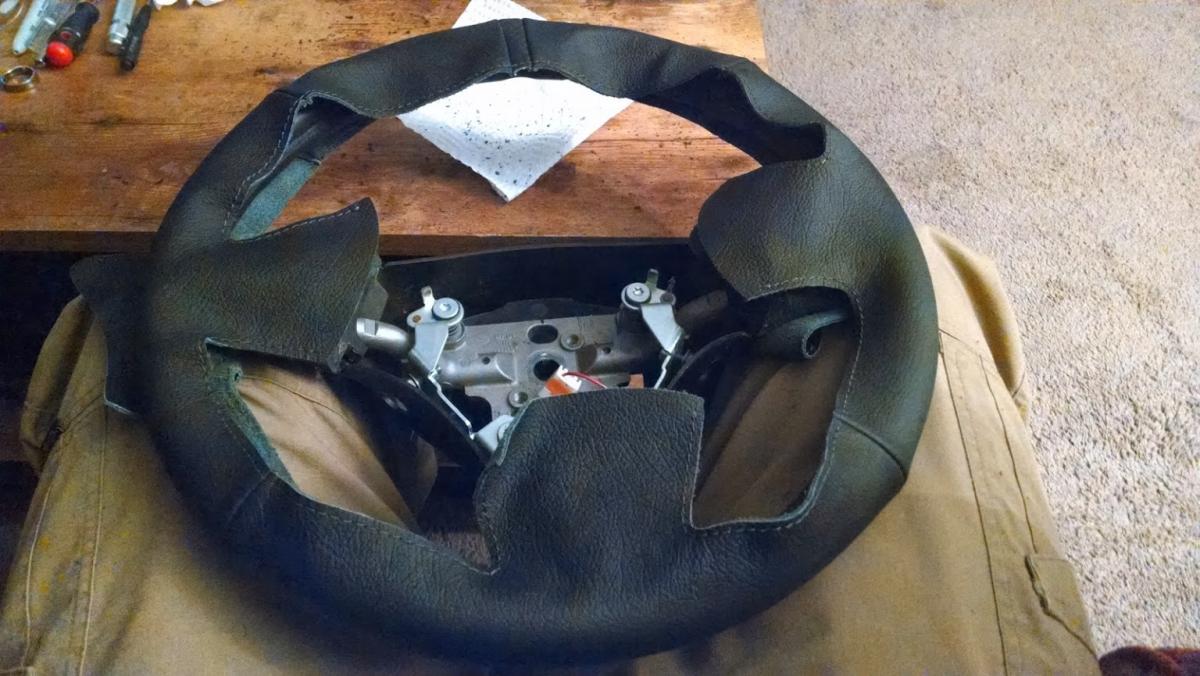
One of these days I'll finish recovering it with the new leather wrap. Steering wheel will match the shift boot. Never done it before and need to set aside a lot of time for figuring it out.
We are just having a hard time getting motivated. Getting screwed and nothing seems to want to work right at the moment. Hitting that point were things want to fight.
. Not the aftermarket stuff and out a ton of money, but the show must go on. If I get screwed again I'll probably murder someone. I have this throttle
And no matter how I line up the adapter for the IAC valve it either hits the intake manifold, or doesn't seal with the plate. I've flipped and rotated every direction I can think of. Do I have the dumb?
The gasket seems right, but the adapter plate doesn't.
Some all thread makes great puller tools. Swapped to delrin steering mounts. No reason. Add it to the list of drunk "I wants" orders I've done.
Picked up this guy and waiting on a bracket. I just set it on the factory slider/rails and my hair hits the hard top. No way I'll fit with a helmet. THe should wings are too ide as well and hit the door. Was suggested to me to use a heat gun and some ratchets. We'll see how that goes
Difference between the really old Sparco Sprint and newer Fighter bottoms look like. The down lip on the fighter might prove to be a pain.
See my almost in okay shape Nardi wheel?
Oh noes!!
Peeled it like a grape.
One of these days I'll finish recovering it with the new leather wrap. Steering wheel will match the shift boot. Never done it before and need to set aside a lot of time for figuring it out.
We are just having a hard time getting motivated. Getting screwed and nothing seems to want to work right at the moment. Hitting that point were things want to fight.
Reply
0
0


 04-16-2014, 11:13 PM
#71
Elite Member
Thread Starter
iTrader: (6)
Join Date: May 2011
Location: Albuquerque, NM
Posts: 1,656
Total Cats: 64
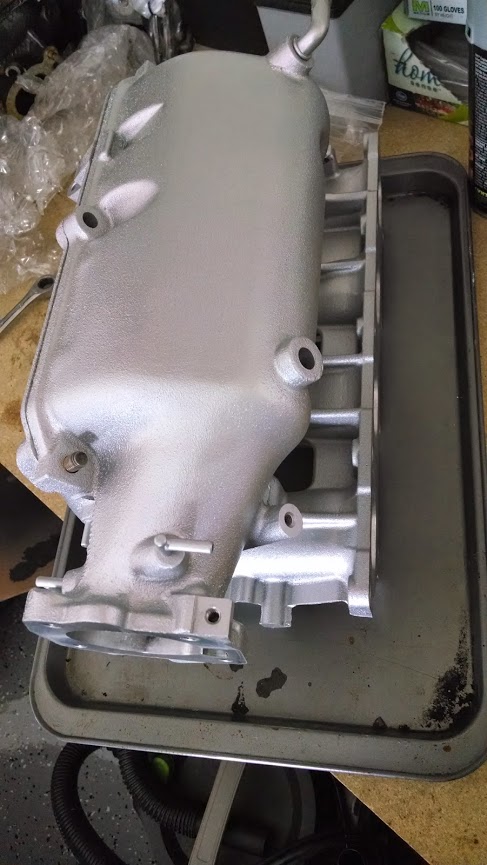
Yep. Trying to find the silver looking paint Jeff used. Thinking VHT aluminum color for the intake manifold. Was going to avoid powder coating it, but I have the time to. Anything I should avoid about powder coating the VVT valve cover? Other than keep it out of the solenoid? Can it take the heat?
EDIT: Maybe it wasn't Jeff. I'll find it.
EDIT: Maybe it wasn't Jeff. I'll find it.
Reply
0
0
 05-15-2014, 10:04 PM
#73
Elite Member
Thread Starter
iTrader: (6)
Join Date: May 2011
Location: Albuquerque, NM
Posts: 1,656
Total Cats: 64
Can I bake the valve cover with the oil control valve on? 200deg F is what the VHT calls for. Going LS coils so no care about threaded stuff mostly. I'll mask everything I don't want painted. I'm digging the matte black look.
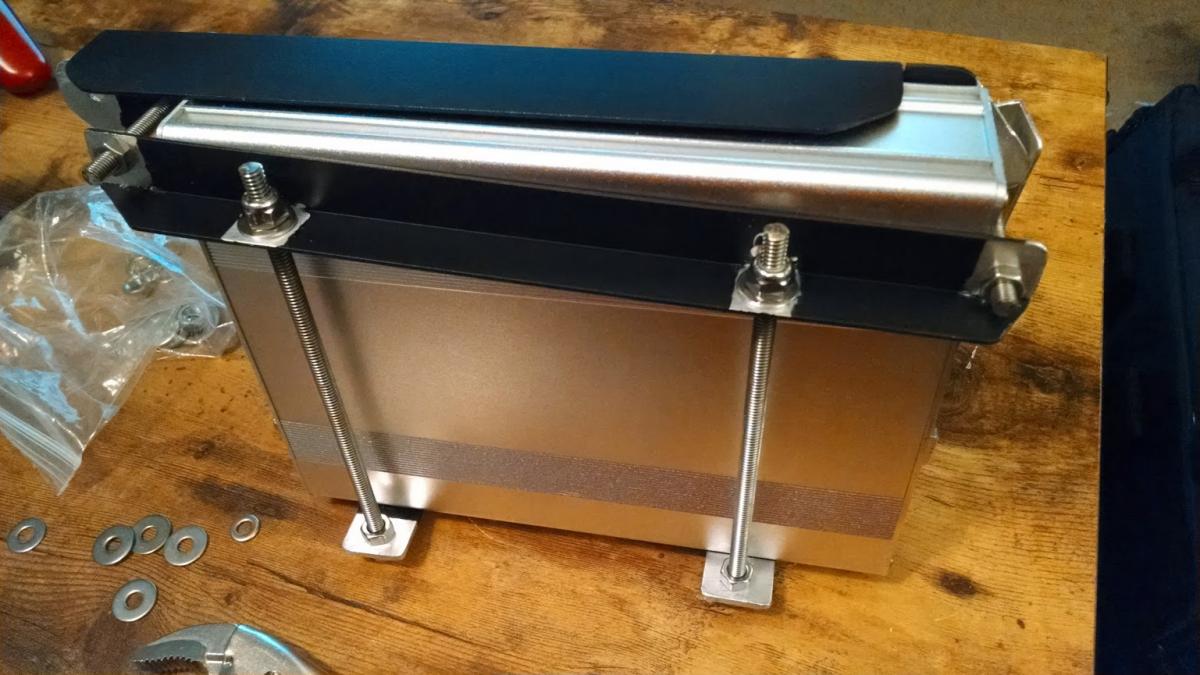
Making a mount for the MS3. I didn't like the idea of mounting it strait to the back of the glove box. Opening and closing the box and possibly working loose the connections or vac line didn't settle well. So weird S&M bracket it is.
Basic idea so far
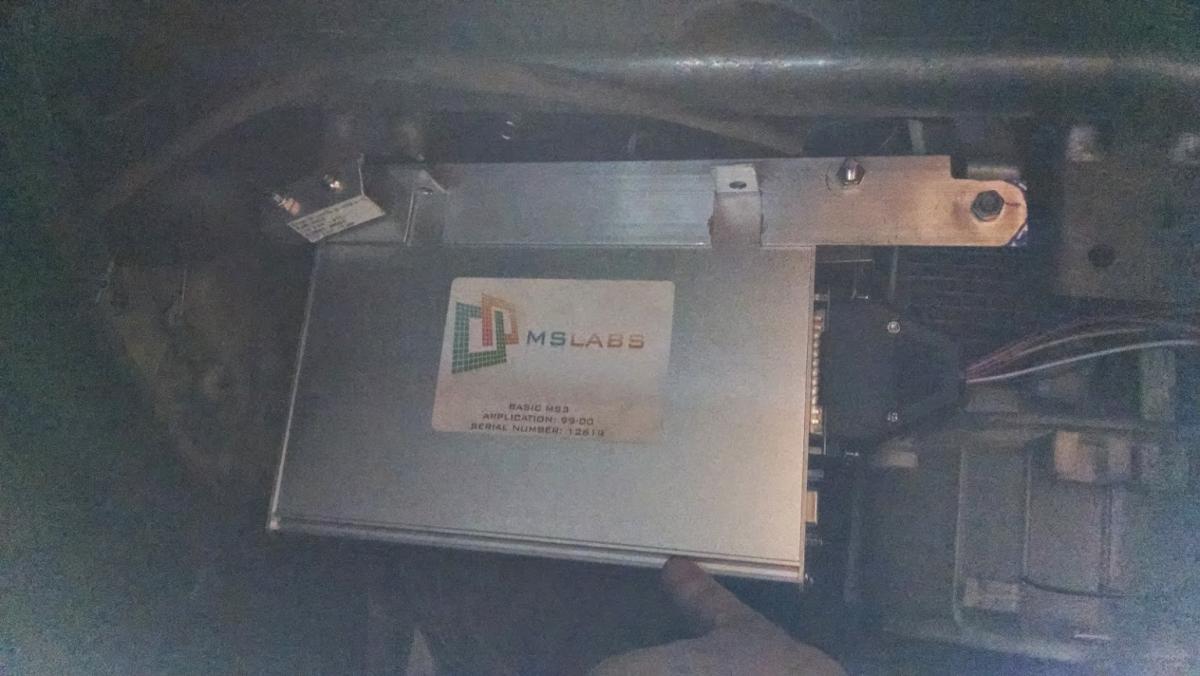
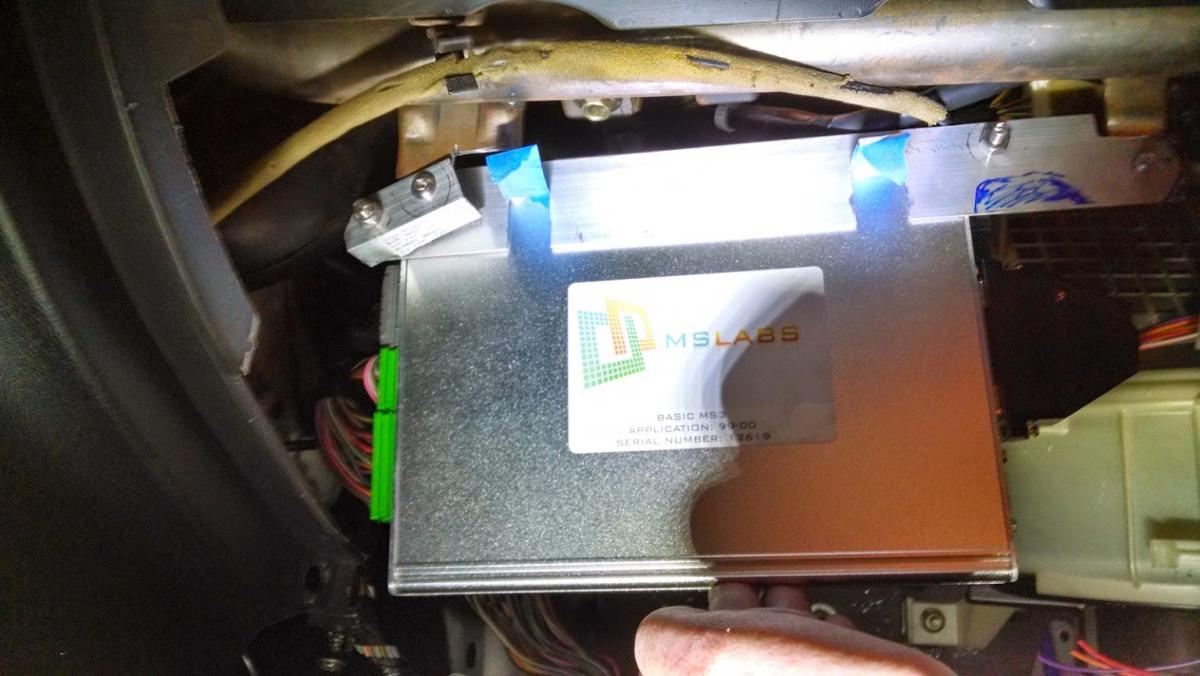
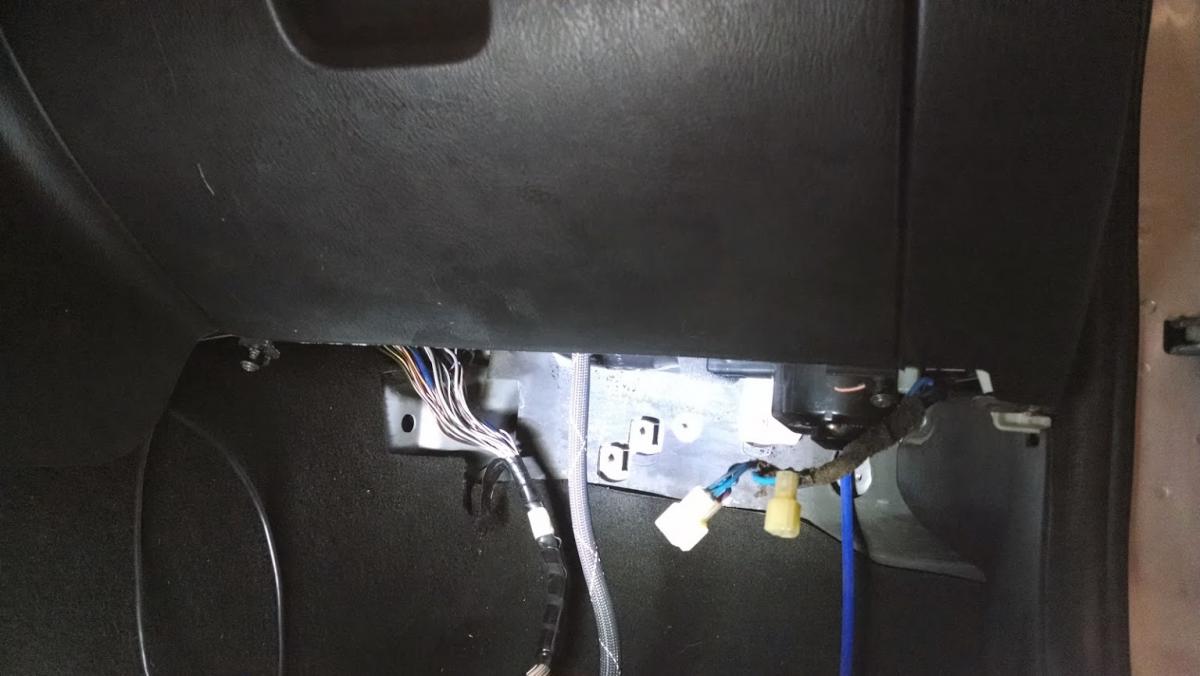
Two options thus far. Big bolts on both sides, or just on one with tabs at the bottom. I'm thinking the second. Easier and cleaner. The ECU sits just behind the glove box. No movement when tightened down. Going to clean up the bracket, paint it black, and PlastiDip the parts that come in contact with the ECU case. The weird double bracket on the left is so that the ECU can sit farther left so that the giant DB connector doesn't make contact with the heater fan case on the right when mounted.
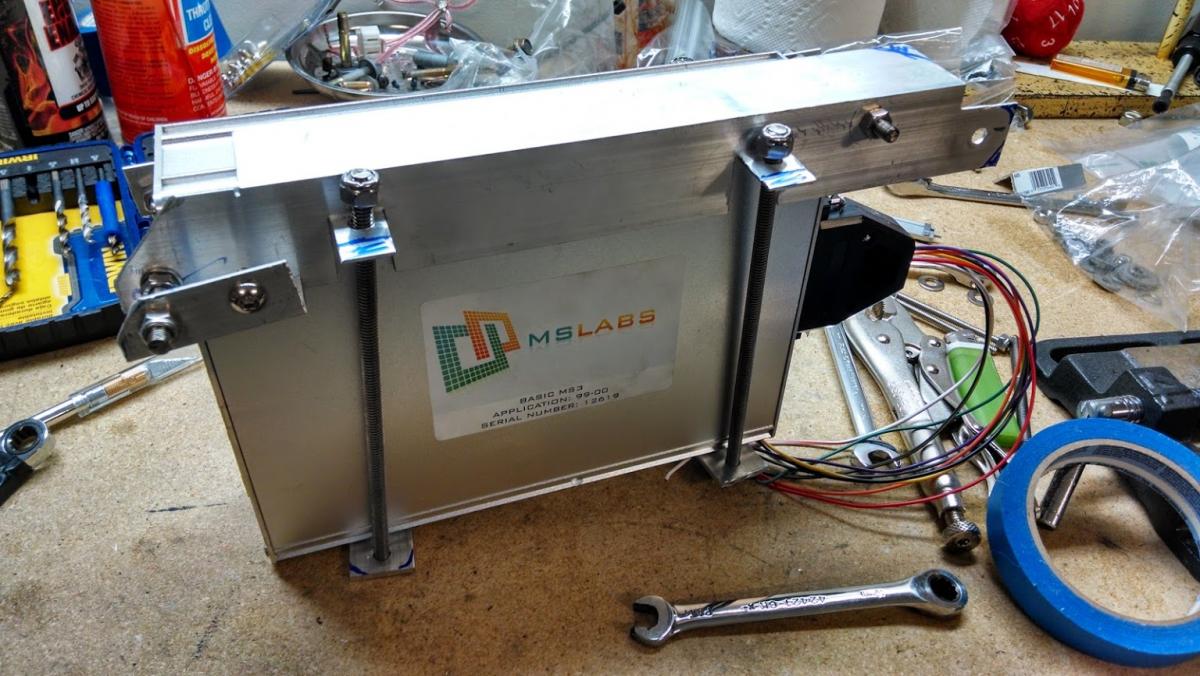
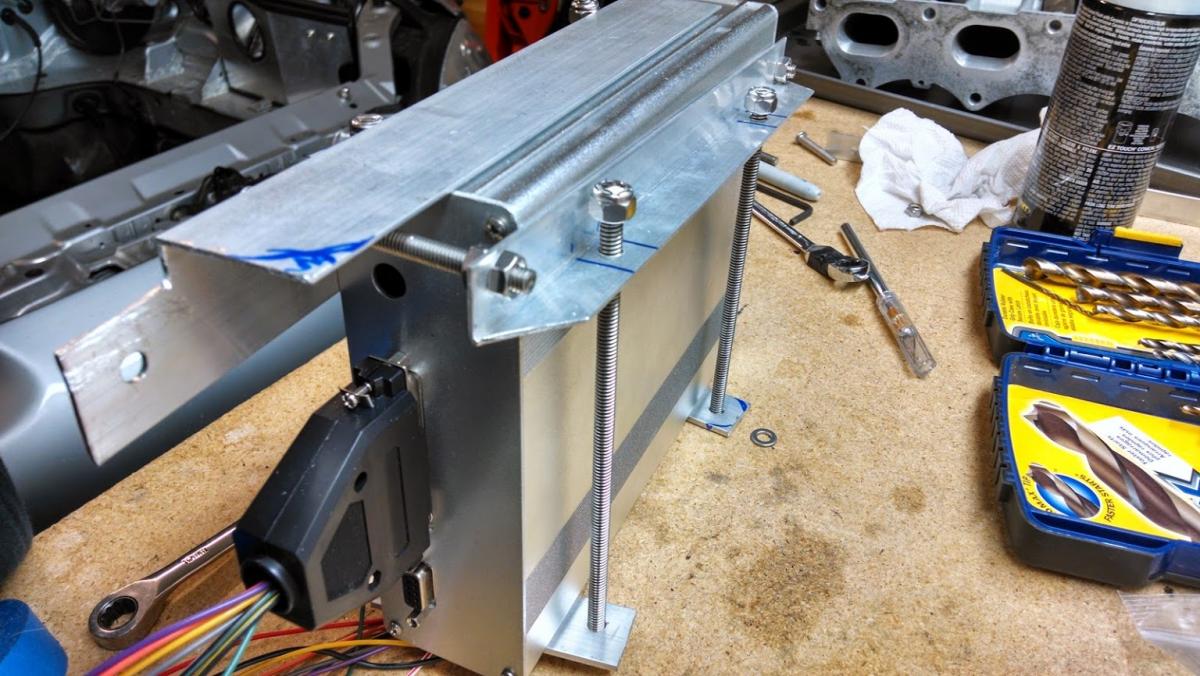
The cables will be cleaned up.
Making a mount for the MS3. I didn't like the idea of mounting it strait to the back of the glove box. Opening and closing the box and possibly working loose the connections or vac line didn't settle well. So weird S&M bracket it is.
Basic idea so far
Two options thus far. Big bolts on both sides, or just on one with tabs at the bottom. I'm thinking the second. Easier and cleaner. The ECU sits just behind the glove box. No movement when tightened down. Going to clean up the bracket, paint it black, and PlastiDip the parts that come in contact with the ECU case. The weird double bracket on the left is so that the ECU can sit farther left so that the giant DB connector doesn't make contact with the heater fan case on the right when mounted.
The cables will be cleaned up.
Reply
0
0
05-16-2014, 10:22 AM
#74

The VVT valve will be fine at 200 but do you want to coat the entire thing? They clean up pretty nicely with a scuff pad, then just do the solenoid itself in flat black to break things up. I'd hate to see it come out looking like it was rattle canned (everything the same color and texture).
+1 what Vlad said to avoid it - Just tape off the gasket area for the valve and partially thread in some junk hardware to keep your threads clean.
+1 what Vlad said to avoid it - Just tape off the gasket area for the valve and partially thread in some junk hardware to keep your threads clean.
Reply
0
0

 07-28-2014, 02:56 AM
#76
Elite Member
Thread Starter
iTrader: (6)
Join Date: May 2011
Location: Albuquerque, NM
Posts: 1,656
Total Cats: 64
Was told the other day my builder is working on the cyl head, so hopefully one day it'll run. About to rebuild what I have laying around with a ebay kit and rods to get it on the road and learn to tune. New built motor and no tuning ability terrify me a bit. I did get a set of Mazdaspeed brakes that I'll put on once it is running.
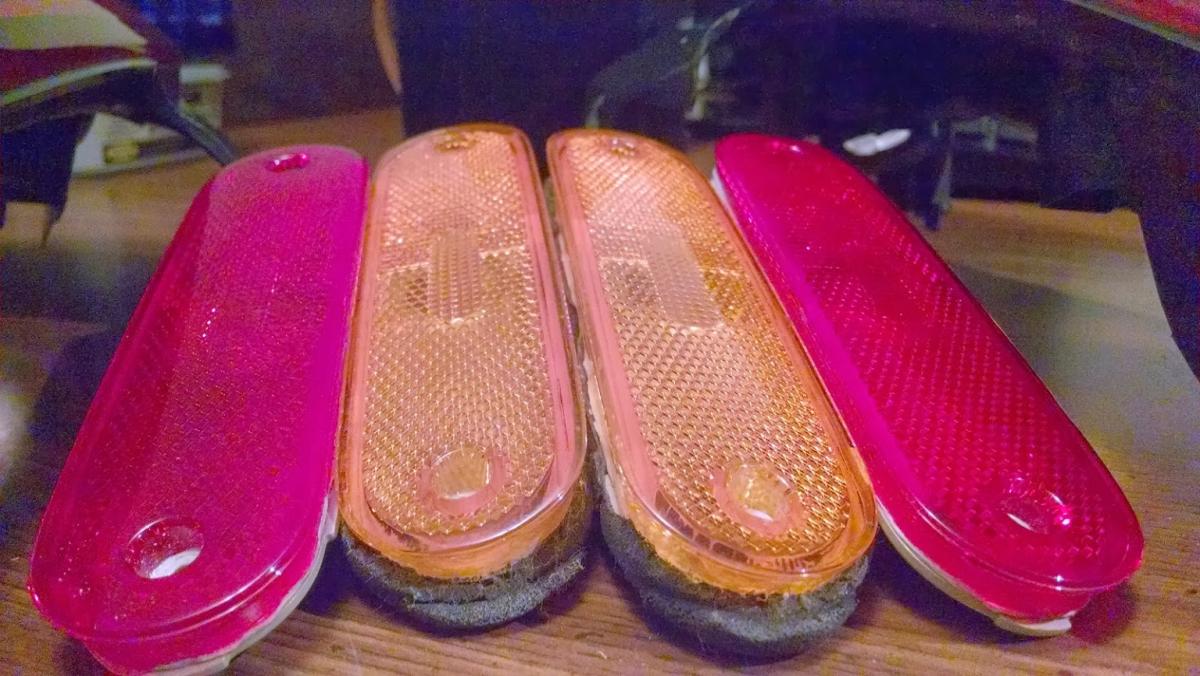
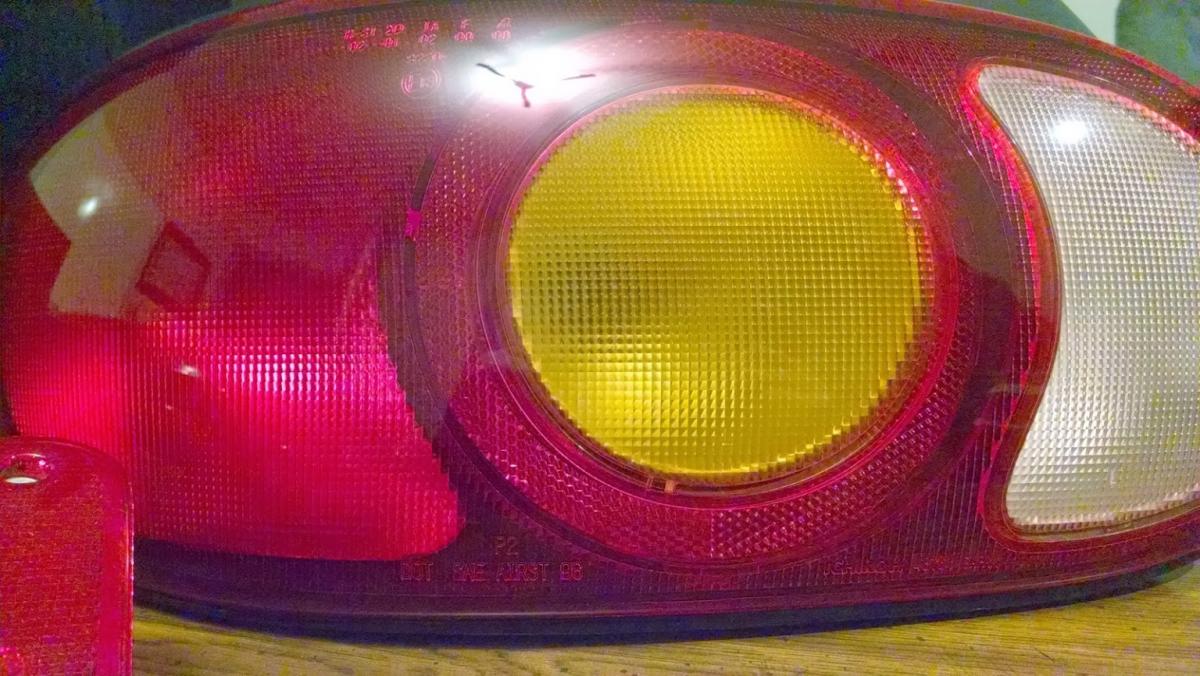
Also got these to buff and put in.
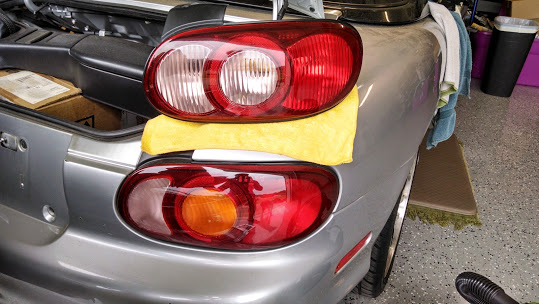
Then this happened. I went to put my street bike on it's stand and the stand failed, so yeah hit my car with my bike. Missed the tail light my soooo little. Would not have cared if it hit the tail lights. The car has accumulated more nicks and scratches sitting in the garage than the years before. Still really pissed.
I also am down to my last idea for mounting the the seat. I've tried a bunch of different ways and refuse to bolt it to the floor. Anyone ever use these? Everything else I've tried if off center with the wheel or sits to high to clear my helmet with the hardtop. So far tried the APR and GarageStar. The Garagestar was an awesome mount, but not for the Sparco V. This Kaze mount on clubi'mcoolroadster/#gargle.com shows it should sit pretty much on the floor. ProCar Innovations Race Spec Seat Mount Version 2 | KazeSpec Engineering

Also got these to buff and put in.
Then this happened. I went to put my street bike on it's stand and the stand failed, so yeah hit my car with my bike. Missed the tail light my soooo little. Would not have cared if it hit the tail lights. The car has accumulated more nicks and scratches sitting in the garage than the years before. Still really pissed.
I also am down to my last idea for mounting the the seat. I've tried a bunch of different ways and refuse to bolt it to the floor. Anyone ever use these? Everything else I've tried if off center with the wheel or sits to high to clear my helmet with the hardtop. So far tried the APR and GarageStar. The Garagestar was an awesome mount, but not for the Sparco V. This Kaze mount on clubi'mcoolroadster/#gargle.com shows it should sit pretty much on the floor. ProCar Innovations Race Spec Seat Mount Version 2 | KazeSpec Engineering
Reply
0
0
07-28-2014, 01:27 PM
#78
Elite Member
Thread Starter
iTrader: (6)
Join Date: May 2011
Location: Albuquerque, NM
Posts: 1,656
Total Cats: 64
Heat gun should help. Knocked some of it out. No mater what it'll need a paint. Wish it had hit the taillights. Was wanting to paint it someday. I just hate how dents like this tend to become permanent.
Reply
0
0
08-03-2014, 09:37 PM
#79
Elite Member
Thread Starter
iTrader: (6)
Join Date: May 2011
Location: Albuquerque, NM
Posts: 1,656
Total Cats: 64
I'm thinking of slapping together a quick engine that runs for this car, and to later transplant into my daily. I have a VVT from a yard that ran, or so I was told. I'm thinking of just taking it apart, lapping the valves, swapping the stem seals, and having the head decked and cleaned. Sub $100 head stuff. Then the block I have sitting around would need honed at least. I have no issues with an ebay set of rods, new bearings, and ARP head studs. It is going into a car with a turbo. I just want a running engine to learn to tune on and make sure all the wiring is good. I figure a cheap refresh and drop in gets me on the road and learning to tune and if I blow it up it won't be the end of the world, and not my expensive engine.
Can I just hone the cylinders with a drill to knock the rust off and reuse the rings and stuff, or should I man up and get a cheap ebay rebuild. Looking for the cheapest boostable rods only build. Would prefer if the SuperMiata damper cost more than the engine.
Can I just hone the cylinders with a drill to knock the rust off and reuse the rings and stuff, or should I man up and get a cheap ebay rebuild. Looking for the cheapest boostable rods only build. Would prefer if the SuperMiata damper cost more than the engine.
Reply
0
0
08-07-2014, 07:25 PM
#80
Elite Member
Thread Starter
iTrader: (6)
Join Date: May 2011
Location: Albuquerque, NM
Posts: 1,656
Total Cats: 64
Someone tell me why this won't work. I know it is not the recommended thing to do, but I need a running car for little money. The cylinders of the block in the garage don't look to bad. I saw video of it running before purchasing it from out of state. Any reason I can't take it apart, clean it, and reassemble? Label everything meticulously so every bit goes back as it was, but just clean the dirt out of it. I have a VVT head from a yard that more than likely needs taken apart to get cleaned, but should be good to go with a valve lap and stem seals. I'll have to steal the clutch and timing belt stuff from my daily at the last minute.
I admit the cylinders aren't great, but I just need it to run. I freely admit this is not the right way of doing it. As long as I have more "**** it go for it" than "hell no's" I might give it whack. Worse that happens is I mess up the head/turbo in some catastrophic explosion. I have another VVT head on top of this extra one, but it's my only turbo. The block is a eyesore and inconvenience in the garage now.
Block
-take apart and clean
-change seals that might need it
-clean rusty bits
-put back together with assembly lube
-New ARP head studs, but reuse everything else as long as it looks okay. Maybe new oil pump. I will use my SuperMiata damper on it to.
-
Head
-take apart and clean
-machine head flat at a shop
-lap valves and new seals
-assemble with new head gasket
I don't need it to last forever. Just something to drive and learn to tune on. Everything for the turbo will have to go on as well as I don't have headers, or other factory bits.
The bubbles are WD40 and the bits are just carbon coming off the piston/cylinders. All hole pass the finger nail test and feel smooth ish to the bare finger.
Cyl 1

Cyl 2

Cyl 3

Cyl 4
I admit the cylinders aren't great, but I just need it to run. I freely admit this is not the right way of doing it. As long as I have more "**** it go for it" than "hell no's" I might give it whack. Worse that happens is I mess up the head/turbo in some catastrophic explosion. I have another VVT head on top of this extra one, but it's my only turbo. The block is a eyesore and inconvenience in the garage now.
Block
-take apart and clean
-change seals that might need it
-clean rusty bits
-put back together with assembly lube
-New ARP head studs, but reuse everything else as long as it looks okay. Maybe new oil pump. I will use my SuperMiata damper on it to.
-
Head
-take apart and clean
-machine head flat at a shop
-lap valves and new seals
-assemble with new head gasket
I don't need it to last forever. Just something to drive and learn to tune on. Everything for the turbo will have to go on as well as I don't have headers, or other factory bits.
The bubbles are WD40 and the bits are just carbon coming off the piston/cylinders. All hole pass the finger nail test and feel smooth ish to the bare finger.
Cyl 1
Cyl 2
Cyl 3
Cyl 4
Reply
0
0


