
Porting the 99/00 BP head

 01-26-2013, 09:34 AM
#42
Senior Member
Thread Starter
iTrader: (1)
Join Date: Mar 2012
Location: Pensacola Fla.
Posts: 588
Total Cats: 203
Thanks! Just time and some porting rolls burnt through!
Yes, bronze guides are made for the BP 1.8 and the 1.6l, so installing them is a good idea for a hard running NA or boosted engine.
I change alot of guides, Mainly on the exhaust side, On heads that the factory did not intend to be boosted, the exhaust guides tend to slag out quicker.
^^^^^ This is so true
Is there a better than stock option for valve guides?
It seems head porting on BP motors doesn't make much more power. Is it worth the effort to take the guides out, port it, new (better?) guides, and reassemble. Plus the head rebuild while you're there. How much is 12% more flow help in a turbo car? Not doubting it wouldn't, but how much.
It seems head porting on BP motors doesn't make much more power. Is it worth the effort to take the guides out, port it, new (better?) guides, and reassemble. Plus the head rebuild while you're there. How much is 12% more flow help in a turbo car? Not doubting it wouldn't, but how much.
I change alot of guides, Mainly on the exhaust side, On heads that the factory did not intend to be boosted, the exhaust guides tend to slag out quicker.
^^^^^ This is so true

Reply
 0
0

0
01-26-2013, 10:57 AM
#43
Senior Member
Thread Starter
iTrader: (1)
Join Date: Mar 2012
Location: Pensacola Fla.
Posts: 588
Total Cats: 203
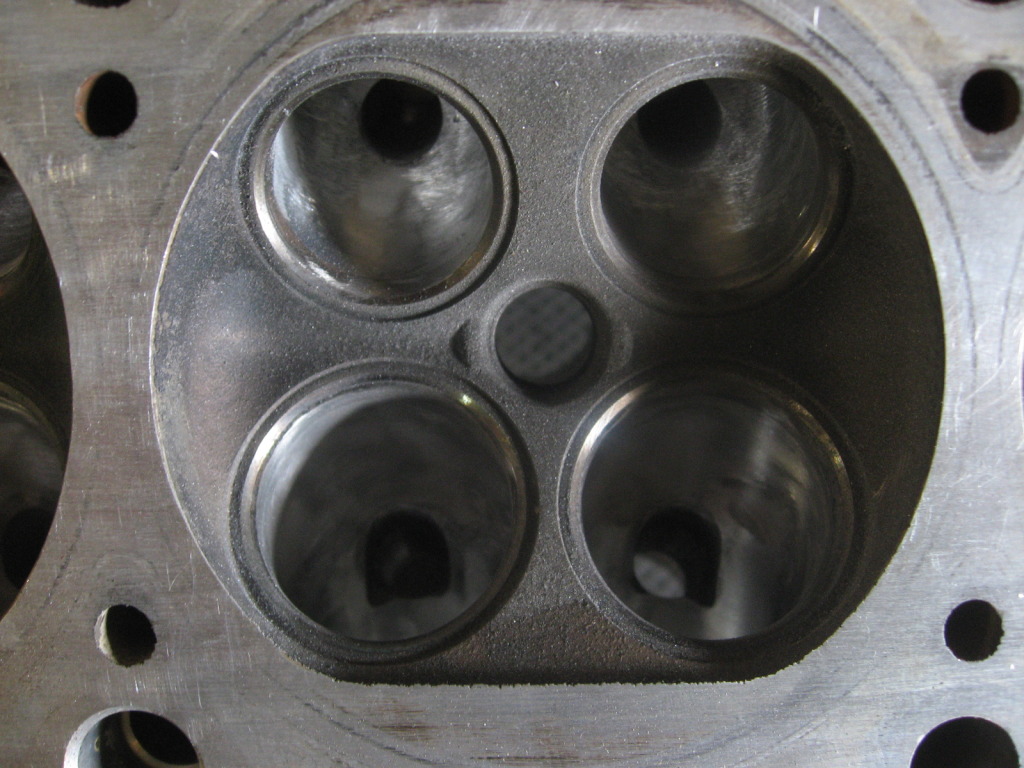
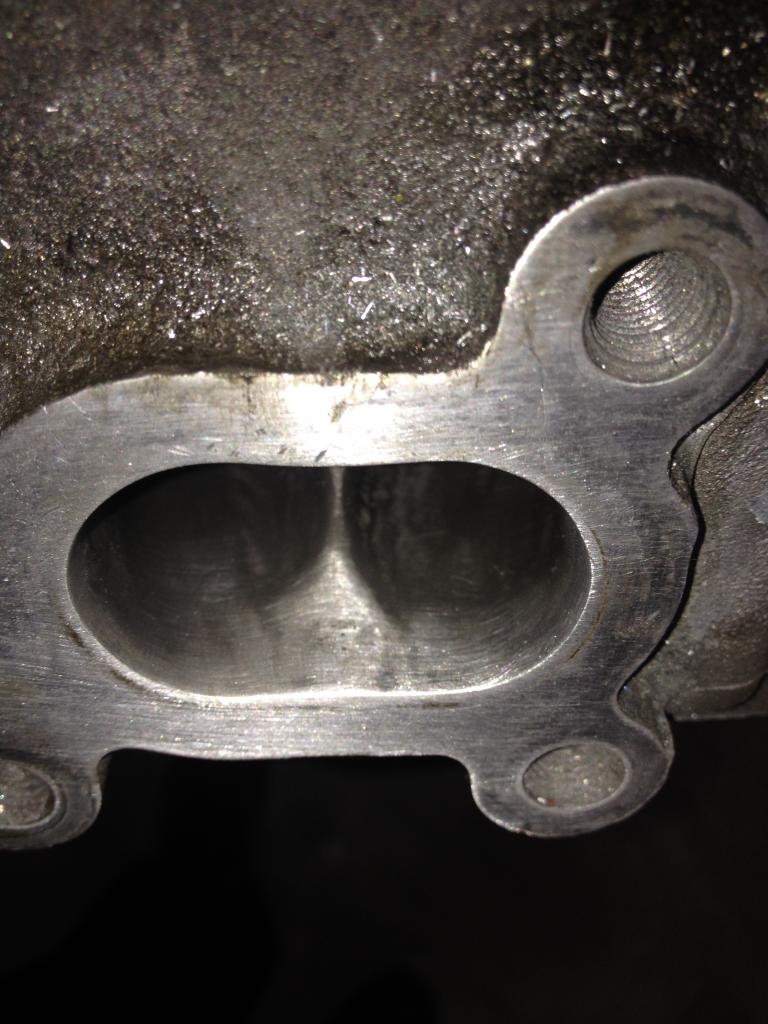
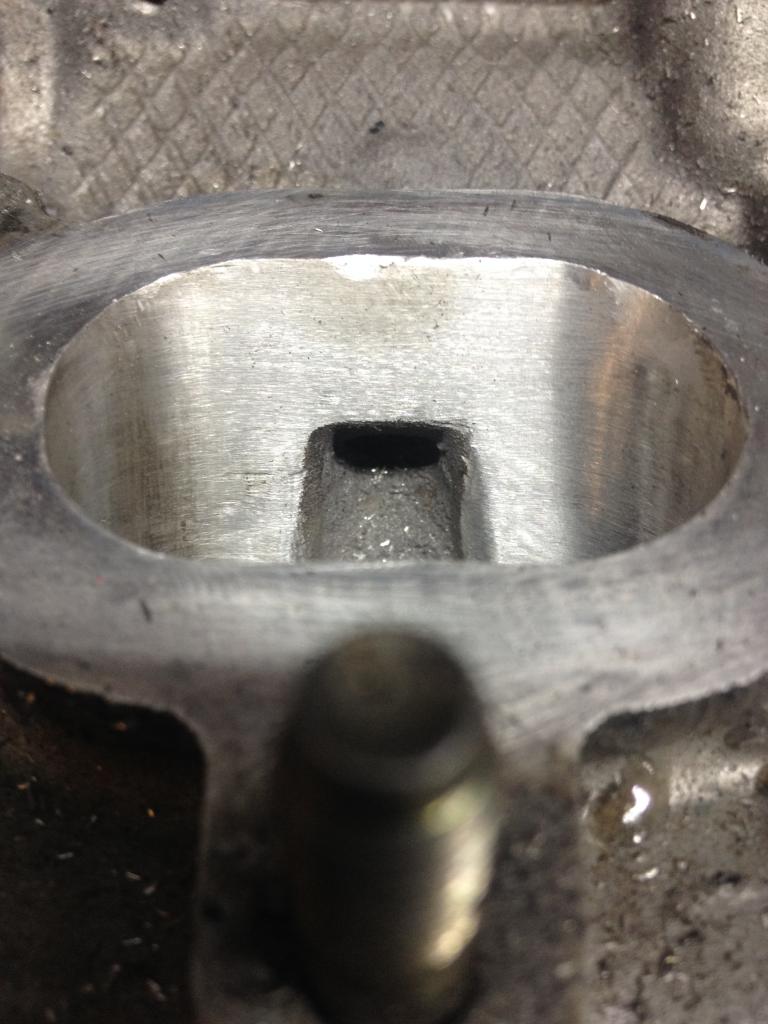
A few more pics
The bowls
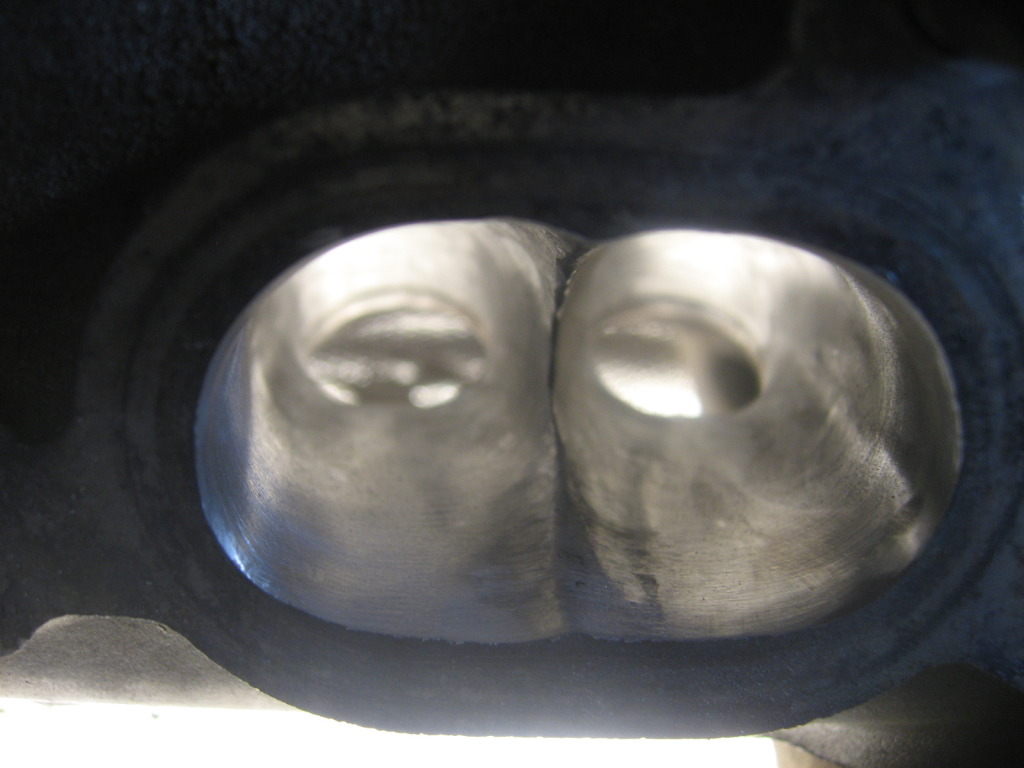
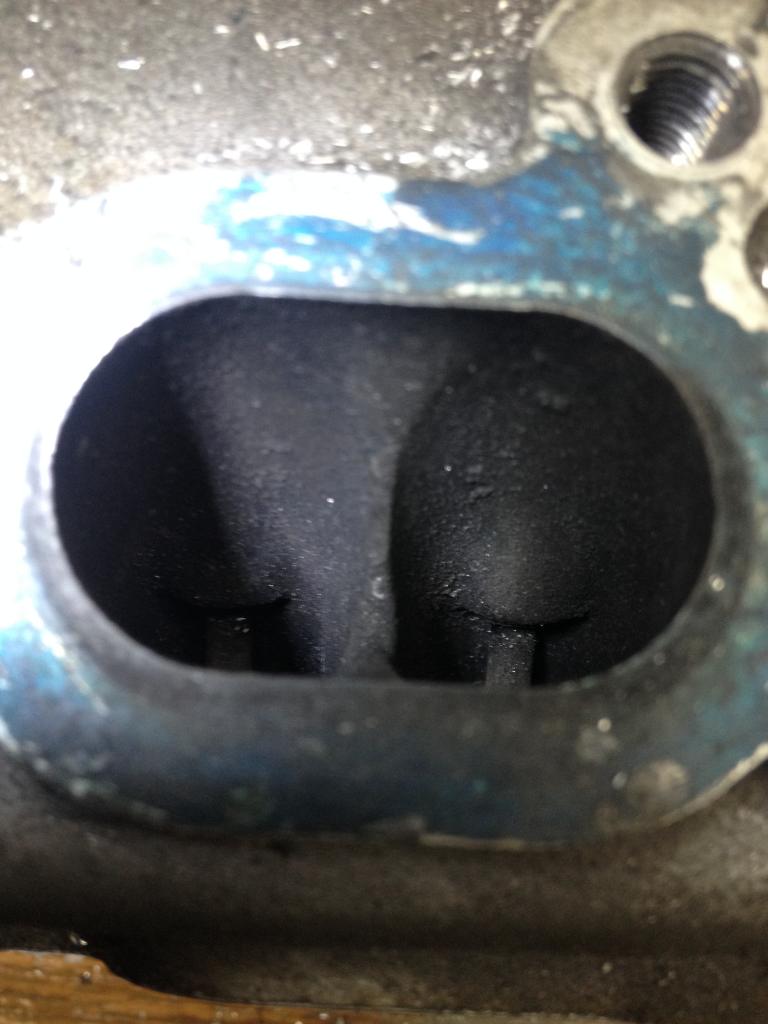
Exhaust runner
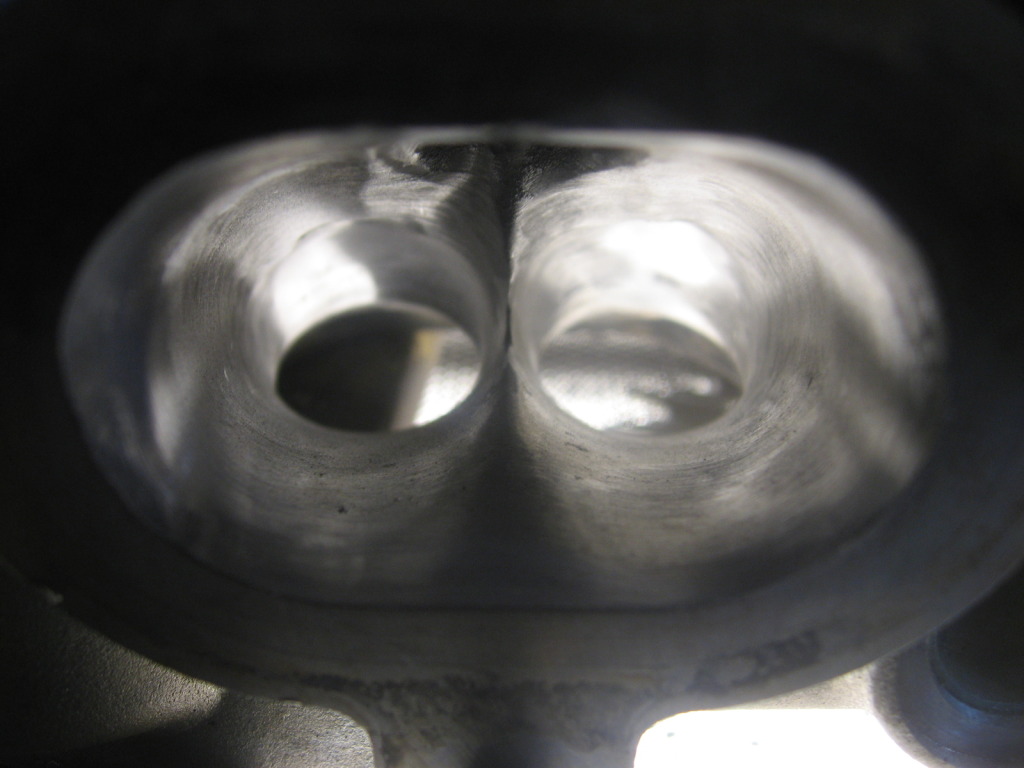
Intake runner
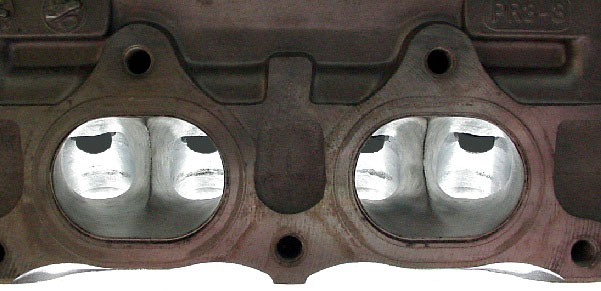
From different threads and fourm boards, Porting means different things to different people.
Now the pic Braineack posted, That is ported, not as far as I have gone, but ported still the same.
Now I have seen pics of heads that claim to be ported, but I would not say it was, a touch here and there with a sand paper roll and done in 20 mins. is not ported, but cast flashing removal, will it help, yes.
The bowls
Exhaust runner
Intake runner
From different threads and fourm boards, Porting means different things to different people.
Now the pic Braineack posted, That is ported, not as far as I have gone, but ported still the same.
Now I have seen pics of heads that claim to be ported, but I would not say it was, a touch here and there with a sand paper roll and done in 20 mins. is not ported, but cast flashing removal, will it help, yes.
Reply
0
0
01-26-2013, 11:06 AM
#44

It seems head porting on BP motors doesn't make much more power. Is it worth the effort to take the guides out, port it, new (better?) guides, and reassemble. Plus the head rebuild while you're there. How much is 12% more flow help in a turbo car? Not doubting it wouldn't, but how much.
Reply
0
0
 01-26-2013, 11:59 AM
#46
Senior Member
Thread Starter
iTrader: (1)
Join Date: Mar 2012
Location: Pensacola Fla.
Posts: 588
Total Cats: 203
When you can run your finger nail down the 90* edge, and it feels like 20 grit sand paper, it needs beveled to a 45* to kill the hot spots.
It is a trade off, between hot spots/ pre det and slightly less quench.
Ill give up some quench area to get rid of a pre det issue.
It is a trade off, between hot spots/ pre det and slightly less quench.
Ill give up some quench area to get rid of a pre det issue.
Reply
0
0
01-28-2013, 08:29 AM
#47

It would be best if you had someone CNC the intake and exhaust port entries and then take a 40 grit all the way down the port to just knock the really high points off. If you start screwing around the long radius and the short radius too much you can cause a velocity seperation in the flow and induce turbulence on its way into the valve. The rough parts of the port rarely actually influence flow because the first 1-2% of the radius of entry is going to be all turbulent anyway acting kinda like a set of ball bearings over the surface.
I'd never give up Quench though. That is the predetonation barrier. The sharp edge is what induces chamber turbulence that keeps your burn even.
A lot of work and mysticism goes into all this, with todays tech I could probably run a full CFD. I know tried back in the day, and the calc time could be measured using Mayan long counts :X
Reply
0
0
01-28-2013, 08:36 AM
#48
I dont think it was until recently that you could do a real CFD of the compustion chamber. But now both ansys and openfoam support combustion in their models. No idea how accurate it is or how complex you can model. IE, can you have the air come through the port and the fuel come through the injector and also have it combustion and the cam events all in one package? Thats asking it for a lot, multiple fluids, transients, combustion, one of those, hit go and come back in a week type simulations.
Reply
0
0
01-28-2013, 08:41 AM
#49
I was just talking about a reynolds averaged navier stokes sim. LOL, I'm not working with servers here man. One desktop machine, a hell of a lot of cells to get anything meaningful, and even then, how good is a RANs in that environment. You need like large eddy, or why not. Direct computational fluid dynamics. Anyone have some spare supercomputer time at national laboratories?? 
Reply
0
0
 12-05-2013, 08:28 PM
#51
Elite Member


Join Date: Feb 2007
Location: Columbus, OH
Posts: 1,533
Total Cats: 741


I found a trashed bp4w head($75) a while back and scavenged it of its exhaust cam for exintak'ing my current motor. #3 & 4 cam journals are all gouged out. Local spec miata machine shop guy says he can cut and line-hone for twice what I have in the head. Then add the rebuild, shave and whatever else I want to do. So im just going to use it as practice scrap.
I plan to gasket match both sides, blend that in an inch or two and then just run a paper roll over everything else. Maybe try full polishing the exhaust runners. I've been reading a ton on the topic and will document my trials here. Unless it becomes counter-educational

If I don't believe I've ruined it, I may ultimately have the cam journals repaired and rebuild it.
Thank you BogusSVO for artificially inflating my confidence with your easy to follow, port-by-numbers thread.
Reply
0
0
12-06-2013, 09:28 AM
#52
Elite Member
iTrader: (8)

Join Date: Dec 2008
Location: Kingston, Ontario
Posts: 2,910
Total Cats: 51
got me to thinking about my build as well.
I will likely only sand off the casting flash though. Im not using a spare head and don't have the budget for experimentation.
The bp6d head I have now has a surprisingly rough port compared to other makes I have seen...even compared to my old b6!
I will likely only sand off the casting flash though. Im not using a spare head and don't have the budget for experimentation.
The bp6d head I have now has a surprisingly rough port compared to other makes I have seen...even compared to my old b6!
Reply
0
0
12-06-2013, 09:58 AM
#53
Elite Member
iTrader: (8)
Join Date: Dec 2008
Location: Kingston, Ontario
Posts: 2,910
Total Cats: 51
For those of you thinking of doing your own porting... This is a website that ha lots of articles on porting and how to identify where to port based on observations within a head.... though they are Honda heads in the link, flow theory is flow theory... if you can extrapolate from the link, there will be power to be made
The Old One - Energy Dynamics
This guy has been around for (what to me) seems like forever.
The Old One - Energy Dynamics
This guy has been around for (what to me) seems like forever.
Reply
0
0
12-06-2013, 07:19 PM
#54
Elite Member
Join Date: Feb 2007
Location: Columbus, OH
Posts: 1,533
Total Cats: 741
In my reading, I have seen this idea pop up more than twice now.
When porting the entrance and exit of the runners at the manifold flanges, it is being said to leave a small step. As in, make the intake port on the head ever so slightly larger than the exit of the intake manifold runner, and to make the exit of the exhaust port ever so slightly smaller than the header flange opening. All these steps being for anti-reversion.
While it may apply to whatever higher-flowing head guide I was reading, does it make sense on a 10.5:1, 8krpm bp4w?
B16 exhuast port for example:
The Old One - Energy Dynamics : Articles
"The fact that the port exits are still smaller than the original gasket (header flange) size is also of great importance."
Reply
0
0
12-07-2013, 01:40 PM
#55
Elite Member
iTrader: (8)
Join Date: Dec 2008
Location: Kingston, Ontario
Posts: 2,910
Total Cats: 51
well, if it was larger than the gasket... you would have to port the gasket too or it would be a hinderance.
Not really that it is a bad thing to enlarge them both the same amount.
something to consider when your looking at your intake and exhaust manifolds when your porting... do they have larger holes for the studs than needed? if they do, you MIGHT want to add a dowel in it to keep them lined up before properly so the port lines up instead of it sagging down before you tighten it up.
Reply
0
0
 12-09-2013, 10:37 AM
#58
Elite Member
iTrader: (8)
Join Date: Dec 2008
Location: Kingston, Ontario
Posts: 2,910
Total Cats: 51
get some quality hearing protection too... a couple minutes under an air powered grinder (muffled or not) makes your ears ring. and DEFINATELY use a face shield AND safety glasses.... you will understand when the chips fly off a good quality burr.
Reply
0
0
12-14-2013, 06:10 PM
#59
Elite Member
Join Date: Feb 2007
Location: Columbus, OH
Posts: 1,533
Total Cats: 741
Day 1 of my adventure wasnt very successful. The valve retainer tool I have turned out to be too large to fit down the lifter bore. Therefore I couldnt remove the valves. So that limited the areas I could try to port. Still killed almost 3 hours in the garage. I'm sure i'll get quicker as I get used to the feeling, but I can see spending an entire hour per port pretty easily once I can reach the other half with the valve out of the way.
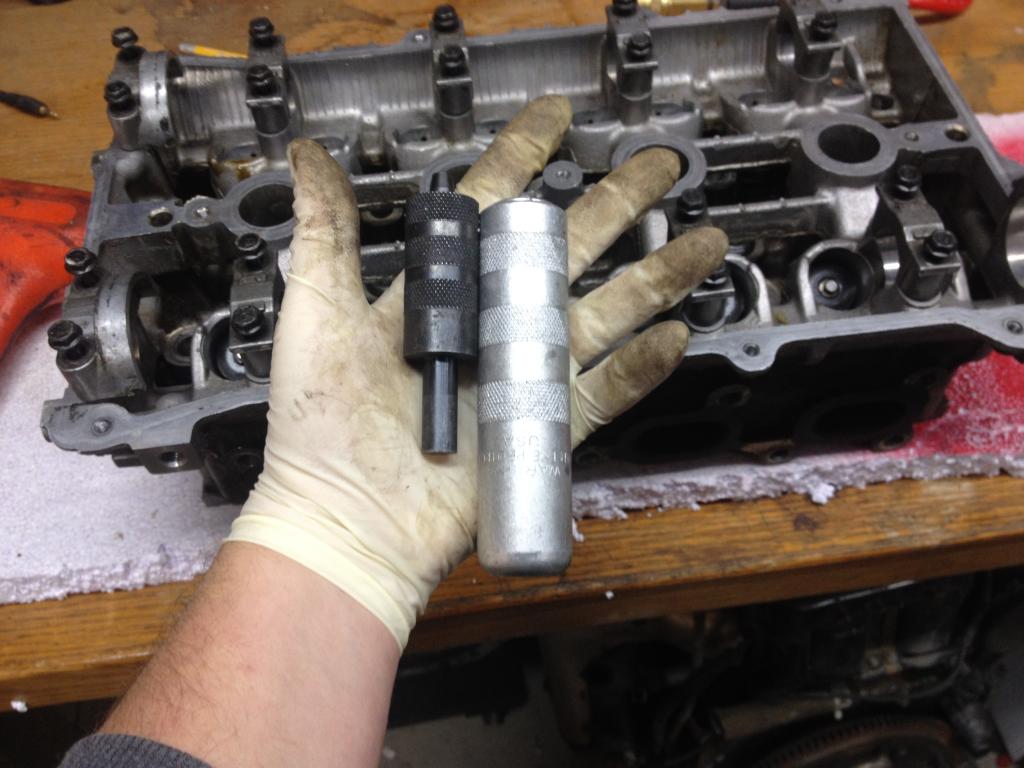
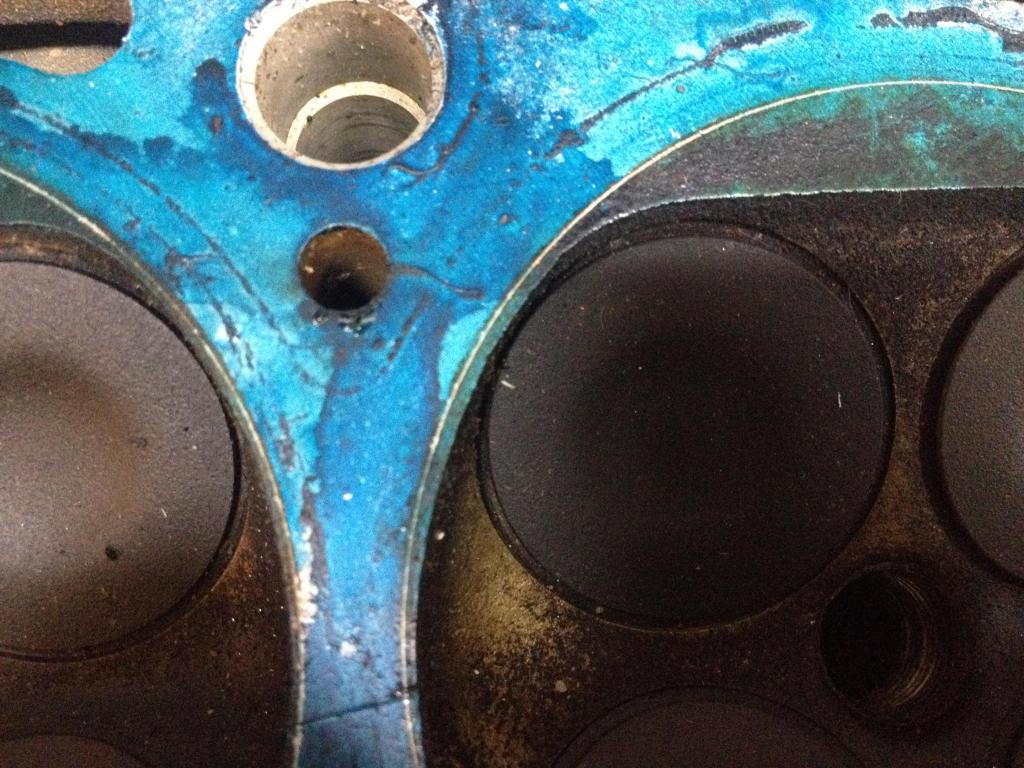
Using what I believe to be a factory headgasket and the dowel pins, the gasket holes don't seem to be centered on the cylinder. Normal?:
Between that and the valves remaining, I didn't even try anything in the chamber.
I spent most of my time on an exhaust port. I only used the 80, then 120 paper rolls and then shined it up a bit with some 240 emery cloth. No carbide on the exhaust side as I'll want to remove as little material as possible.
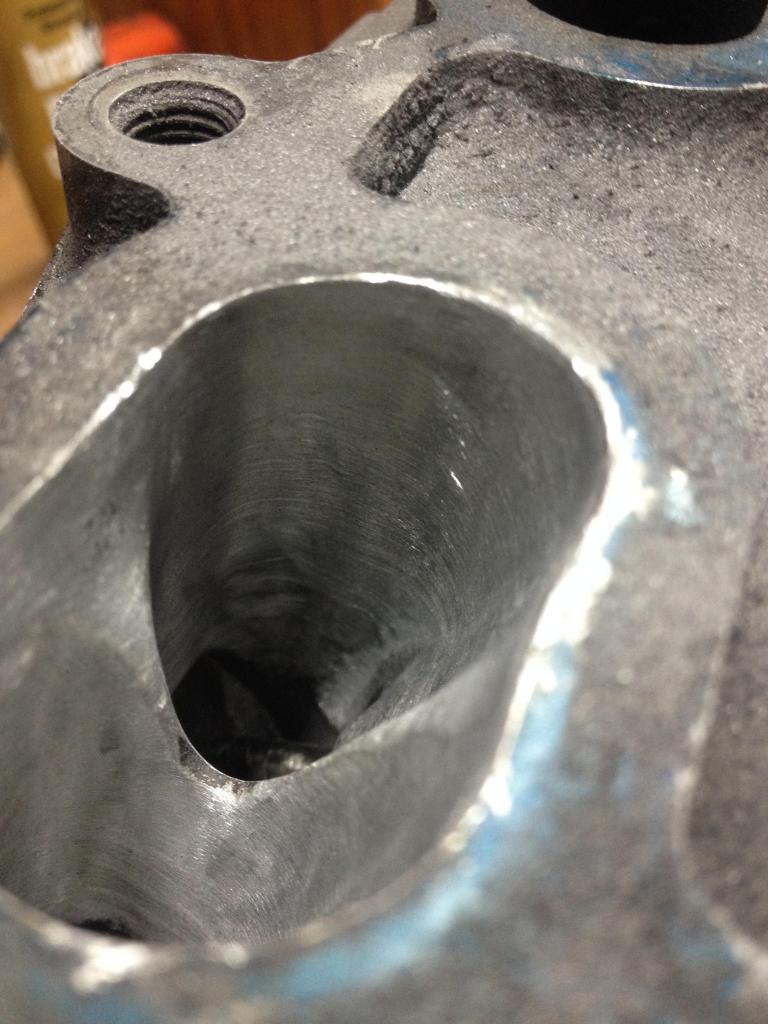
I tried the tree shaped burr on an intake runner to remove some casting roughness.

And ended up taking one intake port through to an 80 grit paper roll finish.

Using what I believe to be a factory headgasket and the dowel pins, the gasket holes don't seem to be centered on the cylinder. Normal?:

Between that and the valves remaining, I didn't even try anything in the chamber.
I spent most of my time on an exhaust port. I only used the 80, then 120 paper rolls and then shined it up a bit with some 240 emery cloth. No carbide on the exhaust side as I'll want to remove as little material as possible.


I tried the tree shaped burr on an intake runner to remove some casting roughness.

And ended up taking one intake port through to an 80 grit paper roll finish.

Reply
0
0
12-14-2013, 06:44 PM
#60
Elite Member
iTrader: (8)
Join Date: Dec 2008
Location: Kingston, Ontario
Posts: 2,910
Total Cats: 51
cool.
you may or may not know but a long socket with extension works well to remove valves as well... same OD as the retainer... just a few smacks with a hammer and the keepers pop right out. (think of it as self induced valve float lol)
you may or may not know but a long socket with extension works well to remove valves as well... same OD as the retainer... just a few smacks with a hammer and the keepers pop right out. (think of it as self induced valve float lol)
Reply
0
0


