Raspberry Pi 3 and Tunerstudio
 02-07-2017, 07:56 AM
#24
Newb


Join Date: Jul 2014
Location: Clarksville, TN
Posts: 36
Total Cats: 3
I would certainly be curious to find out what your workaround for the odometer is. Do you intend to go without an odometer or are you going to use wheel speed sensors to make something else work?

Reply
 0
0

0
02-07-2017, 10:48 AM
#25
Senior Member
iTrader: (1)

Join Date: Dec 2010
Location: Farmington Hills, MI
Posts: 1,218
Total Cats: 175
I'm excited to see more people doing this! I'll have my final mount done tonight hopefully.
Has anyone been using an OS other than Raspbian Jessie? I've been playing around with dietpi to try to run a lightweight headless OS, but I'm super new to Linux so right now I'm just playing around with no success lol. Or if you are using Jessie, anything specific you've done to cut down boot times?
How are you guys handling power and shutdown?
Reply
0
0
 02-07-2017, 10:55 AM
#27
Junior Member

Join Date: Jul 2013
Location: Norway
Posts: 85
Total Cats: 48
I'm excited to see more people doing this! I'll have my final mount done tonight hopefully.
Has anyone been using an OS other than Raspbian Jessie? I've been playing around with dietpi to try to run a lightweight headless OS, but I'm super new to Linux so right now I'm just playing around with no success lol. Or if you are using Jessie, anything specific you've done to cut down boot times?
How are you guys handling power and shutdown?
Has anyone been using an OS other than Raspbian Jessie? I've been playing around with dietpi to try to run a lightweight headless OS, but I'm super new to Linux so right now I'm just playing around with no success lol. Or if you are using Jessie, anything specific you've done to cut down boot times?
How are you guys handling power and shutdown?
For power I use a 3A micro USB adapter connected to switched power. More specific I used the cigarette lighter circuit.
Reply
0
0
02-07-2017, 12:27 PM
#28
Senior Member
iTrader: (1)
Join Date: Dec 2010
Location: Farmington Hills, MI
Posts: 1,218
Total Cats: 175
I've heard of issues with pulling the plug without commanding a safe shutdown. There is chance of corrupting the SD card. My current solution is to have a momentary button that goes to GPIO to command a shutdown. The Mausberry car circuits have been out of stock for a while.
Reply
0
0
02-07-2017, 01:57 PM
#30
Senior Member
iTrader: (1)
Join Date: Dec 2010
Location: Farmington Hills, MI
Posts: 1,218
Total Cats: 175
Possibly. I'll have to look into that.
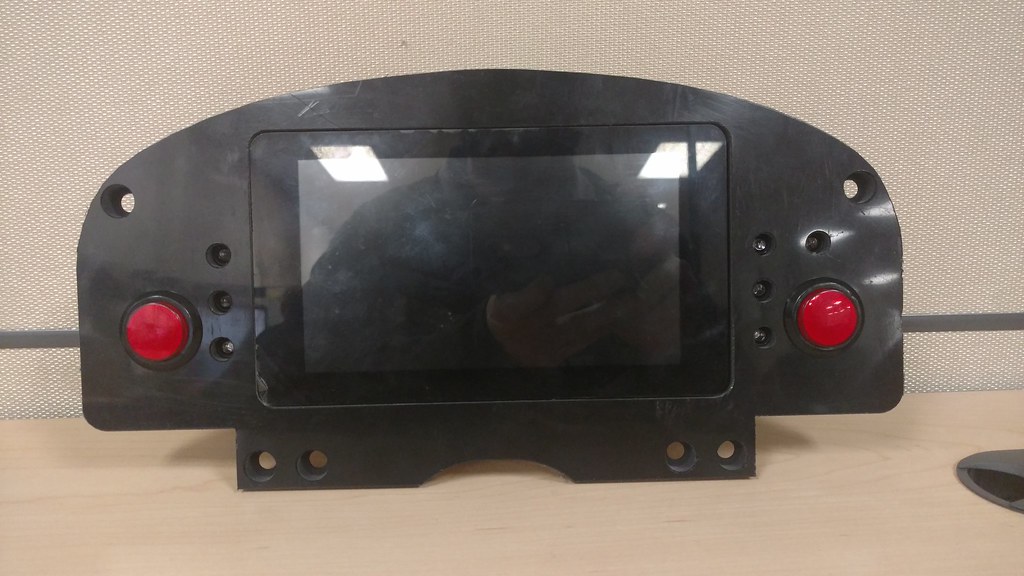
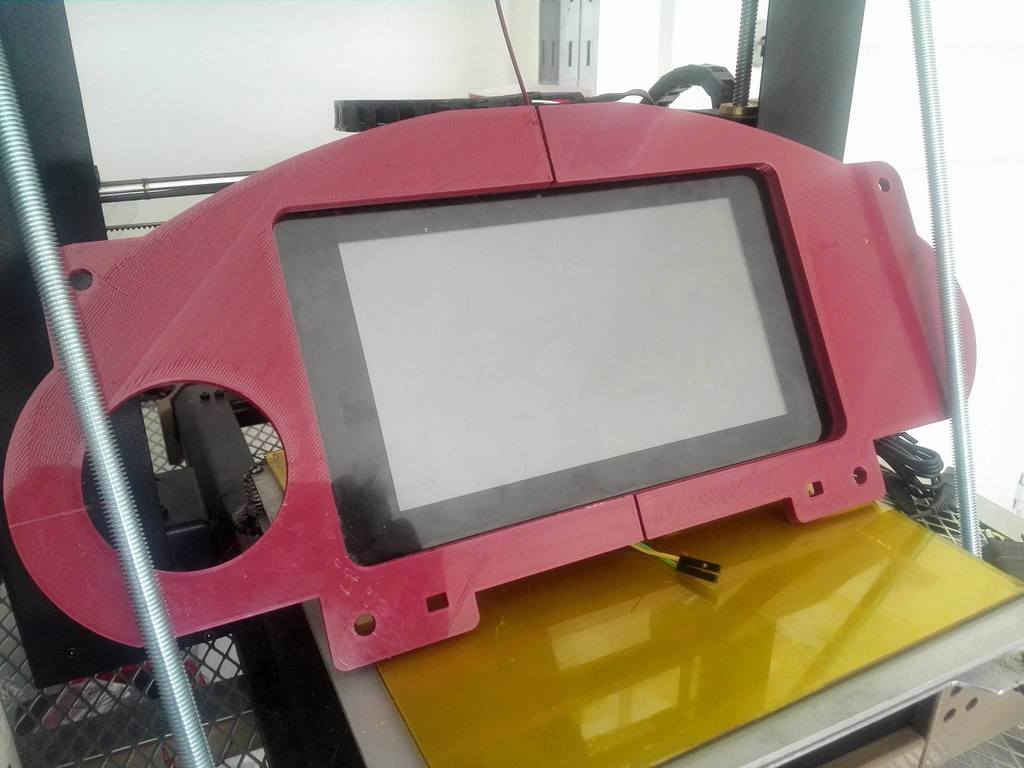
Just got the final mount panel waterjet. I just need to clean up the plastic that got a little tarnished in the waterjet.
Just got the final mount panel waterjet. I just need to clean up the plastic that got a little tarnished in the waterjet.
Reply
1
1
02-08-2017, 06:38 AM
#31
Newb
Join Date: Jul 2014
Location: Clarksville, TN
Posts: 36
Total Cats: 3
Are those LEDs on either side and what are they being used for? As for powering mine, I haven't been able to work on that piece of the puzzle as of yet. Still out of the country so I haven't been able to do much testing.
Reply
0
0
02-08-2017, 07:32 AM
#32
Junior Member
Join Date: Jul 2013
Location: Norway
Posts: 85
Total Cats: 48
For powering the unit, I used one of these. Micro USB Trasformatore Convertitore Alimentatore DC12V a DC5V 3A Impermeabile eBay
It is a 3A 5V Micro USB adapter that runs on 12V. Also the angled plug makes it easier to use, at least for my application.
Regarding problems with a "dirty" shutdown, I have had none. I use small SD-cards and if a dirty shutdown causes a volume check, it takes like 2 seconds more at boot. Unless you are logging, there should be minimal writing to the SD-card and no reason for corrupting data.
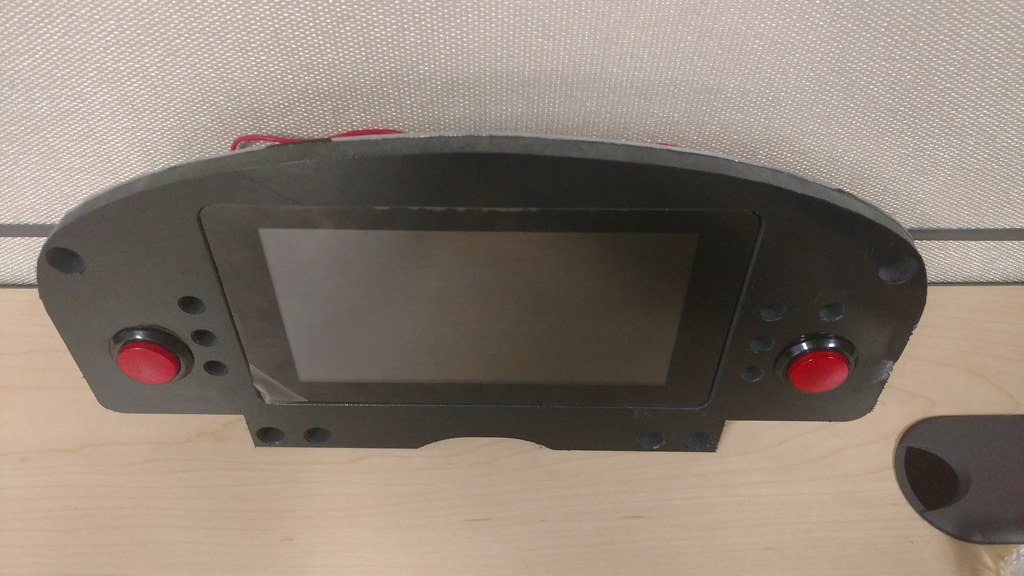
Ace, that panel looks sweet! I am really curios on these LEDs and buttons.
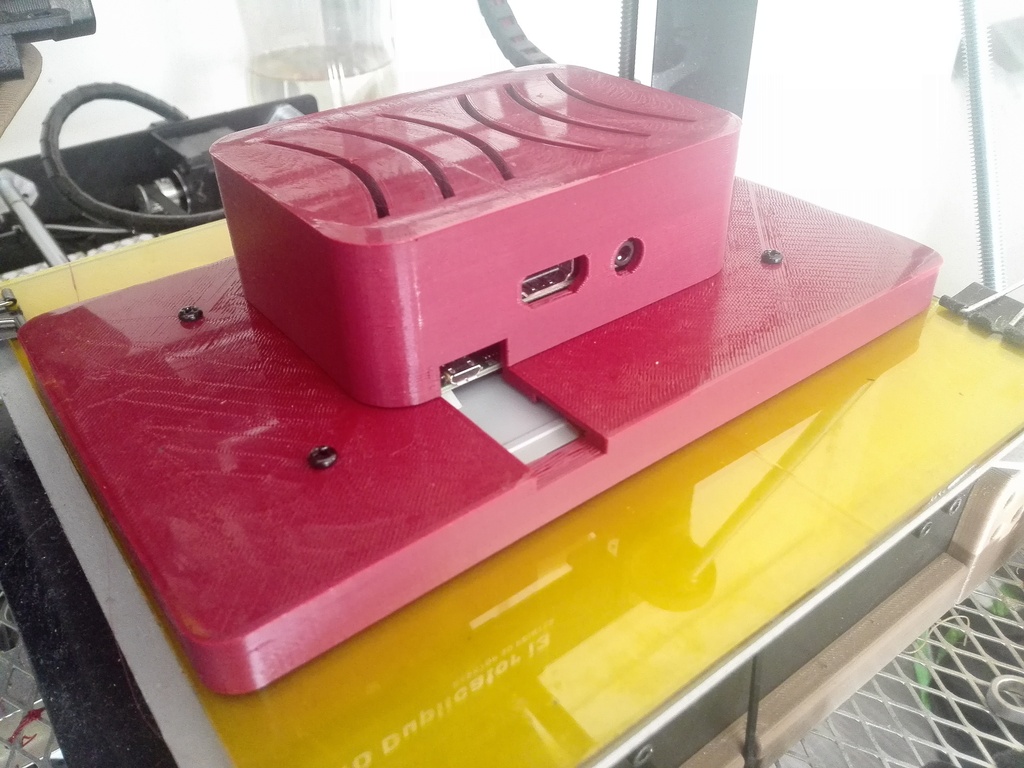
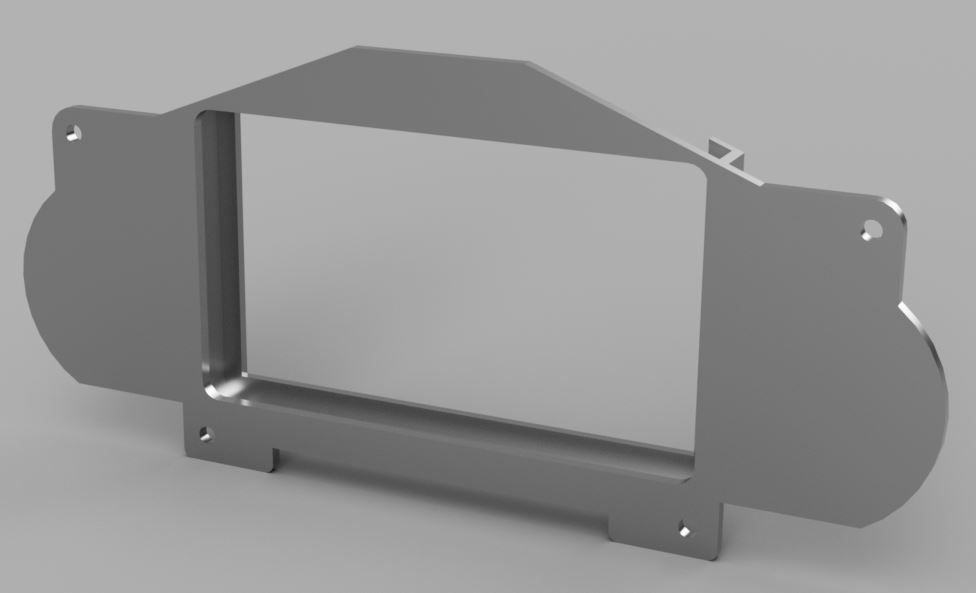
My setup consists of two parts. A case containing the screen/Pi/GPS module, and the frame that the cases slides into. So removal requires only the removal of the hood cover.
It is a 3A 5V Micro USB adapter that runs on 12V. Also the angled plug makes it easier to use, at least for my application.
Regarding problems with a "dirty" shutdown, I have had none. I use small SD-cards and if a dirty shutdown causes a volume check, it takes like 2 seconds more at boot. Unless you are logging, there should be minimal writing to the SD-card and no reason for corrupting data.
Ace, that panel looks sweet! I am really curios on these LEDs and buttons.
My setup consists of two parts. A case containing the screen/Pi/GPS module, and the frame that the cases slides into. So removal requires only the removal of the hood cover.


Reply
2
2
02-08-2017, 07:40 AM
#33
Newb
Join Date: Jul 2014
Location: Clarksville, TN
Posts: 36
Total Cats: 3
For powering the unit, I used one of these. Micro USB Trasformatore Convertitore Alimentatore DC12V a DC5V 3A Impermeabile eBay
It is a 3A 5V Micro USB adapter that runs on 12V. Also the angled plug makes it easier to use, at least for my application.
Regarding problems with a "dirty" shutdown, I have had none. I use small SD-cards and if a dirty shutdown causes a volume check, it takes like 2 seconds more at boot. Unless you are logging, there should be minimal writing to the SD-card and no reason for corrupting data.
Ace, that panel looks sweet! I am really curios on these LEDs and buttons.
My setup consists of two parts. A case containing the screen/Pi/GPS module, and the frame that the cases slides into. So removal requires only the removal of the hood cover.
Reply
0
0
02-08-2017, 08:02 AM
#34
Junior Member
Join Date: Jul 2013
Location: Norway
Posts: 85
Total Cats: 48
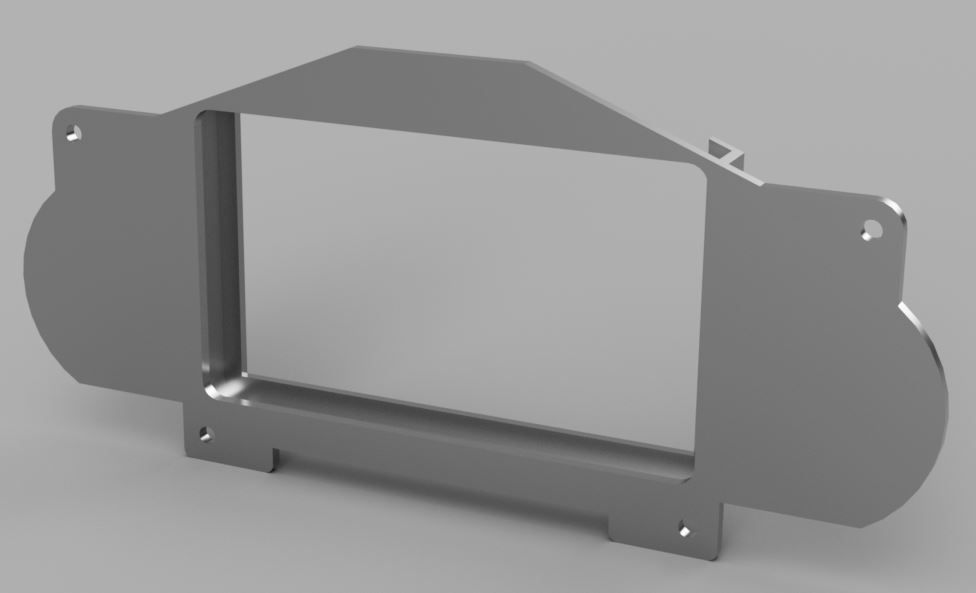
That's awesome! I am going to do a full write-up on both software and hardware in the near future. Attaching the 3D-files for the frame/case as well, so people can use a 3Dhub near them to get it printed. That should make for a sub $400 dash replacement that is actually easy to set up.
Reply
0
0
02-08-2017, 08:59 AM
#35
Senior Member
iTrader: (1)
Join Date: Dec 2010
Location: Farmington Hills, MI
Posts: 1,218
Total Cats: 175
Nice enclosure, very cool!
Even though the thick plastic on mine isn't the best solution, it's a super efficient way to make it. I would probably sell my setup for $275 including the pi, screen, 5V regulator, and plates to mount it. Maybe $325 for $350 with LED's, buttons, and fully wired with a connector. It takes no extra time to change around LED or button location, and changing the type of LED or button requires just the diameter of the shaft, and packaging space. Updating the dxf for waterjet takes a few seconds as well.
The 3 LED's on either side of the screen are a sequential tachometer. Just using 3 different programmable outputs from Megasquirt. The one to the side is a coolant warning light. I shouldn't need these with the screen displaying all the data, but I felt it'd be nice to have these redundant and in your face with really bright LED's.
The red guys are button/light combo's. The lights in them are turn signal indicators. One of the buttons commands a safe shutdown through the GPIO. No function for the other button yet.
Reply
0
0
02-09-2017, 08:25 AM
#36
Newb

Join Date: Aug 2016
Location: Deerfield Beach
Posts: 40
Total Cats: 2
How are you guys going about connecting the rpi to megasquirt? Just the usual db9 to usb adapter?
I was slowly working on my own dashboard project where I was going to theoretically not use tuner studio and just make my own gauge cluster. I've got the graphics more or less sorted and I'm not just trying to figure out what to use (for a reasonable price) to read can broadcasts from the ms. PiCAN2 and Canberry Pi looked like good solutions but more expensive than I'd like when you can get a board with an mcp2515 chip for $2 from china that almost works.
I was slowly working on my own dashboard project where I was going to theoretically not use tuner studio and just make my own gauge cluster. I've got the graphics more or less sorted and I'm not just trying to figure out what to use (for a reasonable price) to read can broadcasts from the ms. PiCAN2 and Canberry Pi looked like good solutions but more expensive than I'd like when you can get a board with an mcp2515 chip for $2 from china that almost works.
Reply
0
0
02-09-2017, 09:36 AM
#38
Newb
Join Date: Aug 2016
Location: Deerfield Beach
Posts: 40
Total Cats: 2
My plan was to use an MS3x and try to make use of the db9 connector it has and leave the USB connector open for tuning on a laptop. The rpi dash is mainly just for aesthetitcs and I didn't planning on having it do more than just read in values and make shapes on a screen. The db9 connector sounds like it lends itself better to wiring a short cable exactly the length I need vs trying to find a properly sized usb cable. Also, I don't completely know what I'm doing and outside figuring out the graphics side of things, everything is still theoretical for me on this.
Reply
0
0
02-09-2017, 09:43 AM
#40
Senior Member
iTrader: (1)
Join Date: Dec 2010
Location: Farmington Hills, MI
Posts: 1,218
Total Cats: 175
My plan was to use an MS3x and try to make use of the db9 connector it has and leave the USB connector open for tuning on a laptop. The rpi dash is mainly just for aesthetitcs and I didn't planning on having it do more than just read in values and make shapes on a screen. The db9 connector sounds like it lends itself better to wiring a short cable exactly the length I need vs trying to find a properly sized usb cable. Also, I don't completely know what I'm doing and outside figuring out the graphics side of things, everything is still theoretical for me on this.
Reply
0
0


