
Help me build my car
 04-26-2012, 01:16 AM
#61
Newb

Join Date: Nov 2011
Location: Goldsboro N.C.
Posts: 36
Total Cats: 0
I like what I see here a lot, I am about to start a similar build soon, so similar in fact that I have been trying to make the same decisions/comprimise's on the same parts (Xida or koni race/GC sleeves, etc.) I have even considered the same TRM's for the same reasons you purchased them. You have let me know that I am on the right track. I want to drink the Kool-Aid and get the Xidas, but have been back and forth about it for a while- Let me know how you like them.

Reply
 0
0

0
05-03-2012, 02:38 PM
#62
Junior Member
Thread Starter

Join Date: Dec 2011
Posts: 105
Total Cats: 1
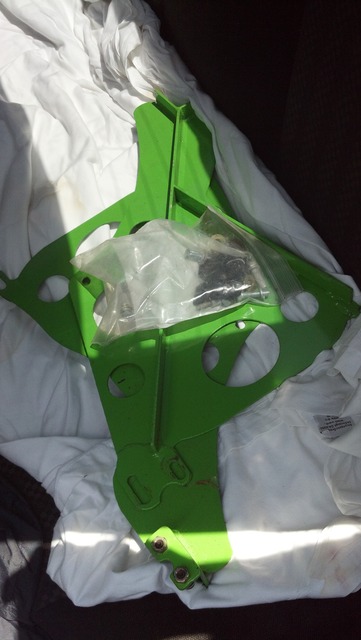
Picked up some frog arms locally today for 120 bucks from one of the few local miata guys.
Has anyone ever seen someone retain AC with a miatacage? I am pretty sure it is impossible due to the required relocation of the blower motor. I wish I would have known this a few weeks ago when I put the dash back in.
The local guy has a wrecked 02 (not msm). He is willing to sell me the motor for well below fair market value because he is sick of looking at it. I need to research more about NB's (I know nothing) to see if this would be useful to me. Maybe put this in the car and build my current block for the turbo? We will see. I need to research what heads are what-- it seems like everyone uses '99 heads, but I dont know the differences. Off to the motor section!
Reply
0
0
05-03-2012, 04:27 PM
#64
Junior Member
Thread Starter
Join Date: Dec 2011
Posts: 105
Total Cats: 1
Boss frog advertises them as under 4 lbs per side. I would have to agree-- they are not that heavy. They do not seem like they would be difficult to fabricate if you have a ton of spare time. I would think that by the time you source the materials, your time for fabricating, and the cost of the hardware, you wouldnt make out as much as youd think-- and then have barely any resale value.
Reply
0
0
05-03-2012, 05:06 PM
#65
Senior Member

Join Date: Aug 2010
Location: Arl. Texas
Posts: 936
Total Cats: 27
At $120 a pair I wouldnt waste my time. At the price that Boss Frog wants, I'll look into it a bit more. I have materials and the means to make them so thats no biggie. Time is my only real hold up. Im not in a hurry by any means, plus I almost enjoy R&D, fabrication, and playing around more than driving.
Have fun with the rest of the build, its goin well.
Have fun with the rest of the build, its goin well.
Reply
0
0

 05-18-2012, 02:22 PM
#68
Junior Member
Thread Starter
Join Date: Dec 2011
Posts: 105
Total Cats: 1
I still havent spent the time to weed through the 4 million coolant reroute threads to see what I need, and this has come up. I need an adapter for the water temp gauge. I was thihnking of getting this.
http://prosportgauges.com/water-temp...e-adaptor.aspx
I feel like I just want to get the m-tuned reroute and be done with it since it comes with sensor holes in it already, and that adapter will be useless once I get that. I just dont want to spend 330 bucks on a reroute (nor do I have that extra cash right now-- more important parts to buy).
Someone school me plz. Ill listen like the little bitch that I am.
Reply
0
0
05-18-2012, 03:46 PM
#69
Senior Member

Join Date: Feb 2012
Location: chicago
Posts: 693
Total Cats: -33
have you looked at at the begi unit from Bell?
http://www.bellengineering.net/produ...roducts_id=300
I got the m-tuned because I was new and had tons of work to do to make my car track ready, and a small budget to do so. now that money is long gone and I kinda wish I knew about this option. I like the fact that the thermostat is on the block where it belongs and this kit is 100 bucks cheaper. if you do some research you can piece together a few items and do it for less than 100 bucks. I believe you can use a 626 or one of the older mazda thermostat housings on the rear then all you gotta do is route lines. since I got the m-tuned unit I have not explored these options, hopefully someone else who did their own true reroute can chime in. what is best, well it depends on if you have the time to figure it out or the cash to just order the kit. hopefully someone that did their own will chime in for you.
honestly you should do some research and then ask specific questions, that goes further then hey i have a problem someone solve it for me.
Reply
0
0
05-18-2012, 06:26 PM
#70
Junior Member
Thread Starter
Join Date: Dec 2011
Posts: 105
Total Cats: 1
have you looked at at the begi unit from Bell?
http://www.bellengineering.net/produ...roducts_id=300
I got the m-tuned because I was new and had tons of work to do to make my car track ready, and a small budget to do so. now that money is long gone and I kinda wish I knew about this option.
honestly you should do some research and then ask specific questions, that goes further then hey i have a problem someone solve it for me.
I really will probably end up with a "premade" kit, leaving me only 2 options. Ill have to compare the begi vs. mtuned and see where the price difference comes into play.
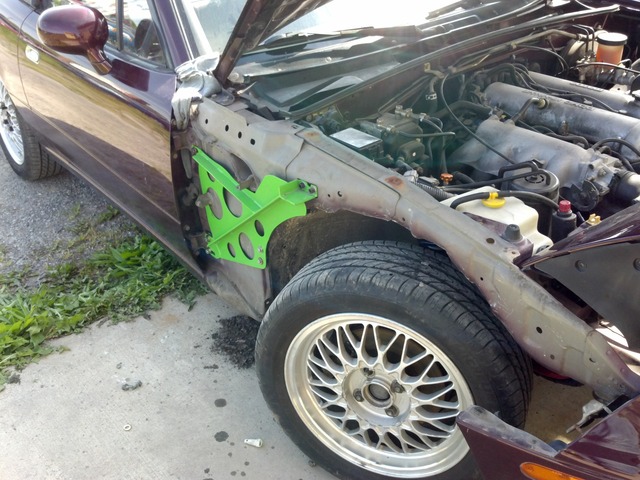
Back to installing my frog arms! Not a fun project.
Reply
0
0
 05-20-2012, 05:43 AM
#72
Junior Member
Thread Starter
Join Date: Dec 2011
Posts: 105
Total Cats: 1
Just thinking out loud.
I think I am stuck buying OEM hubs. Rockauto only has one timken in stock. Everywhere else is priced high enough that I might as well just order OEM. I refused to shop on ebay or partsgeek. Who would have thought this would be such a process. The 100+ dollar price difference is whats stopping me from ordering OE.
I think I decided on gutting the AC due to me not being able to fit the blower motor in with the cage and AC (no one warned me about that beforehand..lol). This leaves me with a decision to make regarding the power steering-- keep it for now, loop the lines(or plug the holes?), or do a complete gut. Im worried about having to weld the pinion. Decisions decisions. More reading to do.
Last edited by stuiephoto; 05-20-2012 at 05:57 AM.
Reply
0
0
05-26-2012, 08:24 PM
#73
Junior Member
Thread Starter
Join Date: Dec 2011
Posts: 105
Total Cats: 1
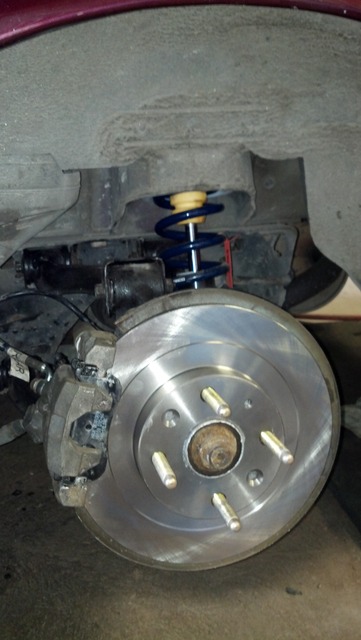
I ended up ordering NTK hubs from autozone. They were 99 bucks with free shipping. With a $200 order you get a $50 gift card, so I should be able to buy some oil and crap with that.
I initially ordered rotor's from napa. The rears (pn 4886129) were the wong bolt pattern (maybe 4x114?) just for the record for anyone looking at NAPA rotors. Had to go to advance instead since NAPA had nothing else.
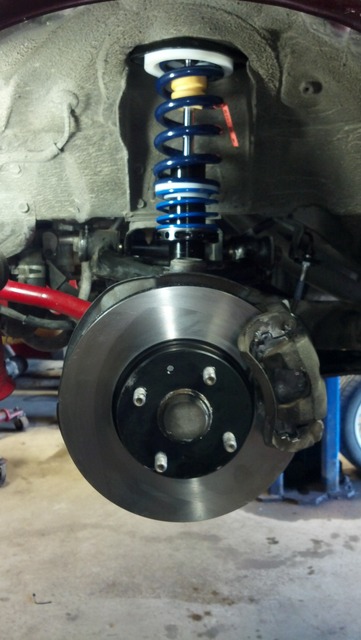
Rear brakes are done. Ride height is roughed in.
About to give her a bath. Shes filthy.
I initially ordered rotor's from napa. The rears (pn 4886129) were the wong bolt pattern (maybe 4x114?) just for the record for anyone looking at NAPA rotors. Had to go to advance instead since NAPA had nothing else.
Rear brakes are done. Ride height is roughed in.
About to give her a bath. Shes filthy.
Reply
1
1
06-04-2012, 10:01 PM
#75
Junior Member
Thread Starter
Join Date: Dec 2011
Posts: 105
Total Cats: 1
Well I got the coolant burped today and found that the radiator fan is dead. Trying to decide what setup to buy. My wallet is telling me to buy a mishimoto but my brain is saying FM stage II. Any other mid-range options that are decent? Since I plan to turbo come winter, im probably going to end up with an FM II kit. Blah.
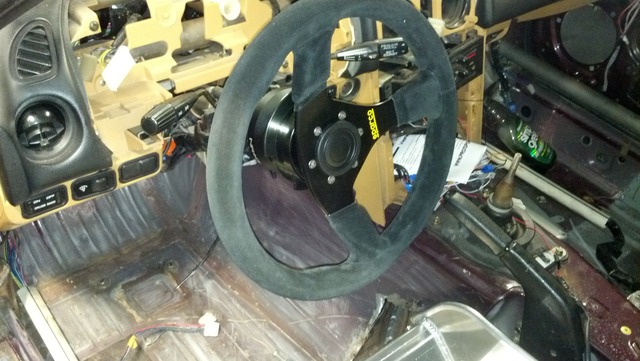
Balljoints, tierods, etc are in. Ordered front hubs, those will be in wednesday to be repacked. I decided to try the raybestos ones since timken is not available from any merchant (literally) and I didnt find any positive or negative reviews. Finished some odds and ends like re-installing the fuel neck, rear-view mirror, harness, steering wheel and hub, etc. Im putting off painting the cage/interior for a rainy day-- im ready for the track NOW.
Have a couple phantom issues. The coolant temp gauge in the dash isnt working and neither is the tach. Not quite sure what the issue is. Im running way over budget so I really dont want to buy a coolant reroute yet to be able to mount the prosport gauge (i refuse to buy a 40 dollar inline adapter). Might have to rig something homebrew for now.
EDIT: Finally found savingtons setup. I found a friend with a spare OEM fan, so I will just put that in for now until i can pick up a spal to tie in there. Never thought shrouding would be bad for a track car. Heres his post from m.net if anyone else wants to know the info and so sav doesnt have to retype.
I have one problem with this statement: If you've got a fully sealed setup, with one exchanger ducted completely into the next, a shroud won't be enough to keep the car cool.
Example:

The mouth is 100% sealed to the IC (Garrett core), then the IC is sealed to the front of the rad. Shroud setup was twin 10" straight-blade Spals sealed to the back of the radiator. 1 hot lap produced catastrophic overheating.
After that event, I ripped the entire ducting setup out, ditched the shroud, and went with this:

The lower chamber feeds air to the IC, which is then sealed at the back to the lower half of the radiator. I considered ducting it under the radiator at the start, and I may still try that since my CLTs are well within safe range now.
The upper chamber feeds directly to the radiator, and the duct behind the IC is separated by a vertical duct which prevents air from the upper duct reverting and stalling airflow through the FMIC.
I replaced the shrouded twin fans with a single 14" curved-blade Spal and no shroud.
This setup has worked flawlessly. IATs peak at ambient+15*F after ~3 laps, CLTs are typically 180-195, peaking at ~210 on extremely hot days at high-altitude tracks (2500+ft). (oil is ~240*F, Rx7 cooler tucked into the nose, no ducting)
I also have some data from a 100*F day at Willow Springs last year. That track is one extremely high-speed section (80mph to 140mph, brakes to 110mph, then 110mph to 155mph) and one slow speed section (120mph down to around 60mph, up a fairly steep hill, then back down the other side up to ~80mph, linking to the high speed section). My CLTs would climb in the low-speed sections, and drop in the high speed sections, by around 7-10*F in either way.
Example:
The mouth is 100% sealed to the IC (Garrett core), then the IC is sealed to the front of the rad. Shroud setup was twin 10" straight-blade Spals sealed to the back of the radiator. 1 hot lap produced catastrophic overheating.
After that event, I ripped the entire ducting setup out, ditched the shroud, and went with this:
The lower chamber feeds air to the IC, which is then sealed at the back to the lower half of the radiator. I considered ducting it under the radiator at the start, and I may still try that since my CLTs are well within safe range now.
The upper chamber feeds directly to the radiator, and the duct behind the IC is separated by a vertical duct which prevents air from the upper duct reverting and stalling airflow through the FMIC.
I replaced the shrouded twin fans with a single 14" curved-blade Spal and no shroud.
This setup has worked flawlessly. IATs peak at ambient+15*F after ~3 laps, CLTs are typically 180-195, peaking at ~210 on extremely hot days at high-altitude tracks (2500+ft). (oil is ~240*F, Rx7 cooler tucked into the nose, no ducting)
I also have some data from a 100*F day at Willow Springs last year. That track is one extremely high-speed section (80mph to 140mph, brakes to 110mph, then 110mph to 155mph) and one slow speed section (120mph down to around 60mph, up a fairly steep hill, then back down the other side up to ~80mph, linking to the high speed section). My CLTs would climb in the low-speed sections, and drop in the high speed sections, by around 7-10*F in either way.
Last edited by stuiephoto; 06-05-2012 at 01:01 AM.
Reply
0
0


