
DIY offset delrin bushings for the rear LCAs for camber correction
 09-01-2013, 08:32 PM
#1
Elite Member

Thread Starter
iTrader: (2)

Join Date: Jun 2009
Location: Istanbul, Turkey
Posts: 3,214
Total Cats: 1,687
It says "use descriptive titles" 
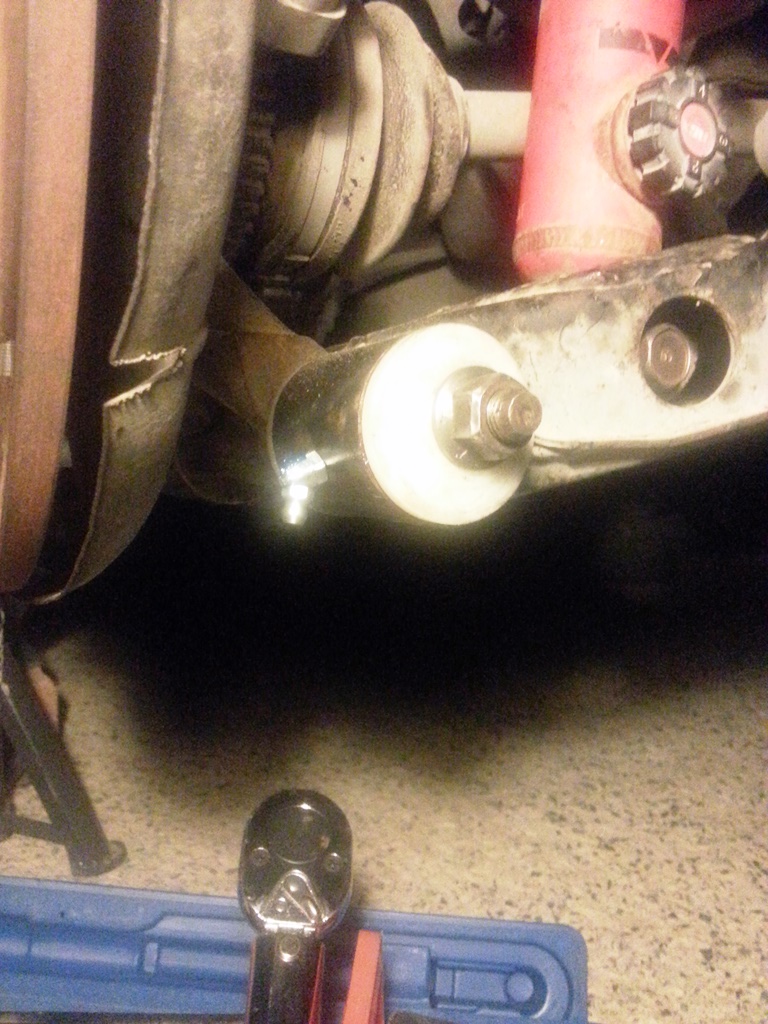
I was suffering from an excessive rear camber issue for a while.
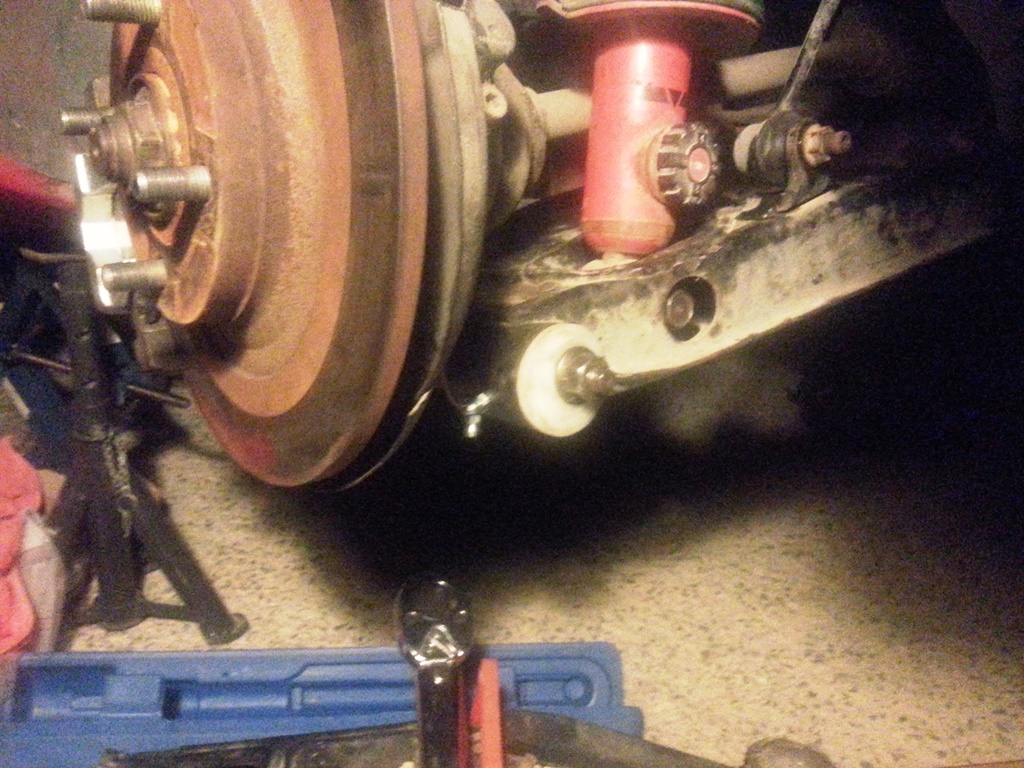
Coupled with a lower than stock suspension, a worn rear upright bushing was making my right rear lean way in, with a 5.6 degree negative camber on that side.
The left rear was sitting at -3.6 degrees.
After much tweaking, and not being able to bring the camber angle to any sort of a reasonable level, I decided to take aggressive action.
The solution would be making offset bushings for the lower control arms (the outer ones) that would bring the camber angle to a level where the inboard adjusters would be able to, well, adjust the camber.
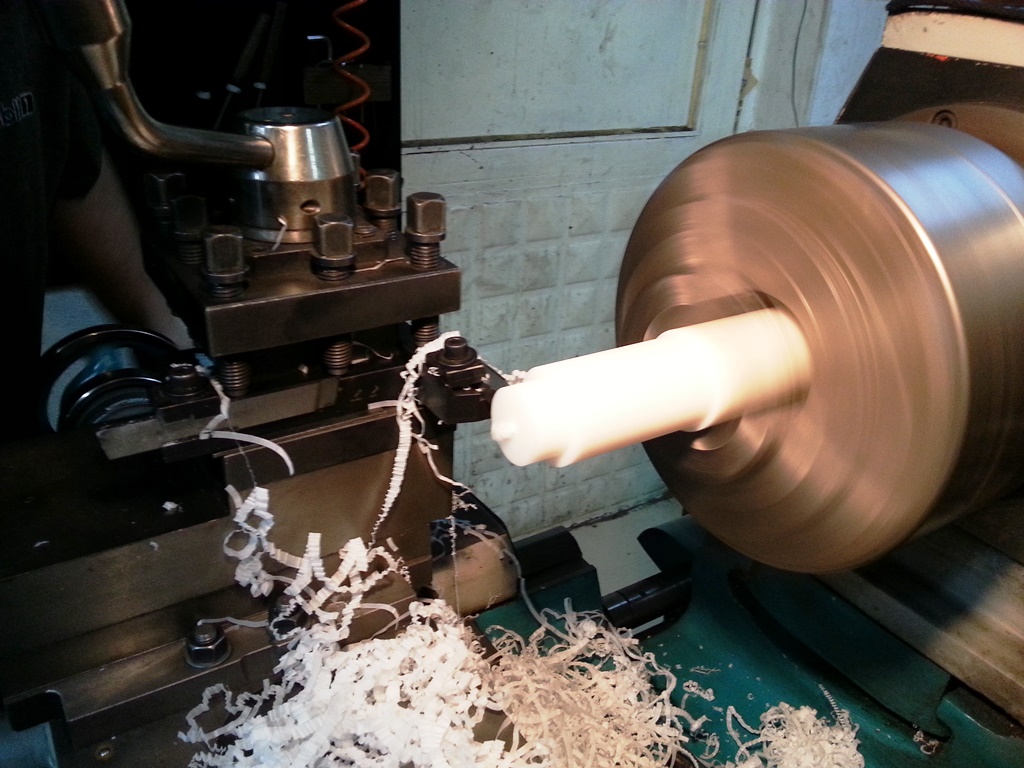
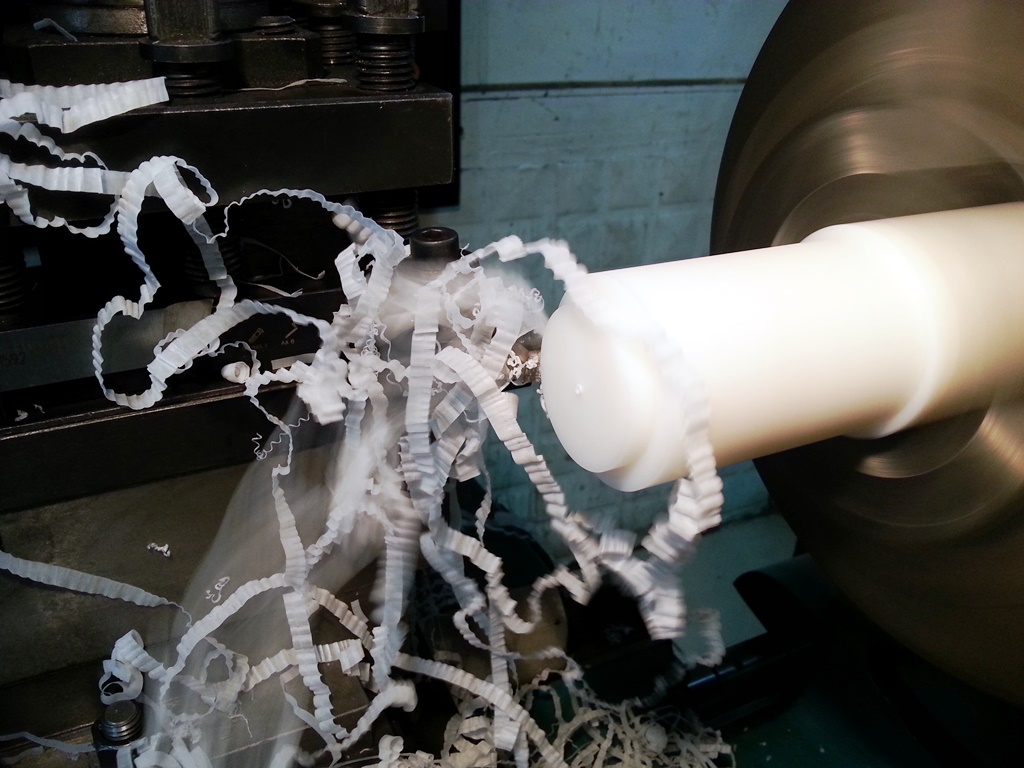
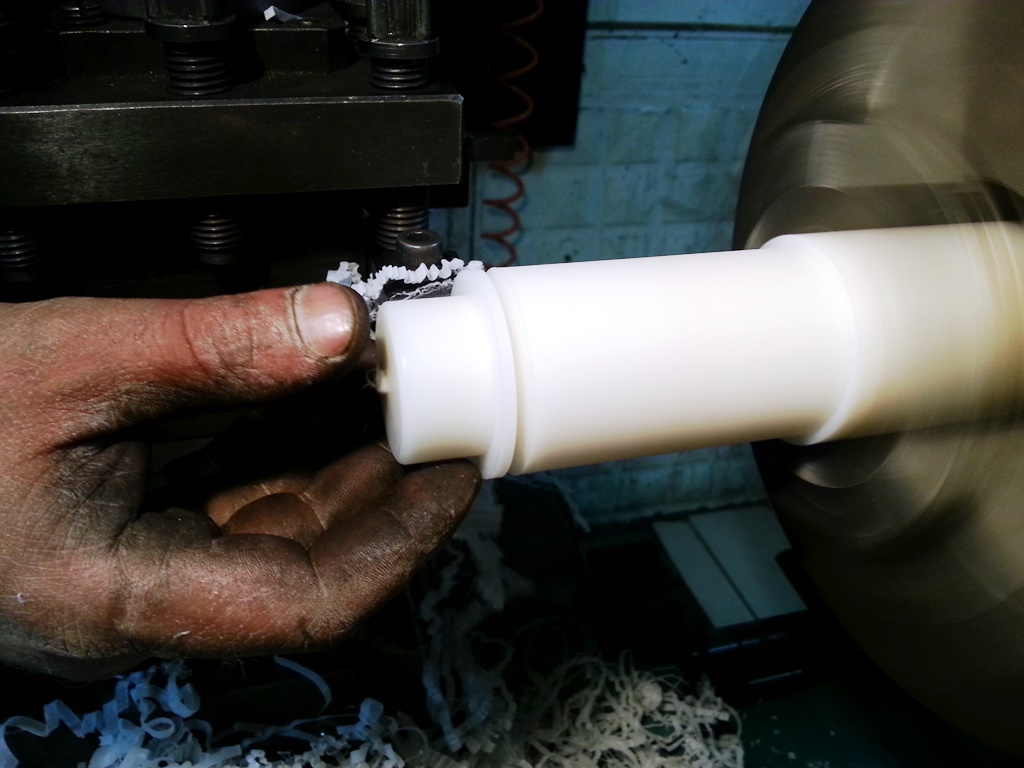
So, I ordered some delrin. That stuff is pretty inexpensive. Like, about $20 for a 55 mm diameter, 1 meter long bar. So, I got two one meter lengths, just to be sure. In hindsight, I could just get the 40 mm variety, that's even cheaper.
Anyway.. I removed the rear suspension, and then the a arms, and then I used the threaded rod method to remove all the outer bushings.
Next step was getting to the machine shop to make the delrin bushings.
I packed the a arms, hubs, the bushings I pulled out, and the drawings I made for the new bushings on my scooter and got to the machine shop.
The owner of the Machine Shop, Sinan, is a very cool, smart guy.
We ordered tea, and went to work.
I was suffering from an excessive rear camber issue for a while.
Coupled with a lower than stock suspension, a worn rear upright bushing was making my right rear lean way in, with a 5.6 degree negative camber on that side.
The left rear was sitting at -3.6 degrees.
After much tweaking, and not being able to bring the camber angle to any sort of a reasonable level, I decided to take aggressive action.
The solution would be making offset bushings for the lower control arms (the outer ones) that would bring the camber angle to a level where the inboard adjusters would be able to, well, adjust the camber.
So, I ordered some delrin. That stuff is pretty inexpensive. Like, about $20 for a 55 mm diameter, 1 meter long bar. So, I got two one meter lengths, just to be sure. In hindsight, I could just get the 40 mm variety, that's even cheaper.
Anyway.. I removed the rear suspension, and then the a arms, and then I used the threaded rod method to remove all the outer bushings.
Next step was getting to the machine shop to make the delrin bushings.
I packed the a arms, hubs, the bushings I pulled out, and the drawings I made for the new bushings on my scooter and got to the machine shop.
The owner of the Machine Shop, Sinan, is a very cool, smart guy.
We ordered tea, and went to work.

Reply
 0
0

0
 09-01-2013, 08:39 PM
#3
Elite Member
Thread Starter
iTrader: (2)
Join Date: Jun 2009
Location: Istanbul, Turkey
Posts: 3,214
Total Cats: 1,687
I wanted the lower outside bushings to be offset. I figured drilling the cores 5.5 mm off center would suffice.
That was easy with the lathe. Chucking the bushing blanks with a 6.5 mm spacer on one side gave us the offset we needed. We used a 18 mm drill.

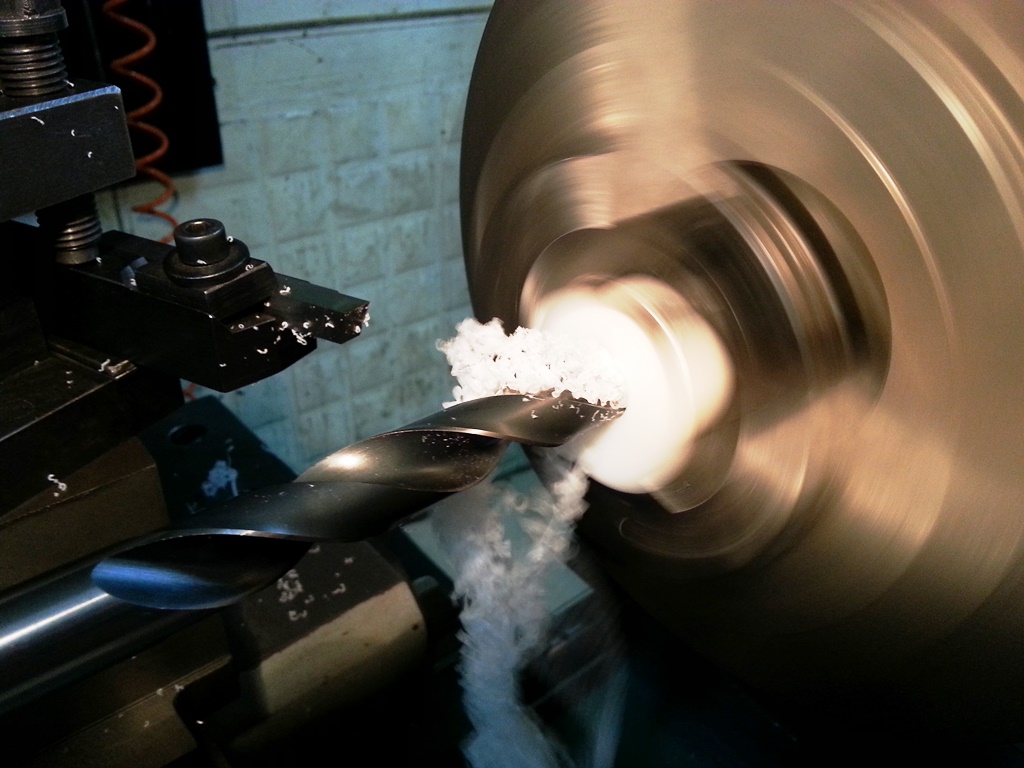
That was easy with the lathe. Chucking the bushing blanks with a 6.5 mm spacer on one side gave us the offset we needed. We used a 18 mm drill.
Reply
0
0
09-01-2013, 08:46 PM
#4
Elite Member
Thread Starter
iTrader: (2)
Join Date: Jun 2009
Location: Istanbul, Turkey
Posts: 3,214
Total Cats: 1,687
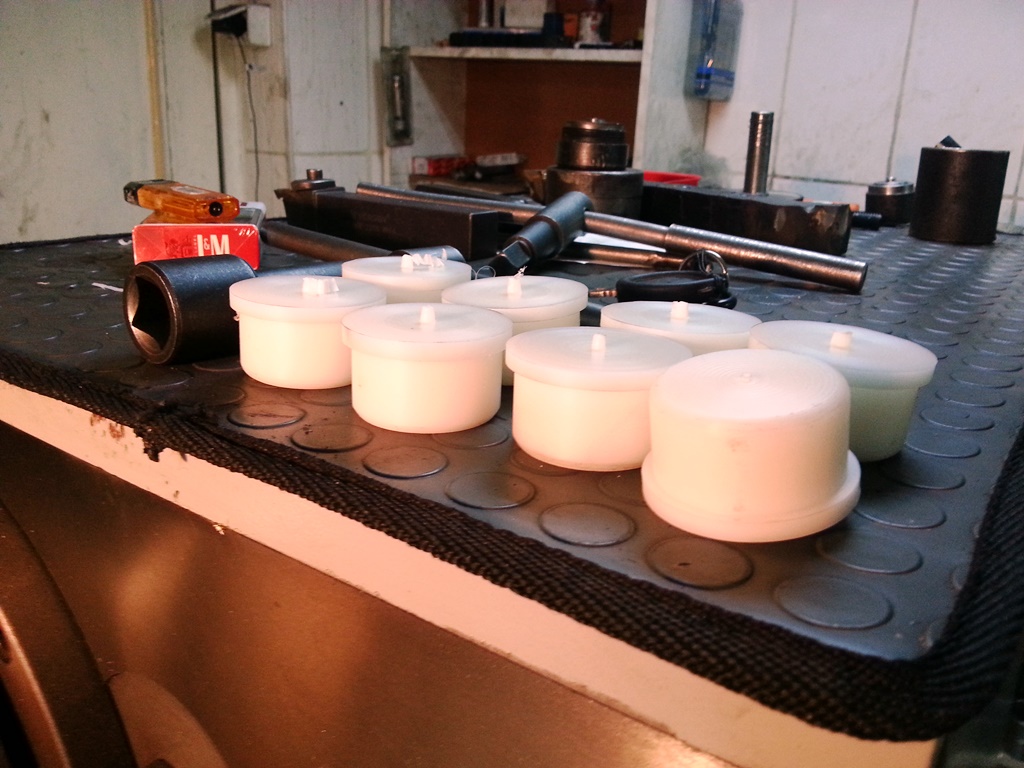
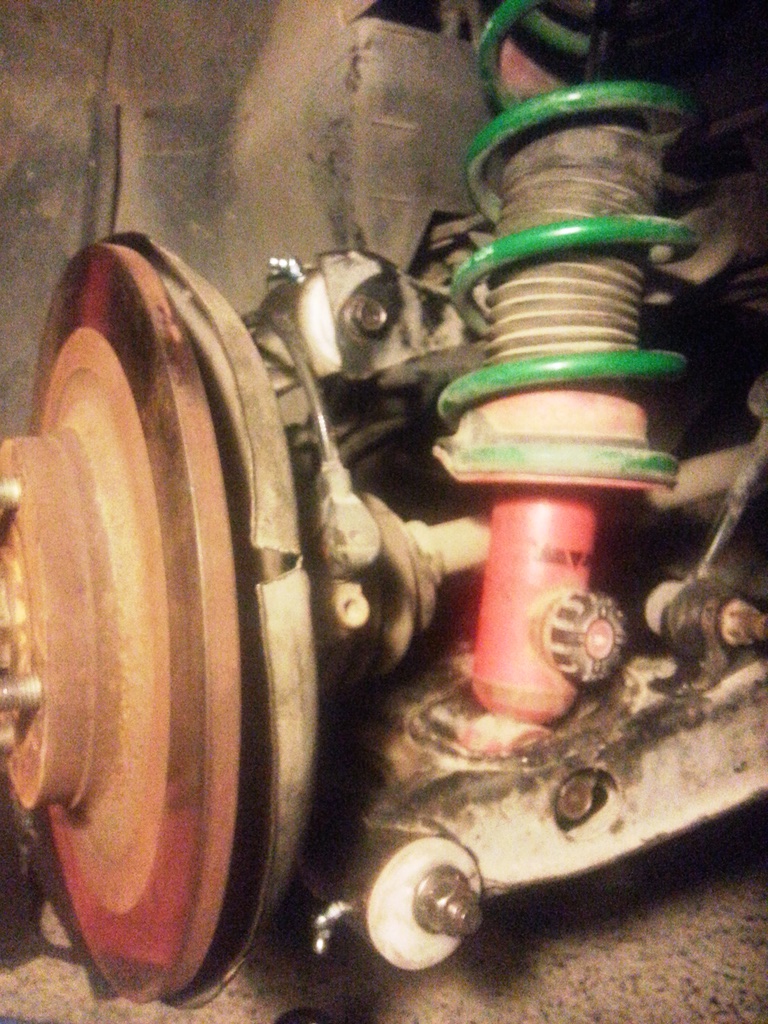
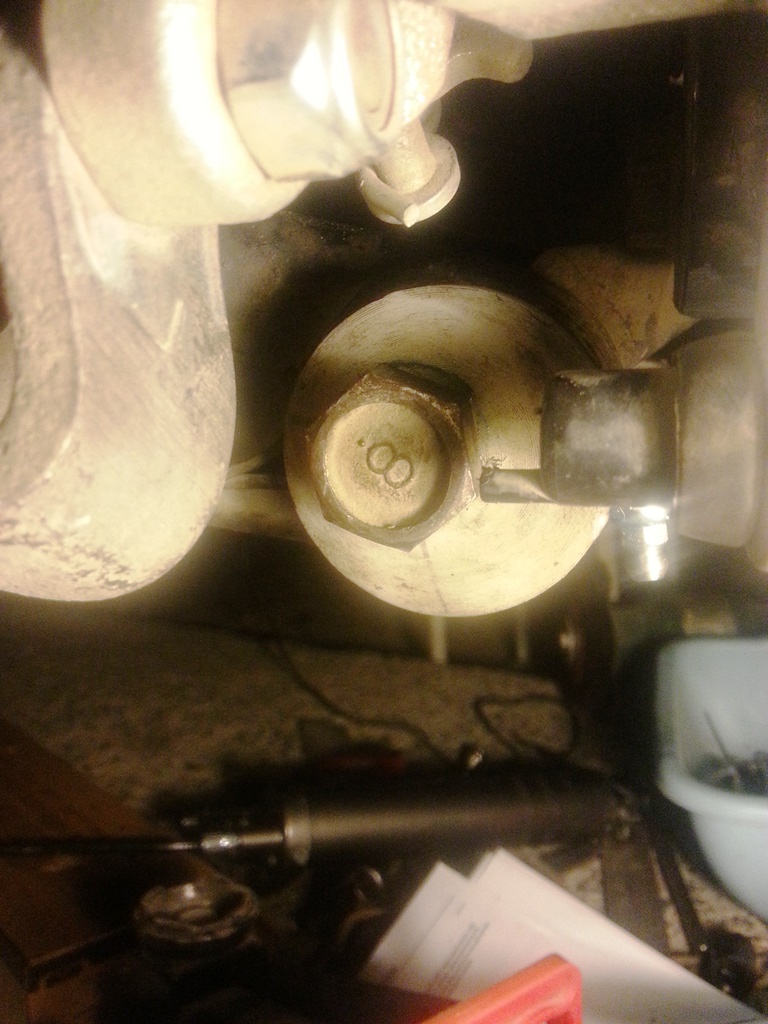
Sinan had some pretty high quality steel stock laying around. We used that to make the sleeves.
Lower bushing bolts are 14 mm, uppers use 10 mm bolts.
We drilled into the steel first, then reduced the diameter to 18 mm, and then really polished them at high speed. That removed another 0.5 mm or so, and gave us just the right clearance for smooth articulation inside the delrin.
I also used the existing holes in the lower arms to thread and install grease fittings. I just drilled the uppers in the appropriate spots for the same purpose.
As for installing the offset bushings, once positioned the first piece, I used the long bolt to line up all the remaining pieces. It was easier than I had anticipated.
Last edited by Godless Commie; 03-15-2017 at 09:25 PM.
Reply
0
0
 09-01-2013, 08:53 PM
#6
Elite Member
Thread Starter
iTrader: (2)
Join Date: Jun 2009
Location: Istanbul, Turkey
Posts: 3,214
Total Cats: 1,687
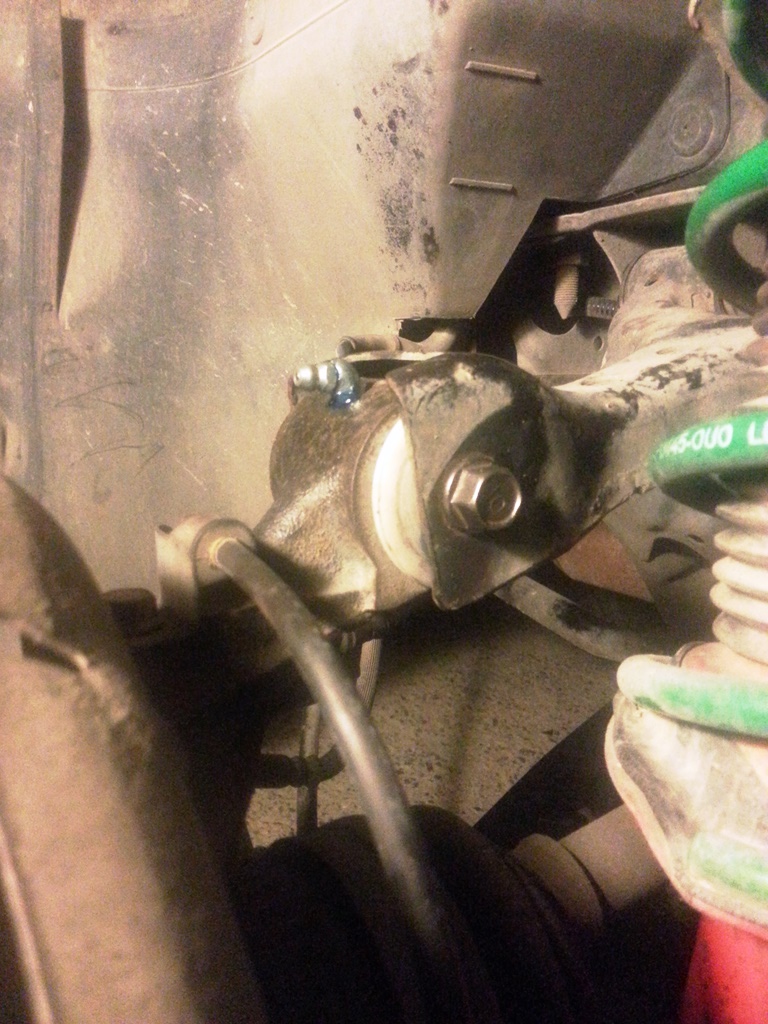

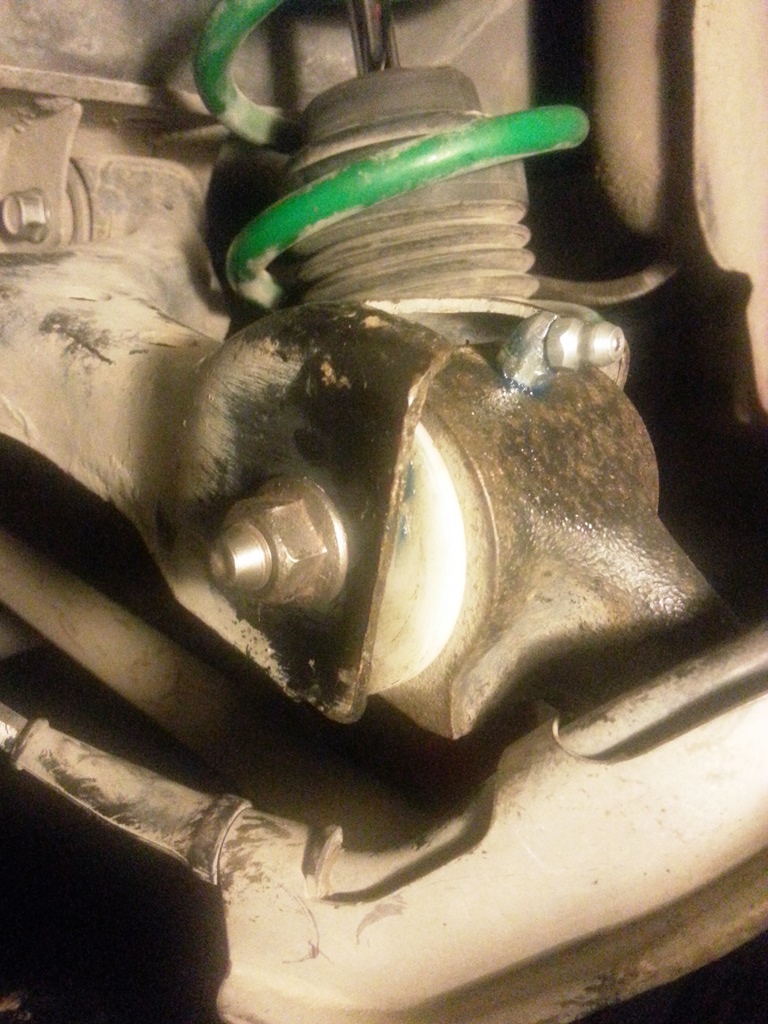
I pumped grease in them till it flowed out from both ends. I am pretty sure I will not have any problems if I just grease them once a year.
There is about a 7 mm gap between the bushing halves inside the housing.The grease fitting points right in that void. I figured having a grease reserve in the center would not hurt anything.
Reply
0
0
09-01-2013, 08:56 PM
#7
Elite Member
Thread Starter
iTrader: (2)
Join Date: Jun 2009
Location: Istanbul, Turkey
Posts: 3,214
Total Cats: 1,687
I took the car in for an alignment, and the rears have -1.25 degrees of camber now.
Feels much smoother, makes no noise at all, corners better, and has less wheelspin when taking off now.
If you have access to a lathe, go for it.
I will do the fronts next, when I have time.
Feels much smoother, makes no noise at all, corners better, and has less wheelspin when taking off now.
If you have access to a lathe, go for it.
I will do the fronts next, when I have time.
Reply
0
0

 09-02-2013, 06:09 AM
#11
Elite Member
Thread Starter
iTrader: (2)
Join Date: Jun 2009
Location: Istanbul, Turkey
Posts: 3,214
Total Cats: 1,687
Kidding. The fact that the outer lips are D shaped makes damn sure they will not rotate.
There is also some ungodly friction between the bushings and the housings - cut them that way on purpose.
Reply
0
0
 09-02-2013, 10:51 AM
#14
Elite Member
Thread Starter
iTrader: (2)
Join Date: Jun 2009
Location: Istanbul, Turkey
Posts: 3,214
Total Cats: 1,687
The delrin is fixed, as in no movement, in relation to the housing at the end of the control arm.
What moves is the sleeve inside the delrin bushing.
And, that movement is very smooth.
Reply
0
0
09-02-2013, 05:06 PM
#15
So the zerk fitting.... I imagine there is a small space between the bushings where they don't sit flush, but what is this greasing exactly? Delrin is self lubricating isn't it? Doesn't some lubricants cause delrin to swell?
Just a couple questions, very cool idea. I'd love to make a set for myself, have any dimensions you want to share? ^_^
Just a couple questions, very cool idea. I'd love to make a set for myself, have any dimensions you want to share? ^_^
Reply
0
0
 09-09-2013, 10:51 PM
#19
Elite Member
iTrader: (37)

Join Date: Apr 2010
Location: Very NorCal
Posts: 10,441
Total Cats: 1,899
I'm curious to see how this holds up over time. You could probably start yourself a neat little side business doing this, I know I've thought about it several times.
God I hated working with Delrin, same with Nylon and Teflon barstock. That **** refuses to break a chip and turns into a giant spaghetti mess.
God I hated working with Delrin, same with Nylon and Teflon barstock. That **** refuses to break a chip and turns into a giant spaghetti mess.
Reply
0
0
09-10-2013, 08:57 AM
#20

I'm curious to see how this holds up over time. You could probably start yourself a neat little side business doing this, I know I've thought about it several times.
God I hated working with Delrin, same with Nylon and Teflon barstock. That **** refuses to break a chip and turns into a giant spaghetti mess.
God I hated working with Delrin, same with Nylon and Teflon barstock. That **** refuses to break a chip and turns into a giant spaghetti mess.
Reply
0
0


