

Post your DIY aero pics


I would prefer some sort of plastic just bolted directly to the side, the plastic will be able to flex when bottoming/high centering and will spring back unlike the aluminum. The stiffness of your plastic will have to be experimented with soft enough to flex without upsetting the car, stiff enough to not flex in due to aero pressure. I'm thinking ballistic nylon might be a good choice since it will be lower wear but you'll need to experiment with the thickness to get the right stiffness.
Reply
 0
0

0

you could try this plastic?
Colored Plastic Rolls, 10 Ft. - Speedway Motors, America's Oldest Speed Shop
Colored Plastic Rolls, 10 Ft. - Speedway Motors, America's Oldest Speed Shop
Reply
0
0
you could try this plastic?
Colored Plastic Rolls, 10 Ft. - Speedway Motors, America's Oldest Speed Shop
Colored Plastic Rolls, 10 Ft. - Speedway Motors, America's Oldest Speed Shop
Reply
0
0

Newb
Joined: Jan 2013
Posts: 9
Total Cats: 0
I use Circle Track wear strip material, its pretty much just thin abs plastic. Its very durable I daily drive with it on the front scraping things everywhere and its still all together in one peice. Im working on sideskirts myself with the same material, using alumalite extensions with the abs seal.
Reply
0
0

Newb
Joined: Nov 2010
Posts: 44
Total Cats: 1
Anyone here dabbled with side skirts? Trying to figure out how I want to approach mine. I have side exit exhaust, so I'm thinking thin aluminum sheet bent into a 90 to come out and down from the rockers to decrease ground clearance, with a possible taper near the front wheels (again, take a look at the Peugeot T16). Optionally, I can frame them out of aluminum tubing or brake line and make a light pair out of fleece/fiberglass, but it would sure suck to go through all that work and then lose it in an off-track excursion. Would also need some sort of insert to protect it from the exhaust exits, which is why I'd prefer the aluminum.
Thomas
Reply
0
0
I'd rather run quick latches on them. The skirts are going to be consumables that you replace and its easier to swap the quick latch buttons to the new skirt than the dzus. BUT if you tear a skirt completely off and dont recover it, you're out $25 x however many quick latches you put on it, vs $5 x however many dzus fasteners. Though, in theory you should still be able to drive onto the trailer with these because they should flex.
Reply
0
0

Senior Member
Joined: Dec 2012
Posts: 624
Total Cats: 81
From: Charlotte, NC
I'd rather run quick latches on them. The skirts are going to be consumables that you replace and its easier to swap the quick latch buttons to the new skirt than the dzus. BUT if you tear a skirt completely off and dont recover it, you're out $25 x however many quick latches you put on it, vs $5 x however many dzus fasteners. Though, in theory you should still be able to drive onto the trailer with these because they should flex.
Reply
0
0

Elite Member

Joined: Feb 2007
Posts: 1,612
Total Cats: 821
From: Columbus, OH
Rear wheel spats. Are they worth a drag reduction over bare tire?
I made these out of clear lexan, so they are incredibly hard to get pictures of. My phone couldn't focus on them, so please excuse the blur and glare.
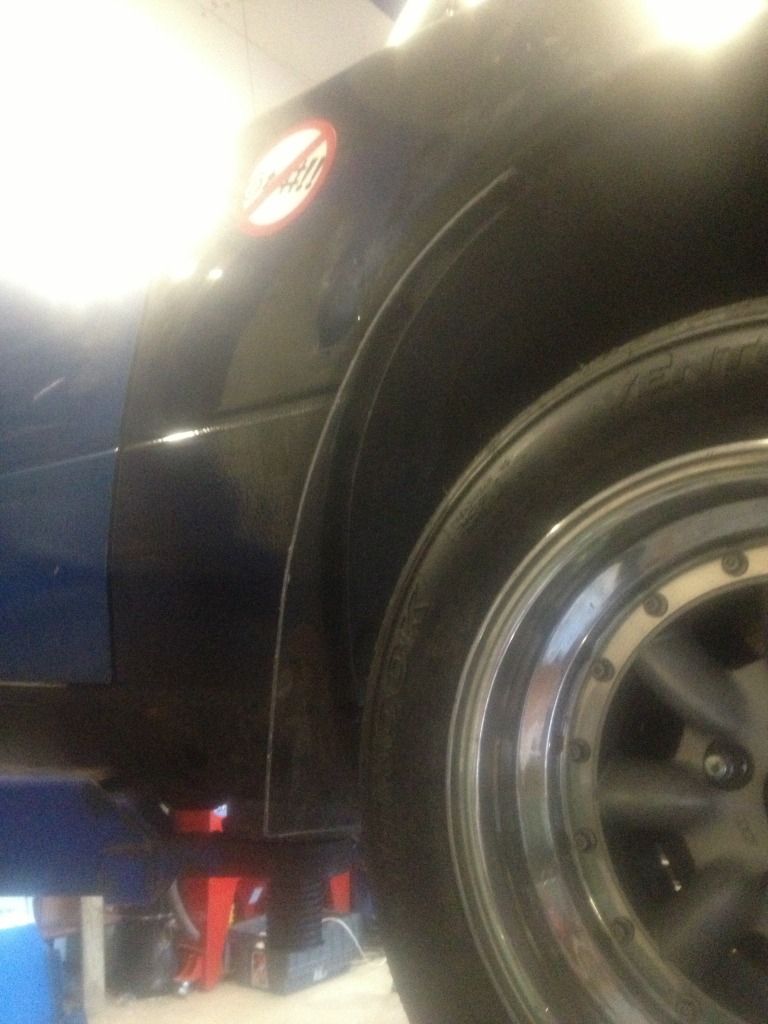
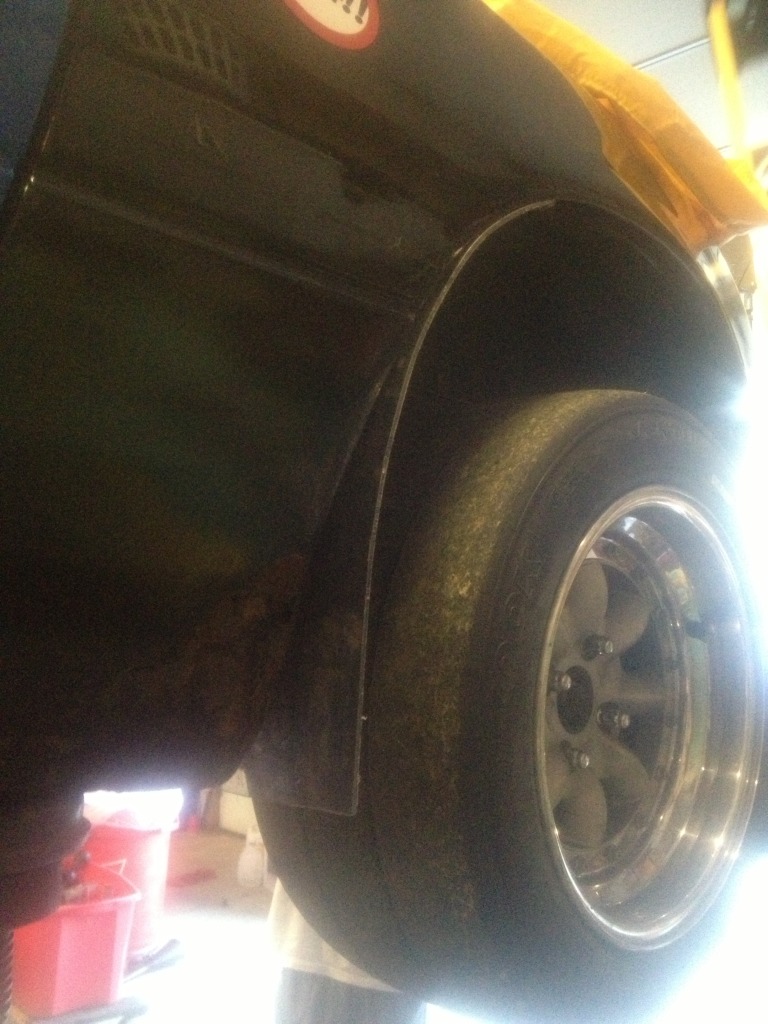
I made these out of clear lexan, so they are incredibly hard to get pictures of. My phone couldn't focus on them, so please excuse the blur and glare.


Reply
0
0

Junior Member
Joined: Aug 2006
Posts: 239
Total Cats: 5
From: Cedar City, UT
In my opinion all that is doing is acting as rock/mud guards to protect your paint and disturbing airflow behind it so the air down the side of your car is more turbulent and unattached
Reply
0
0

I would think that you want the rear open to help air flow out of the wheel well.. and you want something to deflect air around the front of the tire.
In my opinion all that is doing is acting as rock/mud guards to protect your paint and disturbing airflow behind it so the air down the side of your car is more turbulent and unattached
Reply
0
0
Junior Member
Joined: Aug 2006
Posts: 239
Total Cats: 5
From: Cedar City, UT
Reply
0
0

Senior Member
Joined: Oct 2011
Posts: 646
Total Cats: 62
From: The Race Track & St Pete FL
I would put them in front of the tires and try to ease the air flow to the side of the car. The tire is the worst when it comes to aerodynamics, so trying to get the air flow to go around them as much as possible.
Reply
0
0


I just noticed, after going back to page 1 and looking over some of the old stuff, that we've completely lost the structure Emilio originally intended for posts.

Reply
0
0
Senior Member
Joined: Oct 2011
Posts: 646
Total Cats: 62
From: The Race Track & St Pete FL
That's why I started Aerodynamic Discussion to keep his design of good info going. Aerodynamic Discussion was to talk about anything aero from Miata's to Formula's to Tractor Trailers.
Reply
0
0
1993ka24det's separate discussion thread works but now we have two threads discussing the same topic. It would take a mod a few hours to clean up, move posts, splice, merge or whatever.
__________________


Reply
0
0
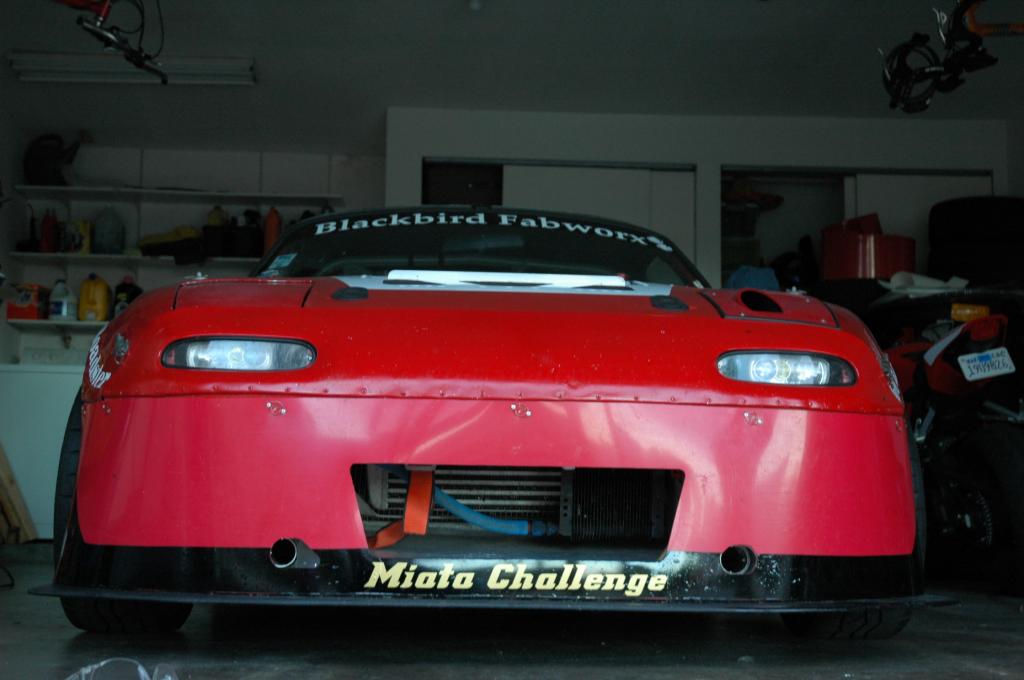
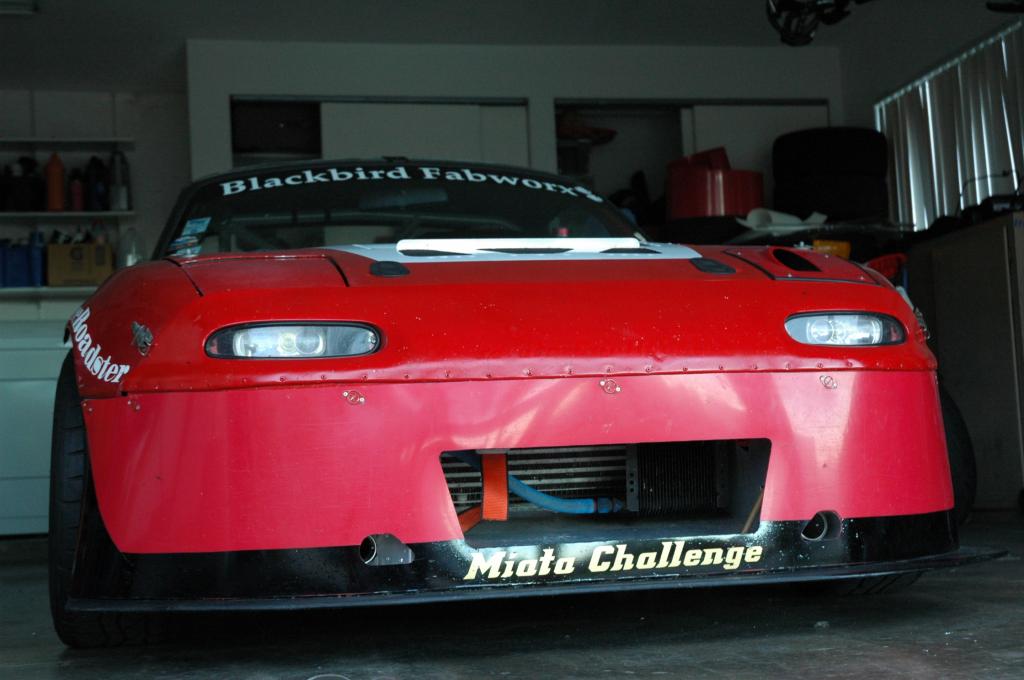
Borderline in terms of "aero" but it deals with airflow so I'll throw it in to get the thread back on it's original format/focus:
Dollars spent: $0 at time of construction (used materials laying around)
Hours spent: 5
How effective: Will find out this weekend
*update*: worked great, brakes performed great and never overheated
Materials used: Aluminum sheet, 2" aluminum intercooler piping, rivets
Tracks tested on: Going to Spring Mountain Motorsport Ranch this weekend
Race/TT class built for: Miata Challenge & Super Miata
I wanted to get the brakes ducted before the next event, but not enough time to order ducting for the airdam and get it here in time...
Originally thought of making these out of a composite but then discovered that I was out of resin. So looks like I'm making it out of aluminum! Scrounged around, found a sheet of a thickness I liked for this, and also some spare 2" intercooler piping. That'll do.
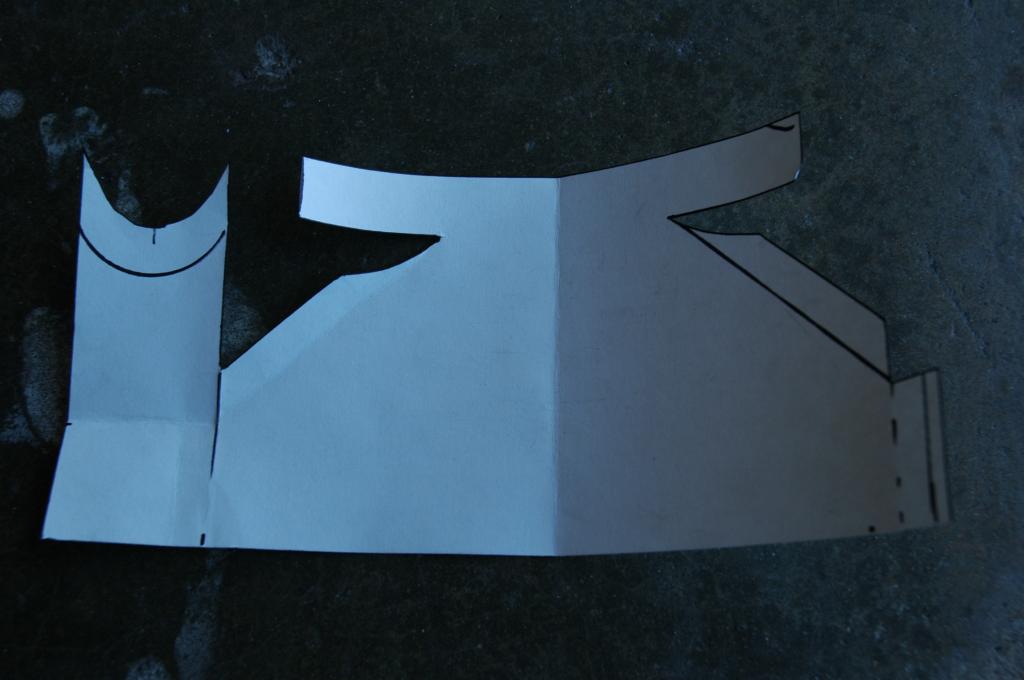
Got a concept worked up in my head, made a template out of construction paper:
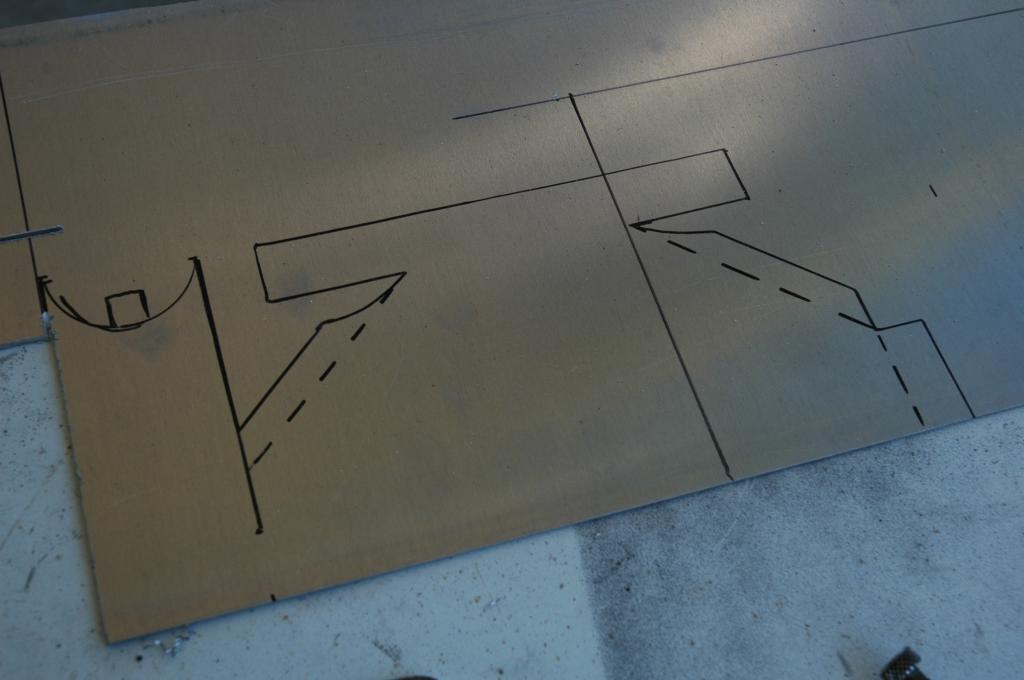
Transfer to aluminum, then get to cuttin':
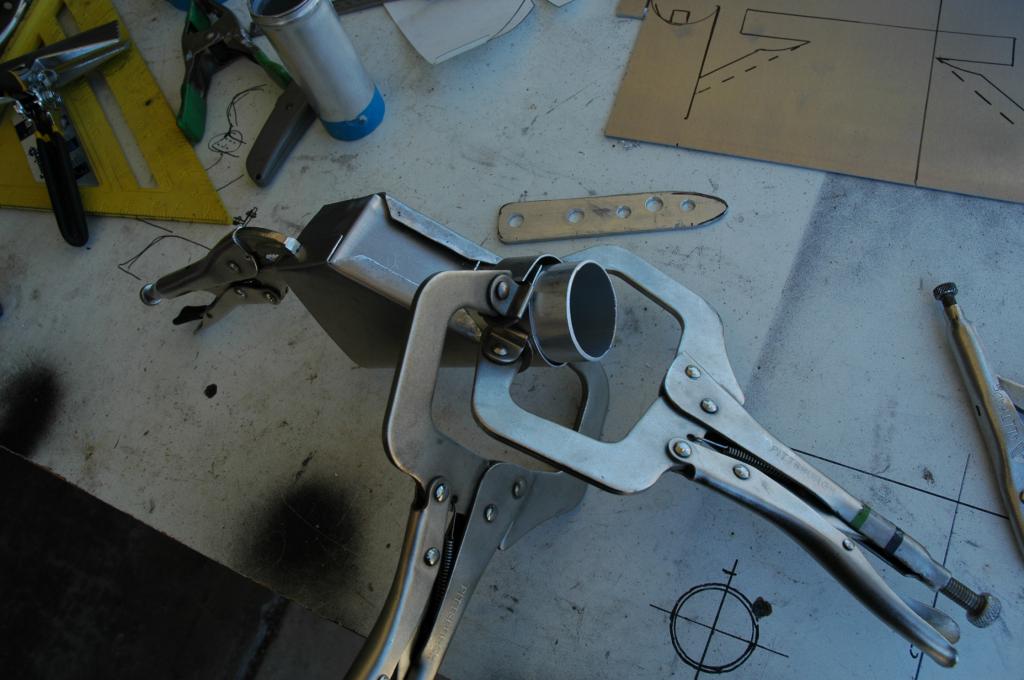
Next, brush up on my origami:
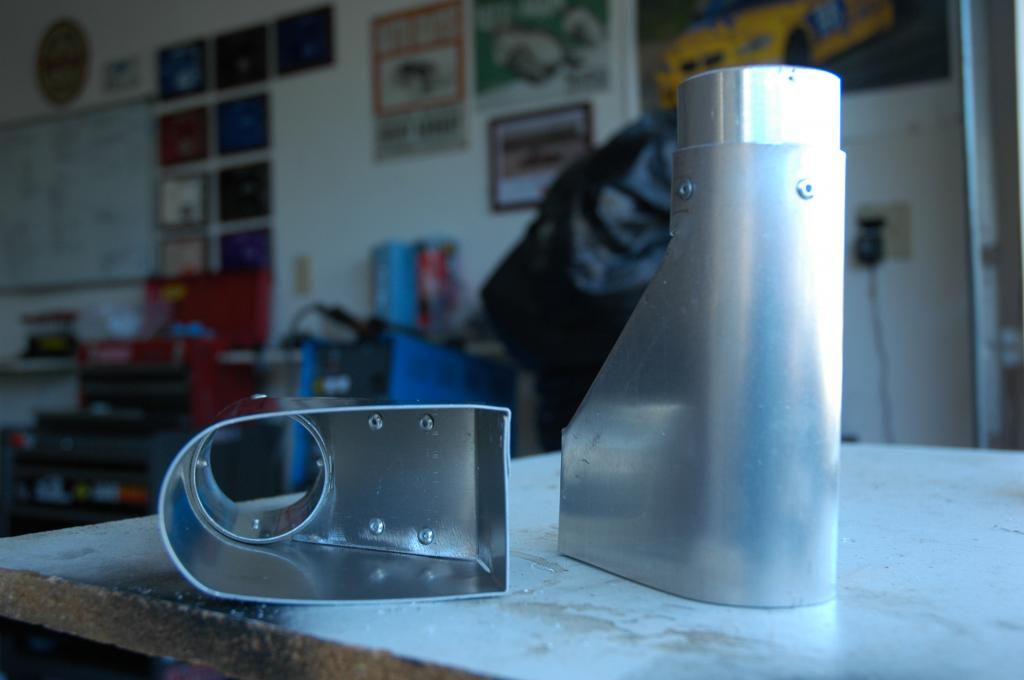
After a riveting time with the rivet gun:
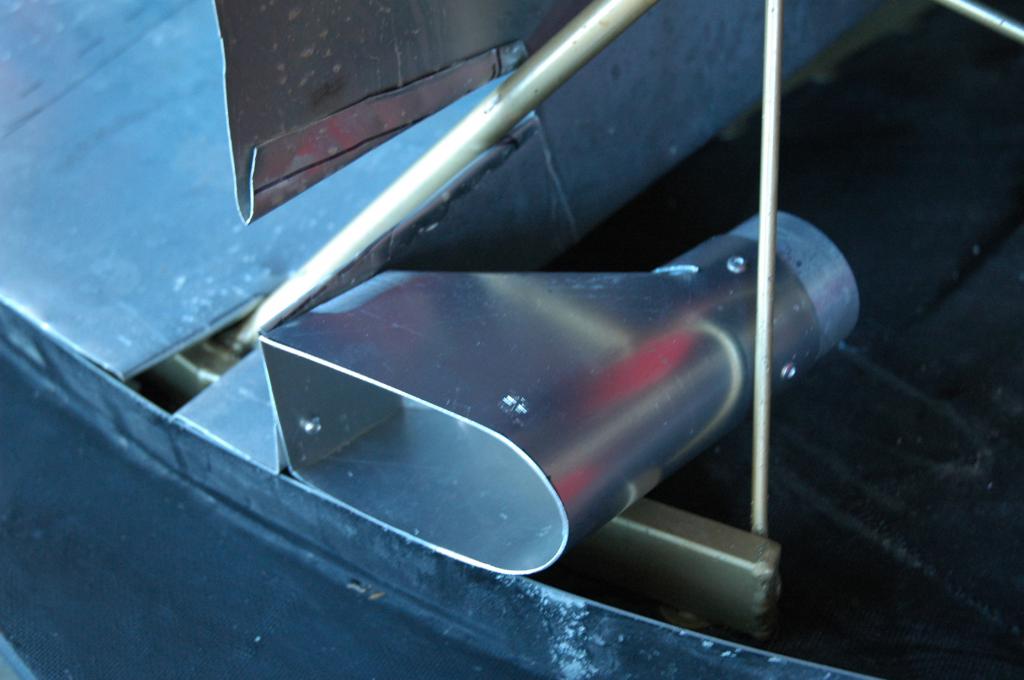
Trimmed the front of them to the same contour as the airdam and then riveted to the sides of the radiator ducting:
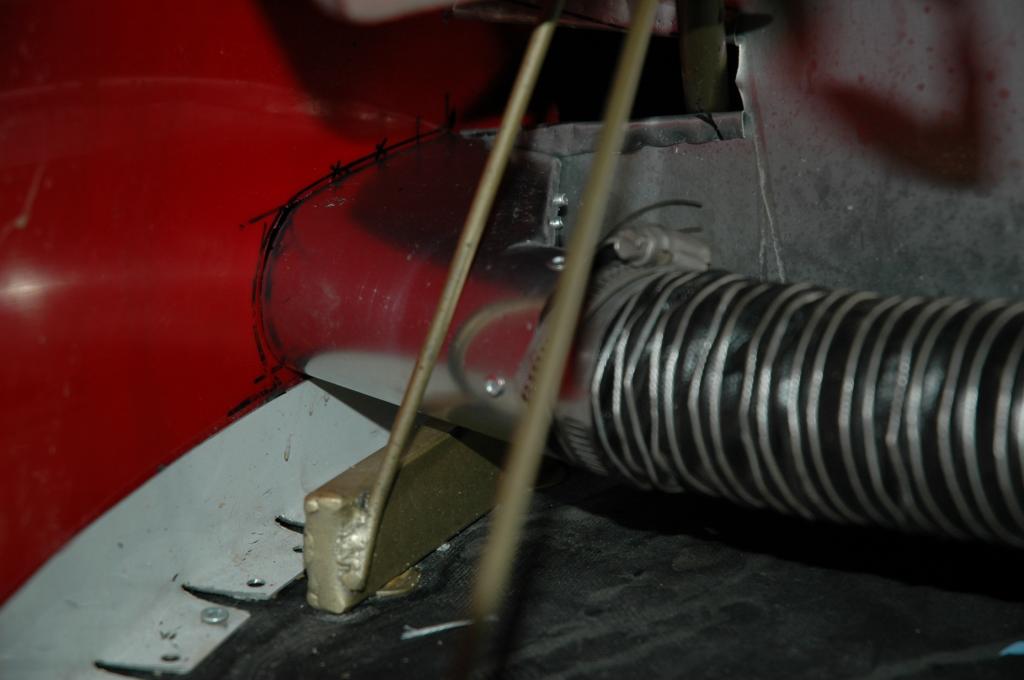
It would have been easier/faster to make these attach to the airdam, but the whole point of all the dzus fasteners on the airdam is for it to be able to be pulled off in 10 seconds to check/repair stuff. This way, the airdam still comes off like usual - the whole brake ducting system is fixed behind it:
Cut el airdamo, and voila!:
Dollars spent: $0 at time of construction (used materials laying around)
Hours spent: 5
How effective: Will find out this weekend
*update*: worked great, brakes performed great and never overheated
Materials used: Aluminum sheet, 2" aluminum intercooler piping, rivets
Tracks tested on: Going to Spring Mountain Motorsport Ranch this weekend
Race/TT class built for: Miata Challenge & Super Miata
I wanted to get the brakes ducted before the next event, but not enough time to order ducting for the airdam and get it here in time...
Originally thought of making these out of a composite but then discovered that I was out of resin. So looks like I'm making it out of aluminum! Scrounged around, found a sheet of a thickness I liked for this, and also some spare 2" intercooler piping. That'll do.
Got a concept worked up in my head, made a template out of construction paper:
Transfer to aluminum, then get to cuttin':
Next, brush up on my origami:
After a riveting time with the rivet gun:
Trimmed the front of them to the same contour as the airdam and then riveted to the sides of the radiator ducting:
It would have been easier/faster to make these attach to the airdam, but the whole point of all the dzus fasteners on the airdam is for it to be able to be pulled off in 10 seconds to check/repair stuff. This way, the airdam still comes off like usual - the whole brake ducting system is fixed behind it:
Cut el airdamo, and voila!:
Last edited by ThePass; Oct 11, 2013 at 06:46 AM.
Reply
0
0


