When you click on links to various merchants on this site and make a purchase, this can result in this site earning a commission. Affiliate programs and affiliations include, but are not limited to, the eBay Partner Network.
$2018 GRM challenge turbo miata build. with added insanity.
Challenge budget so far:
purchased 1999 Miata from John for 800
sold engine, sensors, and top to yupididit for 660
sold/traded torsen rear to self for noisy open rear and 200 recoup
bought 04 3400 from Buick rondevous from Patrick for 75 (going to pick up next weekend)
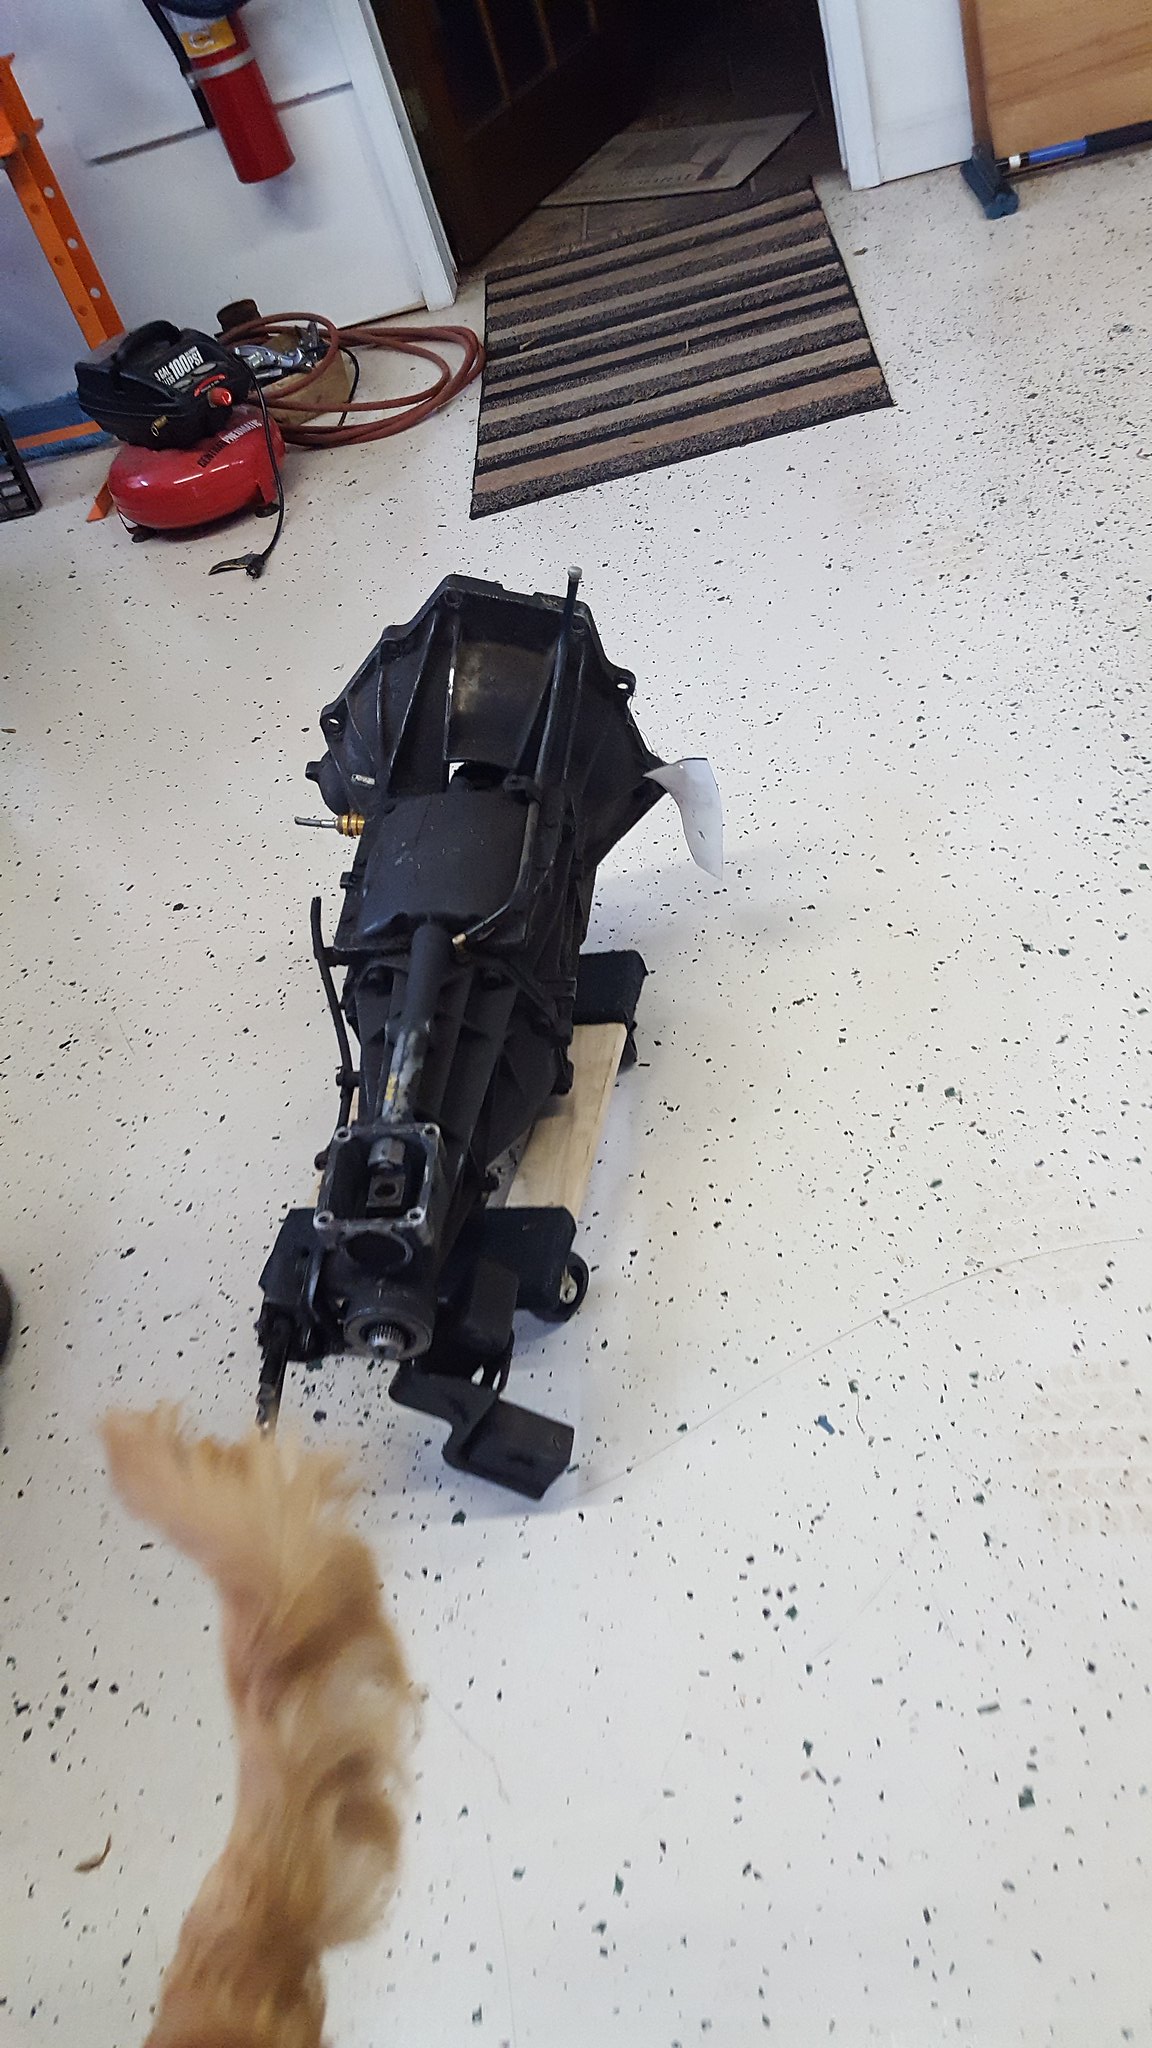
bought 98 camaro 3800 T5 and bellhousing/shifter/hydraulic throwout bearing from adams auto parts: 132.50
bought 3500 intake and exhaust manifolds from pull-a-part 106.75
bought used nitrous kit with bottle heater and chopped up feed line and no pills for a 4bbl from a yardsale in a trailer park near fayetteville: 25
used and abused hoosier SM7 slicks: 20 for the set
Apexi SAFC $25 from craigslist in Raleigh
current total: 384.25
recoup total: 800
ok, so this car wasn't supposed to happen. I had thought about it, and decided against it. But when dad got back from his RV trip out west after $2017 with the AMC, he was bit hard by the challenge and wanted to build a 2018/2019 car with me. So I ventured my idea of a turbocharged NB Miata with a 3400 gm v6. He loved the idea, and layed $1000 on the table for me to work with. With my wife out of work right now, that's ALL we have to work with. Just cant financially do it right now otherwise.
'But I don't want to miss what may be my last opportunity to build a race car with my father. Hes in his 70s now, and I love spending time with him. We've built a few together over the years, and I always enjoy it. Its helped me to be the halfway decent father and husband that I am, as we always talk about a lot more than the metal in front of us. And hes a great guy to go on road trips and junkyard crawls with.
So I jumped at the opportunity. We negotiated some deals to cover our gas to Ohio and back to pick up Patrick 3400, I sourced a trans in greenville SC while delivering a door to Tuna55 (thanks again for picking it up!), and started some threads learning about how to do this.
See, ive never turbocharged anything before. Or stuffed an American engine in a Japanese car without a kit. (SBC RX7 don't count). Or made something OBD2 compliant. So, this should be suitably difficult to be entertaining.
The basic plan, as it sits, is thus:
2018/2019 GRM challenge
3400 v6 5 speed
325+ hp at the wheels
2400lbs with driver
OBD2 compliant
NC street legal and inspected
sticks like superglue between your fingers
reliable
blue
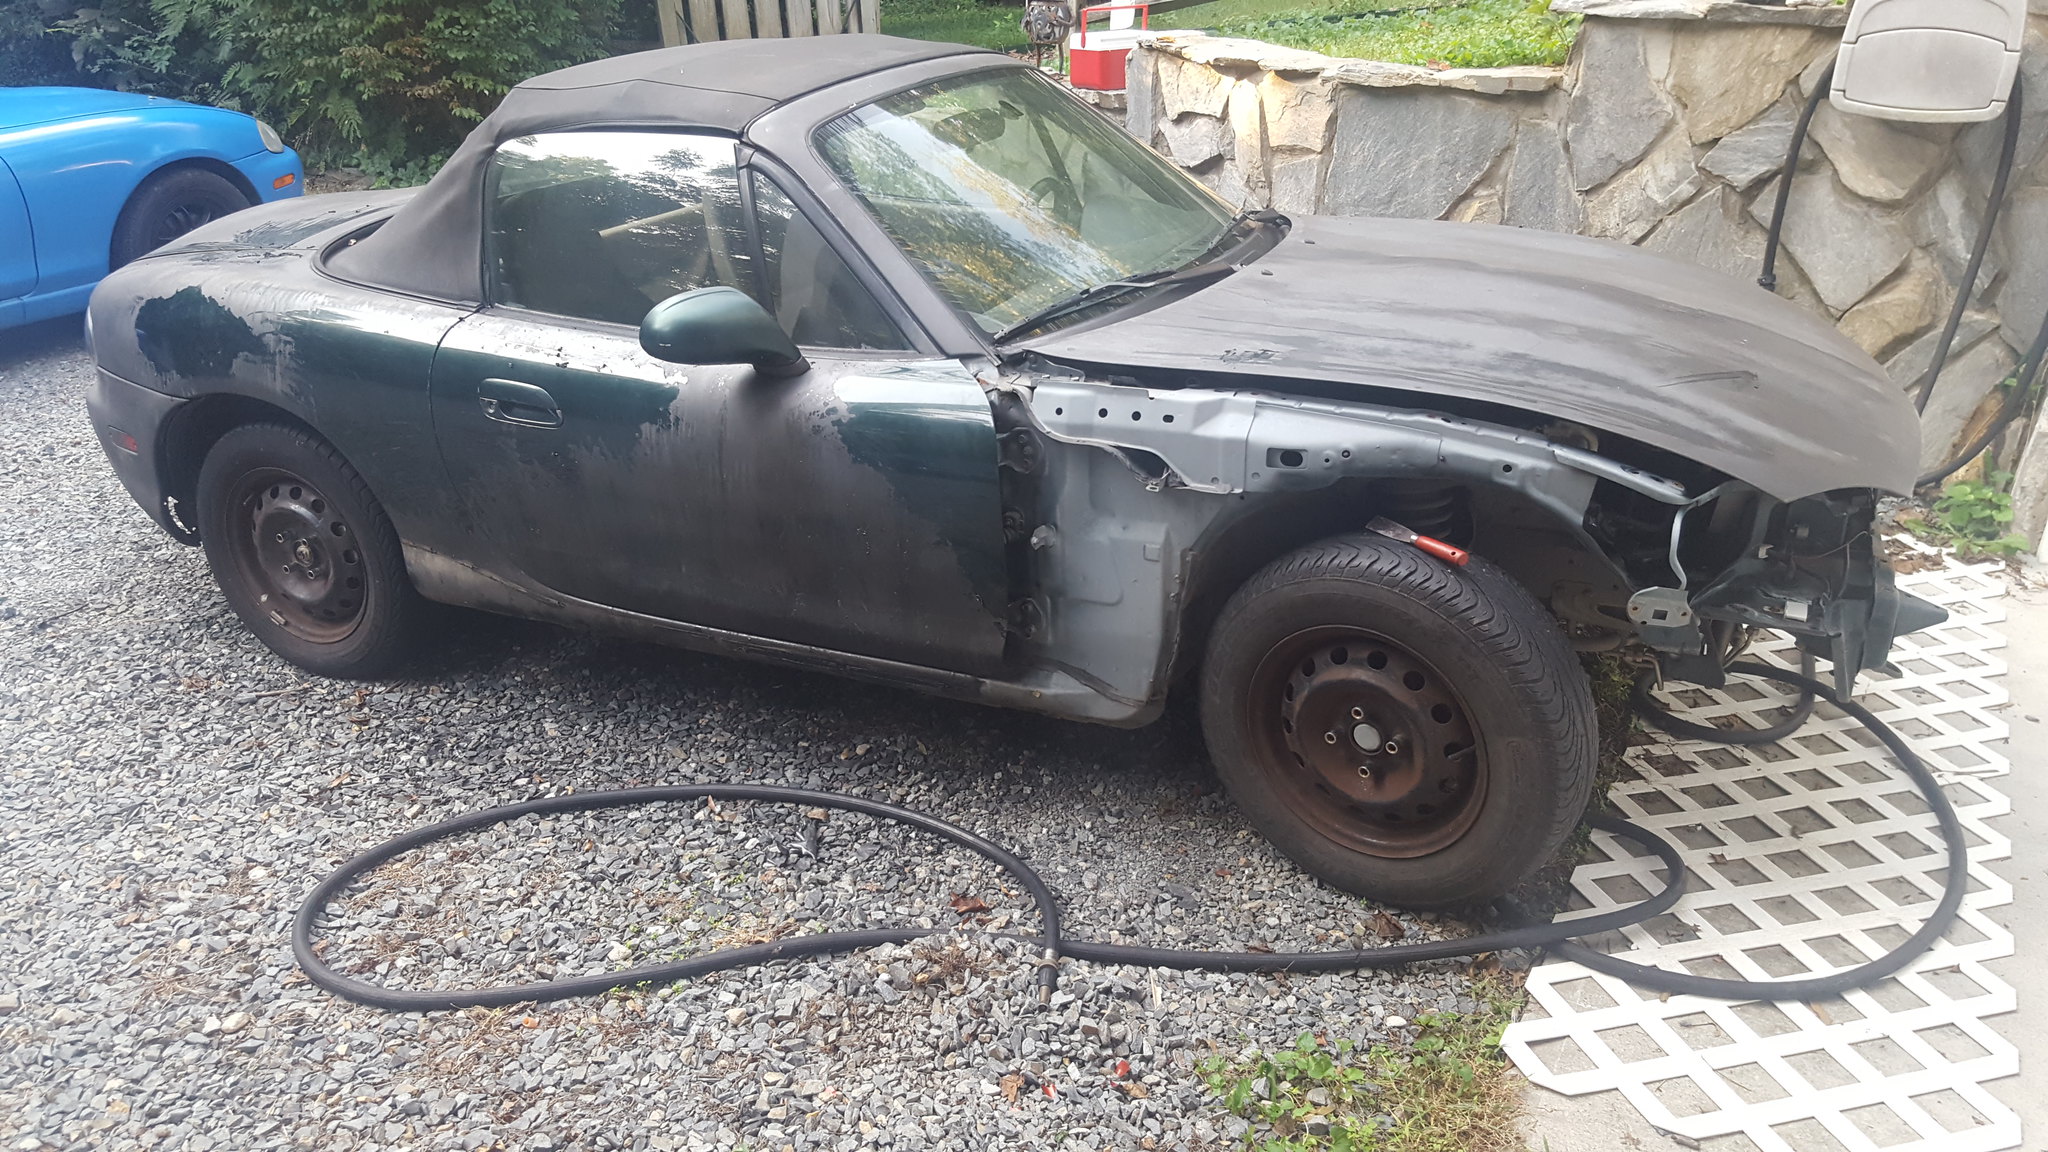
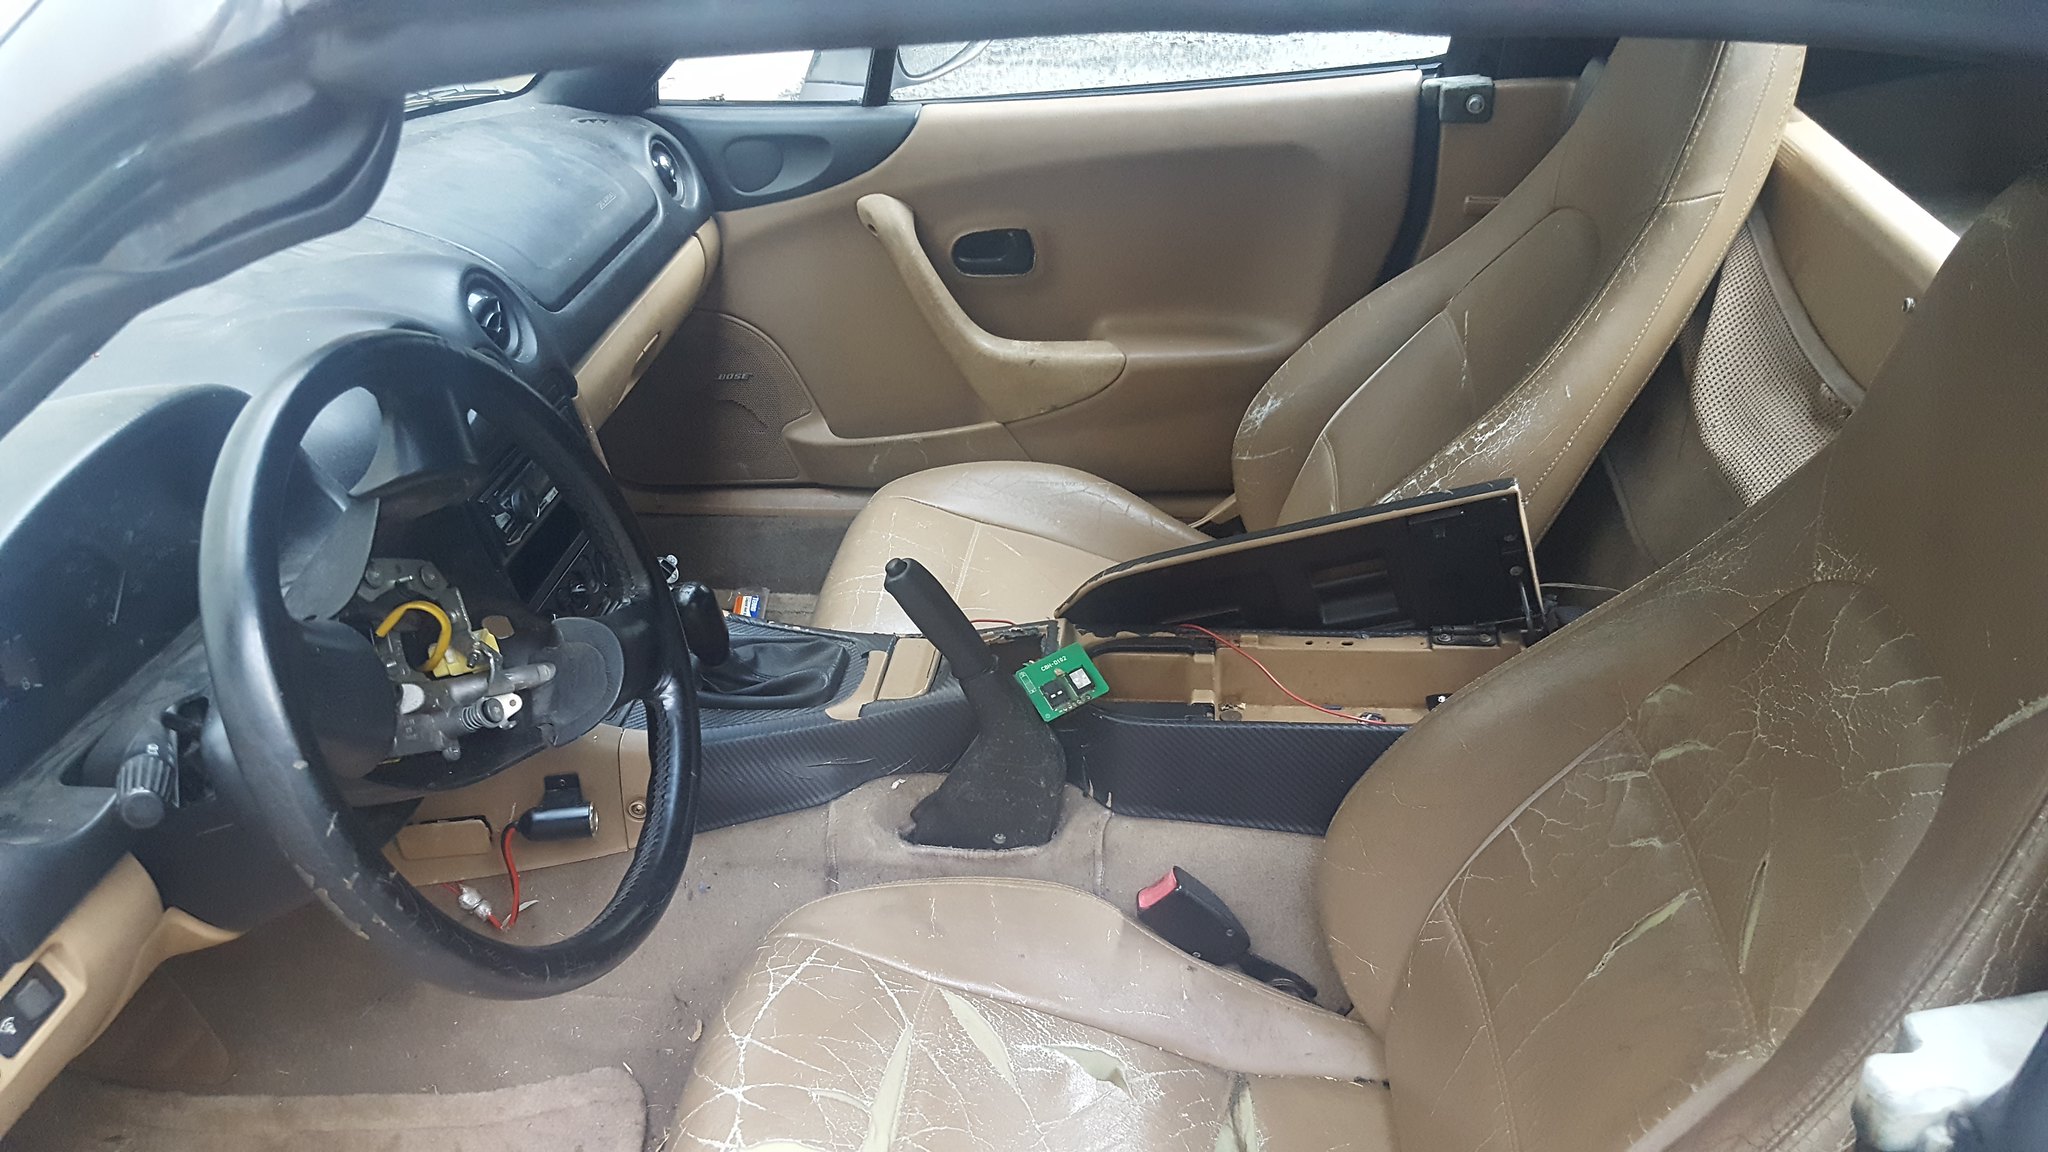
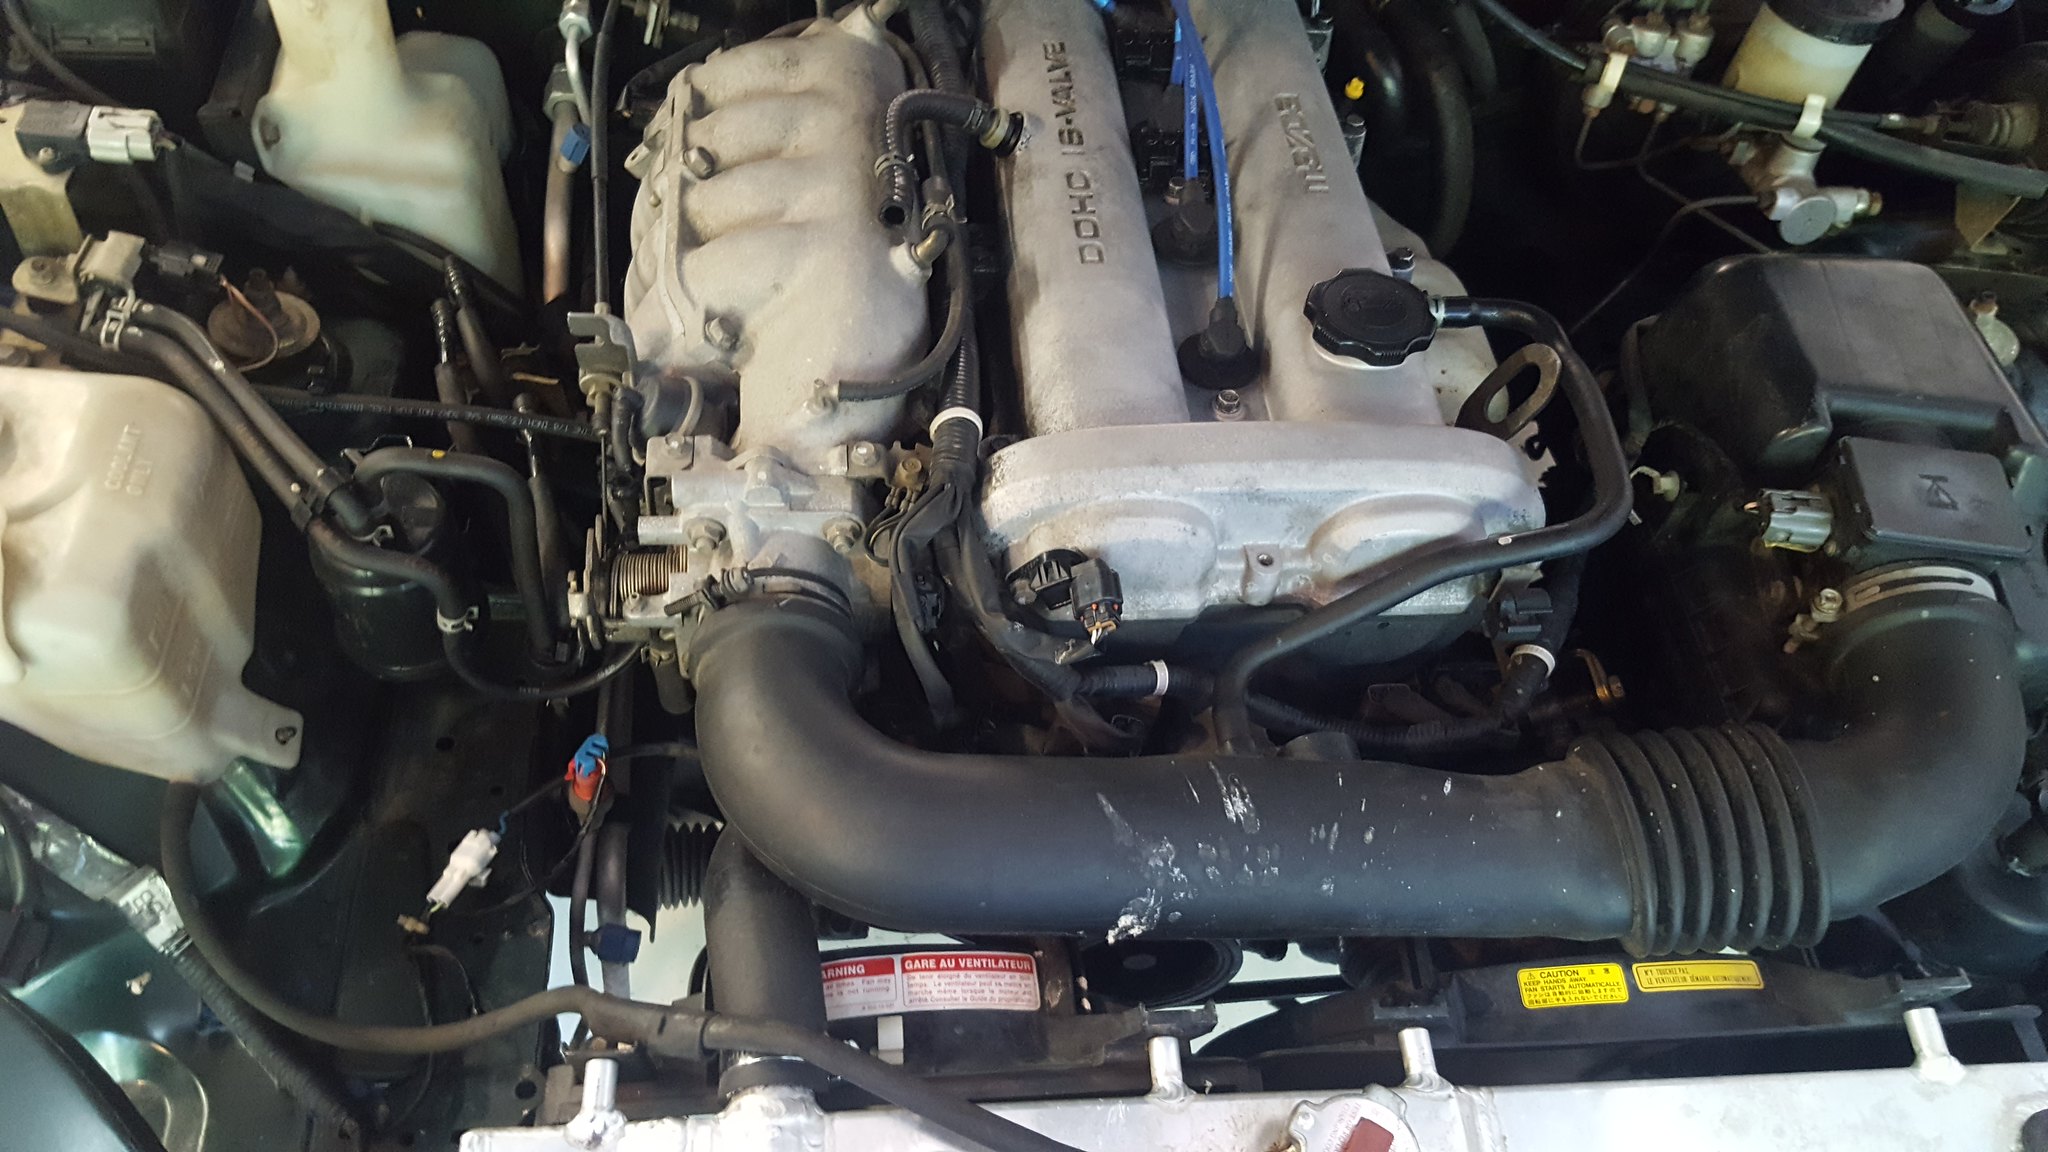
now that that is is out of the way, I guess I should get on with the story of the car.I bought this thing as a parts car. My DD 2000 got sideswiped by Mrs. Magoo, causing some nasty rear end noises. I also wasn't a fan of the peg leg. This car had a torsen, 3 core aluminum radiator, a 3 pack a day smoking habit, horrible plastidip, was half disassembled, and had a good top and supposedly rebuilt trans. So, for 800, I figured I couldn't loose.I swapped the torsen into my car, gave the stereo to my niece, and then sold the engine and top to a fellow GRM member in Texas via the $2017 challenge. Kept the 3 core radiator, stripped the interior, and prepared it to finish parting out. I had kicked the idea around of rebodying Pinata (my 2000 DD), but had decided to not do that, as it was too much like work. Then I had kicked around building the parts car as a challenge car, but decided that now was not the financial time in my life to build a sequel to the AMC. Then dad handed me money. so...well, what the hell. Why not?
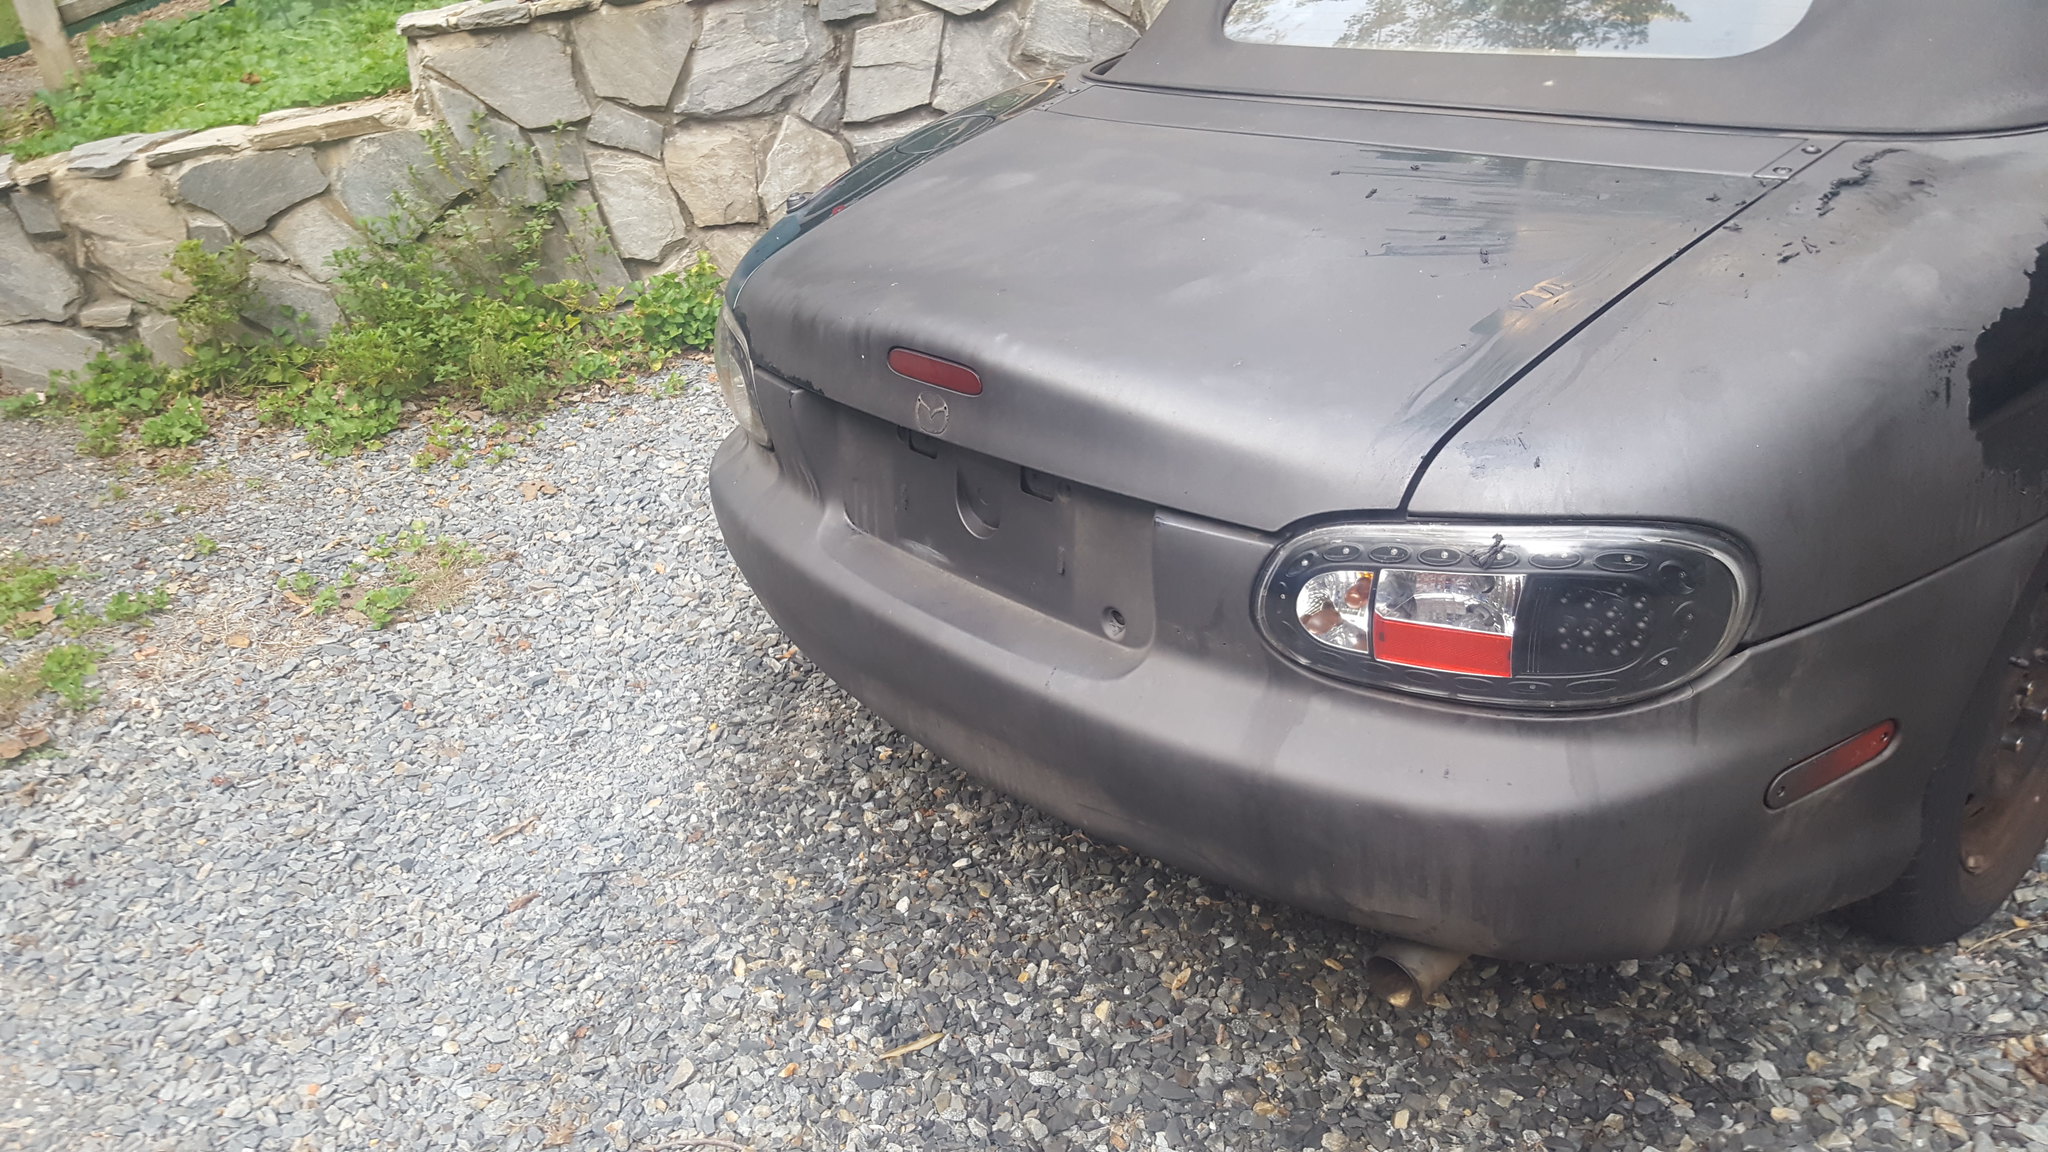
Here's some pictures of how I bought the car, but not shown are the small appearance package, broken headlights, mangled right front fender, or front bumper cover. I hadn't planned a challenge build at first, so initial documentation is pretty pathetic. 20170920_174446 by Michael Crawford, on Flickr
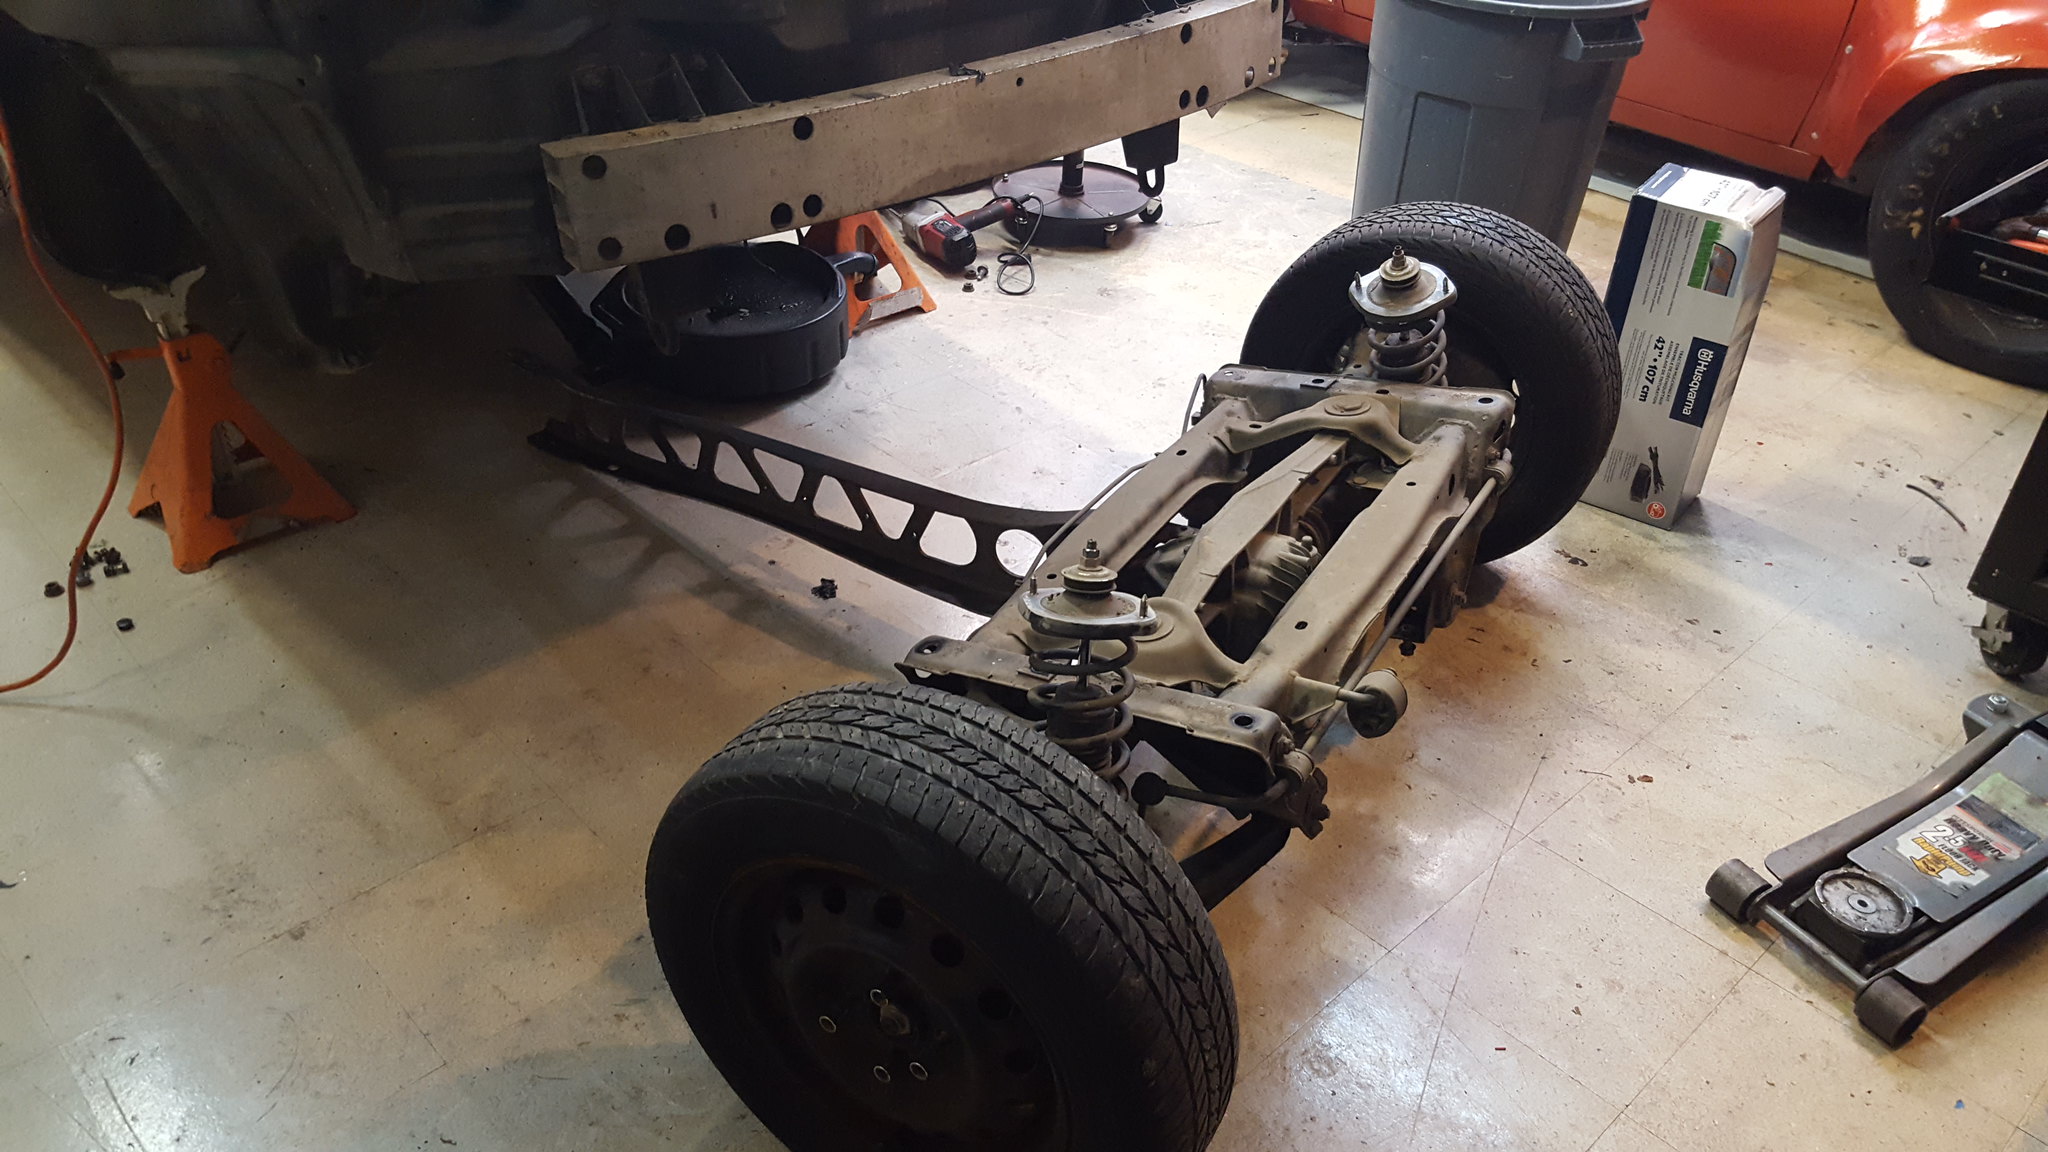
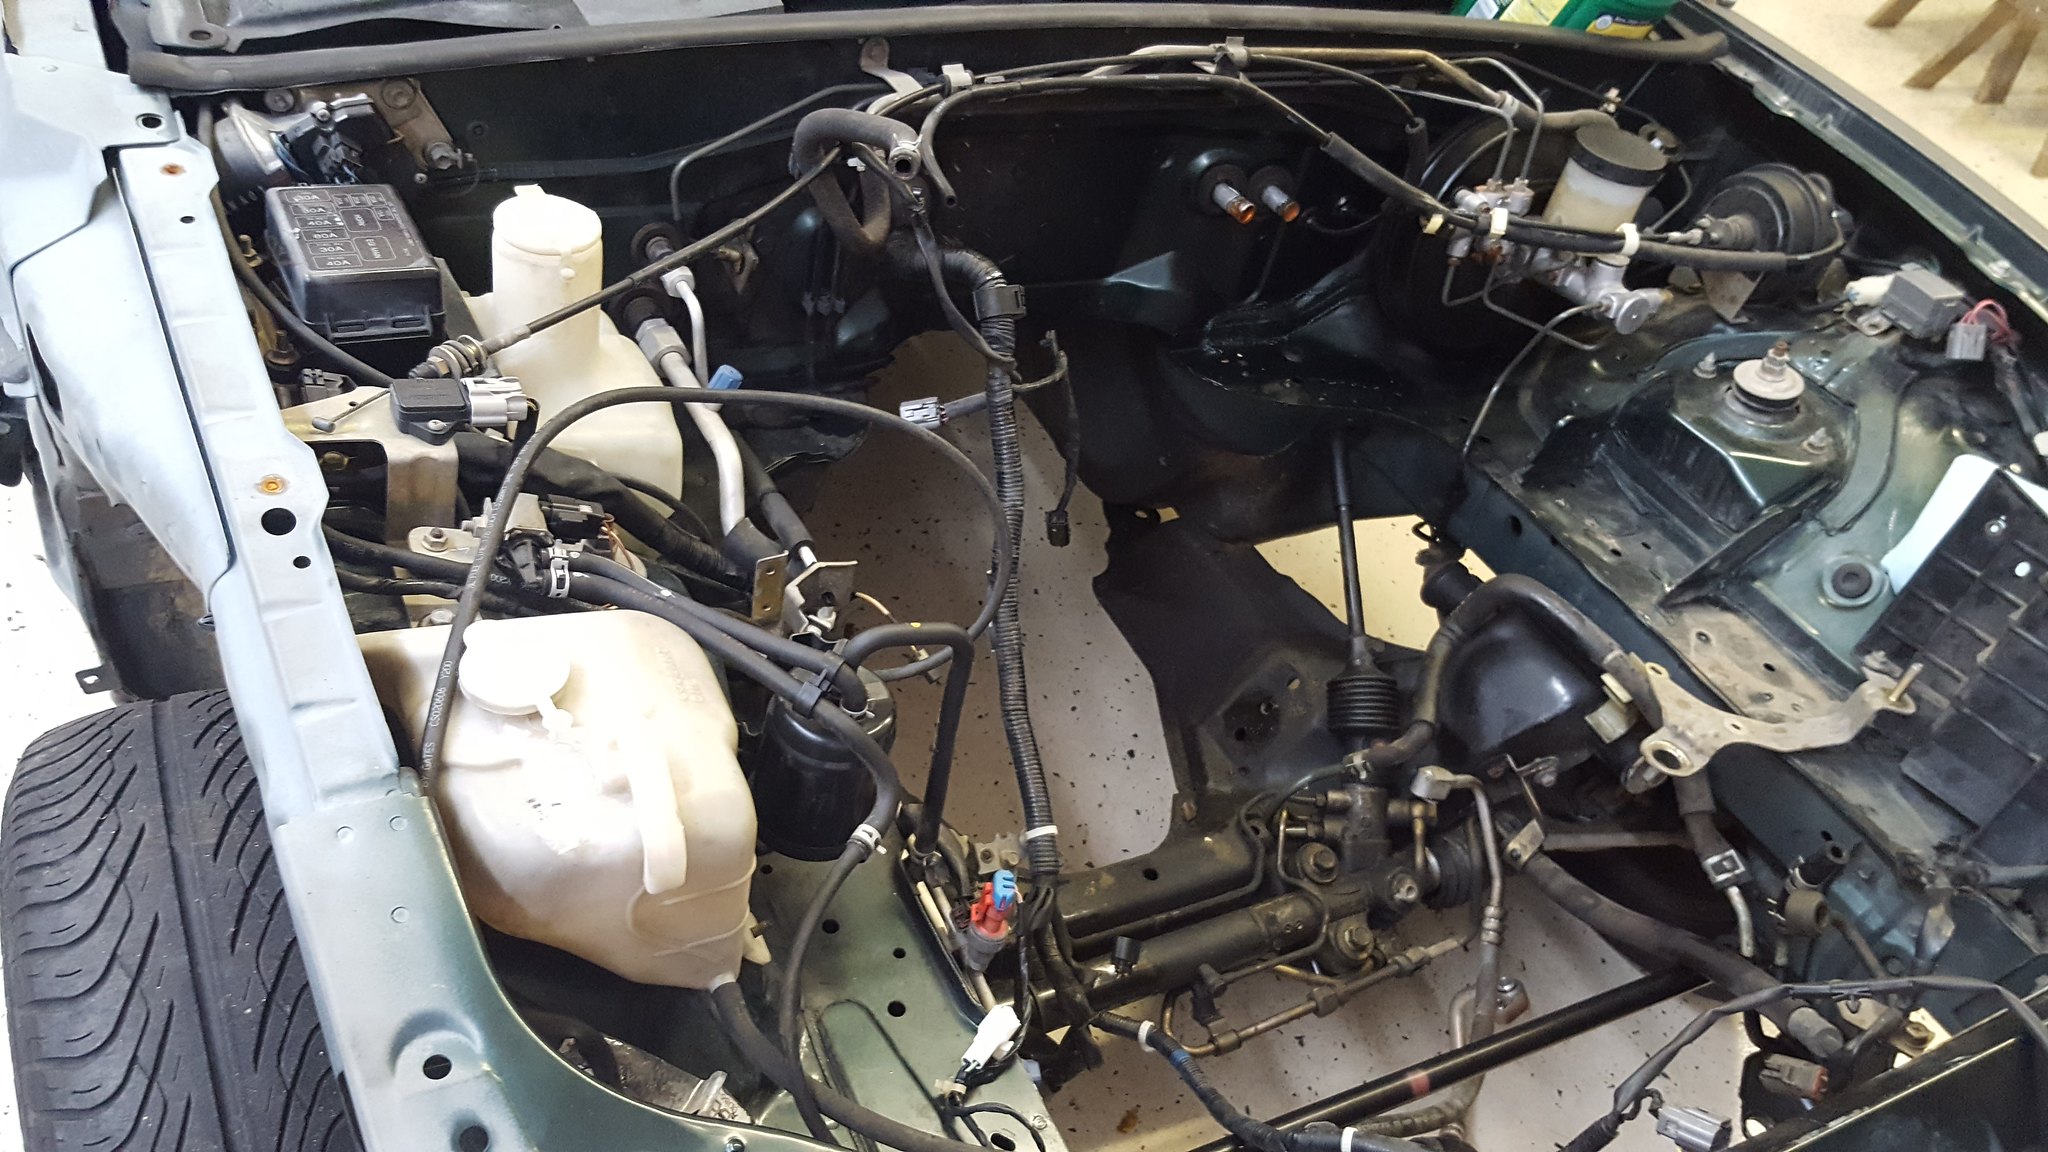
we moved it to dads place a few days ago. Much bigger shop, with a lift. And my dad. Him and I spent an hour today getting some more stripped out in preparation for depowering the rack and seam welding the chassis per flyin miatas recommendations on their page. 20171121_161932 by Michael Crawford, on Flickr
as far as i can find, theres only one guy that has put a 60 degree v6 in a miata. And his was a rwd 3.4 block in an na.
ive also found a guy that did this exact drivetrain in an rx7.
thats about it. If theres more out there, id love to find them. The mg forums have been the best areas for research thus far, as the 60 degree is a common mgb swap.
so, near as i can tell, im in uncharted waters.
question for you turbo guys: what size for this thing? I was thinking td04e or hx35, but thats purely based on cheap ebay turbo availability.
going to pick up a nozzle and pills for a 125 wet shot. Figure it'll hold together long enough for a run to glory. Challenge is autocross, drag strip, and show and shine. All with the same car, back to back, all in at 2018 with an available recoup of 1008.
i have googled my butt off for the last week, and am finally starting to get some good grips on the fabrication and execution of this. as well as the late 660 engines. turns out that the 3500 parts i picked up are from the first of the VVT engines, and therefore not able to be used. so ill need to return them for store credit when i get back into town. additionally, this will not be anywhere near as simple as i initially thought. theres going to be major crossmember surgery due to the oil pan being integral on the 3400 and having crossbolted mains. to properly swap the intake 180 degrees, all the rwd accessories need to be swapped in for the fwd stuff. however, ive found references that just the upper intake can be flipped and prevent half the issues, but no actual pictures or how tos. so no guarantee that its actually possible. there will need to be some flanges and wings and protrusions cut out in the engine bay for clearance. PPF will need dealt with due to the camaro trans not actually using the torque arm in the same manner, and concerns about stress on the t5 in that manner. cooling may be troublesome as well, though i found an LFX swap thread where they angled the radiator, stuffed a bigger radiator in, and vented the hood.
so, areas of research that need to continue at this time (y'all are welcome to play along at home and post links to informative stuff, or personal experience)
1. additional chassis bracing and rigidity mods on challenge budget
2. cooling upgrades, preferably bigger radiators and mounted in was to provide more space for intercooler and turbo
3. PPF/rear end shennannigans
4. crossmember mods for clearance and strength.
as a side note, this build thread is in real time. just like all the others ive done. (well, close to real time. usually a few days lag time between work/purchase and post, just due to life on lifes terms. )
Pat's crossmember/ trans mount is pretty good. Simple to fab too.
I drew up a plan for a simple ppf delete, but I can't find them at the moment.
Similar to this, but with a steel sleeve that goes around three sides of the ppf stub.
The heim joint would get welded to the top of the sleeve and a spare ppf bolt would secure the sleeve to the ppf stub.
I initially thought this too, we can again look at Pat as an example.
He has tons more power than you will be reaching, and he drag races heavily without a ppf. Same for ls swap guys.
Frame rails, a roll bar, and strategic bracing will help rigidity immensely.
Challenge budget so farrevious total: 384.25
recoup total: 800
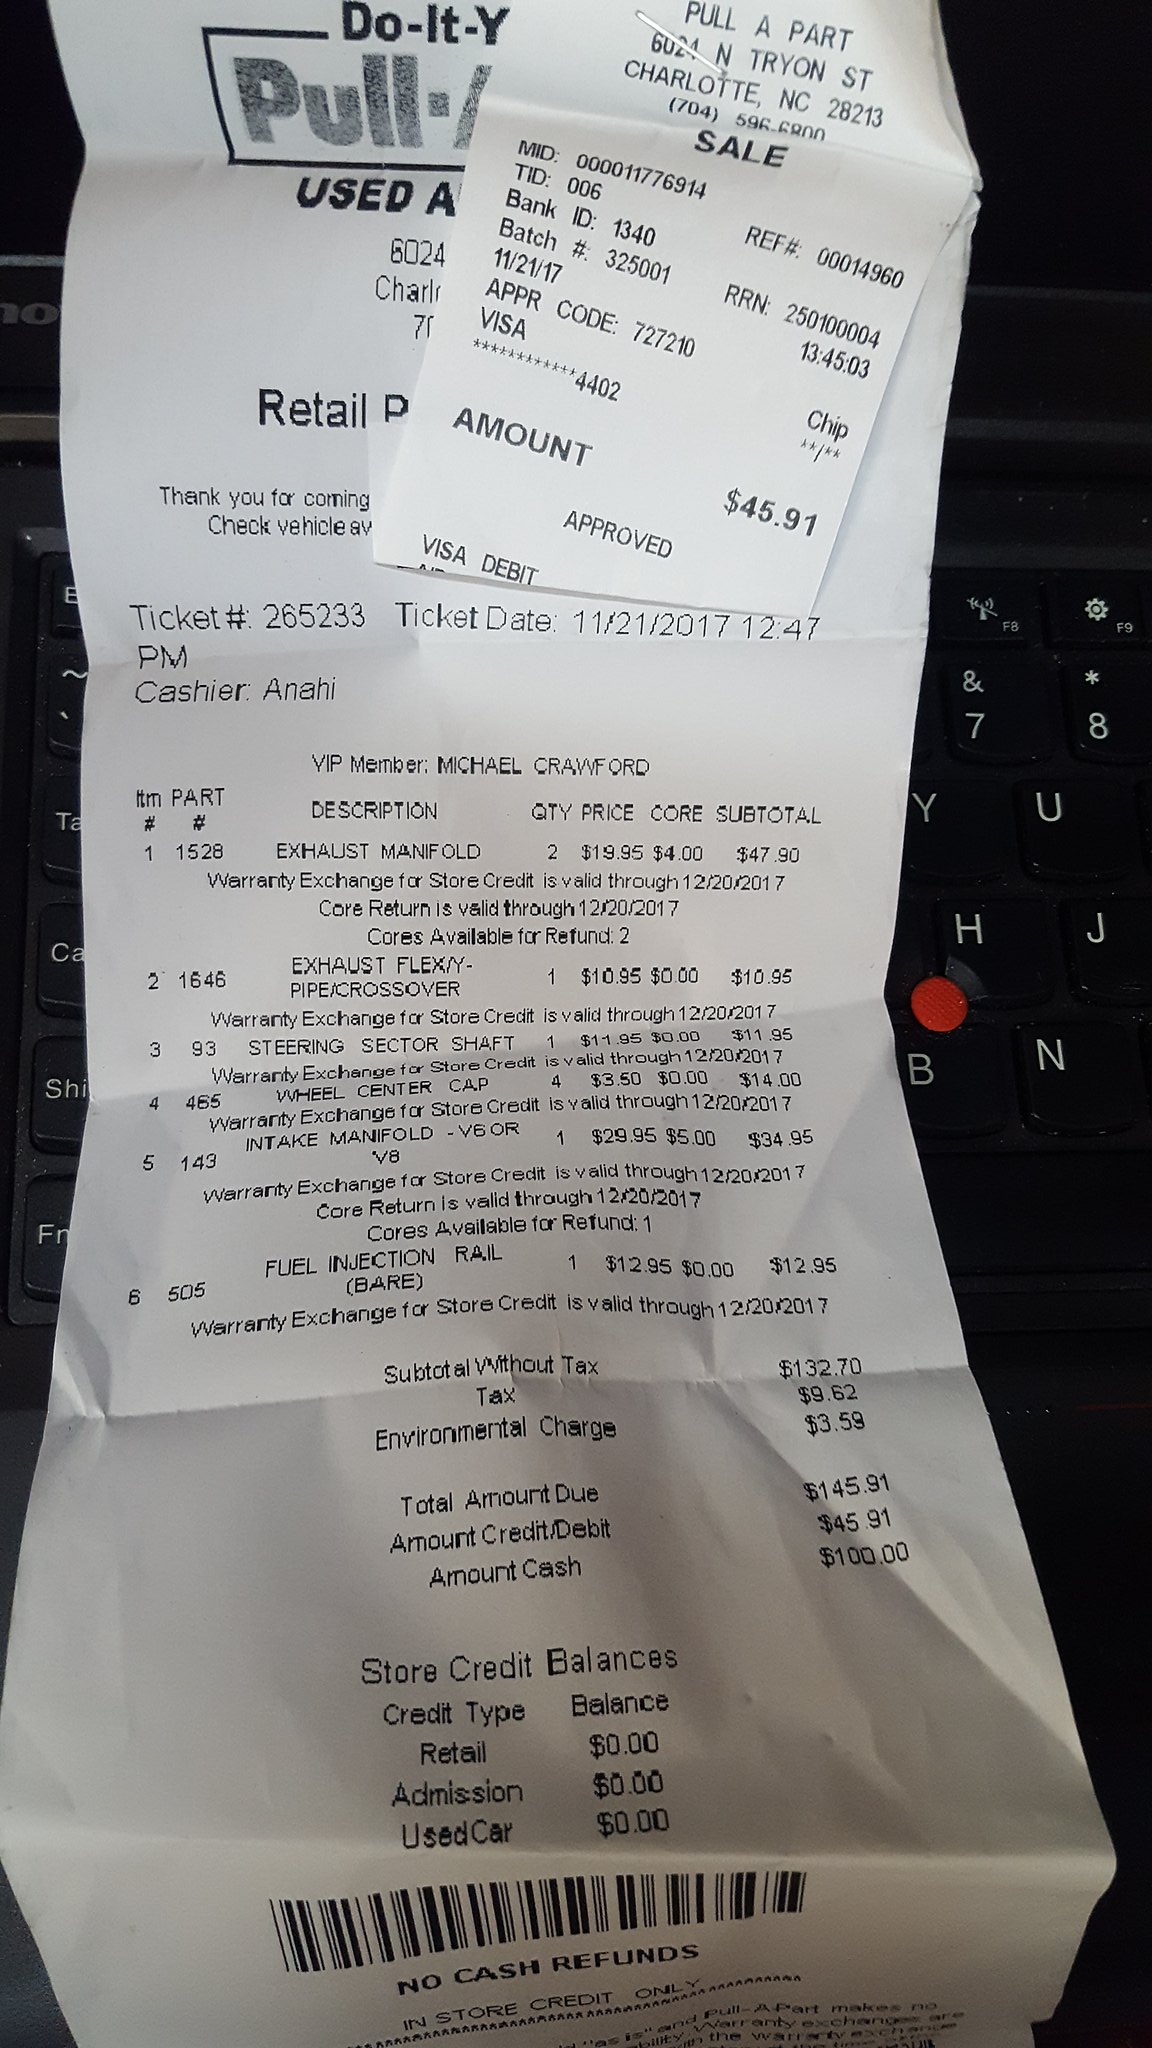
this update:returned the 3500 intake and exhaust manifolds to pull-a-part: -106.75
bought correct intake manifold from non VVT 3500: 34.95
bought 3500 fuel rail and feed line: 12.95
bought big throttle body from an alero: 40.59
current challenge budget: 365.99
recoup total: 800
ok, so thanksgiving has came and went. With it was a LOT of research. See, research for me tends to be relaxing and enjoyable. I like burying myself down deep and incomprehensible rabbit holes to see where they lead.One of these holes was about the 3500 top swap. Turns out that there are 2 (at least) different versions of the 3500: VVT and non-VVT. The parts I had picked up were of the VVT variety, which will not work with the 3400 were using. So, I returned them and got the correct version.
While there, I started looking at throttle bodies. The 3500 was drive by wire in all versions. The 3400 never was. So, needed to come up with a cable driven throttle body. Also, the 3500 intake allows for a much bigger throttle body, which will probably be beneficial in this application. So, while wandering the rows looking for an 04-05 3500 Malibu, I started nabbing throttle bodies that were cable driven and used a visually identical IAC and TPS. I grabbed one from a 6.0 ls, and one that was in an Oldsmobile alero with a twin cam v style engine. Dunno what size....
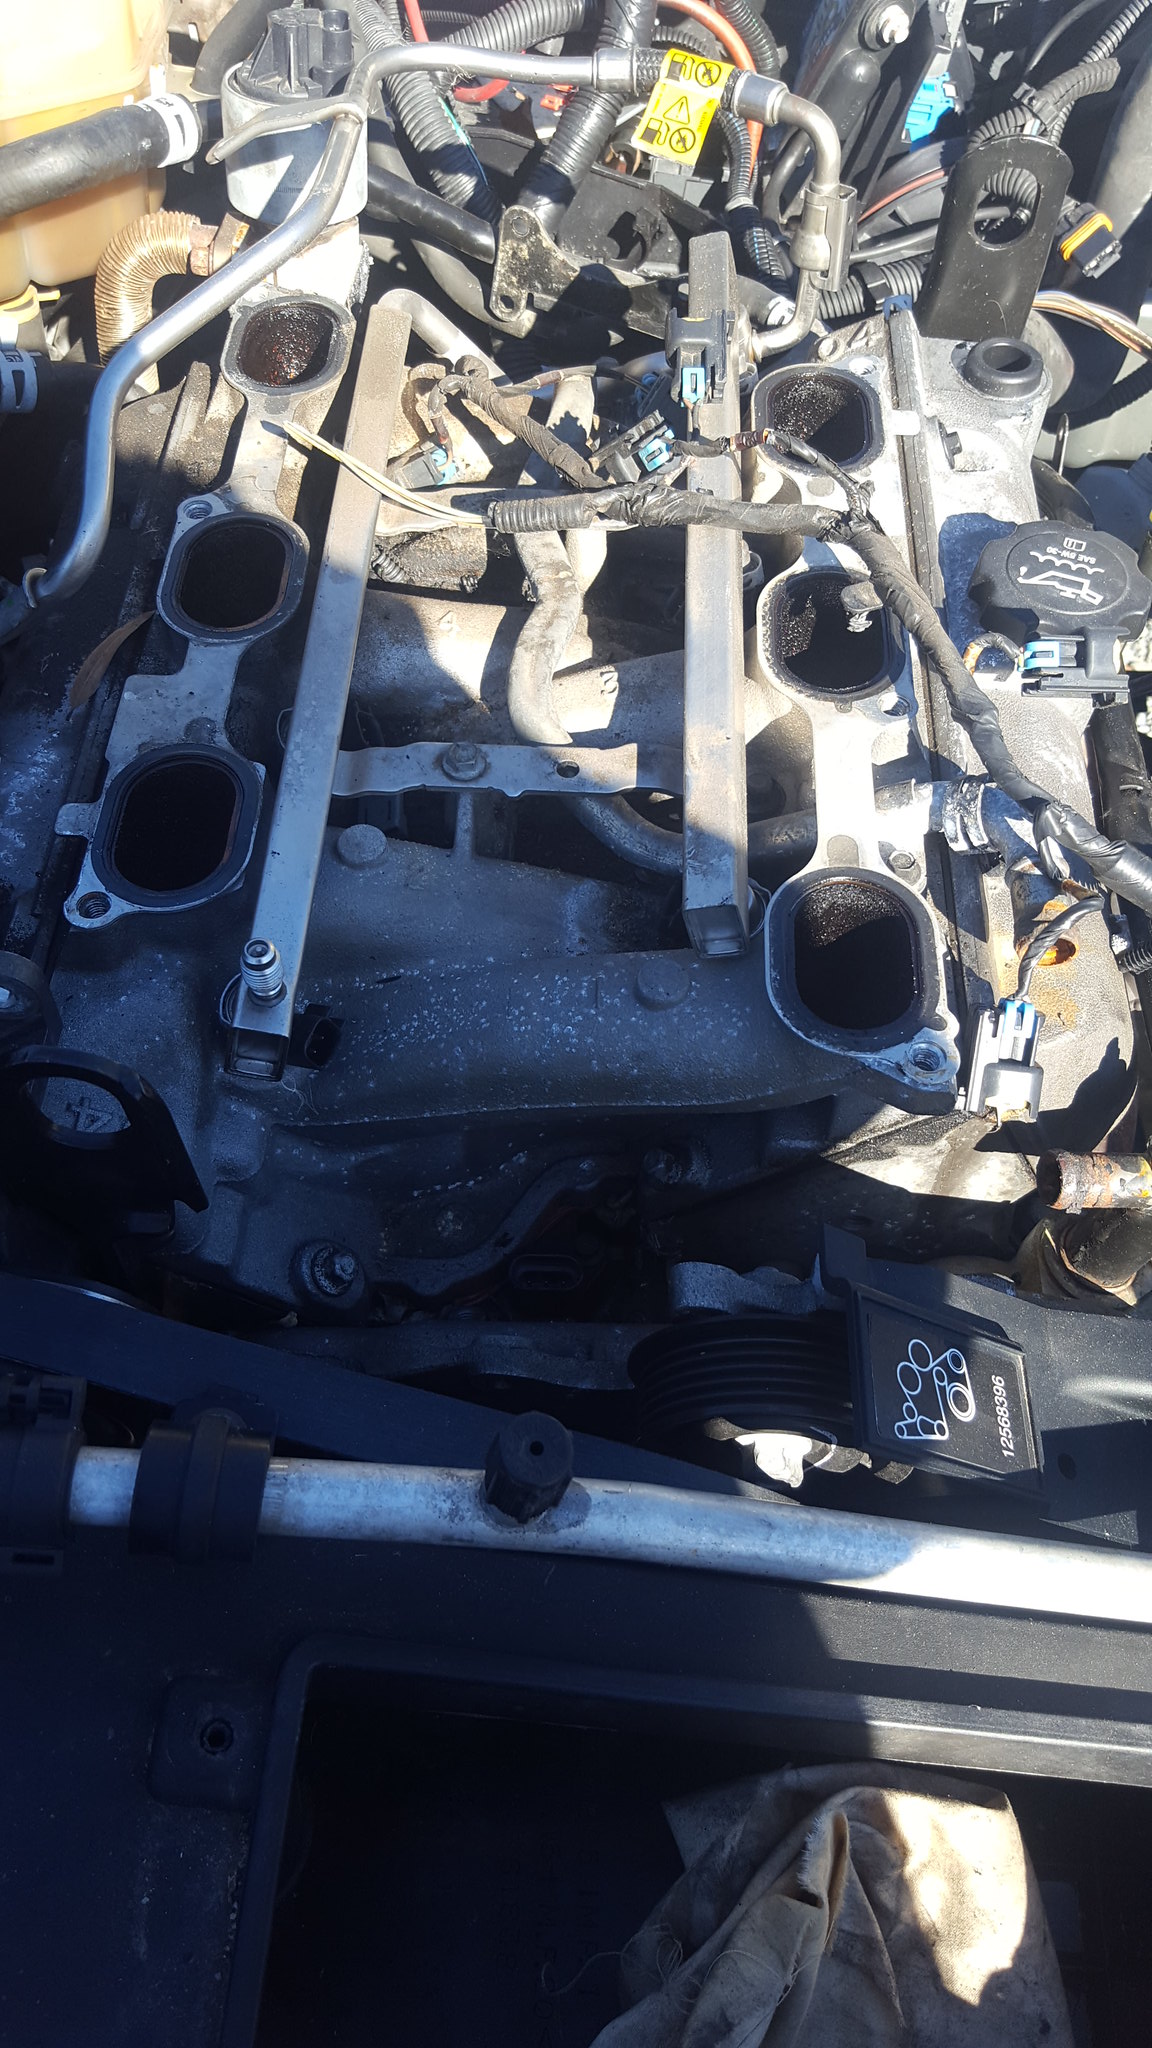
alero throttle body was within 1/16 of the 3500 according to a tape measure, so I went with it. Its 1/16 bigger. Different mounting pattern, but nothing too bad to work with. Proof of intake pulling: 20171126_111444 by https://www.flickr.com/photos/150940429@N02/, on Flickrhttps://flic.kr/p/H1scdk20171126_111450 by https://www.flickr.com/photos/150940429@N02/, on Flickrhttps://flic.kr/p/21UeBy520171127_164002 by https://www.flickr.com/photos/150940429@N02/, on Flickrhttps://flic.kr/p/DPe25u20171127_215620 by https://www.flickr.com/photos/150940429@N02/, on Flickrhttps://flic.kr/p/21S9dW720171127_215605 by Michael Crawford, on Flickr
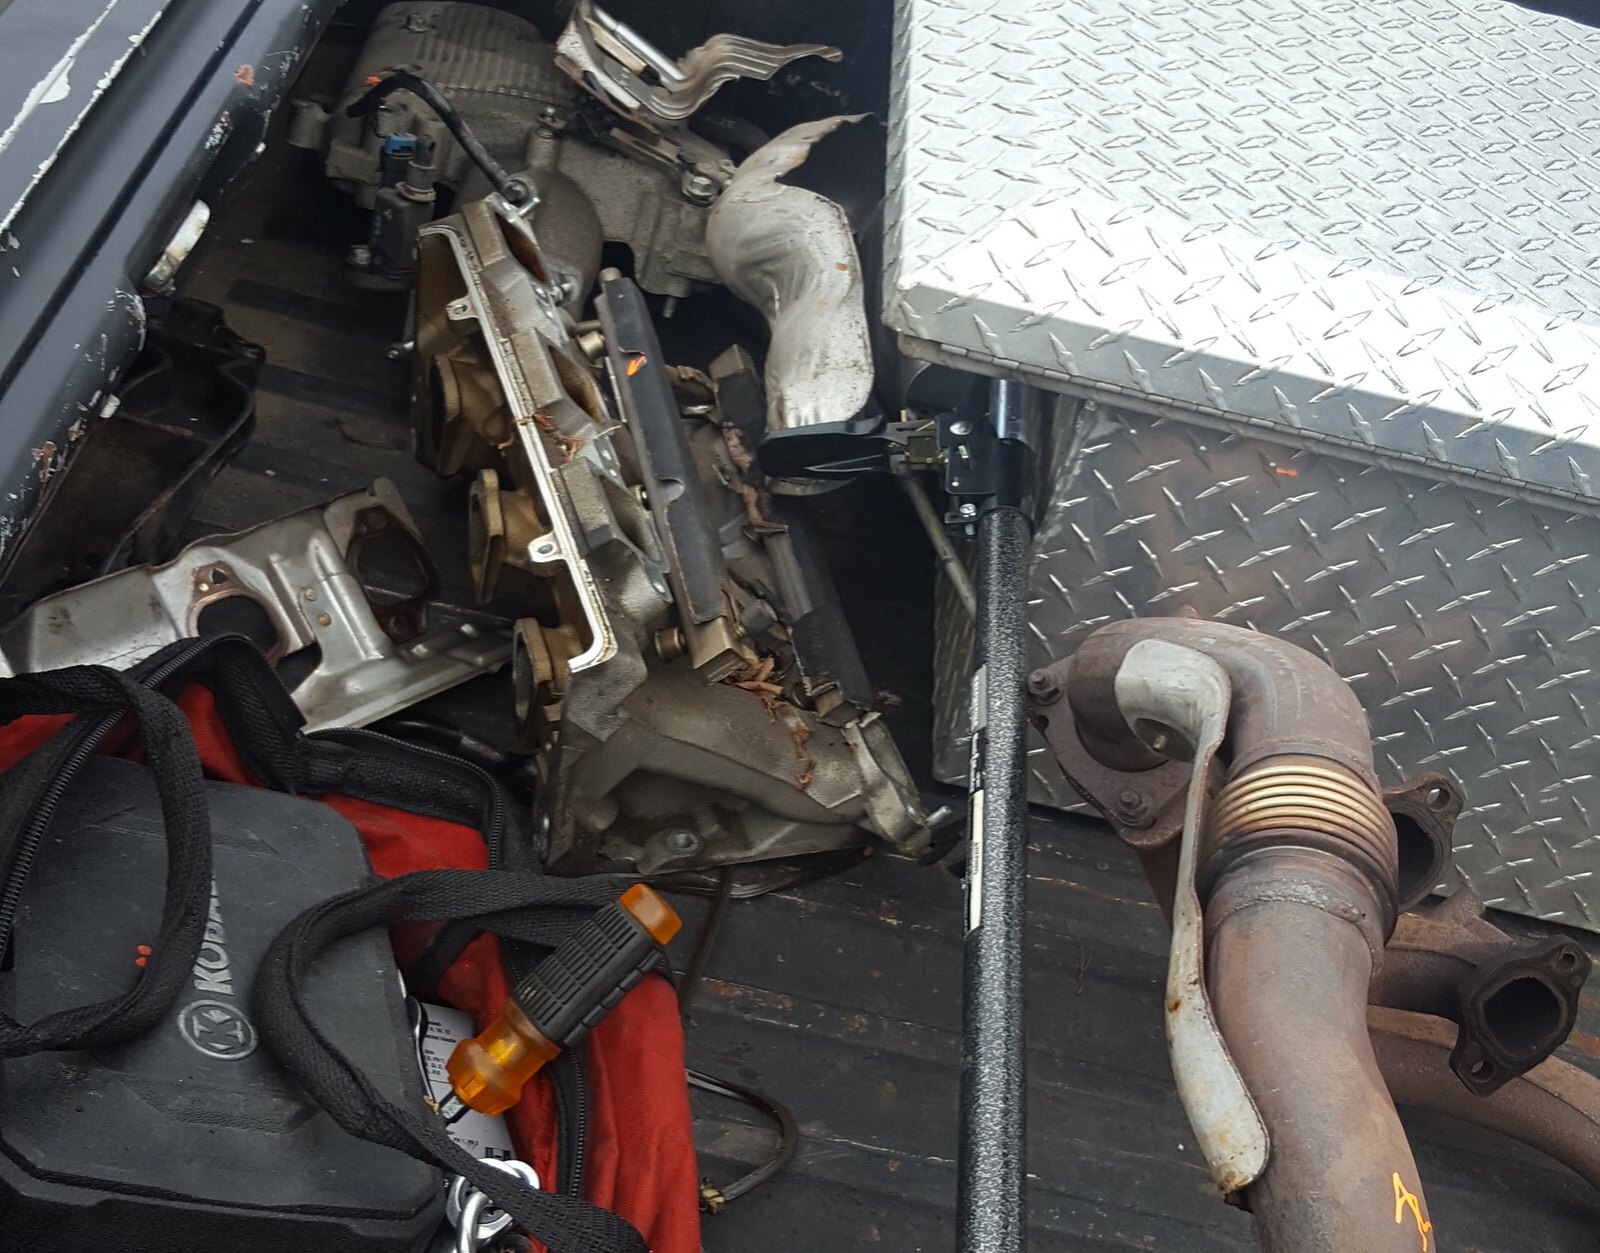
I didn't get the exhaust manifolds, as im fairly certain im making my own log manifolds from junk long-tube SBC headers and scrap 3/8 plate. Im also fairly certain that the fwd manifolds wouldn't come remotely close to fitting.
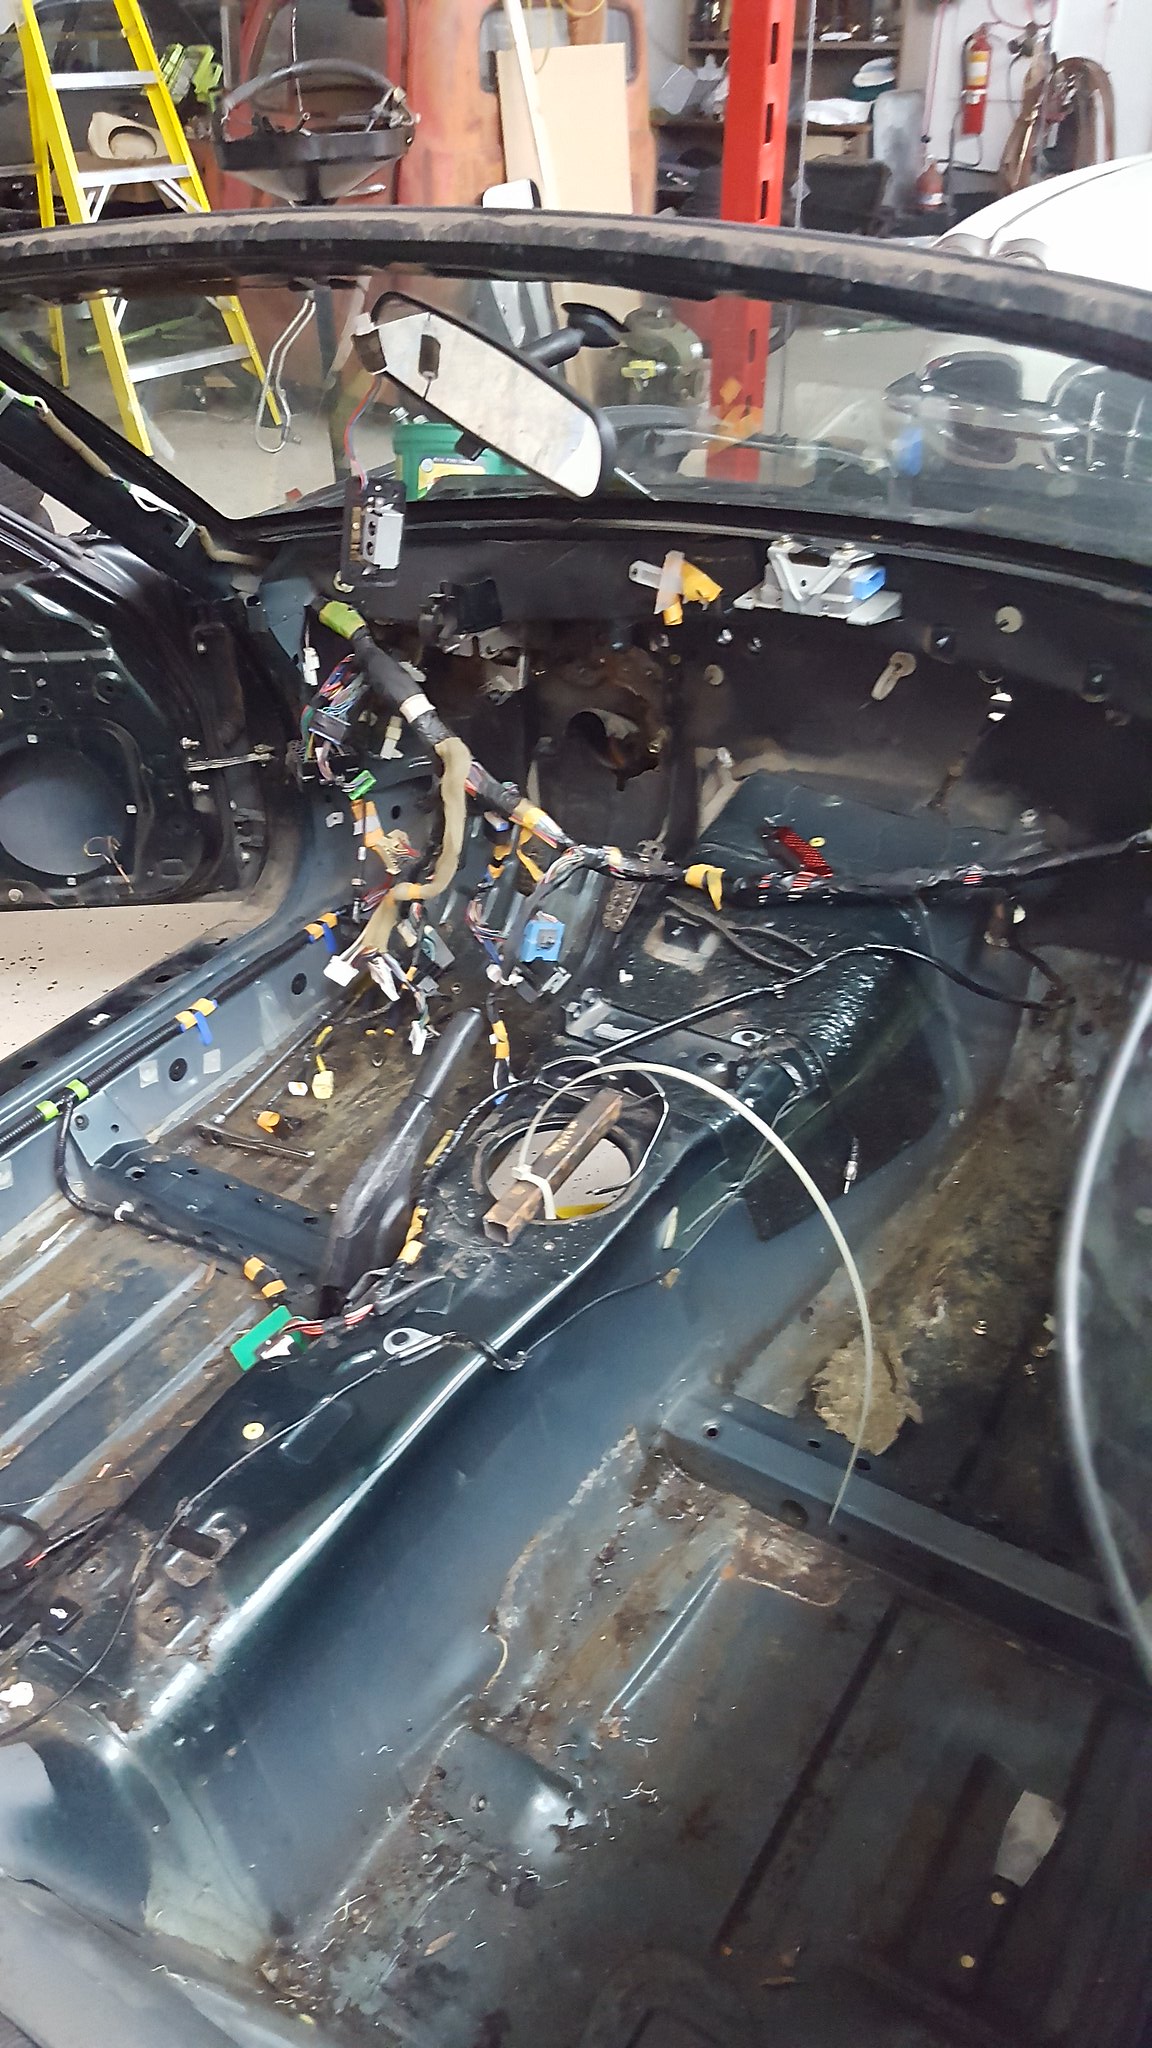
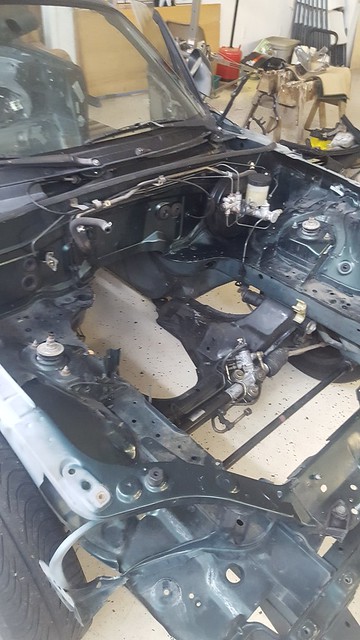
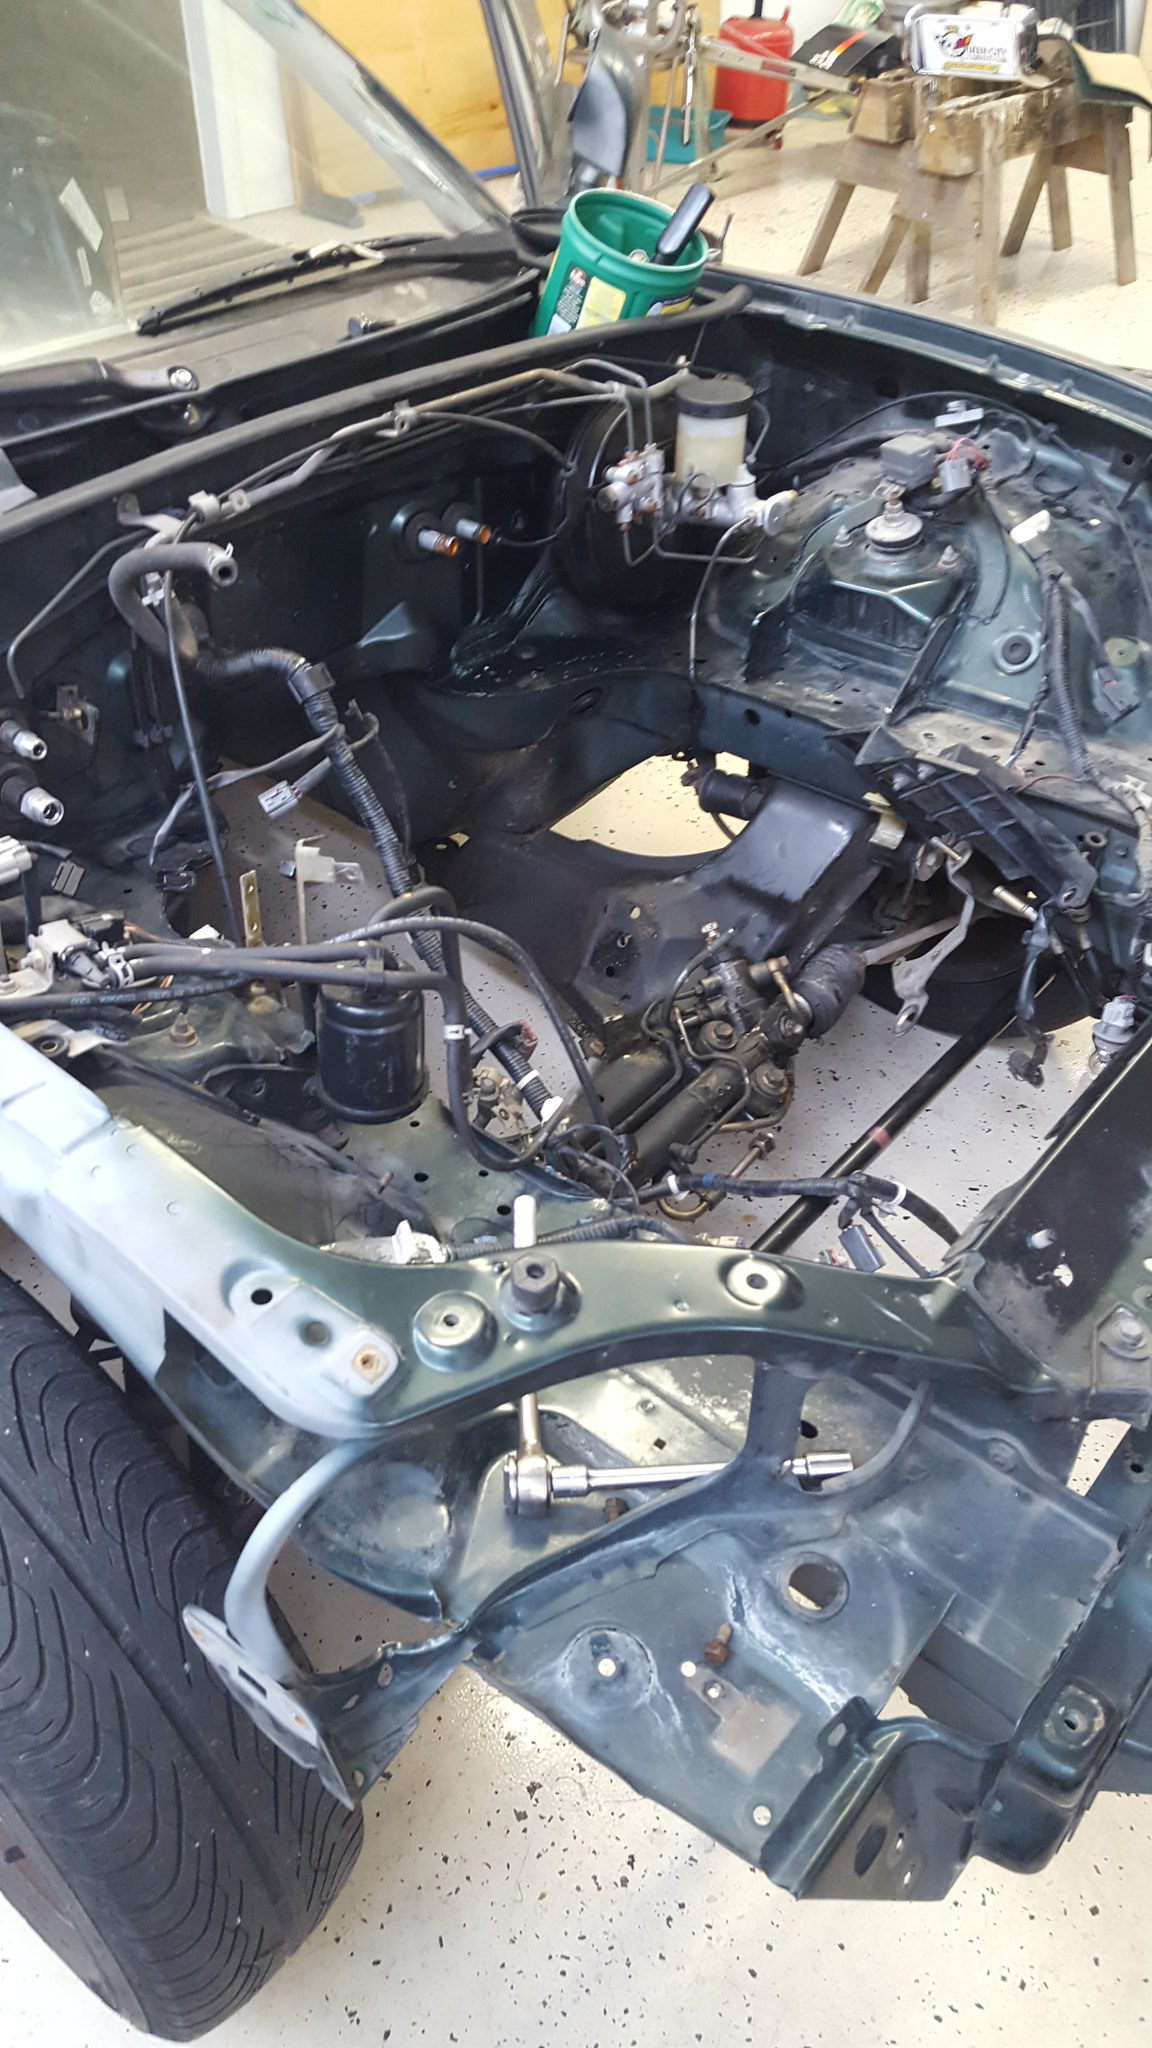
So, Monday while my wife and daughter were doing girl scout stuff, dad and I finished stripping the challenge car to a pretty bare tub. We pulled everything that didn't make it roll, steer, or stop. 20171127_184109 by https://www.flickr.com/photos/150940429@N02/, on Flickrhttps://flic.kr/p/H1tBue20171127_200405 by https://www.flickr.com/photos/150940429@N02/, on Flickrhttps://flic.kr/p/21X7Utc20171127_204603 by https://www.flickr.com/photos/150940429@N02/, on Flickrhttps://flic.kr/p/ZAD9ur20171127_204535 by https://www.flickr.com/photos/150940429@N02/, on Flickrhttps://flic.kr/p/221EiCP20171128_195813 by https://www.flickr.com/photos/150940429@N02/, on Flickrhttps://flic.kr/p/H1uTDB20171127_205456 by Michael Crawford, on Flickr
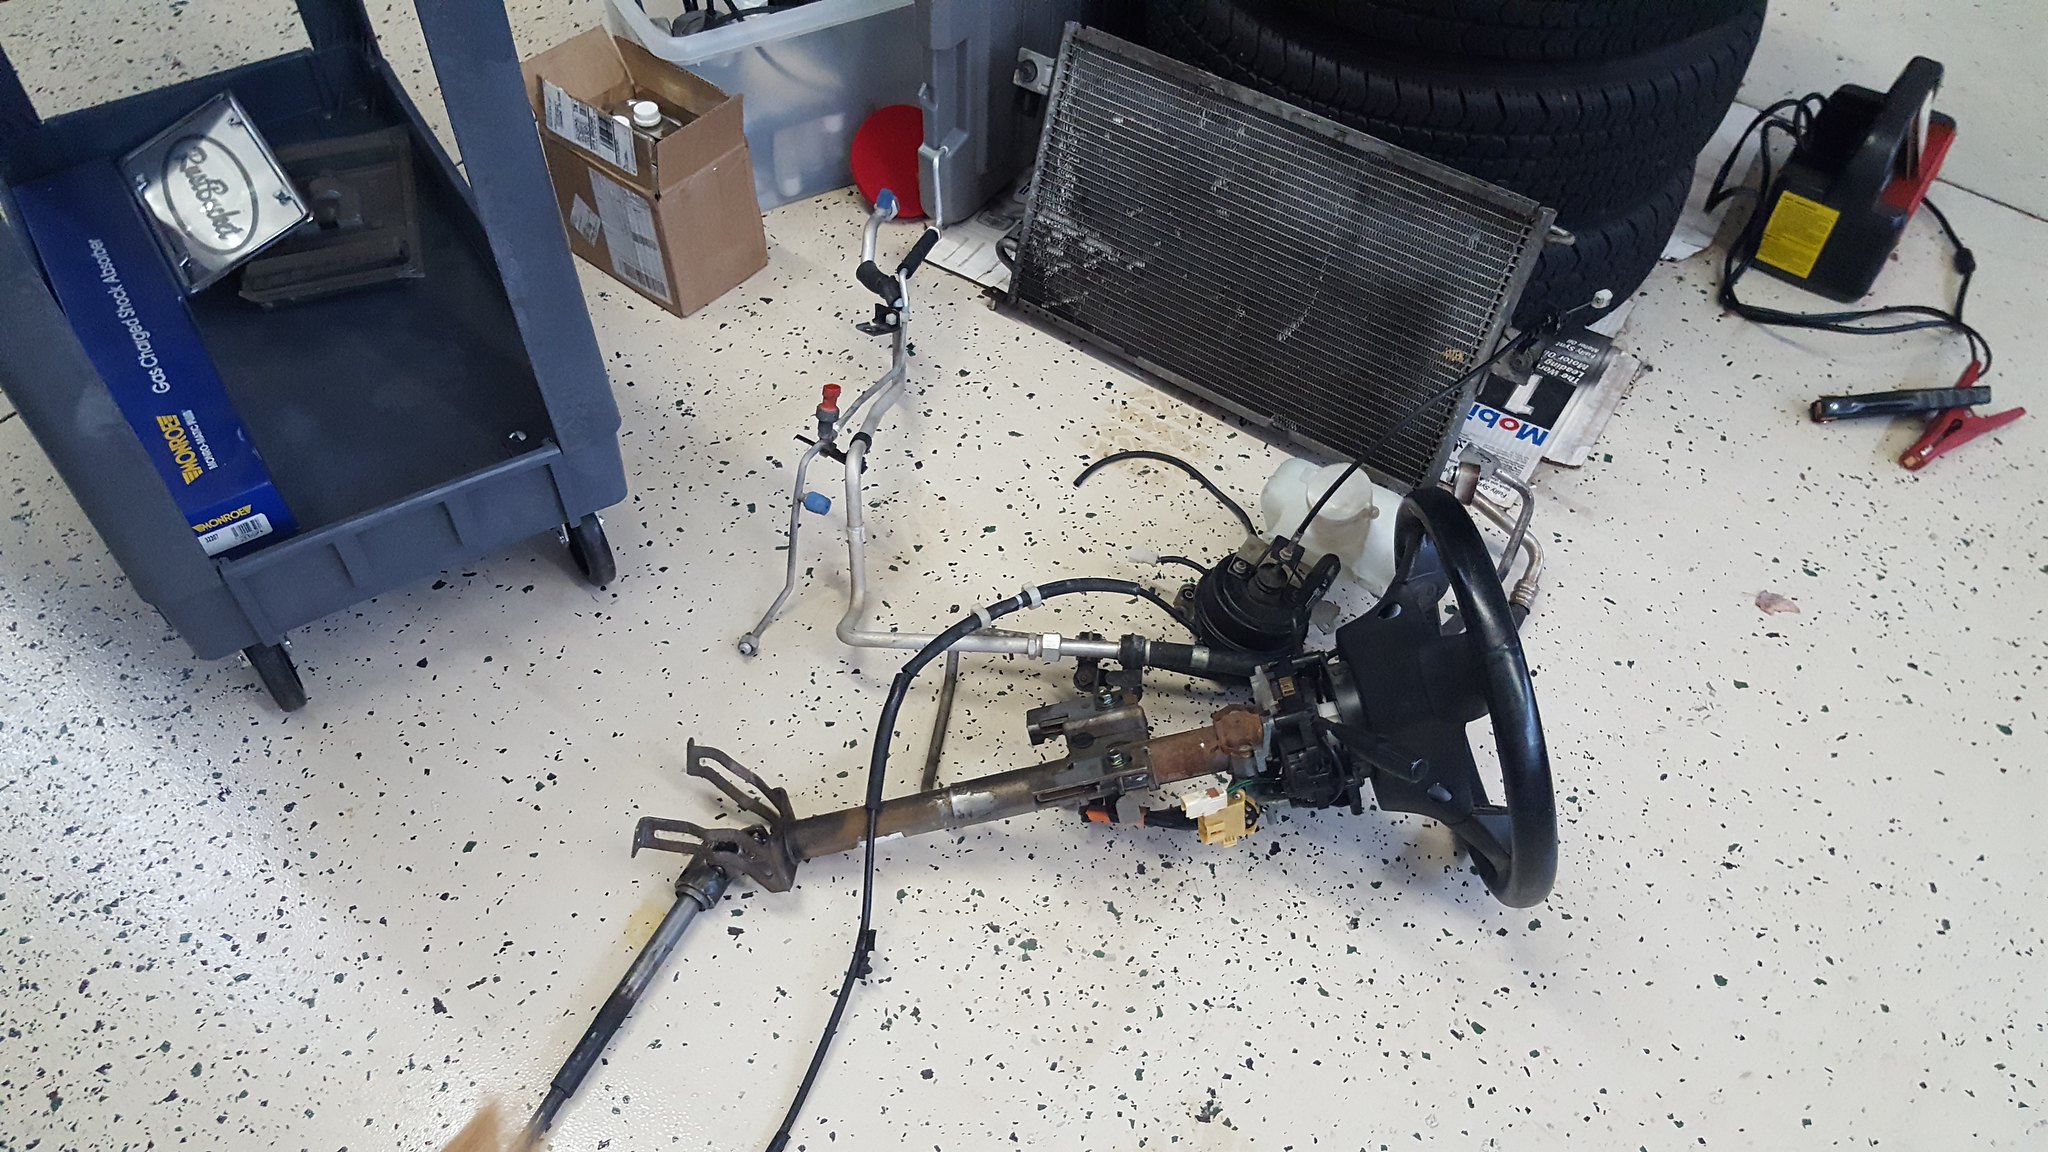
yesterday, dad did a bit of pressure washing. Pictures it doesn't really look much different, and it didn't touch that freaking plastidip nightmare, but its altogether a much nicer thing to work on now.We also found some “minor” damage: steering rack broken, frame rail and floor pan damage... 20171128_195746 by https://www.flickr.com/photos/150940429@N02/, on Flickrhttps://flic.kr/p/21XPmcC20171128_194719 by https://www.flickr.com/photos/150940429@N02/, on Flickrhttps://flic.kr/p/21S7TY920171127_204541 by https://www.flickr.com/photos/150940429@N02/, on Flickrhttps://flic.kr/p/H1ubmX20171127_204548 by Michael Crawford, on Flickr
Challenge budget so far:
previous total: 365.99
recoup total: 800
this update:
deleted tax, environmental charges, and core charges, as those don't go in the budget
returned 3500 fuel rail, wont work
bought 2 inch intercooler piping kit, new in box: 60
bought 15 feet 3 inch exhaust, glasspack, boost gauge: 10
used headers of possibly Chevy descent: 10
x4 3 bolt 2.5 inch flanges for exhaust: 9
traded $25 boom tubes from last years car for FMIC, T04e eBay turbo, and blow off valve
current challenge budget: 445.90
recoup total: 800
so dad and I wanted to get to Ohio to pick up our engine from Patrick before it snowed. Friday morning, 5 am, we left his place pointed north. We had worked out a deal to pull a 454 and trans from a REALLY rusty Chevy 4500, load it up, and deliver it to another forum member in exchange for our gas. So we loaded up some tools (not enough), some thermal gear (also not enough), some grubby clothes, and hit the road. Smooth sailing to Ohio, and a WONDERFUL time with dad. Didn't take many pictures of the drive, but a nice time of year to do this.https://flic.kr/p/E18VD3https://flic.kr/p/E18VD3 by https://www.flickr.com/photos/150940429@N02/, on Flickr
we got to Patrick's about 3:45 or so, just as he had finished DRIVING the 454 truck onto the concrete. The three of us hit it hard, and we had the engine on the ground and the truck ready for the scrap run by 7:00 pm. Hell of a lot of fun, but after the sun went down it got cold in a hell of a hurry. Dad and I aren't used to that anymore, as we've been south of the mason dixon for 20 years. I was also reminded by how blessed we are as far as rust is concerned. I negotiated some El Camino parts, as well as the 3 inch exhaust from the 454 truck for the challenge car.
Saturday morning, dad and I followed Patrick over to his dads place where his dad had already gotten the 3500 hung on the bucket of his tractor with a rope and ready to load. His Dad also found some long tubes off of something that I bought purely to cut up for making headers for our car. We got everything loaded, bought some leftover turbo parts from Patrick after loading up everything, and headed to summit racing. It was only 30 minutes away.https://flic.kr/p/ZMDTdBhttps://flic.kr/p/ZMDTdB by https://www.flickr.com/photos/150940429@N02/, on Flickrhttps://flic.kr/p/E18XjChttps://flic.kr/p/E18XjC by https://www.flickr.com/photos/150940429@N02/, on Flickr
summit racing is a very awesome and bad place at the same time. At the Tallmadge Ohio location, they had roughly 2 dozen racks of discounted and scratch and dent parts. No rhyme or reason to how its organized, and it was 25% off day. Challenge car wise, we scored 4 3 bolt exhaust flanges (think SBC header collector flanges) with a 2.5 hole for 9 bucks after discount. The plan is to use them on the header to crossover pipe junction. Speaking of exhaust, we also were able to retain the y pipe off the big block which uses 2.5 tubes into a very nice collector that turns into 3 inch. I think this should be perfect for the turbo flange/piping. We also got a turn down and glasspack in the deal. I apparently didn't take a picture of the boost gauge, and to be honest im not quite sure where it wound up....Pictures of exhaust and sacrificial headers:https://flic.kr/p/E18YrNhttps://flic.kr/p/E18YrN by https://www.flickr.com/photos/150940429@N02/, on Flickrhttps://flic.kr/p/228YhjPhttps://flic.kr/p/228YhjP by https://www.flickr.com/photos/150940429@N02/, on Flickr
dad and I got home at 9pm Saturday night. 40 hours round trip, 1100 miles, and 168 in diesel. And a fantastic time with my dad. Time I wouldn't trade for the world.We got all the parts and stuff unloaded and organized Sunday after church. I took dads truck to deliver the big block, came back to his place, and got the 3400 mounted to the stand. Hit it, and dads truck, with superclean and a pressure washer to get the worst of the grime off both.https://flic.kr/p/226gKdohttps://flic.kr/p/226gKdo by https://www.flickr.com/photos/150940429@N02/, on Flickrhttps://flic.kr/p/228YkW8https://flic.kr/p/228YkW8 by https://www.flickr.com/photos/150940429@N02/, on Flickrhttps://flic.kr/p/213GzxQhttps://flic.kr/p/213GzxQ by https://www.flickr.com/photos/150940429@N02/, on Flickr
got done with that, jumped in the El Camino, threw the boom tubes from last years challenge car in the bed, and proceeded to turn them into boost goodies in a trade in Winston Salem.https://flic.kr/p/228Yhdghttps://flic.kr/p/228Yhdg by https://www.flickr.com/photos/150940429@N02/, on Flickr
and the received boost goodies:new in box piping kit (from Patrick)https://flic.kr/p/CyiNurhttps://flic.kr/p/CyiNur by https://www.flickr.com/photos/150940429@N02/, on Flickrhttps://flic.kr/p/22cR8uphttps://flic.kr/p/22cR8up by https://www.flickr.com/photos/150940429@N02/, on Flickr
FMIC:https://flic.kr/p/213GrhShttps://flic.kr/p/213GrhS by https://www.flickr.com/photos/150940429@N02/, on Flickrhttps://flic.kr/p/227uX9Lhttps://flic.kr/p/227uX9L by https://www.flickr.com/photos/150940429@N02/, on Flickr
Blow off valve (I think)https://flic.kr/p/228YdDHhttps://flic.kr/p/228YdDH by https://www.flickr.com/photos/150940429@N02/, on Flickr
the turbo:https://flic.kr/p/ZMDSWphttps://flic.kr/p/ZMDSWp by https://www.flickr.com/photos/150940429@N02/, on Flickrhttps://flic.kr/p/226gA9bhttps://flic.kr/p/226gA9b by https://www.flickr.com/photos/150940429@N02/, on Flickrhttps://flic.kr/p/E18Vydhttps://flic.kr/p/E18Vyd by https://www.flickr.com/photos/150940429@N02/, on Flickr
up next is figuring out just what I have as far as the turbo goes. In theory, its what it says it is. But, I want to verify that it will work well enough for what I want before I go to the trouble of installing it. It is physically a lot smaller than I thought it would be, but the price was right. For you turbo guys: how do I determine if its what I need/want? Is there a way to measure things to verify what it is/size/ability to work with this application? I was originally hunting an hx35, but this deal seemed too good to turn down. Intercooler alone was worth 25 bucks. Also, what exactly is the silver thing? I was told its a blow off valve, but it looks more like a blower bypass valve than anything else. This is the first time I have ever even held a turbo in my hands, so please forgive the ignorance.
Challenge budget so far:current challenge budget: 445.90 recoup total: 800what my weekend looked like (in technicolor): Friday night:stripped down the 3400 to a longblock, and investigated ways to execute the intake flip.https://flic.kr/p/21fjM5jhttps://flic.kr/p/21fjM5j by https://www.flickr.com/photos/150940429@N02/, on Flickrhttps://flic.kr/p/22hoGushttps://flic.kr/p/22hoGus by https://www.flickr.com/photos/150940429@N02/, on Flickrhttps://flic.kr/p/22kAgUchttps://flic.kr/p/22kAgUc by https://www.flickr.com/photos/150940429@N02/, on Flickrsaturday we put the lower intake back on in factory location to block the engine off from **** falling it in. bolted a chunk of 2x4 to simulate a thermostat housing, and tried to make it fit.https://flic.kr/p/21fk1Pohttps://flic.kr/p/21fk1Po by https://www.flickr.com/photos/150940429@N02/, on Flickrhad to pull the one lift point off, and decided to mount the trans at the same time.https://flic.kr/p/HoTGRBhttps://flic.kr/p/HoTGRB by https://www.flickr.com/photos/150940429@N02/, on Flickrslid it all in as a package to see what we had. Pics of where it stopped moving down and back. We called it quits to think.https://flic.kr/p/22kAsMehttps://flic.kr/p/22kAsMe by https://www.flickr.com/photos/150940429@N02/, on Flickrhttps://flic.kr/p/21fki1whttps://flic.kr/p/21fki1w by https://www.flickr.com/photos/150940429@N02/, on Flickrhttps://flic.kr/p/HoTWi6https://flic.kr/p/HoTWi6 by https://www.flickr.com/photos/150940429@N02/, on Flickrhttps://flic.kr/p/22kABMihttps://flic.kr/p/22kABMi by https://www.flickr.com/photos/150940429@N02/, on Flickrhttps://flic.kr/p/21fknH7https://flic.kr/p/21fknH7 by https://www.flickr.com/photos/150940429@N02/, on Flickrafter playing around with the engine, trans, tape measure, ****** of metal and wood, etc for almost all day. i decided to take the approach mentioned earlier over on the main GRM forum of going in from the bottom. there's just not enough space or clearance to go in from the top due to protrusions and obstructions. but in from the bottom gets the engine EXACTLY where i wanted it relative to the crossmember, and i think there's enough real estate that everything will fit with very minimal firewall surgery. also, building the motor mounts outside of the car should make things far easier for me. more real estate with better access to see all sides. much simpler than the AMC when i built those mounts. heres where i stopped for today (mostly. i cleaned up and put things away, as tonight is family movie night.) first up, step one:https://flic.kr/p/22j4rHjhttps://flic.kr/p/22j4rHj by https://www.flickr.com/photos/150940429@N02/, on Flickr
step two is sit everything where they are happy being around each other with no cutting or modifications. the flat flange is kissing the oil pan, theres a threaded boss kissing the crossmember, and a power steering hardline is hitting the pan on the drivers side. additionally, with notching the horizontal flange, grinding the boss off the oil pan, and depowering the rack, i should be able to get the engine an inch more forward of the firewall, as well as about 1/2 inch lower. this will make the pan the lowest spot of the drivetrain bu about 1/4 inch or so. but will give me more clearance at the firewall, bellhousing, etc. all a win, assuming i build a bash plate for the pan. here's a picture dump. next up is to figure out what design of engine mounts to use. im seriously thinking about heim joints for adjustability. https://flic.kr/p/22niqC6https://flic.kr/p/22niqC6 by https://www.flickr.com/photos/150940429@N02/, on Flickrhttps://flic.kr/p/21h2Nahhttps://flic.kr/p/21h2Nah by https://www.flickr.com/photos/150940429@N02/, on Flickrhttps://flic.kr/p/22niryKhttps://flic.kr/p/22niryK by https://www.flickr.com/photos/150940429@N02/, on Flickrhttps://flic.kr/p/21h2MDNhttps://flic.kr/p/21h2MDN by https://www.flickr.com/photos/150940429@N02/, on Flickrhttps://flic.kr/p/HqA33Mhttps://flic.kr/p/HqA33M by https://www.flickr.com/photos/150940429@N02/, on Flickr
recoup total: 800
new money: 75 for 15x6 stock nb wheels
37.72 gasket kit for 3400 from ebay
200 for � spec miata cage (main hoop, rear downtubes)
traded stock trans for replacement steering rack cause ours is busted
found some poly bushings and sleeves I a ziplock baggie in the bottom of my gauge box. No idea what they are from, or where I got them. But they fit inside some scraps of roll cage tubing. 2.00
bought a new spool of welding wire: 20 new total: 780.62
ok, when we left off, I had dropped out the crossmember for making the motor fit. I thought I had it sorted out via pictures, so I set the crossmember up on the sawhorses, and made engine mounts. While going through my quickly expanding gauge collection, I found a ziplock baggie of miscellaneous poly bushings. Couple sway bar end links, some mount bushings, bumpstops, and I think 4 control arm bushings. Couldn't tell you what this stuff is from, as I haven't been to the bottom of that box in years. Leftovers from something. But the �control arm bushings� fit inside the scraps from last years roll cage build. So im using them.https://flic.kr/p/D2tQcThttps://flic.kr/p/D2tQcT by https://www.flickr.com/photos/150940429@N02/, on Flickr
went ahead and made some 1/8 plate that mount to threaded bosses in the block, and then some tabs to weld to the crossmember.https://flic.kr/p/22EGx1thttps://flic.kr/p/22EGx1t by https://www.flickr.com/photos/150940429@N02/, on Flickr
to get the engine where I thought it needed to be, I notched the crossmember by an inch or so, and spaced things with various nuts/bolts/chunks of wood.https://flic.kr/p/22C2ZXWhttps://flic.kr/p/22C2ZXW by https://www.flickr.com/photos/150940429@N02/, on Flickrhttps://flic.kr/p/HHZ8Lnhttps://flic.kr/p/HHZ8Ln by https://www.flickr.com/photos/150940429@N02/, on Flickr
I then tacked the tabs, the tube, and the plates all together. Didn't fully weld because I wanted to confirm clearance.https://flic.kr/p/ExqtWShttps://flic.kr/p/ExqtWS by https://www.flickr.com/photos/150940429@N02/, on Flickrhttps://flic.kr/p/D2ucExhttps://flic.kr/p/D2ucEx by https://www.flickr.com/photos/150940429@N02/, on Flickr
while ive been obsessing about drive-train placement, crossmemeber strength, etc, dads been seam welding per the flyin miata recommendations. Hes having a good time, and this is his first time doing sheetmetal with a MIG. Hes now got almost all of it done and ready to go outside for grinding down, seam sealer, and paint.https://flic.kr/p/D2tJAxhttps://flic.kr/p/D2tJAx by https://www.flickr.com/photos/150940429@N02/, on Flickrhttps://flic.kr/p/Exq8n5https://flic.kr/p/Exq8n5 by https://www.flickr.com/photos/150940429@N02/, on Flickrhttps://flic.kr/p/21A9T6Nhttps://flic.kr/p/21A9T6N by https://www.flickr.com/photos/150940429@N02/, on Flickr
we then jockeyed things around, put the engine and trans on a sheet of plywood on 6x6 chunks on refrigerator dollies. We wrapped a tow strap around the front of the car and hooked to the cherry picker, and went to see how it worked.https://flic.kr/p/ExqAV1https://flic.kr/p/ExqAV1 by https://www.flickr.com/photos/150940429@N02/, on Flickr
it did not go as planned. We fouled the ears on the firewall, and the engine was about 6 inches behind the plane of the firewall. No bueno. So we pulled it all back apart, and used the portaband to chop the ears out of the engine bay, and knocked the motor mounts I spent all day building apart. When I get back from the in-laws this weekend, were going to try test fitting again. Dads also starting in on the 2x2 framerail reinforcements, as well as the prep for the � cage.
My Lemons team just killed a 3800 in 25 laps a few weeks ago, oil starvation. The other 3800 that was on the track that day died 10 laps later. If I were you, I’d baffle the oil pan while the motor is out. I’ve also heard it’s good to overfill the oil by about a quart.


 4
4


 revious total: 384.25