When you click on links to various merchants on this site and make a purchase, this can result in this site earning a commission. Affiliate programs and affiliations include, but are not limited to, the eBay Partner Network.
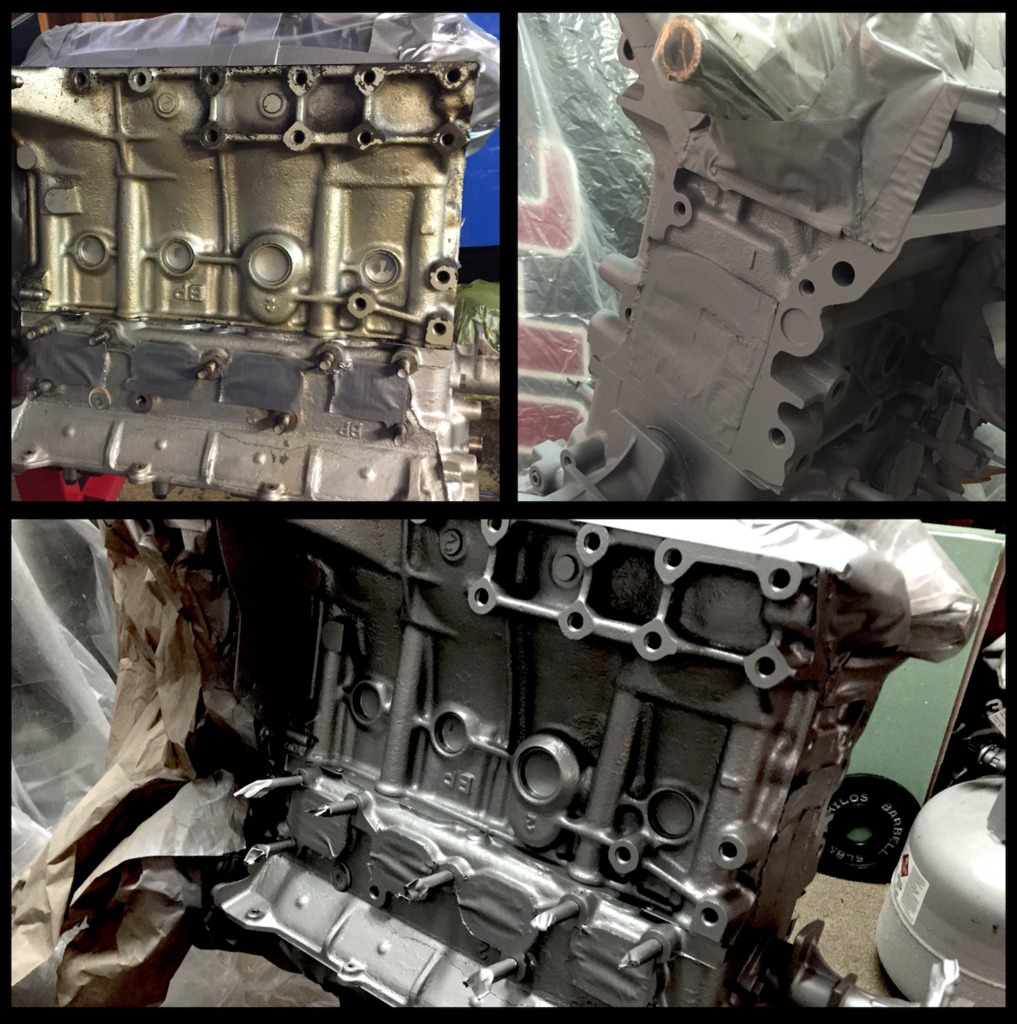
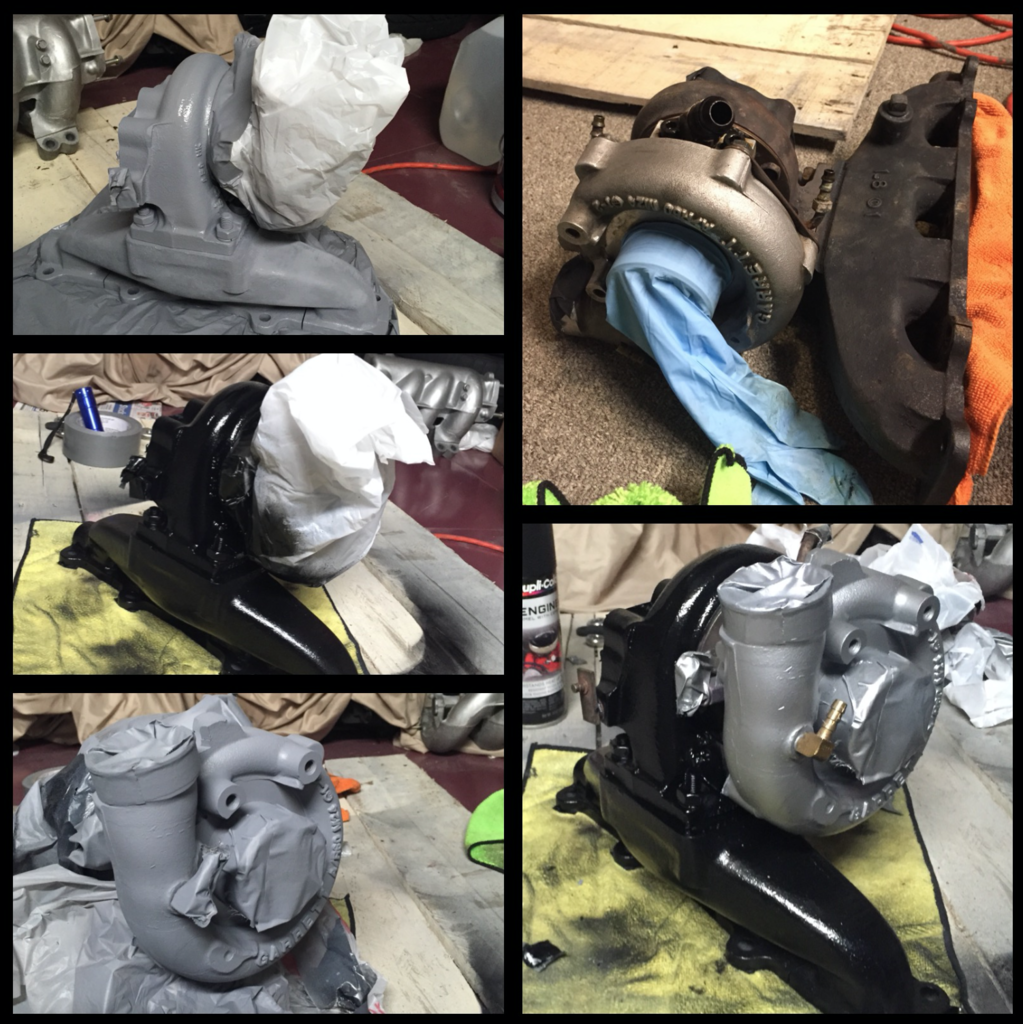
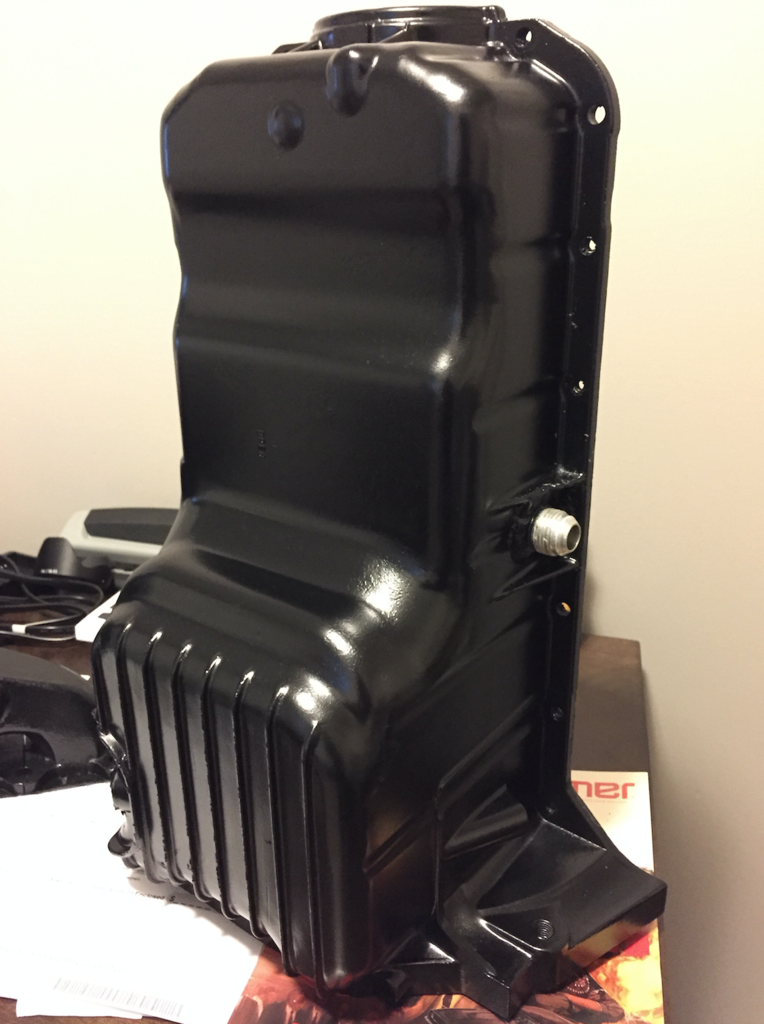
Started dissasembling, cleaning, and putting some fresh coats on multiple pieces.
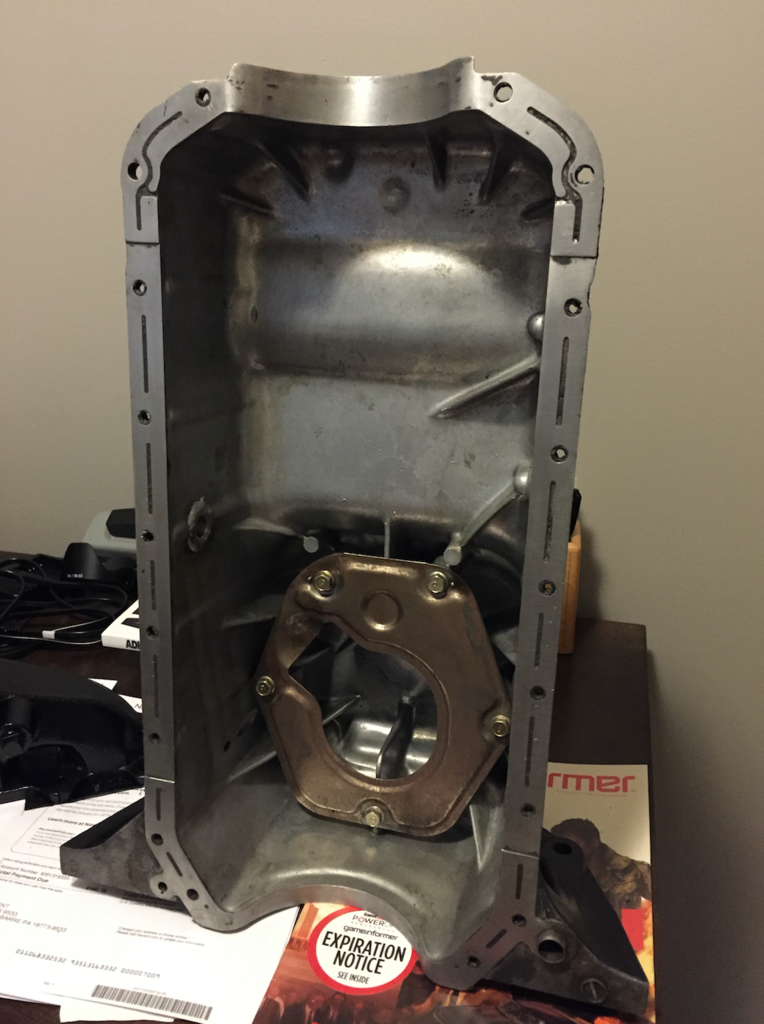
Everything wasn't all fun and games though. Had my first major "lesson learned moment" when pulling the pan.
Bottom end of the motor looked freshened, but it had stock pistons and rods. Yeah. Stock. Lesson here? Pull the pan off when buying a motor instead of relying on the person's word. I felt bad for him too, he got screwed worse in the deal initially than I did, he traded away an S2000 towards this turbo miata. He no longer had the guys number, so we couldn't track him down and call him out on the carpet.
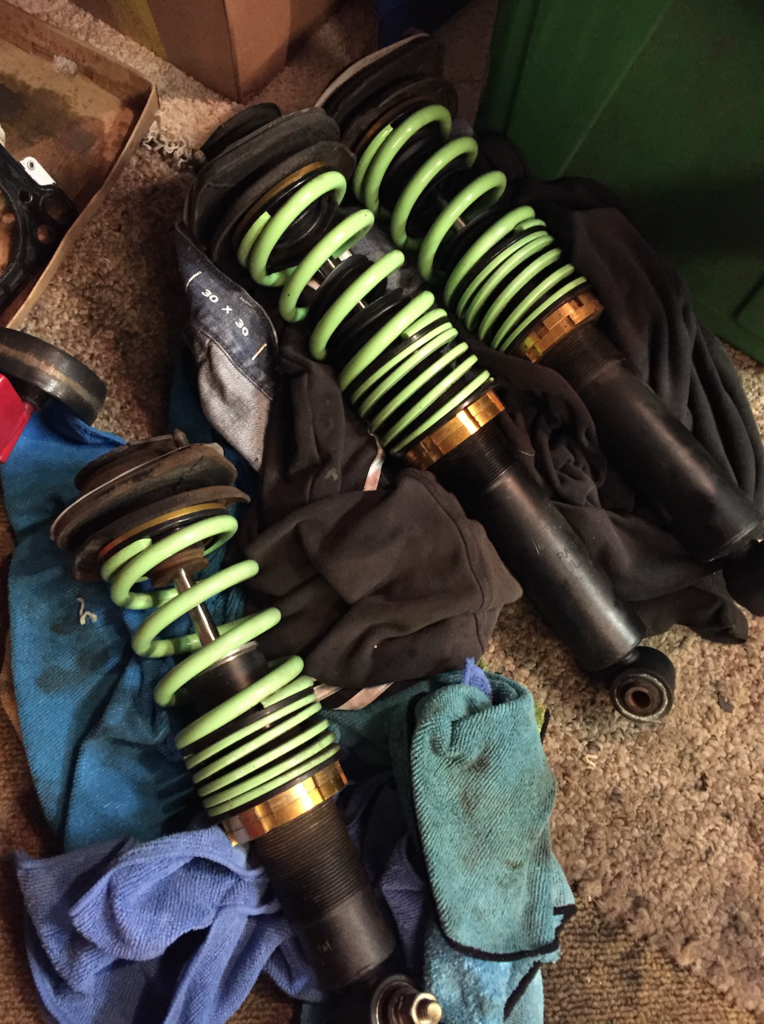
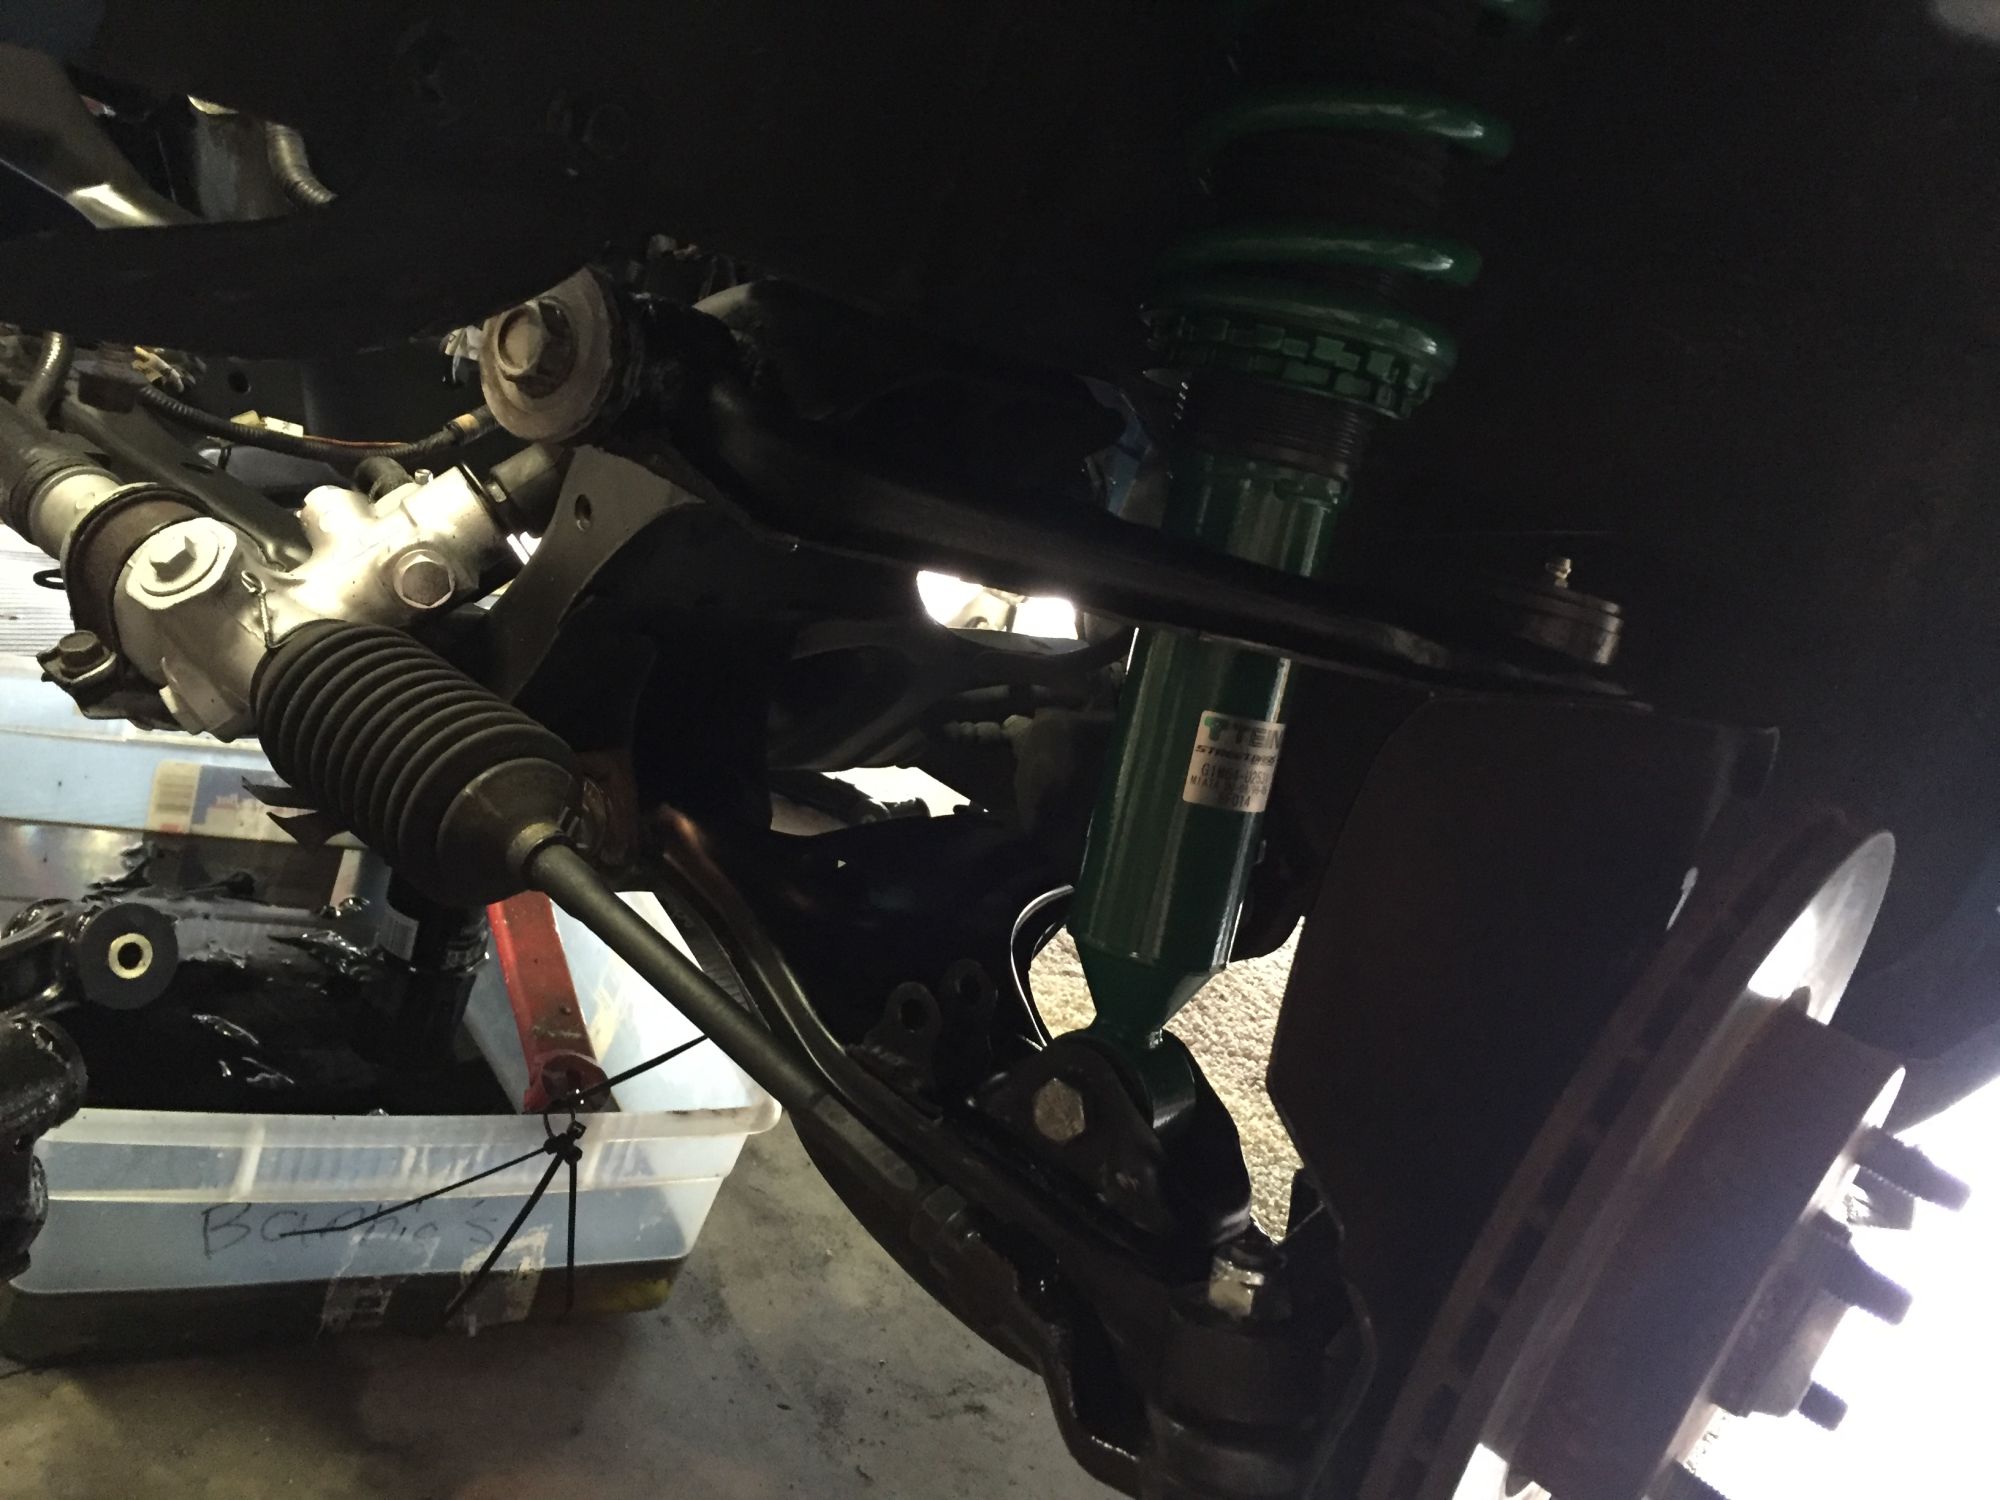
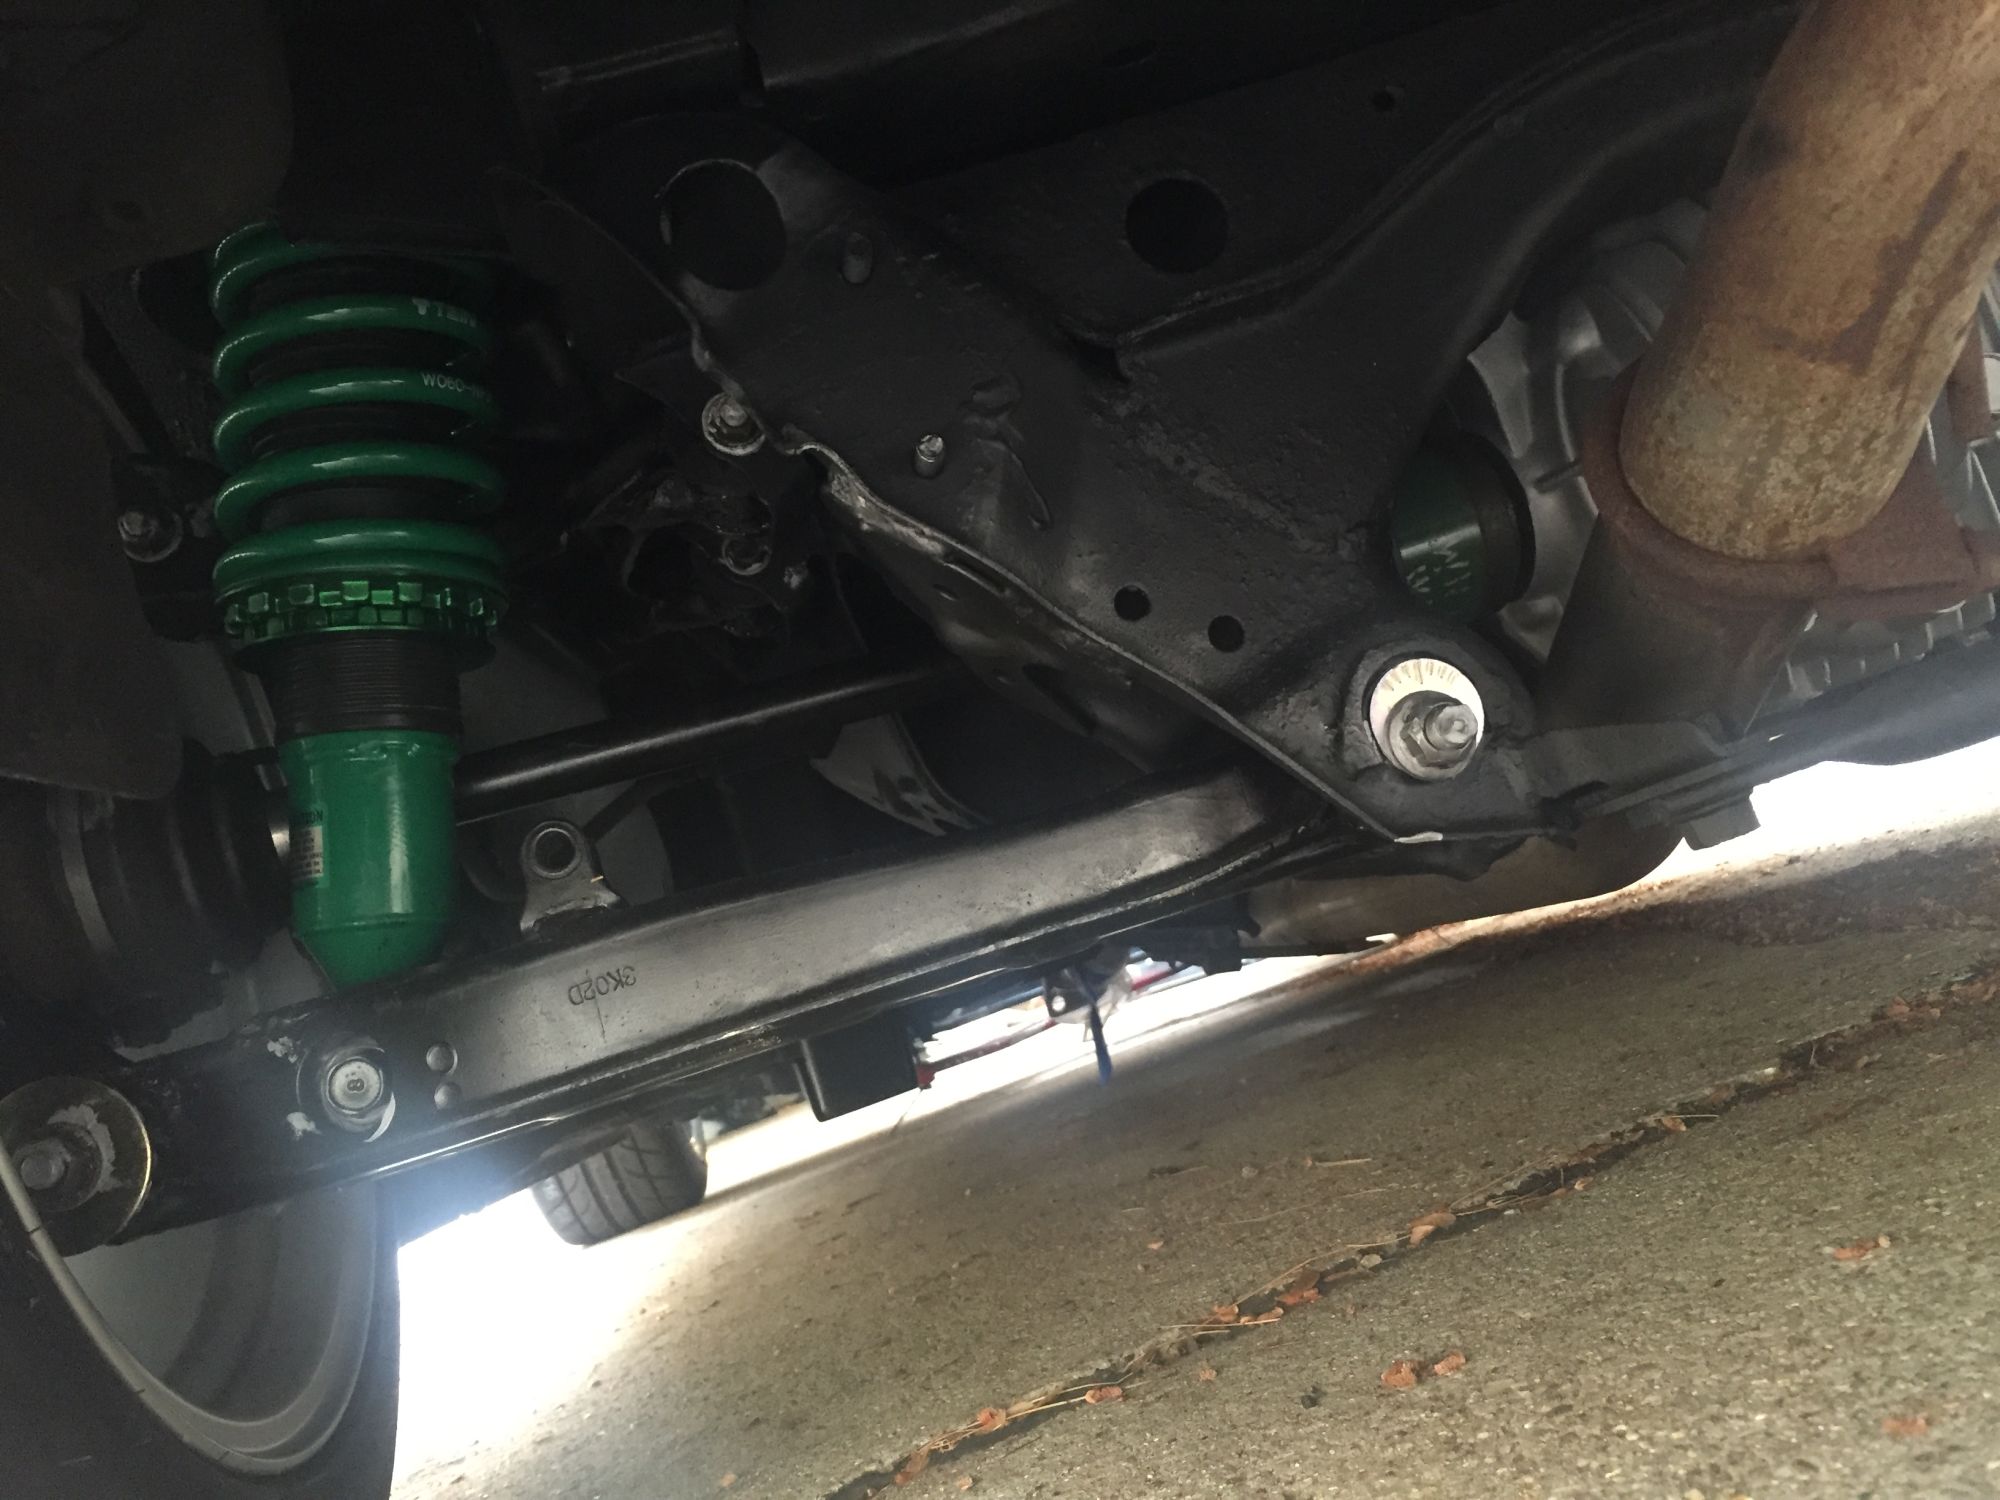
Pulled the old racelands, and am replacing them with new Tein Street Basis coils with NB top hat upgrades. Not my end-all choice, but I scored a killer deal on them and they were brand new from a guy who parted his car out before finishing it.
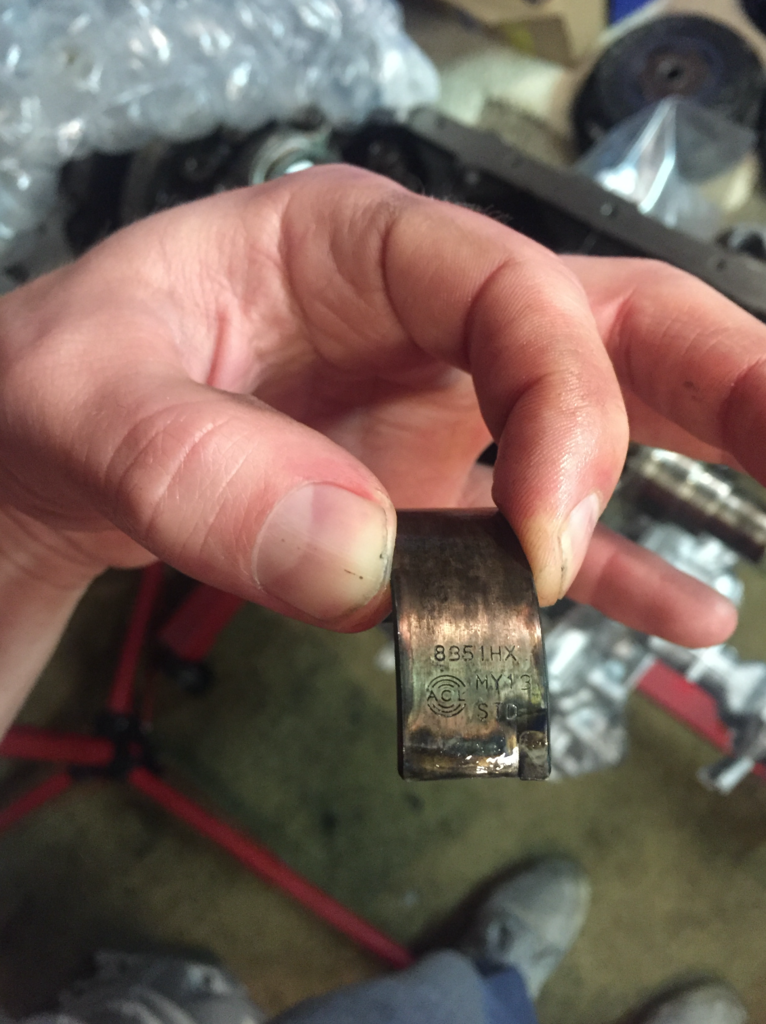
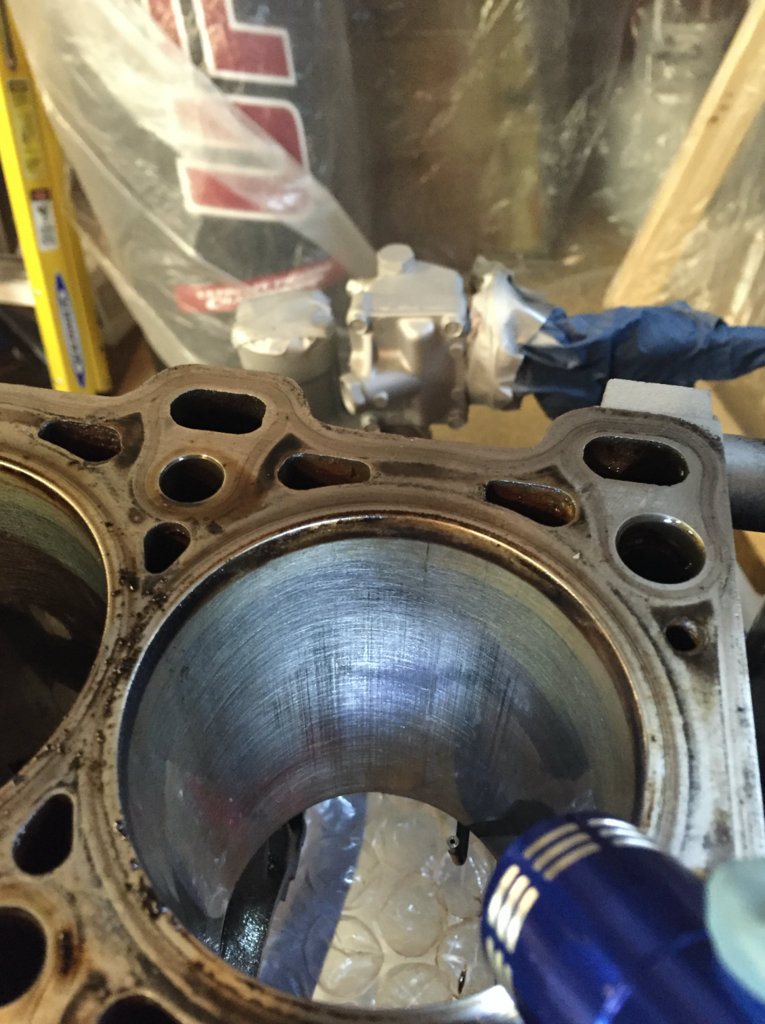
So now that I had realized the bottom end wasn't as advertised, I thought I should take a look at one of the rod bearings before I started to put the oil pan back on. Even though I was dissapointed that the bottom end wasn't built, I was going to run it as-is because my intentions were only about 230-250whp.
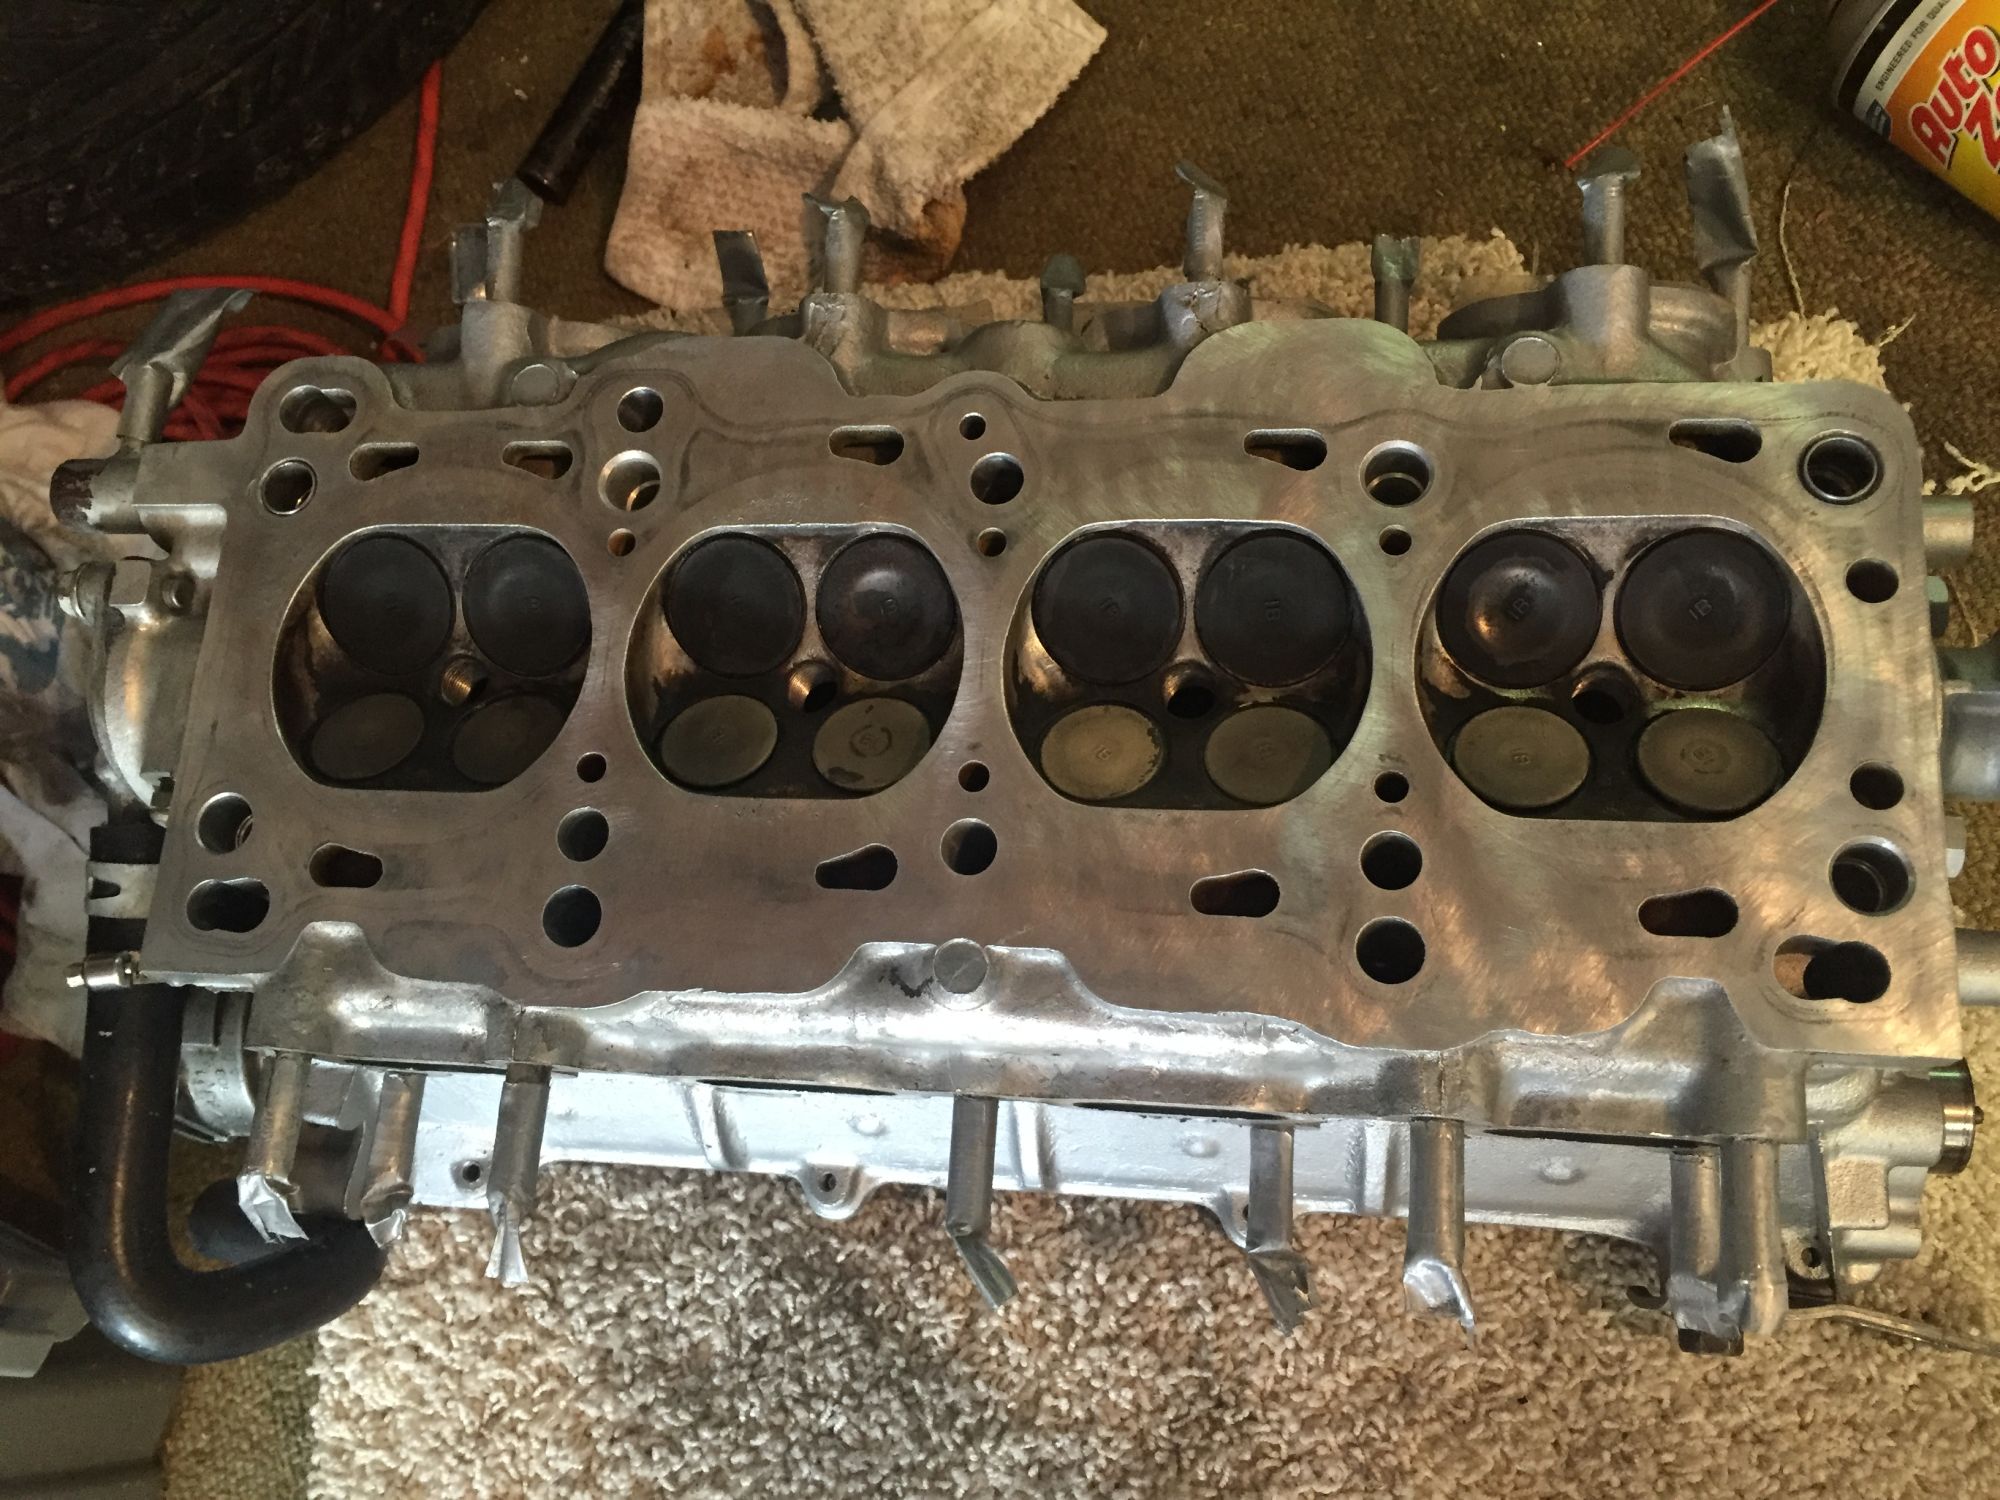
After pulilng rod cap #1, and seeing this, I quickly decided that I needed to go more in depth while the motor was torn down.
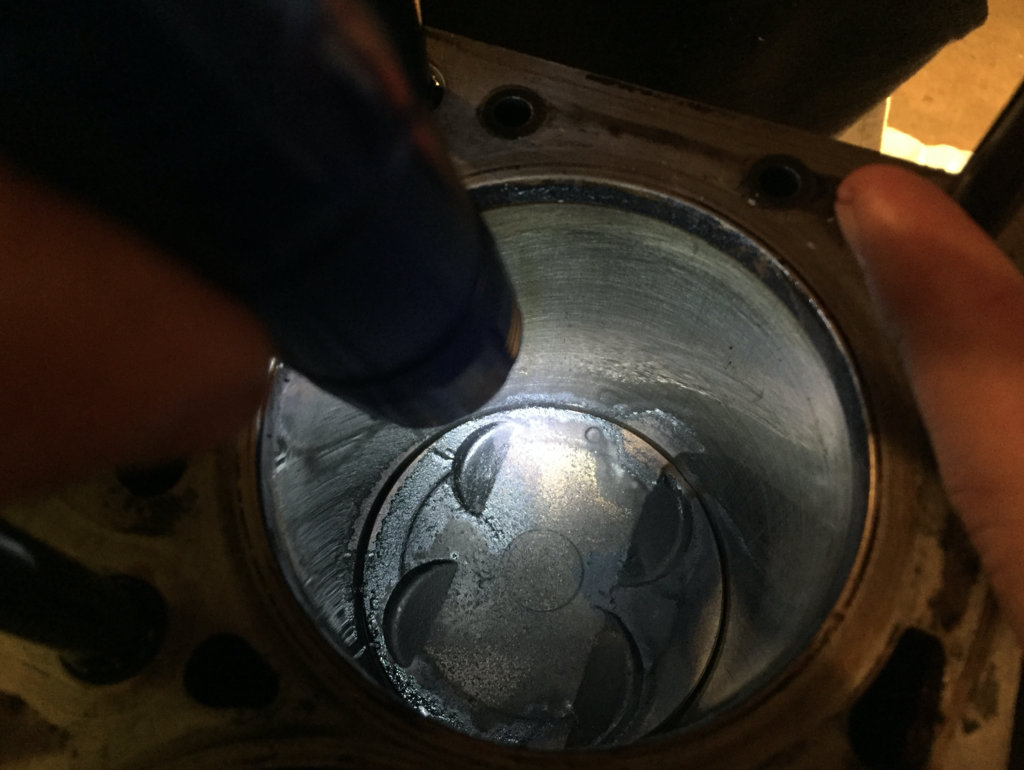
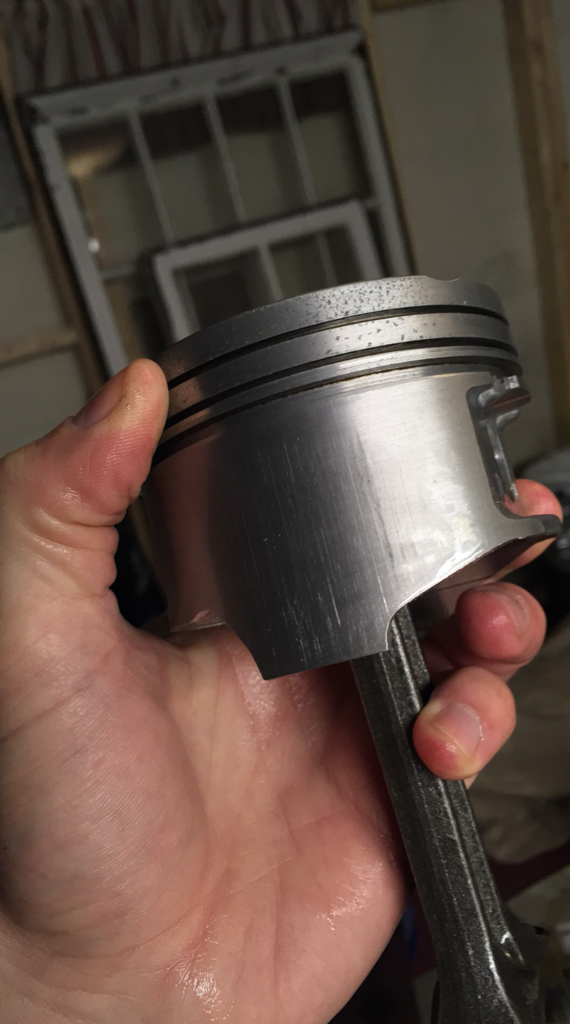
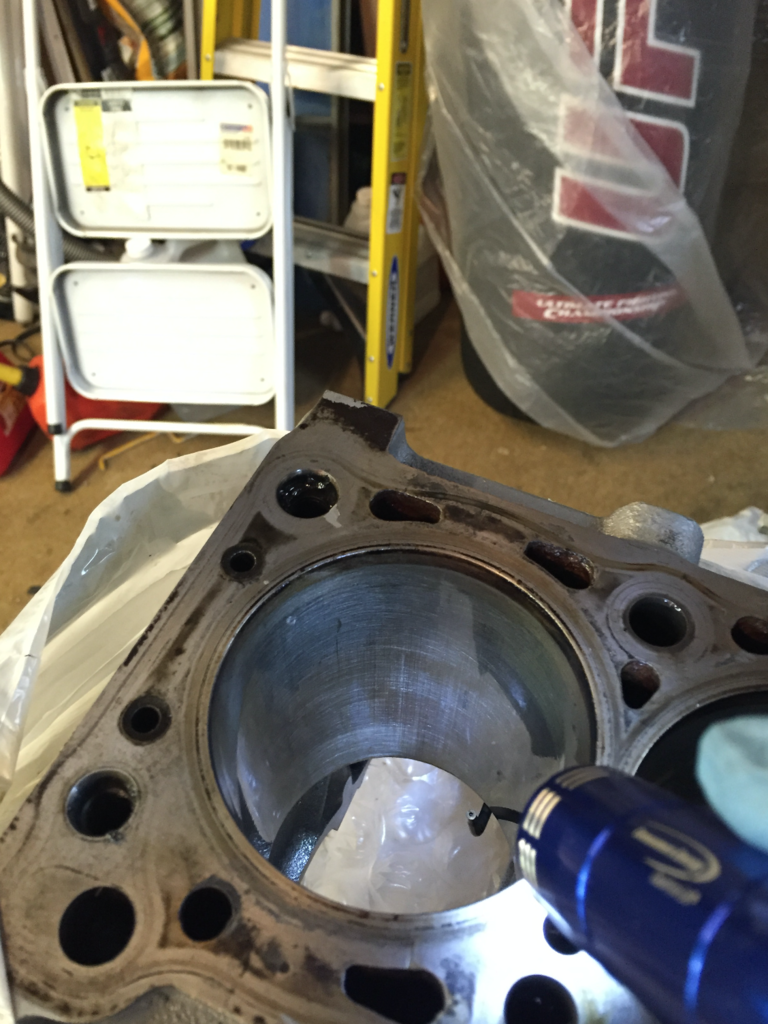
When starting to look into the cylinder bores, I noticed some light scoring on the walls. I also noticed a bit of pitting along the outer rim edges of the piston crowns. Didn't really look like detonation, but more like some debris had worked its way in via dirty oil perhaps.
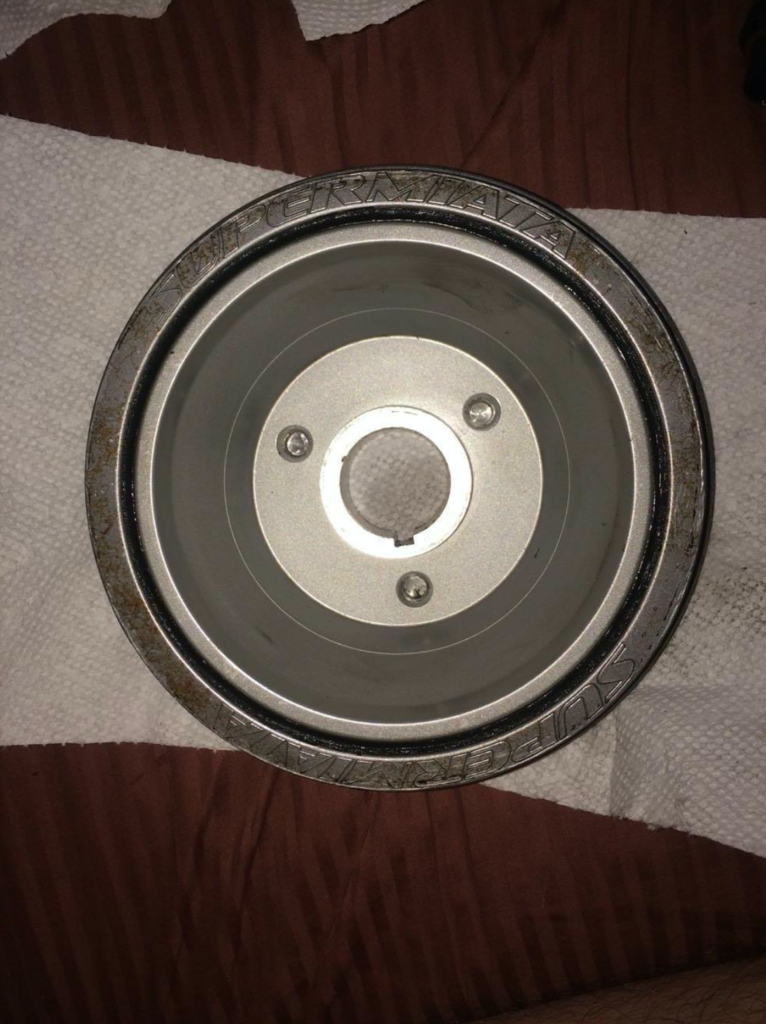
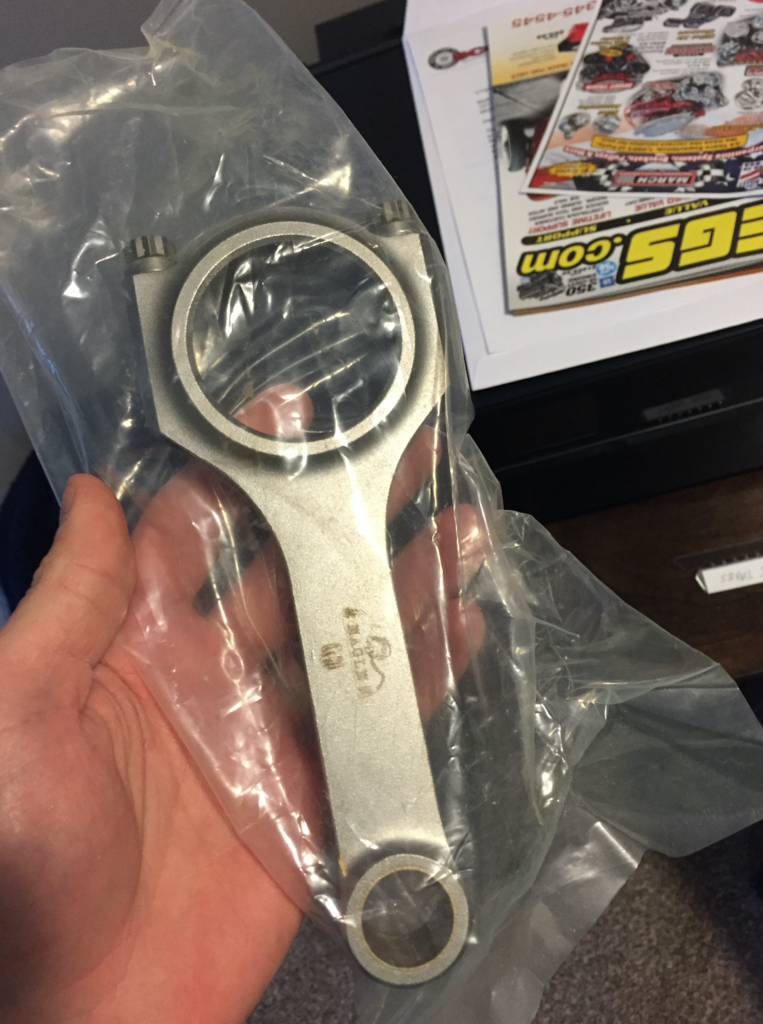
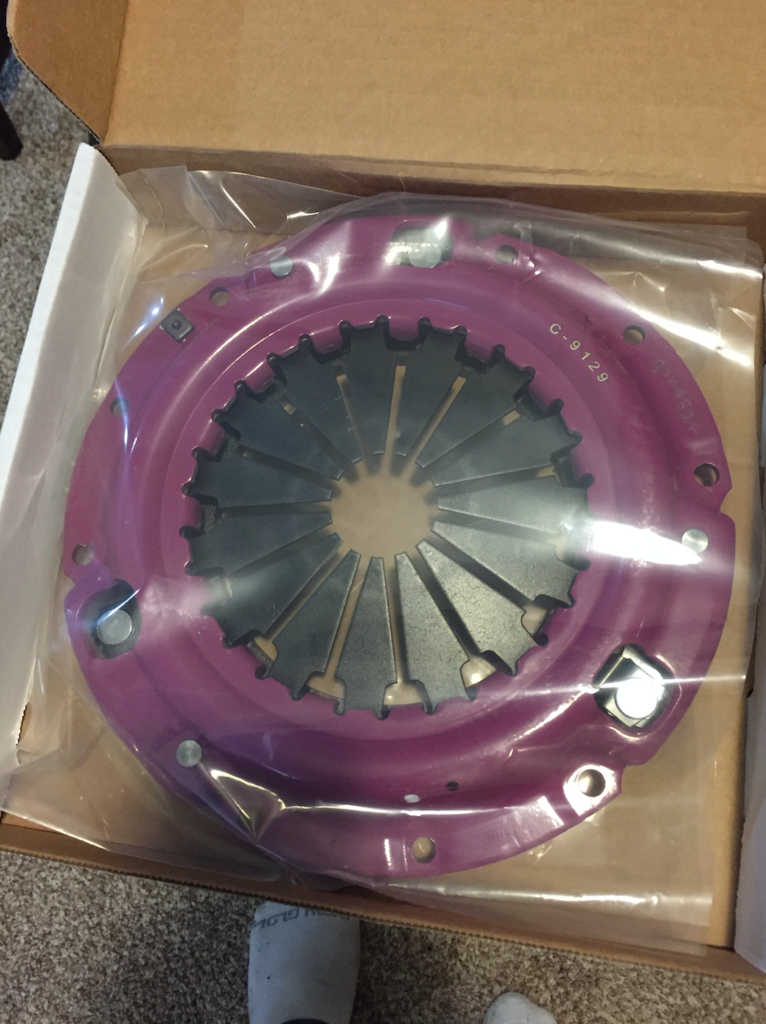
Fast forward over a month of research and purchasing. Scored a good deal on a used supermiata damper, which never happens. Also scored a killer deal on some brand new in-the-box eagle H beam rods. Ended up splurging on a Flyin Miata Happy Meal clutch kit with the HD throwout bearing and 10.3 flywheel.
My new bottom end is going to be: A Braineack built MSPNP2 wired for sequential injection and EBCS. Showed up looking good. Looking forward to working with him when I get to first-fire!
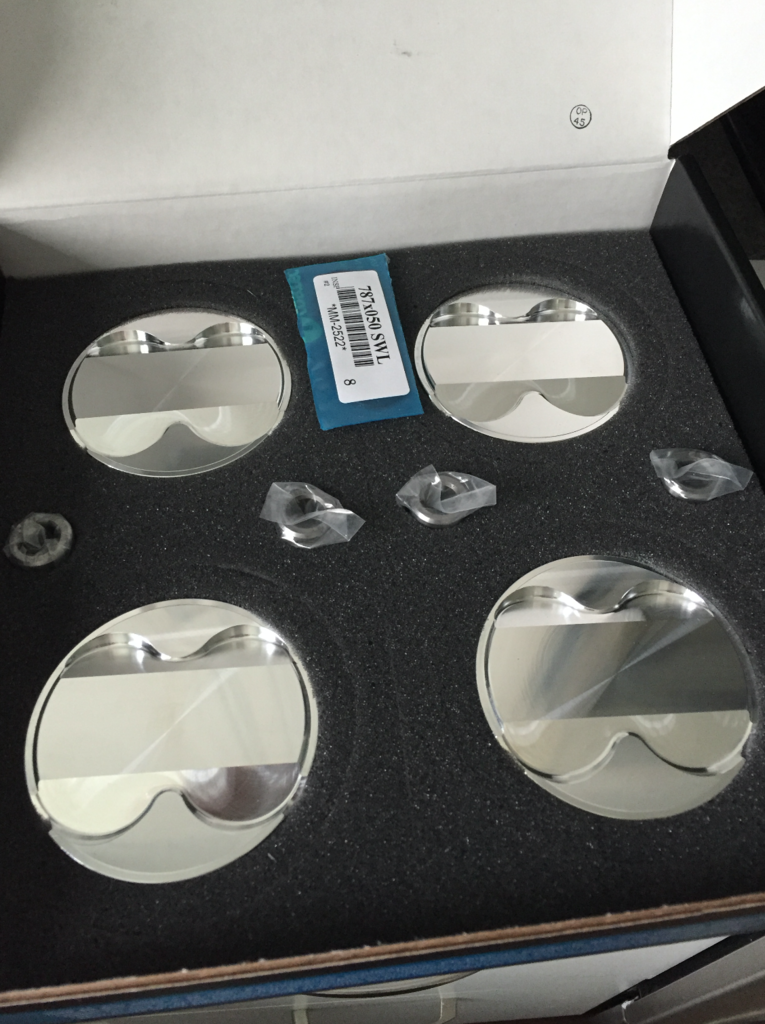
+.5mm overbore on my cylinders
CP Carillo 9.0:1 pistons with CPN rings
Eagle H Beam rods with ARP 2000 studs
Blueprinted/Balanced crank ground down .25mm on all journals (one of the rod journals was .001 out of round
King XP tri-metal .25mm bearings and thrust washers
ARP Main studs
Boundary Engineering Street oil pump
Supermiata Damper
OEM Headgasket
ARP Head studs
Some other things I'm changing since I'm already in way deeper and way over budget from where I had originally planned:
Coolant reroute
Eliminating front thermostat neck on the head
Flyin Miata 2.5" downpipe to replace the crap BEGI gen1 that came with the 1.8L setup
Fuel Injector Clinic 650's to replace the 440cc blue tops that came with the 1.8L setup
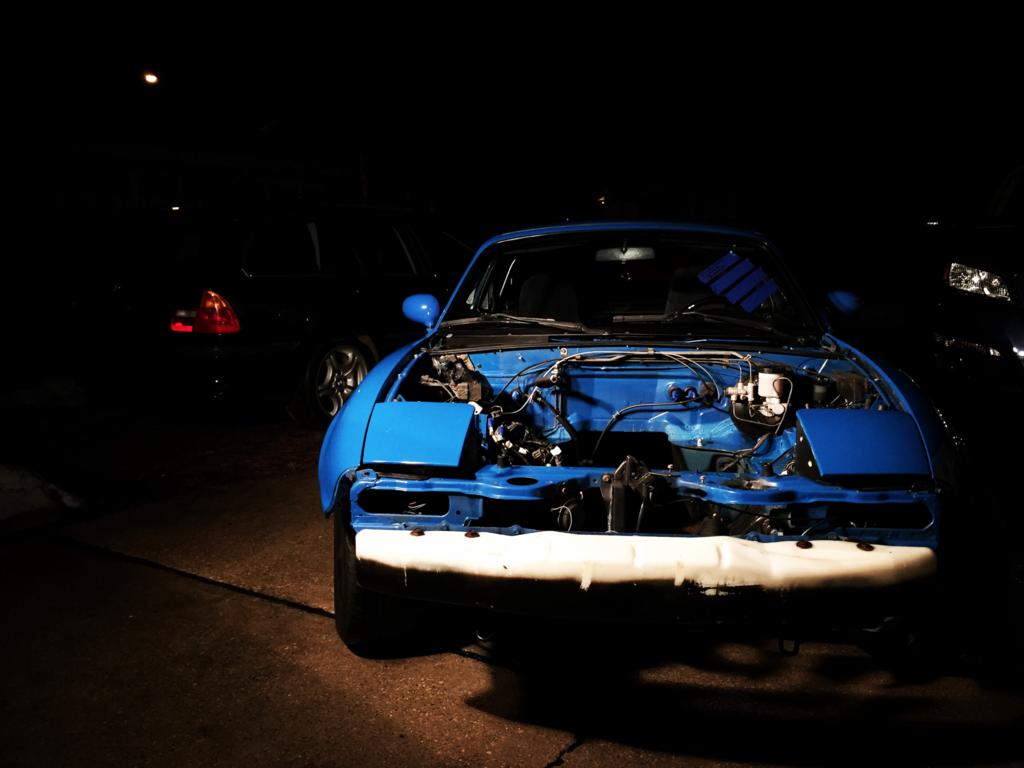
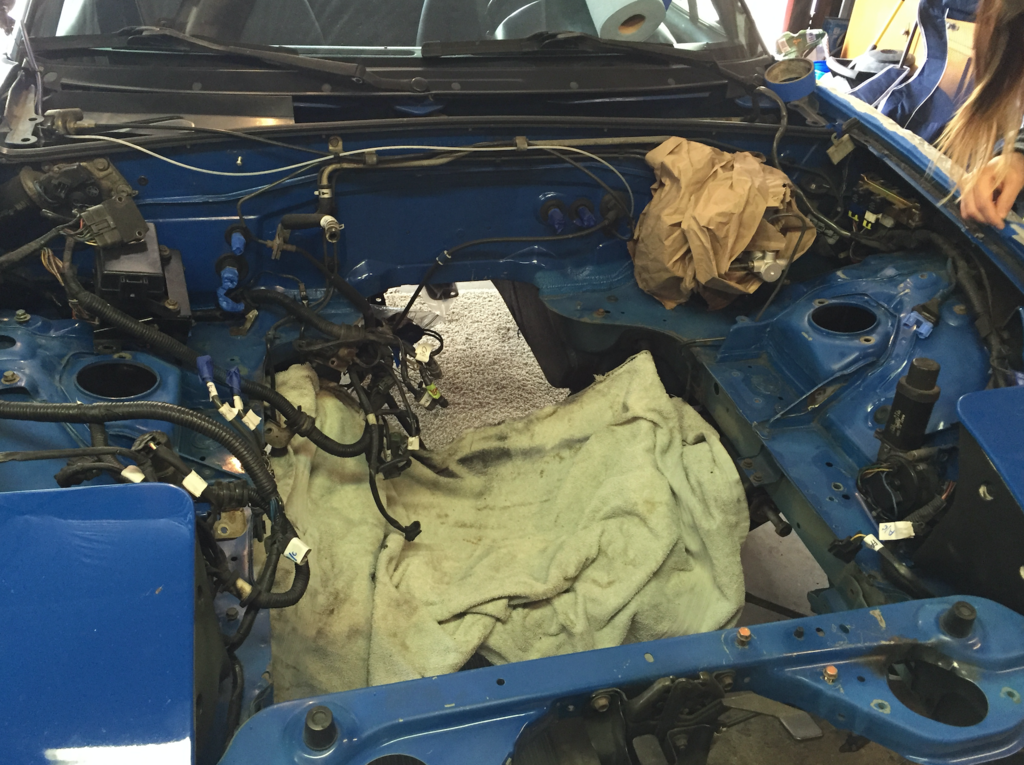
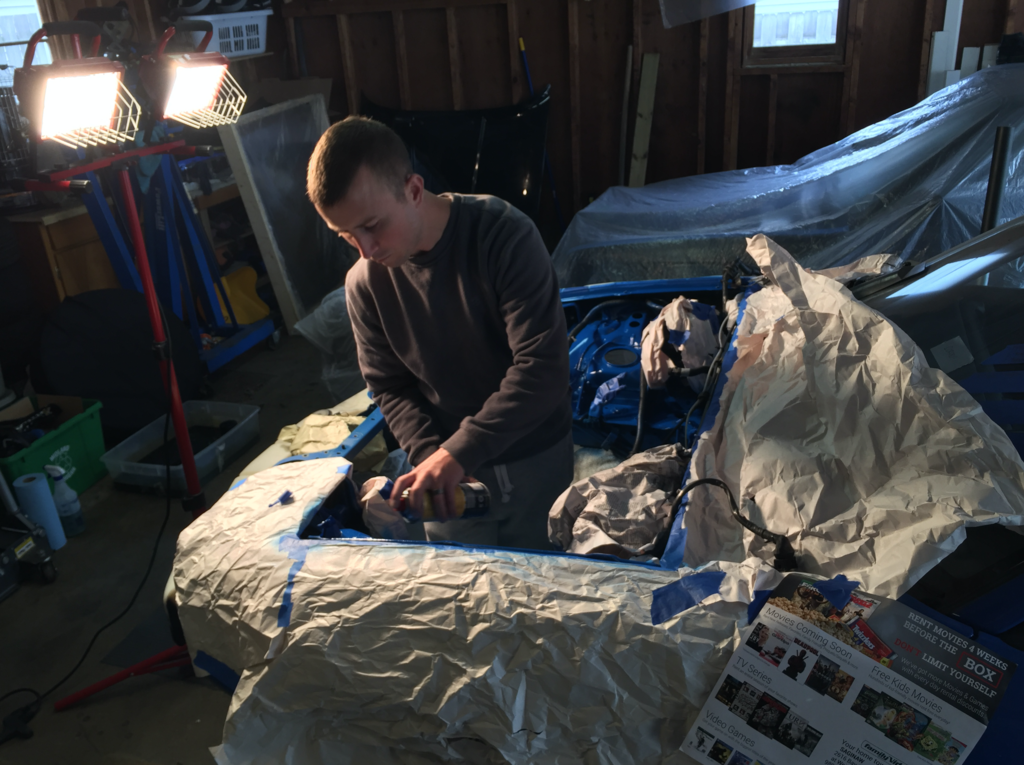
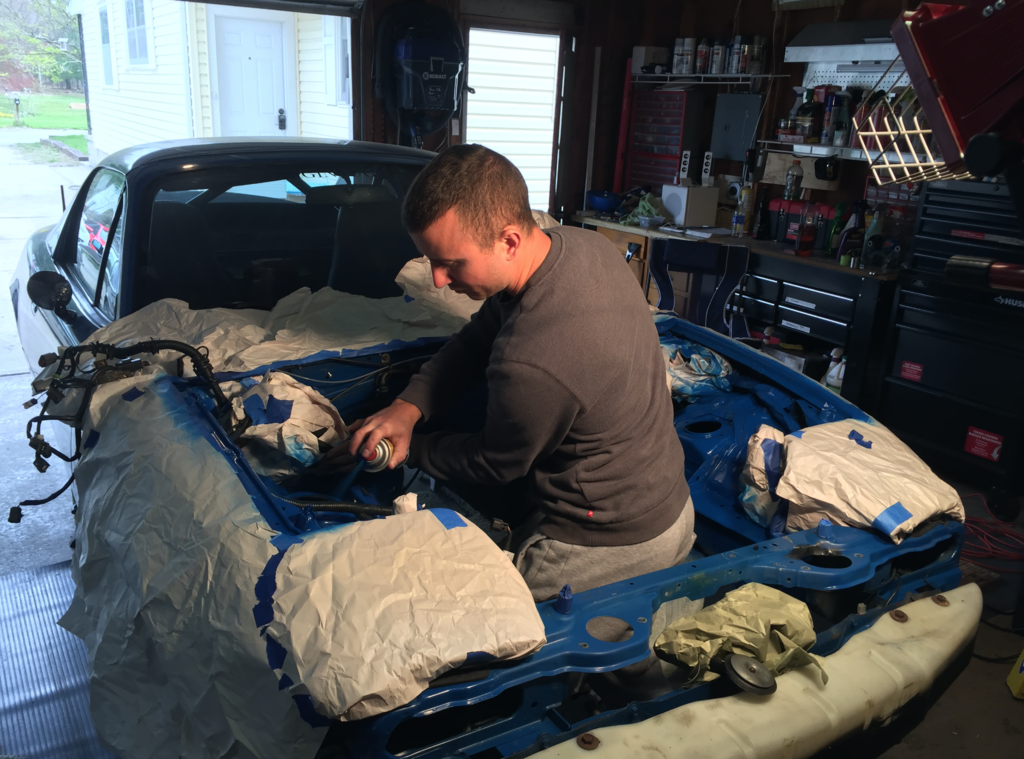
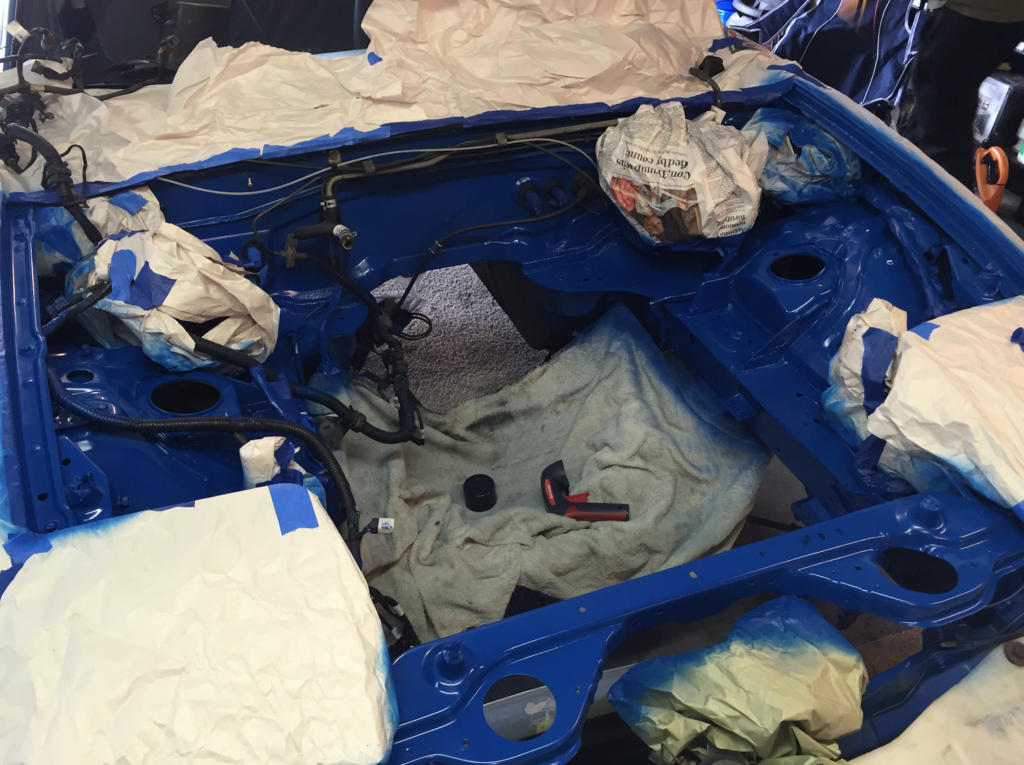
After feeling the sting of the fact my simple 1.8 swap project had now turned into a full build, I knew I should probably take advantage of having my motor out and paint the bay. After alot of prep work, I decided to tackle it.
And the finished product after clearcoat and cure time. I'm VERY happy with the results. Automotivetouchup.com is my go to for color matched OEM paints in aerosol form. I've never been disspaointed.
As of 5-15-16: Motor Status
Currently, my block and crank is at the local machine shop. Monday I take the bearings in so he can do a final clearance measurement and blueprint. Hopefully, all said and done I should have the bottom end back within two weeks ready to finish assembly and then I can proceed with getting the head on, timing the motor, and focusing on the misc other items. I'd love to have the motor and trans back in the car by the middle of June. I think this is reasonable since I'm losing a weekend to Memorial remembrance and also I'll be gone a weekend for GridLife in Michigan.
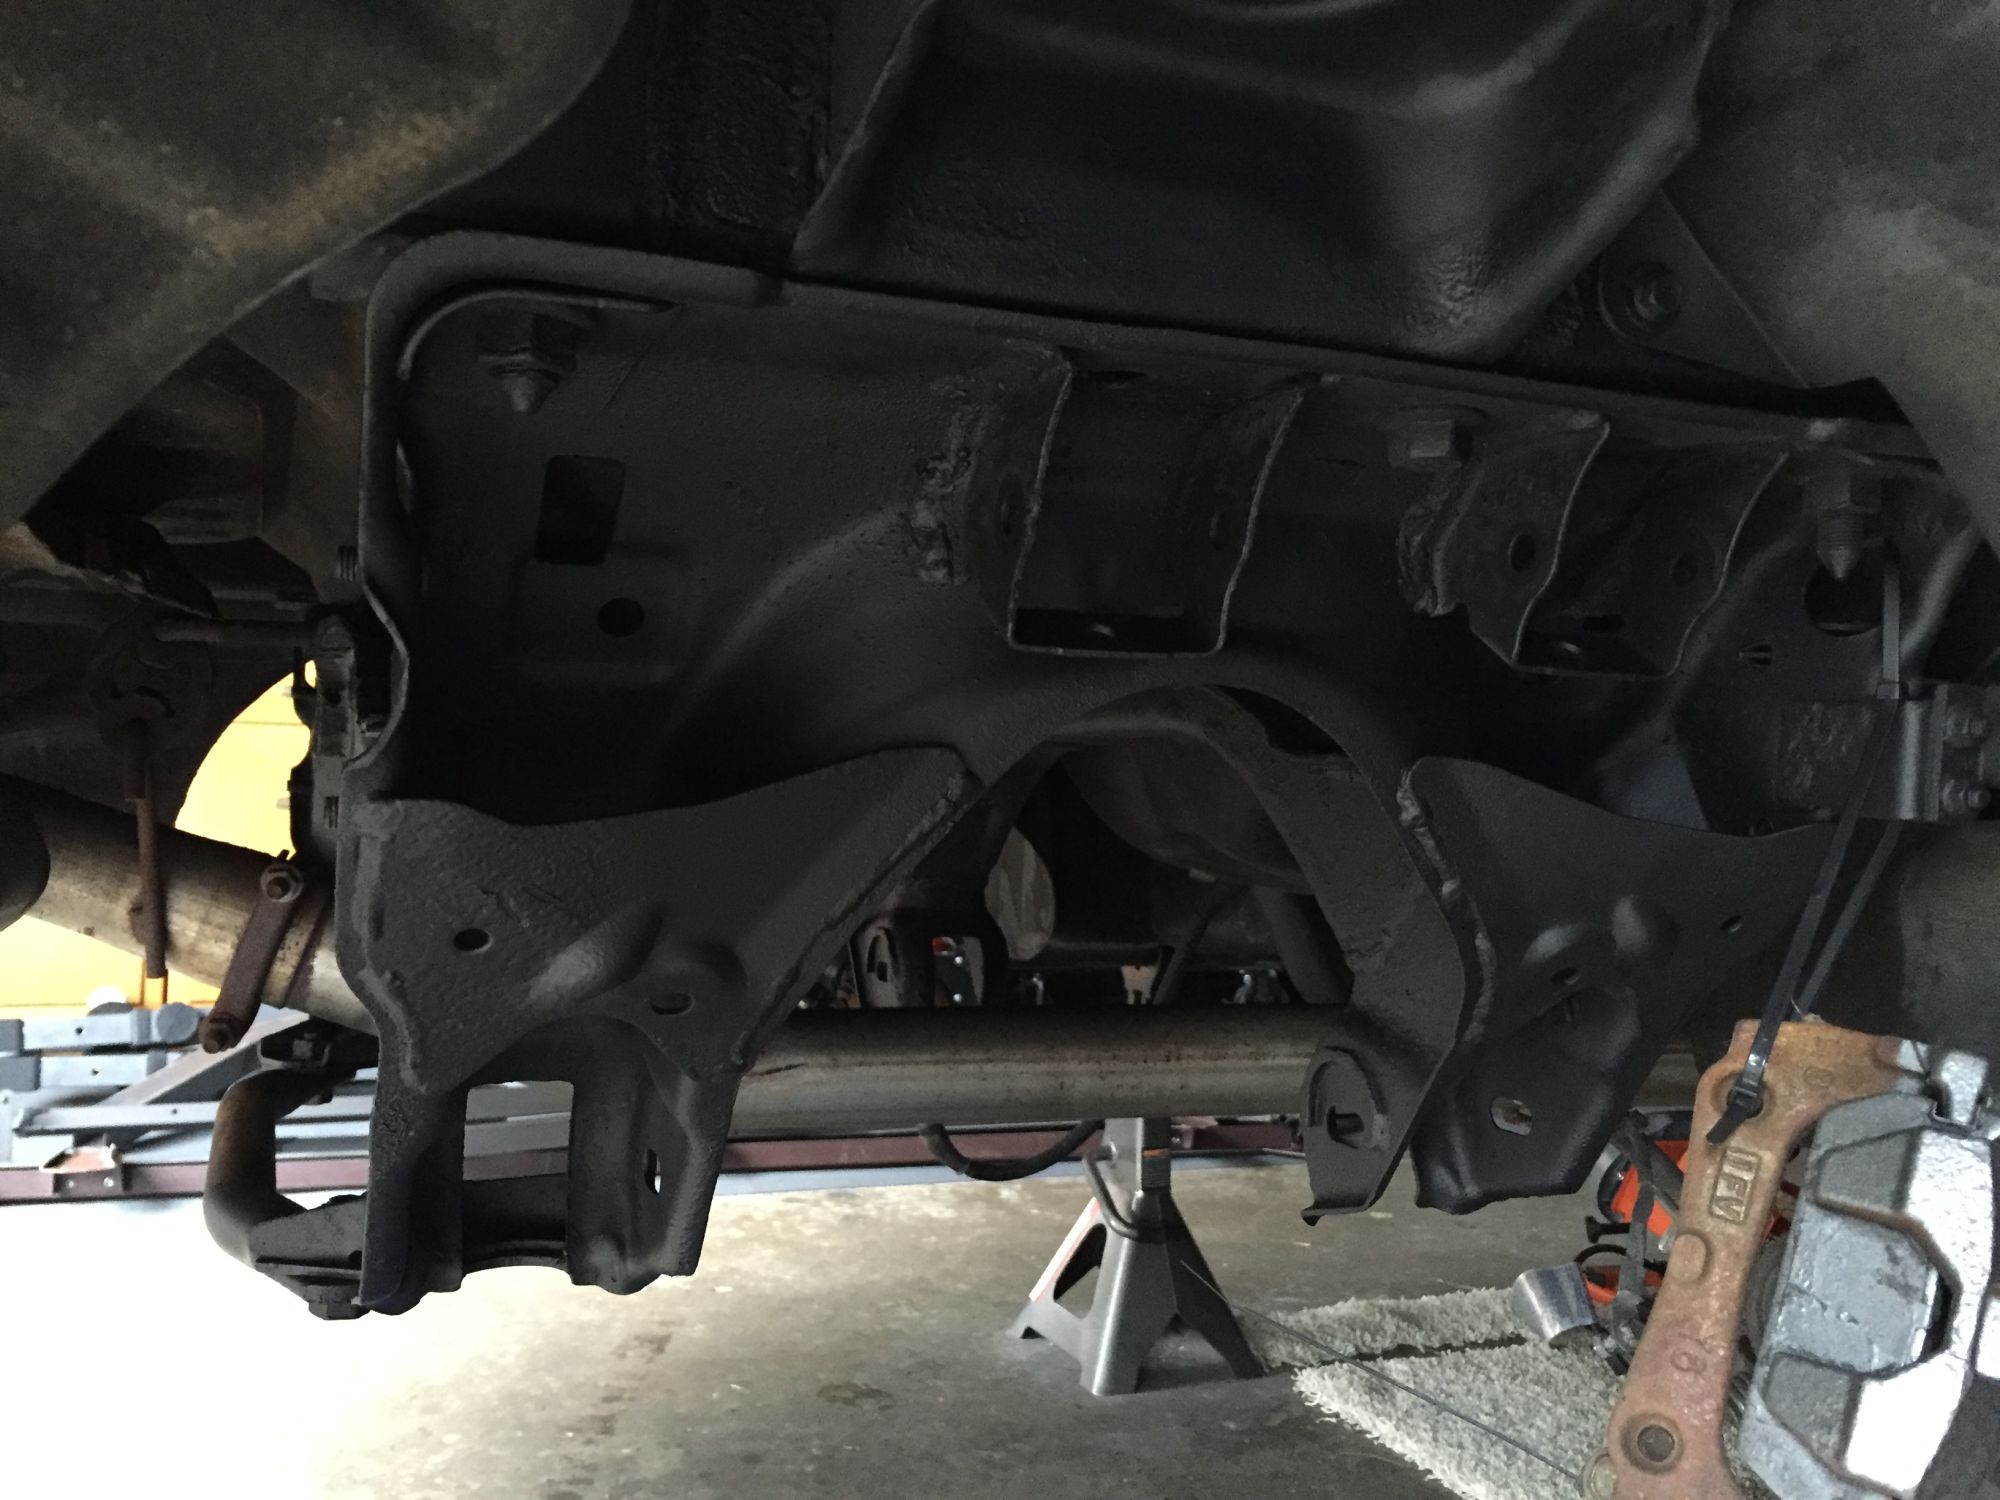
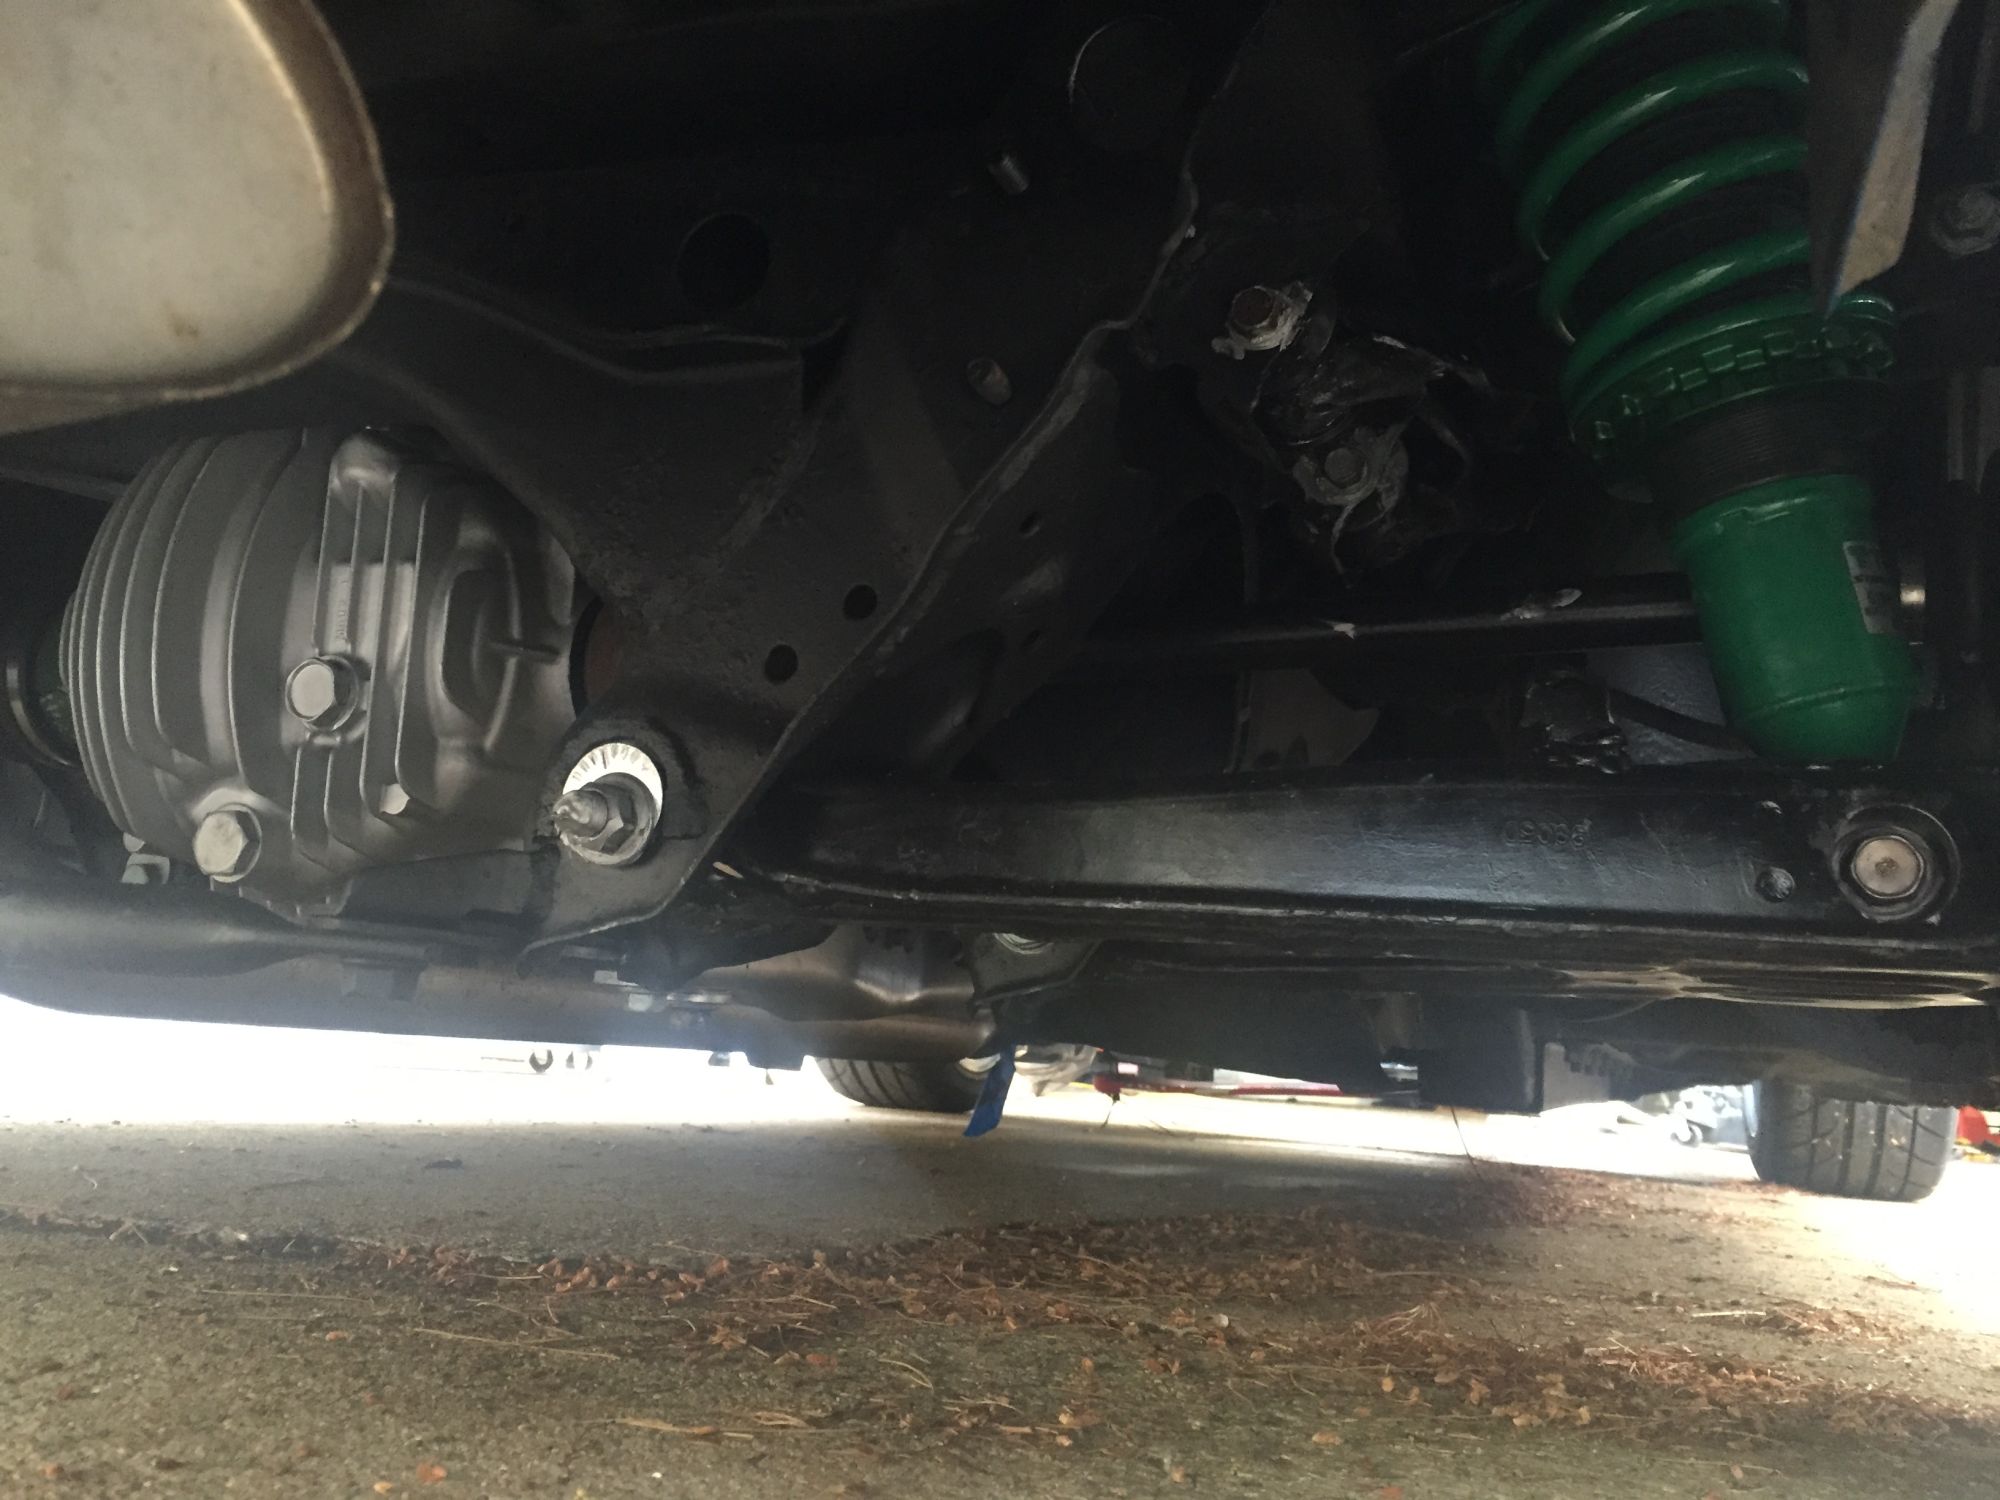
Current Project undertaking: Full Suspension Rebuild.
So, even though my car is pretty clean, its obvious that the underside of the car has a ton of corrosion in the suspension components. I wanted to replace all the OEM bushings with Energy Suspension.
WHAT A MISTAKE. Not that the idea to do that was bad, but the execution has been freaking insane. So much corrosion has forced me to cut and grind more than I ever thought I'd need to. But it gave me a chance to really see how bad the stock bushings were. Many were cracked beyond recognition. A front sway bar end link was broken. In the rear, the sway bar link bushings were so corroded I was able to pull the link off the link bolts BY HAND.
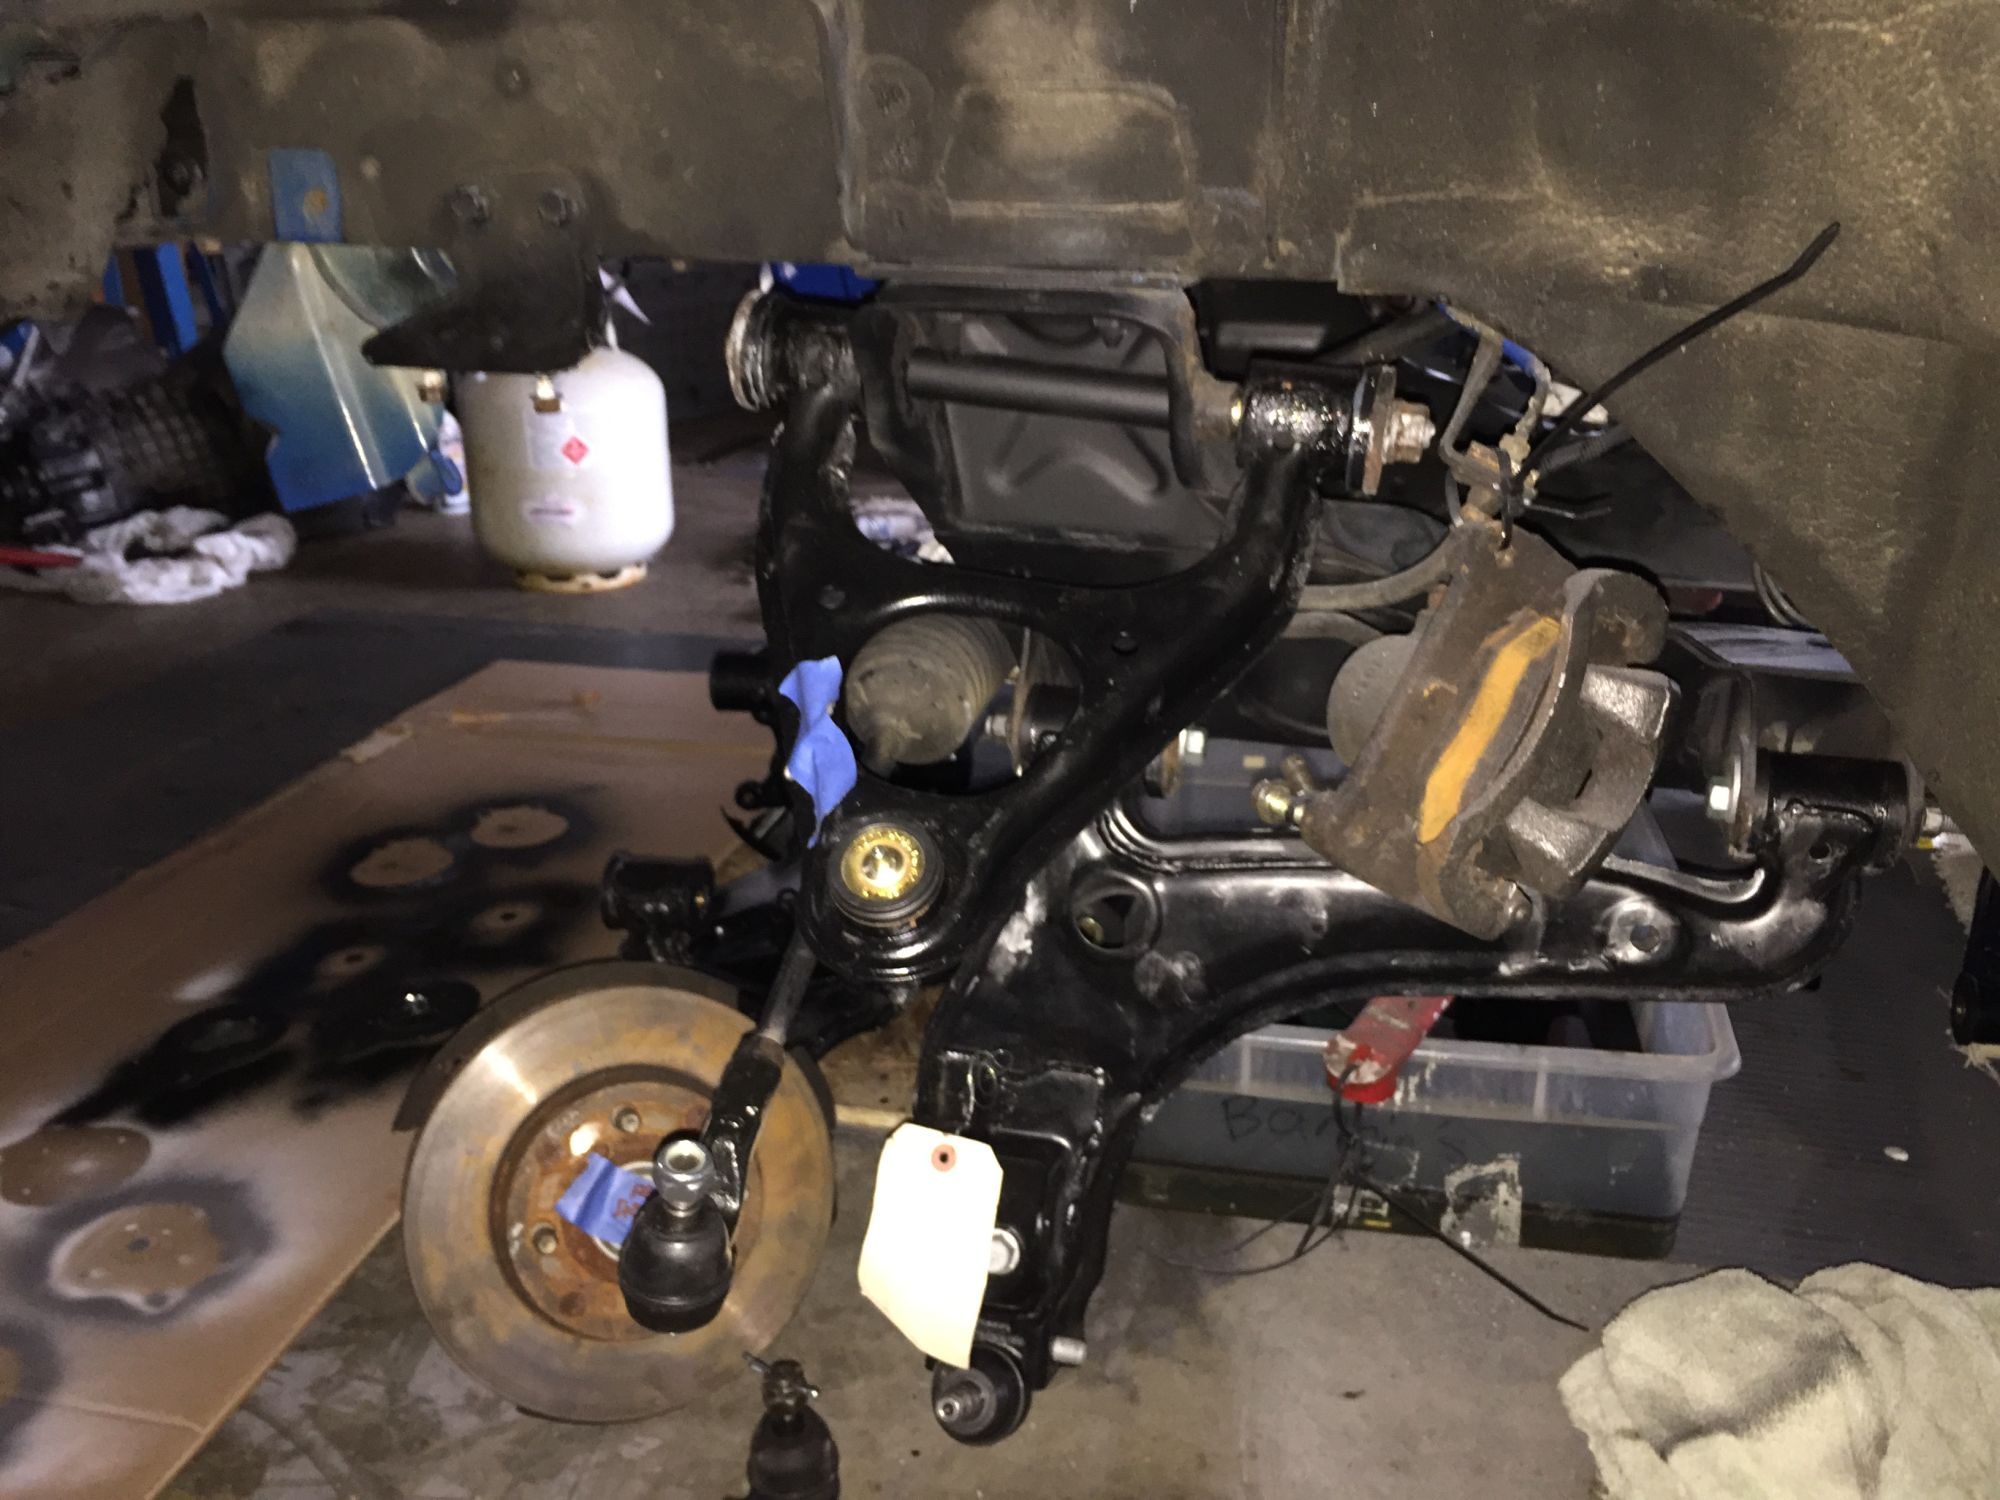
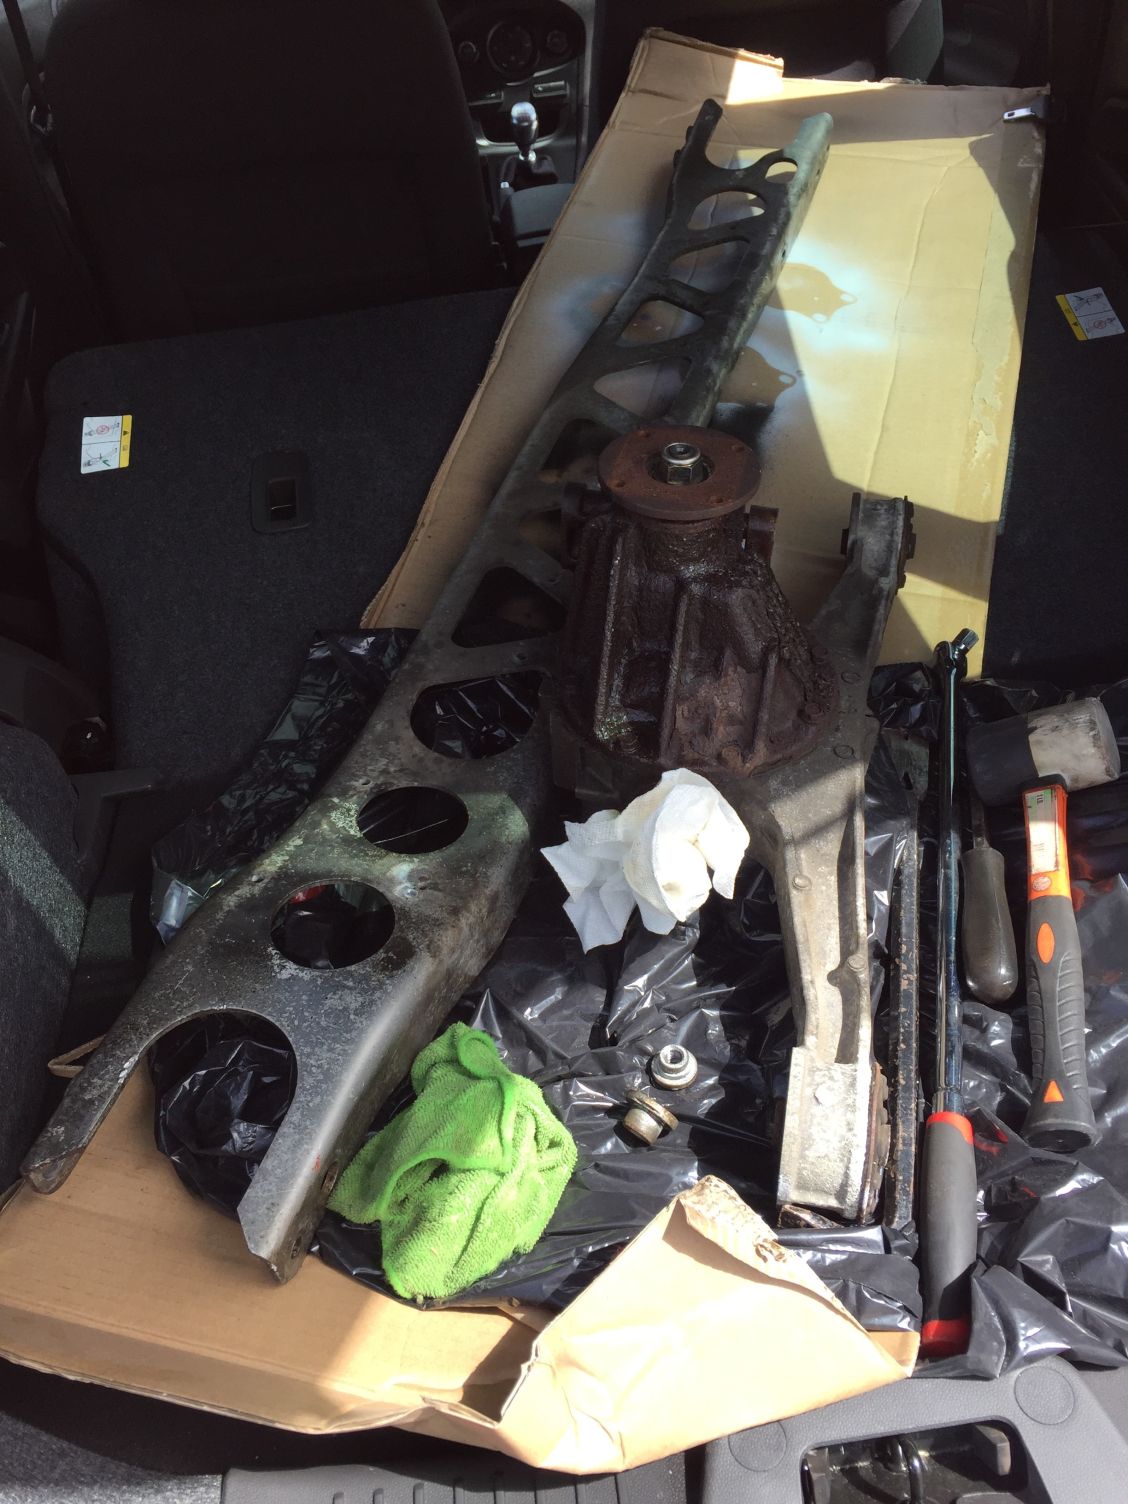
1. BOTH rear knuckles had the lower swivel bolt seized inside the lower rear control arms. COMPLETELY unusable. Therefore I sourced two knuckles and two rear lower control arms from Miata Mecca. Also ordered two new rear wheel bearings, and two new rear hubs.
2. The front driver lower control arm had the camber bolts siezed up. Ended up having to cut that out as well. So yeah, I ordered another one from Miata Mecca. That dude has gotten alot of business from me so far during this suspension restoration process. Look him up on eBay if you need parts.
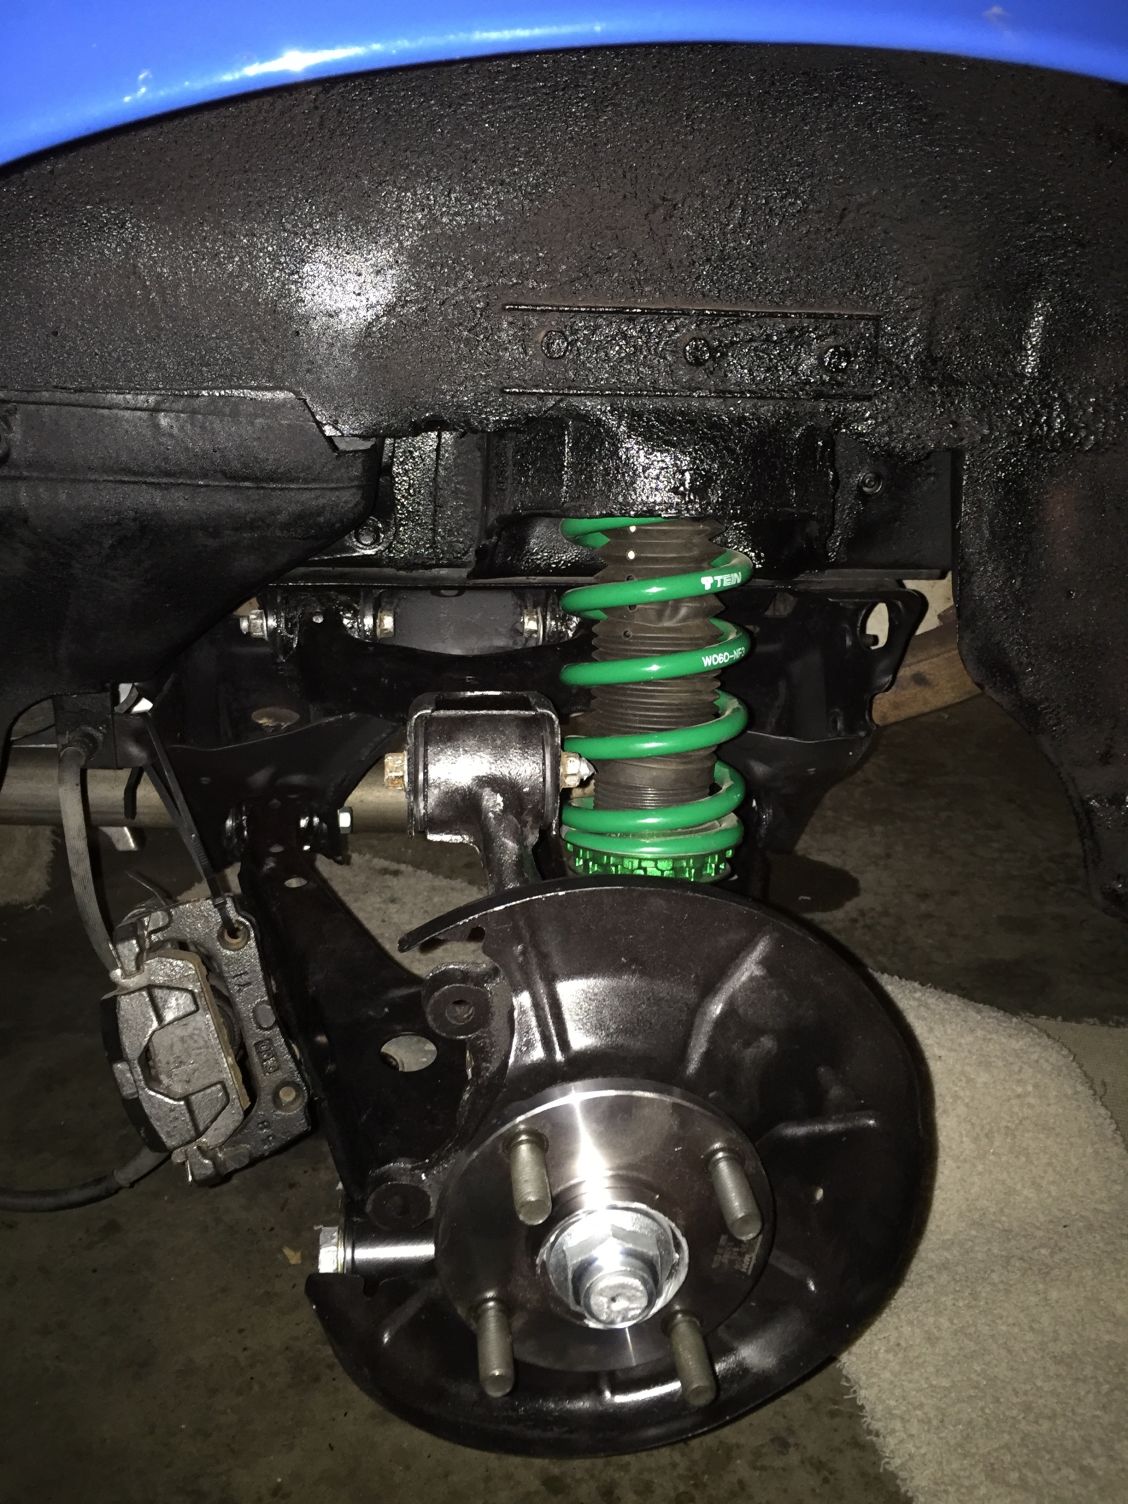
As brutal as this process has been, its allowed me to prep and repaint all suspension parts. All new poly bushings are in. Also ended up replacing around 80% of the bolts and hardware including all new camber bolts with the dual channel grooves. I'm making sure to use LOTS of anti-sieze this time around. My suspension is going to be basically brand new and I'm just about ready to start putting it back in. Just waiting on some new, powerdercoated lower diff mounting plates.
Cuz yeah, as you guessed it the ones I pulled off the car were corroding into pieces.....
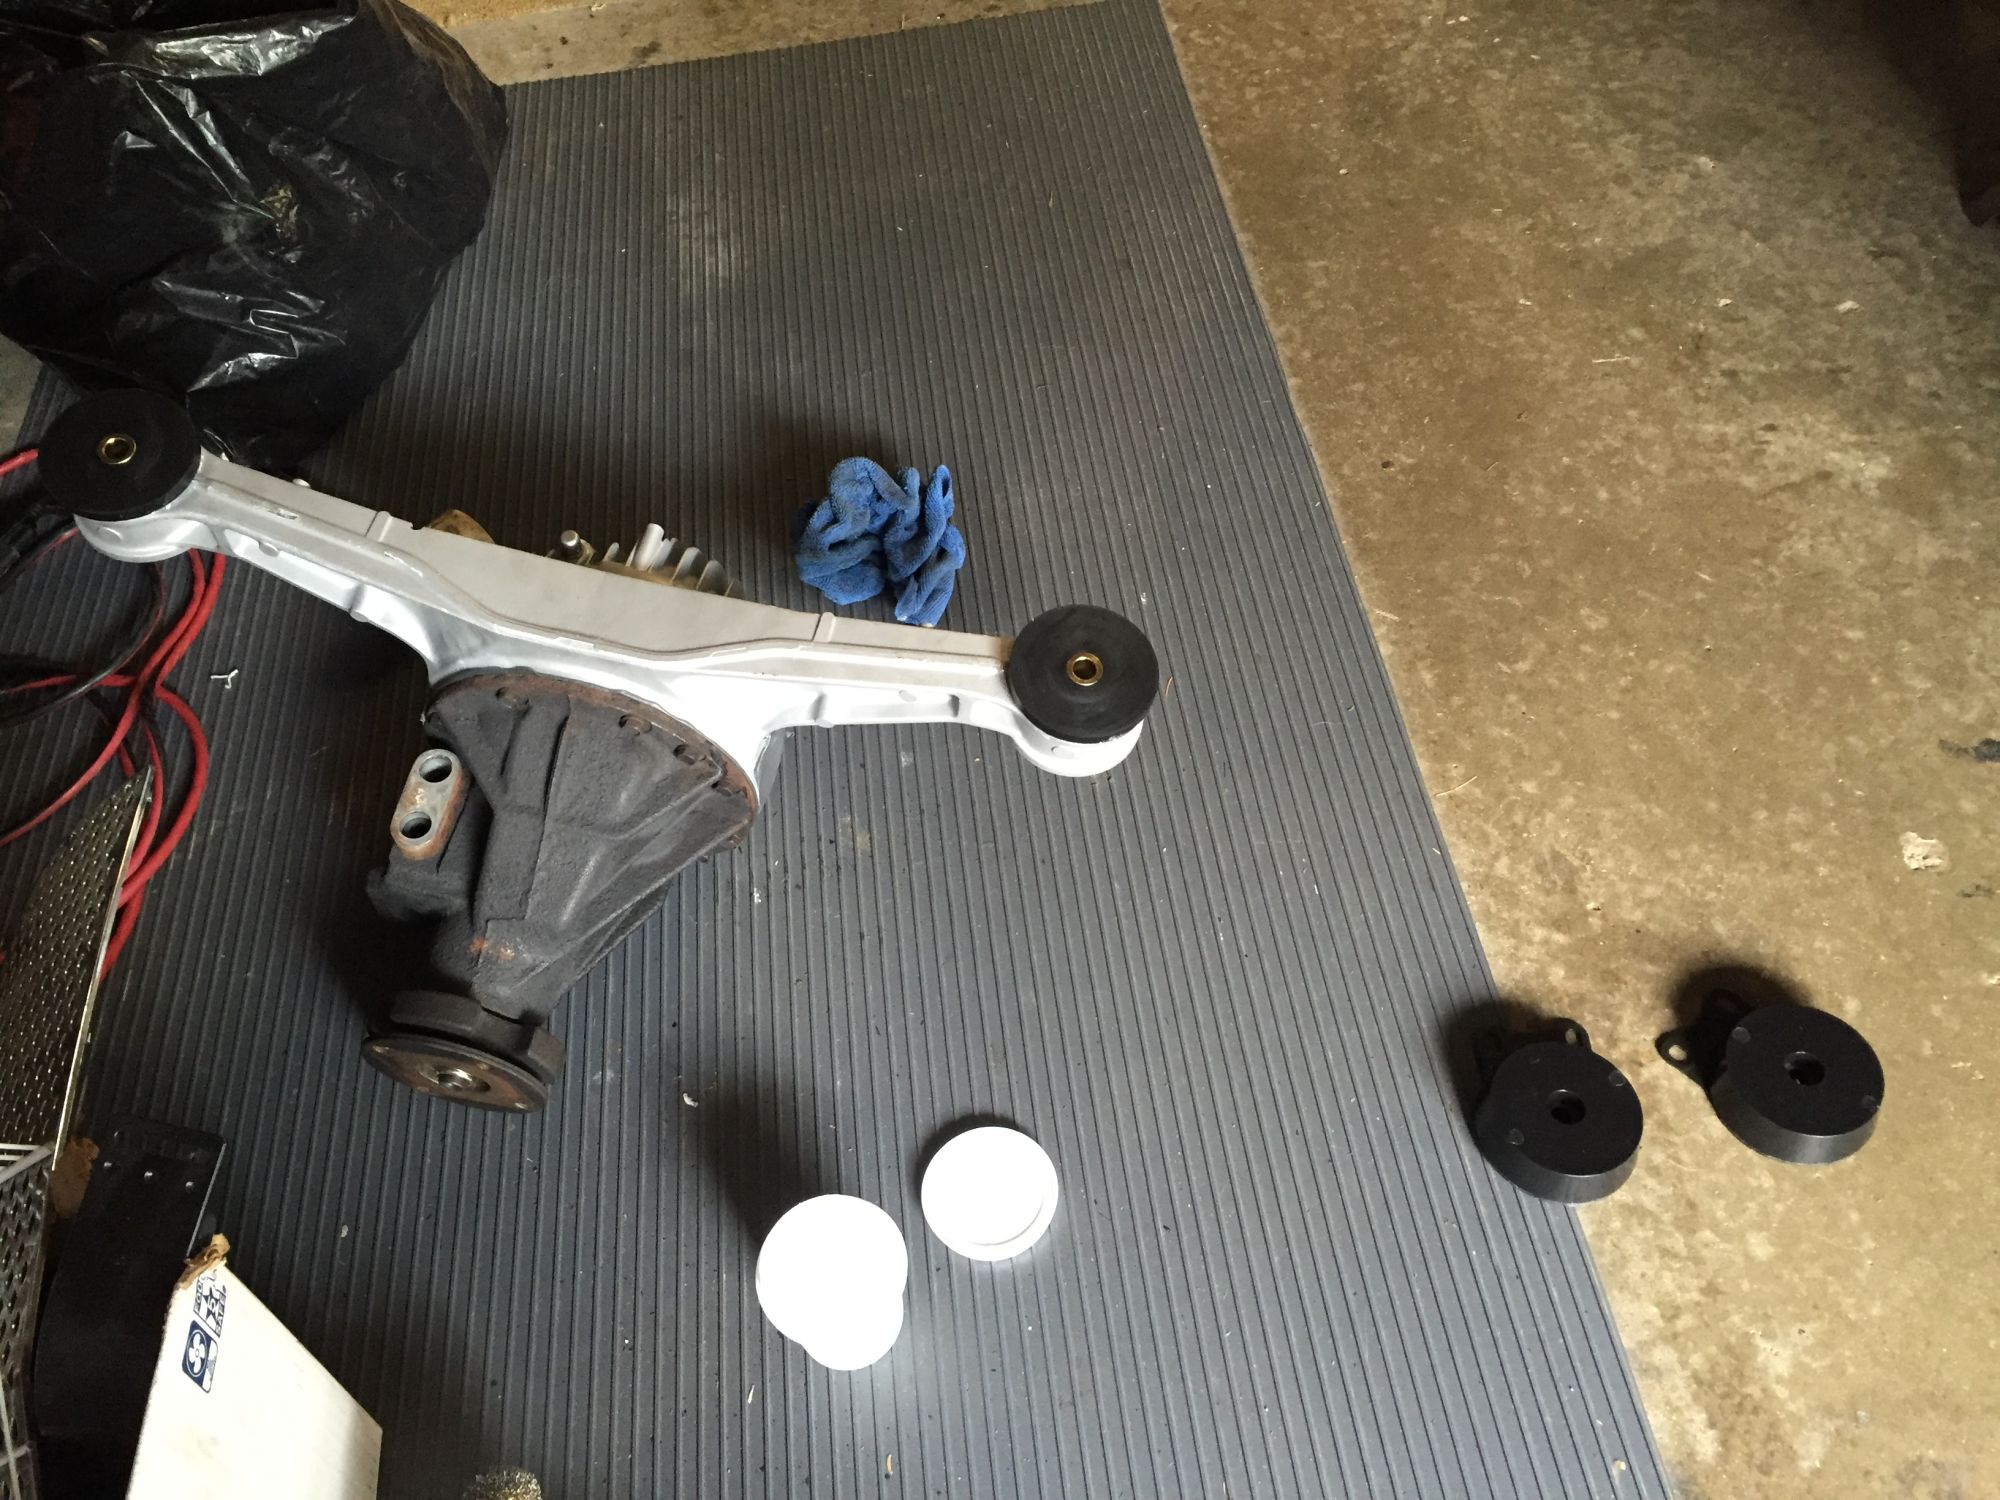
Got the remainder of the rear subframe brushed and coated with rust oleum rust stopper. Initially I was focused on just the control arm mounting points but then figured, hey since I'm here I mine as well prep and do the entire thing to keep it looking good for a long time. Also removed the OEM bushings from the lower diff plates and prepped them for the poly bushings. I'm really close to putting all the suspension back in.
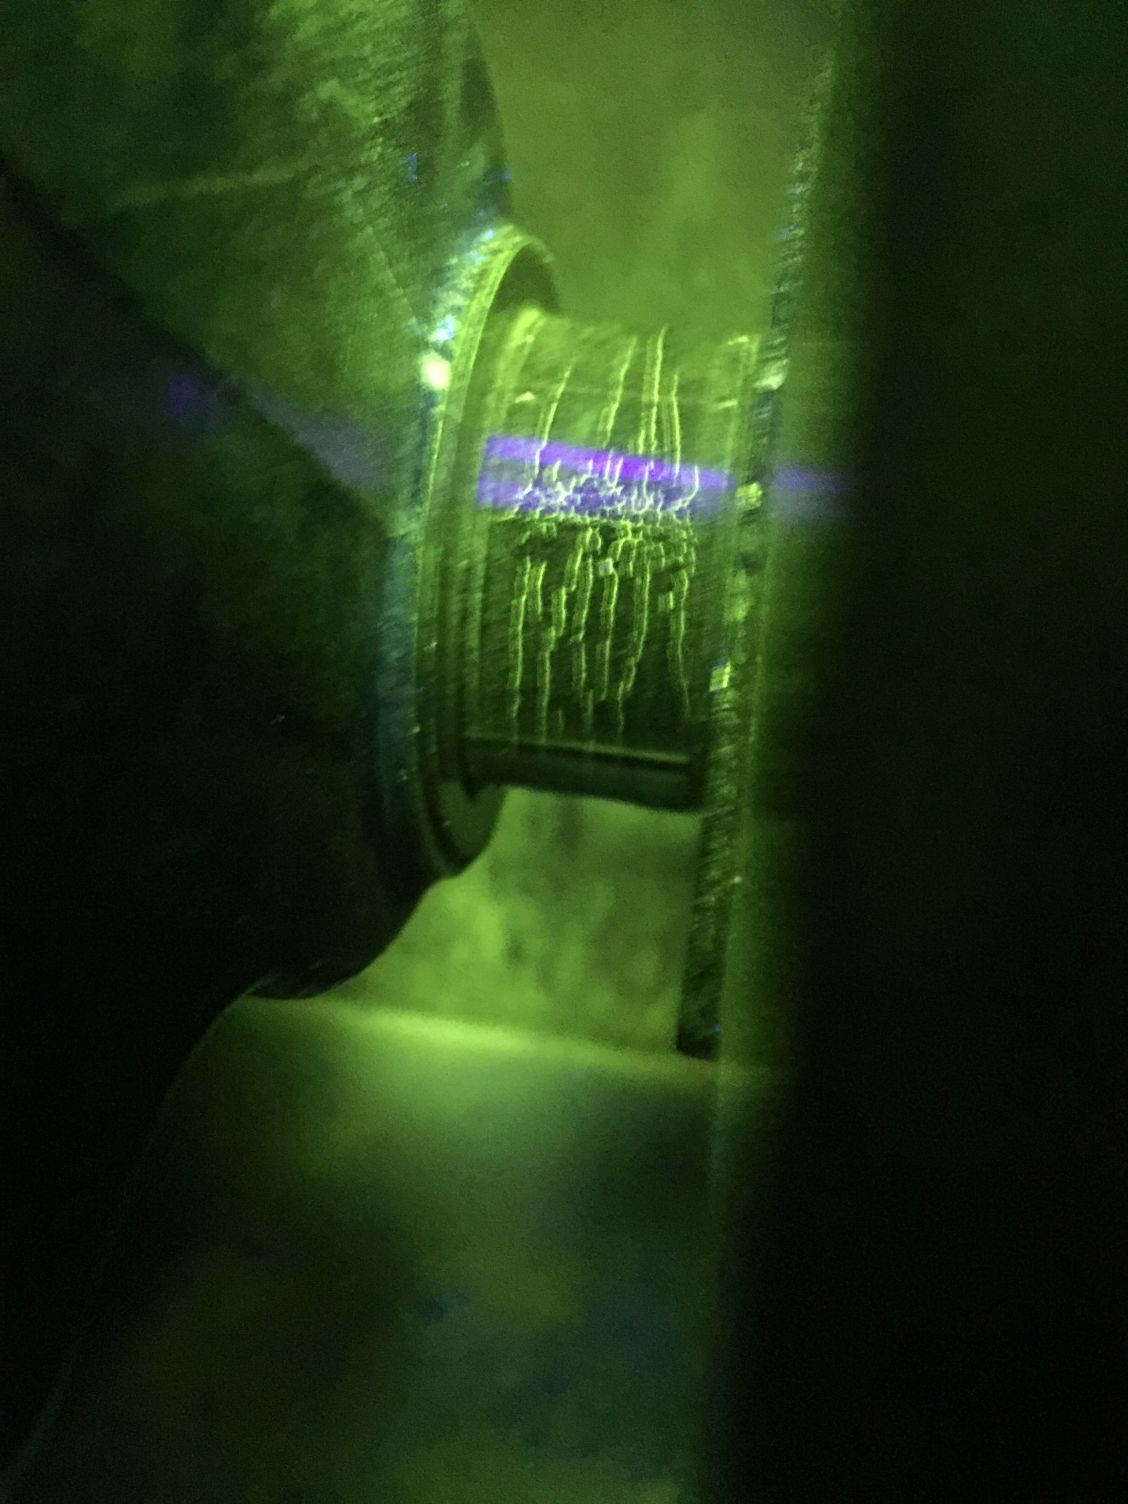
Well, crank showed what appeared to be heavy stress cracking on rod journal #4. Builder didn't want to send it out to get ground, which is understandable. I managed to find another one semi local and paid to have shipped to me over the weekend. #2 crank looked much better, came out of an n/a car. Rod journal 4 again showed some stressing perhaps, but barely anything compared to the first. We are sending it out for a -.25mm grind to run these King XP bearings I already have. From what I know of Miata cranks, I'm expecting it to be just fine.
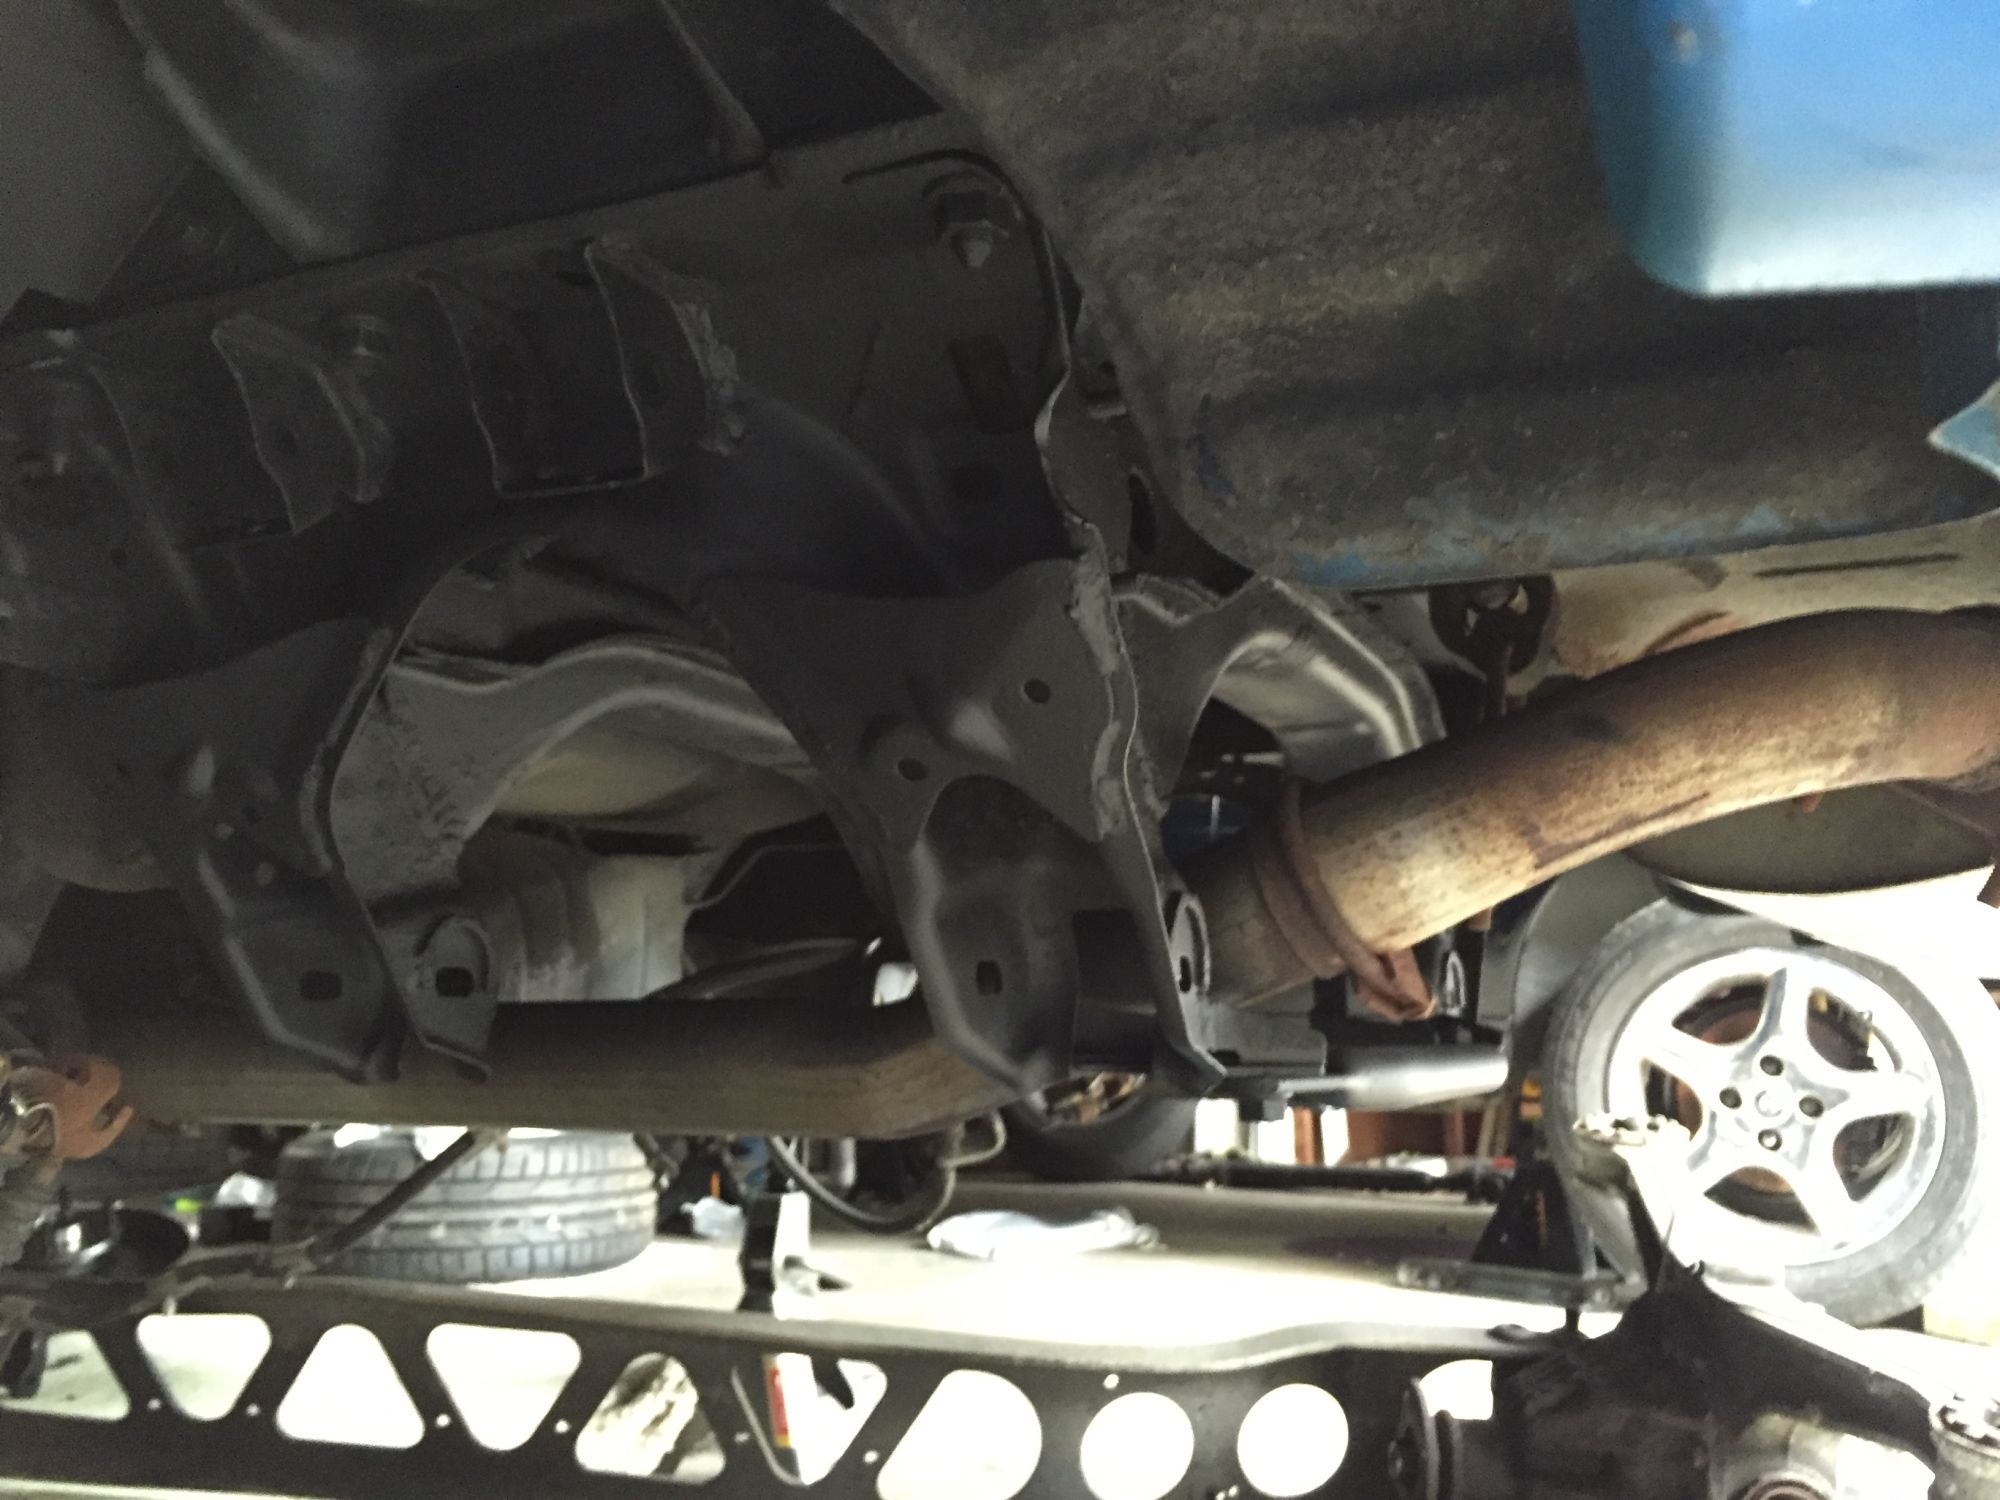
Finally got that #4 ppf bolt out. Had to drop the diff and the ppf as one piece in order to "massage" it enough. Air, heat, pb, cheater bar, nothing would break it loose. In the end, it took voodoo magic, a 4.5" cutting wheel, and threatening to burn the car to the ground to get it out. Finally, with a combination of all the above, we managed to get it out.
Then proceeded to put poly bushings in the torsen, clean/paint/mount it to the diff, and lift the entire unit into place. This was especially challenging with my exhaust still in place and doing it by myself. But with a jack, a stack of 2x4's and a bunch of patience I finally got the diff lifted into place level and toqued down.
All the poly bushings, new hardware, and suspension components are now in place.
Rather catch this stuff now and do the motor work right the first time. I didn't realize that testing in this method wasn't common practice when doing bottom end work, but my builder does it and magnaflux's the block as well every time....so whatever. To me, its worth a few bucks to know what's going on. I'll post a picture of what crank #2 looks like post -.25mm grind. If anything, it's good for the forums.
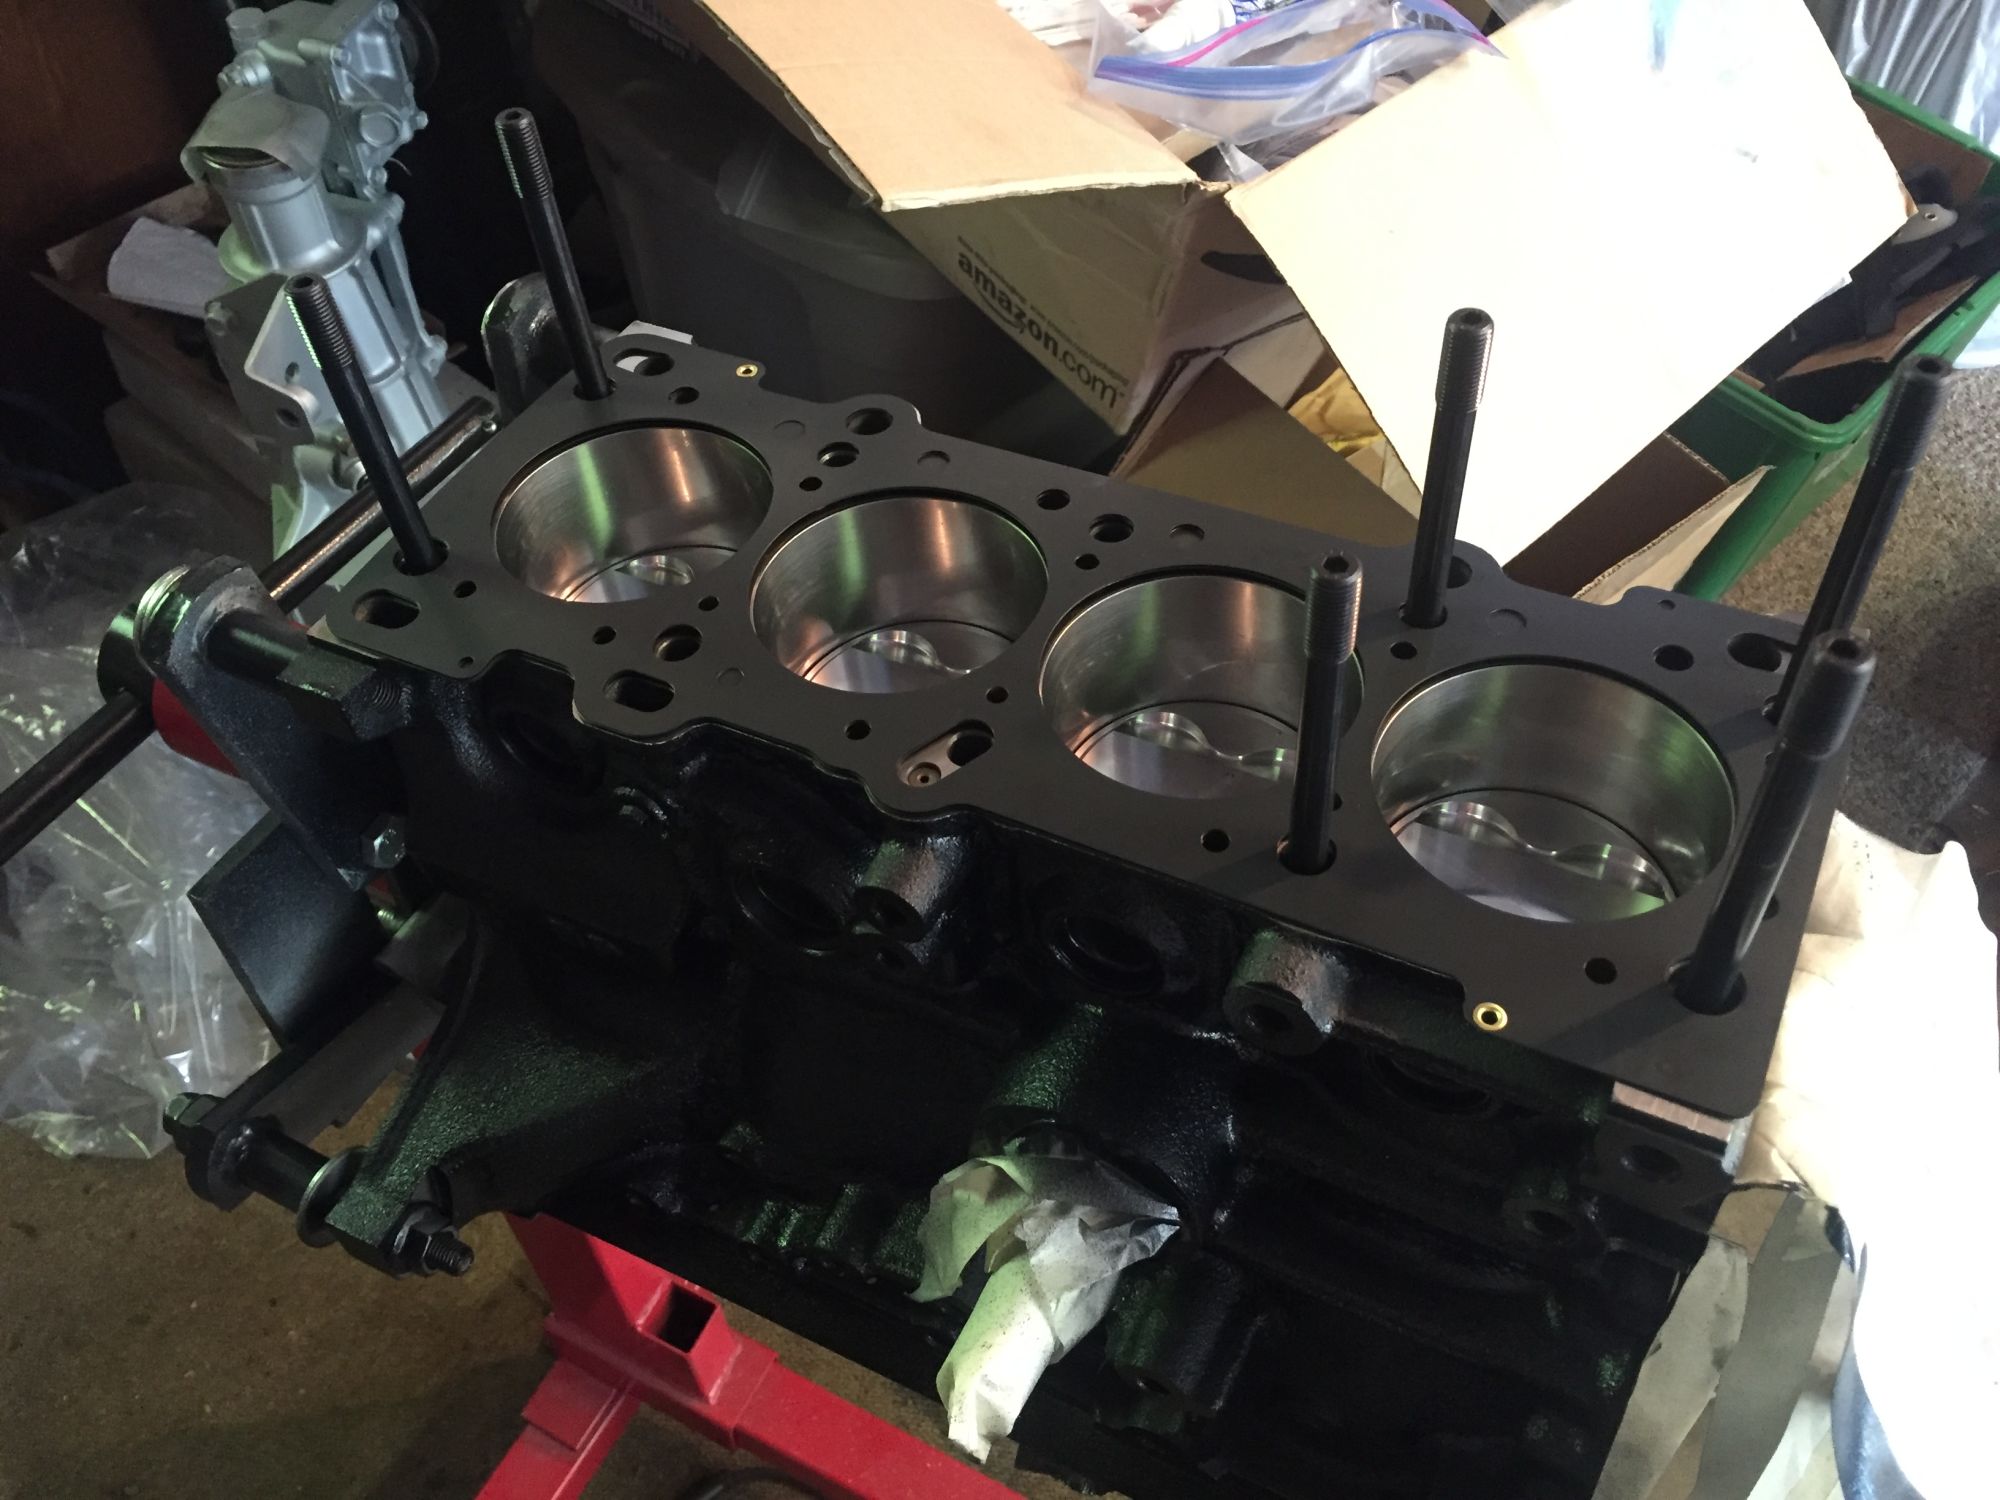
Block got bored today. Progress is being made FINALLY on the bottom end after all these unexpected things, so I'm happy.
All engine bay harness loom is now rewrapped with the Tesca high temp black fabric loom wrap. Looks SO much cleaner that the OEM plastic tubing.
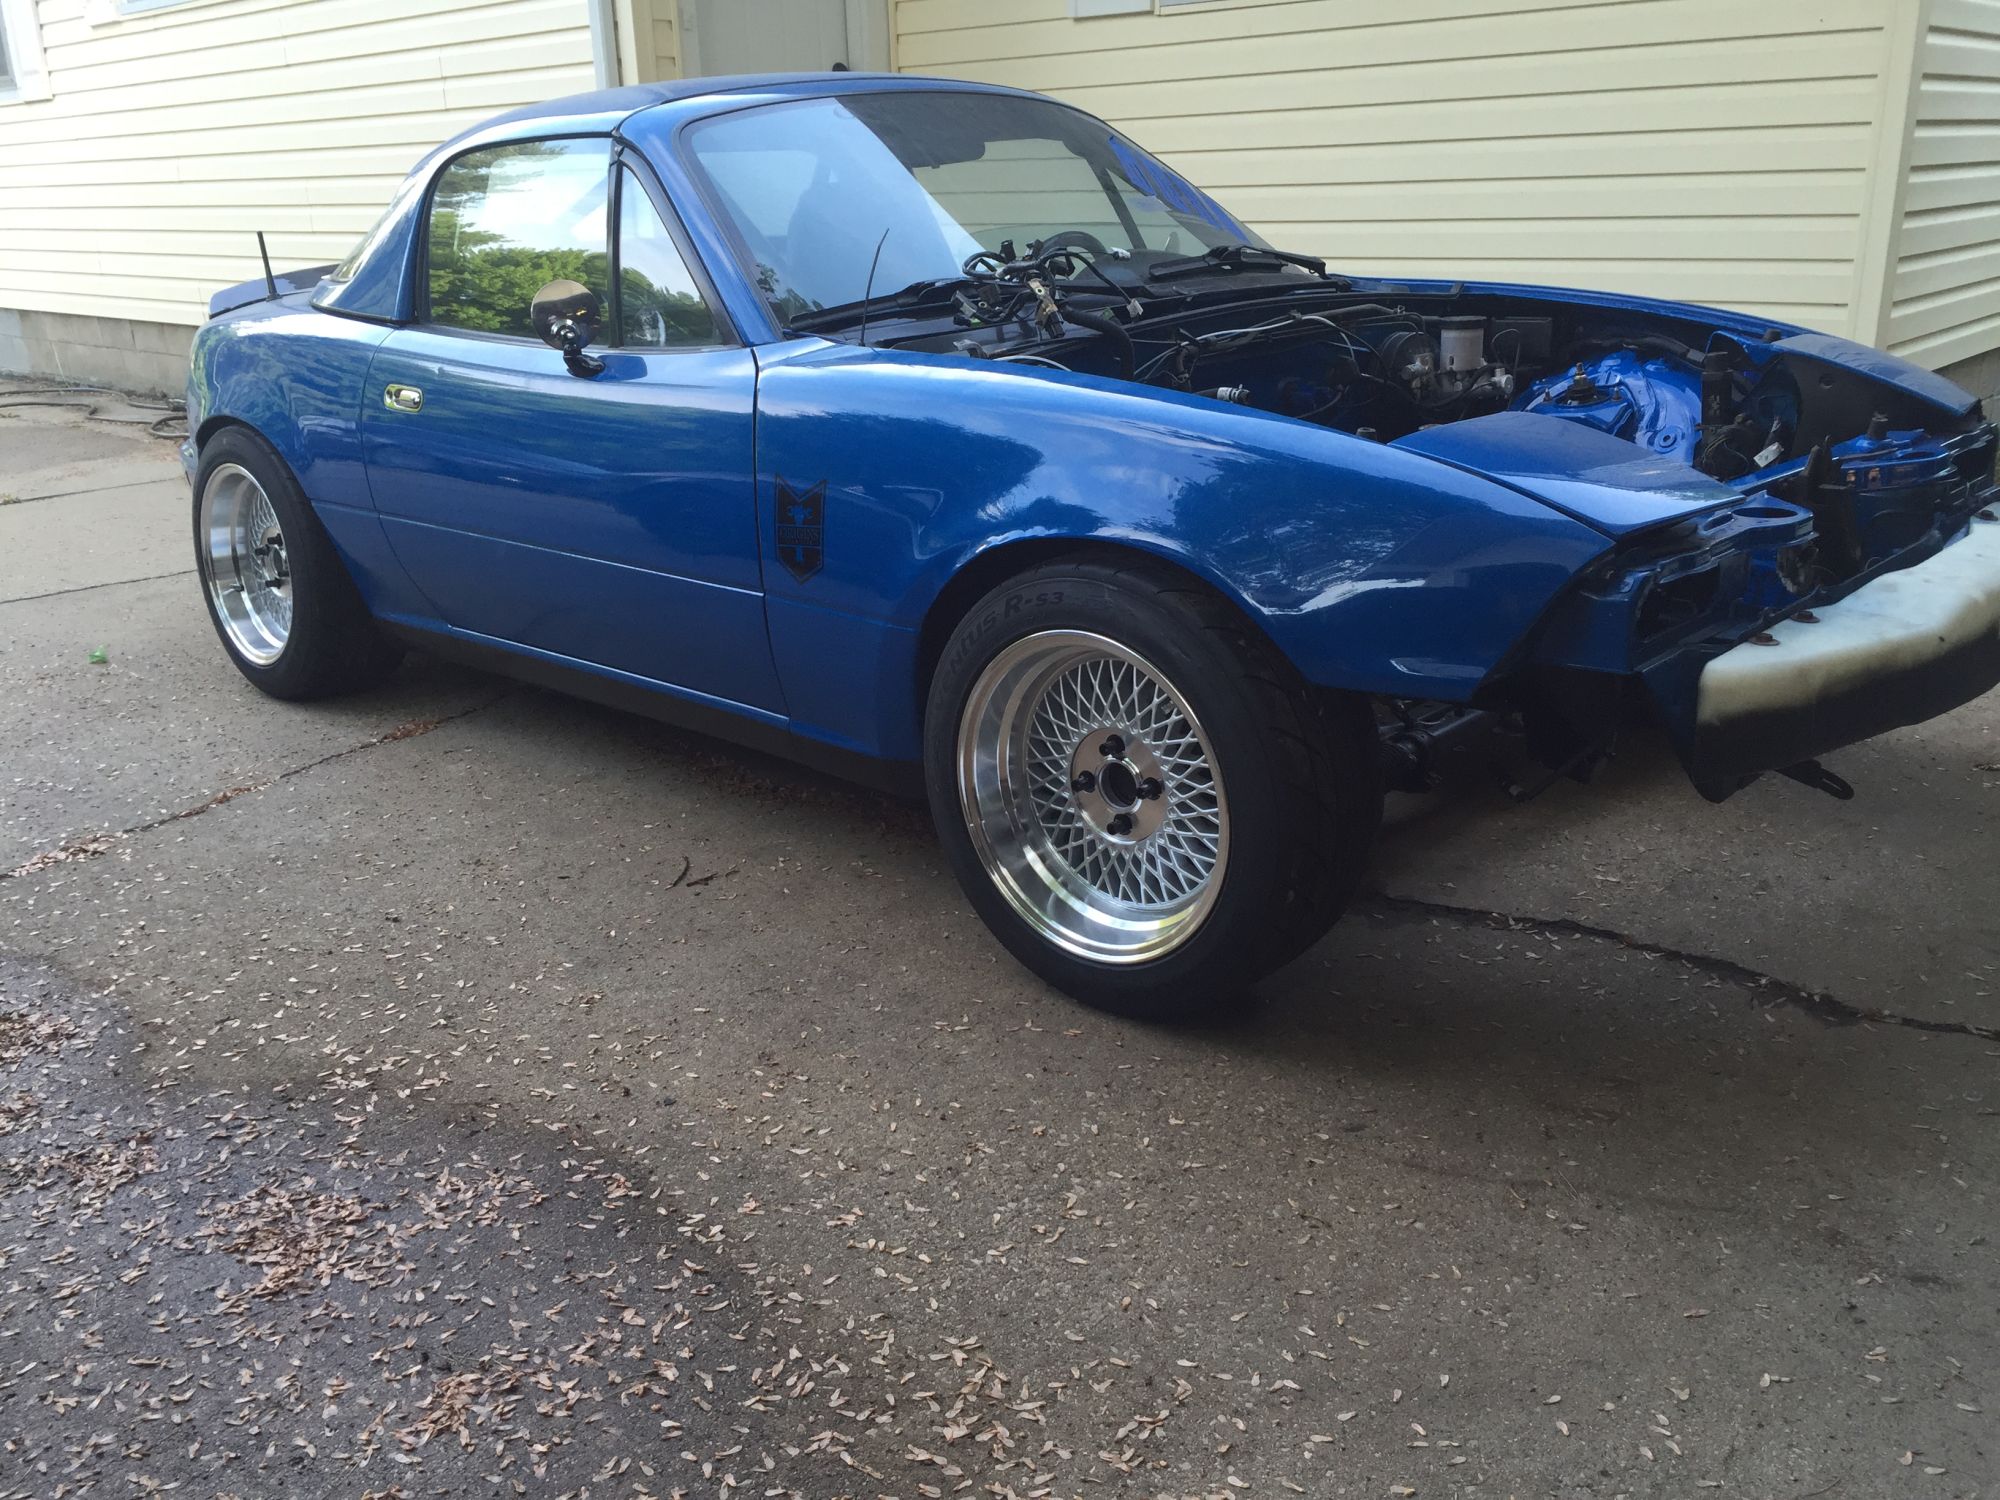
Fluid is in the diff and axle nuts torqued down now that I was able to test fit the new wheel/tire setup. Without the motor in, I'm not worried at this point about dialing in ride height. I'll want it a bit higher in the back when it's all said and done and obviously lower in the front. Who makes the best fitting aluminum skid plate?
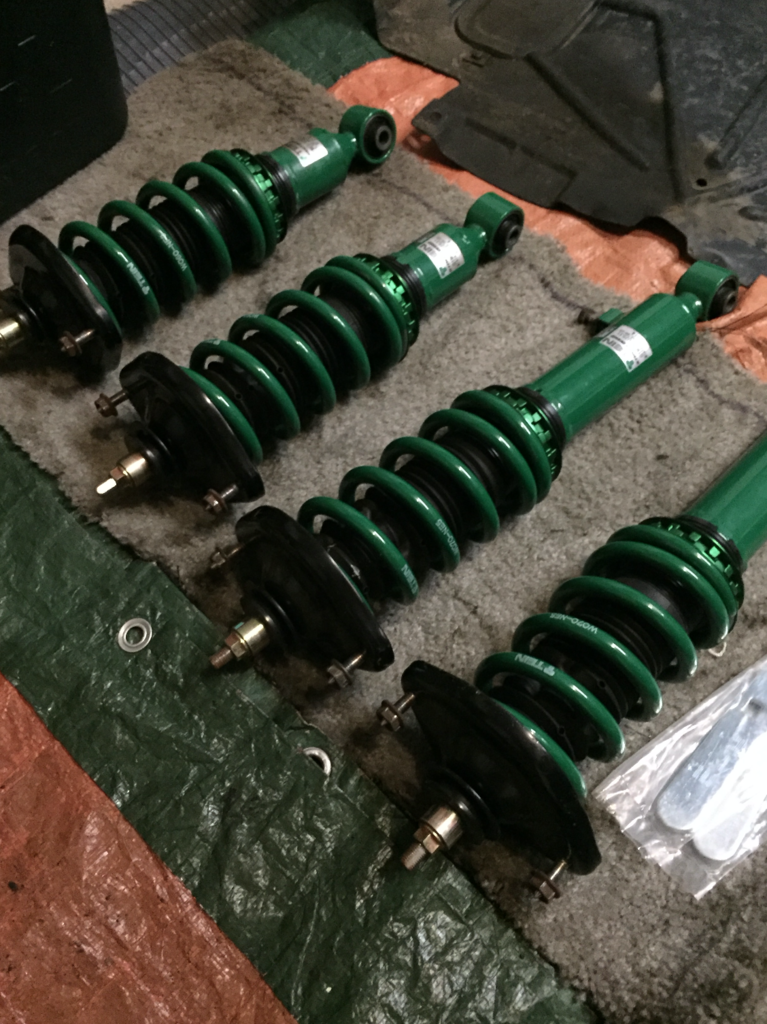
FWIW, I have those coilovers and regarding your comment about adjusting ride height:
The damping on those coilovers is preset, and unfortunately can not be adjusted. I found that adjusting the ride height, even small increments (~.25") resulted in terrible performance out of them. Bouncy, bottoming, un-planted, it was not pleasant. I am aware they are not the best coilovers in the world but they do perform quite well AT their prescribed "reference height" TEIN tells you to set them at when installing. Anything lower and they are terrible. I would look up that reference value from TEIN, and set them there, then enjoy your 100% performing Street Basis'.
Car looks great man, so much attention to detail and cleanliness. I like.
Man, GREAT info. I will look and see what they suggest. Appreciate the kind words, I'm really getting antsy trying to wrap this thing up.
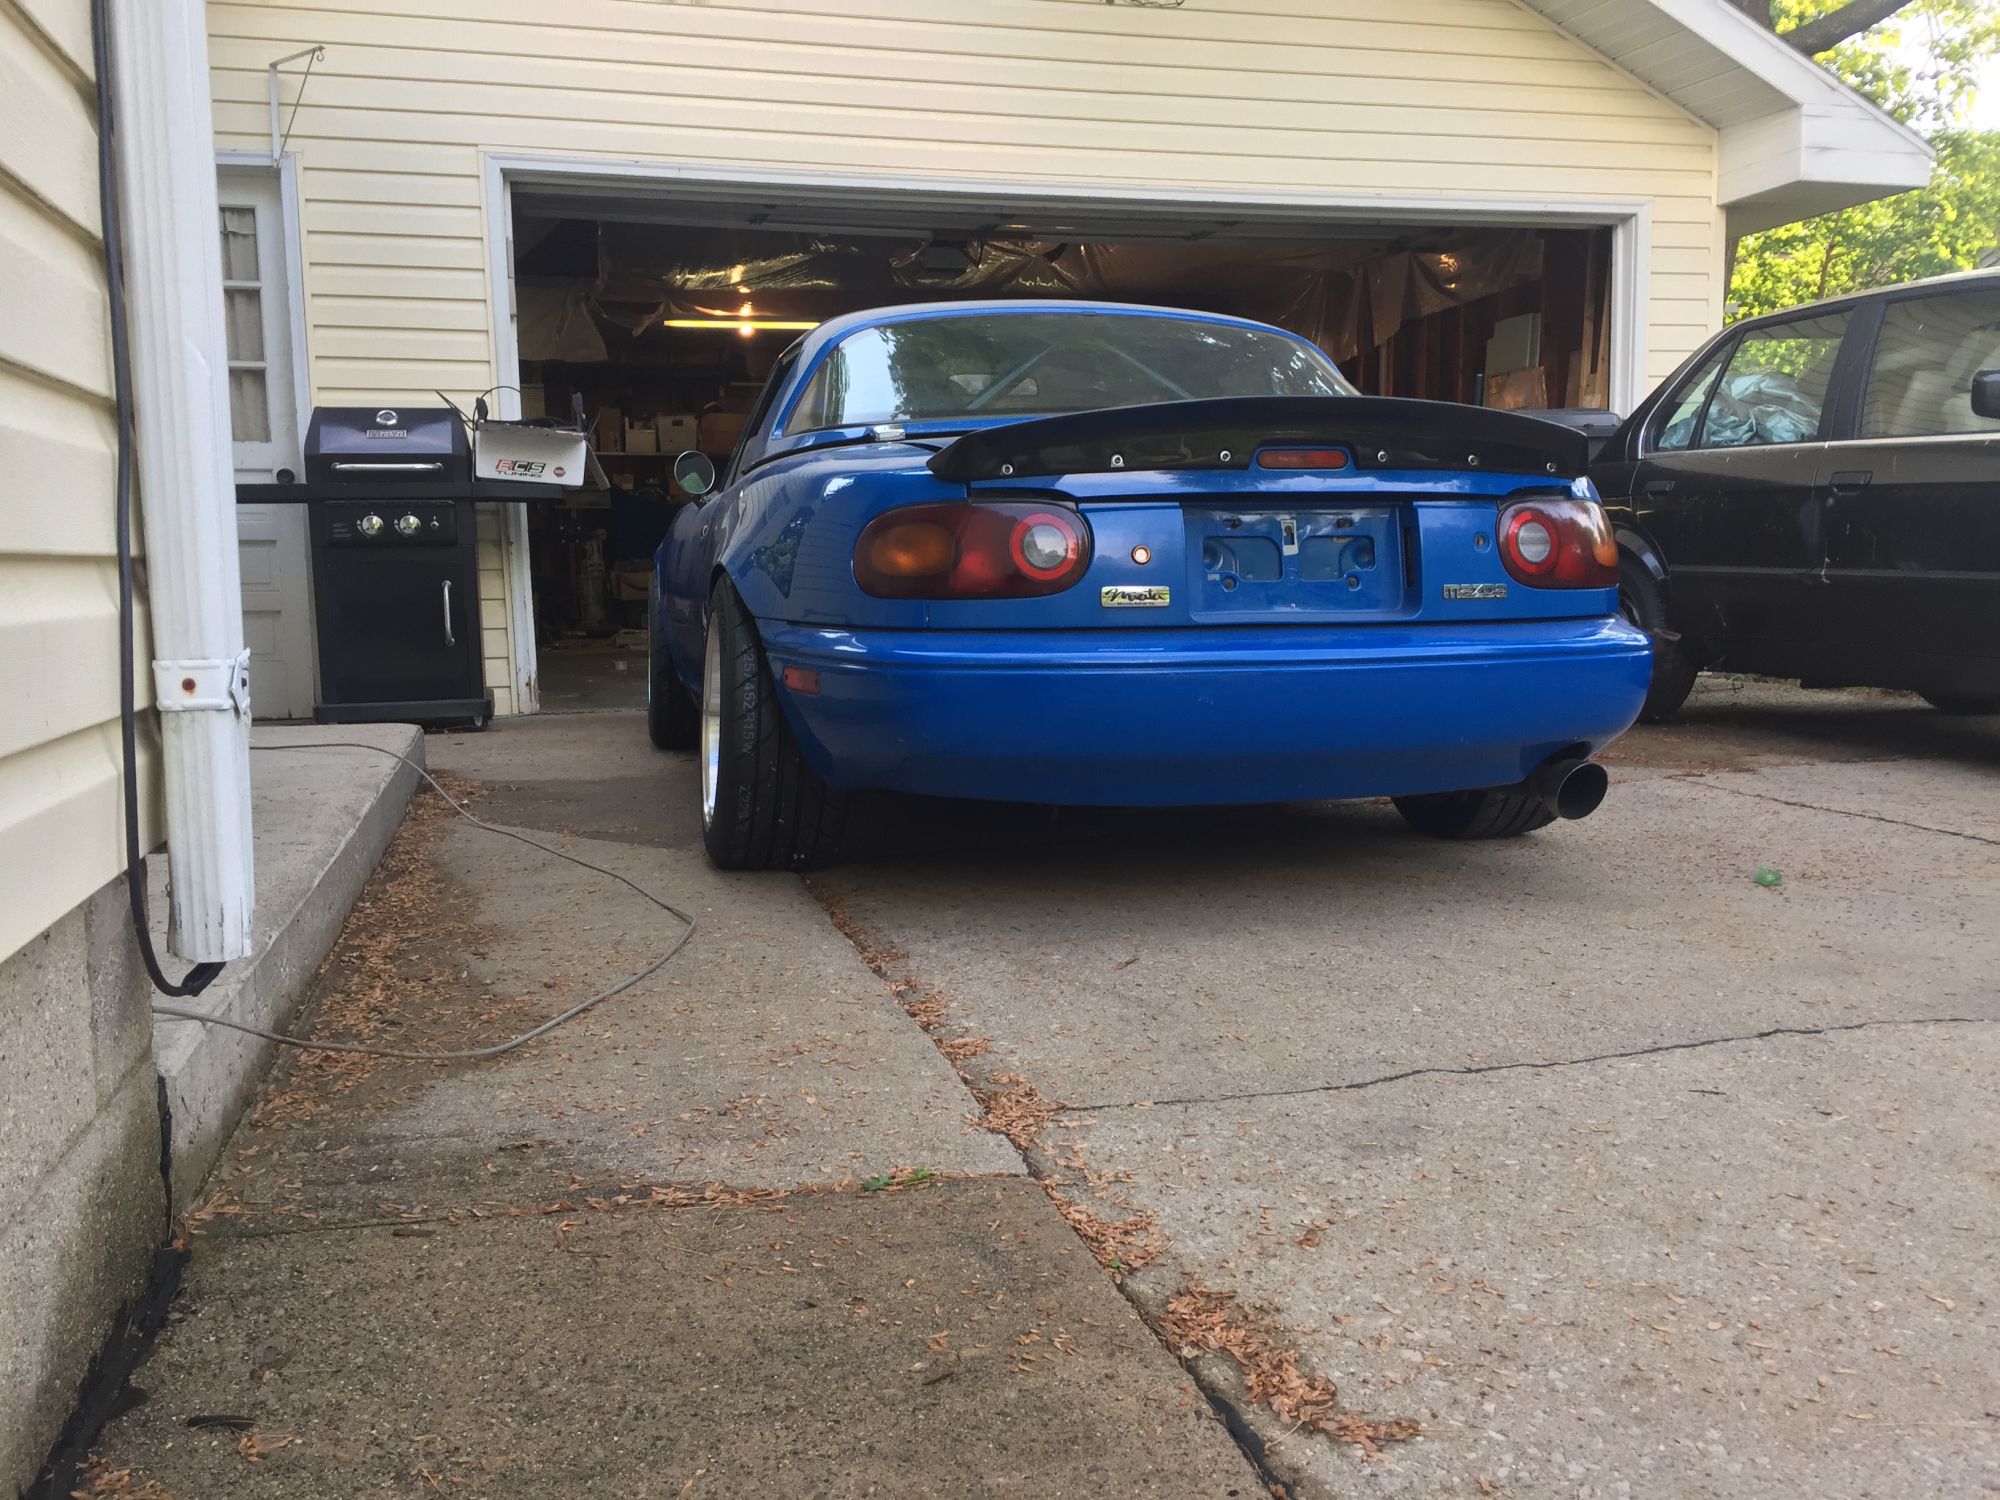
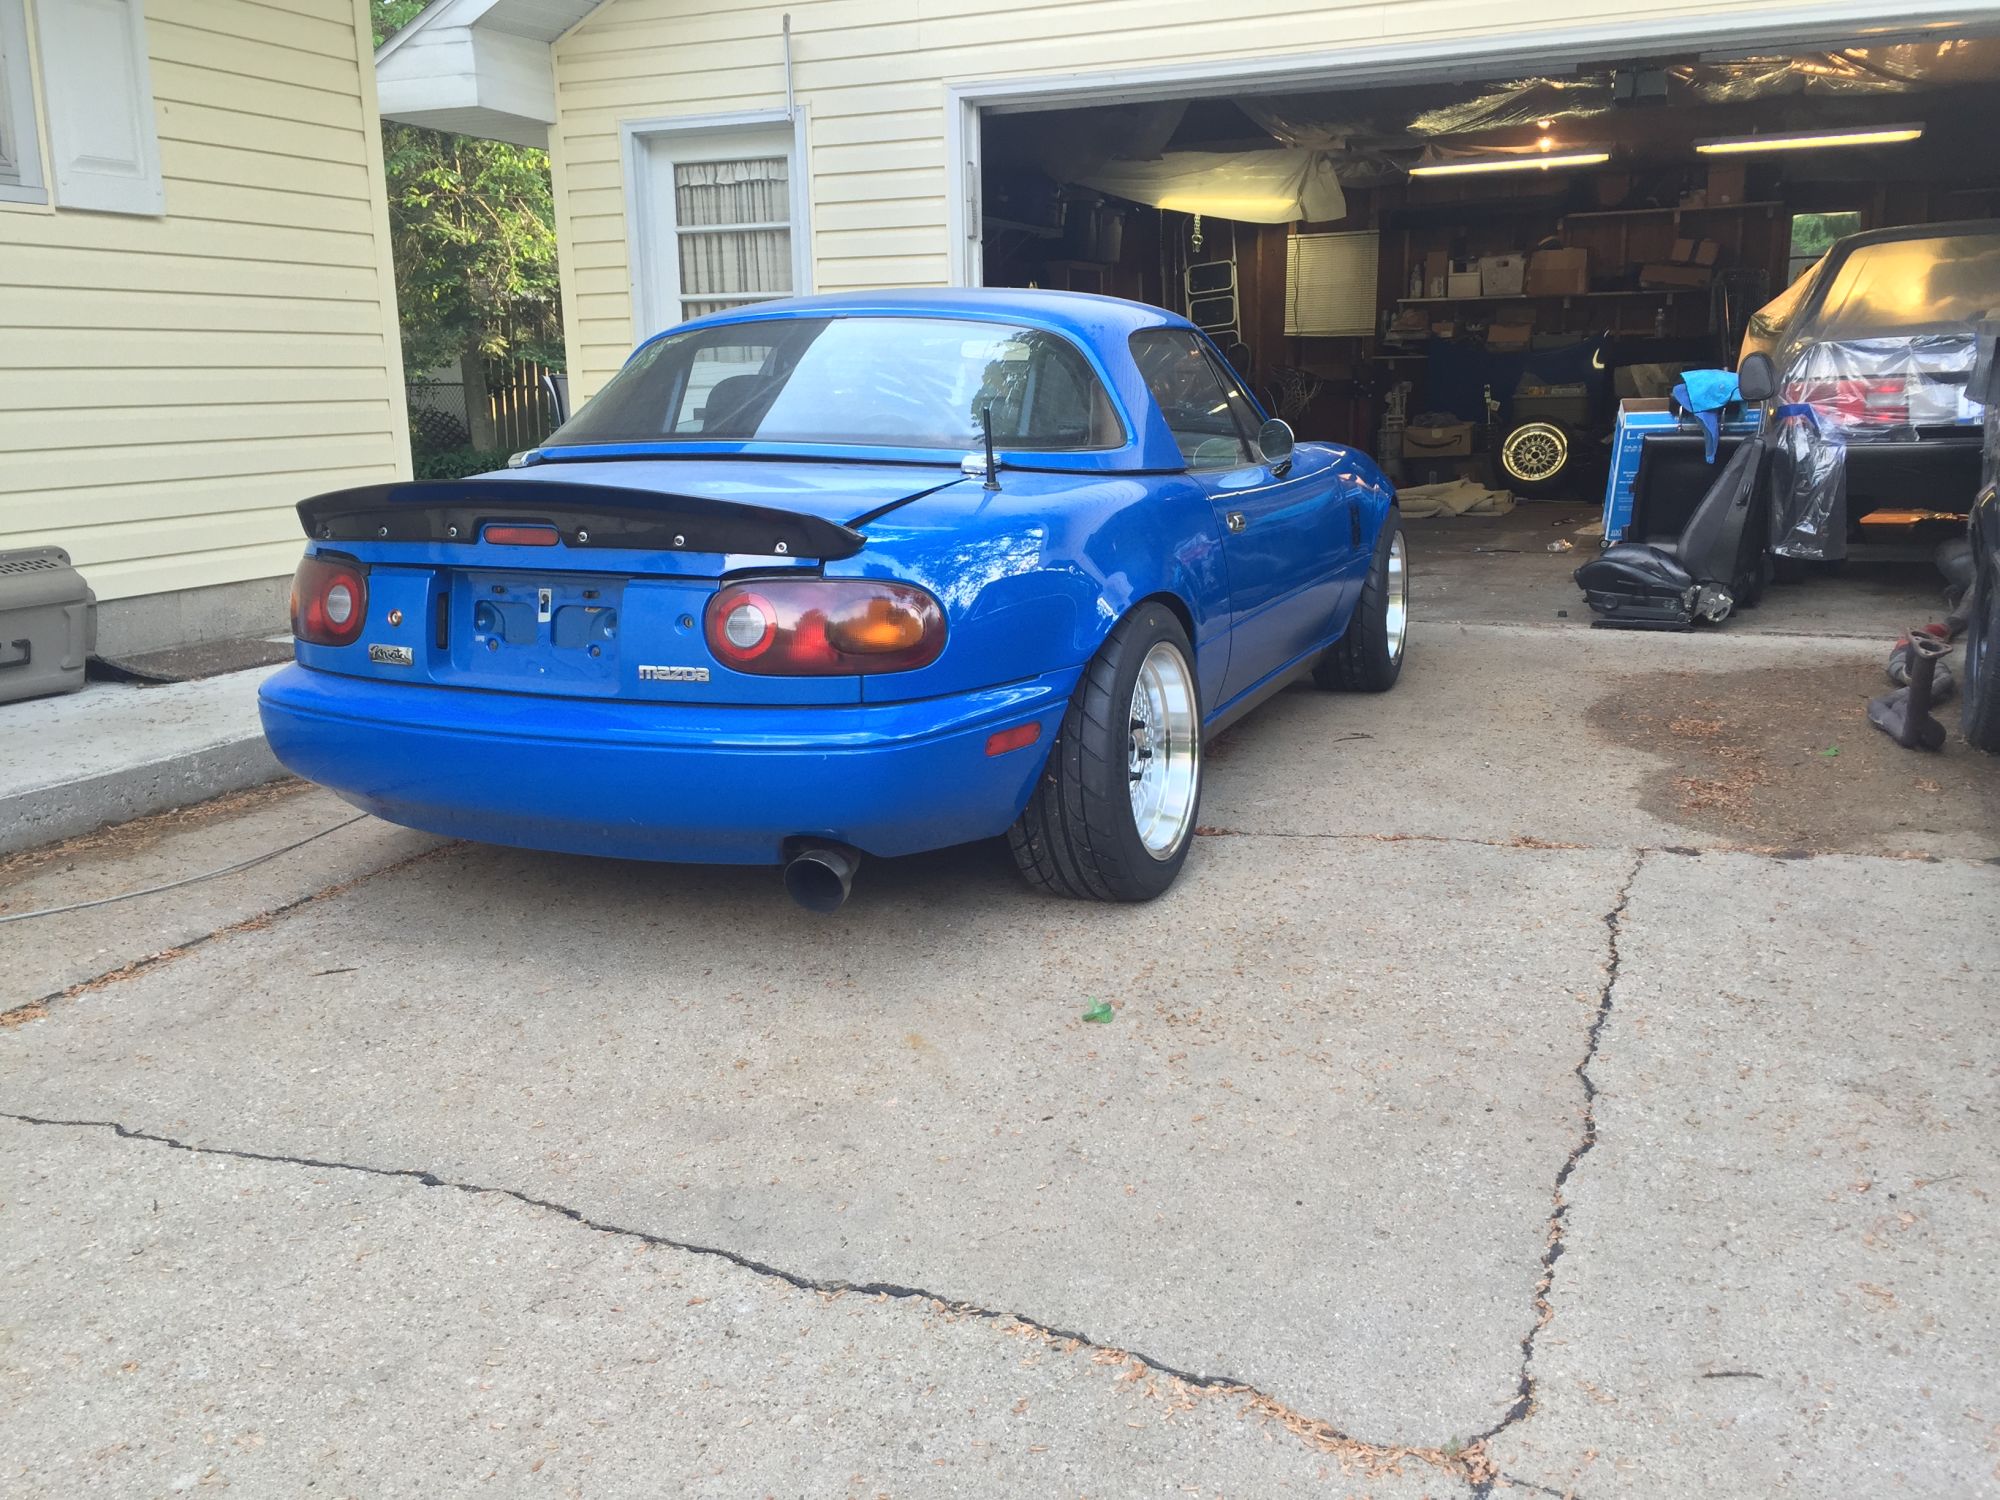
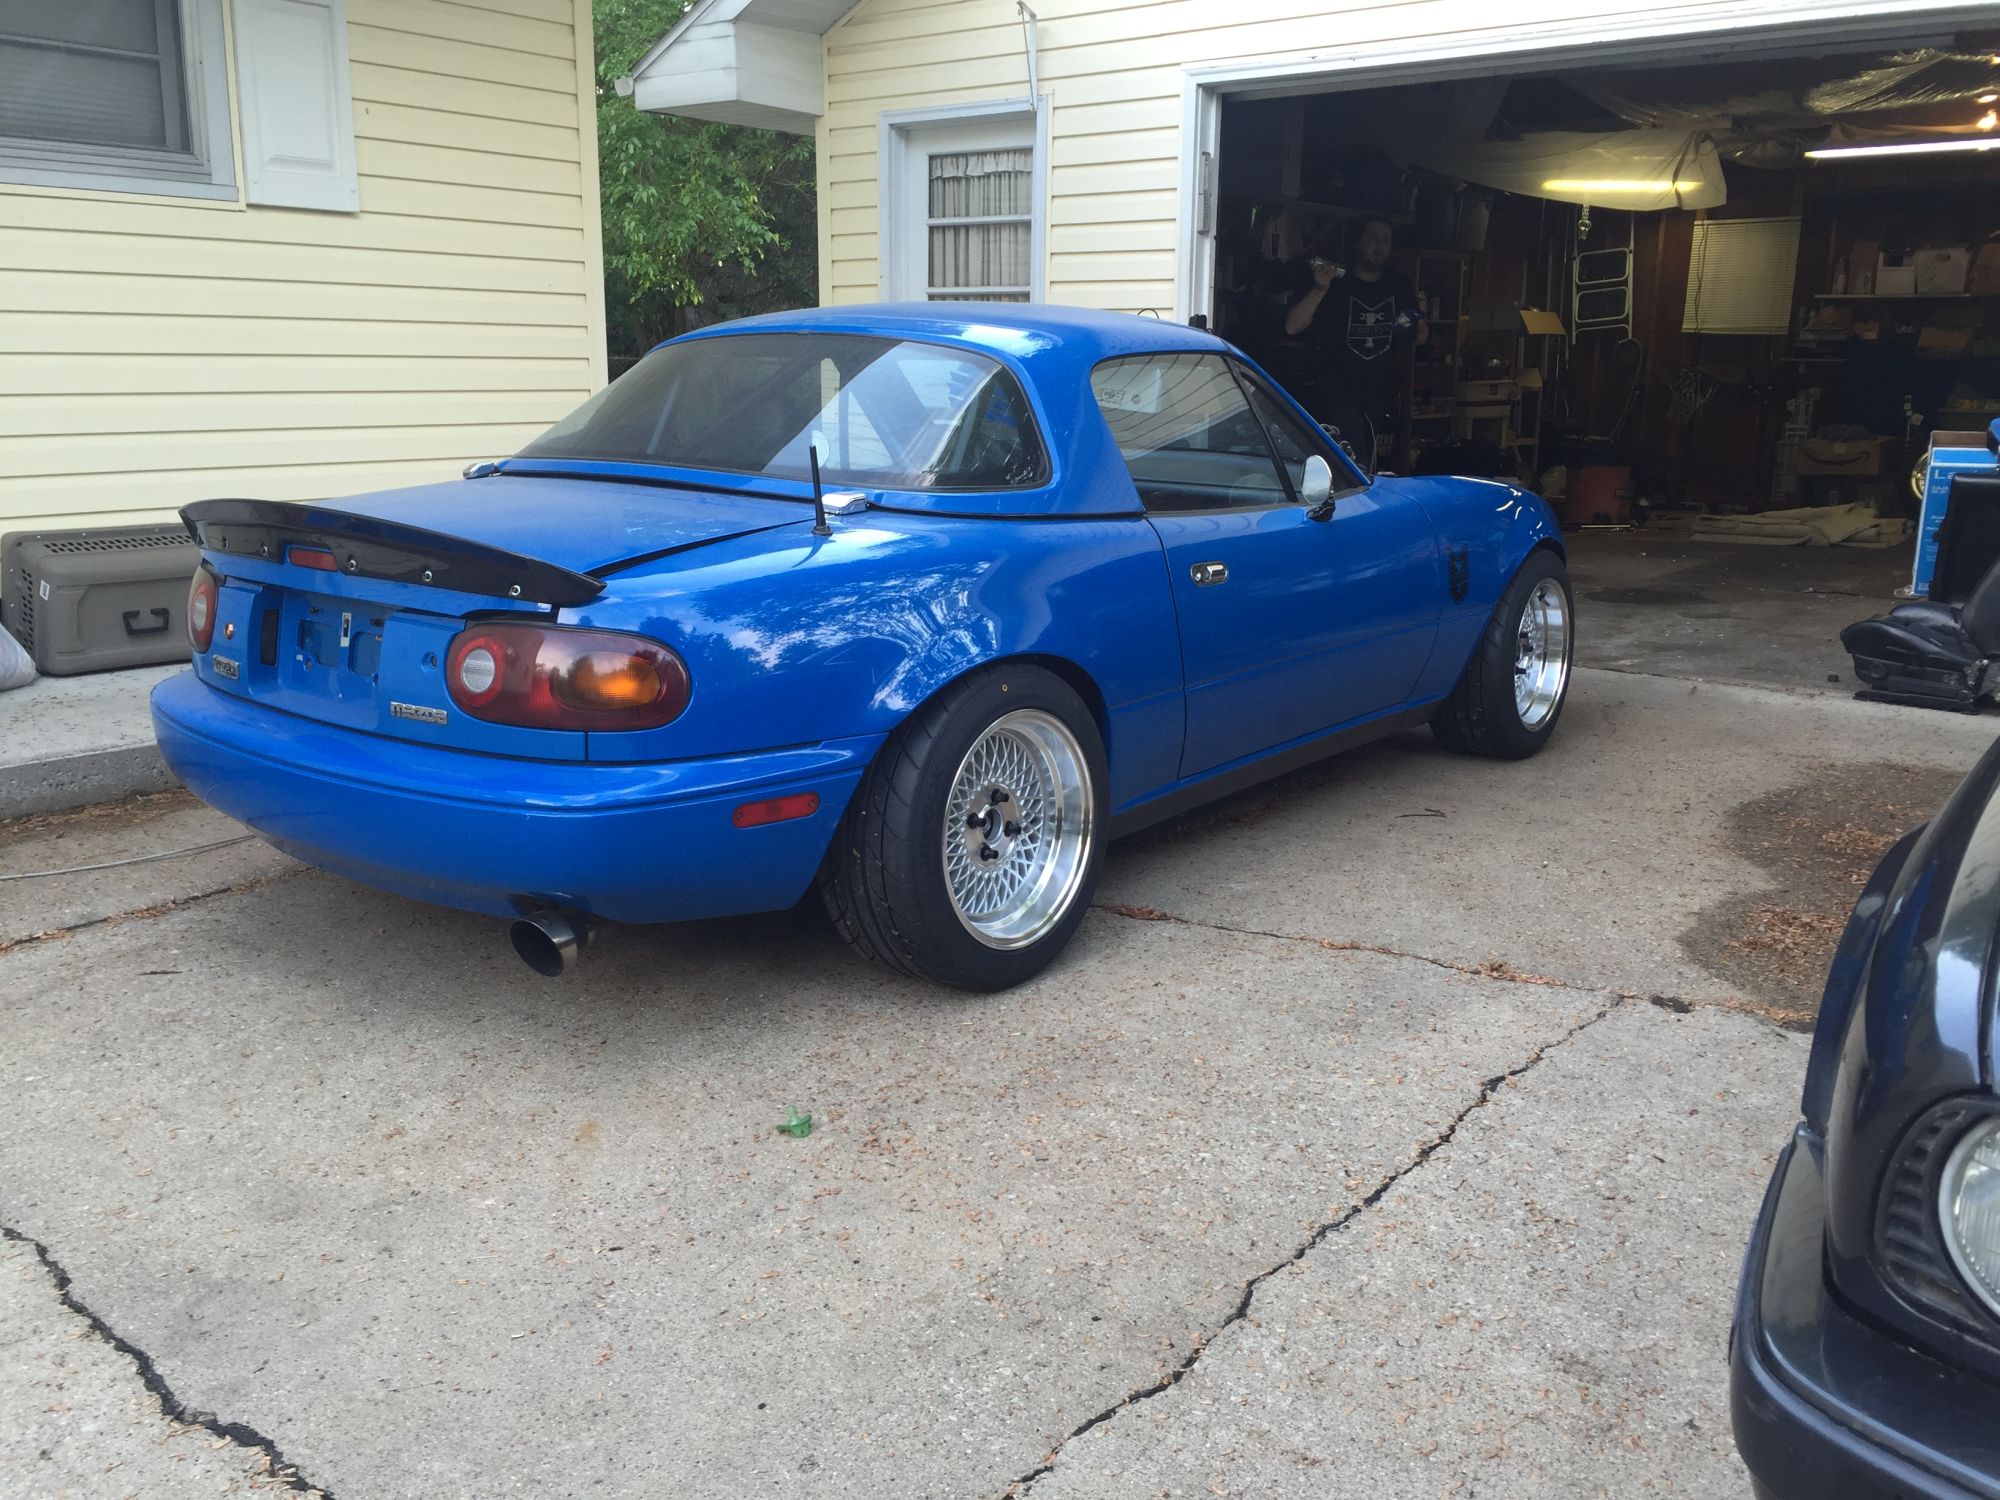
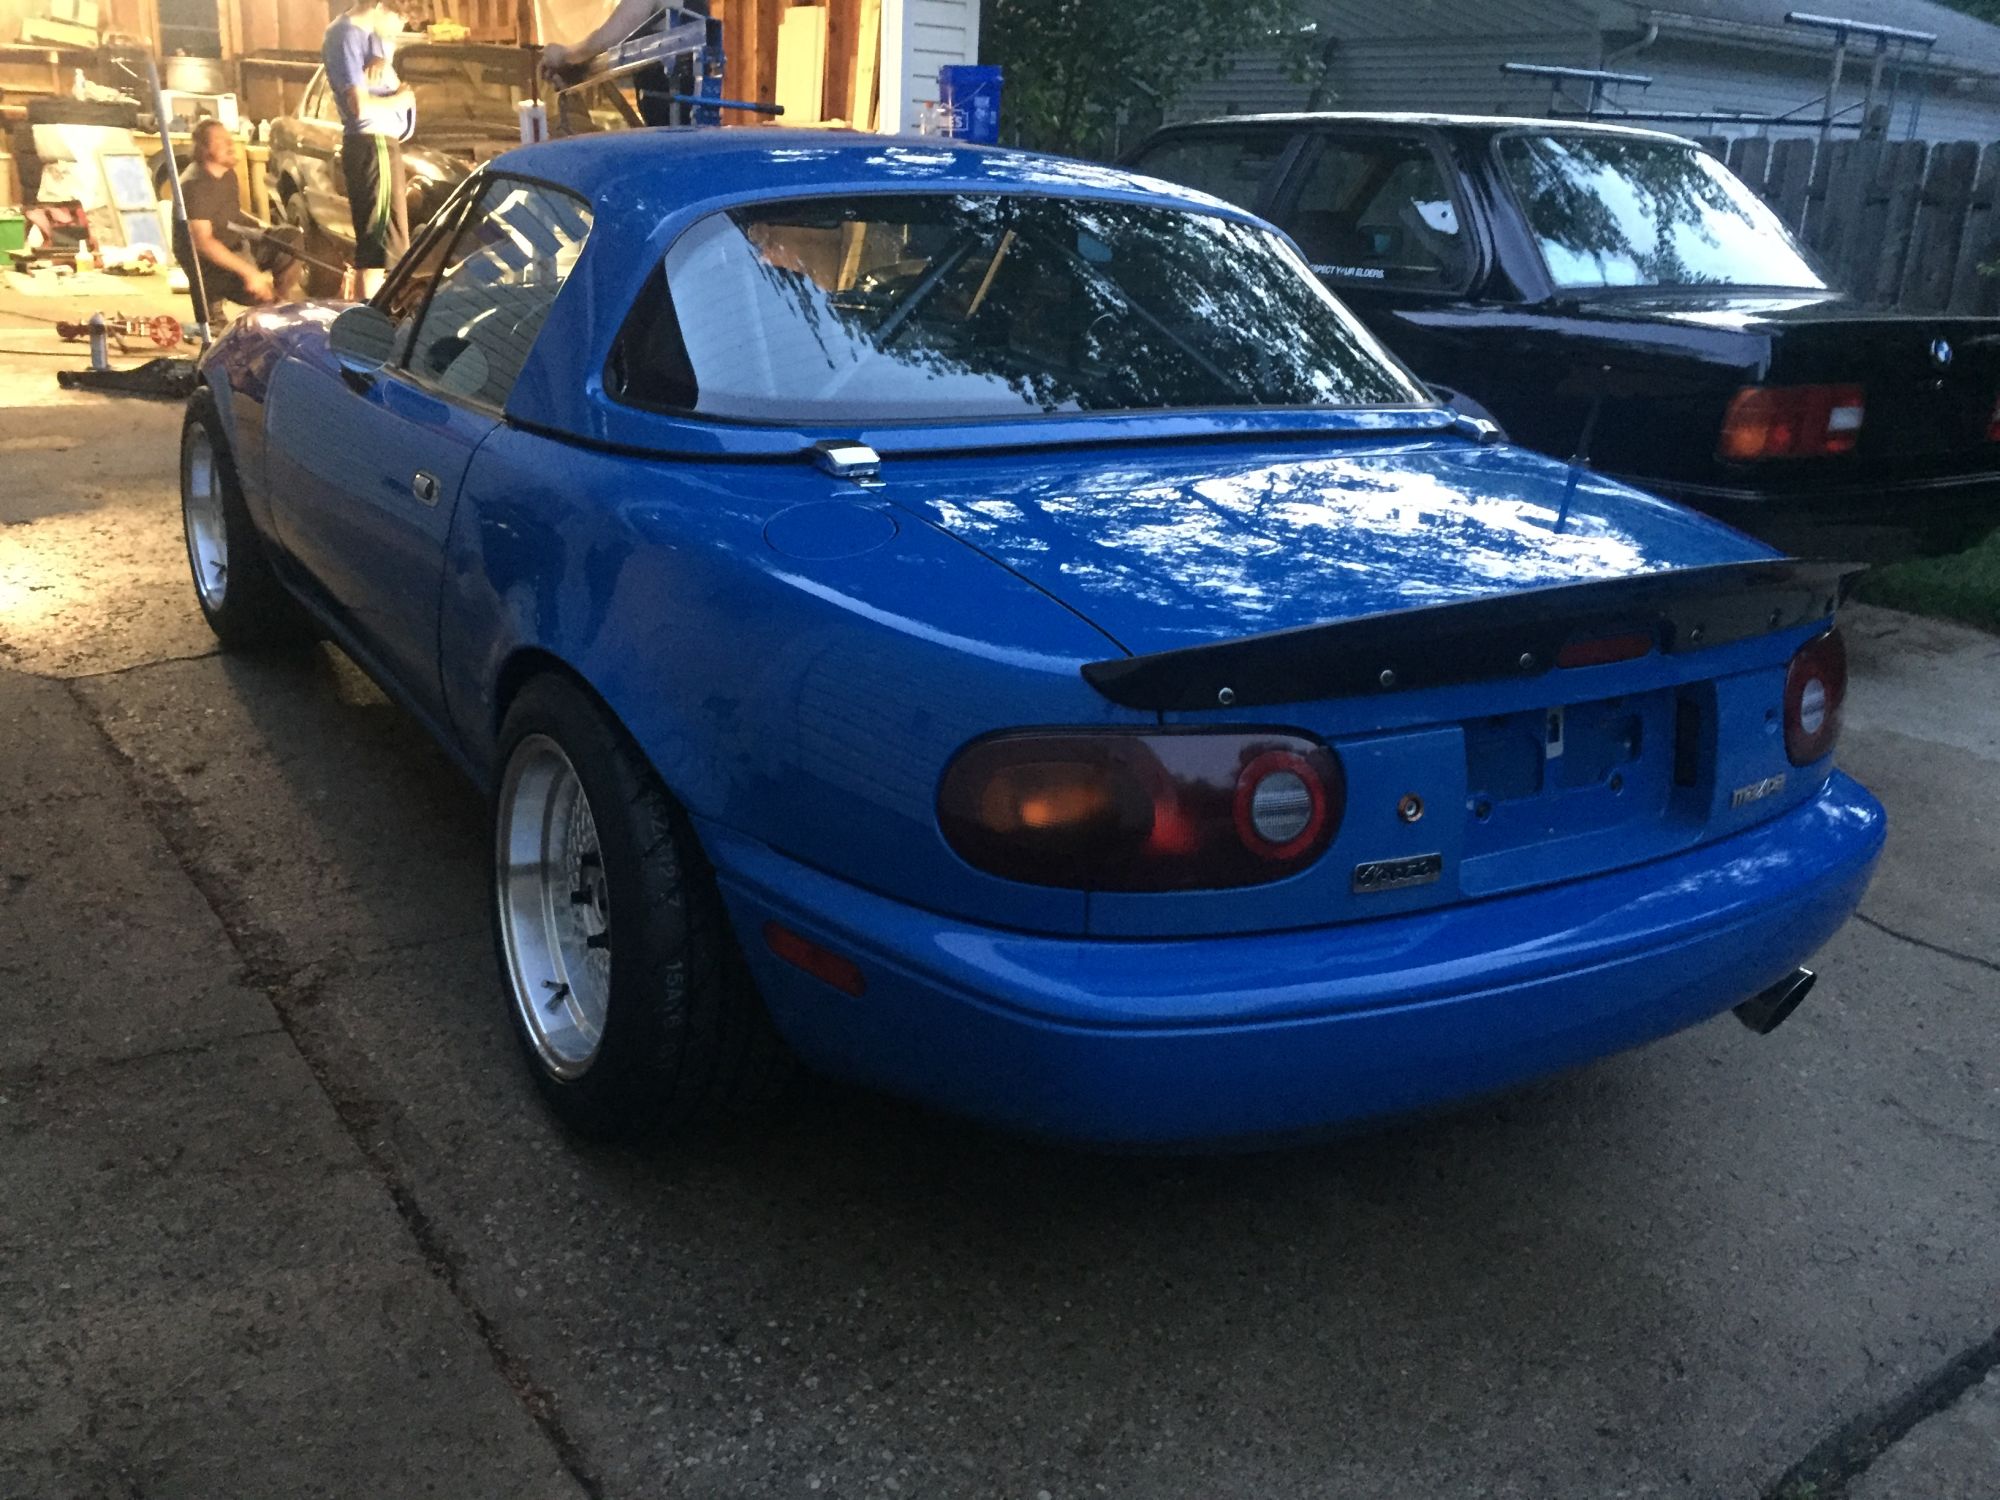
Finally got the car a quick wash and a few shots of the change to the suspension. It's factory fresh at all four corners now.
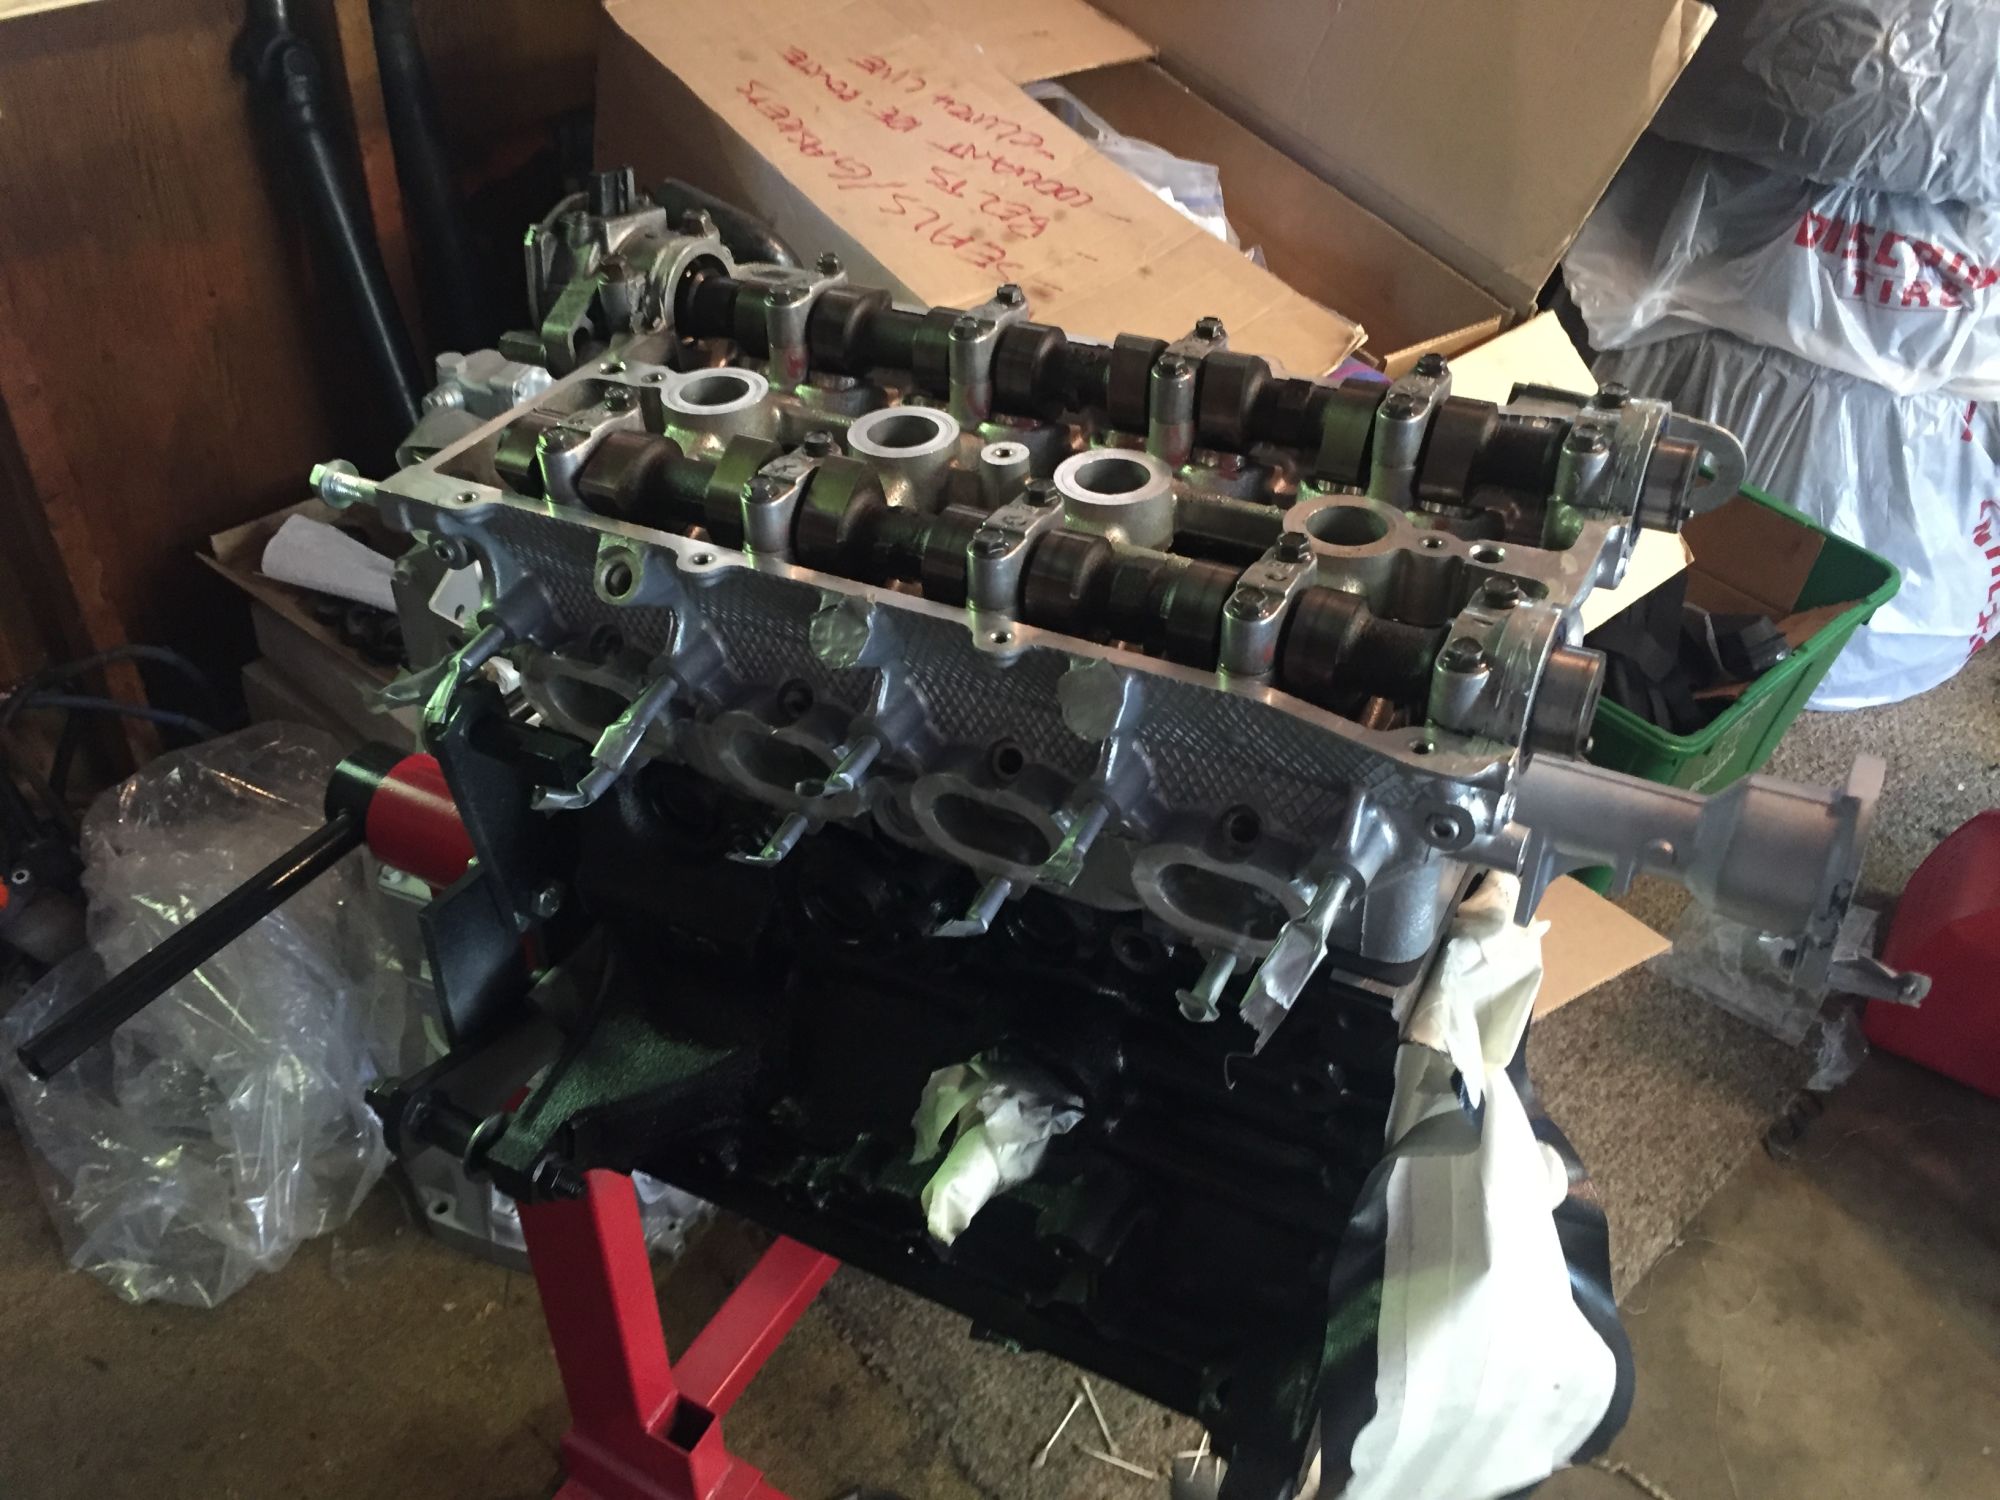
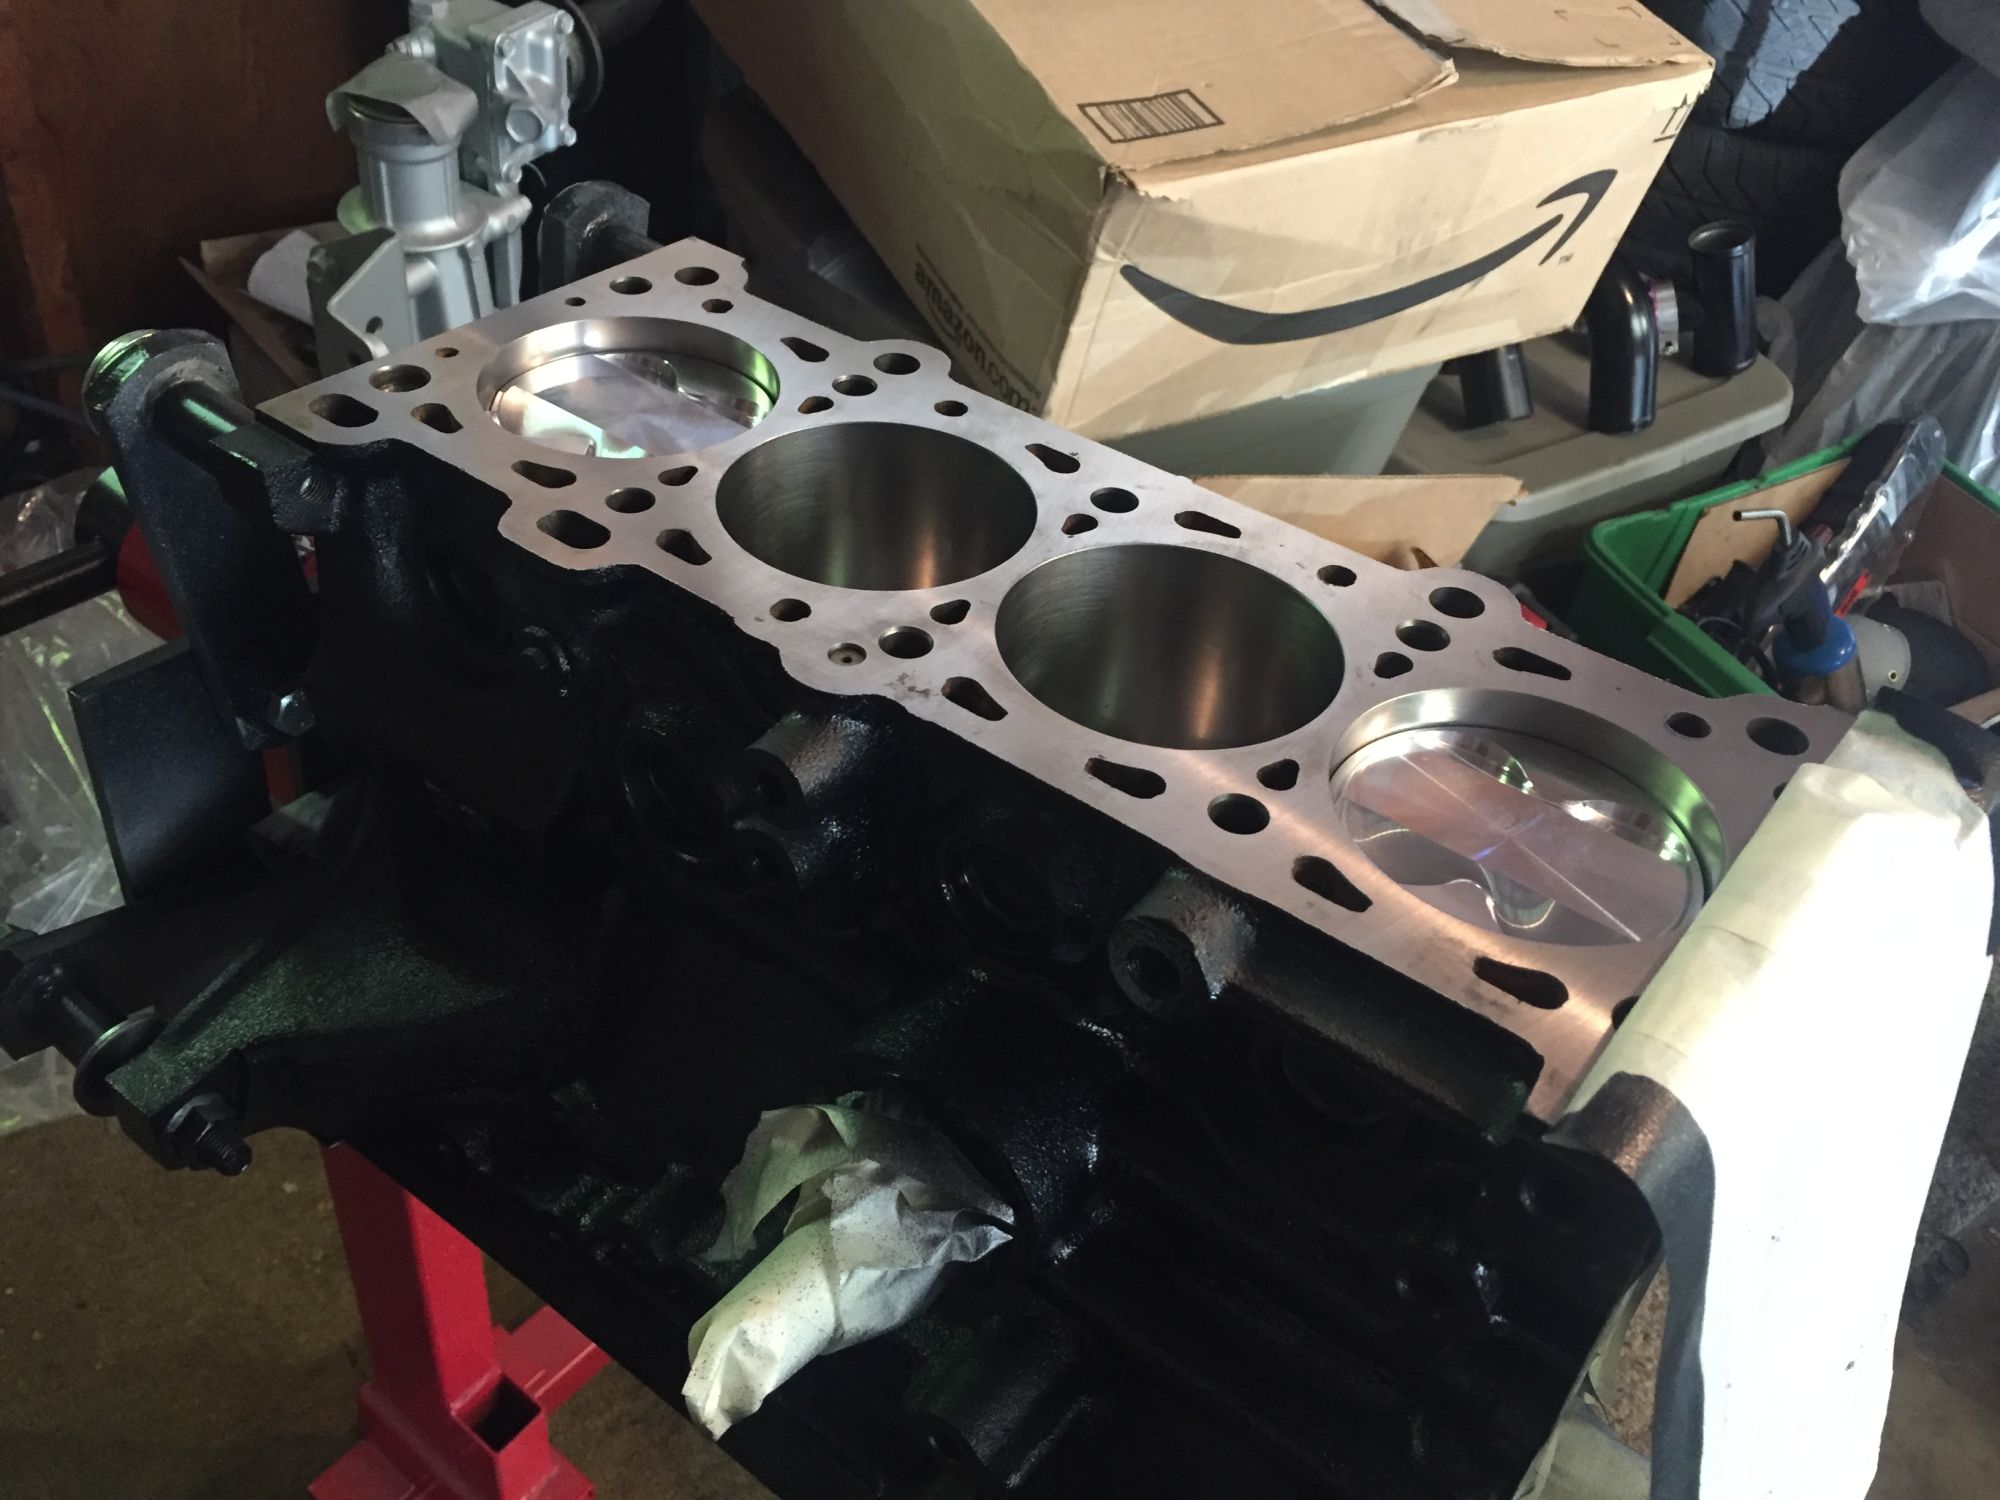
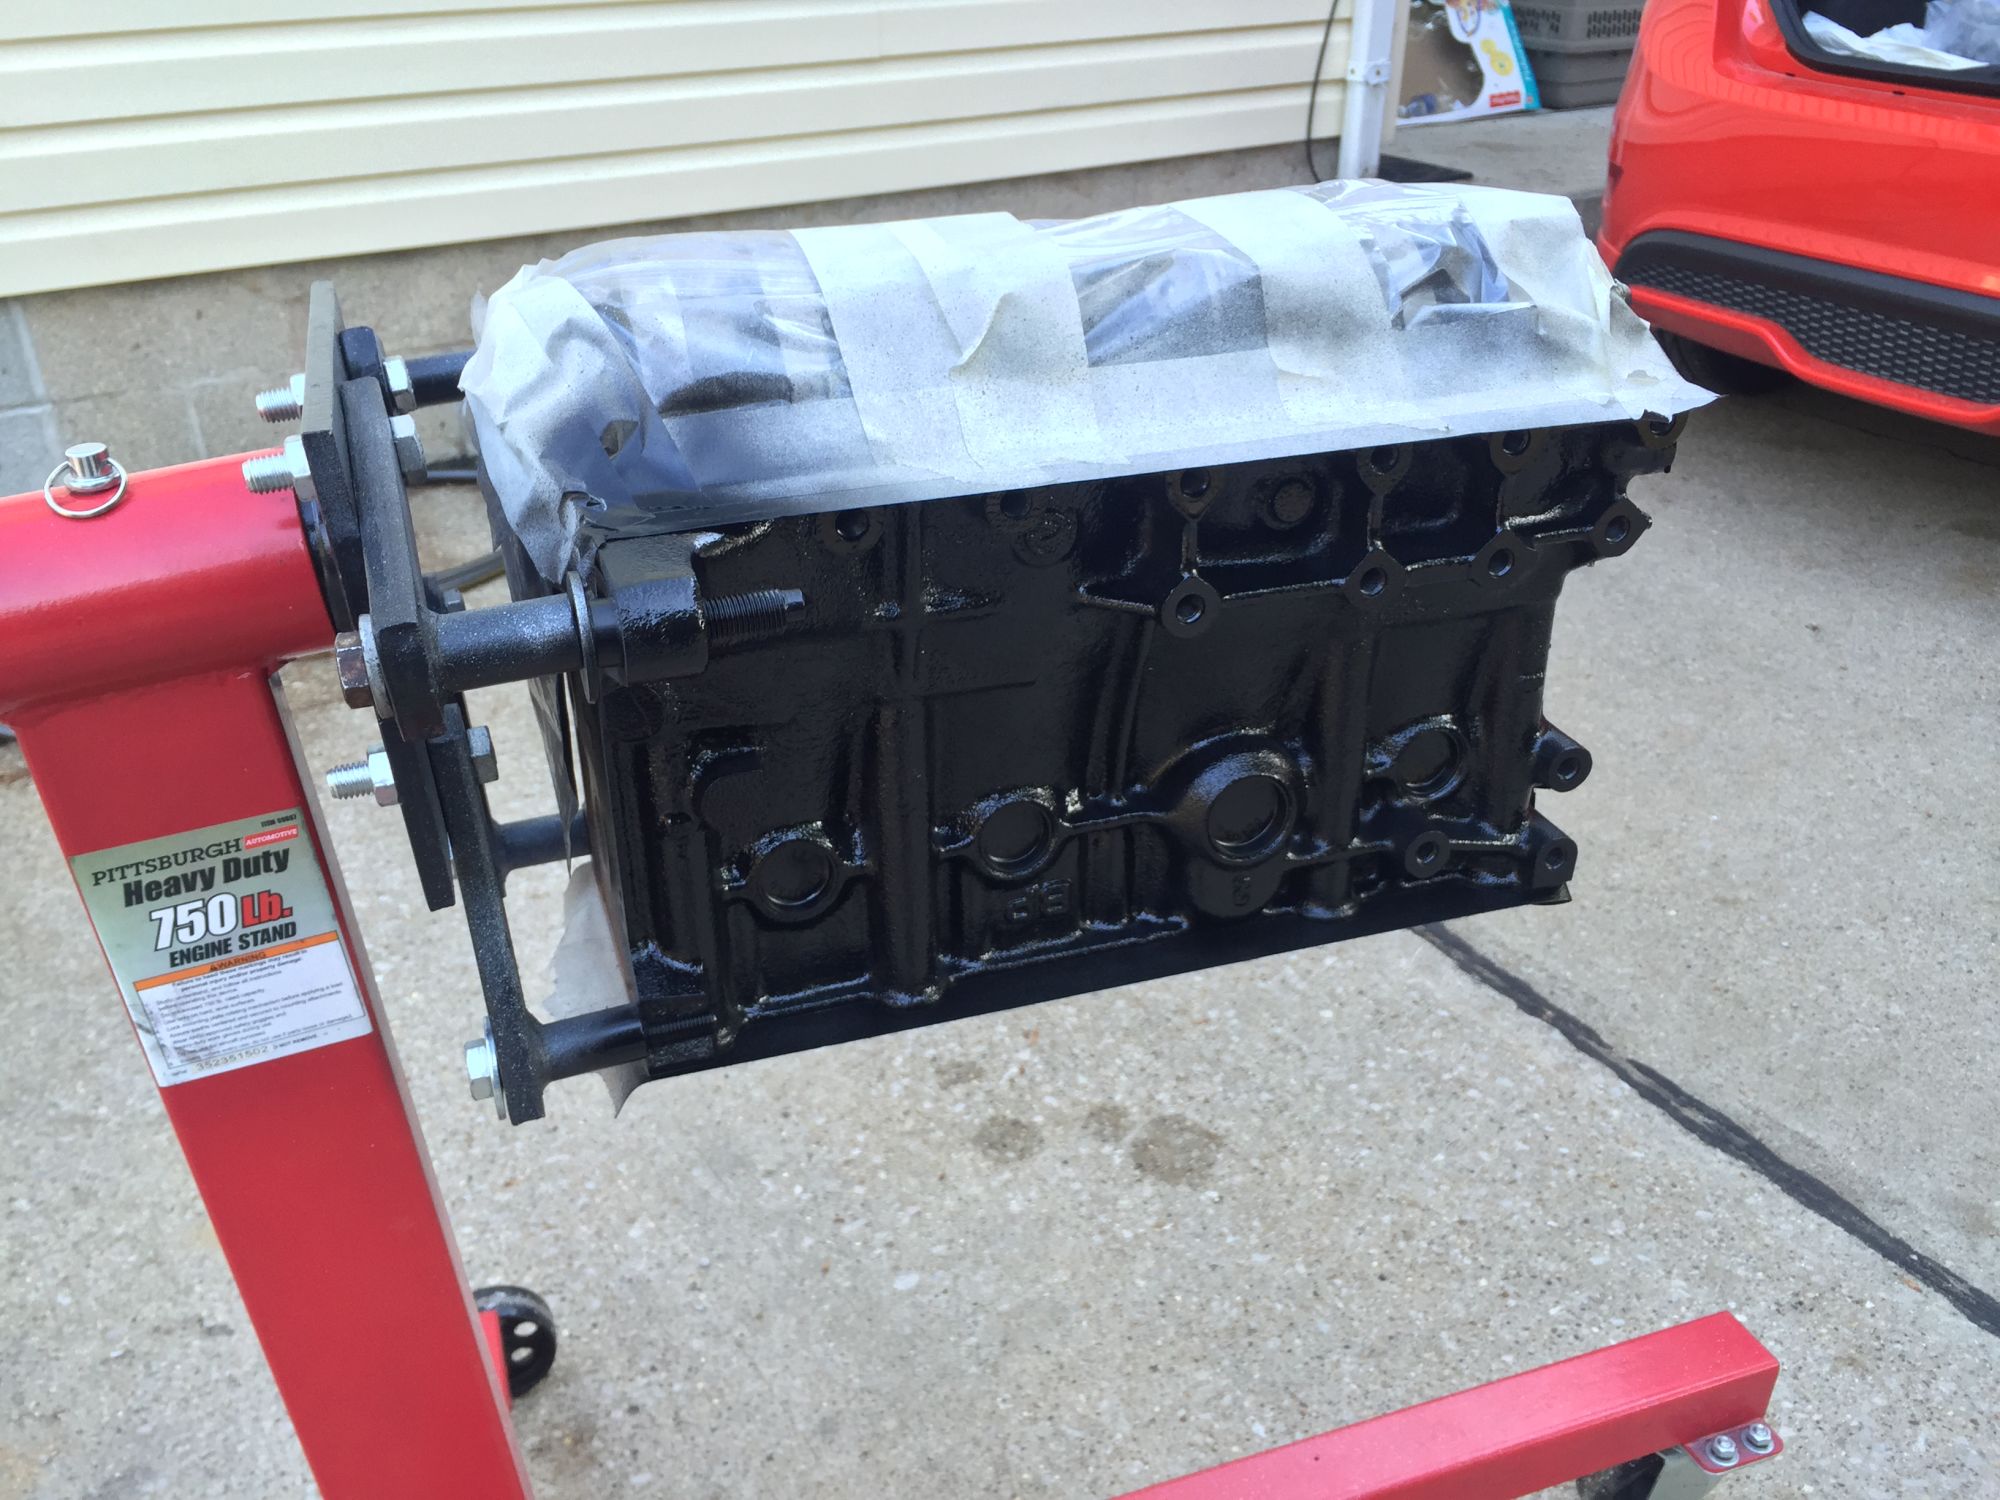
Also got my shortblock back from the machine shop and got to start putting the head on. Just waiting for my Boundary Engineering street pump.
Blocked bored .5mm
CP Carillo 9.0:1 83.5mm Pistons
Eagle H Beam rods with ARP 2000's
KING XP Trimetal Race bearings
ARP Main Studs
ARP Head Studs
Supermiata Damper
BE Street pump
Refreshed head with intake/exhaust port work
Coolant reroute
DIY Autotune EBCS setup
IAT
Tial bov
FM front mount
Walbro 190
Fuel Injector Clinic 650's flow tested and matched
sequential injection setup
Garrett gt2560r
2.5" turboback
Braineack built MS2
Happy Meal Clutch setup and 10.3 flywheel
Hoping to have the motor, new clutch setup and trans back in the car within two weeks.
Sorry I haven't updated in a while, been busy trying to get this thing running.
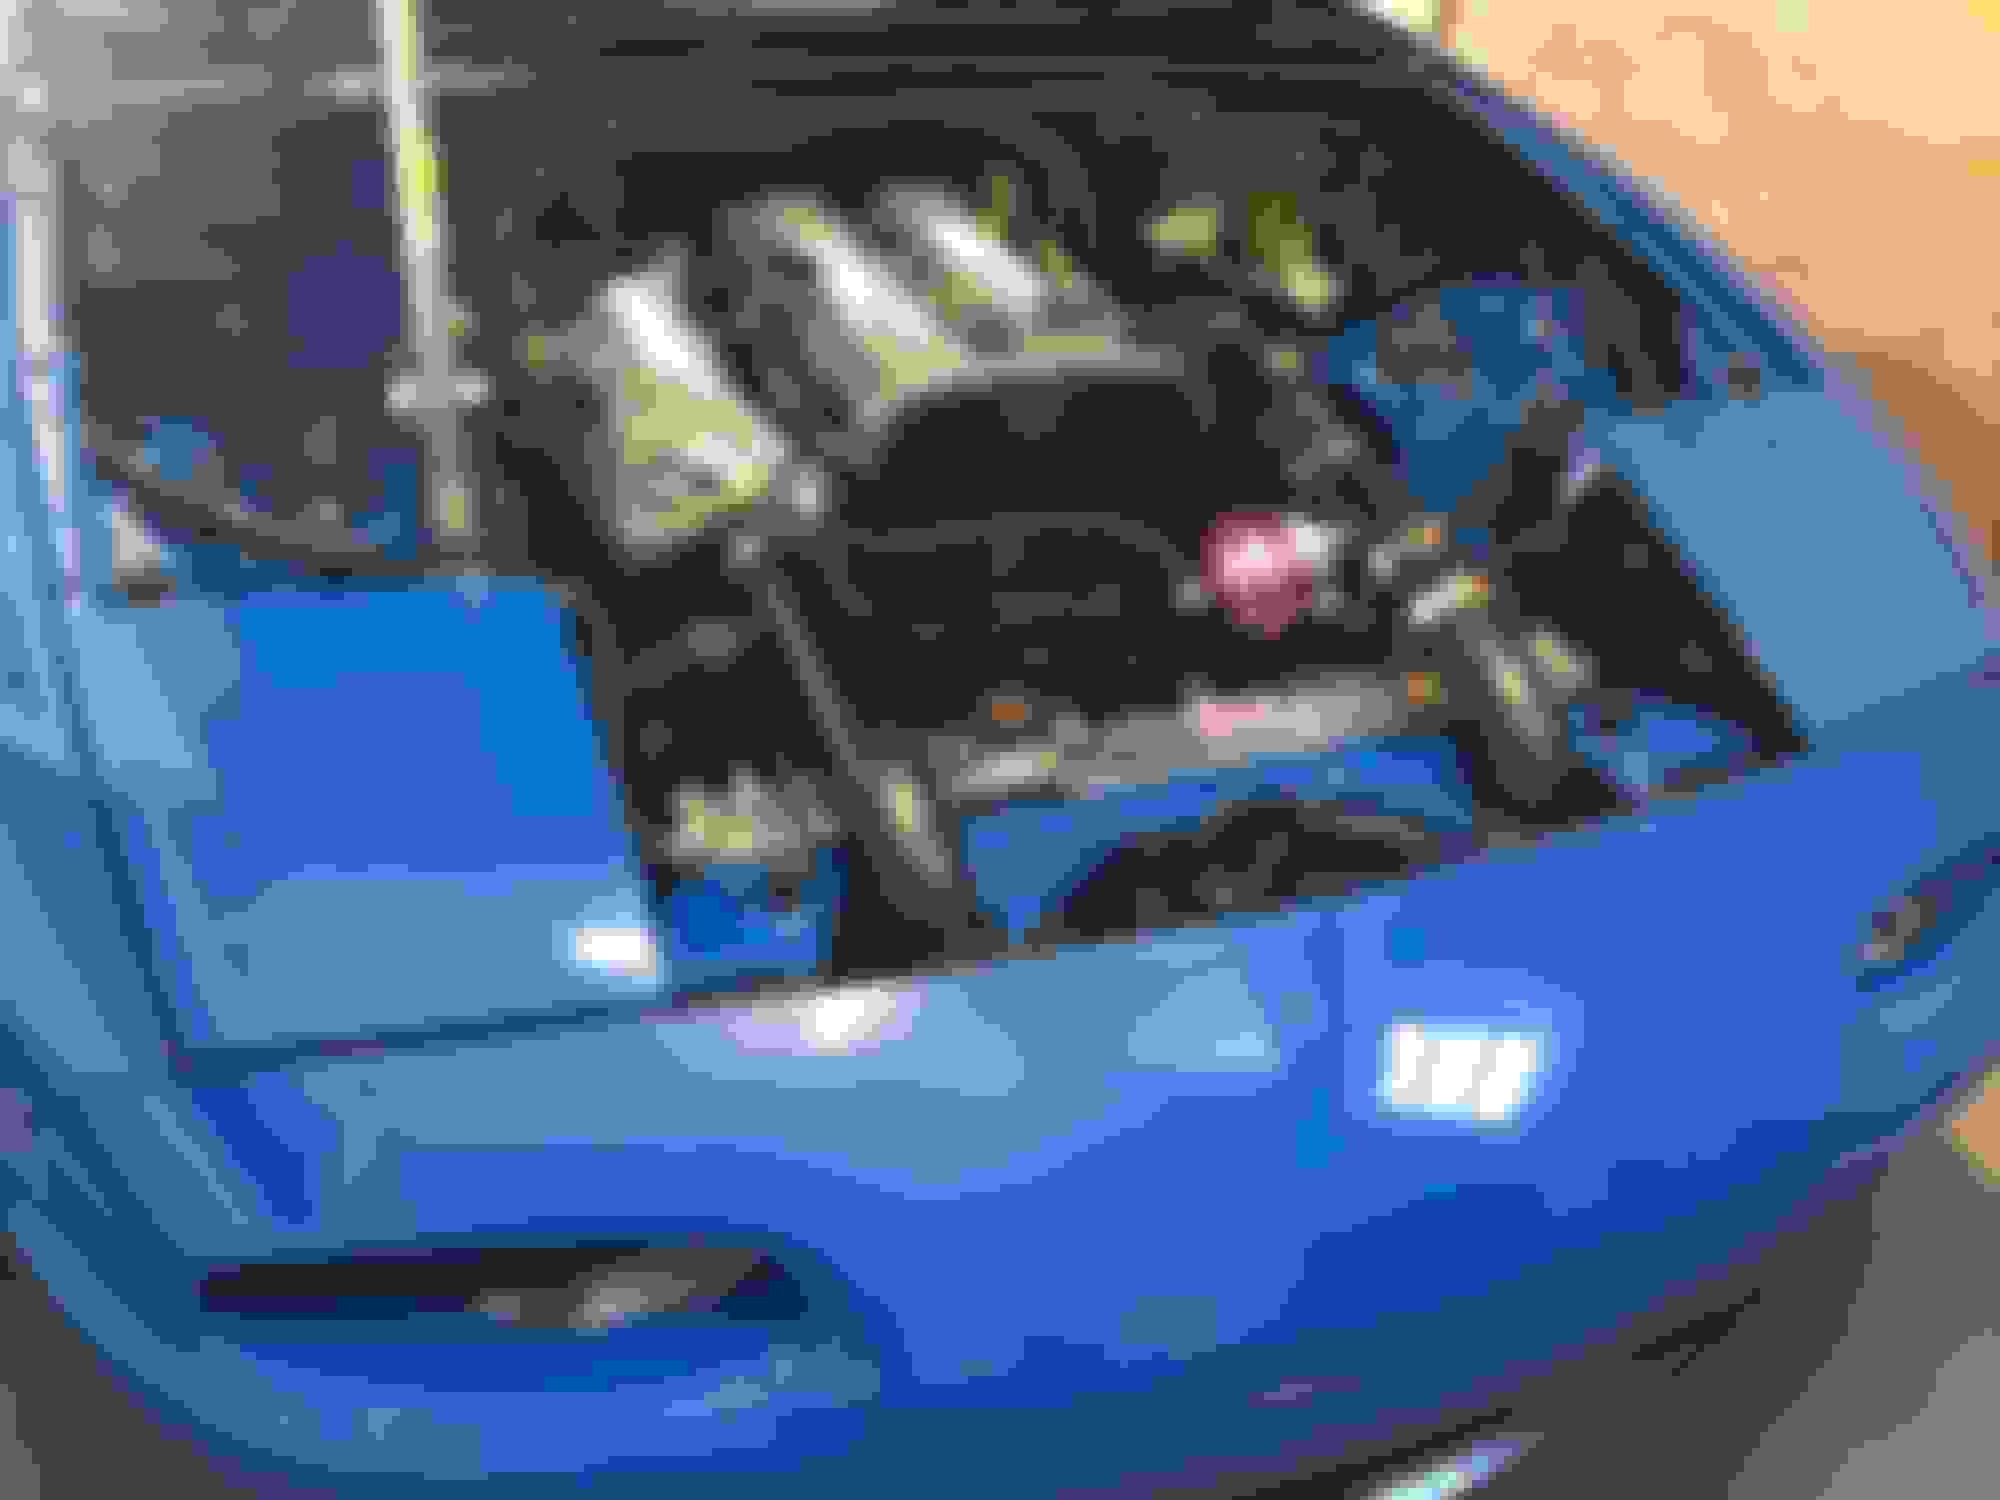
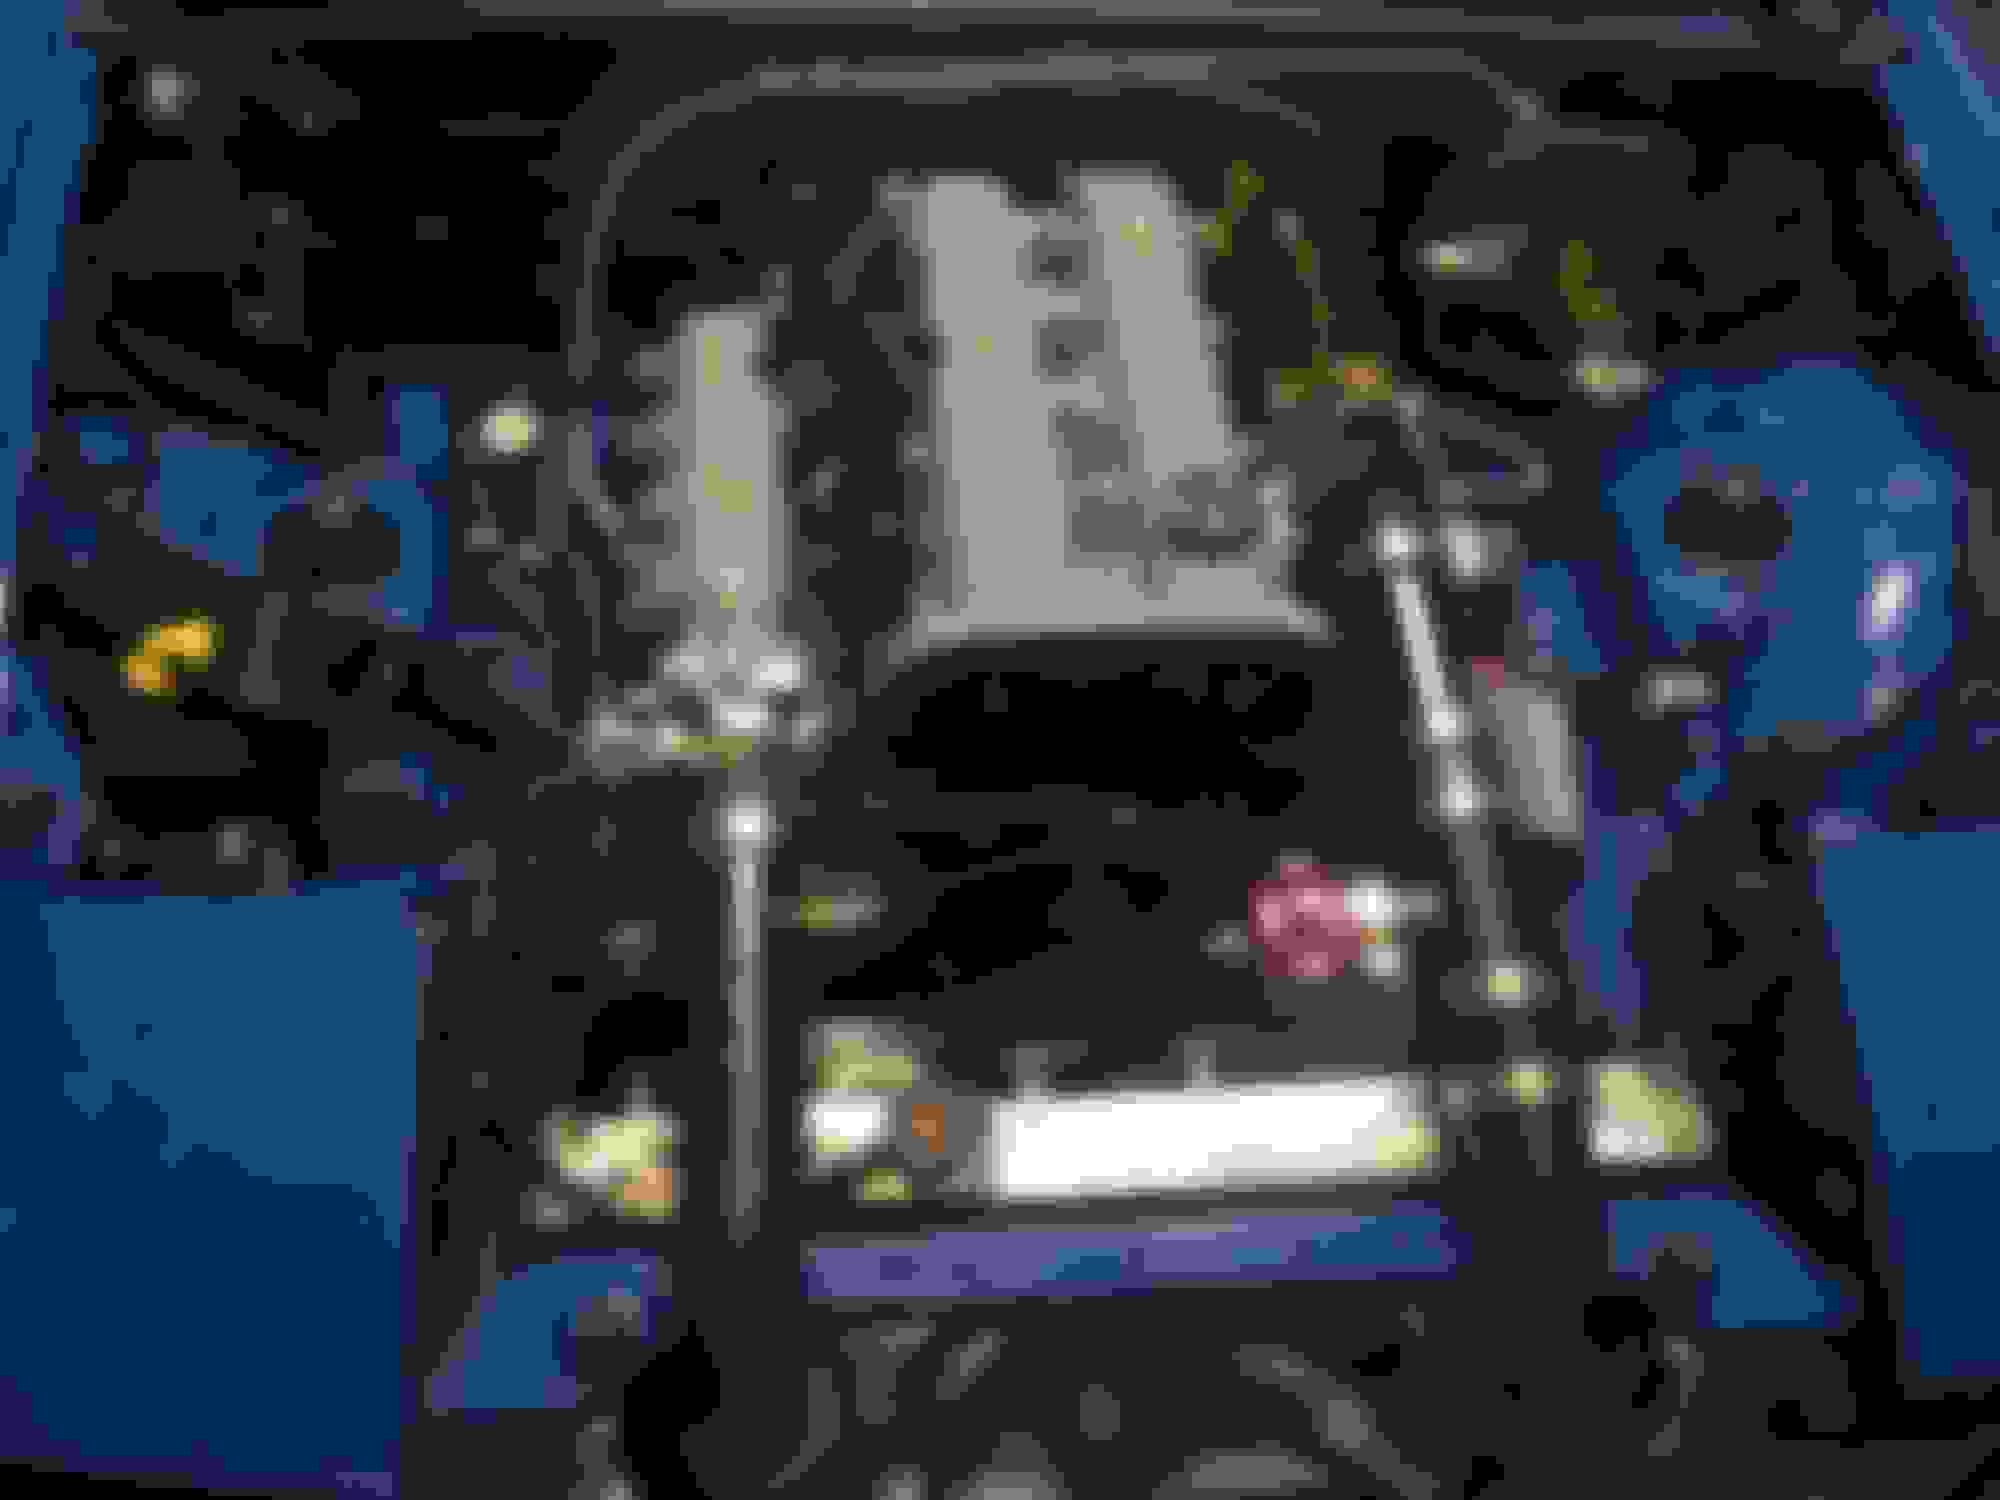
Entire drivetrain is now in the car. Just waiting on a few intercooler couplers and misc items and I will have all the hardware part wrapped up. Going to be installing my Braineack-built MS this coming weekend, putting fluids in, and getting first fire on the motor.
So I've been very lazy with the updates...it's like I'm trying to finish this car to actually drive it or something haha.
My master checklist is now complete, say for a few very minor things that won't stop me from firing the motor.
Electrical:
I modified my injector harness for sequential injection by adding the two additional signal wires from the DB15 on my megasquirt ecu. On the ecu side, I had to move a few injector wires around and add two jumpers on the board to take advantage of this...Braineack helped walk me through this. Thanks again! I ran these signal wires through the grommet in the firewall I'm using for my MS boost source line, and wrapped the loom. It looks very clean. Also wired in the IACV and VTPS plugs from the 1.8 harness to my 1.6 harness since they're different. Installed and ran wires for my GM IAT and DIY EBCS, both to the AFM plug per Braineack's design. Installed 1k resistor in the DIAG box since my car doesn't have a dash signal.
I wired and ran my lines for my new AEM oil temp gauge and made a mount to sit it alongside my AEM wideband. I extended the wires on my wideband and ran them to the now supplied power/ground/input wires on my DB15 ecu connection. I put an inline 10A fuse on the power for the wideband.
Exhaust:
New flyin' miata downpipe and custom 2.5" midpipe are in. Titanium wrap is itchy as crap.
Engine:
All the misc connections are done, switched out worm clamps on fuel lines for t clamps because fires suck. It took me a while to fab up the location of the intercooler but I'm very please with the end product. I made some custom steel brackets for further support and utilized the top threaded holes on the fmic. Hood requires modification and I'll be painting these areas to mask them a bit more, but I couldn't really care less what the bottom of my hood looks like in those spots.
Suspension:
Installed supermiata end links as a final piece of my suspension rebuild.
And a ton of other crap I won't take the time to type out right now. If you have questions PM me or ask away. I'm ready for first fire.


 0
0