When you click on links to various merchants on this site and make a purchase, this can result in this site earning a commission. Affiliate programs and affiliations include, but are not limited to, the eBay Partner Network.
**Edit** I guess I should mention here at the start what my goal for the car is; I always just wanted this to be a street car that was capable at open track and autocross. I've also always had a dream of building my own 4cylinder to run 12's on boost. Since I already had a Greddy kit and already had two 1.6 motors, I figured I would take the 1.6 and the Greddy as far as I could safely take them. I've thrown around power "goals" of 290-350whp but I've seen mixed results on if it was even possible. I plan on eventually doing water-meth injection and possibly nitrous to get there, but those would be some of the last "power adders" after the rest of the supporting mods are completed. I don't like the look of "aero" on a street car (like wings, splitters, front air dams) and especially hate them if I know they're not functional. To each their own, but if that kind of "racecar" stuff is YOUR thing, this might not be the build thread for you. TLDR: This is the story of me taking a 1.6 miata block and a TD04H turbo as close to 350whp as I can on a street car, and hopefully making it capable of 12's in a 1/4mi without changing the setup (other than tire pressures).
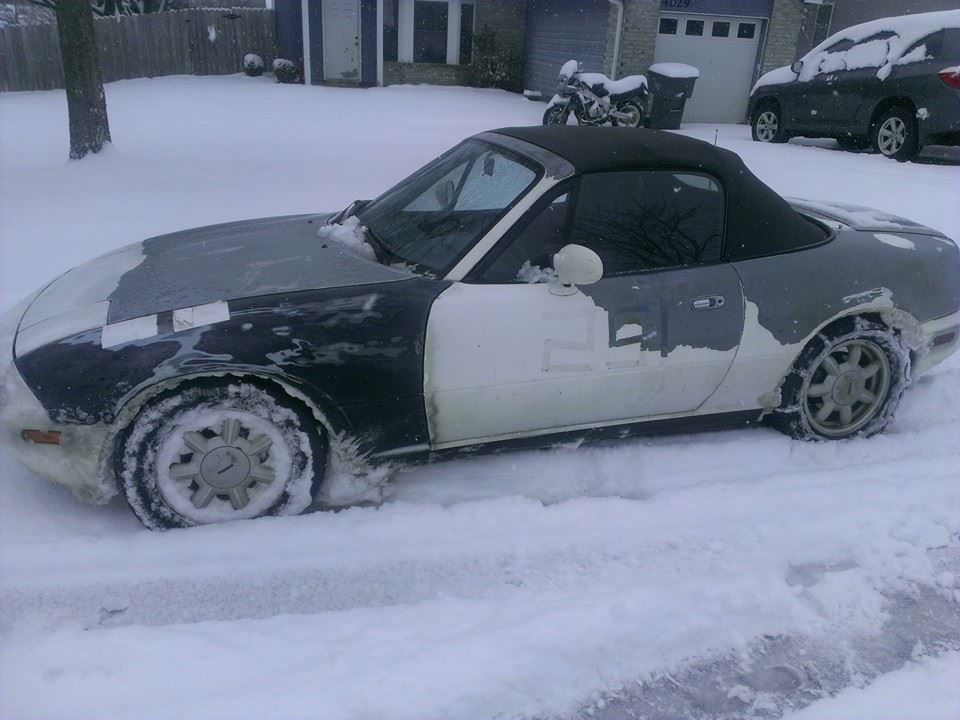
This 92' was bought from some old guy by my friend Garrett many years ago. The guy said it wouldn't run but Garrett put a new battery in it and drove it home for $700.
He autocrossed it and eventually found a used Greddy turbo kit and put it on the car. He would also install some Megan EZ Street coilovers. This was his DD and it got put through some interesting weather conditions.
A cursed water plug issue caused his head gasket to fail. Instead of replacing the gasket he decided to motor swap in another 1.6 he had found on craigslist. In the process he removed the power steering and AC. The new engine worked fine except it was leaking coolant under boost. We assumed it was the head gasket and so we replaced it. This is the car just after that work was being finished up.
He drove it less than a week after this and the car had an engine fire, the result of a cracked head (causing the coolant leak). The head leaked coolant into spark plug wells #2 and #3. He also had a leaking fuel pressure regulator, so when he went to check those cylinder plugs one day, a fireball happened, and an engine fire happened. He would eventually sell the car to me for $700 bucks, He was tired of working on it and swore it was cursed.
This was some of the damage I had set into repairing.
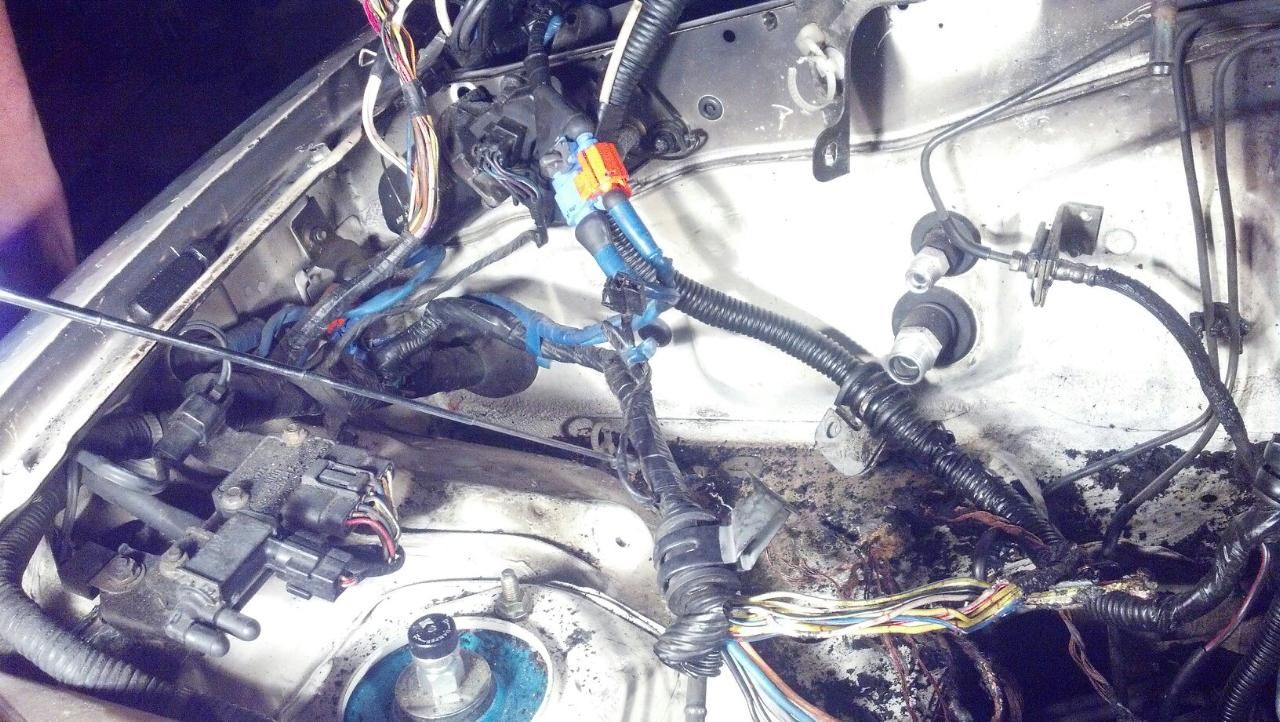
The wiring harness from the starter back to the firewall was fried. The washer fluid bottle was melted, the hood was warped and scarred, the clutch line was destroyed/charred, two of the injectors were melted, and various plastic pieces and wires needed to be replaced.
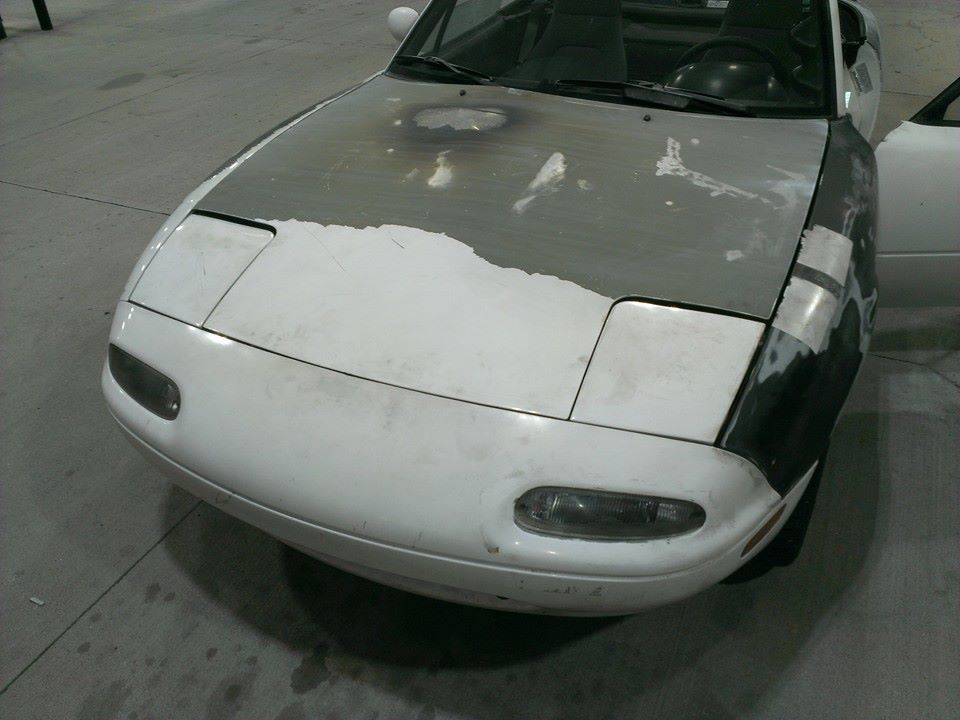
Here was the damage on the TOP of the hood (the bottom looked worse, but I never took a picture of it)
I took the original head Garrett had in the car and gave it a good once-over. I took it to the machine shop and had them resurface it and replace valve seals and do a pressure test. I replaced all of the parts of the car that had fire damage and washed/resprayed anything I could to make the car look half-okay. I de-turbo'd the car to get it back to a "reliable" state. After I reassembled it all the car fired up and was a great little daily driver. I gave it the "more aggressive timing" that is often recommended and ran premium gas for it.
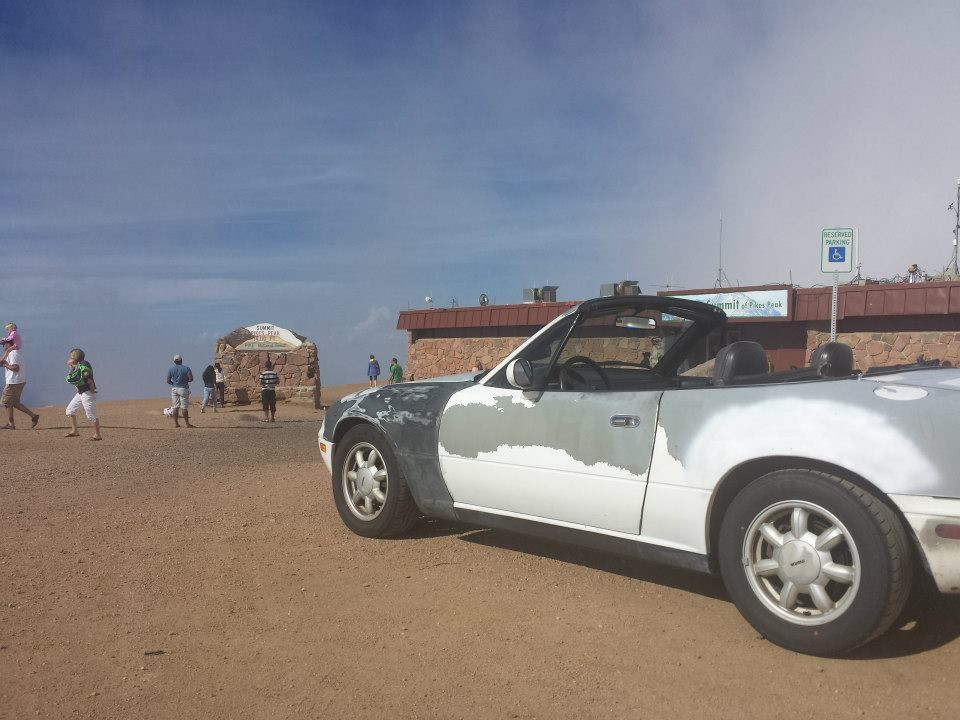
I drove the car like this for almost a year and in the process visited family in Colorado Springs and drove to the top of Pikes Peak.
I'm originally from Colorado Springs and had been to the top of Pikes Peak probably 3-4 times and went to the Pikes Peak Hill Climb "Race to the Clouds" 3 different times but I had never driven my own car to the top. So this was a long-time goal of mine finally achieved on a car that I had put a lot of work into. It was a great day!
On the way back from Colorado I noticed a scuffing noise coming from the car. It was cyclical and varied with speed. Initially I thought it was the driver's side wheel bearing so I replaced it. I thought it had gone away and drove it a while longer, but then the sound came back. It sounded more and more like a knock instead of a scuff and it only occurred during certain RPM ranges. I thought I had let the car run a day or two on low oil before I realized it and thought for sure I had trashed the bearings on this motor. So i decided to build the short-nose motor that was originally in the car.
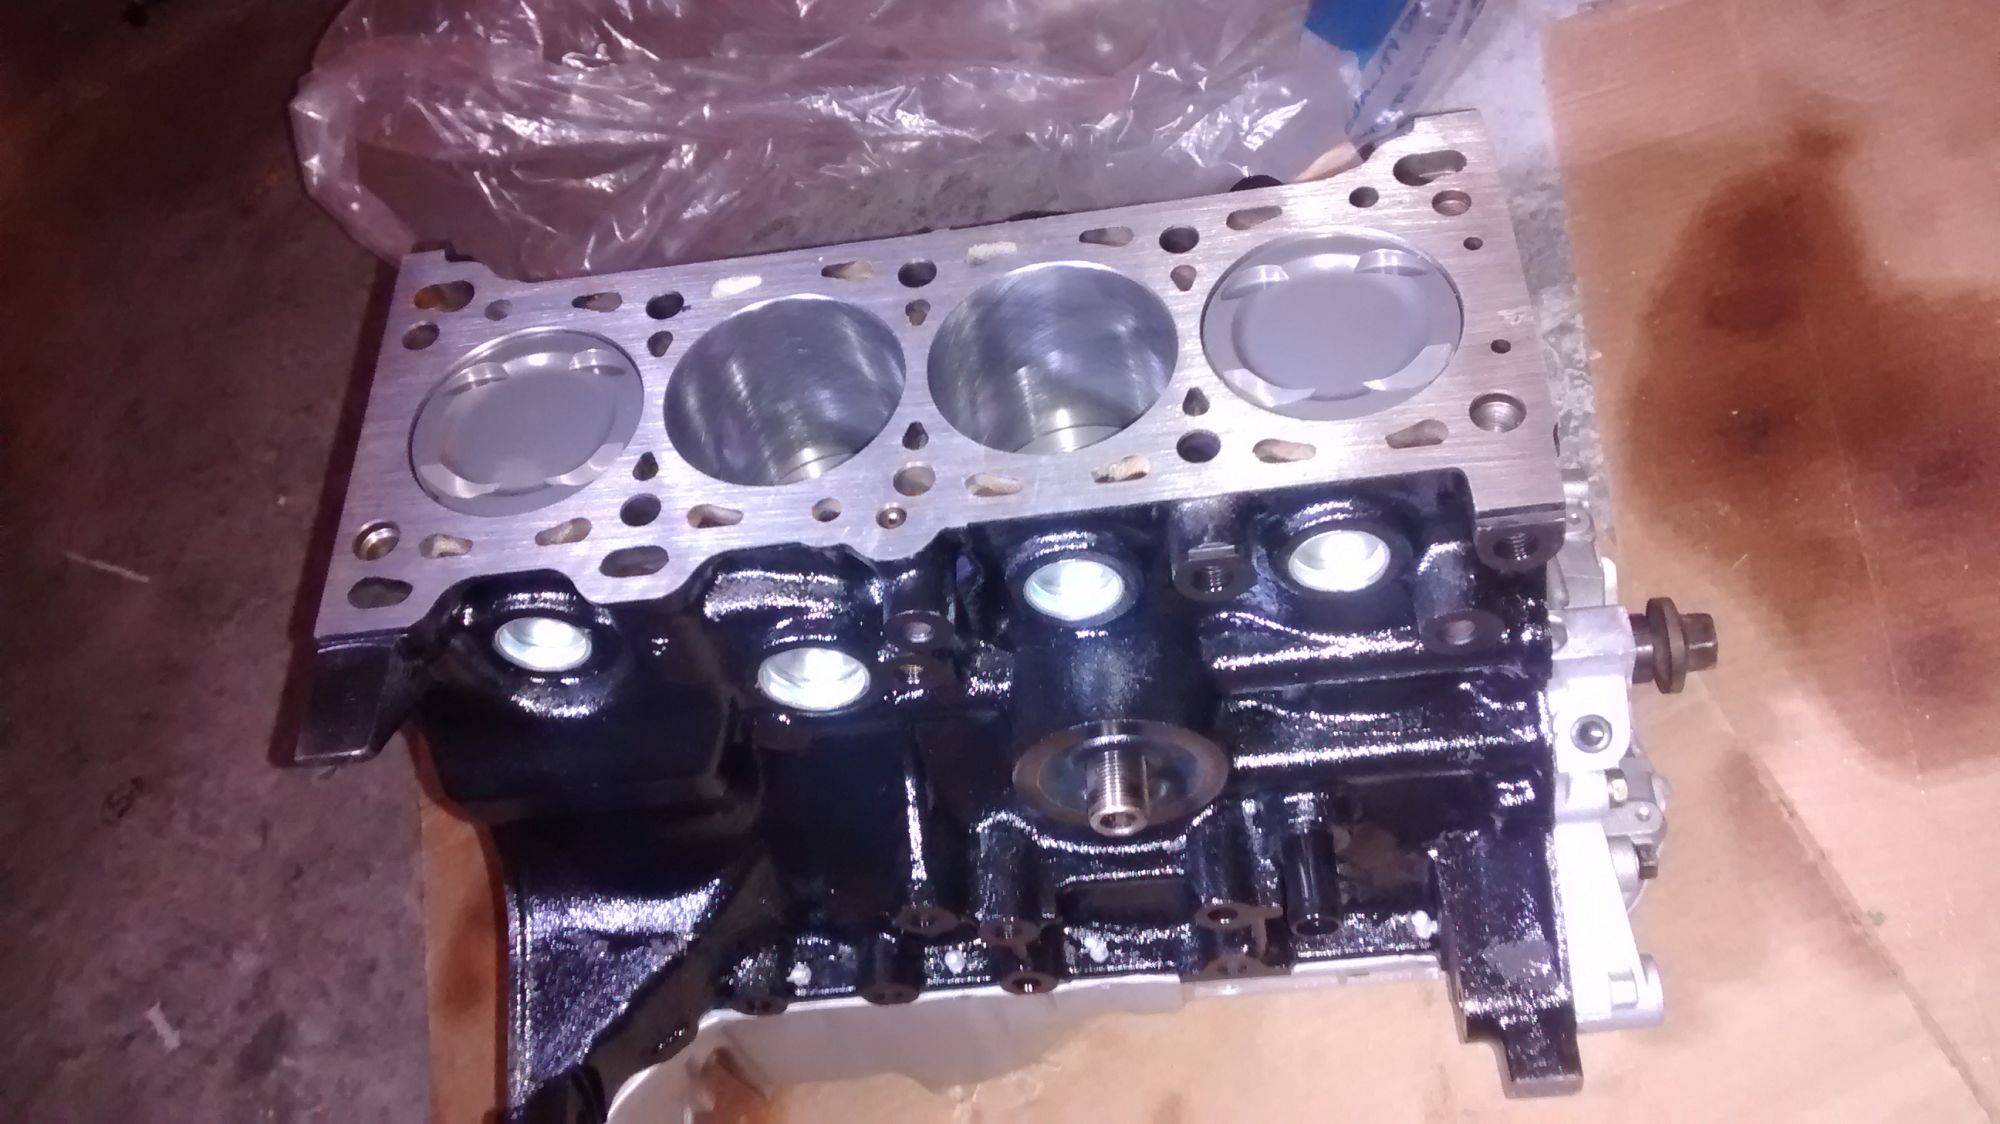
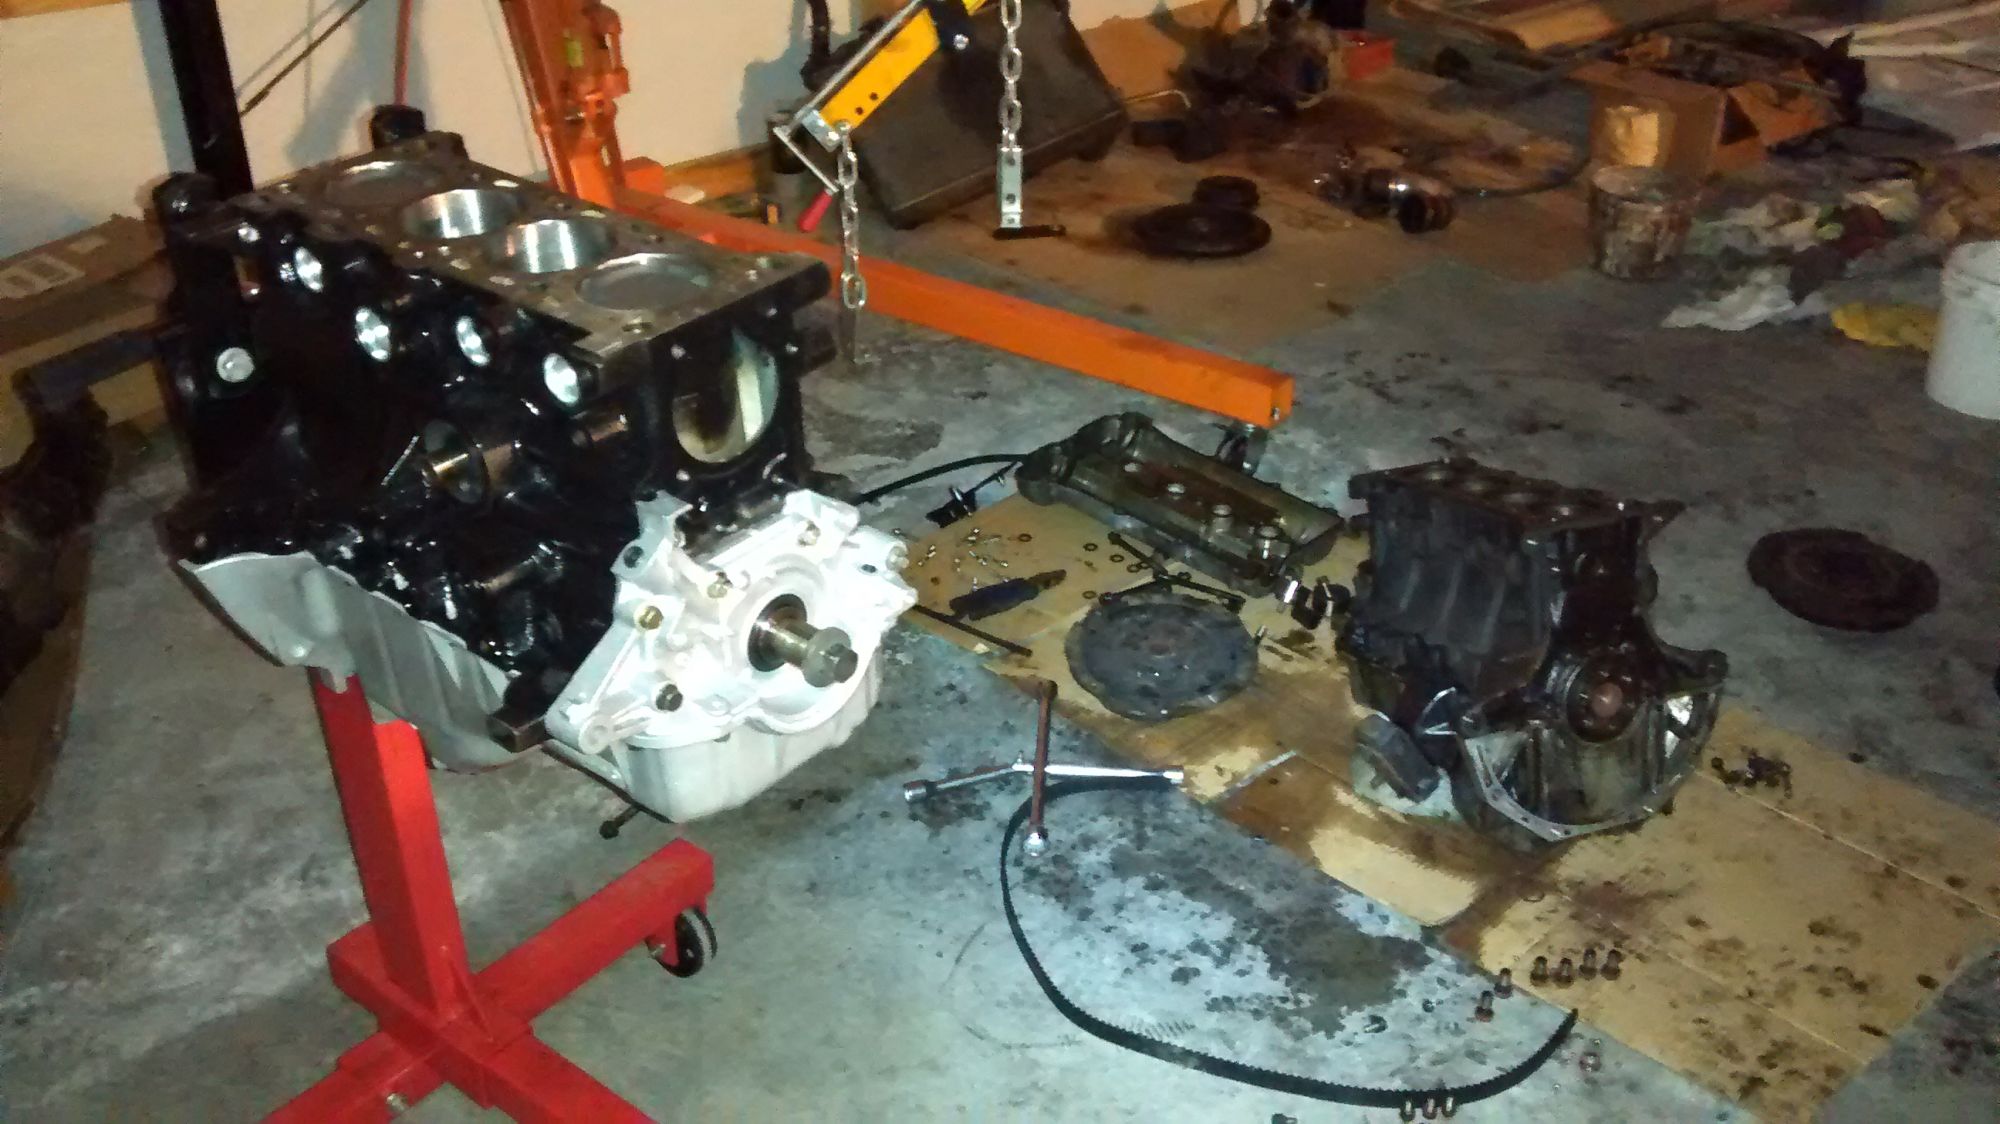
I bit the bullet and sent it off to my local machine shop so they could build it. I figured that if I was about to go through the work to put a new block in the car, it might as well be built for boost. So, I bought some goodies.
FM rebuild kit
Wiseco Piston Rings
Supertech Pistons
Manley Rods
ACL Main Bearings
etc etc.
Also had the oil pan drilled and tapped for an oil drain line on the driver side of the engine.
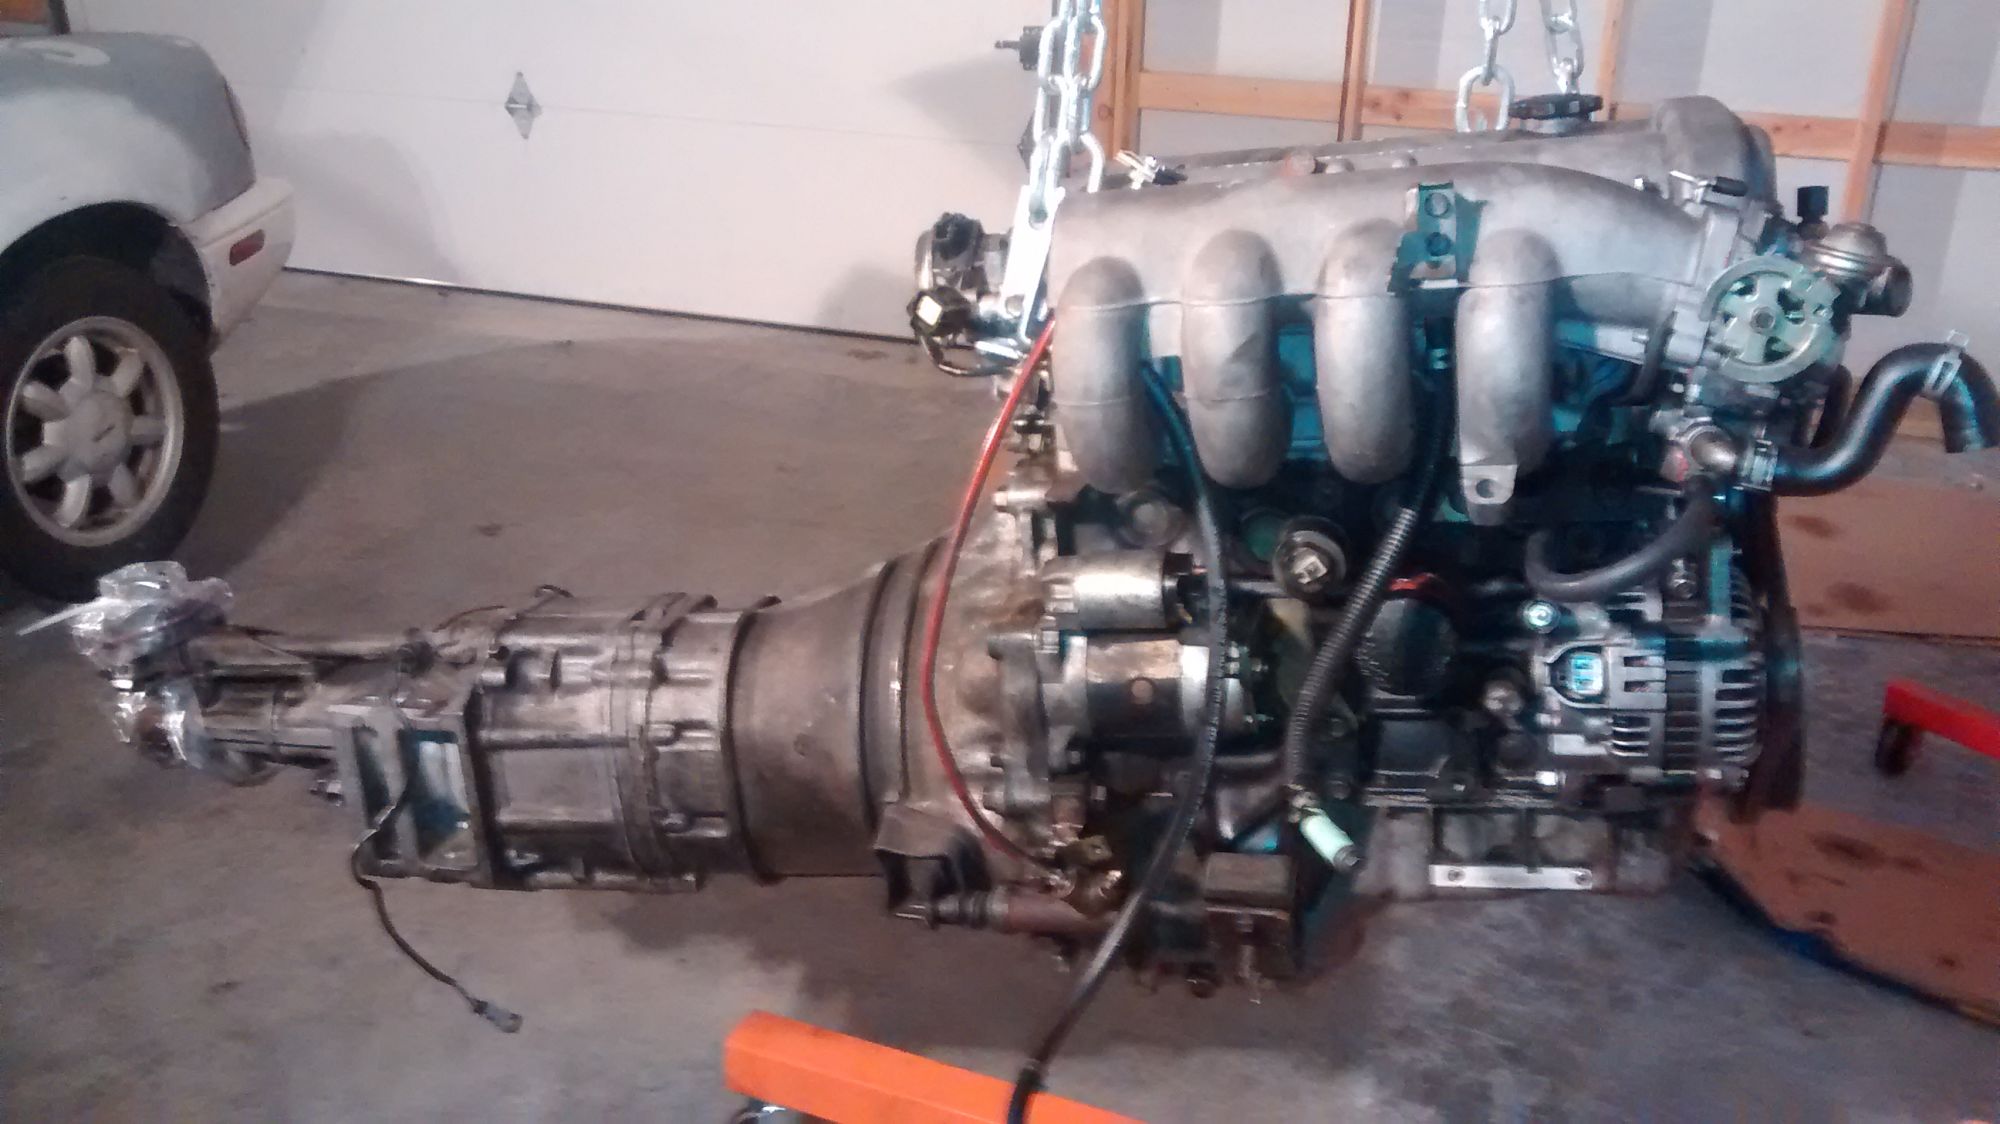
Here's the engine when I just got it back from the shop all ready to drop in:
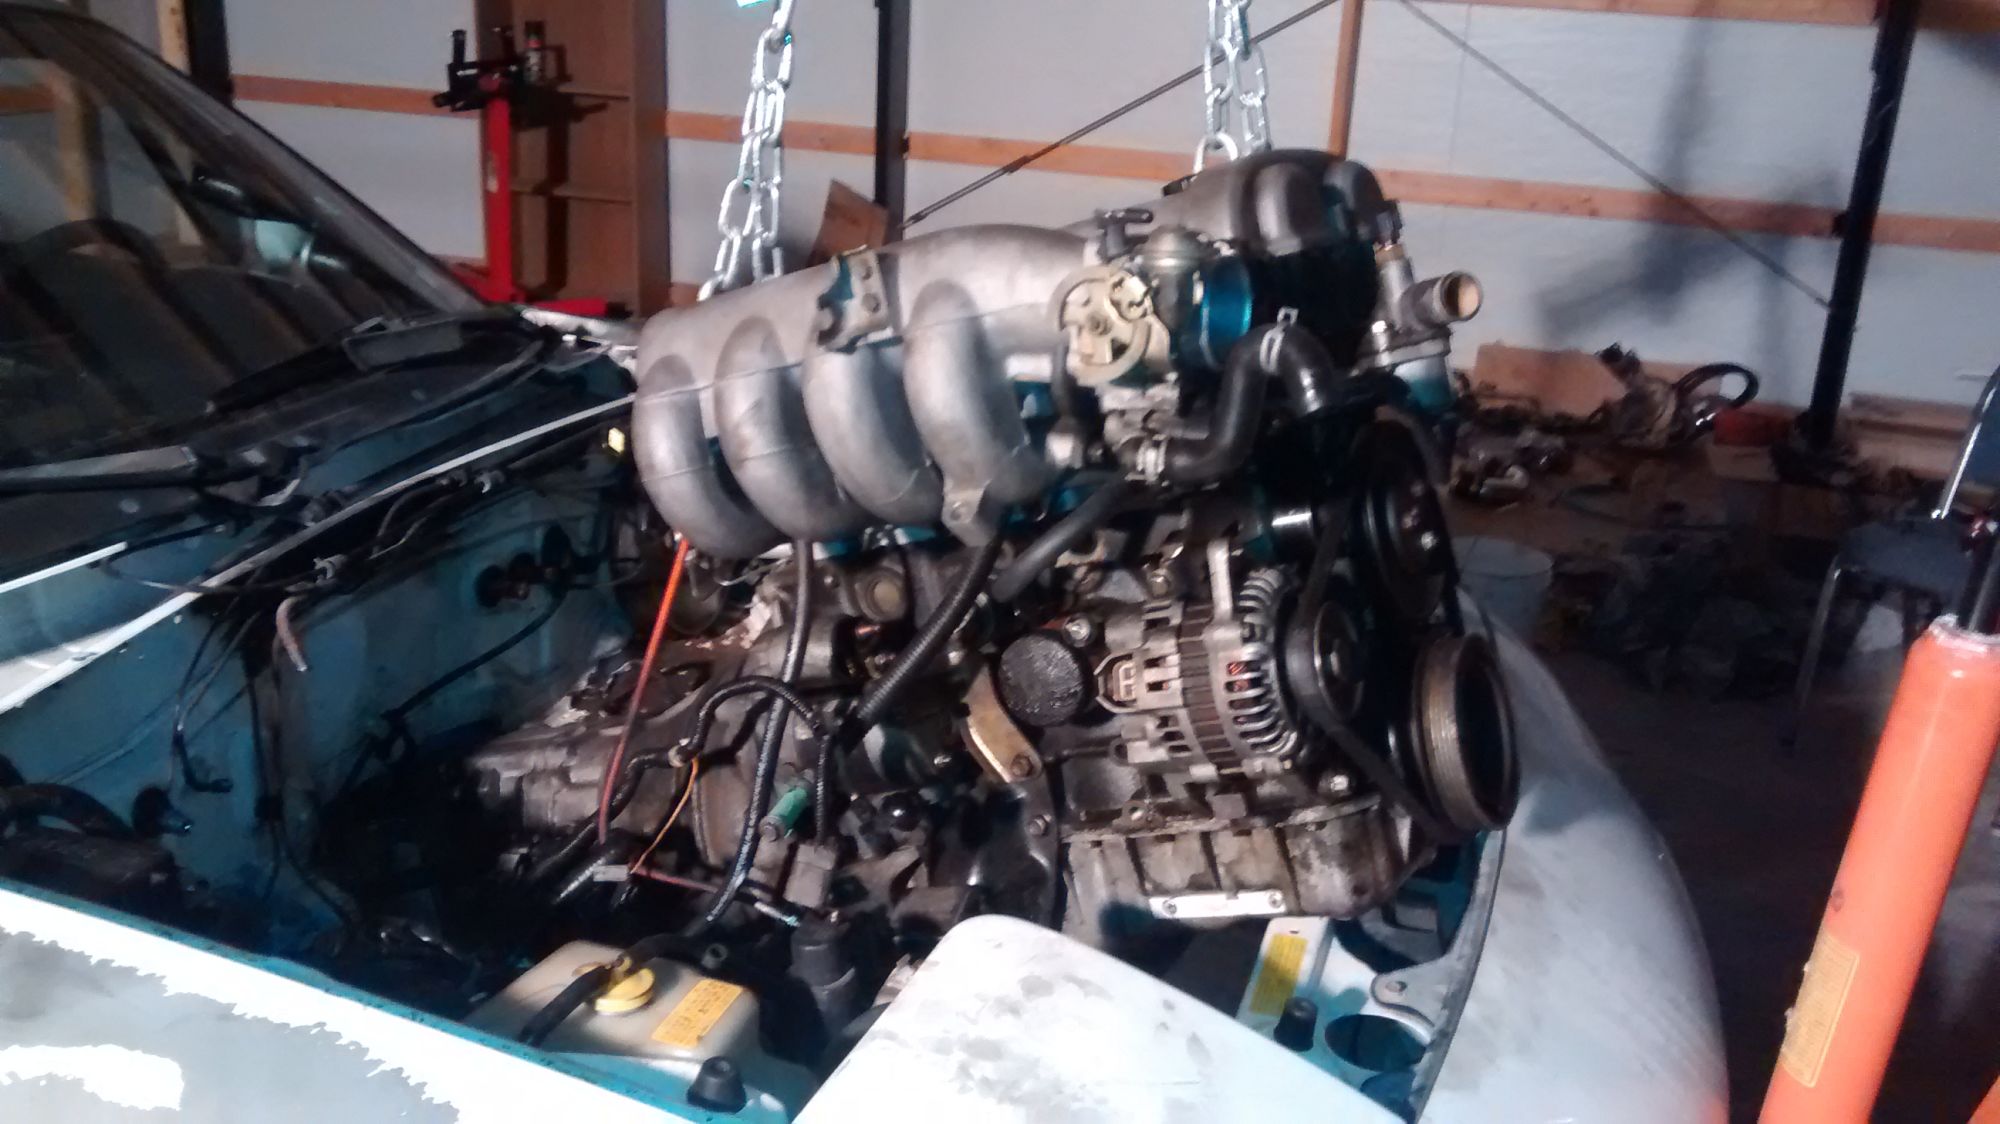
A word of caution: Anyone who is using the orange harbor freight engine hoist on their Miata needs to know that the top arm simply isn't long enough. Even on the "longest" setting (holds the least weight) it wasn't quite long enough to INSTALL our engine. Pulling it was a breeze, but install was a nightmare because of this. The answer is to remove the front bumper and its plastic support. This would have given enough clearance to use the orange harbor freight engine crane.
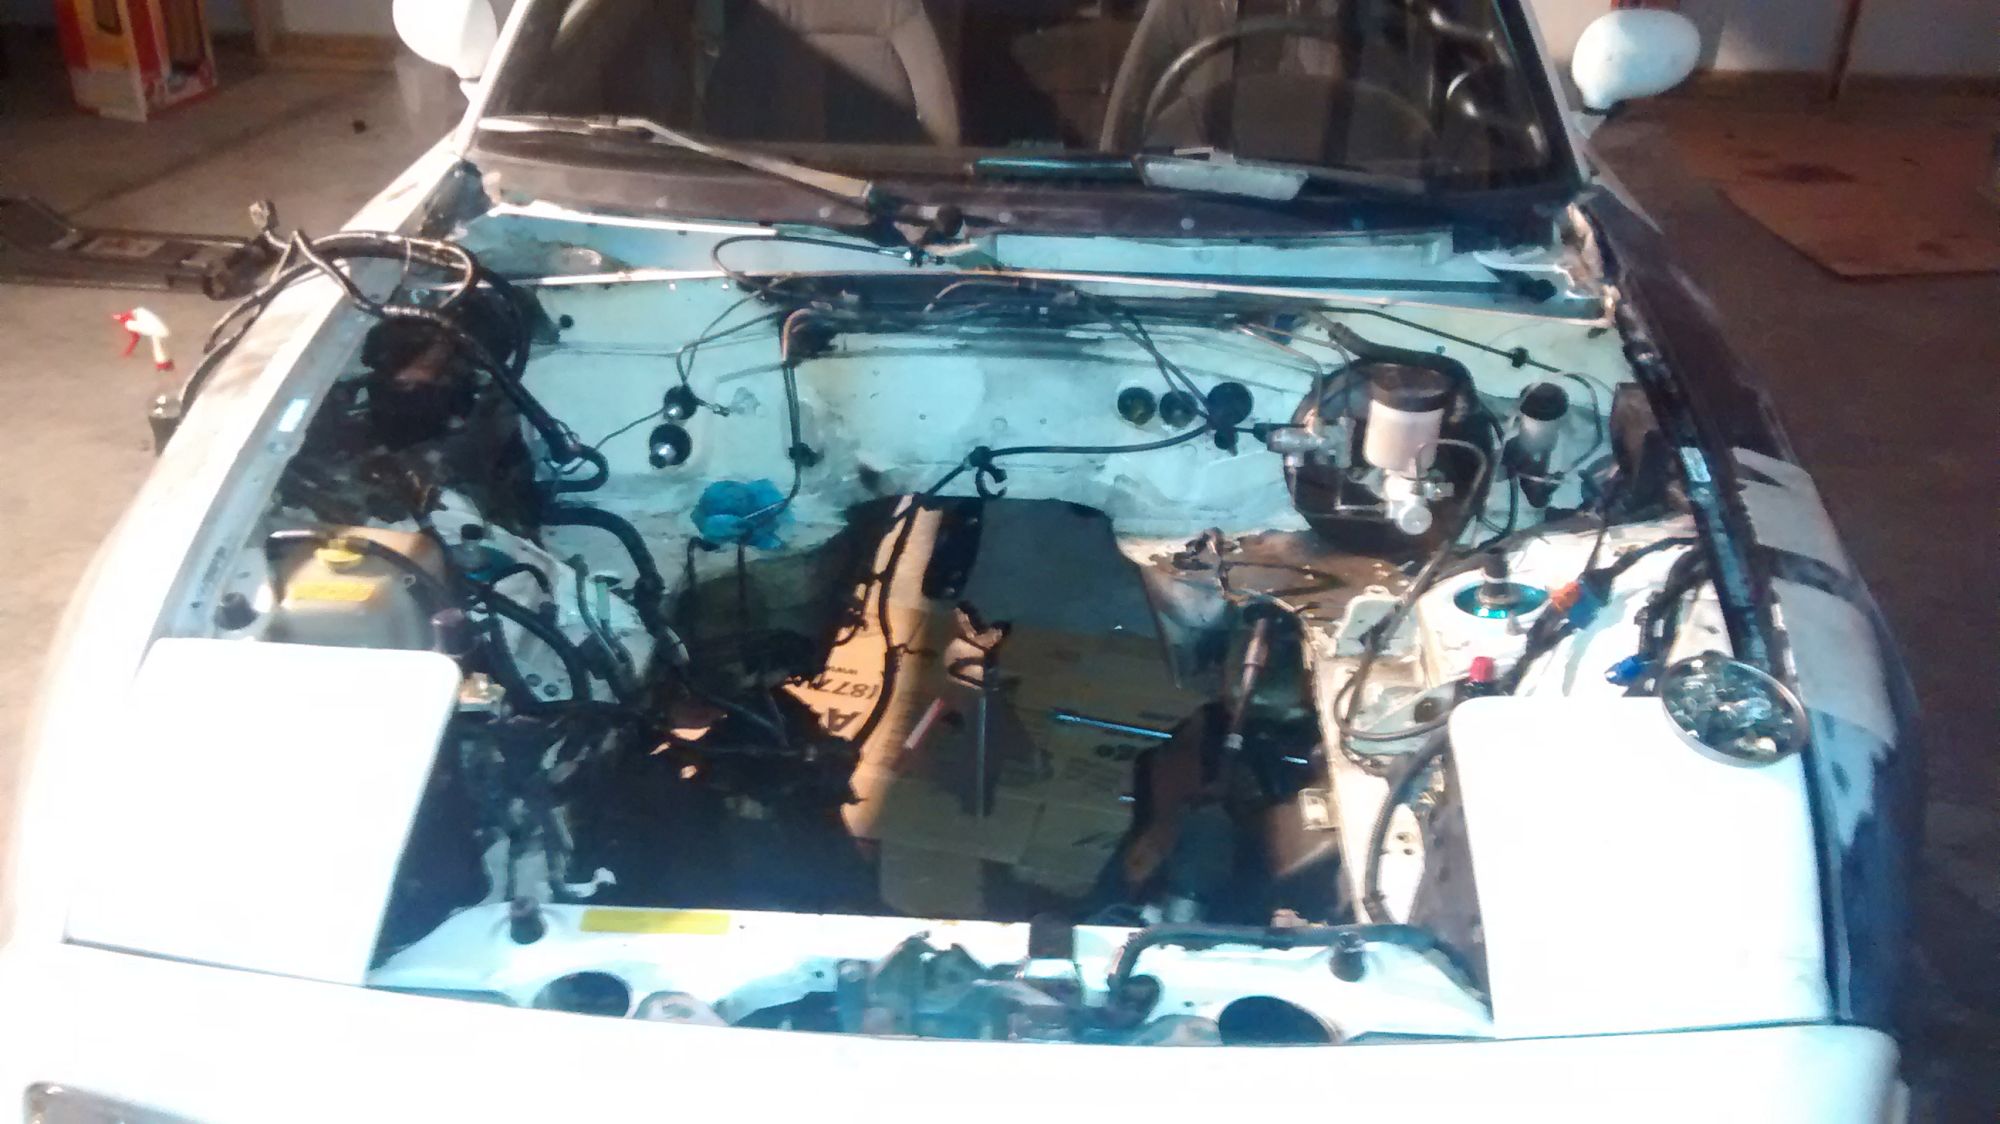
Empty bay!
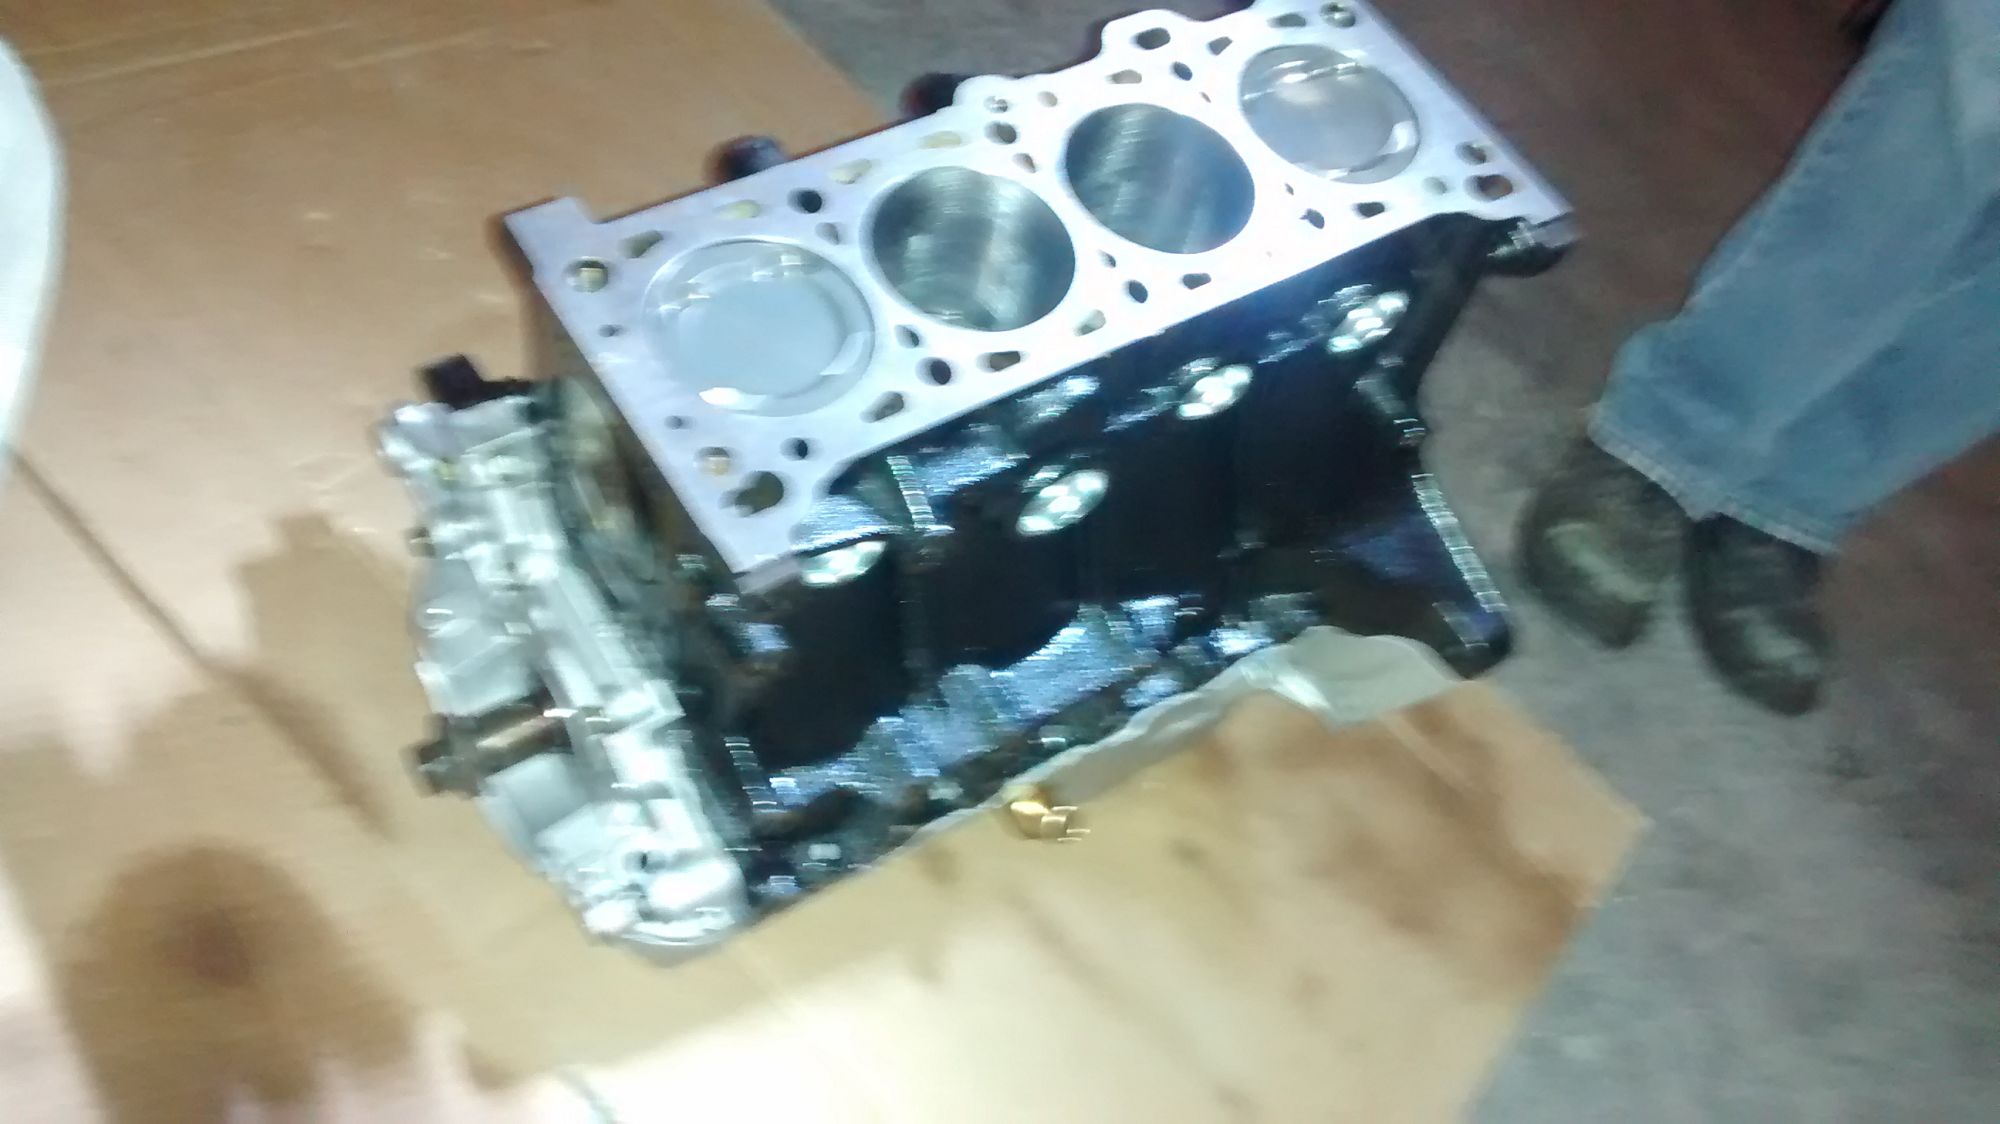
We took off all the accessories on this engine to use on our fresh one (sans oil pump):
New engine on the stand with the old block on the cardboard of shame:
Other side of the old engine on the crane:
The car also got a new clutch and pressure plate combo that I didn't get a picture of. IIRC it is an ACT "Stage 2" which feels very much like a stock clutch if anyone is ever interested in them.
There'e me under the car making a creepy face. I was going half-insane from fighting the short-armed crane when trying to install the motor. Tools got thrown around more than once.
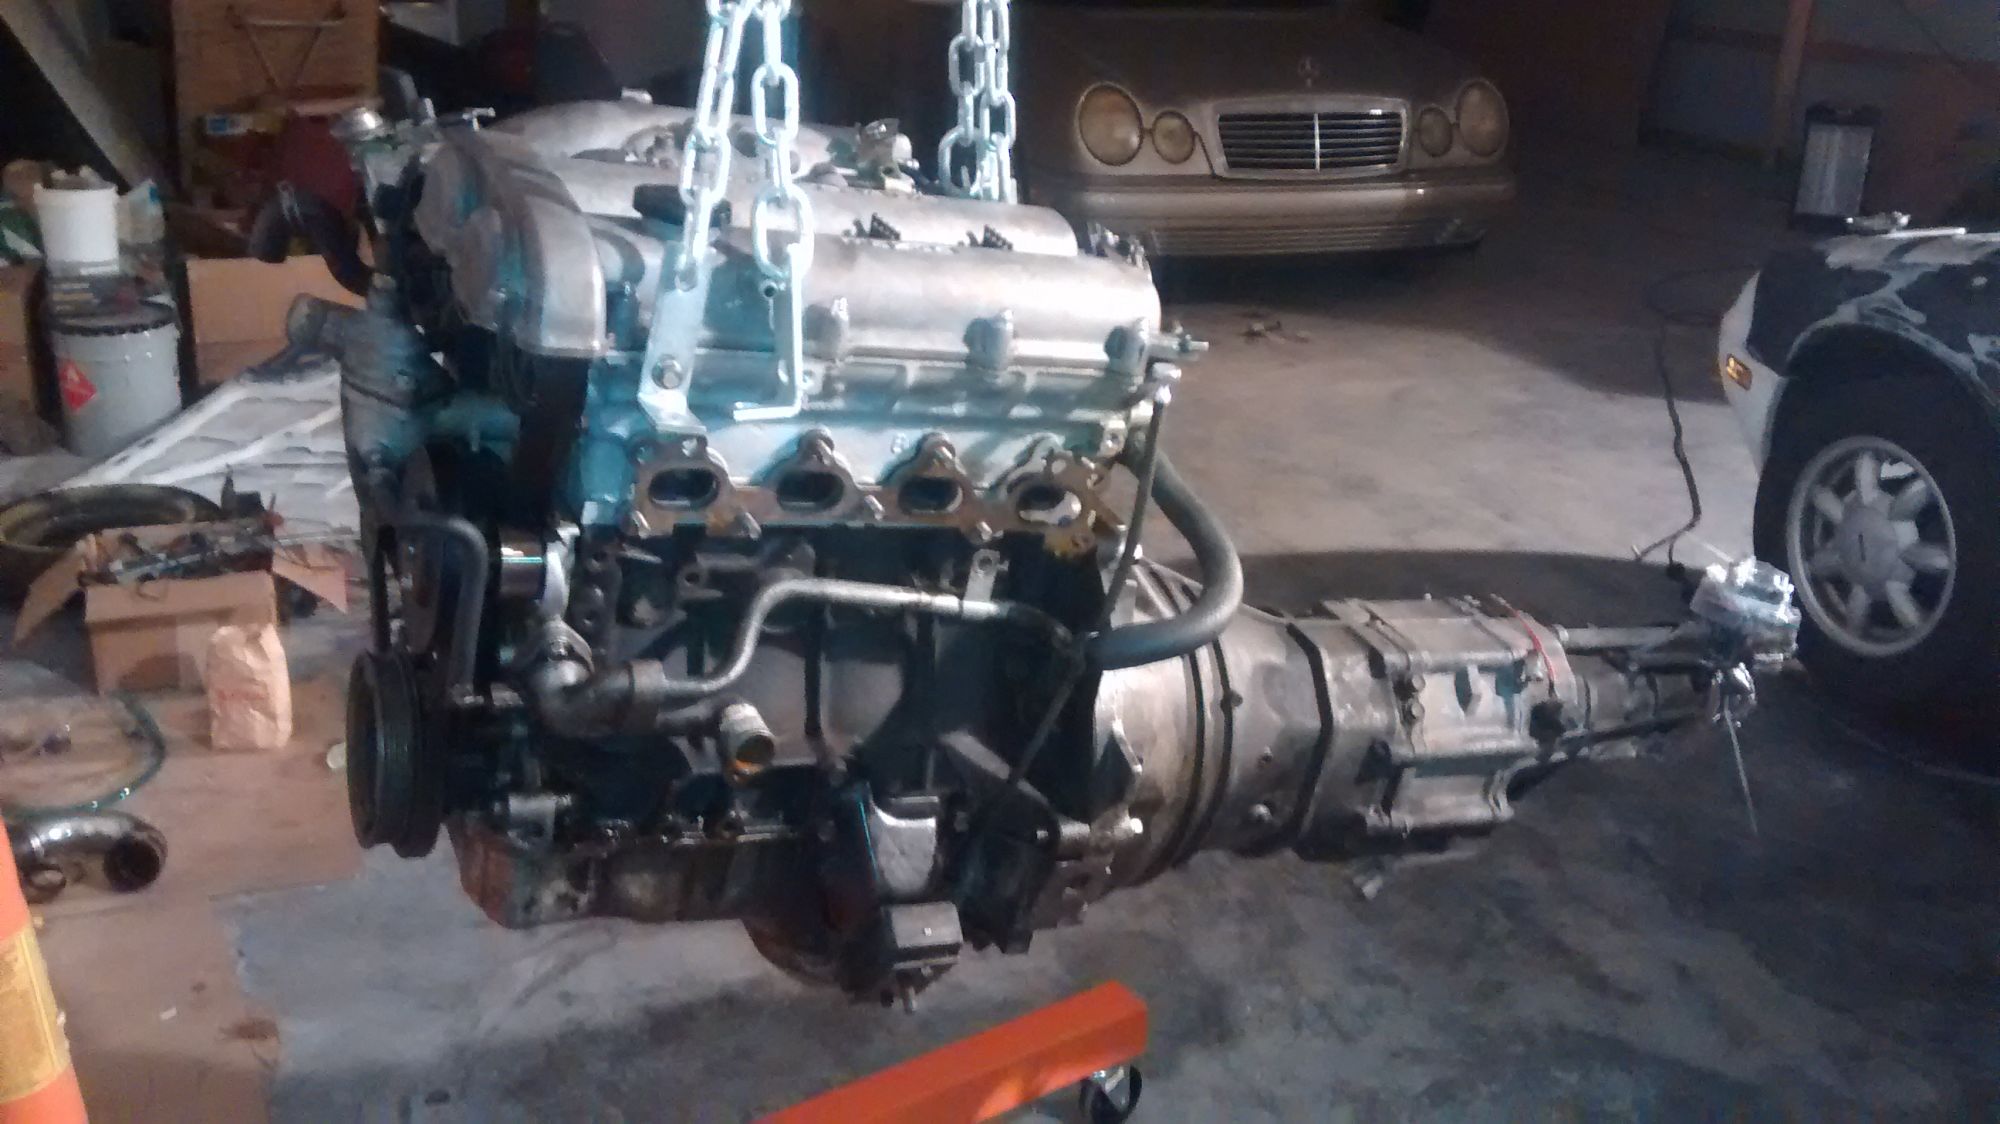
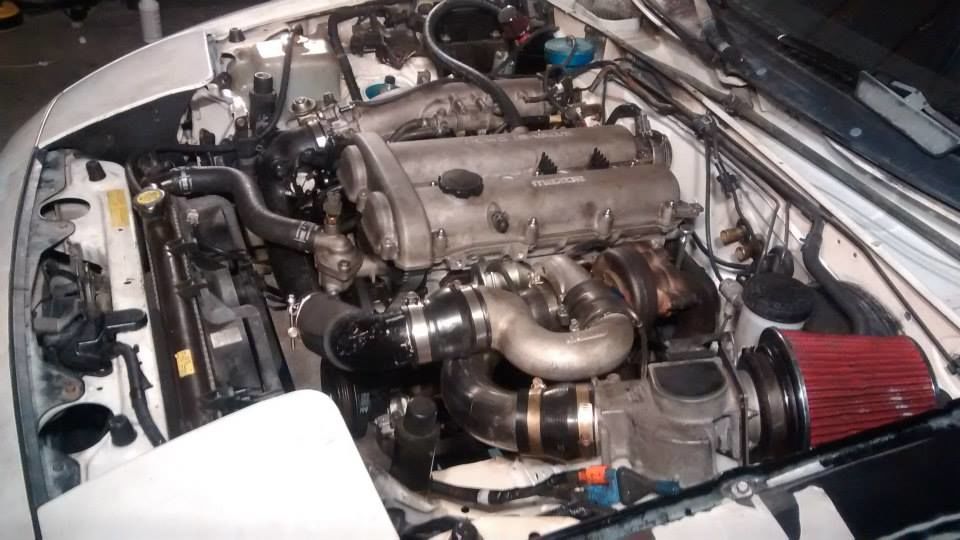
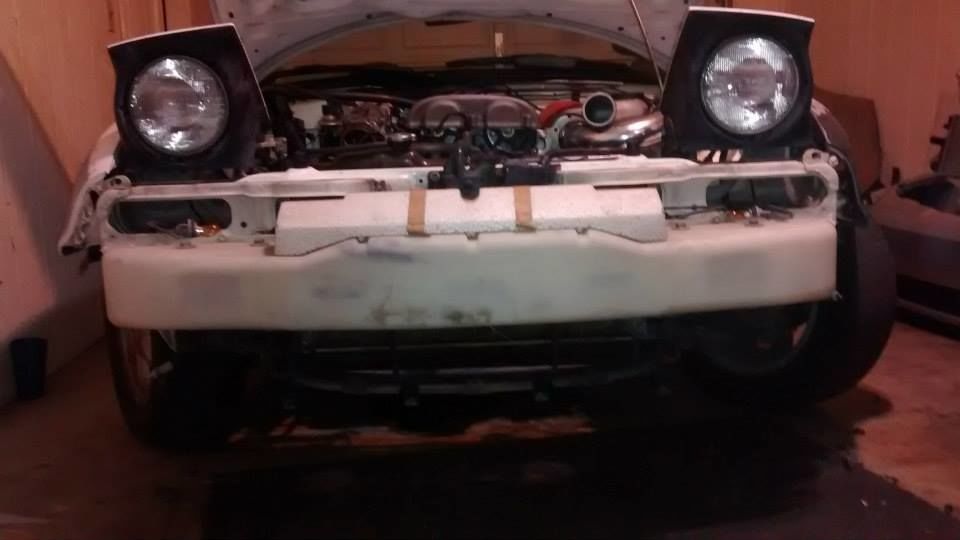
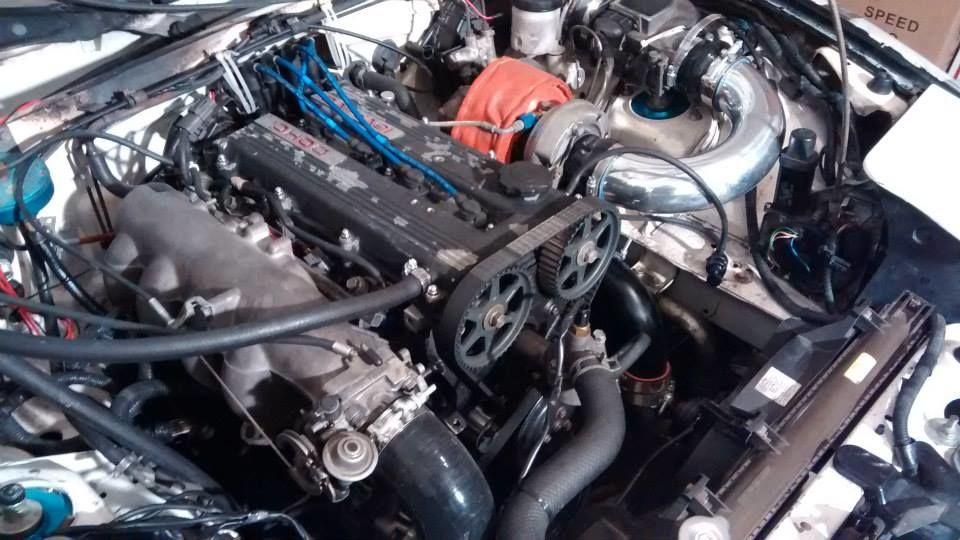
FINALLY back together on a built motor with turbo. Notice the discoloration on the Vortech FMU and the scorch marks on the firewall. I added an ebay Oil catch can and JB Welded shut the cursed water plug, the oil return on the passenger side of the engine, the EGR nipple on the intake manifold, and the open hole that is on replacement oil pumps. JB weld is my friend.
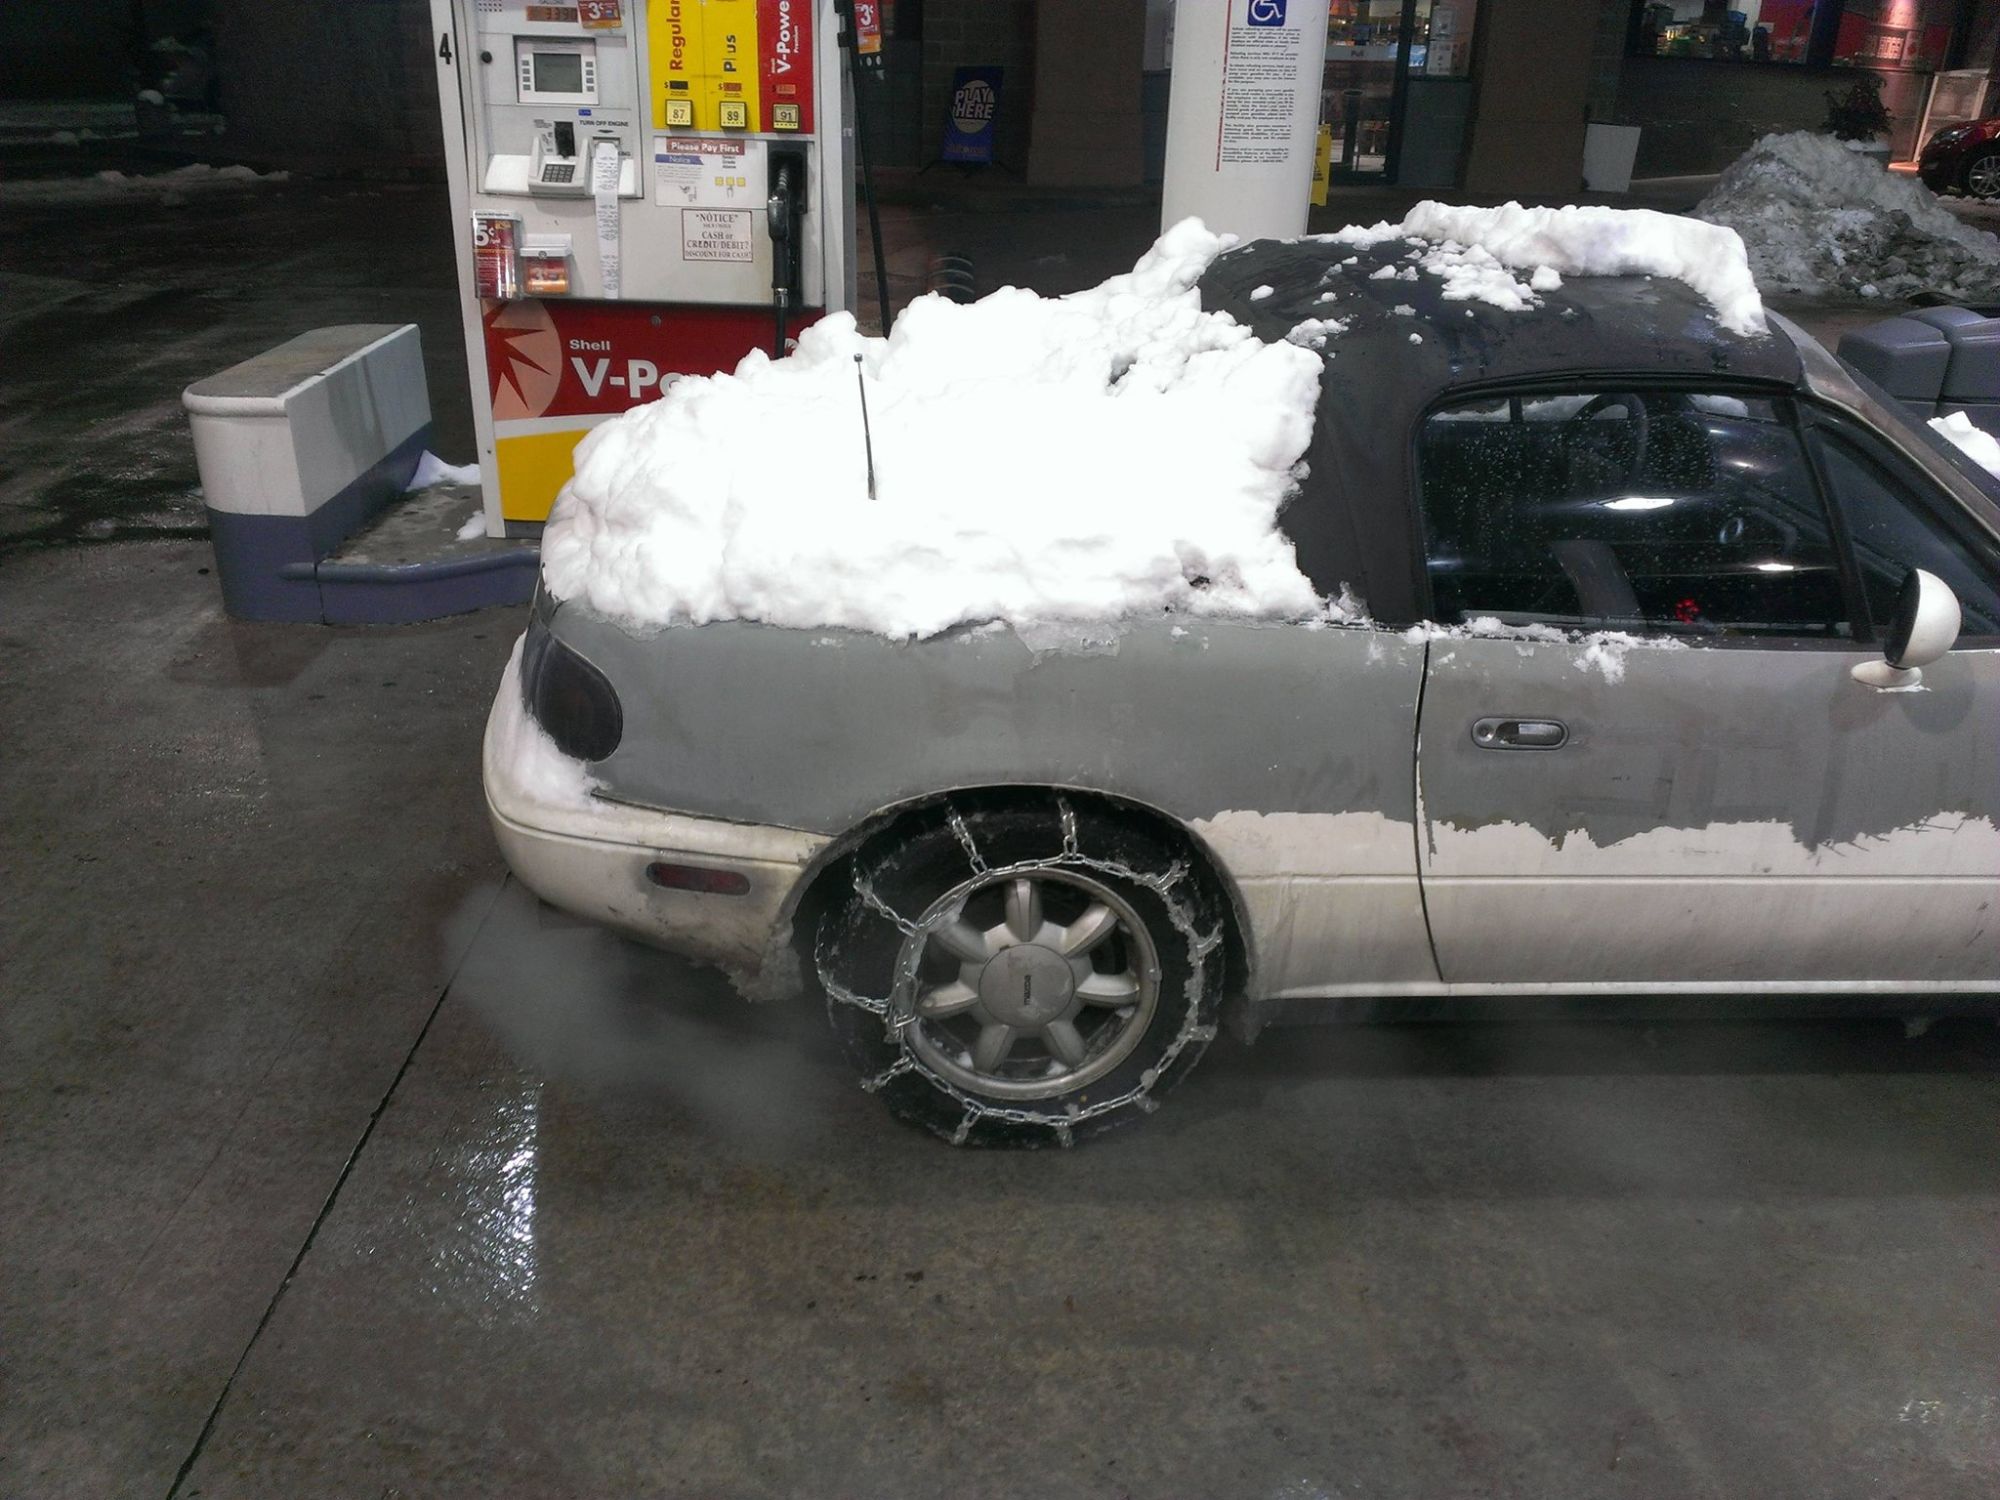
Notice in this picture that the heater lines don't have hoses on them. I ran the coolant bypassing them for a little while because they were leaking bad enough that I had hot coolant spraying on my ankles at one autocross event when I took a hard right-hand turn. I used a socket that was just the right OD to fit the ID of the heater pipe which re-rounded them out. Then I put new hoses on them and they've been good ever since!
This "charge pipe" setup was pretty awful even at the stock Greddy boost levels. The pipes never wanted to stay together. In this picture you can see some liberal use of duct tape used as a "cap" on the intake. This saved an autocross day for me and actually held for 100's of miles until I gave the intake pipe to a friend and intercooled the car. I have a new-found respect for multiple layers of duct tape and a worm gear clamp.
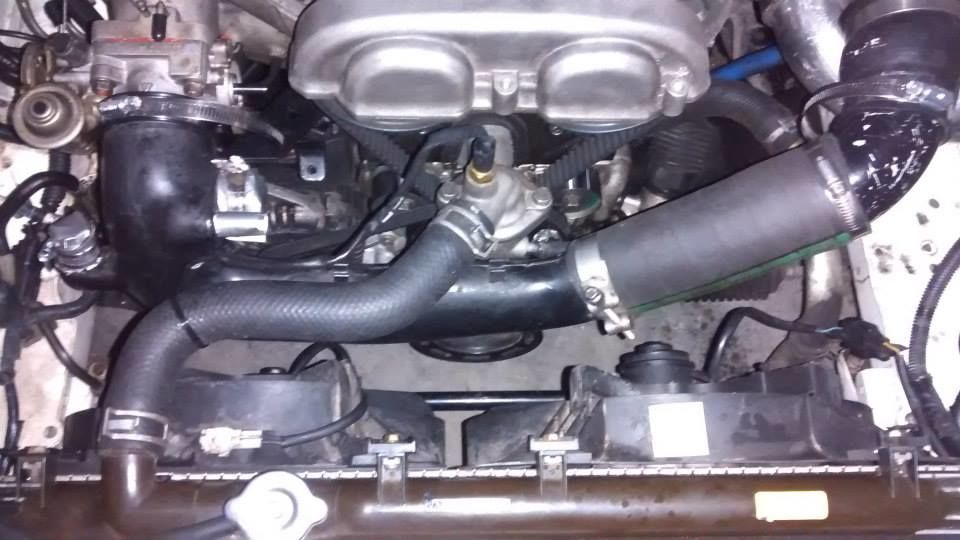
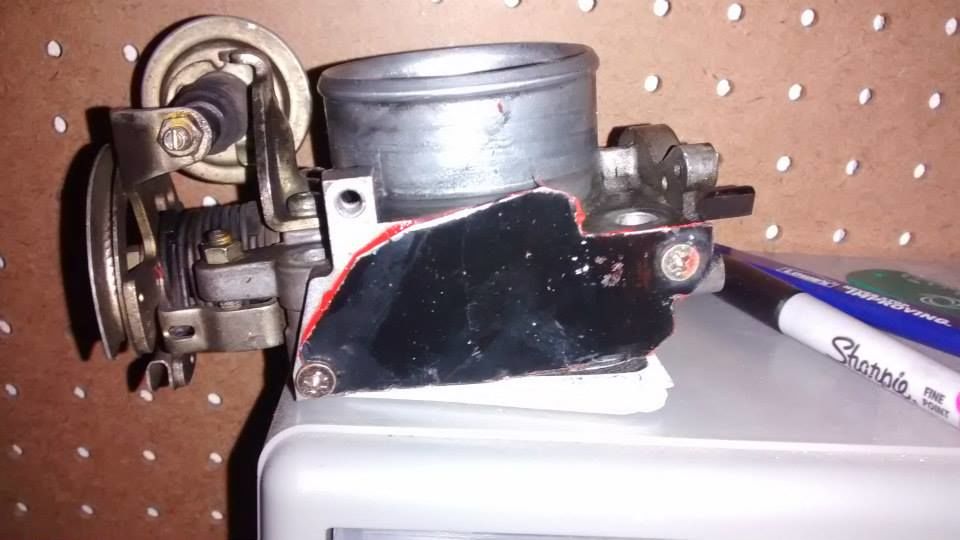
Here you can see a block off plate I made with an old computer case and a pair of tin snips. By the way tin snips are NOT the right tool for cutting a steel computer case (it was.....difficult....) RTV was used for a gasket. This is still on the car and going strong. I love the simplified amount of coolant lines on the car now too! ISCV, IAC, and TPS delete! I opted to keep the dashpot but it may get removed later.
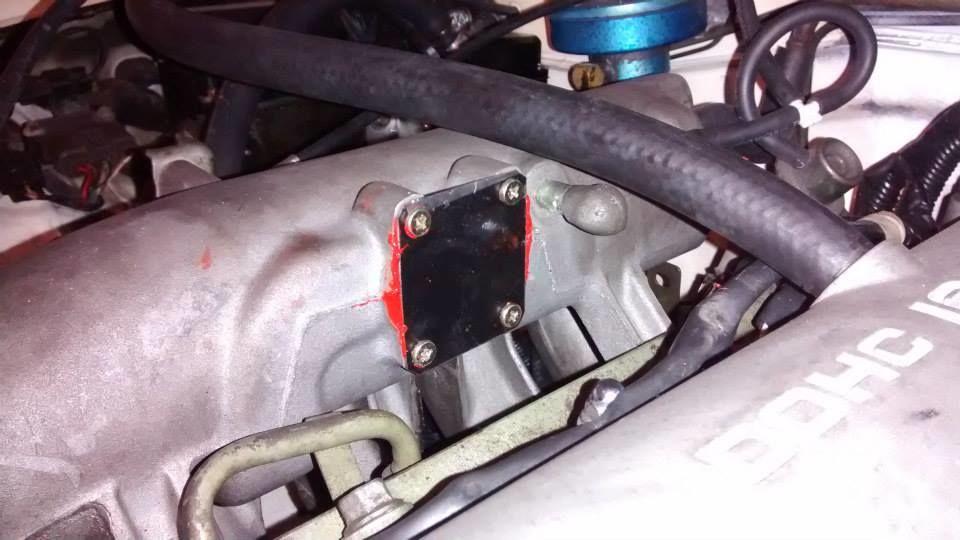
I used JB Weld's "Steel Stick" to cap off the EGR on this intake manifold.
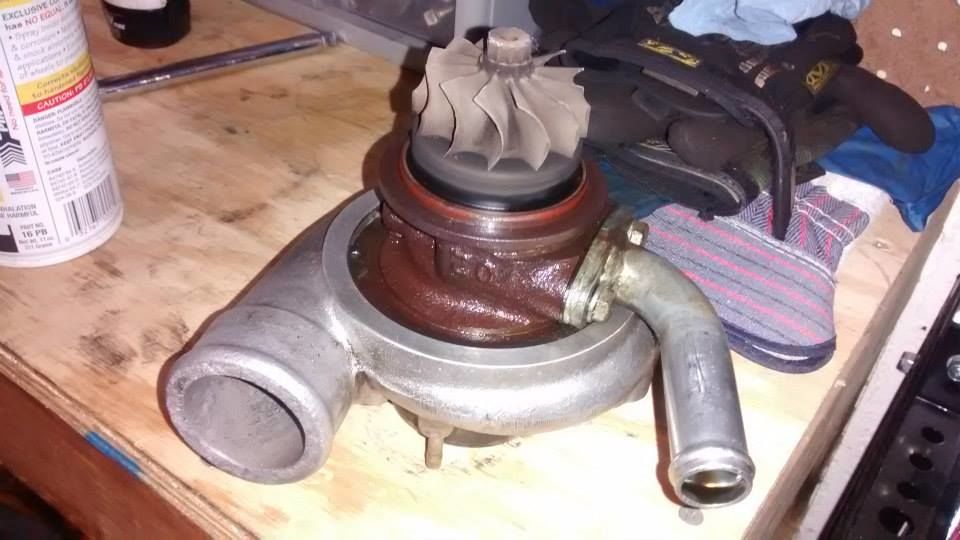
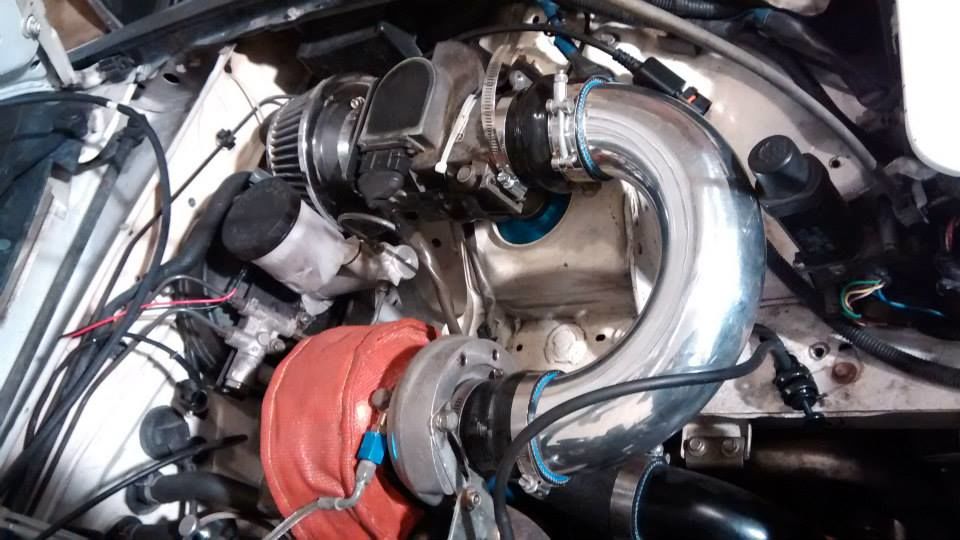
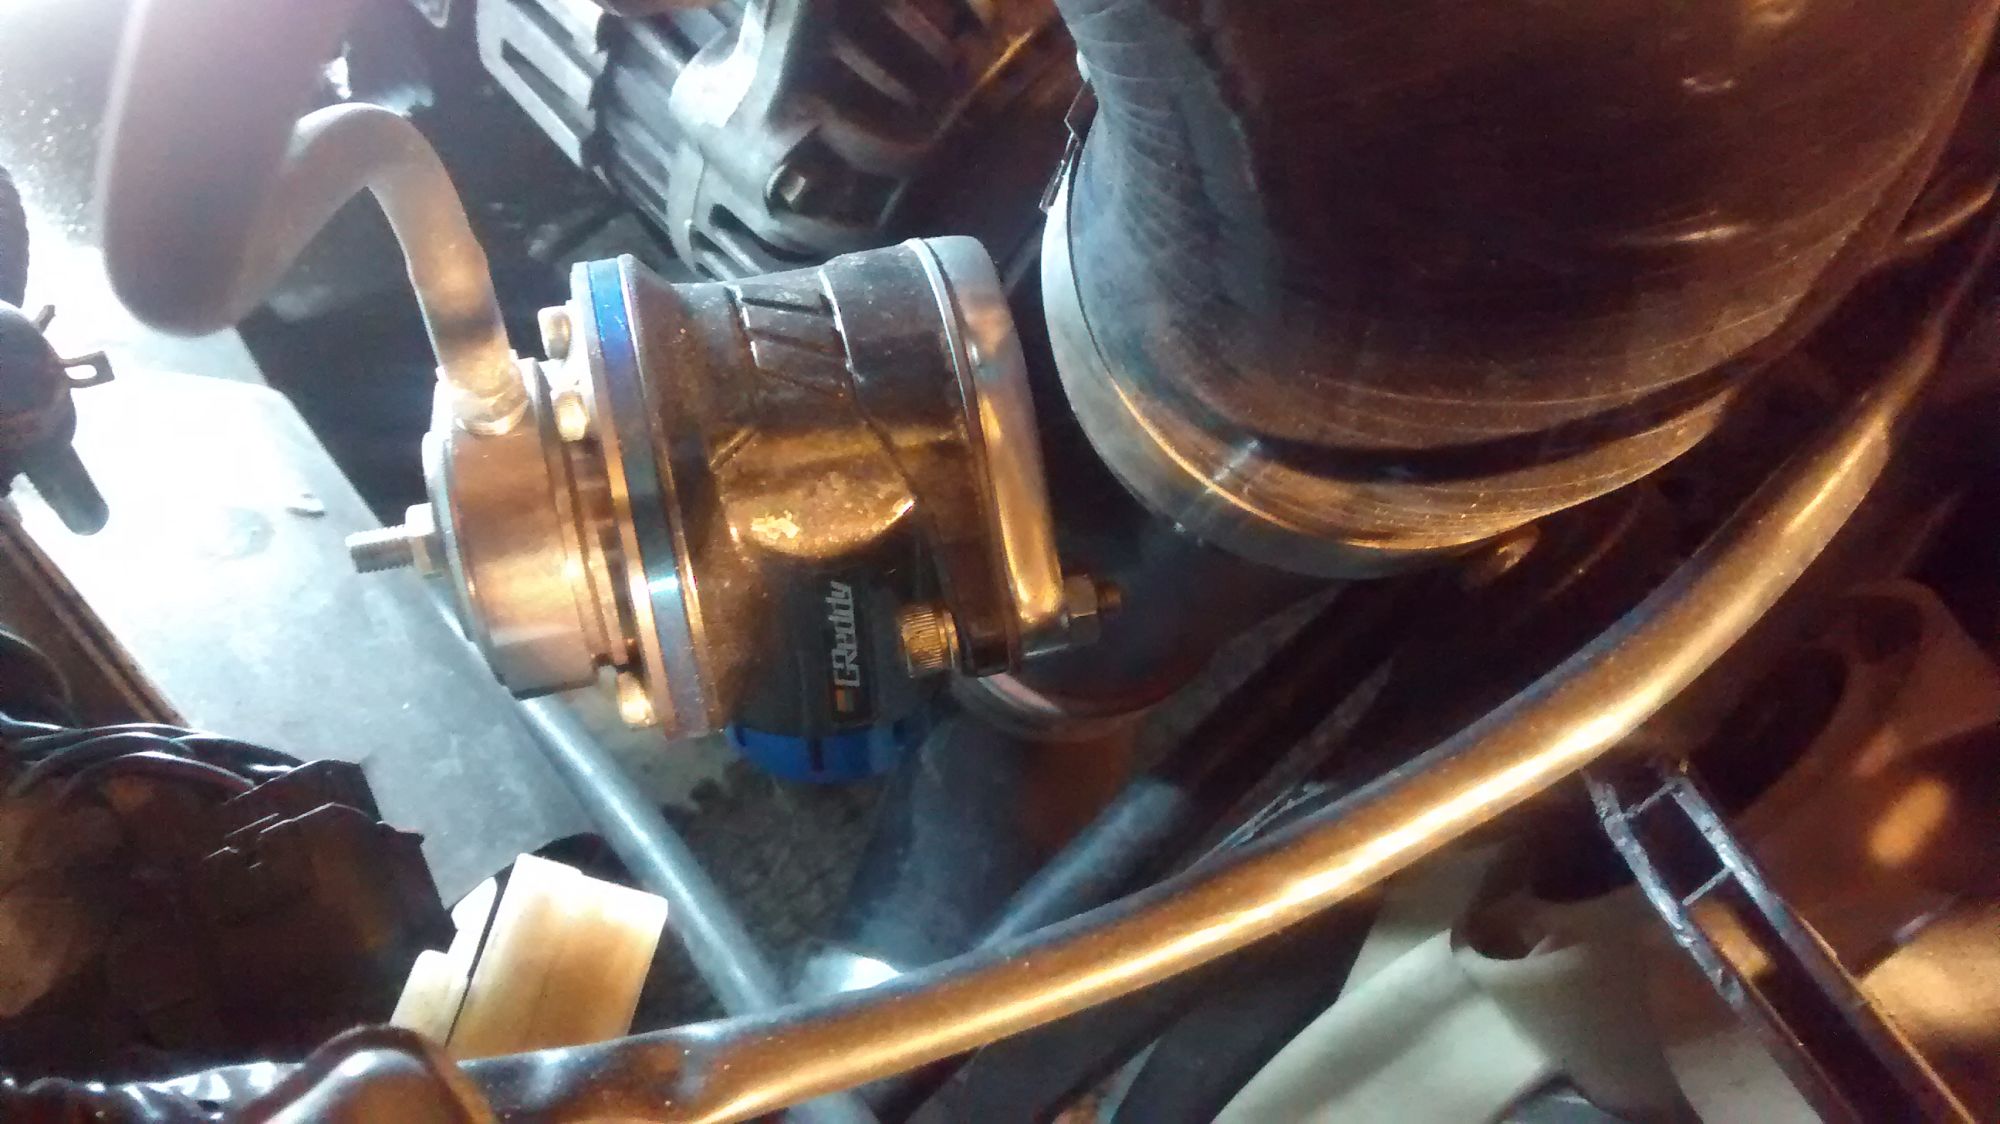
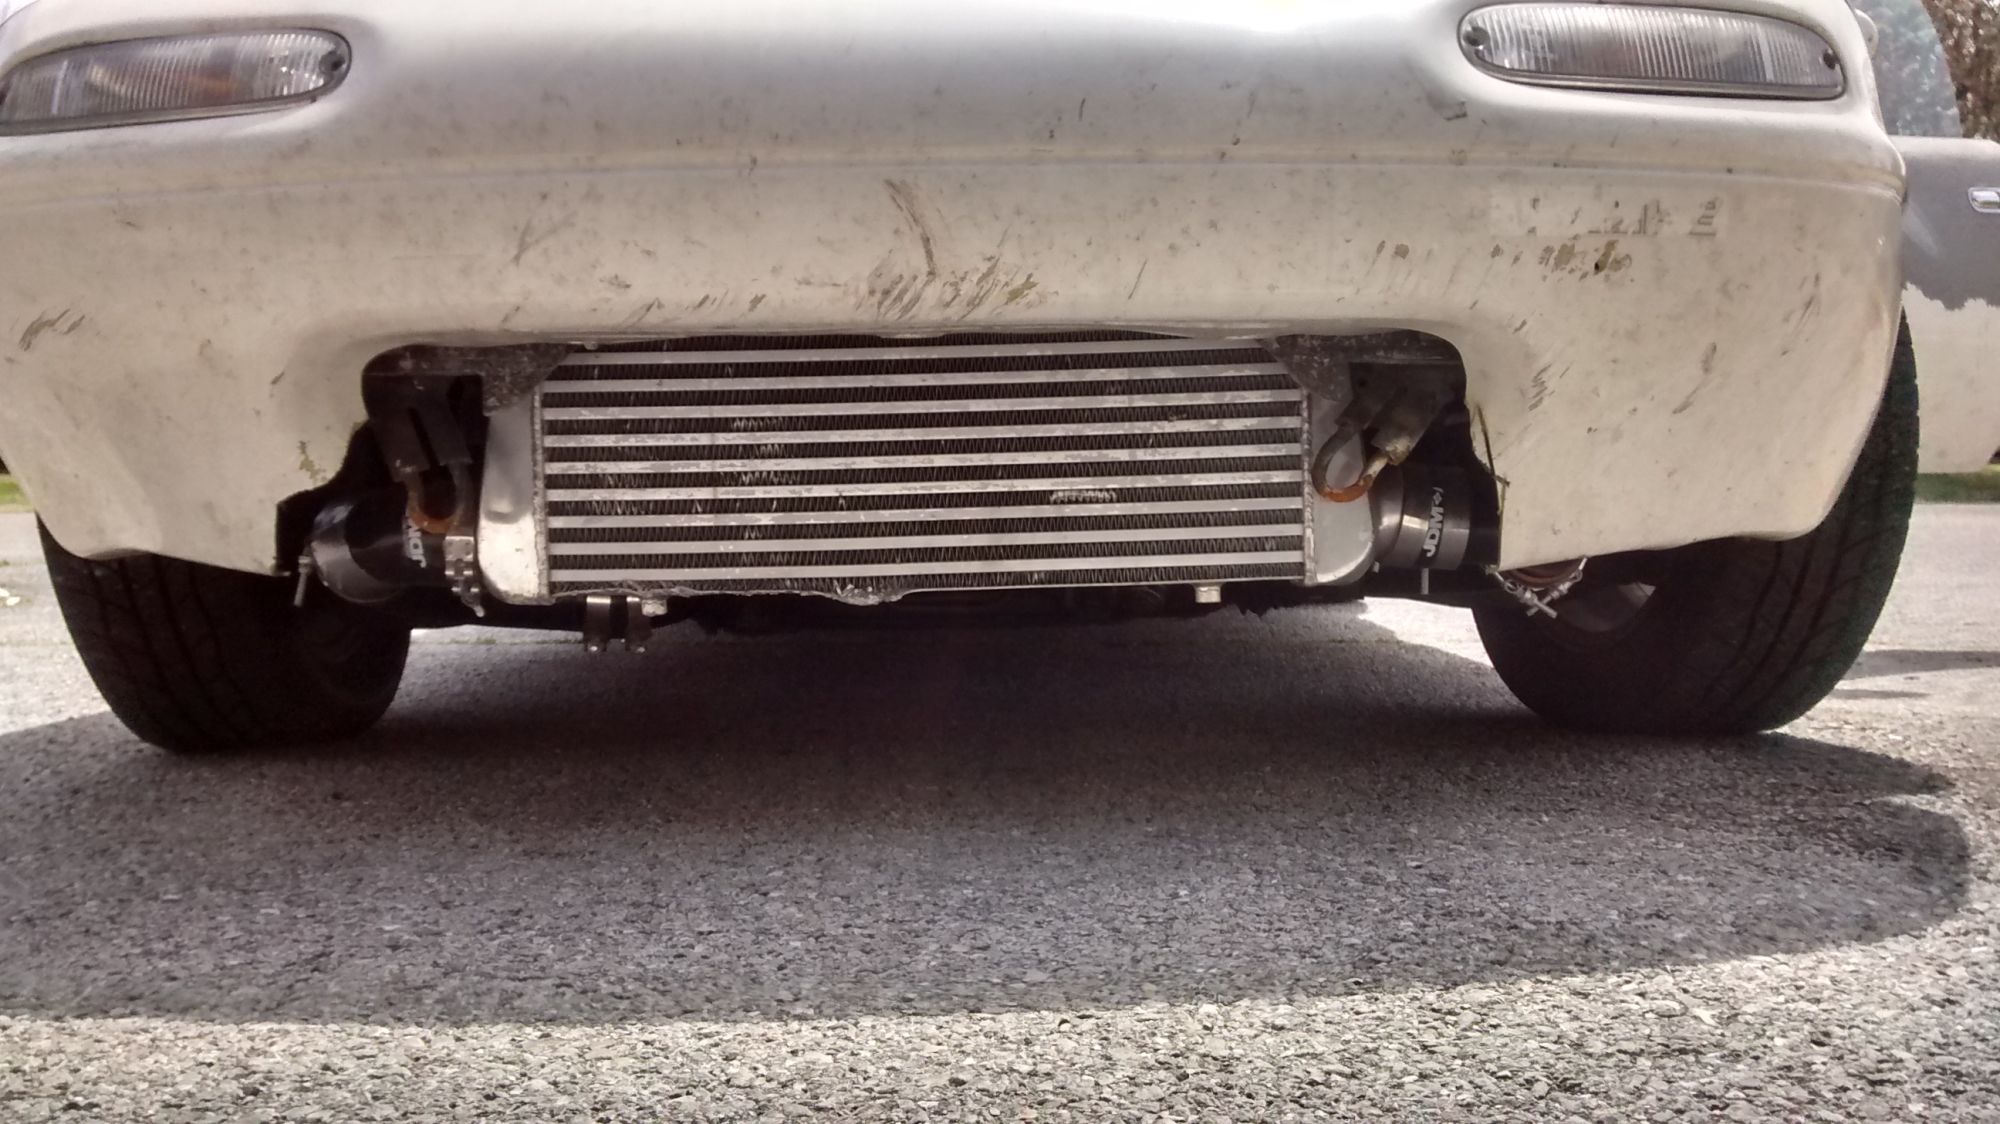
Since I had a ton of issues with the stock Greddy Piping I needed to upgrade. I wanted to try to reduce the amount of couplers (and thus, potential points of failure) and/or upgrade the couplers to a higher quality with properly sized piping, etc. So I bought a nice eBay kit for like $110 with 2.5" piping. Black aluminum with bead rolled ends. I had an EMUSA core bar and plate intercooler that Garrett gave to me as part of the sale so I put it all together. Along with that I decided to clock the turbo to make it all work.
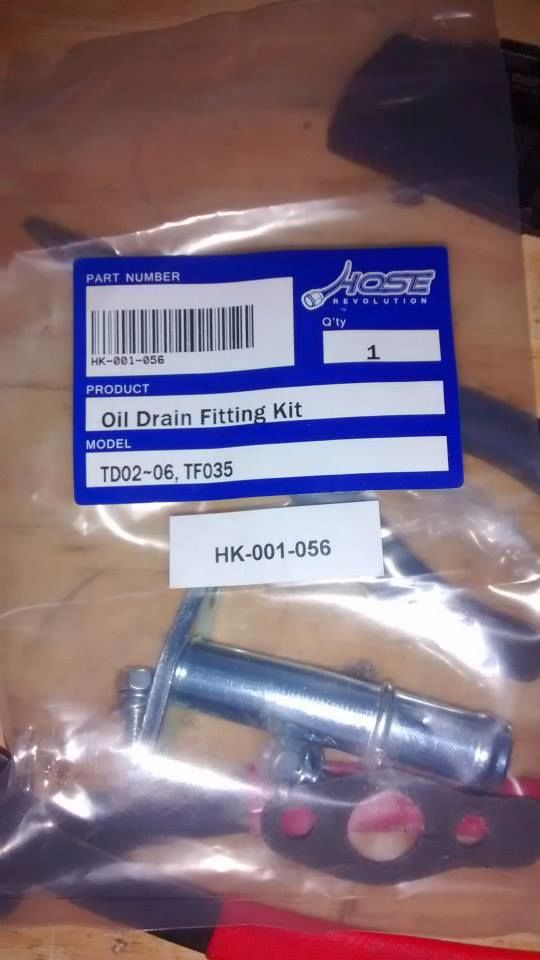
I needed to have a straight oil drain tube off of the turbo so I ordered this kit for $12 shipped "Turbo Oil Drain Return Pipe Kit Mitsubishi TD02 TF035 TD04 TD05 TD06 KKK K03 K04" from eBay from a seller called xaturbo (That's the brand too XA Turbo). Was a really nice quality piece that came with hardware and a gasket.
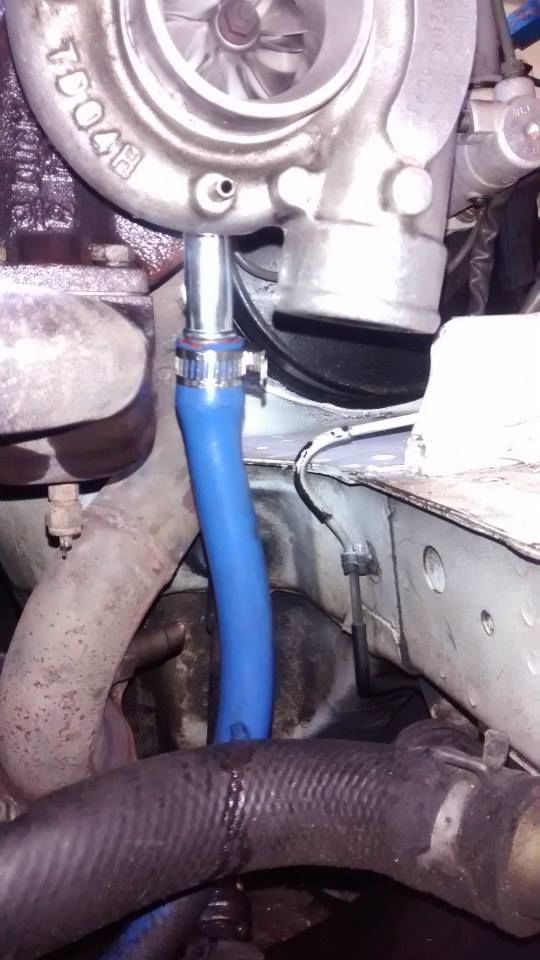
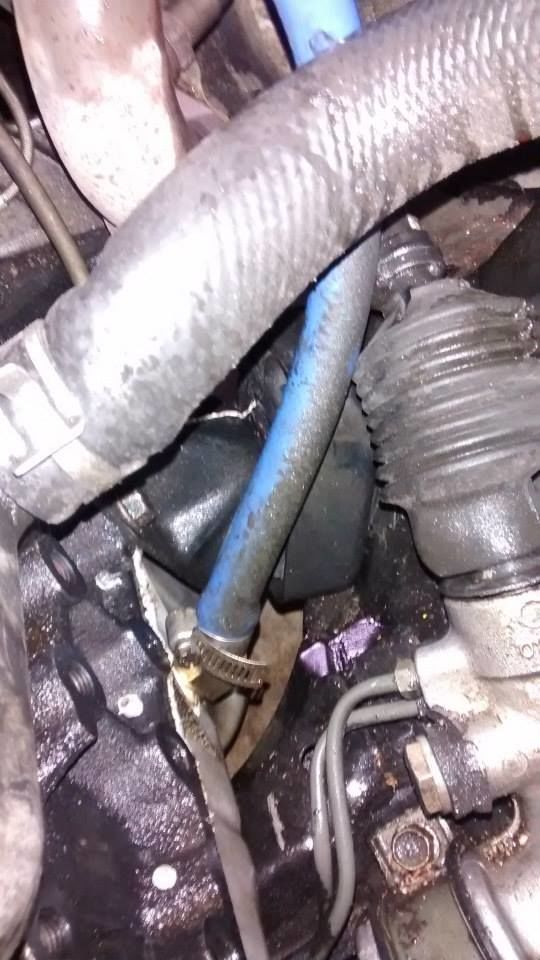
With the turbo clocked and the new drain line installed:
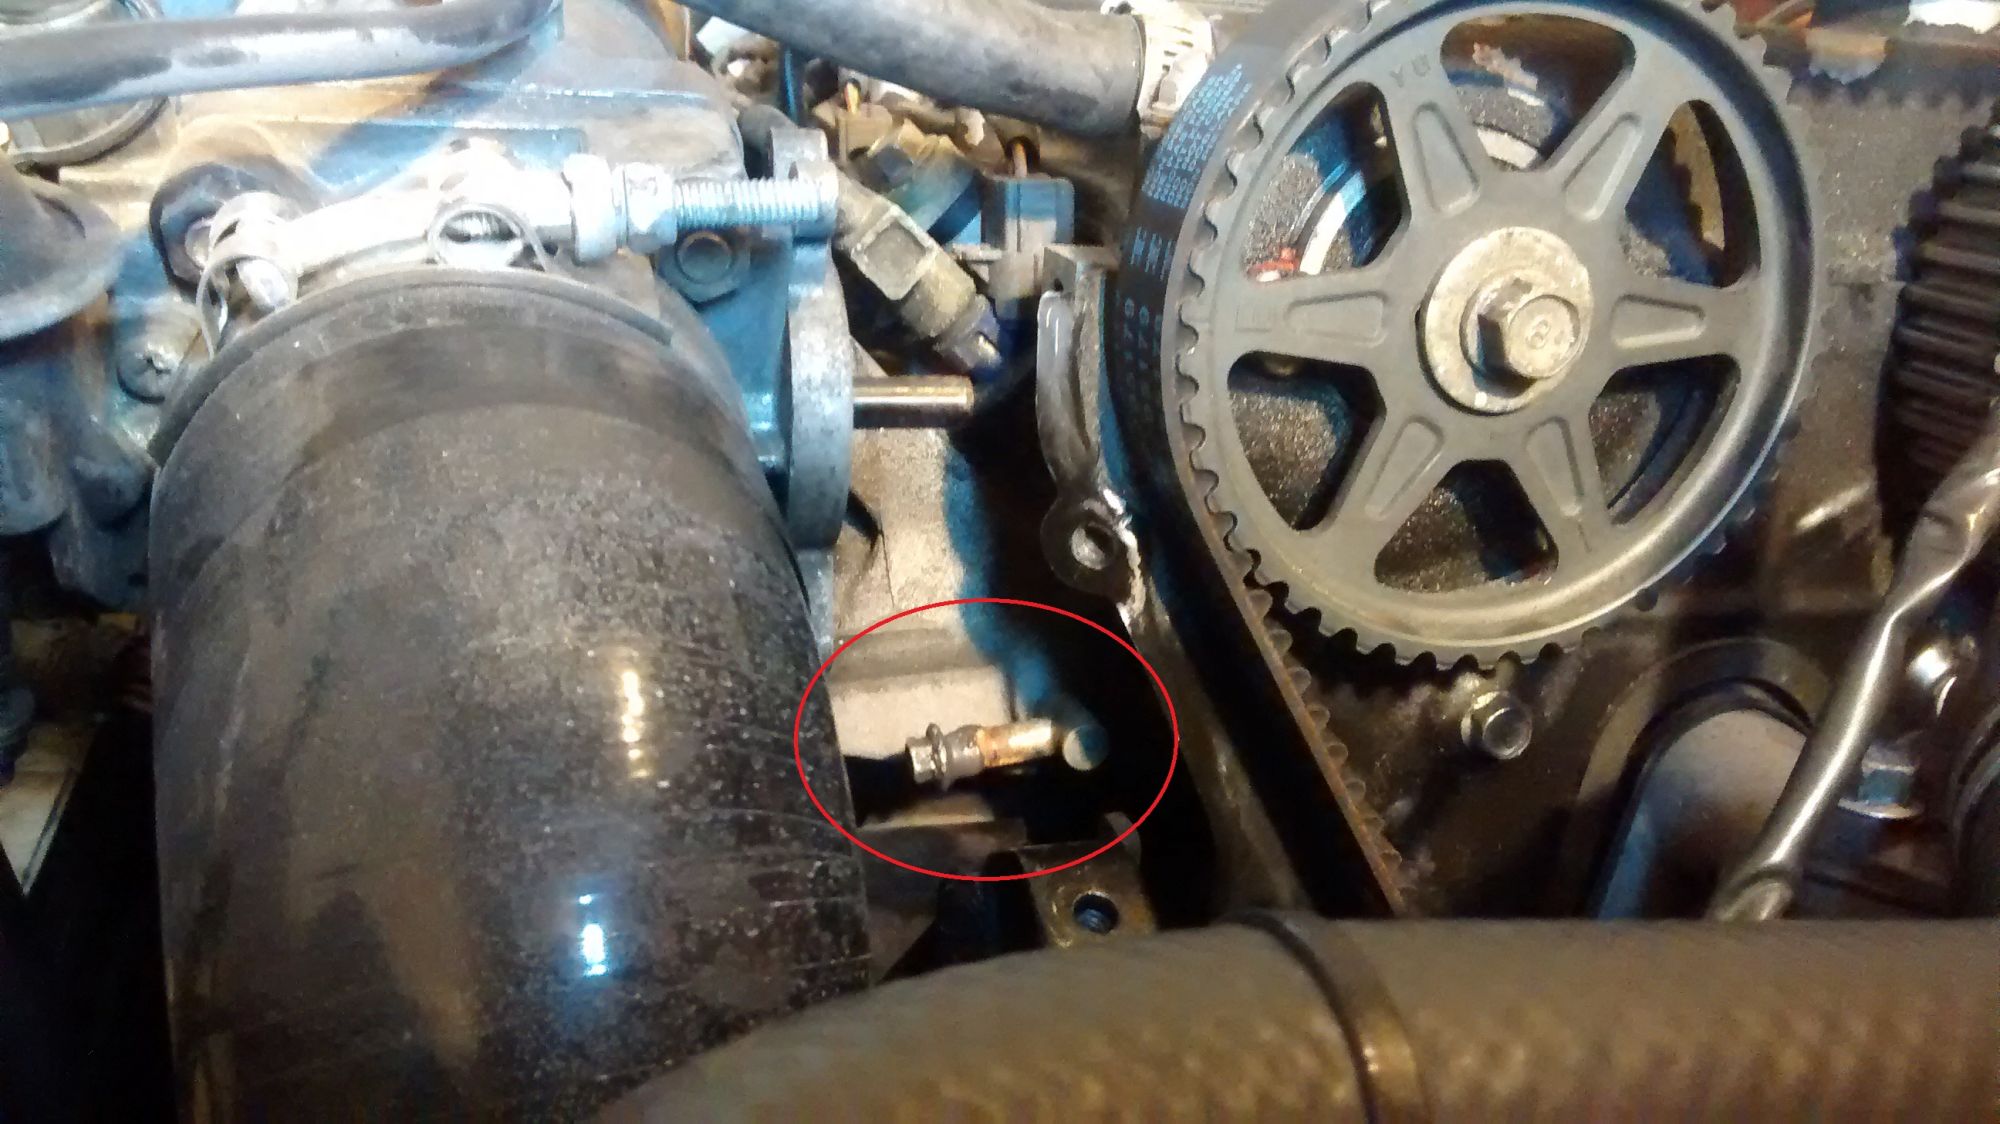
And the turbonetics brand (lol, as if it matters) brass fitting in the pan. It's something like a 45degree angle which works great for my setup!
BTW for anyone wanting to do this, I took my turbo off to do the oil drain line (If I remember right I think I had to in order to get a tool where the oil drain is). I had a pair of needle nose pliers that I used to take the giant retaining ring off that holds the turbo housings together. The two C-Clip tools I had bought for this purpose would not take it off and just bent/broke.
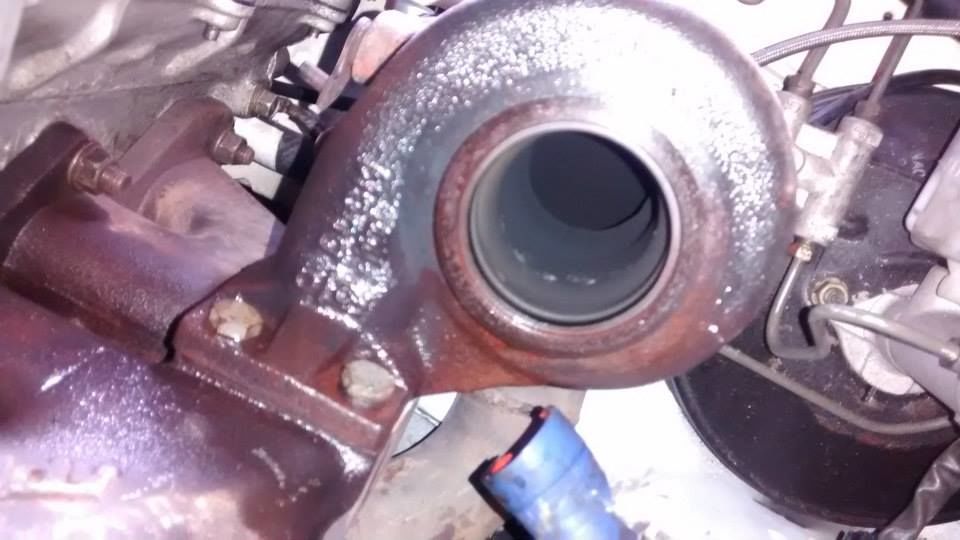
Once I had the intercooler piping mocked up I decided to try this as an intake setup...it failed miserably because the turbo inlet on the turbo that I have is smooth and without a bead on the edge which makes it hard to retain a bite with a coupler. The inlet is also recessed into the compressor housing slightly and causes clamps to have clearance issues.
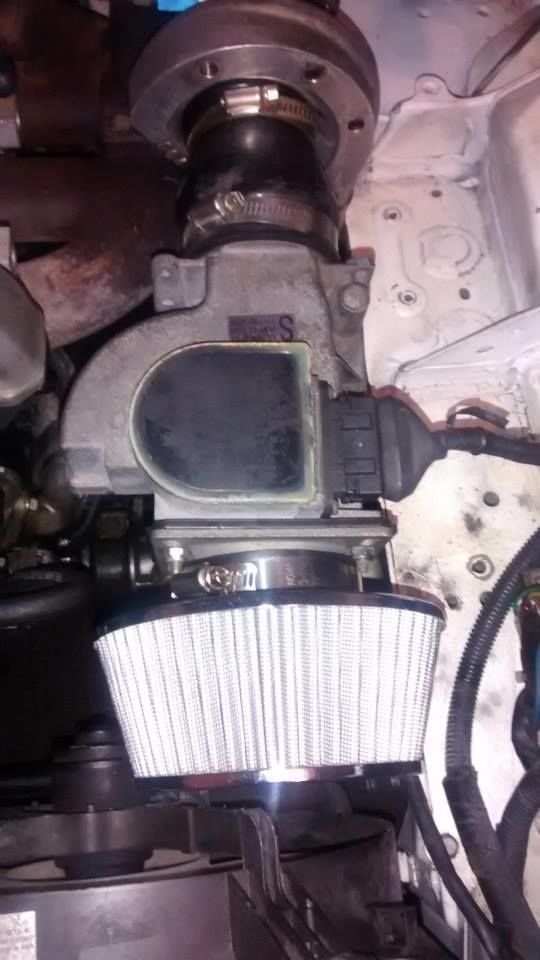
I even had a bracket up under the AFM on this setup but it wasn't enough. Once the turbo got hot that "silicone" coupler turned into jelly and came loose, ending an autocross day prematurely. My bracket was merely a "hold-up" to allow the AFM to rest on it. The bracket was bolted to the body of the car (which doesn't move like the motor does). Also, since it was just holding it up, during cornering the AFM actually wobbled side to side enough to contact the timing belt. The only way I'd run an intake setup like this would be if it had at LEAST one bracket that was bolted on both ends: one on the motor and one on the AFM, otherwise there's too much mass being supported by the turbo inlet coupler.
That glorious little filter is another eBay purchase; a Spectre 8168 SHORT LOW PROFILE. Fits 3" 76mm. I love that thing.
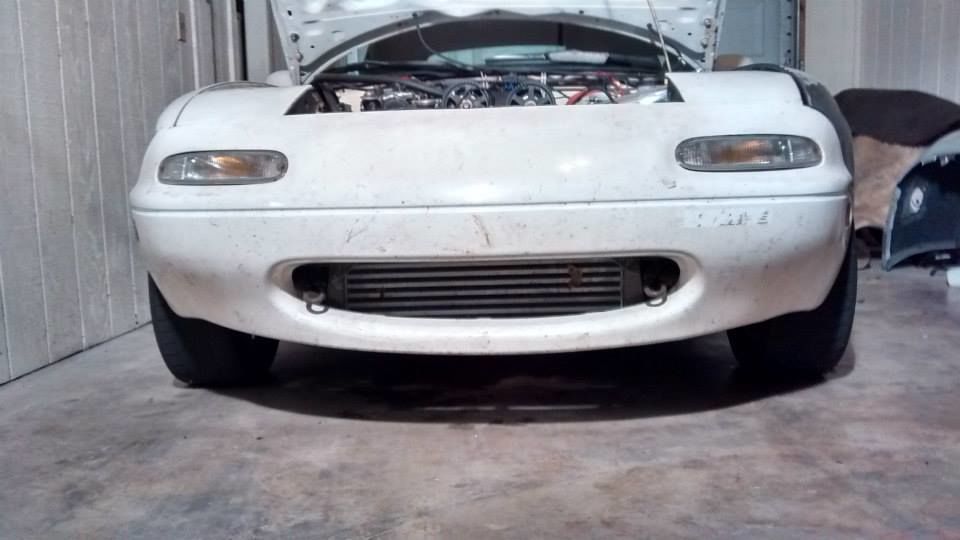
Once the setup was complete it looked like this: Mouth full o' intercooler! For mounting I drilled two holes in the metal in front of the radiator and put threaded rod into the threaded sections that were already on the top of the intercooler. The rod I used was A2 SS, M8 x 1.25mmx1m
1 meter was enough to do the two support rods and have extra.
This was the intake setup I ended up going with. If you're still using the AFM, it's basically required to have its weight supported in all directions somehow. This is easiest doing it like Greddy did and just flopping it over the driver side shock tower. The shiny pipe is a 180˚ 2.75" (70MM) pipe from ebay with bead rolled ends. The AFM side of that pipe is coupled with a 2 3/4" (70mm) Hump Straight Silicone Coupler, the turbo side of that pipe has a 2 3/8" to 2 3/4" Straight Reducer Silicone Coupler (60mm to 70mm). After clocking the turbo I needed a specific coupler to get the intercooler piping to mate up more easily so I used a 2" to 2.5" (51mm - 64mm) 90 Degree Silicone Elbow Reducer. It connects from the compressor to my 2.5" intercooler piping.
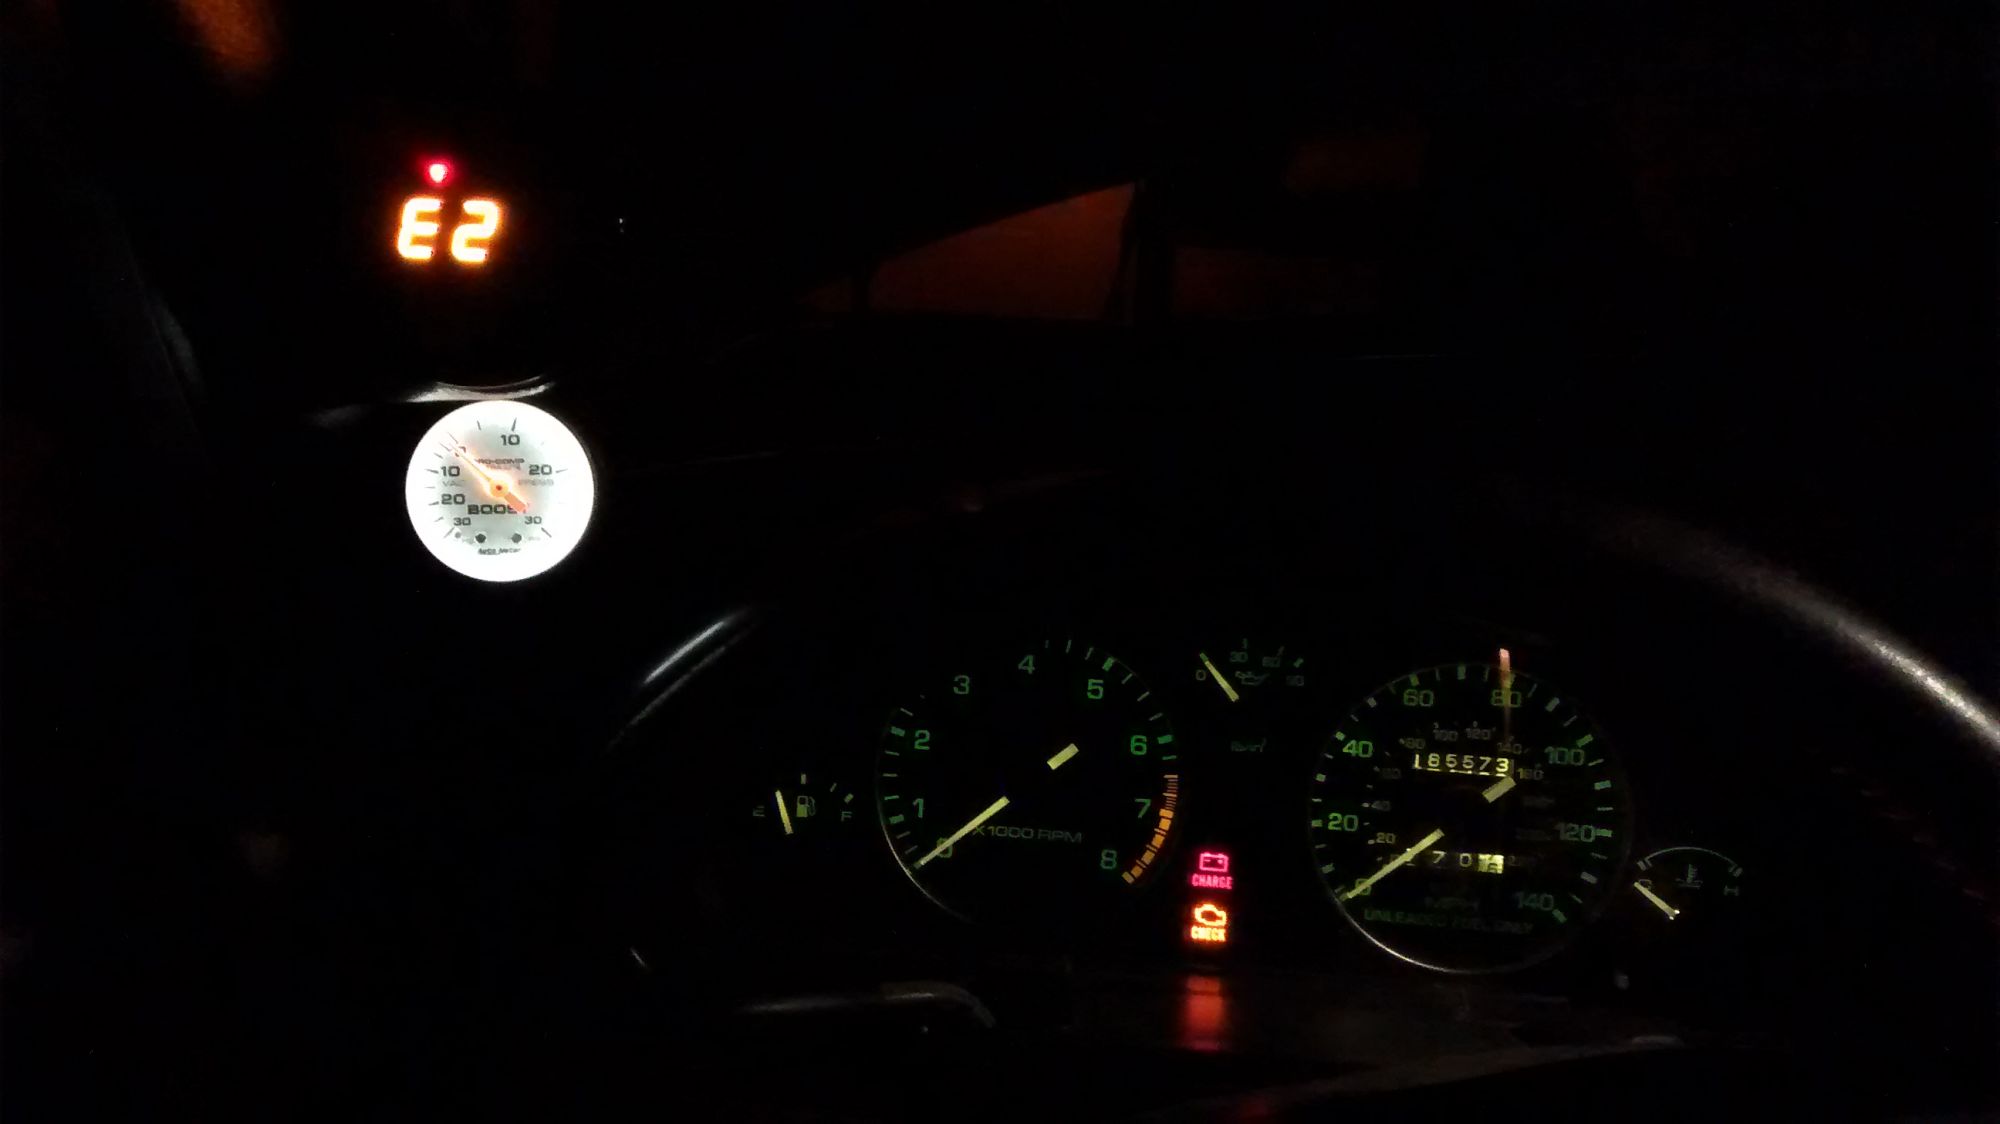
You might also notice in the pic above that I added a MBC. This one is the Voodoo V. I'm still unsure whether or not this thing is doing its job. More testing is needed.
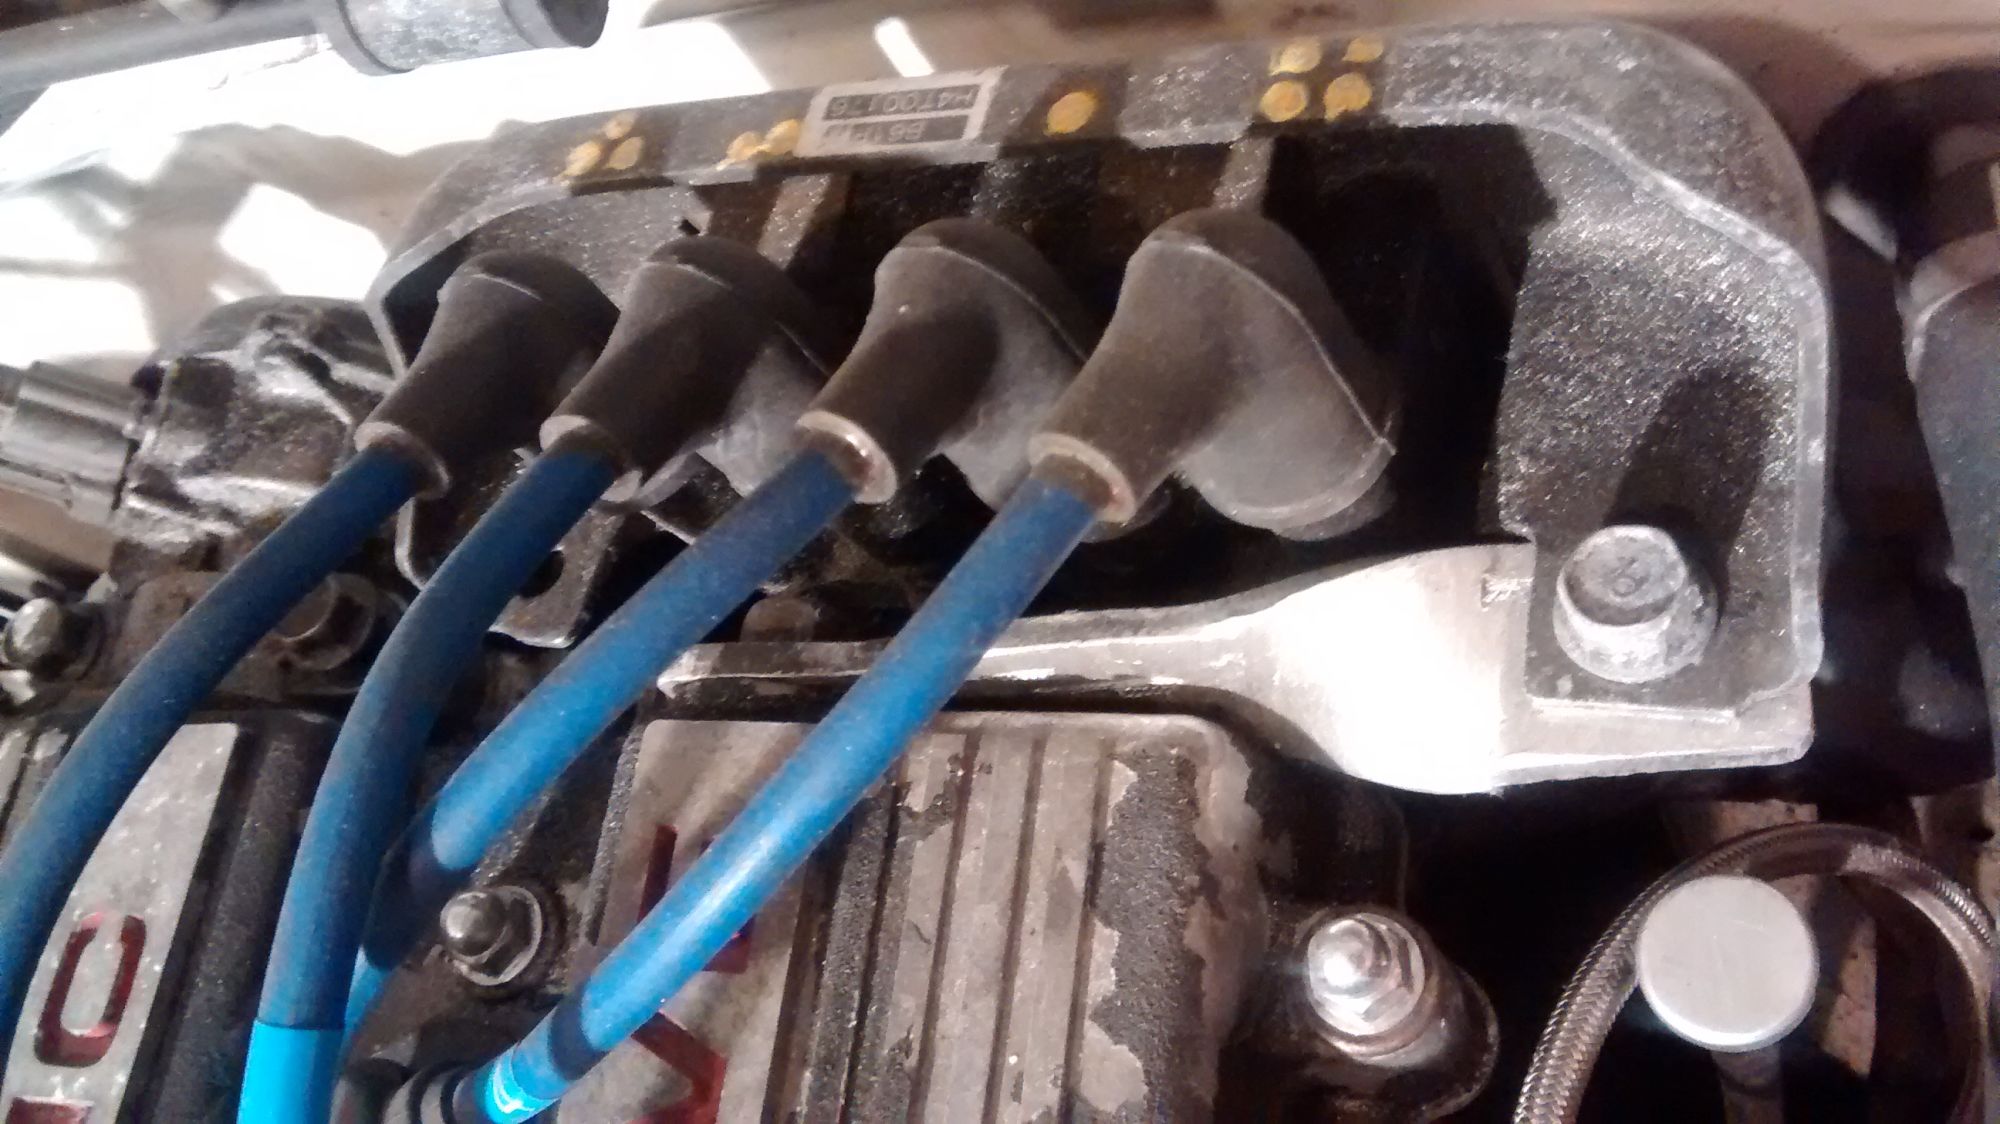
I found a Mercury Capri XR2 Turbo at the junkyard and snagged its valve cover. Its powdercoat was flaking which matches my car's "paint scheme" perfectly. Also note I used 949's braided steel clutch line when I fixed the fire damage, you can see it in this pic. I pulled the rear vent tube on the Capri Valve cover and tapped it. Then threaded a bolt into it to cap it off. I'm just using the single "front" vent for PCV now (running it into my oil catch can, and then VTA). I didn't realize it at the time, but the valve cover on my Miata is what had the mount for the ignition coil, so I made a new (temporary) "bracket" out of 4 zip ties. This held up through 3 autocross events until I finally upgraded it.
I also picked this up!
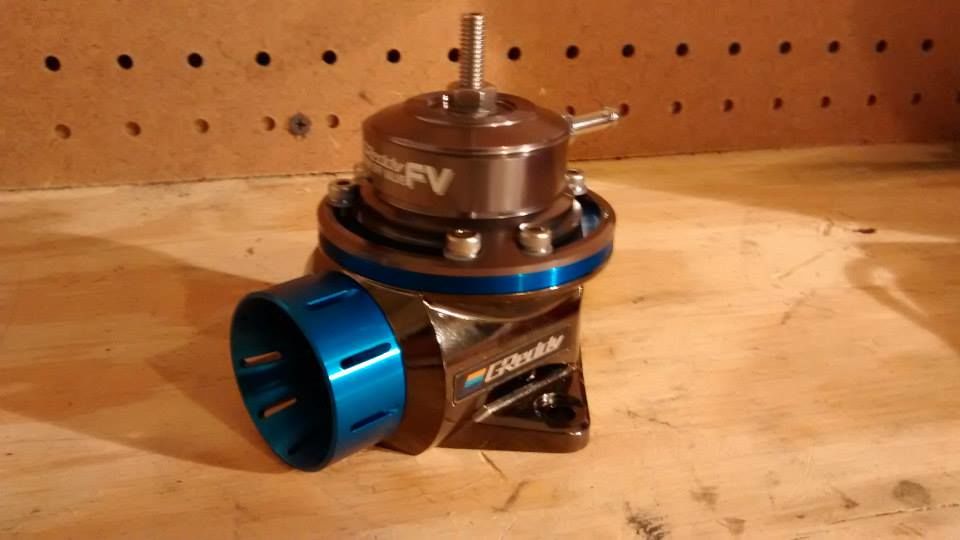
To make this work with my universal piping I bought a flange from "enjuku" on eBay called: "ISIS Performance Aluminum Modular BOV Flange" for $10. I had a local guy TIG weld it on for $20 and I now have a nice setup for my BOV. This is an extremely convenient flange since you can unscrew the flat flange surface and weld the fishmouth on while keeping a tight profile to your intercooler piping. I was hoping to be able to unscrew this part of the flange to remove my BoV if I ever needed to but Greddy's BoV hardware has bolts that stick THROUGH the flange holesand bolt on the backside, they're long enough that It makes contact with the pipe and I have to unbolt the BoV if I want to remove it. I may tap the flange and BoV eventually and use bolts in the future.
I like this location because I can still adjust the BoV and the outlet for it faces down which should reduce the chance that any debris finds its way into the mouth somehow.
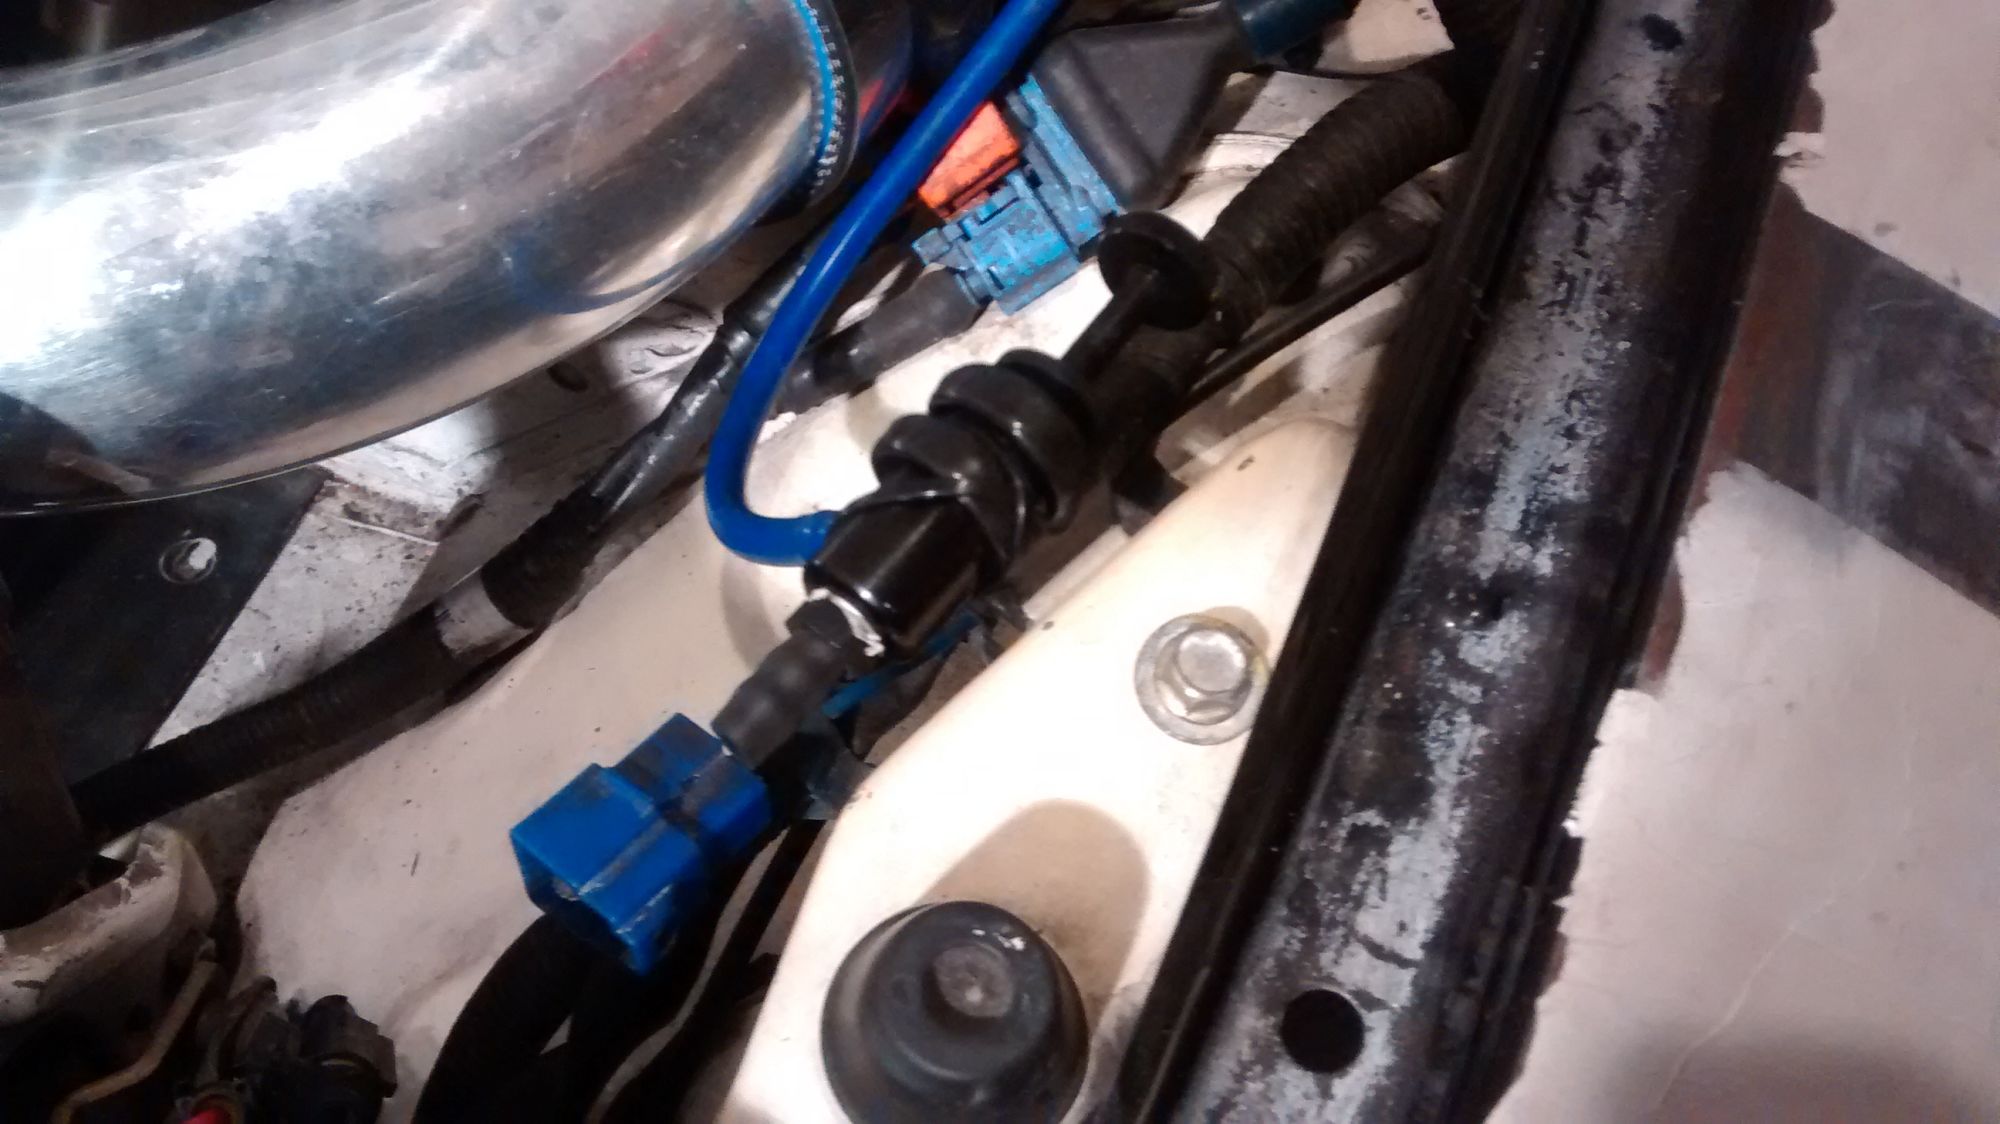
I used a bar of thick aluminum and twisted it for a bracket. I mounted it to the tapped PCV location and then drilled a hole on the other end to mount the ignition coil.
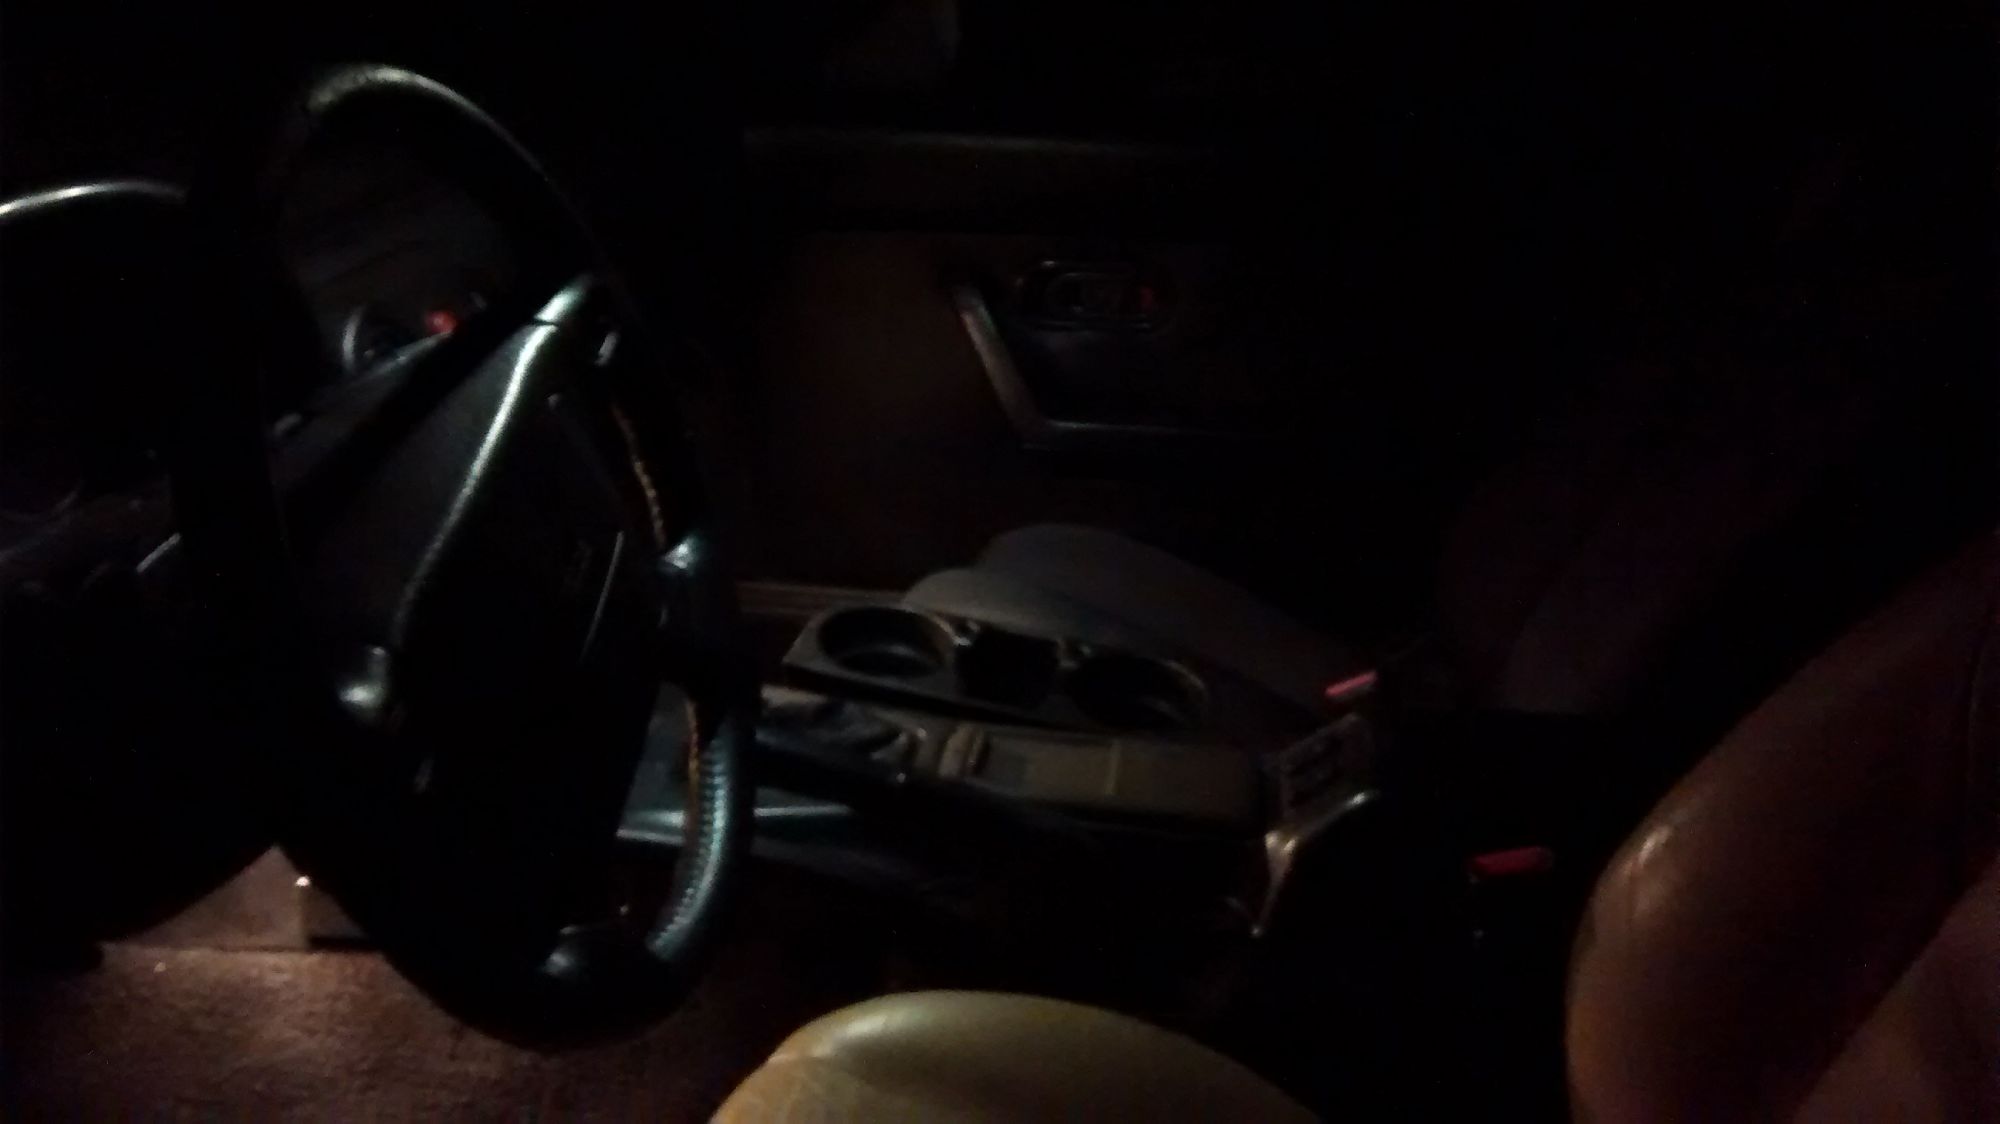
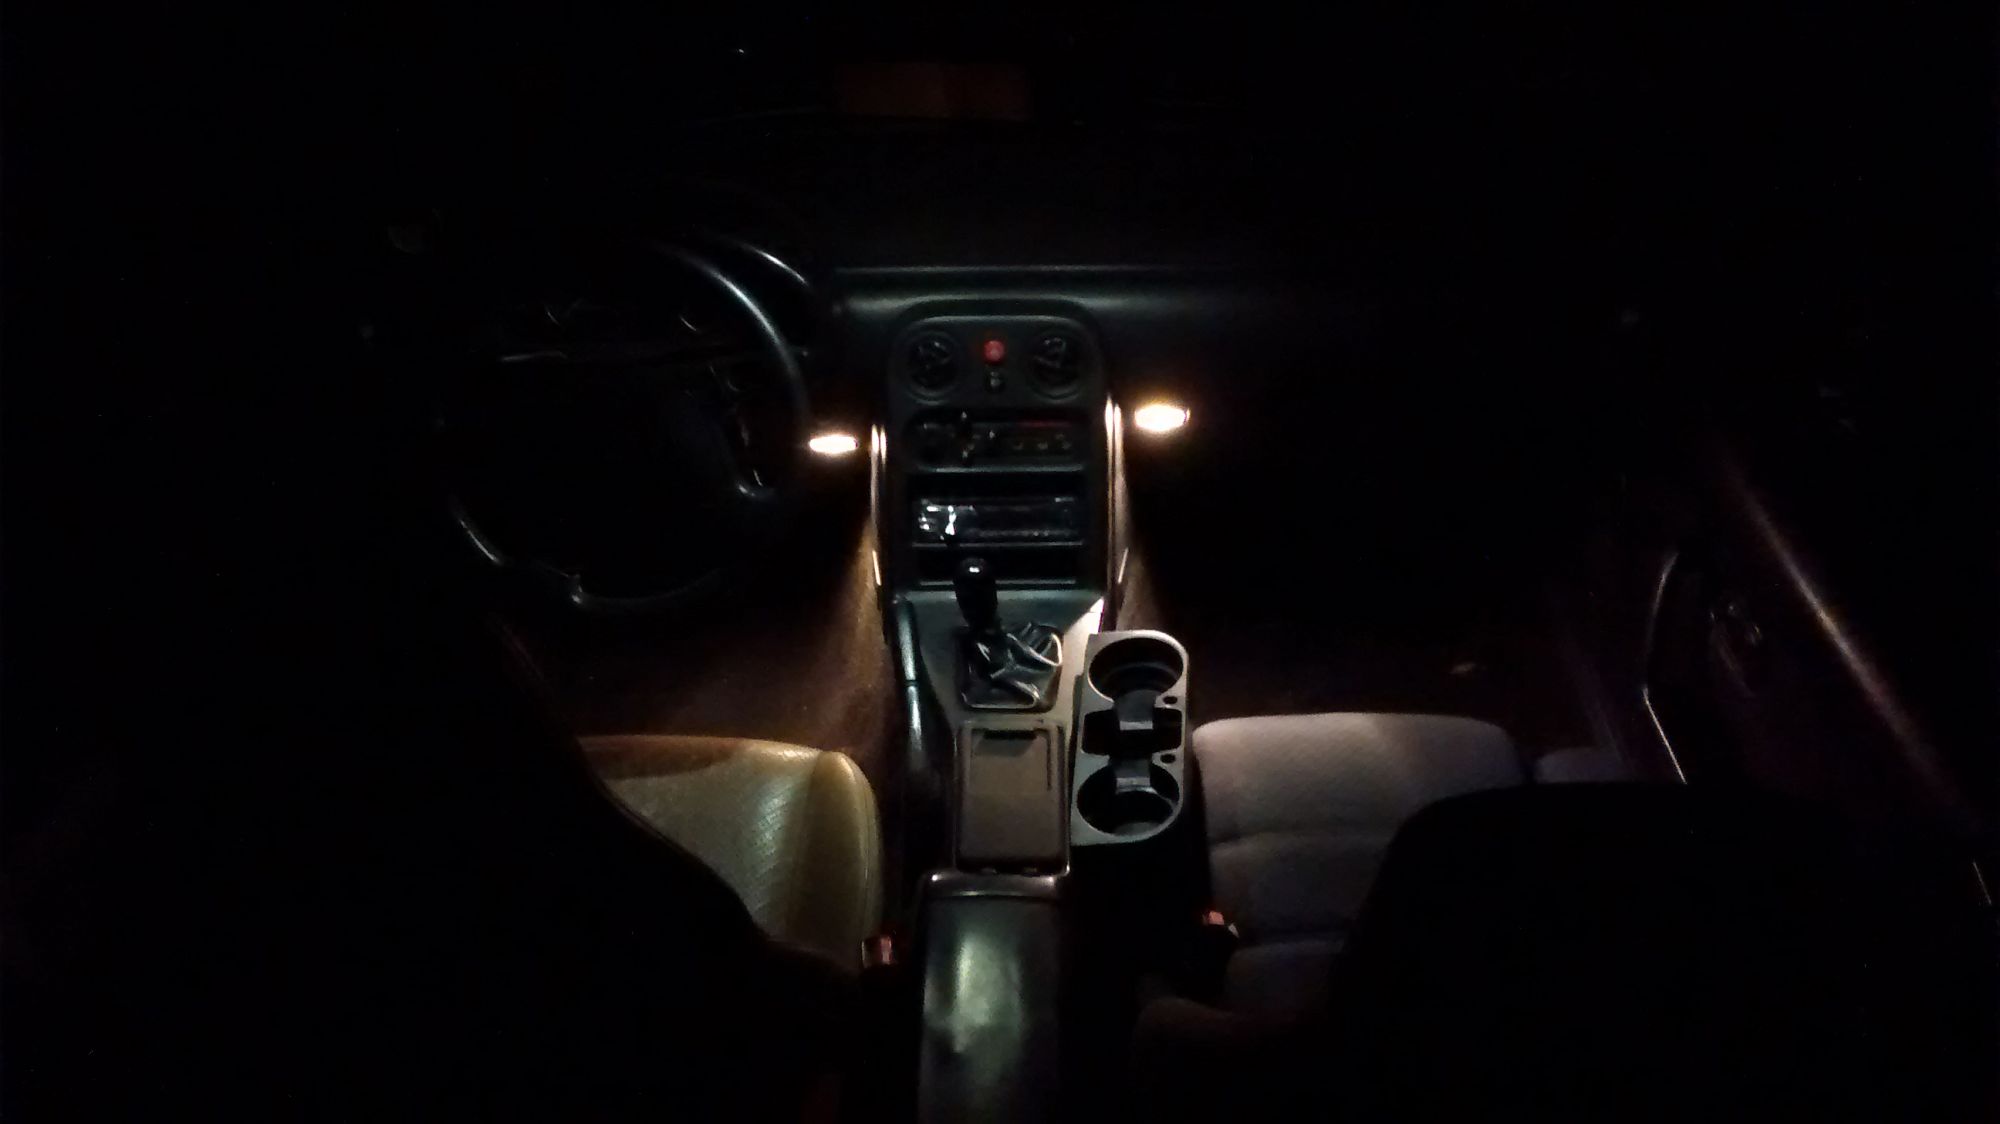
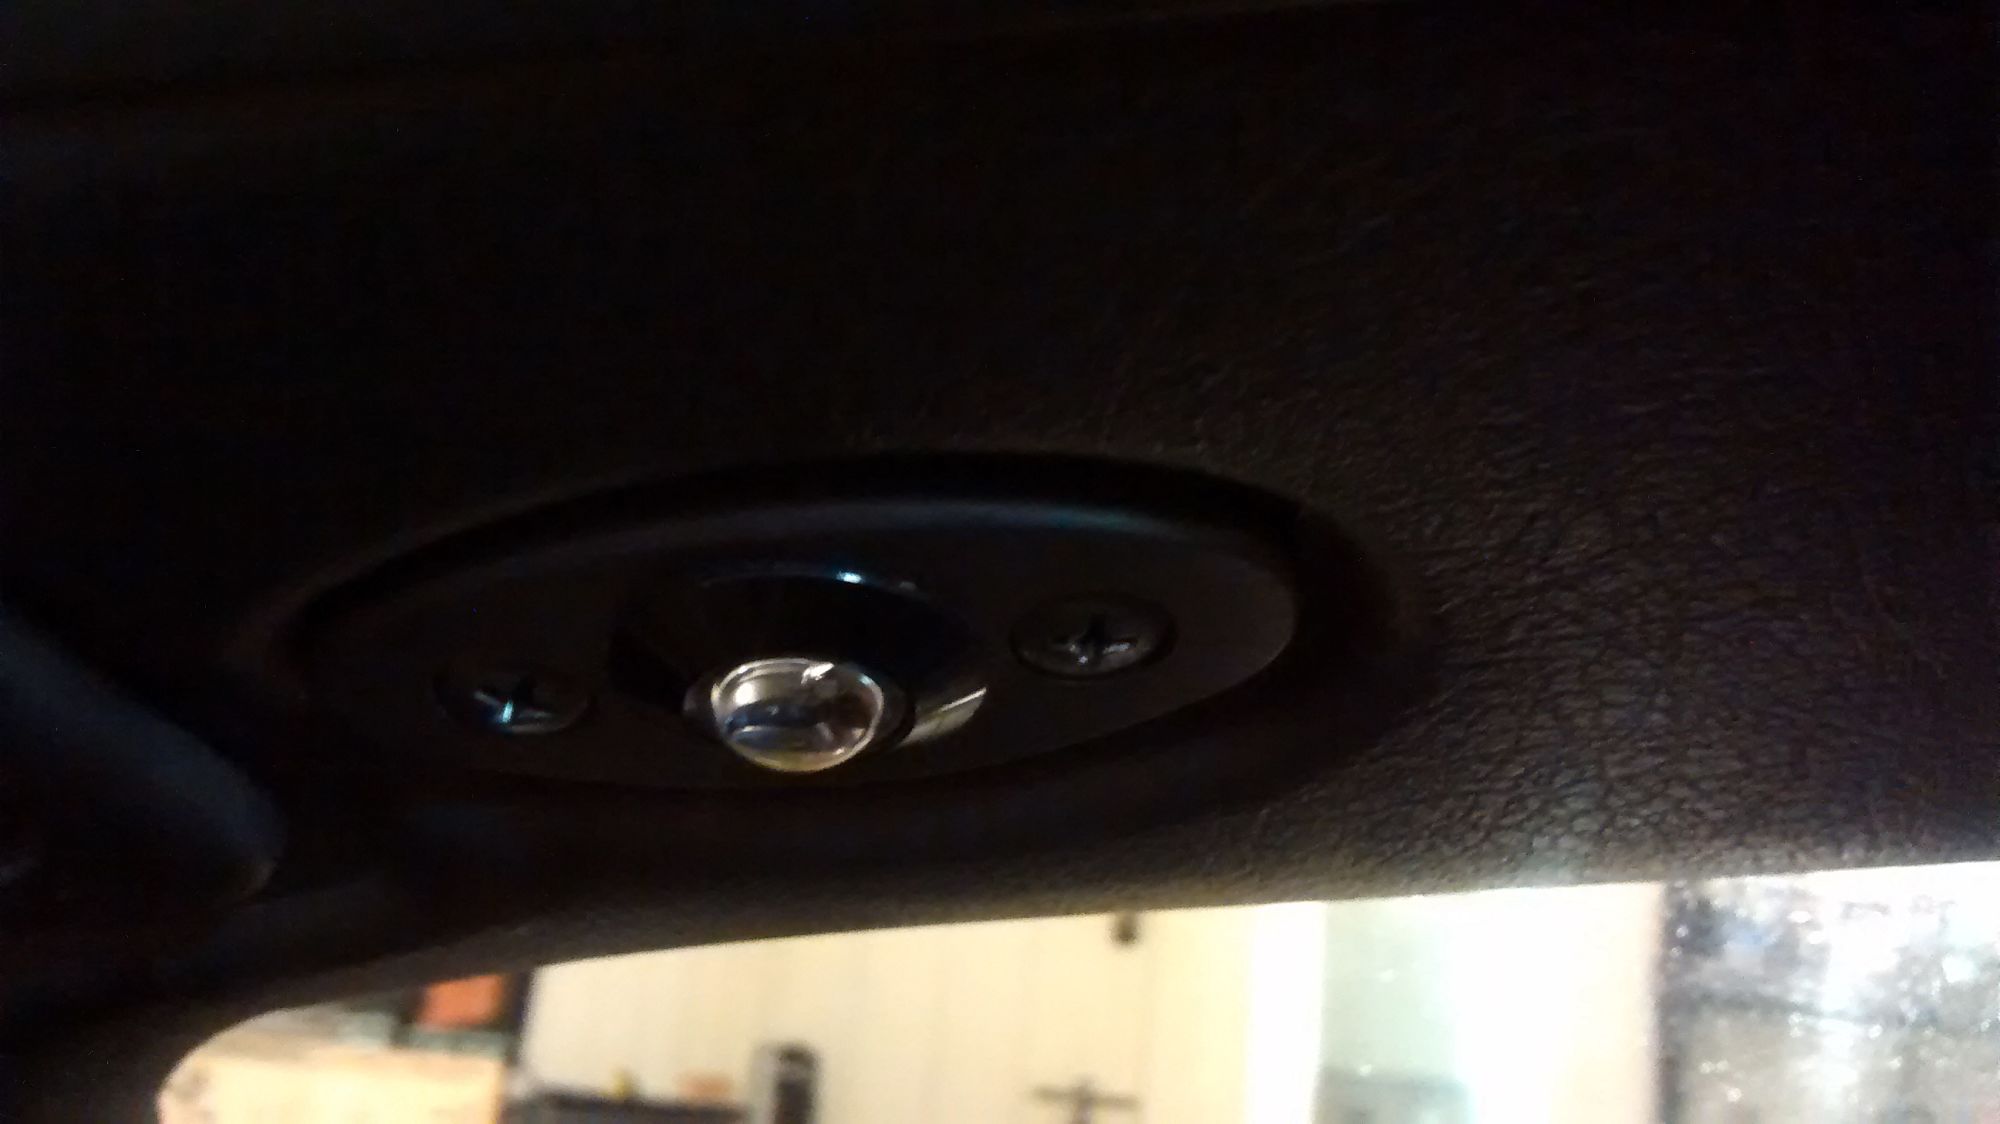
I also decided to do a few other small things on the car at this point. I converted the "knee/map" lights to LED, which helped a bit with light output. I still couldn't see anything above my waist at night so I decided to to a lighted rearview mirror. I added LED's into it as well and wired it all up. End result was amazing! My crappy phone pics just don't do it justice.
Also put a light in my boost gauge. The company sells a light kit for like $30 bucks or something, but that's way too expensive for what it is. I was able to buy ten T10 168 194 2825 Wiring Harness sockets for $6.66 shipped from eBay. Here is the result (in person doesn't look overbight/bleedover)
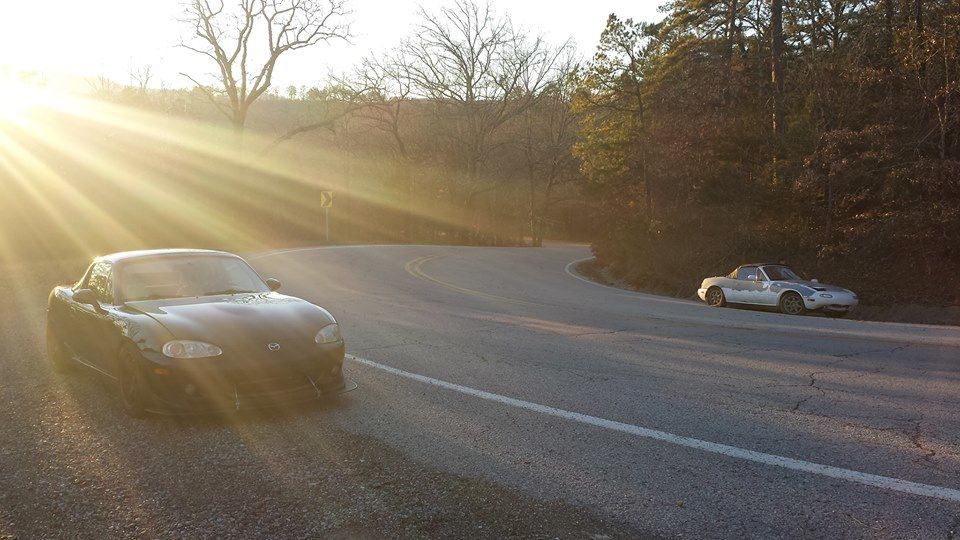
Went on a cruise with some friends of mine on some good twisty roads around here. Pretty hilly with a few switchbacks. Well, found the weak link....brake fluid. After three spirited runs on a particularly twisty/hilly section of road. I went from completely fine brakes to nothing in about two turns. We suspect the brake fluid ended up boiling and/or the pads just went past their max operating temp range (it has autozone brake fluid and random OEM replacement pads). Here was the result:
An interesting image taken from video that day. This is from my friend's car whom was behind me. I probably eventually was about 2-3 feet in the air after hitting the right rear wheel into an embankment that had concrete poured over it.
Flyin' Miata
It was a beautiful day for a drive, that's where I ended up landing, you can see the two scrape marks where the tow hooks from the miata dug in to the cement (keep in mind the right rear wheel of the car hit first)
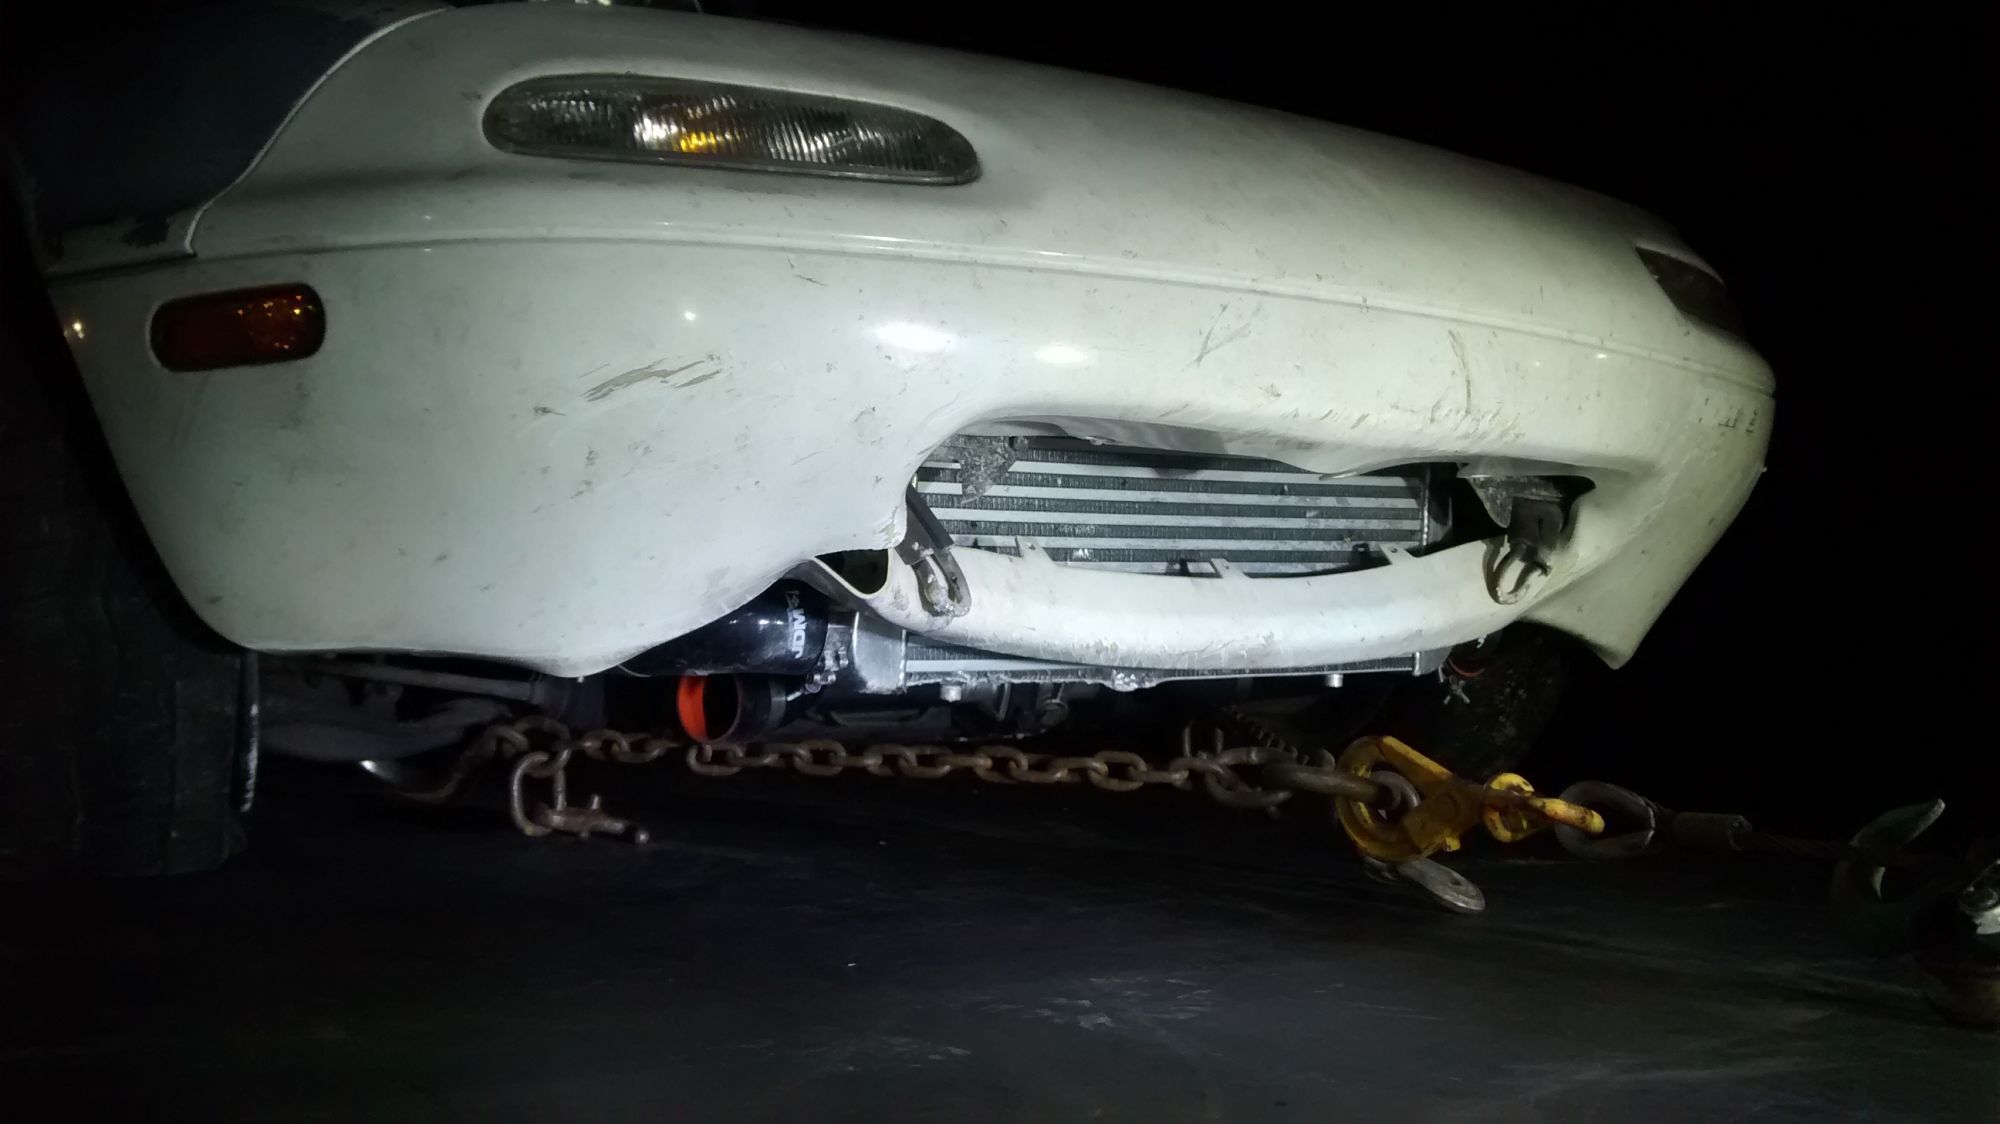
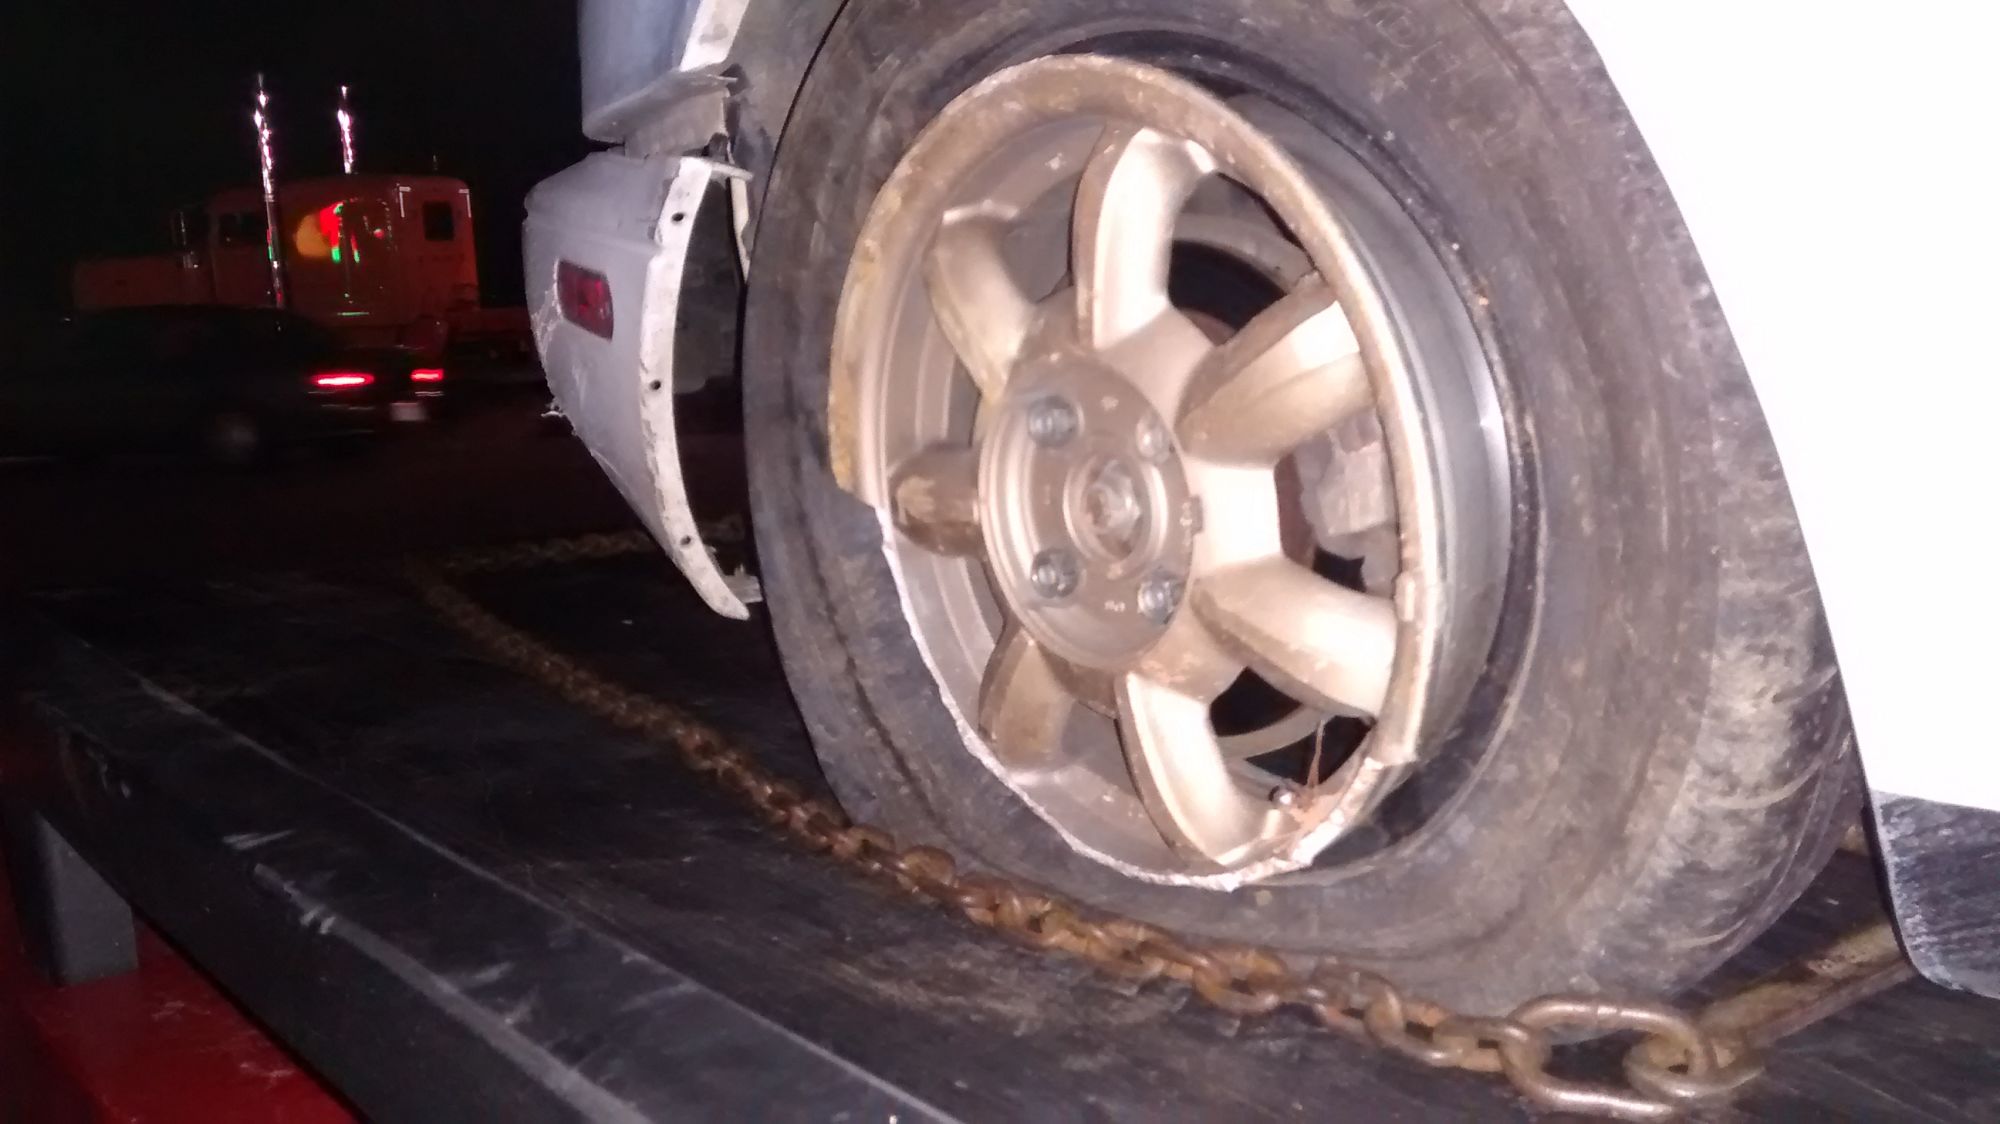
Luckily everyone was okay, just banged up. Got a tow truck out after a few hours and took it home:
The "baby teeth" saved the front end.
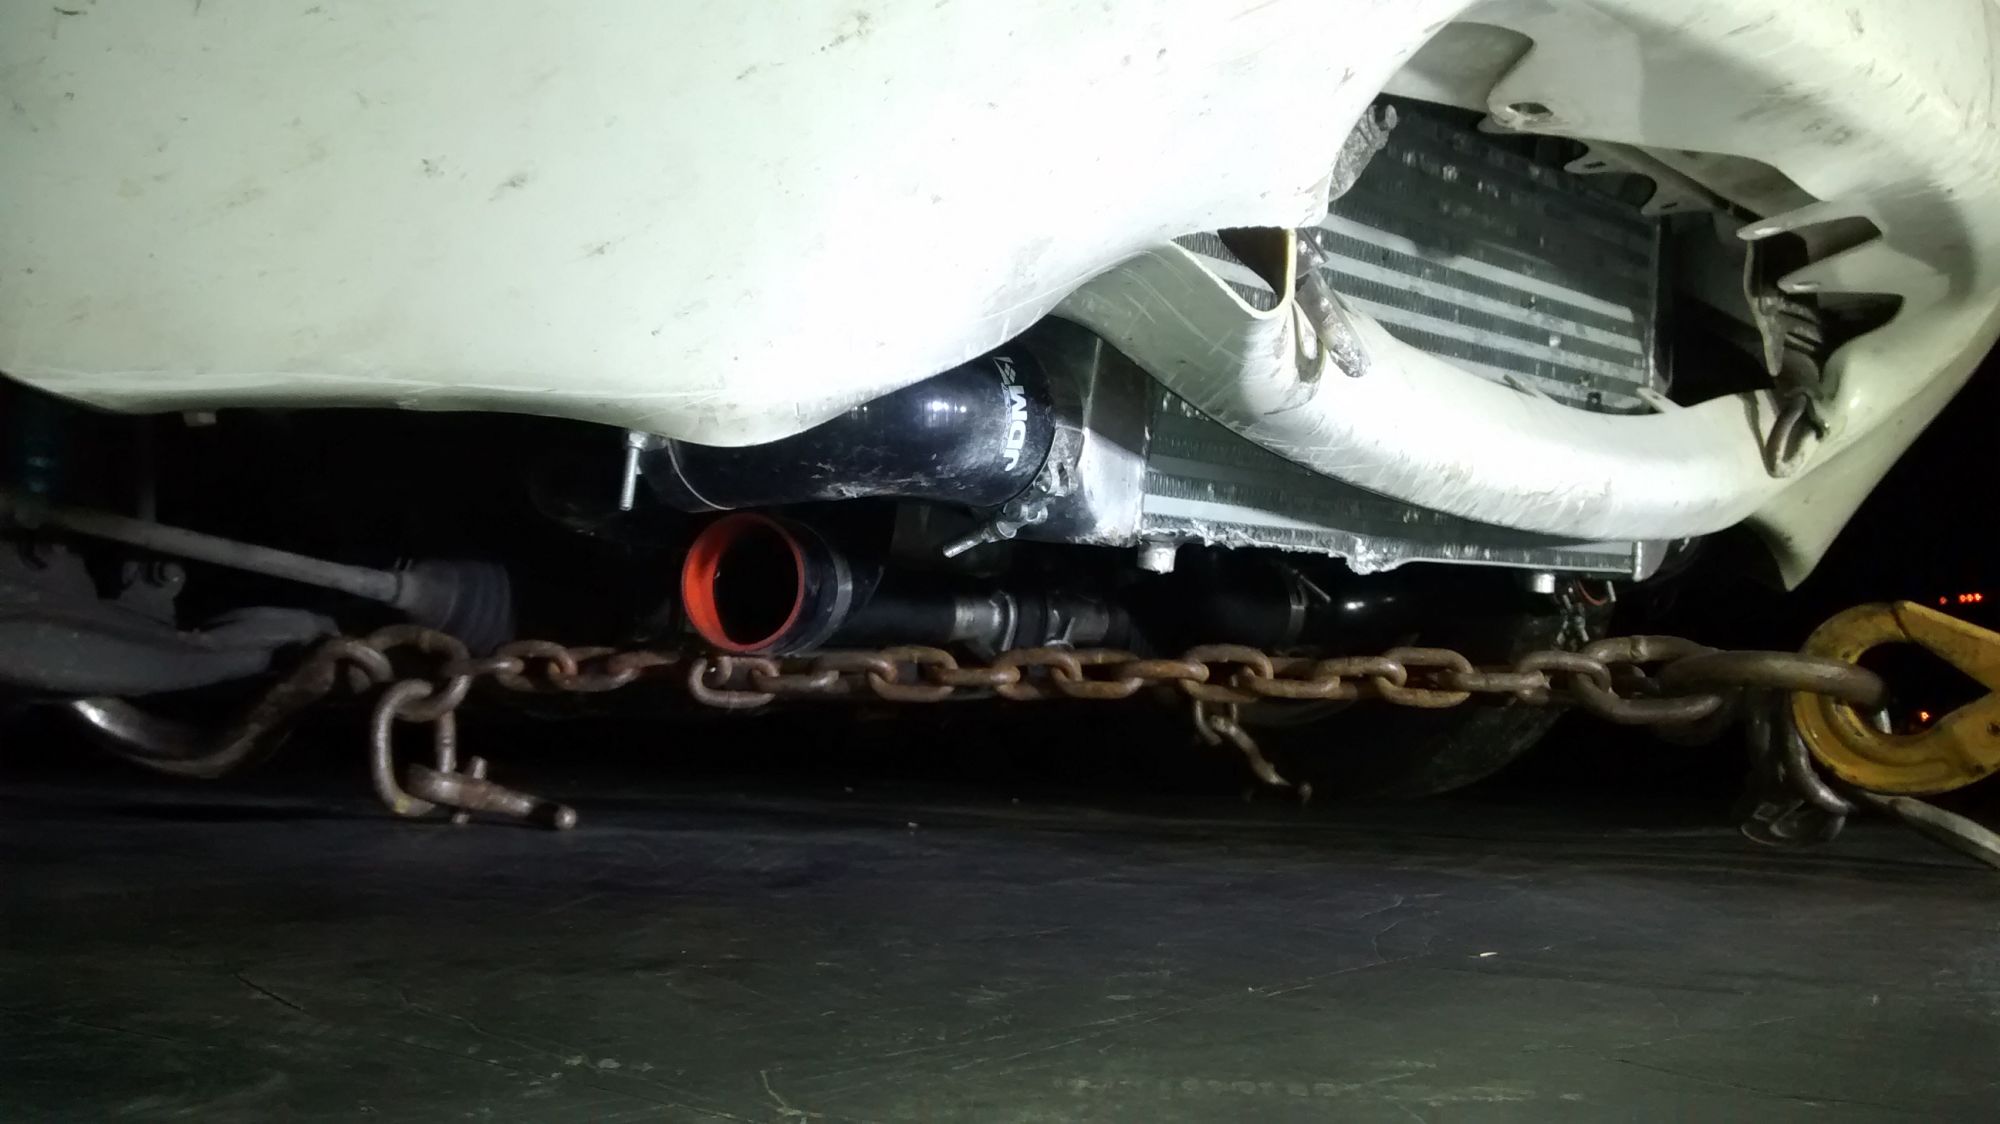
One advantage of not hard-mounting the bottom of the intercooler....it just swung out of the way during the collision. It doesn't have any leaks at all right now, just looks bad.
The right rear wheel that took the brunt of the blow.
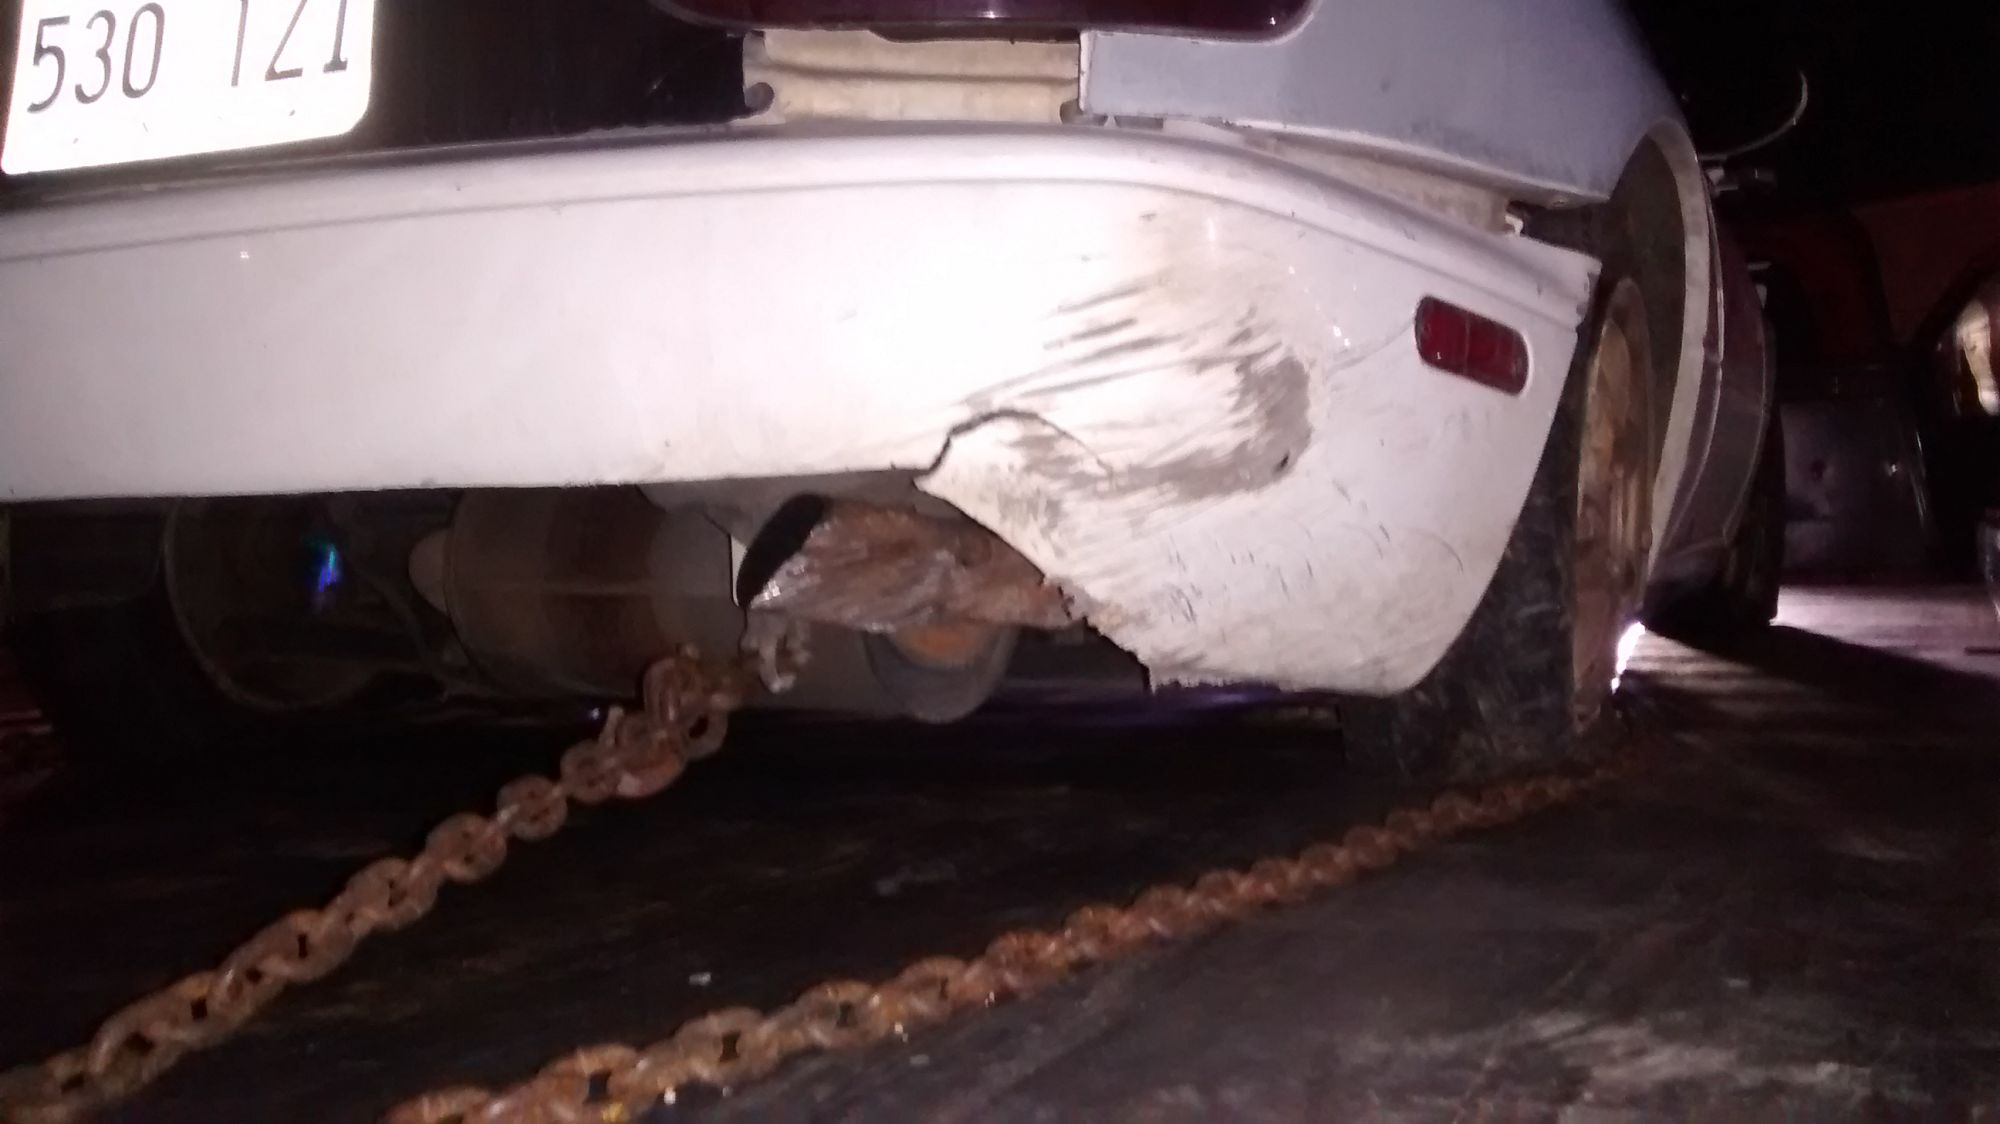
Finish panel exploded for no reason, and some rear bumper scuffing action.
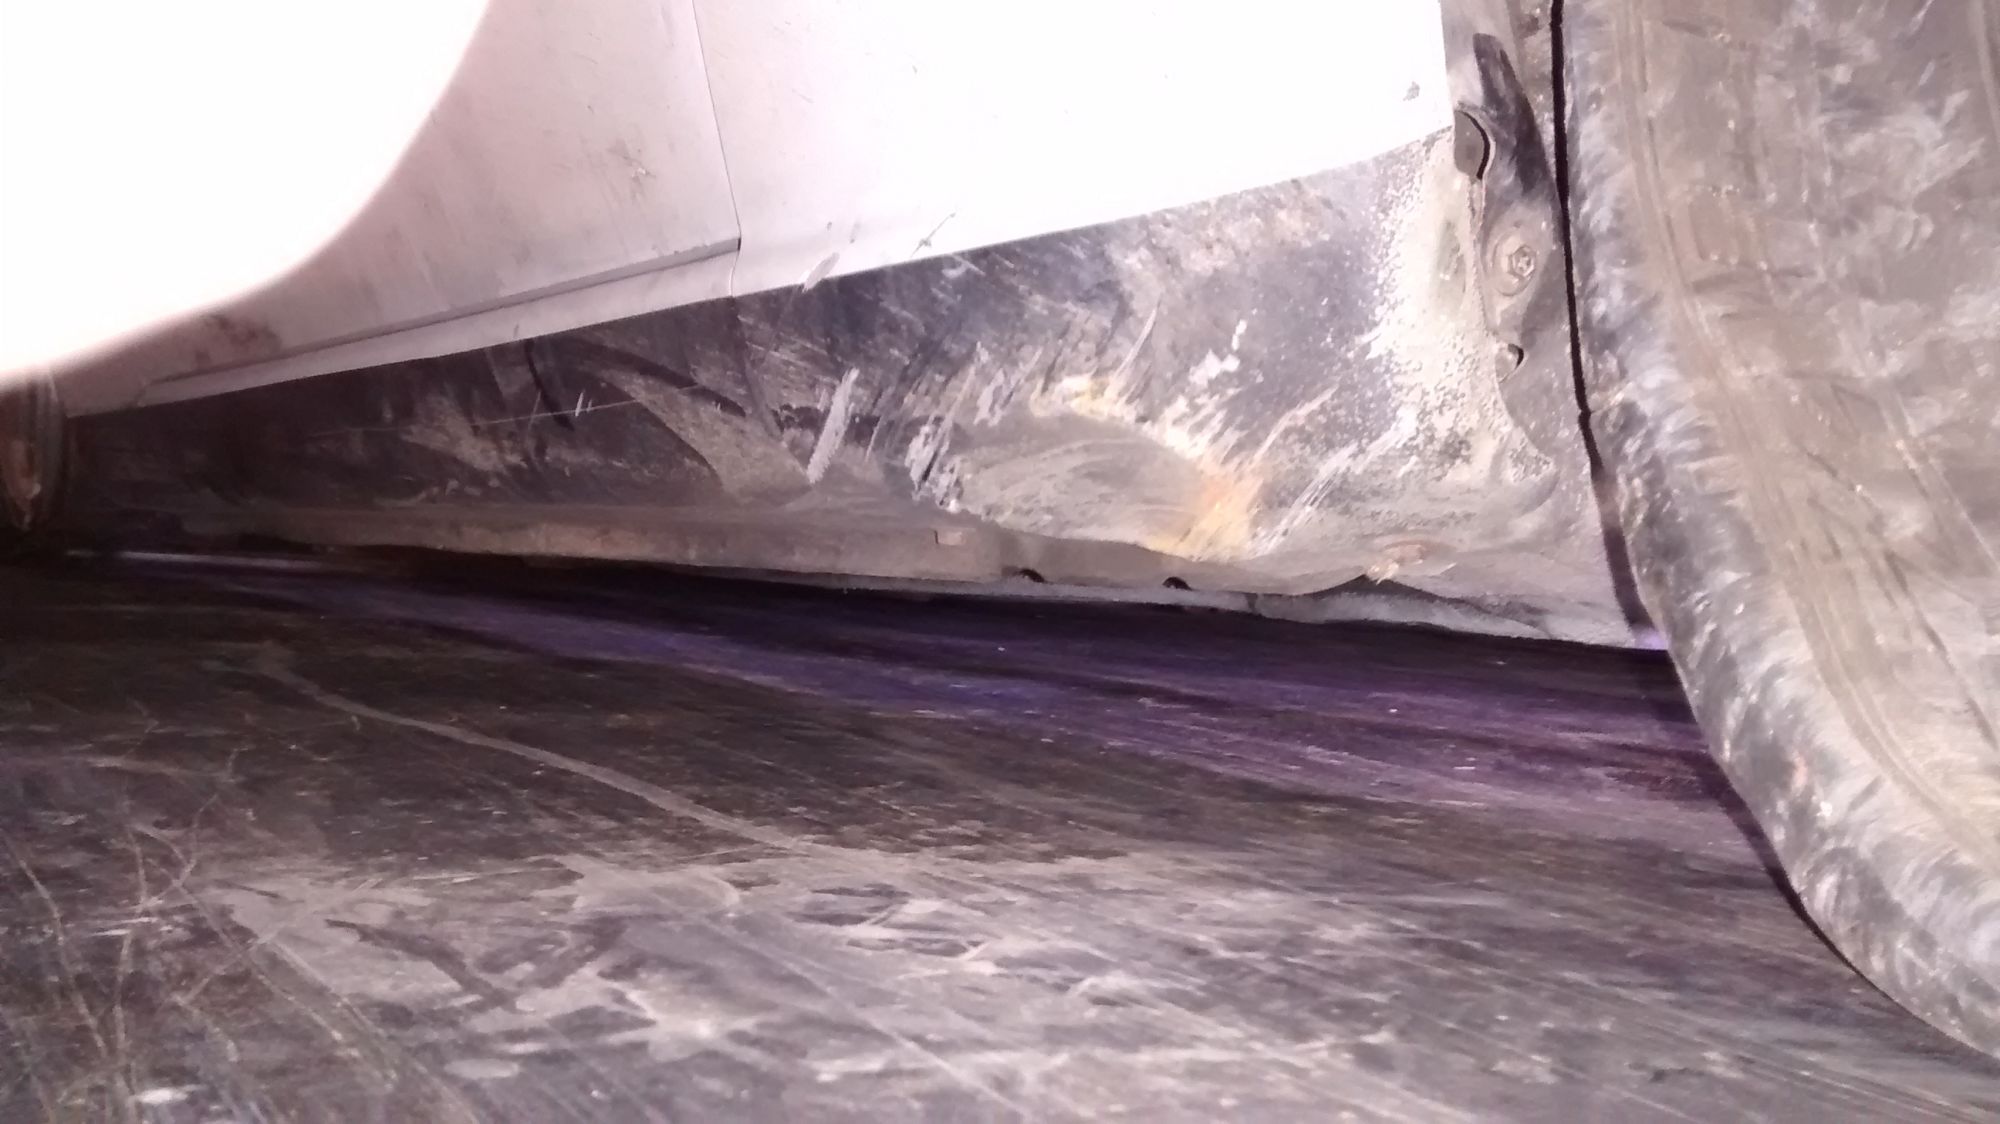
The only real metal (monobody) damage was on the passenger front rocker panel from when we spun back around and landed on the lip of the road.
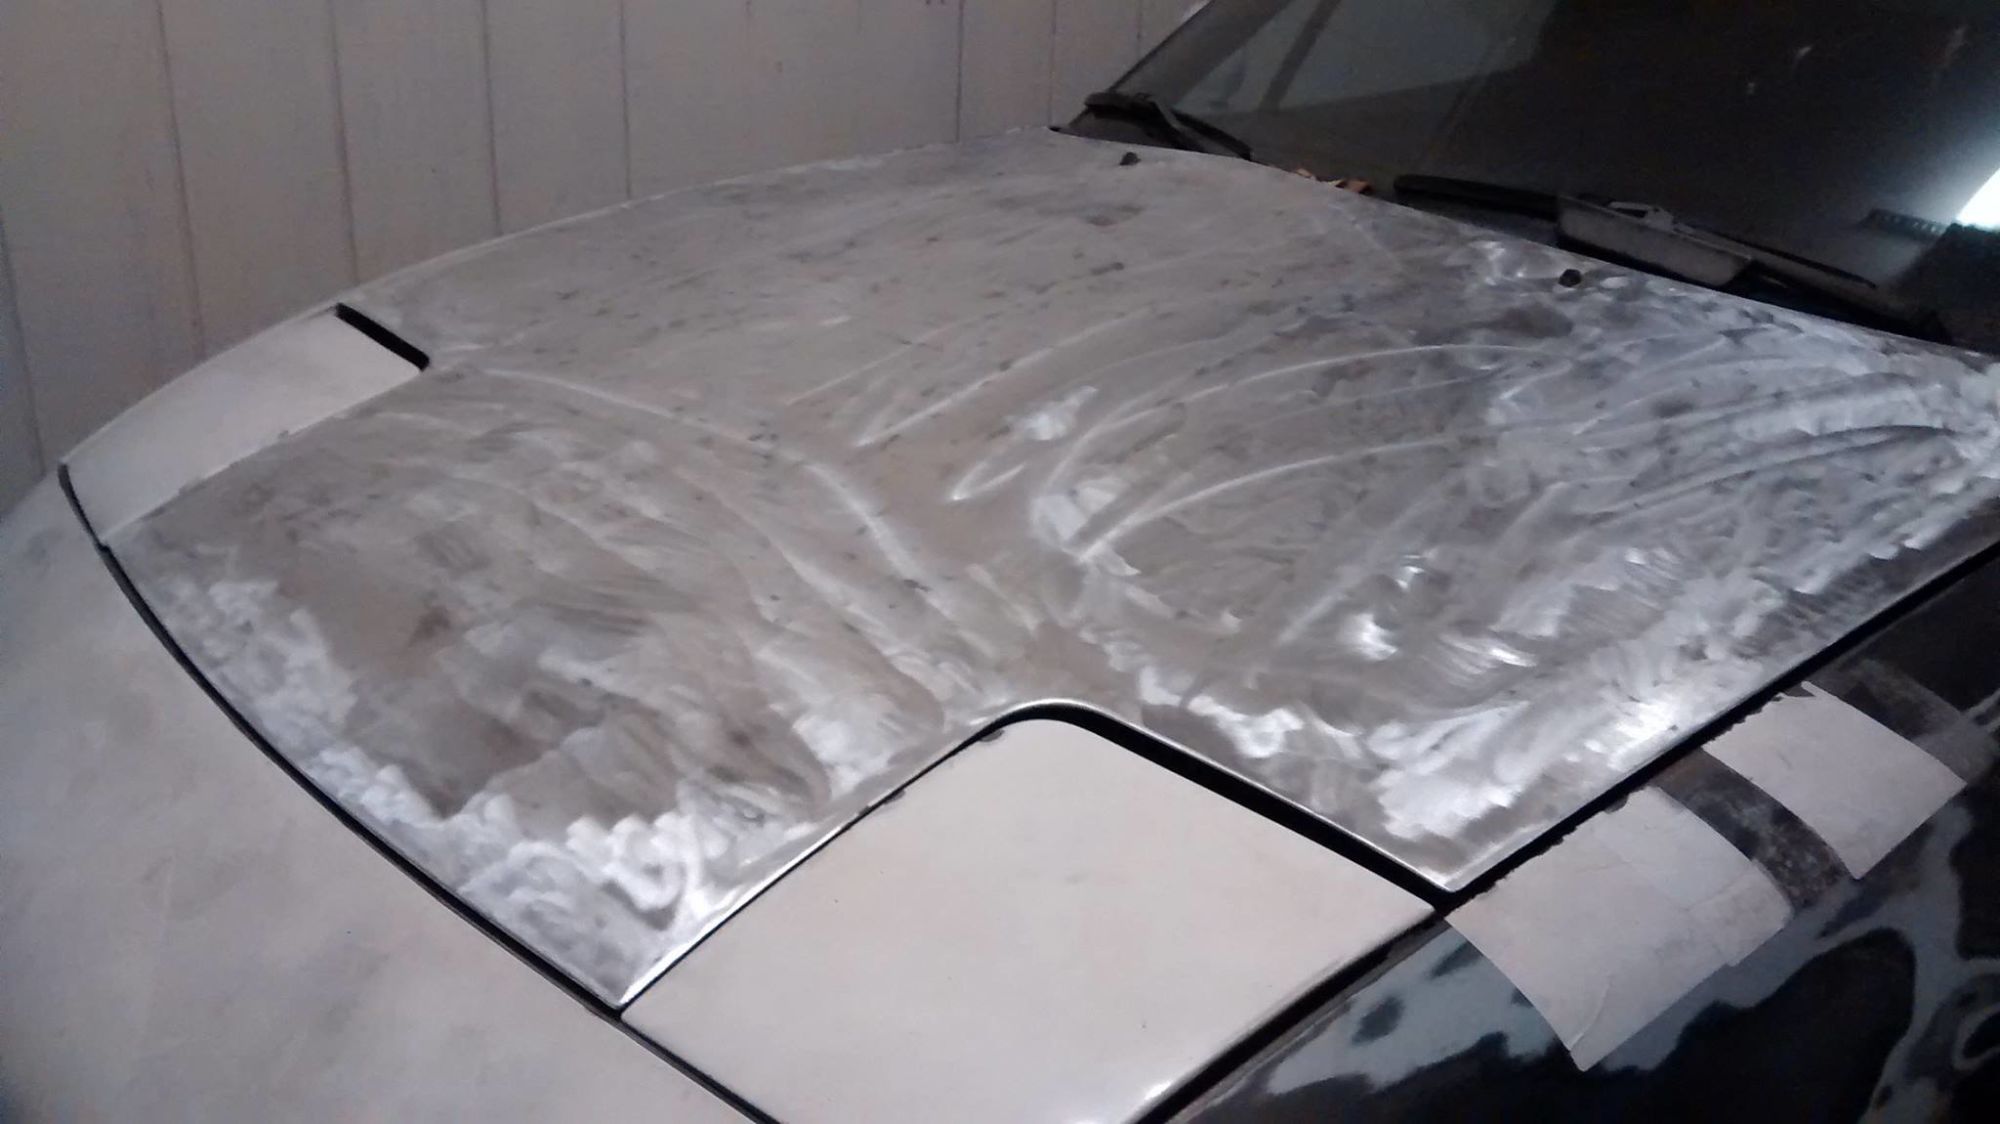
I forgot to mention (and think it's funny that no picture clearly shows it) but for a while I had been driving around with my hood wire-brushed. I got tired of the old paint look and did this instead. I actually got quite a few compliments on it (this hood had been through a fire so I didn't care too much).
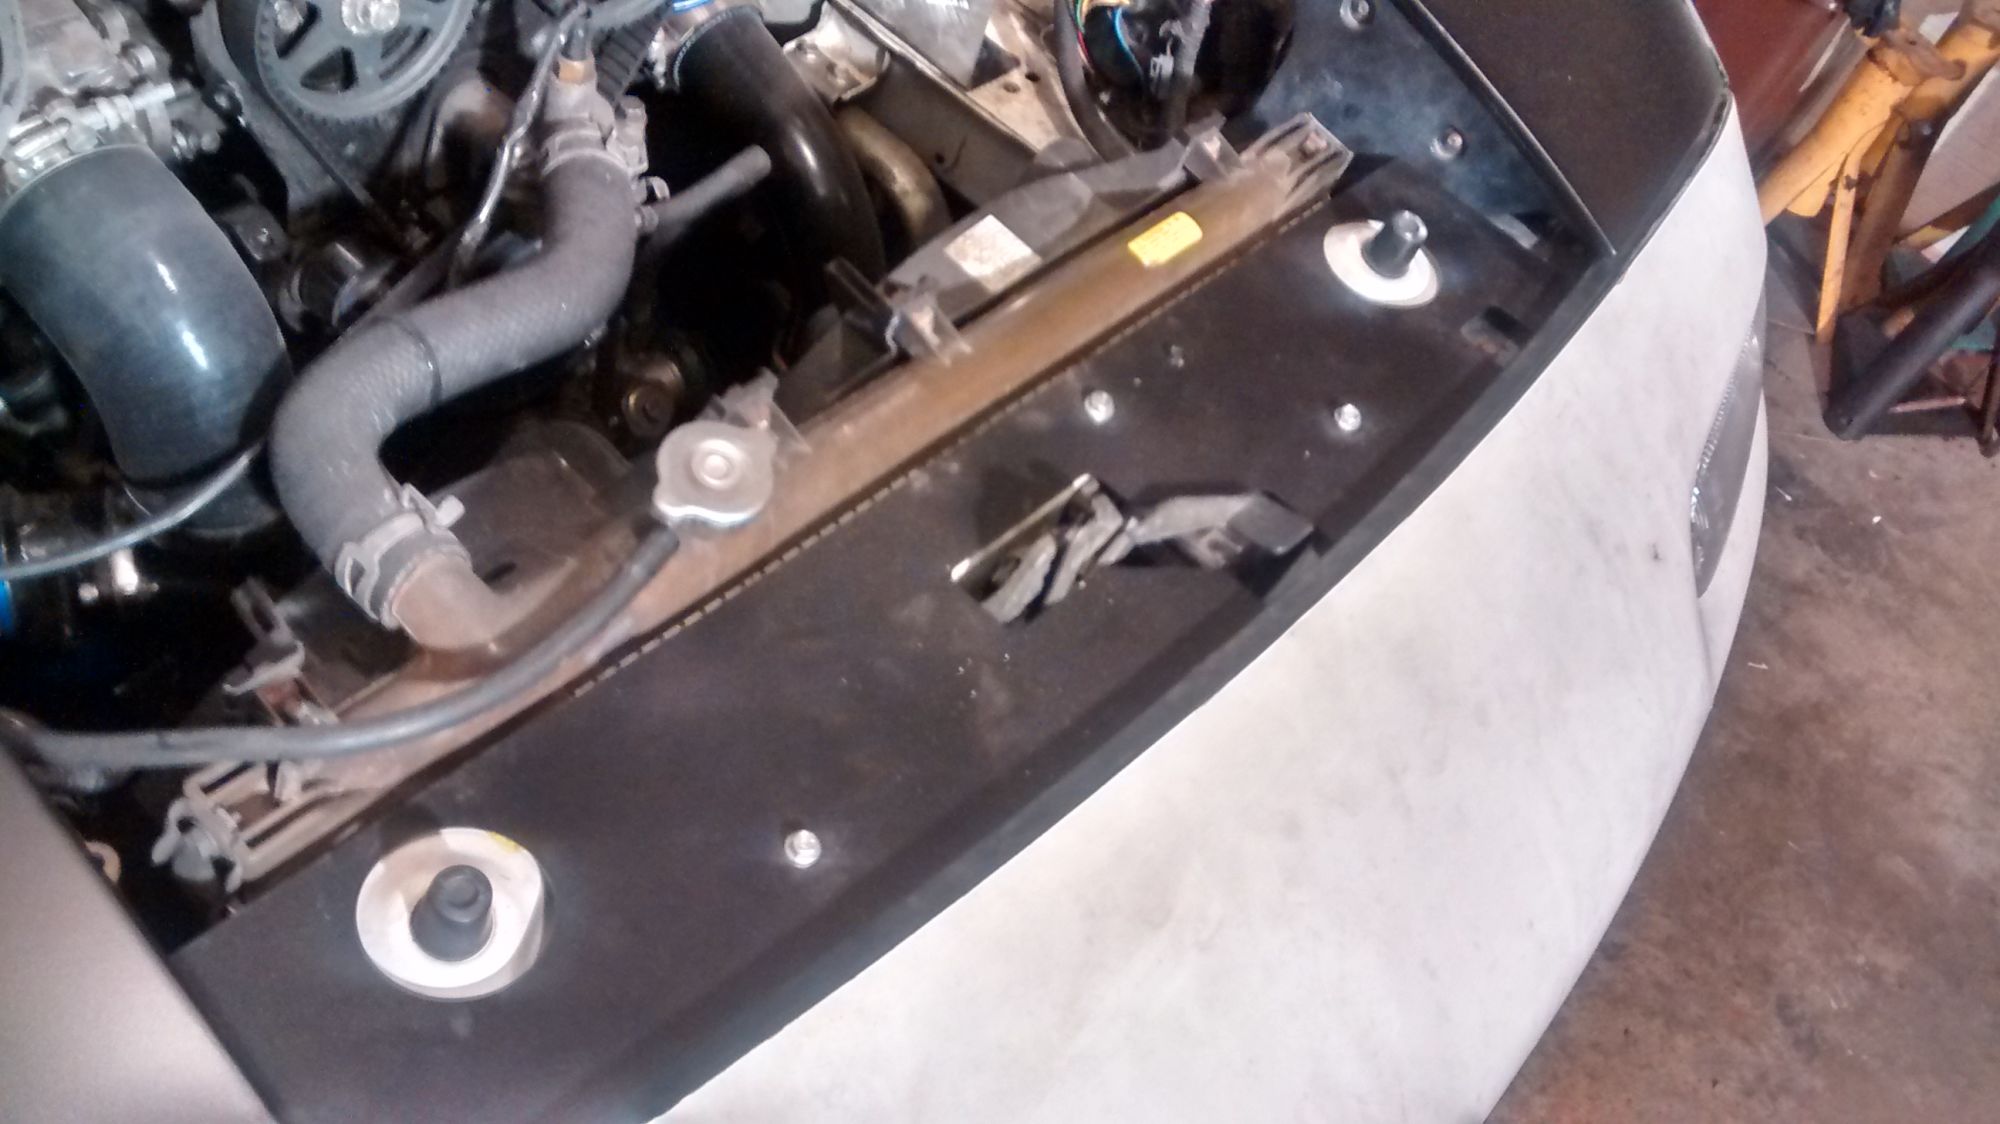
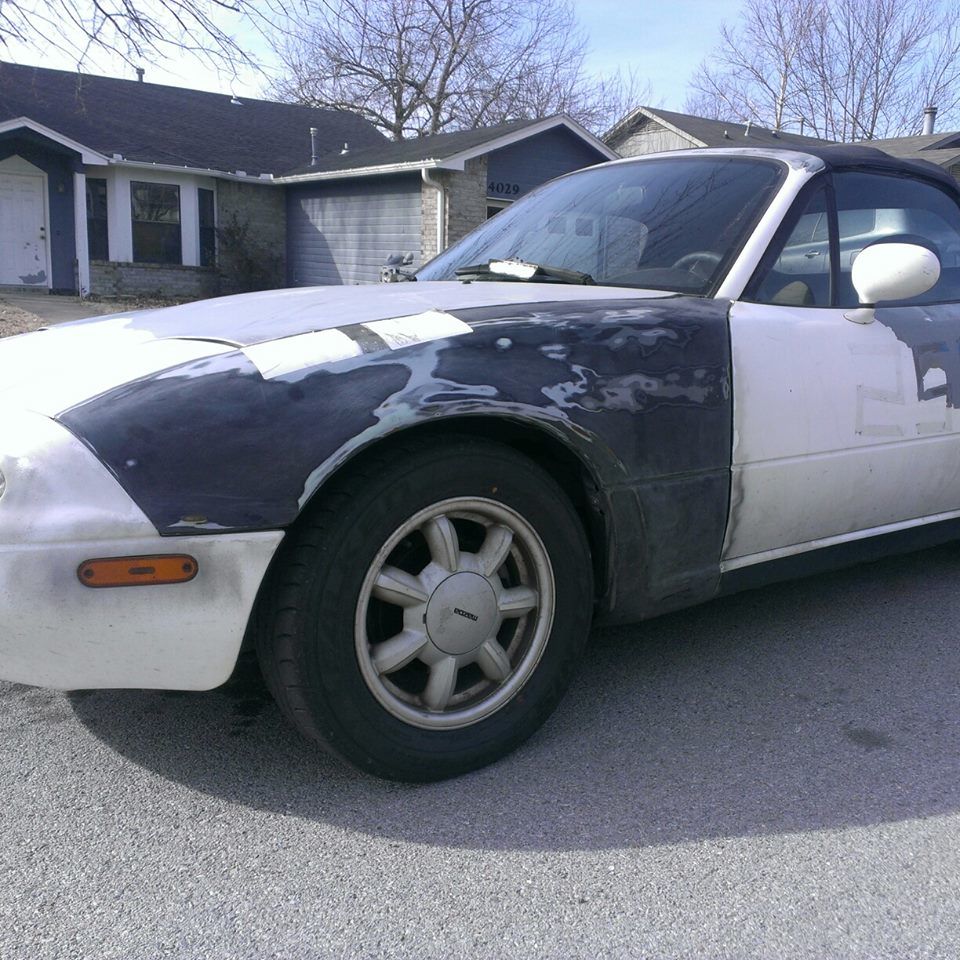
And so the car sat for a while until I was able to order the repair parts. It needed upper and lower control arms front and rear. I also gave it new tie rod ends just in case. I was able to re-shape the rear fender arch by hand and reattach the bumper with ease. While it was out of commission I also added a new upper radiator panel.
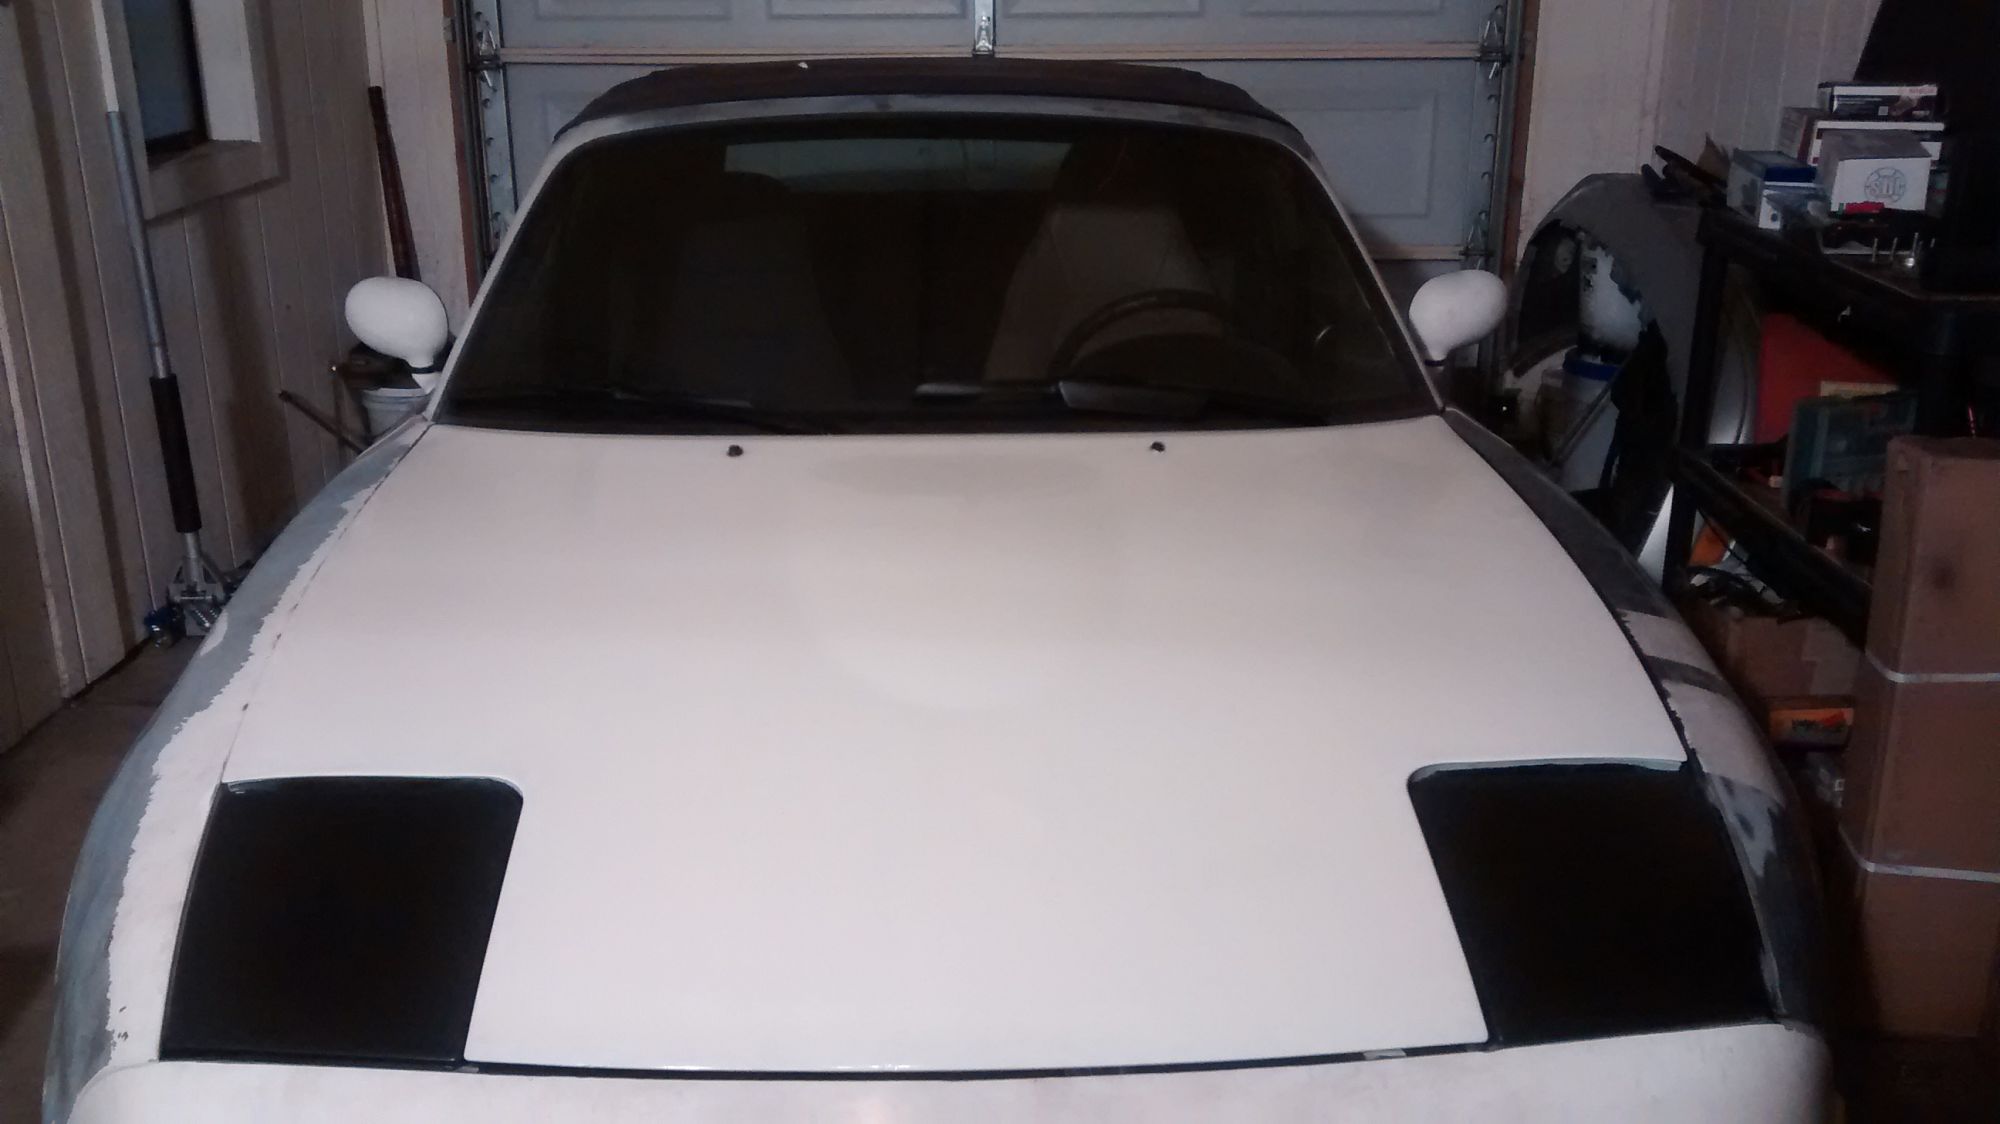
Painted the headlight covers and got a new hood!
I just finished up the suspension work two days ago and sanded down the bumper a little bit. Going to look into products to fill in/ repair the plastic and respray it myself. I got a set of stock NA wheels from my friend with tires at a great deal and should be going to get my exhaust all fabbed up very soon (as the stock exhaust broke in the wreck).
Also will have to replace belts because one of my t-bolt clamps got pushed into the belts and scarred them up pretty bad.
I'll update as things happen (and they should happen soon-ish!)
Future plans include a Reverant ECU, 1.8 Rear end with LSD, another rearview mirror (mine broke in the accident), brake pads, brake lines, brake fluid, turbo heat shielding, new bracket for wastegate actuator, and loads more!
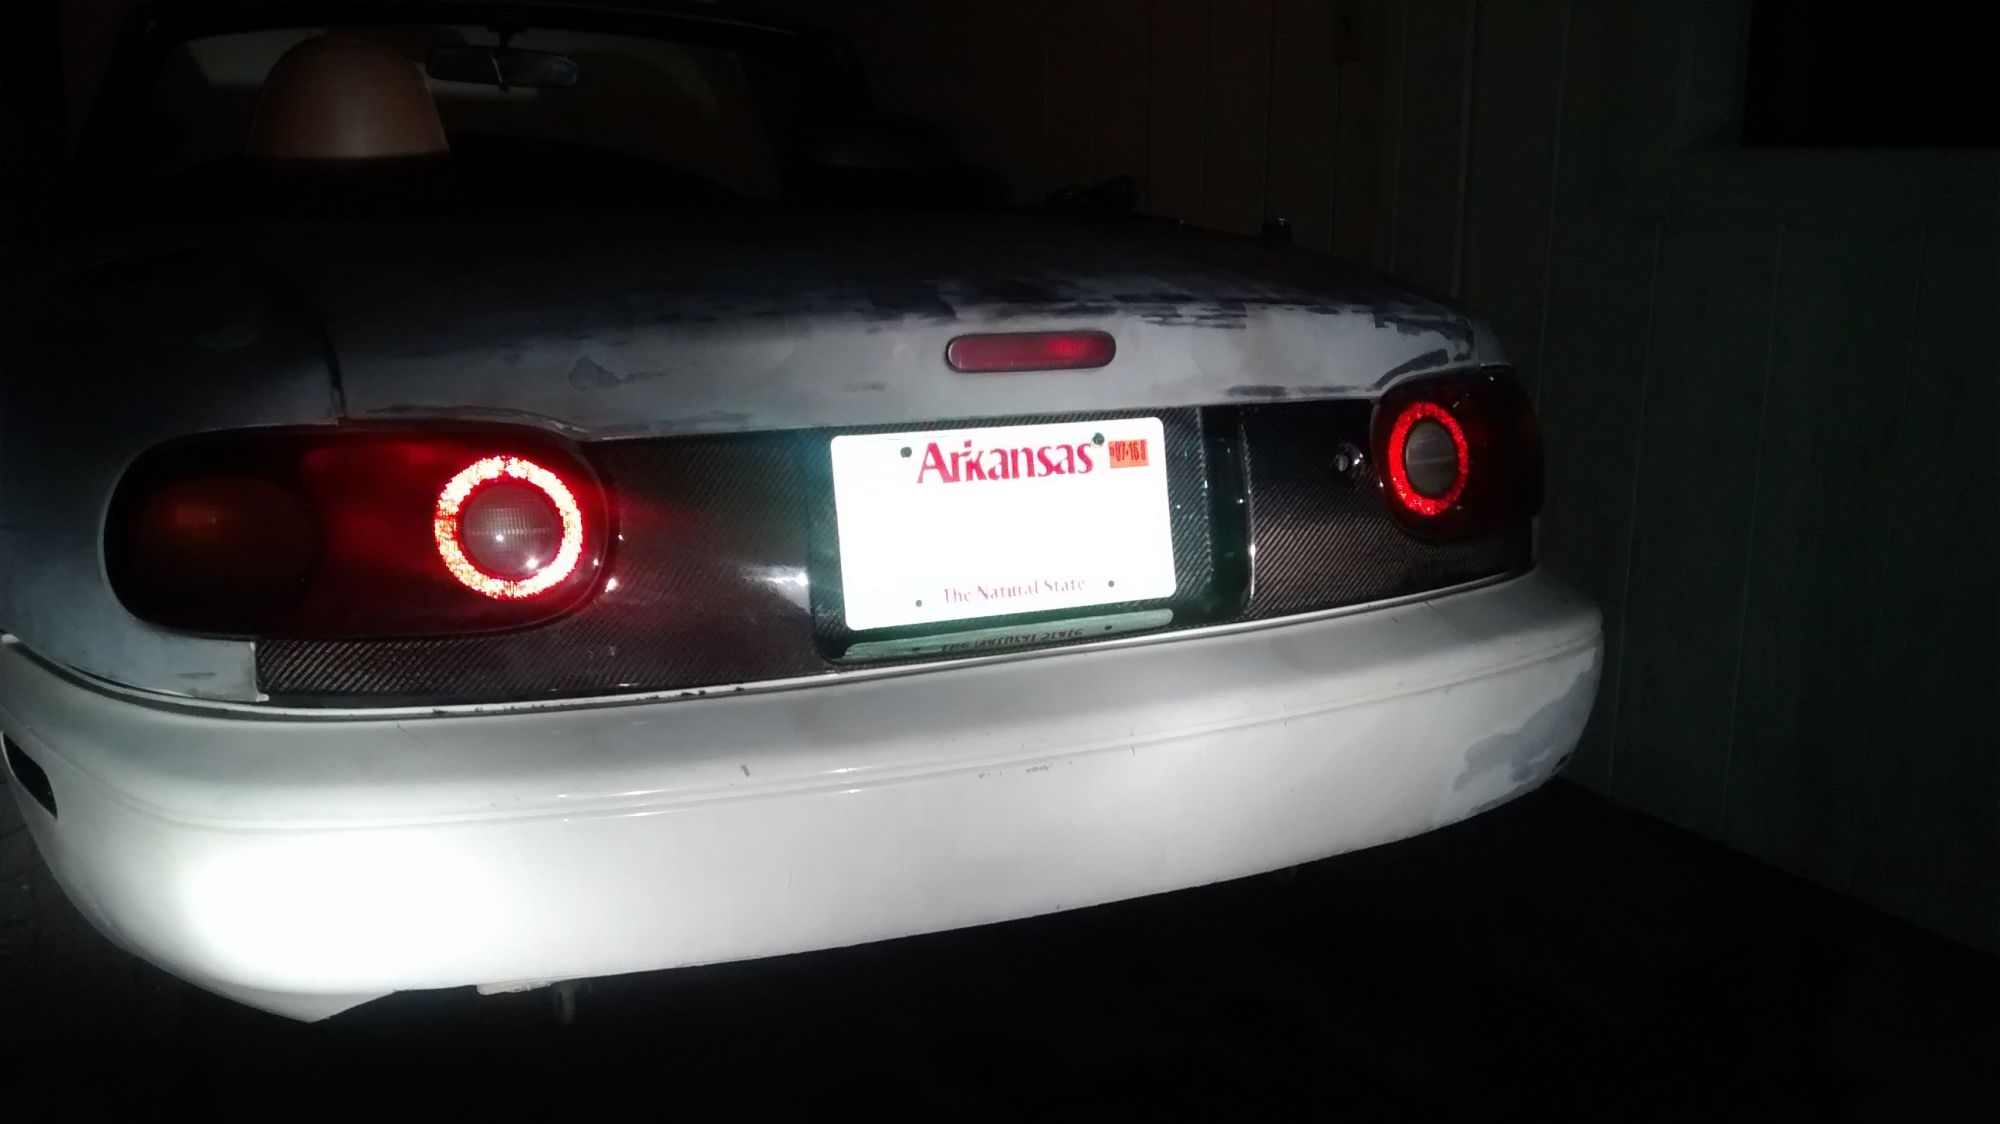
Got a new rear finish panel from Carbon Miata. Very happy with it overall. Needed a tad bit of dremel work on the holes that mount the license plate to the car (maybe 1/4" clearance) but that was easy and end up being hidden behind the plate.
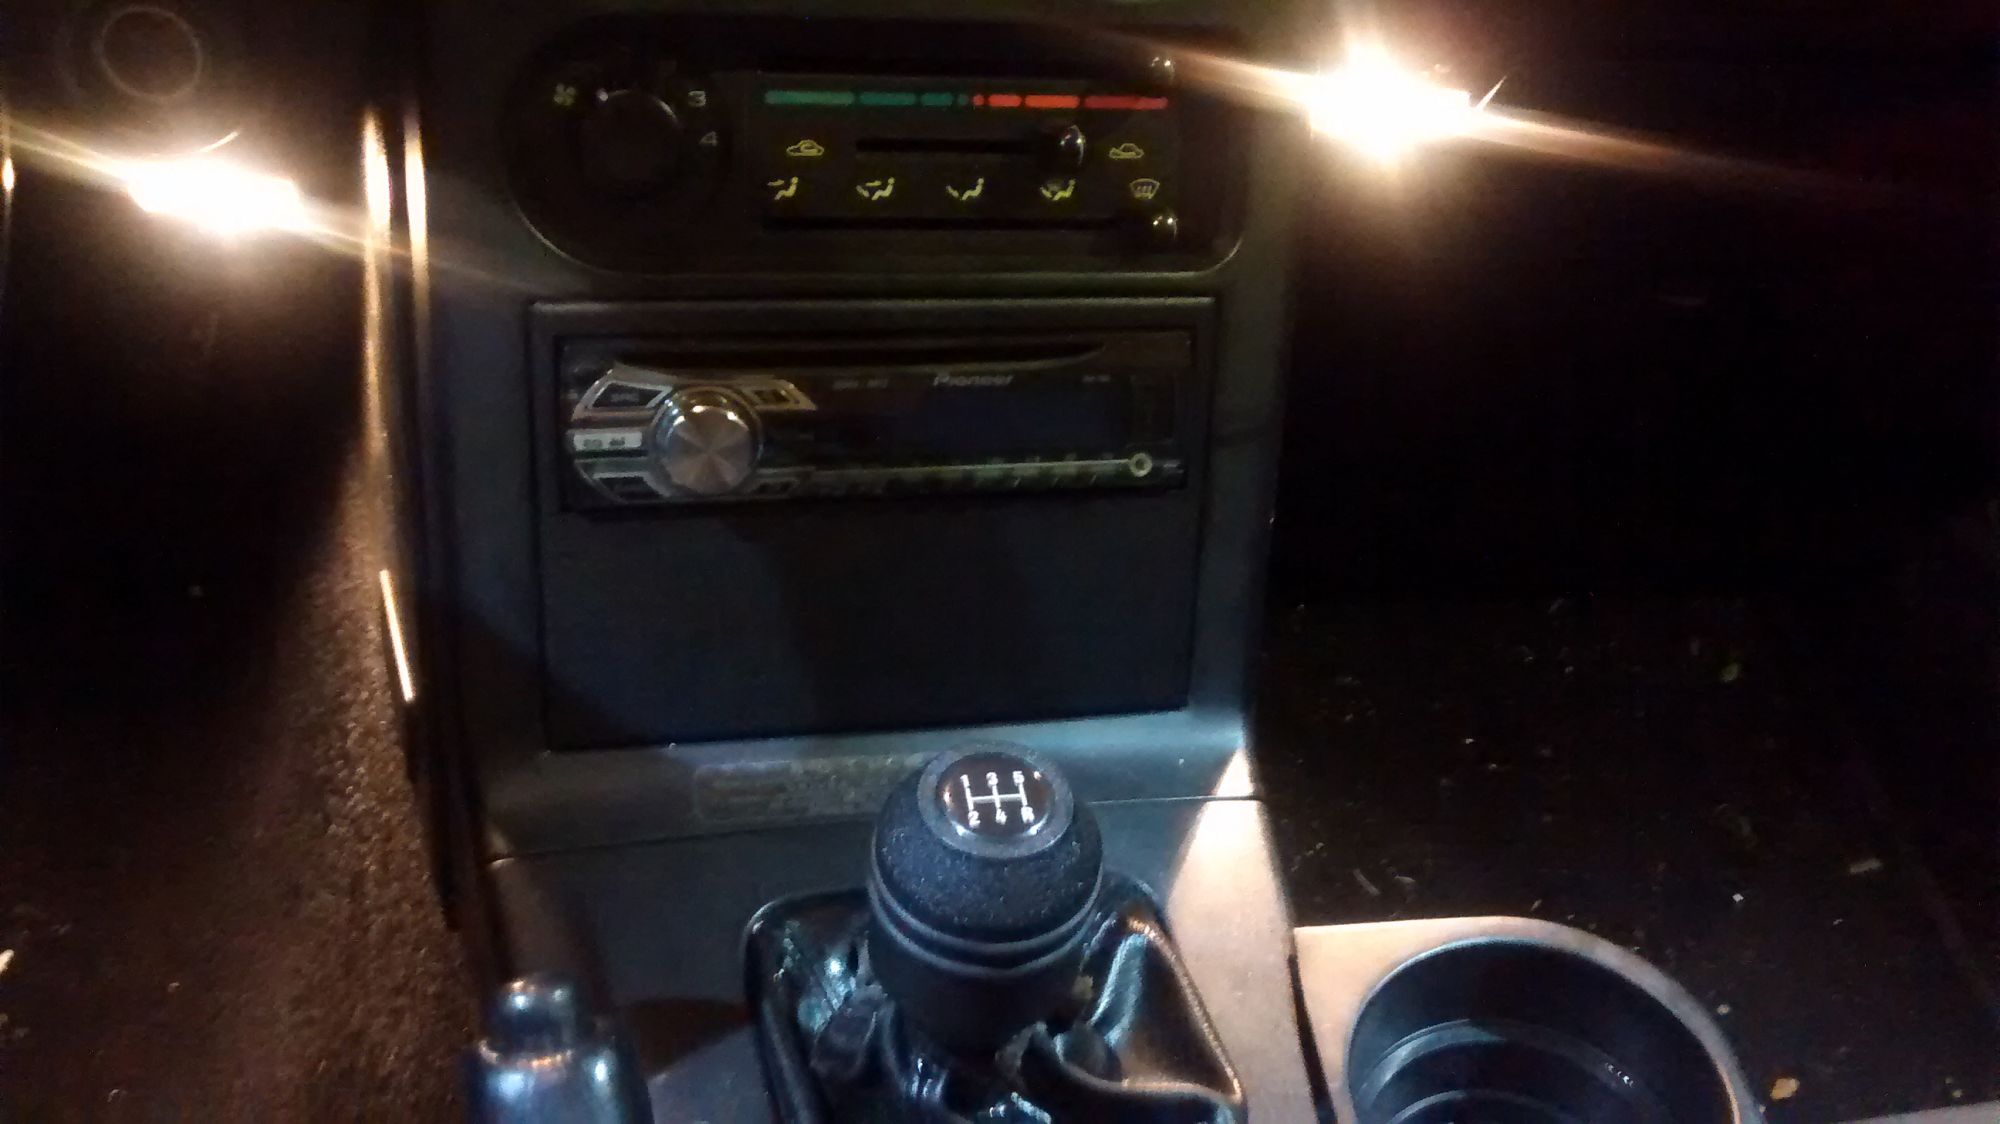
Also got a new radio surround from DDM Works which I am SUPER happy with. Amazing product there. They also sell a 3 hole and 2 hole version for mounting gauges, and you can get a flipped 3 hole version so your gauges are on top. Check those guys out, as they made a really quality part with this one! Also pictured here is my shift **** I think I've failed to mention in any other posts. It's from James Barone Racing and weighs in at a whopping 625grams! I LOVE the way the car shifts with this thing. Part number is MAZ-CYL-5RLR-BLK but they have others threaded for Mazda's in varying shapes and weights. And those rubber O-Rings around the **** they call "Kritz Rings" and I would encourage you to buy your shift **** with them. They give a much better feel/grip overall. I wouldn't have imagined those O-Rings would make much difference, but after trying the shift **** with and without the rings, I'm convinced they are the way to go.
Thanks Joseph, welcome aboard! This is what the intercooler looks like after the wreck. I "Fixed" the bumper (with an angle grinder).
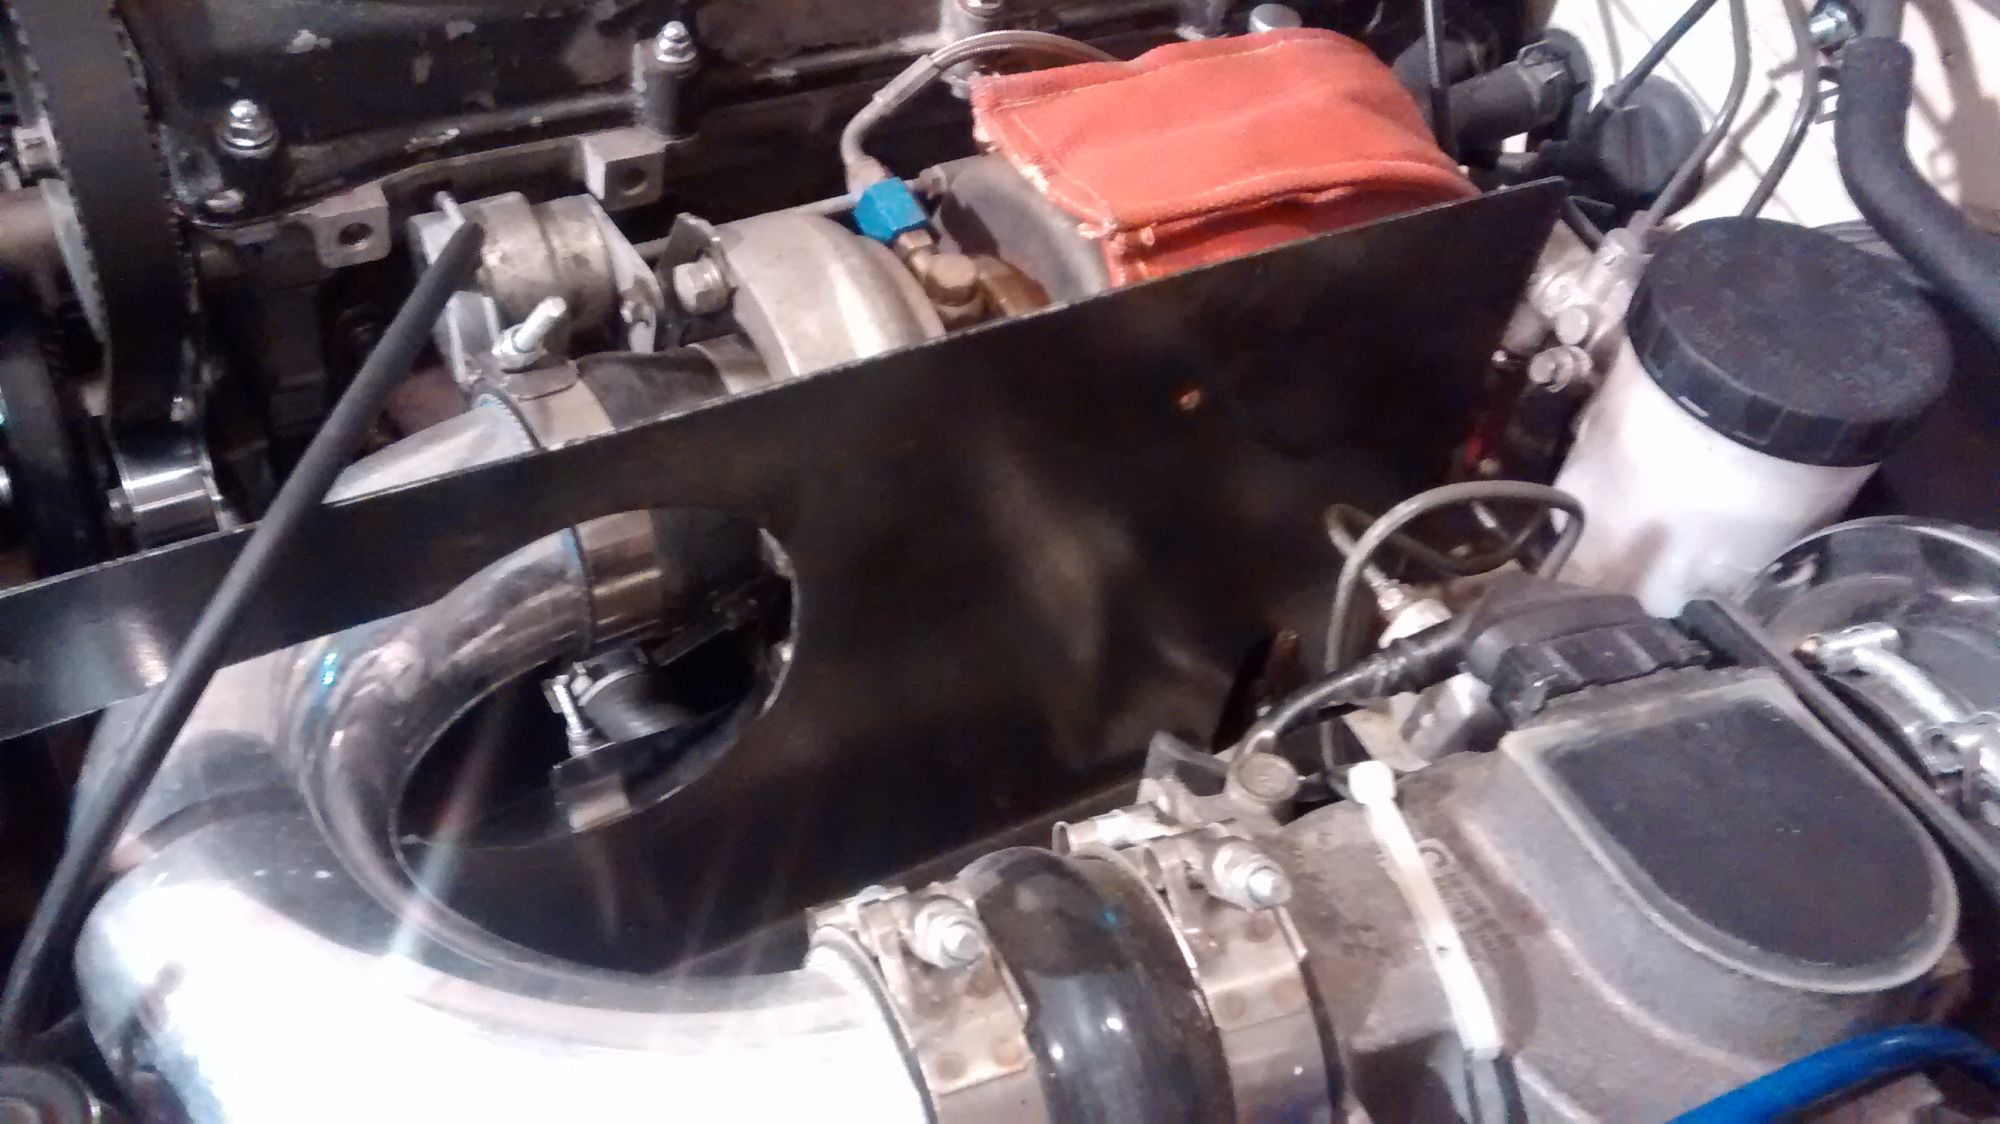
I also needed to get a new picture for this amazing spot to mount a MBC. I have it out of the equation in this pic (just running on the 7lb wastegate for now). This is a terrible picture but the location is near the drivers fender just behind the headlight.
I also got a heatshield and slapped the old turbo blanket back on (at a strange angle)! This setup is actually helping a lot with temps (haven't checked scientifically, but I swear it helps!)
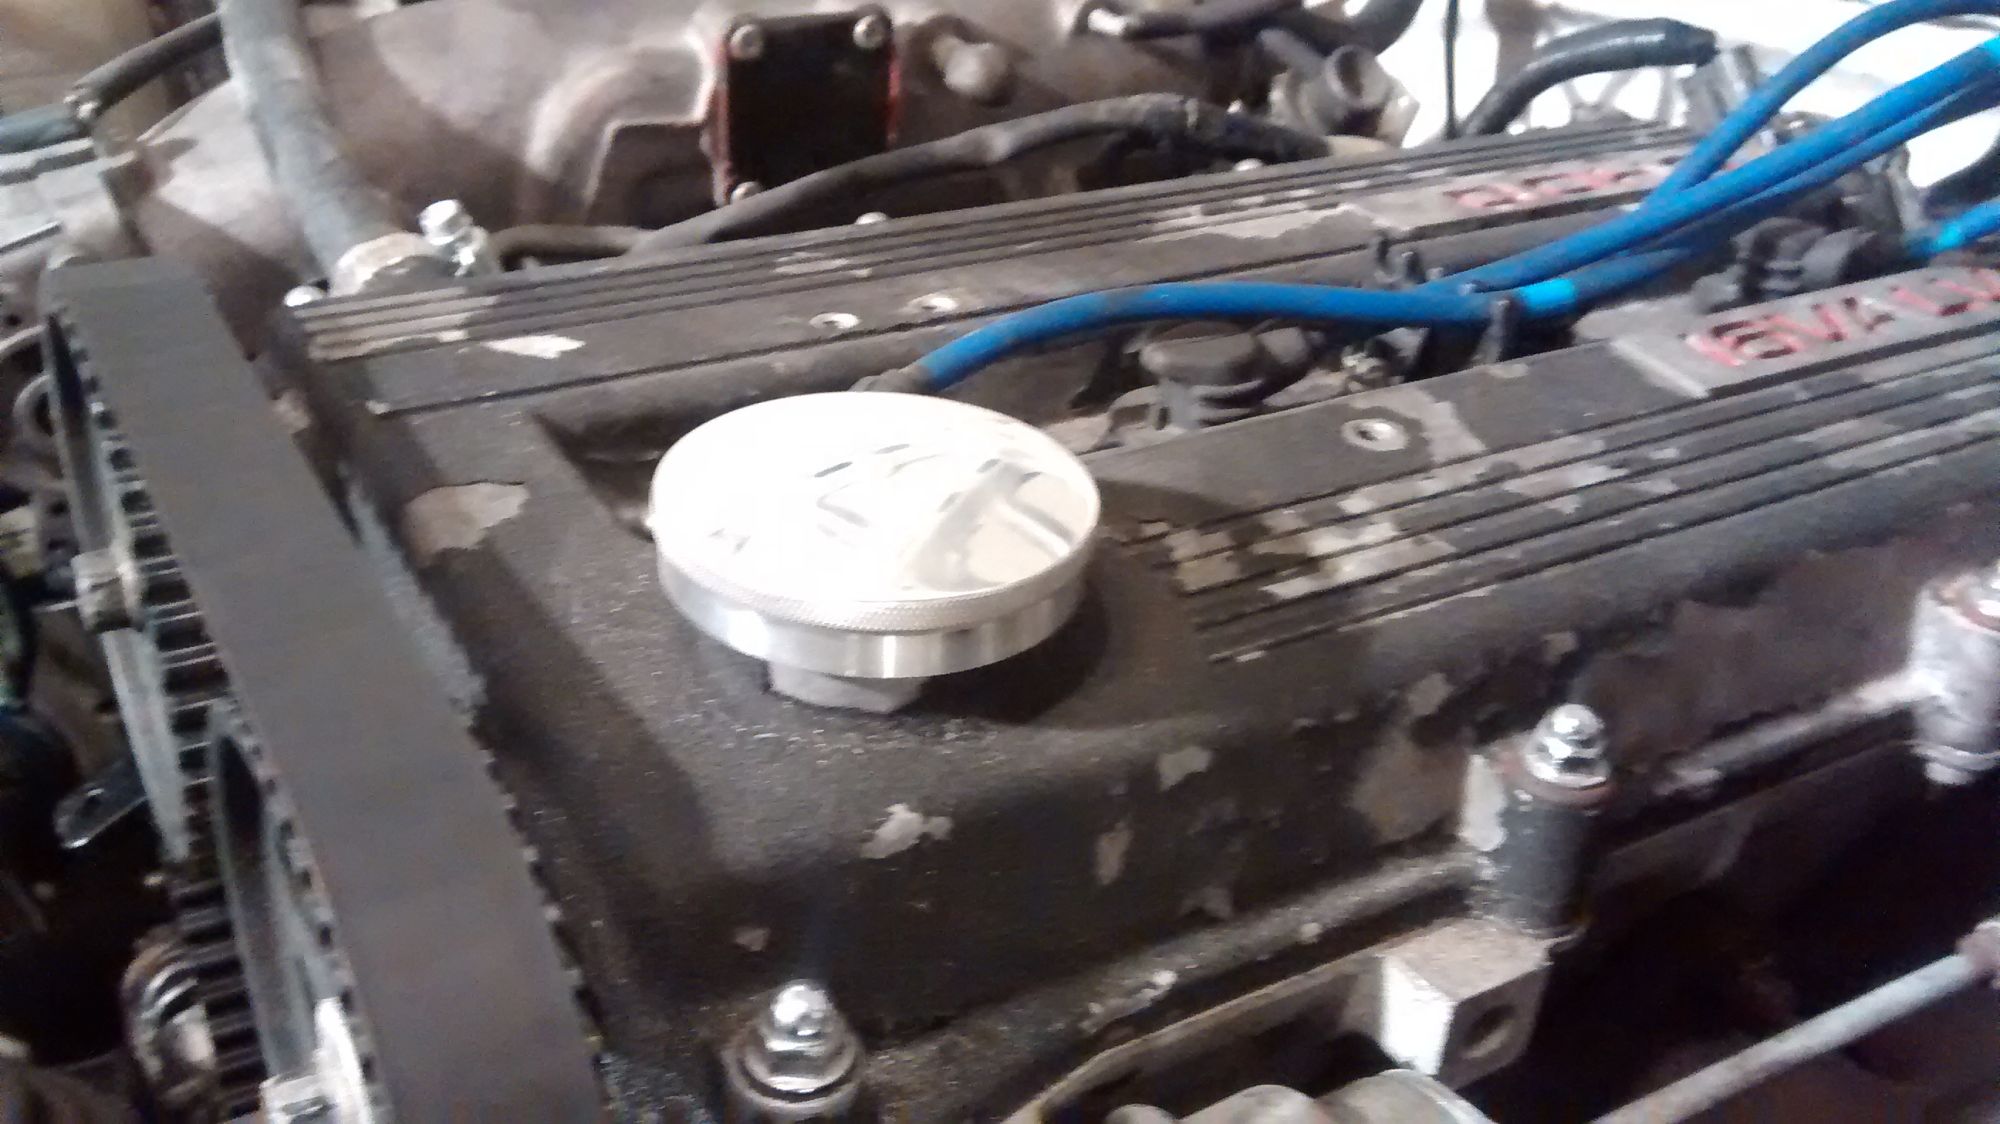
Shiny parts on an ugly car makes everything better! New oil cap!
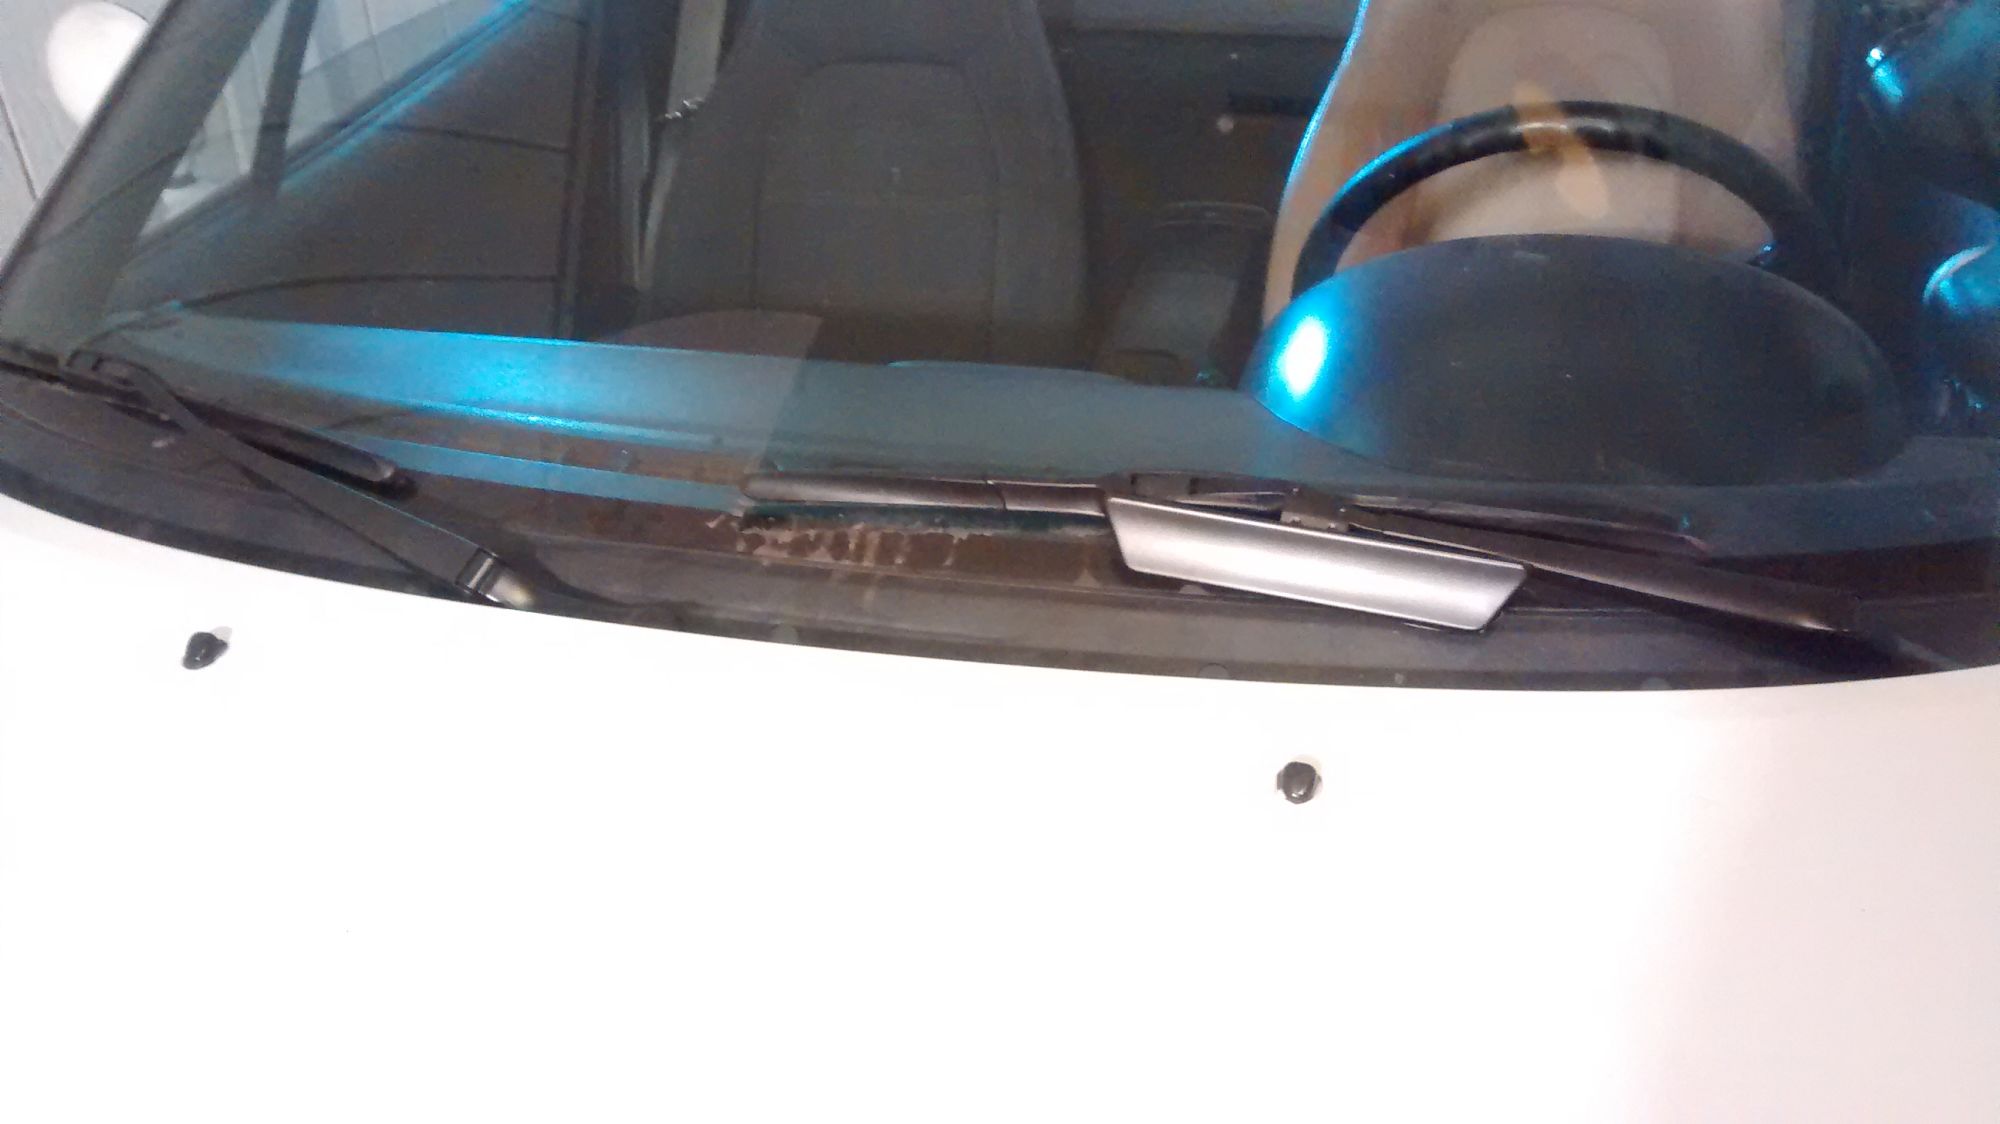
Painted the wiper arms!
Also since the lighted mirror I had broke (on my hand) in the wreck, I bit the bullet and went with the Jass performance visor lights. I'm really happy with these! (install is a bit fiddly, they're expensive, but they're really nice)
Have I mentioned that I hate points of failure....especially coolant lines? I haven't? Well then:
I hate coolant lines! I hate coolant in general, the smell and feel of that crap just bugs me. I'm running distilled water with some additive in it now that it's summer. I did some research and found that I would supposedly be okay deleting these lines on the front of the Miata. Since I wasn't sure, I JB welded bolts into the lines so that now I'm sure!
These are valve cover bolts for a Ford Focus (which, by the way, are a lot stronger than our VC bolts). I used this same "technique" on the "cursed water plug" on the back of the block years ago and it's never leaked since. I was using those vacuum cap rubber plugs you can buy from the auto parts store, but they kept cracking over time so I made a more permanent fix. What prompted this, by the way: I realized that during the wreck the car had jumped timing somehow. So when replacing the accessory belt I also did the timing belt. When replacing the timing belt I noticed a tiny leak coming from the lower right mixer tube (the line that comes from the actual mixer unit). After removing my hose I realized that the actual aluminum line on the mixer neck had a pinhole leak in it...so I "fixed" it.
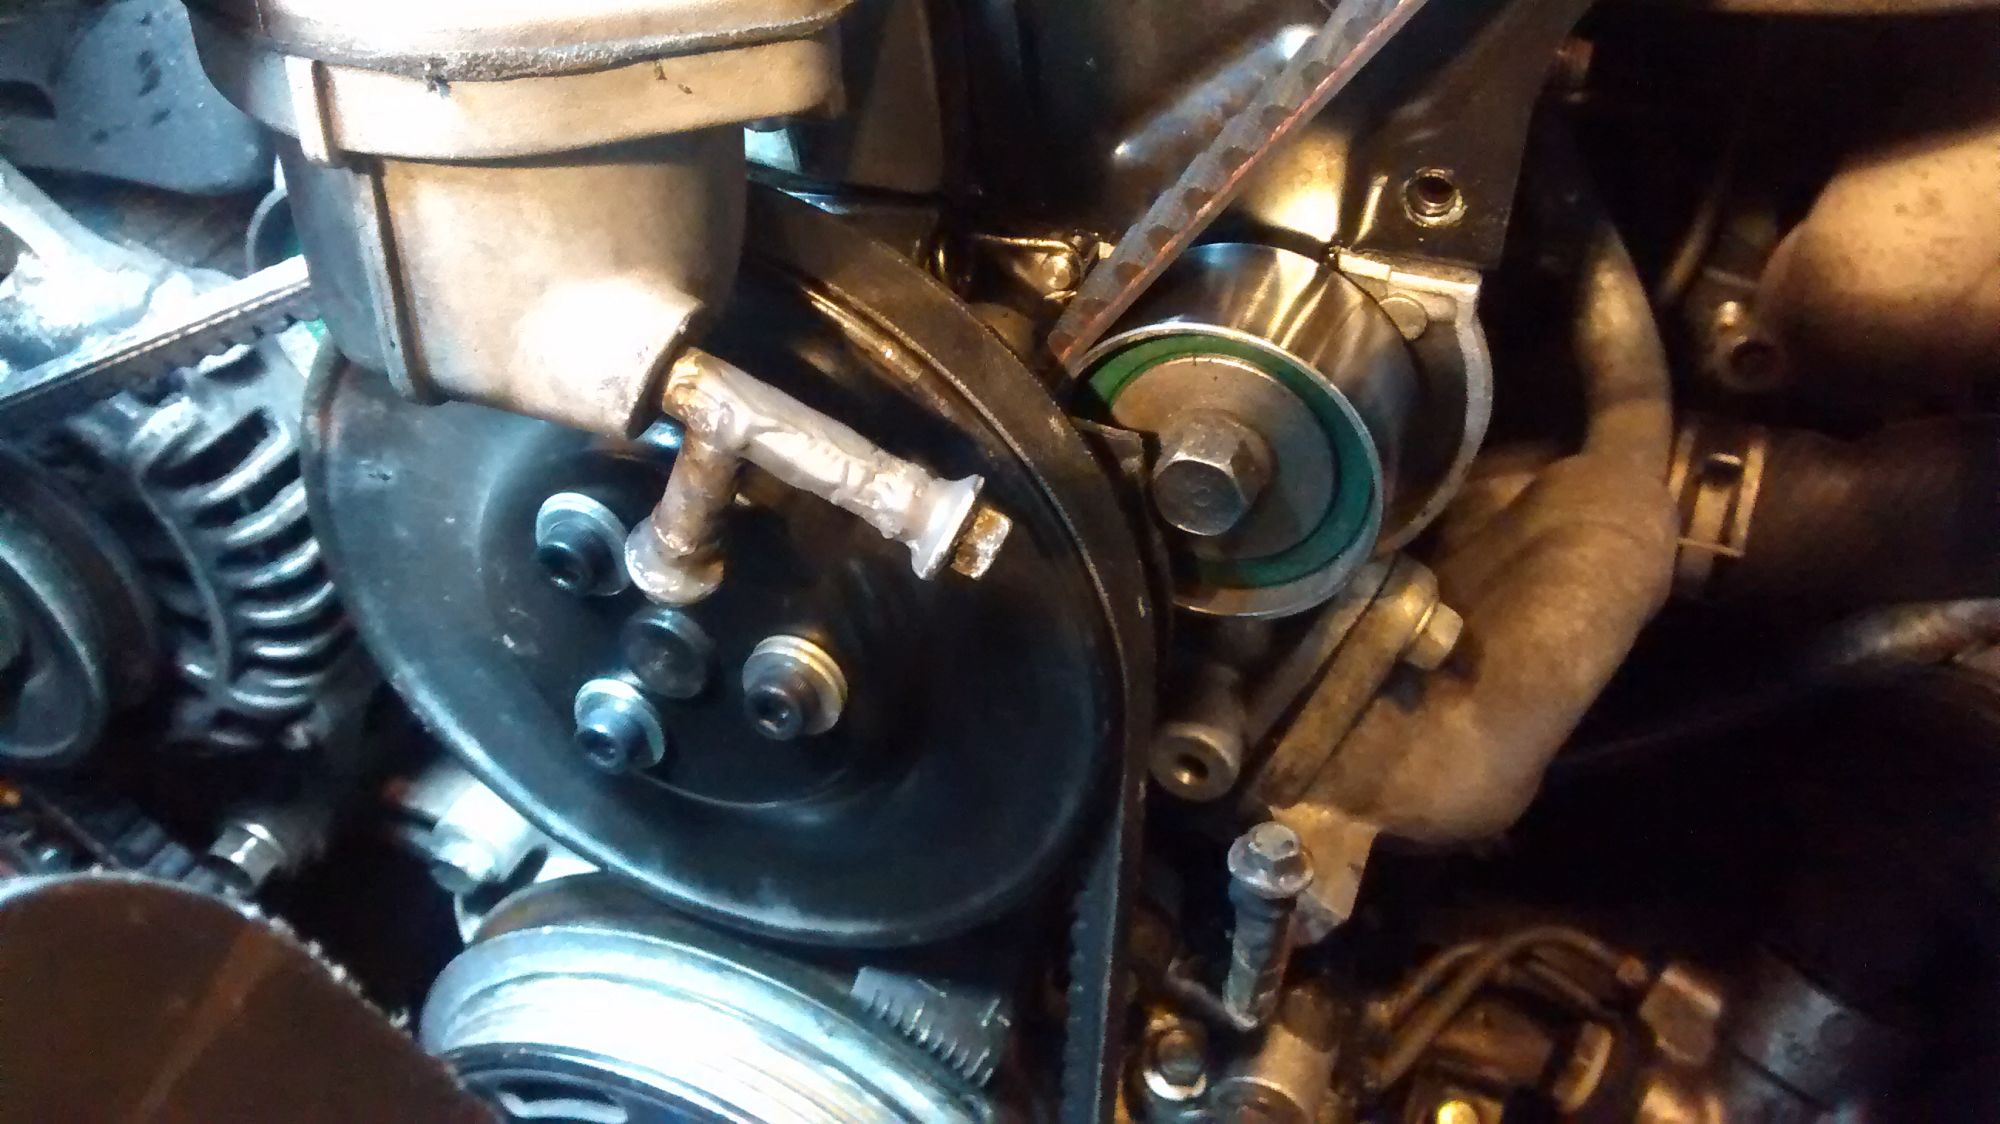
Also, the crank pulley bolts are awful. Period. They can't hold the 10lb/ft torque they're supposed to hold without stripping over or breaking in half. I saw a lot of debate about this on the forum and a few guys said "they always break" and everyone else acts like those guys are retards and don't know how to install things properly. Well chalk me up with the camp that swears those bolts are total ****. (because they are...they're grade 2 hardware....on your damn pulley stack...You gonna trust that?) I went out to Fastenal and got some grade 12.9 M6x1.0x16mm hex head fasteners. I had to tap the messed up threads on the pulley for M6x1.0 (I think it might be m6x1.25 normally) I have no idea how/why it actually tapped properly to a coarser thread pitch (without going up in size to M8) but it holds 15lb/ft of torque now and those bolts don't move. I had such success that I used the same bolts on the water pump which you can see here. The water pump is already m6x1.0....so now you can use one fastener for both pulleys and stop getting those bolts confused.
If you are going to delete your coolant lines like me, you must drill a hole in your thermostat at least 3/16" in size. Someone smart on the forum had that recommendation. I drove the car around (on goofy not-alignment) and it heated up like normal and held temp like normal. That hole allows coolant to pass the thermostat and go into the radiator before the coolant gets to a temp that would cause the thermostat to open normally. Since you bypass super-hot coolant coming from the heater core (no coolant touching the backside of the thermostat), the thermostat takes a bit longer to open up (I think).
I really felt the need to upgrade things that weren't broken and NOT fix things that are still broken: So I bought these!
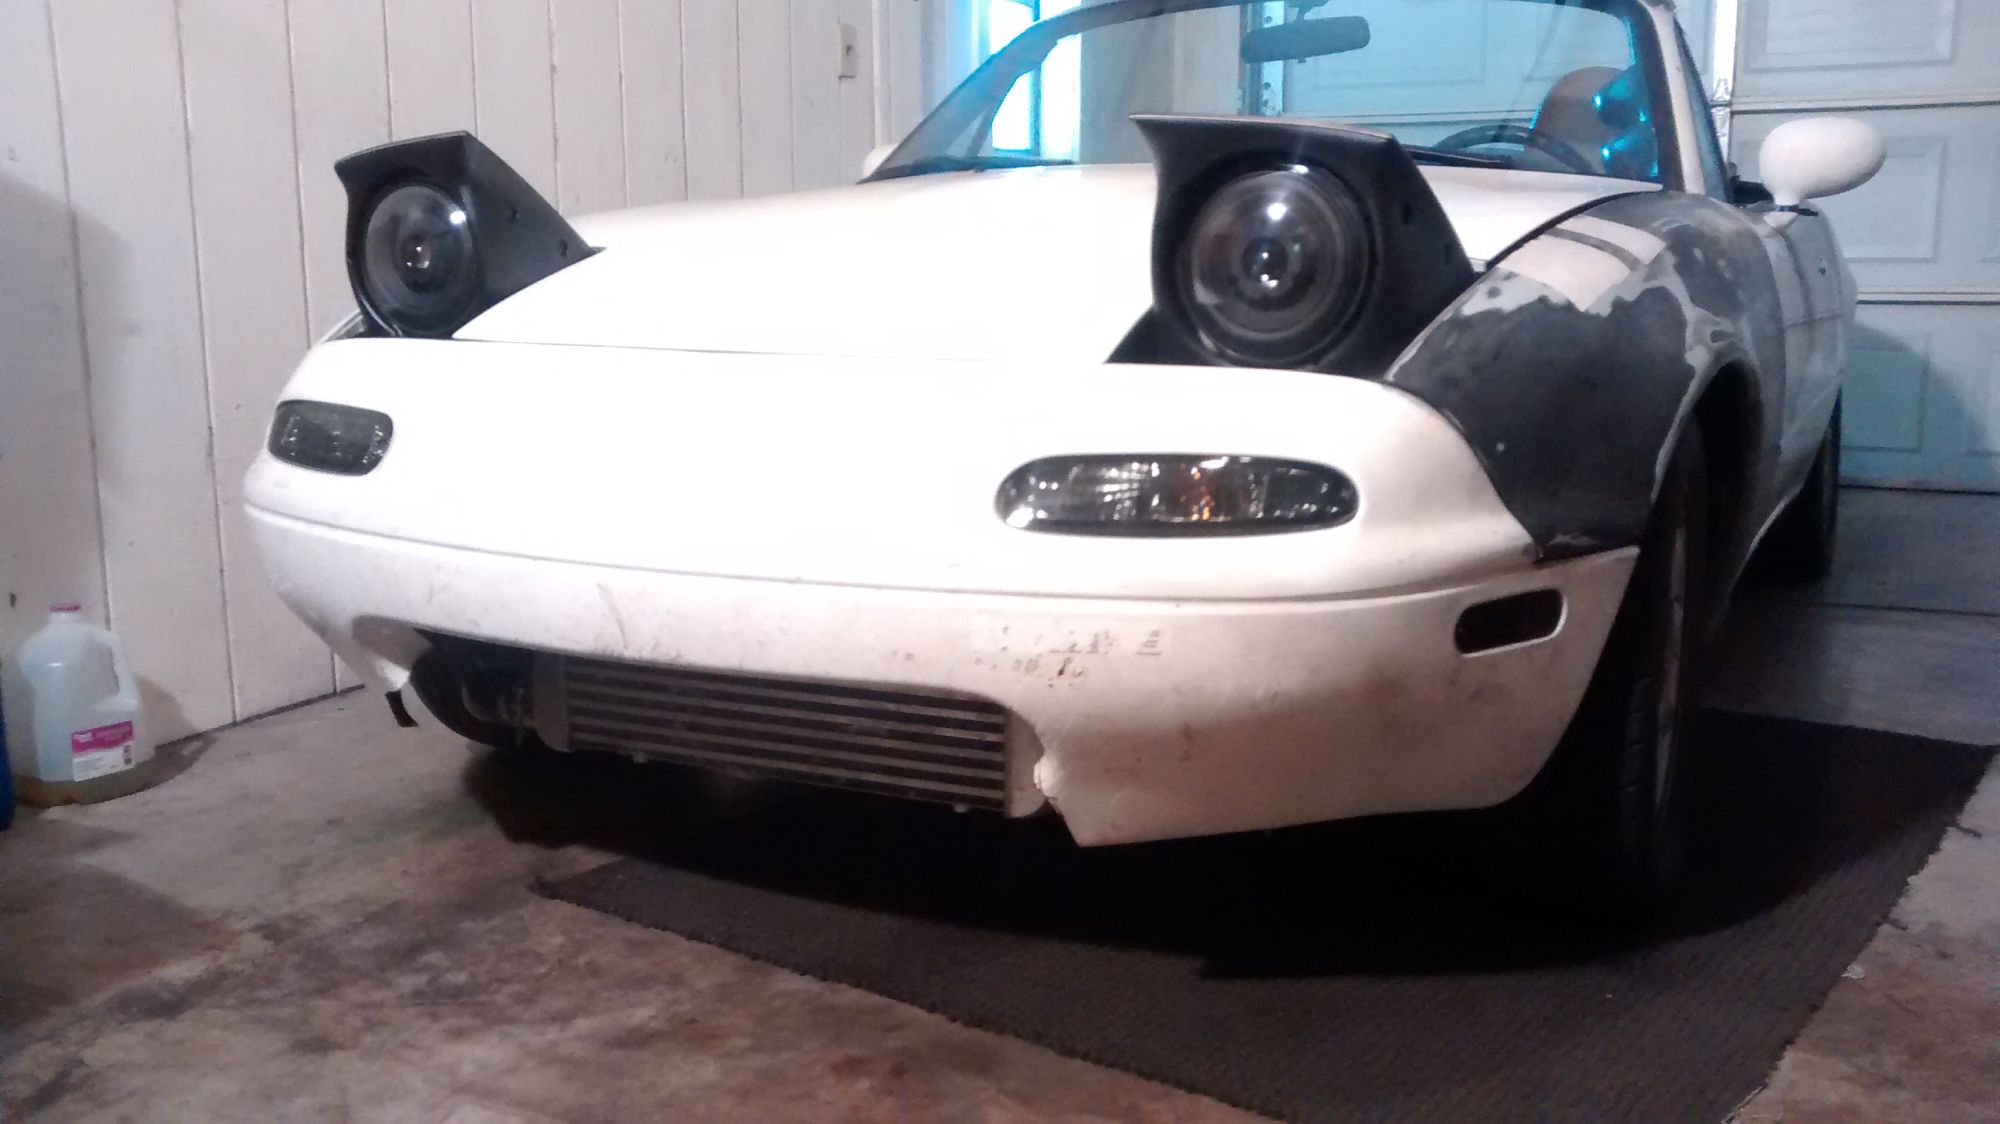
Another eBay purchase! Those HID projectors are actually really nice and have a great cutoff. I still need to lengthen 4 wires to get high beams but they work great otherwise. The smoked turn signals and running lights were also really nice quality and came with new screws, pigtails and bulb sockets. I think I paid $110 for the headlights and maybe $60 for the signals (all 6 in a kit).
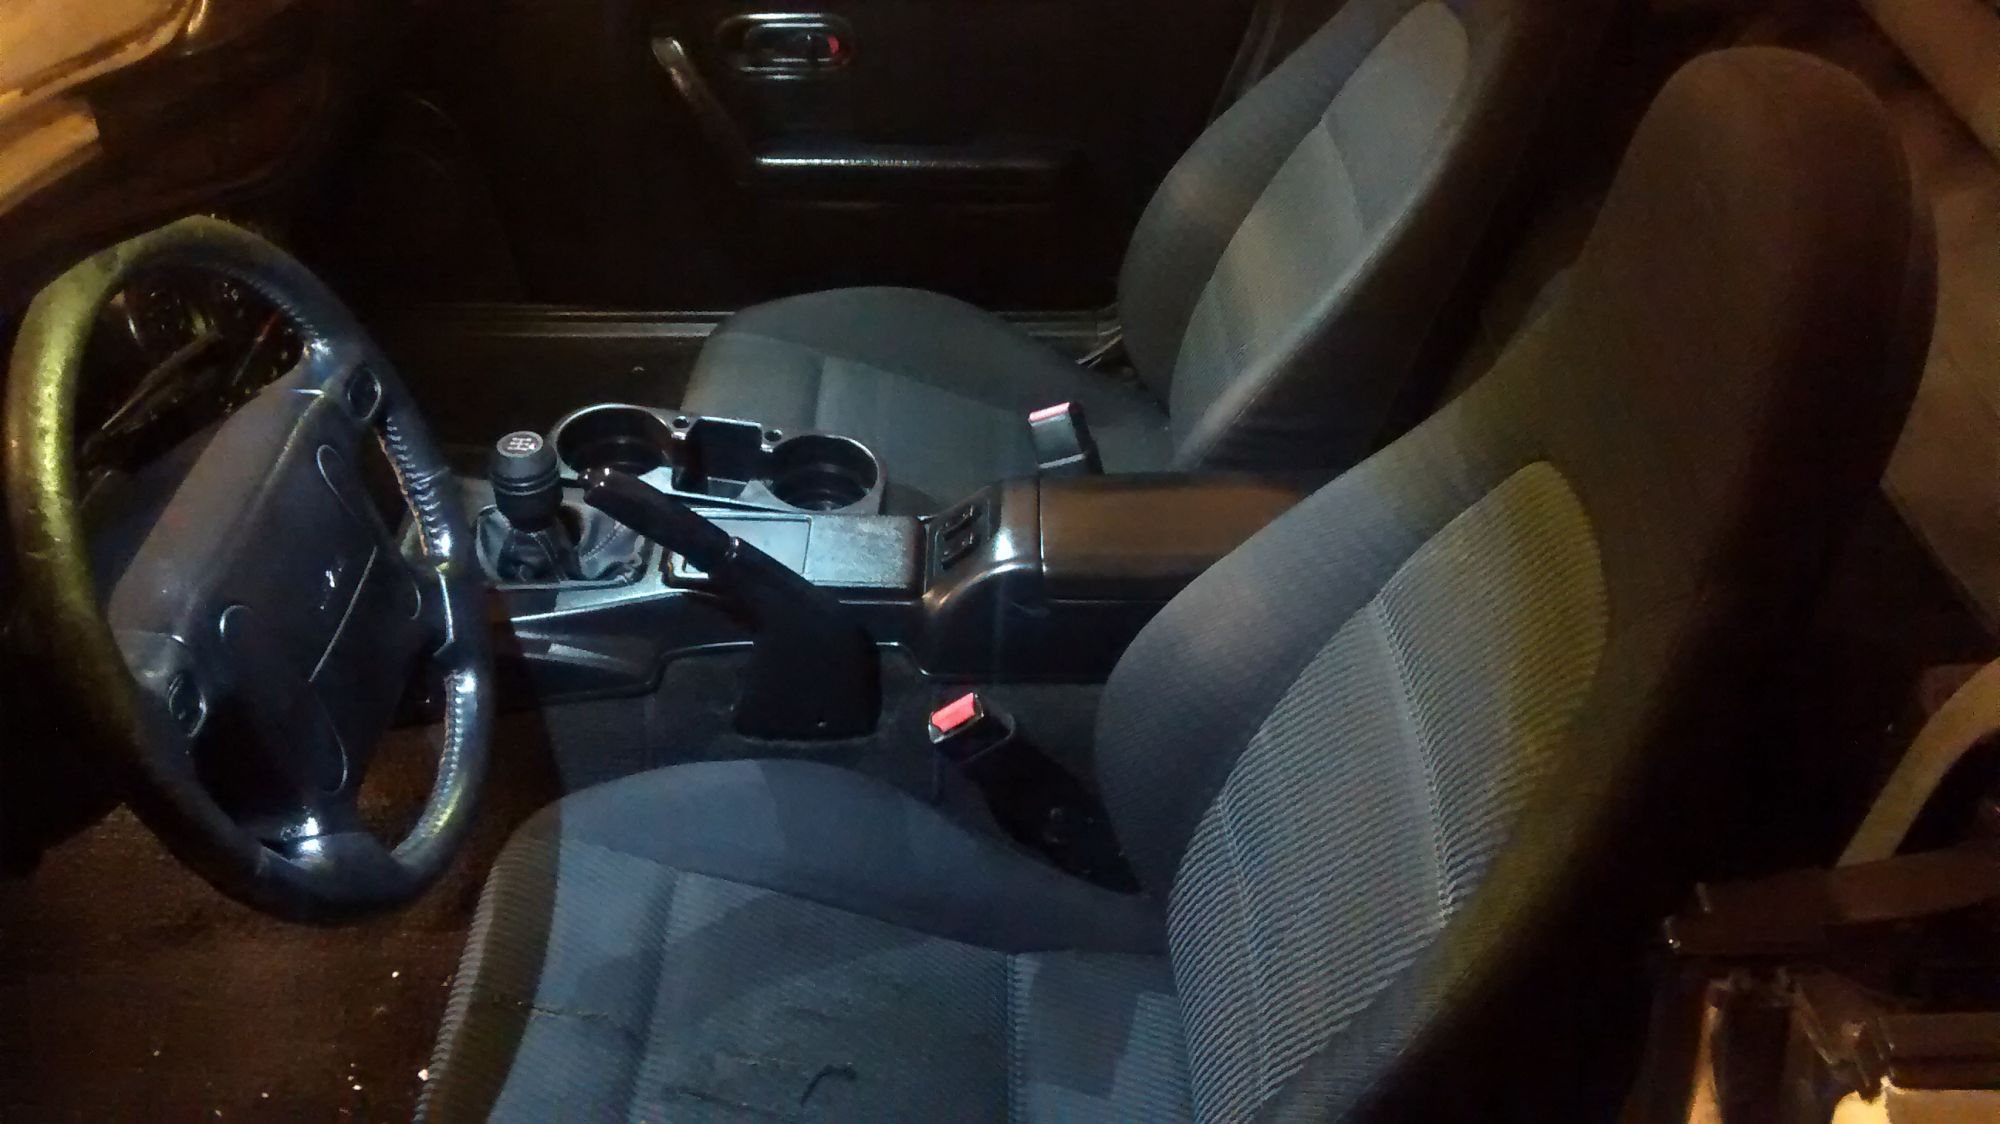
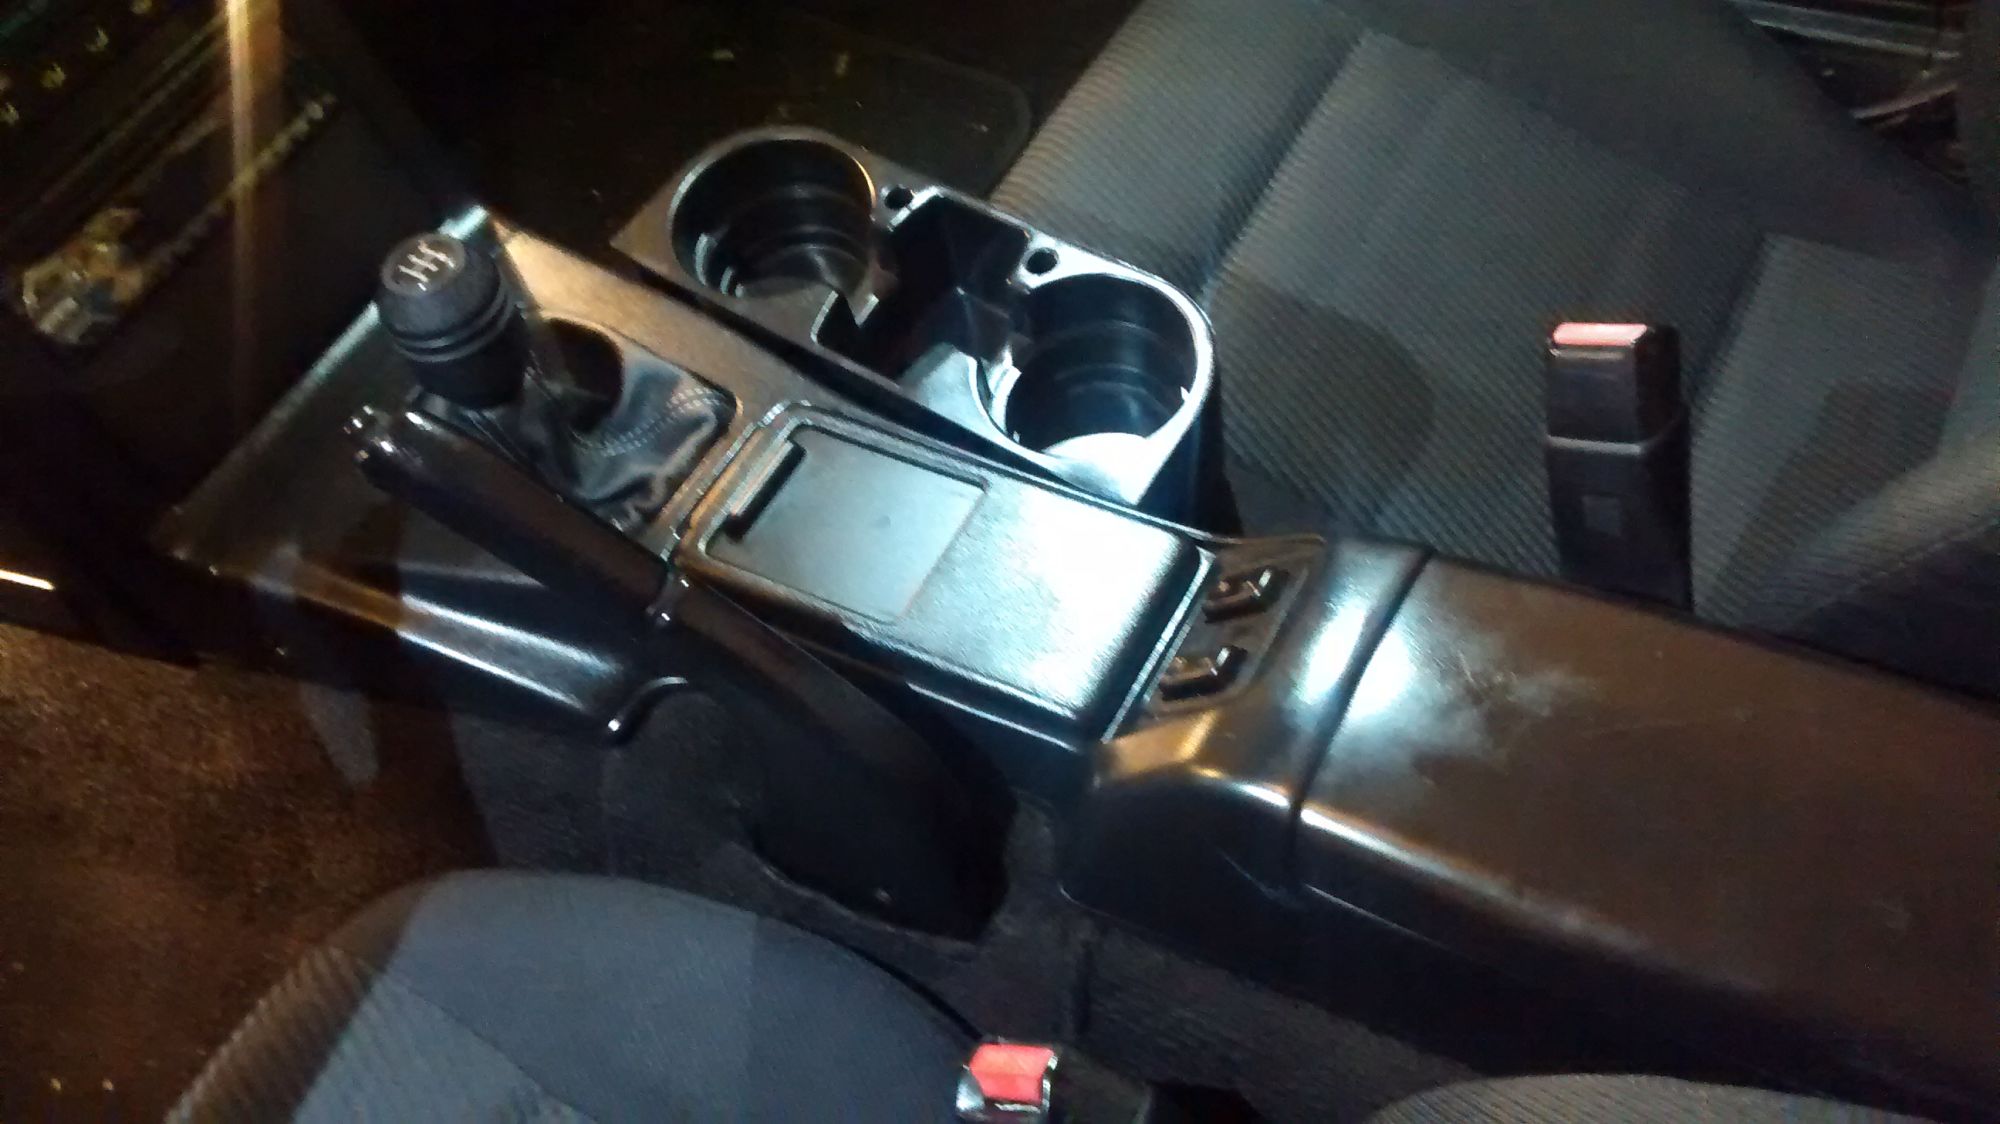
I also decided it was LONG overdue that I clean up my interior a bit. I got some NB1 seats in decent condition (better than my torn and mismatched seats. (I WAS running a tan NB2 driver seat and a stock black NA passenger seat). I actually like the way the NB1 seats feel even though everyone says they're the worst seat ever. I'm a big guy though so my opinion usually differs from other people on seats anyways. You will also notice my $4 "wedgie" cup holder from AutoZone. Worth every dollar. Lastly the new shift boot from RedLine. I used "Goop" to secure the new leather to the little plastic ring near the top of the shifter. I'm happy with the quality of stitching and leather and the fit. Top notch product!


 0
0