When you click on links to various merchants on this site and make a purchase, this can result in this site earning a commission. Affiliate programs and affiliations include, but are not limited to, the eBay Partner Network.
I think I also plan to tap the oil pan now for turbo oil return line while engine is out, should be easier, right? Idea is to do 3/8NPT and plug for now. Smart or stupid?
I would. I think I went 1/2 NPT, which is recommended in the WIKI, but both are used. Also, you could consider a welded bung with the engine out.
Luckily a new coolant sensor was available at Advanced Auto, and only cost $20 or so. Even after buying drill and tap, I chickened out on tapping the oil pan. My thinking was that if the engine stuck a rod through the block after I started it, I would always wonder, did I buy a bad engine, or did a shaving travel through my bearings and screw me. So, I will deal with that when the turbo shows up.
The good news is that the engine fired up on the second try. Only issue was the need to switch MS3 Ignition Input Capture from falling to rising edge. Once I made that change, bam, it fired right up. Took the car for a quick spin, love the new six speed, and amazingly the car had no leaks or issues.
Still need to hook up the VVT and Knock sensor, that is the final step and this process will be complete. Never could have done it so quick without Reverant and the definitive VVT thread by Savington.
So, I have not posted in a long while. This is because I had the misfortune of getting rear-ended by a brand new Telsa S on the DC beltway. It has taken a year and a half to negotiate a settlement on my total loss, and I am still working on an injury settlement, so I will not go into too much detail on that.
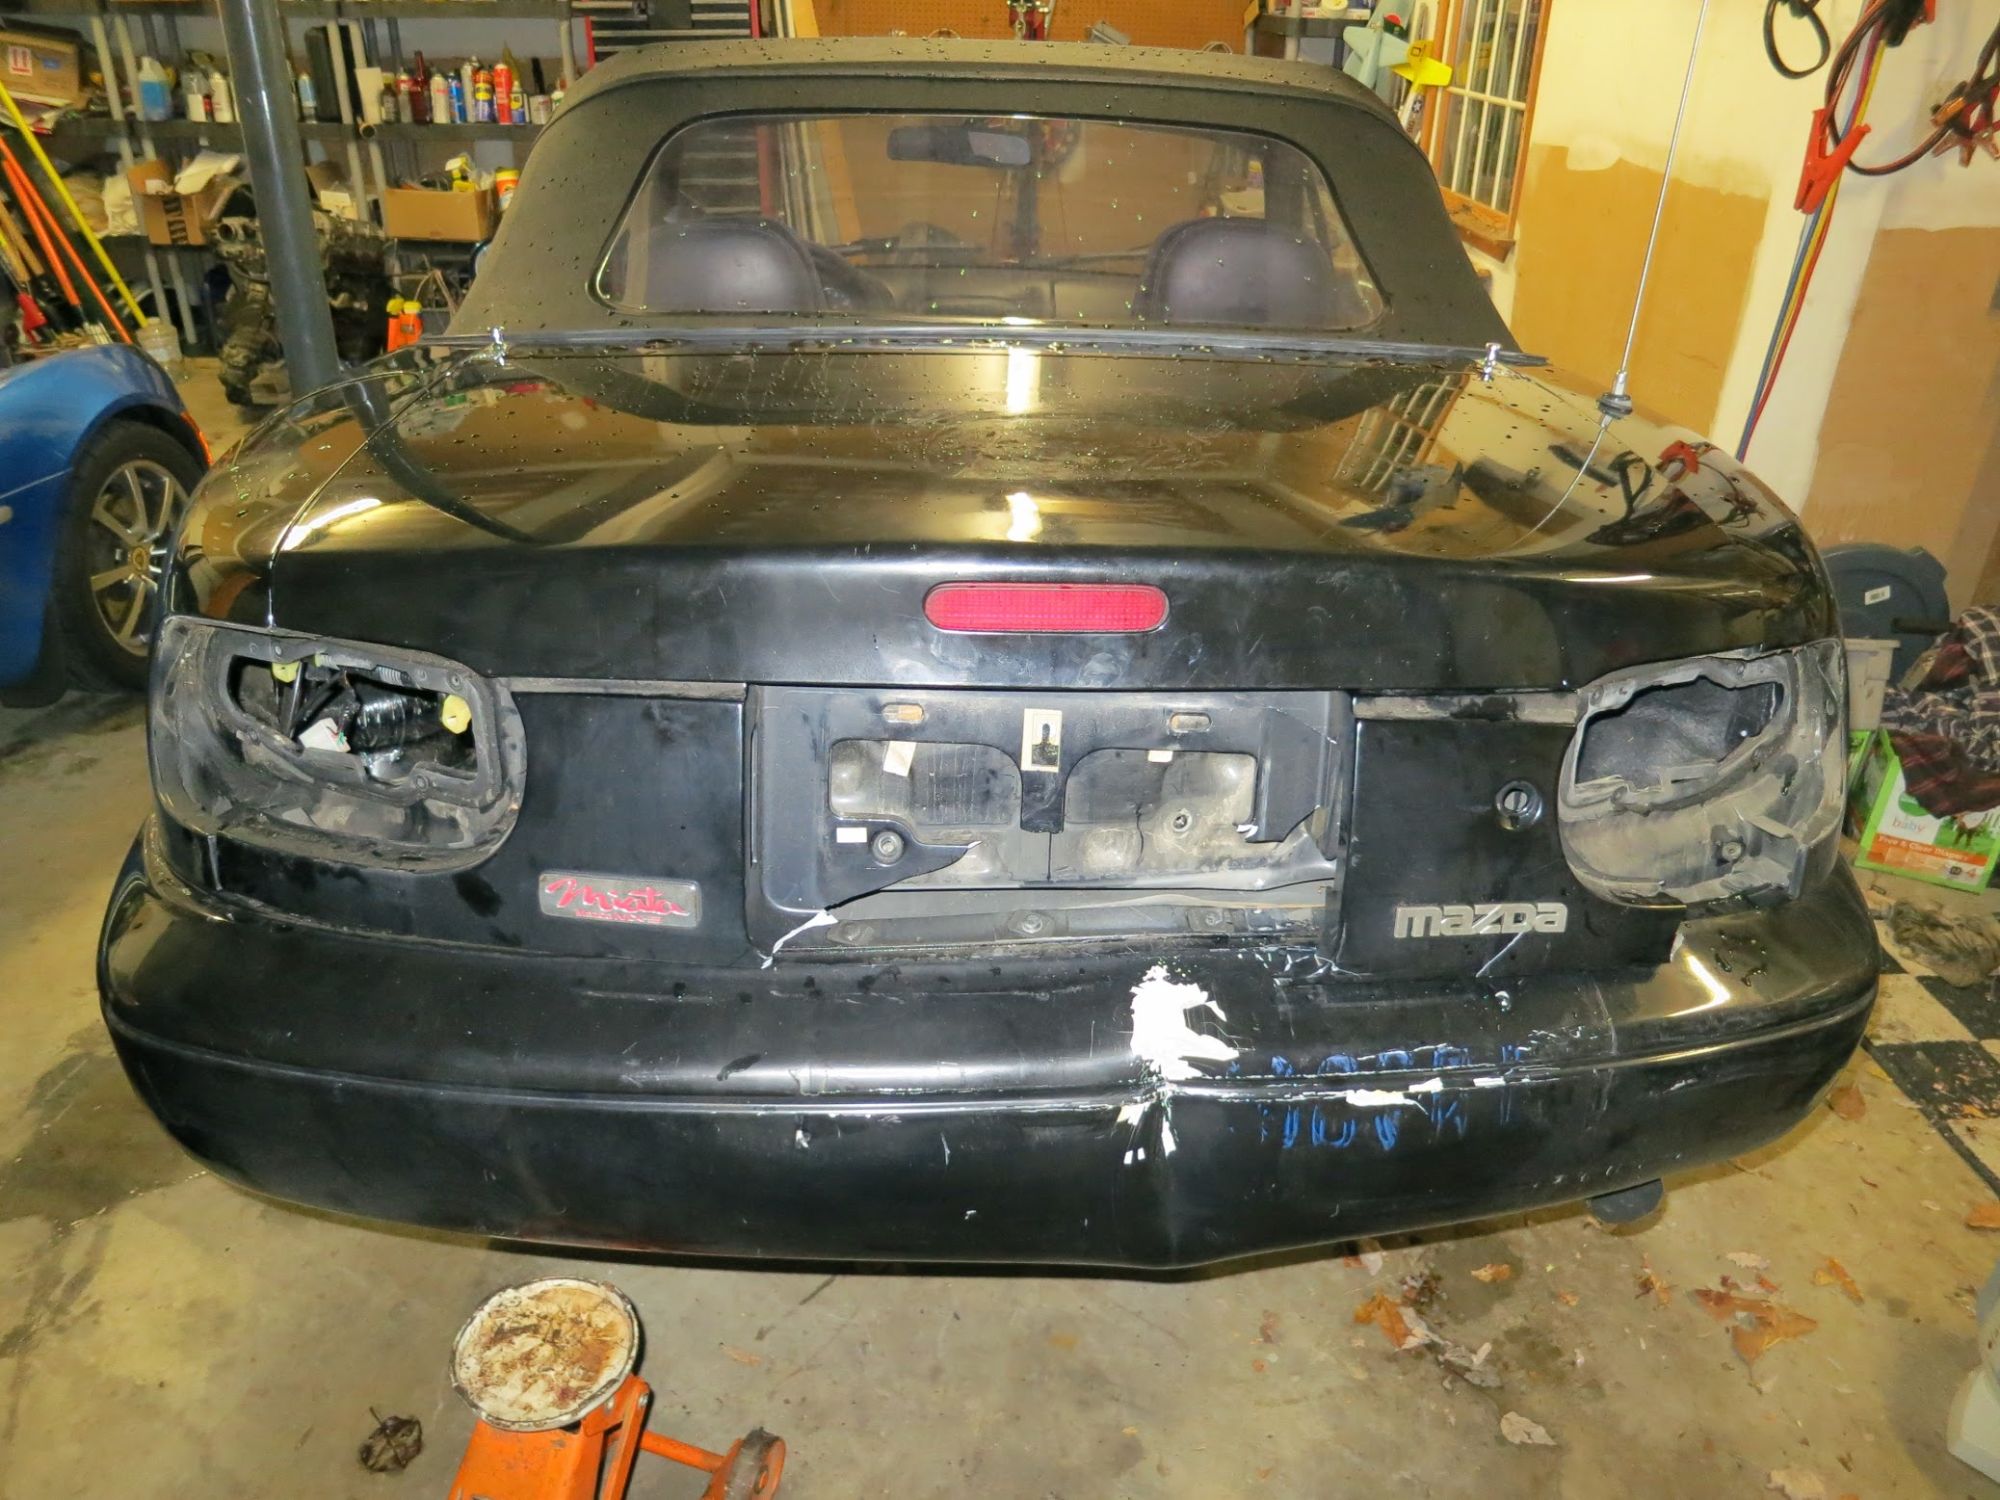
In Nov 2014, I was minding my business in stop and go traffic when the Tesla S behind me decided to stop paying attention. I definitely felt all 4,647 pounds as it tried to imprint its license payment as clearly as possible into my bumper....
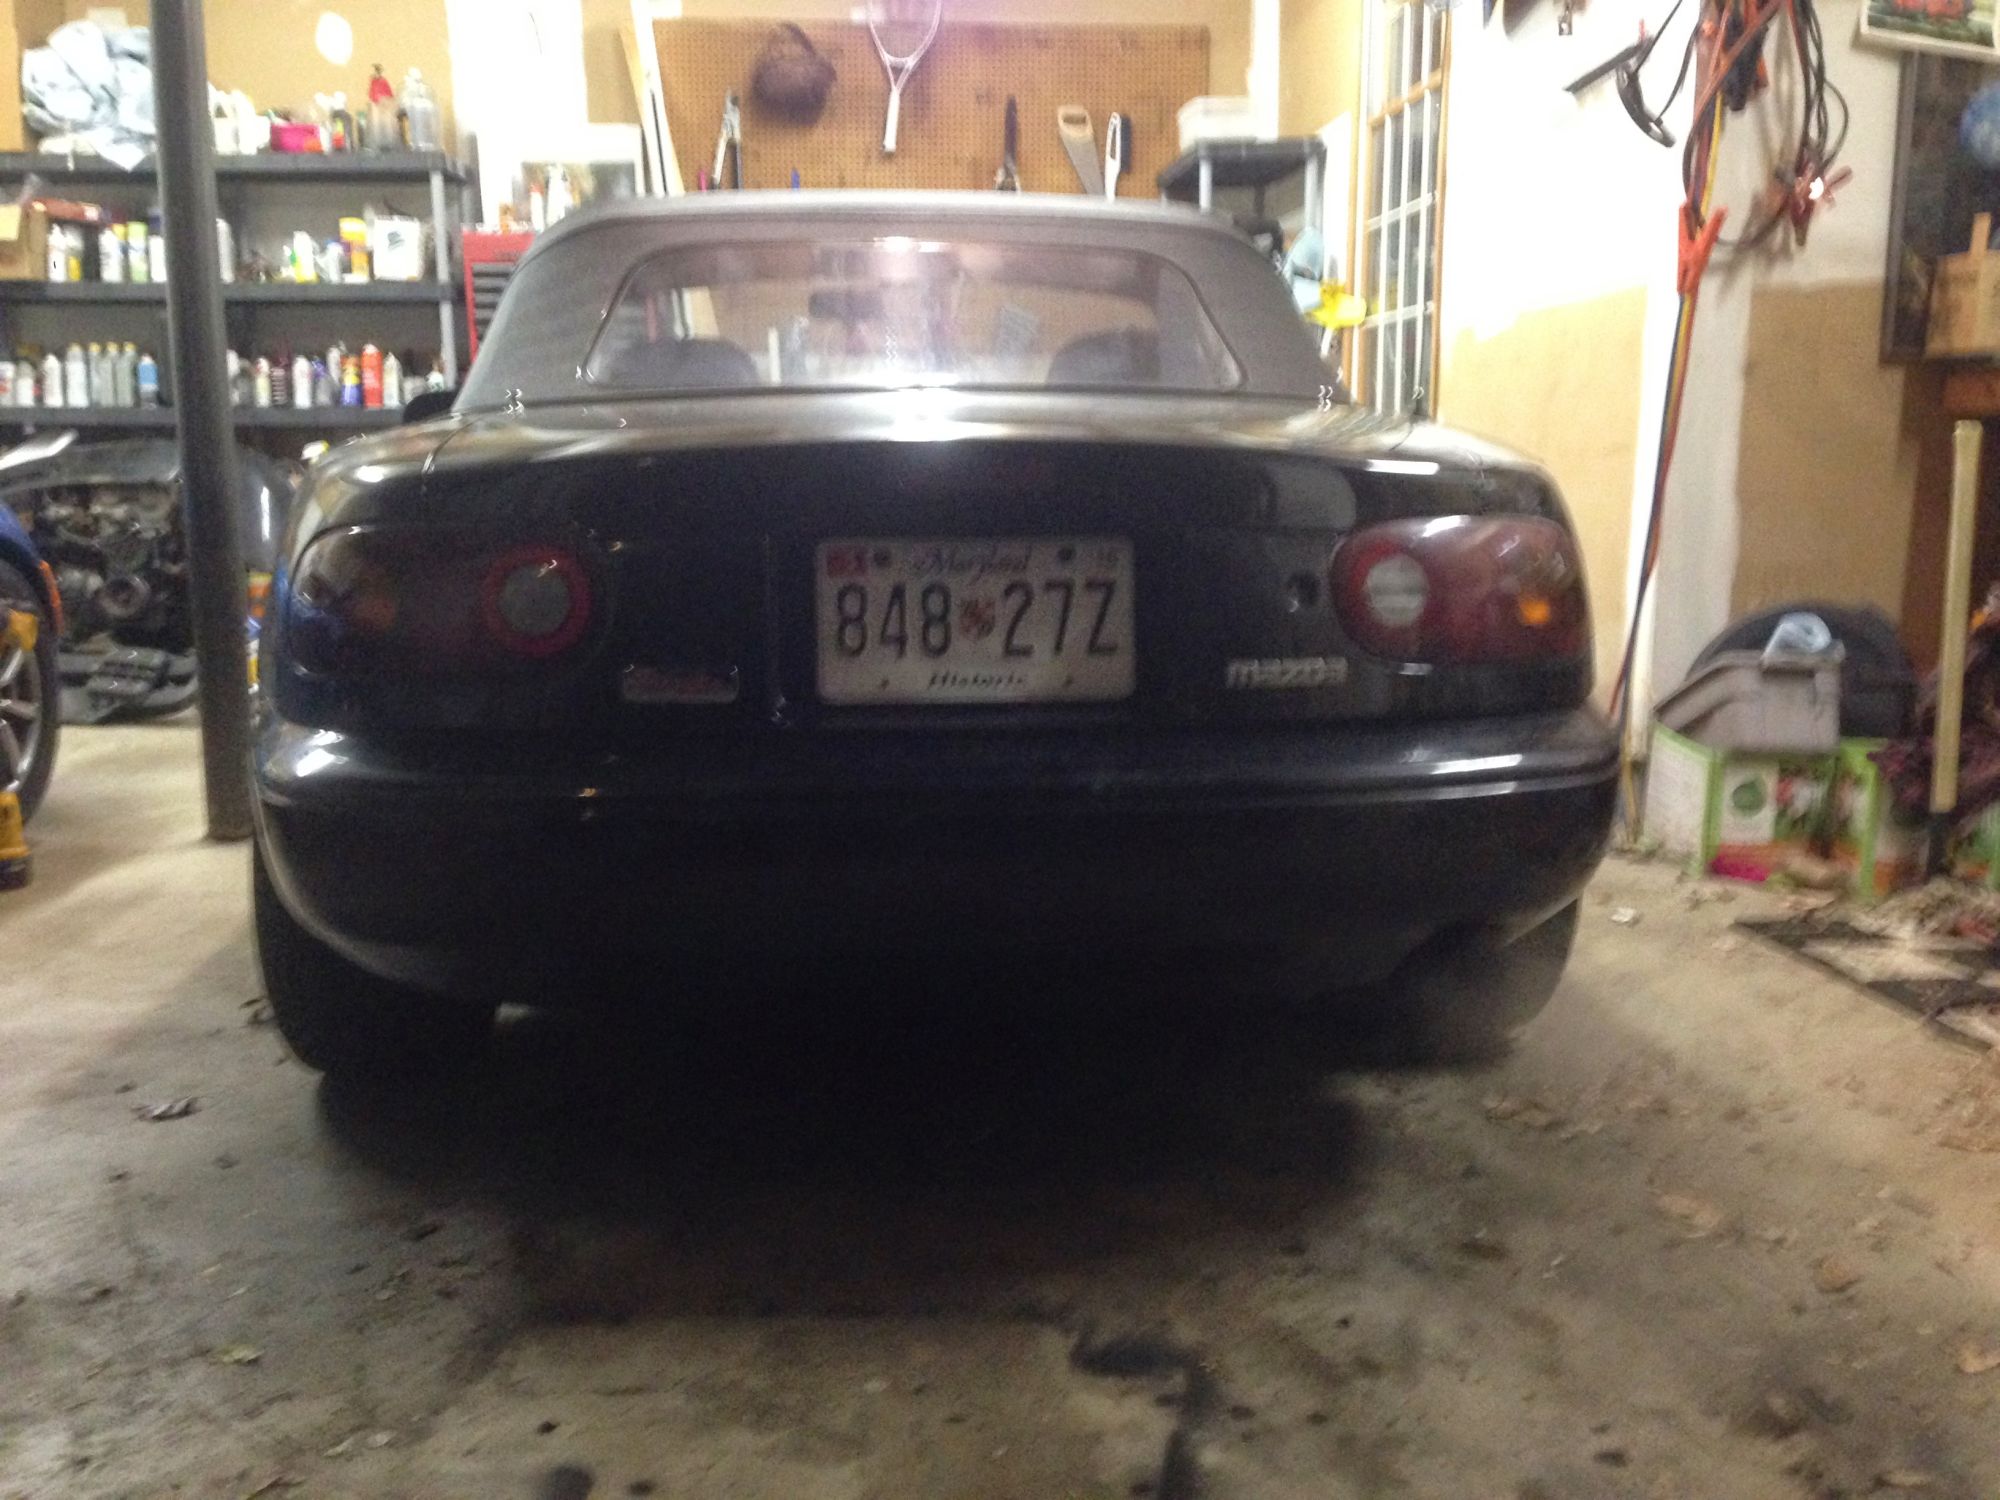
This is what the car looked like shortly after getting home. Bumper destroyed (notice blue license plate imprint), finisher cracked, trunk would not open because the mount had gotten pushed back.
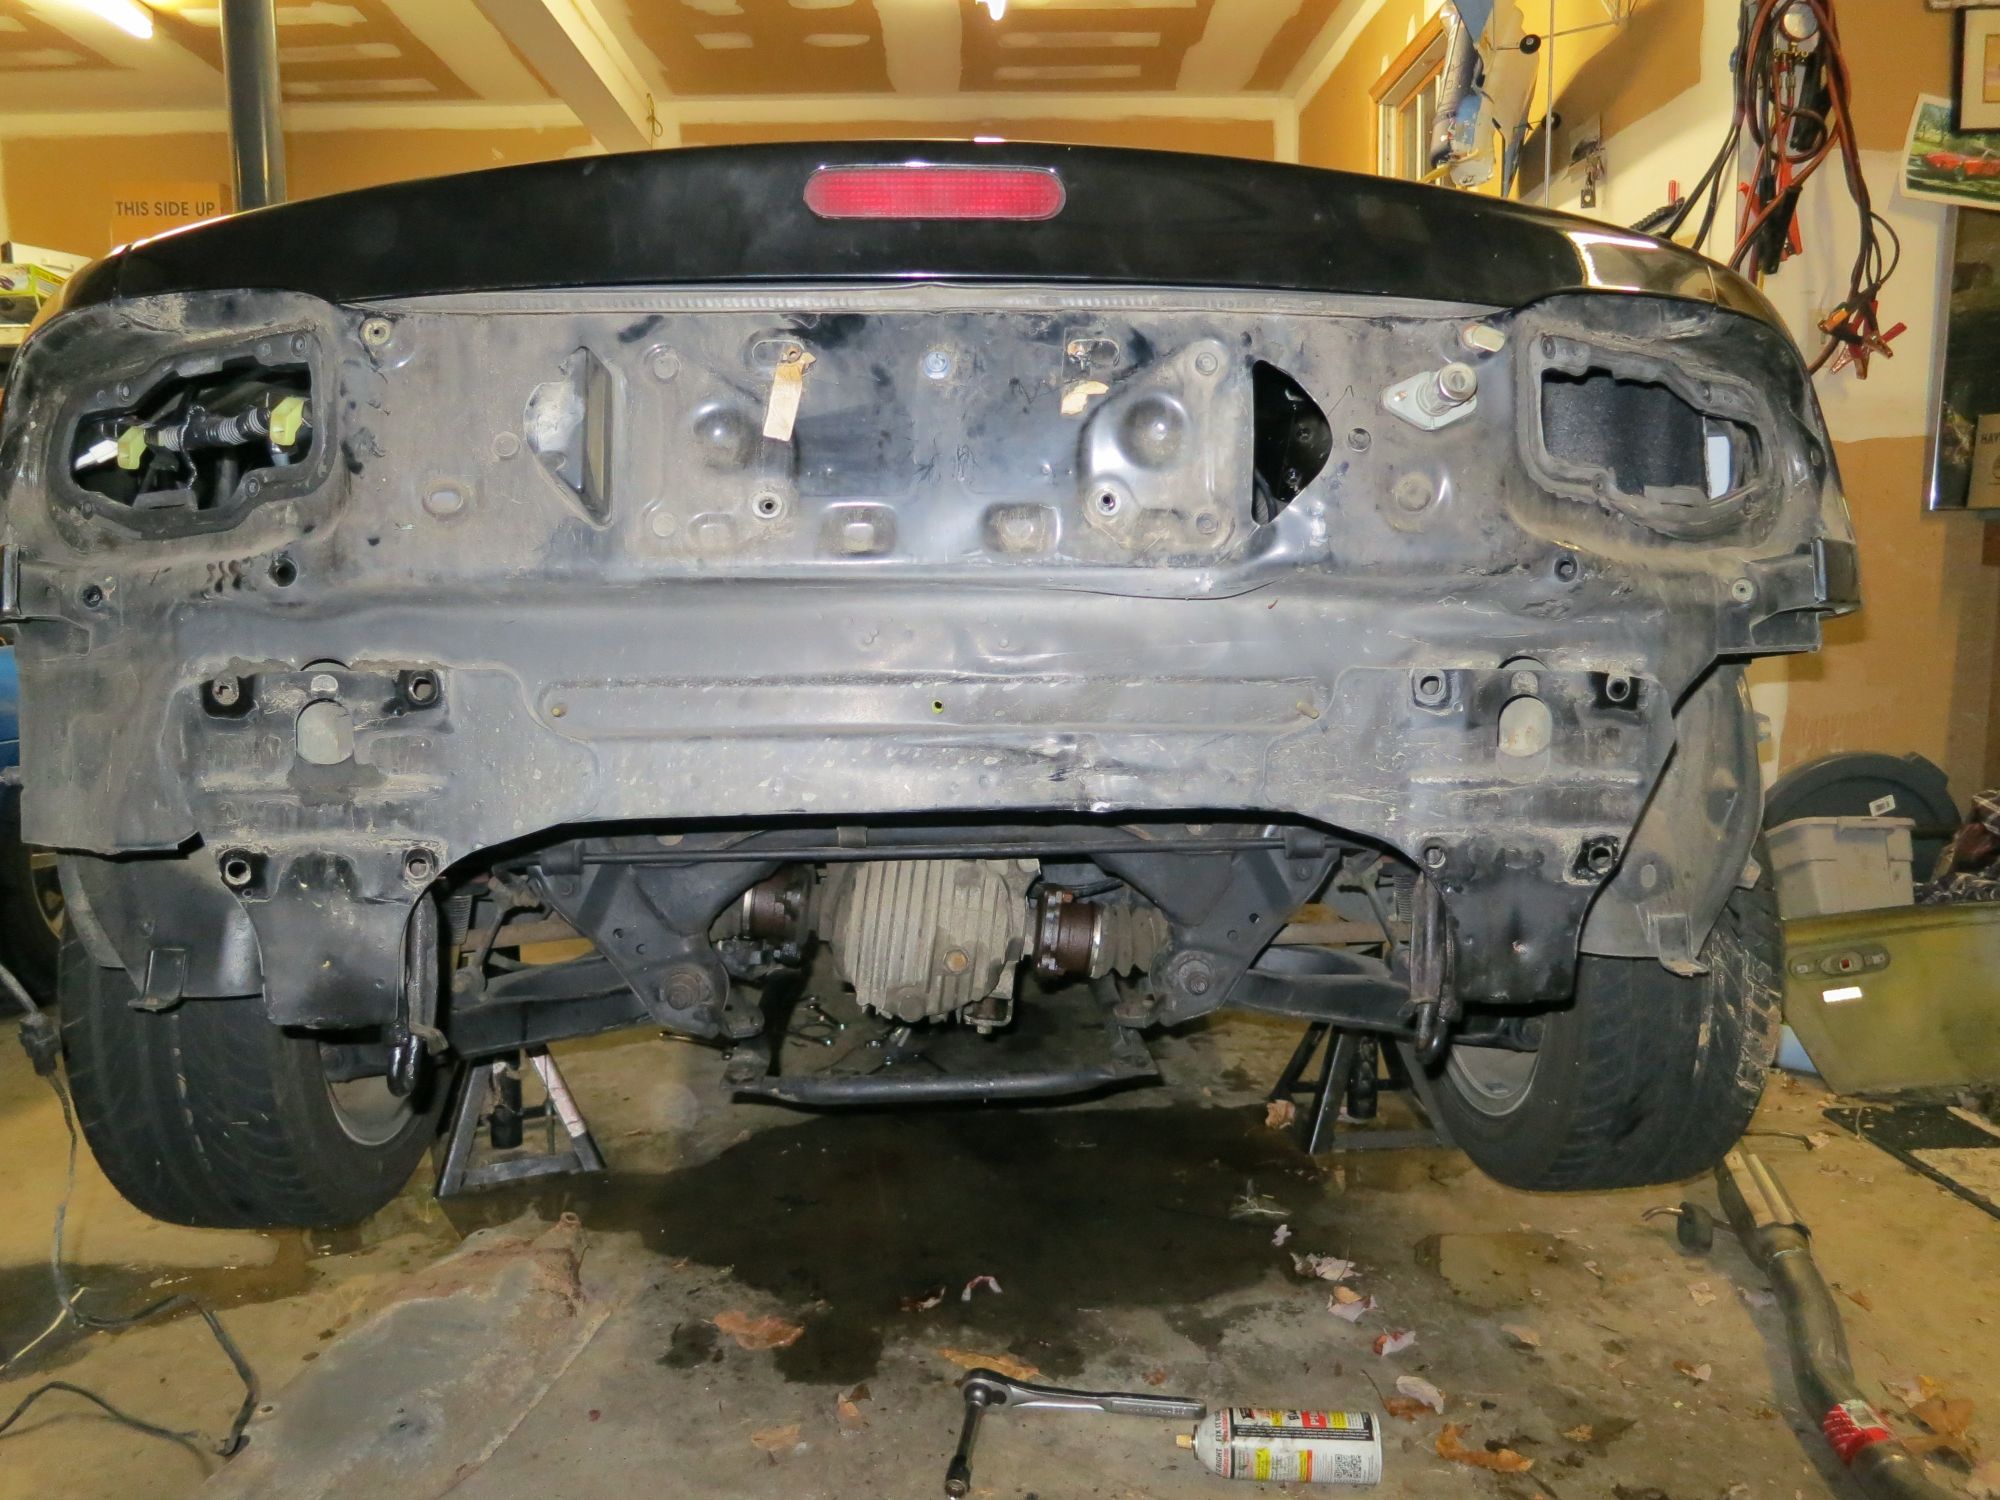
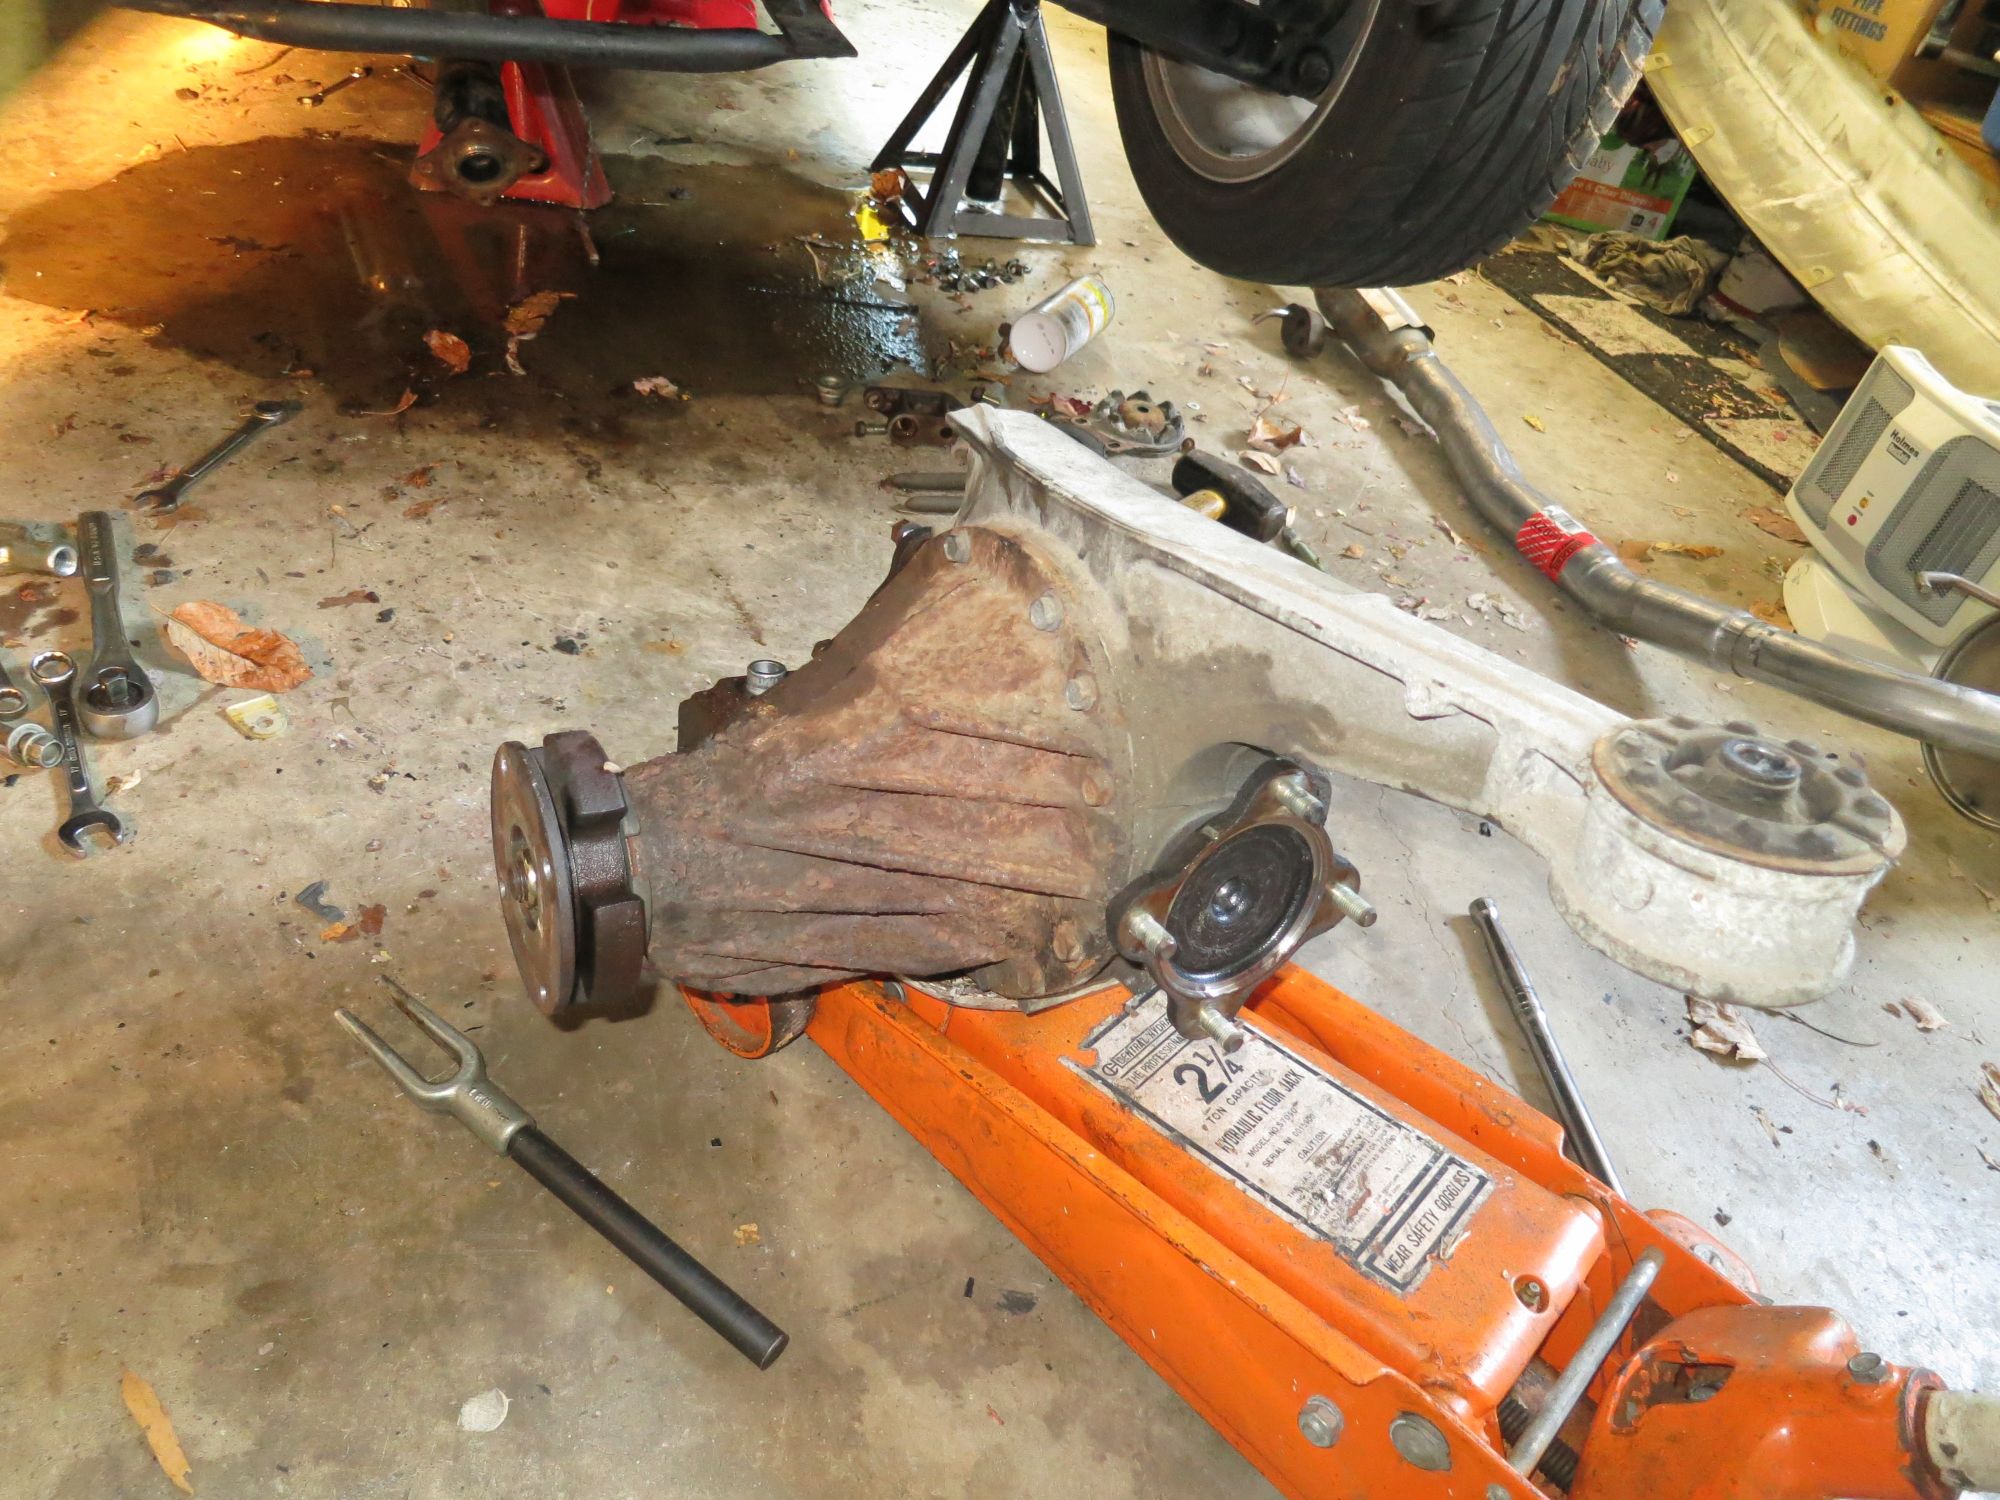
Underneath the diff mount snapped like they all do, and the frame rail from the bumper mounting point was accordioned for about 2-3 inches.
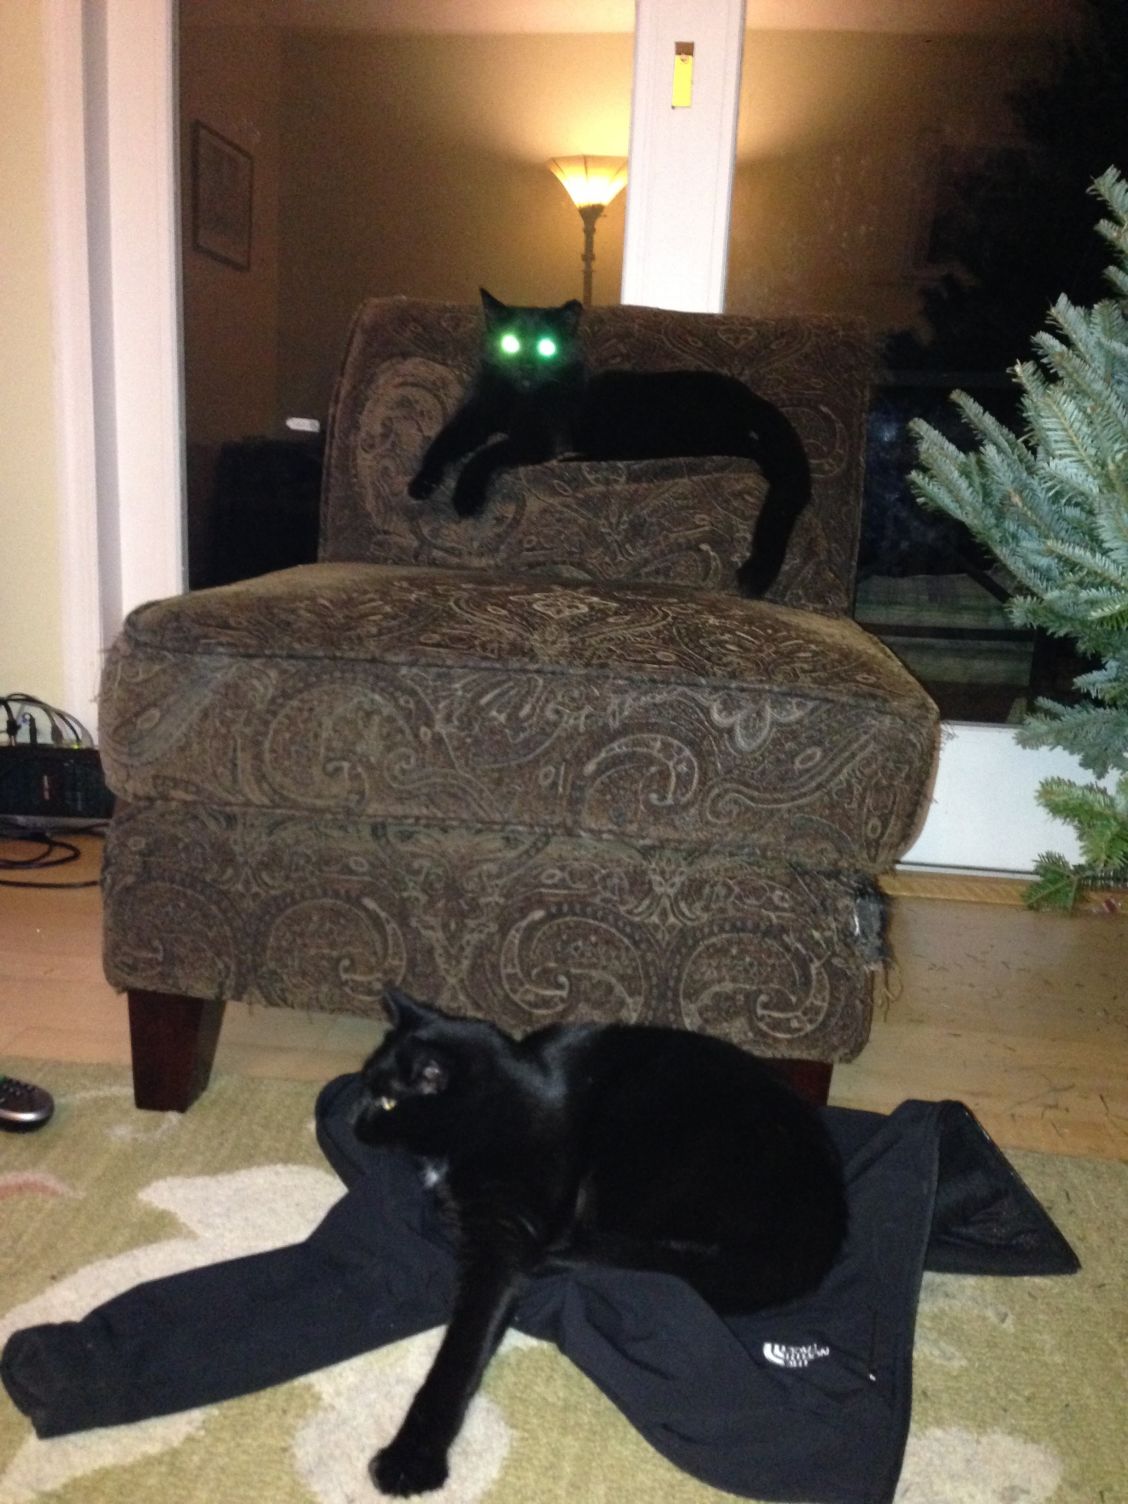
Laser cats not happy about the carnage.
So, first step to fixing was swapping the diff mount with a RX-7 mount.
Ultimately I ended up pulling the trunk, getting a new bumper and cover, and patching up the finisher. Within two weeks I had it back to 96%.
Of course the insurance company totaled the car. However, the car was basically in perfect shape, I had just completely replaced the drivetrain and suspension. Dealing with the insurance company has been a pain, but I ended up putting 20K miles on Miata since the accident, and just received payment for my loss. And, the best part is I bought the car back for salvage, so in the end I got my Miata for free.
I have done minimal work on the car since the accident, mainly because I was not sure what would ultimately be its fate. But, now that the loss has been settled, I am moving forward with the next part of my build.
I honestly don't see what's so "green" about Teslas. I've got an overly liberal friend (would be a staunch conservative in MD) who's just gaga about them.
I have to admit I always thought they were pretty damn cool, but after having met one in a violent collision, I look at them a bit differently now. And, while I have always despised tail gaters, I now have a burning hatred for them.... Even if it did get me a free Miata, without Bernie's help...
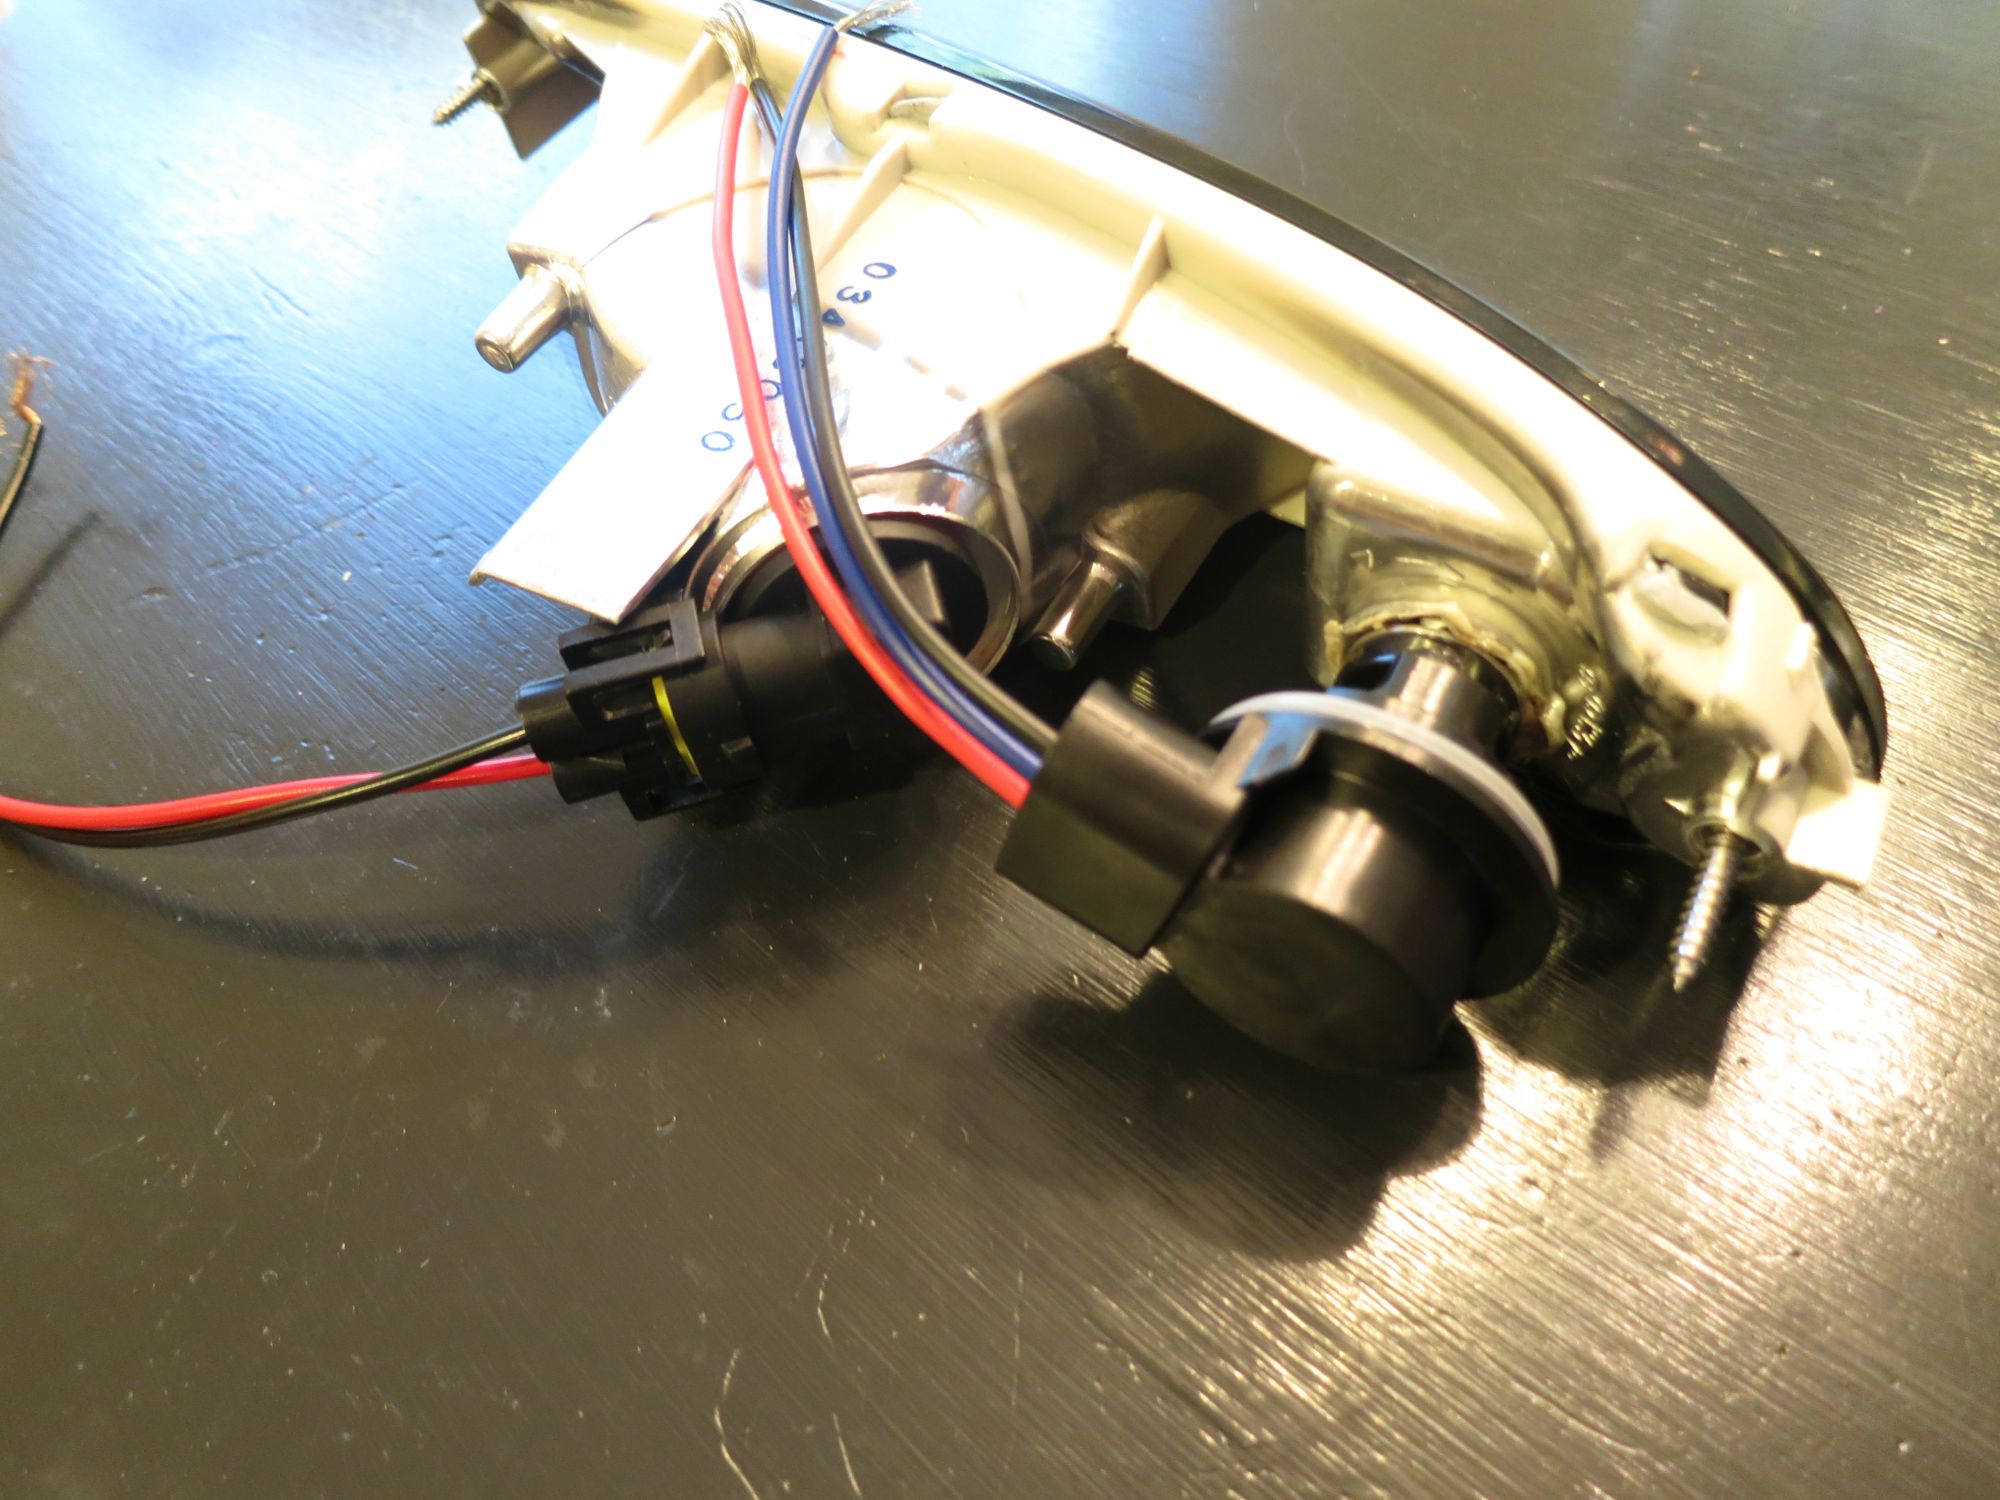
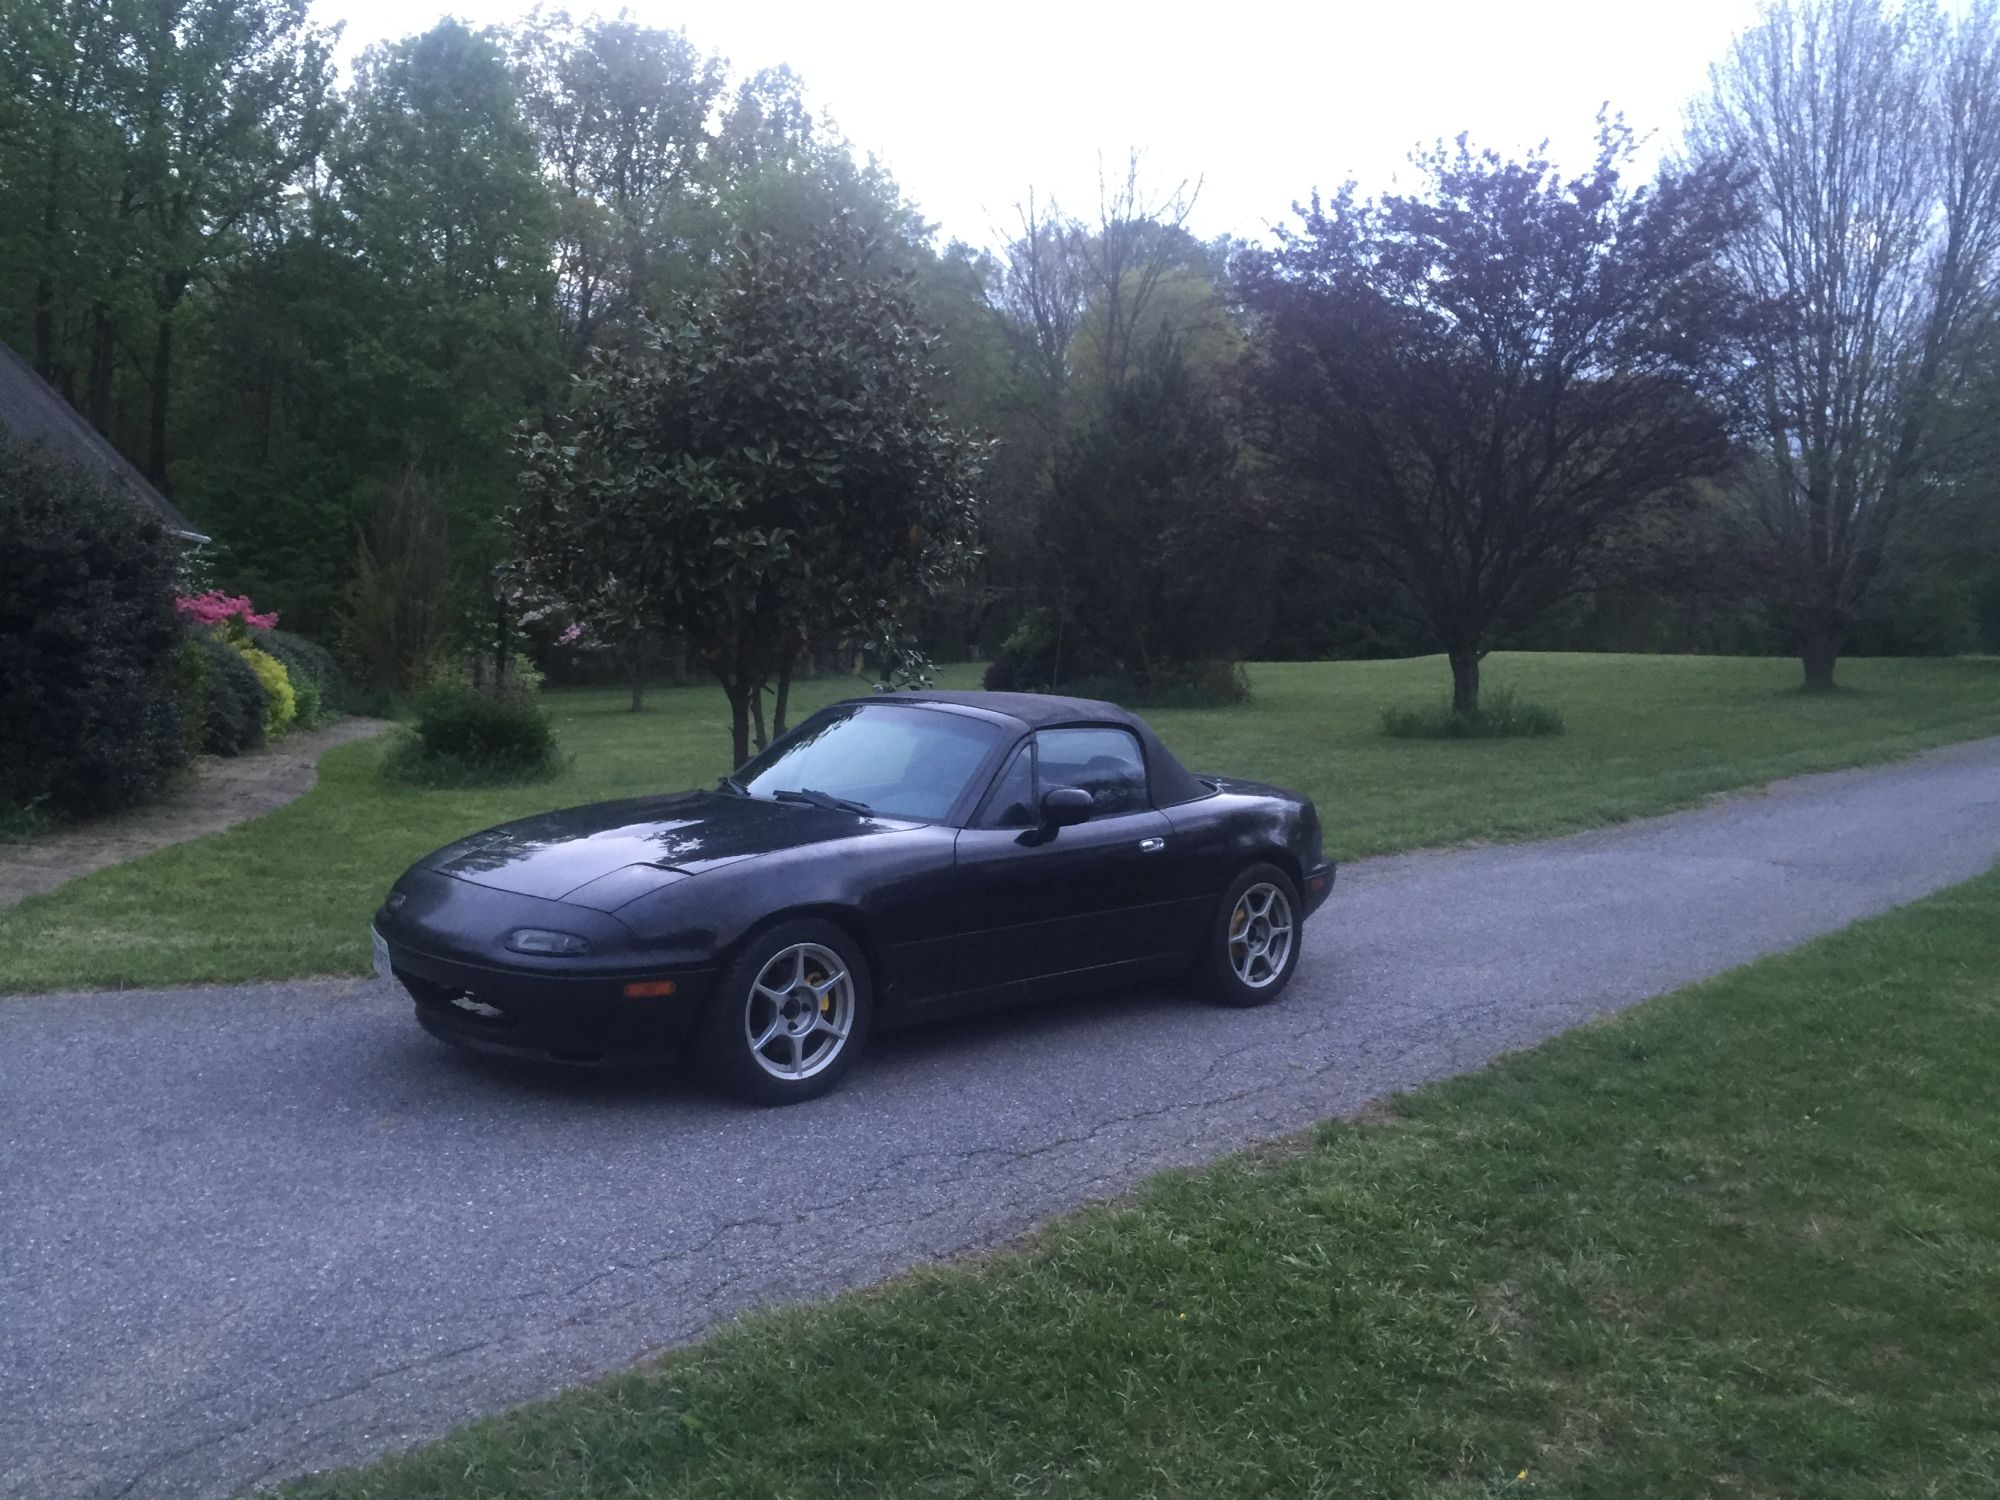
So, I have been daily driving my car for the last year or so, and after my accident I have been more cognisant of trying to make the little Miata more visible. We also have a lot of divided highway out this way that require head lights to be on, and the cops enforce it. I hate raising the barn doors, and if I just turn on my parking lights, they don't really do much, and I always forget that I left them on. So, I decided to get a couple smoked replacement lights ($50 on Ebay for a pair), and modify them. I opened up the unused half of the light and used a LED for the parking and turn signal, and used the main bay with a H11 LED.
As you can see, it worked out pretty well. I wired in a relay that turns them on whenever the the car is in Run, instant DRL. I also wired the side markers to flash with the turn signals.
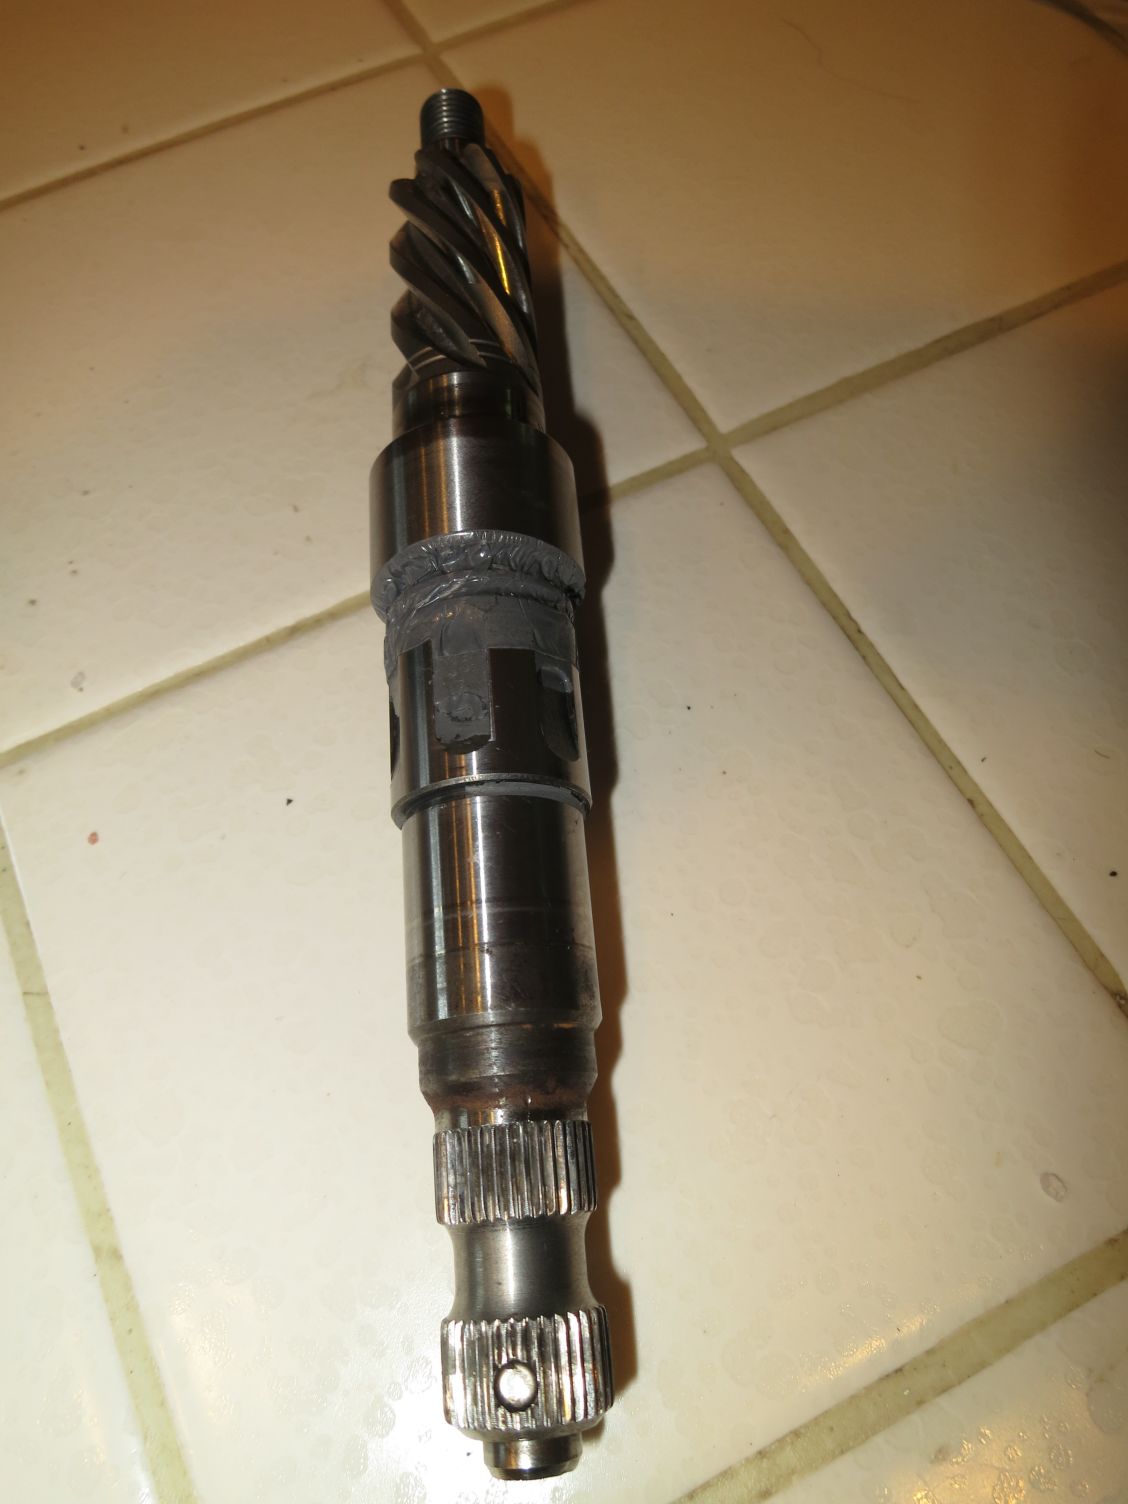
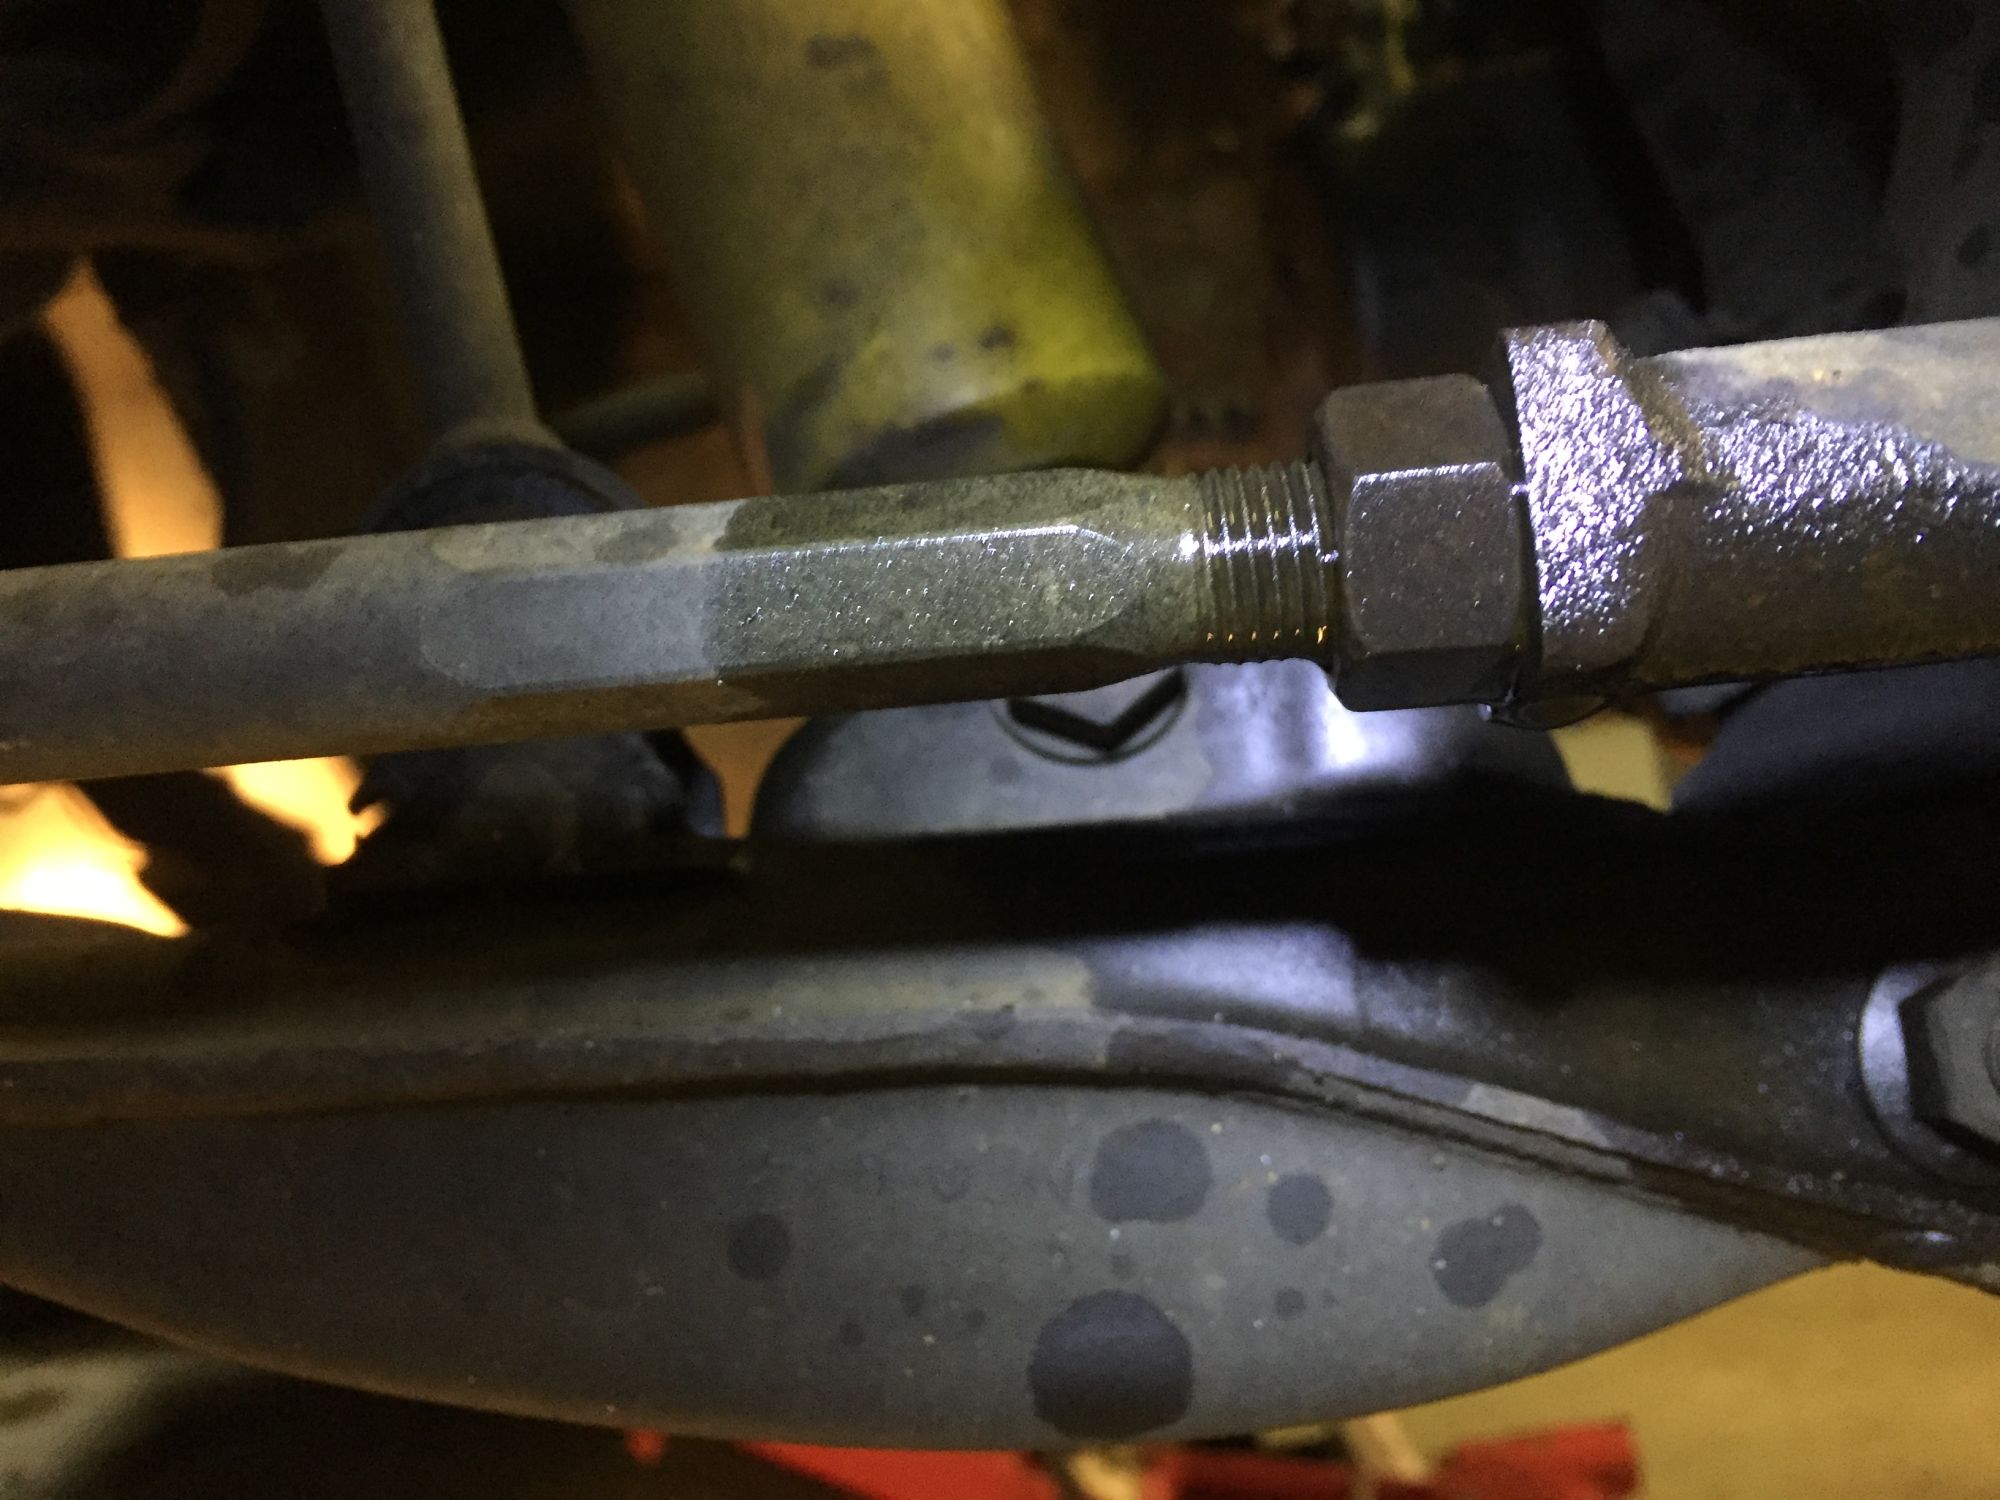
So, I finished my power steering delete this past weekend. I took a spare rack and completely gutted it, along with removing the spool valve. What I did do that was unorthodox, and pictured in one my previous pictures, was to use JB Weld to get rid of the pinion slop. I know most folks either leave as-is, or weld them up, however I felt like there were potential disadvantages, even though I know that there are a lot of cars (including lots of Spec Miatas) doing both ways. My theory is that if the internal portion of the pinion, and the key-way are filled with epoxy, this would essentially create a solid pinion.
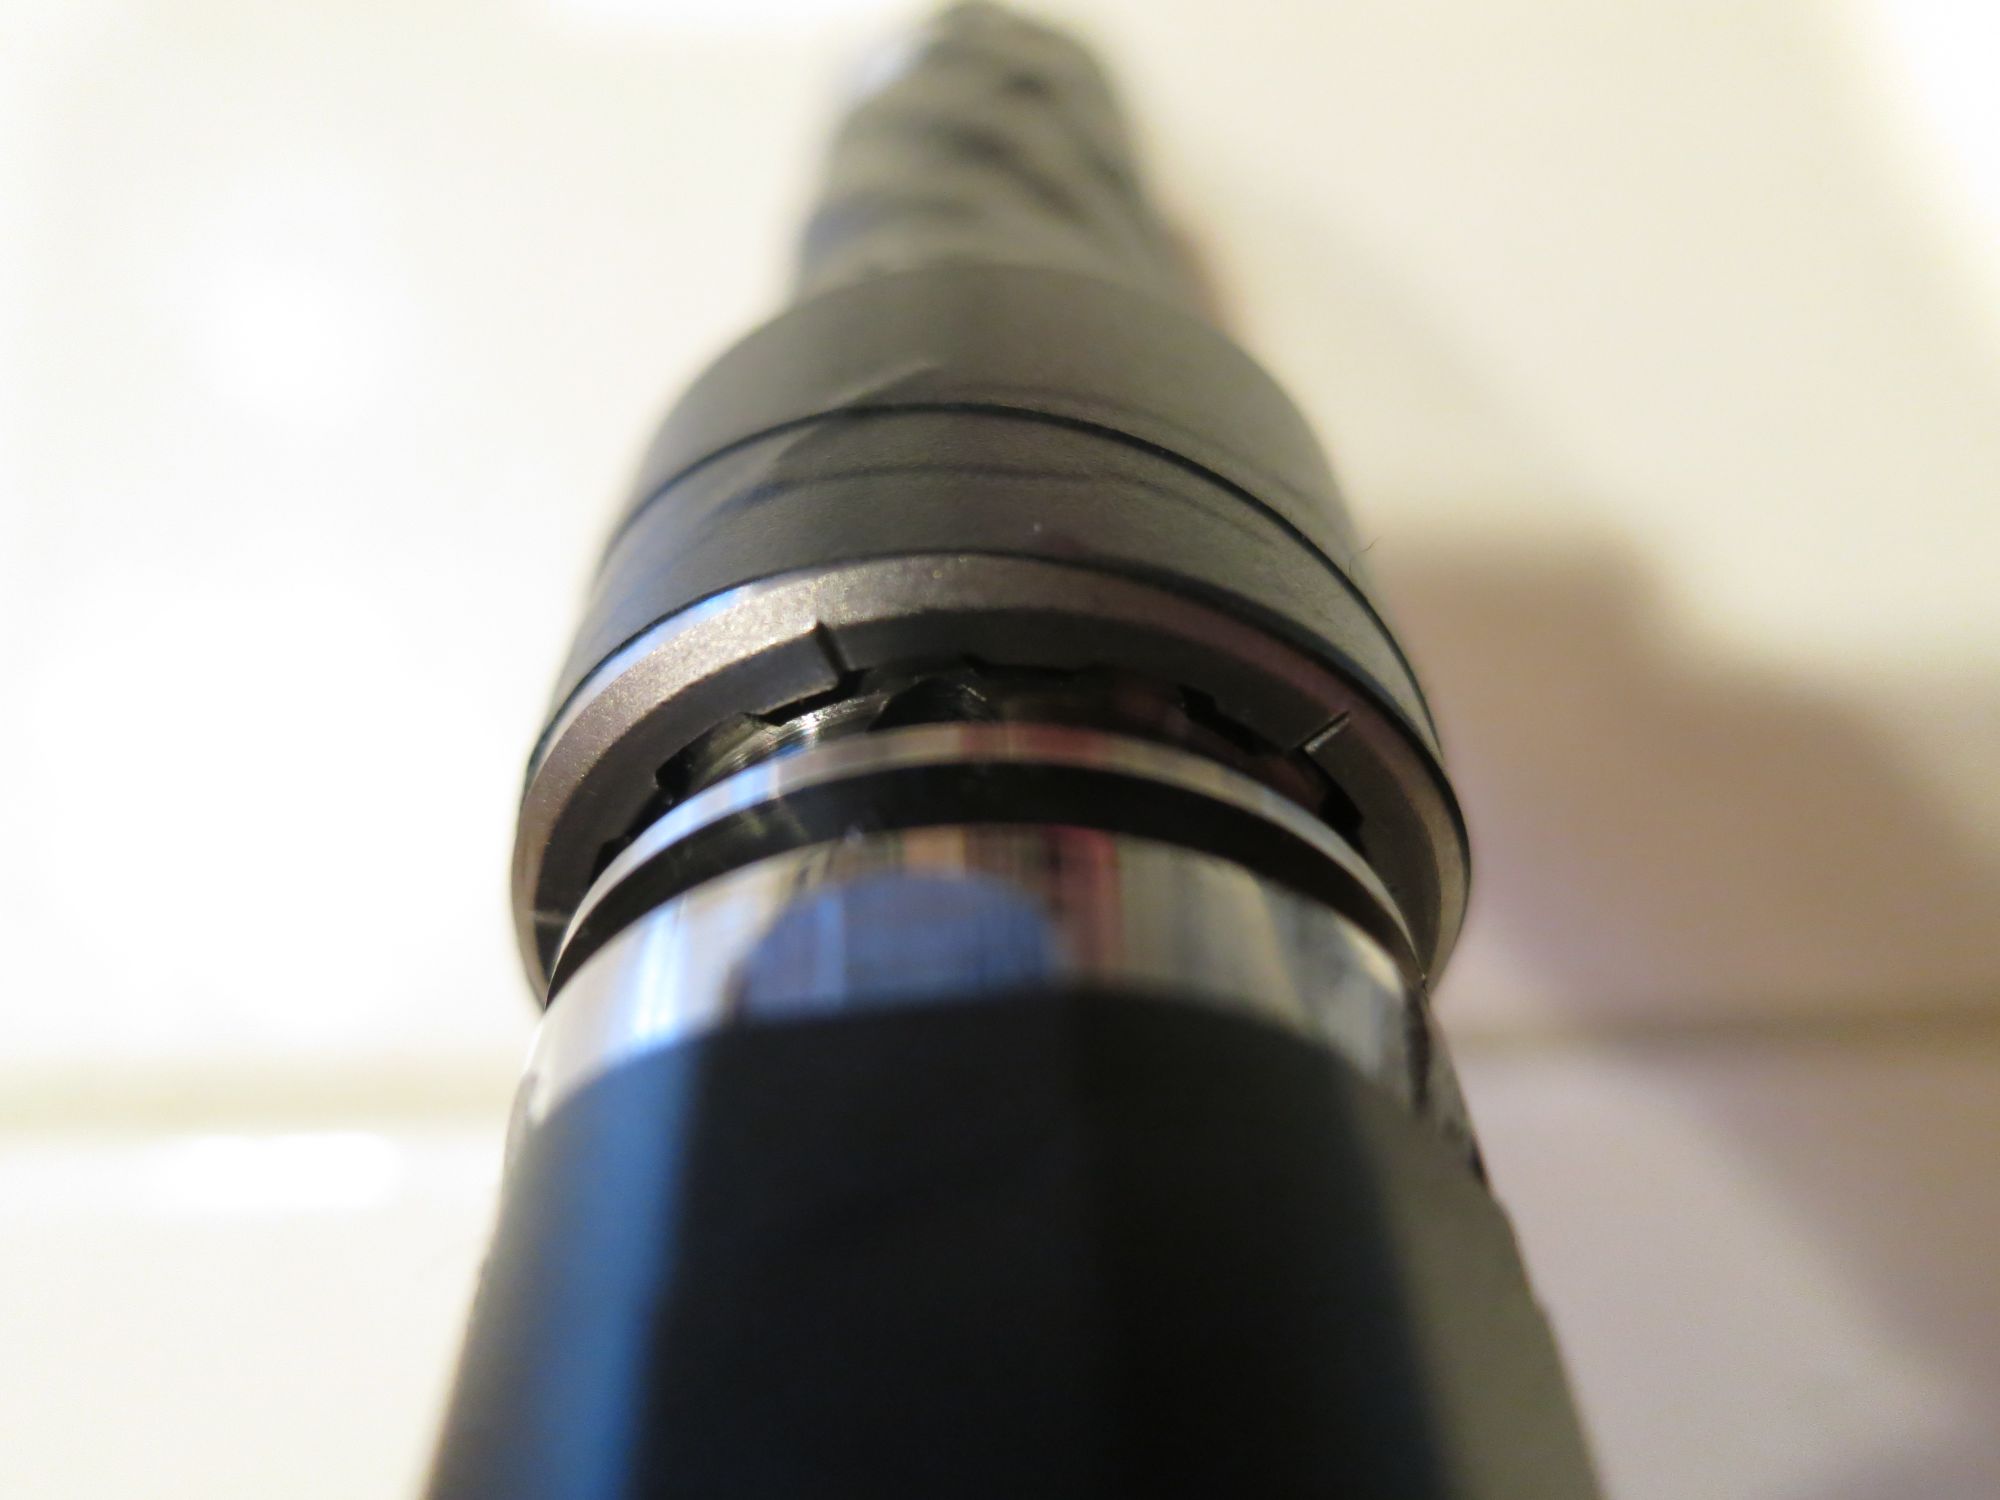
I picked up some Acetone, Carb Cleaner,syringes, and JB Weld at my favorite Tractor Supply. Interestingly, you now have to show ID to buy both carb cleaner and acetone... I thoroughly cleaned the pinion, and used the syringes to flood it with acetone. After it dried, I plugged up all but one of the openings at the top. After mixed up some JB Weld with a VERY small amount of acetone, I sucked it up with a syringe. I then slowly injected it into one hole, rotating the pinion as I went. It slowly oozed out of the key-way, and I rotated the pinion to keep from dripping all over the place. I used some plastic sheet to tightly wrap it, secured with tape. I let it set for 48 hours, and then removed the plastic. As you can see above, it completely sealed the whole pinion.
After that was complete, the rest was easy. I removed the old rack, the boots and tie rods were all actually in awesome shape for a car with 170K on the chassis. I find it hard to believe the previous owner would have replaced them, but who knows... Anyhow, I replaced inner rods, boots, and swapped in the R tie rod ends (last purchase from Rosenthal before they shut down). I got my toe-in set, and put some miles on it. The feel is incredible, and I am glad I was able to get the power steering pump removed before the turbo happens. I should also thank @sixshooter for posting the belt required for running the A/C without an idler pulley. "I'm running the AC compressor right off the crank pulley. Find the right belt. Here it is: 4PK0775 or 5040305"
I have put a couple hundred miles on my JB Welded steering rack pinion, and so far no issues. I even lucked out and my tape measure toe-in appears to have gotten me close, and the steering wheel is actually centered now. I was actually hoping that I would get some comments that I was crazy to JB Weld my steering rack together... Although I have been very happy putting 30K miles on my budget Bilstein coil-overs, I do plan on making a couple further changes to my suspension in the next few months, so I will hold off getting a real alignment until those are complete. My lower ball-joints definitely look like they could use some love, and I am thinking about some extended top-hats in the rear so I can lower the car another half inch or so and still stay off the bump-stops.
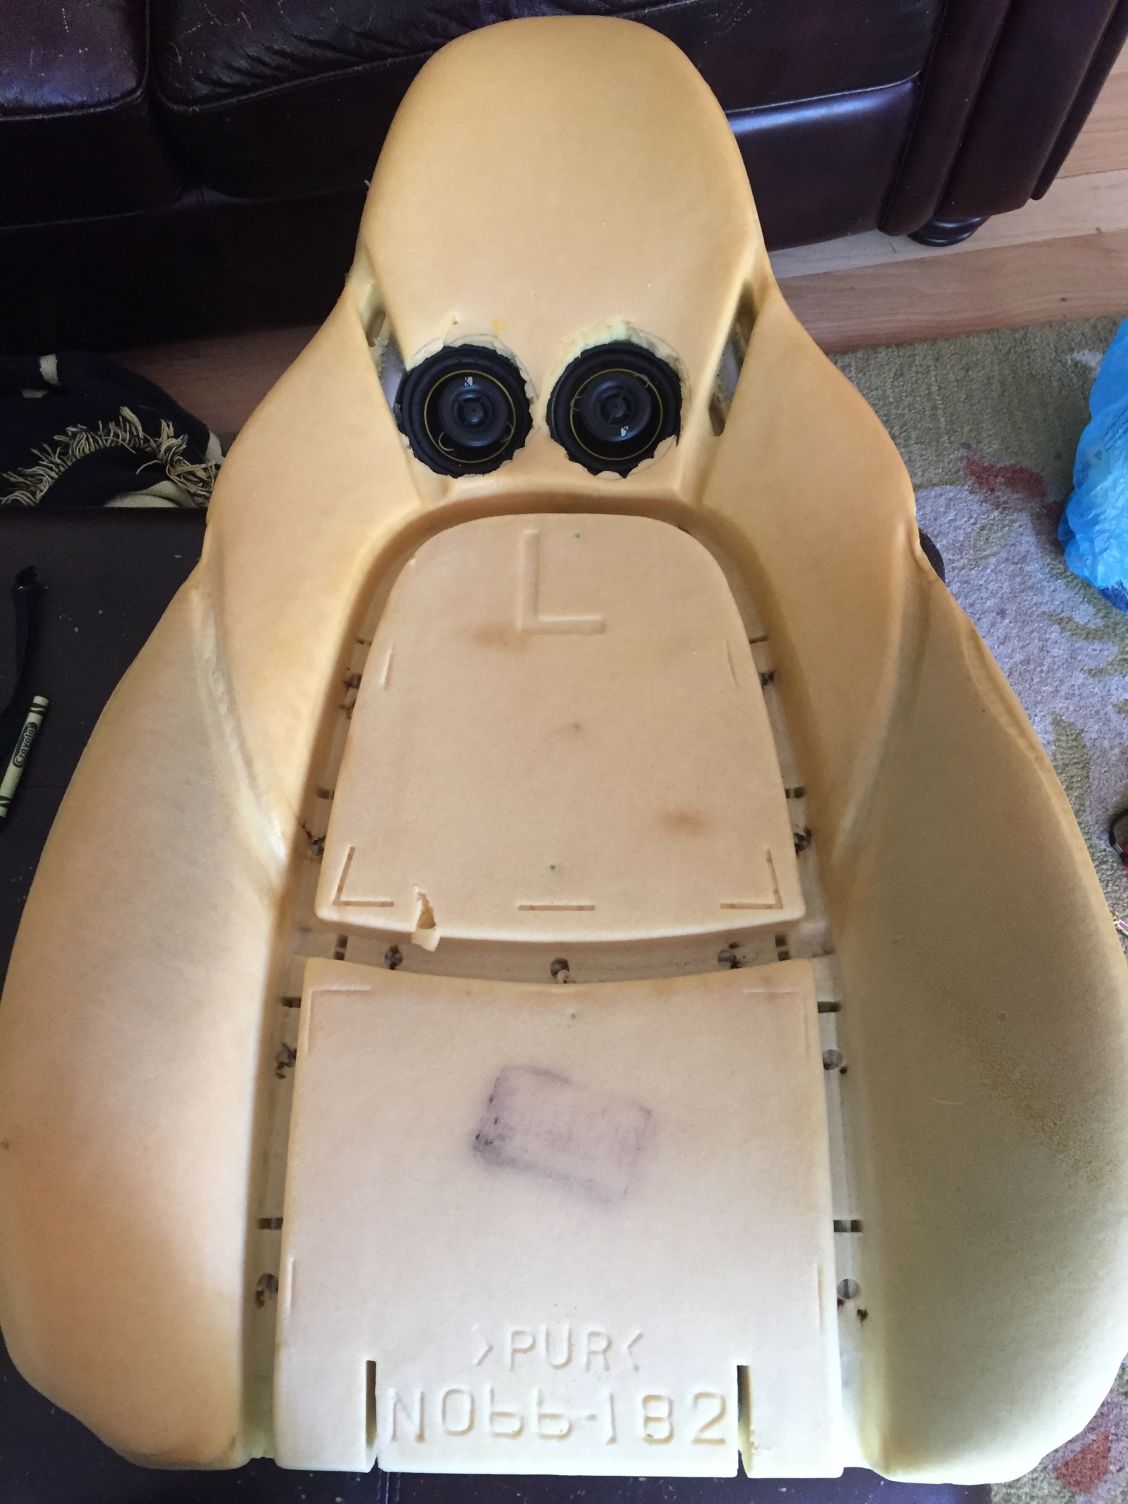
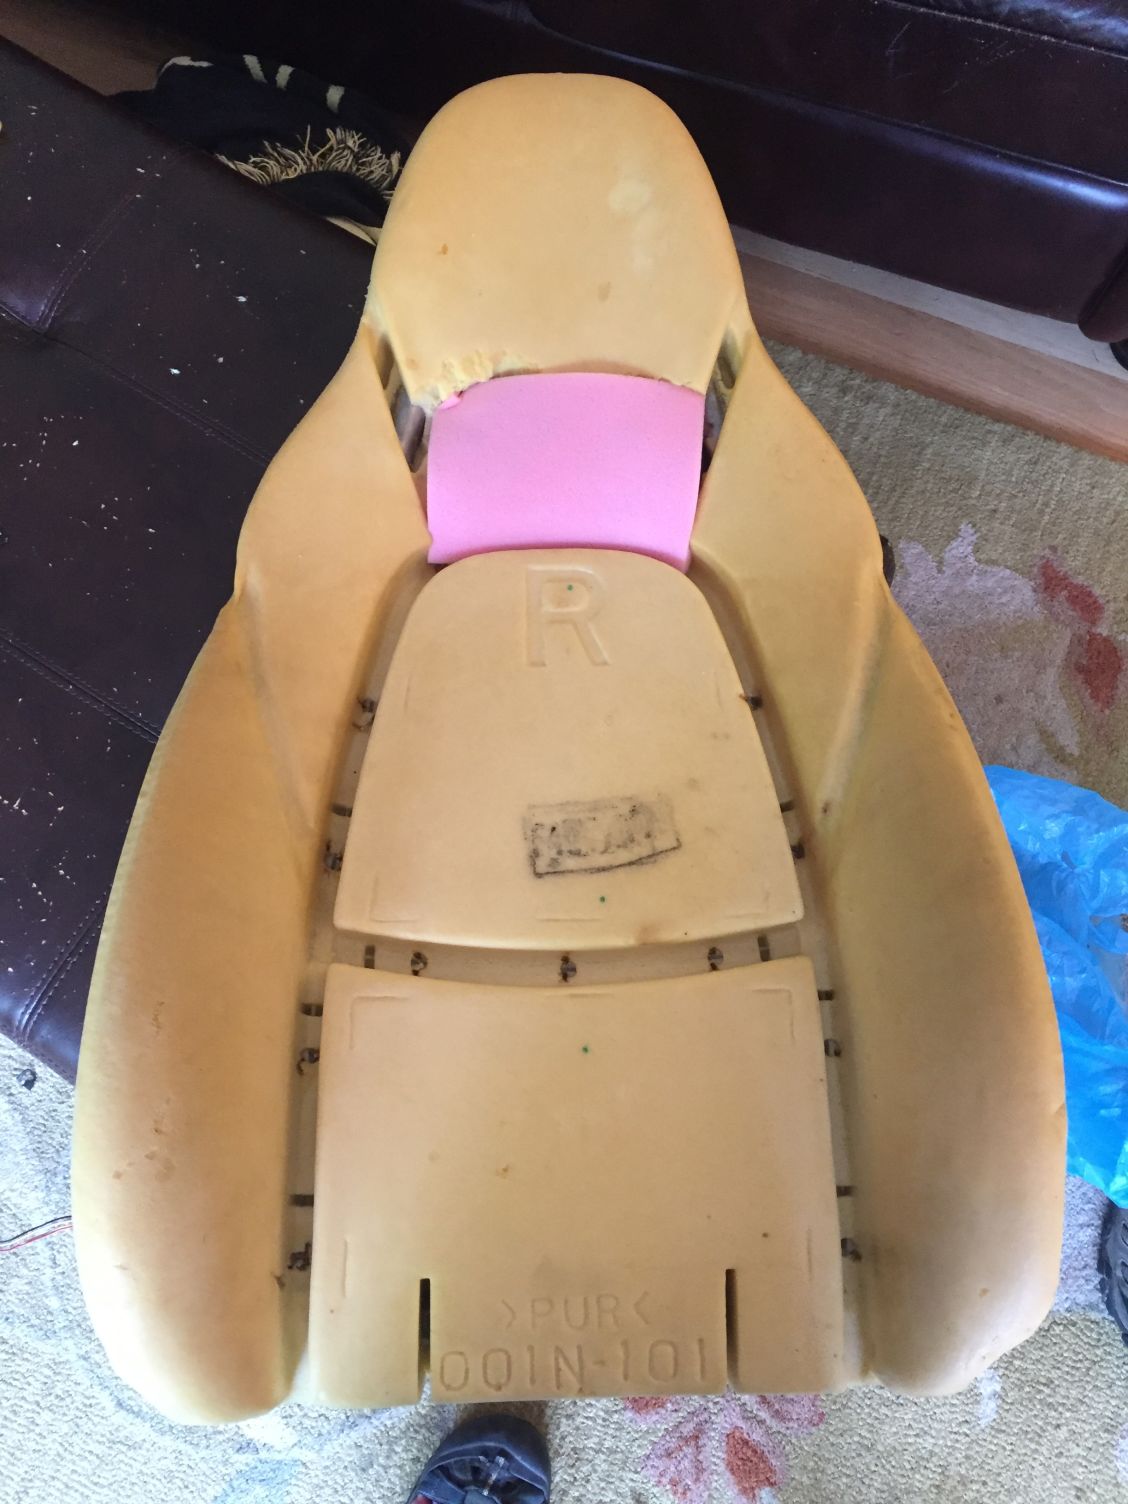
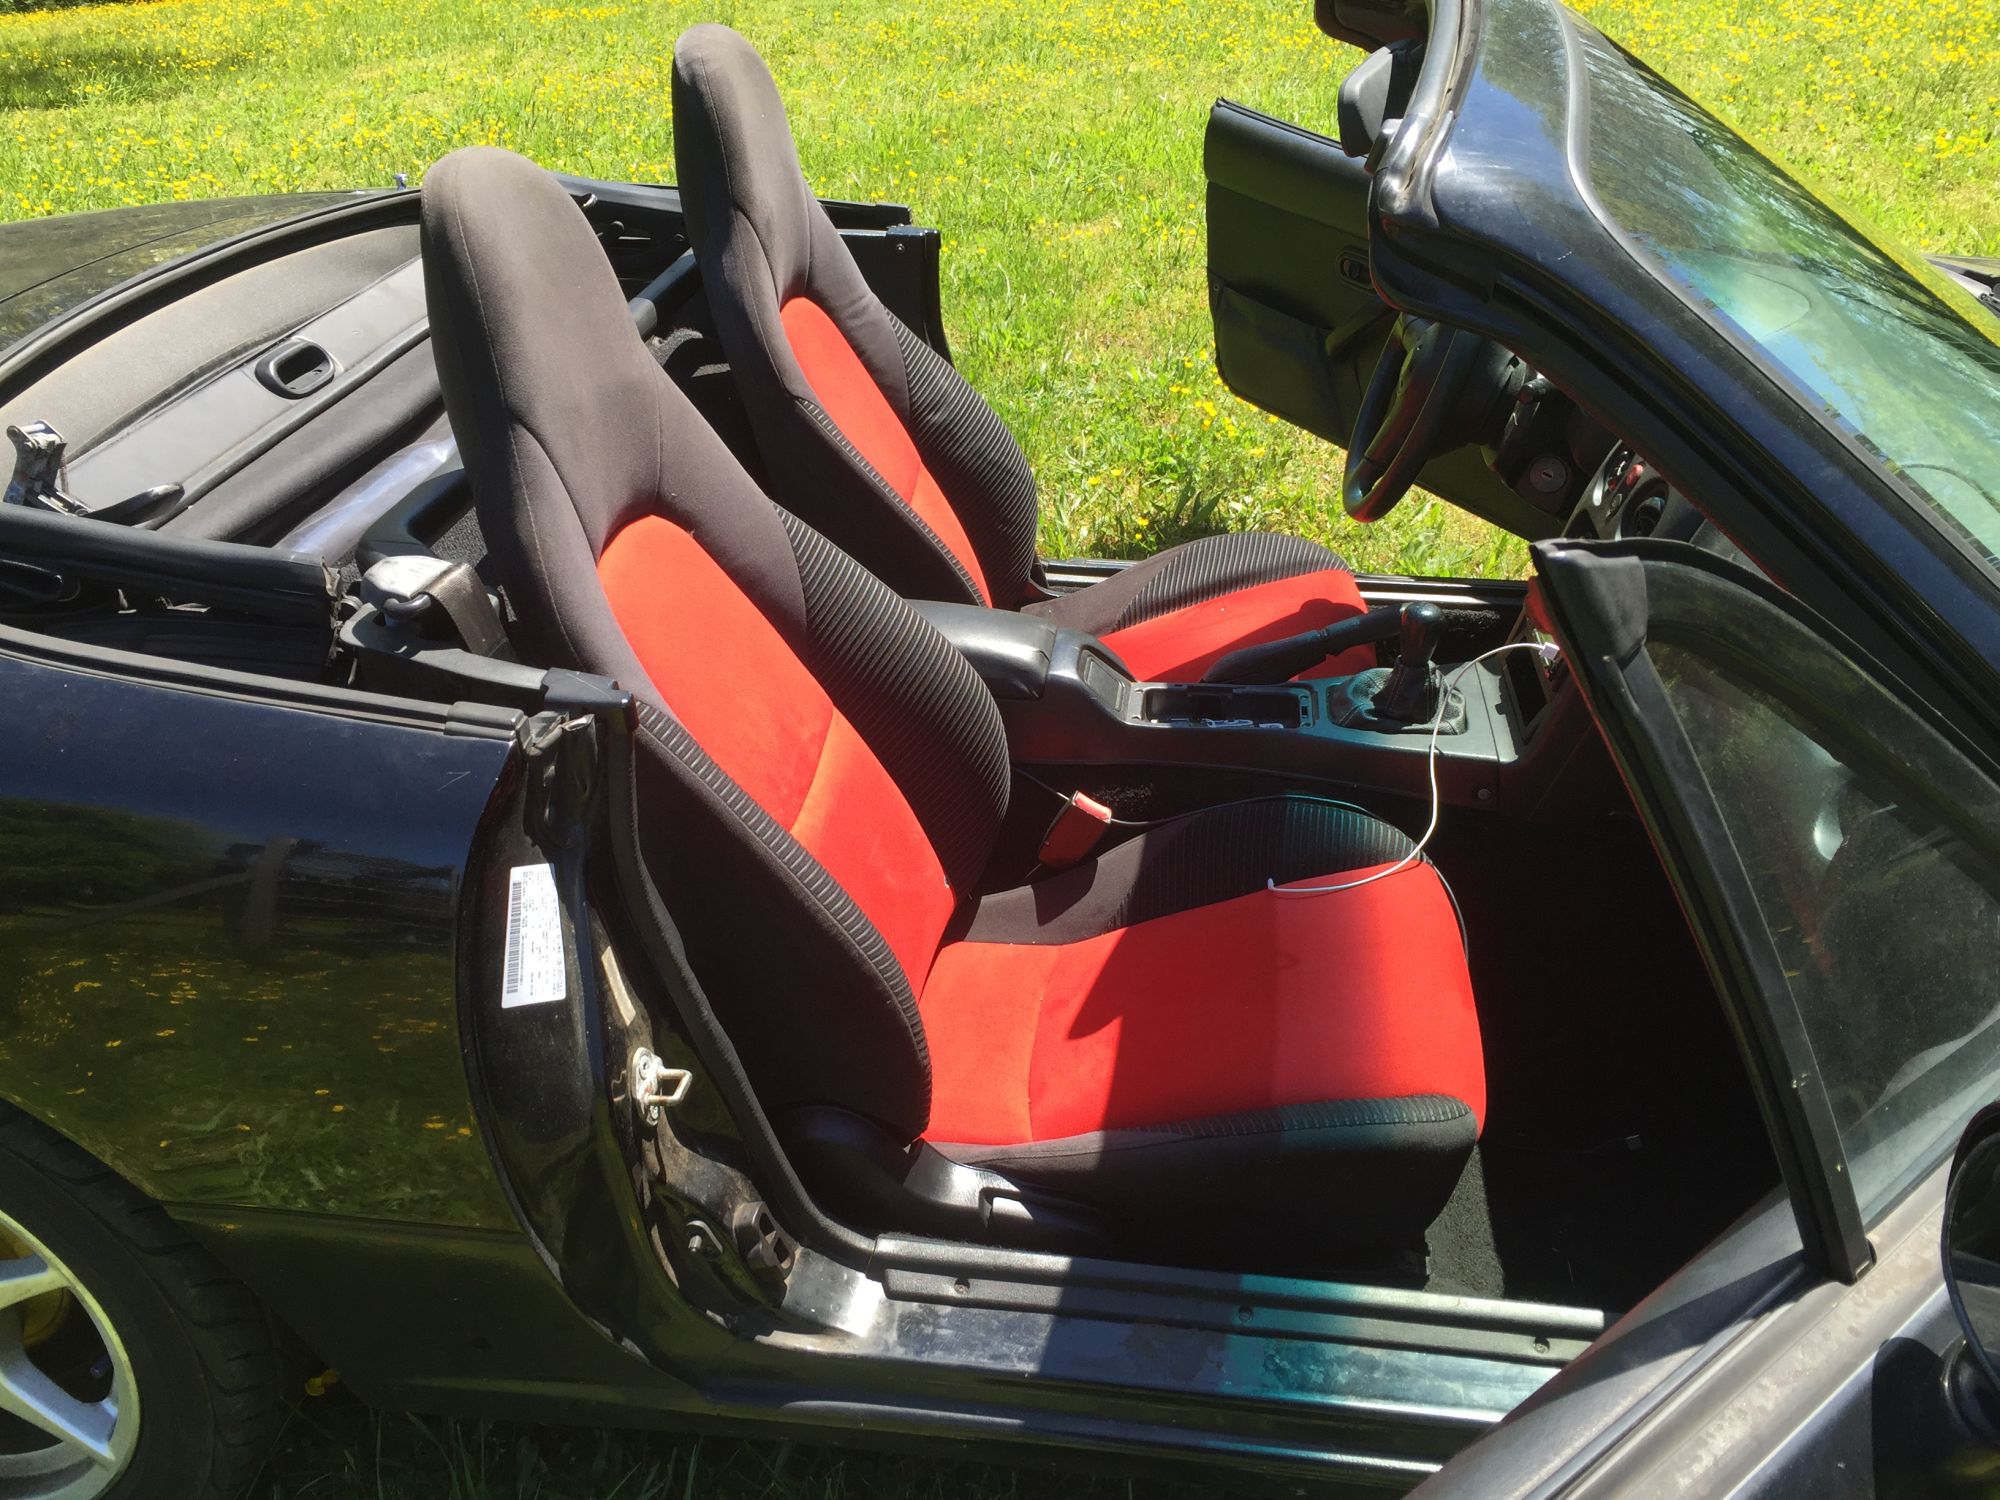
Last weekend I was able to score a set of Minty MSM seats from @airbrush1, my old seats were a bit worn, and I really wanted to get some extra head support in case I ever get rear-ended again. Because I daily this car, and need some tunes for the ride, I really wanted to keep my headrest speakers. So, a couple hog-rings later, I pulled the covers and cut into some pristine MSM foam.
This location was perfect, the speakers fit in nicely, and it actually ends up about neck level. A little extra foam over the top, a couple zip-ties, and it was all ready to go into the car. I cleaned out 20 years of crap under the driver's seat, and was thankful that I did not find any hidden signs of rust.
It has been a little over a year since my last update, however I should have a bunch more shortly. I recently sold my house, and while I am losing a ton of garage space (and yard space), it has helped free up some cash for the next phase of my build. Three years, and 40K miles, after I picked this sucker up, it is finally going to get a turbo.
I pulled the Trigger on a MKTurbo, I have the order in with Lars and am hoping to have it in my hands by the end of July. I also started the process by getting a nice shiny Vibrant intercooler that will be getting installed shortly.
One of the downsides of moving is that I needed to put the Lotus into storage. My original plan was to sell it to help fund a place down in Clearwater, FL. But, everytime I drive it, I change my mind and decide to hold on to it for a little while longer. This picture was taken on the way to storage, seems as if the more things change, the more they stay the same...
I would not sell for less than 30K. Will probably list at 35K. It has a hardtop, and while I put 50K miles on it, they were mostly easy miles, no track time. It also is a fairly rare color, and never had any body damage. Hard to find an unmolested early Elise anymore.
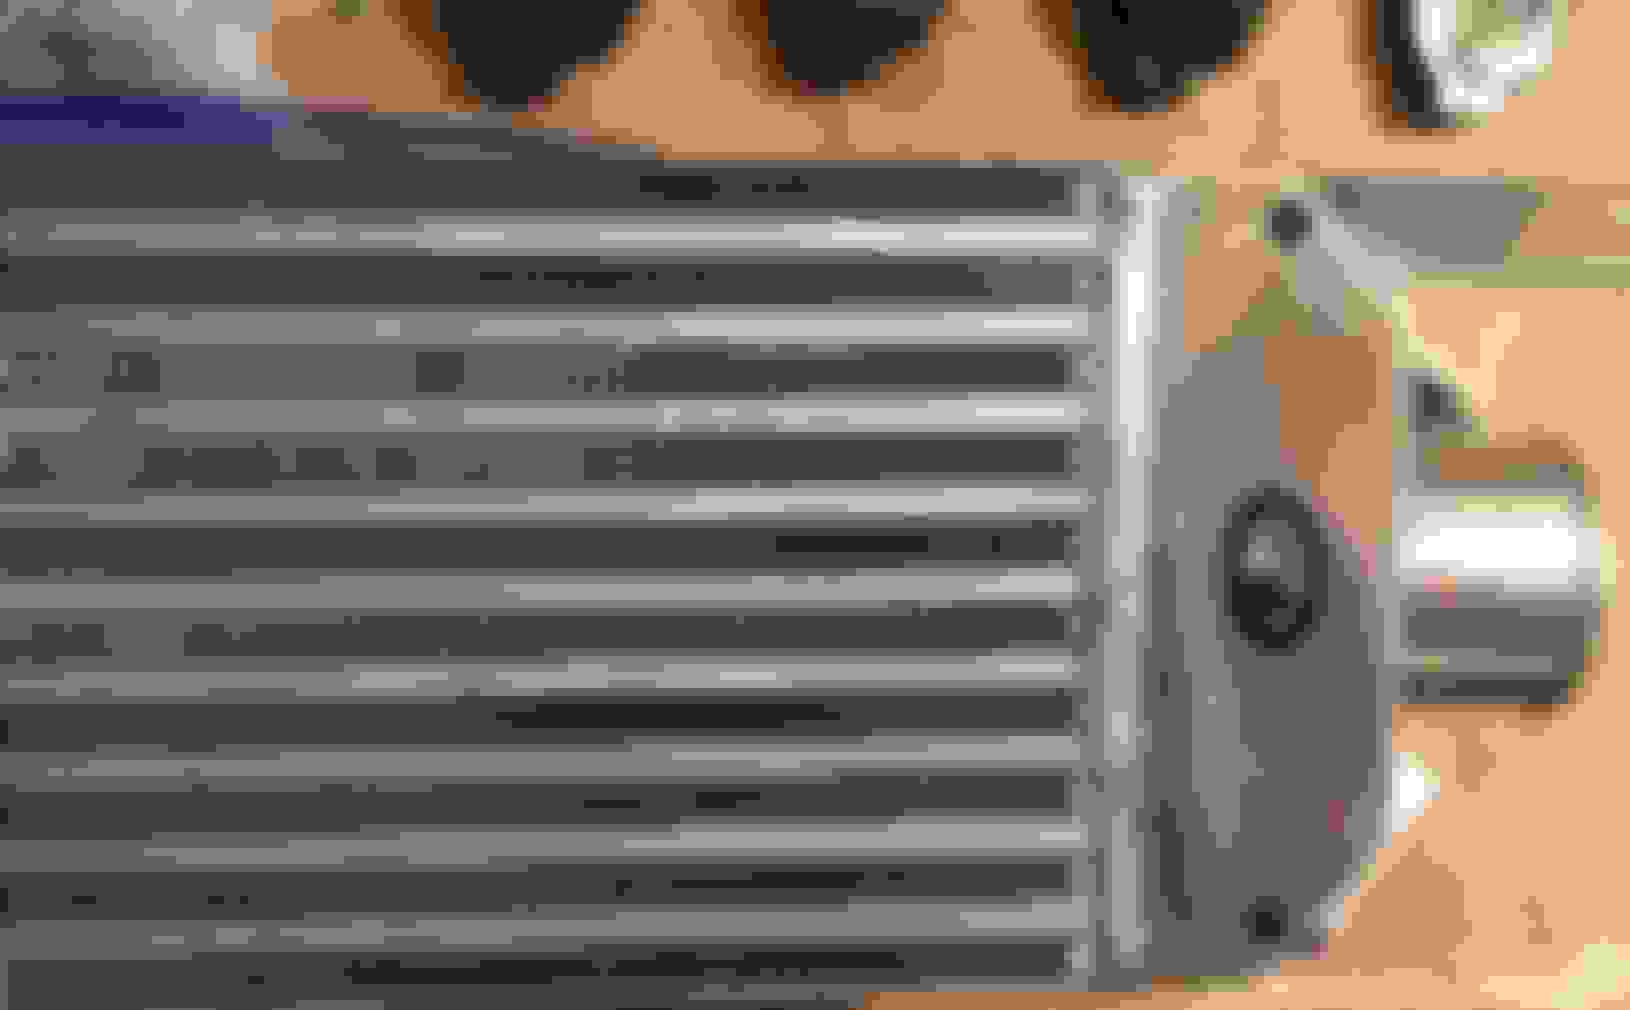
Although I have a couple weeks before my MKTurbo arrives, I have started working on installing the intercooler, IAT, and piping. I went with the FAB9 Vibrant intercooler. I know, I know, I could have bought the same unit on Amazon for $100 less. However, I did not want to fiddle around fabbing the support brackets, so I pushed the easy button. I have heard the horror stories with FAB9 customer service, however the unit arrived in three days, and looks great.
The first step was removing the front bumper and my baby teeth which were still on the car.
Then I test fit the unit.
I plan on installing the IAT on the cold side of the intercooler. I have marked where I plan on placing it. I will start drilling tomorrow after work, so please let me know if I am making a critical mistake. Or, just say, yep, that is where it goes. On Lars advice I will be running 2" pipe on both the hot and cold side. They are on order, hopefully will get here by the weekend. Has anybody ever run an intercooler N/A? I wonder what it will do to my temps if anything.


 0
0