When you click on links to various merchants on this site and make a purchase, this can result in this site earning a commission. Affiliate programs and affiliations include, but are not limited to, the eBay Partner Network.
Ive been seriously considering prepping this car for a race class. My first inclination was to see if I could run in PT, but even with the B16 the power to weight is too far out of line. So Im now looking into the global time attack "street" class. The rules are weird enough to allow even a highly modified car run pretty easily. Still just researching.
In the mean time Im going to try to get out to some more local autocross events. Ive only been once in this car since Ive had it and it was a bit of a **** show because I was so unfamiliar with the car.
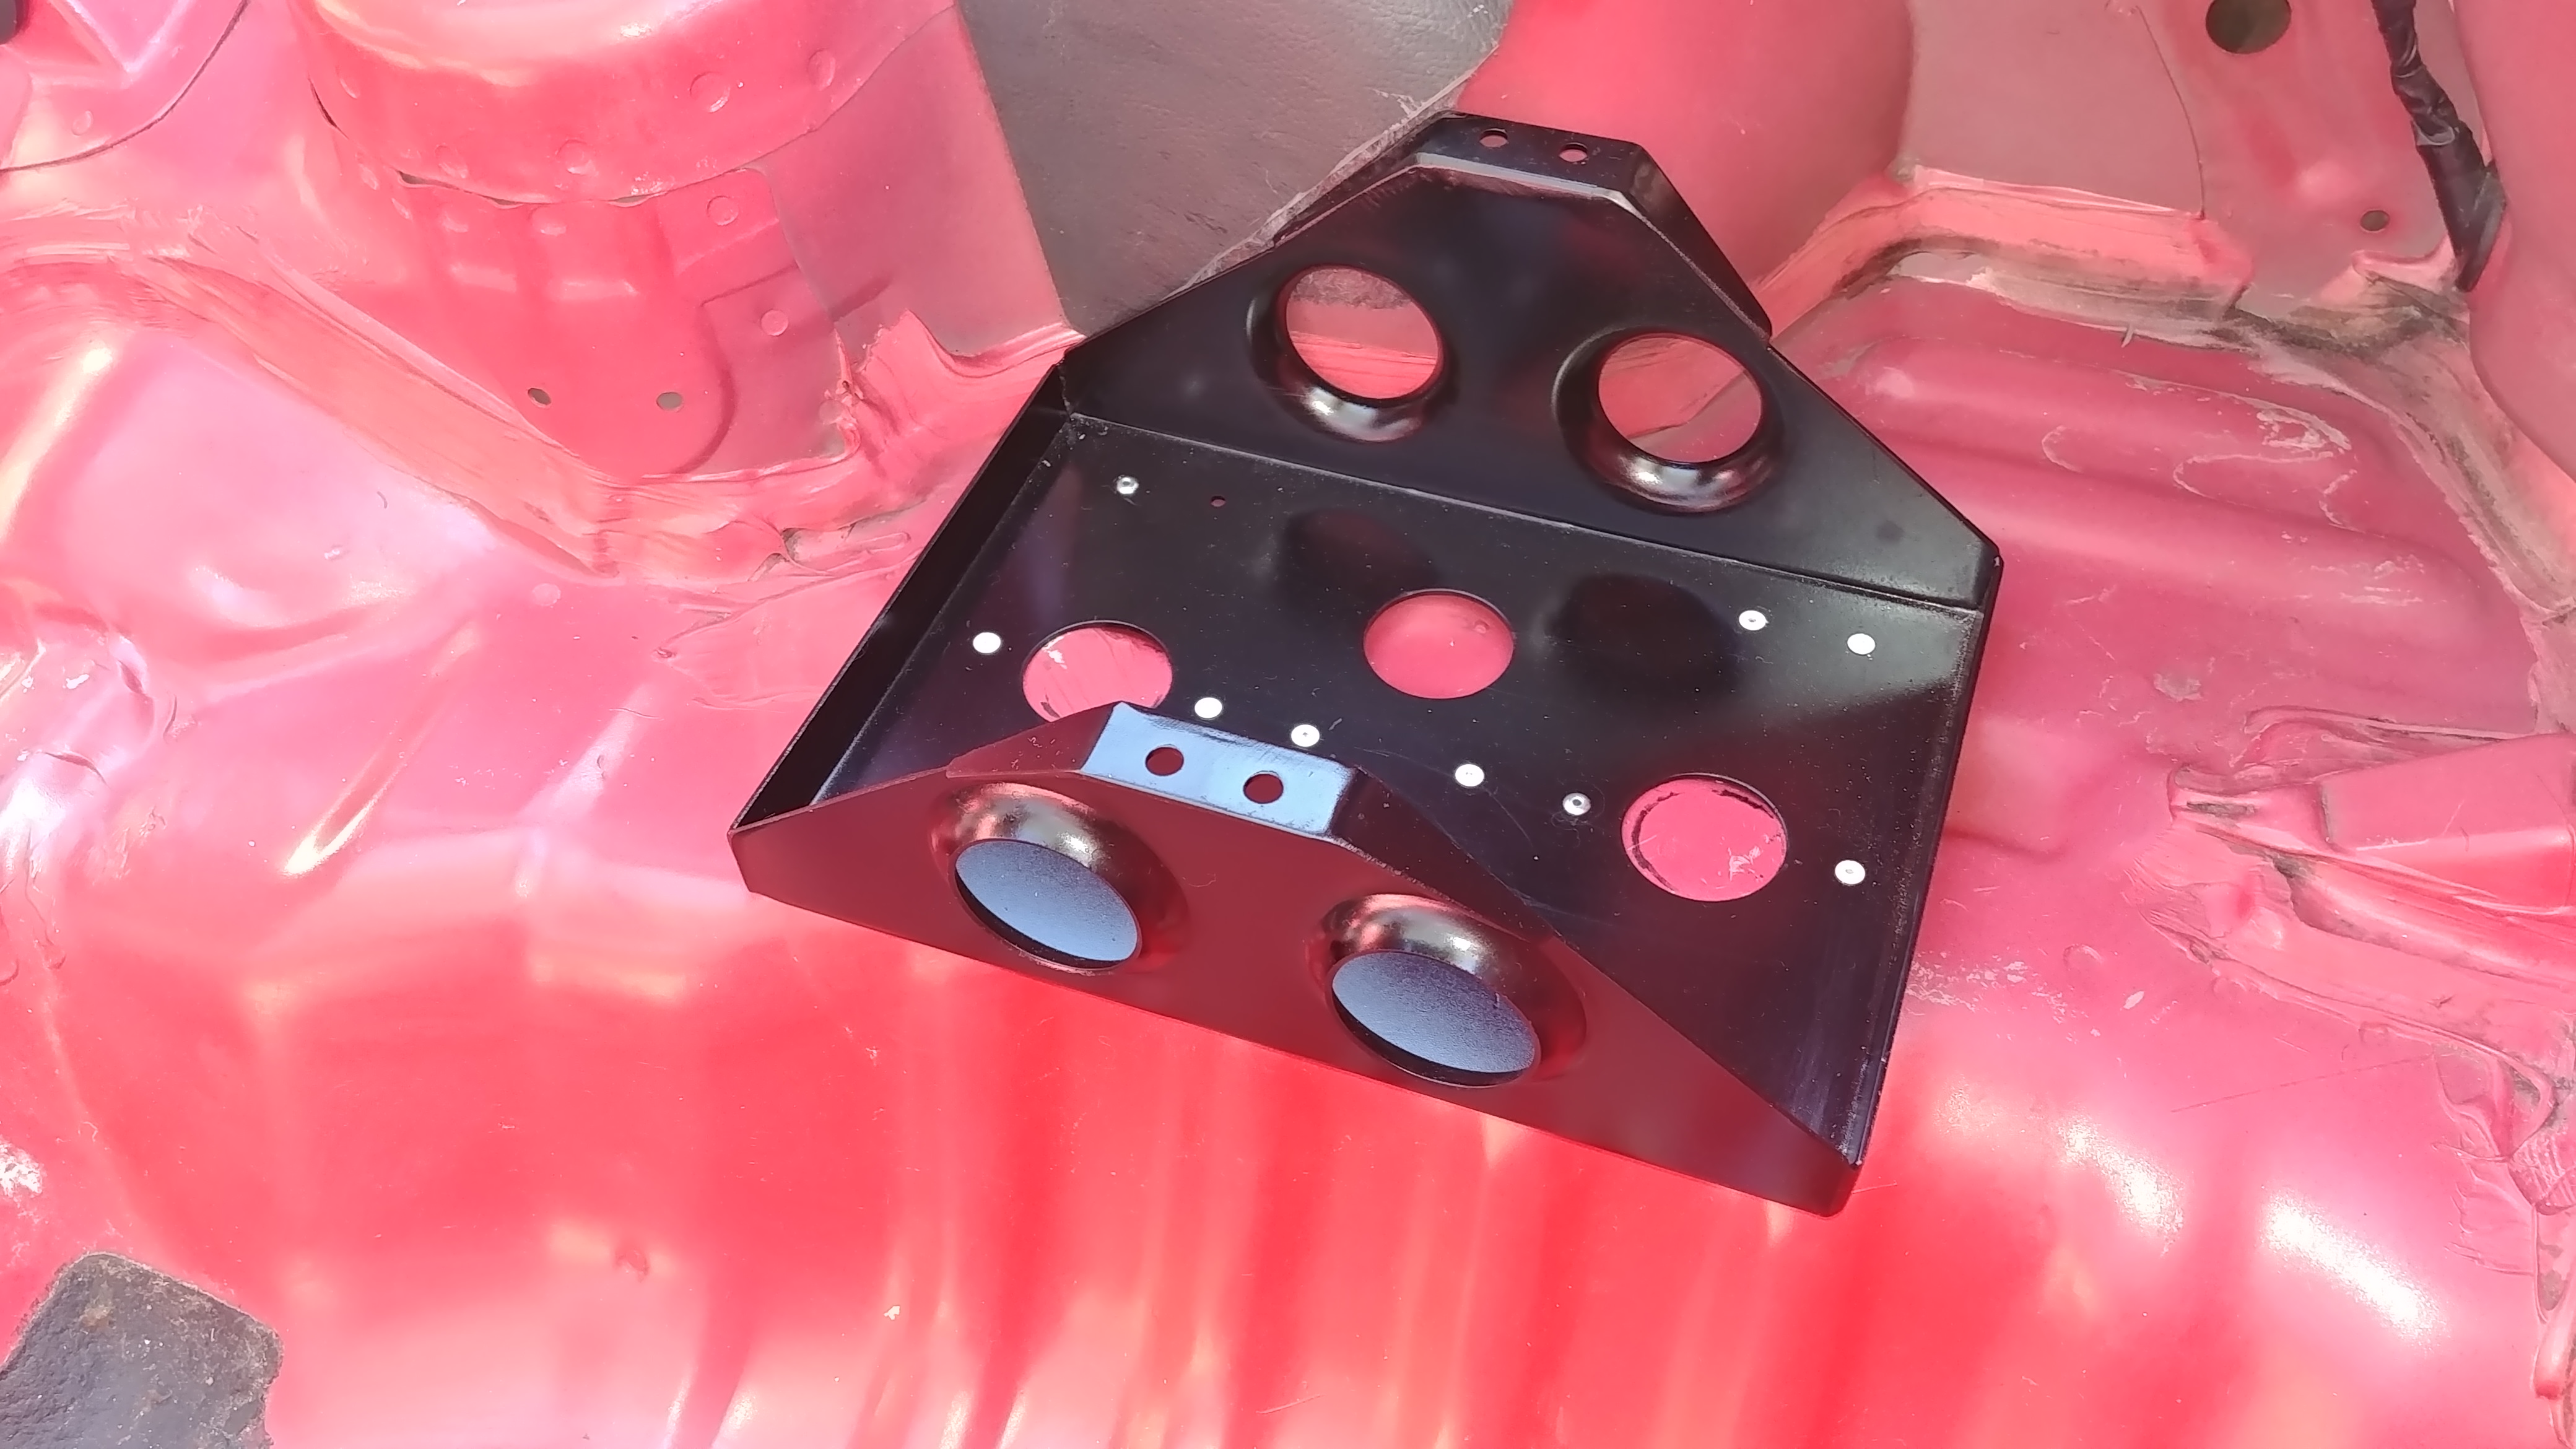
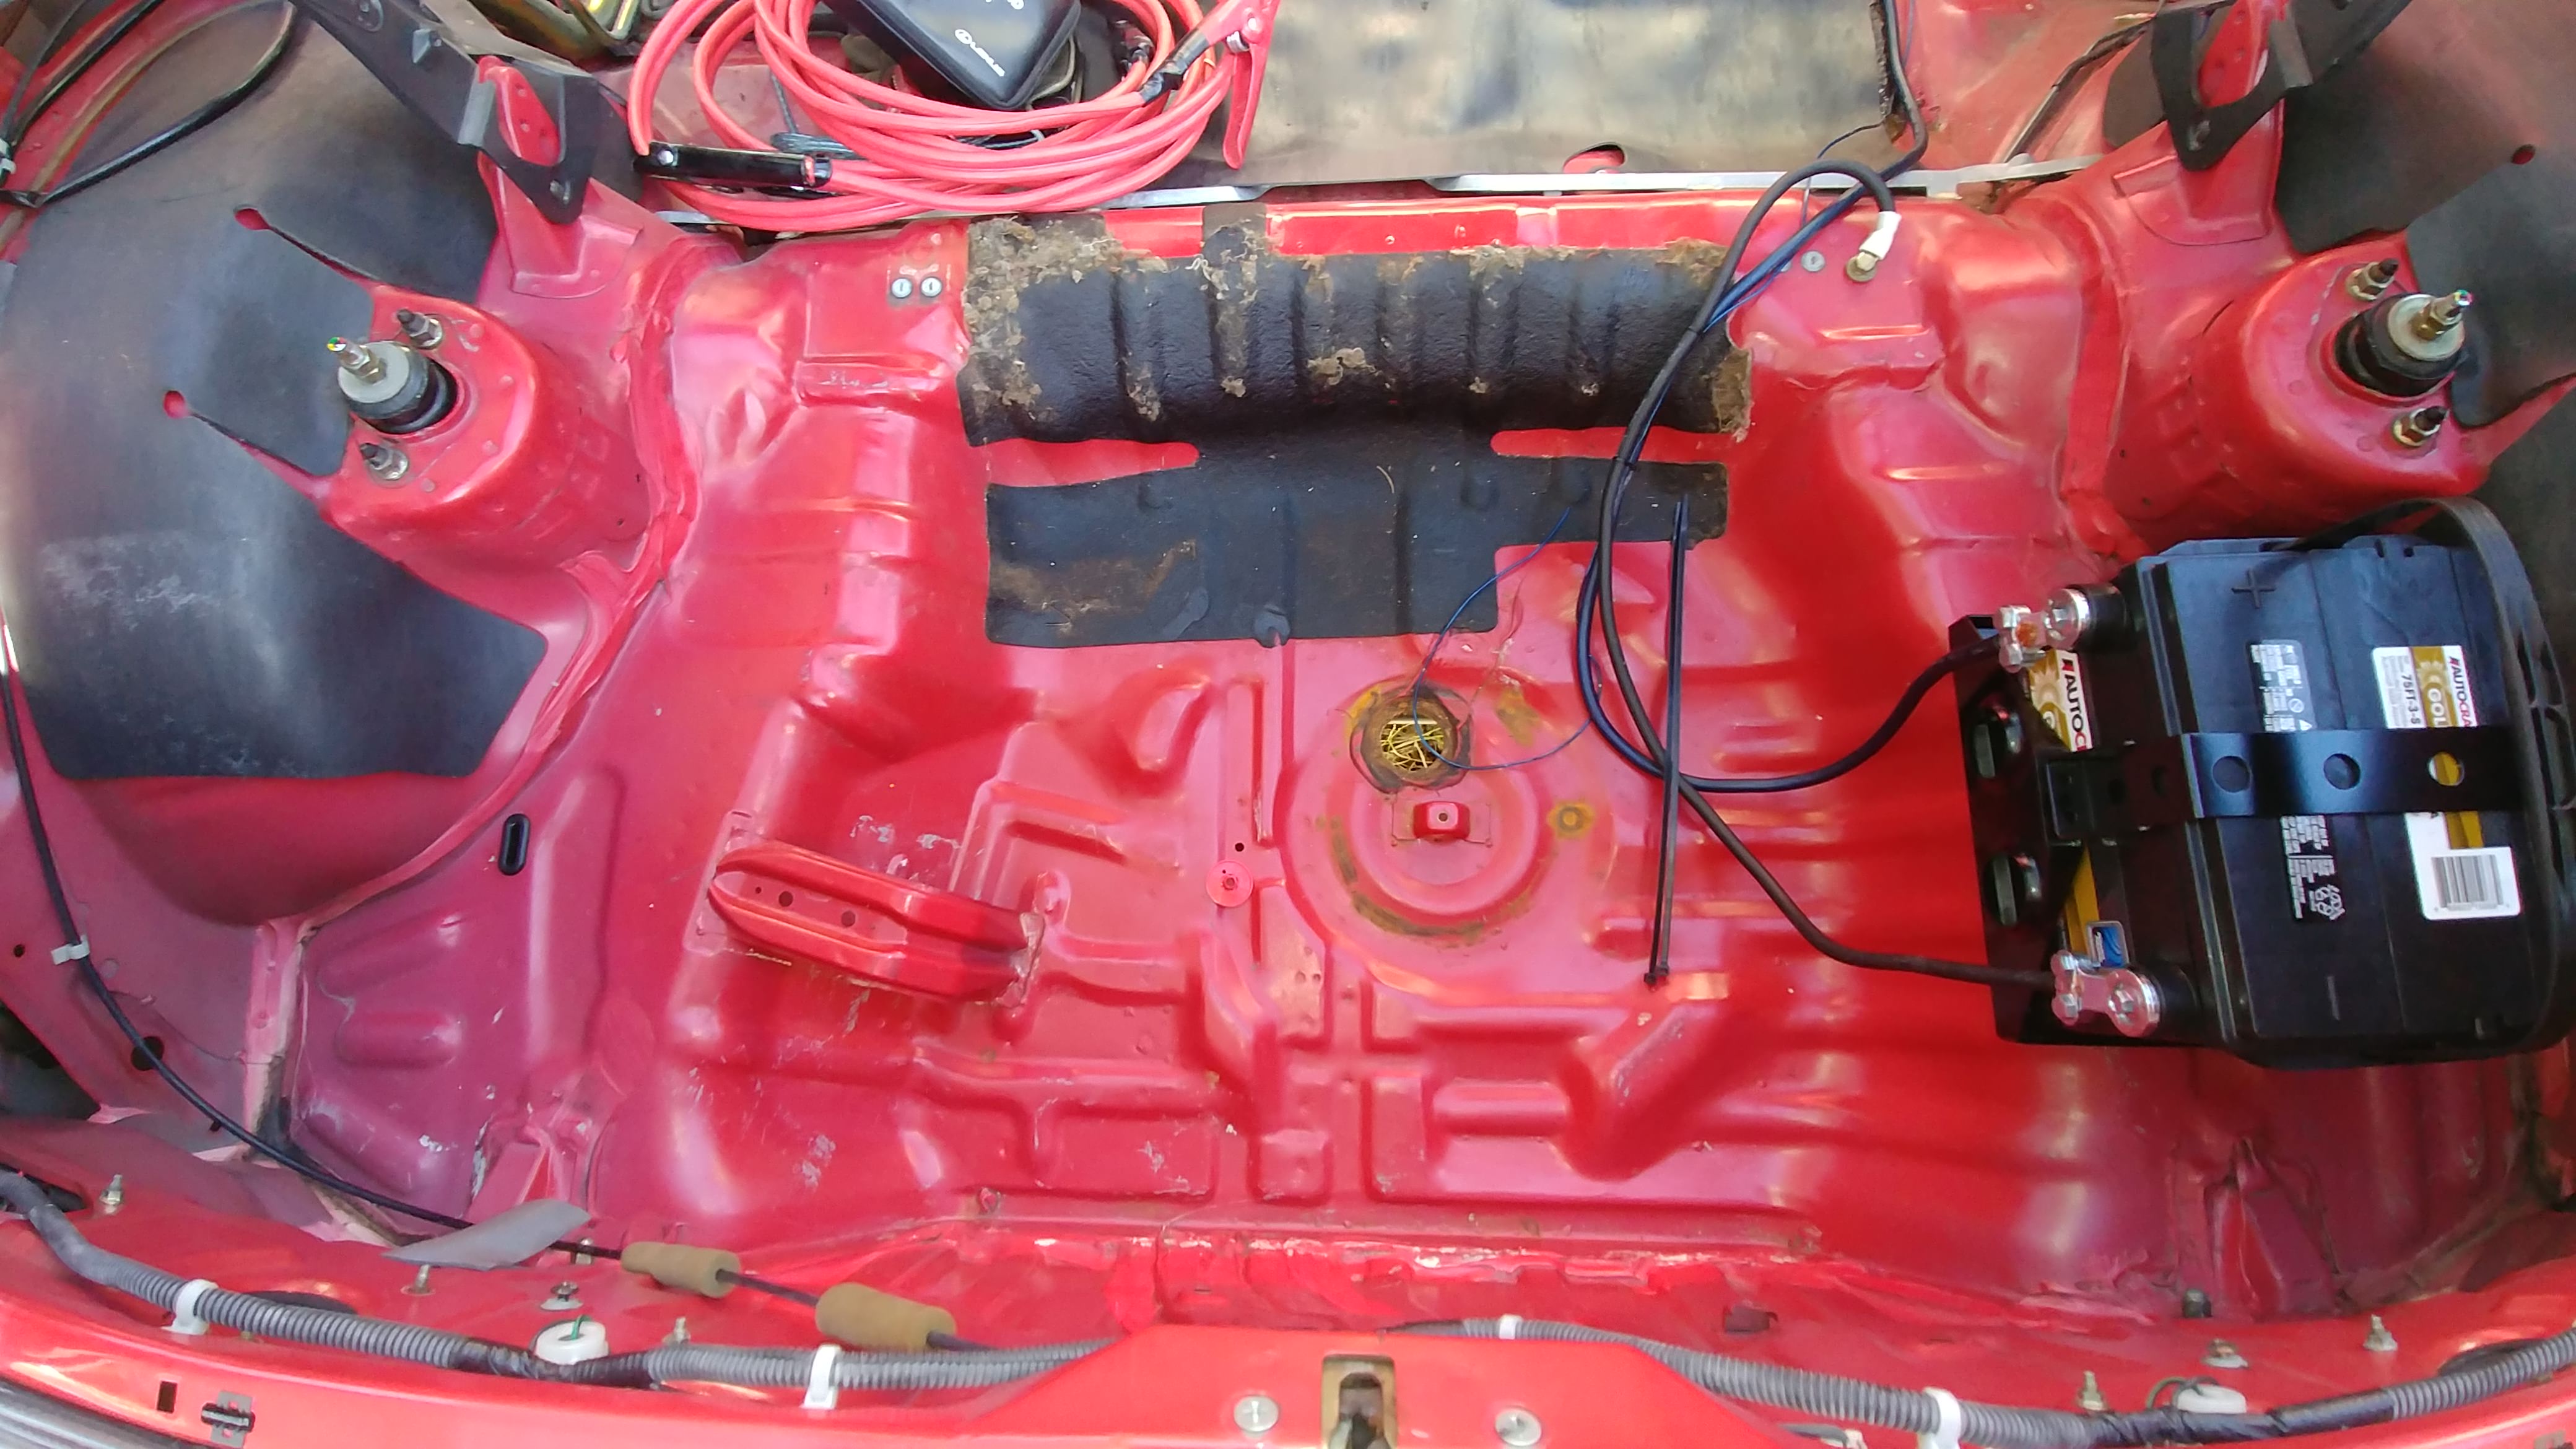
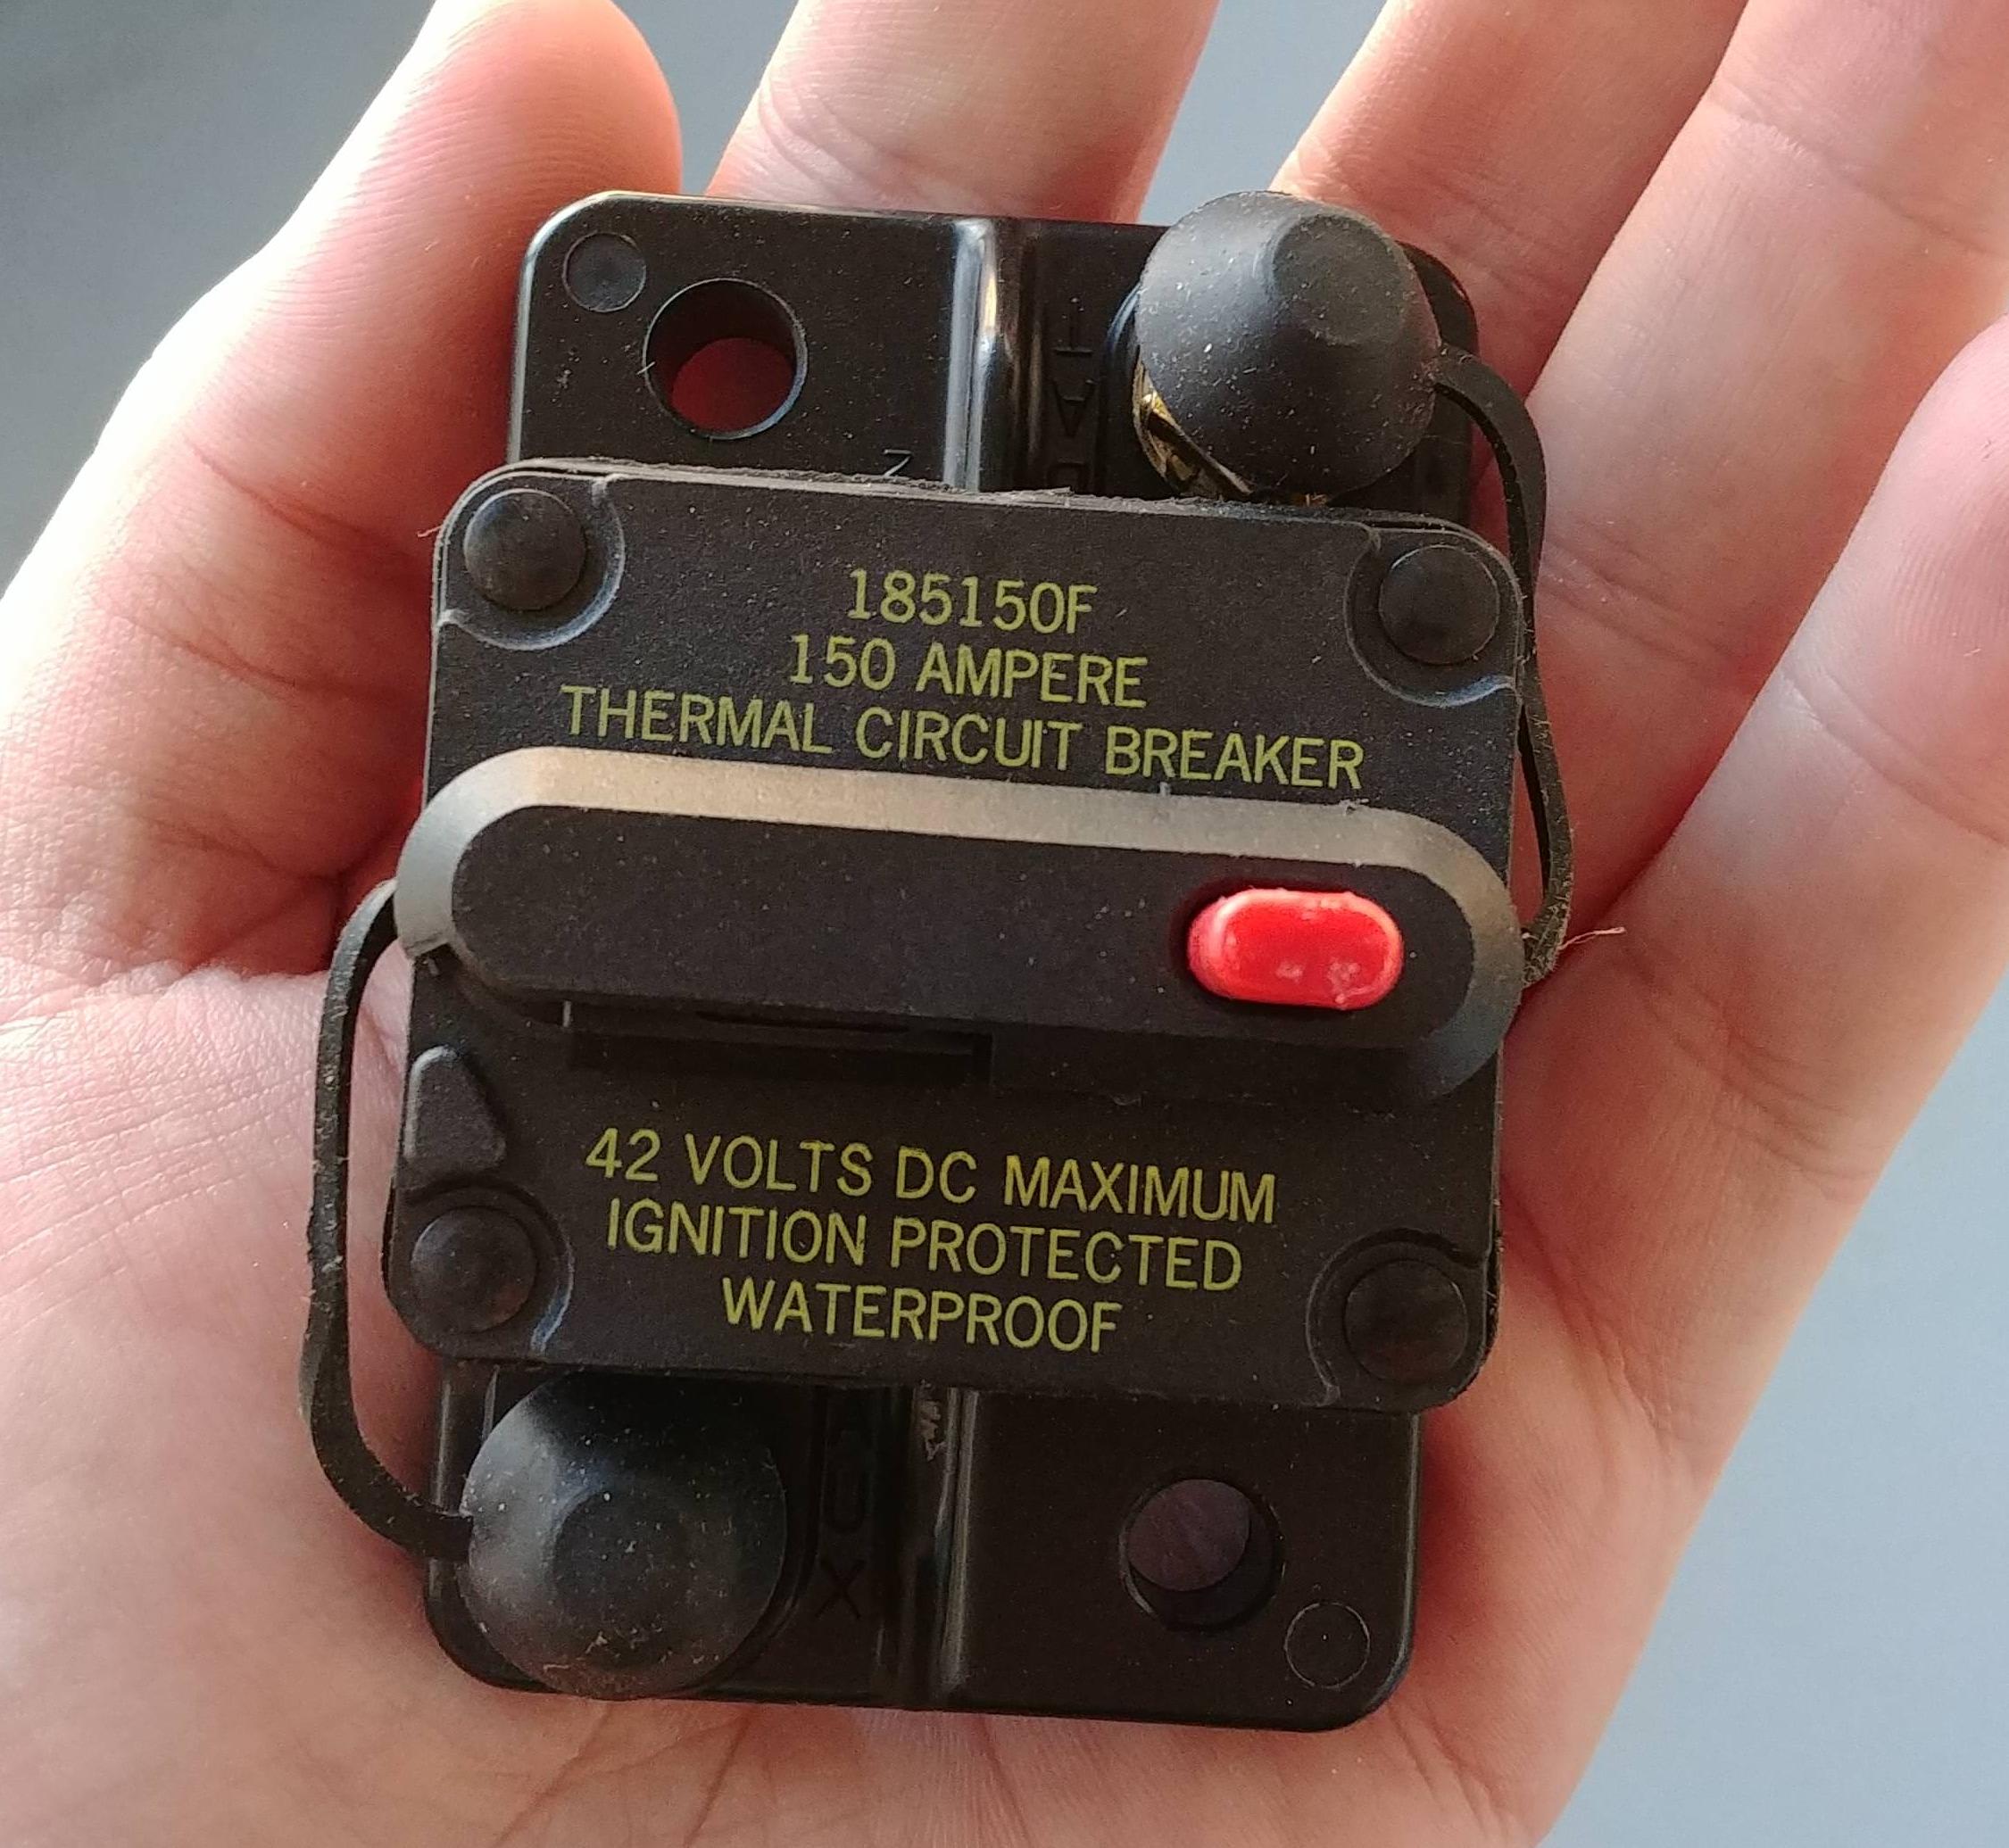
The car had a relocated little motorcycle battery in it when I bought it, but it was not forgiving enough for me and I eventually killed it. So I decided to put a more normal sized battery in the back. I found this cool, steel, dimple-die-stamped battery holder on ebay:
Still need to hook this little breaker up somewhere
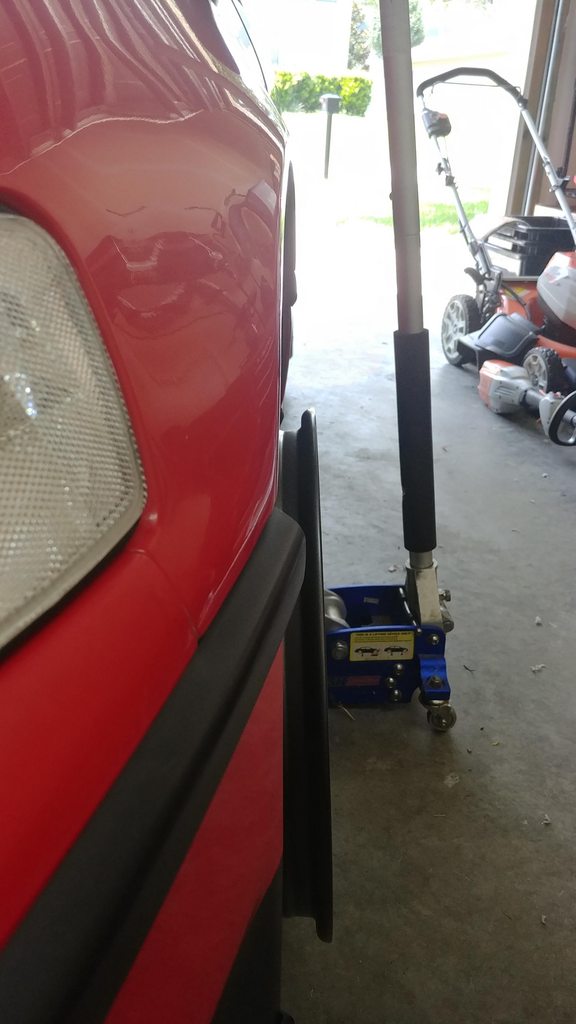
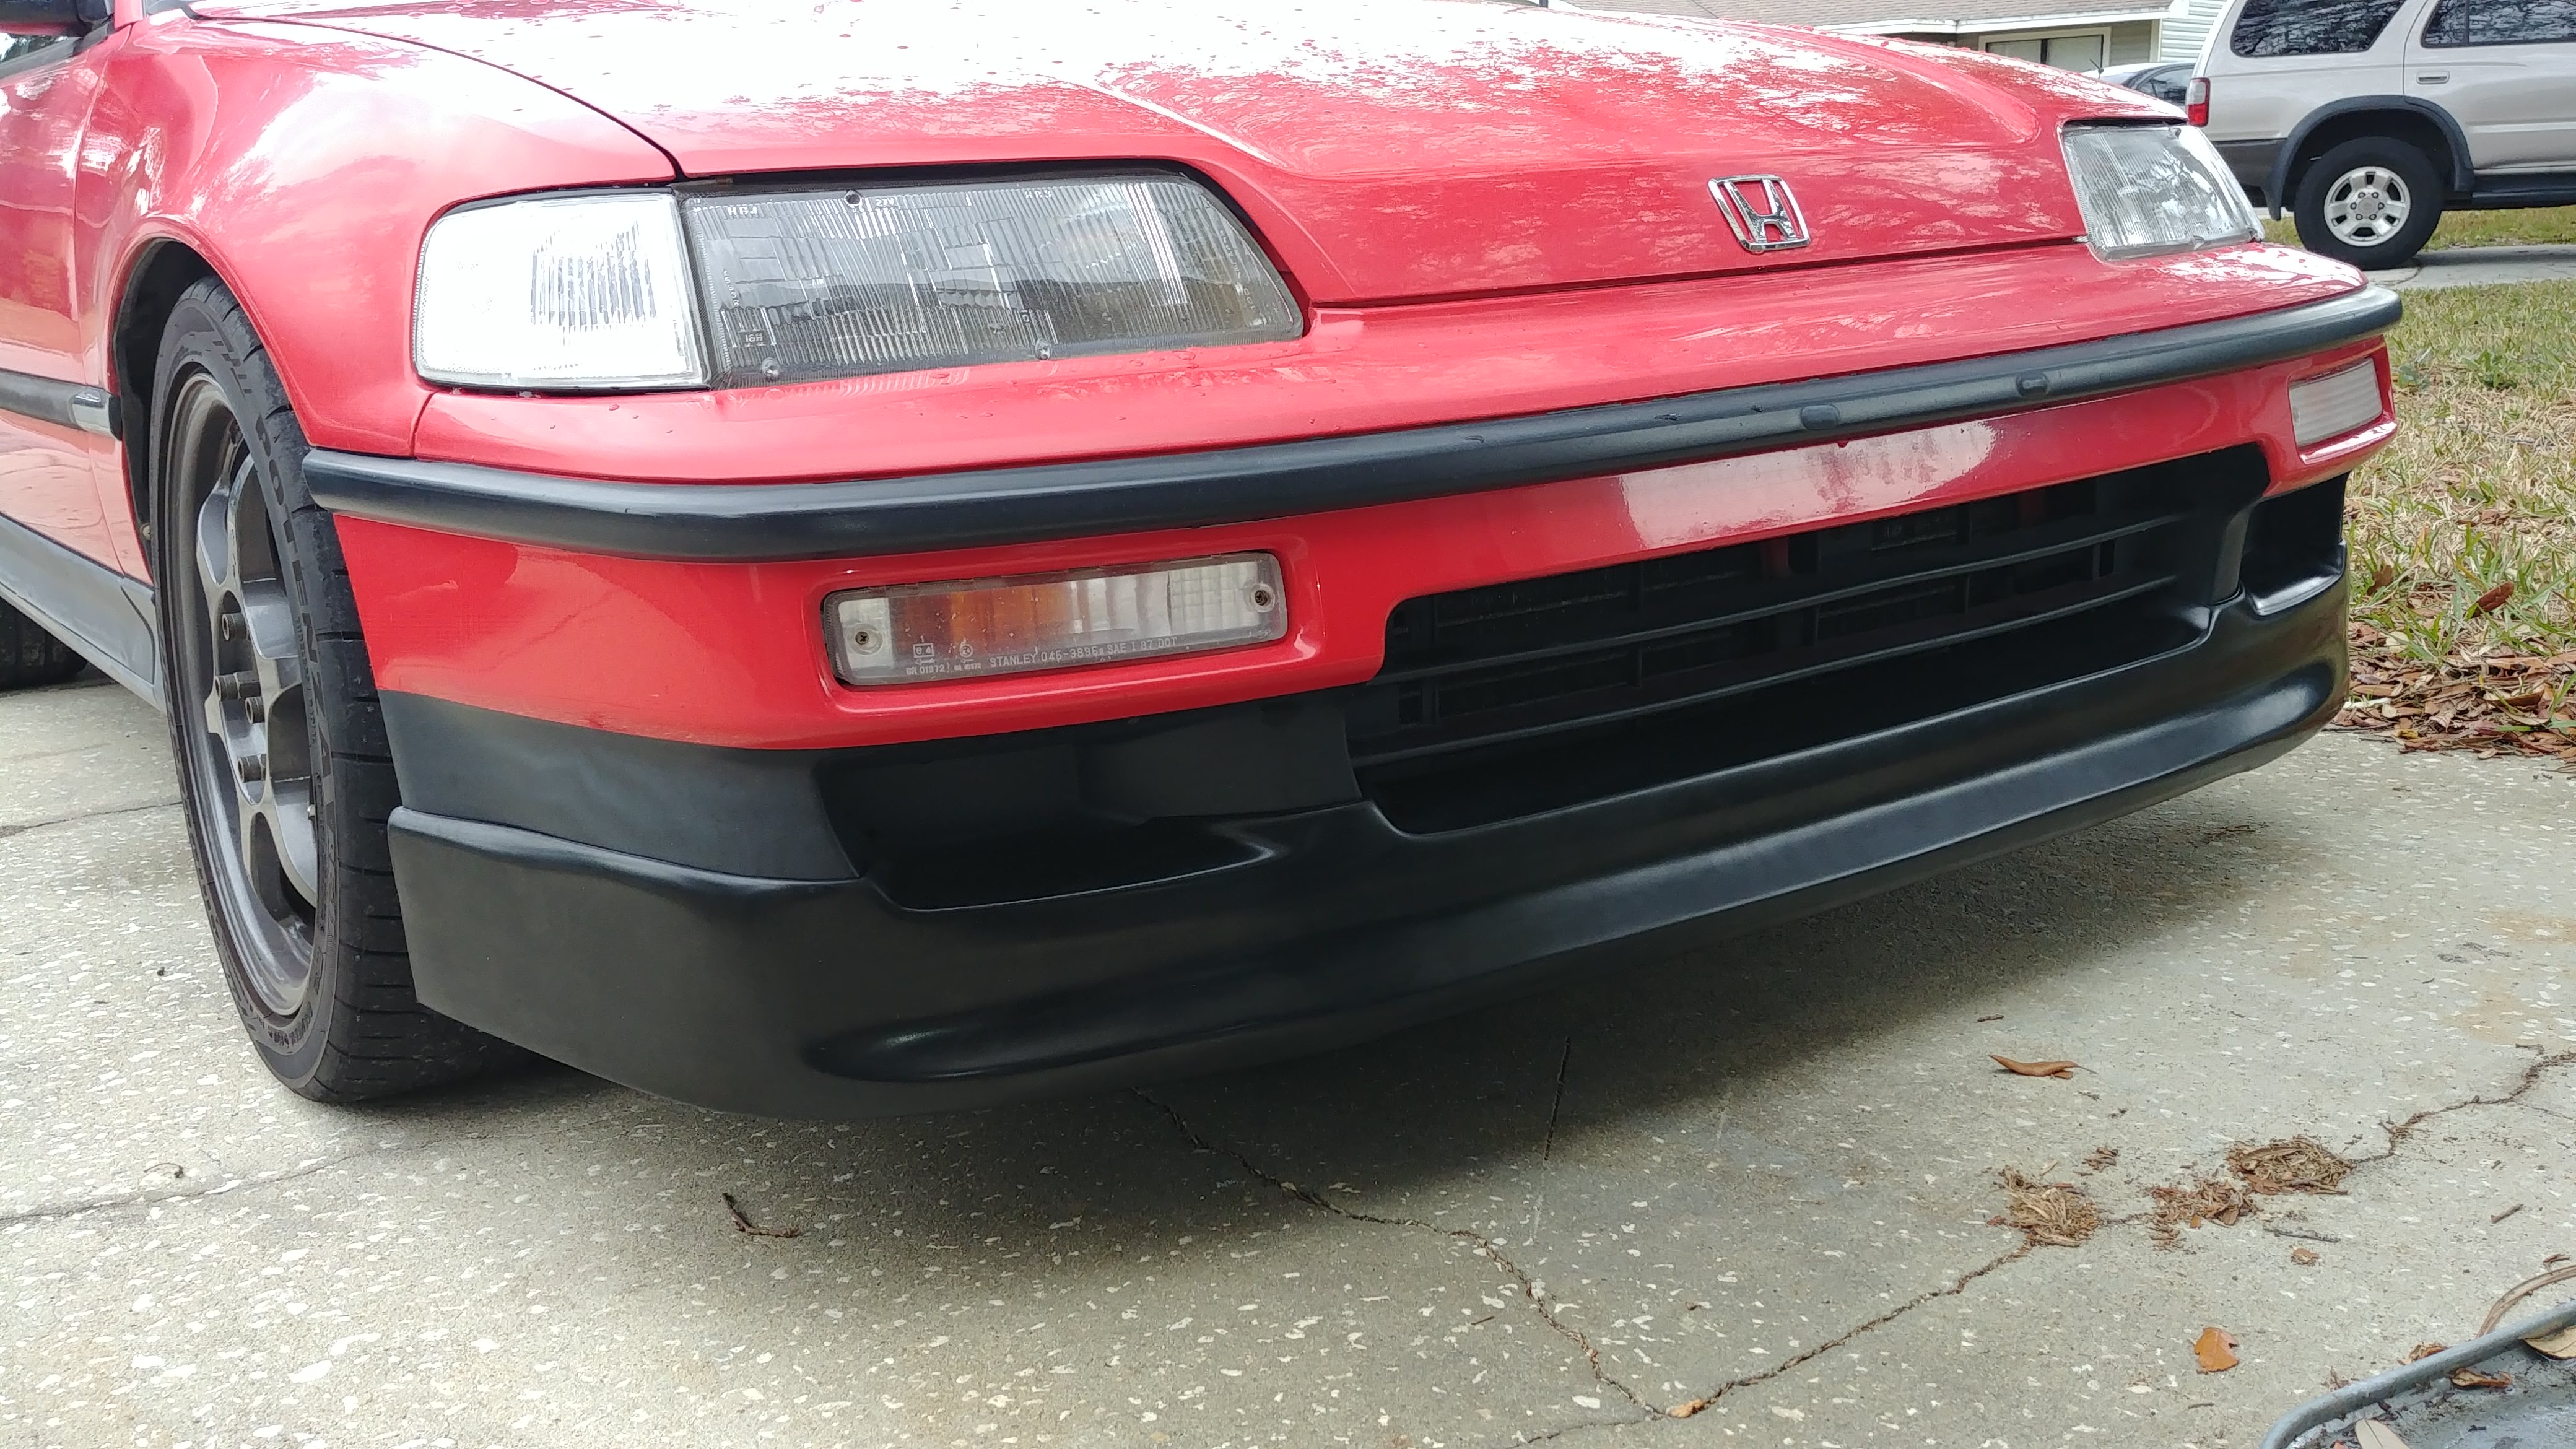
I bought this "lip" because I think it will work well with a splitter. It a solid 2.5" lower than the factory Si lip
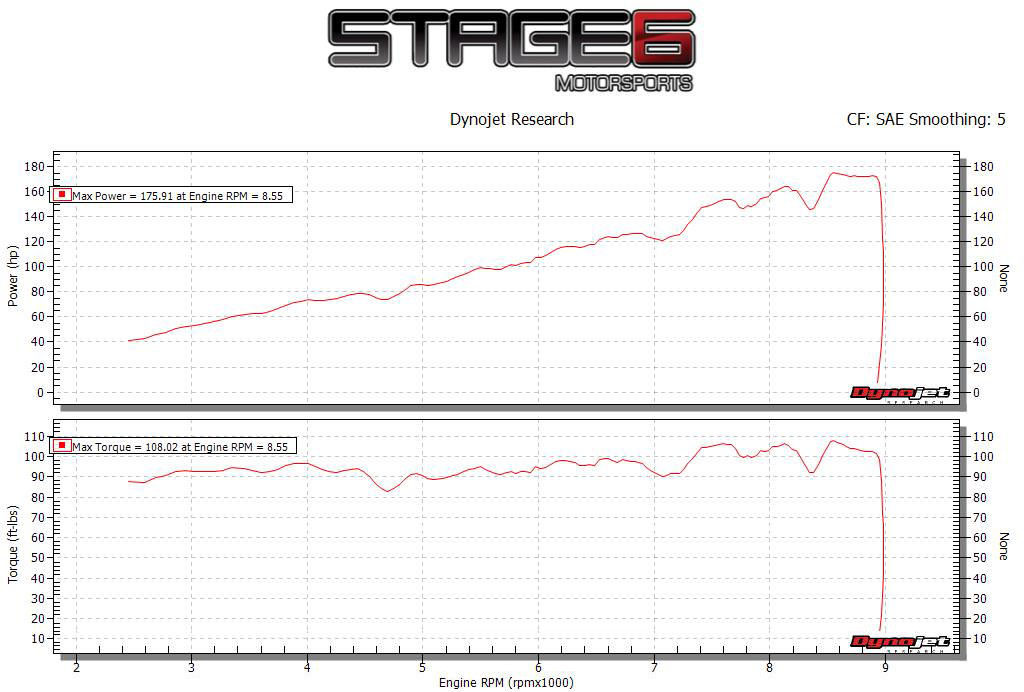
I also finally took the time to get the little B16 on the dyno to see what it would do
Pretty decent considering what it is (A torque-less wonder)
Here is a video as well, because it turns out that spinning a 1.6 to 9500 rpm in 4th gear is the dyno equivalent of an endurance race
Last edited by Full_Tilt_Boogie; Feb 7, 2018 at 11:46 AM.
Reason: added dyno sheet with torque
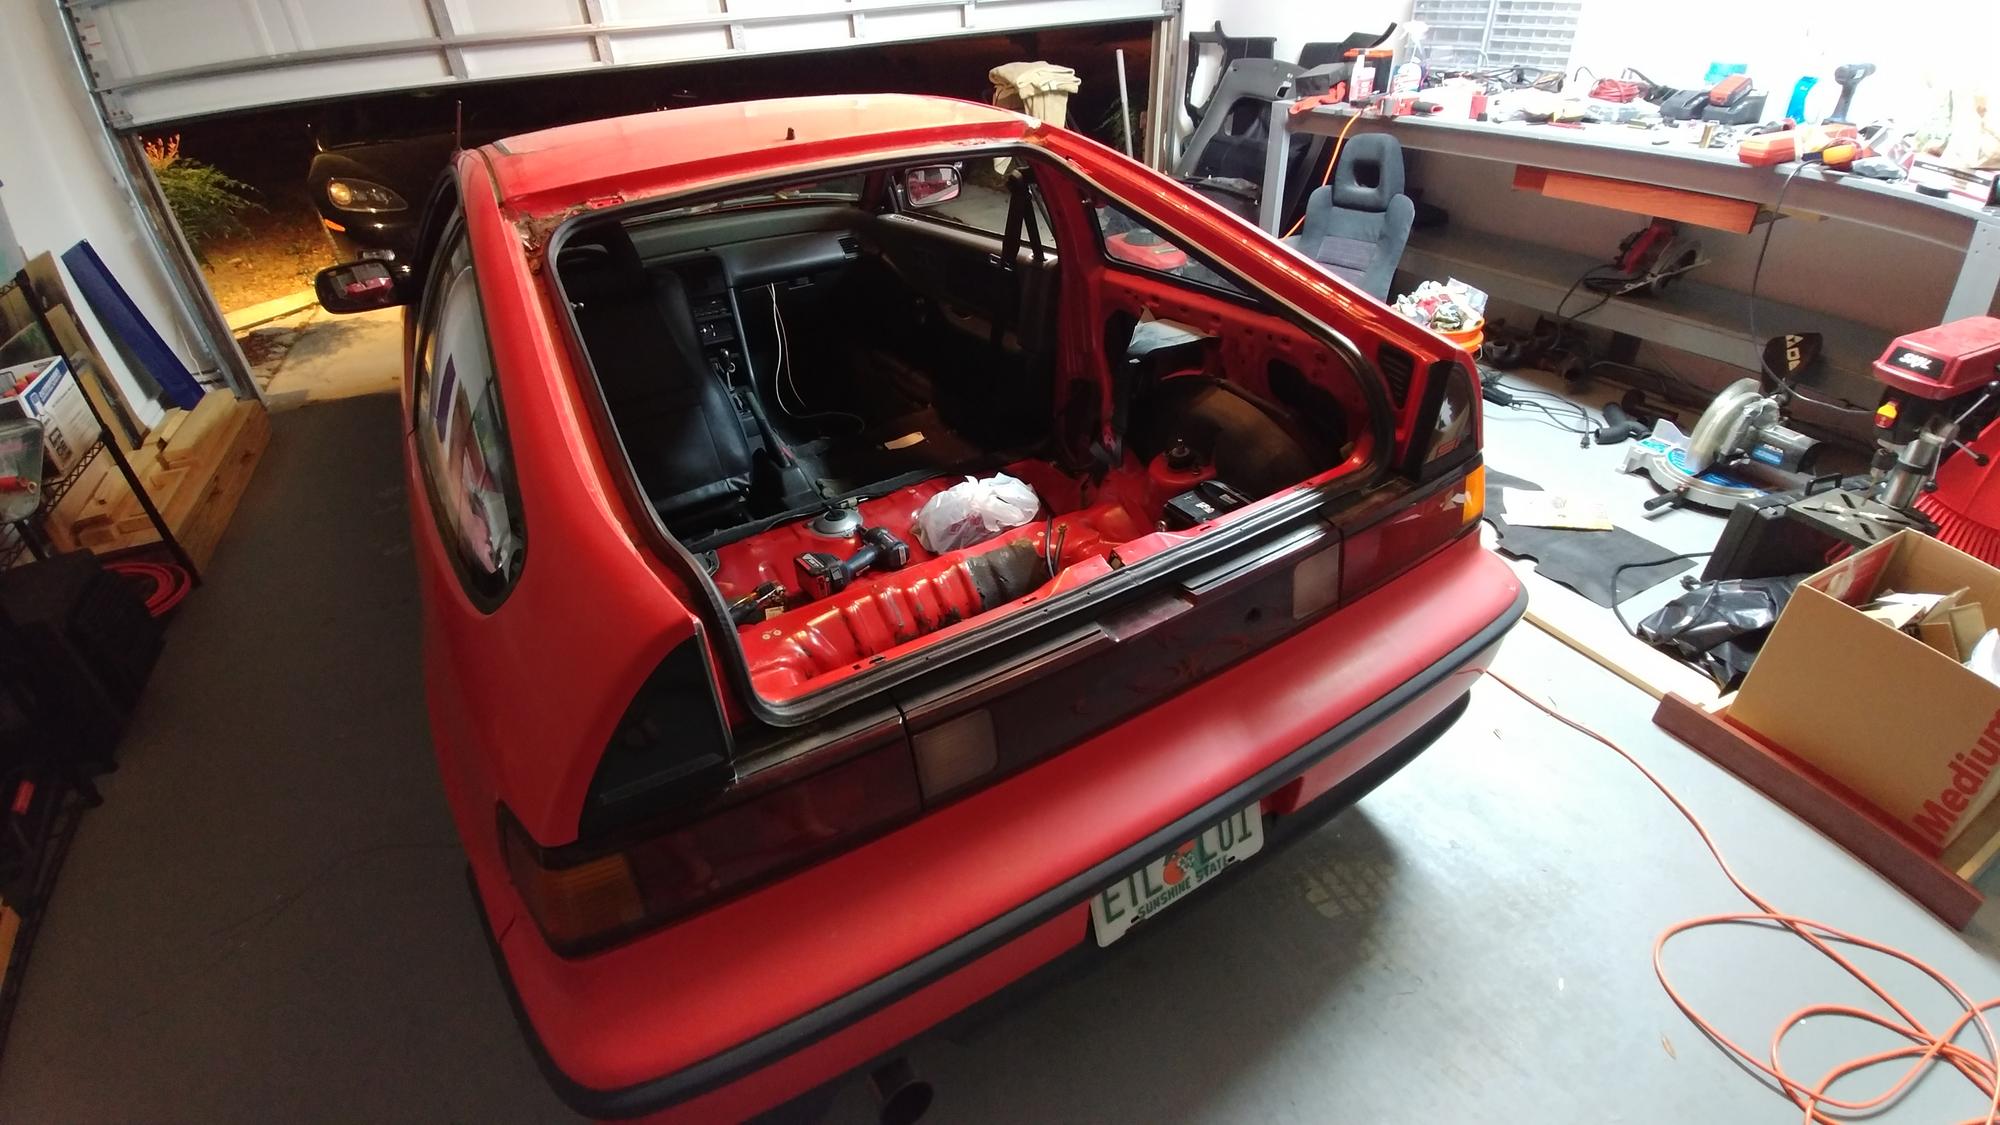
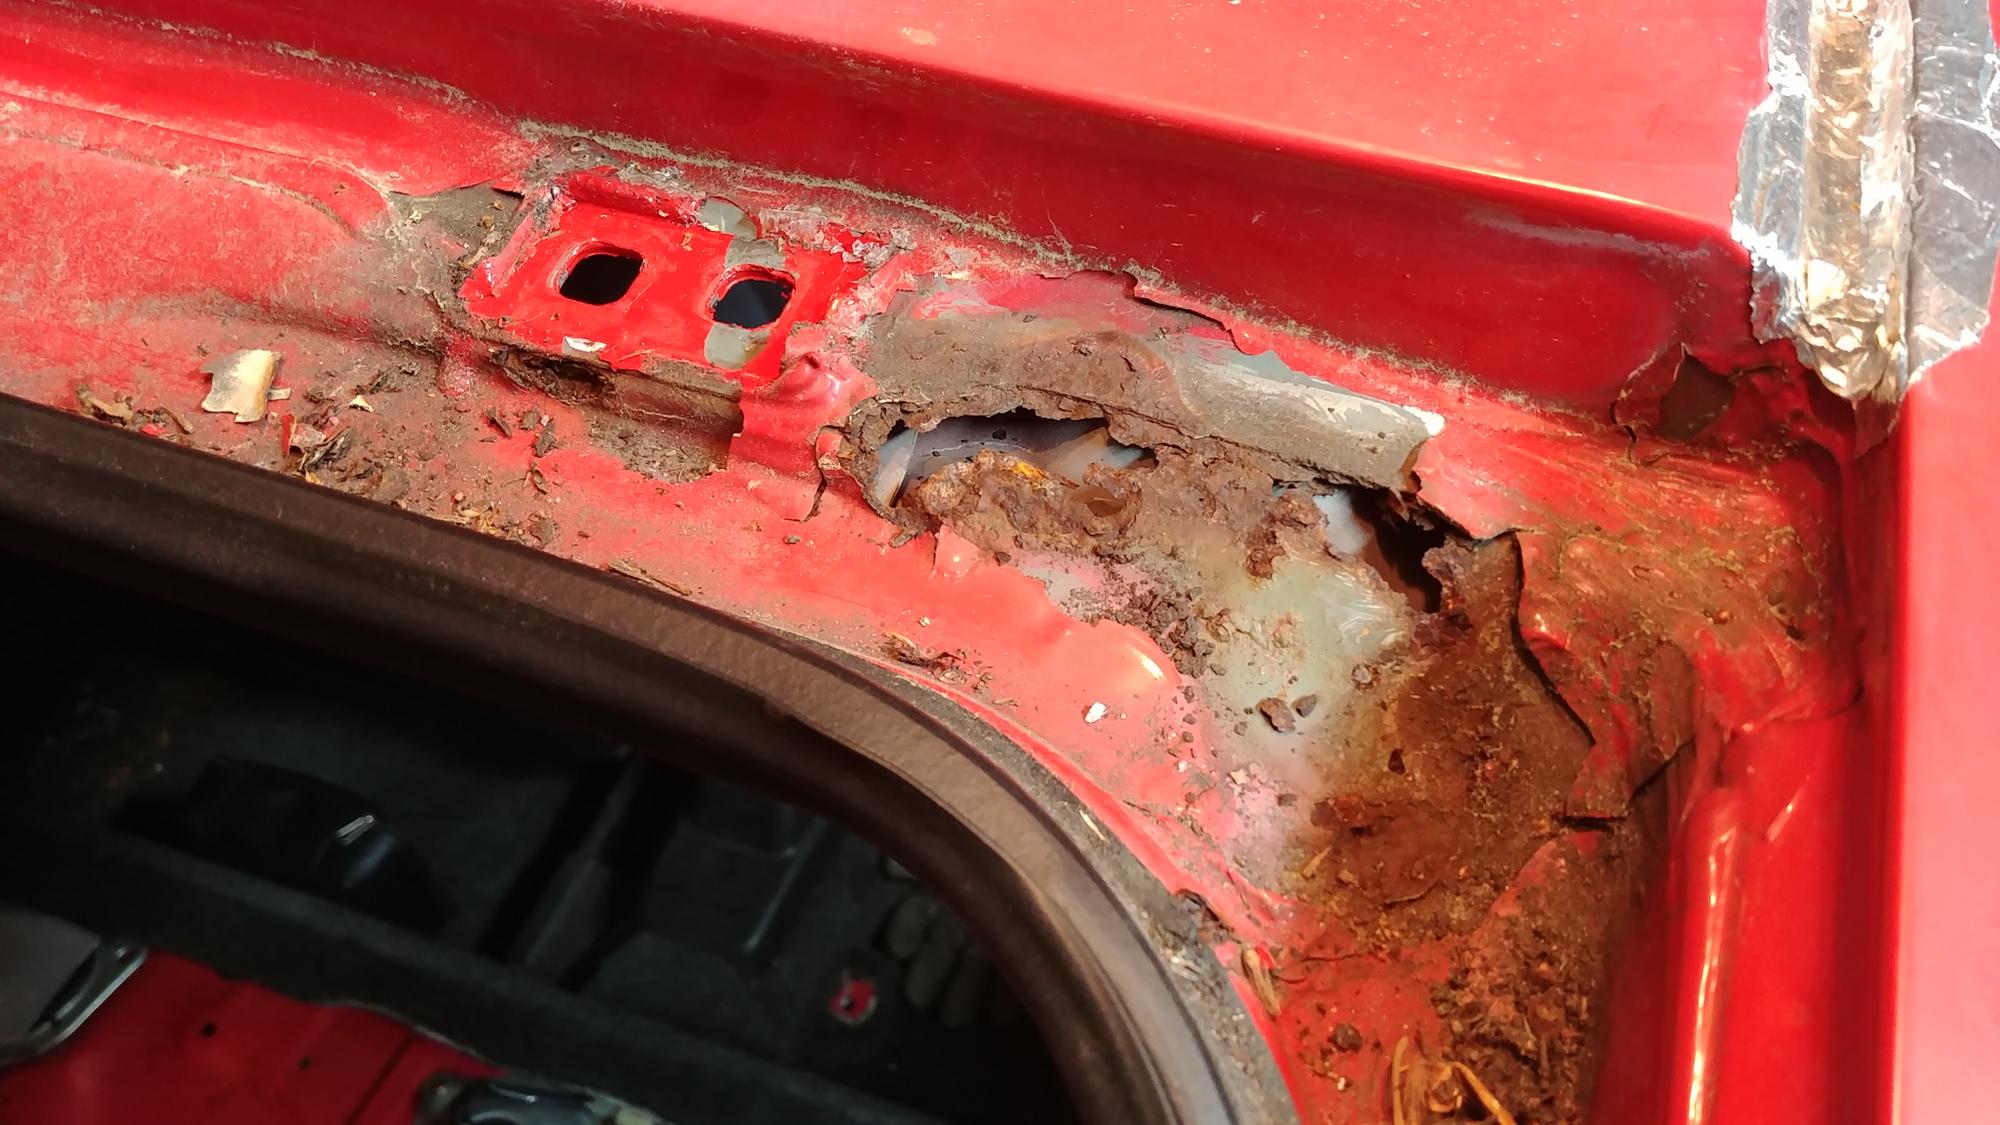
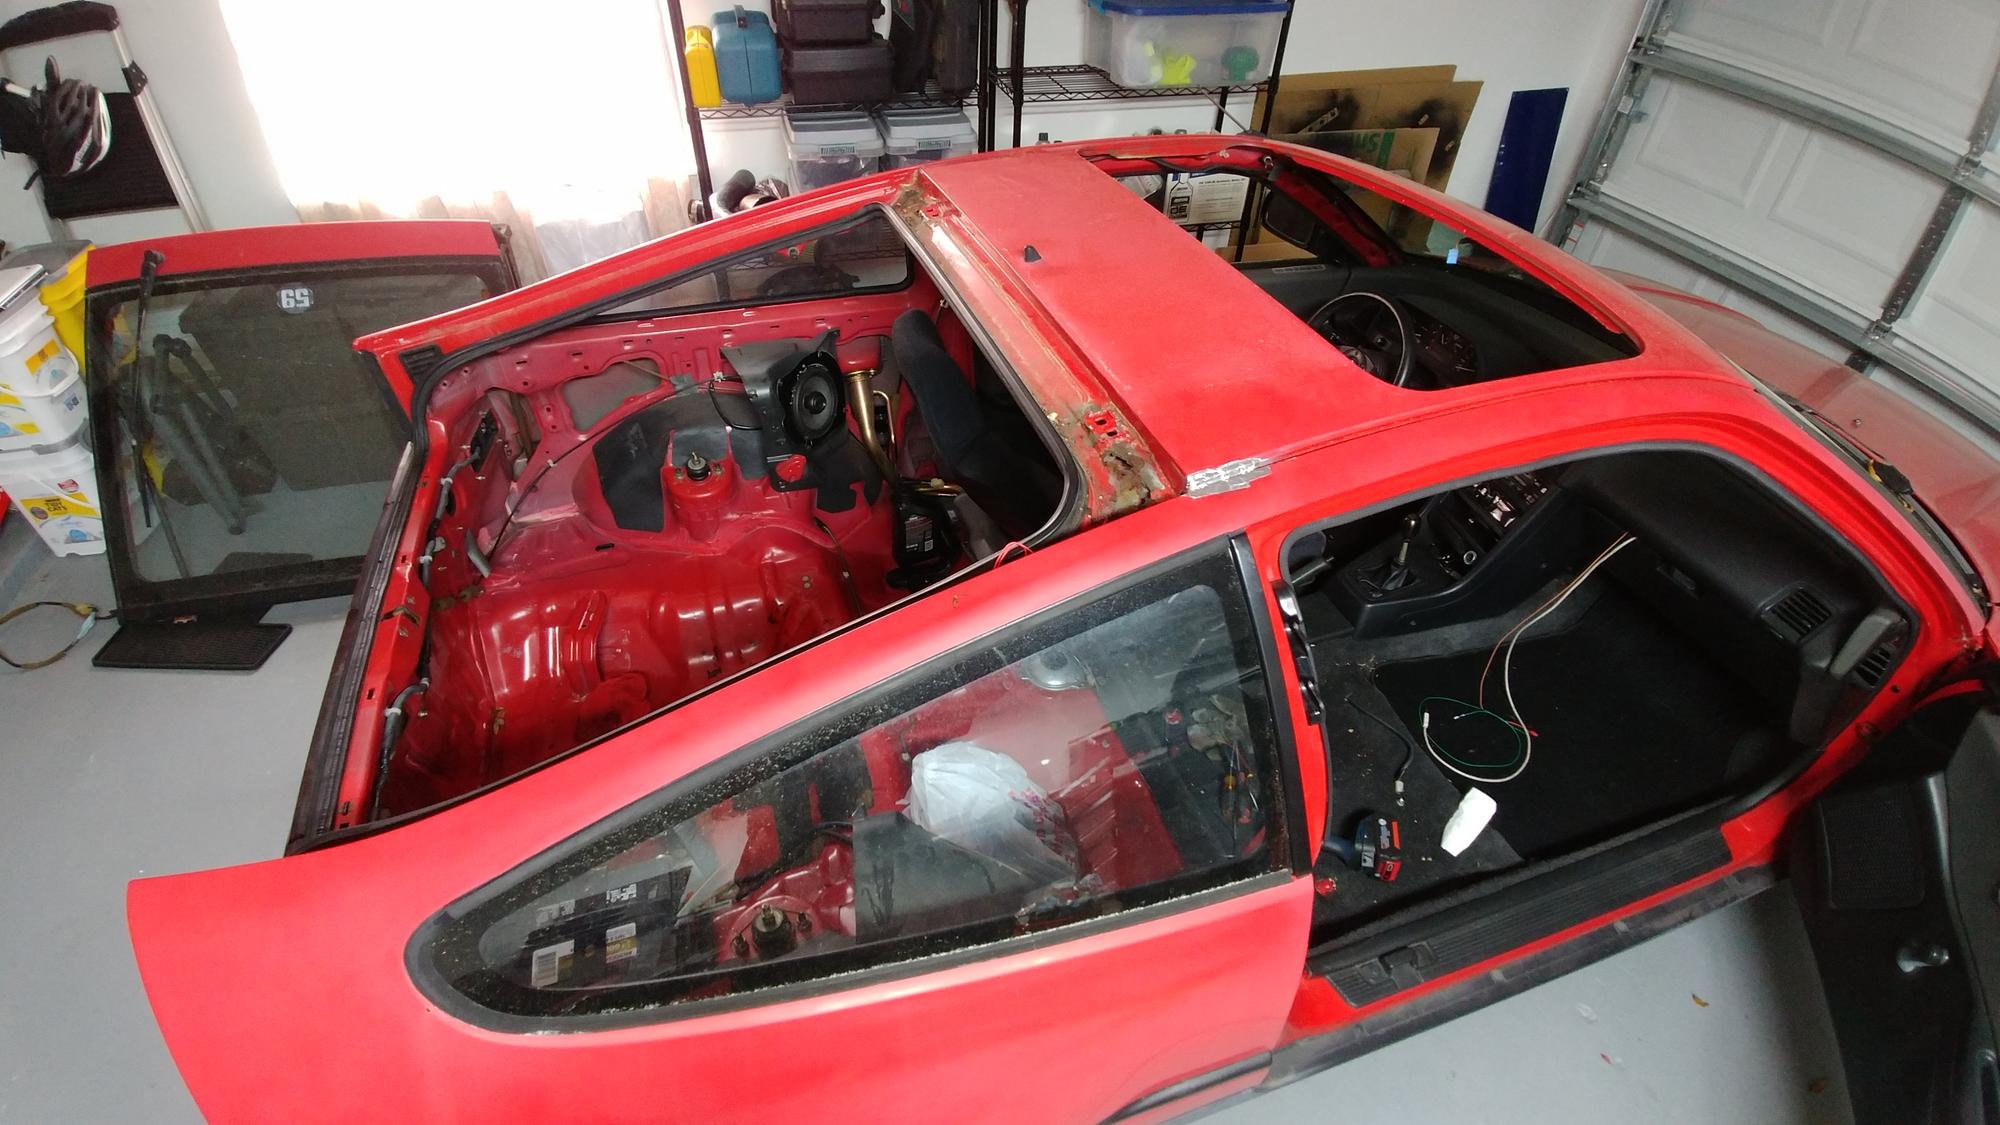
I pulled the hatch off because there are a couple of holes rusted through right around the hinges.
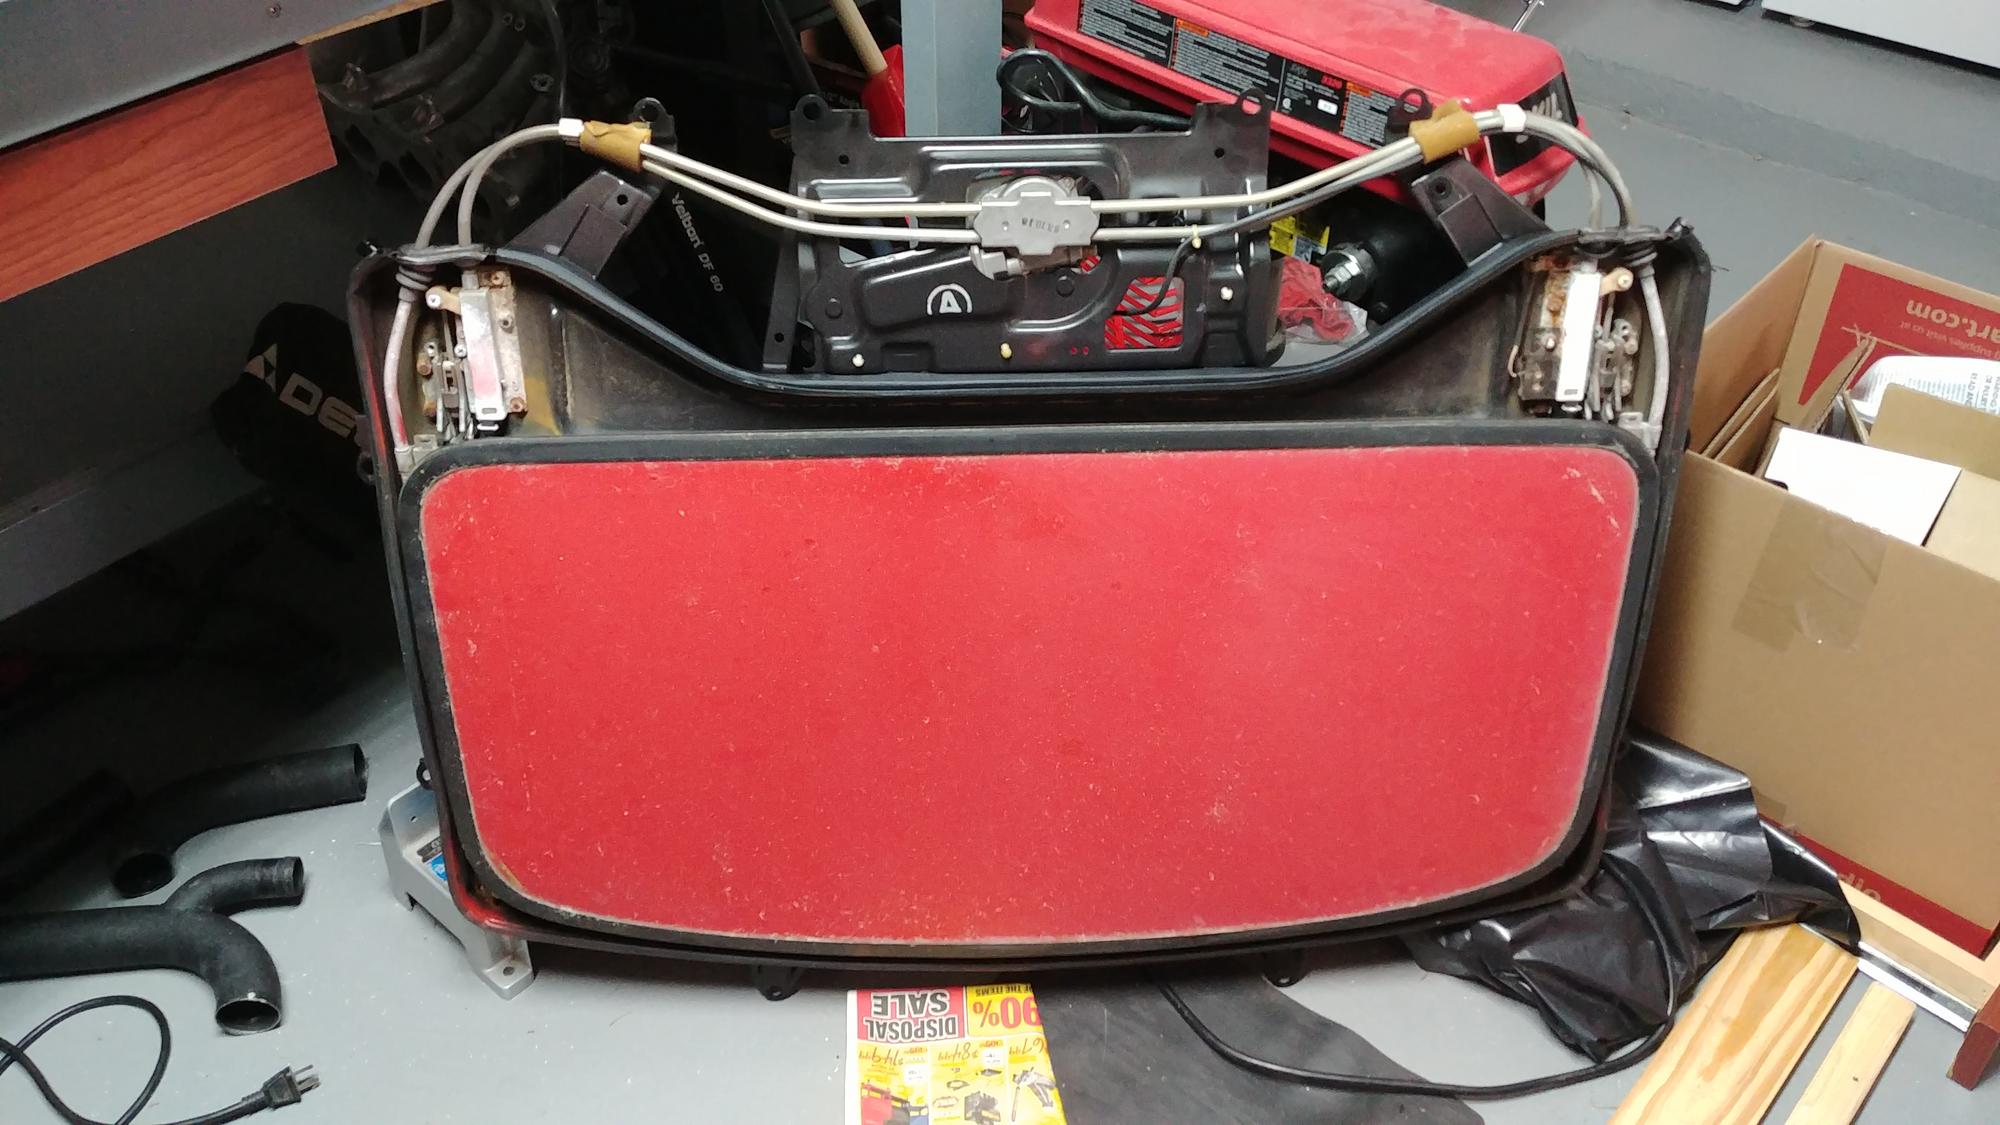
I also pulled the sunroof out because I want to delete it. The whole assembly weight 28 lbs.
I gotta say, with the sunroof and hatch off, the car feels really peppy. This little B16 would be great in a truly light car, and I dont think the Si version of the CRX is truly light (<2000 lbs IIRC).
The current dilema is how to get rid of the sunroof. The obviously (propper) solution is to find a good roof skin of a std or HF. But that is going to be a bit time consuming, mostly because Im not finding any CRXs within a few hundred miles of here that would make a good donor candidate.
The other thing I thought of doing was cutting a piece of similarly shaped steel from another car, like perhaps from a hood. The curve is in both directions, so I dont think a piece of fresh, flat steel will do it without buckling. Then, just welding it in very carefully and slowly with a million tack welds and hoping I dont warp the roof.
Finally, I could buy one of the sunroof "delete" kits where you rivet in a piece of carbon fiber or aluminum and window weld it around the edges. But its not the best for looks and not cheap.
^Pretty sure that is going to be illegal in any racing other than maybe Solo
EDIT:
After some research
Originally Posted by NASA CCR
15.13
Windshield / Sunroof Clips
, Headlights
Windshield clips are recommended to hold the windshield from ejecting in case of a crash. Sunroof clips are
required. Glass sunroofs (moon roofs) must be removed or completely covered with tape on both sides.
Taping
to protect headlights from rocks is recommended.
Originally Posted by NASA Honda Challenege rules 2018
4.5 Sunroofs/Moonroofs:
4.5.1
All cars equipped with Sunroofs or Moonroofs made of glass must be either:
a) removed from the vehicle (in this case arm restraints required); or
b) replaced by an acceptable covering such as sheet metal, aluminum, or composite (i.e. Lexan,
carbon fiber) that is securely attached to the vehicle covering the opening, or
c) covered with tape on both sides of glass.
4.5.2
All cars equipped with Sunroofs or Moonroofs made of metal must be either:
a) retained if additional fasteners are used to secure them to the vehicle; or
b) removed from the vehicle (in this case arm restraints required); or
c) replaced by an acceptable covering such as sheet metal, aluminum, or composite (i.e. Lexan, carbon fiber) that is securely attached to the vehicle covering the opening.
So thats the NASA CCR and Honda challenge rules.
Unfortunately, This car could never run in Honda challenge or PT with the engine that is currently in it, but still that is good news as far as what NASA should be okay with.
If I did ever end up running in NASA I would probably end up building the car for ST4.
I also found this:
Originally Posted by SCCA Street Modified Rules
Removable OE hardtops, T-tops, targa tops, sunroofs, moonroofs, and sim
-
ilar roof-mounted panels may be removed/replaced with alternate panels
provided that the area of interface is limited to the original perimeter of
the t-top, sunroof, etc. or utilizes the OE panel mount points, and that the
contour of any replacement panel surface does not vary from the contour
of the part being replaced by more than 1.0” (25.4 mm) in any direction. The material used to construct the alternate panel and the method used
to attach it to the interface is unrestricted. Any actuation mechanism and
the associated wiring, if any, may be removed. Vehicles utilizing alternate
(non-OE) hardtops will be considered as open cars in regard to Section
Im not sure where I got the idea that a carbon fiber plug would be illegal. At this point now Im thinking I just might make out out of fiberglass...
Last edited by Full_Tilt_Boogie; Mar 6, 2018 at 01:52 PM.
I figured after a year it was about time for an update.
I would like to have made more progress with this car during this time, maybe have gotten it out on the track a bit, but unfortunately life had other plans.
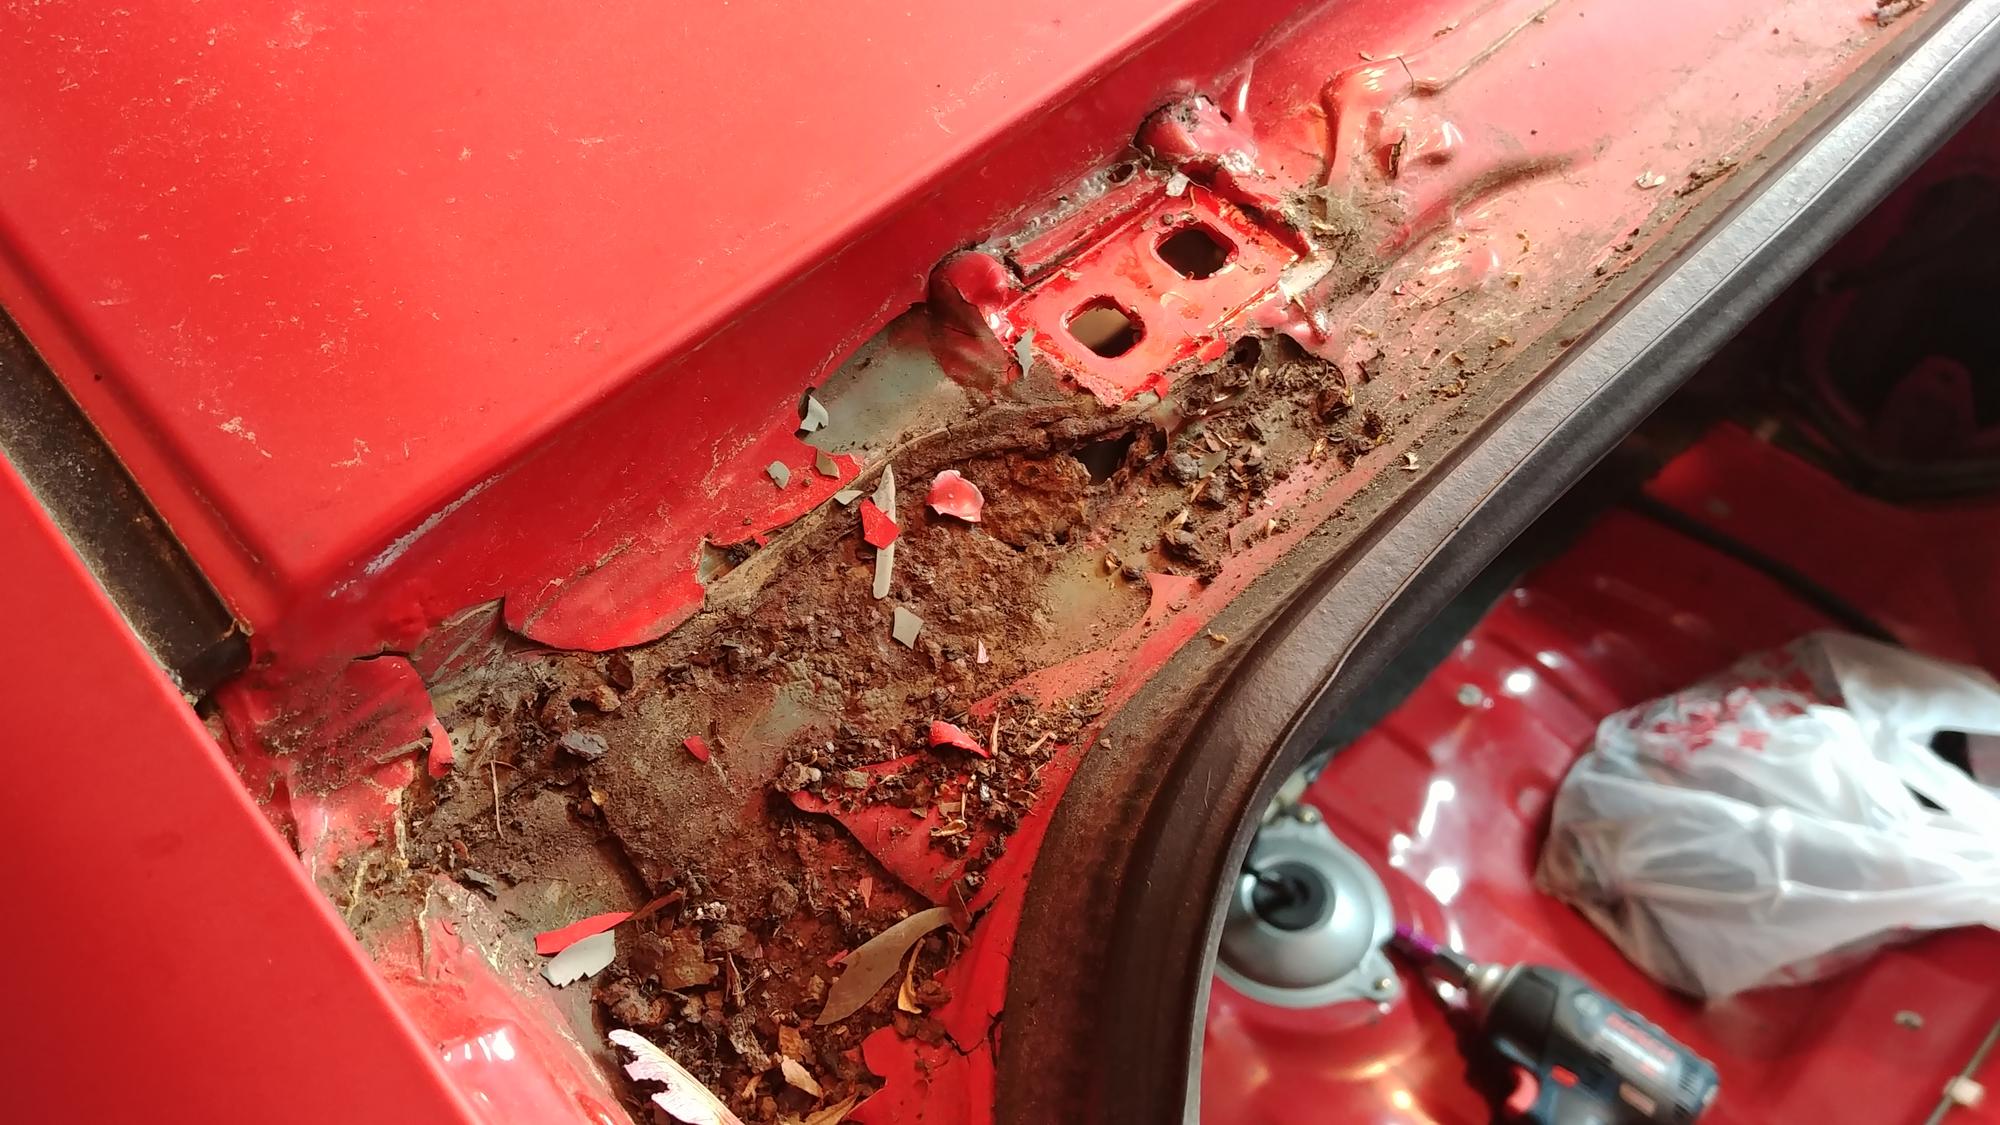
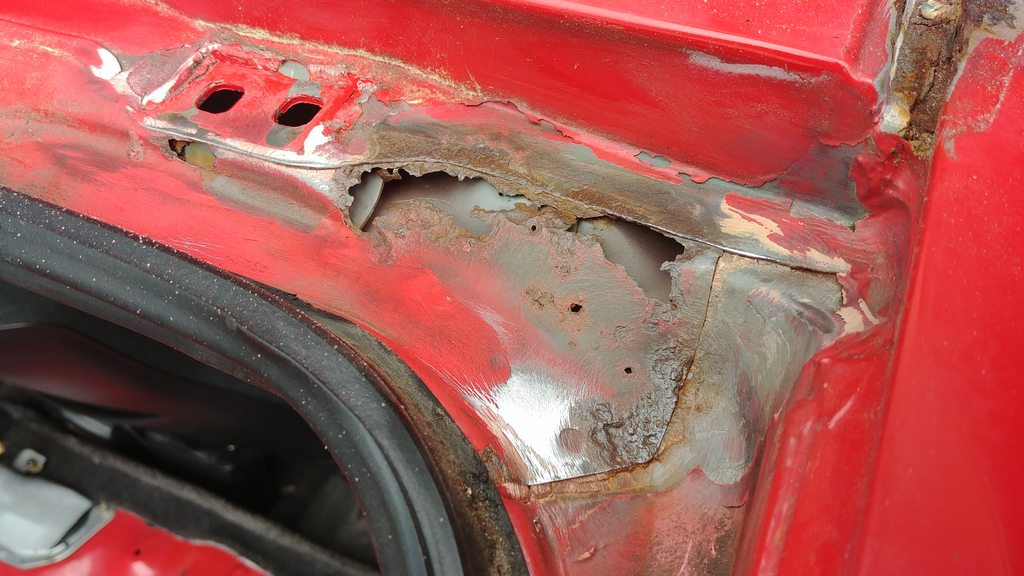
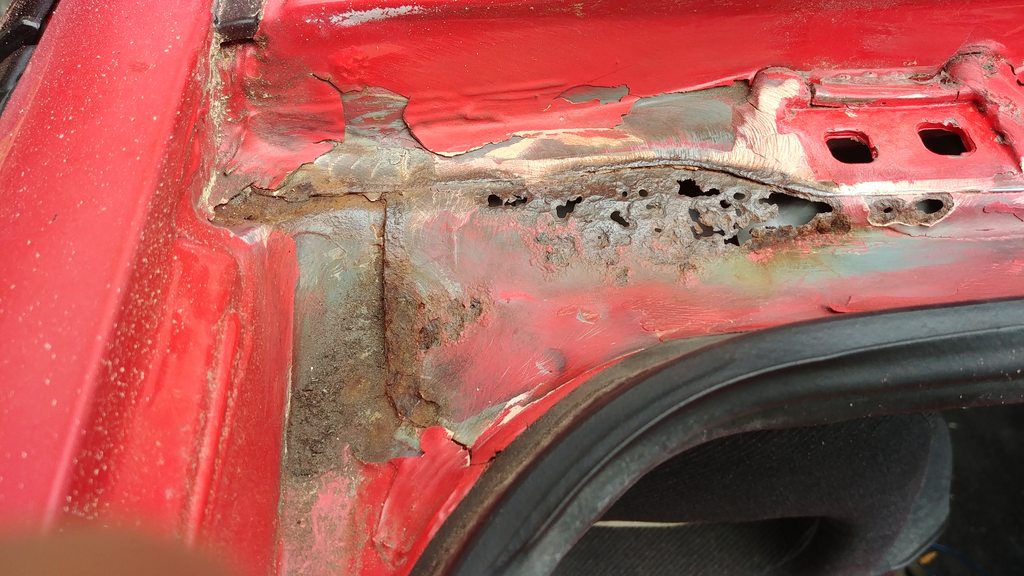
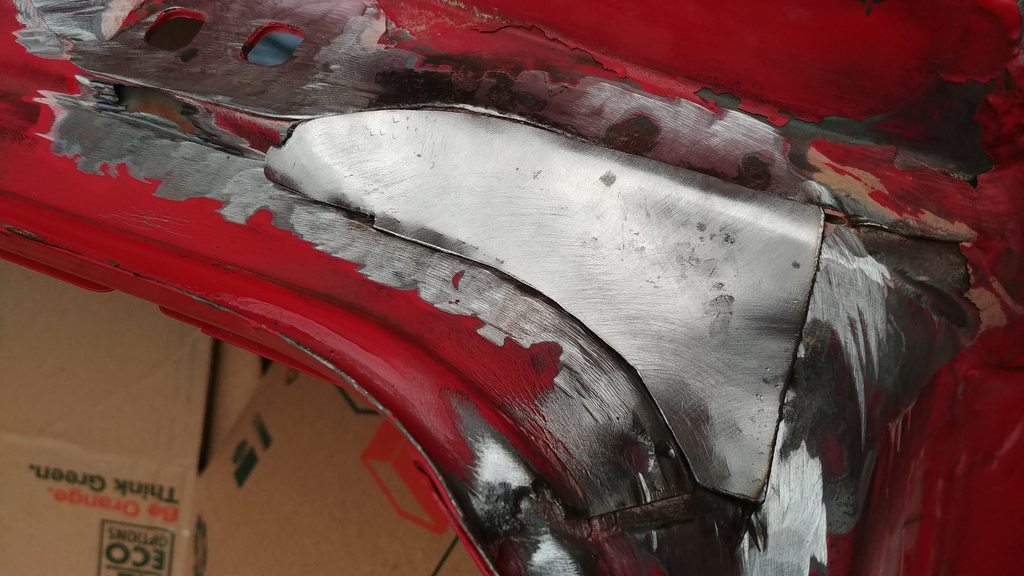
We left off in the middle of rust-busting around the top of the rear hatch. Here is what I was looking at after cleaning off the flaky stuff.
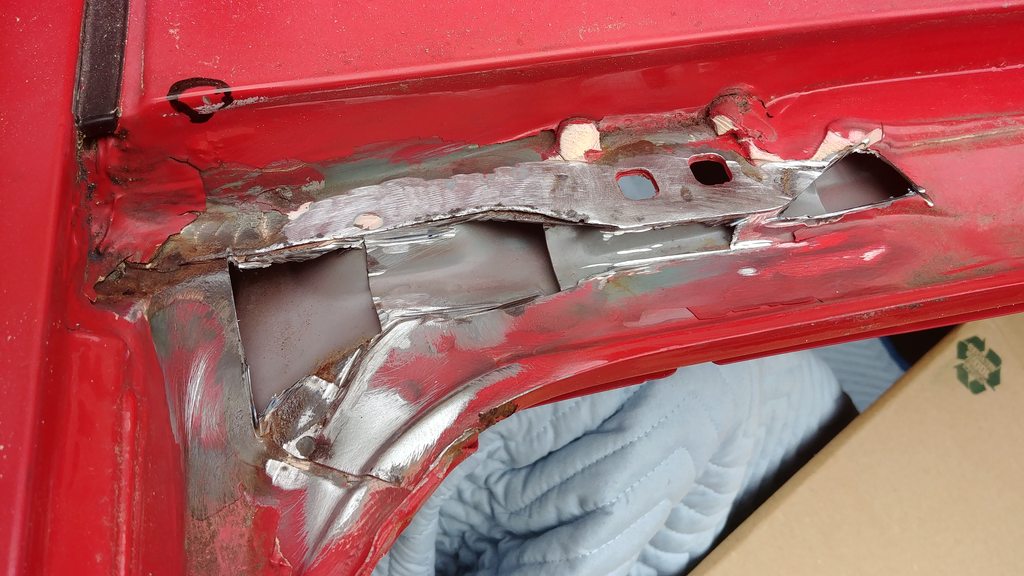
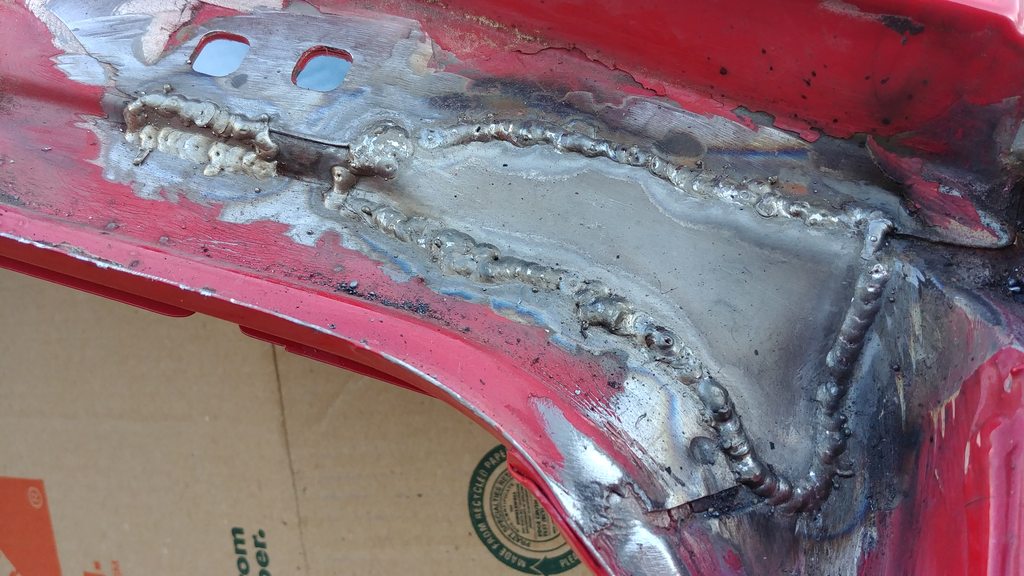
I started by cutting out the cancer and MIG'ing in some filler pieces.
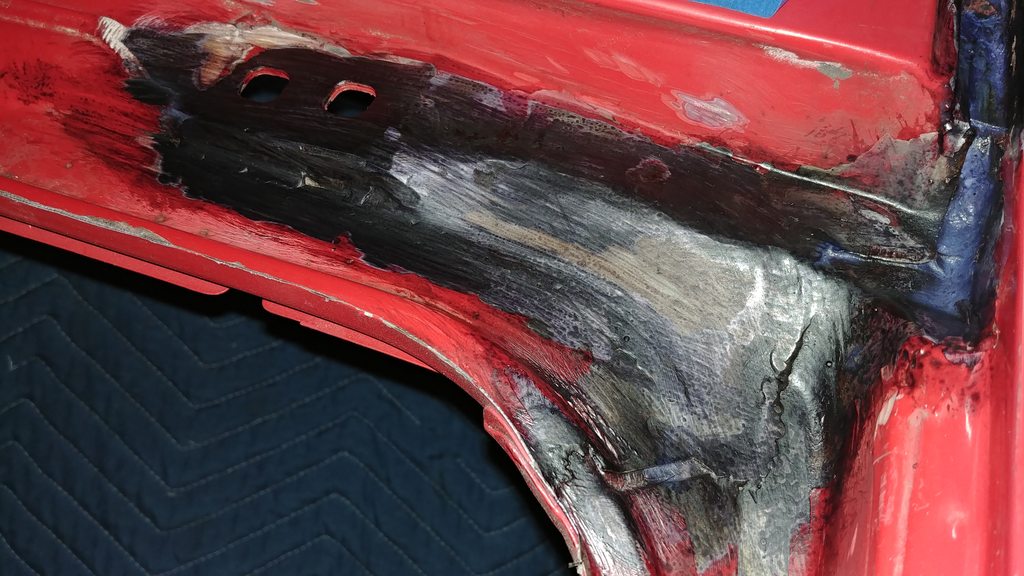
After grinding down the welds I applied some POR15. Hopefully this stuff will prevent rust from forming any time soon.
I didnt take any detailed photos after painting, but it came out "okay". Im not interested in building a show car, I just dont want it to look like **** and to leak water. Im satisfied with the results.
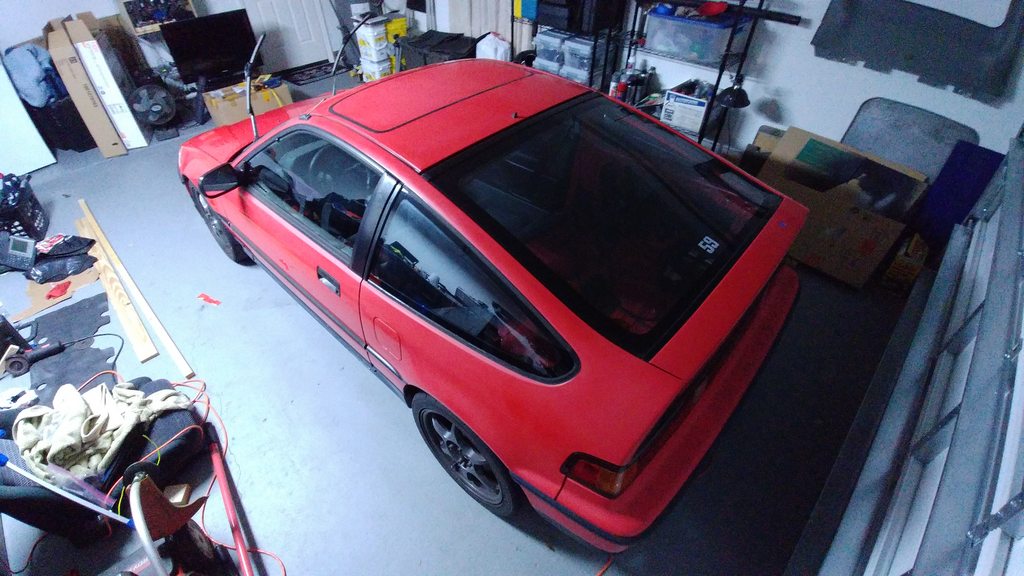
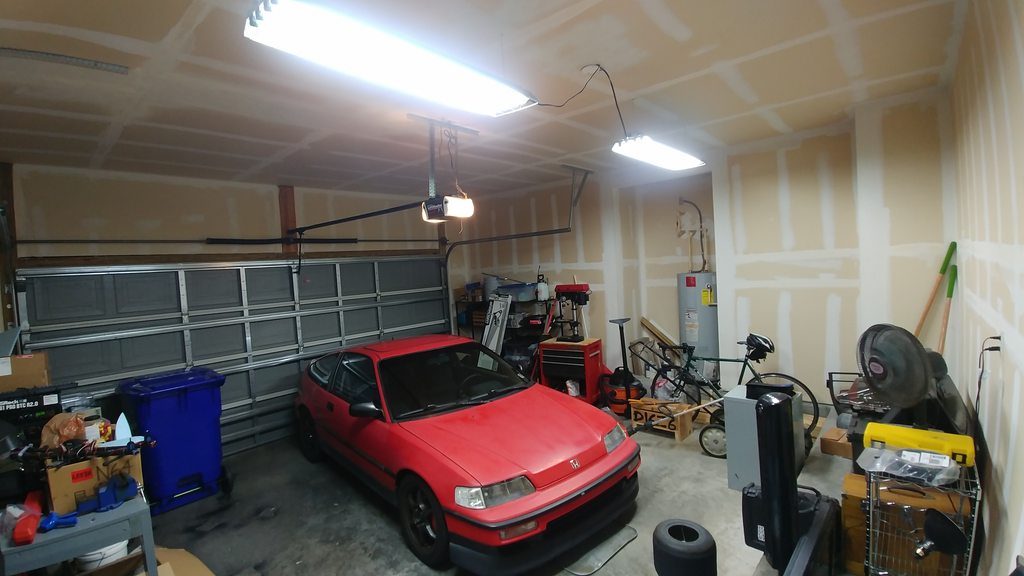
I took this photo after putting up some cheap T8 fluorescent fixtures.
As you can see I have the CRX situated among the post-moving mess, meanwhile the the Corvette sits out in the driveway. Im sure the neighbors think Im nuts...
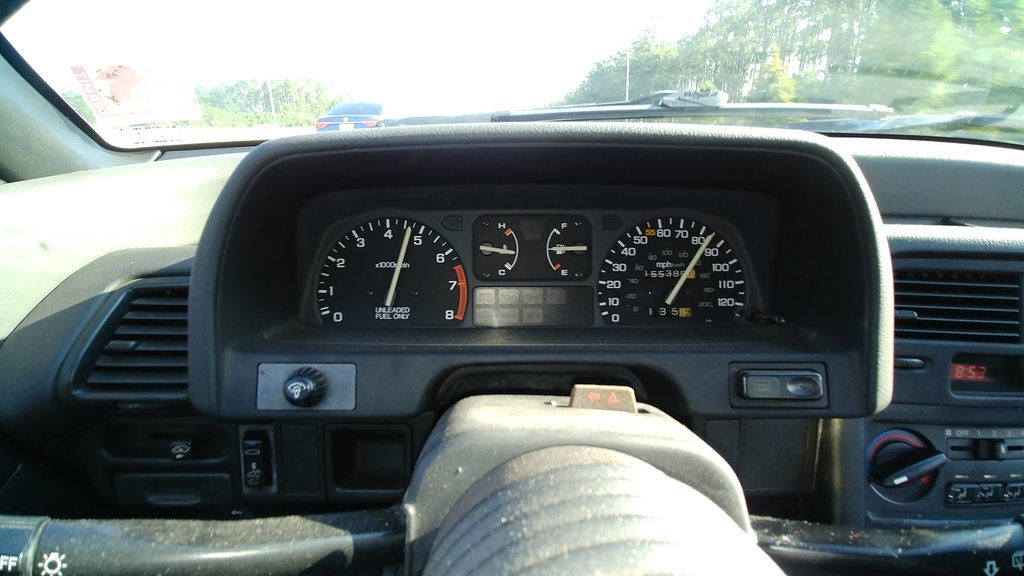
The new house is much further from work than where we were living before, which means lots of revs when commuting in the Honda. Pretty similar to Miata gearing.
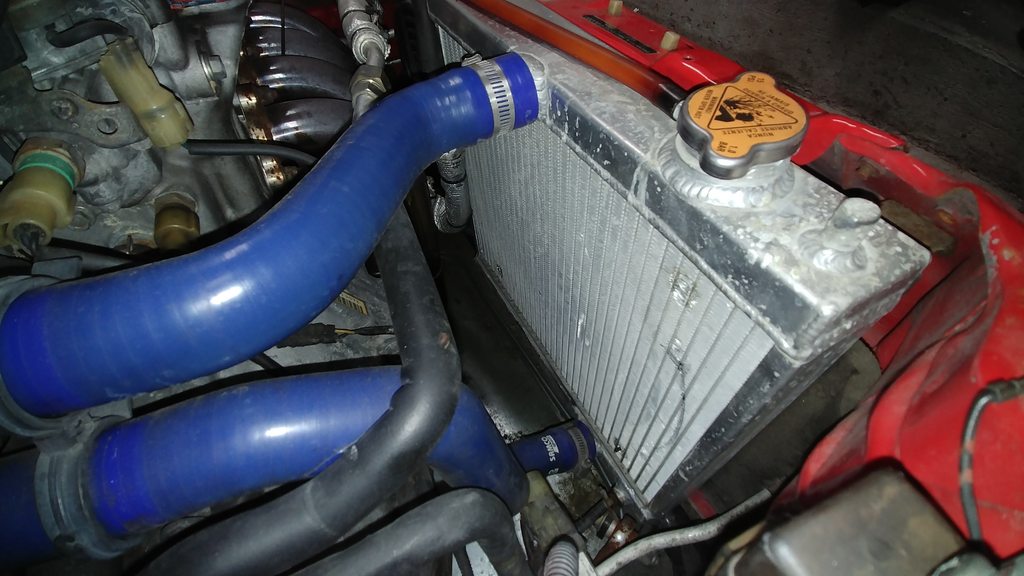
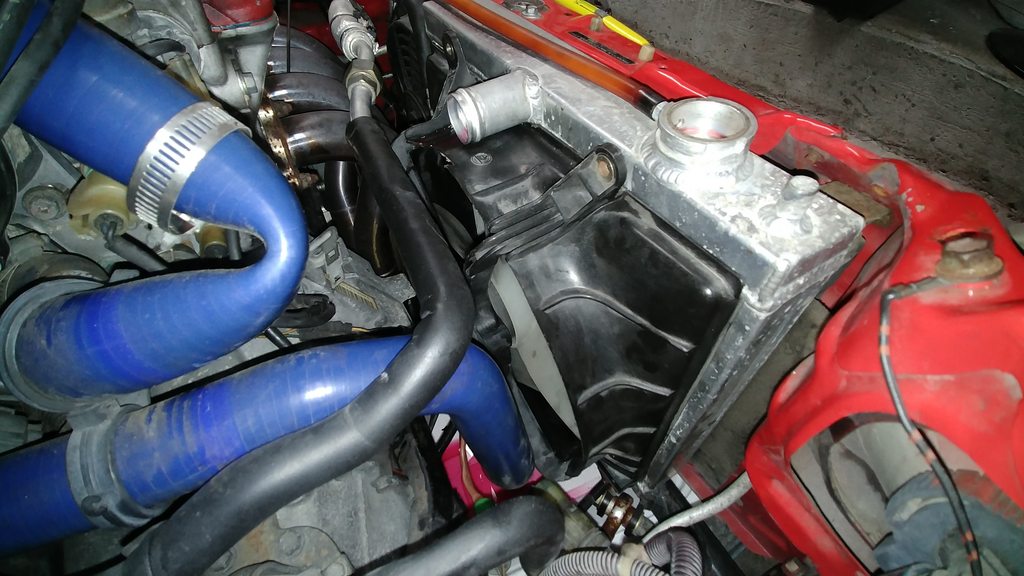
One of the issues I've dealt with since buying the car is it overheating in stop-and-go traffic or even when driving at low speed for extended periods. It hadnt been a huge problem, but going to get lunch during the summer would often cause coolant temps to break 215 degrees (This is where I have the ECU set to turn the CEL on). If I turned the AC off the temps would drop back down after a few minutes. Since the overheating only happened at low speed I figured a fan upgrade should be an easy fix. It had an OBX slim fan on it with no shroud. Here is the cute little radiator with the fan removed.
and after retrofitting an OEM civic fan (lots of trimming required)
I topped it off with distilled water and Redline water wetter. Happy to report, zero overheating issues since doing this mod.
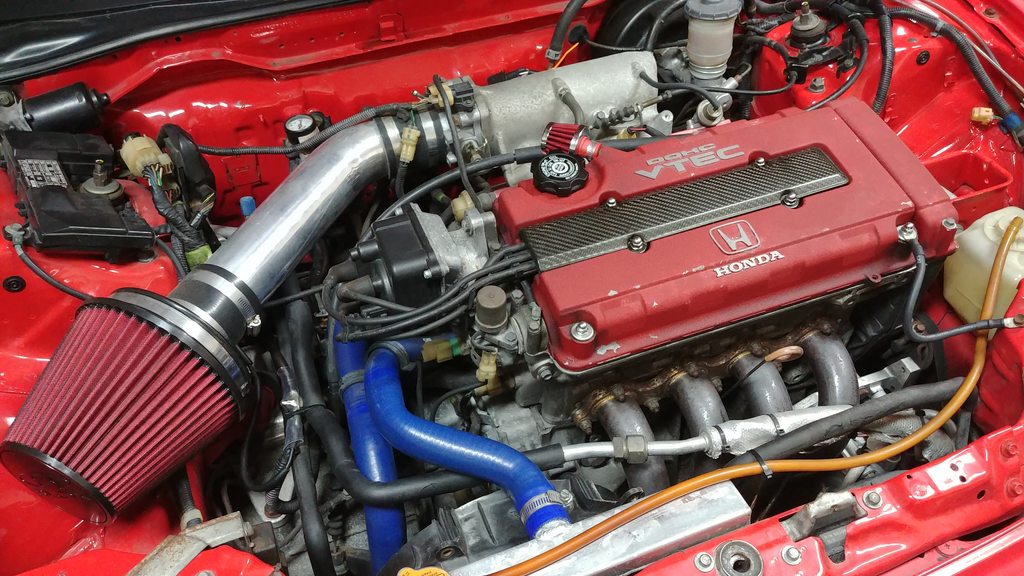
This is what the engine bay is looking like at this point. The extra large air filter conceals a large radius 3" ID velocity stack
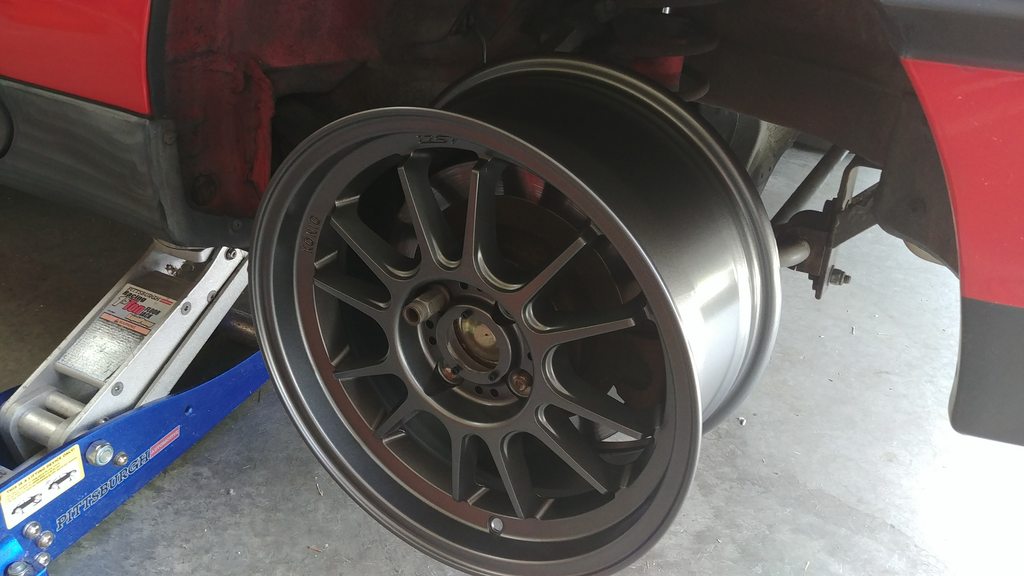
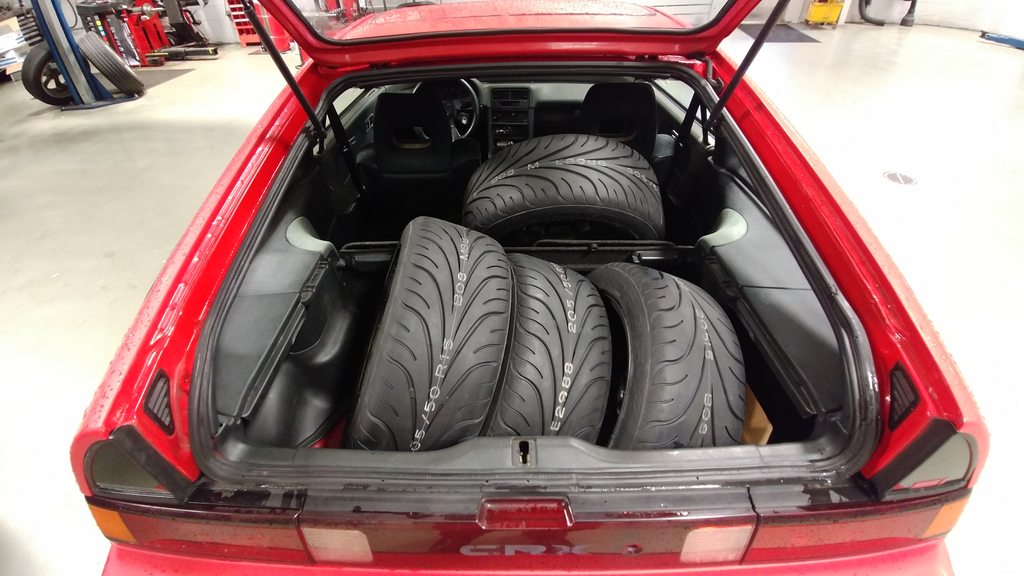
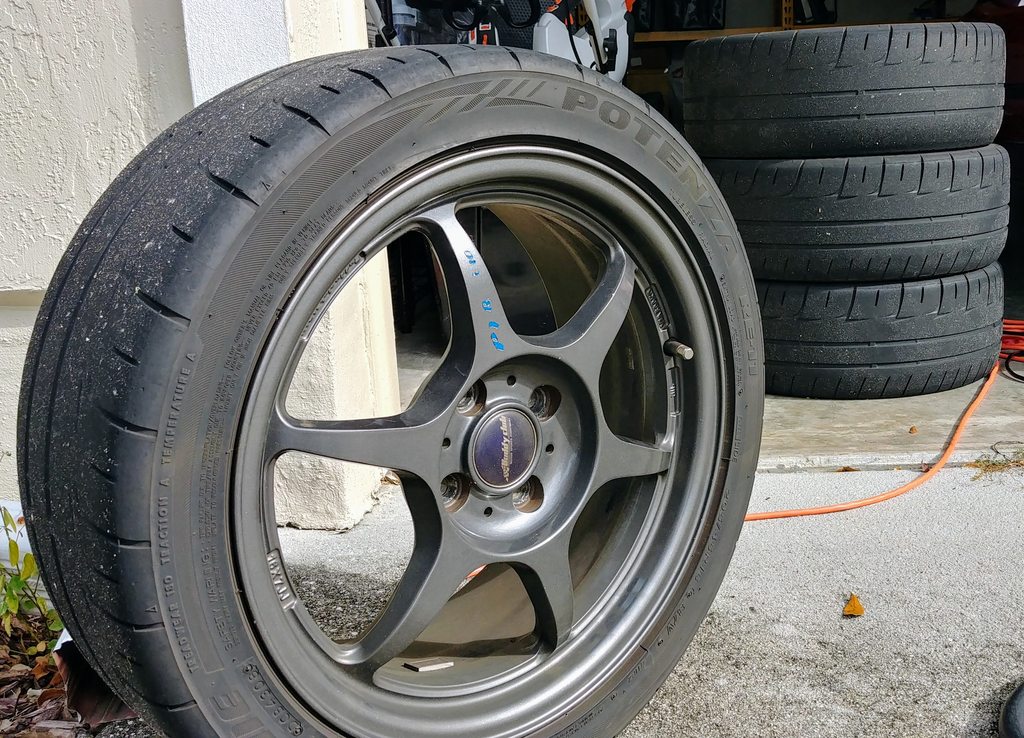
I had been putting off replacing the heavily heat-cycled bridgestone RE-11 tires for a while. The debate in my head was between getting another set of 16" tires with their higher price, or do I spend a little more to get some lighter 15" wheels and enjoy less expensive tires in the future. I finally caved and bought a set of 15x7.5 Konig Hypergrams. Tire fitment is a little challenging on these old civics, the wheel wells are pretty small and as much as I would have liked to have to 8+ inch wide 6ULs, its not very feasible without fender flares.
Taking my fresh Federal 595RS-RRs to get mounted at the shop
Goodbye 16" Buddyclubs
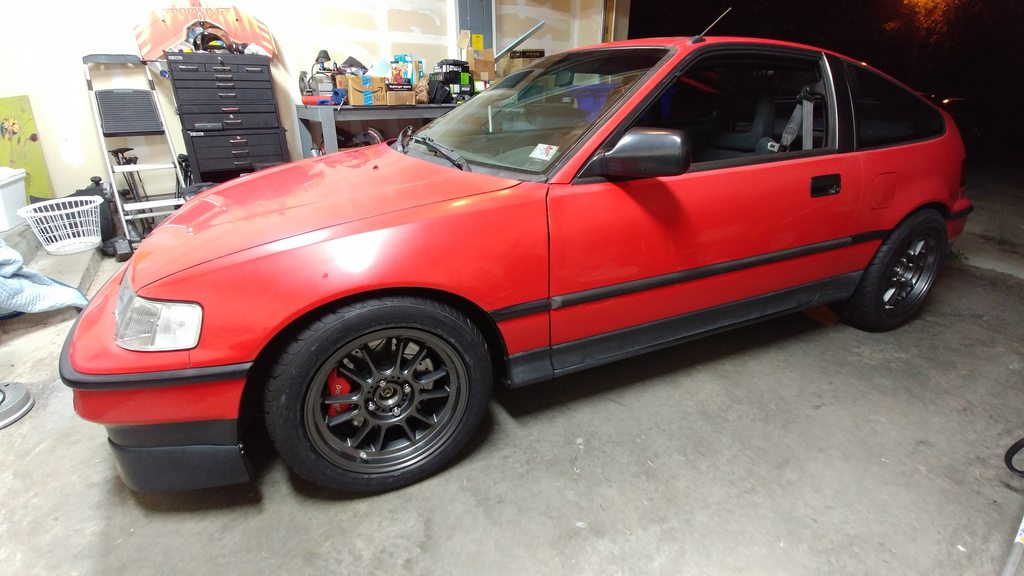
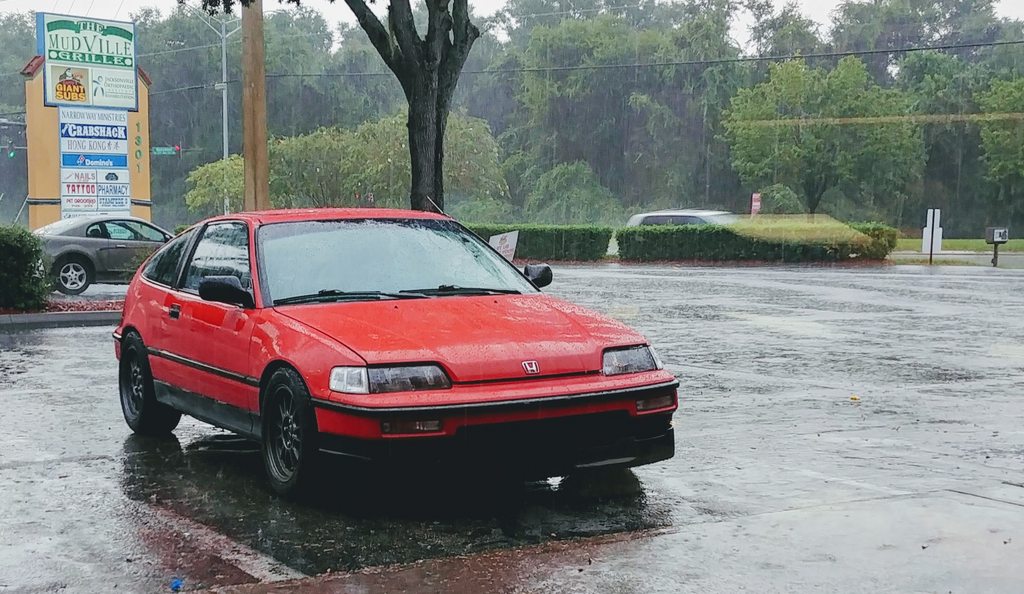
Hello 15" Konigs
The difference between the old worn out tires and these was dramatic. Additionally the larger sidewalls added some compliance that I appreciate. The steering is less sharp feeling but still excellent imo. Wet traction is good too.
Last edited by Full_Tilt_Boogie; Mar 14, 2019 at 10:35 PM.
In October I left Lexus and started a new job at Land Rover/Jaguar. Think these would fit on the CRX?
I hadnt done much with the Honda for a while other than drive it. But there was a problem with the CRX, a problem that can be found in the dyno chart posted a while back... Too few torques.
So, I had an engine builder friend of mine put together a high compression B20 short block for me. Its nothing too fancy, just a basic rebuild with ARP rod bolts and some special "B20 VTEC" pistons that have the proper valve reliefs for my B16 VTEC cylinder head.
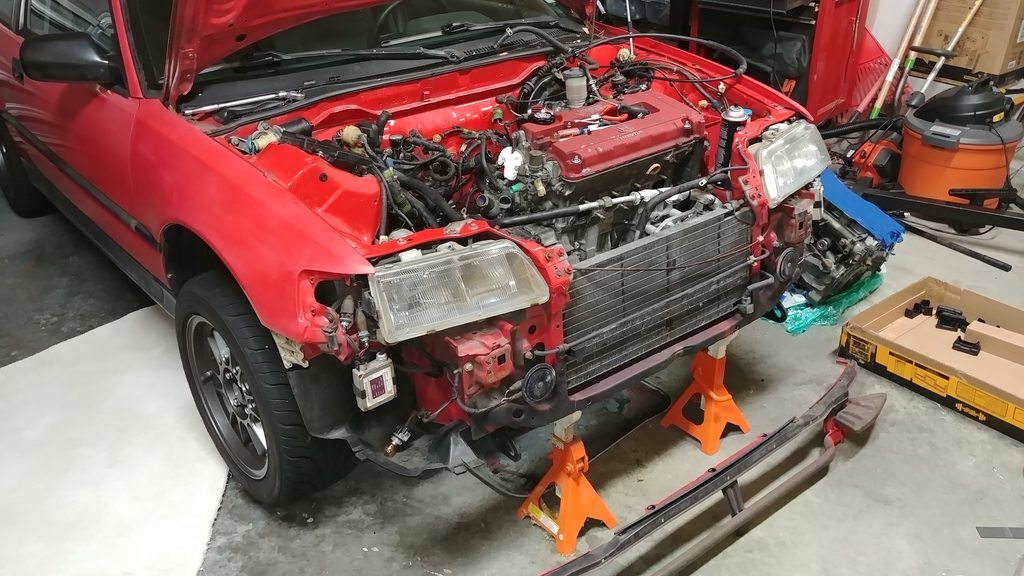
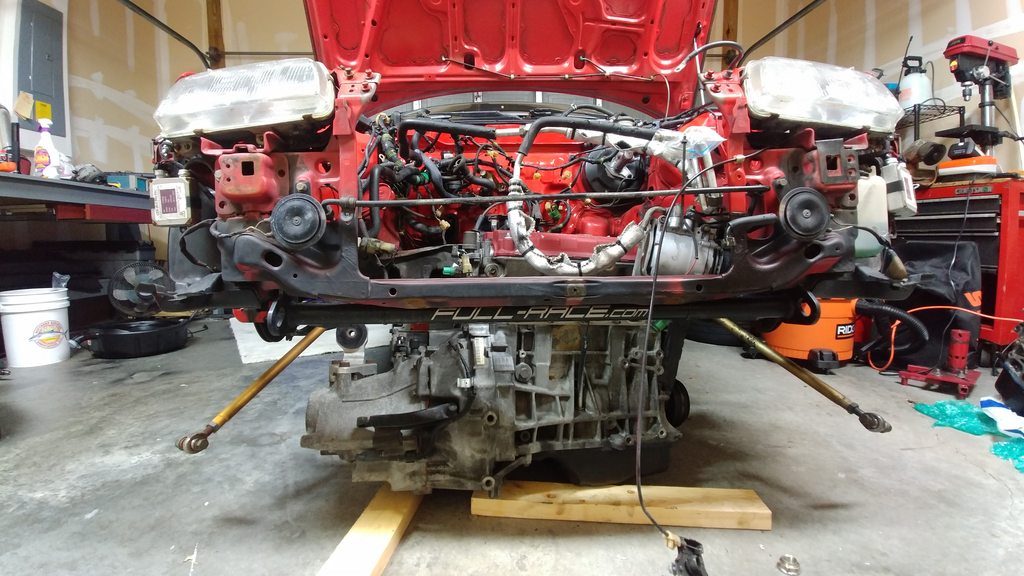
Started pulling things apart
I dont have an engine hoist so I was planning on borrowing one from a buddy. Then, my impatients got the better of me and I decided I was going to try pulling it out without one.
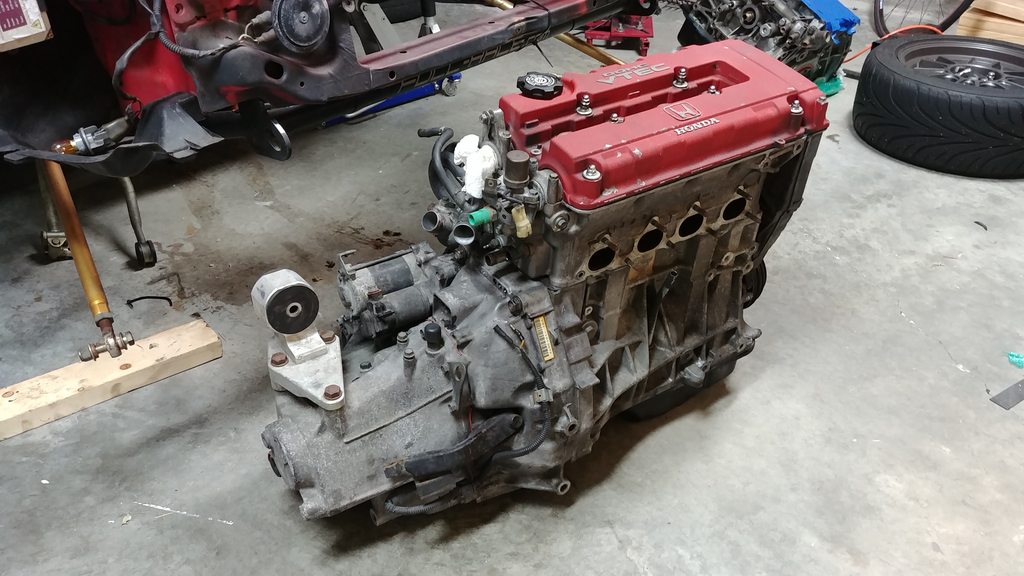
It wasnt elegant and it took much longer than normal, but I got it out
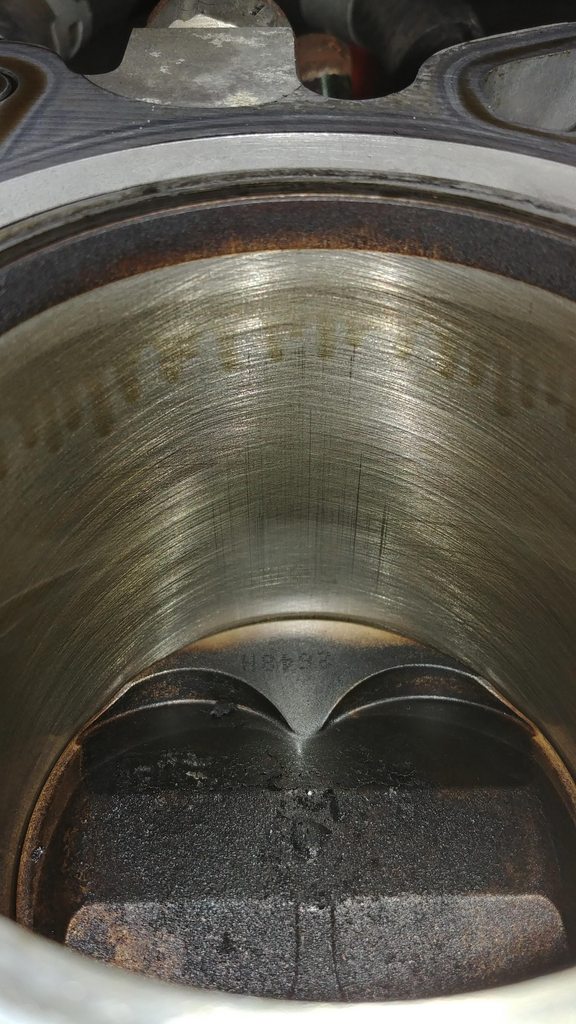
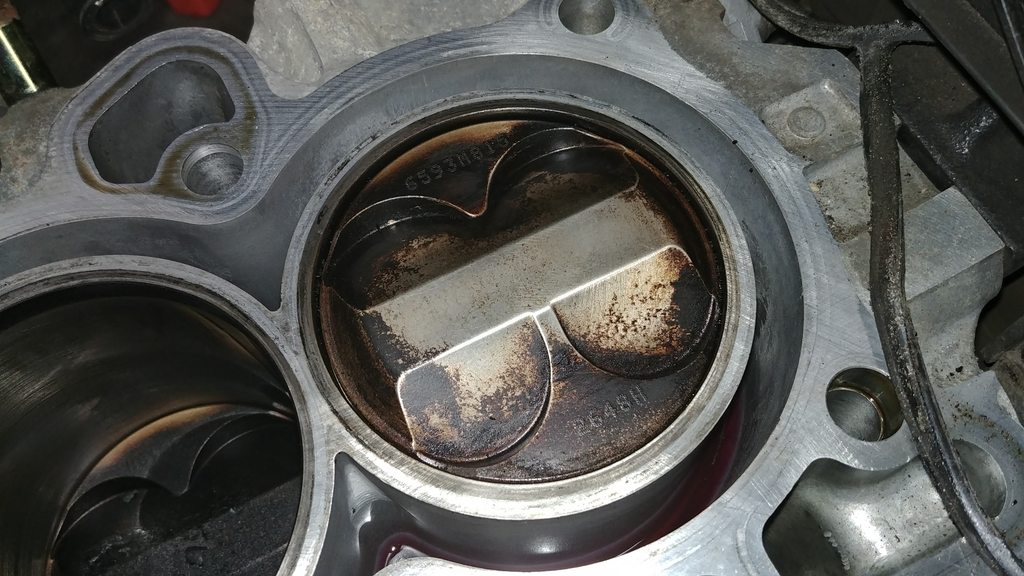
Heres what the B16's bores look like after running forged pistons for the better part of a decade and regularily being rev'ed to 8k+ rpm.
Pistons were pretty built up with carbon. Beleive it it or not, even with that big dome the CR was only around 11.0:1. The B20 is going to be 12.0:1.
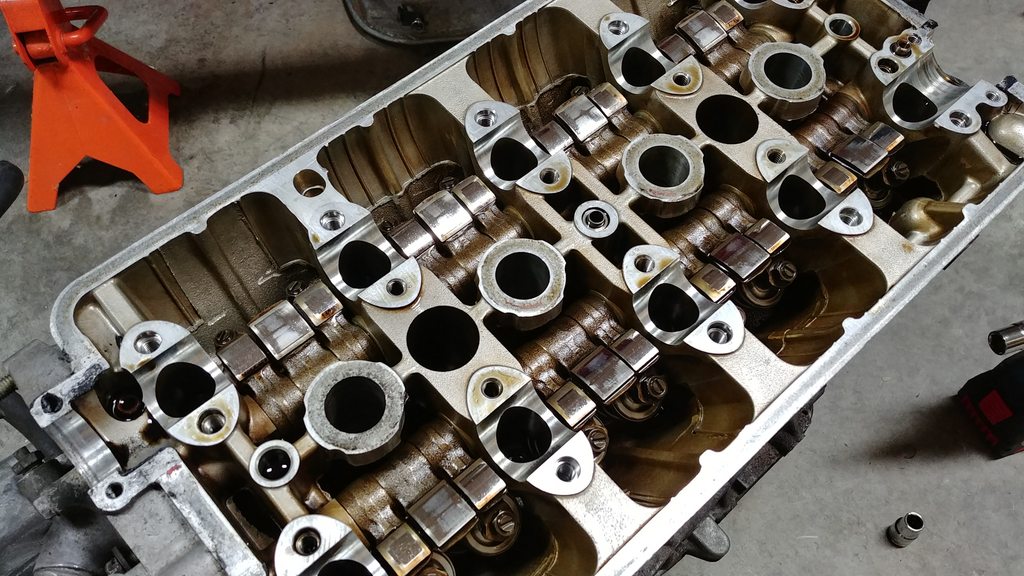
Rocker wear looks pretty good.
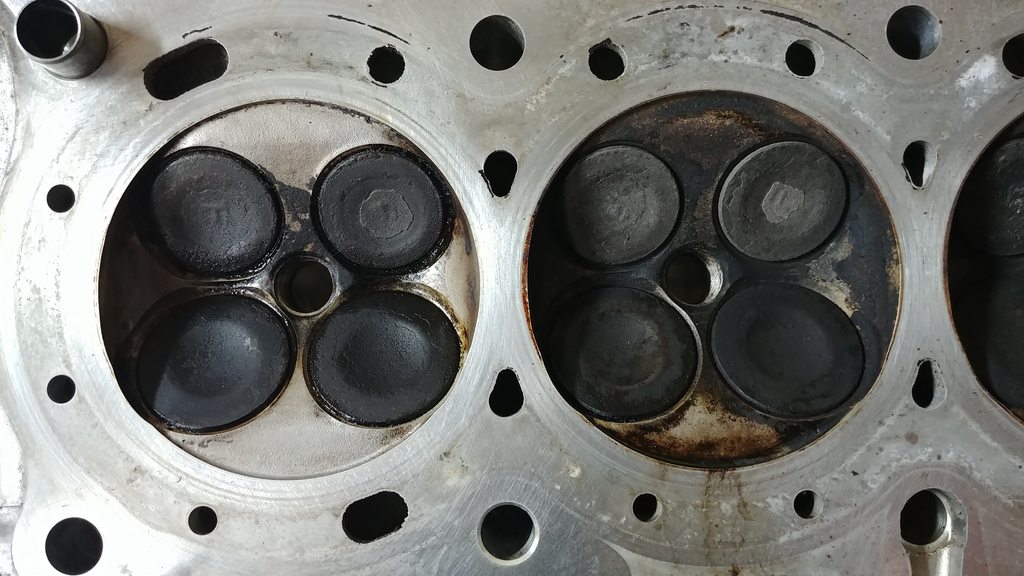
I cleaned a bit of the carbon out of the combustion chambers. The one of the right is just brake cleaner, the left was soaked in some MOC intake cleaner stuff I got from work.
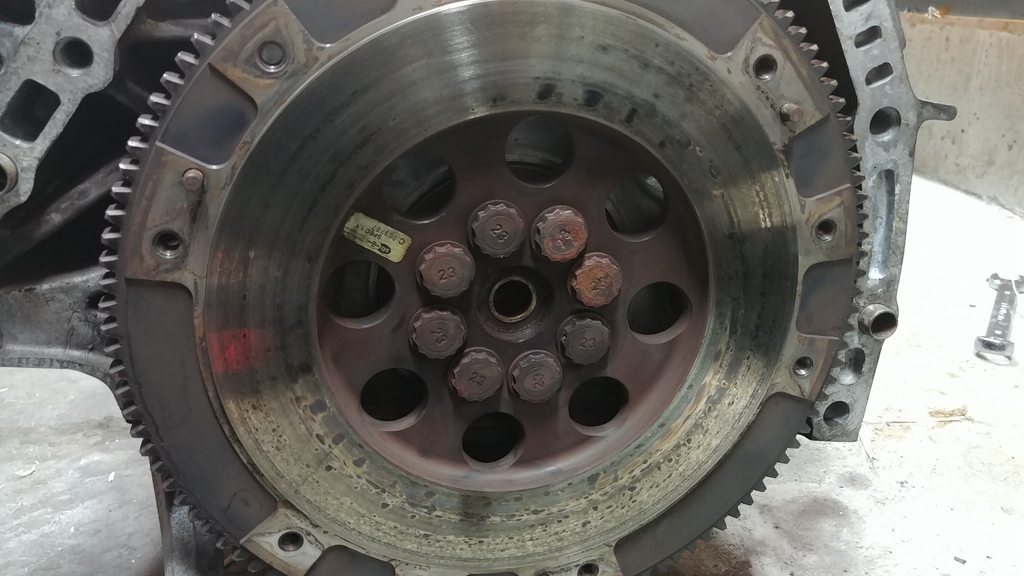
What do you guys think about the heat spots on this flywheel (The clutch PP looks similar)?
It had an ACT HD street clutch that was holding well, part of me just wants to throw it back together. If I hadnt take the engine out the clutch would have probably remained in there, working, for a long time. Im not sure I want to spend the money on a new clutch just because Im looking at it.
God i miss messing with these old B series engines,i did this exact engine build for an integra several years back. I have a 4 door EG shell that i have been threatening to build an engine for and put back on the road and reading this thread makes me want to do it so much more.
Embarrassingly enough, its a year later and I just very recently got the engine mounted back in the car. Its crazy how working 60 hours a week with an hour commute not only robs you of time but also of motivation to work on projects.
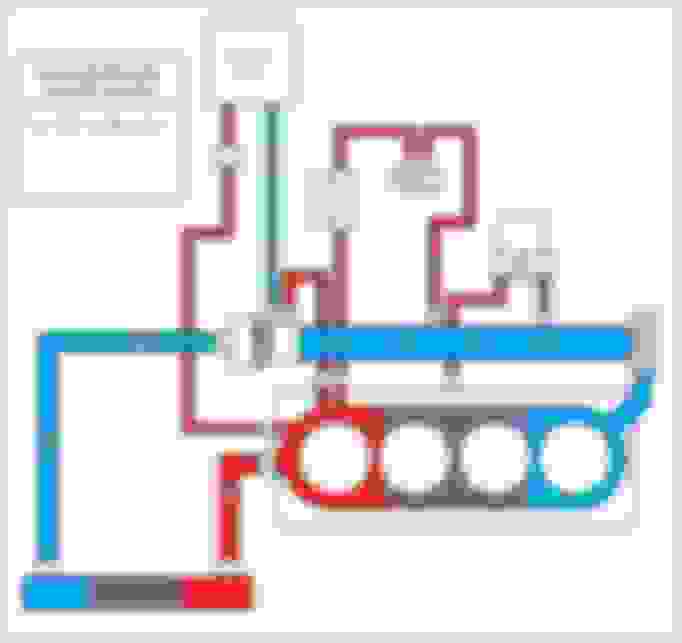
The good news is Im feeling the burn to get it back together and keep tinkering with it. Right now Im playing with the idea of improving the cooling system. Ive gotten a larger radiator that will require some custom mounting and shrouding, and Im considering an MTnet inspired coolant reroute. These cars never had the issue the Miata had, but they are a bit unusual in that the thermostat is in the "cold" side of the system. There is a pretty big bypass hose that goes from the hot end of the head to the mixing manifold (thermostat housing), which Id imagine has to be there to get the thermostat to open. Ive also speculated that it may need to be there to keep the lower radiator hose from collapsing at high RPM, since the cold side is also the side being drawn upon by the water pump.
Heres some MSPaint art to explain
I found a few posts referencing the bypass style BMW 2002 thermostat that may or may not have been used by a few people here in the early days of coolant reroute development. I like the idea of the bypass thermostat where you dont have the hot water bypassing the radiator all the time, while also getting fast warmup.
Im thinking something along these lines.
I may keep the heat. Not sure.
Other than filling/bleeding the system being harder, I think this may be a nice improvement over the OEM design. You may even want to call it the "Holy Grail" coolant reroute... just kidding.
is there a tial spring that works well with miatas ? Out of the box no mod? or is the hks the only one that works well outta the box?
I think you may have just been screwed by the terrible Miataturbo mobile layout. Whatever thread you were looking for I'm pretty sure this one isn't it
Just caught up on this thread, love the CRX SI, it's a sick car you got there.
Since its been almost a year again, time for an update.
I got the car running last april with the new engine setup. It ran really well, loooads more torque with the 2.0L bottom end.
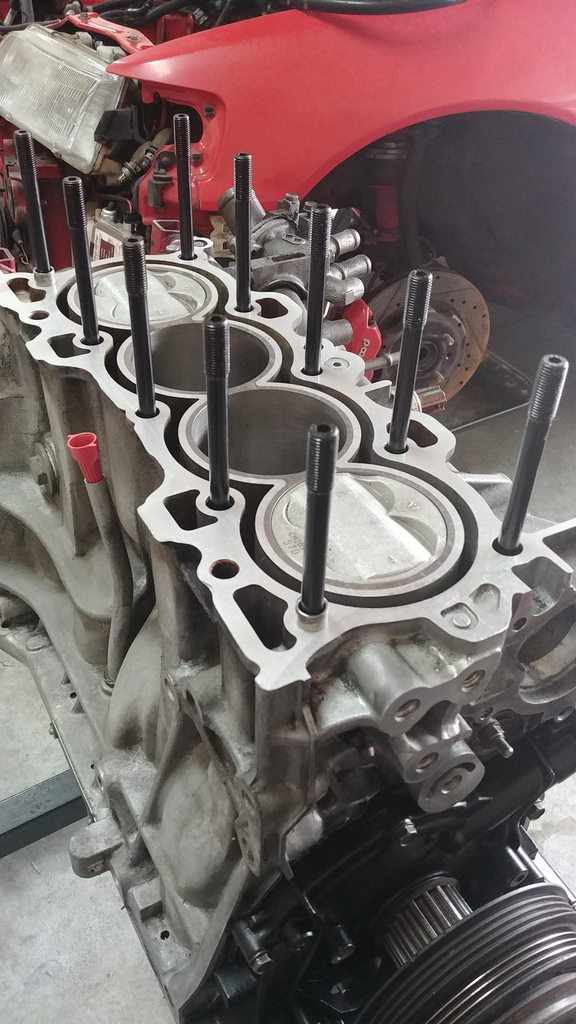
The only issue was a pesky oil leak in the head gasket. I replaced the head gasket once and it didnt fix it. Then I got busy selling my house, moving, etc. and just got around to pulling the head back off again.
The leaks are right here. You can see the gasket doesnt really line up properly since this is a mismatch of head and block, but there is at least 3mm+ of sealing surface everywhere, so Id think it would seal up if everything is flat.
The finish on the head looks "okay". It wasnt a problem before on the B16. But who knows. Maybe it was good enough there where the gasket aligned perfectly, but now its marginal.
Im going to take the head apart and get it milled just to be 100% sure its flat, but if that doesnt fix it I'll be at a loss.
I also found that Ive got some abnormal cylinder wear already. Not a good sign on an engine with only a couple of hours on it. Im thinking maybe the p2w is a little big, or maybe I just broke it in too hard.
EDIT - I figured Id add a few more photos for this update:
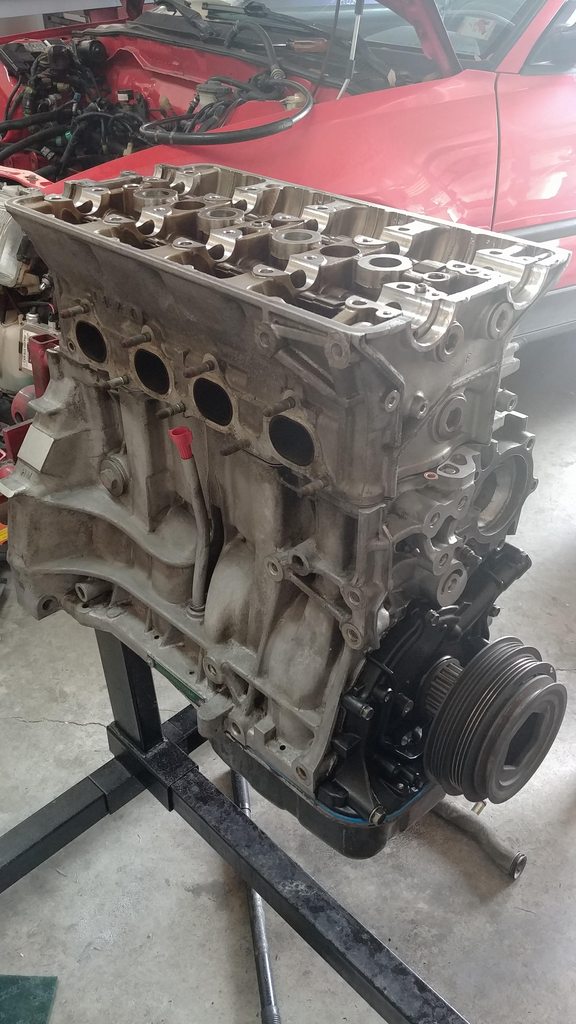
One of my quartine projects was rebuilding the engine bay harness with new tefzel wire, pins, conector shells, and wrapping it up in a mixture of braided sleeve and raychem heat shrink. I also added some deutch connectors in a few places. I should have taken more pics, but its still somewhat incomplete. The main thing is that all the old, brittle wire is gone.
Took a couple pics of it all together with the freshly painted VC and inlet manifold (This was when I had just started re-working the engine harness)
Last edited by Full_Tilt_Boogie; Feb 23, 2021 at 02:21 PM.
Another quarantine project has been working on a ITB setup. I bought some CBR1000RR throttles years ago, with the idea of putting some together, but like everything I do it turned into lots of procrastination planning.
The first issue with these throttles is that they are kinda too small. They would probably be fine on a stock B16 or B20, but I expect this engine to put out somewhere in the range of 210+ hp. So from the get go this is pretty much a project for the sake of a project. Mainly Ive wanted to get some experience really dialing in an alpha-n tune.
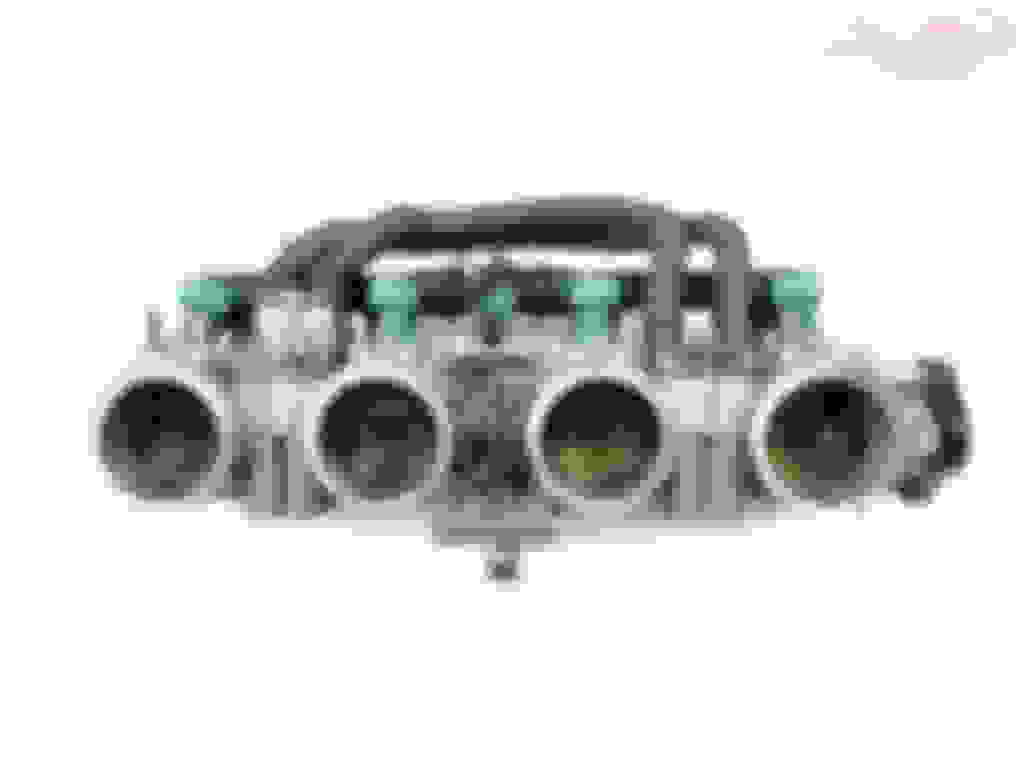
The second issue with these throttles is that the internal bore is offset compared to the outer diameter. This doesnt seem like a huge issue, but I really wanted to optimize this setup as well as I could, so I didnt want some kind of lip in there to disturb airflow. I also was totally opposed to holding them together with silicone couplers, even though that would have been really easy.
Not my pic, but you can see the offset here:
One solution to this was to forego the boots that normally hold the throttles to the head, and instead make a flange that would allow the throttle bodies to sit down into it, and have an offset opening. This would be sealed up with captured o-rings, and the throttles would be clamped into it using threaded rods that held the throttles in compression. I made a few designs like this, one of which was a 2 piece flange that could be cut on a waterjet. This screen cap is a single piece flange that would have to be cut on a CNC mill or router:
I decided this would be too much money to invest in these small throttles. So instead I reworked the plan to use the flanged boots. This means the flange could just be cut out of a piece of flat stock. Something like this:
I had a B16 manifold sitting around. Kind of a shame to cut it up because its actually a really good performing manifold. Works better than all the aftermarket stuff up to around 7.5-8k rpm...
The fitment with the boots ended up perfect. There was no hand port matching needed here.
cleaned up the cut on the chopped intake manifold as well. It needed to be a bit closer to the flange to get the closest alignment of the runners to the throttles.
and here it is all mocked up
runner length is roughly 22cm with the factory velocity stacks. I intend on messing with runner length with some 3d printed velocity stacks and spacing out the boots from the flange for fine tuning
Finally, here it is held up to the engine
I still havent gotten around to welding it.
Other than that Ill have some things to plug up, IAC to figure out, throttle cable to figure out, and then tuning.
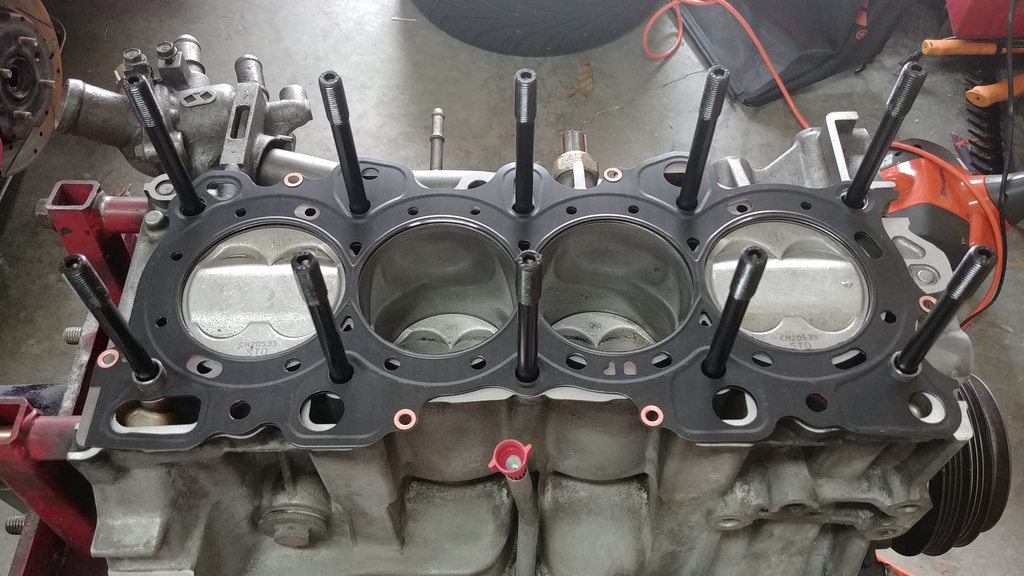
I didnt end up having the head milled. Instead Im trying a different head gasket, this time the gasket matches the block instead of the head. This is apparently the trick to not having these leaks. The only thing that sucks about it is that you have to open up 2 holes in the gasket for it to work with the larger diameter dowels that the head accepts.
If anybody is wondering, this is apparently the best tool to enlarge an opening in an MLS gasket. I tried a step drill, carbide cutter, and twist drill on an old gasket and they all sucked. This little sanding roll made a nice cut and was fast too.
Here is the gasket fitted
I didnt get it started because I need a new gasket for the vtec spool valve, but Im feeling pretty confident this will fix it.
Last edited by Full_Tilt_Boogie; Feb 28, 2021 at 08:13 PM.
I got it all together, but it was still leaking oil. Im thinking maybe I should have had the head skimmed, but I also noticed it seems to have quite a bit of blow by. I dont have a leak down tester, but when I took the oil cap off it was like a leaf blower the way gasses were blowing through that opening. Im thinking the high crank case pressure may be responsible for the oil finding its way past the head gasket around those drains.
So it turns out that cylinder wear really is as bad as it looks. Time to pull the engine back out.
Some of you may know me as having a somewhat irrational hatred of the Honda K series. Im able to admit that I was being a contrarian hater. This isnt going to the cheapest swap imagineable, but considering how old and rare the B-series stuff is getting, this makes more sense than ever.
I was able to get a low miles, JDM, K24A (basically the 200hp TSX engine) for $800
I did splurge a bit to get a late model 6 speed Civic Si transmission that came factory with a LSD. I could have saved a lot of money and gone with a 5 speed, but the gear ratios were pretty depressing. The length was one thing, but the spacing was awful. This box will give me ratios through the first 5 gears that are very similar to the excellent B16 transmission its replacing, plus the 6th gear so it doesnt howl so bad on the highway.
Here is a comparison of the gear ratios:
and here is a comparison of the estimated engine outputs, with gearing taken into account. Think of this like a dyno multiplied by the gear ratios and tire size to get the force the wheels are imparting to the ground (red is K24, blue is B20V):
My technical analysis is "This **** gonna be quick"
Most swap kits are built around the RSX 6-spd. The 8th gen Si trans (PNN4) is slightly different...different trans mount, different shifter mechanism, different VSS.
You may already know this...just a heads up. If you buy swap kit parts or a swap kit package, they’re likely to be based on the RSX style trans.
Most swap kits are built around the RSX 6-spd. The 8th gen Si trans (PNN4) is slightly different...different trans mount, different shifter mechanism, different VSS.
You may already know this...just a heads up. If you buy swap kit parts or a swap kit package, they�re likely to be based on the RSX style trans.
Its all pretty new to me since I havent messed with many swapped cars. I did get the appropriate mounts, witch also work with the AWD transmissions, so maybe thatll be something to do one day if the differentials ever stop being stupid expensive.
I think Im going to try to use a later shifter box, which will work natively with this late model shift selector. But if I have to, apparently you can swap in the older RSX type shift selector and use the more traditional shifter options.
Considering taking a gamble on one of these chinesium eBay shifters


 0
0