
DOWN THE RABBIT HOLE......2manyhobyz build thread


Thread Starter
Senior Member
iTrader: (4)
Joined: Feb 2011
Posts: 744
Total Cats: 42
From: Crest Hill, IL
Hello, and welcome to my build thread. First a little history on the car. 00 SE, I am the third owner. The original owner (a doctor I was told) had the FMII kit installed and was driven about 30k miles before I picked it up in Mobile AL. in March 2011. I drove the car for about a year picking up parts along the way for the built motor. Then disaster happened. After breakfast with a friend of mine, I said �Have you driven my car? I think I have It dialed in pretty well.� He starts getting on it and it�s over boost cut. I say no problem lets get out the laptop and see what the deal is. We started data logging and found it was hitting 17psi. All the settings looked fine, WTF? The third time we accelerated it still did it and I bent all four rods. Up until he drove it I had it dialed in to hit 10psi and stay there. Spark cut at 12psi. Obviously I missed something in the tune. Possibly I didn�t compensate enough for a more aggressive WOT.
So, with that being said, I came up with a list of everything that�s been done to the car to this point. I have pics of most everything but they won�t follow much of a time line.
LOWER STUFF:
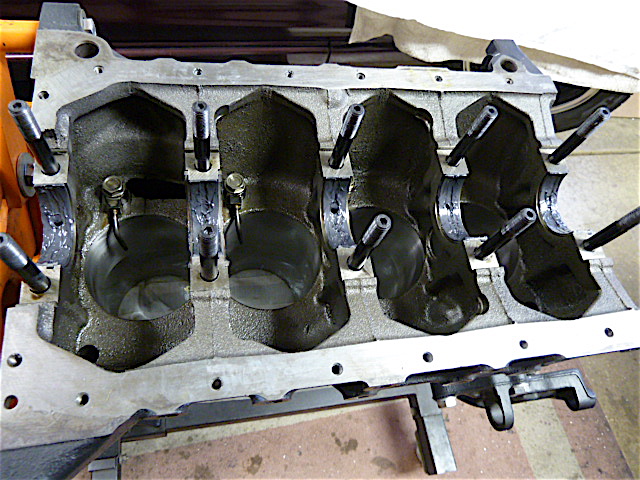
1.8 NB block
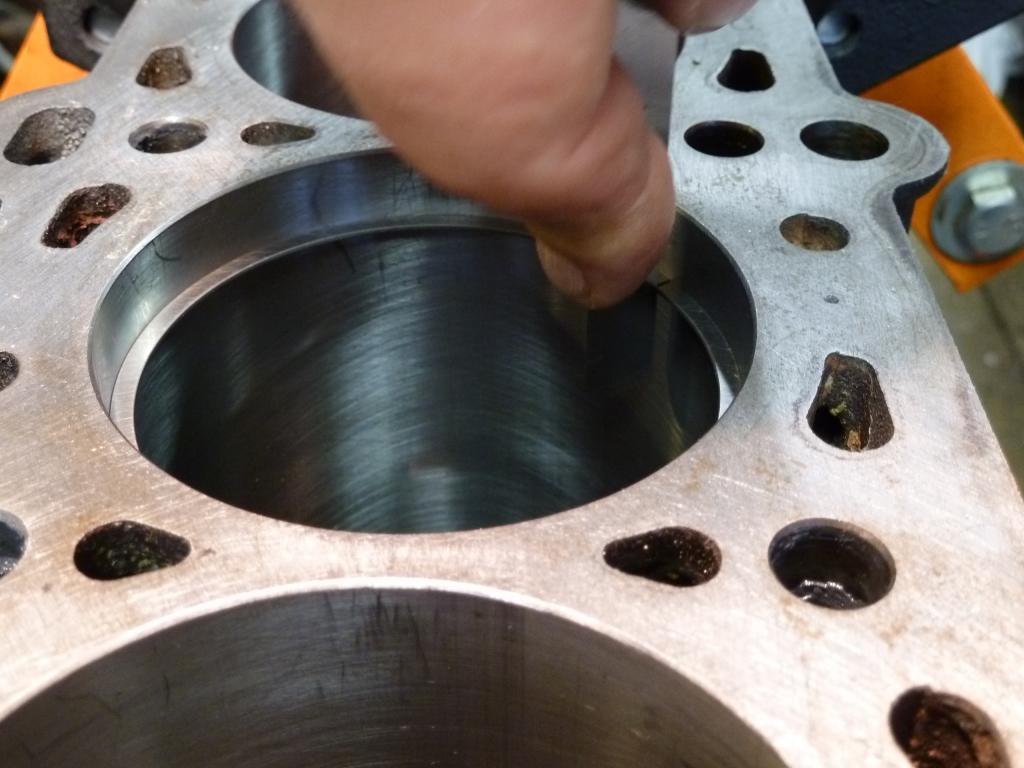
1mm over
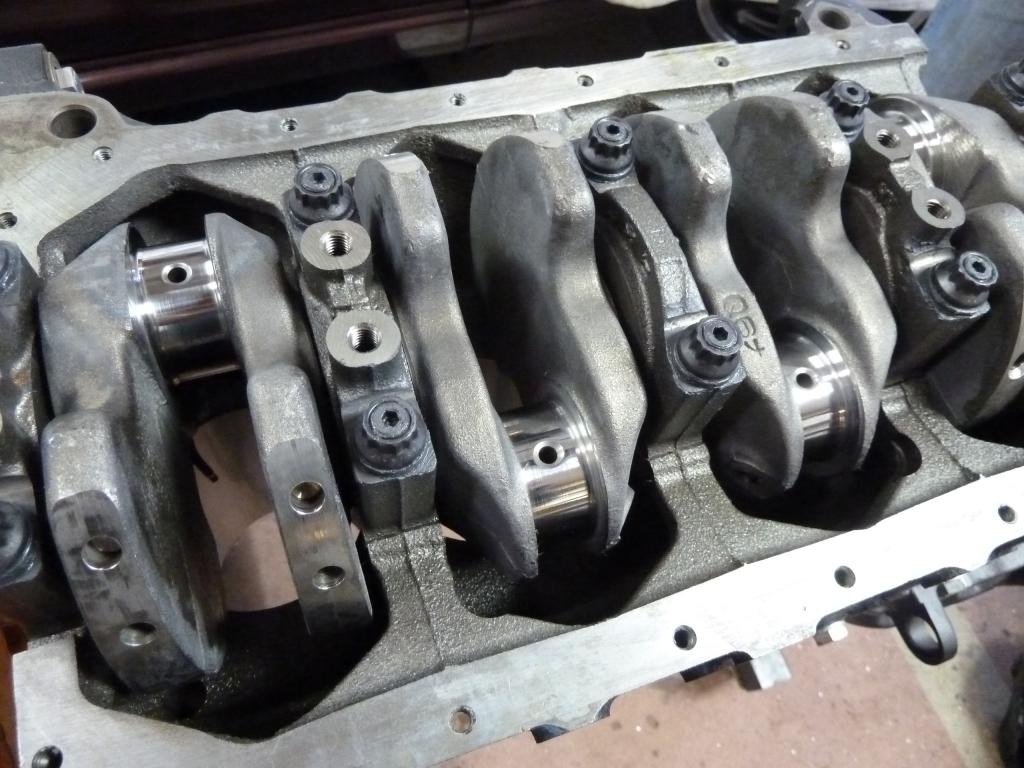
Polished main & rod journals
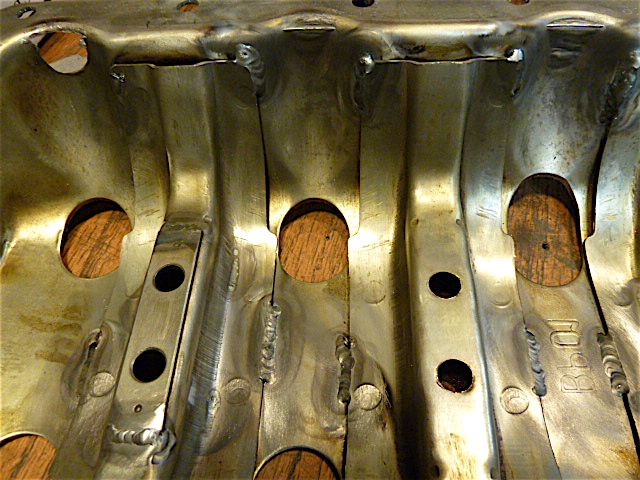
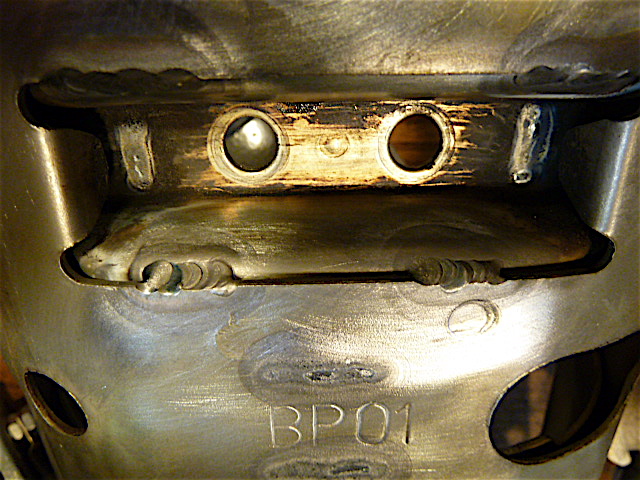
Main bearing support bracket with Tig welded supports
Machined oil pan with welded plate for turbo oil return
Boundry Engineering oil pump
Custom windage tray
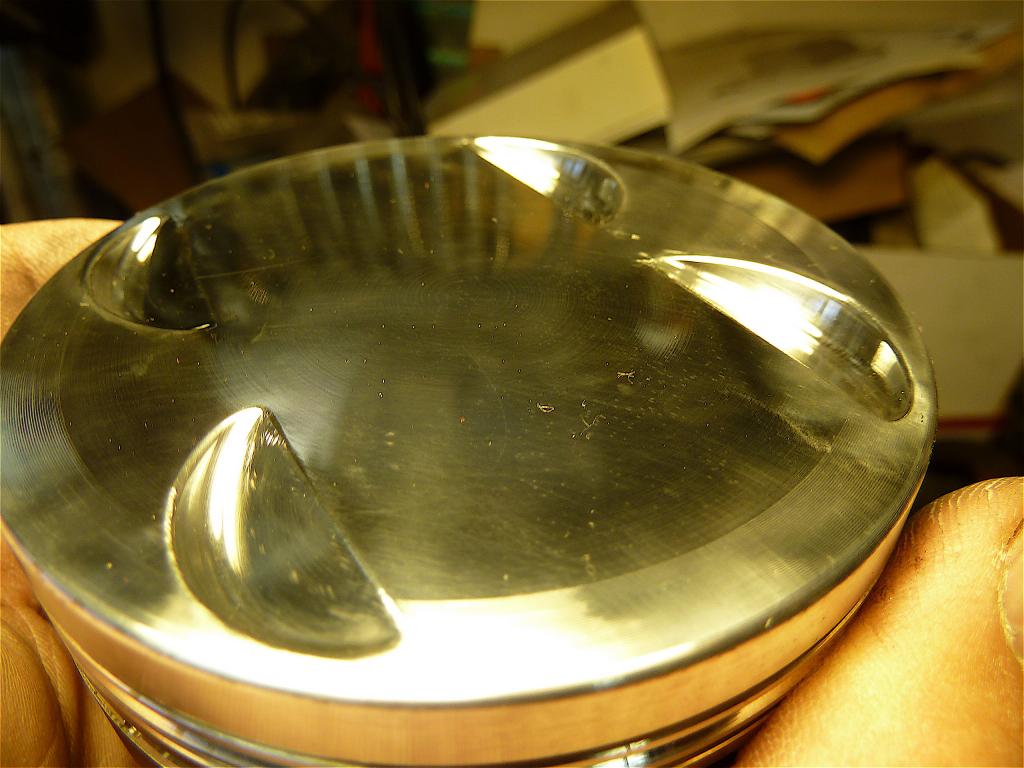
JE 9:1 pistons with valve edges smooth and polished
Eagle H beam rods
The engine block vent mod
Entire rotating assembly (balancer to flywheel) balanced to less than one gram
Flyin Miata 8lb flywheel
ACT clutch
UPPER STUFF:
00 intake been gutted, polished, port matched.
Custom manually operated VICS
OBX intake gasket
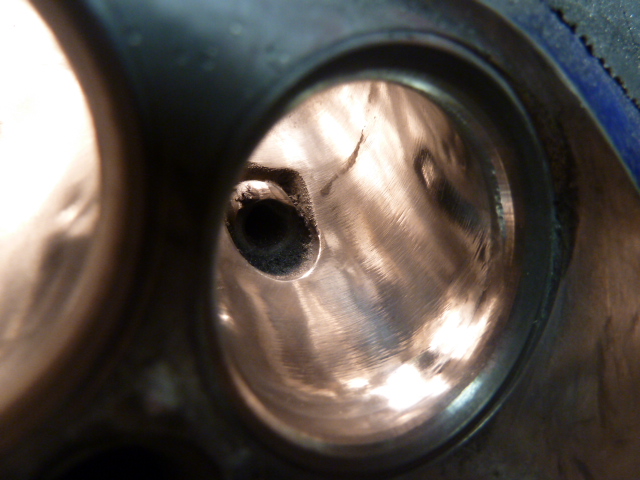
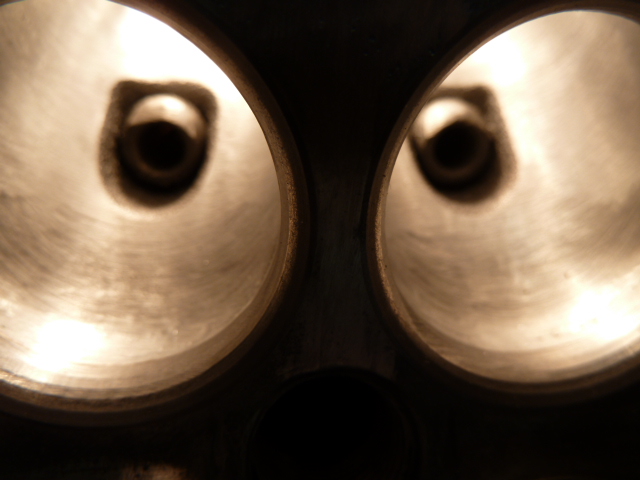
BP4W head port & polished, blended bowels, enshrouded valves
Supertech valve train, +1 intake & exhaust valves, dual springs
All lifters & shims polished
Polished combustion chamber
Singh Groove combustion chamber mod
Fidanza adjustable cam gear on exhaust cam
2560R turbo, ported & polished, hot side ceramic coated, enlarged waste-gate
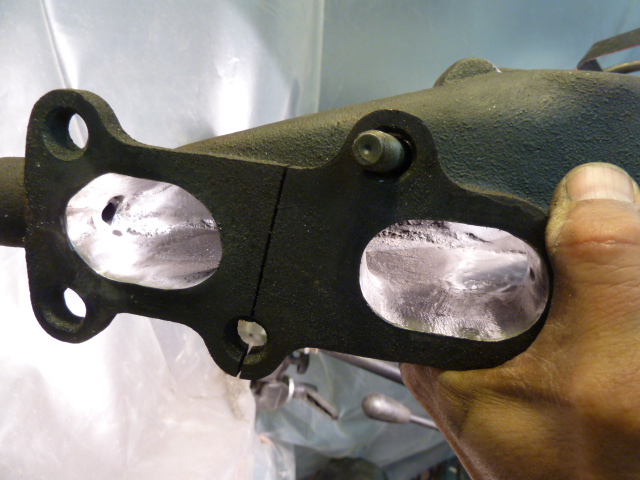
FMII cast exhaust manifold, ported & polished, ceramic coated, wrapped down pipe
Begi coolant reroute with heater valve addition
OTHER STUFF:
Stock/poly engine mounts (73 durometer)
3.63 limited slip � six speed
LS2 coils
Taylor 10mm custom wire set
650 Siemens injectors
MSII+ by Revrant
Digital EGT by Auber Instruments
Aeromotive fuel pressure regulator
FM sways & AGX shocks
Valve cover mods
Honda valve/PVC mod
Corrado rotors, Hawks, Prop valve
4� ram air induction
I realize I went a little OCD on some stuff. I just wanted to take each individual component and try to maximize it�s contribution to the whole.
With the bottom and top end being squared away I can upgrade the intake, exhaust, turbo, etc as budget allows and the down time kept to a minimum.
A few parts came in.
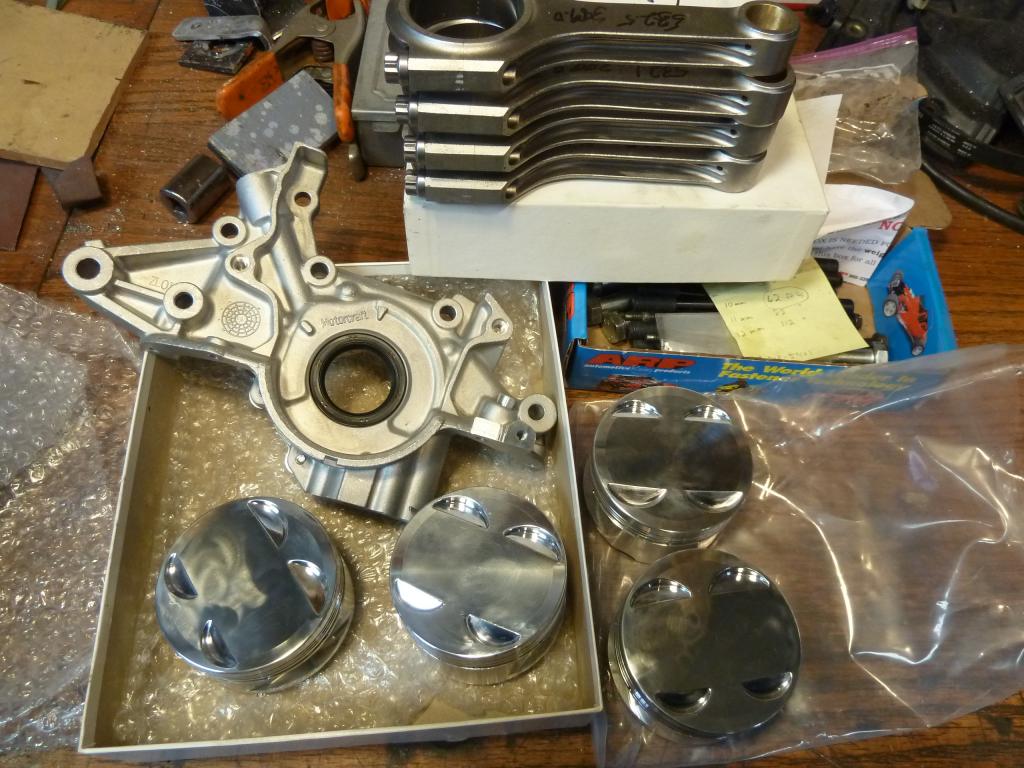

Some assembly pics.
I thought a lot about what to do for ring gaps. I choose .030 (top) and .034 (second). This may seem a little wide, but only by .007. Compression test after 5k miles will see how well my guess was.
I had to trim the main bearing studs down so the MBSP (Main Bearing Support Plate) will fit correctly.

The MBSP came off a Protege. I pulled an extra couple of bearing caps with the intention of replacing the center one on my block which had no mounting studs and welding in another support rib so that all the bearings were braced. But since the block had already came back from the machine shop I decided to just beef it up with tig welds all over. Way better than the spot welds from the factory.

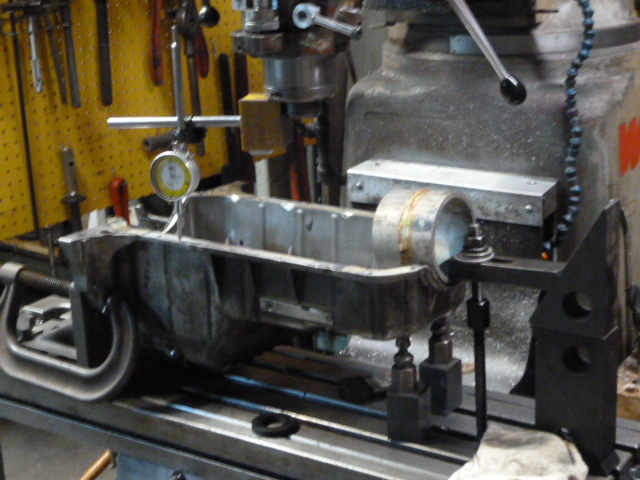
If you use the stock pan you have to machine .087 off the face of the pan so the transmission bolts will line up correctly again.
So, with that being said, I came up with a list of everything that�s been done to the car to this point. I have pics of most everything but they won�t follow much of a time line.
LOWER STUFF:
1.8 NB block
1mm over
Polished main & rod journals
Main bearing support bracket with Tig welded supports
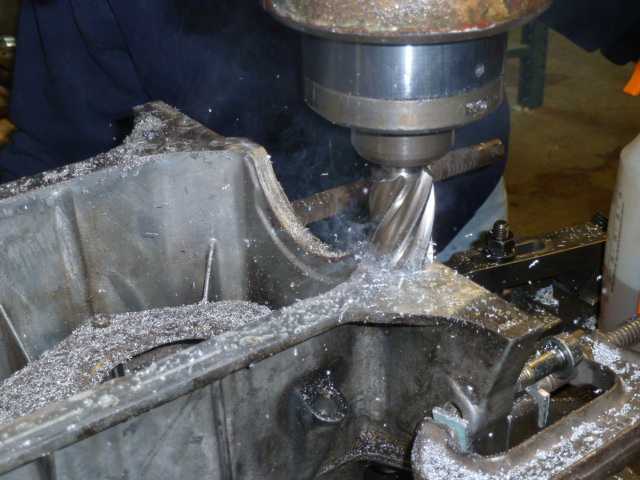
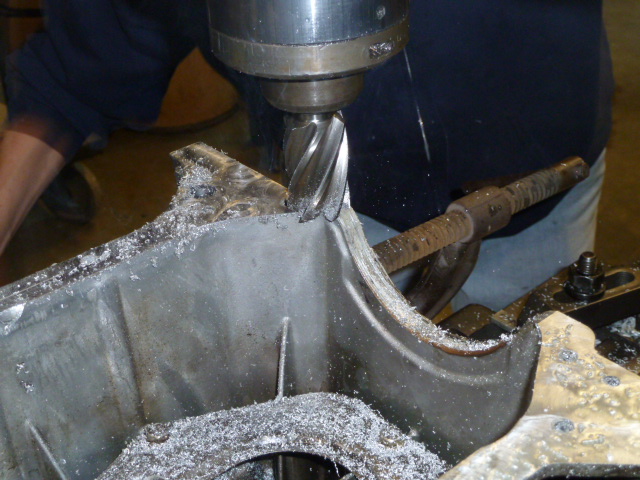
Machined oil pan with welded plate for turbo oil return
Boundry Engineering oil pump
Custom windage tray
JE 9:1 pistons with valve edges smooth and polished
Eagle H beam rods
The engine block vent mod
Entire rotating assembly (balancer to flywheel) balanced to less than one gram
Flyin Miata 8lb flywheel
ACT clutch
UPPER STUFF:
00 intake been gutted, polished, port matched.
Custom manually operated VICS
OBX intake gasket
BP4W head port & polished, blended bowels, enshrouded valves
Supertech valve train, +1 intake & exhaust valves, dual springs
All lifters & shims polished
Polished combustion chamber
Singh Groove combustion chamber mod
Fidanza adjustable cam gear on exhaust cam
2560R turbo, ported & polished, hot side ceramic coated, enlarged waste-gate
FMII cast exhaust manifold, ported & polished, ceramic coated, wrapped down pipe
Begi coolant reroute with heater valve addition
OTHER STUFF:
Stock/poly engine mounts (73 durometer)
3.63 limited slip � six speed
LS2 coils
Taylor 10mm custom wire set
650 Siemens injectors
MSII+ by Revrant
Digital EGT by Auber Instruments
Aeromotive fuel pressure regulator
FM sways & AGX shocks
Valve cover mods
Honda valve/PVC mod
Corrado rotors, Hawks, Prop valve
4� ram air induction
I realize I went a little OCD on some stuff. I just wanted to take each individual component and try to maximize it�s contribution to the whole.
With the bottom and top end being squared away I can upgrade the intake, exhaust, turbo, etc as budget allows and the down time kept to a minimum.
A few parts came in.
Some assembly pics.
I thought a lot about what to do for ring gaps. I choose .030 (top) and .034 (second). This may seem a little wide, but only by .007. Compression test after 5k miles will see how well my guess was.
I had to trim the main bearing studs down so the MBSP (Main Bearing Support Plate) will fit correctly.
The MBSP came off a Protege. I pulled an extra couple of bearing caps with the intention of replacing the center one on my block which had no mounting studs and welding in another support rib so that all the bearings were braced. But since the block had already came back from the machine shop I decided to just beef it up with tig welds all over. Way better than the spot welds from the factory.
If you use the stock pan you have to machine .087 off the face of the pan so the transmission bolts will line up correctly again.
Reply
 1
1

1

I choose .030 (top) and .034 (second). This may seem a little wide, but only by .007
How did you calculate for .030/36 gaps?
Not knocking your build, just making sure "you're sure" and ok with it - before you build a wicked smoke generator

Last edited by GeneSplicer; Feb 10, 2013 at 08:58 AM.
Reply
0
0
Thread Starter
Senior Member
iTrader: (4)
Joined: Feb 2011
Posts: 744
Total Cats: 42
From: Crest Hill, IL
Hi Bryan, yeah I know those numbers seem a bit much. My decision was based on hearing about boosted motors that have been running ring gaps at the minimum calculations and then ended up with broken/cracked rings. JE uses a carbon steel nitrided ring which I believe has a little more thermal expansion. The heat generated from this turbo at 17-18psi and later on with an EFR might see EGT's in excess of 1300+F. So in this situation the ring gap could close another .004 on each side of the ring half. I think that's a couple of human hairs. The person helping me with this build had problems with the recommended minimum on his motor and cracked all for rings. His next time around he went with the above gaps and compression was great and so was power and no smoke on boost. Biased on his good results I hope I have them too. We'll have to wait and see.
Reply
0
0
Thread Starter
Senior Member
iTrader: (4)
Joined: Feb 2011
Posts: 744
Total Cats: 42
From: Crest Hill, IL
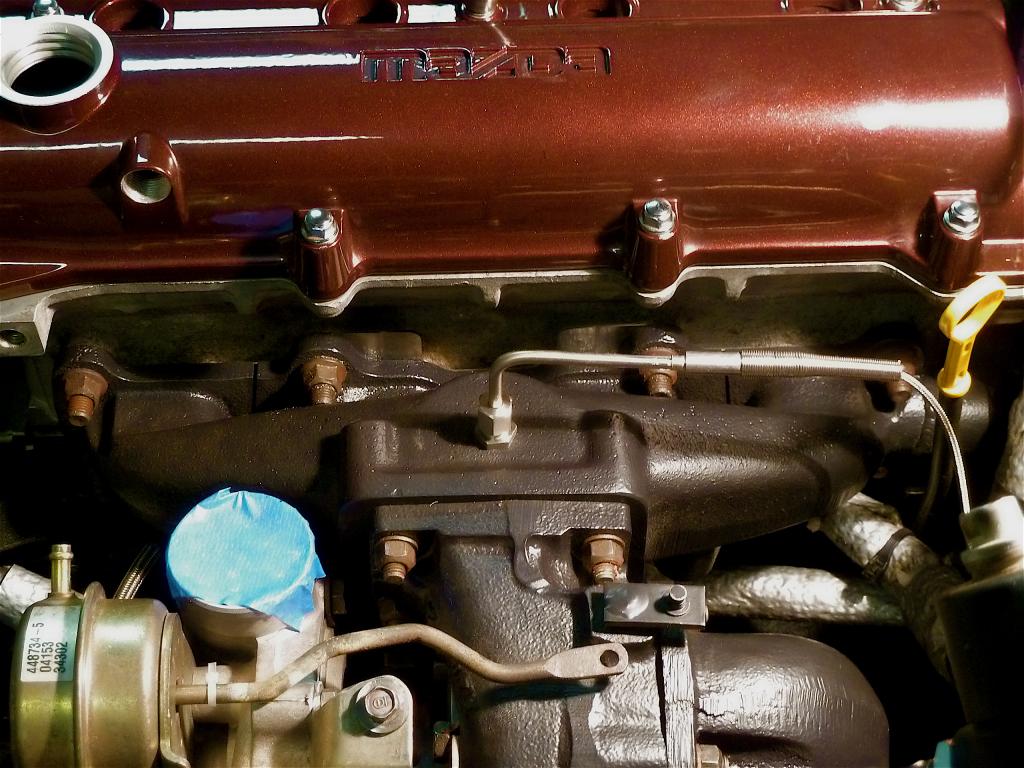
Next up is the vent hole in the engine block. Where this is at there is a large opening inside. The idea behind this is to find an alternative air vent besides the valve cover. This also where the engine oil is also draining back to the engine so there is also some competition between air that's in the lower half of the engine and the oil in the head trying to drain back down. I drilled and tapped this for 3/8 npt and connected a hose barb for 5/8 hose. For testing I will vent this into a clear container to monitor any oil trying to get out. If this turns out that too much oil is coming out the vent I can try a smaller hose or just put a plug there. No harm, no foul.

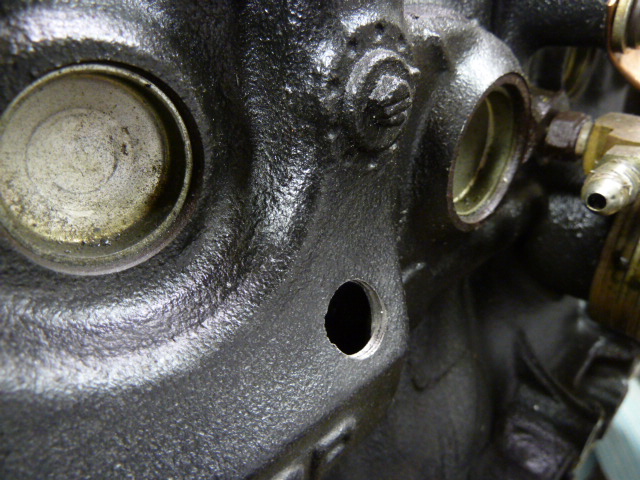
I welded a small 3/16" plate to the side just about where the factory turbo drain is. If you have power steering, (Mine's deleted) you might want to take a sharpie and mark the spot before taking the engine out. One of the lines is really close and could need to be bent.

That about does it for the bottom end, I'll post more soon.
I welded a small 3/16" plate to the side just about where the factory turbo drain is. If you have power steering, (Mine's deleted) you might want to take a sharpie and mark the spot before taking the engine out. One of the lines is really close and could need to be bent.
That about does it for the bottom end, I'll post more soon.
Reply
0
0
Thread Starter
Senior Member
iTrader: (4)
Joined: Feb 2011
Posts: 744
Total Cats: 42
From: Crest Hill, IL
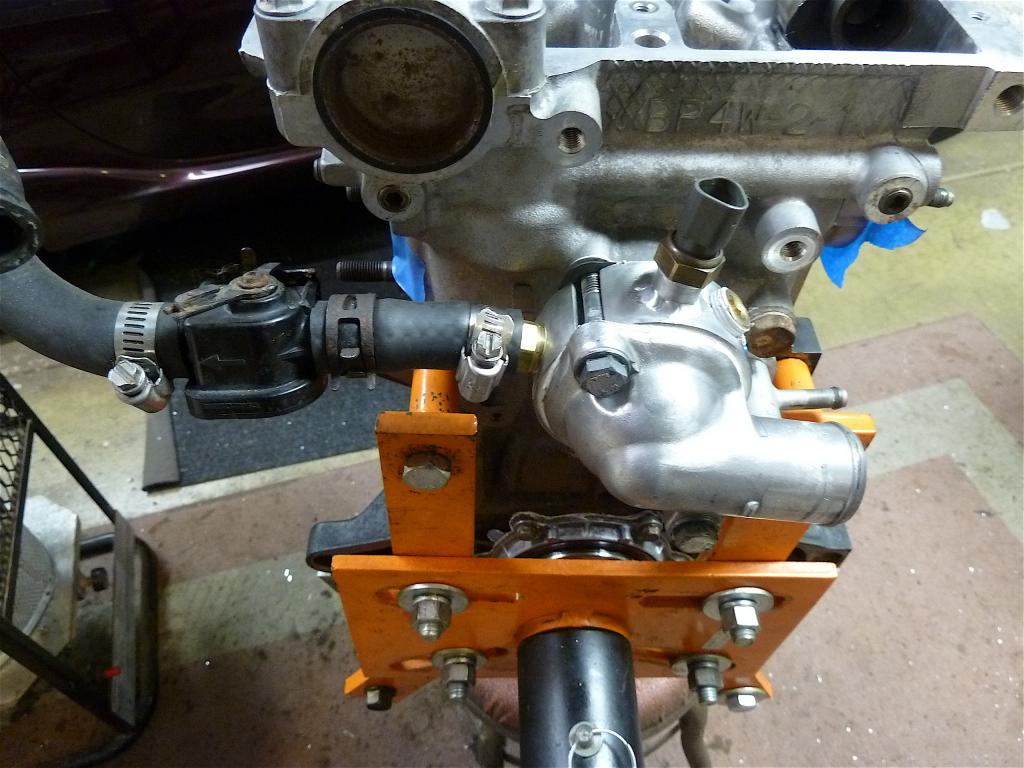
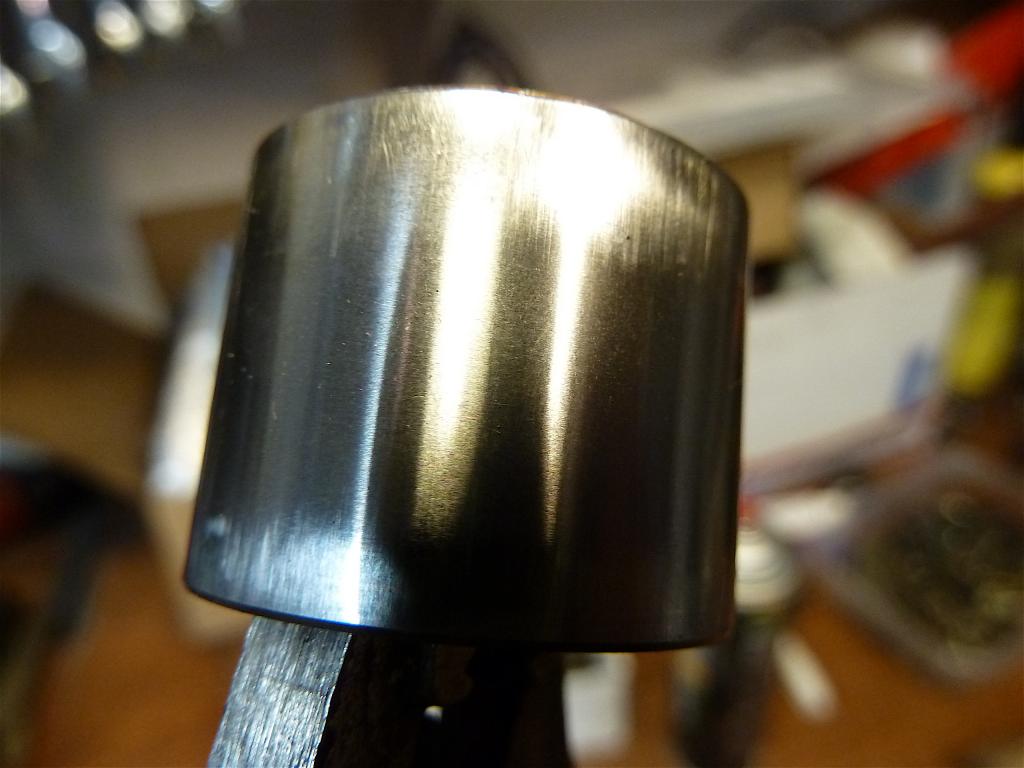
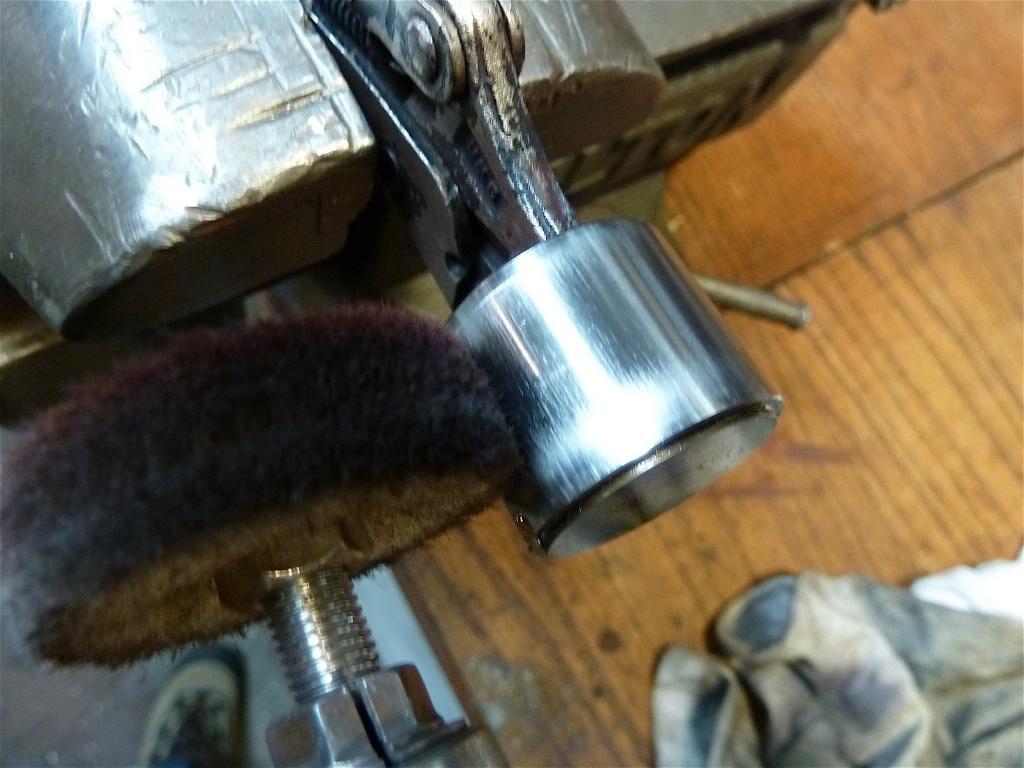
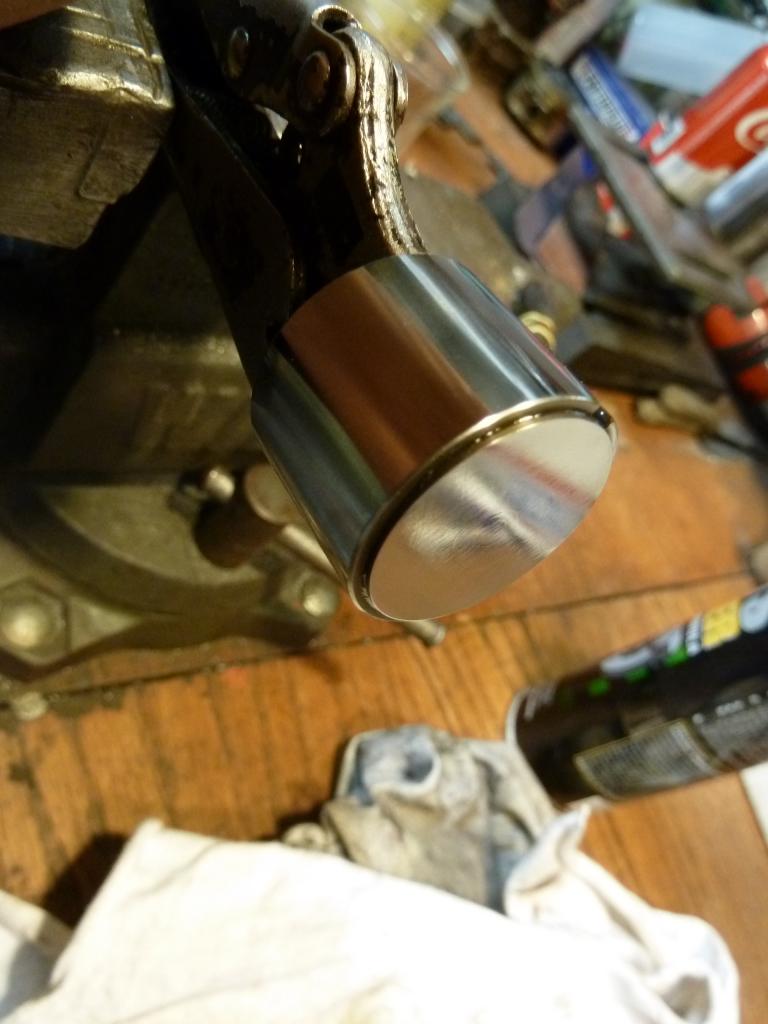
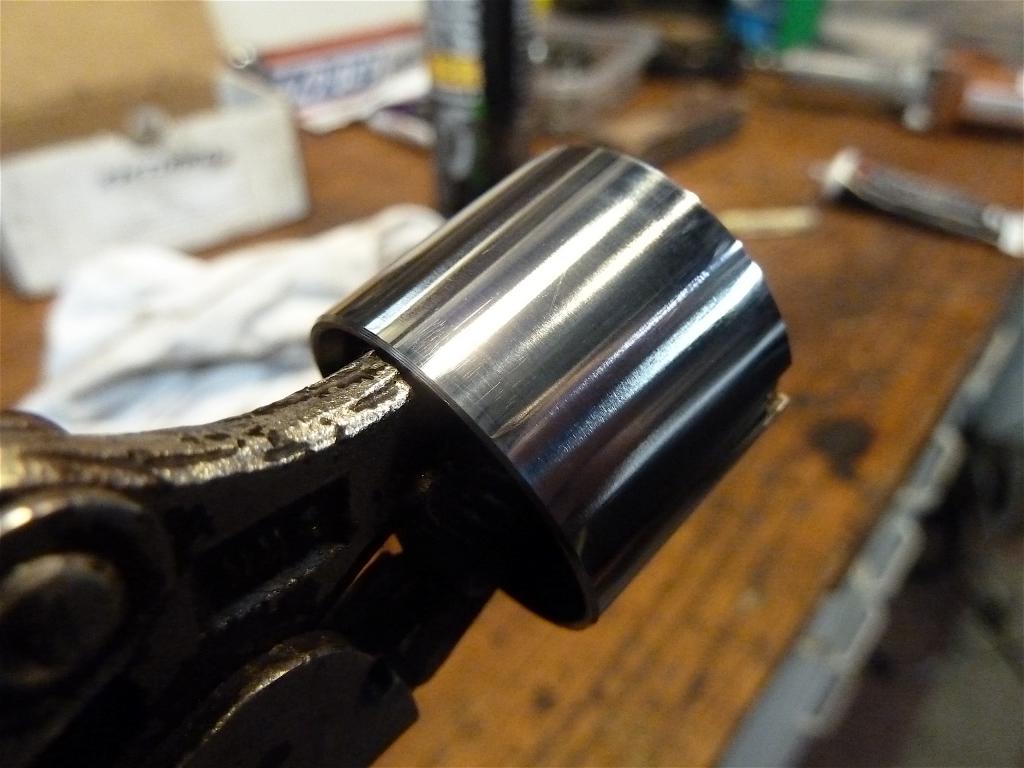
I ported & polished the turbo. I'd done this on two previous turbo builds and felt there was a noticeable difference in the way the turbos responded.
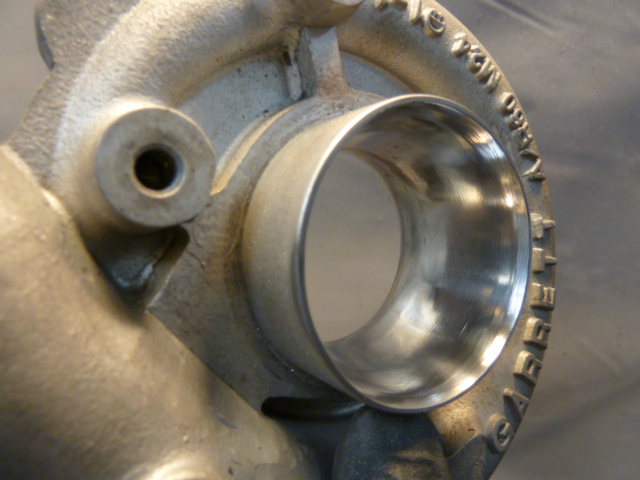

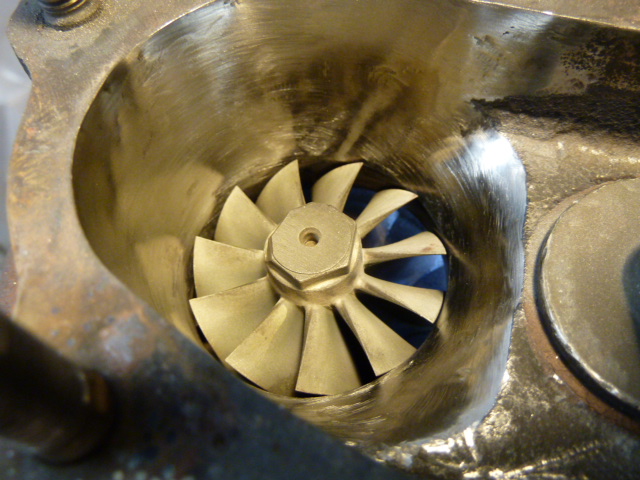
I was also able to go in and inlarge the waste gate opening by about 1/16". Then used valve lapping compound to make sure there was a good seal when its closed. The manifold and the 90 got P&P and went off to be ceramic coated.
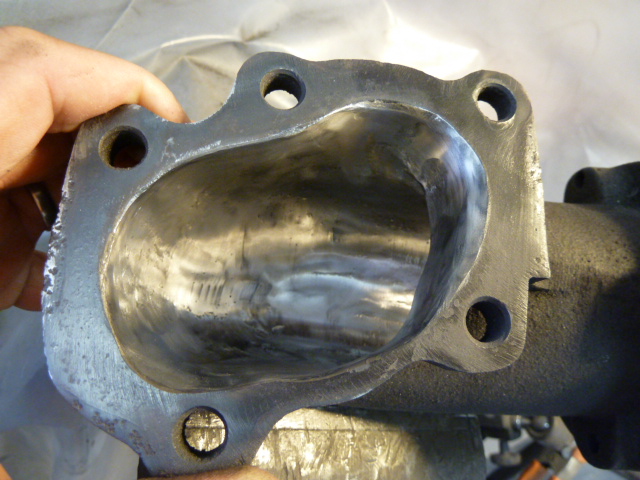
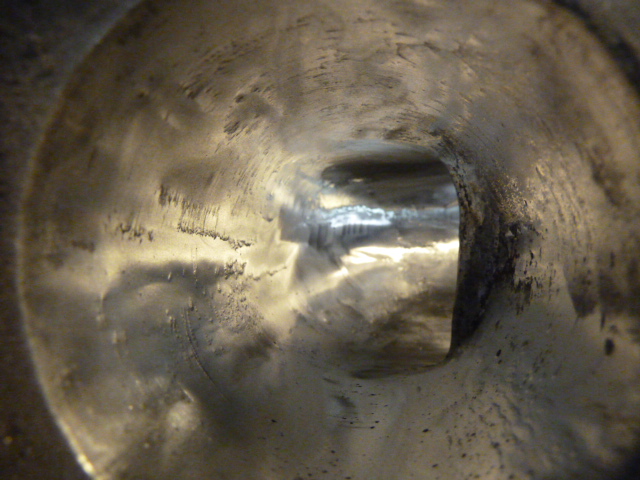
In this shot it wasn't quite done but you get the idea.
I was also able to go in and inlarge the waste gate opening by about 1/16". Then used valve lapping compound to make sure there was a good seal when its closed. The manifold and the 90 got P&P and went off to be ceramic coated.
In this shot it wasn't quite done but you get the idea.
Reply
0
0


Thread Starter
Senior Member
iTrader: (4)
Joined: Feb 2011
Posts: 744
Total Cats: 42
From: Crest Hill, IL
Here's a shot if how the coolant reroute ended up. I added a heater valve to stop coolant from entering the heater core in the summer, hopefully keeping my feet a little cooler.
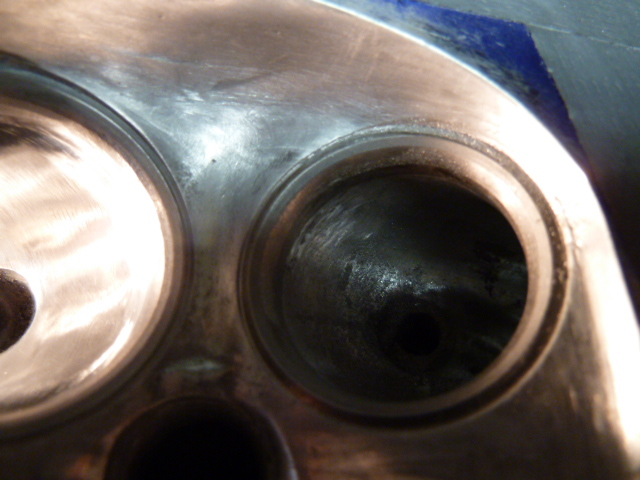
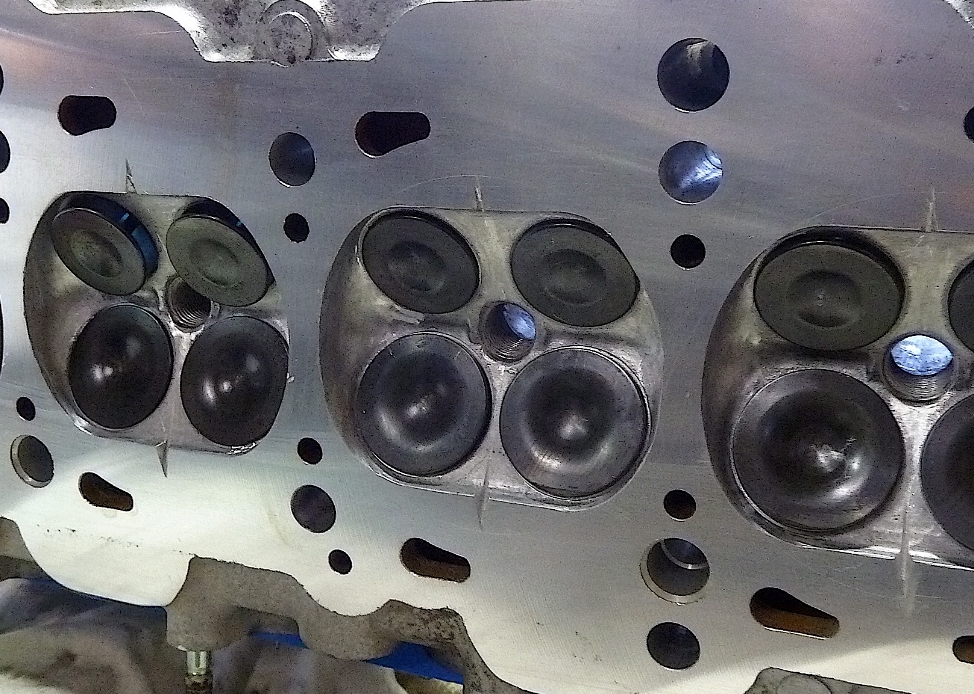
The BP4W head is getting the 1mm over valves with their dual springs. Some clean up in the ports and open the valve pockets. Has anybody flow benched this set up to see how much better than stock it is?
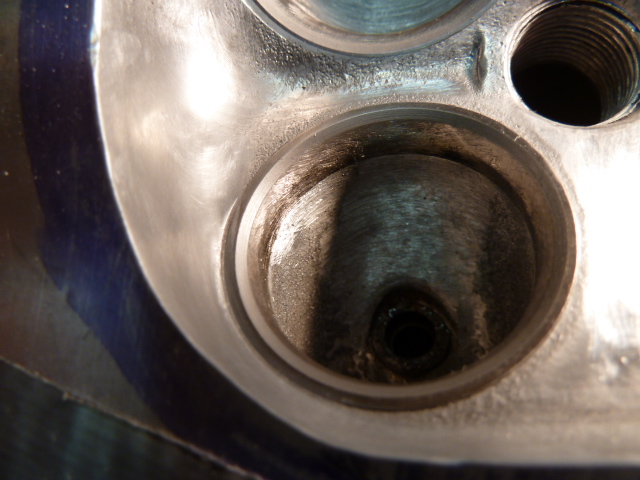
I took the to the machine shop to have it washed before valve installation.
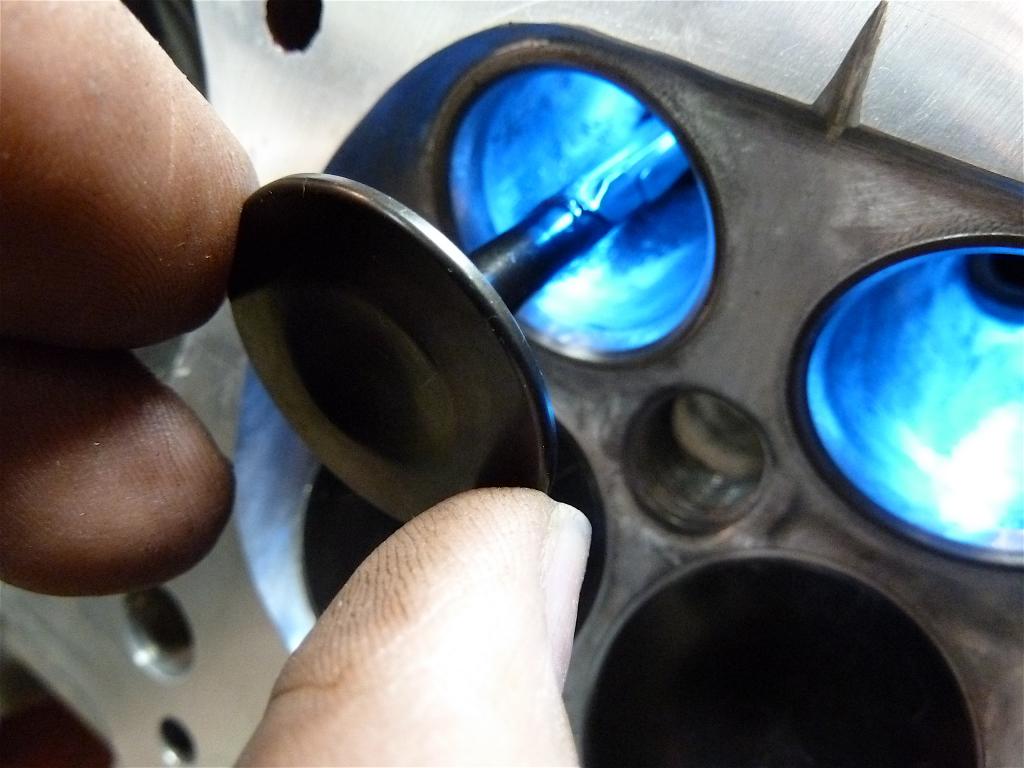
I had a tough time getting the valve springs installed even with the adapter I made.
What I ended up doing was compress it then use the pick tool that had been magnetized with a tiny bit if assembly grease on the keeper to hold it in place.


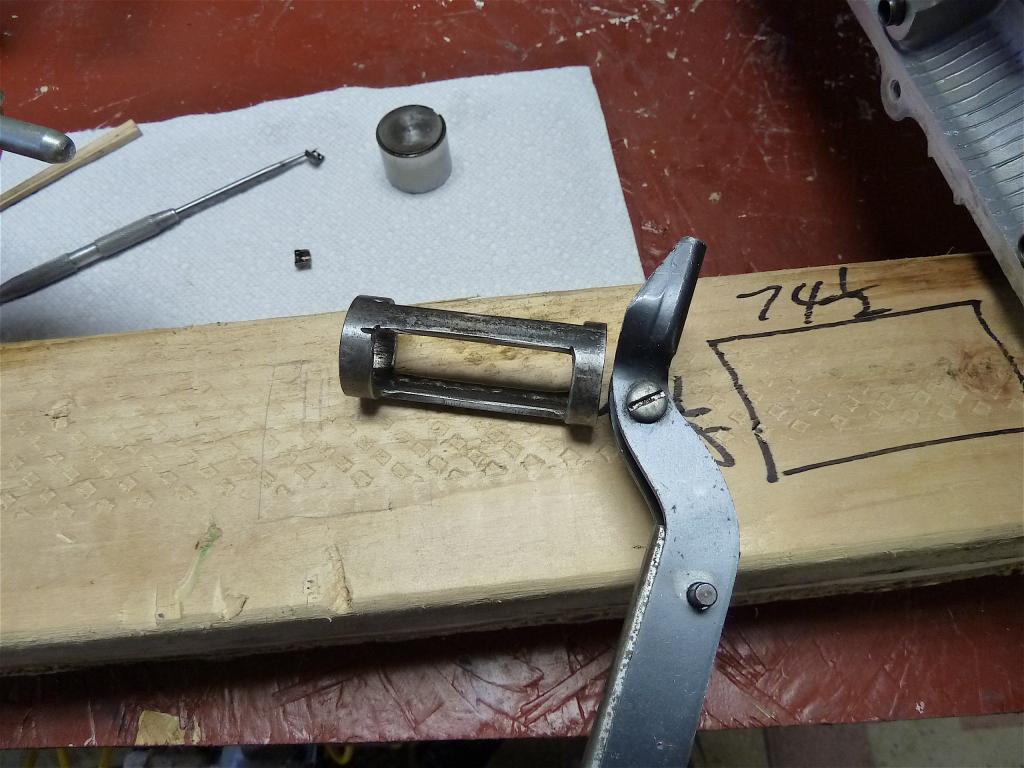
While I was in there I polished the lifters.
Before
After
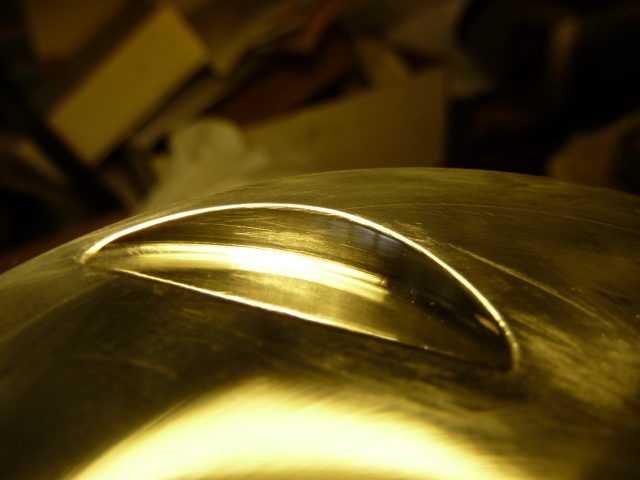
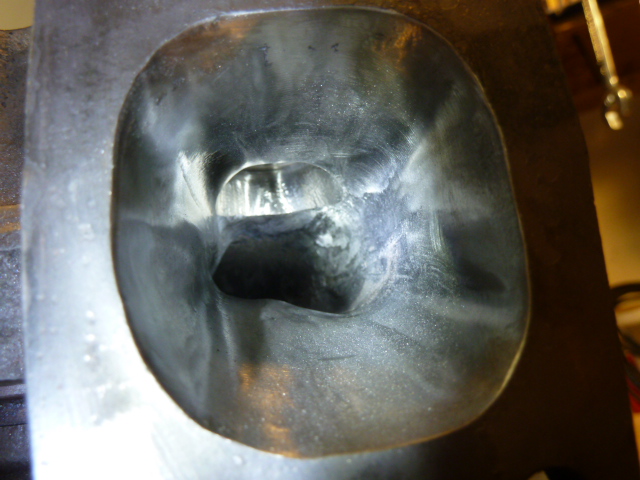
I also decided to do the Singh groove mod to the combustion chamber.
The BP4W head is getting the 1mm over valves with their dual springs. Some clean up in the ports and open the valve pockets. Has anybody flow benched this set up to see how much better than stock it is?
I took the to the machine shop to have it washed before valve installation.
I had a tough time getting the valve springs installed even with the adapter I made.
What I ended up doing was compress it then use the pick tool that had been magnetized with a tiny bit if assembly grease on the keeper to hold it in place.
While I was in there I polished the lifters.
Before
After
I also decided to do the Singh groove mod to the combustion chamber.
Reply
0
0
Thread Starter
Senior Member
iTrader: (4)
Joined: Feb 2011
Posts: 744
Total Cats: 42
From: Crest Hill, IL
Ok, so the motor's back in the car. I've put about 1500 miles on at this point. I used Brad Penn for the break in oil, with changes at 40, 500 to 1000, then switched to Castrol 5w30 dyno oil. For some reason the cam seals leaked and the front main. I replaced them with Mazda OE stuff but the front main still seeps a bit. Maybe there's a nick in the crank causing the seeping  .
.
Break in has been ok, I upgraded to the 36-1 wheel and came up with a way to run the cam pulley off a single pickup. The resolution is better so my PID"s are lower than I expected P=.6 I=10 D=0. I went with 4 psi boost for the break in, then upped to 6 at 500mi and now at 10 psi.
I picked up a catch can off ebay. I chose this one cause the top can be easily removed. I extended the inlet port with 1/2" copper tube about 3/4 of the way down inside.
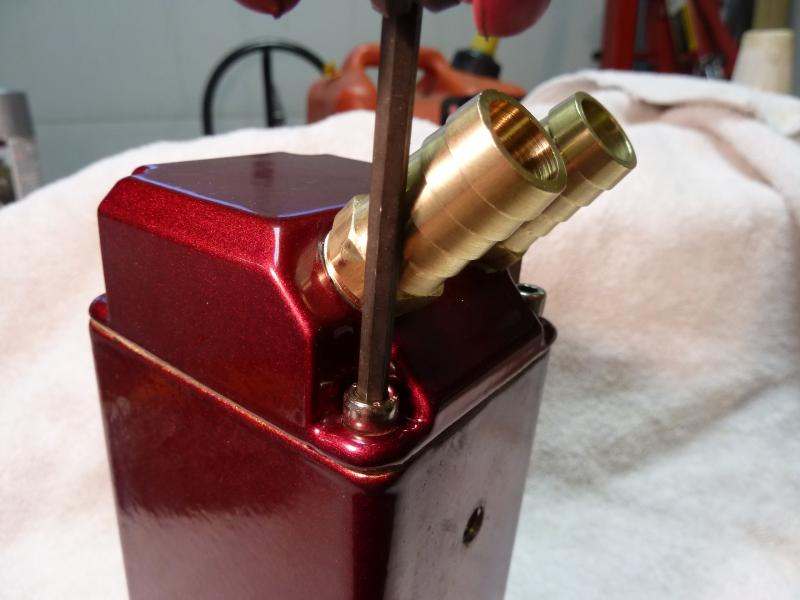
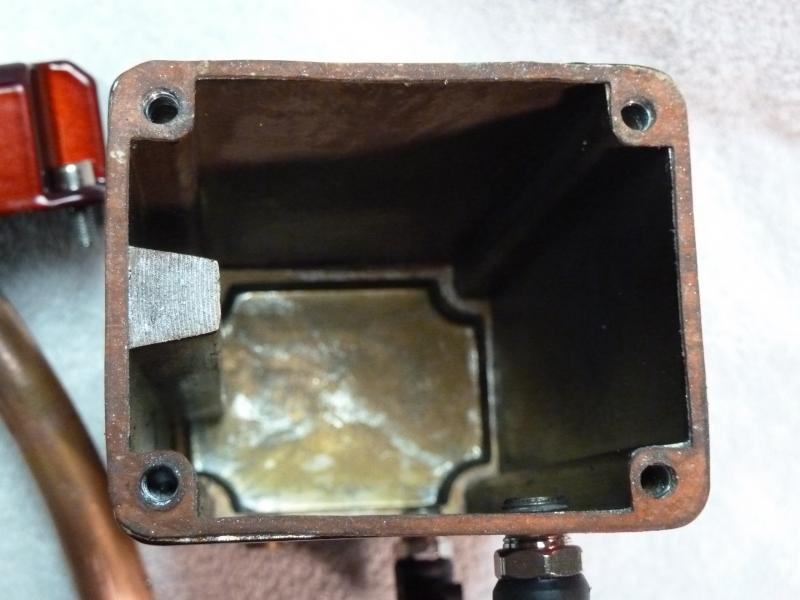
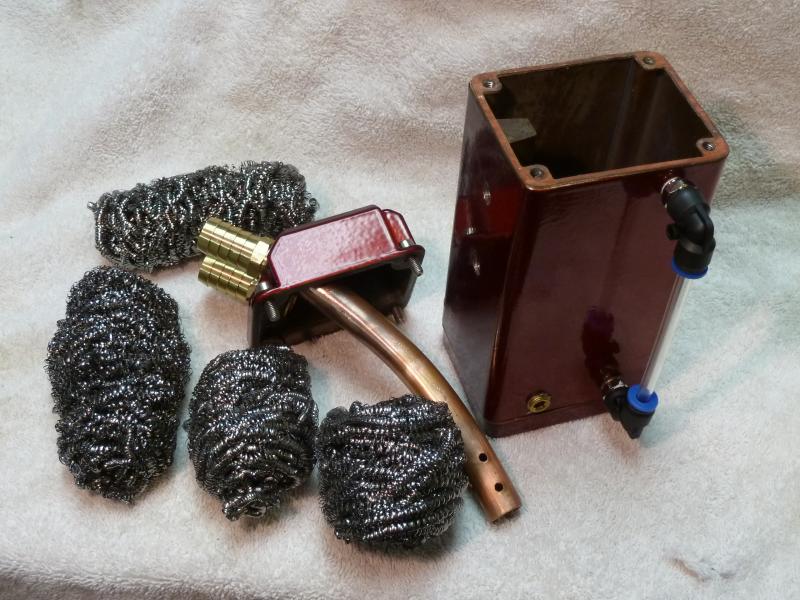

The material is the stainless scrubby pad stuff. This should create a great air/oil separator material.
I had to also enlarge the the fittings to 5/8" inch hose barbs. I have the whole system plumed this way. I put a temporary boost gauge on to monitor engine blow by. At 10 psi boost there is zero pressure inside the motor.
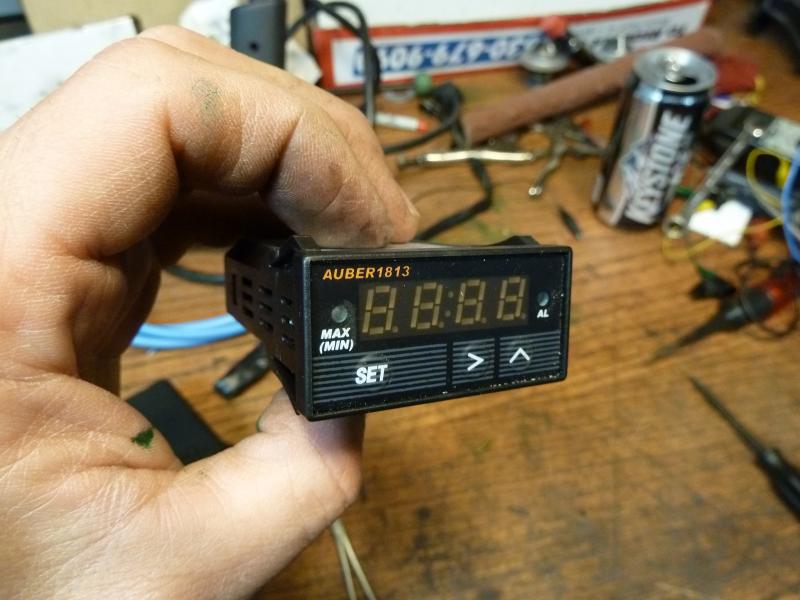
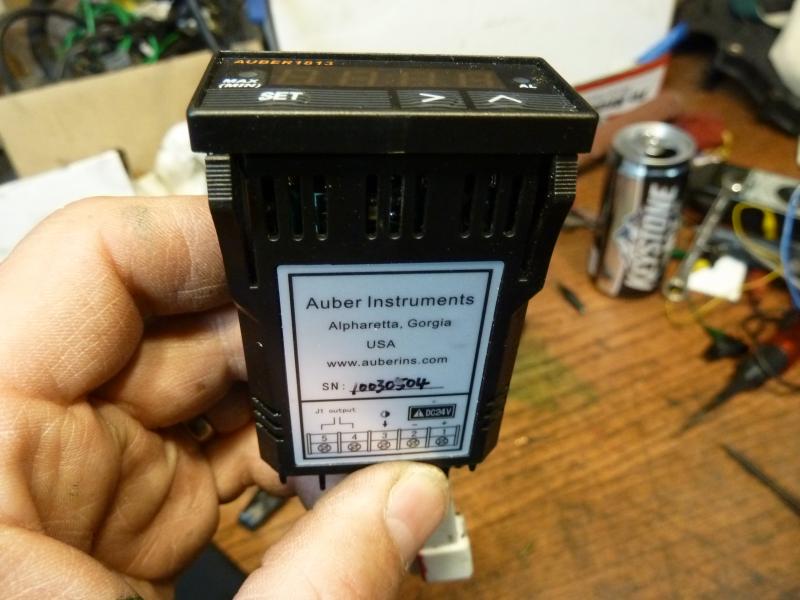
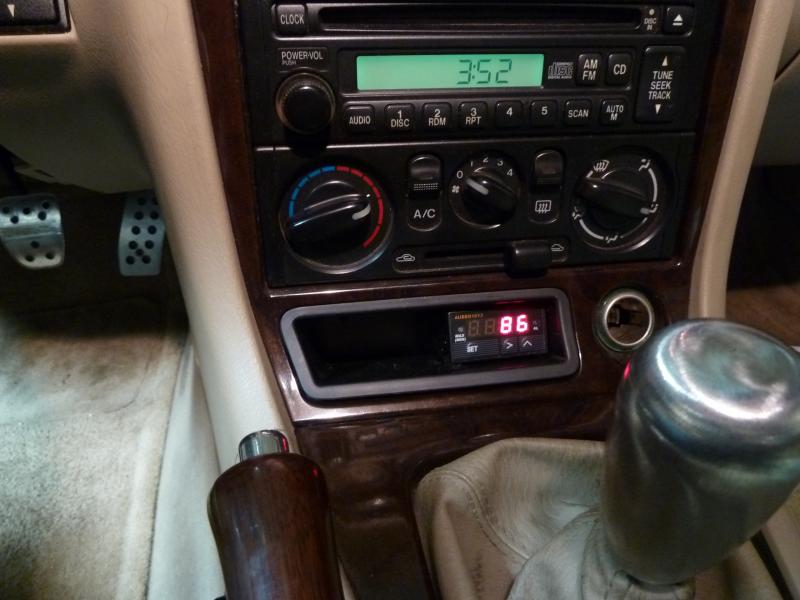
I also had time to install an EGT. I choose the one from Aubur Insturments. It's digital, accurate to 2K degrees and small. They have two K type thermocouples, tell them what its being used for so you can be sold the correct one.
.Break in has been ok, I upgraded to the 36-1 wheel and came up with a way to run the cam pulley off a single pickup. The resolution is better so my PID"s are lower than I expected P=.6 I=10 D=0. I went with 4 psi boost for the break in, then upped to 6 at 500mi and now at 10 psi.
I picked up a catch can off ebay. I chose this one cause the top can be easily removed. I extended the inlet port with 1/2" copper tube about 3/4 of the way down inside.


The material is the stainless scrubby pad stuff. This should create a great air/oil separator material.
I had to also enlarge the the fittings to 5/8" inch hose barbs. I have the whole system plumed this way. I put a temporary boost gauge on to monitor engine blow by. At 10 psi boost there is zero pressure inside the motor.
I also had time to install an EGT. I choose the one from Aubur Insturments. It's digital, accurate to 2K degrees and small. They have two K type thermocouples, tell them what its being used for so you can be sold the correct one.


Reply
0
0


Thread Starter
Senior Member
iTrader: (4)
Joined: Feb 2011
Posts: 744
Total Cats: 42
From: Crest Hill, IL
Thanks for the settings for the 36-1

Reply
0
0

Newb
Joined: Dec 2012
Posts: 42
Total Cats: -7
From: Garden Grove, California, United States
Is it just the turbulence caused by compressing the air fuel mixture into the tiny notches and forcing "airjets" from the sides into the center of the combustion chamber perhaps?
Reply
0
0
Newb
Joined: Dec 2012
Posts: 42
Total Cats: -7
From: Garden Grove, California, United States
Reply
0
0
Reply
0
0
Reply
0
0
Obsession: Mr. Singh's Search for the Holy Grail | Popular Science
Reply
0
0
Thread Starter
Senior Member
iTrader: (4)
Joined: Feb 2011
Posts: 744
Total Cats: 42
From: Crest Hill, IL
I read a little bit of everything on this. Some of it seems like you should be ordering a SHAM-WOW along with this mod. There was a good discussion on the Speed Talk forum. I didn't go as crazy as some people. I just decided to do it, I haven't seen a down side yet. I haven't been to a dyno yet but I would think that if the advance curve is more that what most people are getting then there would be some evidence that the idea works.
I have a couple of questions.
What kind of compression numbers are you guys getting with BP4W and 9:1 compression? I'm wanting to switch to synthetic as soon as I reasonably possible. I have about 1200 miles now.
Thanks
-JB
I have a couple of questions.
What kind of compression numbers are you guys getting with BP4W and 9:1 compression? I'm wanting to switch to synthetic as soon as I reasonably possible. I have about 1200 miles now.
Thanks
-JB
Reply
0
0


