AliveMX5's MKTurbo build
 05-30-2017, 11:52 AM
#1
Newb
Thread Starter

Join Date: Mar 2016
Location: Phoenix, AZ
Posts: 26
Total Cats: 0
Summer/Fall 2015 I began searching for a Miata. Most of the cars on CL that didn't sell within hours were inches from the ground, had more camber than the owner knew what to do with, or were just trashed. I wanted a black 1.8 with a black interior but after months of searching I was willing to take anything.
I expanded my searches to LA, Las Vegas, and eventually Oregon and Washington when I found "the one". It was a black/black 94 and the seller was willing to hold it for me by showing a receipt for a one way plane ticket to Seattle. Then proceeded to drive the car home 800 miles. Discovered a leaky radiator when I got home that could have failed on me at any time during my drive. Hit snow coming through the CA border but it had just started falling and I was able to get through the area before it was collected on the ground.
First things I did were routine maintenance plus added a smaller steering wheel since I'm 6'3". Added a DDM Gauge surround with a vacuum/boost gauge, Innovate MTX-L, and temp gauage.
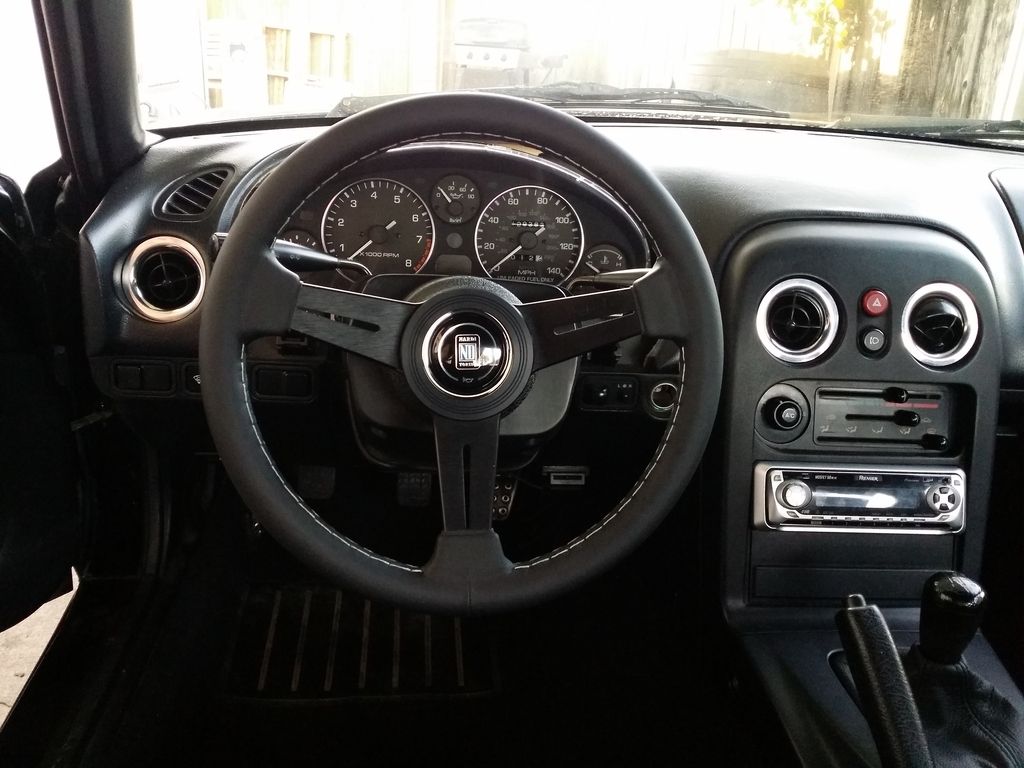
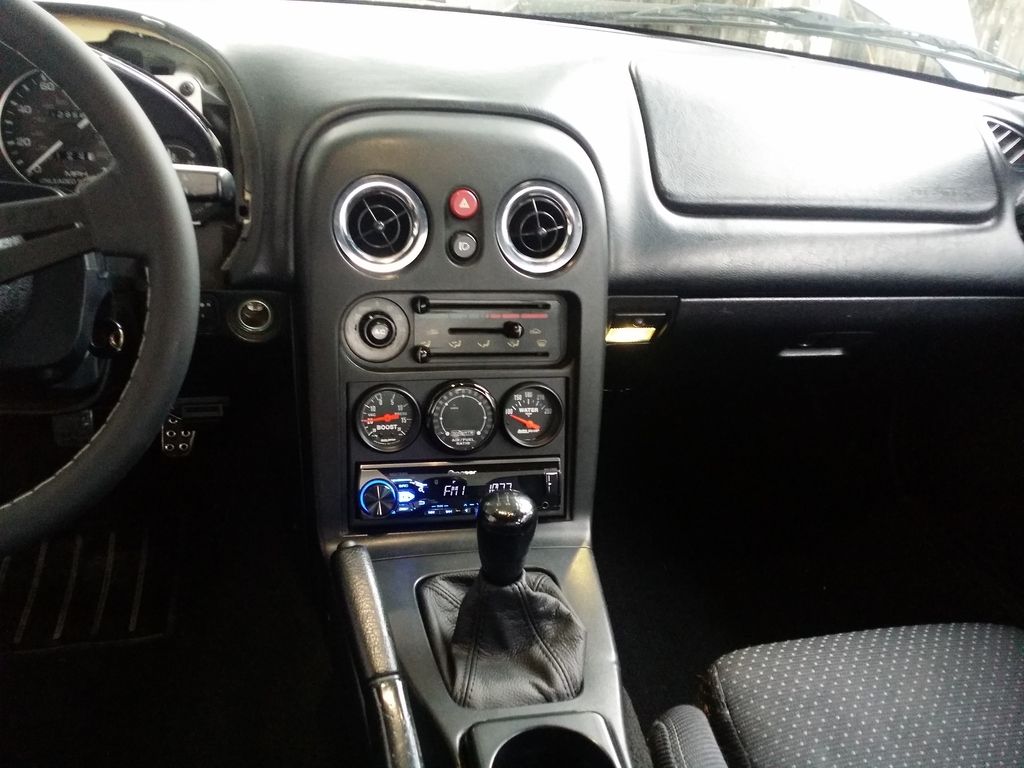
Temp gauge was wired into a Bell spacer with the Kia waterneck and big truck hose. I had to get a flexible lower clutch line to clear the water return as that metal one was in the way.
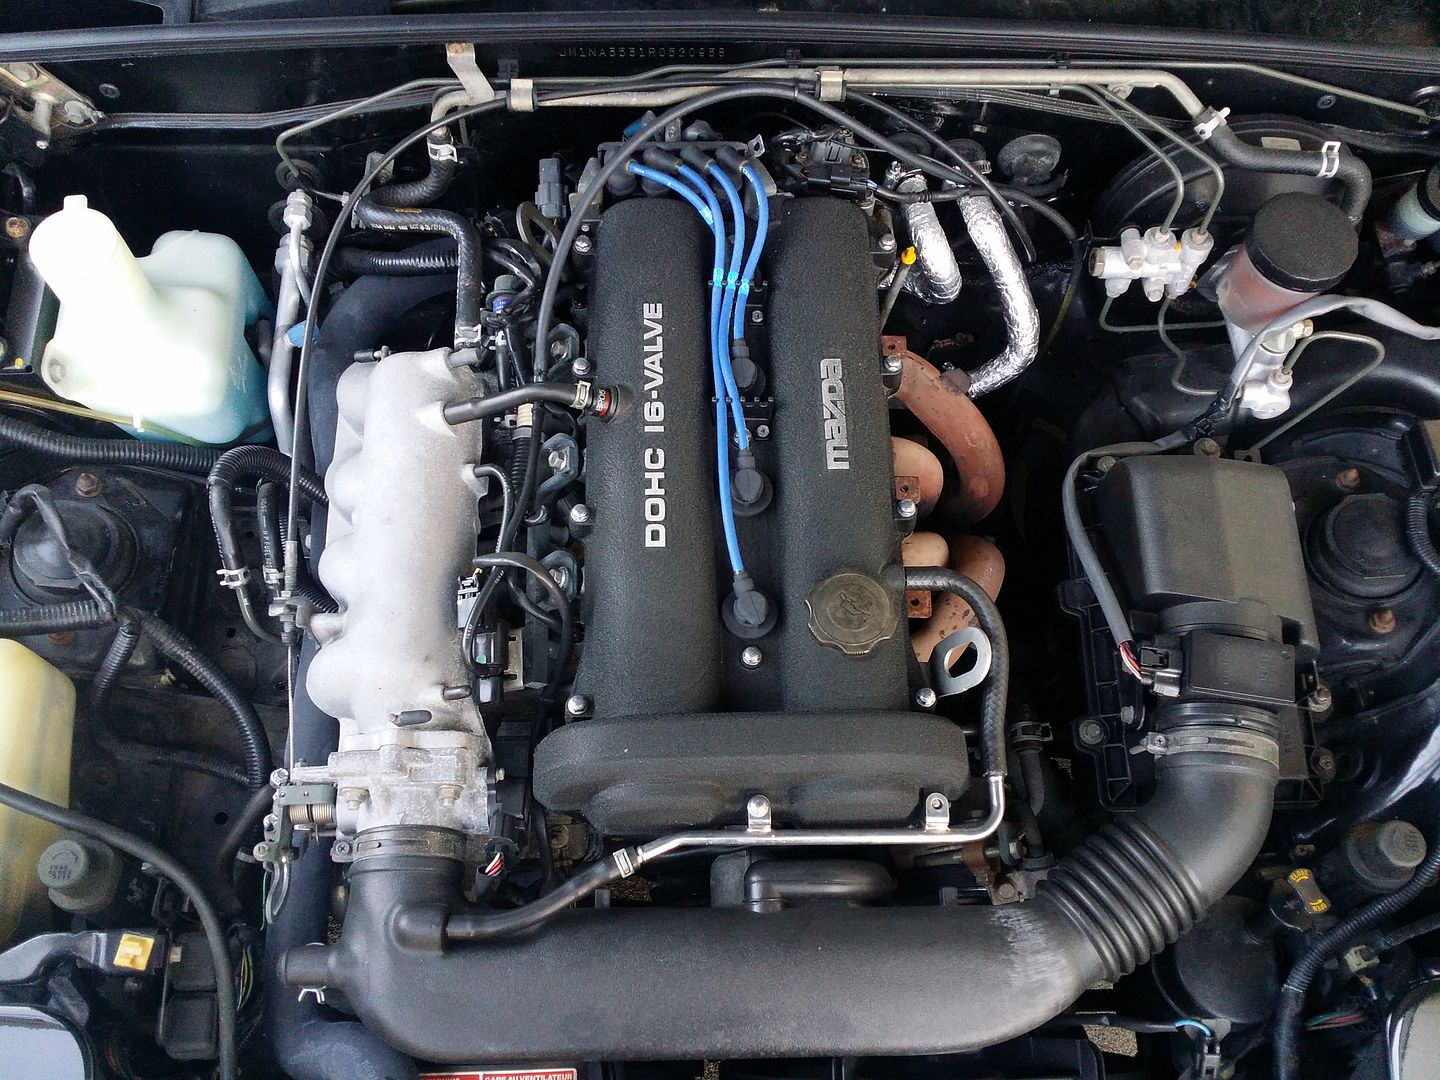
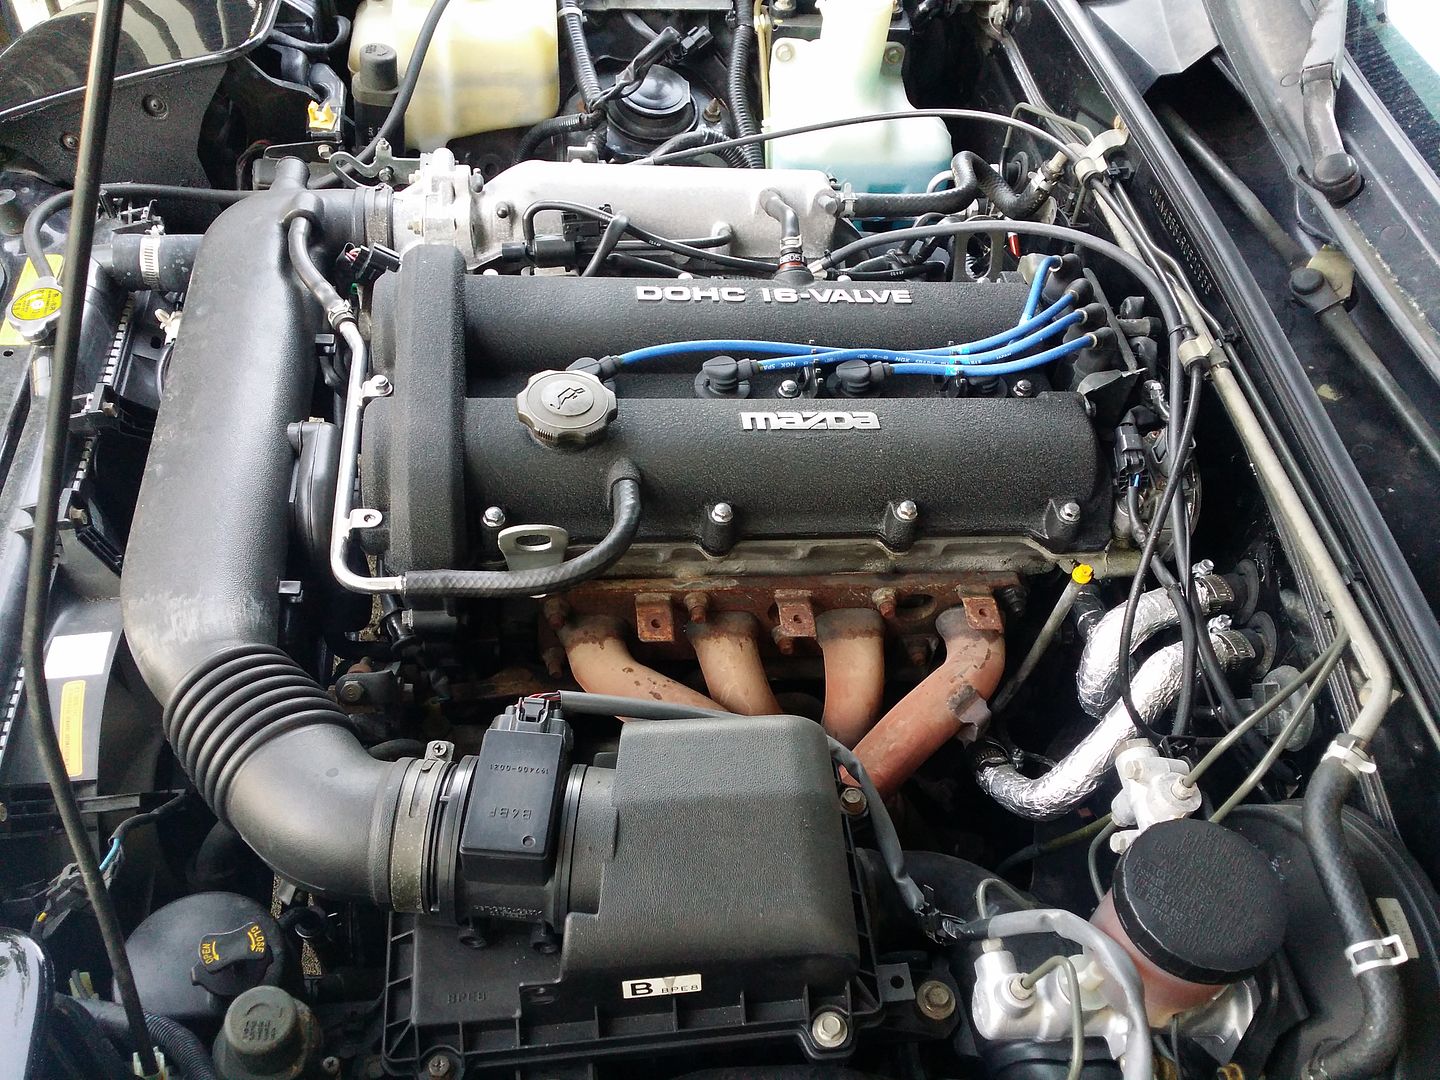
Stock motor with reroute:
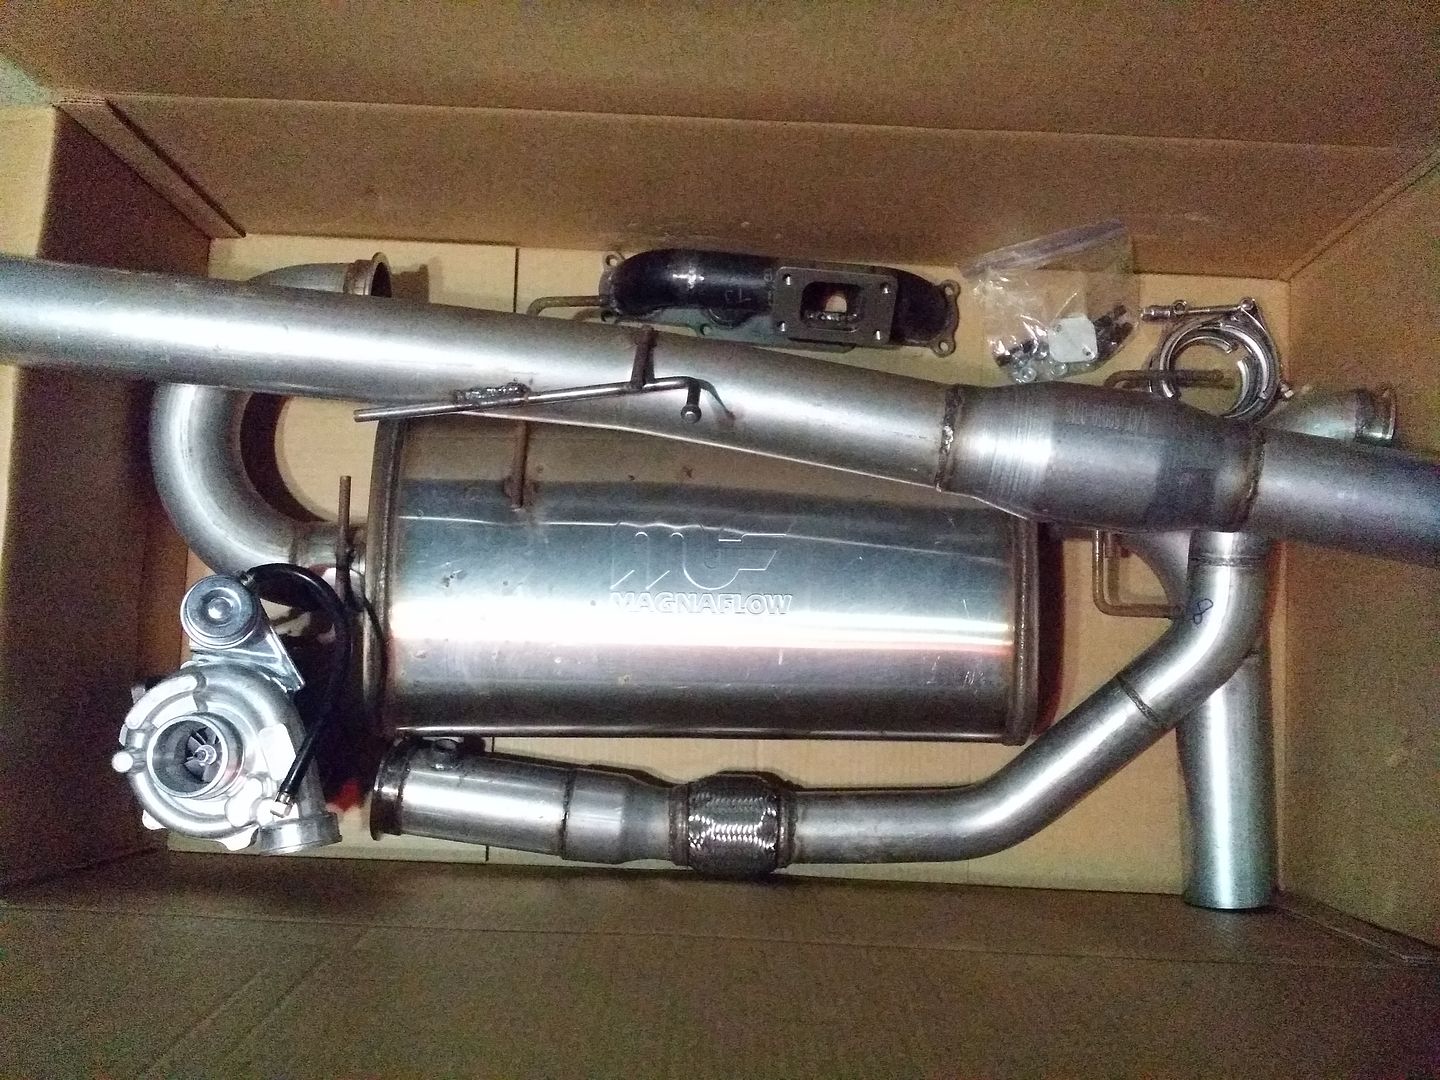
Ordered stuff from Lars:
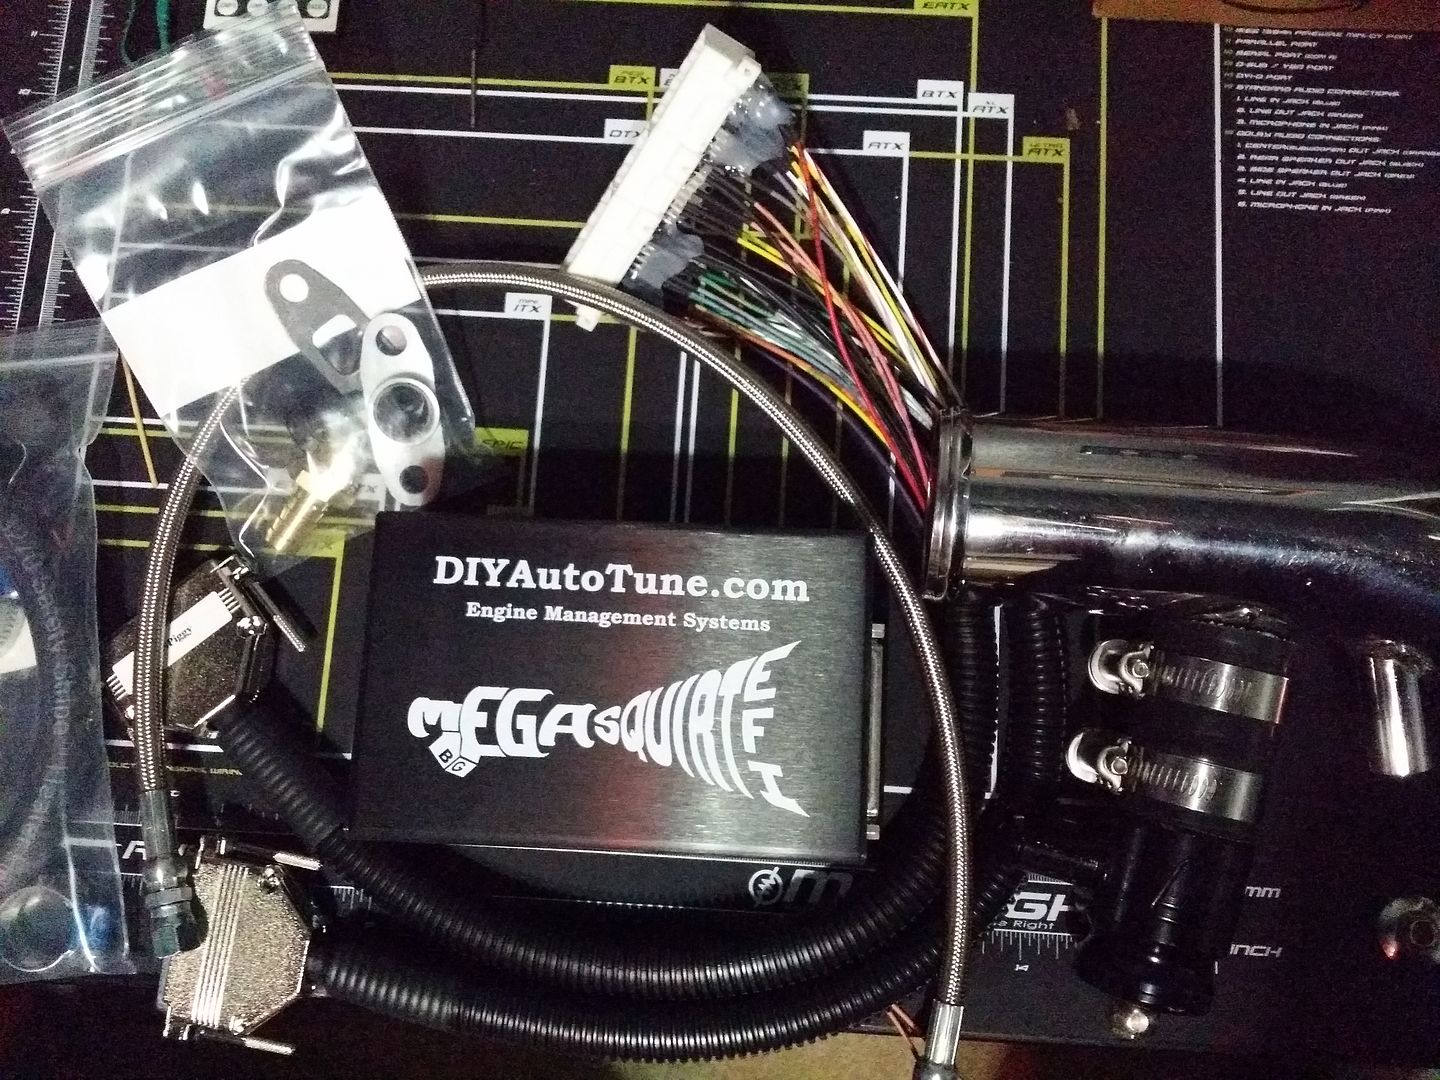
Brain:
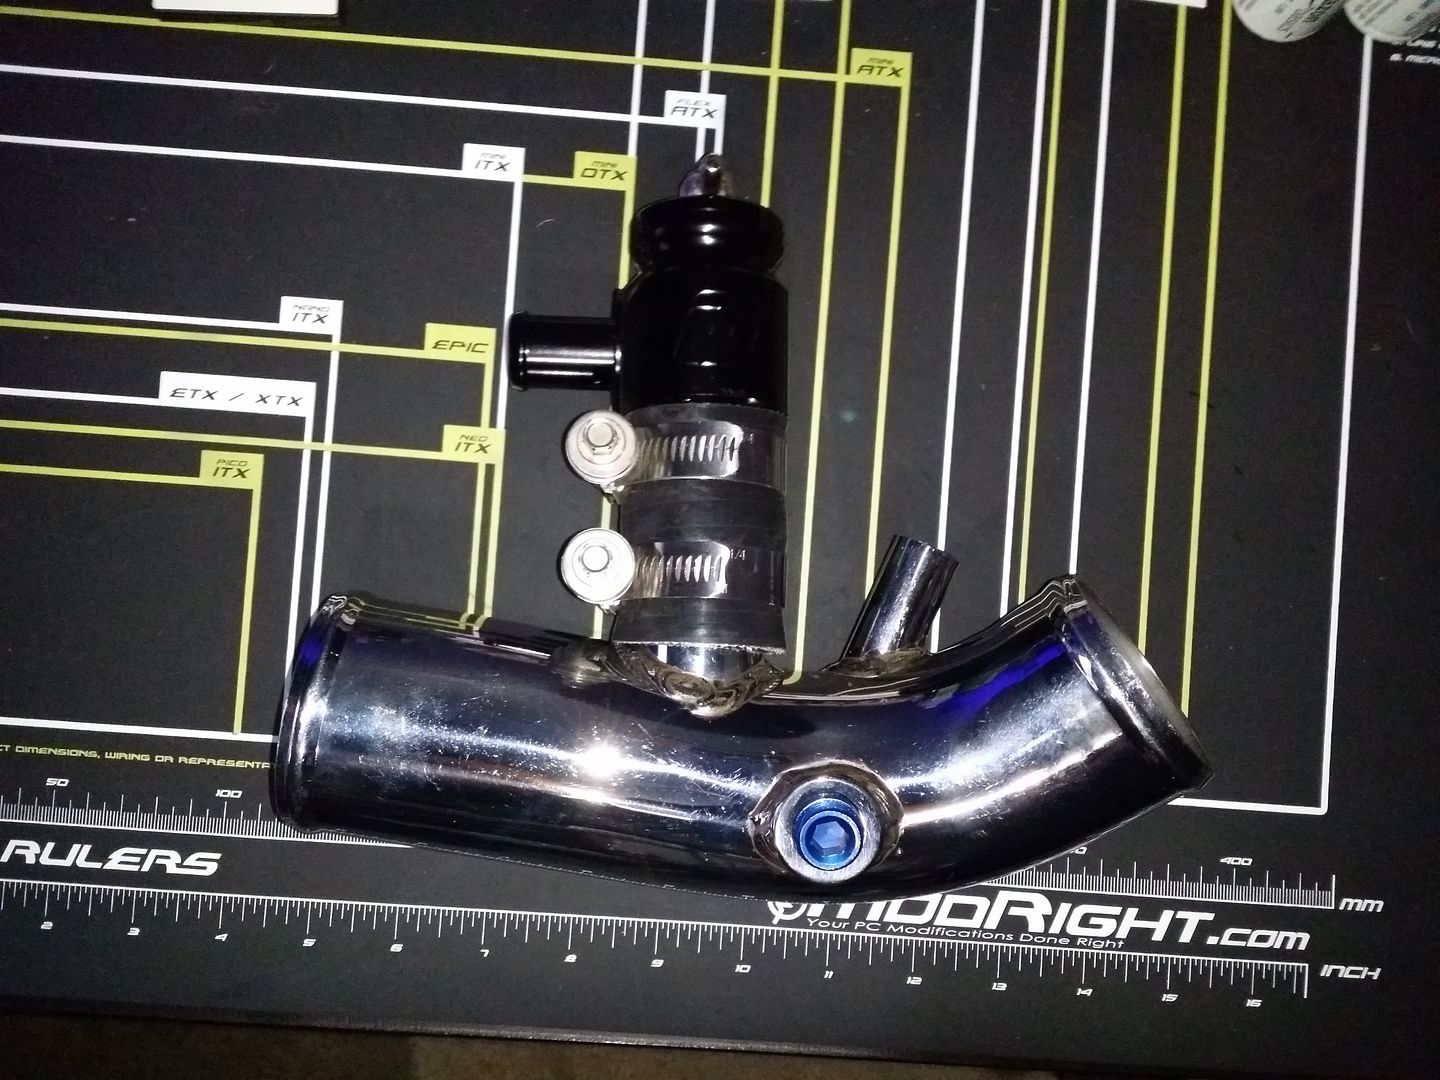
And forum member Onyxyth:
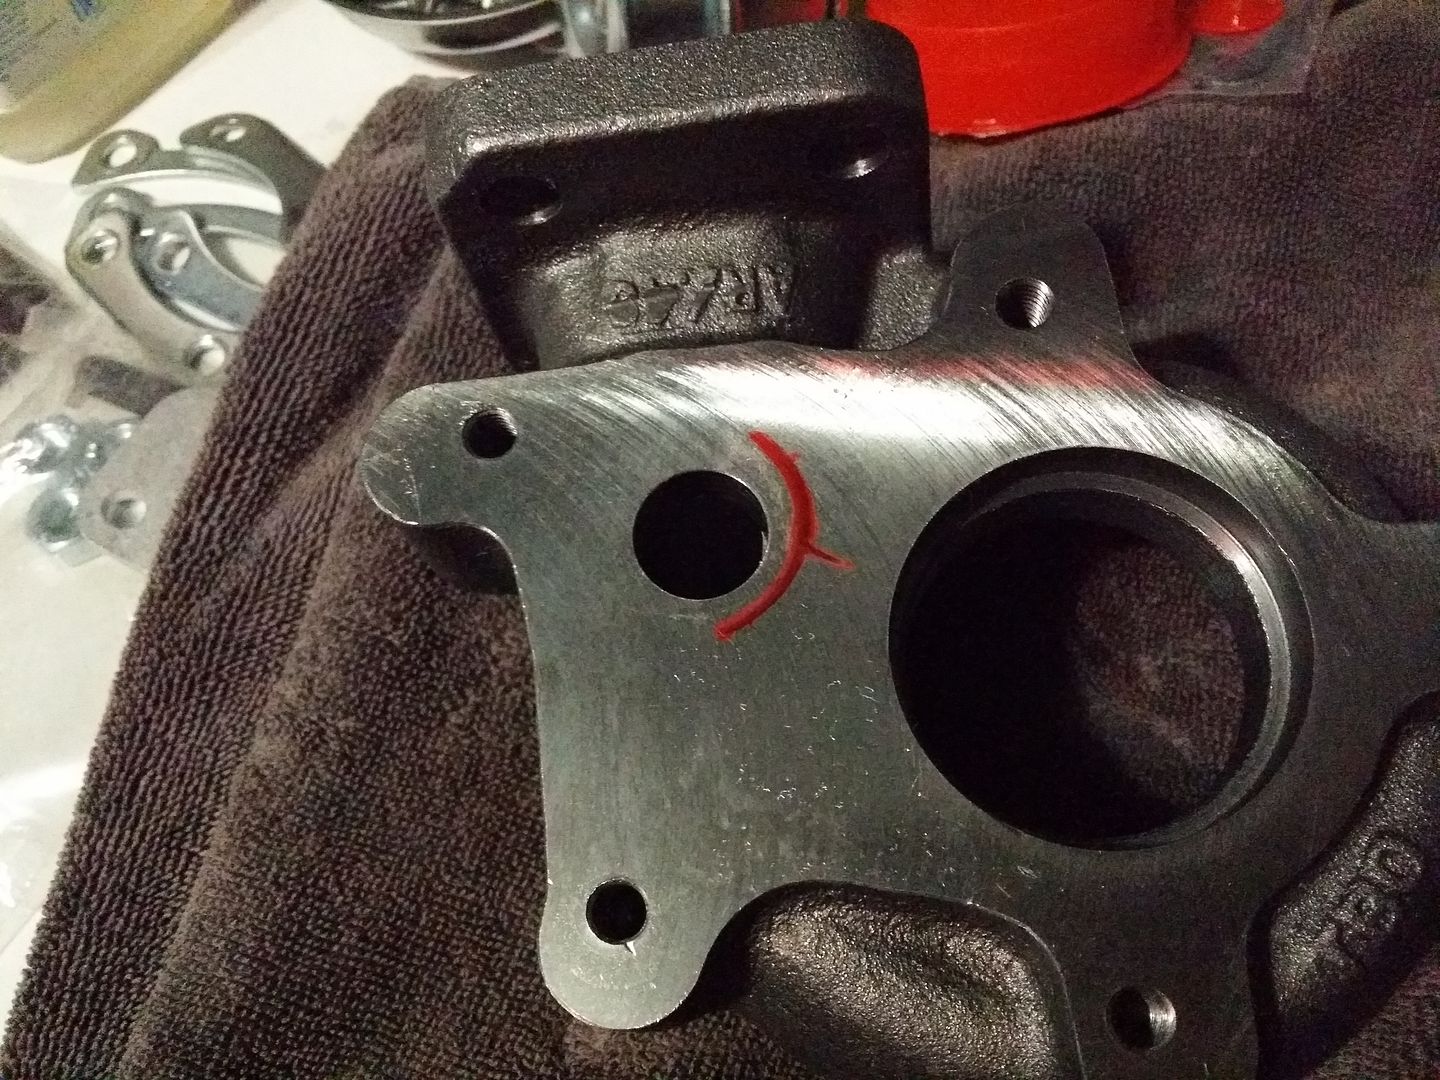
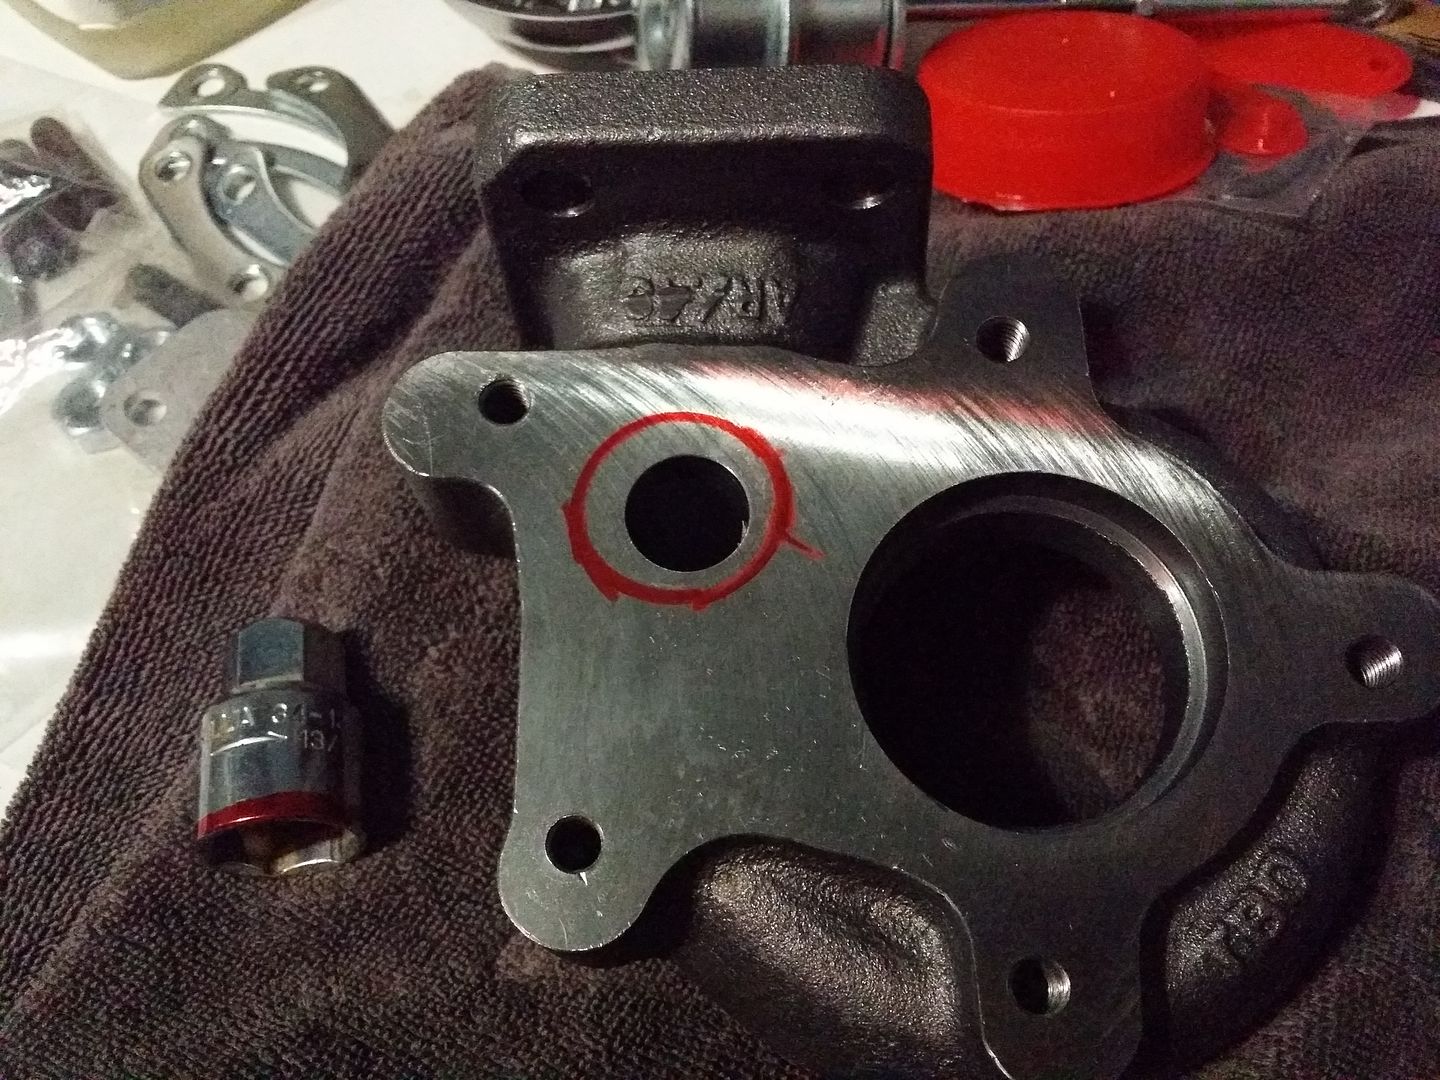
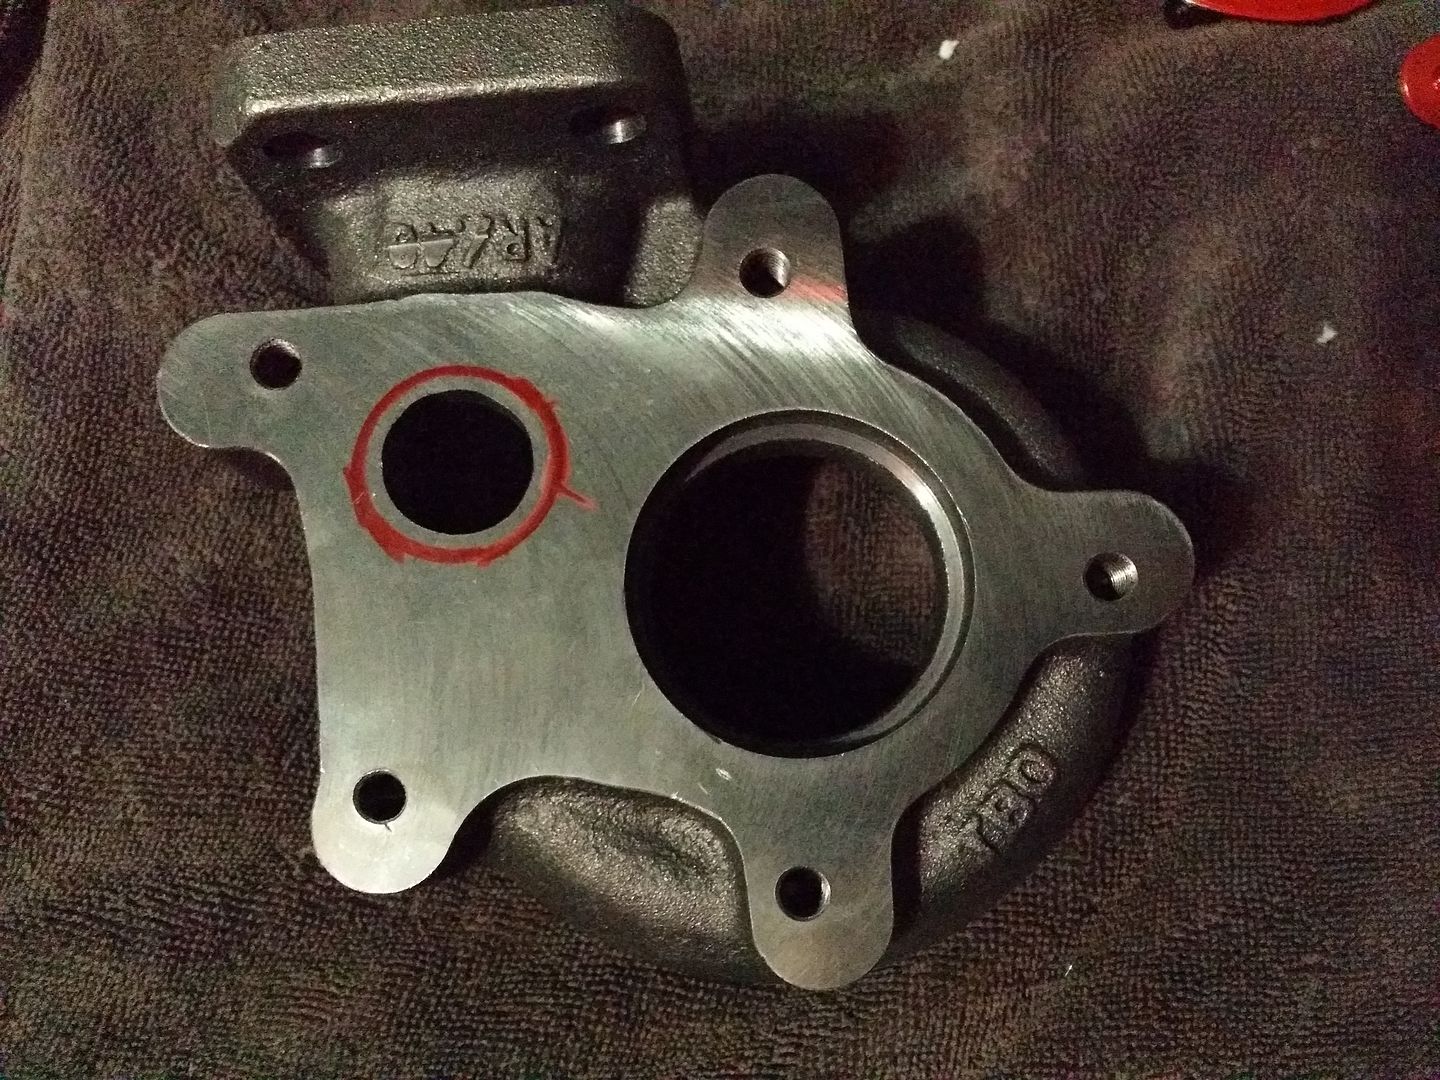
Started porting the wastegate during the rainy months. Traced what I could reach through the exhaust exit with a sharpie then finished the circle with a socket. The socket was slightly smaller than the wastegate flapper to give me a very small margin for error. For the porting I only enlarged the hole and made a small divot for the flapper to open up farther, didn't touch the path.
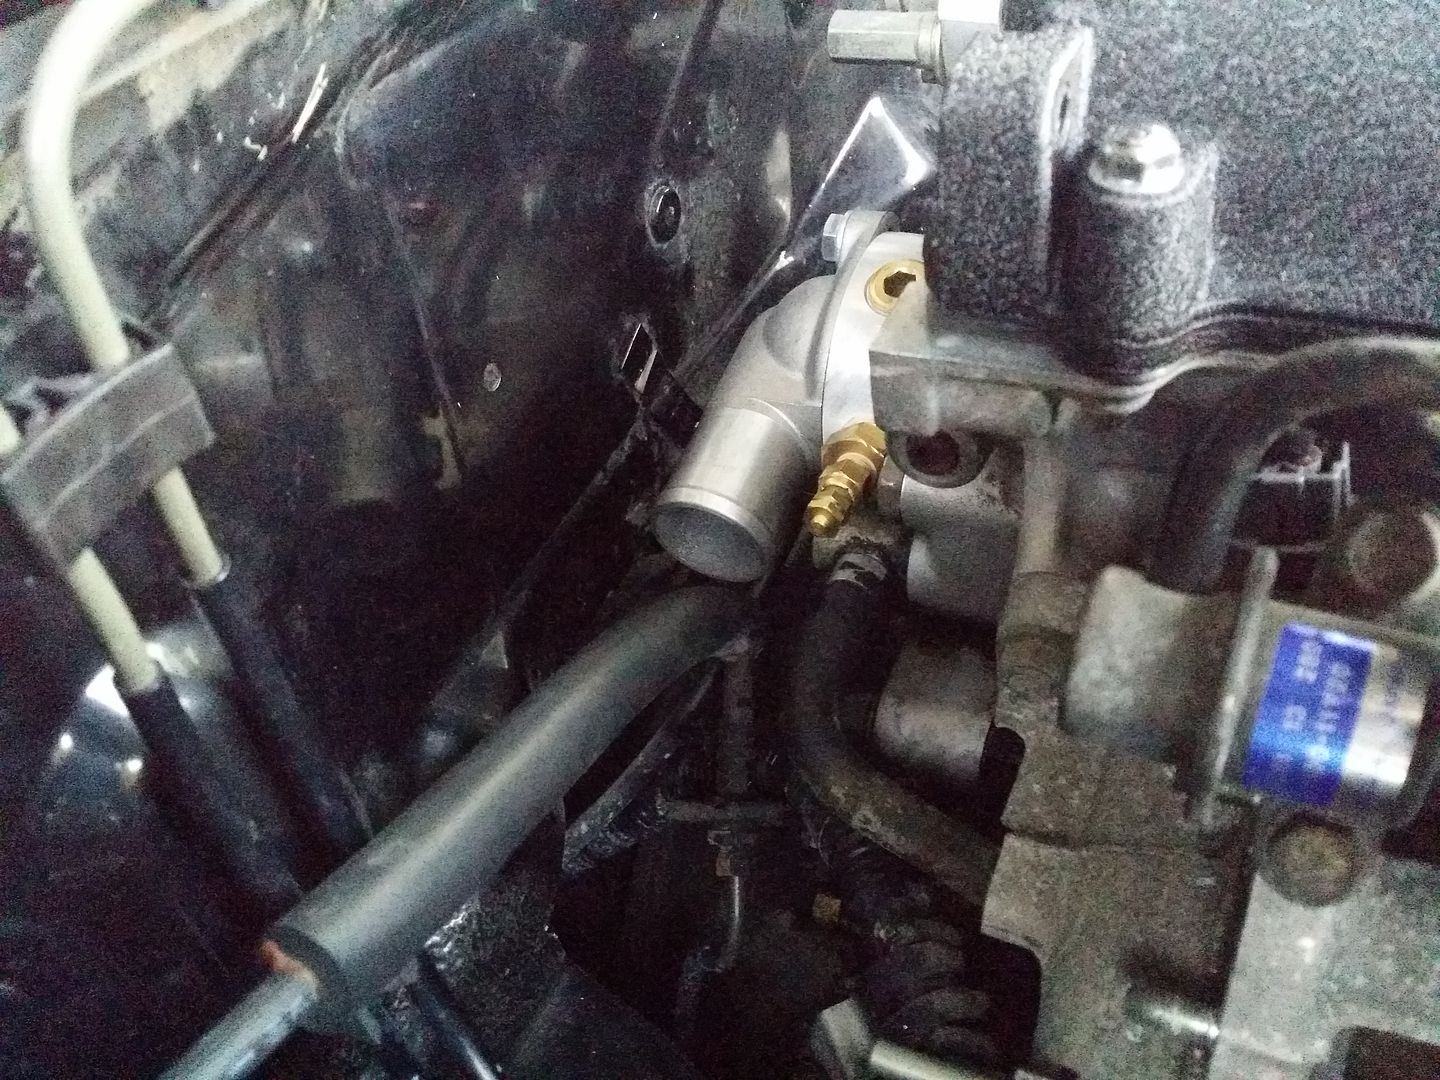
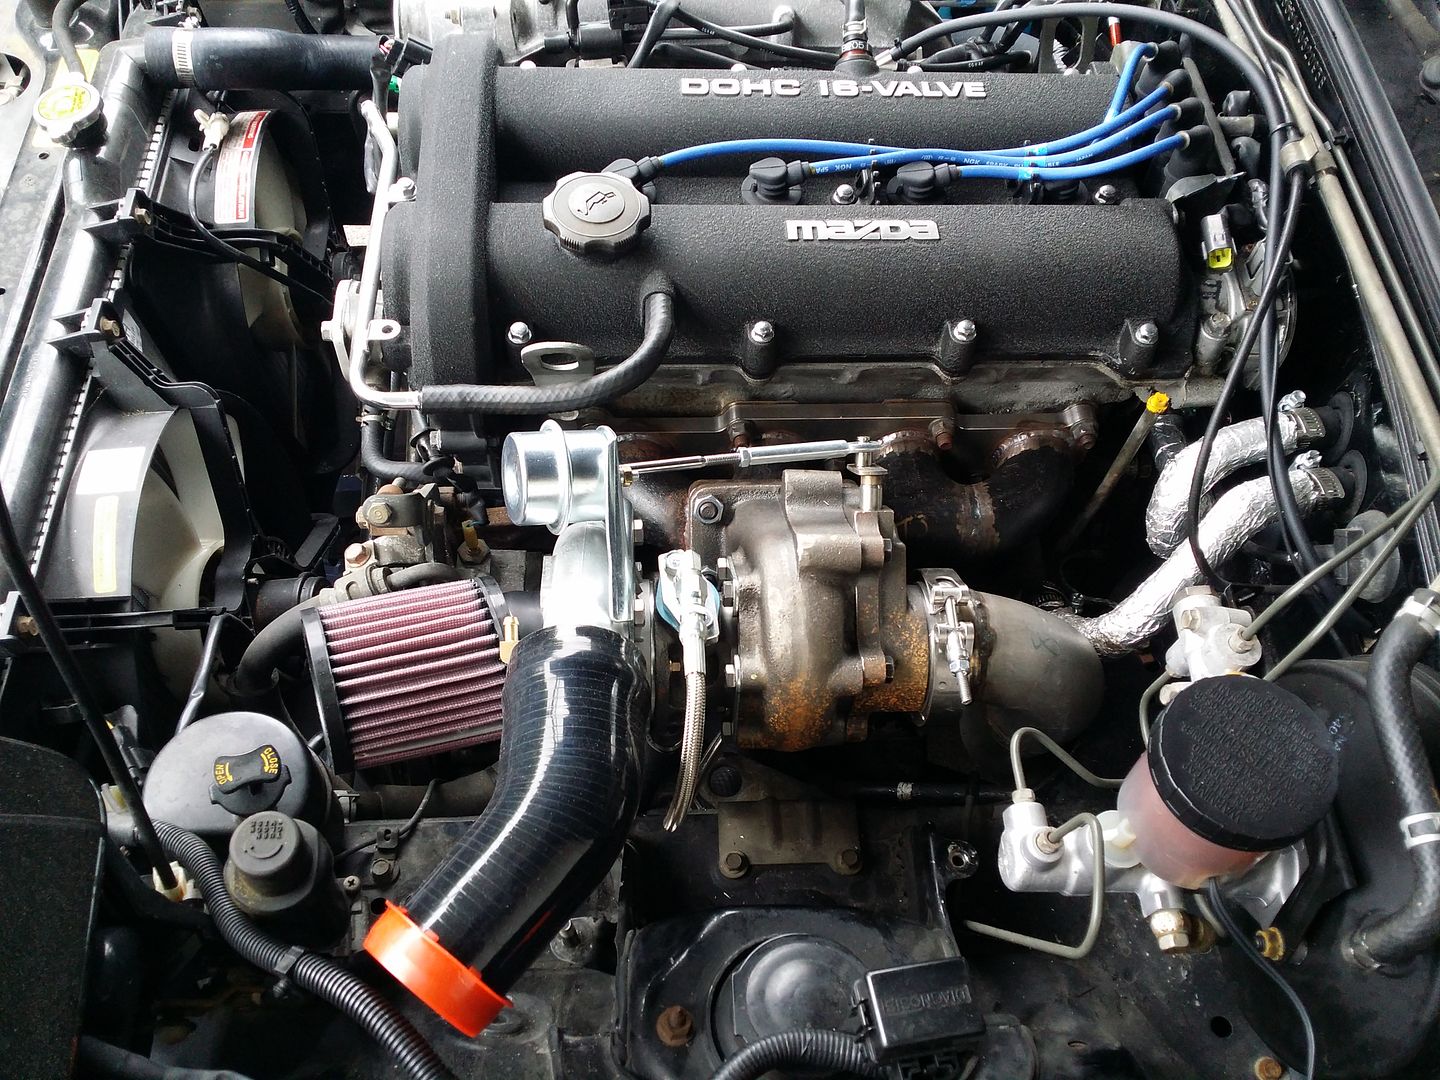
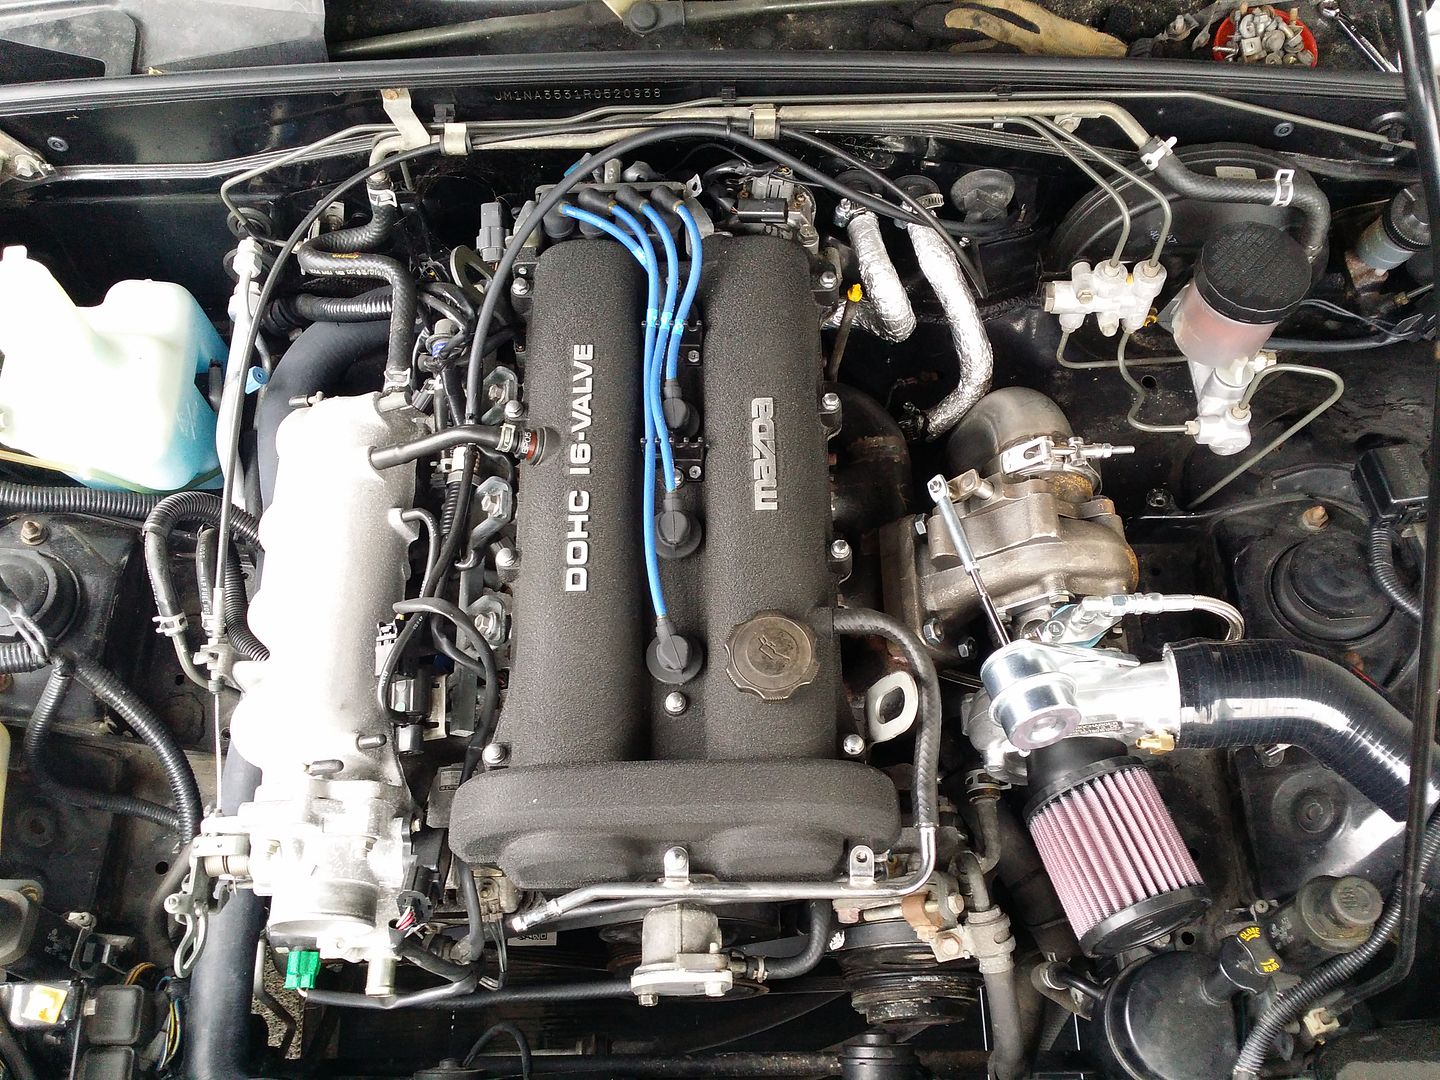
Mounted the turbo and manifold. Drilled and tapped the pain, and ran oil feed from the side of the block.

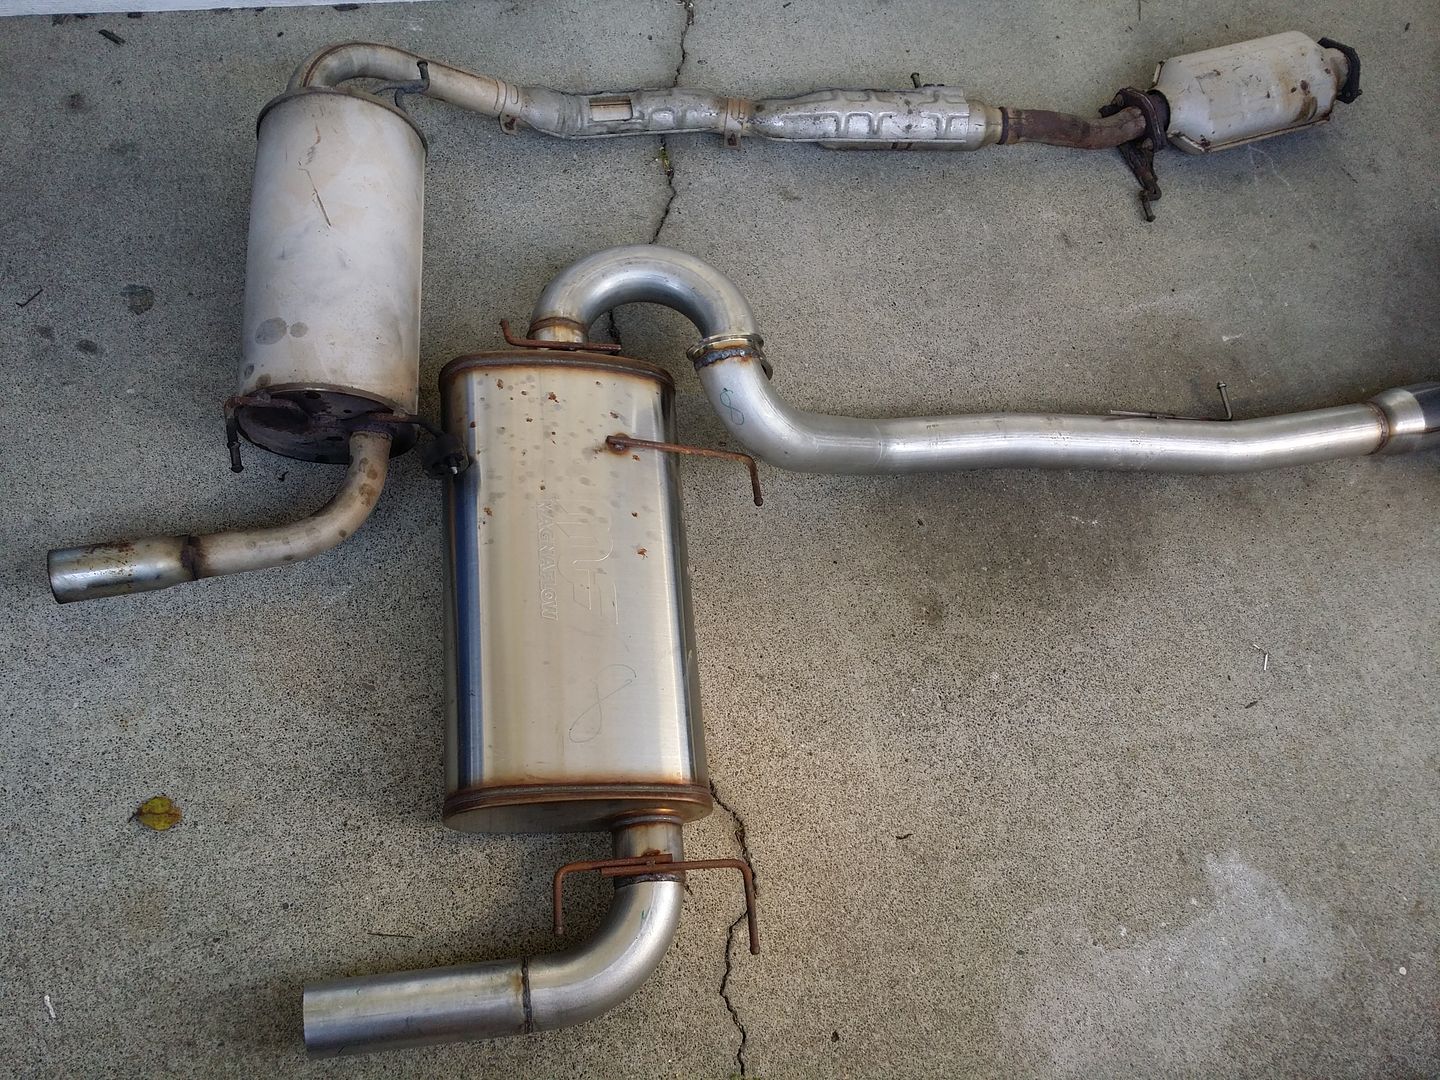
Mounted the exhaust. Notice how small the stock exhaust looks next to the stock. (yes that's a cat)
Ordered stuff from Silicone Intakes. (the 4mm vacuum line is too thick to fit into the MS3X )
)

Drilled and tapped the IC and installed the IAC sensor. I spent many hours fiddling, drilling, and wasting time trying to make mounting brackets for this thing (Vibrant core). Finally I just gave up and went with my first idea which I thought was going to be insufficient but turns out to be surprisingly rigid. I removed the two bolts in the sheet metal "tabs" that hang down so the IC can sit more flush there, measured the distance between the holes on the IC and drilled corresponding holes in the metal there using 1/4 bolts to hold it in place. I'm fairly confident that this will hold up, time will tell.

This is where I'm at currently. I had to rotate the wastegate actuator so that the vacuum port was not pointed straight up, with it pointing straight up the hood wouldn't close. (it did close actually when I forced it and realized that the port was bending the hood)
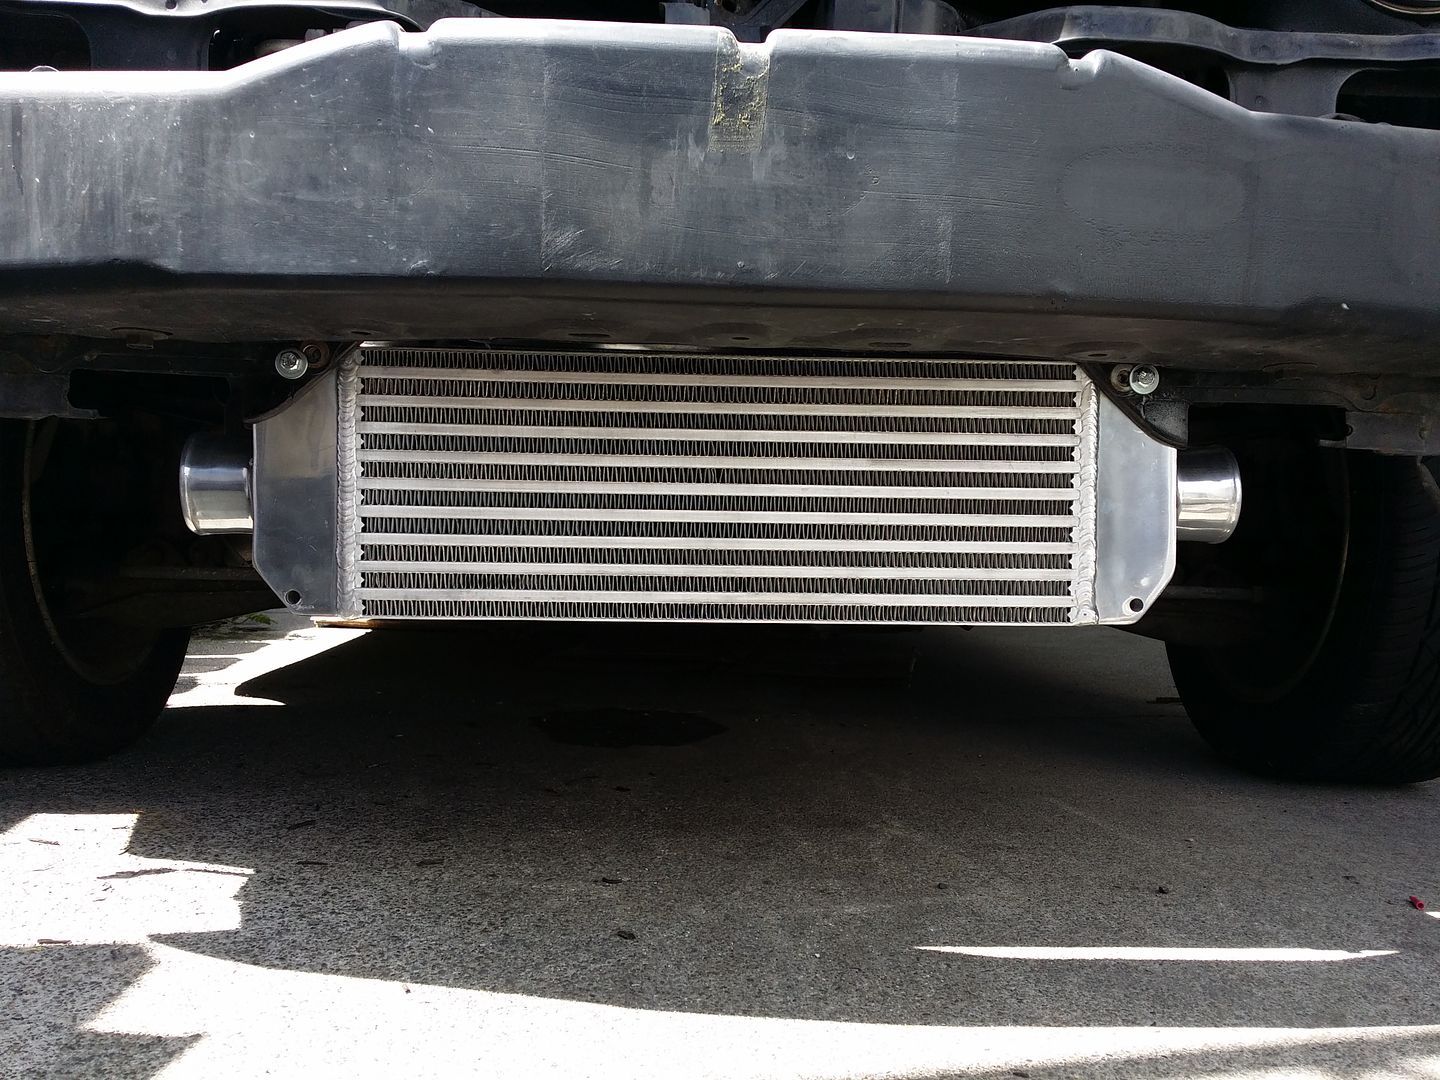
I need to remove the drivers side fender, drill and route the IC pipes through the inner fender (thanks hornetball for your build thread). Need to fix my reroute hose as I have it down running through the fuel lines and the way it is positioned now I cannot fit the 90 degree fitting on the TB at all, also as seen in the picture above I need to shorten that heater hose so it is not directly in contact with the downpipe. Need to install injectors. Need to run vac line from my vac gauge to behind the passenger seat (already have a capped tee under there from when I installed the gauge. MS3X is wired to the harness, just need to run the MAP and connect the wideband. I think I'm about 75-80% to starting the car.
Suggestions/criticism are welcome.
I expanded my searches to LA, Las Vegas, and eventually Oregon and Washington when I found "the one". It was a black/black 94 and the seller was willing to hold it for me by showing a receipt for a one way plane ticket to Seattle. Then proceeded to drive the car home 800 miles. Discovered a leaky radiator when I got home that could have failed on me at any time during my drive. Hit snow coming through the CA border but it had just started falling and I was able to get through the area before it was collected on the ground.
First things I did were routine maintenance plus added a smaller steering wheel since I'm 6'3". Added a DDM Gauge surround with a vacuum/boost gauge, Innovate MTX-L, and temp gauage.
Temp gauge was wired into a Bell spacer with the Kia waterneck and big truck hose. I had to get a flexible lower clutch line to clear the water return as that metal one was in the way.
Stock motor with reroute:
Ordered stuff from Lars:
Brain:
And forum member Onyxyth:
Started porting the wastegate during the rainy months. Traced what I could reach through the exhaust exit with a sharpie then finished the circle with a socket. The socket was slightly smaller than the wastegate flapper to give me a very small margin for error. For the porting I only enlarged the hole and made a small divot for the flapper to open up farther, didn't touch the path.
Mounted the turbo and manifold. Drilled and tapped the pain, and ran oil feed from the side of the block.
Mounted the exhaust. Notice how small the stock exhaust looks next to the stock. (yes that's a cat)
Ordered stuff from Silicone Intakes. (the 4mm vacuum line is too thick to fit into the MS3X
)Drilled and tapped the IC and installed the IAC sensor. I spent many hours fiddling, drilling, and wasting time trying to make mounting brackets for this thing (Vibrant core). Finally I just gave up and went with my first idea which I thought was going to be insufficient but turns out to be surprisingly rigid. I removed the two bolts in the sheet metal "tabs" that hang down so the IC can sit more flush there, measured the distance between the holes on the IC and drilled corresponding holes in the metal there using 1/4 bolts to hold it in place. I'm fairly confident that this will hold up, time will tell.
This is where I'm at currently. I had to rotate the wastegate actuator so that the vacuum port was not pointed straight up, with it pointing straight up the hood wouldn't close. (it did close actually when I forced it and realized that the port was bending the hood)
I need to remove the drivers side fender, drill and route the IC pipes through the inner fender (thanks hornetball for your build thread). Need to fix my reroute hose as I have it down running through the fuel lines and the way it is positioned now I cannot fit the 90 degree fitting on the TB at all, also as seen in the picture above I need to shorten that heater hose so it is not directly in contact with the downpipe. Need to install injectors. Need to run vac line from my vac gauge to behind the passenger seat (already have a capped tee under there from when I installed the gauge. MS3X is wired to the harness, just need to run the MAP and connect the wideband. I think I'm about 75-80% to starting the car.
Suggestions/criticism are welcome.

Reply
 0
0

0

 05-30-2017, 02:17 PM
#7
mkturbo.com


iTrader: (24)
Join Date: May 2006
Location: Charleston SC
Posts: 15,177
Total Cats: 1,681
The actual steps that I follow are to have the manifold/turbo/downpipe removed. Tighten a not onto the stud that the heater line bracket bolts onto. Then put on the bracket and tighten another nut down. This holds the line in place. Then beat it with a rubber mallet until it has moved back a good bit. I leave the hose attached while I am doing this. I also would recommend having a spare o-ring available in case the metal line comes out of the water pump outlet.
Reply
0
0
 07-10-2017, 02:19 PM
#10
Newb
Thread Starter
Join Date: Mar 2016
Location: Phoenix, AZ
Posts: 26
Total Cats: 0
Intercooler piping is done. Vacuum lines under the hood are done. Need to fix heater hose at the down pipe and wire up the o2 sensor to the MS3X, and run wire from the IAT to the MAF connector, add oil and should be ready to start.


Reply
0
0


