When you click on links to various merchants on this site and make a purchase, this can result in this site earning a commission. Affiliate programs and affiliations include, but are not limited to, the eBay Partner Network.
I'll chime in on Fuel Tank venting with my experience.
My NA Used to have a miserable gas smell in the summer. You could smell the car just walking out of the grocery store on a really hot day. I did everything, new valve(s), new charcoal canister.
Loosely hung the header in place to verify that clearance to the V8R subframe was sufficient by the bolting flange as I've heard of a few complaints from people where clearance was tight. It was not in my case, so it looks like I'm good to go. Small victory!
Then started the process of laying out all of the engine wiring... as not really any surprise to me, most of this is going to need to get shortened to satisfy my OCD... yay
Last edited by Padlock; Apr 6, 2020 at 06:47 PM.
Reason: adding spaces
Apparently, when you ask enough times, good things happen. David came through and designed up a midpipe, so that all of us K24A2 guys can simply bolt up the K24A2 Kmiata race header directly to the Kmiata 3" catback that was released with the K24Z3 swap. The midpipe fills that gap that exists in that specific case. I already had the parts to fabricate a midpipe myself, but I'm inherently lazy and would rather spend a few extra bucks than mess around with trying to get a welder buddy (and all of his supplies) over to my house amongst all this COVID-19 nonesense.
Another thing I finally got ordered was the Kpro4 ECU modifications from David. Just need to get the ECU sent in now, so hopefully that's a relatively quick turnaround.
In exciting news, that marks the end of any major parts that need to be purchased for the kswap on the car. The only thing I have left to buy is some split wire loom to make the harnesses throughout the car look pretty and stay protected and then fluids to refill the car, which I'm not really counting against the swap in terms of costs. For those curious that may have missed the link previously, below is where I have my cost tracking on this swap stored for everyone's reference. The high level summary is that I could have easily done the swap for about $8900 if your goal was to have a running and driving K24A2 NB with the full Kmiata exhaust (I've fabricated nothing). I spent approximately $1100 in extras that weren't exactly needed but "nice to have's" (fancy looking fuel rails, engine bay dress-up items, additional interior gauges, shifter rebuild kit, etc). Adding those extra's in brought my total to a tickle over $10k all-in. As can be seen by the dates (and this build thread), I spread this cost out over the course of almost 2 years and managed to get some nice deals in the process. I wouldn't be surprised for a common build to run $1-2k more if your not penny pinching as much as me.
Finished up a set of Honda Ridgeline retrofits last week. Really happy with how clean these turned out.
Shortly after I received 5 sets of LED NB tail light cores to play with. After removing the ugly reflectors from the housings (which takes forever thanks to permaseal housings), I wanted to see how they would look on the car all chrome with tinted lenses. While not awful (and definitely an improvement from how they originally were), it still isn't my style.
All 5 sets were claimed within a day, and not surprisingly all of the customers wanted them completely blacked out. Just got them out of paint yesterday. Was very happy with how they turned out. Gives the blacked out tail light look without sacrificing output as the lens is still clear. Honestly makes me want to redo the ones on my car to match.
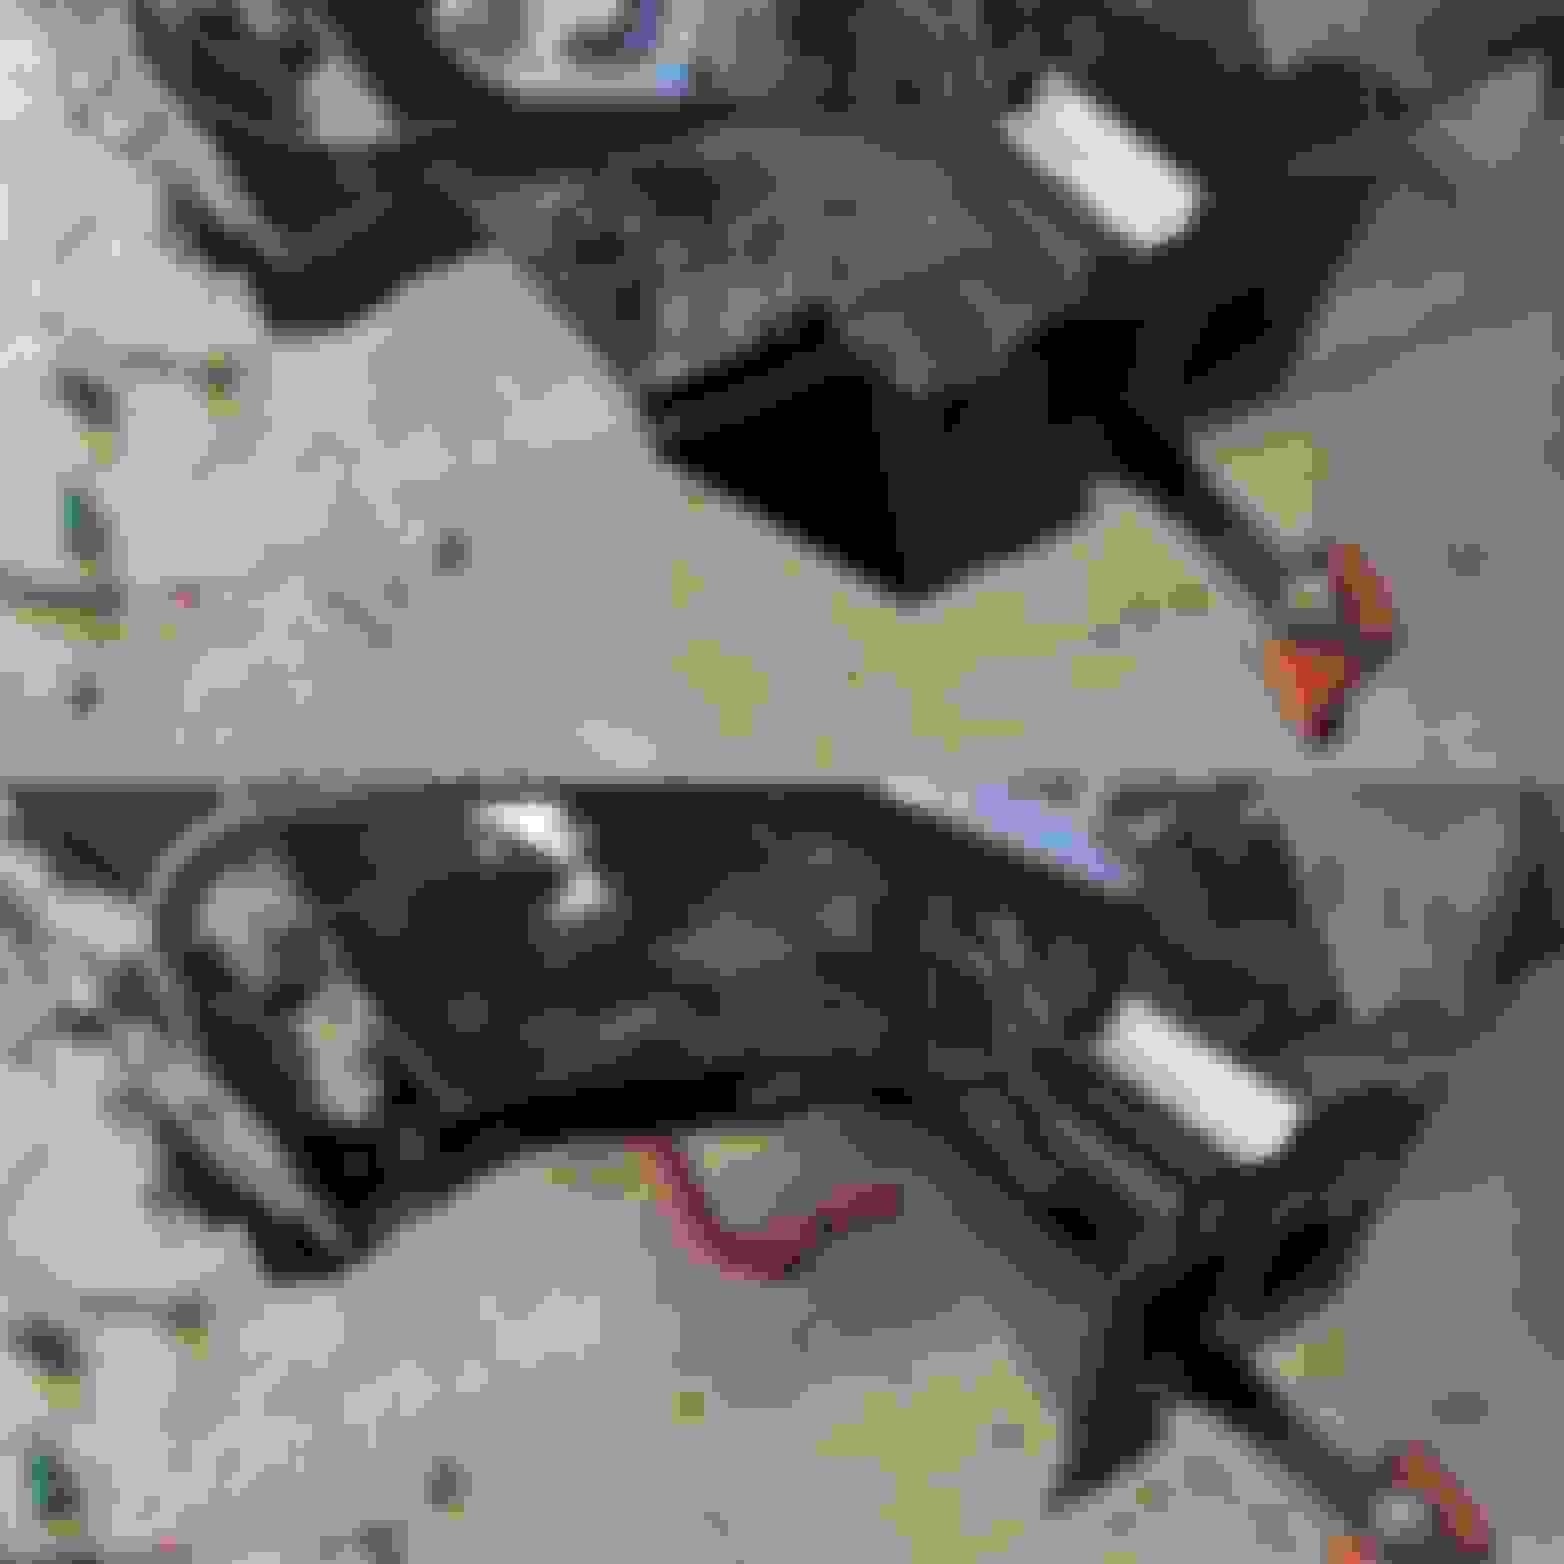
Full Kmiata exhaust photo dump incoming. I got the header, midpipe, and catback finally installed. Overall, very impressed with the fitment of everything. Some clearances get close, but nothing contacts so I should be in good shape. Don't mind the ghetto wiring holding up the muffler in these shots. I was waiting on parts to come in the mail that you will see later.
Finished it off with some poly exhaust hangers. Needed new ones anyway, so figured why not upgrade.
Next up was continuing to work on the engine wiring harness. Seeing as I will be running this through the bulkhead fitting, I need to prune as many items as I can to minimize the number of pins I need to use. I yanked the harness from the car again and started the tedious process of labeling to ensure I don't miss anything. I also will be deleting the main junction connection shown sticking up in the center of the harness so that the harness slims down a bit more for easier looming. For the most part you can sort through all the connections with the diagrams I have posted previously.
That said, I ran into a couple hiccups where I had wires that my previous diagrams didn't depict. Off to the mighty google, and I was led to these two helpful diagrams. The C101 connector is an important one to understand. Back-up light, back-up light switch, and oil pressure light can be pruned out in my specific case as either miata wiring or aftermarket sensors are going to be utilized.
In my attempt to keep the car on a diet while still being loosely defined as a street car, I found some low hanging fruit that had a cost of $0 to remove. The sheet metal underneath the headlight which integrates into the frame horn was originally only really used as a ground location. I won't be using it as such any longer with the wire tuck, so away it goes. I was also able to take a few inches off the support bar as well. Two bolts per side should be plenty to hold it in place. In this specific case, the parts removed were maybe 1 pound or so. Nothing crazy, but 1 pound here and there adds up quickly.
Next up was getting the fuel rail feed line sorted. Picked up a Vibrant hard line to -6AN hose adapter and ran the line to the fuel rail. I was planning on running a straight fitting to the rail, but it interferes with my custom water neck, so I'm waiting on a 90 degree fitting now to finish it up. It should tuck in really nicely and look clean when done.
The last brainstorm of the night was intake plumbing. Due to time constraints, I'll only have time to mess around with intakes that are easily made with standard pipe and couplers. A shorter intake behind the driver side headlight seems achievable, but so does a longer passenger side intake. I'm following up with some Kswap people to understand which is best. Long intake is good for mid range power, but it locates the filter closer to the header. How hot it would actually get on the passenger side location in my specific case is probably hard to figure out without testing considering my hood vent would be essentially right above it. Anyone have thoughts here?
When I tried poly exhuast hangers, this happened the first track day. I'm interested to see how yours hold up...
Appreciate the heads up. I'll keep an eye on things.
Originally Posted by mghtymouse380
I cant wait to see it fire up and run!
I have owned this K24 for over 2 years now, nobody can wait to see it run more than me at the moment. Home stretch is in sight and I have a pile of some necessary and not-so-necessary parts due to arrive early next week which should aid in powering through some of the remaining things on the list. Verifying it is all wired up properly before looming everything back together is the main focus because undoing work would be an egregious waste of time
When I tried poly exhuast hangers, this happened the first track day:
I'm interested to see how yours hold up...
I have had similar experiences with poly hangers. I had some stretch on my cars in less then a month of street driving. I use new rubber hangers from advance auto and I put coolant clamps over them to help hold the weight and keep it all from moving.


 0
0