Just Another F20C build... <Preview>
 04-25-2012, 03:46 PM
#221
Elite Member
iTrader: (1)

Join Date: Jun 2006
Location: Warrington/Birmingham
Posts: 2,642
Total Cats: 42
Interesting you bring up the GT3RS as the harnesses are something that both Chris Harris and Jeremy Clarkson complained about.
Chris Harris actually owned one for a bit too (a guy worth following on twitter if you're into that btw).
Chris Harris actually owned one for a bit too
(a guy worth following on twitter if you're into that btw).

Reply
 0
0

0
04-25-2012, 03:54 PM
#222
Junior Member
Thread Starter

Join Date: Dec 2010
Location: UK, in Cambridgeshire or wherever work takes me.
Posts: 375
Total Cats: 20
Well what do they know���.. lulz.
I read Chris Harris' tweets every day. Always interesting and entertaining� much more so than JC's!
O/T edit: Chris likes the new Exige. So do Autocar. As a huge Lotus fan, I'm pretty relieved that this car's received great press today.
I read Chris Harris' tweets every day. Always interesting and entertaining� much more so than JC's!
O/T edit: Chris likes the new Exige. So do Autocar. As a huge Lotus fan, I'm pretty relieved that this car's received great press today.
Last edited by owenwilliams; 04-25-2012 at 04:06 PM.
Reply
0
0
05-08-2012, 01:57 PM
#223
Junior Member
Thread Starter
Join Date: Dec 2010
Location: UK, in Cambridgeshire or wherever work takes me.
Posts: 375
Total Cats: 20
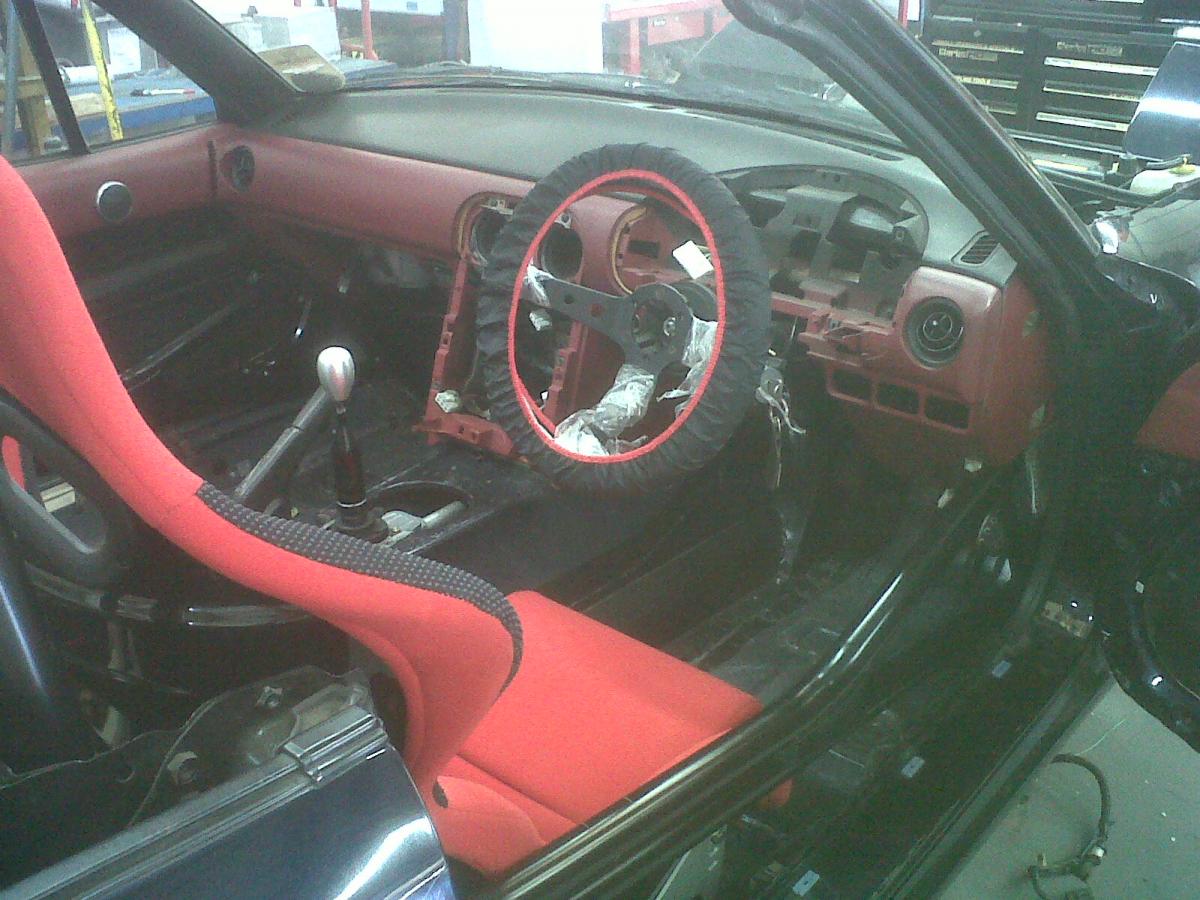
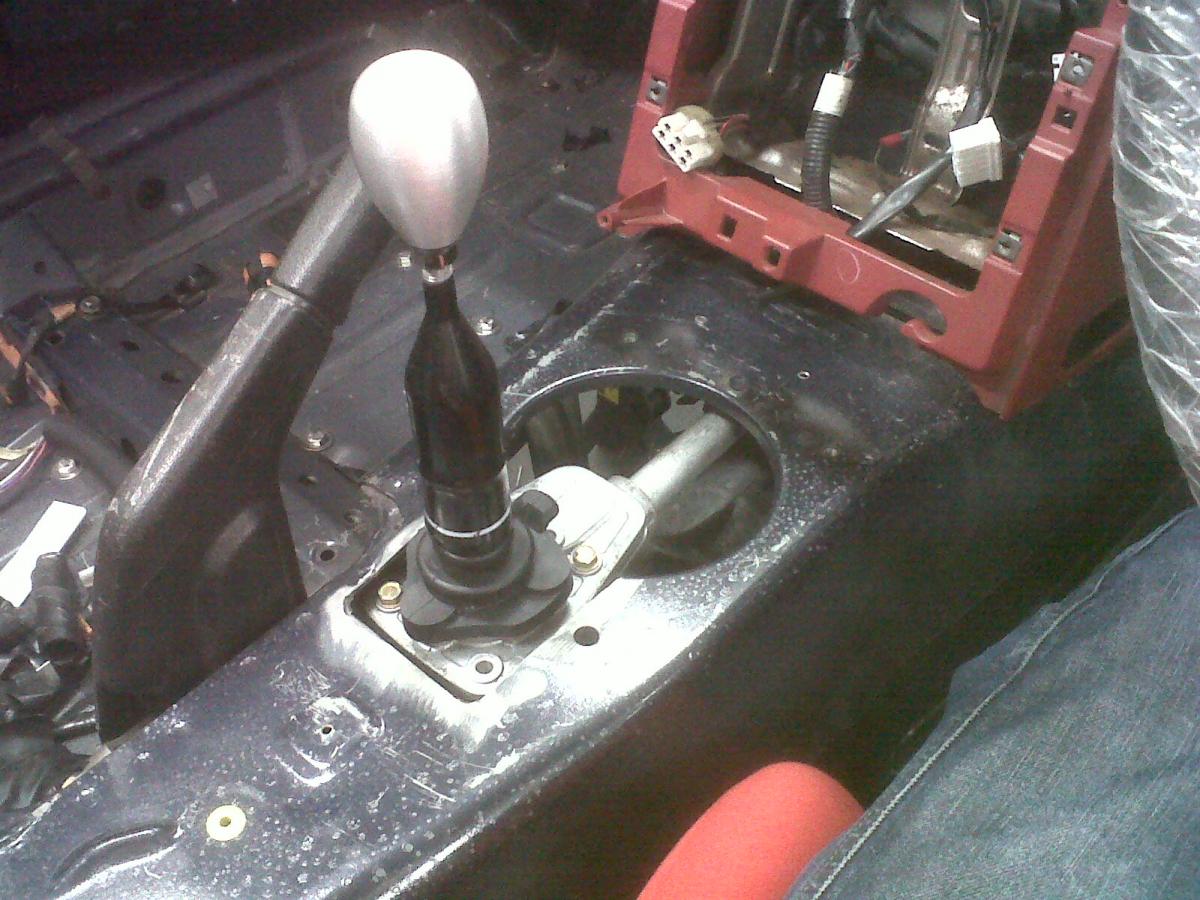
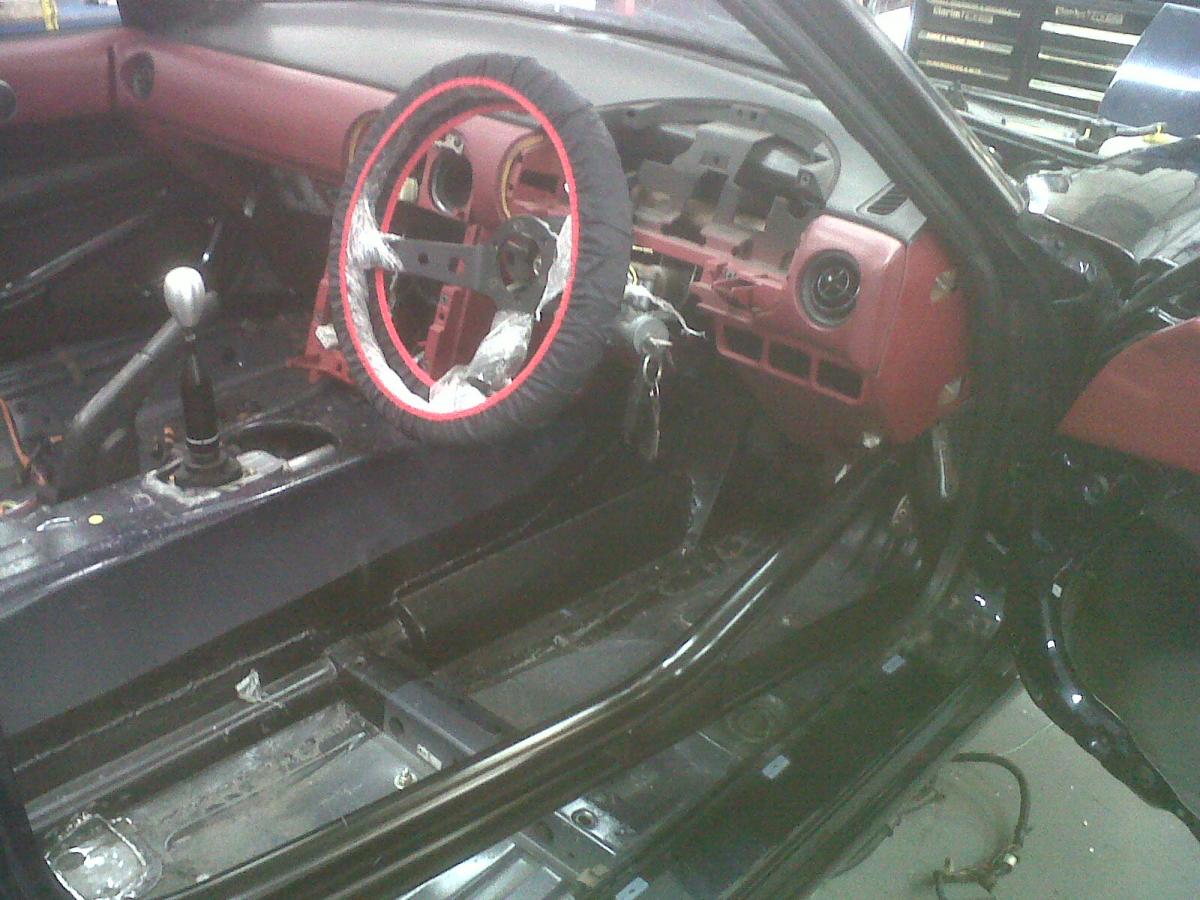
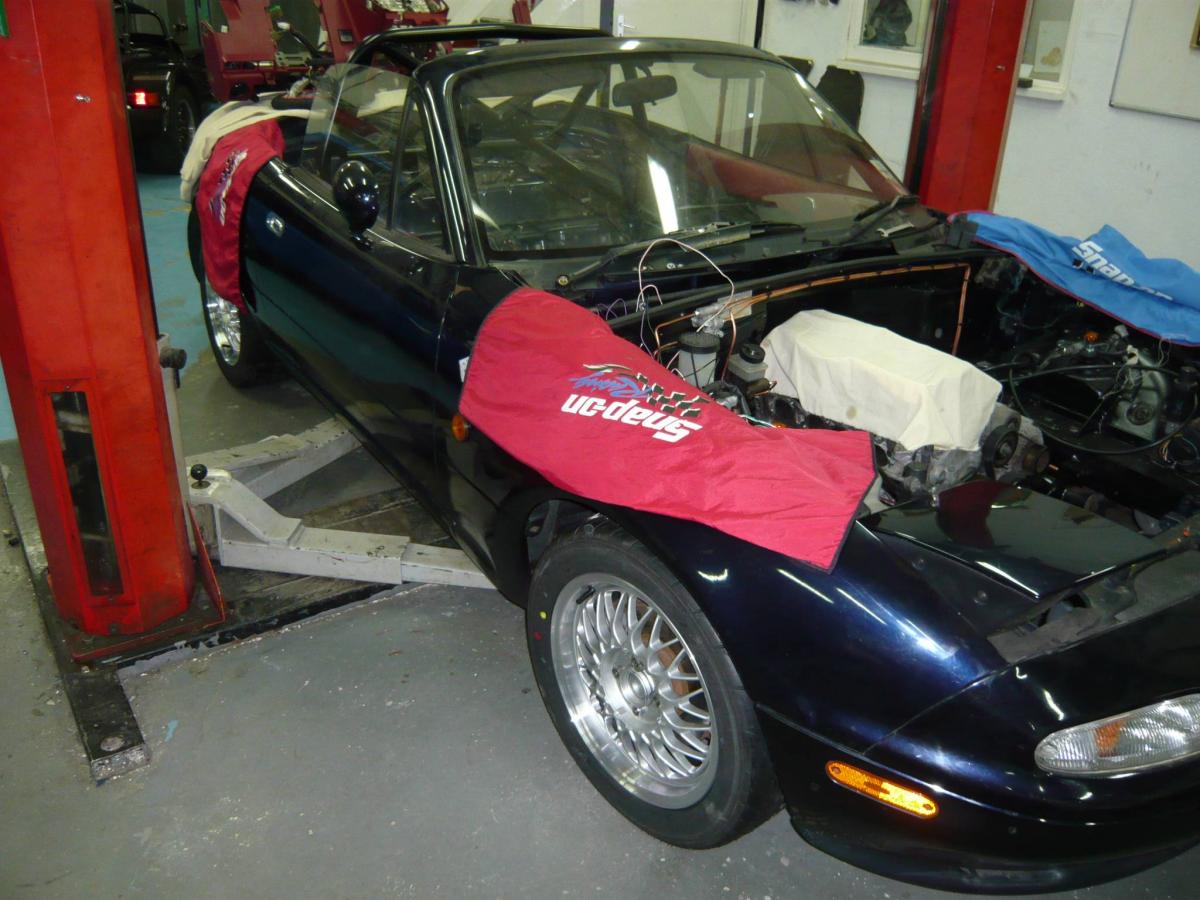
OEM BBS wheels came back from refurb today. A local garage has mounted the tyres and balanced them, and got them over to QPrep. So, the car now is now movable once more.
Also, the shop have started on the electrics, and said they managed to take a nice round 5kg/11lbs out of the wiring loom. I'm going in for a seat fit on saturday, not least to allow us to work out exactly where to extend the pedals to. Pics 'n' stuff to follow.
Also, thank ----------ing kitties this is starting to come together. Not long now
Reply
0
0
05-12-2012, 04:55 PM
#224
Junior Member
Thread Starter
Join Date: Dec 2010
Location: UK, in Cambridgeshire or wherever work takes me.
Posts: 375
Total Cats: 20
Should be on the road within a month
The latest plan is for the doors and the flat underbody to be completed after this date by me. I can't really put them on QPrep as they weren't part of the original quote.
The full piggyback ECU tune will be taken care of by tdi-plc.com instead of by myself, partly because I've spent too much time learning CAD things instead of ECU tuning things in the last few months, and partly because I dislike electronics intensely because I don't understand them.
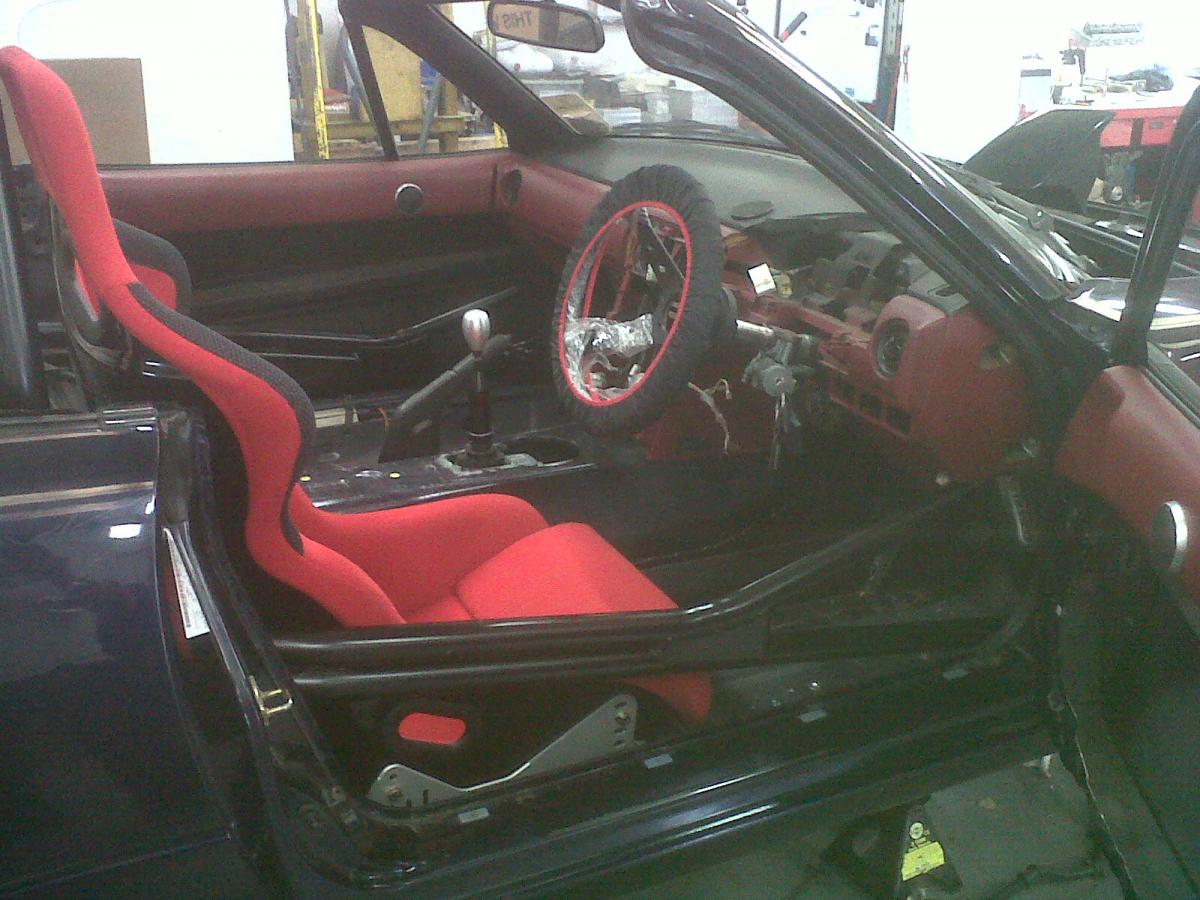
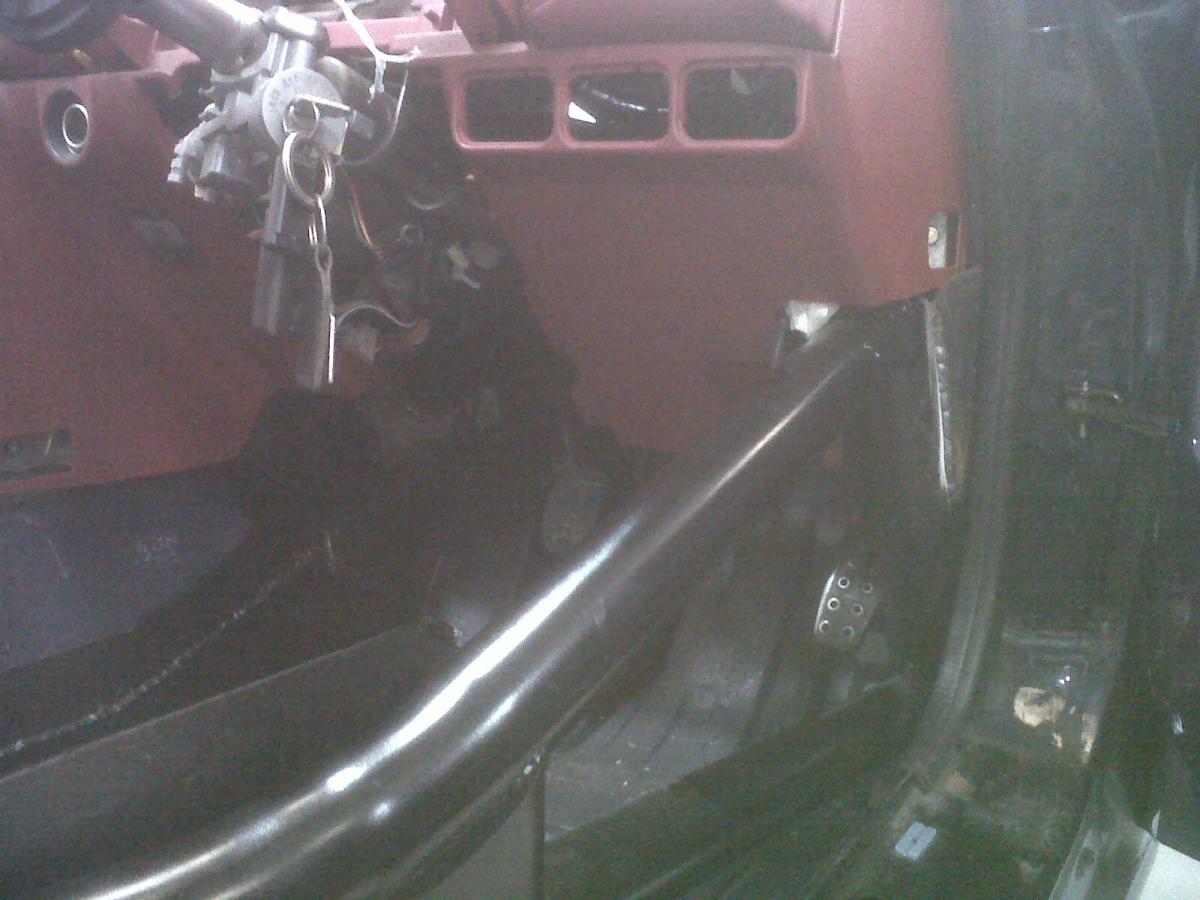
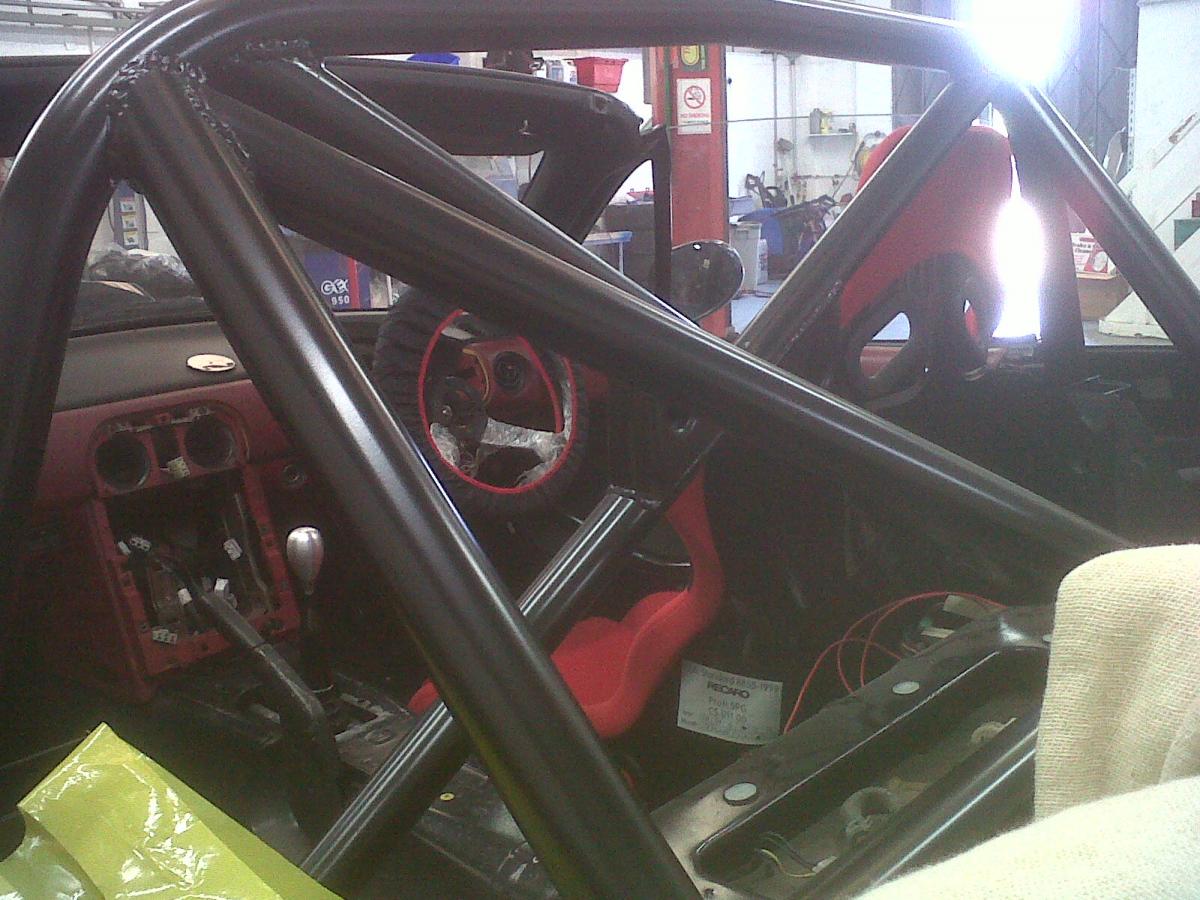
Seat will be moved down about an inch, and towards the trans tunnel as much as a couple of inches to line it up a little better with the steering wheel and pedals. The front lower left corner of the seat will probably end up getting "trimmed" this week to accommodate this.
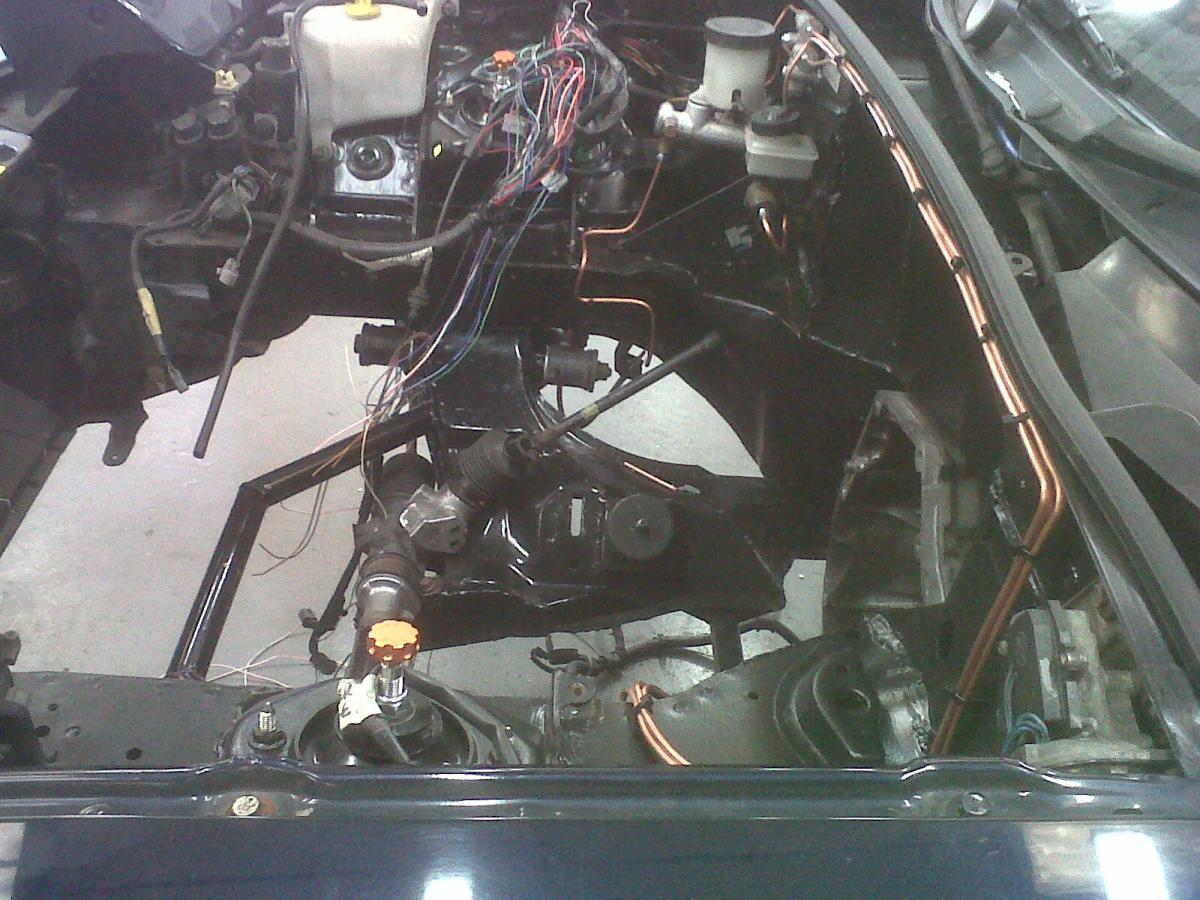
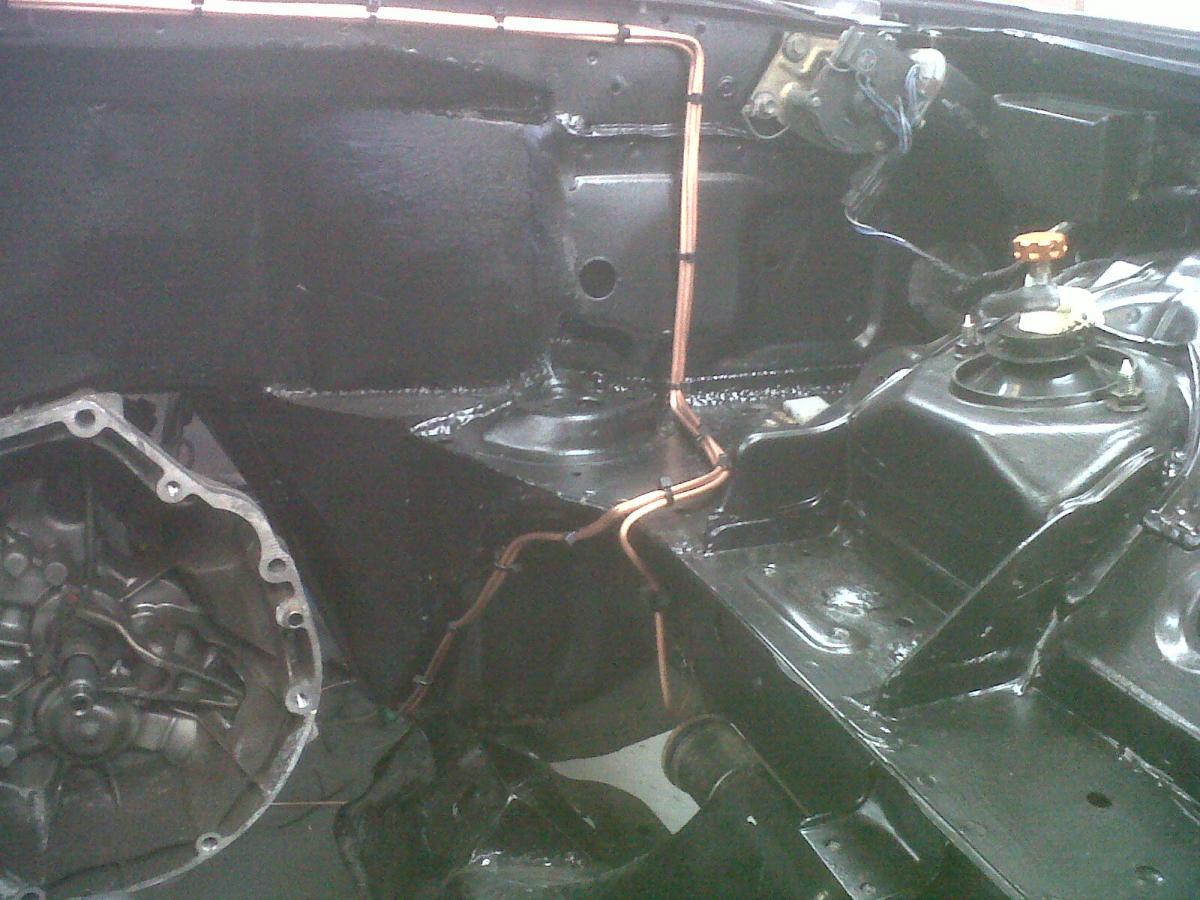
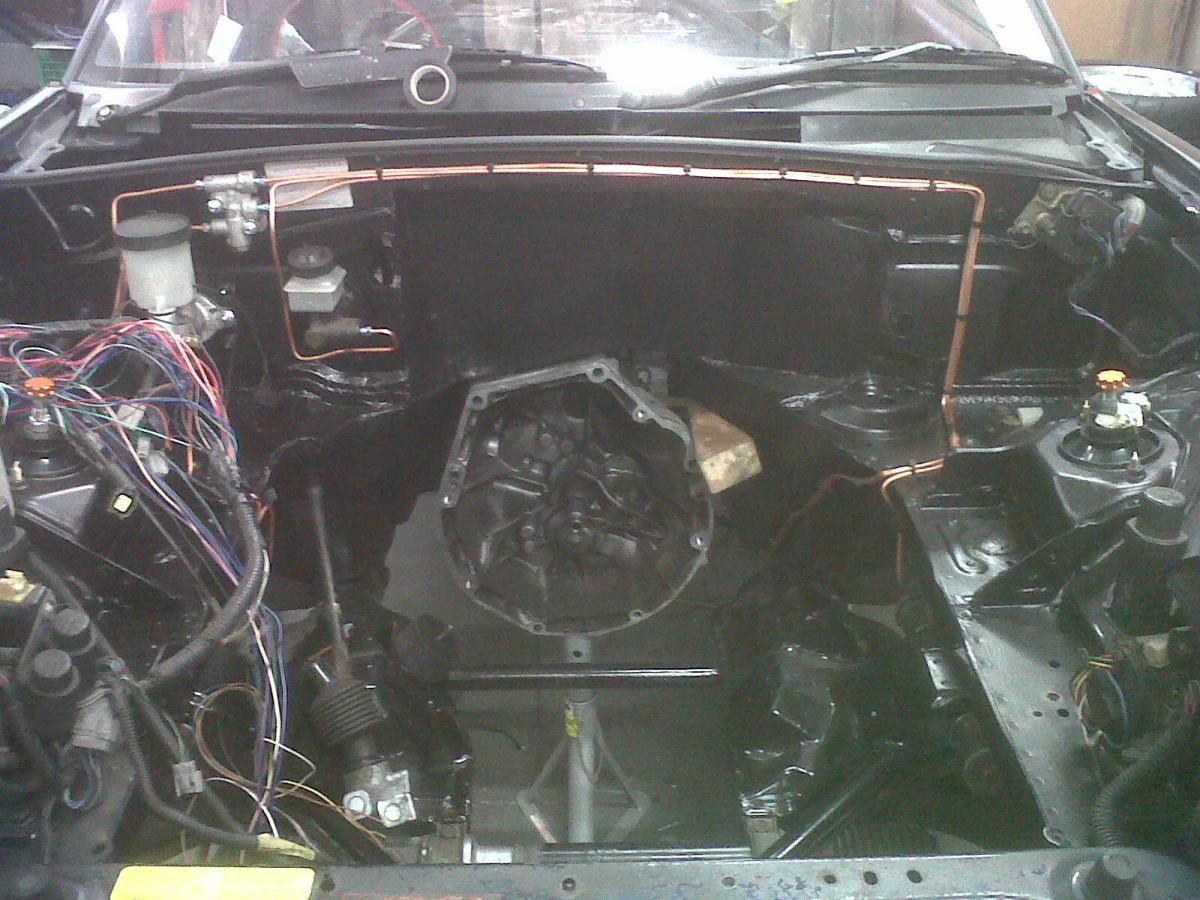
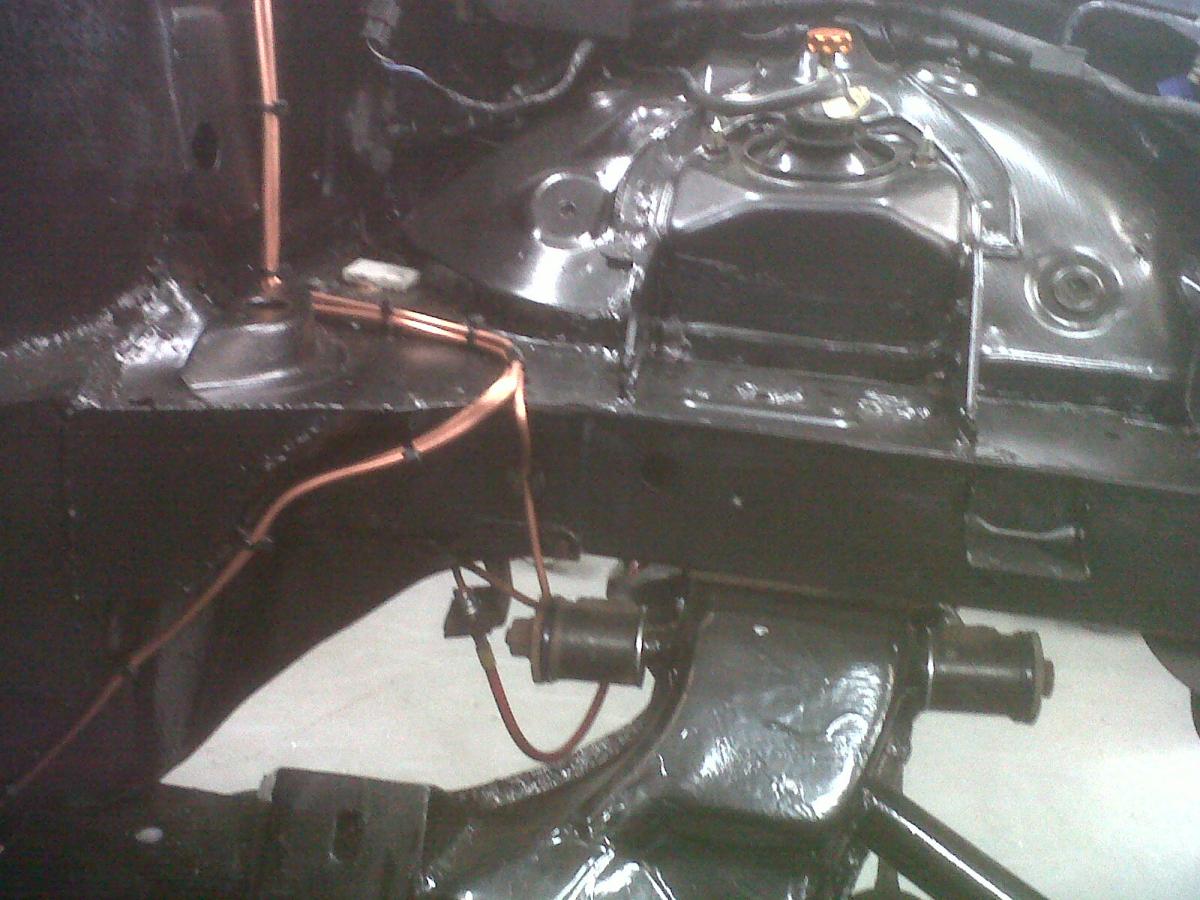
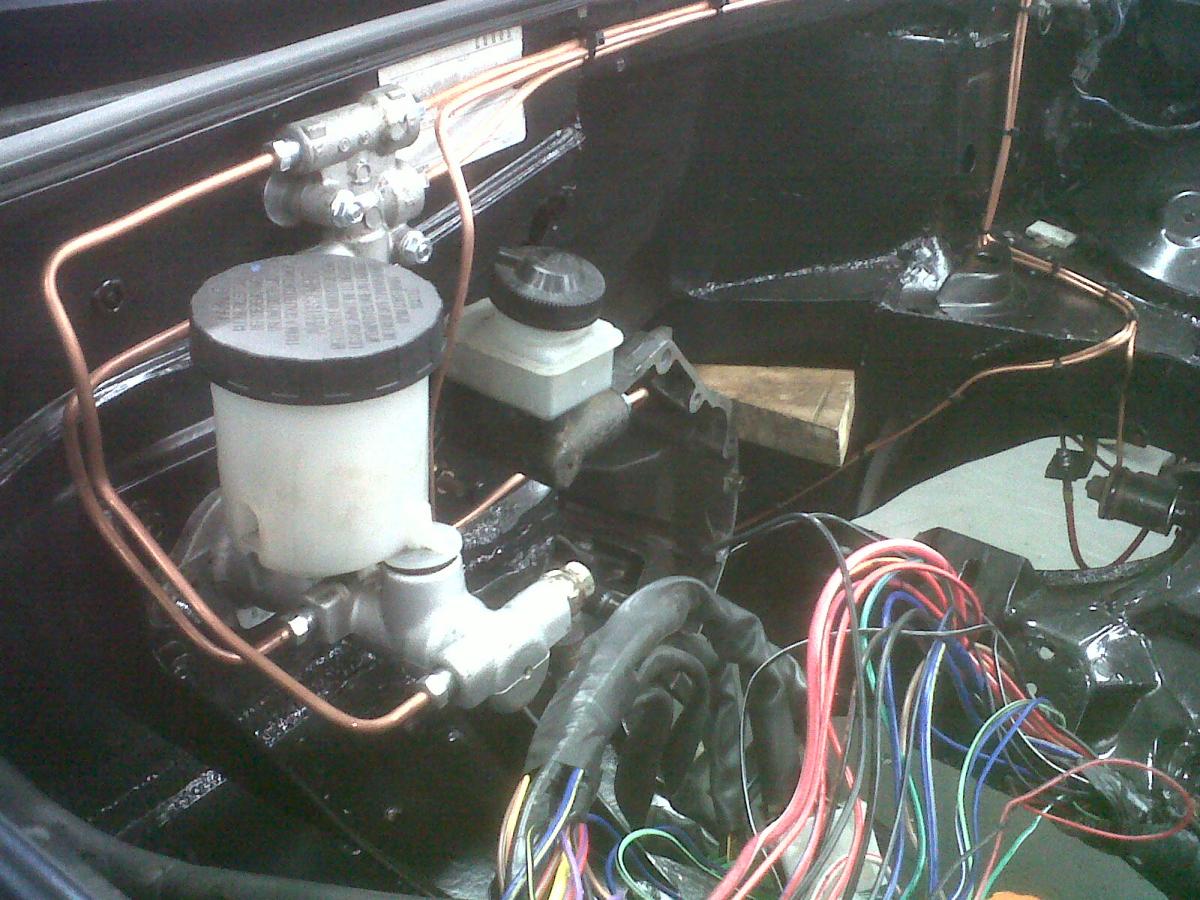
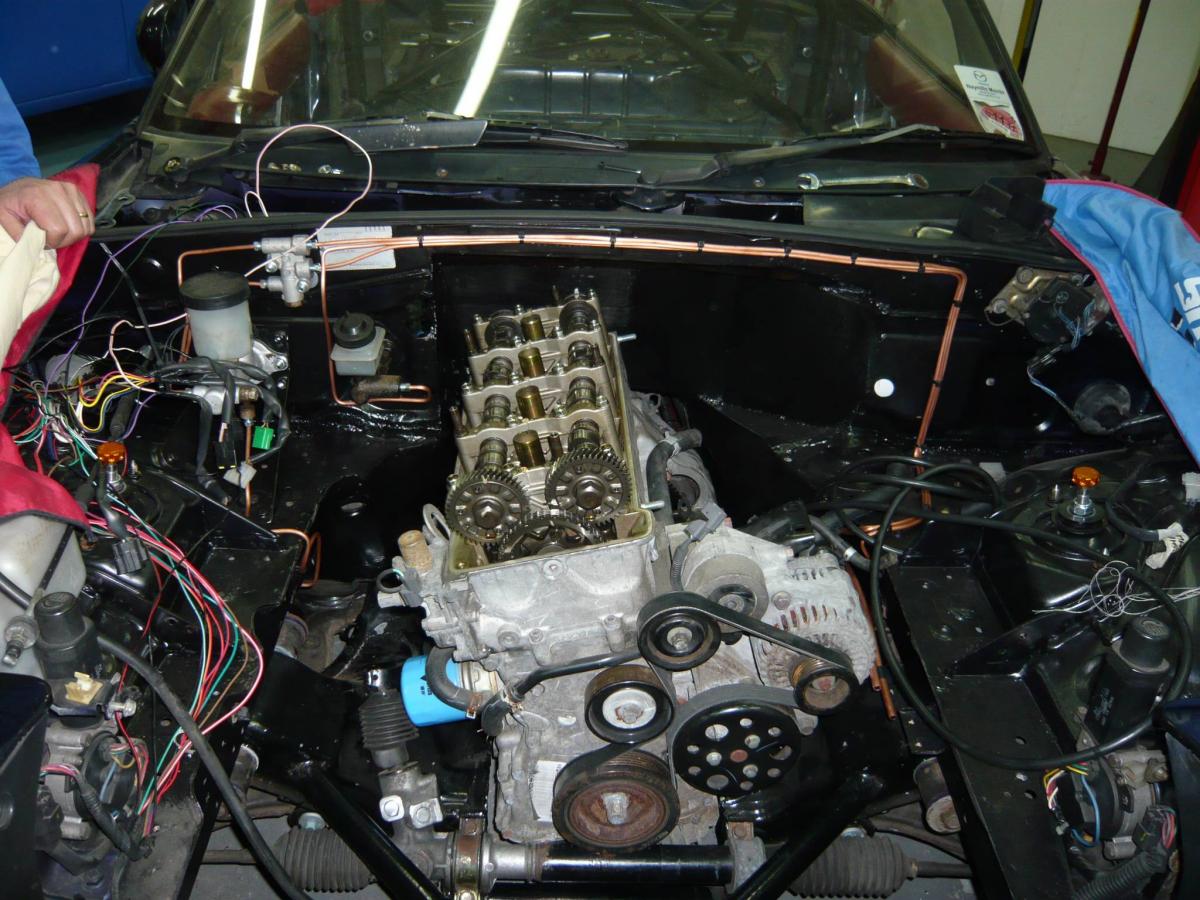
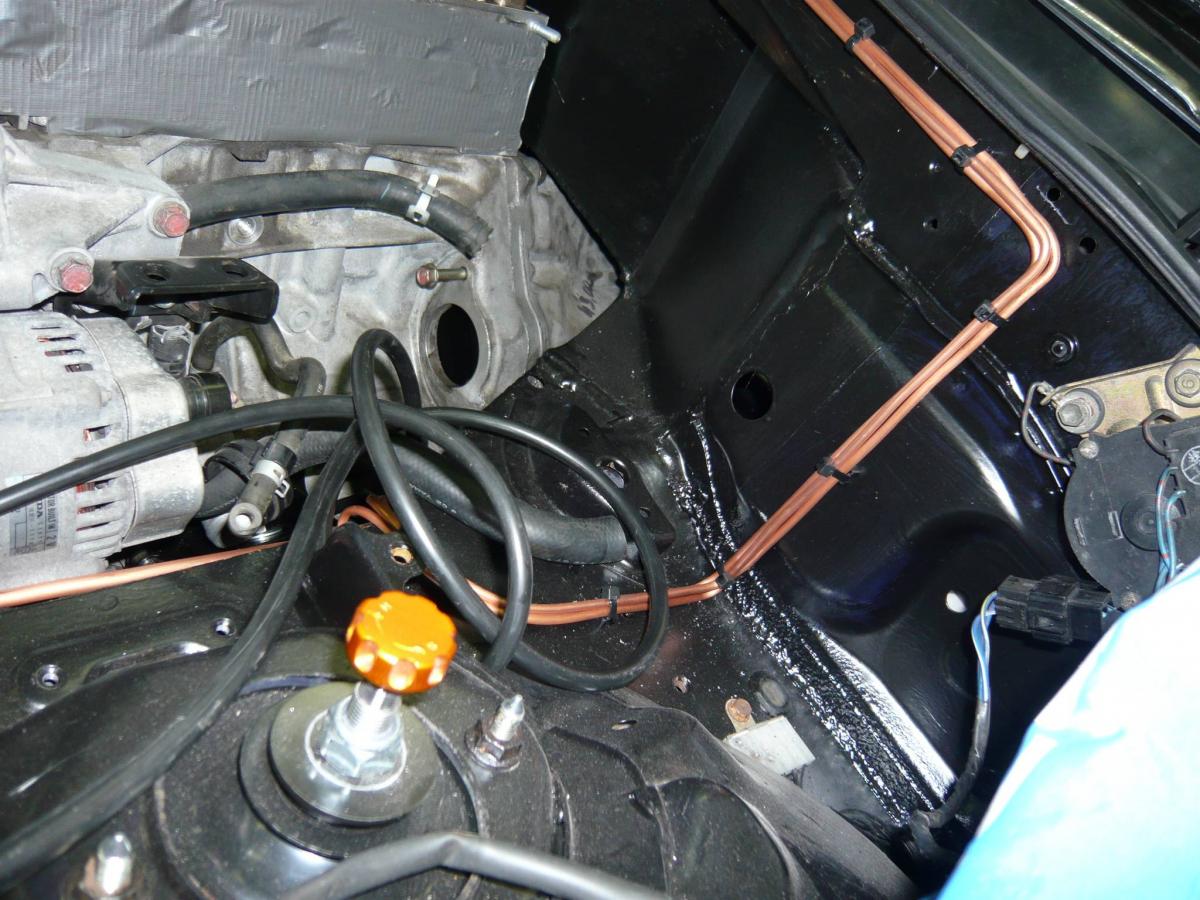
Unservoed brakes, braced firewall around the master cylinder, and all copper lines:
General:
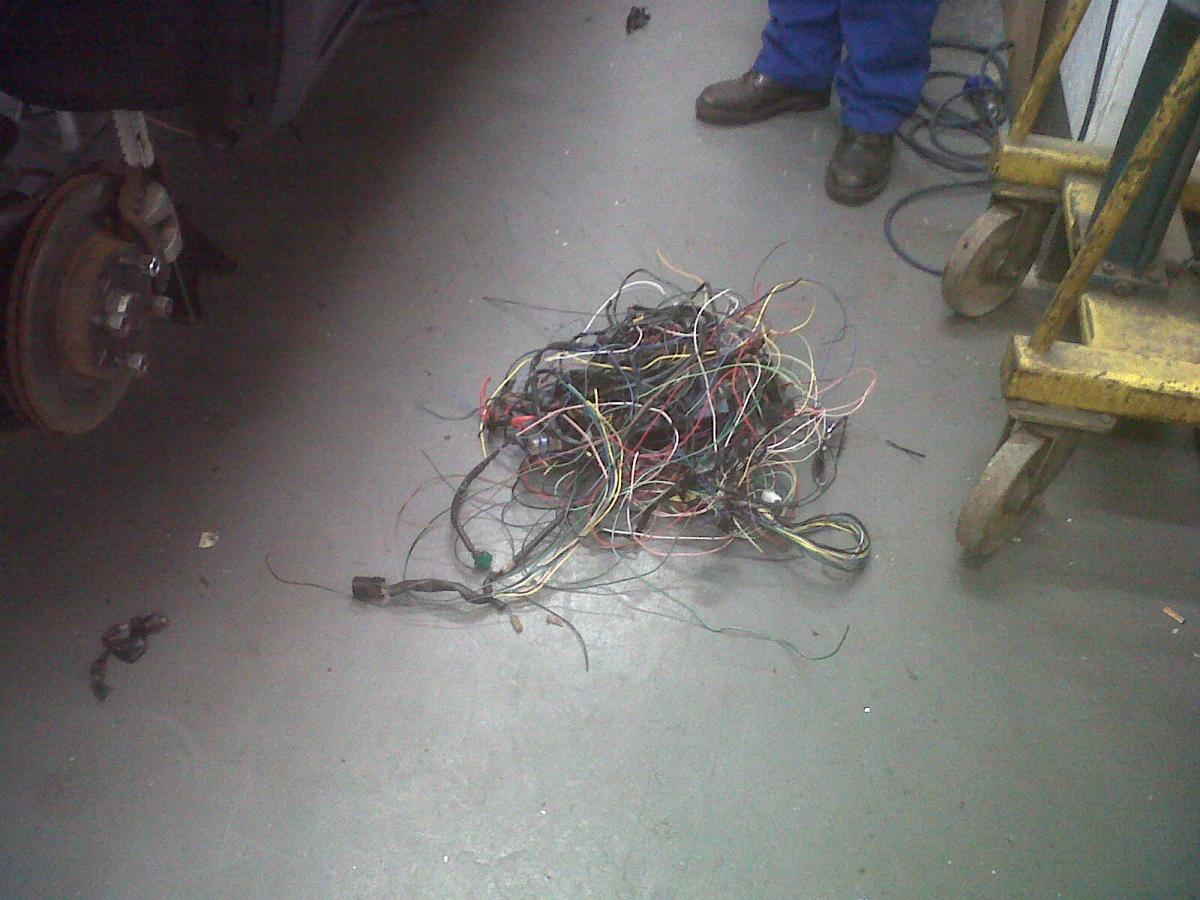
A few kilograms of surplus wiring, including the Honda immobiliser. For the record, the car will be extremely un-stealable when done :P
The latest plan is for the doors and the flat underbody to be completed after this date by me. I can't really put them on QPrep as they weren't part of the original quote.
The full piggyback ECU tune will be taken care of by tdi-plc.com instead of by myself, partly because I've spent too much time learning CAD things instead of ECU tuning things in the last few months, and partly because I dislike electronics intensely because I don't understand them.
Seat will be moved down about an inch, and towards the trans tunnel as much as a couple of inches to line it up a little better with the steering wheel and pedals. The front lower left corner of the seat will probably end up getting "trimmed" this week to accommodate this.
Unservoed brakes, braced firewall around the master cylinder, and all copper lines:
General:
A few kilograms of surplus wiring, including the Honda immobiliser. For the record, the car will be extremely un-stealable when done :P
Reply
0
0
05-13-2012, 02:34 AM
#226
Junior Member
Thread Starter
Join Date: Dec 2010
Location: UK, in Cambridgeshire or wherever work takes me.
Posts: 375
Total Cats: 20
It's a DOT copper/nickel alloy. Quent chose it, and I'd definitely agree with his choice - it's prettier and tidier than regular brake line, and cheaper than steel braided line. Downside is that you have to know what you're doing when it comes to attaching it (it requires 'flaring', apparently) and working with it. I have to say he's done a really neat job.
Reply
0
0
 05-13-2012, 07:11 AM
#228
Junior Member
Thread Starter
Join Date: Dec 2010
Location: UK, in Cambridgeshire or wherever work takes me.
Posts: 375
Total Cats: 20
Will do matey.
Also, EXCITING BREAKING NEWS…
I just found a digital camera in the house. This means that finally, after 12 pages of ---- photos, I might just provide this forum with media that does not require the viewer to squint.
In fact, I'm going to try and take a photo right now and upload it.
Also, EXCITING BREAKING NEWS…
I just found a digital camera in the house. This means that finally, after 12 pages of ---- photos, I might just provide this forum with media that does not require the viewer to squint.
In fact, I'm going to try and take a photo right now and upload it.
Reply
0
0
05-13-2012, 07:34 AM
#229
Junior Member
Thread Starter
Join Date: Dec 2010
Location: UK, in Cambridgeshire or wherever work takes me.
Posts: 375
Total Cats: 20

It's only gone and bloody worked! Non-blurry photos will feature in this thread from now on. I <3 my newfangled Panasonic Lumix Mega O.I.S./28mmWIDE Leica DMC-FX55 contraption.
Reply
1
1
 05-18-2012, 03:33 PM
#232
Junior Member
Thread Starter
Join Date: Dec 2010
Location: UK, in Cambridgeshire or wherever work takes me.
Posts: 375
Total Cats: 20
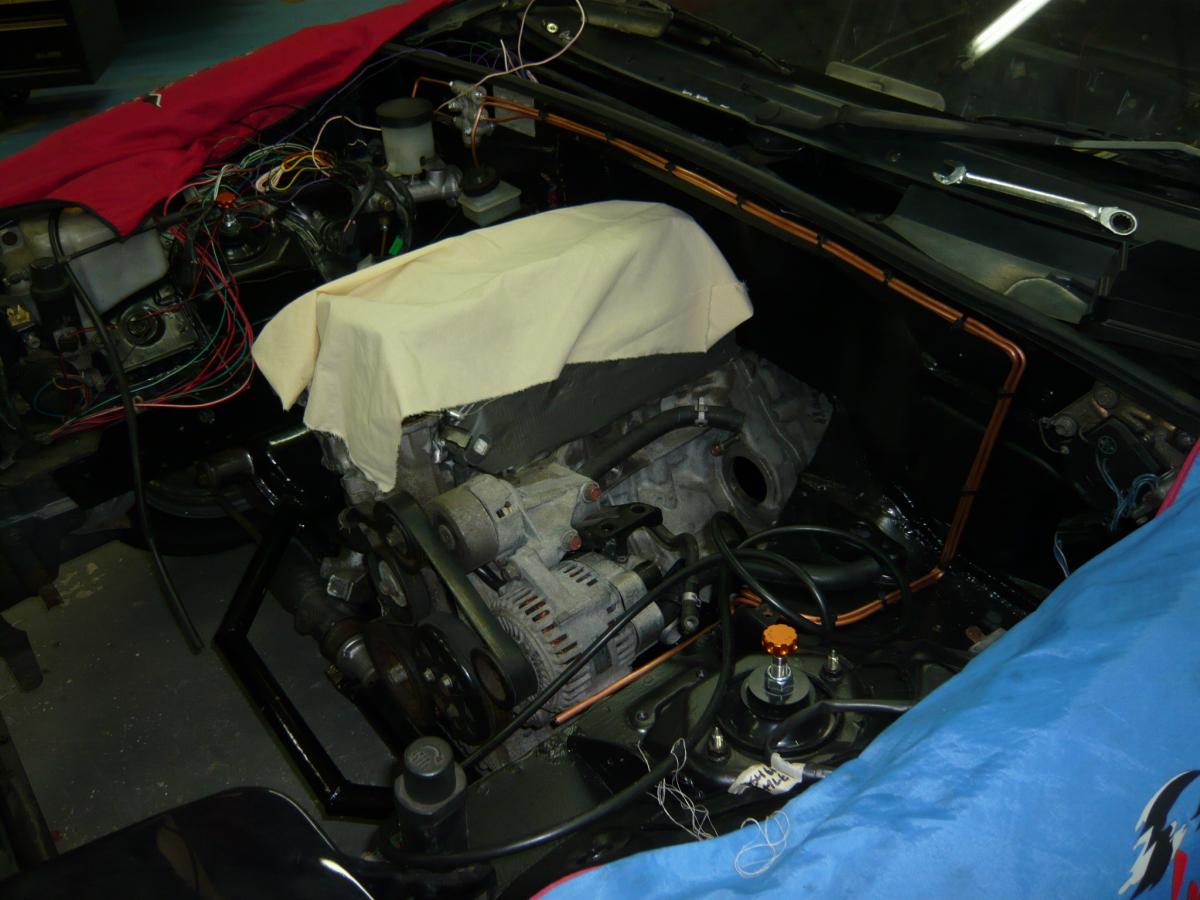
So the big news, for me, is that the lowered subframe is a bastard, and in order to run the dampers within the damping parameters indicated to me by Emilio, I will be spacing each corner of the car up 30mm. This is to achieve around 4 inches clearance between the road and the front subframe. 4 inches is the maximum legal speedbump height in the UK.
While 30mm will be ideal to achieve this, I have a feeling I will be limited by the length of the central threaded section of the damper that the orange adjuster is mounted to. I.e., if the body is spaced up too much, I'll run out of thread. The two studs either side can be replaced with longer ones according to Quent, but he didn't mention this central section. I've emailed him to see what he thinks.
Couple of relatively high definition photos below. More pictures later, I'm late for stuff.
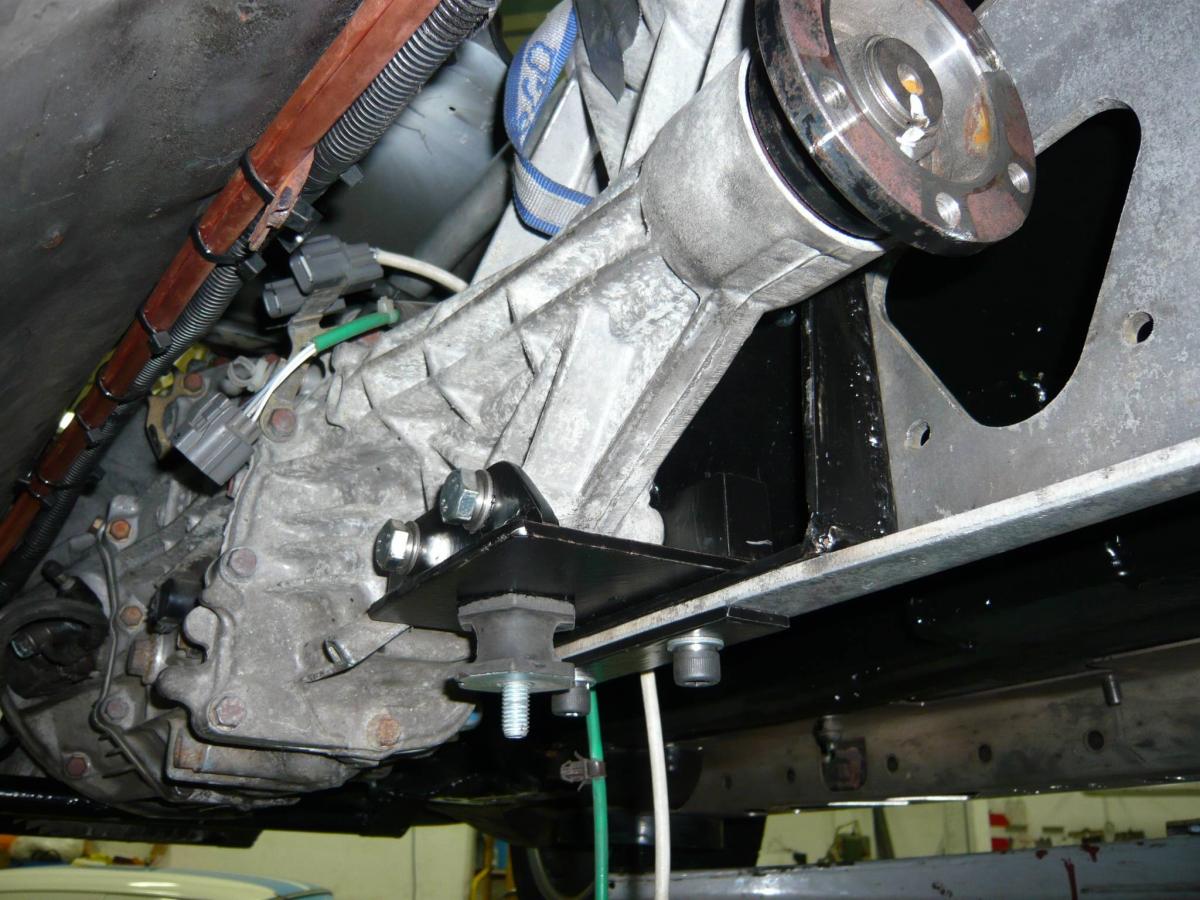
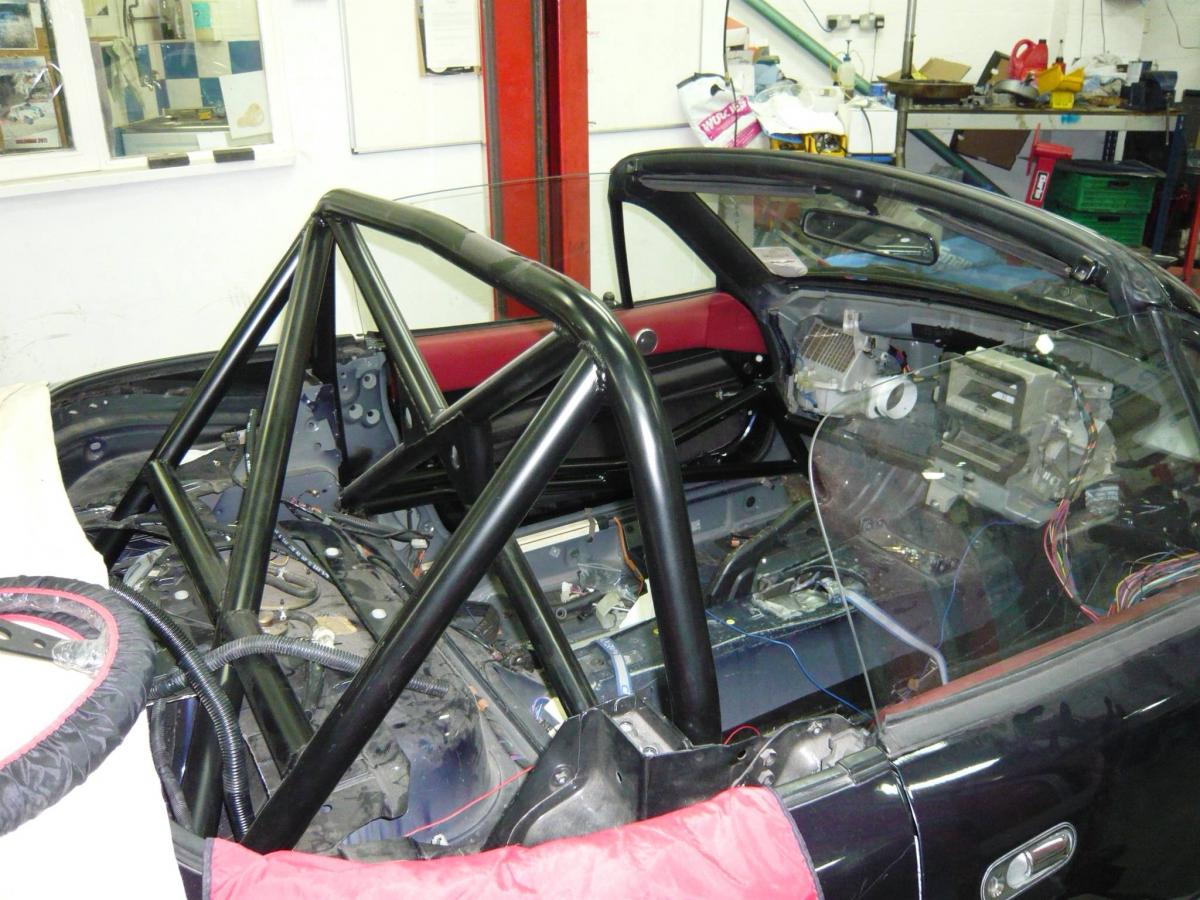
Note rubber bushing for cross brace
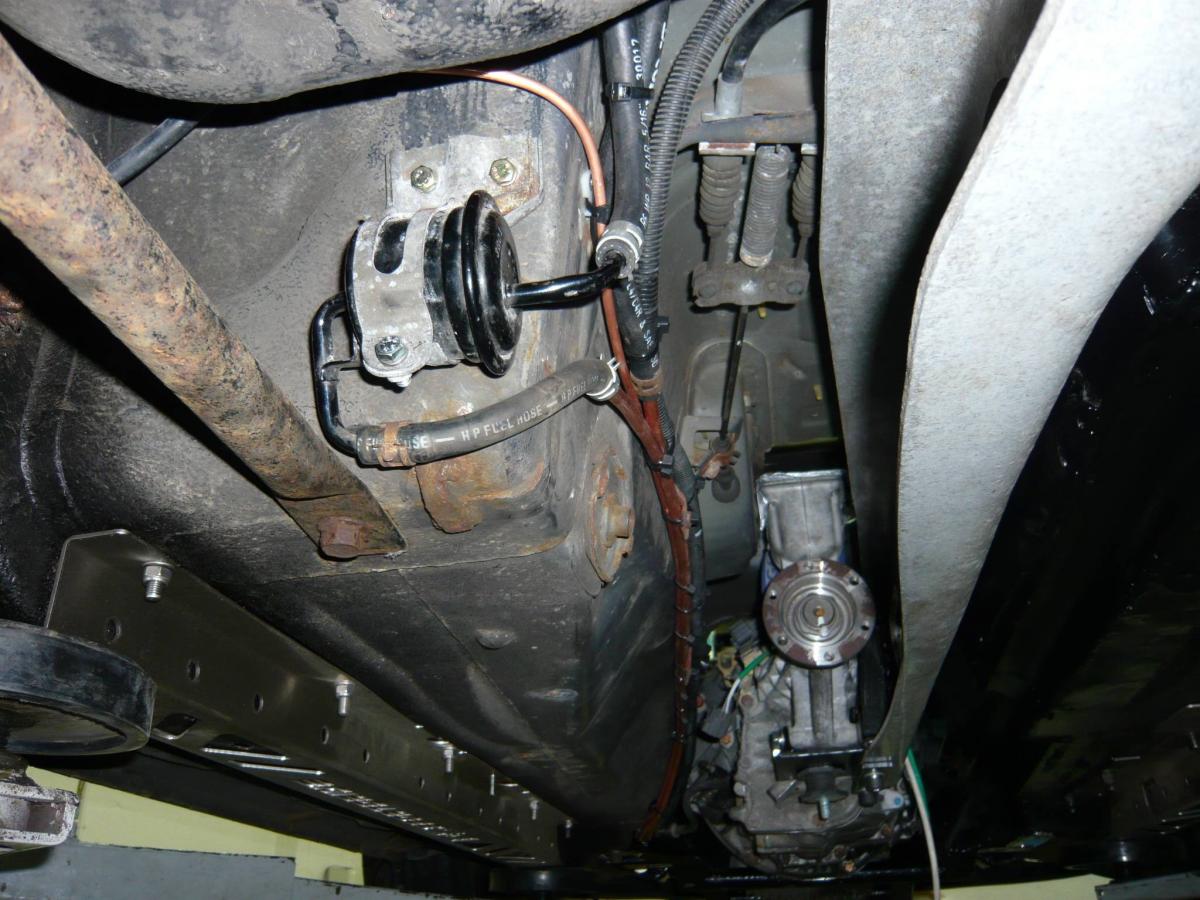
Fuel stuff relocated to the other side of the car, away from the exhaust
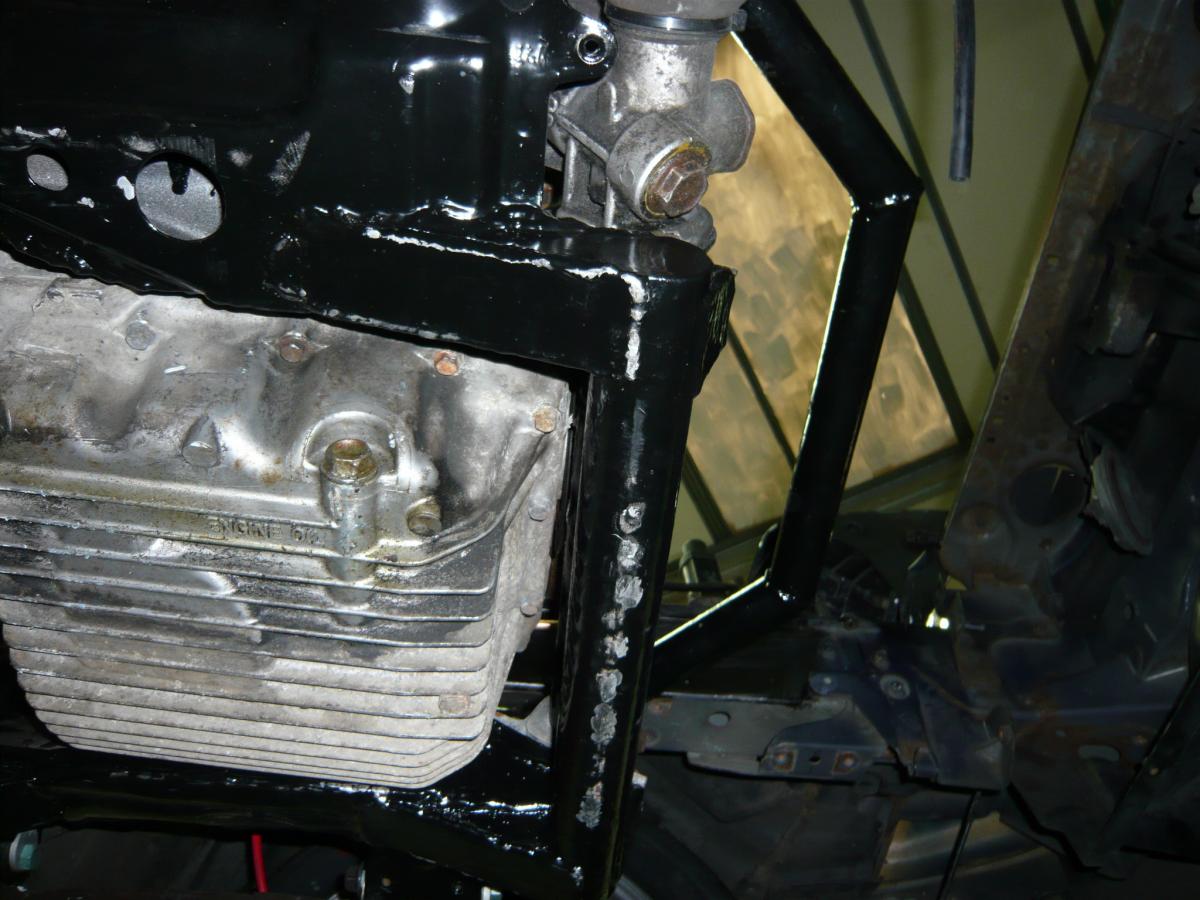
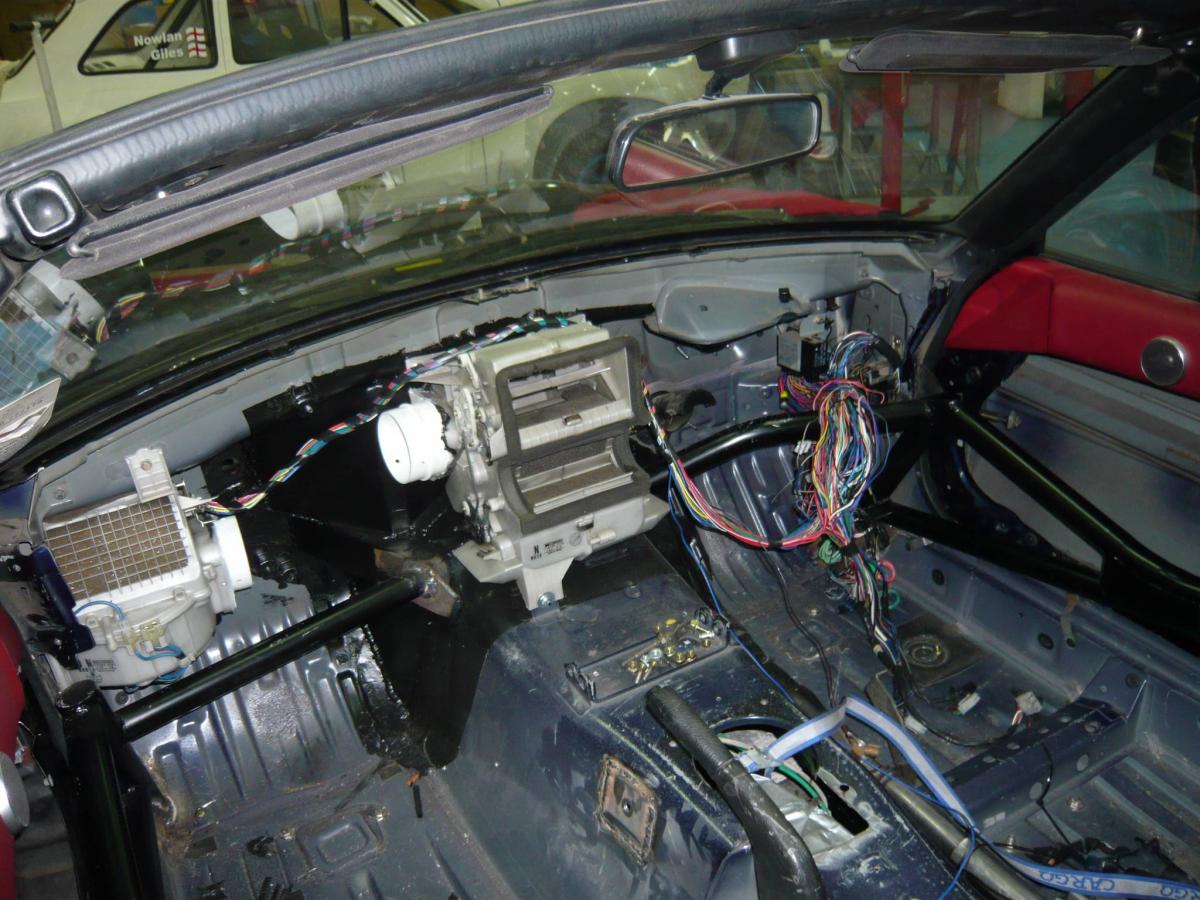
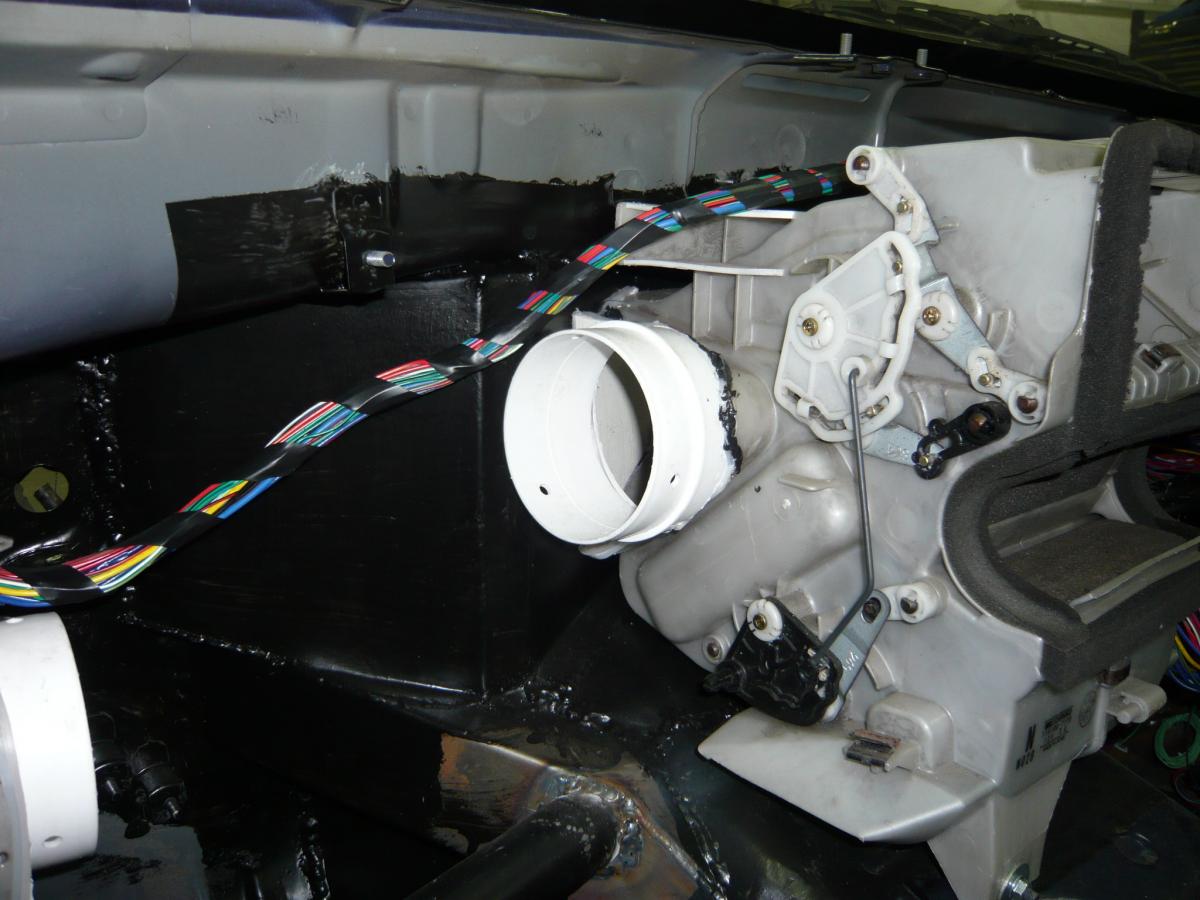
AC used to live in the middle. Now there will be a straight pipe in its place. Heater box had to be cut and shut.
While 30mm will be ideal to achieve this, I have a feeling I will be limited by the length of the central threaded section of the damper that the orange adjuster is mounted to. I.e., if the body is spaced up too much, I'll run out of thread. The two studs either side can be replaced with longer ones according to Quent, but he didn't mention this central section. I've emailed him to see what he thinks.
Couple of relatively high definition photos below. More pictures later, I'm late for stuff.
Note rubber bushing for cross brace
Fuel stuff relocated to the other side of the car, away from the exhaust
AC used to live in the middle. Now there will be a straight pipe in its place. Heater box had to be cut and shut.
Last edited by owenwilliams; 05-20-2012 at 12:02 PM. Reason: Grammar, and spacing info
Reply
1
1
05-19-2012, 03:06 PM
#234
Junior Member
Thread Starter
Join Date: Dec 2010
Location: UK, in Cambridgeshire or wherever work takes me.
Posts: 375
Total Cats: 20
More of the same:
That Caterham in the background below has a built Hayabusa engine. Quent was installing a sequential box. It's my perfect track car.
Regarding brakes, Quent has assured me i will not fade these on track. He's running the same fluid in this as he and other UK prep teams run in most of the Brit RAC rally cars. Yes, I will taper my pads to hell, but pads are replaceable. And it's a road car, really.
Random photo: I was at a test day today. This shifter kart was particularly mental. I drove my mate's Rotax senior kart, on a circuit I've never seen before, and came to the conclusion that I need more practise. It was a big step up from the twin lawnmower engine karts I'm used to. That said, the kart needs rain tyres on the back and a 250cc motor for maximum skidability. I wanted it to feel like it did on the first half a lap for every lap, ha. Can't wait to get my car going and book a few track days. Brake pads be damned.
Reply
0
0
05-21-2012, 03:54 PM
#235
Junior Member
Thread Starter
Join Date: Dec 2010
Location: UK, in Cambridgeshire or wherever work takes me.
Posts: 375
Total Cats: 20
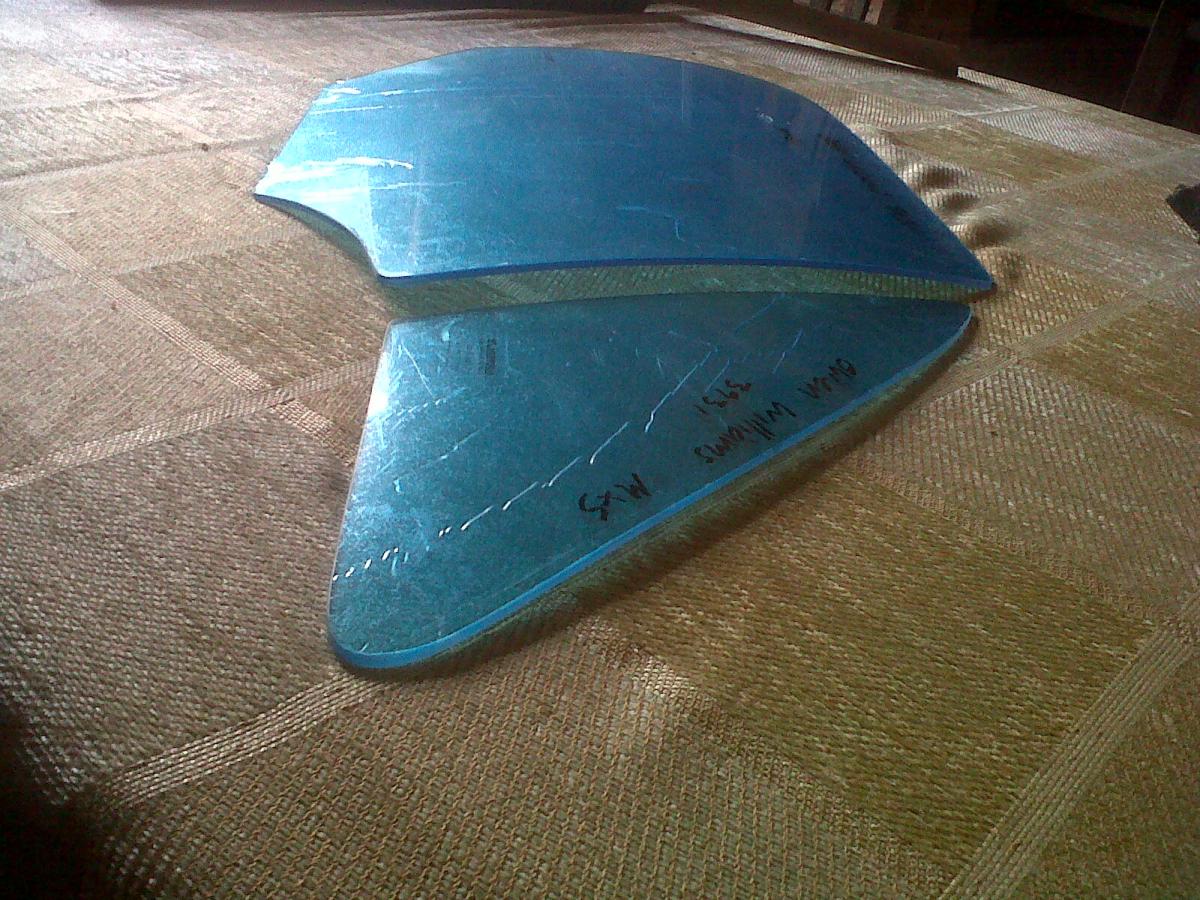
Lexan windows arrived today. With lube. AKA, marine sealant/super adhesive.
My dad has kindly agreed to go over to QPrep tomorrow afternoon to pick up some 2mm aluminium sheet, some black carpet, and some self tapping screws. I will also source some compressed air hose and some bolts. I will use these to make my doors ASAP.

My dad has kindly agreed to go over to QPrep tomorrow afternoon to pick up some 2mm aluminium sheet, some black carpet, and some self tapping screws. I will also source some compressed air hose and some bolts. I will use these to make my doors ASAP.
Reply
0
0
 05-26-2012, 08:09 AM
#237
Junior Member
Thread Starter
Join Date: Dec 2010
Location: UK, in Cambridgeshire or wherever work takes me.
Posts: 375
Total Cats: 20
Thanks Nolan.
Quick tip for people… if you ever order expensive Lexan windows for your MX5, do not order them a couple of millimetres thicker than the OEM glass width, to 'ensure they'll be stiff enough'. If you do this, you'll end up with unnecessarily stiff windows that don't want to fit and are barely any lighter than the glass they replace. I am presently really rather ragefilled.
I'm going for a pint. Photo updates of minimal progress and maximal carnage later.
Reply
0
0
05-26-2012, 06:12 PM
#238
Junior Member
Thread Starter
Join Date: Dec 2010
Location: UK, in Cambridgeshire or wherever work takes me.
Posts: 375
Total Cats: 20
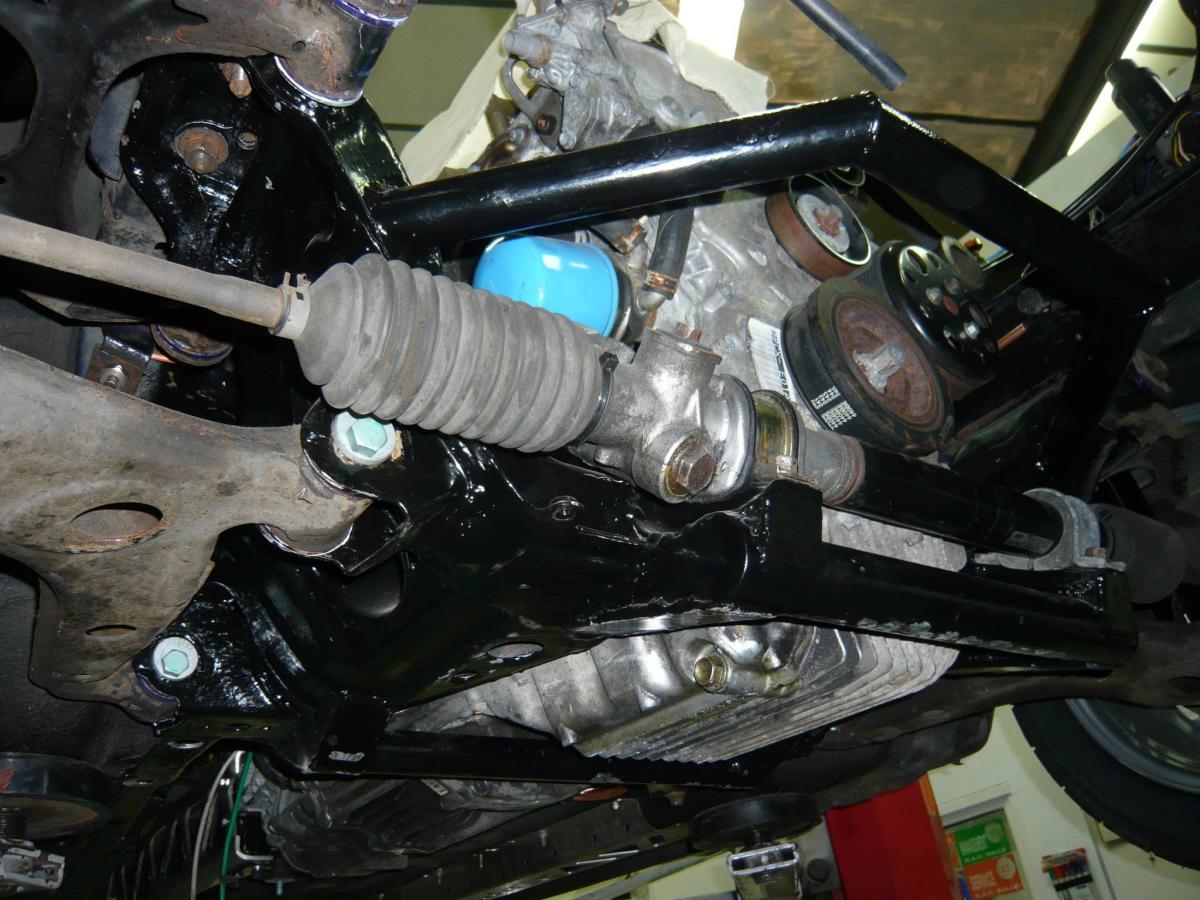
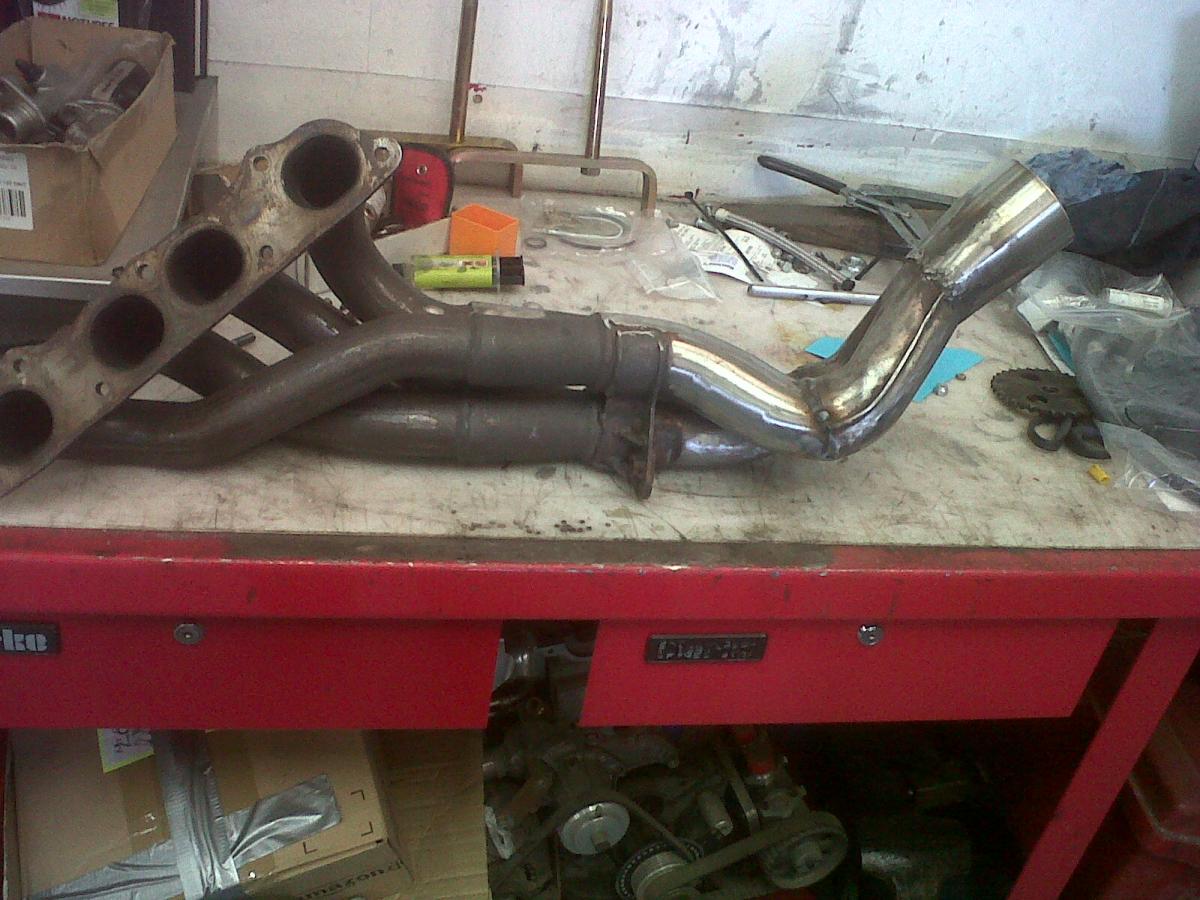
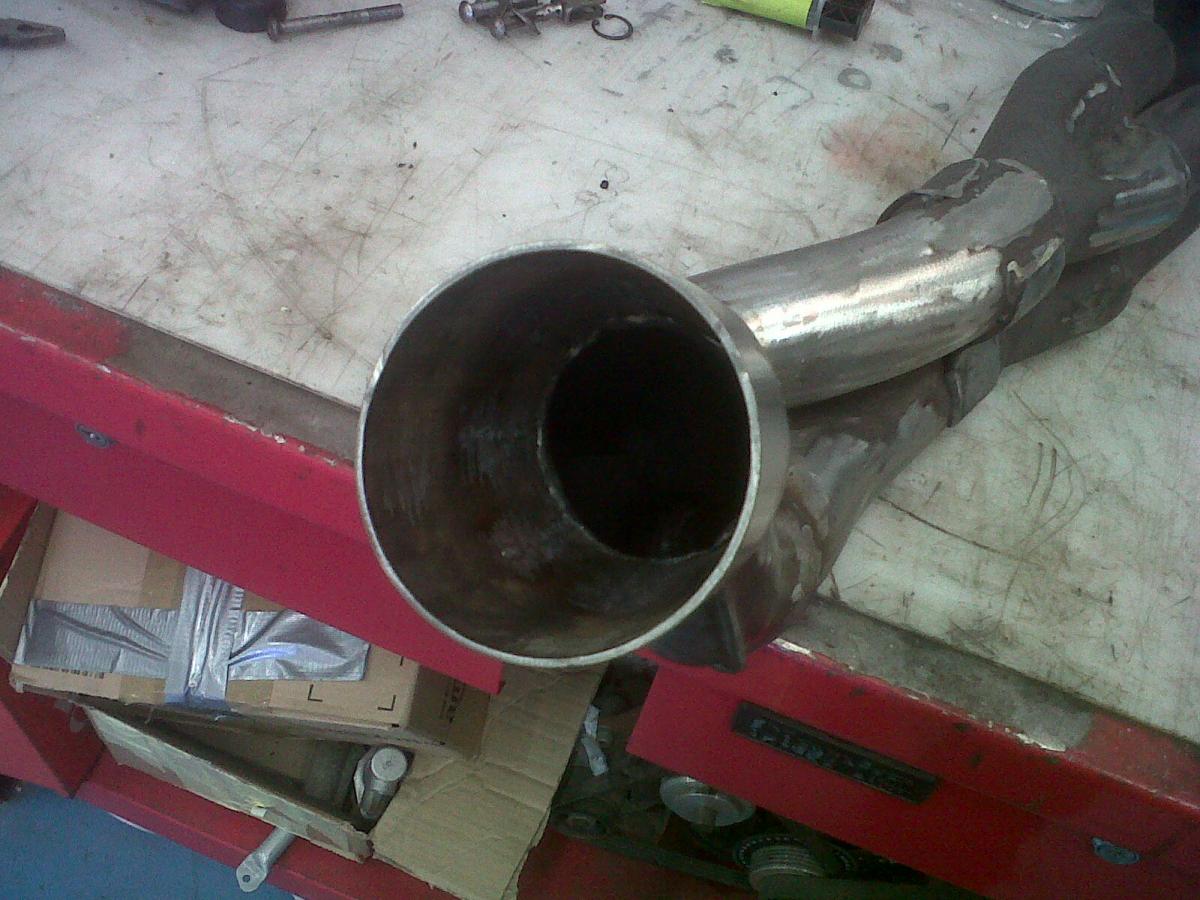
Secondaries shortened approx 1.5" for ground clearance reasons. In theory this should move the powerband up the rev range.
Note flare into 3" exhaust. Quent's linished it decently inside. Should work quite well on this engine. The catless + flare-into-three-inch design has been used by a company called Berk with great success on the F20C.
Radiator positioning. I've maintained my request for this to be ducted up out of the bonnet. I completely forgot about the anti roll bar's position… Quent says it'll just pass straight through the rad ducting.
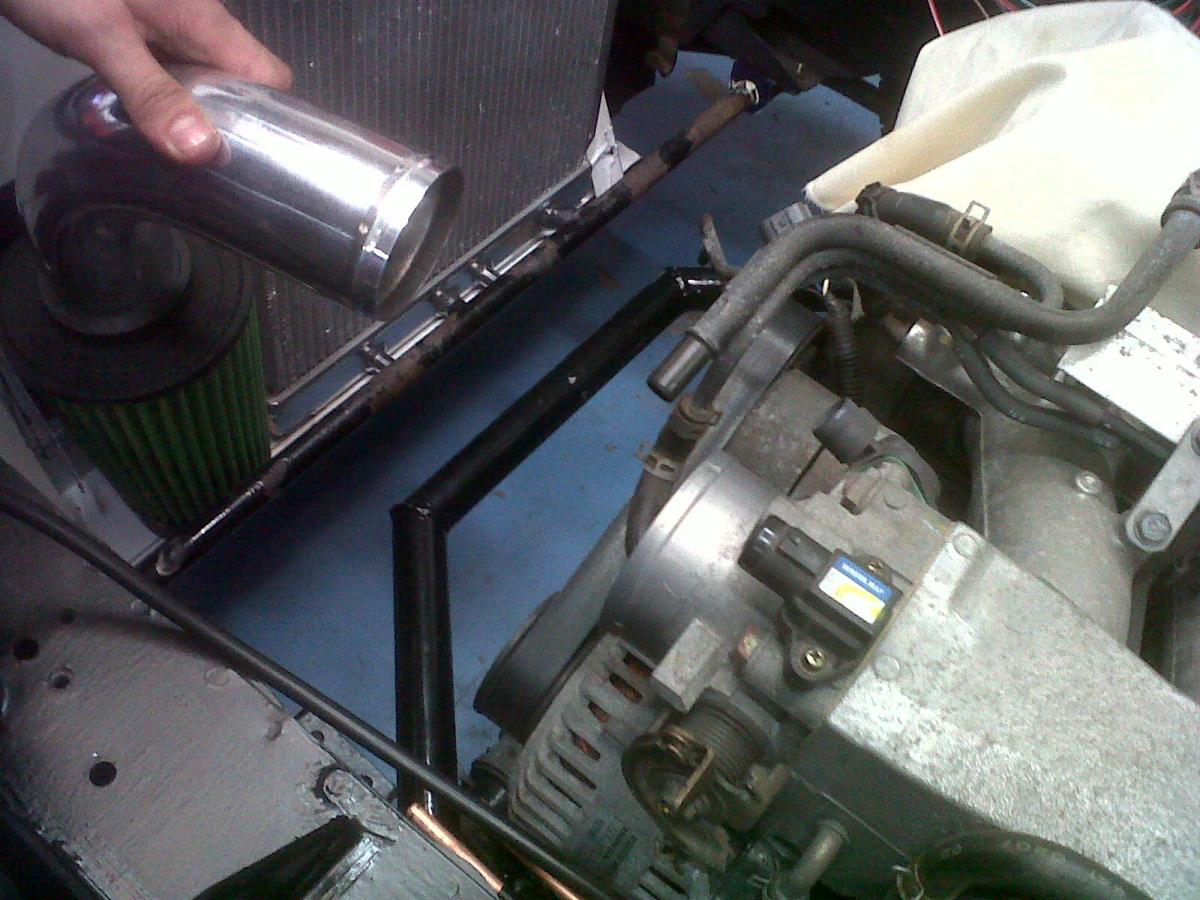
The shop's current thinking on the air filter is to have it sitting beside the radiator in a vertical position. I'm slightly concerned about water being sprayed straight onto it, but I'm probably worrying over nothing because the side of the filter facing the engine should remain dry enough.
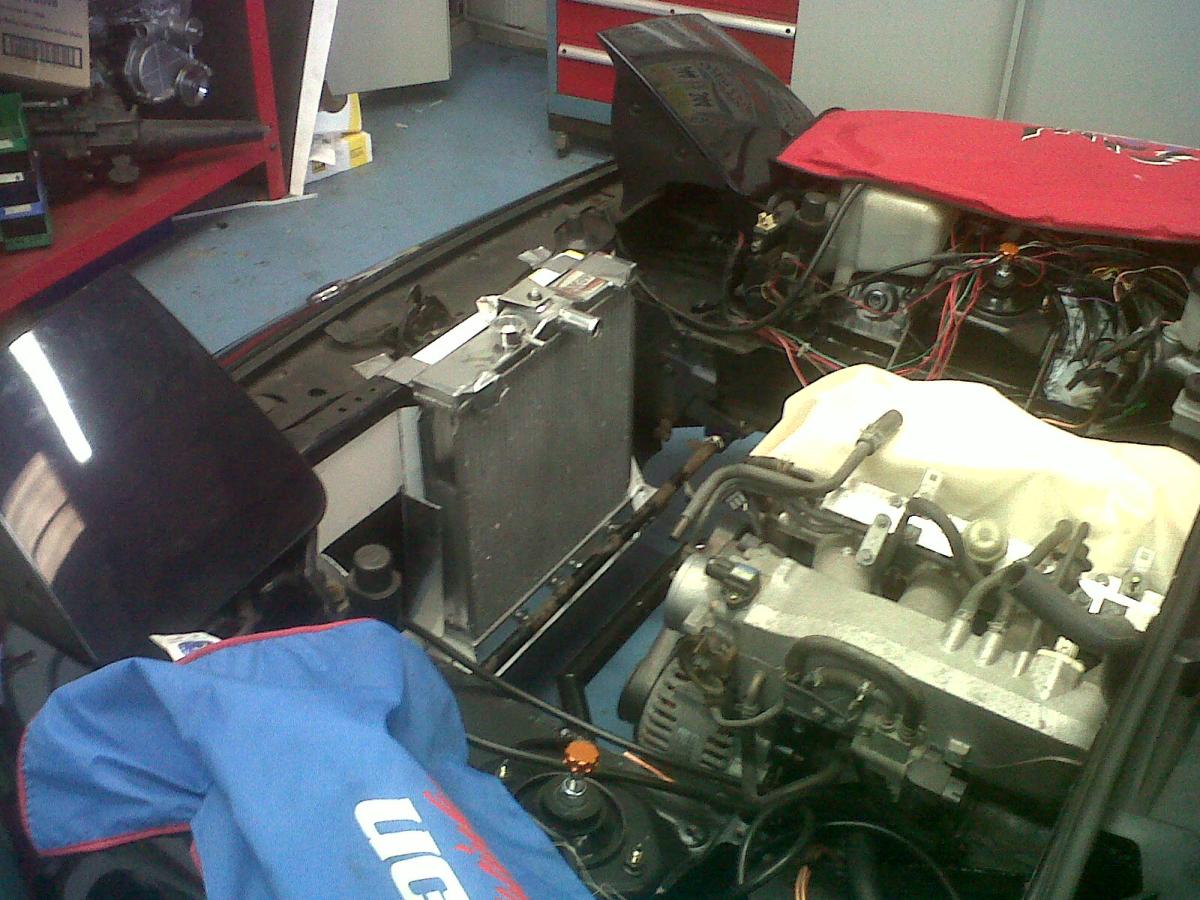
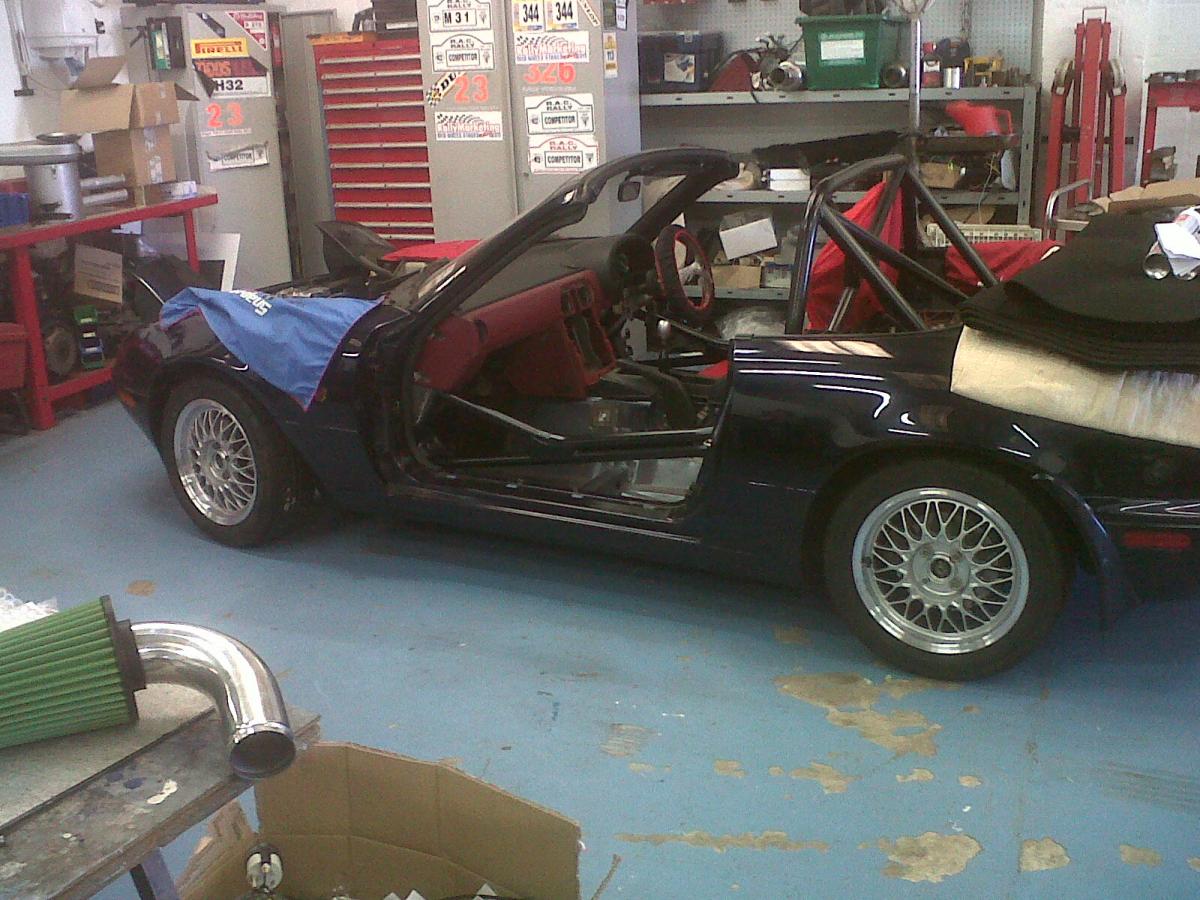
Xidas are just wound up to clear the ramp in the shop. So ride height in this photo is not representative.
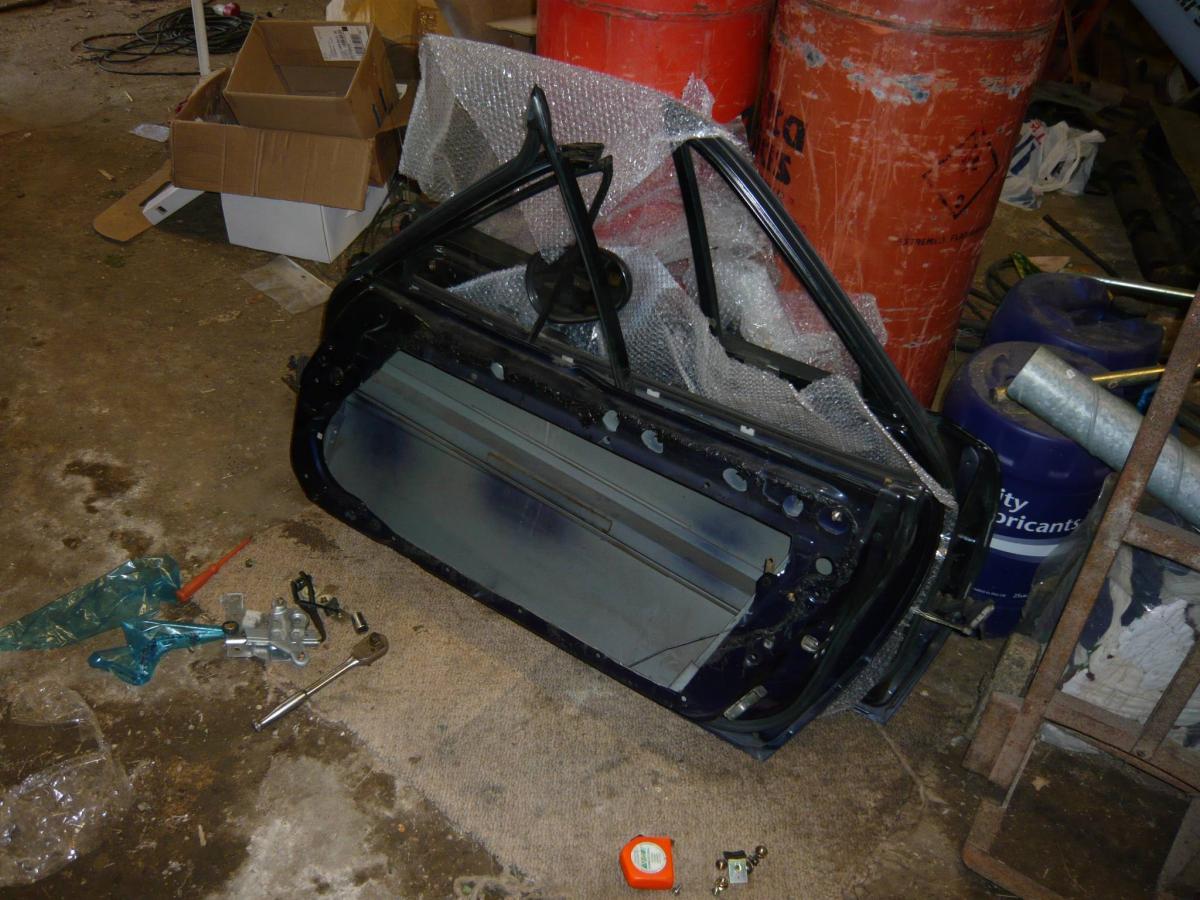
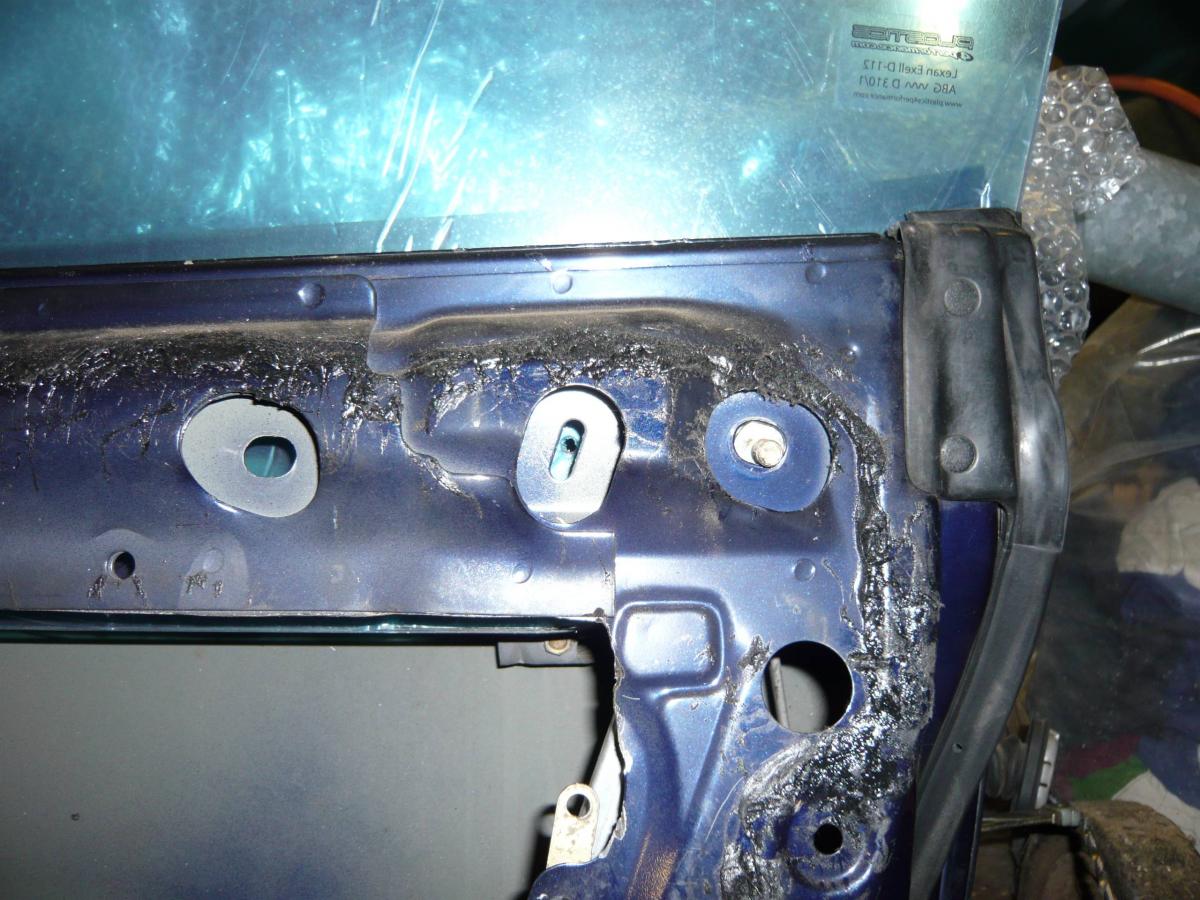
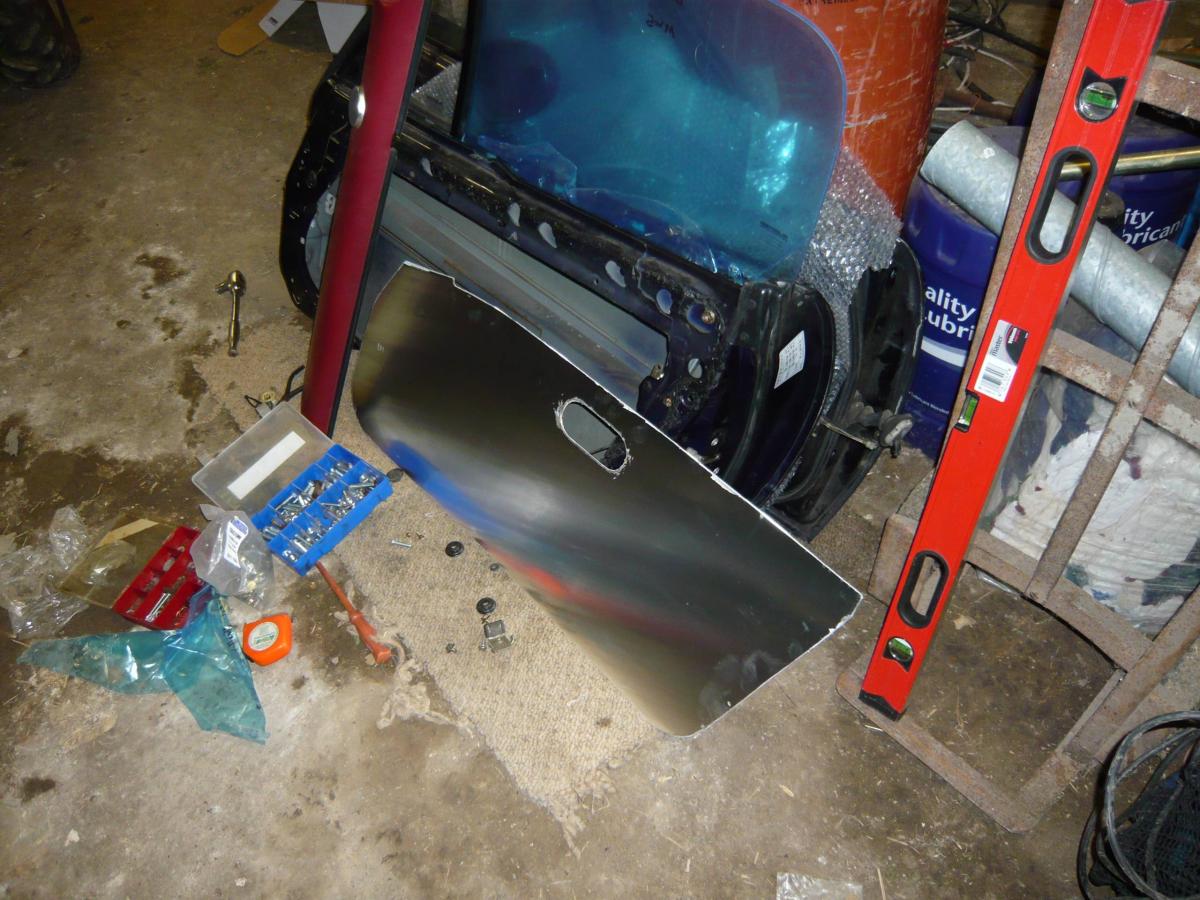
Right. Doors. I started these this afternoon. They'll work out roughly the same weight as they did before, because the weight of the new aluminium skin offsets the surprisingly small amount I've saved by using overly-thick plastic windows.
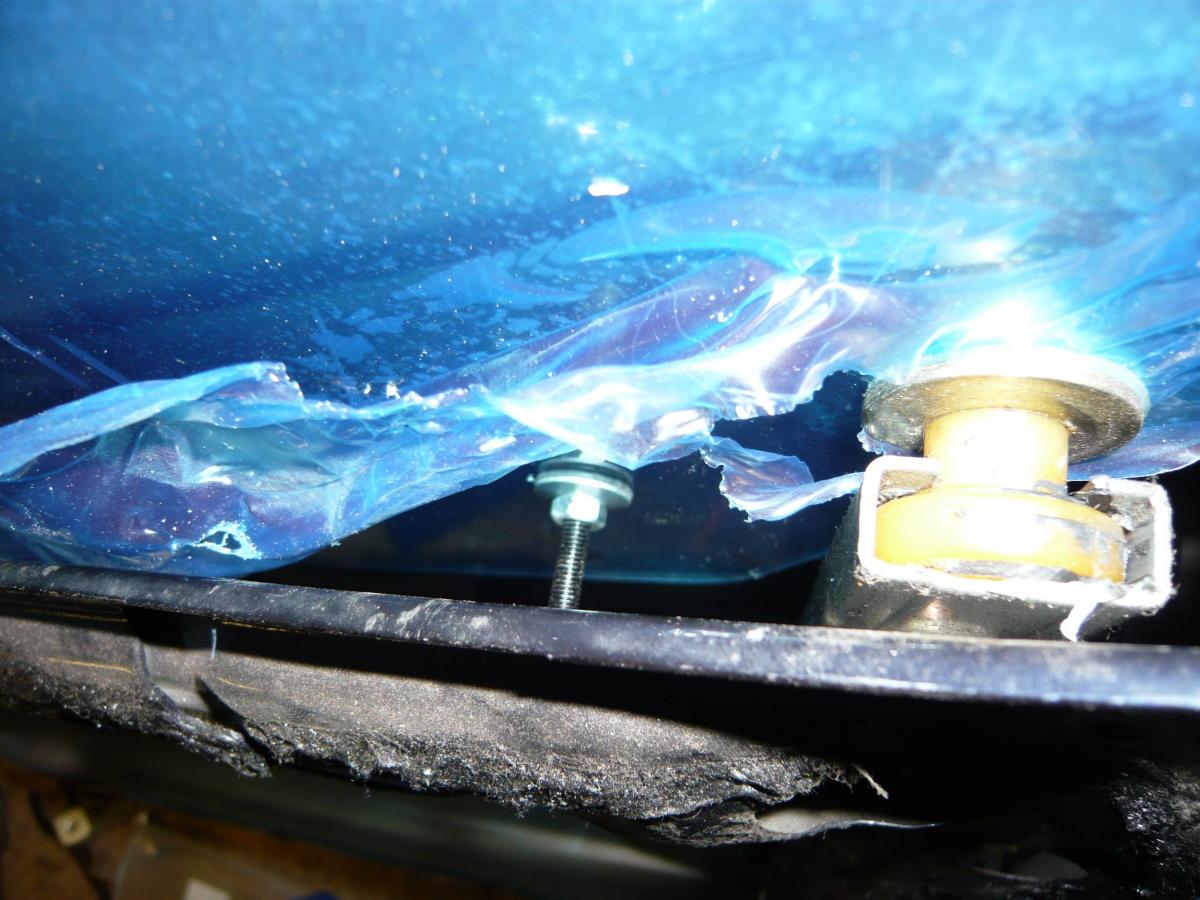
So far, I've installed the Lexan windows and cut the aluminium inner skin for one door. If I had another day on it I could get them done, but alas, I do not. Squeezing in 5mm thick plastic into the space previously occupied by 3mm glass proved tricky in places. I was advised to use vaseline to ease insertion, but unfortunately I could not find any. I did, however, find a suitable substitute. I won't say what it was, but I will say that my doors now smell slightly suspiciously like cherry. Mmm.
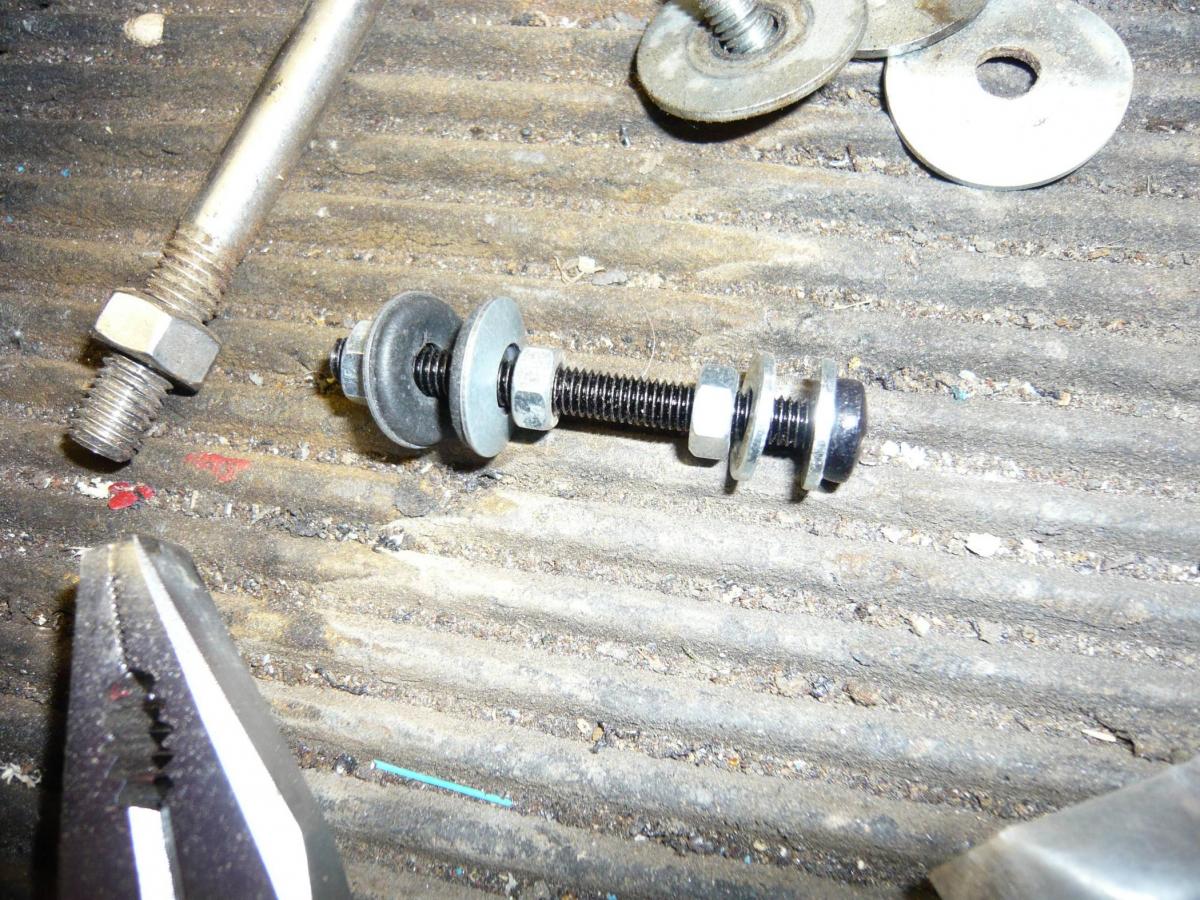
Fixing system for the larger windows. The steel original door skin is sandwiched between the nuts and washers on the right, and the Lexan between the rubber-backed tech screw washers on the left. This allows me to wind the bottom of the window in and out, which moves the top out and in, which means I can make it seal correctly. Vertical adjustment is taken care of by play in the holes in the steel door skins.
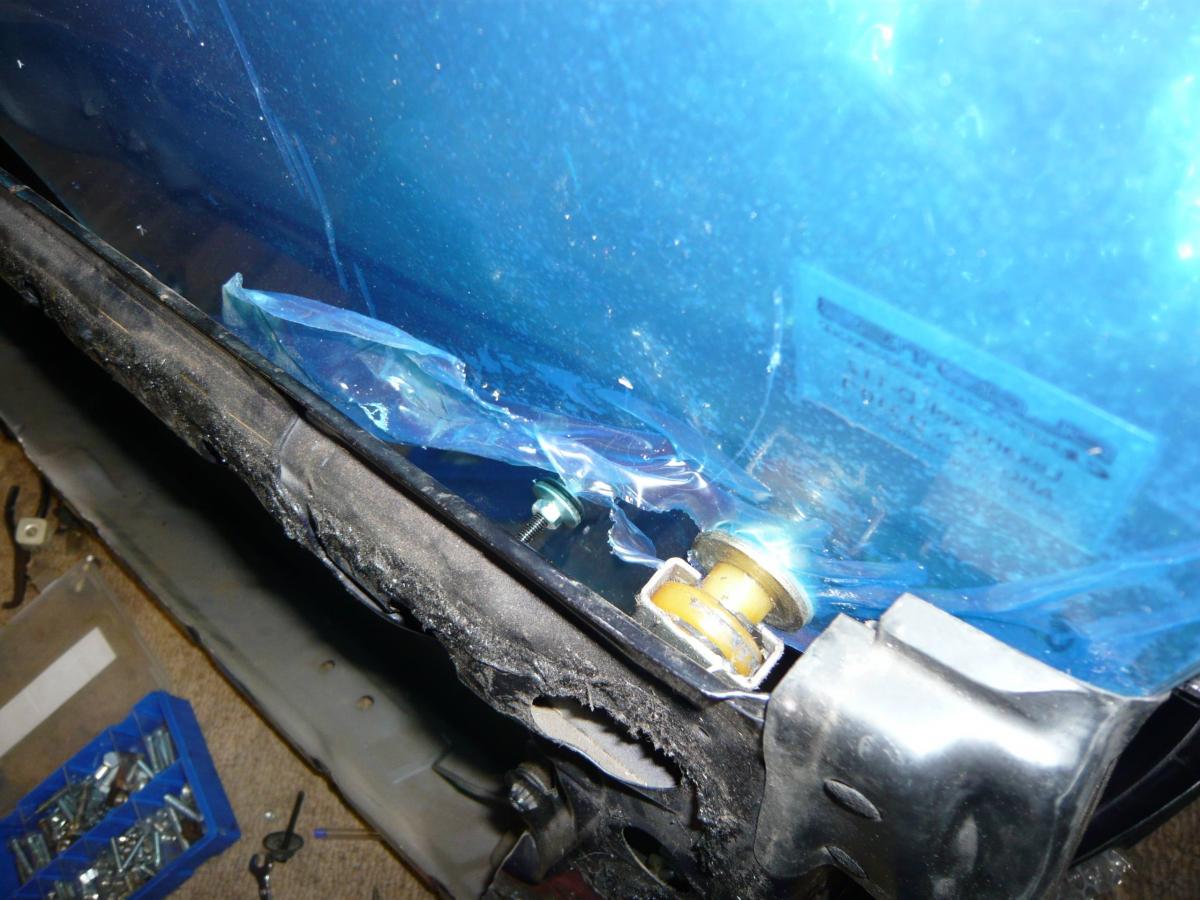
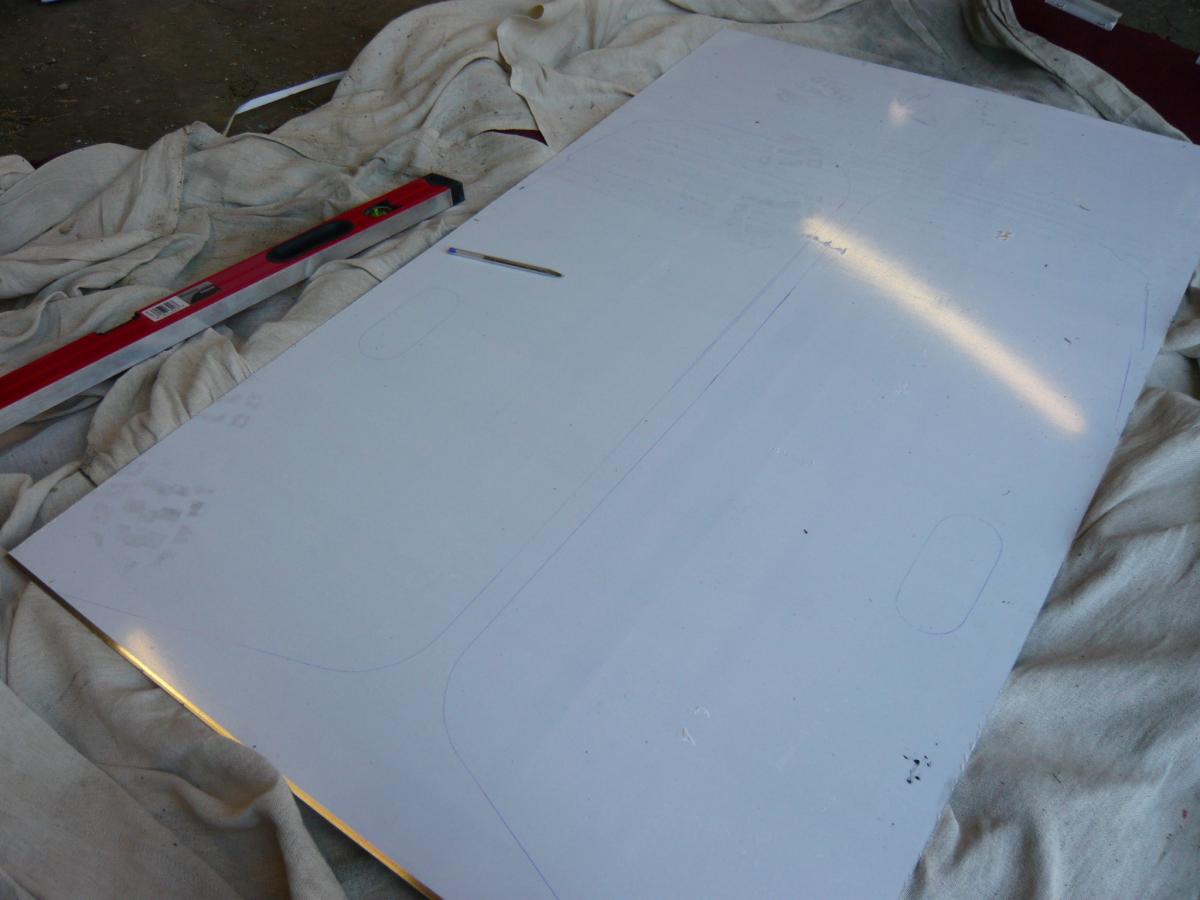
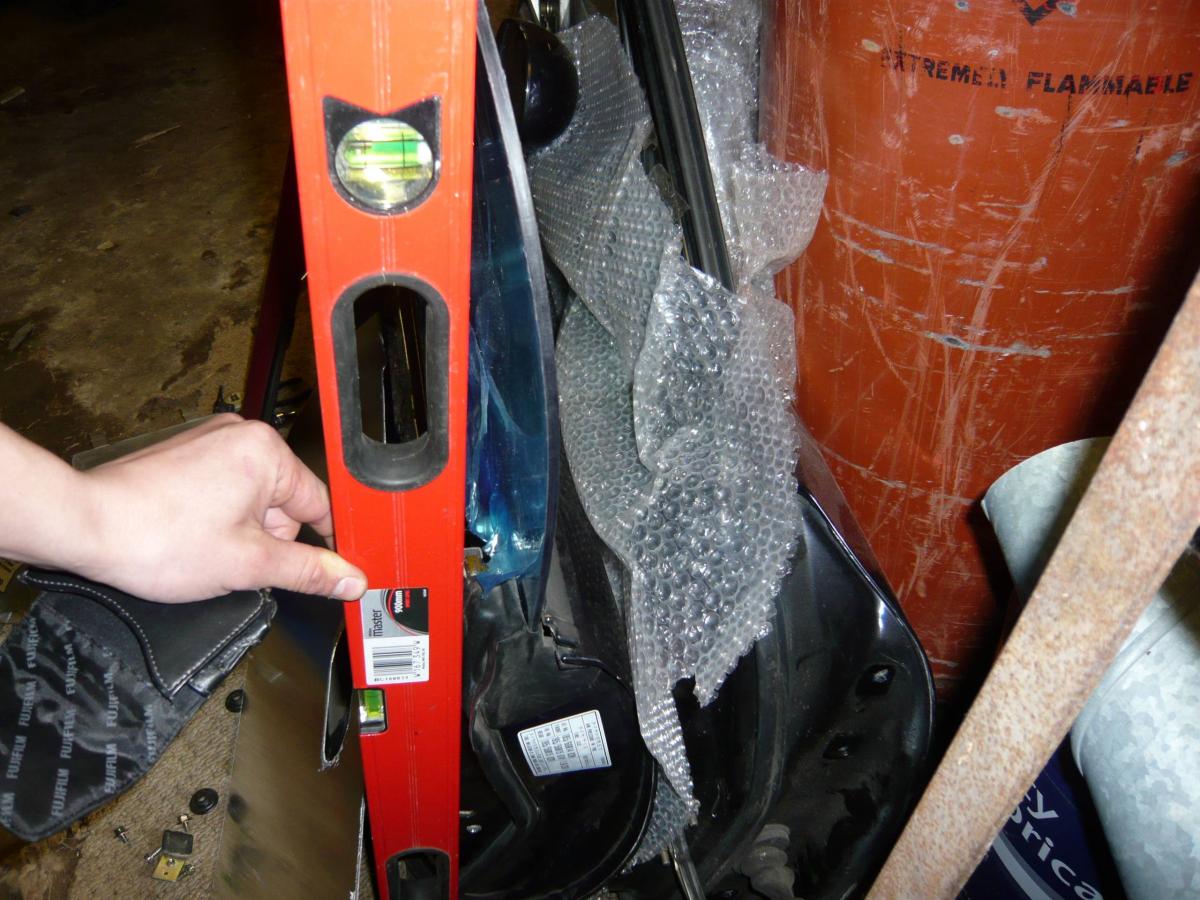
I measured the position of the top of the OEM glass windows by holding the middle of a straight edge on a known point on the end of the door, holding the top edge against the top of the window, and noting where the bottom of the straight edge ended up. I adjusted the location of the top of the plastic window to suit, using the adjustable fixings mentioned above. I've got the position of the plastic located fractionally further in than than that of the glass, to allow for the plastic flexing when it contacts the door seals when the door is shut.
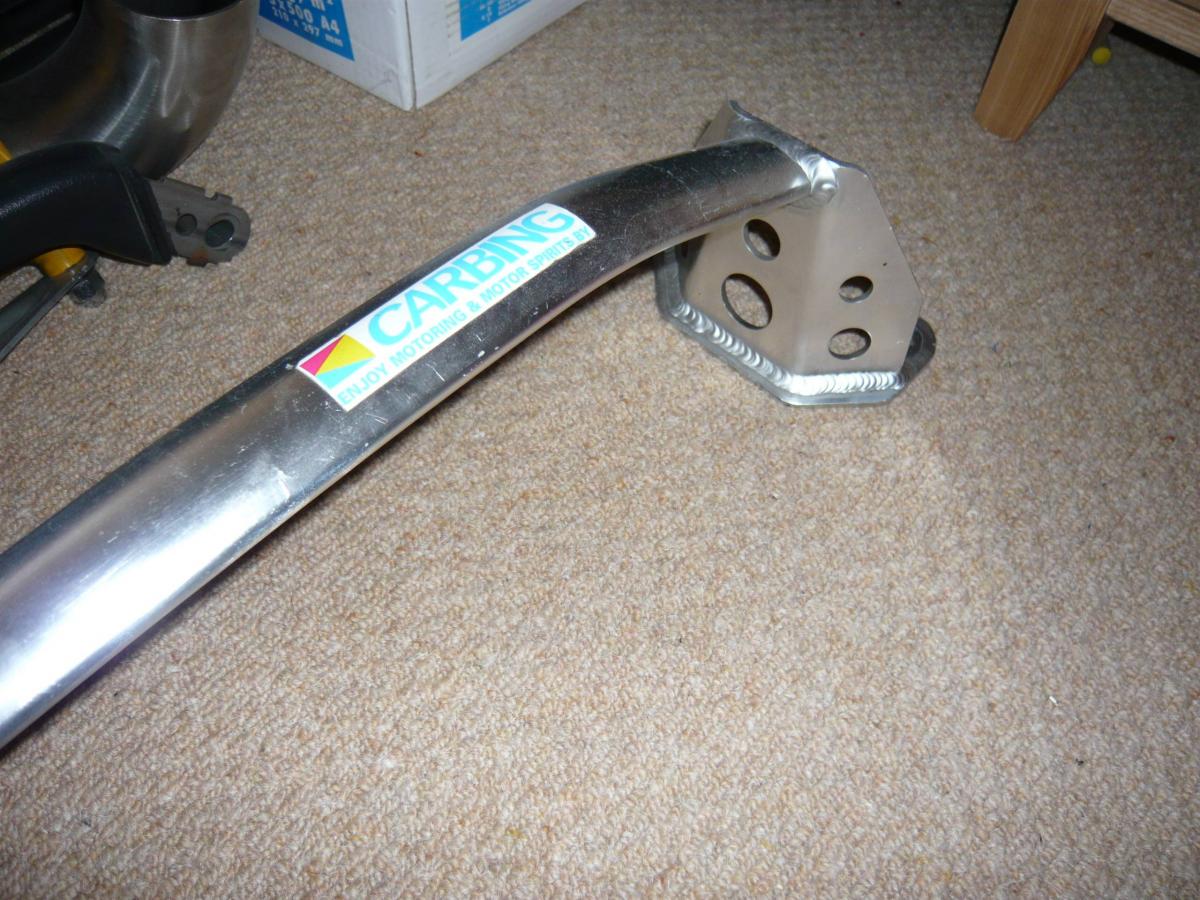
Lastly, here is my superdoriftoJDMyo Carbing strut brace. I realised today that I can flex it by hand…

I'll post some photos of slightly prettier and more complete doors later this week
Note flare into 3" exhaust. Quent's linished it decently inside. Should work quite well on this engine. The catless + flare-into-three-inch design has been used by a company called Berk with great success on the F20C.
Radiator positioning. I've maintained my request for this to be ducted up out of the bonnet. I completely forgot about the anti roll bar's position… Quent says it'll just pass straight through the rad ducting.
The shop's current thinking on the air filter is to have it sitting beside the radiator in a vertical position. I'm slightly concerned about water being sprayed straight onto it, but I'm probably worrying over nothing because the side of the filter facing the engine should remain dry enough.
Xidas are just wound up to clear the ramp in the shop. So ride height in this photo is not representative.
Right. Doors. I started these this afternoon. They'll work out roughly the same weight as they did before, because the weight of the new aluminium skin offsets the surprisingly small amount I've saved by using overly-thick plastic windows.
So far, I've installed the Lexan windows and cut the aluminium inner skin for one door. If I had another day on it I could get them done, but alas, I do not. Squeezing in 5mm thick plastic into the space previously occupied by 3mm glass proved tricky in places. I was advised to use vaseline to ease insertion, but unfortunately I could not find any. I did, however, find a suitable substitute. I won't say what it was, but I will say that my doors now smell slightly suspiciously like cherry. Mmm.
Fixing system for the larger windows. The steel original door skin is sandwiched between the nuts and washers on the right, and the Lexan between the rubber-backed tech screw washers on the left. This allows me to wind the bottom of the window in and out, which moves the top out and in, which means I can make it seal correctly. Vertical adjustment is taken care of by play in the holes in the steel door skins.
I measured the position of the top of the OEM glass windows by holding the middle of a straight edge on a known point on the end of the door, holding the top edge against the top of the window, and noting where the bottom of the straight edge ended up. I adjusted the location of the top of the plastic window to suit, using the adjustable fixings mentioned above. I've got the position of the plastic located fractionally further in than than that of the glass, to allow for the plastic flexing when it contacts the door seals when the door is shut.
Lastly, here is my superdoriftoJDMyo Carbing strut brace. I realised today that I can flex it by hand…
I'll post some photos of slightly prettier and more complete doors later this week
Reply
1
1

 06-16-2012, 02:00 PM
#240
Junior Member
Thread Starter
Join Date: Dec 2010
Location: UK, in Cambridgeshire or wherever work takes me.
Posts: 375
Total Cats: 20
Very quickly…
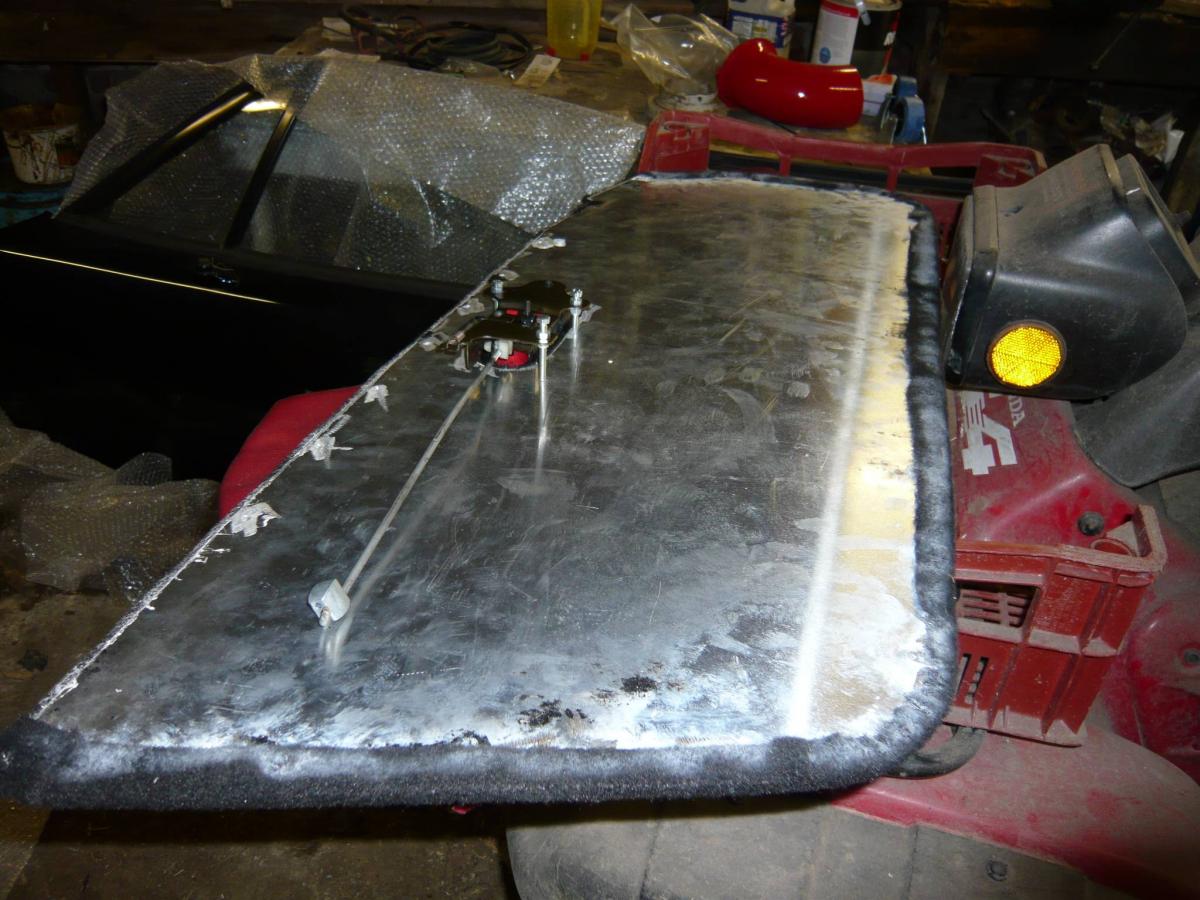
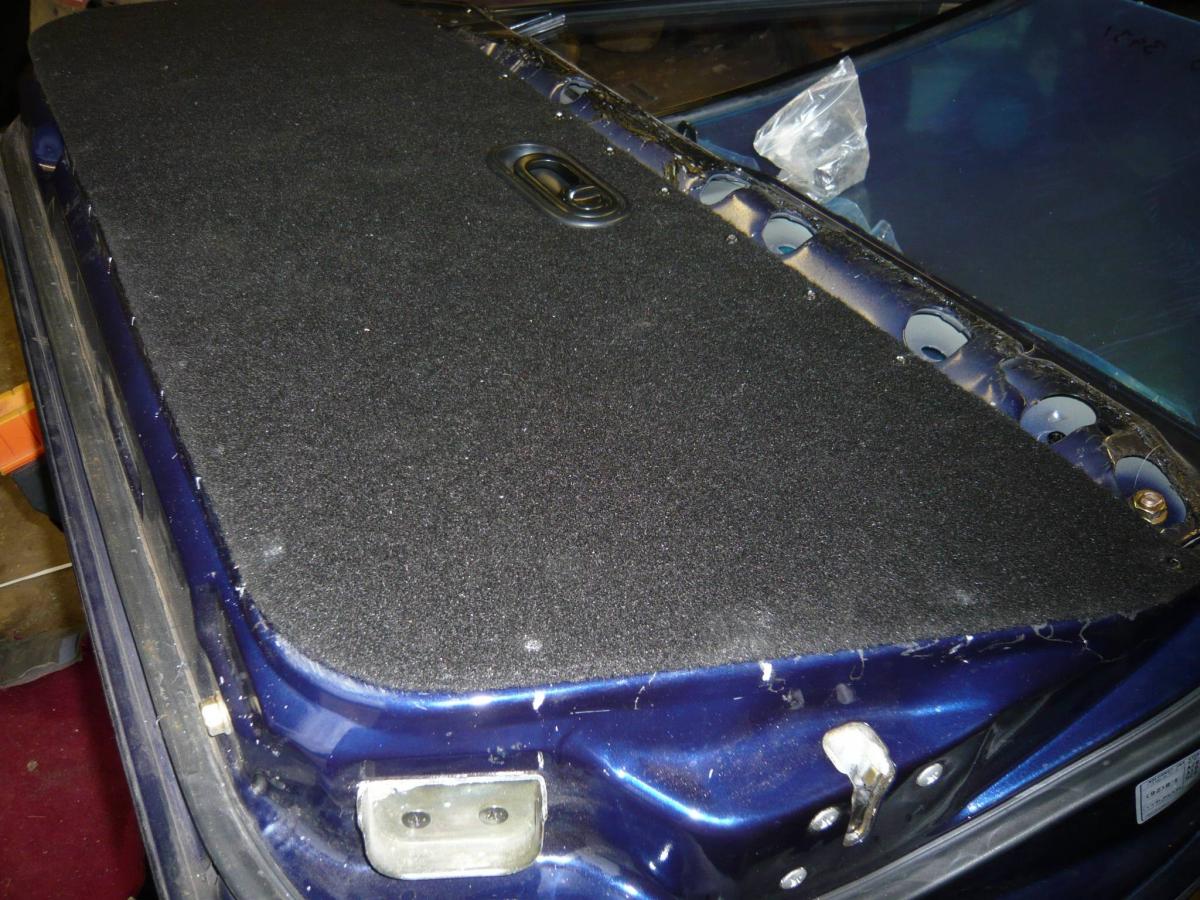
Doors will look like this, plus storage nets, handles, and the red trim piece that slots over the top by the window. Only issue I have with these now is how to firmly attach the red trim to the door. Currently, there is a gap between the new panel and the bottom of the plastic red trim section, and said trim section is also loose towards the rear.
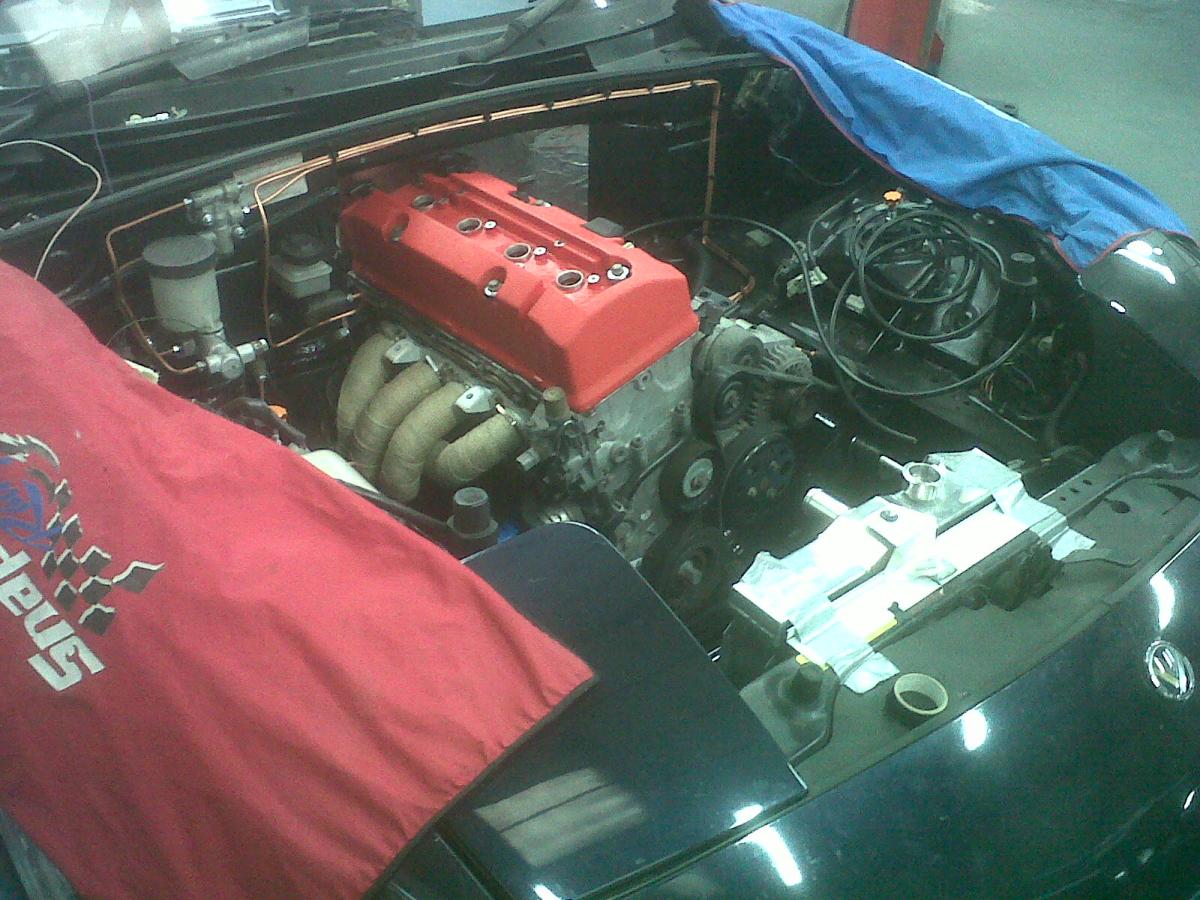
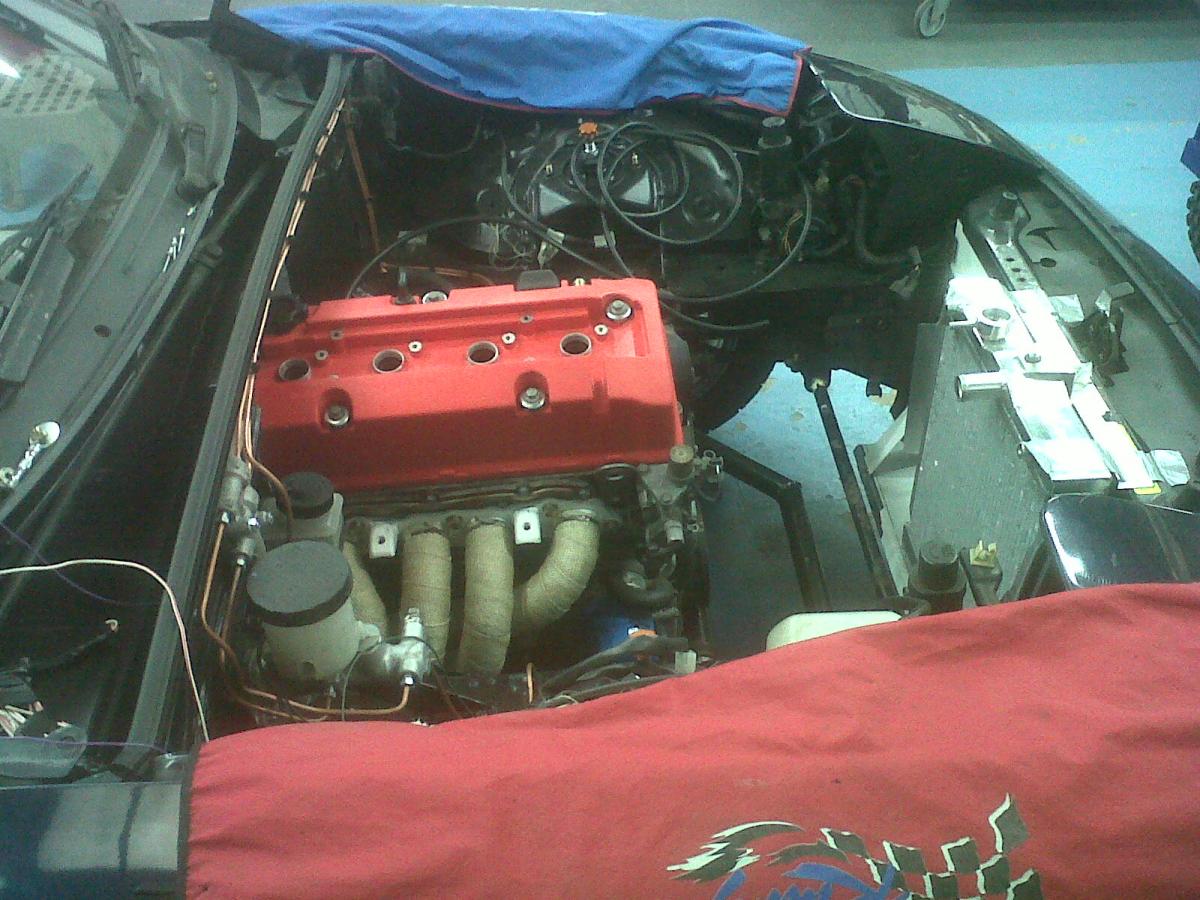
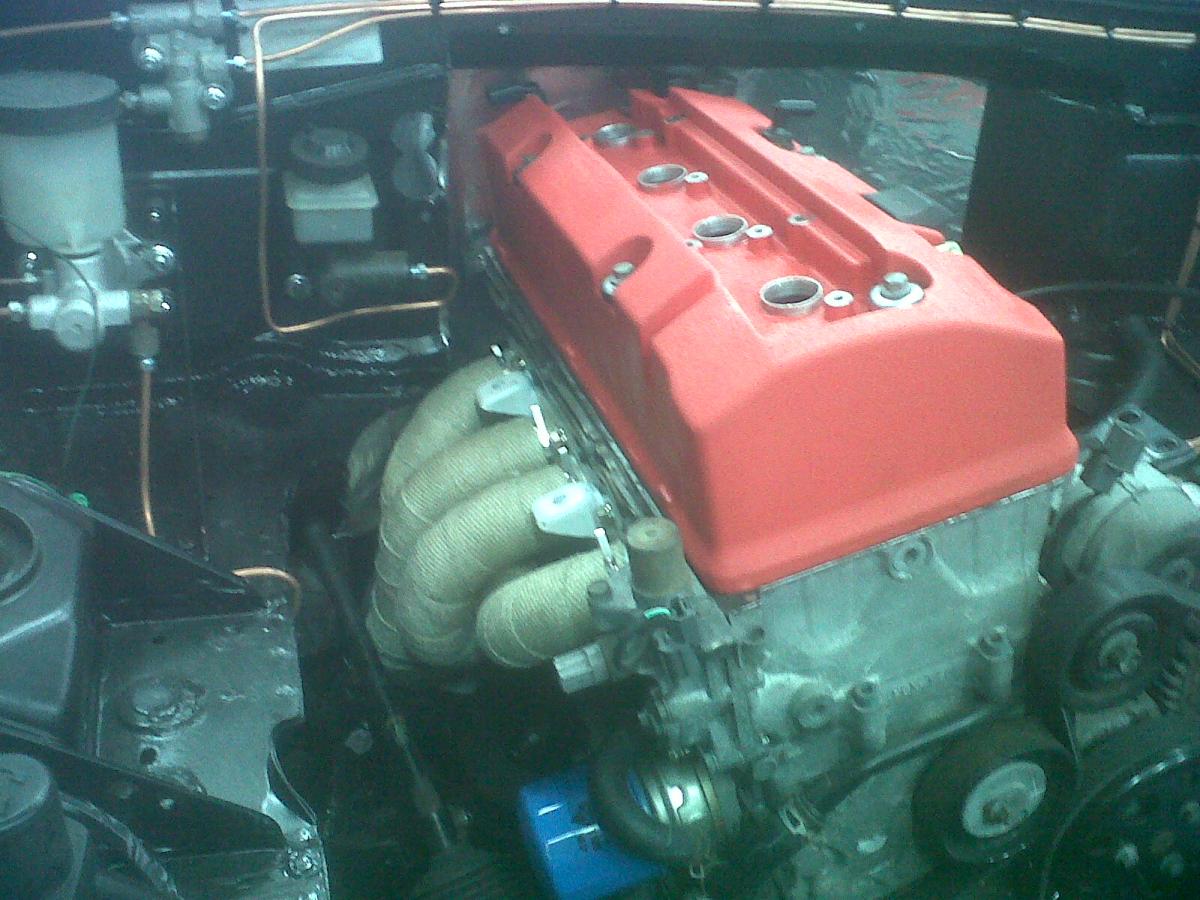
Exhaust is done, and valve clearances set. The cam cover has been painted by a different forum user to an unfortunately 'meh' standard:
A 10mm top hat spacer is currently at a local machine shop. I'm having four 50mm spacers made for each corner of the car.
Slowly but surely
Doors will look like this, plus storage nets, handles, and the red trim piece that slots over the top by the window. Only issue I have with these now is how to firmly attach the red trim to the door. Currently, there is a gap between the new panel and the bottom of the plastic red trim section, and said trim section is also loose towards the rear.
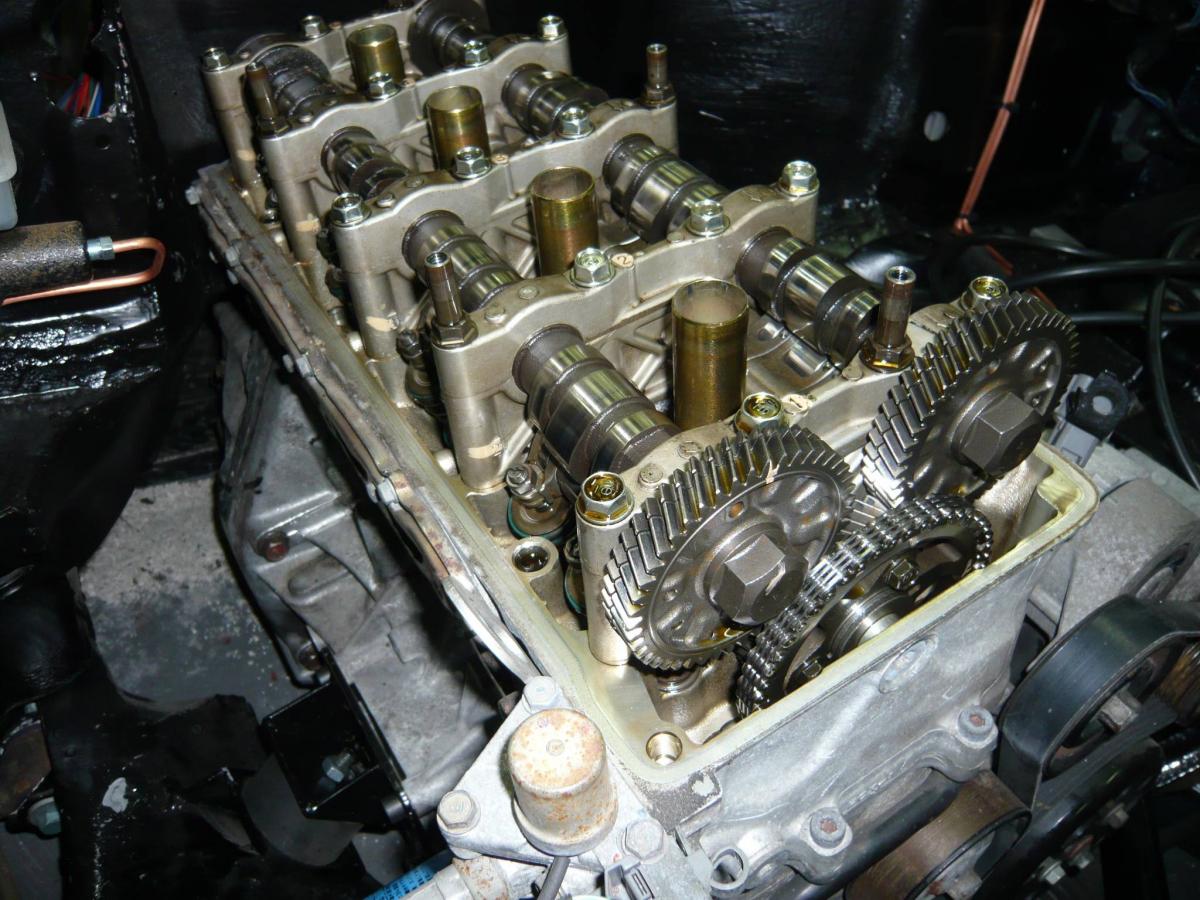
Exhaust is done, and valve clearances set. The cam cover has been painted by a different forum user to an unfortunately 'meh' standard:
A 10mm top hat spacer is currently at a local machine shop. I'm having four 50mm spacers made for each corner of the car.
Slowly but surely
Last edited by owenwilliams; 06-17-2012 at 04:10 AM. Reason: clarity, typos
Reply
1
1


