
Miata rally project


OK, engine install time....

In she goes...


Not to bad. I used some stiffer Mazdaspeed comp engine mounts so it took a little jiggling, but got there in the end..
In she goes...
Not to bad. I used some stiffer Mazdaspeed comp engine mounts so it took a little jiggling, but got there in the end..
Reply
 0
0

0
Got this out of my 1994 - I believe it's a 1st gen Torsen unit which should be great for the loose surfaces. Installed some new axle seals and everything else looks fine inside with a cursory check. It was pretty rusty on the outside but that shouldn't effect the function too much...
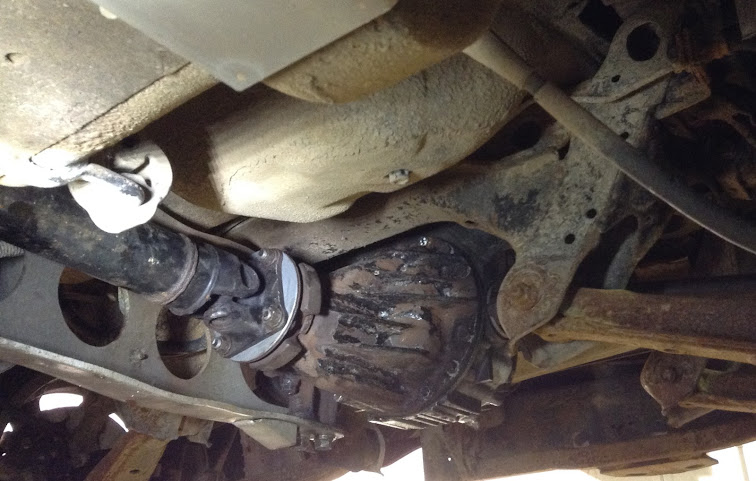
I also pulled the speedo gear from my 94' trans and installed into the 1990. New oil in both and we are done with this part....

I also pulled the speedo gear from my 94' trans and installed into the 1990. New oil in both and we are done with this part....
Reply
0
0
Interested in opinions on this setup - If you bolt each LS2 coil together it can be fitted to the cam cover with a long bolts and spacer. My idea was to keep the lead lengths short and the same length and I saved a bunch of time making up a bracket....


I think they look pretty nice ?

I think they look pretty nice ?
Reply
0
0

Not as much as I thought they would. There is a spare threaded boss in the middle of the cam cover too, which I could use, but would need to make up a little offset bracket for. At this point though they seem to be pretty robust.
Reply
0
0
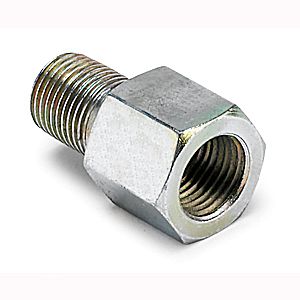
I'm using the oil pressure sensor from my 1990 with a "T" fitting to add the sender/switch from my 1994 which I will wire separately to a big light on the dash. Hopefully I'll never see this on while driving !

Reply
0
0

The NA pressure sender out there on the end of a T has always scared me. So vibrations. Such metal fatigue. Wow.
Clever with the coil mount, this is quite relevant to my interests. Where did you get those plugwires for the LSx coils?
Clever with the coil mount, this is quite relevant to my interests. Where did you get those plugwires for the LSx coils?
Reply
0
0

A leak in that area will never be caught until it's big.
Remote sensors is not my idea, but are there BSP hose fittings at most hydraulic shops?
https://www.miataturbo.net/engine-pe...ocation-73987/
Last edited by NiklasFalk; Sep 1, 2014 at 03:33 AM.
Reply
0
0
BSP is not terribly uncommon, but personally I'd adapt from BSP to NPT and have all the fittings done in NPT. Then again, I'm in the US and NPT is super easy to get out here.

Glowshift ~ 1/8 NPT female to 1/8 BSPT male Adapter
Auto Meter ~ 1/8" NPT Female to 1/8" BSPT Male
Or you could be baller and go all -4 AN
I've also see guys use a padded clamp or bend up a bracket to keep the sender from vibrating around. Lots of options out there, I guess it all depends on what you have available.
Reply
0
0
MSD-3303 - Coil ends
MSD-34039 - Wire
MSD-3301 - Plug ends
Last edited by TheV's; Sep 2, 2014 at 09:02 PM. Reason: Spelling
Reply
2
2

OK, so I skipped a few posts while I got the sensors all wired up and the Megasquirt going. Ran into a few issues - wired the sequential spark plugs wrong and was having some issues with the IAC sensor calibration but those have been overcome and the engine is running nicely now. I was a good boy and did plenty of Oil and filter changes and now have about 1k miles on it for the run-in period...so I figured it's time for Phase II - Turbo power !
Reply
0
0
OK, I think I'll start with the hot side, Old Manifold and exhaust came off easily since they were only on for a few months....and I never installed the heat-shield..

And on with my BEGI Cast manifold

Now for the 1st spot of bother....removing the old studs two of them broke off....Darn it !

Off with the Mani, onto the drill press and some very careful drilling and re-tapping....two hours later we get to put the Turbo on..you have no idea how long I've wanted to do this ! very exciting !

And on with my BEGI Cast manifold
Now for the 1st spot of bother....removing the old studs two of them broke off....Darn it !
Off with the Mani, onto the drill press and some very careful drilling and re-tapping....two hours later we get to put the Turbo on..you have no idea how long I've wanted to do this ! very exciting !
Reply
0
0
Next step was to clock the turbo. it's a GT2554R which has a monster cir-clip on the compressor side - took a few tries but eventually it came out and I was able to rotate it around. Here it is back on the car...
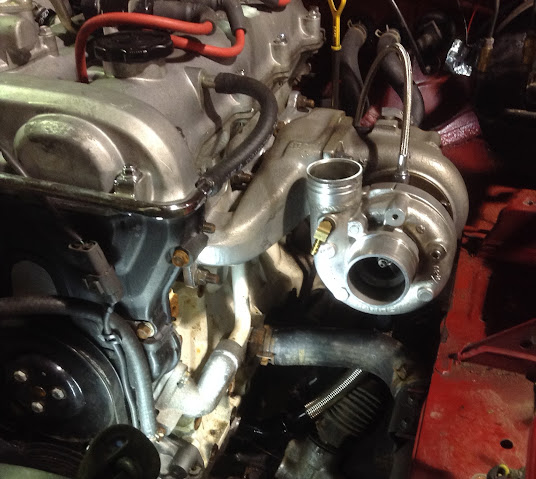
I'm trying to decide if I want to do a V Mount Intercooler or an over rad setup. I'm trying to keep piping volume down to a minimum since i'm very focused on throttle response, but the V mount will take a lot more work for the install...not sure I have the time at this stage...
Anyway on with some more plumbing - oil return line - gotta love those AN fittings, worth at least 10HP LOL !

Here's a shot from the front, sorry about the grainy image..Also swapping the Throttle body to a '99 version to make plumbing the IAC valve a non issue.

I'm trying to decide if I want to do a V Mount Intercooler or an over rad setup. I'm trying to keep piping volume down to a minimum since i'm very focused on throttle response, but the V mount will take a lot more work for the install...not sure I have the time at this stage...
Anyway on with some more plumbing - oil return line - gotta love those AN fittings, worth at least 10HP LOL !
Here's a shot from the front, sorry about the grainy image..Also swapping the Throttle body to a '99 version to make plumbing the IAC valve a non issue.
Reply
0
0

Joined: Apr 2014
Posts: 18,643
Total Cats: 1,870
From: Beaverton, USA
Did you also machine a lip for the thermostat to sit in? On the Moss spacer?


Reply
0
0
Had a fruitful day with my Fuel pump swap.....
Here's the old and new pumps - Swapping for a Walbro 190lph pump.

Have to hacksaw off the fuel feed line bellmounth fitting and use a short piece of fuel hose to connect the pump feed to the steel pipe. The connector needed no modifications...Not too tricky..
and here it is ready to be re-installed

Here's the old and new pumps - Swapping for a Walbro 190lph pump.
Have to hacksaw off the fuel feed line bellmounth fitting and use a short piece of fuel hose to connect the pump feed to the steel pipe. The connector needed no modifications...Not too tricky..
and here it is ready to be re-installed
Reply
0
0
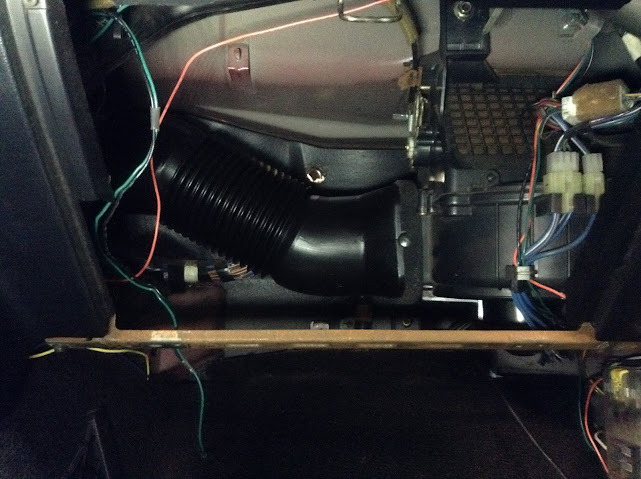
Something I've been meaning to do for a while - pull out the old AC core and replace with a non ac duct. These are pretty inexpensive on Mazdamotorsports. not sure how many lbs it remove but it felt good...just need to remember to cover the holes left in the dash
Old AC Core

New duct - lots of space
Old AC Core
New duct - lots of space
Reply
0
0


