
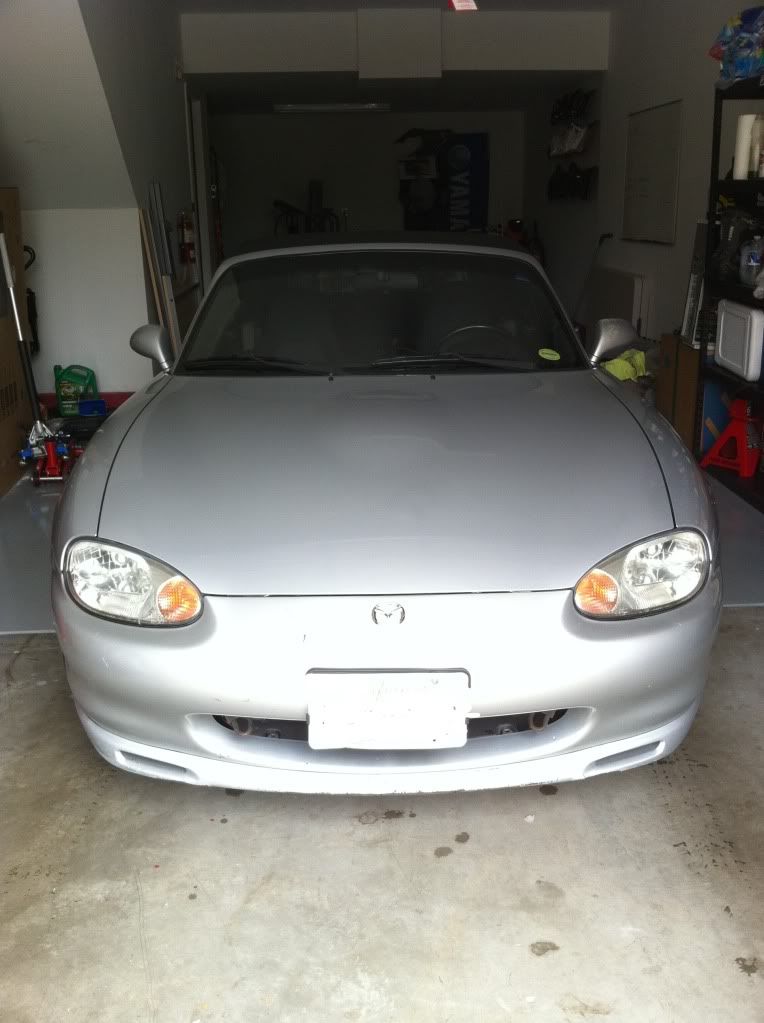
My Tame and Lame Commuter/Track Toy


Just as the title says, I picked up a 99, bone stock, 1 owner car. As of now, it will serve as my fun commuter car (25mpg mixed>15mpg mixed of my SUV)
In addition to that, its going to by my track toy. And before you ask, yes, I've spent lots of time at the track. My old rig had a massive 118whp..similar to the miata. Except it was <450lbs wet. I crashed it though
Plans for the car are, KISS, basic suspension, sticky tires and good brakes. No desire to chase plastic trophies at this point, more than content using more expensive cars as lap traffic to feed my speed ego. I do have a tow vehicle, but with a pending big financial obligations, just not going to gut it and go all out yet. That and I have to re-learn how to drive a 4 wheeled vehicle fast. Going to start off with a very conservative 5-6PSI tune (150whpish??) to accomplish this. I'll run this until I fry the clutch. Once I do that, new clutch, 55mm Radiator, oil cooler, and shoot for 200-220whp.
In addition to this, I plan to keep the car tame and CARB legal, being im stuck in commiefornia and intend to drive it daily.
Mods so far-New door speakers (woot!).
Mods in House-
-NA Konis, 550/350 on ebay sleeves, FCM Bumps, DIY NB top hats/isolators
-Hard Dog Hardcore Double Diagonal
-4.3 Torsen (might regret this )
)
-Hard Top
-FMII 2-Cat Turbo Kit sans turbo (Carb Legal y0)
Maintenance due
-Super mega Ford Magic fluid in the box
-Redline 75w90 in the diff
-Rotella T6
-New Plugs
-Redline Water Wetter
-New Timing Belt
-New Fuel Filter
Mods in Transit-
- MSII
MSII
-Sparco Sprint Vs
-15/16" MC
Next to buy
-Replacement GT2560R
-225 RS3s
-15x9s
-949 Caliper relocators, 11" Coronado rotors, sport rear rotors
-race pads
-SS Lines/RBF600
-Harnesses
-550CC injectors (down the line)
Thats all for now, this will all take me awhile since Im doing all the work myself with limited time on weekends/evenings
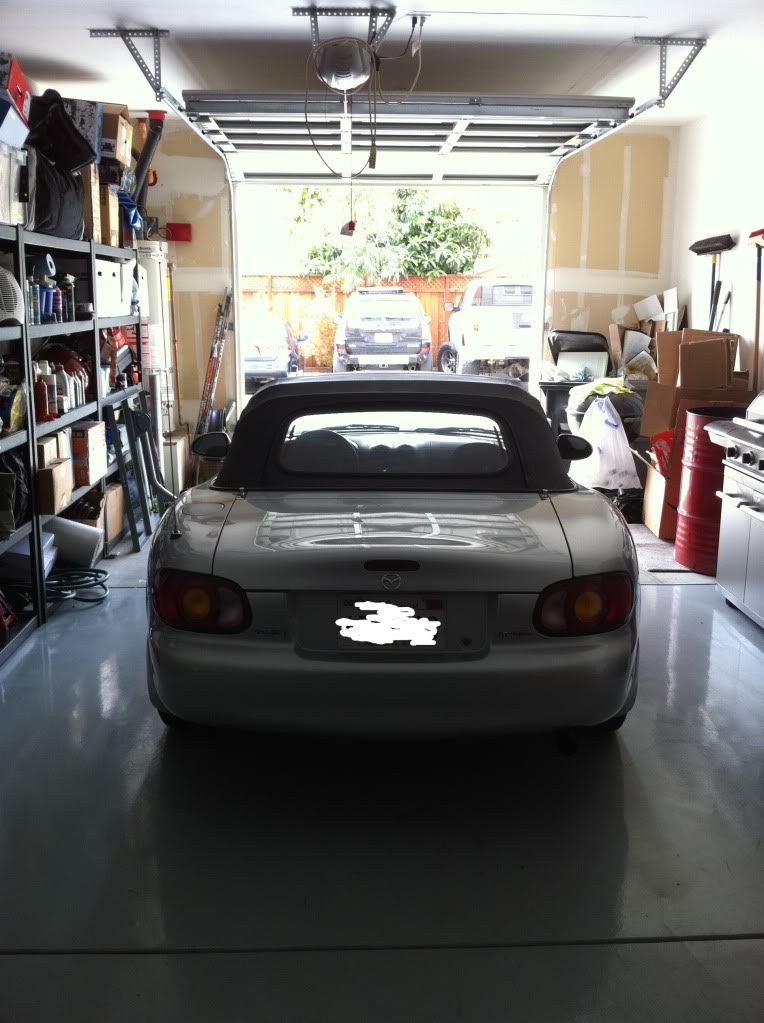
Obligatory Pics
In addition to that, its going to by my track toy. And before you ask, yes, I've spent lots of time at the track. My old rig had a massive 118whp..similar to the miata. Except it was <450lbs wet. I crashed it though
Plans for the car are, KISS, basic suspension, sticky tires and good brakes. No desire to chase plastic trophies at this point, more than content using more expensive cars as lap traffic to feed my speed ego. I do have a tow vehicle, but with a pending big financial obligations, just not going to gut it and go all out yet. That and I have to re-learn how to drive a 4 wheeled vehicle fast. Going to start off with a very conservative 5-6PSI tune (150whpish??) to accomplish this. I'll run this until I fry the clutch. Once I do that, new clutch, 55mm Radiator, oil cooler, and shoot for 200-220whp.
In addition to this, I plan to keep the car tame and CARB legal, being im stuck in commiefornia and intend to drive it daily.
Mods so far-New door speakers (woot!).
Mods in House-
-NA Konis, 550/350 on ebay sleeves, FCM Bumps, DIY NB top hats/isolators
-Hard Dog Hardcore Double Diagonal
-4.3 Torsen (might regret this
)-Hard Top
-FMII 2-Cat Turbo Kit sans turbo (Carb Legal y0)
Maintenance due
-Super mega Ford Magic fluid in the box
-Redline 75w90 in the diff
-Rotella T6
-New Plugs
-Redline Water Wetter
-New Timing Belt
-New Fuel Filter
Mods in Transit-
-
MSII-Sparco Sprint Vs
-15/16" MC
Next to buy
-Replacement GT2560R
-225 RS3s
-15x9s
-949 Caliper relocators, 11" Coronado rotors, sport rear rotors
-race pads
-SS Lines/RBF600
-Harnesses
-550CC injectors (down the line)
Thats all for now, this will all take me awhile since Im doing all the work myself with limited time on weekends/evenings
Obligatory Pics
Reply
 0
0

0


Thanks guys, its a tandem garage so right now the SUV is in the back. But yes, throwing down the epoxy before I moved all my crap in was a great idea. Fluid spills clean up uber easy
Reply
0
0

I used the rustoleum professional kit+clear over it. 2 kits of the base+1 box of clear was good for about 500sq ft. SO I ran out and didnt want to buy a whole box of base and clear for the small front section of the garage where I dont do any work at anyway. And I stacked all my **** there in the front while painting the rest of the floor 
Reply
0
0
I'm in northern commifornia...it gets a little slick when wet during the rain, the sand (grip additive to the clear) settles very easily so it goes on sort of uneven
I'm sure thats not the answer you were looking for however lol
I'm sure thats not the answer you were looking for however lol
Reply
0
0

Suspension.
Well I received a free set of old NA konis from a buddy, unfortunately they had some..issues with the springs. (reason for removing them from his old NA in the first place)
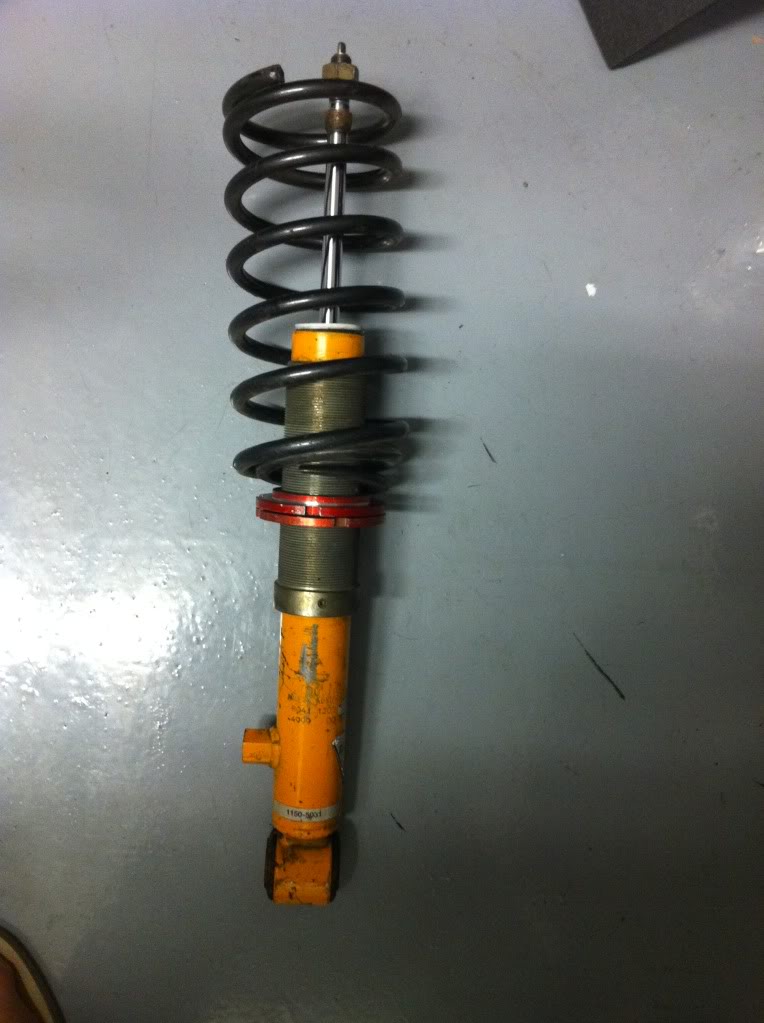
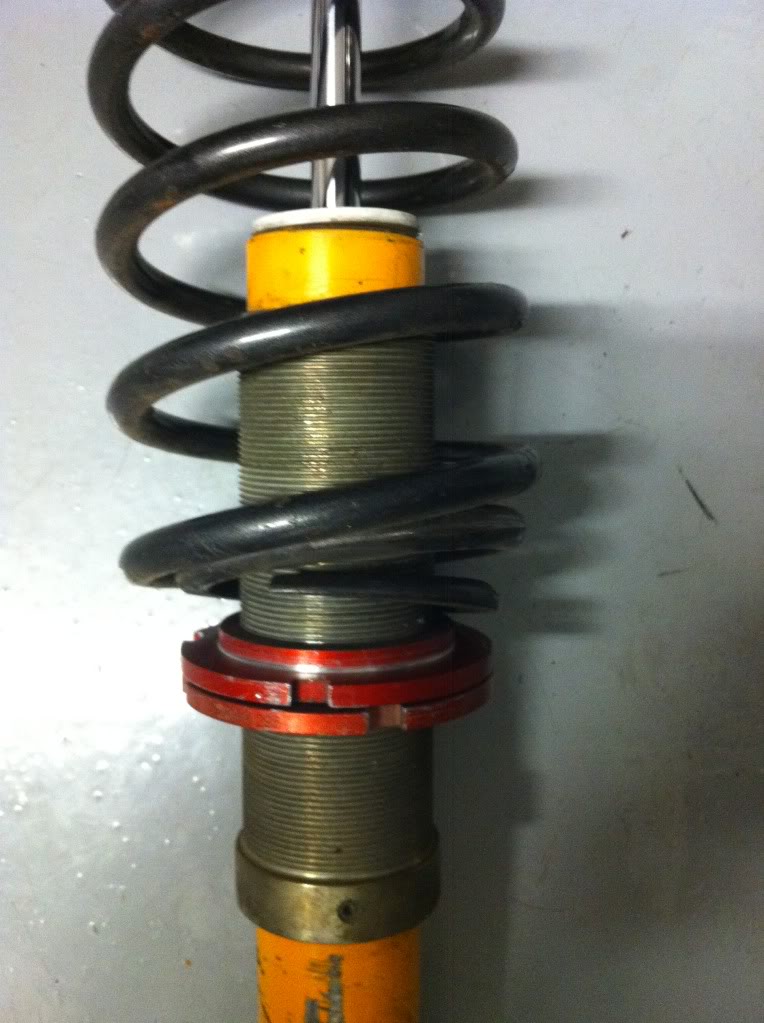
No point in replacing tuner springs, so switching to 2.5" fixed rate springs. The koni sleeves are made for 2.25" ID springs and had no spanners forthem, so I pulled them off for the time being and went with ebay sleeves.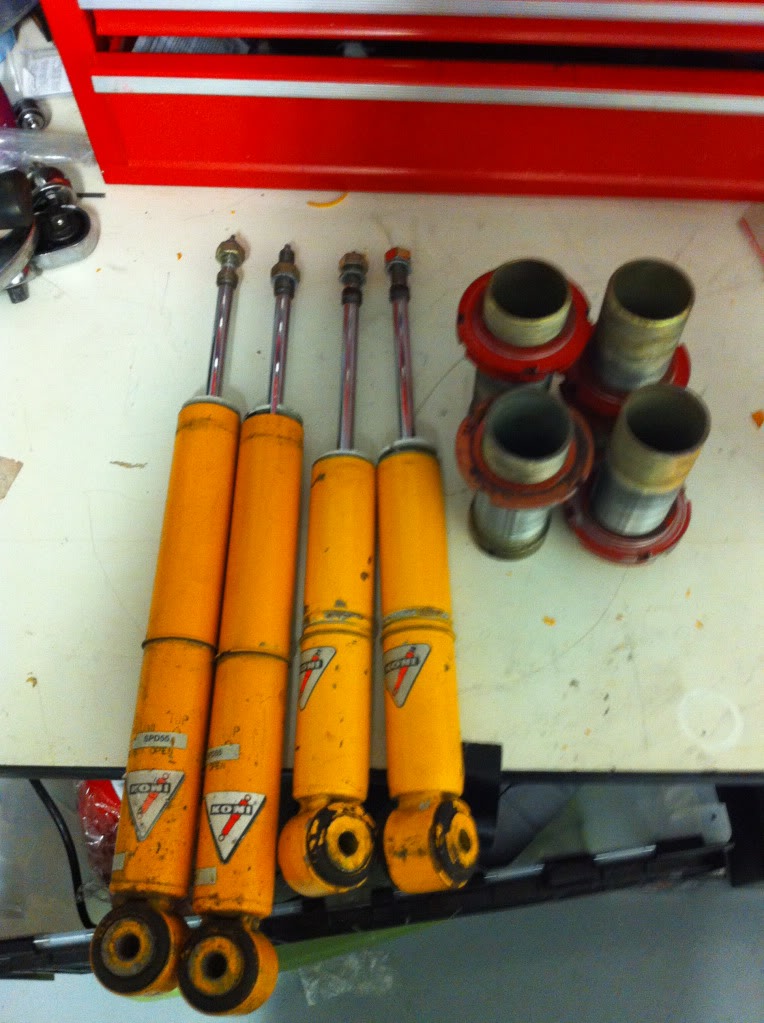
Ebay sleeves are a bit larger in OD
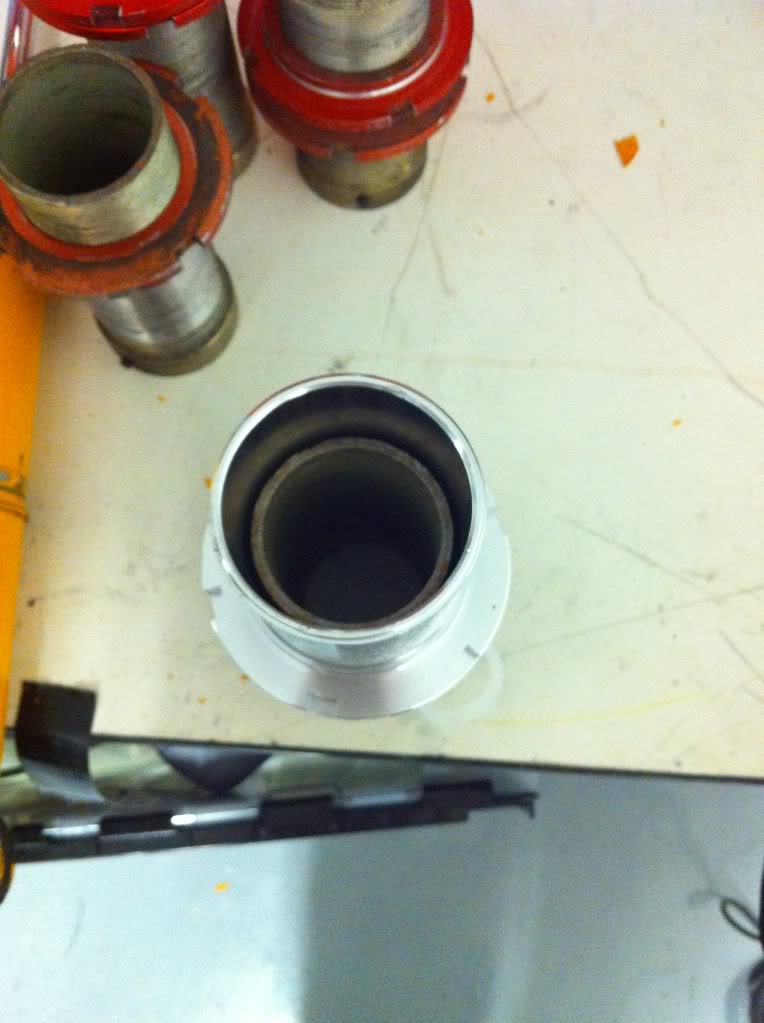
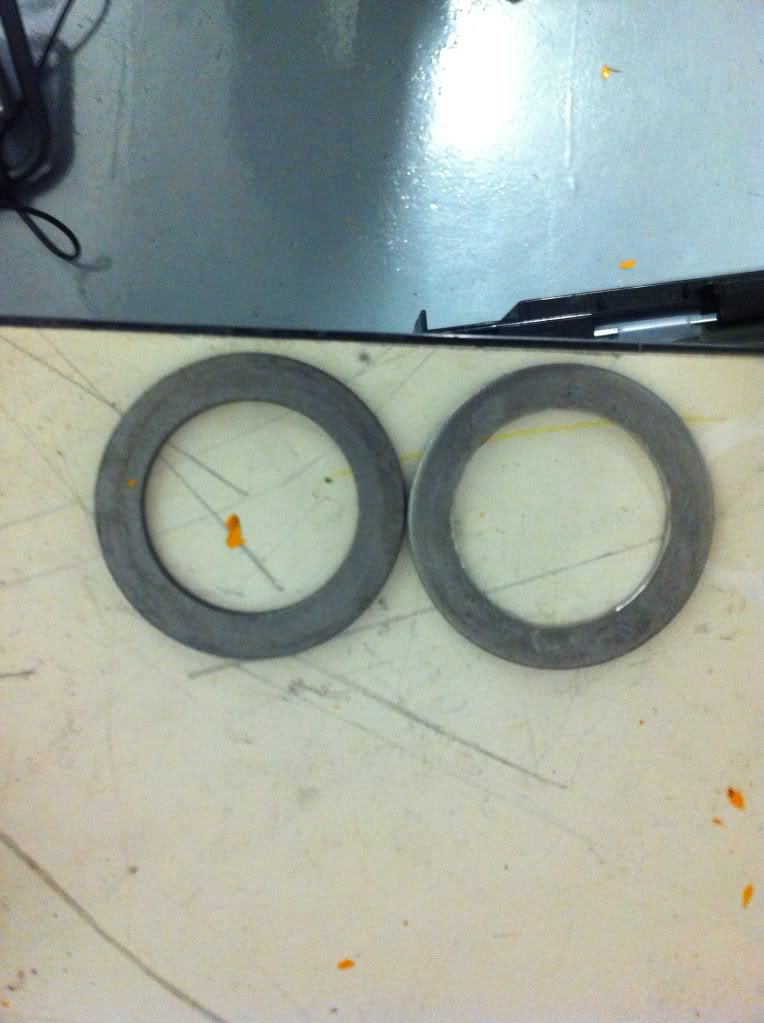
Had to make fancy adapter flange to keep the sleeve on the snap-ring. And by fancy, I mean steel washer+dremel
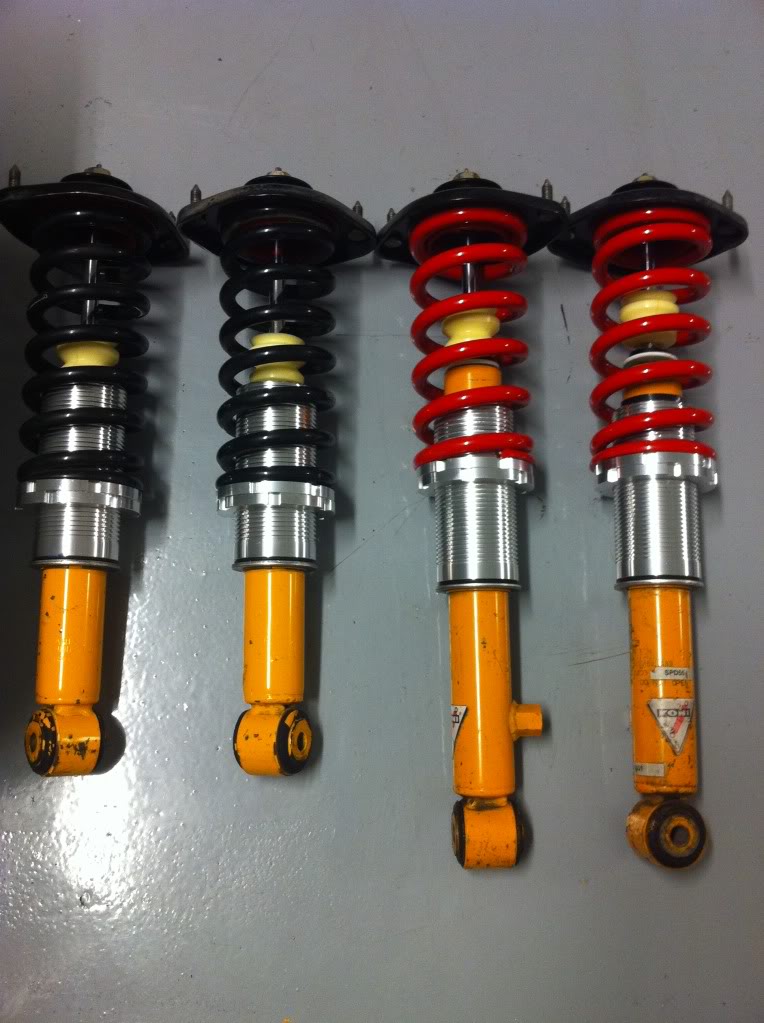
The Ebay sleeves from with 7.5" 525lb springs, so used those up front. I had some old 6k 8" springs as well, so threw those in the rear
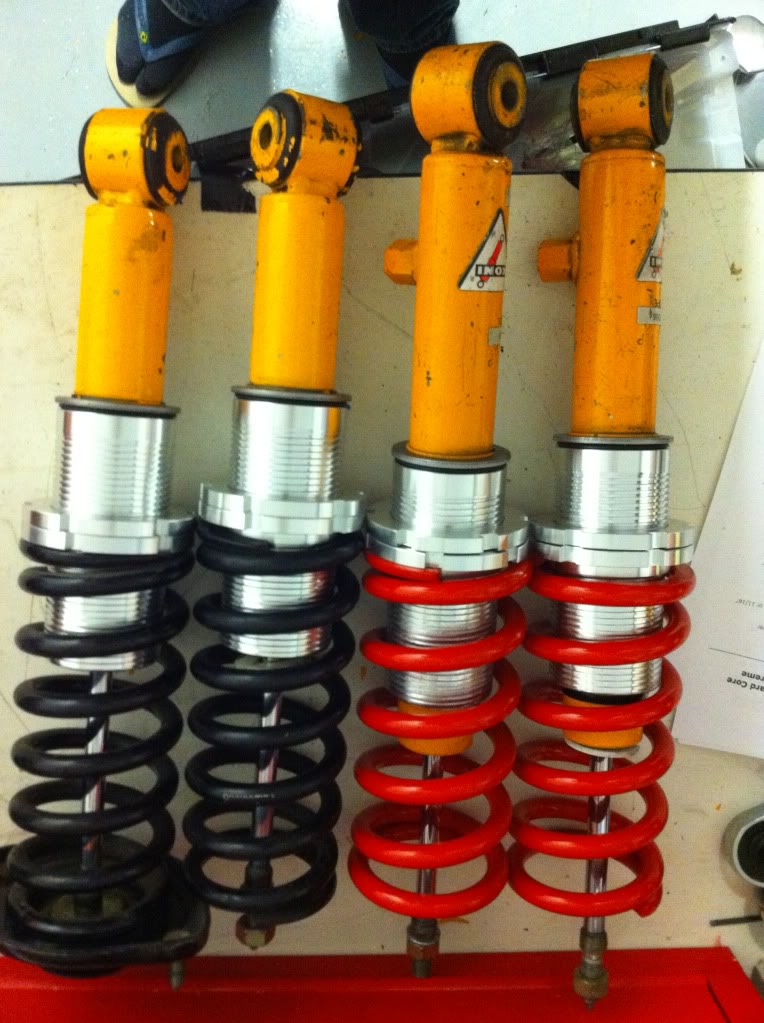
Used the NB top-hat conversion write-up on m.net. Bought the spare NB top-hats from the parts group so I could do the pre-assembly
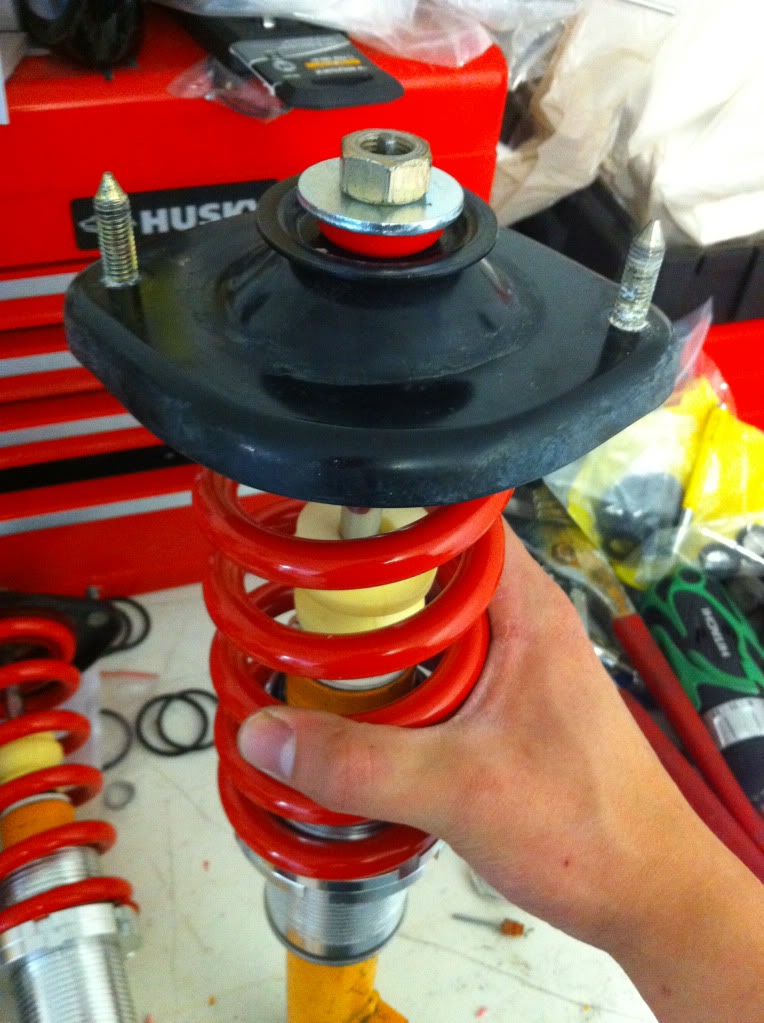
Most expensive part of the build, the fancy FCM 36mm bumps.
Well I received a free set of old NA konis from a buddy, unfortunately they had some..issues with the springs. (reason for removing them from his old NA in the first place)
No point in replacing tuner springs, so switching to 2.5" fixed rate springs. The koni sleeves are made for 2.25" ID springs and had no spanners forthem, so I pulled them off for the time being and went with ebay sleeves.
Ebay sleeves are a bit larger in OD
Had to make fancy adapter flange to keep the sleeve on the snap-ring. And by fancy, I mean steel washer+dremel
The Ebay sleeves from with 7.5" 525lb springs, so used those up front. I had some old 6k 8" springs as well, so threw those in the rear
Used the NB top-hat conversion write-up on m.net. Bought the spare NB top-hats from the parts group so I could do the pre-assembly
Most expensive part of the build, the fancy FCM 36mm bumps.
Reply
0
0
Got started this weekend
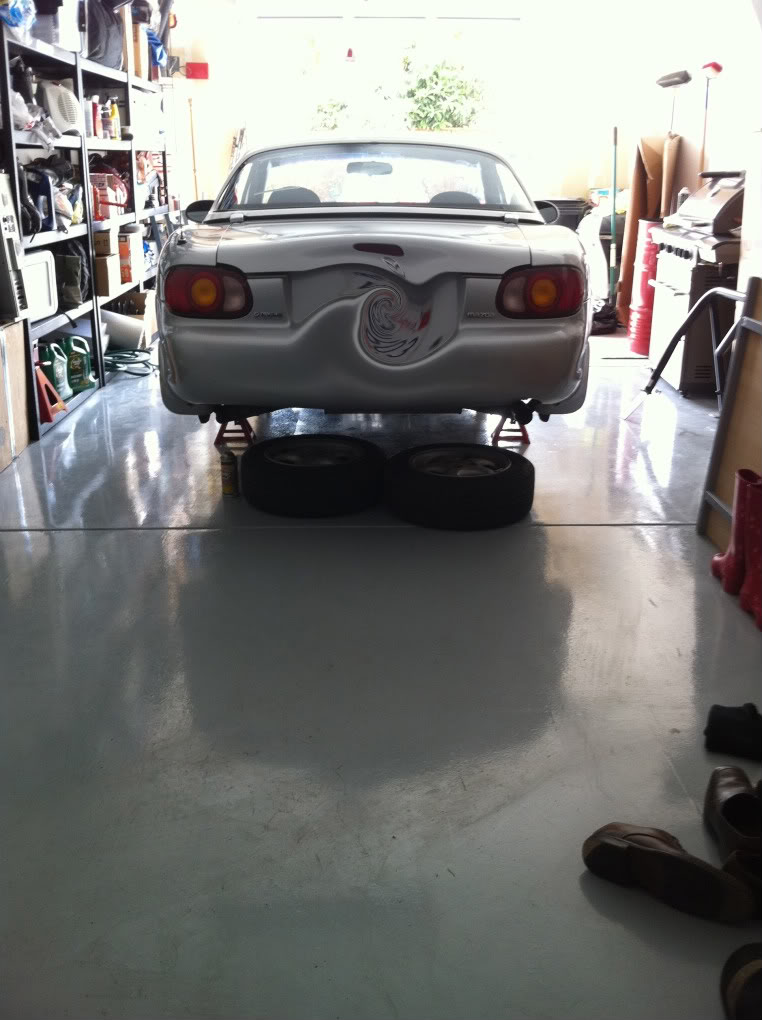
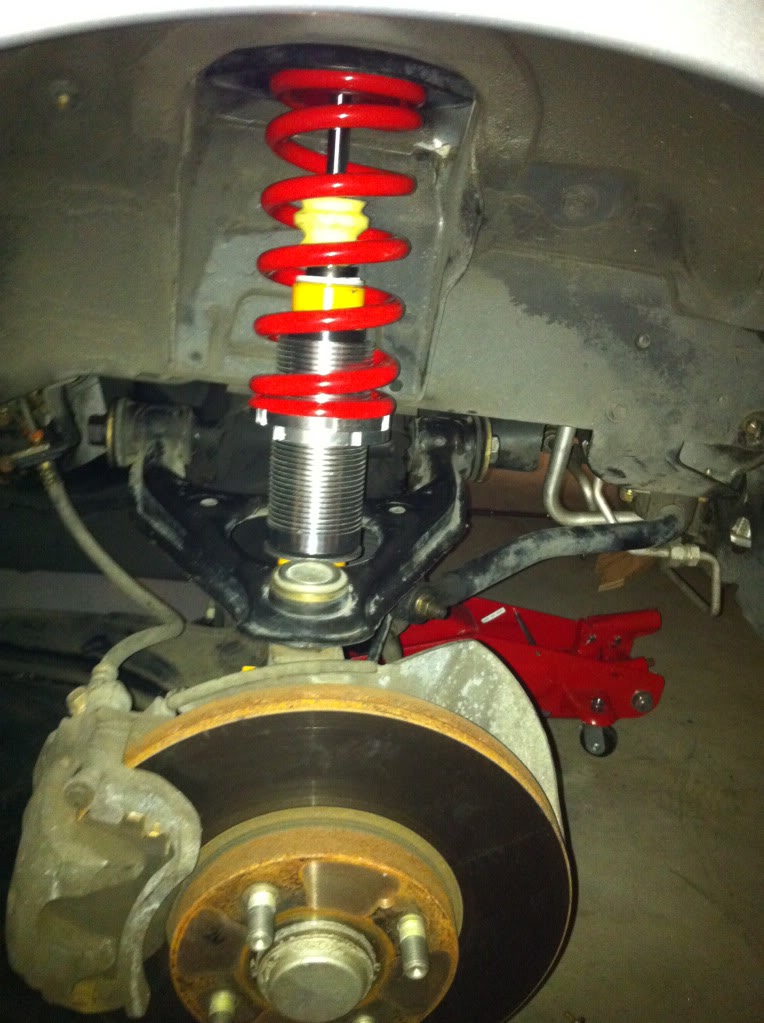
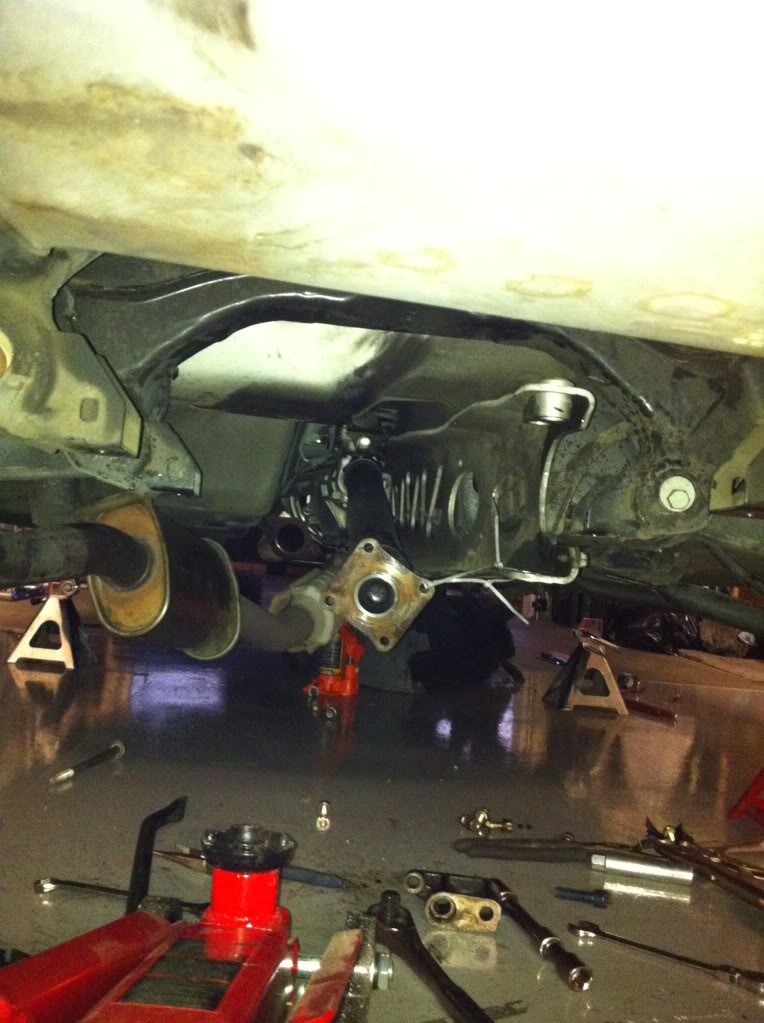
Front installation was easy, used the "long-bolt" method.
Had some issues in the rear
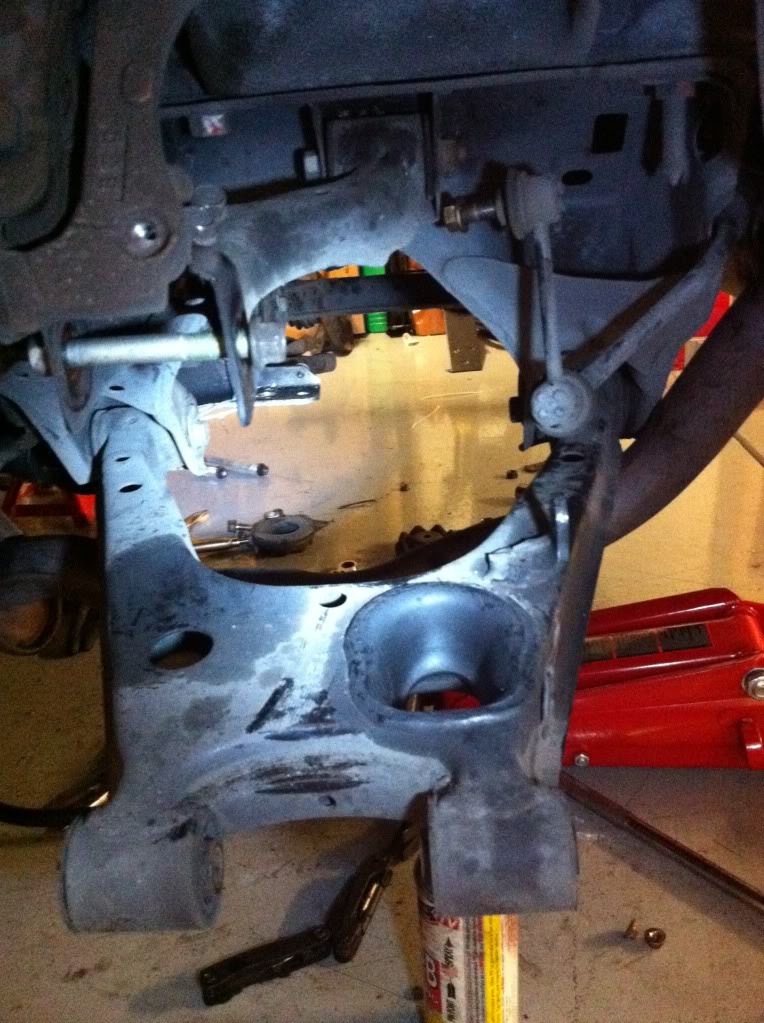
Solo removal of the PPF and driftshaft was a bit of a PITA
No bar
Waiting on a 2nd axle/diff seal, local parts place only had 1. Torsen should go in tomorrow night and ill button everything up and move on to the roll bar install.
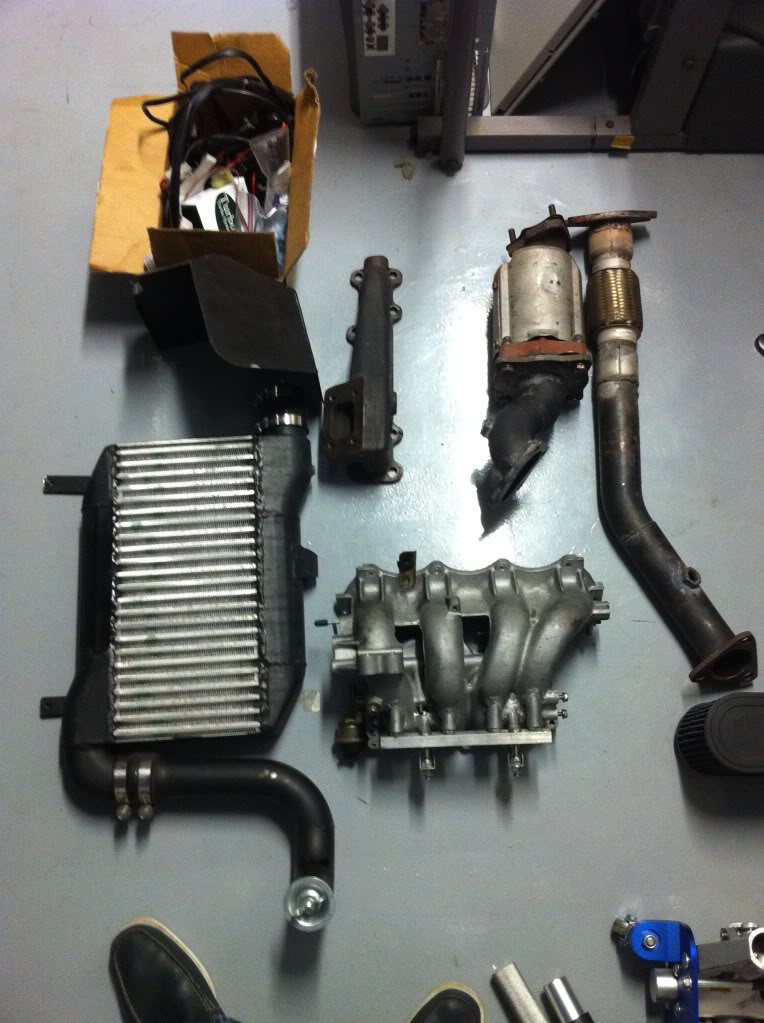
Sneak peak of my strange strange turbo kit
Front installation was easy, used the "long-bolt" method.
Had some issues in the rear
Solo removal of the PPF and driftshaft was a bit of a PITA
No bar
Waiting on a 2nd axle/diff seal, local parts place only had 1. Torsen should go in tomorrow night and ill button everything up and move on to the roll bar install.
Sneak peak of my strange strange turbo kit
Reply
0
0

FYI, a pair of adjustable pliers like this:

Work fairly well for those Koni sleeves when you don't have the wrenches, that's the exact setup I have. But if you're comfortable with your washer, the ebay sleeves are probably a good method as well.
I can't tell, do you have spring isolators glued to the bottom of your NB top hats?
Work fairly well for those Koni sleeves when you don't have the wrenches, that's the exact setup I have. But if you're comfortable with your washer, the ebay sleeves are probably a good method as well.
I can't tell, do you have spring isolators glued to the bottom of your NB top hats?
Reply
0
0

Yeah 2.5"' ES isolators glued on. Got a dab of glue on the c-clip as well since they aren't captured by the washer. Worst case I get 2.5" adapters and go back to the koni sleeves if I see any issues down the road. They wete only $50 which is I'd pay for just a set of front springs
Reply
0
0


I got the kit locally,but the guy I got it from may have snagged it. He posted here I think. And yeah.. Strange design to make room for the precat on the DP so it's smog legal in CA. And good eye spotting the lumber
Reply
0
0

Junior Member
Joined: Sep 2009
Posts: 76
Total Cats: 0
FYI, a pair of adjustable pliers like this:
http://website.lineone.net/~dave.cus...slipjoint1.jpg
http://website.lineone.net/~dave.cus...slipjoint1.jpg

Reply
0
0


