
My turbo prep rebuild page

Thread Starter
Elite Member
iTrader: (1)
Joined: Feb 2008
Posts: 7,930
Total Cats: 44
From: Birmingham Alabama
I have another comment. **** SCREWS! They should be done away with in any important automotive application. They are ok for low torque interior and exterior stuff, but not in an engine assembly. The oil pump screws wont come out for me. I dont really need to take it apart, but I wanted to take it apart to check clearances and maybe clean it up a bit. Not going to now, because I have nearly rounded off 2 of them. Ive used an impact screw "driver" that you shock them off with a hammer, and I have used a bit and a 1/2'' ratchet and all but stood on it and turned it and it still just deforms the metal before it backs them out. So again, **** SCREWS!!! God, I can never get any imprtant screws to come out. They should all be torx or square bit, something that isnt going to slip out of the angles channels. 
Also, is it possible to clean out the pump assembly without taking the cover off? Compressed air or maybe high pressure water through it while turning the gear. Im not sure, but some stuff (dirt and carbon) may have gotten into it while its been stored with the pistons for the last week or two.
Also, is it possible to clean out the pump assembly without taking the cover off? Compressed air or maybe high pressure water through it while turning the gear. Im not sure, but some stuff (dirt and carbon) may have gotten into it while its been stored with the pistons for the last week or two.
Reply
 0
0

0
Thread Starter
Elite Member
iTrader: (1)
Joined: Feb 2008
Posts: 7,930
Total Cats: 44
From: Birmingham Alabama
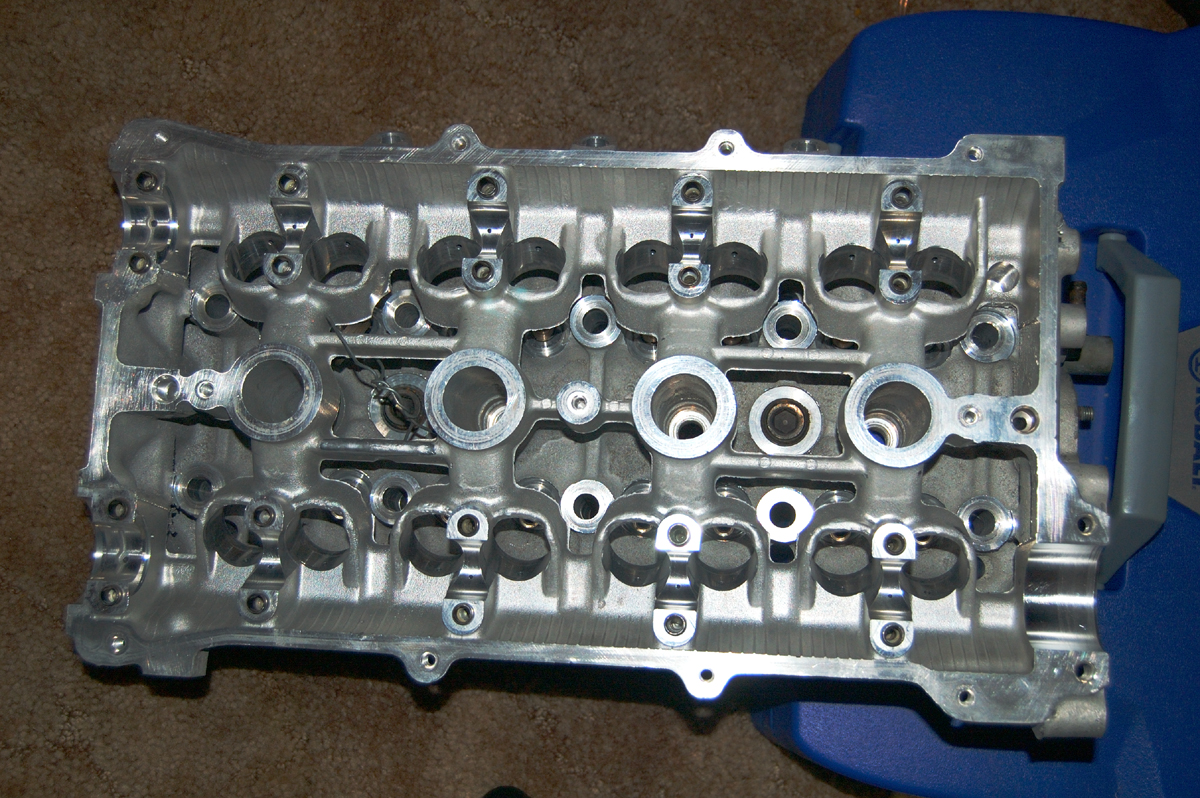
Ok, so now that the block is all but done, Im working on the head. I thinking maybe I will keep away from any more head machining, even though it has a few little scars from laying the mating surface on nuts and bolts and the likes. None seem to be deeper than a few thousandths, and none in any important places. So Im just stripping it, cleaning it again, then assemble it with new gaskets and such. Went to Trussville Mazda today and got my last bit of parts, mostly soft gaskets I couldnt reuse from last time thanks to sealant on them. Also picked up an OEM t/o bearing since the one from my ACT kit I dont trust. Another head gasket, number 4. The other various orings for water neck, ect. Was cheaper than I thought it would be too, only $140. Trussville is usualy more than Rosenthal, but this time they were even, though I got the "Miata discount", I guess since Im in there so often.
Got the head stripped, everything but the valves, springs and retainers/keepers on #2-#4, #1 is done (minus seals). I used my nifty new valve tool I paid like $80 for. It works ok I guess. The magent isnt strong enough and doesnt suck the keepers out of the grooves like it says it does, so I had to wiggle around like a mad man while pushing down with how ever much force the springs are rated at. I couldnt make them go back in like the video shows either. Oh well.
Some pictures, nothing special.
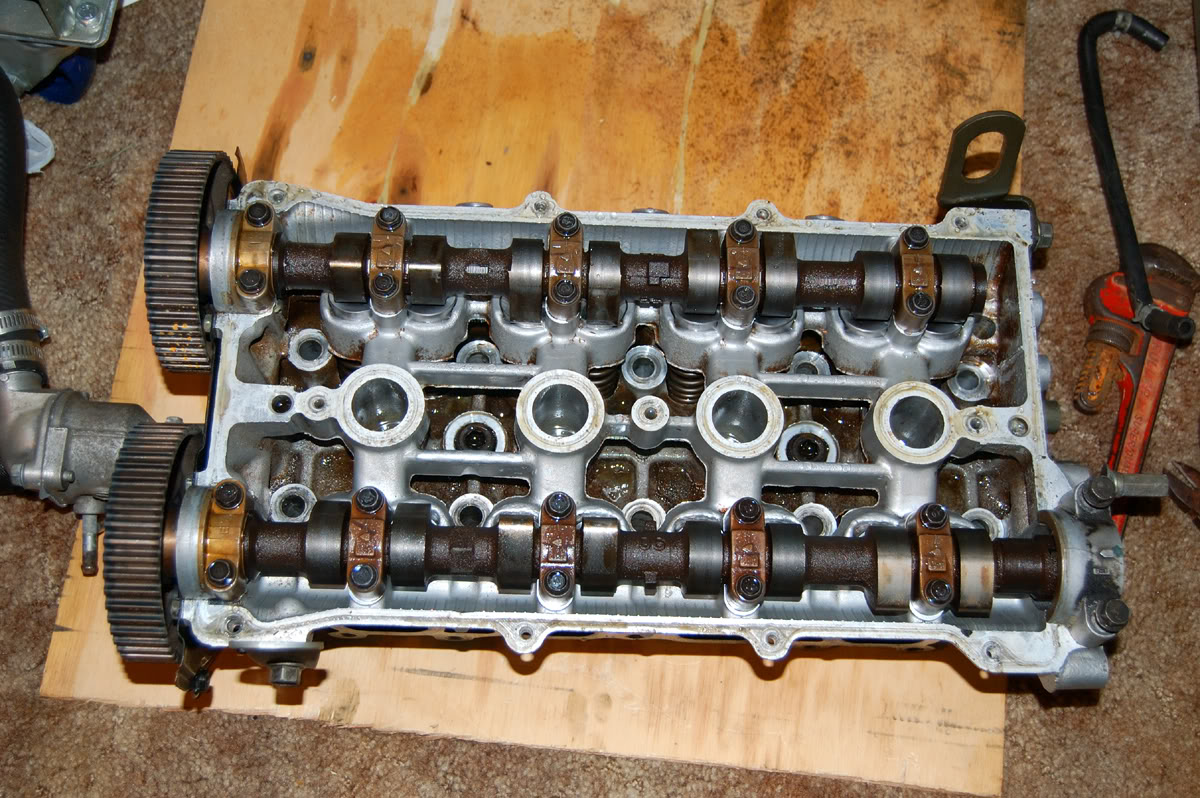
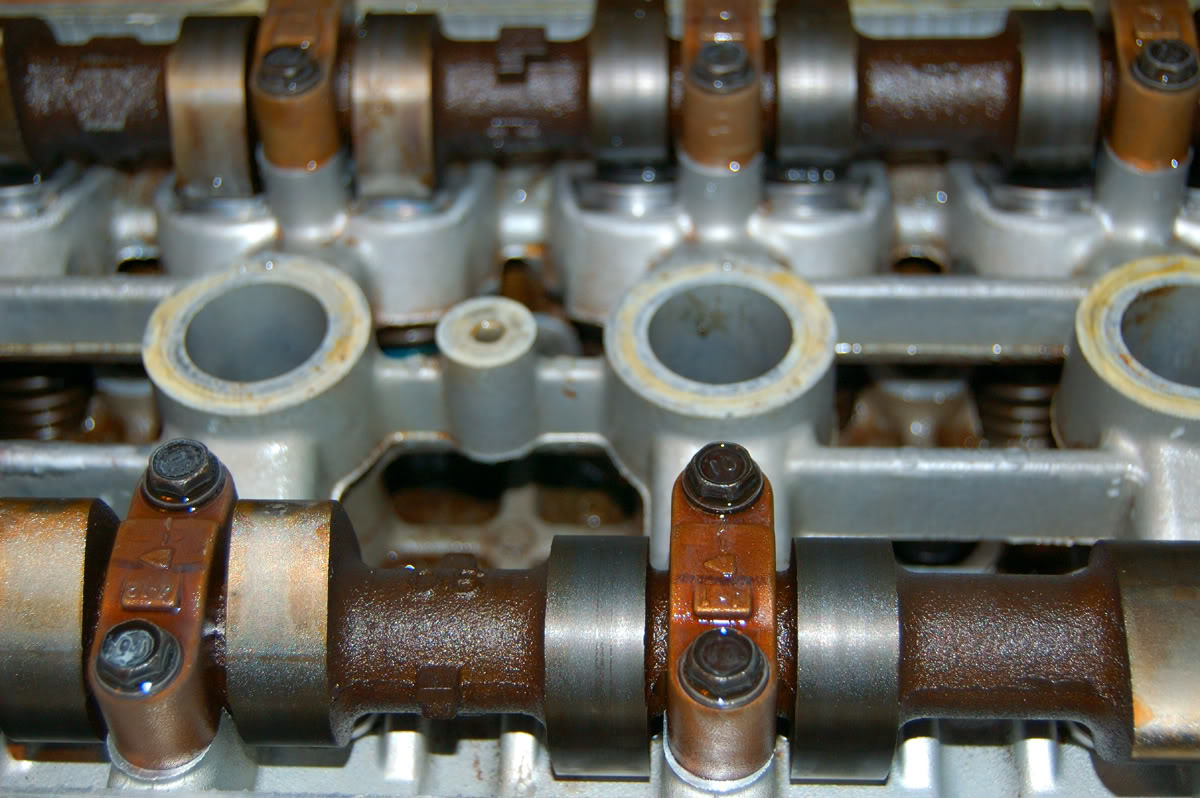
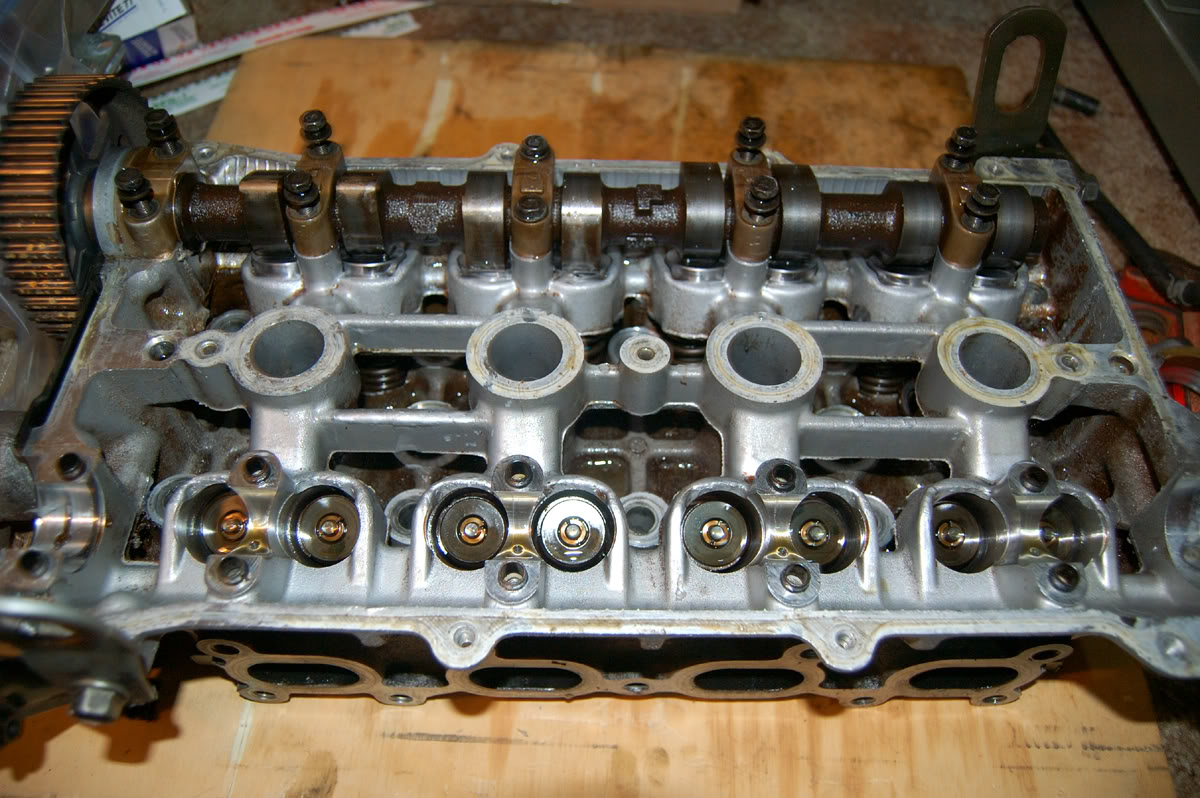
I bet if I put my mind to it, I could have a head fully stripped bare in under 30 minutes (not breaking anything). I took my time and got that far in only about 45 minutes. This is only my 4th or 5th time taking the head apart in some shape or form in the last 3-4 months though, so its no wonder.
Got the head stripped, everything but the valves, springs and retainers/keepers on #2-#4, #1 is done (minus seals). I used my nifty new valve tool I paid like $80 for. It works ok I guess. The magent isnt strong enough and doesnt suck the keepers out of the grooves like it says it does, so I had to wiggle around like a mad man while pushing down with how ever much force the springs are rated at. I couldnt make them go back in like the video shows either. Oh well.
Some pictures, nothing special.
I bet if I put my mind to it, I could have a head fully stripped bare in under 30 minutes (not breaking anything). I took my time and got that far in only about 45 minutes. This is only my 4th or 5th time taking the head apart in some shape or form in the last 3-4 months though, so its no wonder.
Reply
0
0
Thread Starter
Elite Member
iTrader: (1)
Joined: Feb 2008
Posts: 7,930
Total Cats: 44
From: Birmingham Alabama
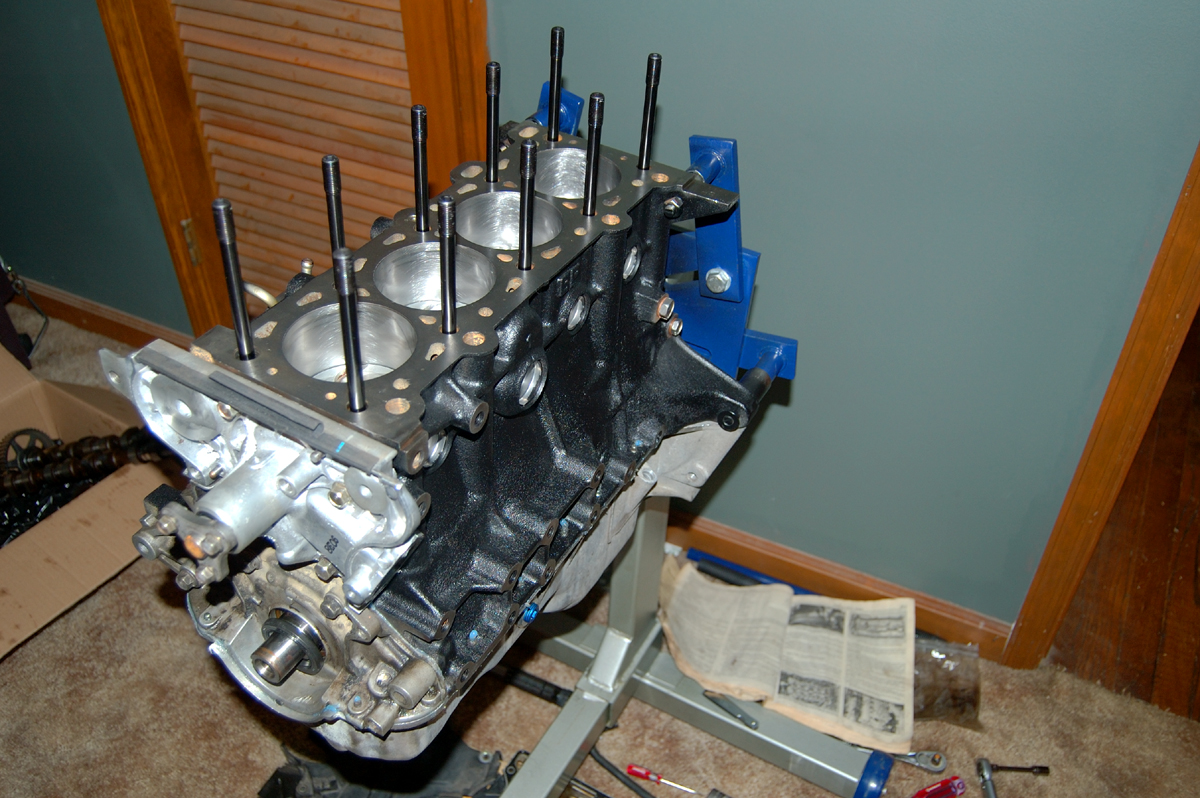
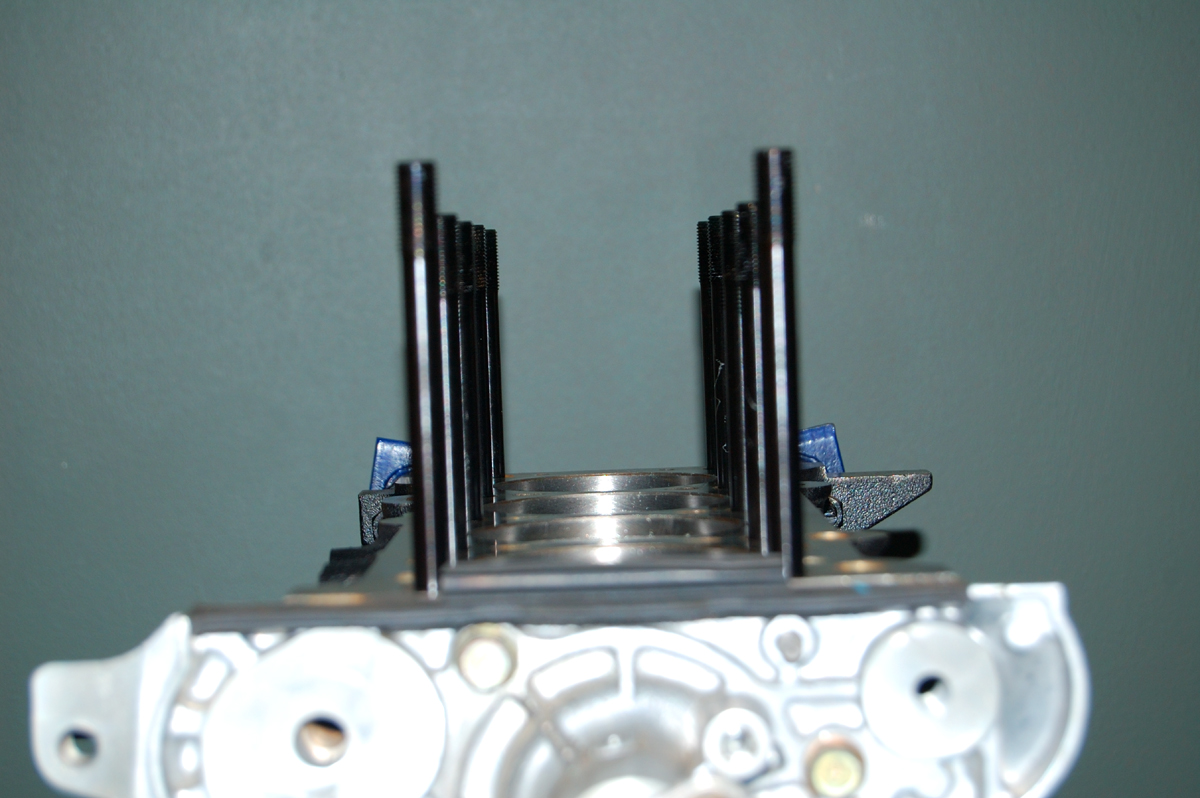
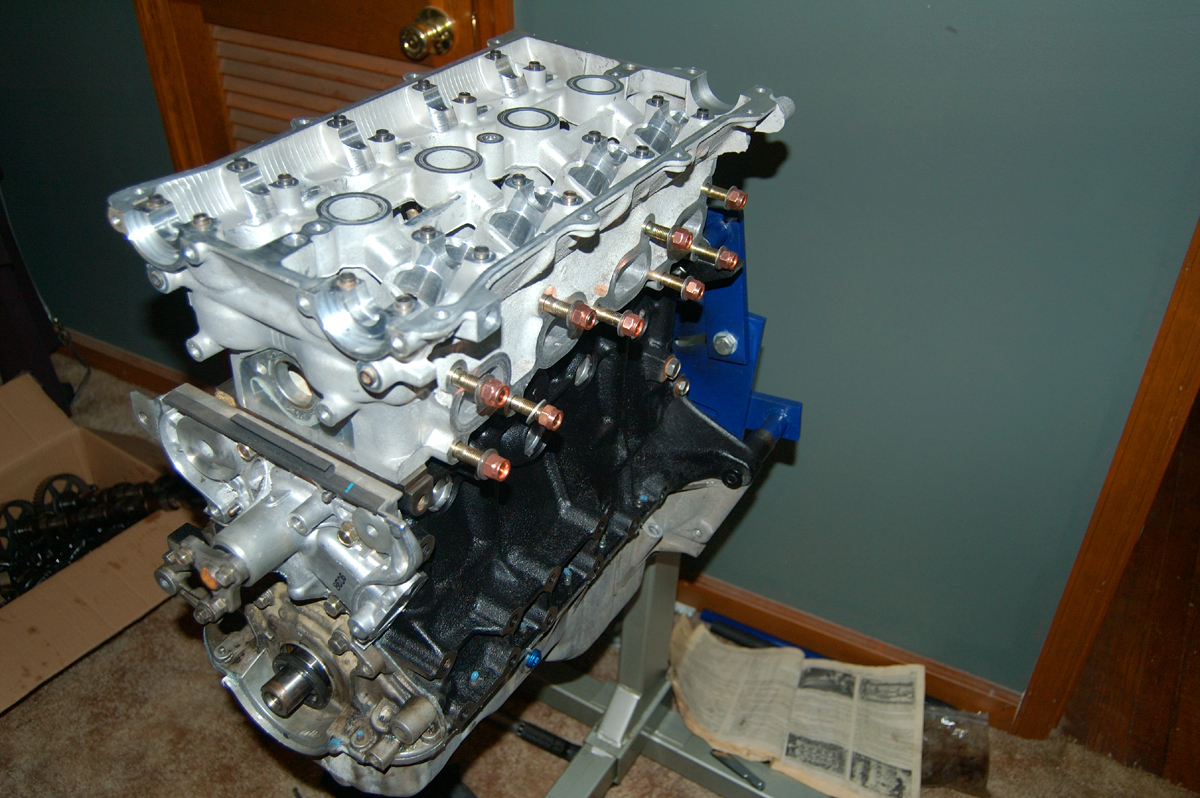
Slow progress. Block coming together one bit at a time. Waiting on the head studs and dowels, as well as the oil pan and head at the machine shop.
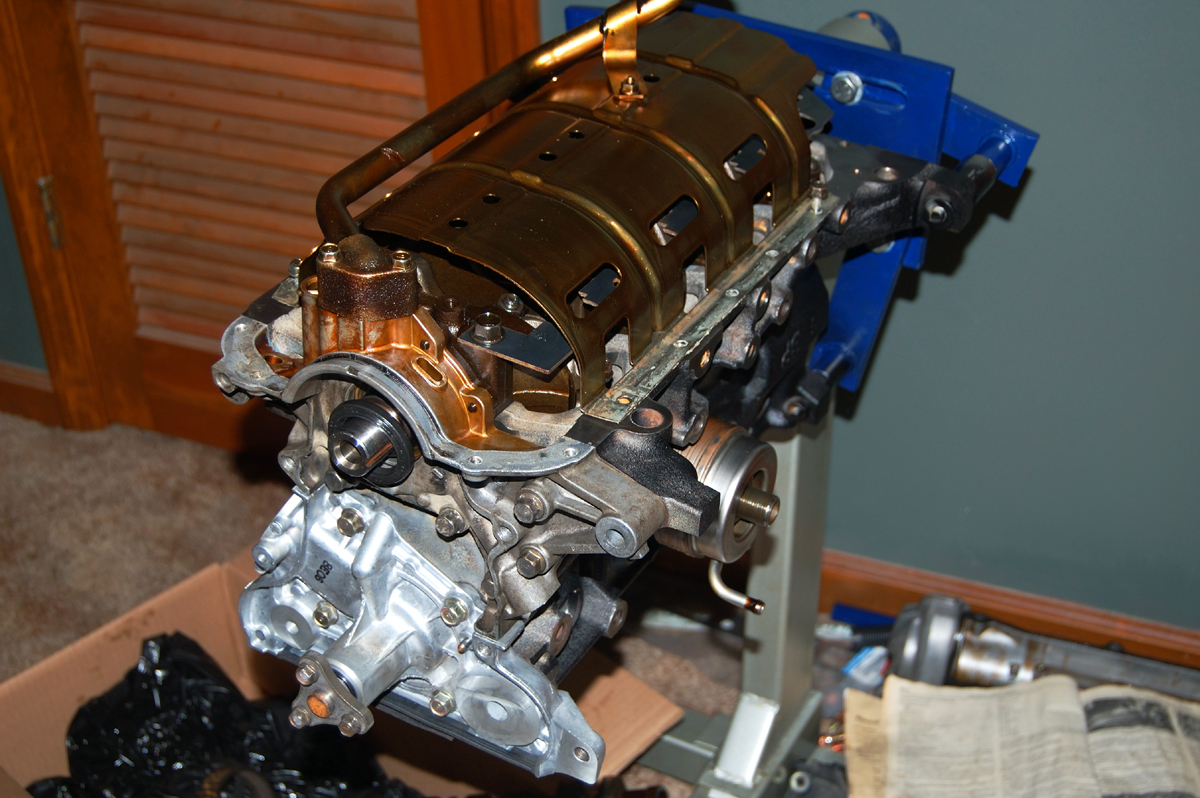
Its coming down to the wire, first start of a fully rebuilt by me engine. Ive rebuilt many engines, but never one so fully as this one. Should be fine this time though, all of my bases are covered, and all specs I checked were fine.
Its coming down to the wire, first start of a fully rebuilt by me engine. Ive rebuilt many engines, but never one so fully as this one. Should be fine this time though, all of my bases are covered, and all specs I checked were fine.
Last edited by NA6C-Guy; Jan 5, 2009 at 02:22 AM.
Reply
0
0

Thread Starter
Elite Member
iTrader: (1)
Joined: Feb 2008
Posts: 7,930
Total Cats: 44
From: Birmingham Alabama
Thanks, it is not a problem. Im weird like that and like to document almost everything I do car related, as you can see in my cardomain (150+ pictures and a fairly detailed diary from day one till now). I wasnt as thorough as I wanted to be, but as always I was too much into the work to take step by step pictures and document in great detail.
Im getting paranoid leaving the bottom end open like that, but dont want to put anything over it, scared a small chunk of something will get slung in it some how. So I will leave it alone and ignore it till I get the oil pan back.
Im getting paranoid leaving the bottom end open like that, but dont want to put anything over it, scared a small chunk of something will get slung in it some how. So I will leave it alone and ignore it till I get the oil pan back.
Reply
0
0
nice build thread man. I rebuilt a 1.6 last year or so and this brings back memories (ya i know its a 1.8) Anyway wish i could give some input on the oil rings, but I guess it sounds like they may have been the cause because I don't remember that happening to me when I pulled the pistons out. Well ill be watching this thread, and my god there are a ton of pictures on here. Made my DSL freak out for a minute.
Reply
0
0
Thread Starter
Elite Member
iTrader: (1)
Joined: Feb 2008
Posts: 7,930
Total Cats: 44
From: Birmingham Alabama
Thanks. Sorry about the pictures  I only posted a few of the ones I have taken too. I always have a camera within reach and decide to snap some every now and then when I think about it.
Im thinking the rings were the problem all along, and the extra head gaskets werent needed. I was looking at a useful picture of the piston tops after the first time re-pulling the head, and noticed oil, and not coolant like I for some reason said the first time. any coolant that was there was probably from the head being pulled, and what ever little that was left slipping by the gasket when I lifted off the head. The first time around, when I cleaned the carbon off the piston tops still in the block, I probably didnt do as good of a job at keeping the carbon out of the gap between the pistons and the walls as I could have. Im thinking all of that junk just got packed down in there and worked their way past the compression rings and around the oil rings. I did a good bit of hand turning the crank at that point, so its very possible I think. You live and you learn I guess.
I only posted a few of the ones I have taken too. I always have a camera within reach and decide to snap some every now and then when I think about it.Im thinking the rings were the problem all along, and the extra head gaskets werent needed. I was looking at a useful picture of the piston tops after the first time re-pulling the head, and noticed oil, and not coolant like I for some reason said the first time. any coolant that was there was probably from the head being pulled, and what ever little that was left slipping by the gasket when I lifted off the head. The first time around, when I cleaned the carbon off the piston tops still in the block, I probably didnt do as good of a job at keeping the carbon out of the gap between the pistons and the walls as I could have. Im thinking all of that junk just got packed down in there and worked their way past the compression rings and around the oil rings. I did a good bit of hand turning the crank at that point, so its very possible I think. You live and you learn I guess.
Reply
0
0
Thread Starter
Elite Member
iTrader: (1)
Joined: Feb 2008
Posts: 7,930
Total Cats: 44
From: Birmingham Alabama
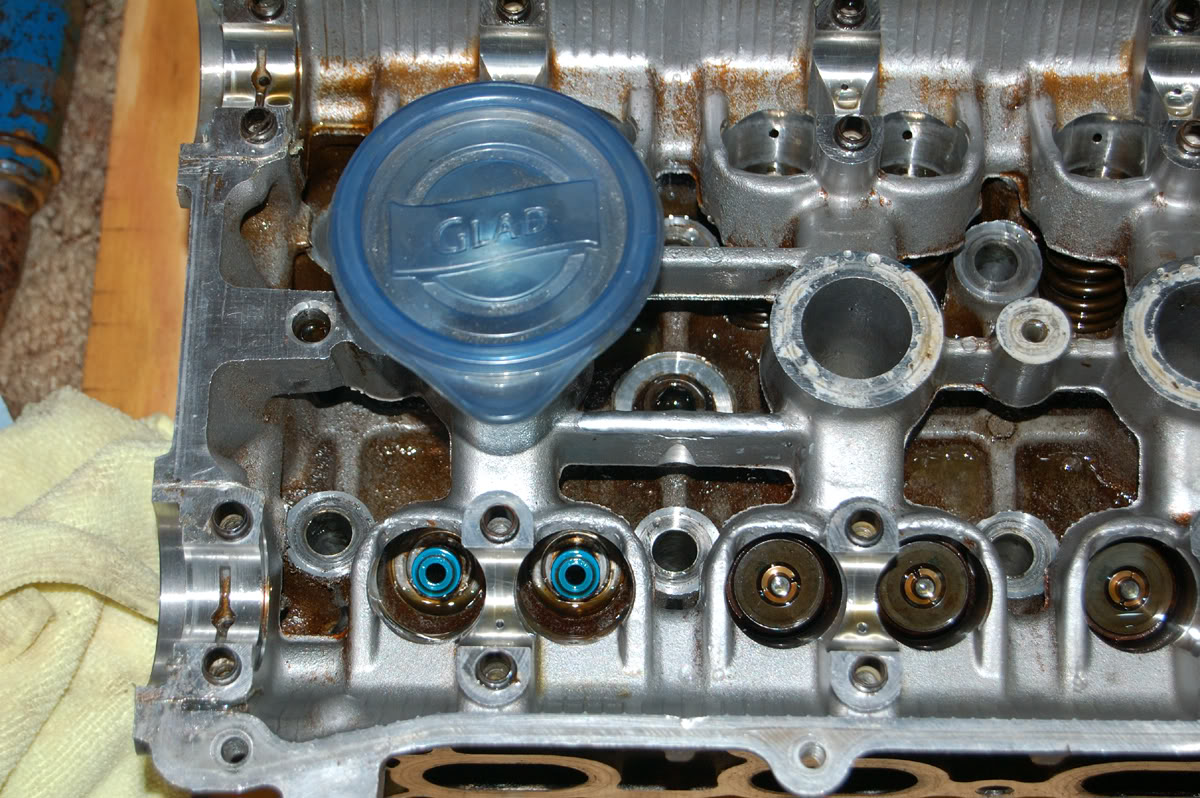
Woot, oil pan and head back from the shop! I think they did a pretty good job. Im a bit upset with myself though, I forgot to remove the valve spring shims and they only found 15 when they were putting it on the machine. So either one is somewhere around my house, or on their shop floor under a shelf. Maybe I can scrape up a shim somewhere.
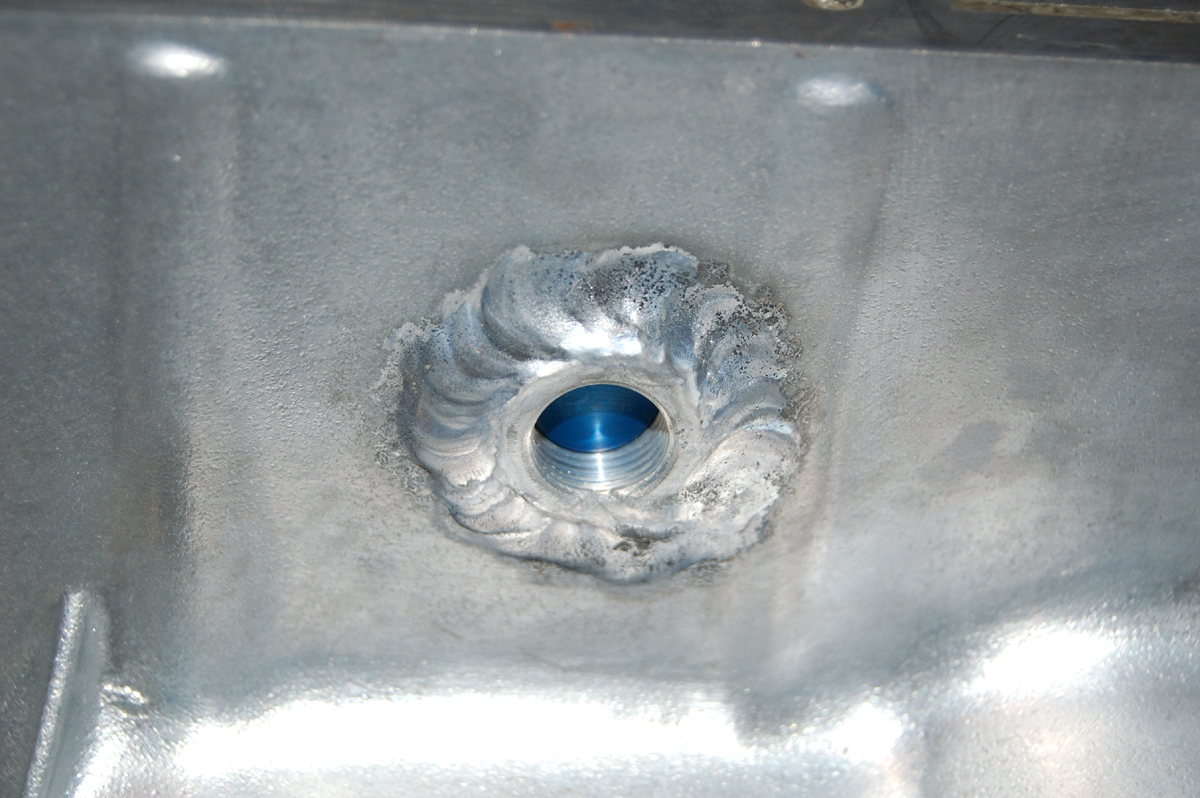
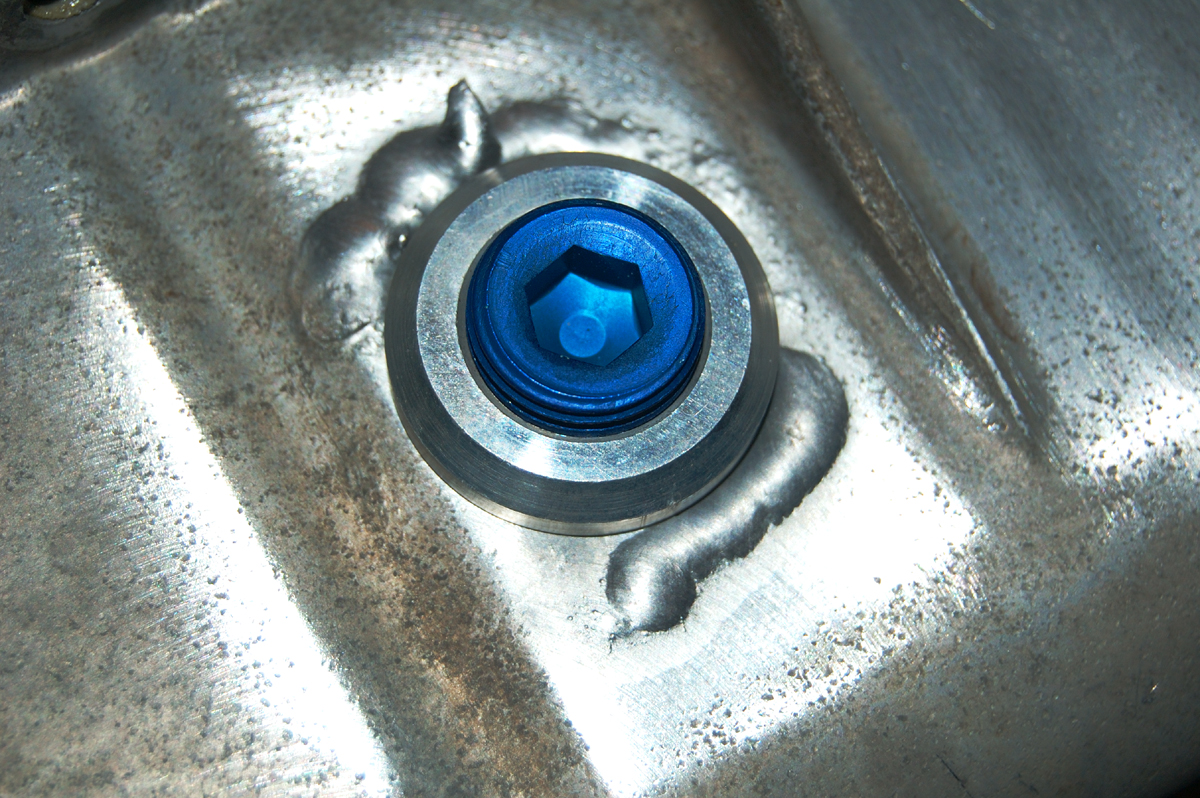
Feast your eyes on a proper oil drain fitting. No JB weld or drills and taps here
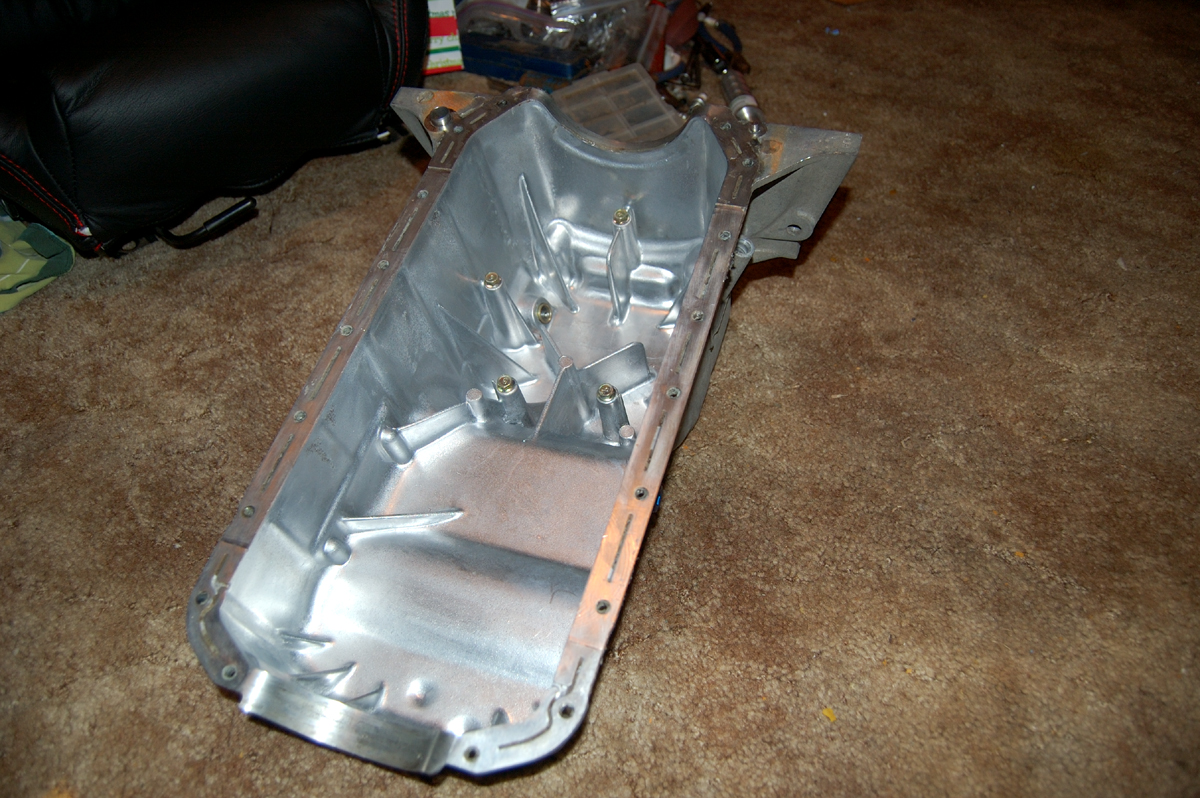
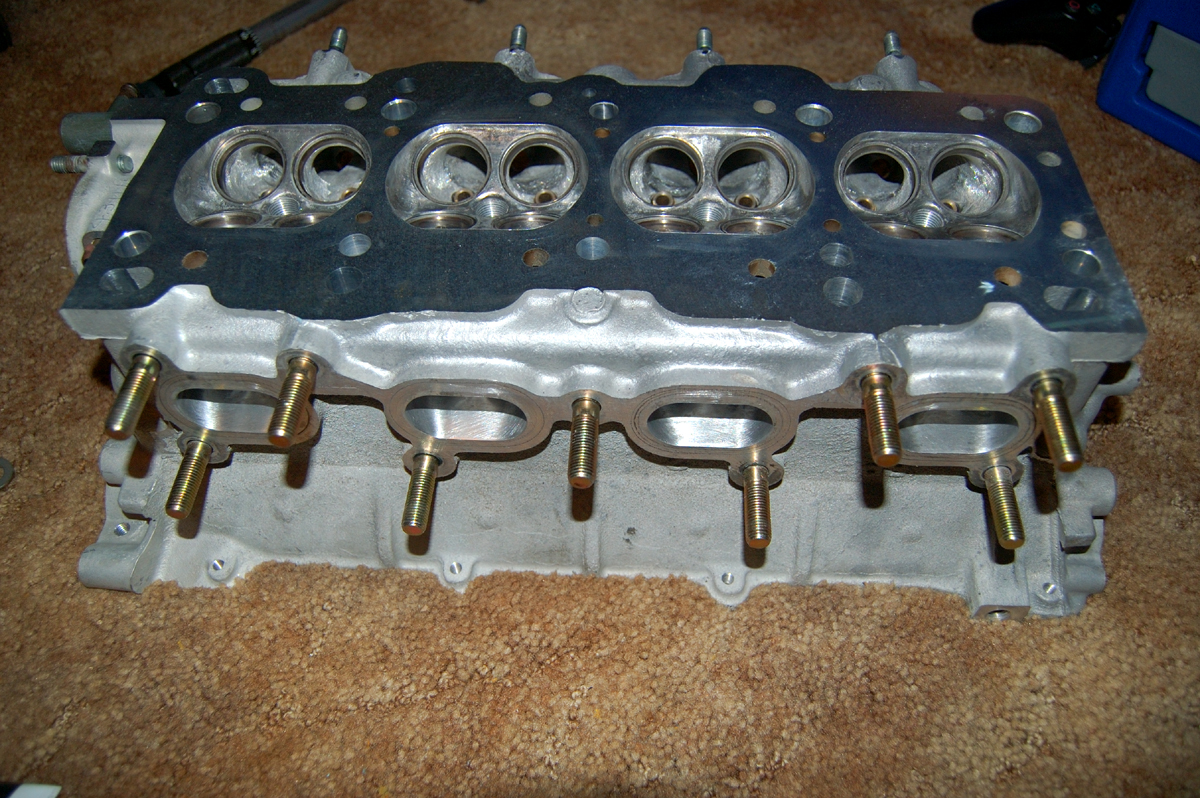
The head is now cleaner than before. I guess that happens when youve cleaned with several times yourself, and had shops hot tank it twice in under 4 months.
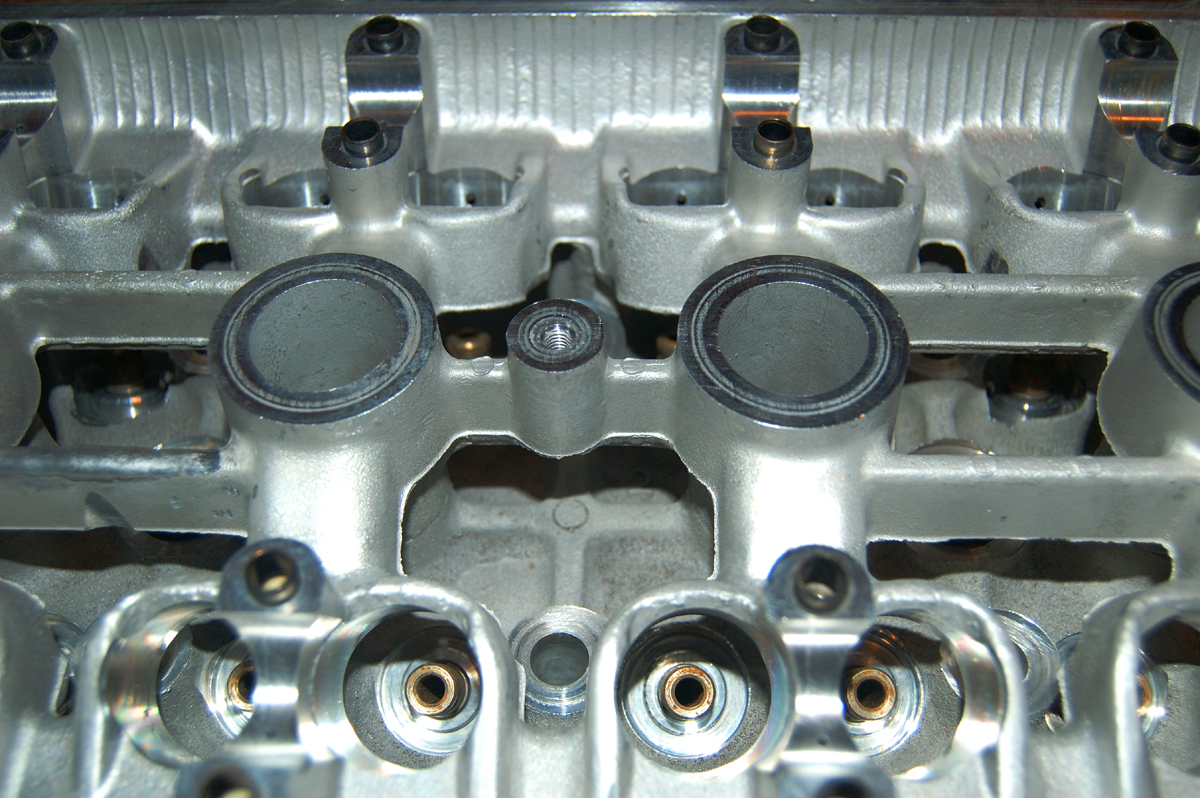
My exhaust ports look terrible after the hot tanking. They looked fairly decent before, but now its looks terrible down inside.
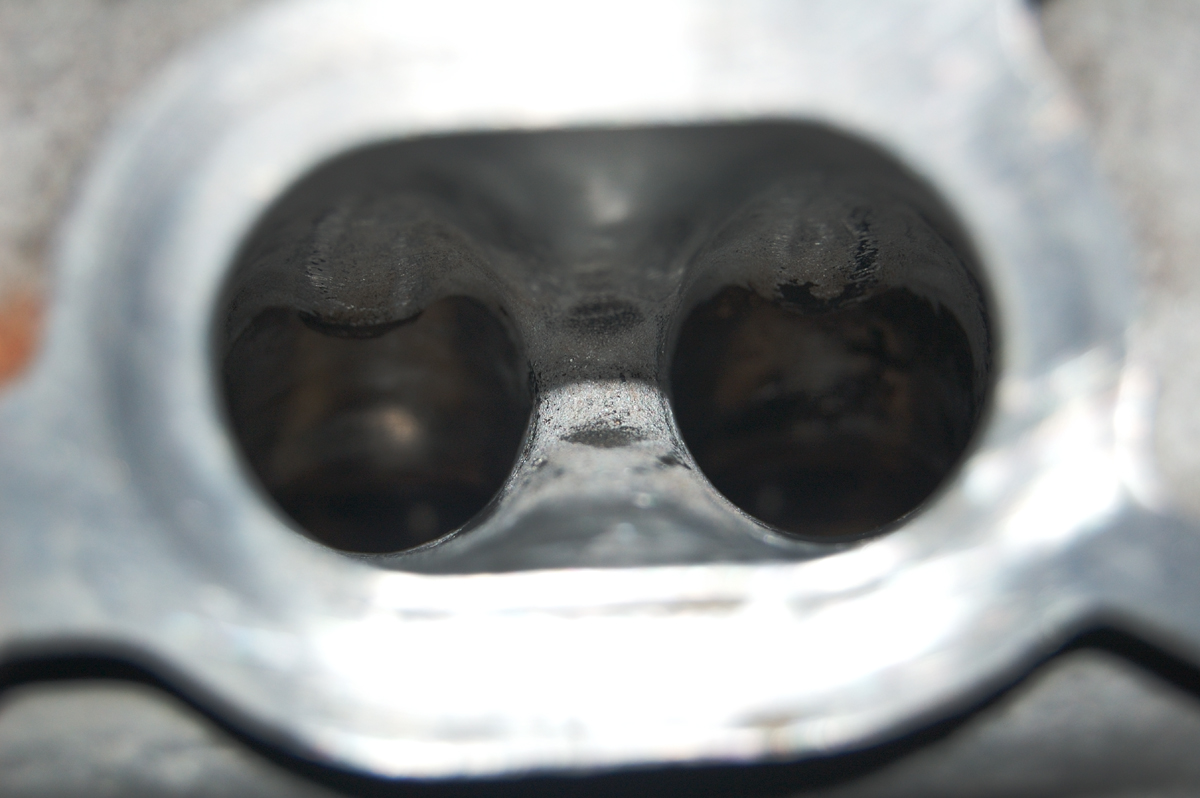
Outer areas still looks good like I remember them.
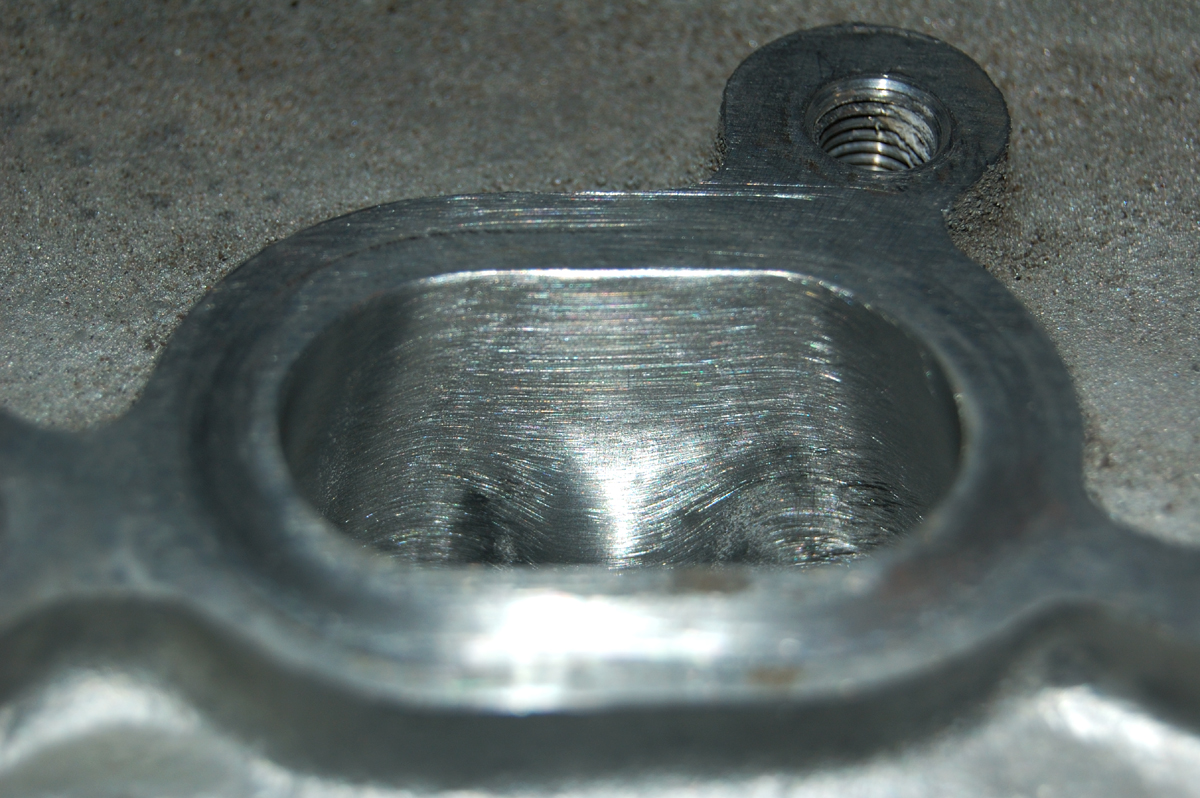
I guess while I wait for the studs and the dowels, I can touch up the ports a bit more. That mess bothers me.
EDIT:
Added the new exhaust side hardware from MiataRoadster. Looks good on that freshly cleaned head.
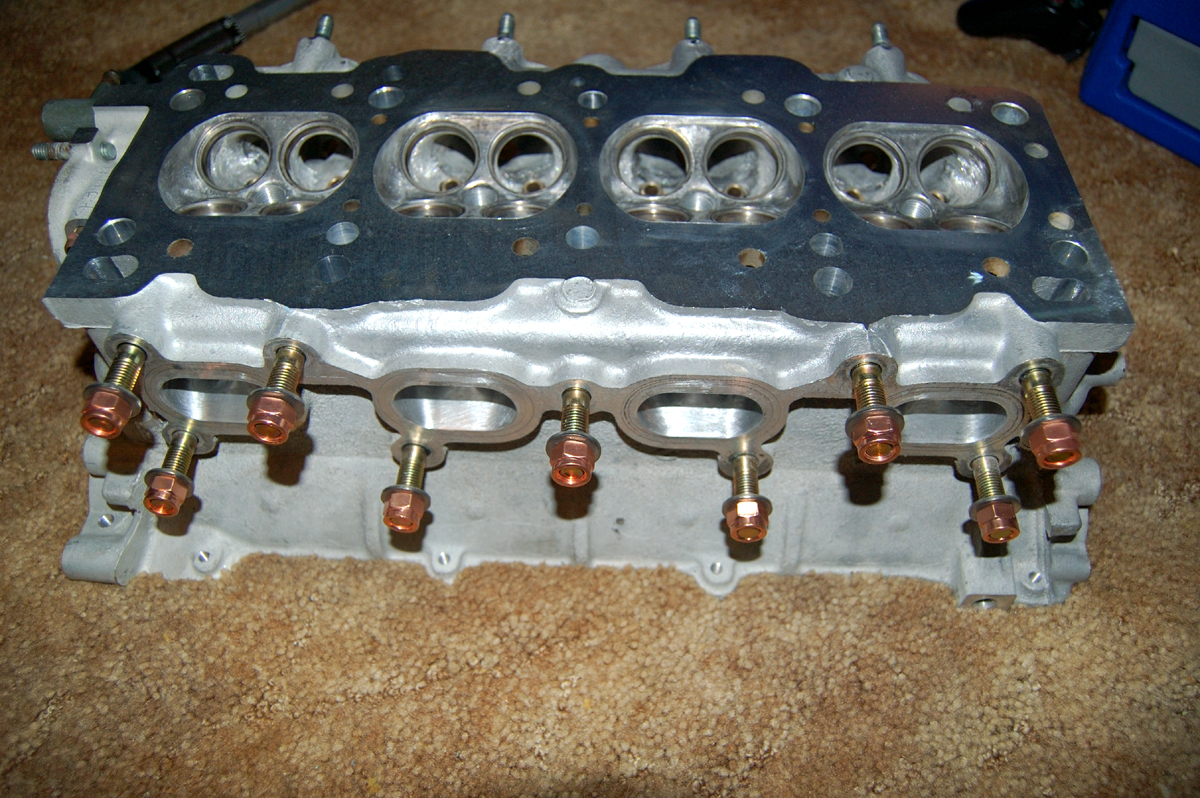
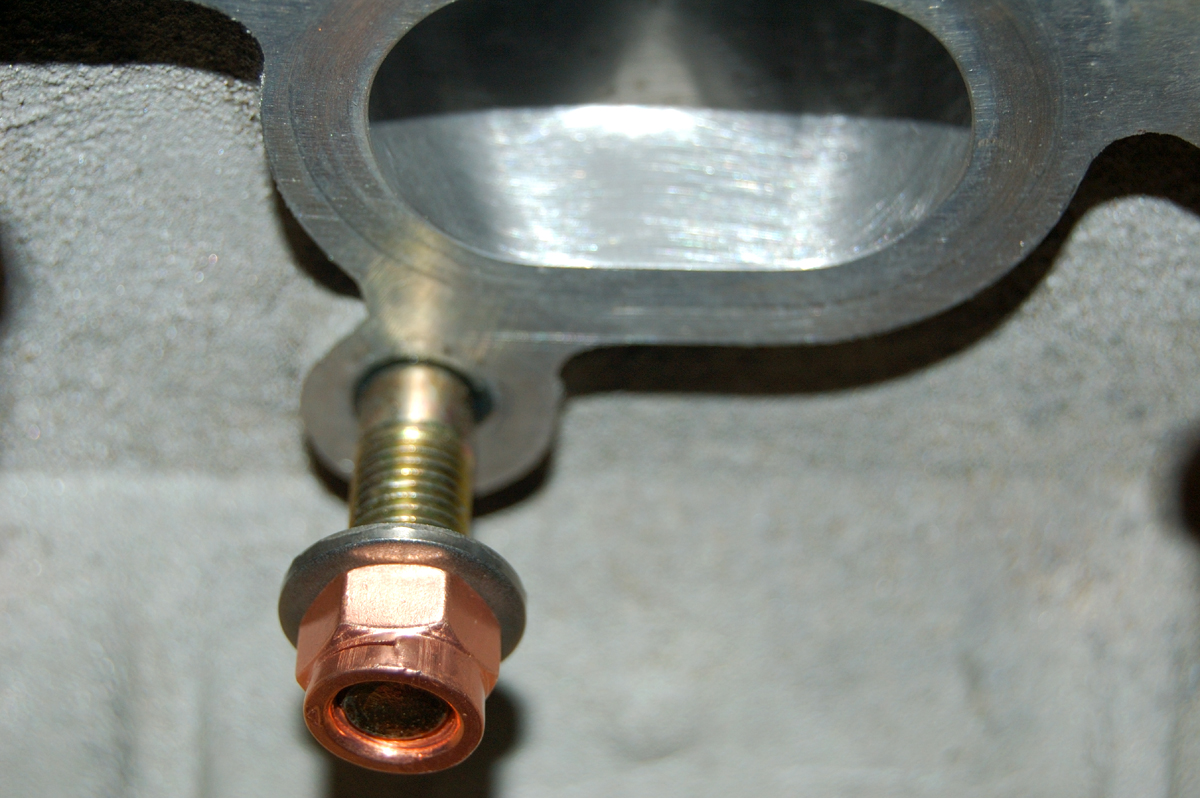
Gonna look killer with the stainless RB header.
Feast your eyes on a proper oil drain fitting. No JB weld or drills and taps here
The head is now cleaner than before. I guess that happens when youve cleaned with several times yourself, and had shops hot tank it twice in under 4 months.
My exhaust ports look terrible after the hot tanking. They looked fairly decent before, but now its looks terrible down inside.
Outer areas still looks good like I remember them.
I guess while I wait for the studs and the dowels, I can touch up the ports a bit more. That mess bothers me.
EDIT:
Added the new exhaust side hardware from MiataRoadster. Looks good on that freshly cleaned head.
Gonna look killer with the stainless RB header.
Last edited by NA6C-Guy; Jan 6, 2009 at 04:35 AM.
Reply
0
0
Thread Starter
Elite Member
iTrader: (1)
Joined: Feb 2008
Posts: 7,930
Total Cats: 44
From: Birmingham Alabama
And while Im at it, a question/thought. Correct me if Im wrong (as Im sure you will). Not only by shaving a head do you increase compression (of course), but you retard timing. By retarding timing, shouldnt "most" Miata's pick up some upper range power? Seems like I recall hearing that people with adjustable cam gears typically retard the cam timing. Maybe Im completely *** backwards on this. I have taken about ~.015-.022 off my head(in two machining sessions), which is probably good for maybe only 1/4 of a point on the compression. One tooth on the cam gear is what, 12 degrees? So .020 off should be maybe 1/2 degree of timing change. So probably not enough timing change to have any effect on power, but the compression will for sure help with power across the range. With my current plans of turbo, the little bit of extra compression shouldnt hurt anything at all. A little extra power out of boost and in the lower rpm's.
Reply
0
0

I just posted an update to a problem I had last summer on a junkyard motor I bought. Maybe it will answer your oil ring question.
https://www.miataturbo.net/forum/t23655/
https://www.miataturbo.net/forum/t23655/
Reply
0
0
Thread Starter
Elite Member
iTrader: (1)
Joined: Feb 2008
Posts: 7,930
Total Cats: 44
From: Birmingham Alabama
Thanks for updating for me, I hope thats my problem too. Did you have any engine stumbling under load? Along with the same smoke as you describe, my car would spit and spudder under load, but cruising it seemed to smooth out and smoke would go away. I had by far the most smoke with no load, which turned the eshaust into a smoke machine. Thanks again, this gives me new hope.
Reply
0
0
No stumbling under load, that is when it ran best as the motor was making no vacuum to pull the oil past the rings. Under high vacuum (cruising), it would pull oil up past the rings and into the combustion chamber, then out the tailpipe.
Reply
0
0
Thread Starter
Elite Member
iTrader: (1)
Joined: Feb 2008
Posts: 7,930
Total Cats: 44
From: Birmingham Alabama
Actually, yeah, I dont know why I said that. It didnt have a problem if I went over maybe 30% throttle, and was above 3500-4500 rpm. At higher rpm and higher load it would clear up and pull like a bastard, but cruising it would stumble. I could go heavy throttle and clear it up, then go back to cruise at 3000rpm and within 10 seconds or so of cruise it would start to stumble again and I would have to get back on the throttle, which would sometimes cause it to bog and nearly die. So it wasnt running well at all. Maybe it was a combination of things, rings and a vacuum leak, or something like that. I hope this time it fired right up and runs like a champ.
Ordered my missing shim from Trussville. I hope they understood what I meant, because they asked me several times exactly which part it was. First they asked if I meant the retainer on top of the spring, then one of the half moon keeper keys, then valve seal... NO The shim on the bottom of the spring between the spring and the seat on the head. I ordered 4 since they were like $1.50 each, incase I drop another. Had to wait 5 days for my 2x $2.45 dowels, and ordered my 4 shims next day from Mazda for an extra $.50. Should maybe be called to pick both up Thursday or Friday. Its always the small things that **** me up!
Ordered my missing shim from Trussville. I hope they understood what I meant, because they asked me several times exactly which part it was. First they asked if I meant the retainer on top of the spring, then one of the half moon keeper keys, then valve seal... NO The shim on the bottom of the spring between the spring and the seat on the head. I ordered 4 since they were like $1.50 each, incase I drop another. Had to wait 5 days for my 2x $2.45 dowels, and ordered my 4 shims next day from Mazda for an extra $.50. Should maybe be called to pick both up Thursday or Friday. Its always the small things that **** me up!
Reply
0
0
Thread Starter
Elite Member
iTrader: (1)
Joined: Feb 2008
Posts: 7,930
Total Cats: 44
From: Birmingham Alabama
A lighter note of the build. Here is some of my mess:
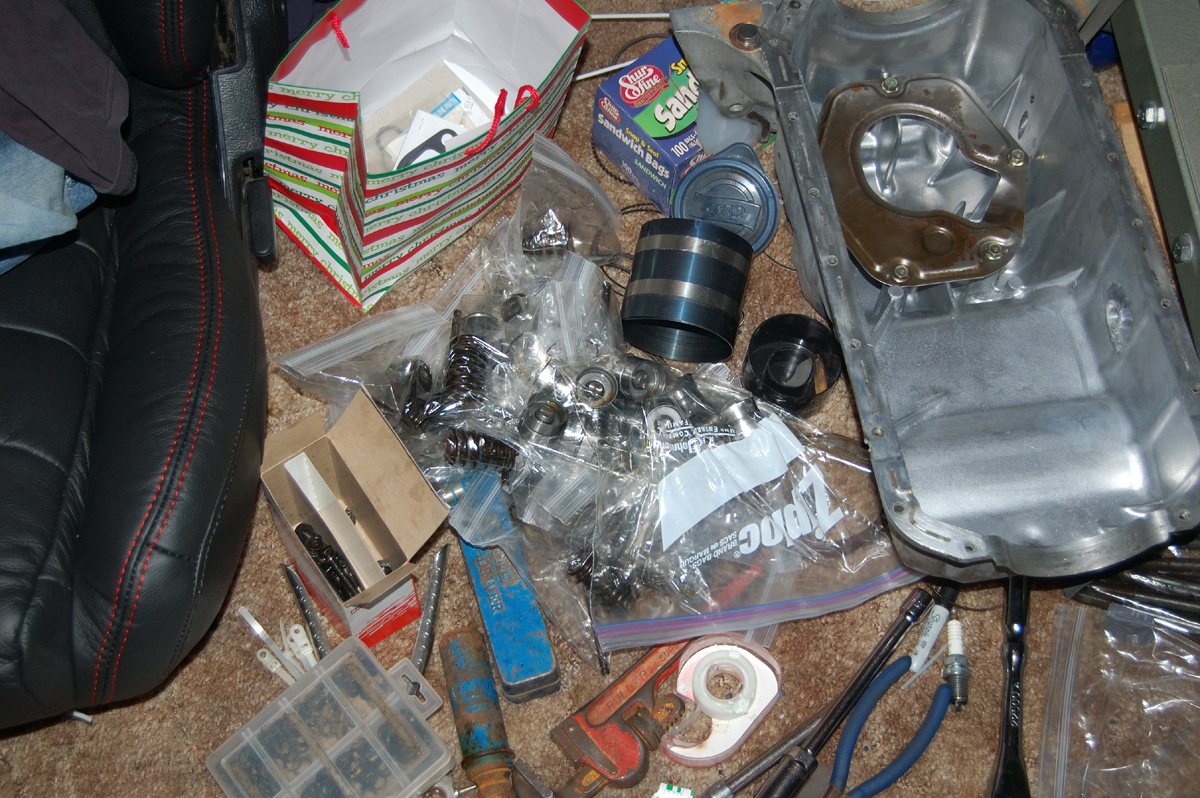
Have everything you need! Scotch tape, pipe wrench, Sharpie, Sandwich Bags, Zip ties, ring compressor, impact screw driver, pliers and other random hand tools. Boxes for the rings used as a storage box for the cam cap bolts. Tons of zip lock bags hold valve assemblies and one big bag full of nearly new HLA's still filled with oil. That old christmas bag is now used to hold new parts I got at Trussville the other day. Scary thing, is thats just maybe 1/5 of that room, the other 4/5 looks nearly the same I guess that happens when a room gets transfered to a full time engine rebuild shop, with limited or no storage.
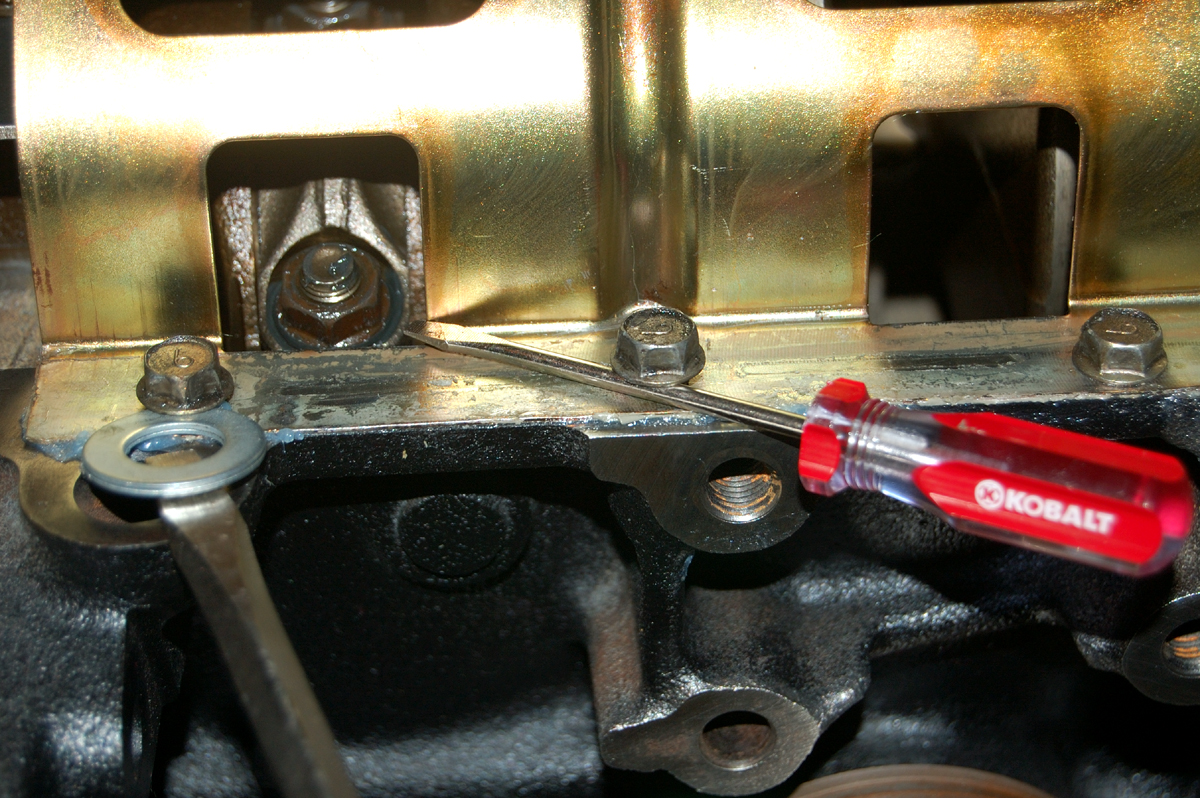
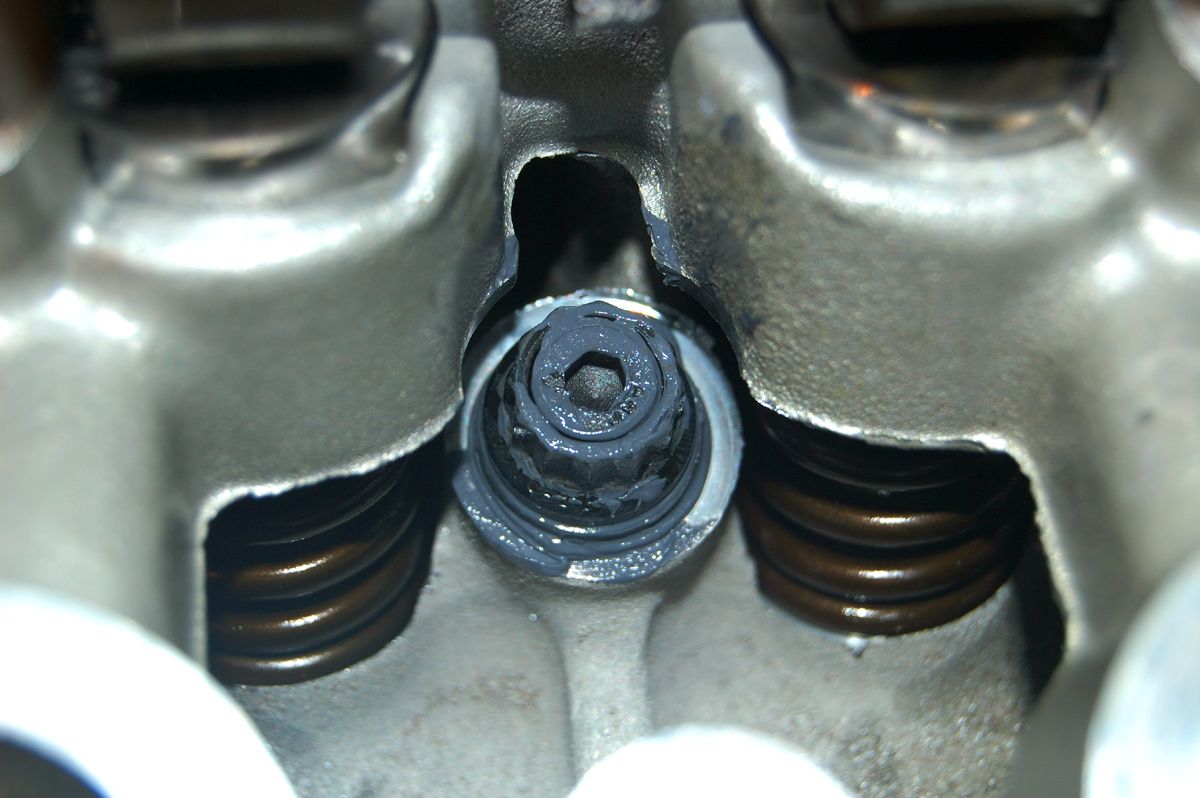
Also having a time getting the damn windage tray mated to the block. I didnt want to have to rush myself by laying a bead of sealant under the tray, line it up, drop the pan on, run another neat bead, get it all lined up, start all of the bolts, ect. all while trying to beat the short dry time. So now Im just sealing the tray to the block, then I can just worry about the pan and end seals at once. Creative use of some washers laying near by, and a screw driver or two. Those two bottom out into casting, the other ones go all the way through.
Just some random stuff before I turn in for the night/morning.
Have everything you need! Scotch tape, pipe wrench, Sharpie, Sandwich Bags, Zip ties, ring compressor, impact screw driver, pliers and other random hand tools. Boxes for the rings used as a storage box for the cam cap bolts. Tons of zip lock bags hold valve assemblies and one big bag full of nearly new HLA's still filled with oil. That old christmas bag is now used to hold new parts I got at Trussville the other day. Scary thing, is thats just maybe 1/5 of that room, the other 4/5 looks nearly the same
I guess that happens when a room gets transfered to a full time engine rebuild shop, with limited or no storage.Also having a time getting the damn windage tray mated to the block. I didnt want to have to rush myself by laying a bead of sealant under the tray, line it up, drop the pan on, run another neat bead, get it all lined up, start all of the bolts, ect. all while trying to beat the short dry time. So now Im just sealing the tray to the block, then I can just worry about the pan and end seals at once. Creative use of some washers laying near by, and a screw driver or two. Those two bottom out into casting, the other ones go all the way through.
Just some random stuff before I turn in for the night/morning.
Reply
0
0
Thread Starter
Elite Member
iTrader: (1)
Joined: Feb 2008
Posts: 7,930
Total Cats: 44
From: Birmingham Alabama
Question. When installing the ARP studs into the block, does the block end of the studs get any moly lube? Or just the end that the nuts will go onto? Says install them into the block hand tight only, so I guess that is what I will do unless someone knows otherwise. Its VERY dry while installing. Im assuming they just didnt say becausemost would assume thats how to do it anyway.
Reply
0
0
Thread Starter
Elite Member
iTrader: (1)
Joined: Feb 2008
Posts: 7,930
Total Cats: 44
From: Birmingham Alabama
Just some pictures. Too tired to get any real work done tonight. Been all week with maybe 6-8 hours of sleep. Need to get that damn head back together but Ive been ignoring it hoping the engine fairy would pay me a visit in the night and do it for me. Having done it so many times, Im getting about sick of seeing it. Not looking forward to it at all.
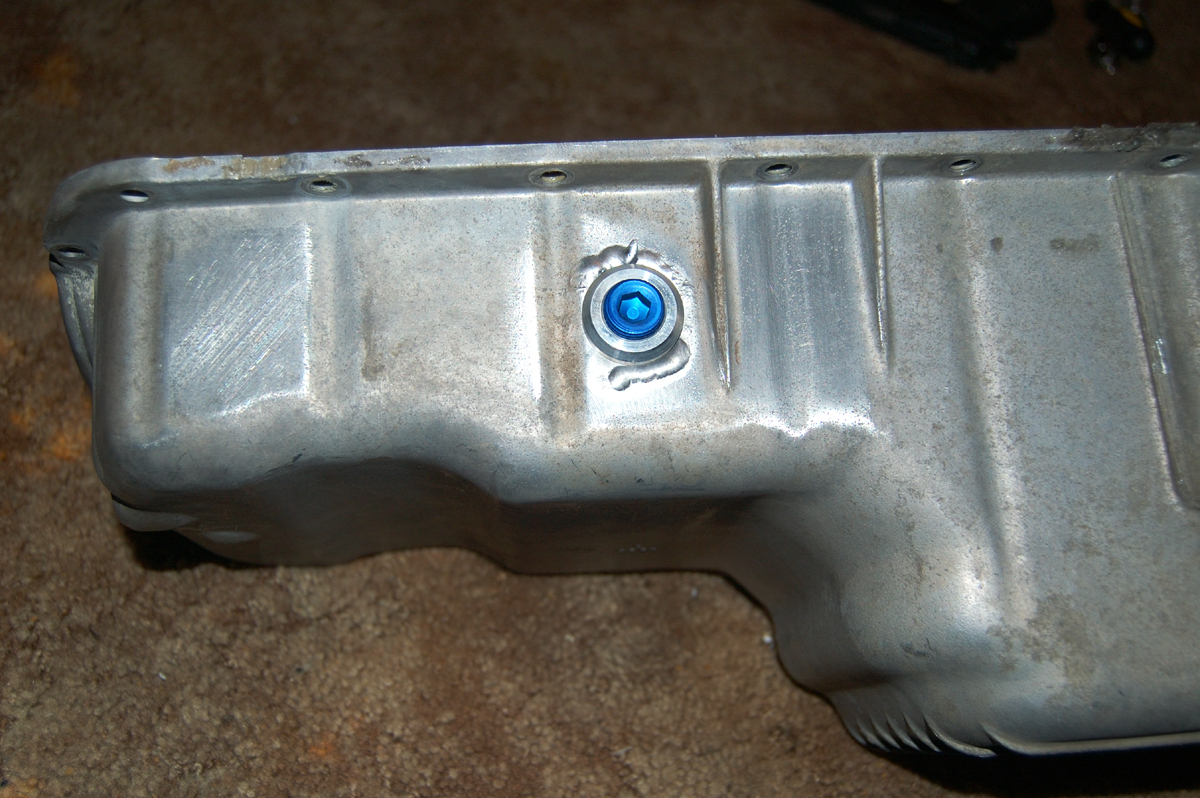
How does this return location look? I think it should clear my a/c bracket and the engine mount just fine.
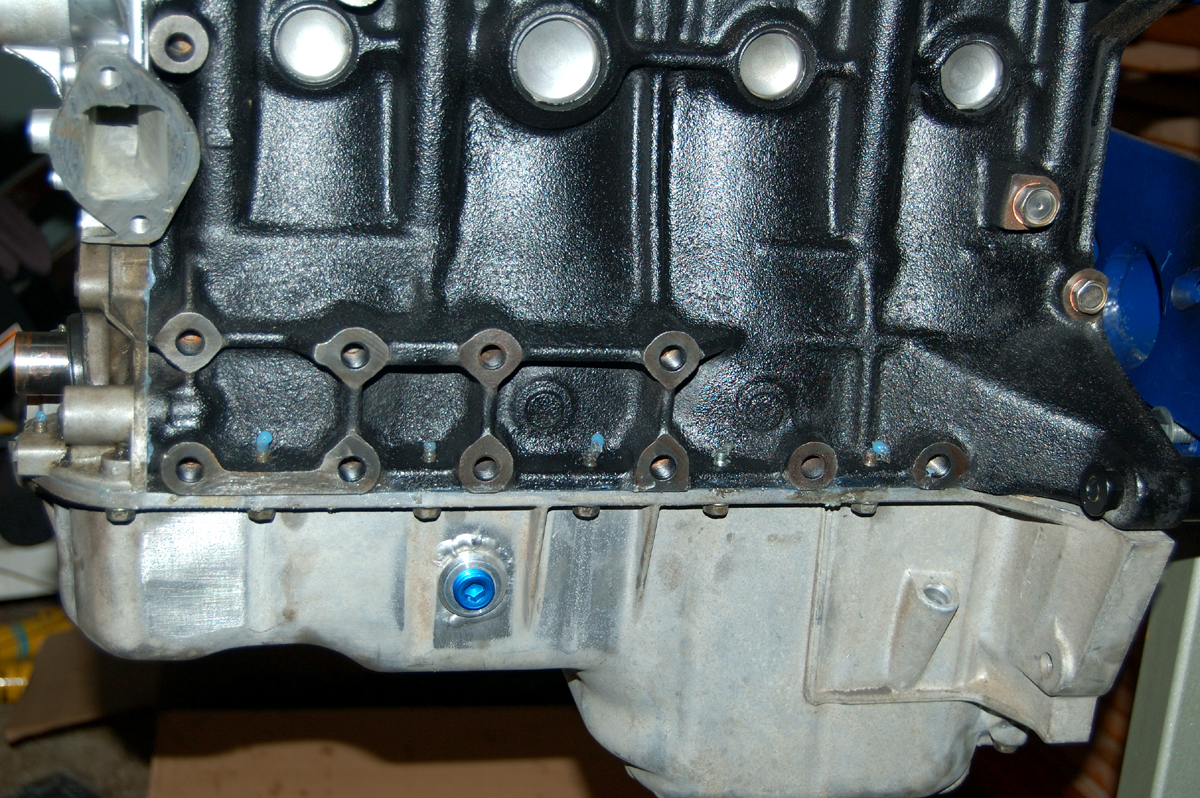
Wish I had maybe taken some more time and cleaned up and painted my oil pan, and cleaned up the oil pump housing. Looks bad having only those two things dirty. Thats my typical style, get bored with cleaning and slack towards the end and always regret it.
How does this return location look? I think it should clear my a/c bracket and the engine mount just fine.
Wish I had maybe taken some more time and cleaned up and painted my oil pan, and cleaned up the oil pump housing. Looks bad having only those two things dirty. Thats my typical style, get bored with cleaning and slack towards the end and always regret it.
Reply
0
0
Thread Starter
Elite Member
iTrader: (1)
Joined: Feb 2008
Posts: 7,930
Total Cats: 44
From: Birmingham Alabama
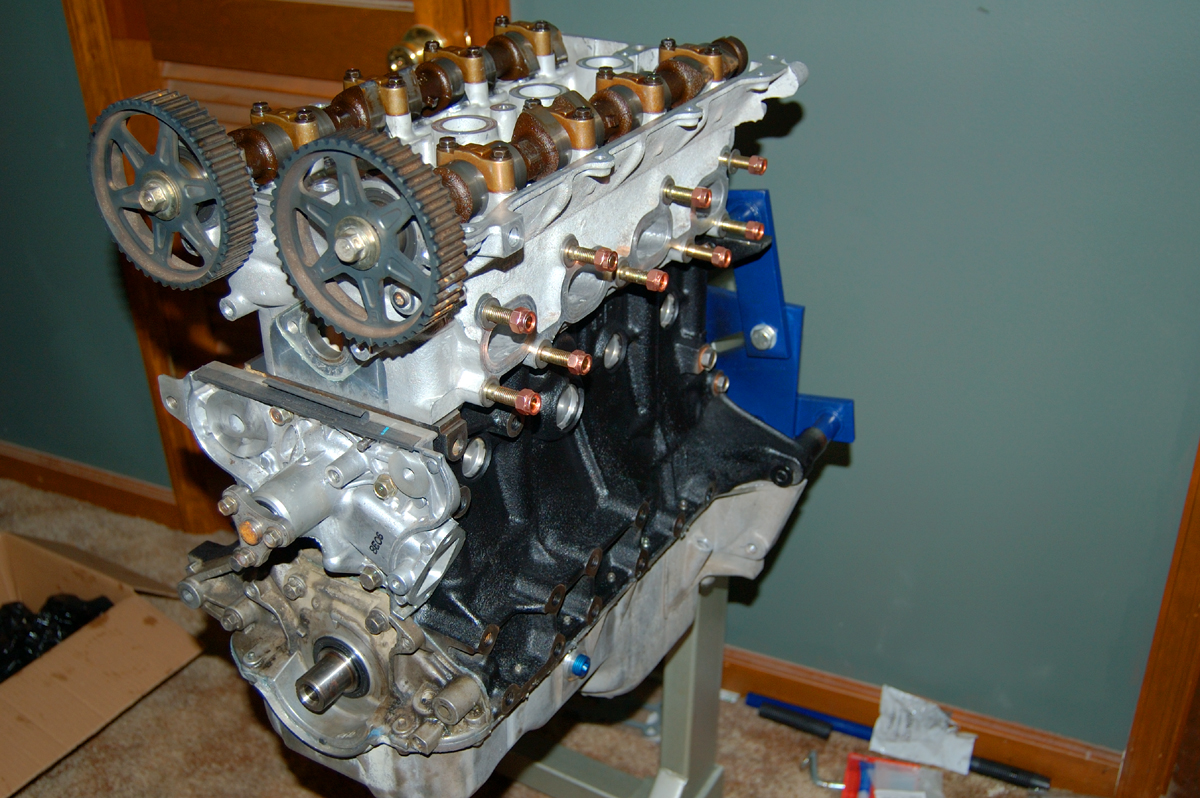
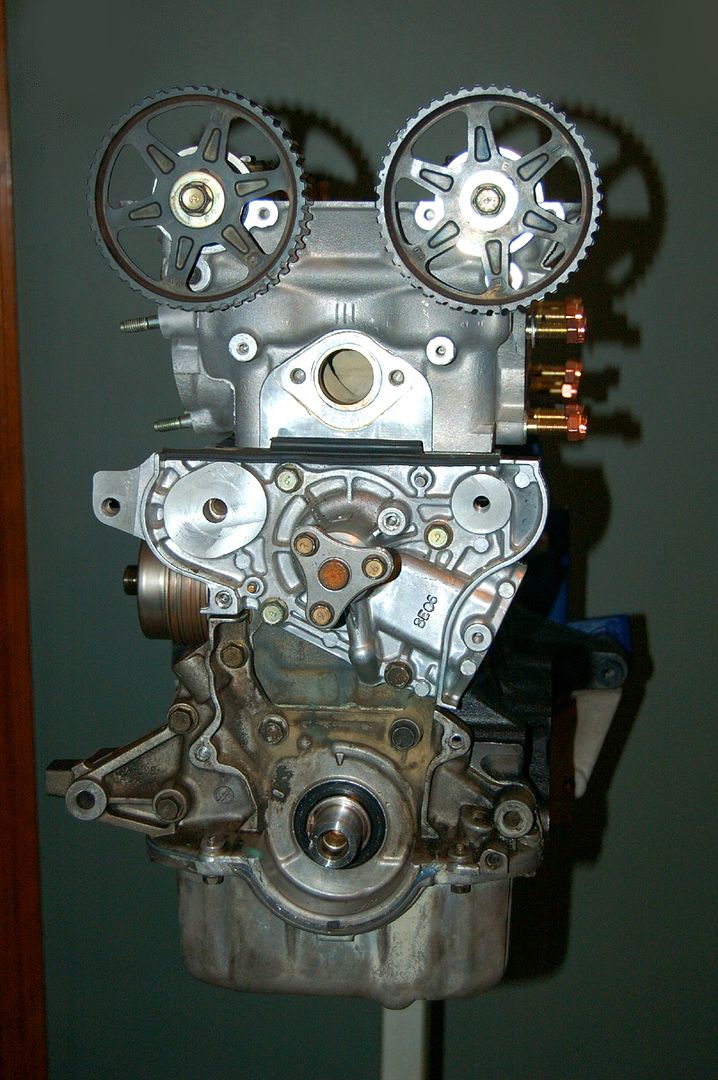
Little bit of progress. Valvetrain finished up, still need to bolt up the front and rear water neck and the rear timing cover to finish up the head. Head is already bolted to the block though. I will do the rest of the little stuff tomarrow, along with installing the timing belt, and the other little things. Dont want to load it down too much since I still have to get it down 2 seperate sets of stairs. Smart me, work on the engine upstairs.
Im beginning to think my old Craftsman click type torque wrench was way off, because using my new torque wrench to the same torque on the head bolts, they seem quite a bit tighter. Id guess my old wrench may have been 10-15% under. Or it could just be my imagination. I lubed the hell out of the studs, washers and nuts before torqueing them. Made a mess, but at least I know there were no dry spots.
Smart me, work on the engine upstairs.Im beginning to think my old Craftsman click type torque wrench was way off, because using my new torque wrench to the same torque on the head bolts, they seem quite a bit tighter. Id guess my old wrench may have been 10-15% under. Or it could just be my imagination. I lubed the hell out of the studs, washers and nuts before torqueing them. Made a mess, but at least I know there were no dry spots.
Reply
0
0
Thread Starter
Elite Member
iTrader: (1)
Joined: Feb 2008
Posts: 7,930
Total Cats: 44
From: Birmingham Alabama
Yeah I know, its killing me seeing all of you people doing your turbo installs lately, and reading all of the threads on them. Hopefully once its back on the road and running reliably again, which I hope is soon, I will first install the MSPnP. A few small items between now and then, but then the next thing to come I guess will be the turbo. Probably going to do the BEGi S2. Still cant decide between the 2554 or the 2560. I dont plan on ever running more than 250whp, so the 2554 would probably be enough, but would be pushing efficiency at those levels.
Either way, I hope to see a turbo within 6 months. With an extremely planned out budget (which never seems to work, always some little thing here and there I have to have), I should be able to afford it in 5 months of saving from now, but I know thats only best case scenario. So 6 or 7 months to be safe. Which SUCKS! I want to go turbo right now so bad, but dont want to take out a loan or sell any other cars for it. Anybody want to take some RX7's off my hands?
Either way, I hope to see a turbo within 6 months. With an extremely planned out budget (which never seems to work, always some little thing here and there I have to have), I should be able to afford it in 5 months of saving from now, but I know thats only best case scenario. So 6 or 7 months to be safe. Which SUCKS! I want to go turbo right now so bad, but dont want to take out a loan or sell any other cars for it. Anybody want to take some RX7's off my hands?
Reply
0
0
Yeah I know, its killing me seeing all of you people doing your turbo installs lately, and reading all of the threads on them. Hopefully once its back on the road and running reliably again, which I hope is soon, I will first install the MSPnP. A few small items between now and then, but then the next thing to come I guess will be the turbo. Probably going to do the BEGi S2. Still cant decide between the 2554 or the 2560. I dont plan on ever running more than 250whp, so the 2554 would probably be enough, but would be pushing efficiency at those levels.
Either way, I hope to see a turbo within 6 months. With an extremely planned out budget (which never seems to work, always some little thing here and there I have to have), I should be able to afford it in 5 months of saving from now, but I know thats only best case scenario. So 6 or 7 months to be safe. Which SUCKS! I want to go turbo right now so bad, but dont want to take out a loan or sell any other cars for it. Anybody want to take some RX7's off my hands?
Either way, I hope to see a turbo within 6 months. With an extremely planned out budget (which never seems to work, always some little thing here and there I have to have), I should be able to afford it in 5 months of saving from now, but I know thats only best case scenario. So 6 or 7 months to be safe. Which SUCKS! I want to go turbo right now so bad, but dont want to take out a loan or sell any other cars for it. Anybody want to take some RX7's off my hands?
My advice is save up and buy someones badass turbo setup in a few months. Seriously, last year I know 5-6 badass setups came up on the forum and were sold for much less than their cost new. Some even sat on the market a few days till someone with the $$$ came in and bought it. Just save up and wait, and I bet a deal will fall in your lap.
Reply
0
0


