When you click on links to various merchants on this site and make a purchase, this can result in this site earning a commission. Affiliate programs and affiliations include, but are not limited to, the eBay Partner Network.
Some pics of the cleanup of other items. Anything I removed, I either cleaned and got powder-coated or painted myself (if powdercoating wasn't a good option)
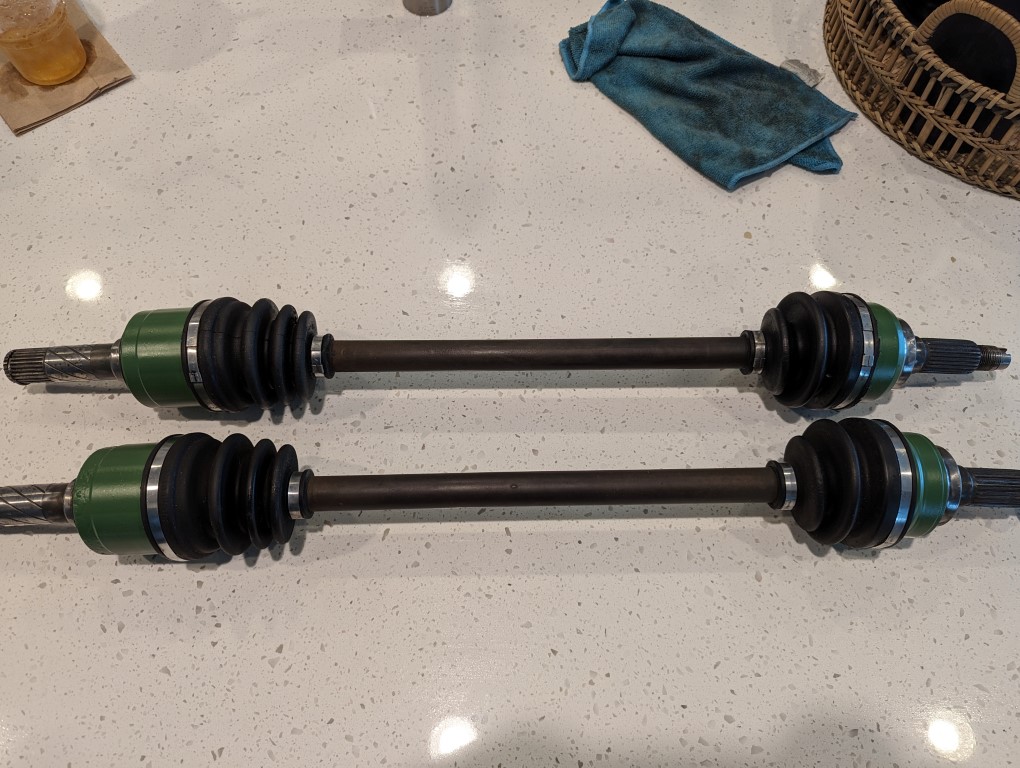
Cleaned and painted the rear axles. Unfortunately for me. the person I bought these off sold me axles from different cars. I was a little upset when I found out. One axle uses the smaller 29mm nut and the other uses 32mm.
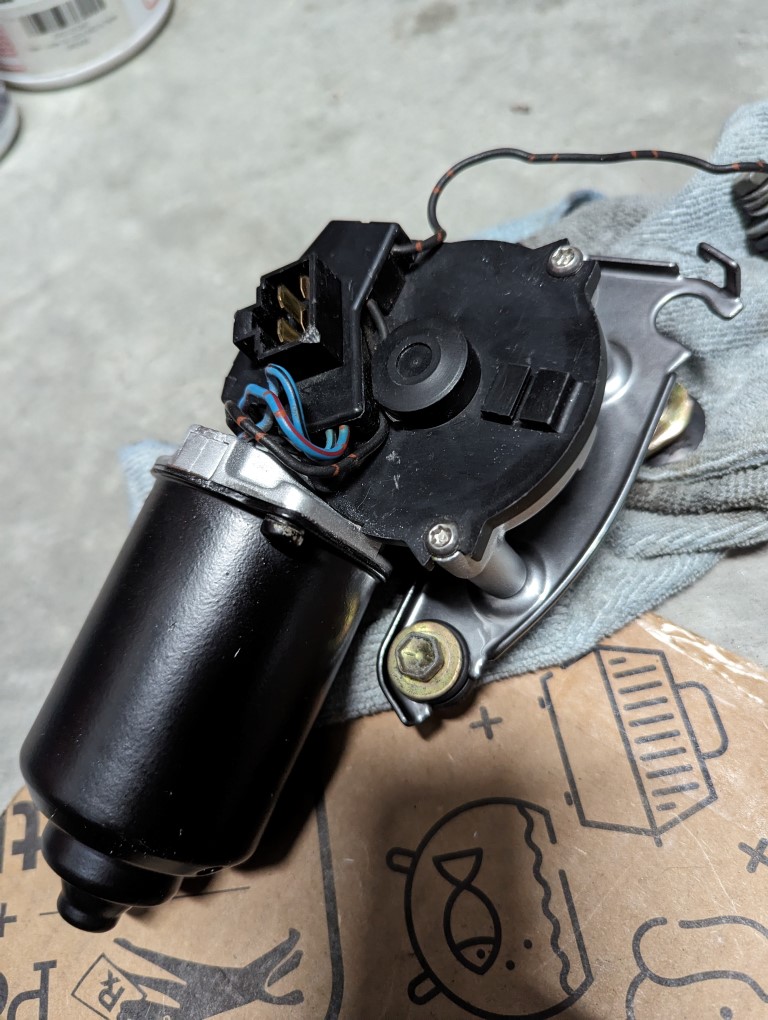
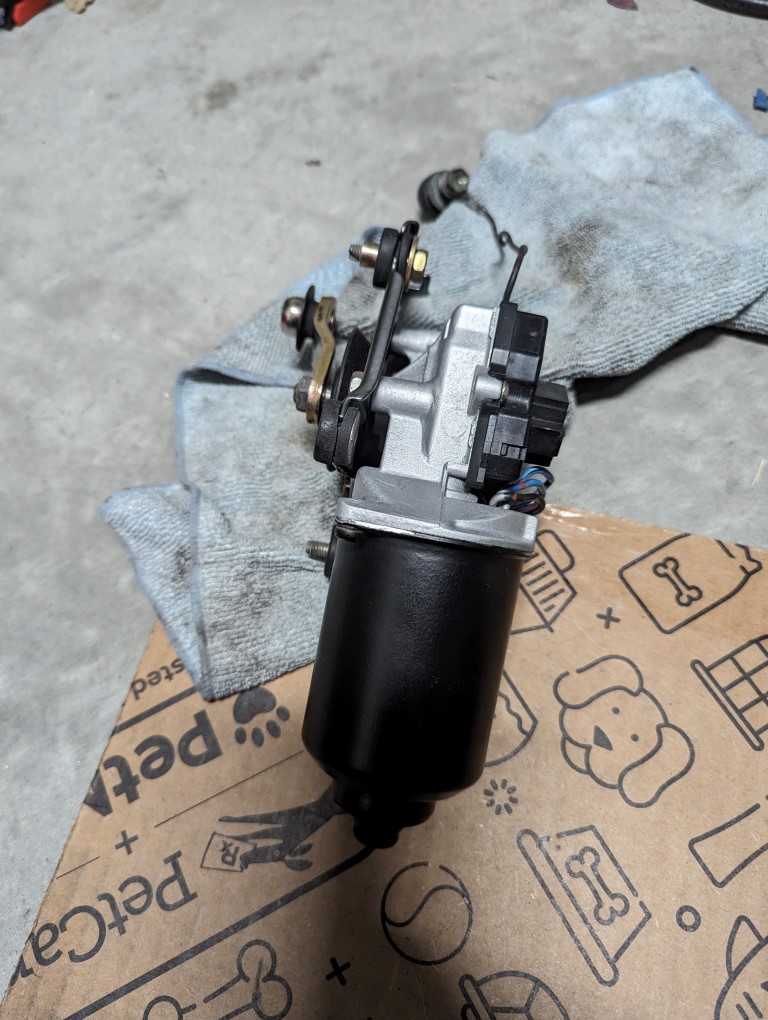
Powdercoated the base for the wiper motor and painted the rest
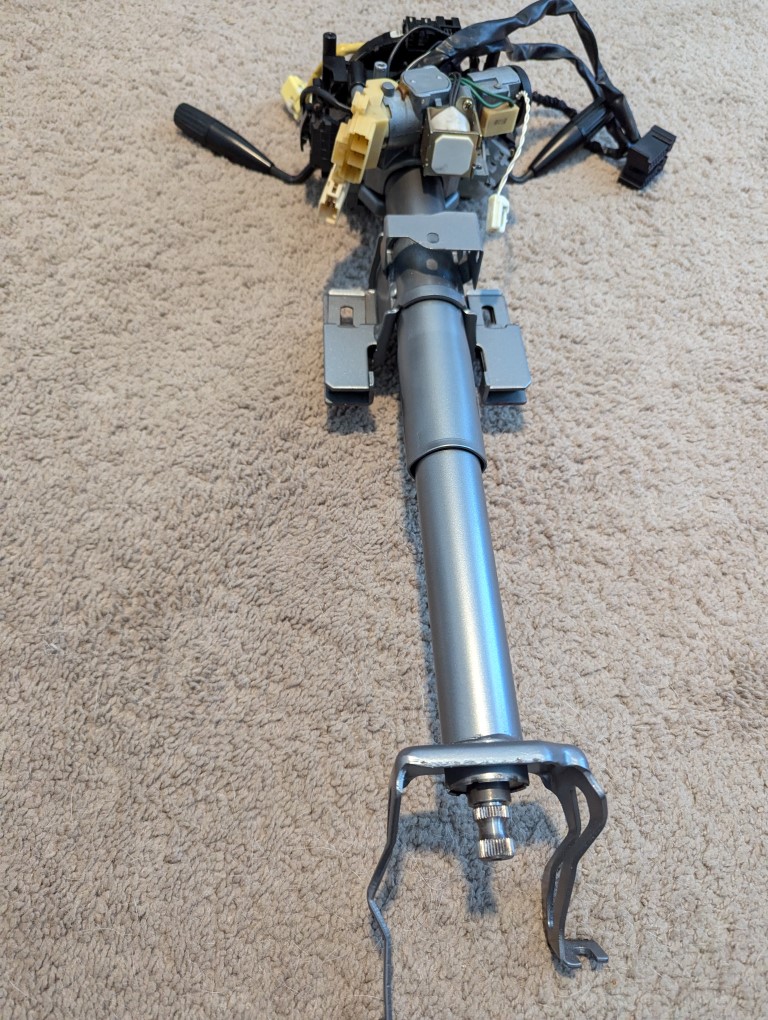
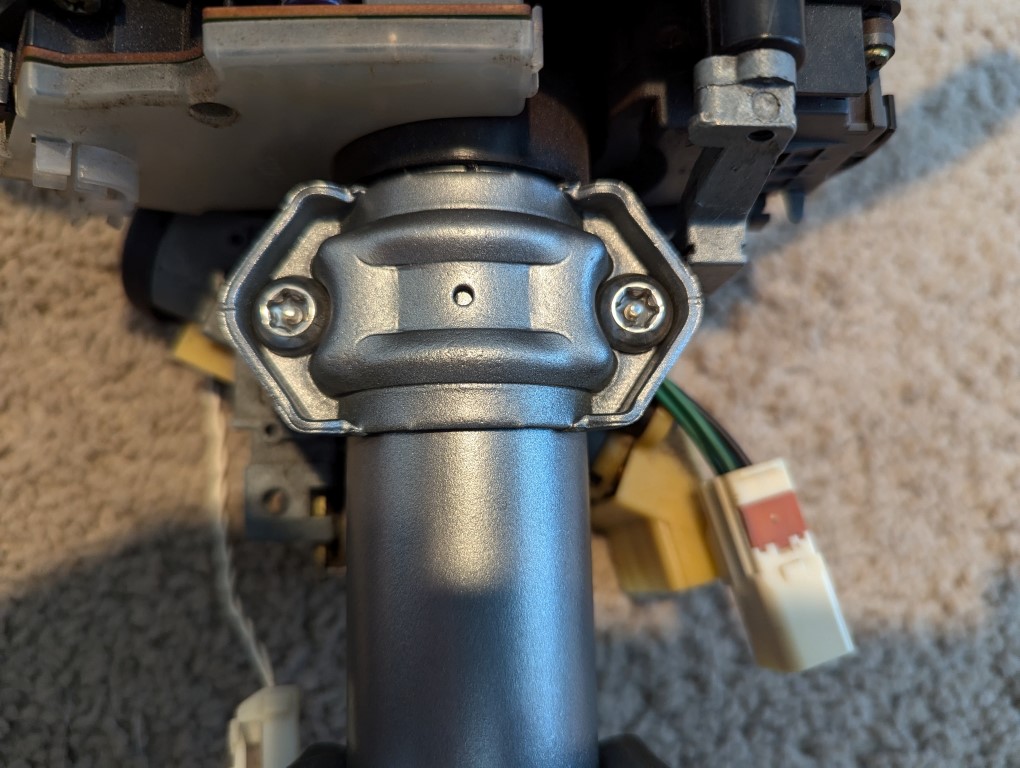
Cleaned and painted the steering column (so much surface rust on interior metal components of this car). Swapped the non-serviceable bolts with torx head bolts.
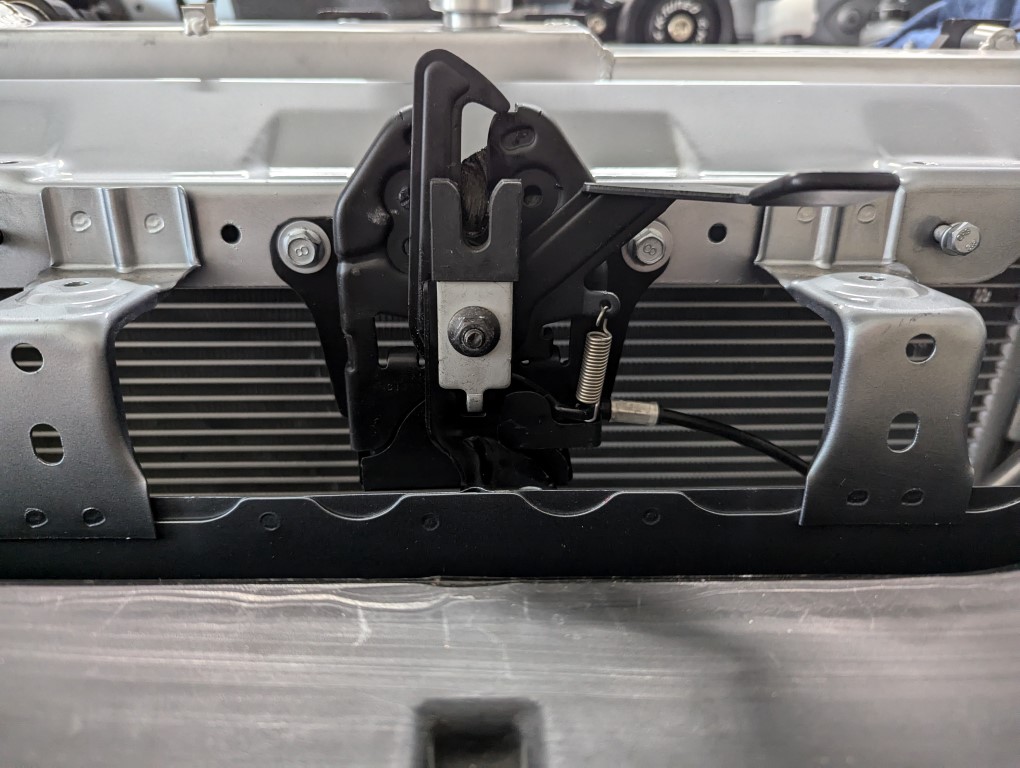
Disassembled, cleaned, painted, then greased my hood latching mechanism
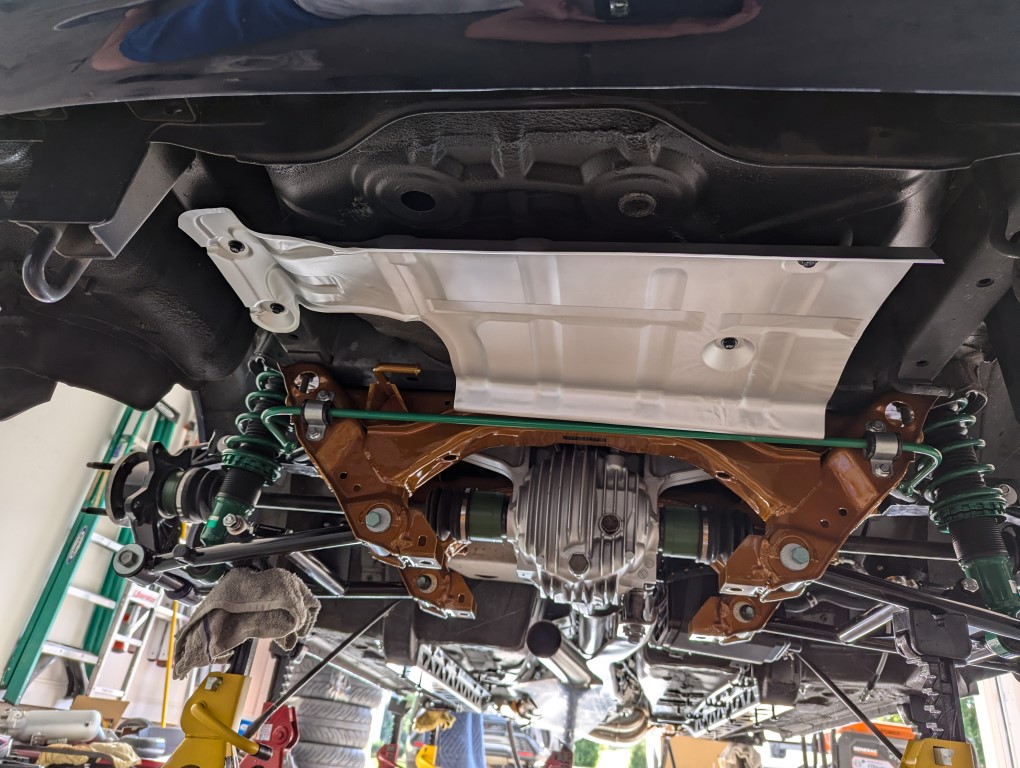
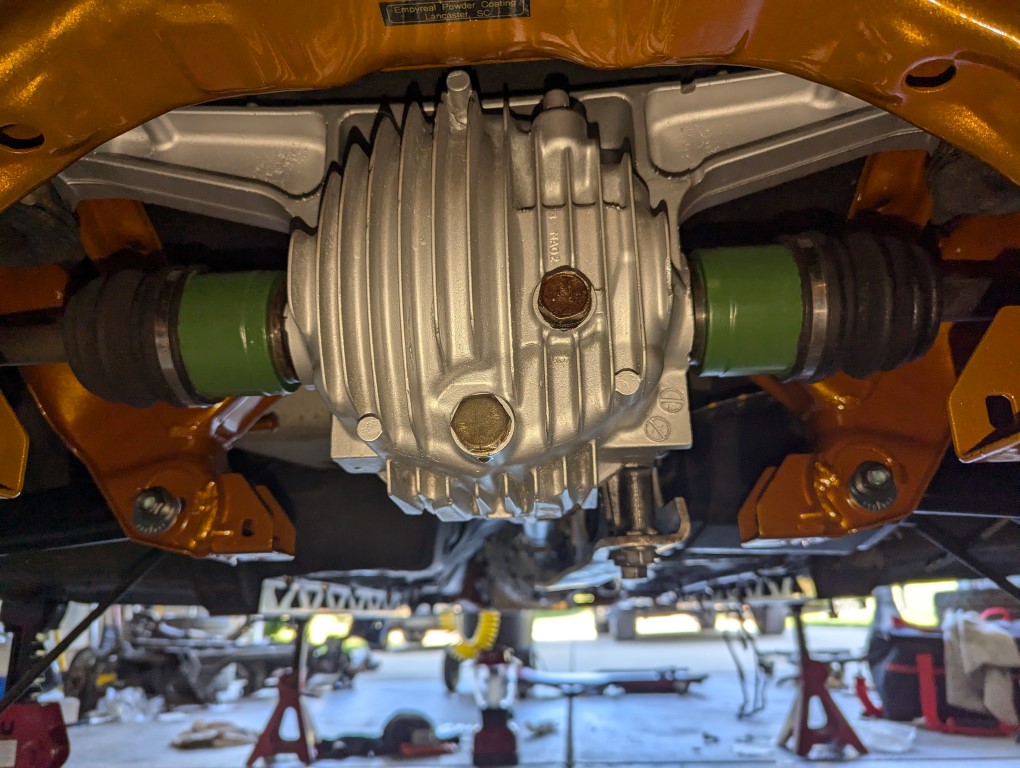
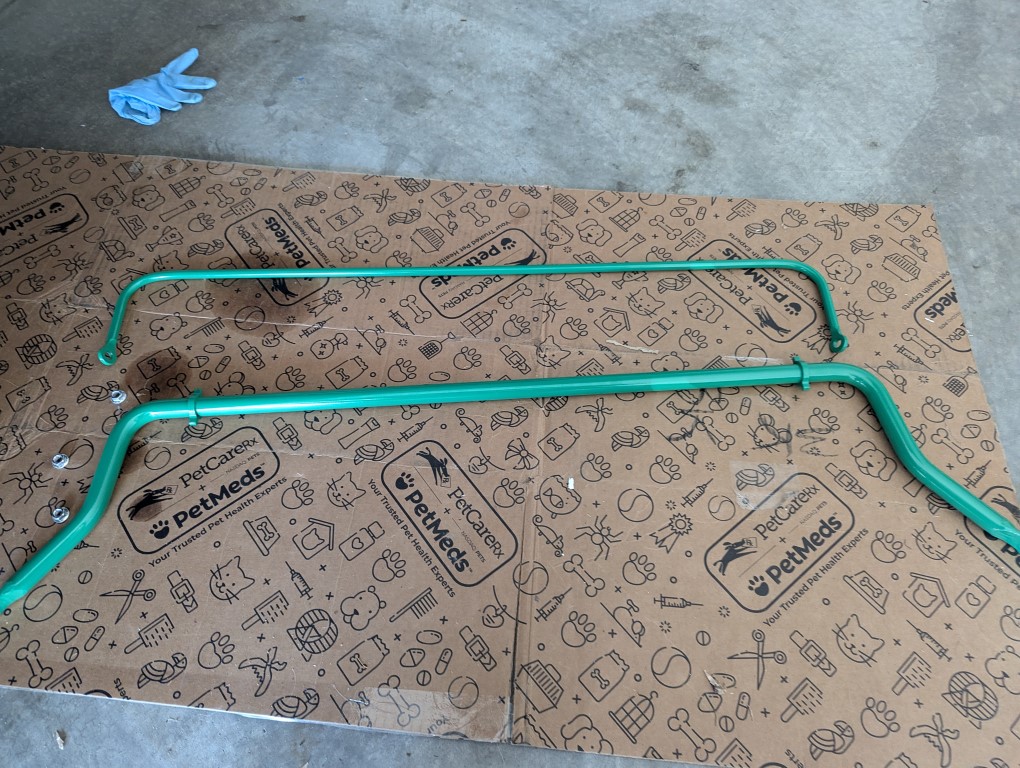
And finally powder coated my oem sway bars in as close a match as I could find to the Wilwood competition green
Pic of the front bar installed with new oem mounting hardware
Last edited by belacyrf; Dec 15, 2024 at 11:37 AM.
I spy some as yet unmentioned parts hanging out! I like the new FM butterfly design.
Regarding the rear brakes - the drop spindles seem to have a second set of caliper mounts. Will you be using the FM dual caliper bracket or the ones built into the spindle?
That axle difference is frustrating. If you're going to track it hard and are using an upgraded rear hub, you may want to change it out for a 32mm nut axle that can take a higher torque load. One of mine was torqued to the lower end of spec and developed some play that caused me issues with brake knockback and popping noise. Bronson now recommends 250ftlbs for that axle nut, higher than the 32mm nut factory spec.
So I planned to use the FM dual caliper bracket, but had clearance issues. The angle of attachment would required a fairly decent amount of notching. And I was really not comfortable with notching the bracket and sacrificing strength. So I ended up ordering a 2nd pair of brackets (for the caliper only and then cutting and clearancing the 2 caliper bracket. So the original dual caliper bracket will only be used for the parking brake and then the standalone bracket for the calipers using the 2nd pair of mounting holes. Someday I'd love to find a way to cleanly mount a hydro hand brake with a locking mechanism to act as a drift lever as well as parking brake. But that will be much further down the road, if ever.
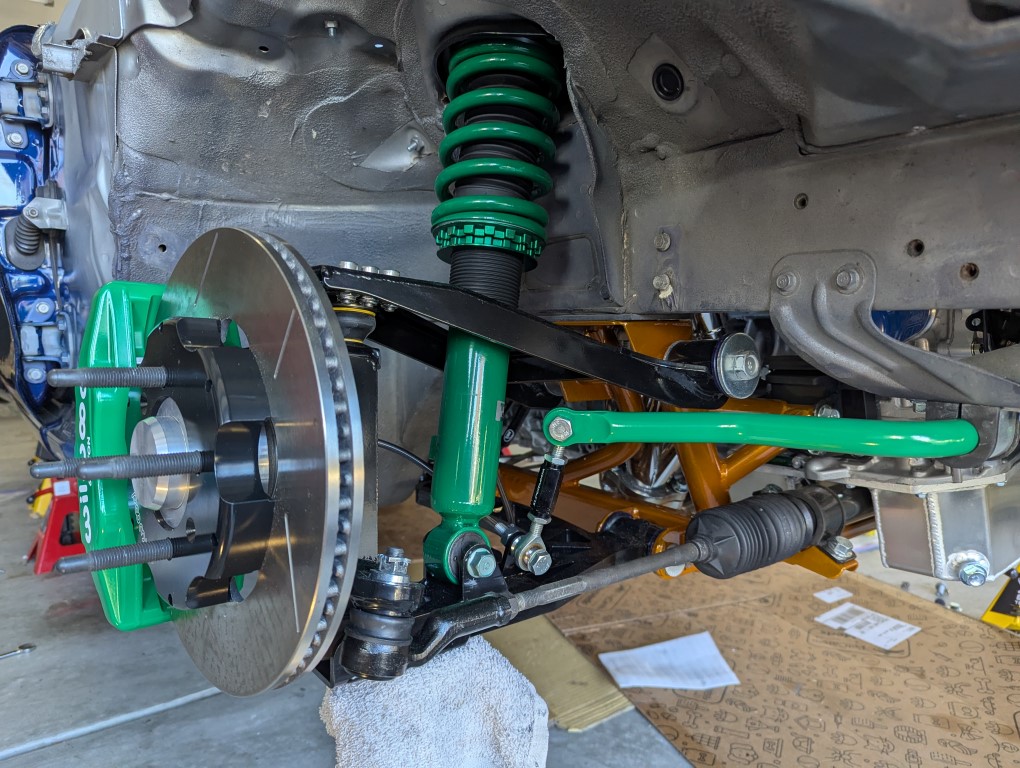
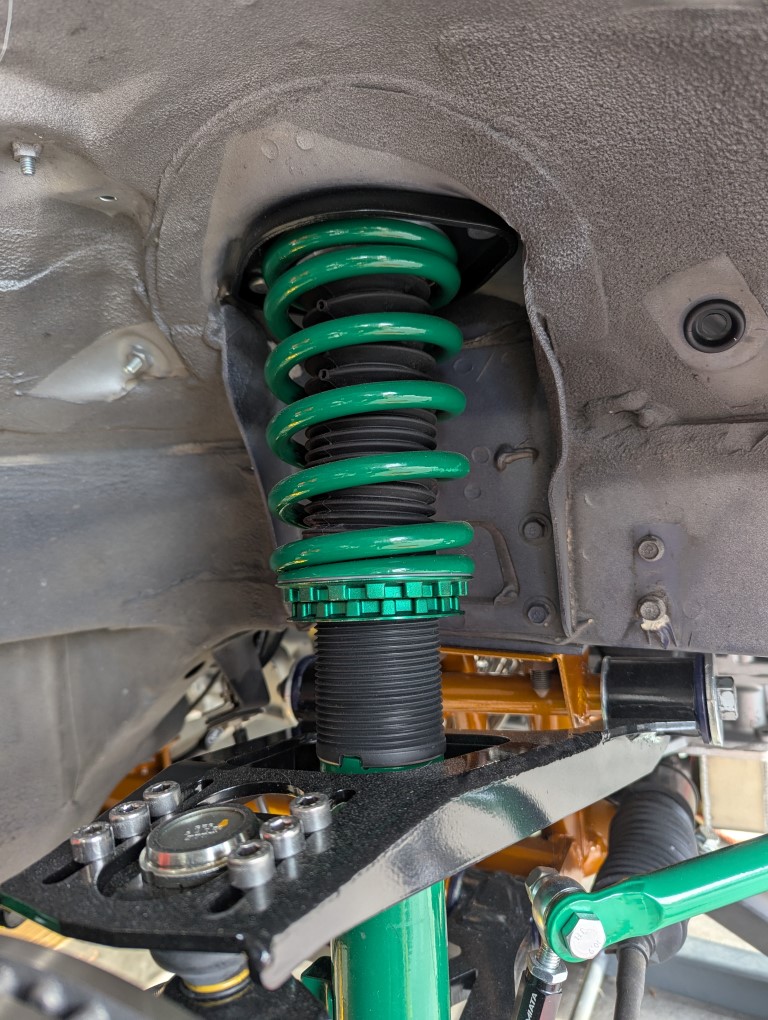
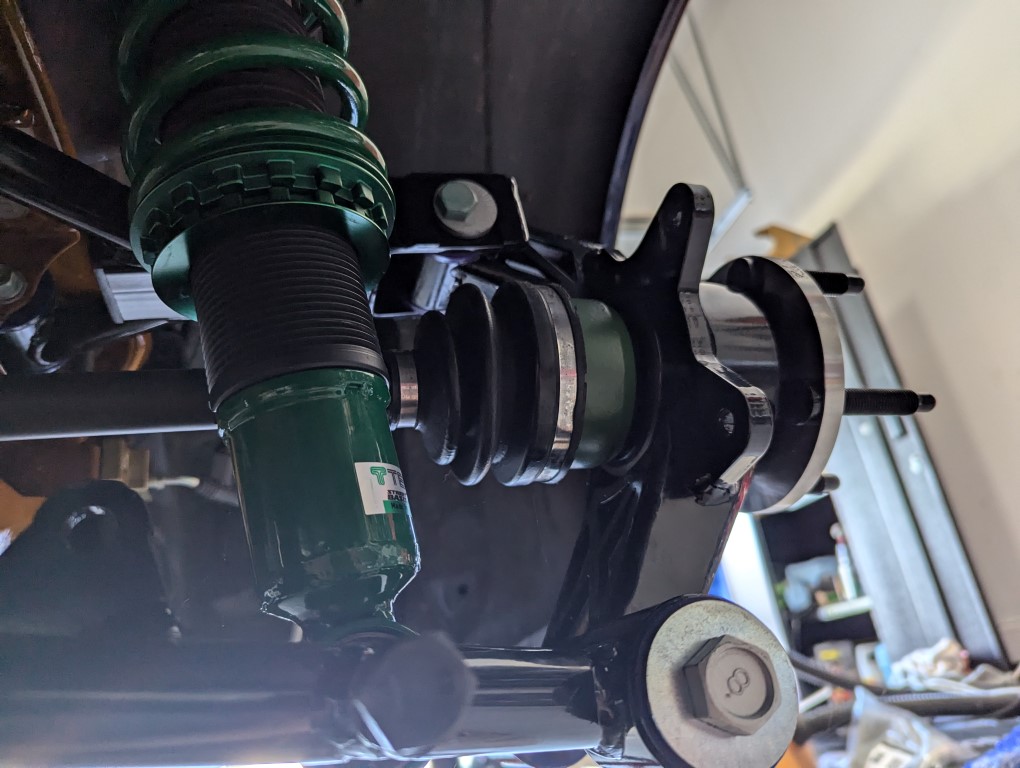
The crazy thing about these knuckles is how much they lower the car all by themselves. I'll have some pics, but let's just say I put the Teins at, what I thought, would be a reasonable height, trying to error on the higher side, and my car looks completely slammed right now. I might have to run them at full height just to make it streetable.
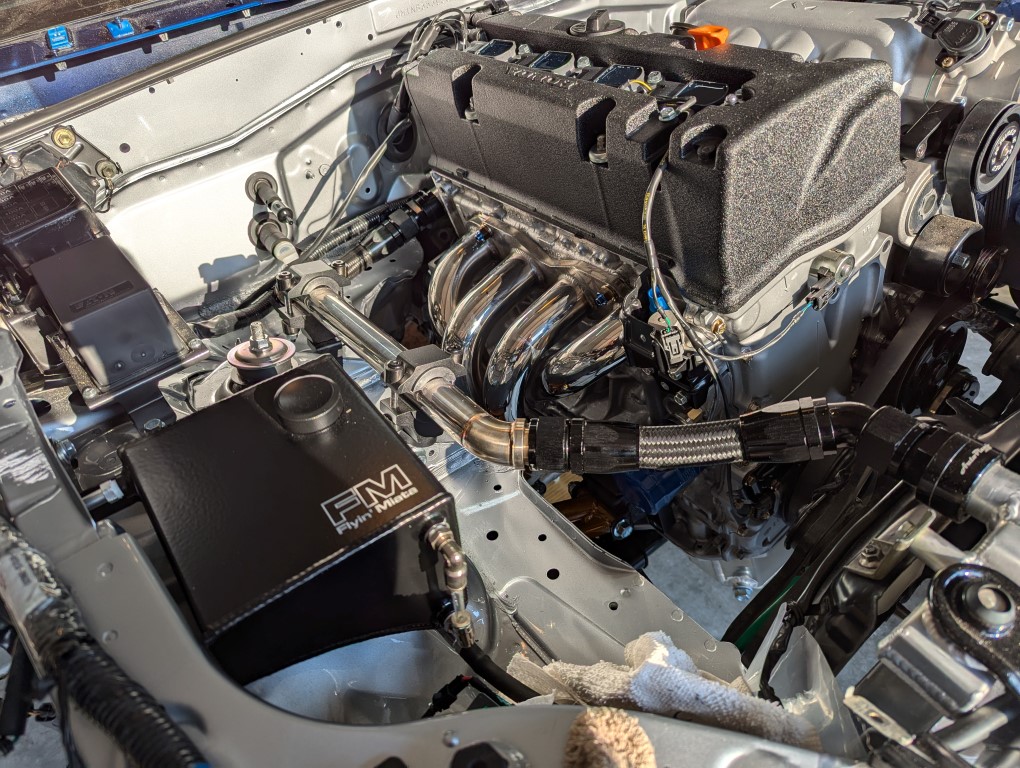
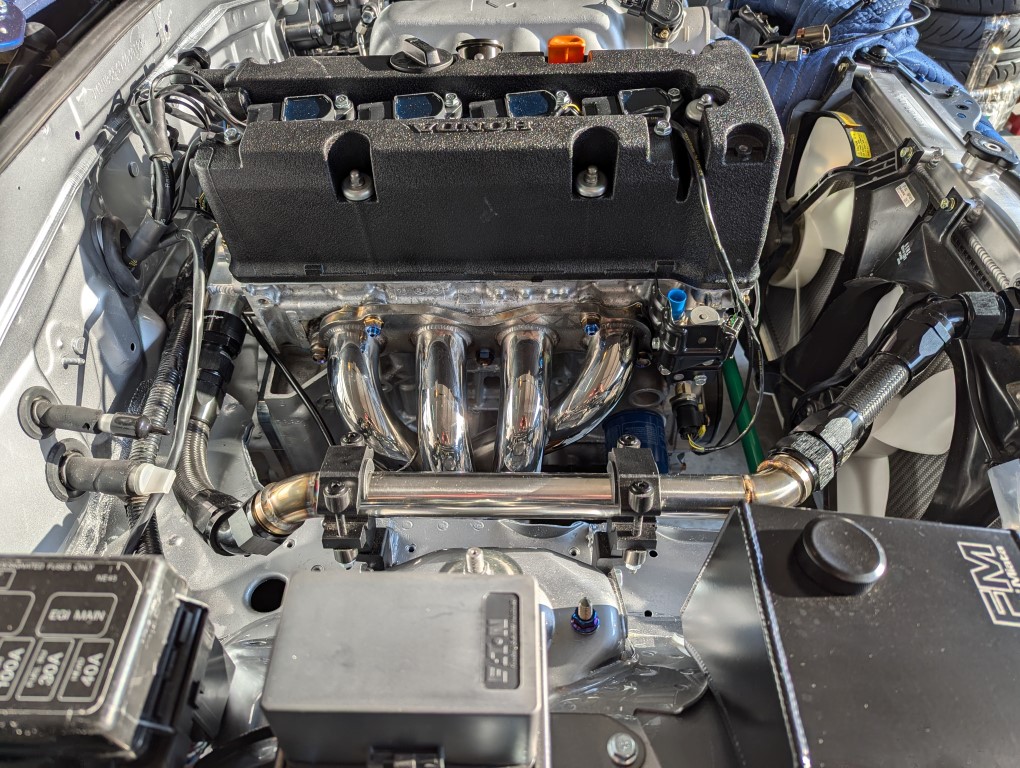
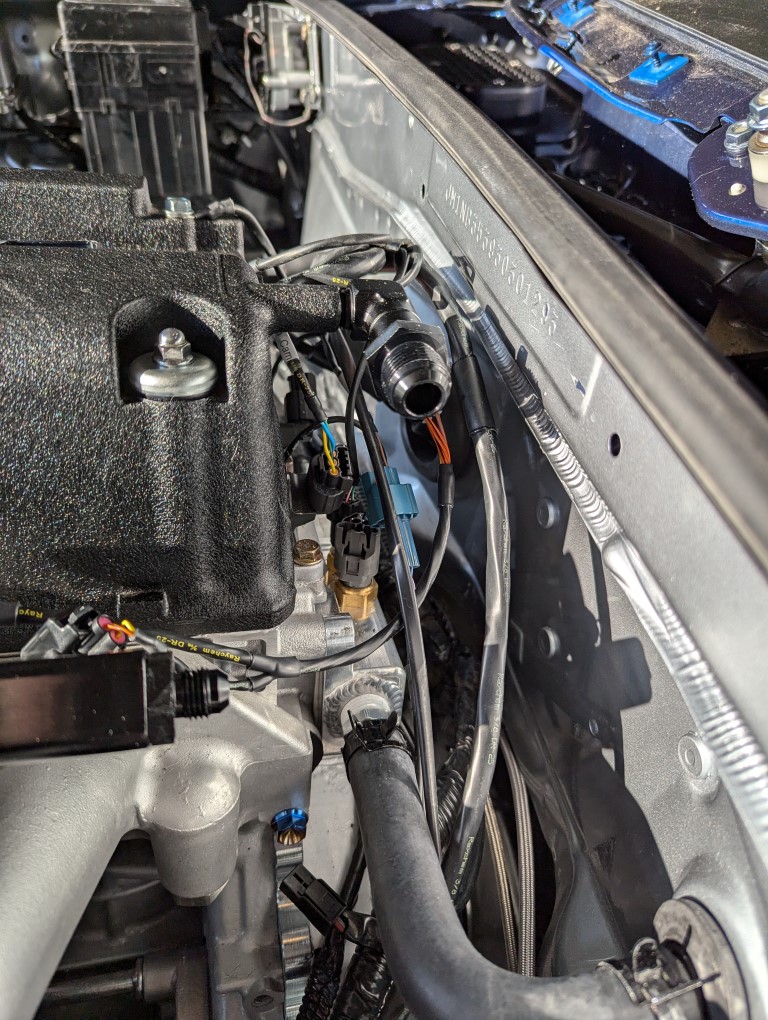
Here are the pics adding the accessories and some wiring work.
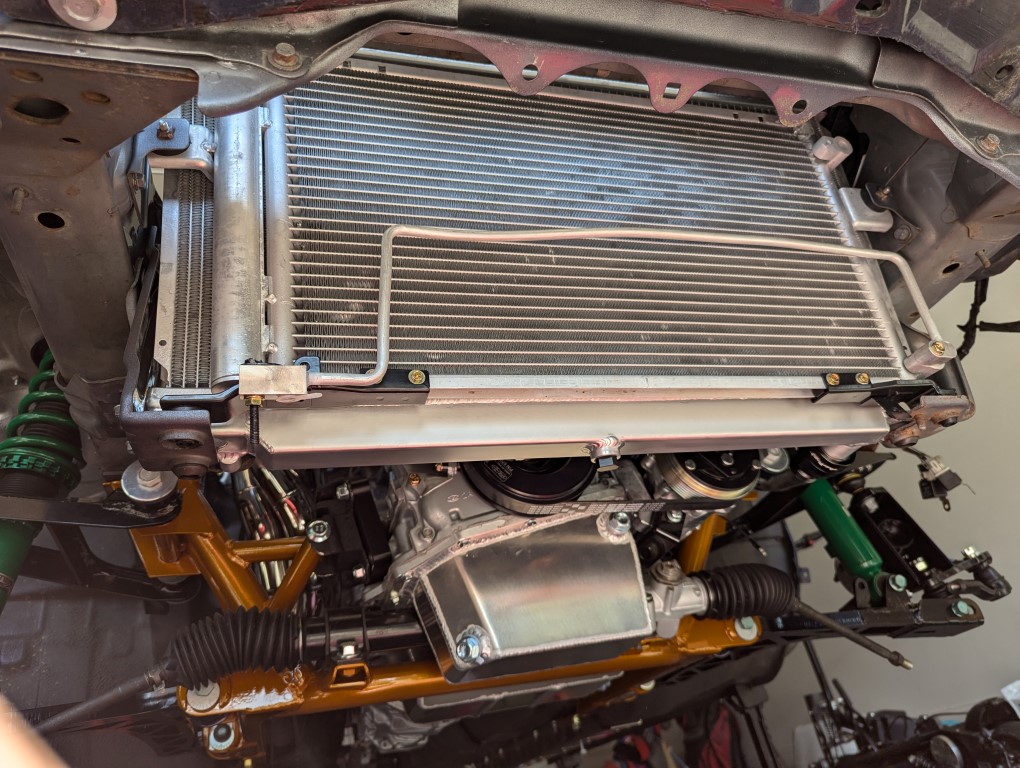
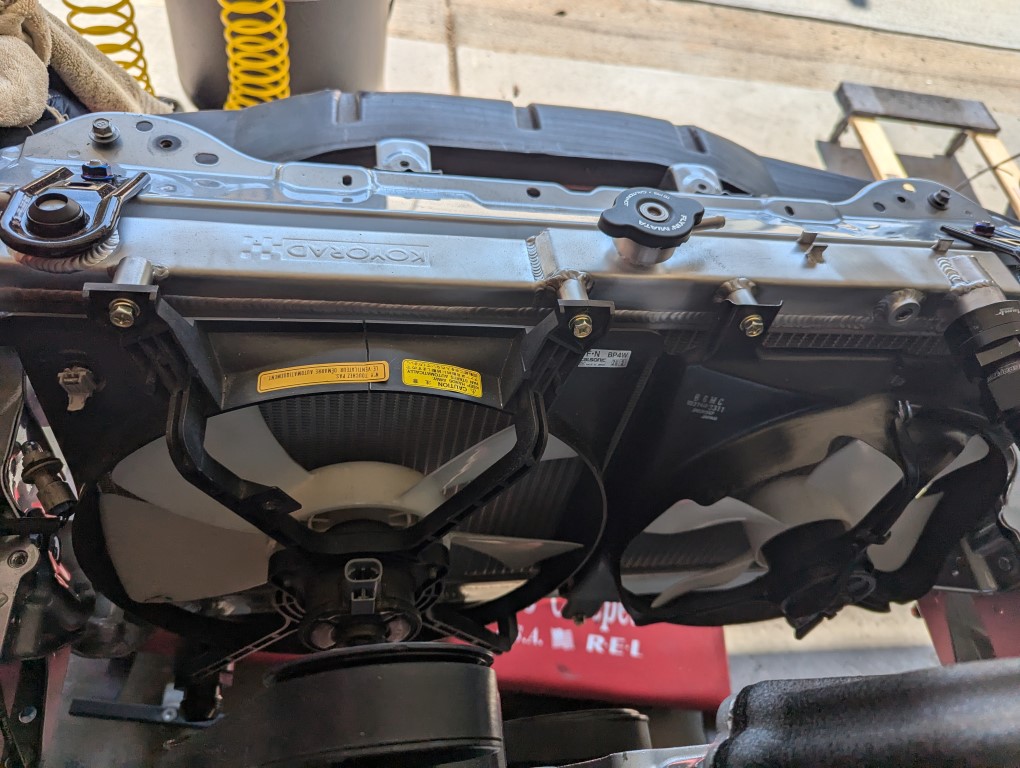
Radiator is the 36mm Koyo Hypercore. Was planning for a crossflow, but this car will not be tracked regularly, so this will do. Fully disassembled and cleaned the OEM fans as well.
Had a custom return pipe made and am going to attempt using all AN lines for the cooling. I did cheap out and am just using rubber for the heater core. I don't' want to have to cut / grind the barb off the heater core to fit adapters and then risk leaking. So I wussed out on that one.
Also powder coated the radiator brackets with a black metallic coat. You can't tell but they sparkle in the sun
\
Picture of the custom return tube and some of the AN lines.
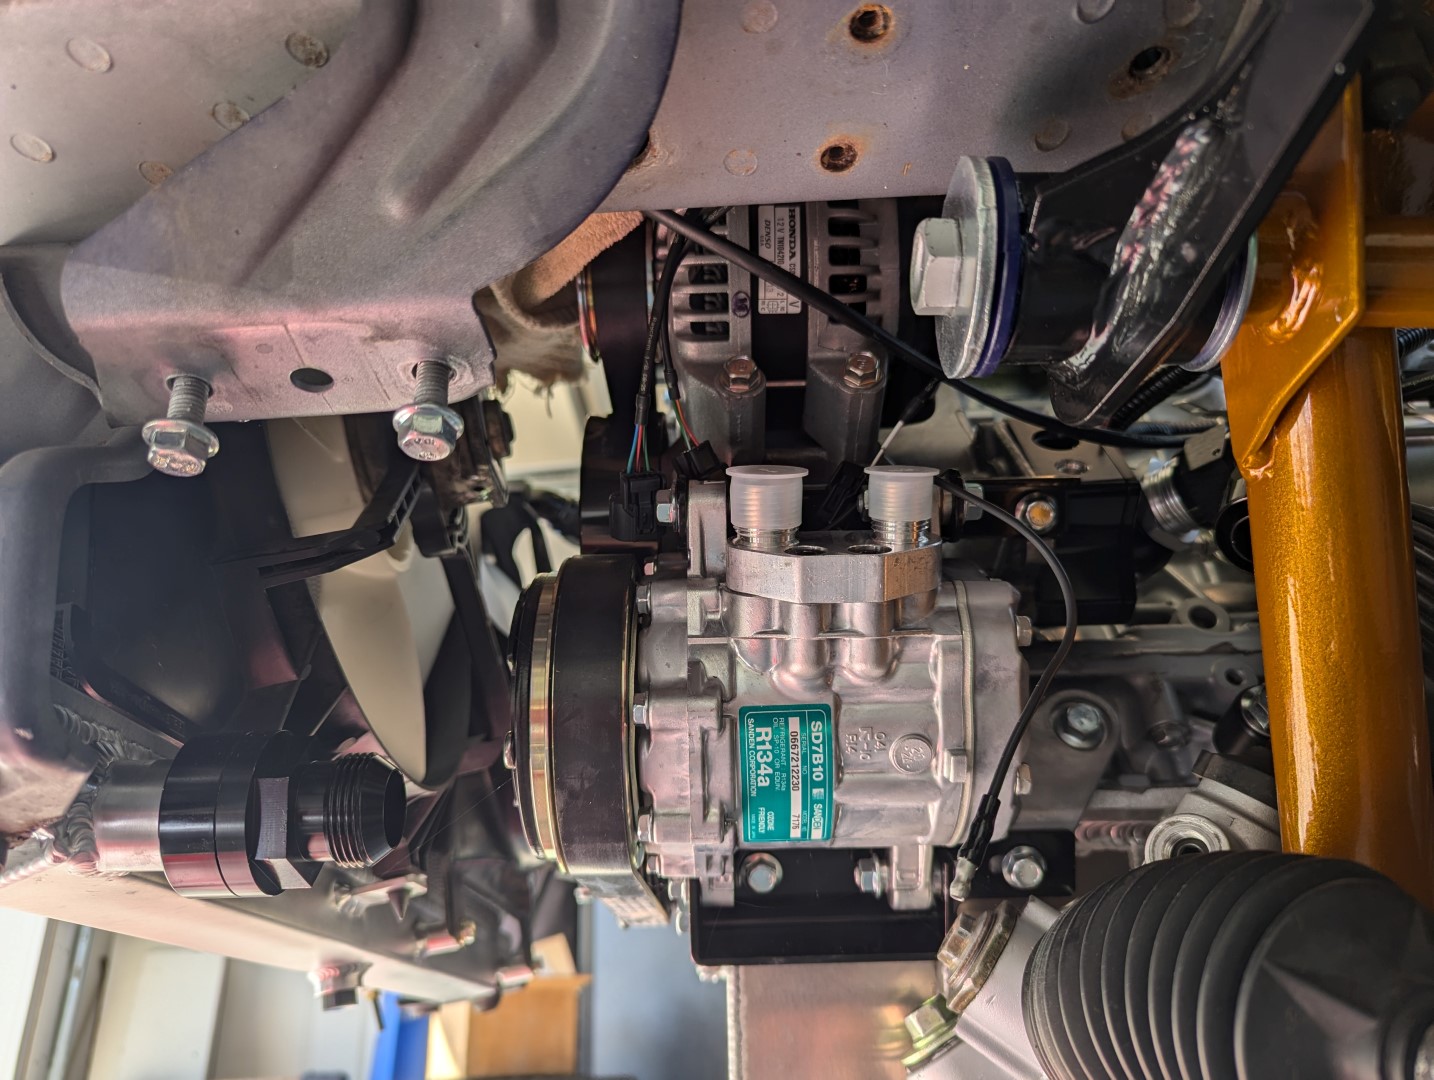
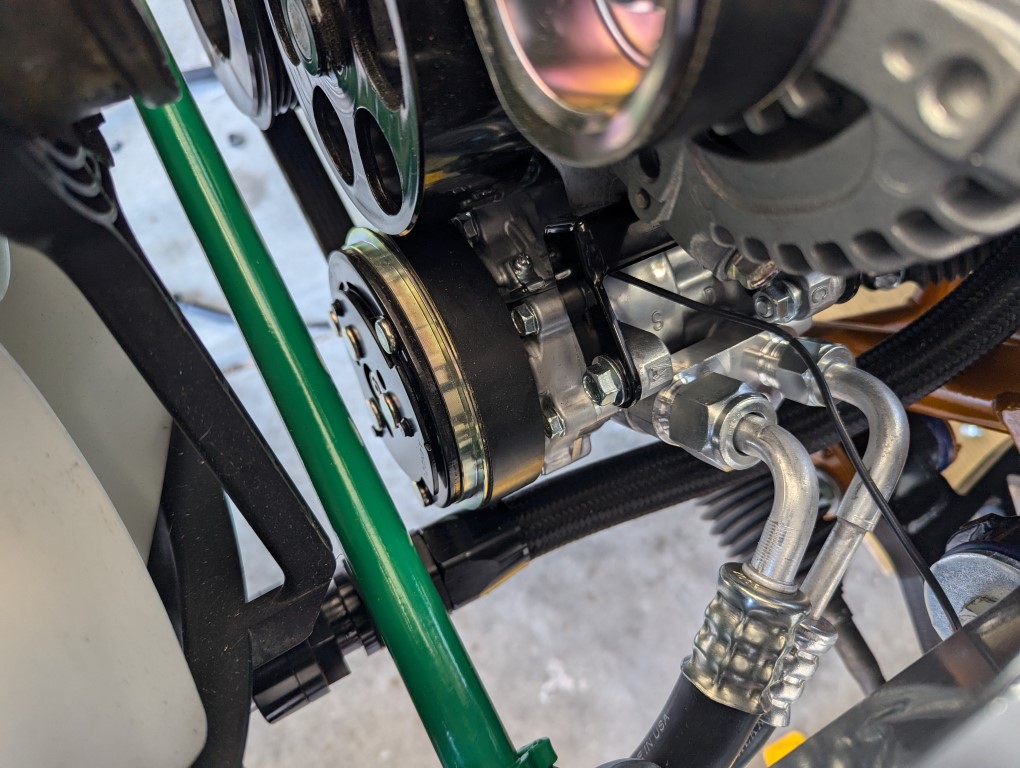
Added an aftermarket condenser for the AC system.
Bought the KPower AC Kit, but read bad things about the china made copies of the Sanden compressor. So bought an authentic Sanden 7176 compressor. Hope it doesn't fail as often as some of the cheaper copies.
You can see how close that compressor wheel comes to the AN line for the radiator. For now, the AC compressor isn't part of the belt system yet since I need to rework the AC lines, but i'm going to add an engine damper to minimize movement hoping we don't see that pulley his the radiator line.
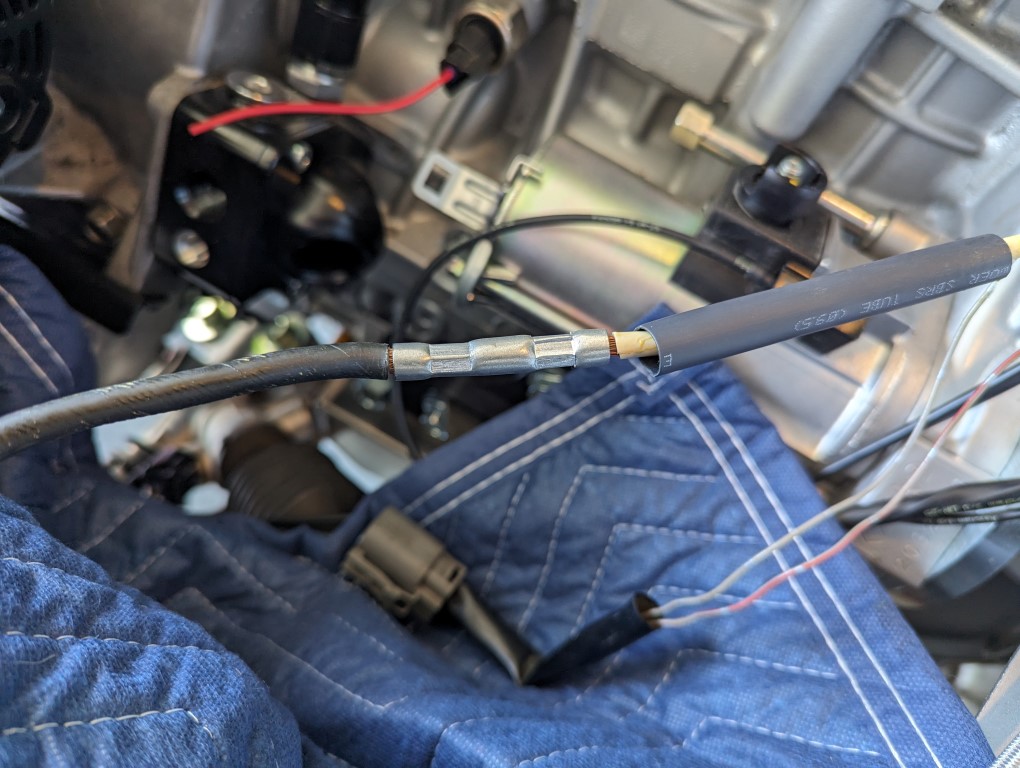
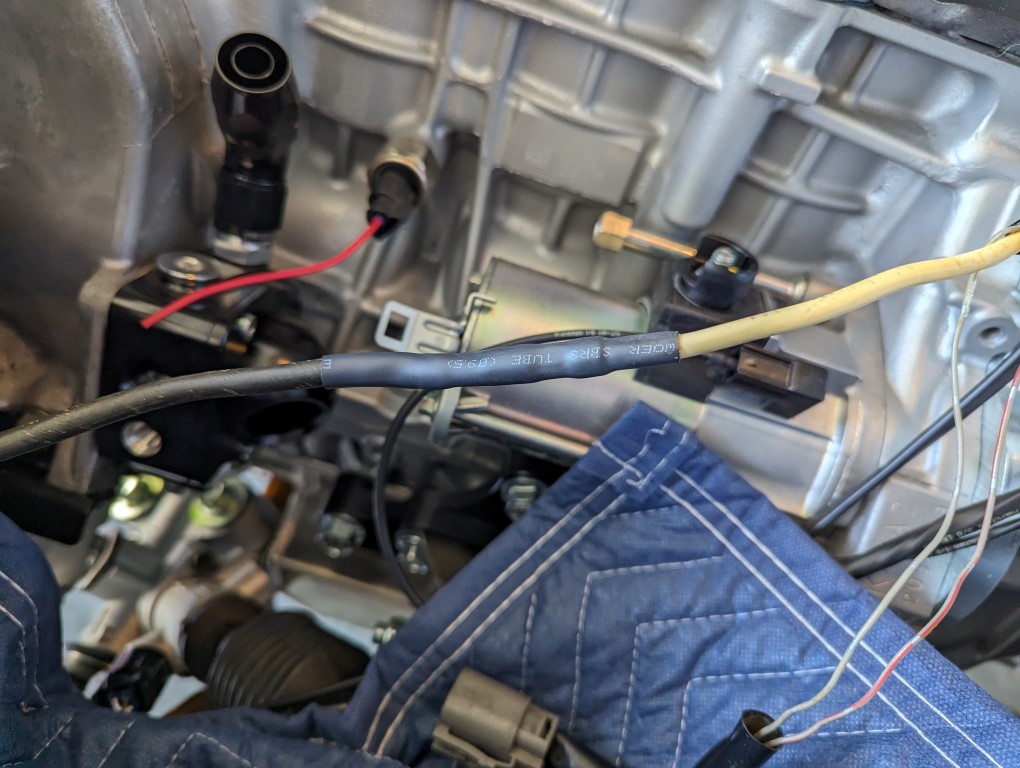
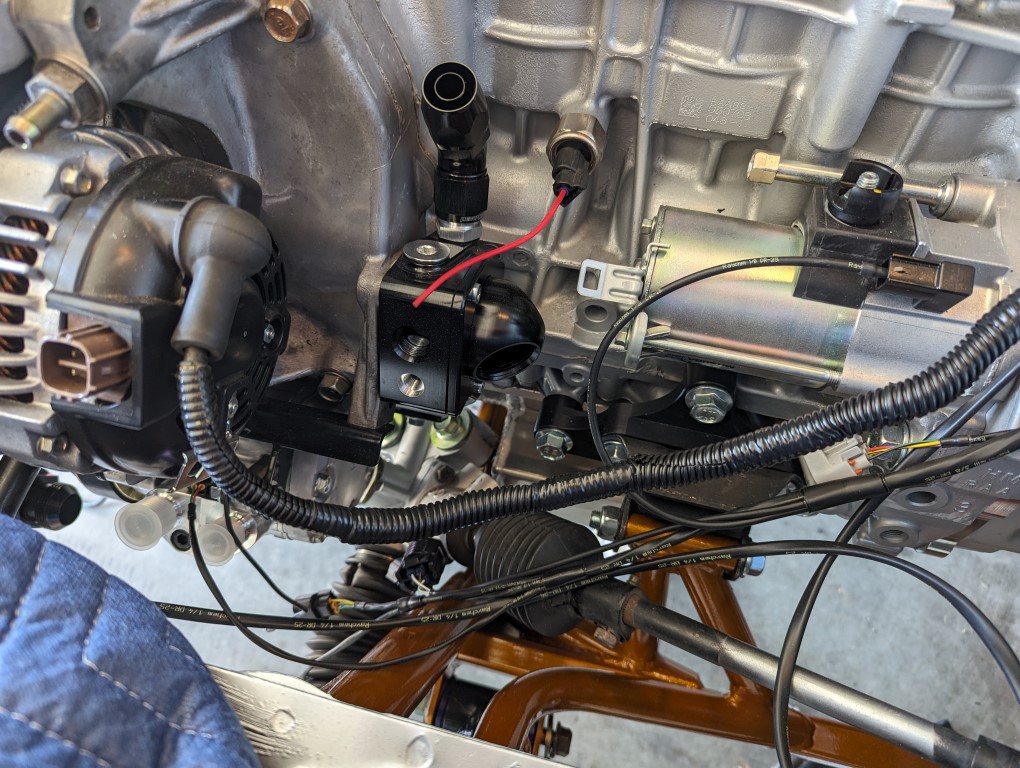
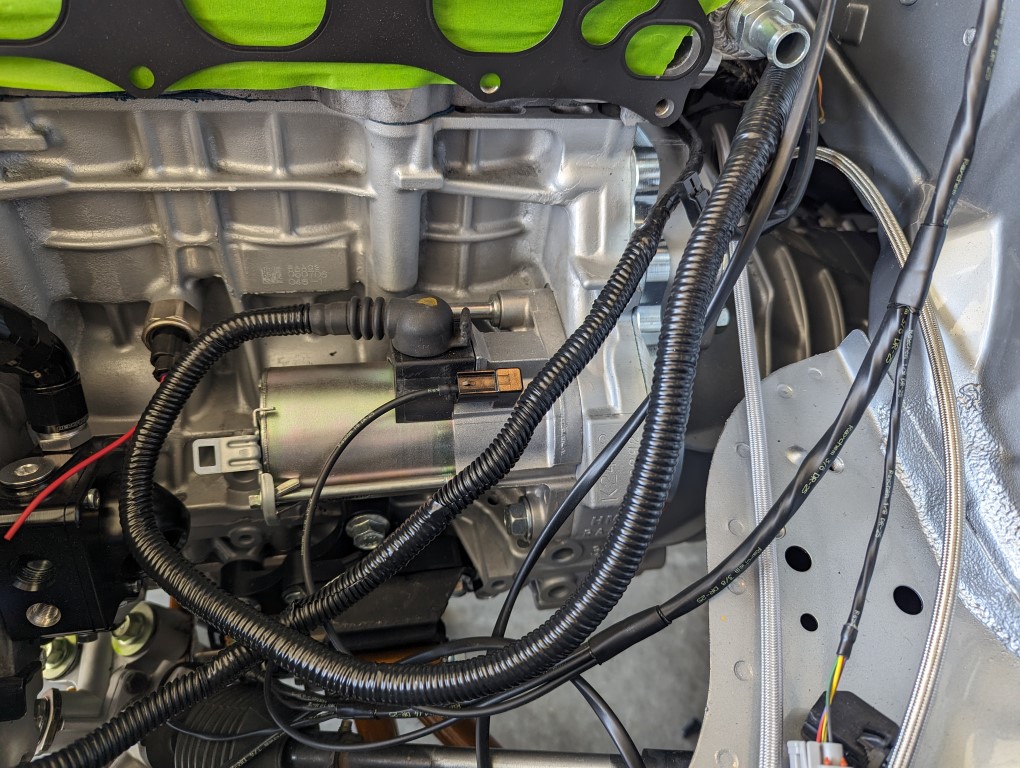
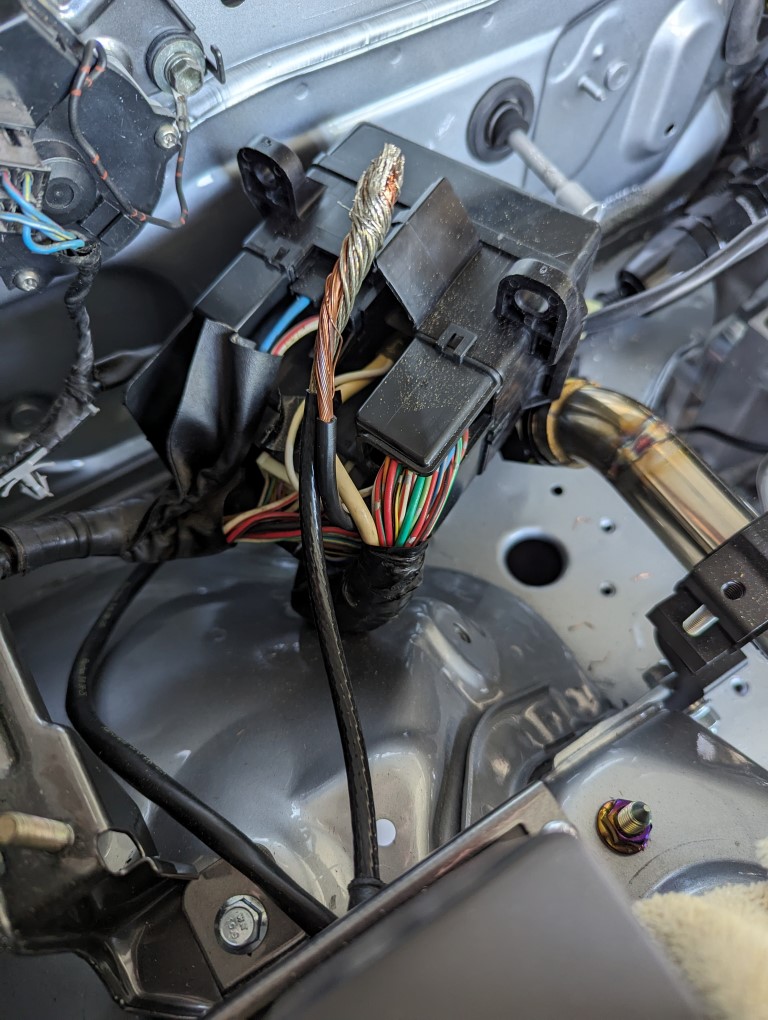
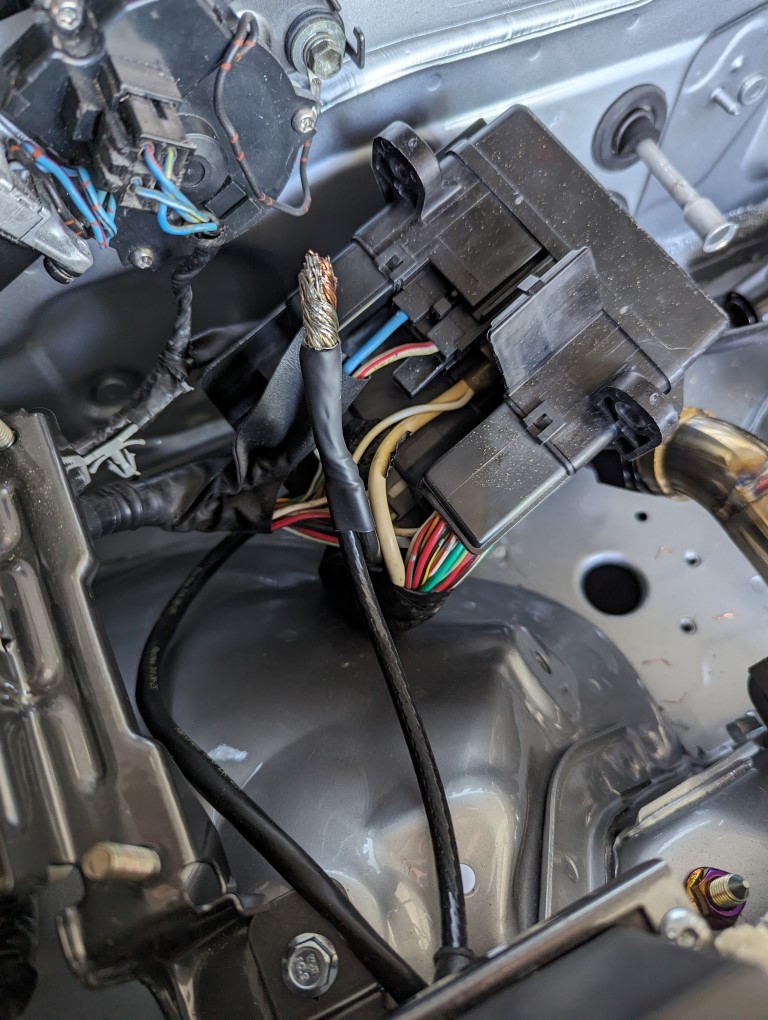
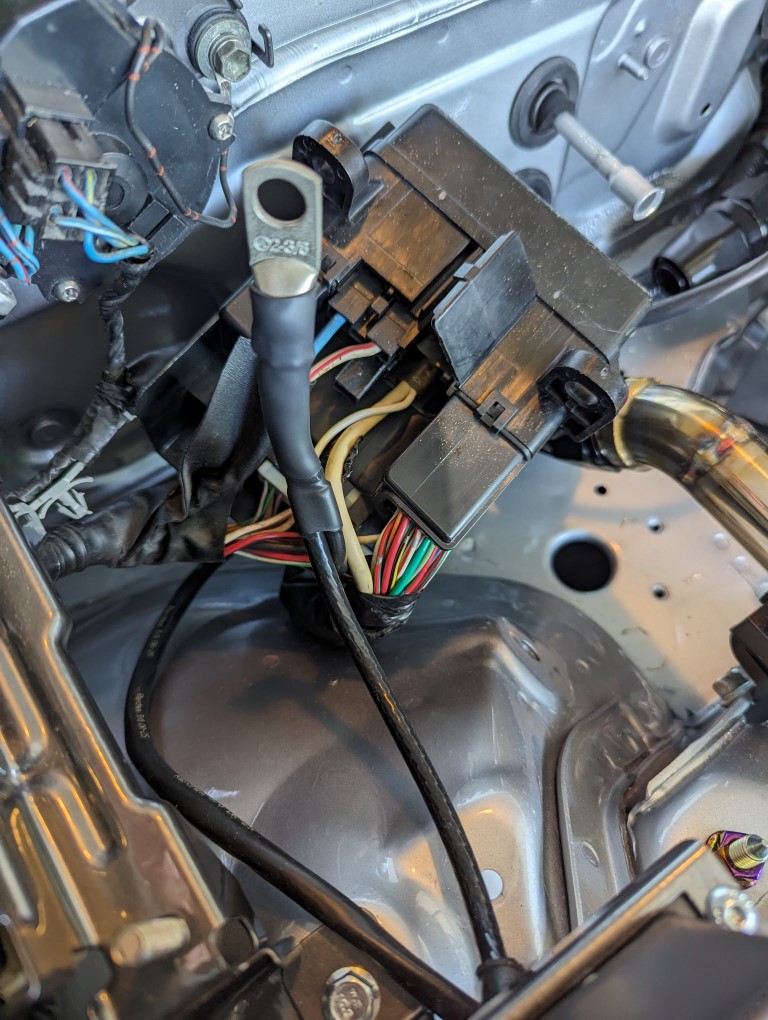
The K Power harness requires you to extend or jumper the OEM power harness to the K series alternator and starter. Also the kpower harness gets it's power by just adding a 2nd ring terminal on top of the existing ring terminal at the fuse box in the engine bay. Problem is, there is no room for a 2nd terminal. You'd need a longer bolt as well as that little door covering it would not be able to close. So I just spliced the wires together, crimped on a larger ring terminal and then added some heat shrink. I'm pretty happy with the results. The little plastic door still is a struggle to close, but it does close!
Bought a honda harness off ebay that had the correct connectors and covers for the K series and then spliced them into the miata wiring.
Extended the wiring to the alternator.
Fully covered and looking OEM
Did the same for the starter
Here is the wiring for the fuse boxes.
Combining both leads into one.
Adding a 1st layer of heat shrink
Finished product after crimping the new terminal as well as a 2nd layer of heat shrink.
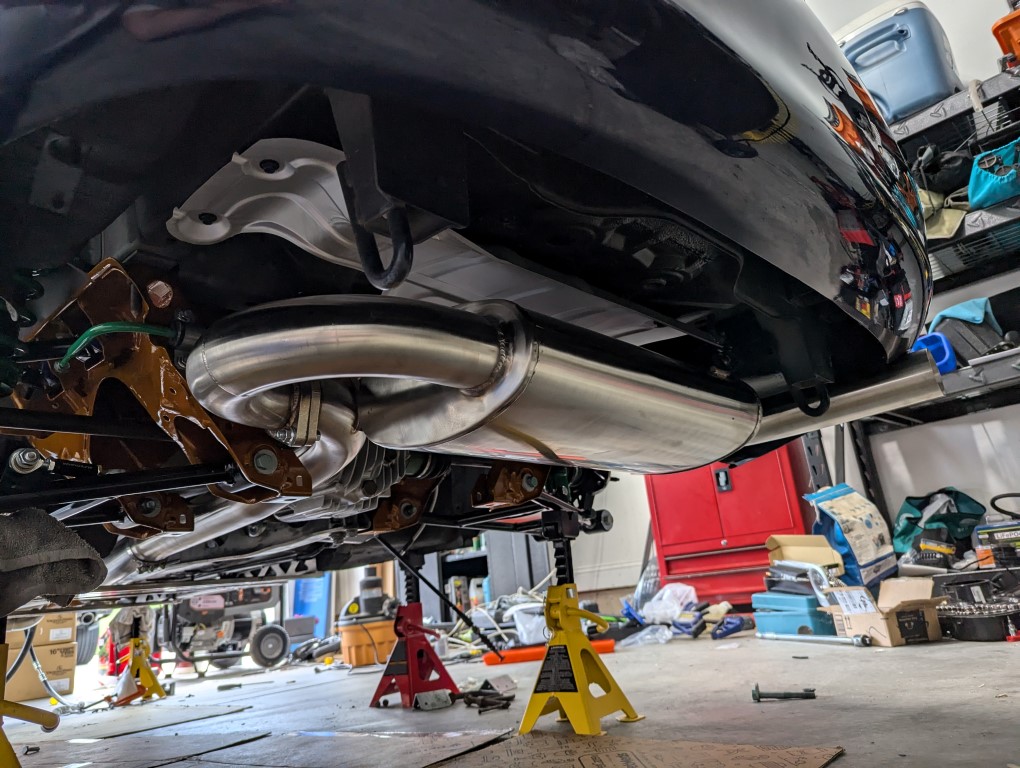
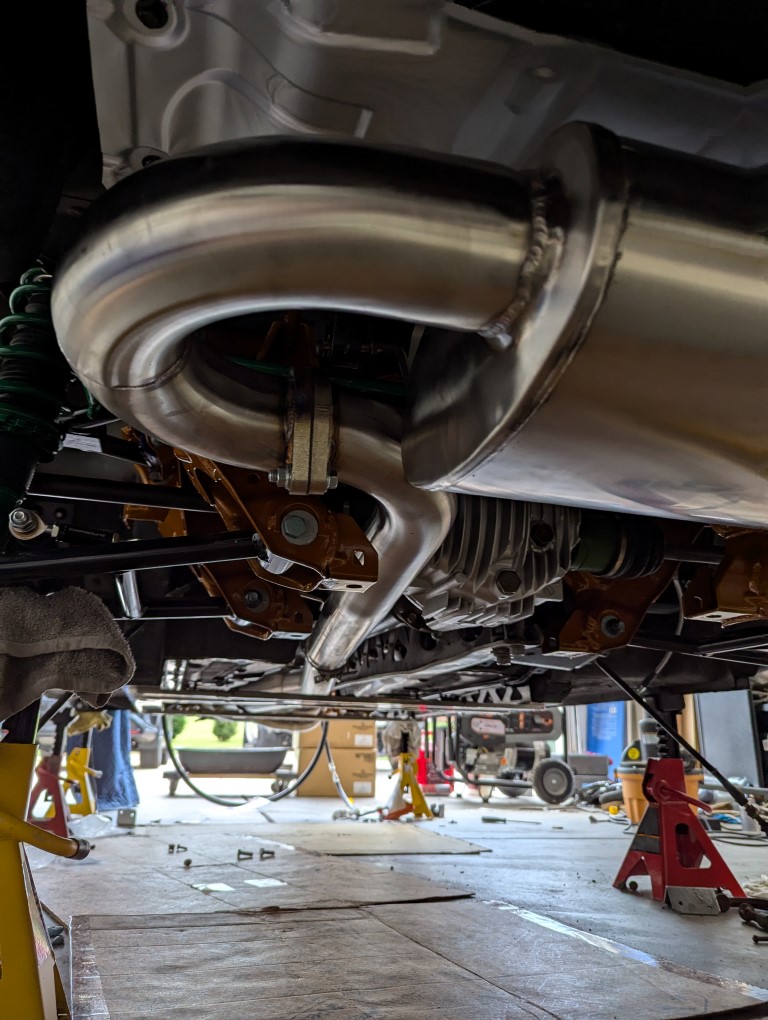
Pictures of the underside being completed. Here is the K-Power exhaust.. this thing is T-I-G-H-T... I mean the cross over (two into one) pipe... goes right between the oil pan and the trans. something in me says wrap that thing to minimize heat transfer. We'll see if I can even fit a wrap in there. Cerakoted the original heat shields in a silver, so they look oem'ish.
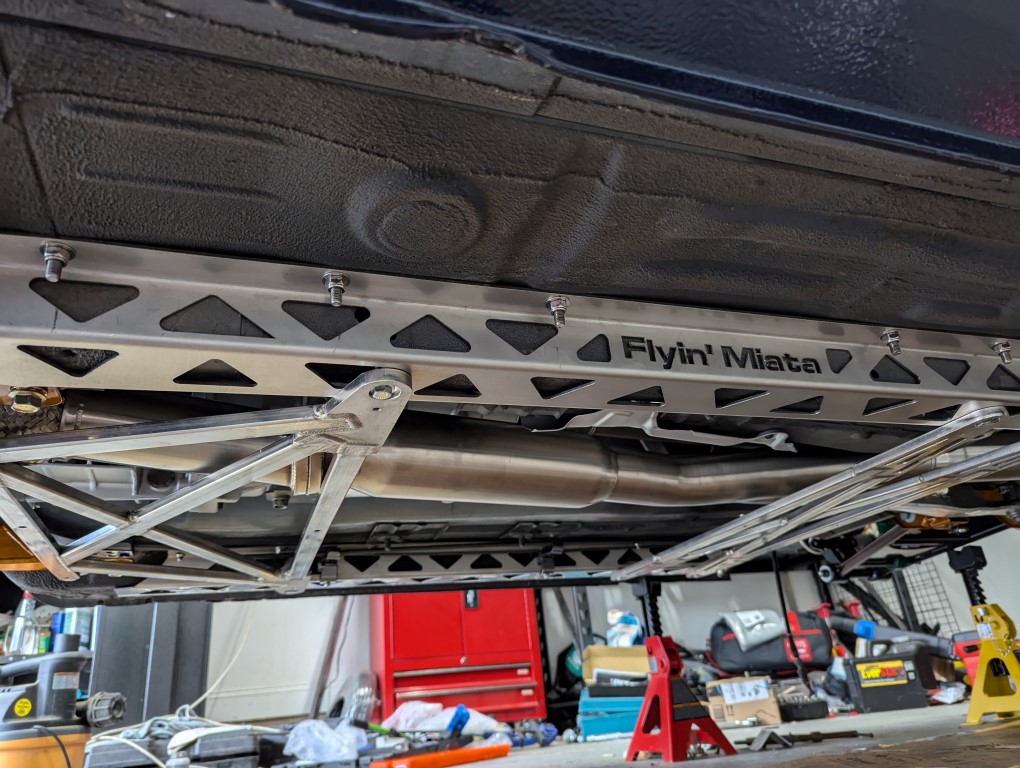
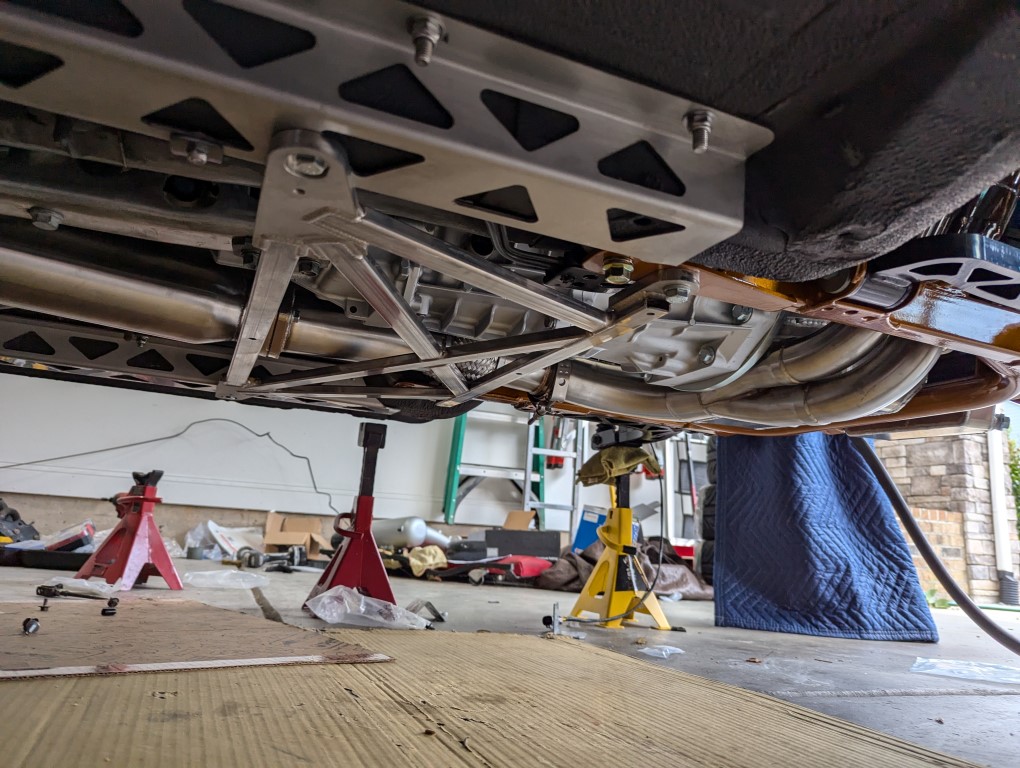
Picture of the butterfly brace and in the distance you can see the soft lines, which I'll post more about after.
Picture of that crossover tube and it's tight fitment
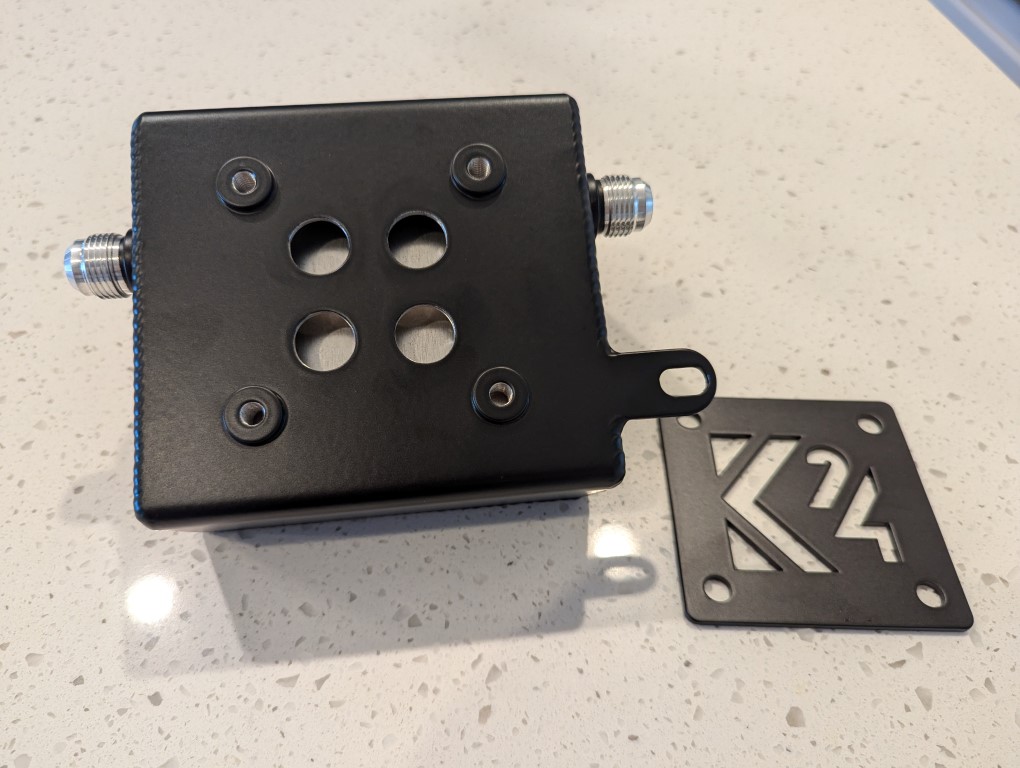
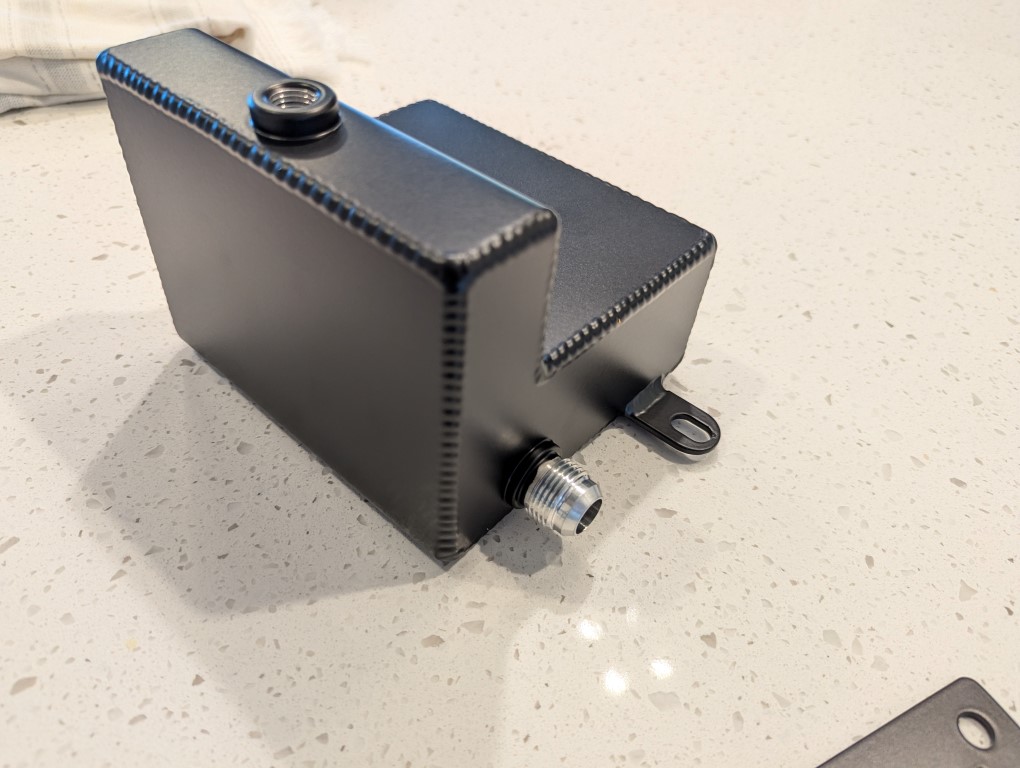
One of the coolest things (for me) is my custom catch can. This thing isn't turbo, but I wanted to prepare for if I go turbo someday and a catch can is never a bad idea.
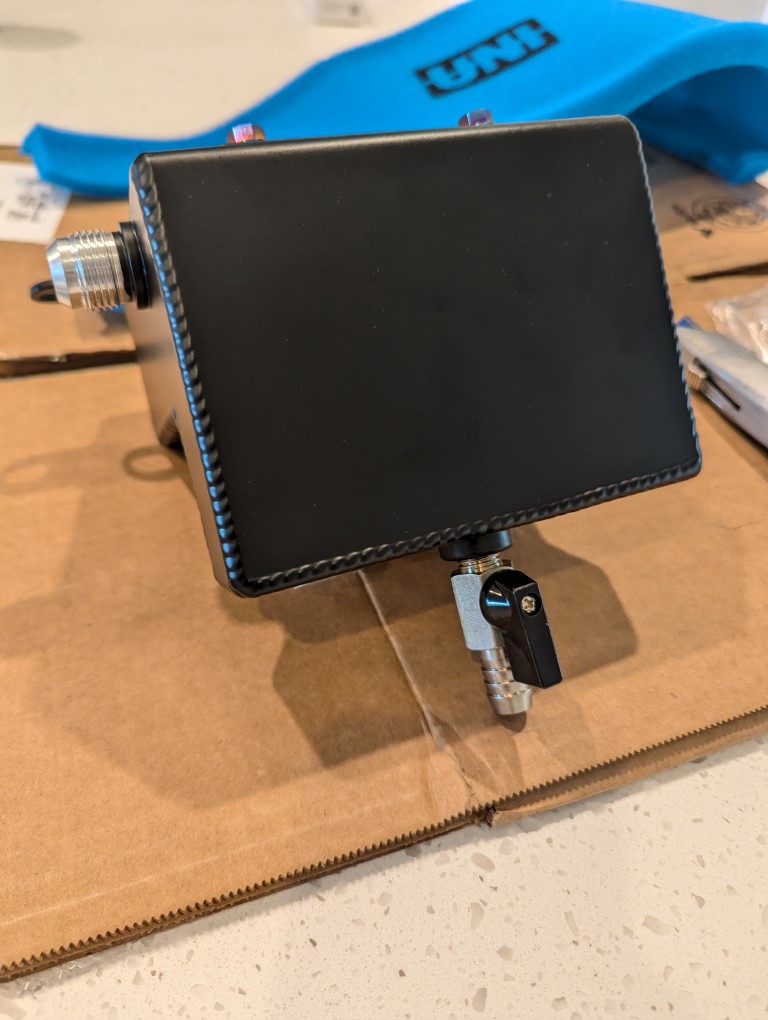
Tapped and threaded the crankcase breather whole with a 1/4 NPT tap. Then an adapter to fit a 10AN fitting to it.
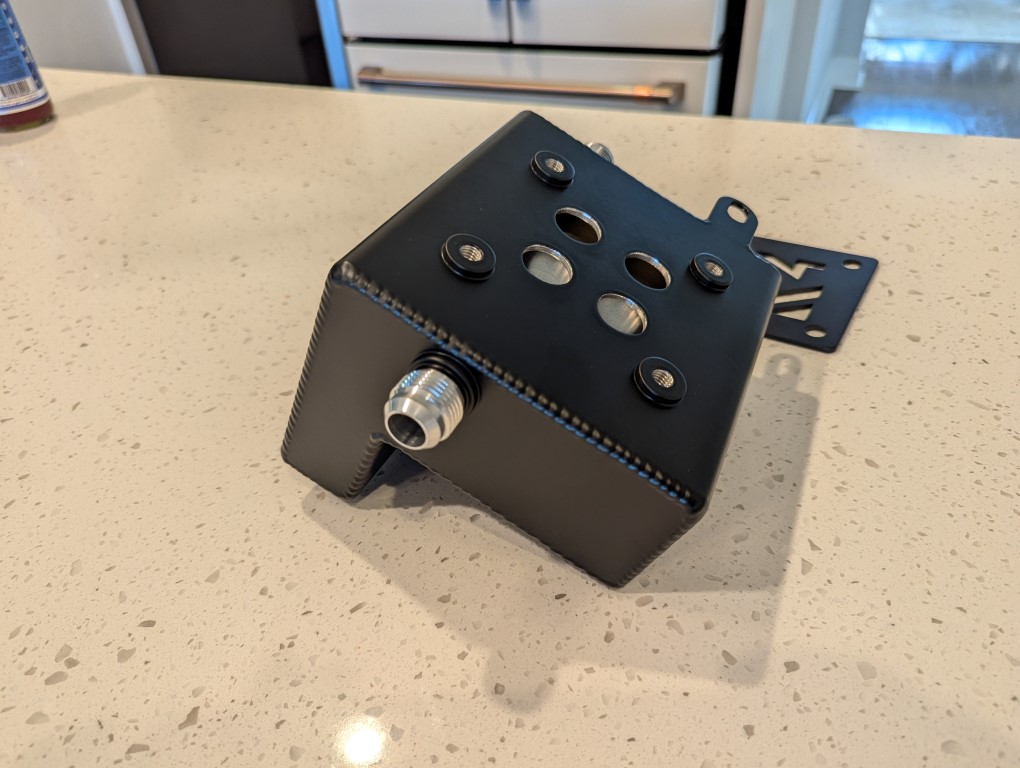
Picture of the custom catch can build by Snail Fab ( google Snail Fabrication if you're interested.. he's on facebook ) Guy did a great job and price was more than fair. It has 1/4 NPT fitting at the bottom for a drain as well. Also a single baffle inside to keep oil from the filter element. I had it powder coated in matte black.
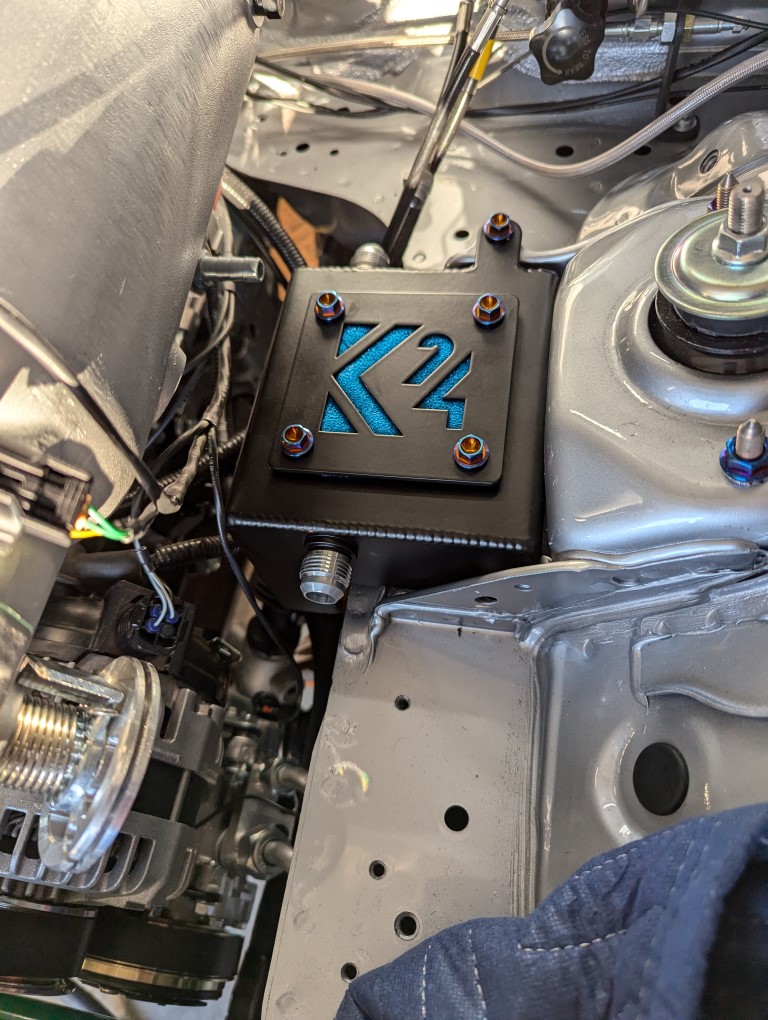
Picture of the catch can installed.
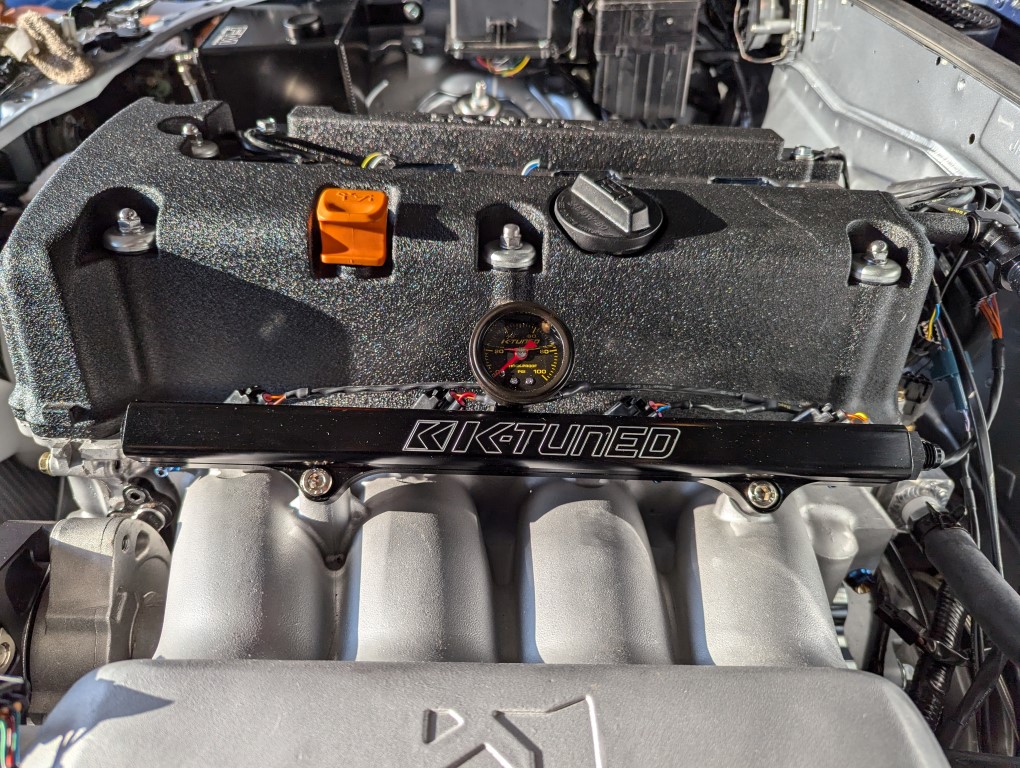
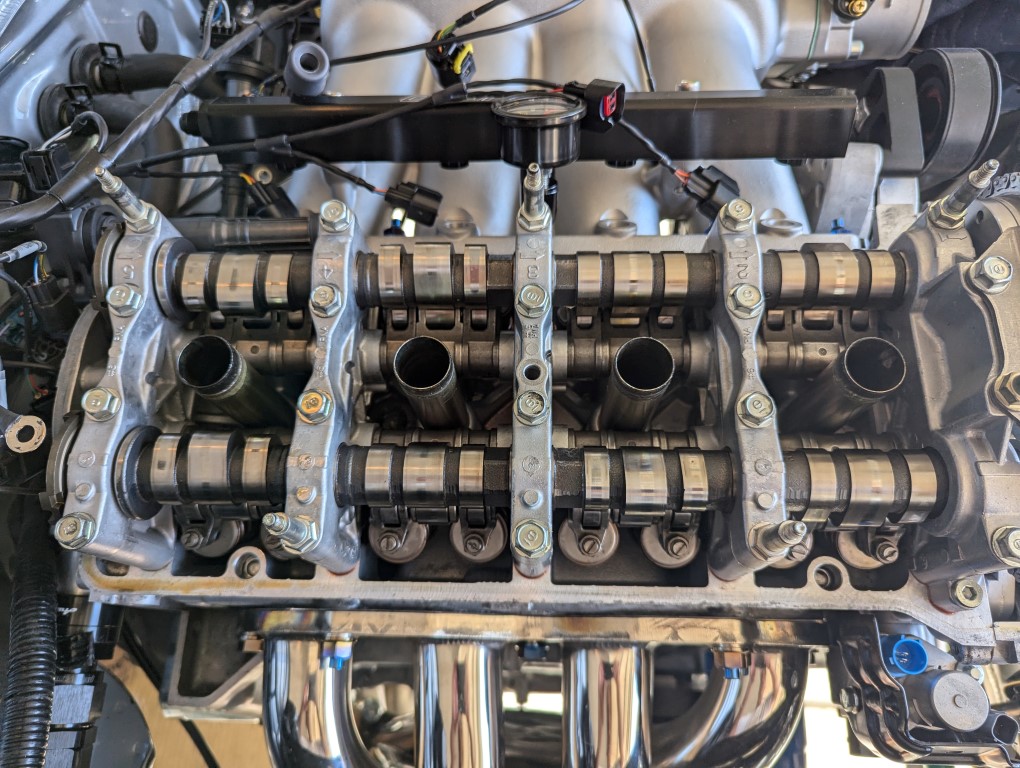
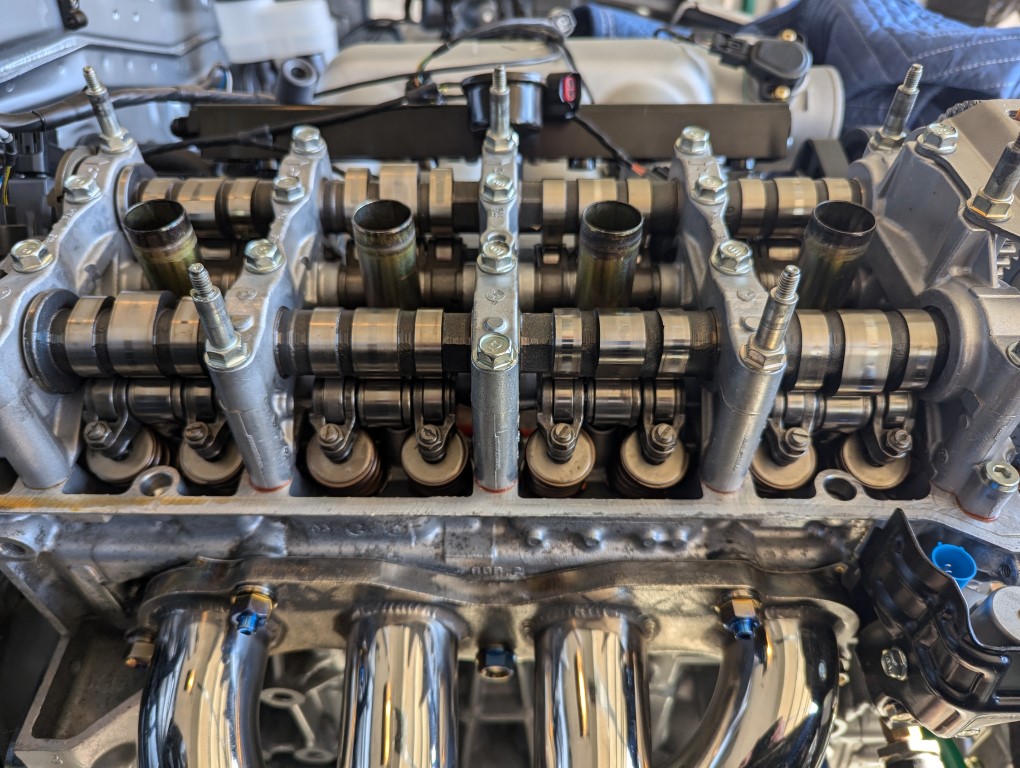
Last update for today.. some random shots of the k-tuned fuel rail, and the valvetrain with the valve cover off. This was done before the engine had oil in it. I'm sure right now it wouldn't look quite as clean.
I'll post the brake setup next.
Last edited by belacyrf; Dec 14, 2024 at 10:35 AM.
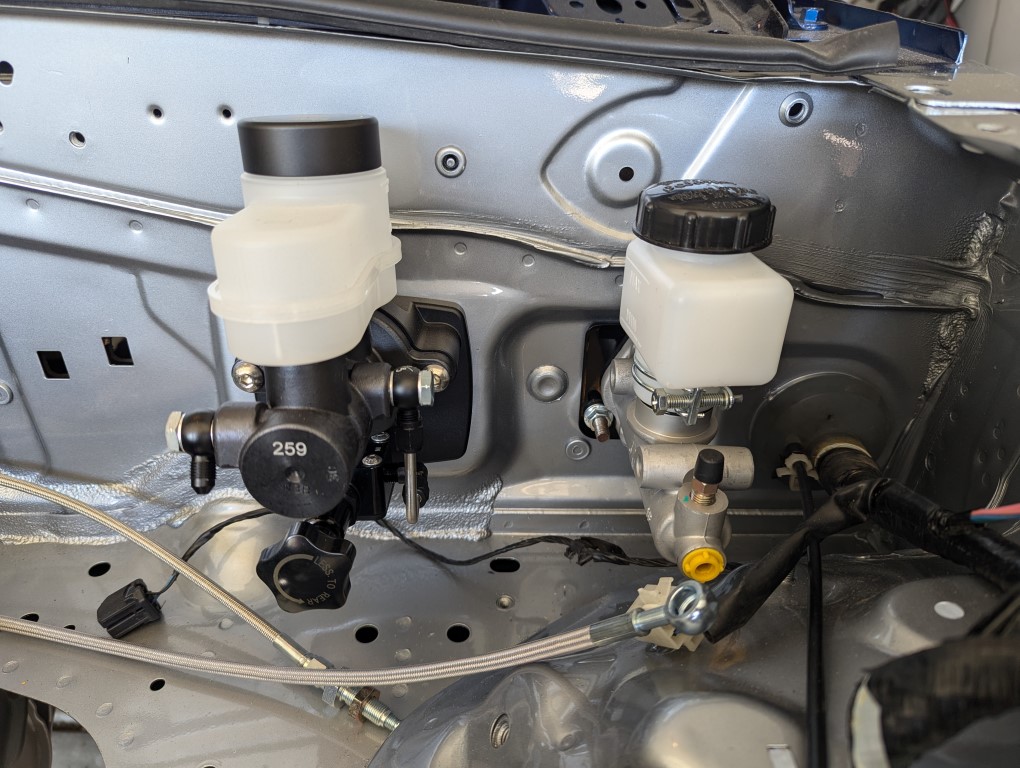
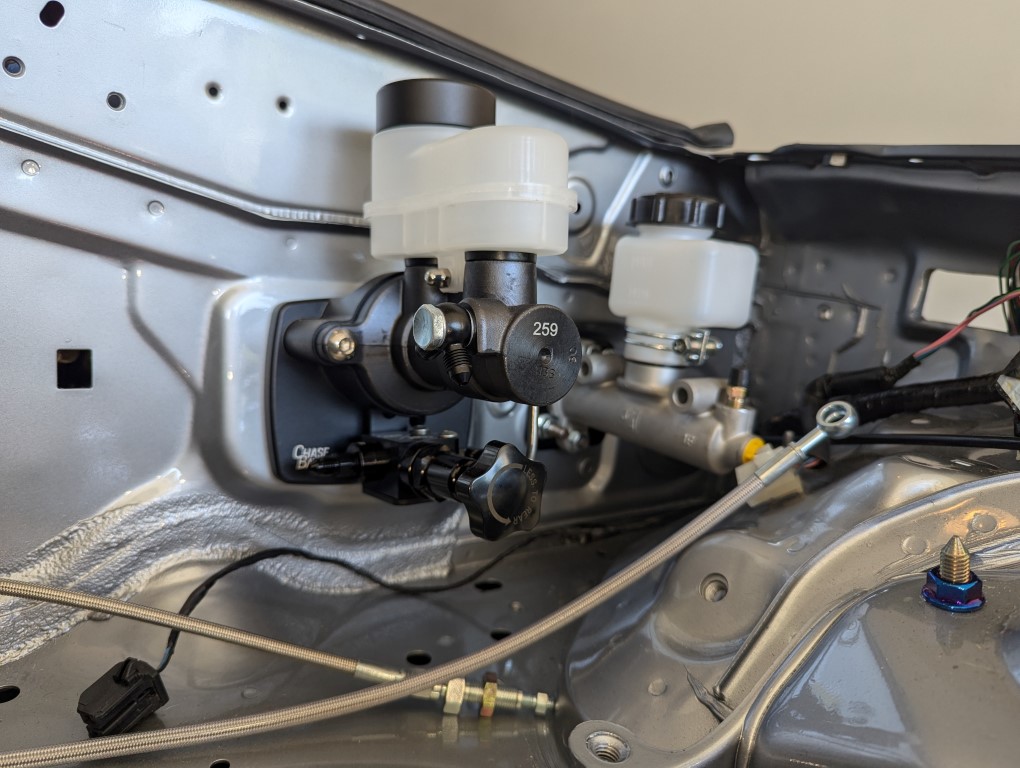
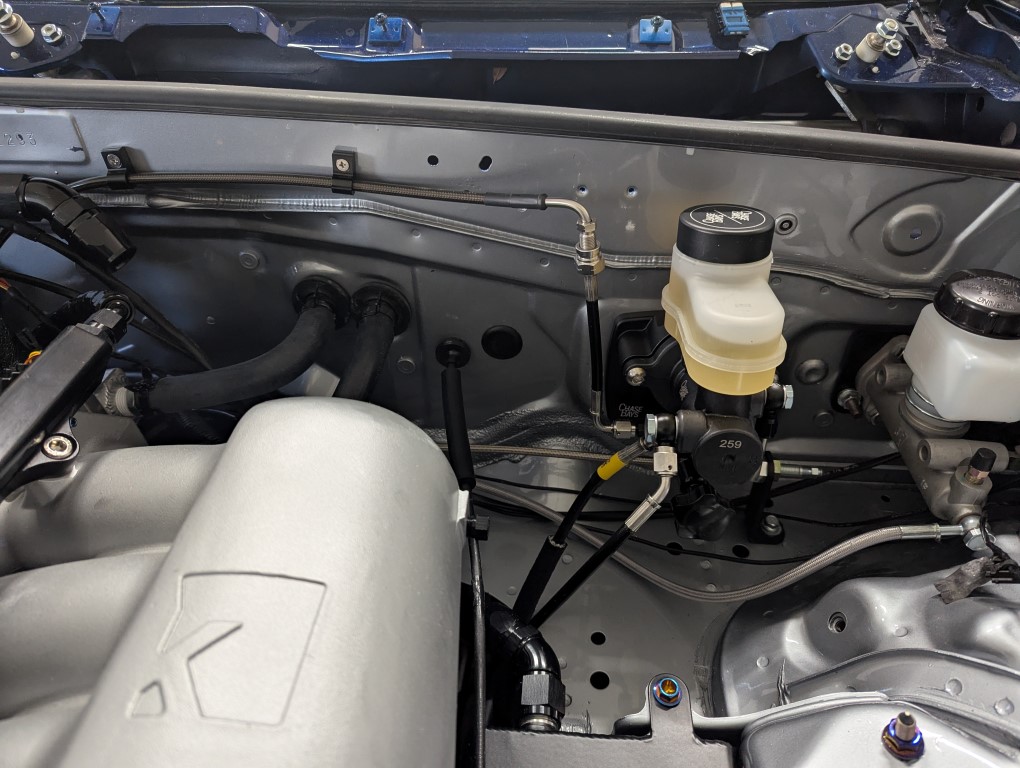
Here is the brake setup including the custom lines from HEL. Also I replaced the fuel hard line with a soft lin as well.
Used the Chase Bays Dual Piston Brake Master Cylinder (which deletes the brake booster). Also used their hardline replacement kit to move everything to soft lines. The only hardline left on the car is the one that attaches to the rear subframe connecting the left and right sides.
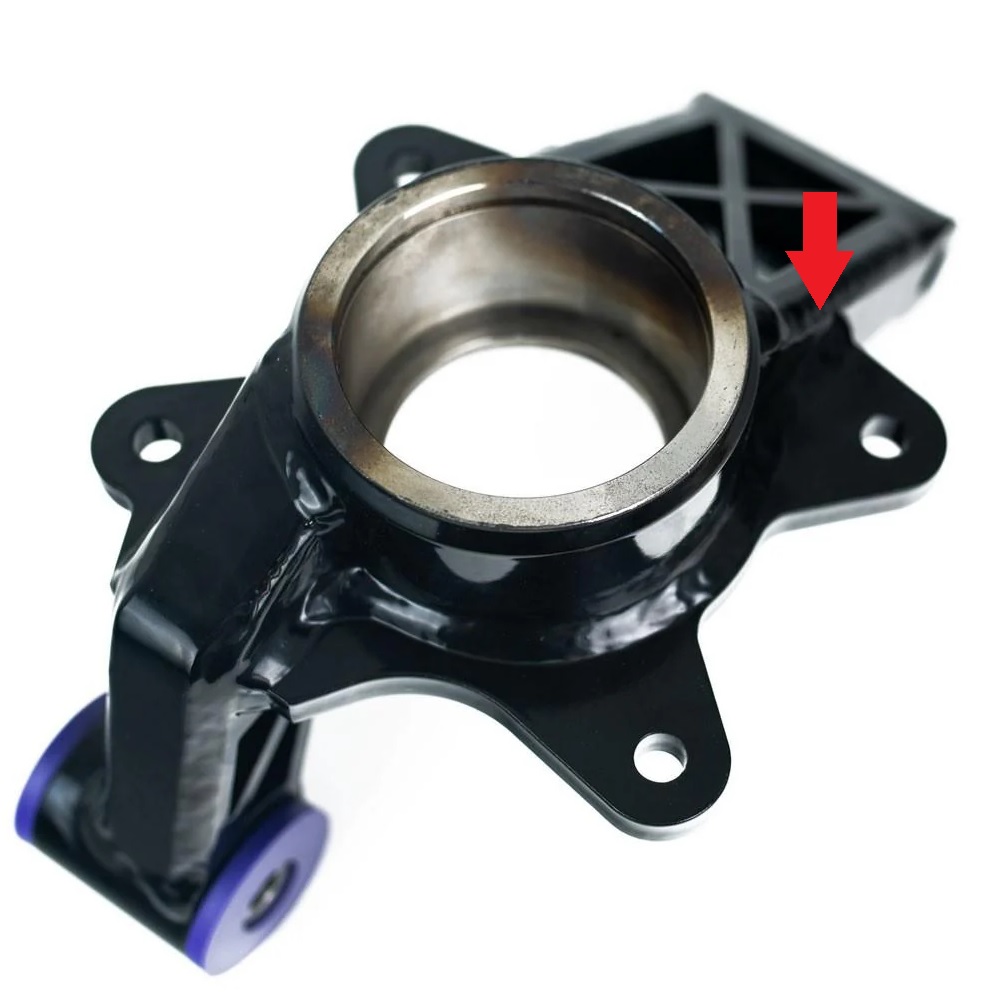
Purchased the FM Big Mama Jama kit with ebrake, but unfortunately the ebrake bracket does not fit with the Destroy or Die rear super knuckle. I would have had to notch the bracket, which I wasn't willing to do.
The brackets hit the weld here
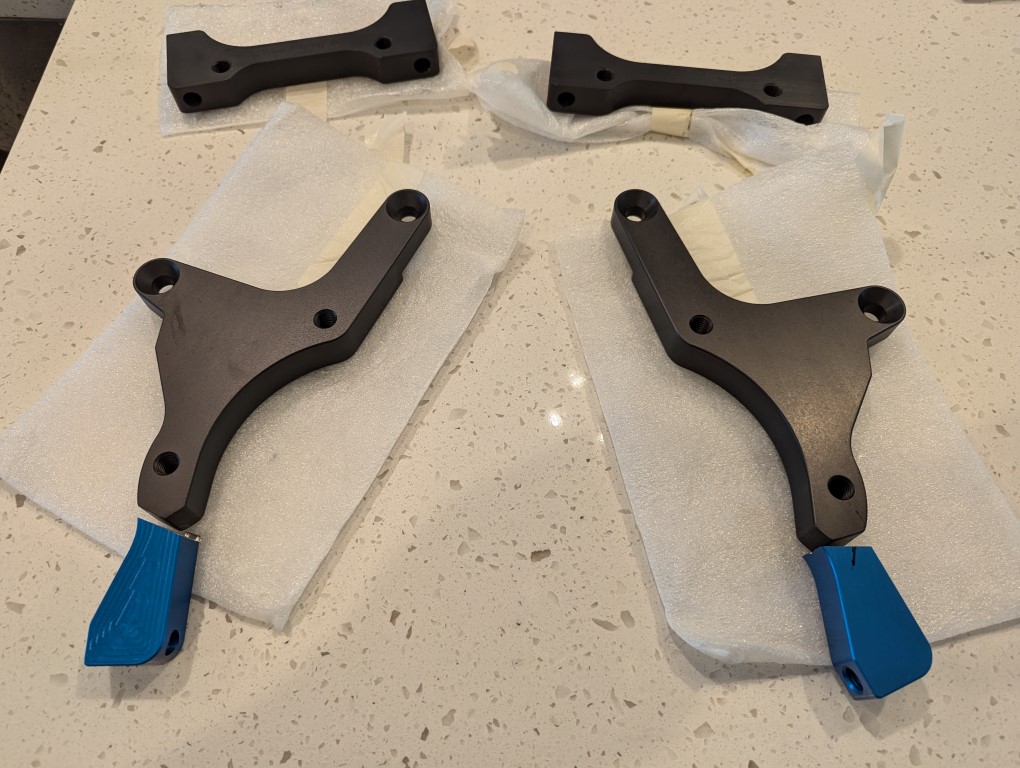
So I ended up cutting the dual caliper bracket, so it would only support the parking brake, and then ordered a set of single "brake caliper only" bracket b/c the super knuckles support dual calipers. After cutting the brackets, sent them off to get hard anodized in a dark gray.
Here's a pic of the brackets and the piece that was cut. (don't mind that the cut pieces are facing the wrong direction)
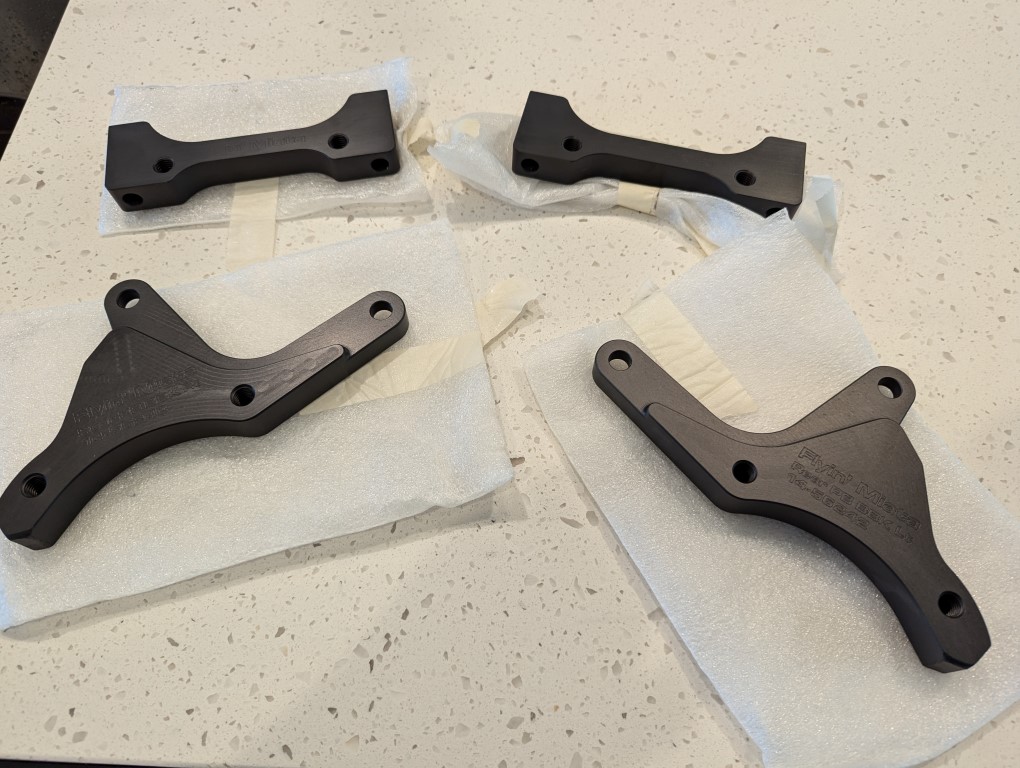
Brackets complete after anodizing. You can see bottom edges with a bevel, that is to clear that weld in the knuckle. Fit was still close.
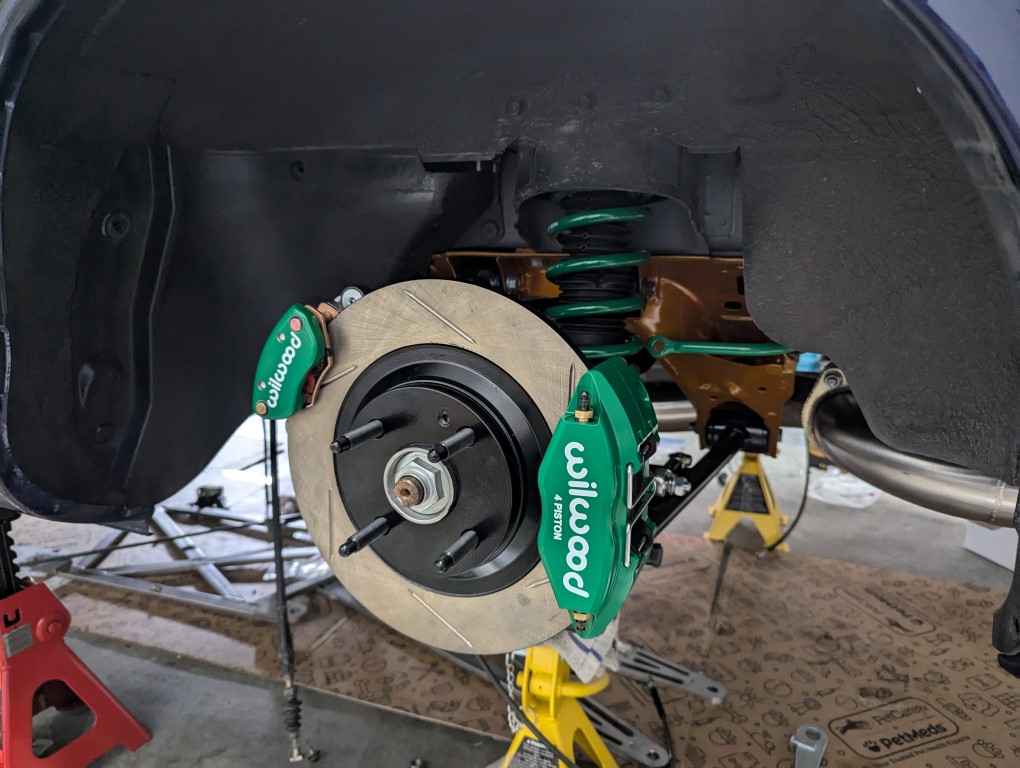
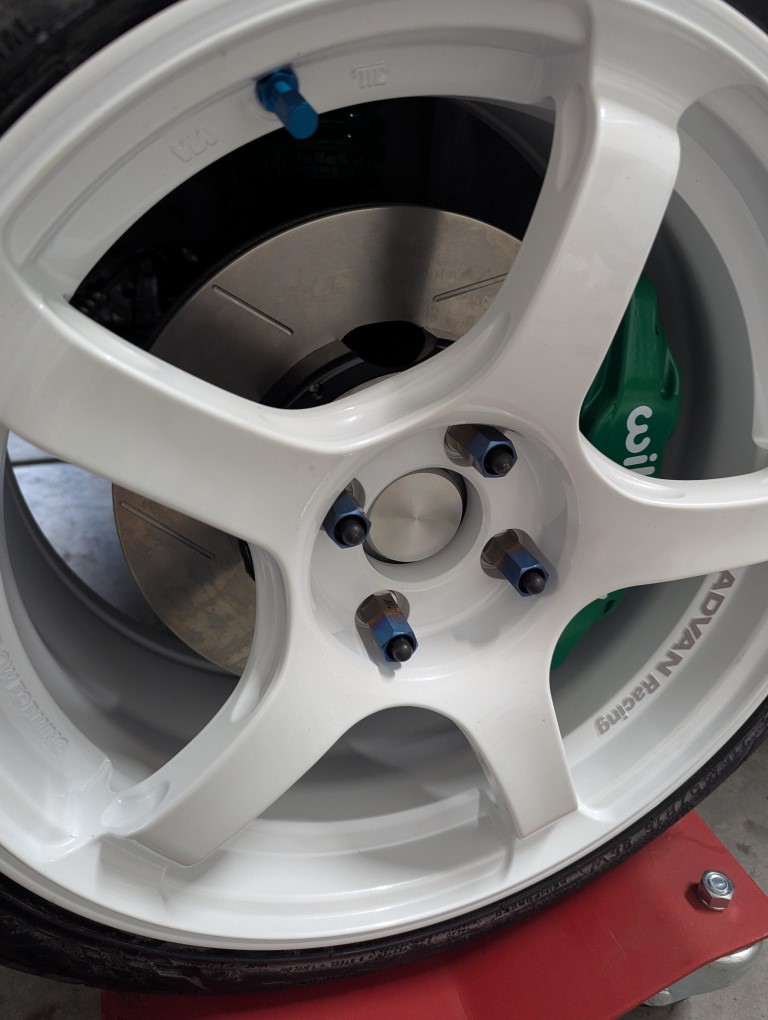
Here are the brakes mounted. I worked with Wilwood to exchange the FM Calipers so I could get the color I wanted. They were very helpful! I really wish FM would partner with Wilwood more and just allow people to order them factory direct. So many color options. I chose competition green.
Rear Brakes with parking
See the 30" HEL brake routed under the rear axles and attached to the subframe b/c the real caliper is now on the other side.
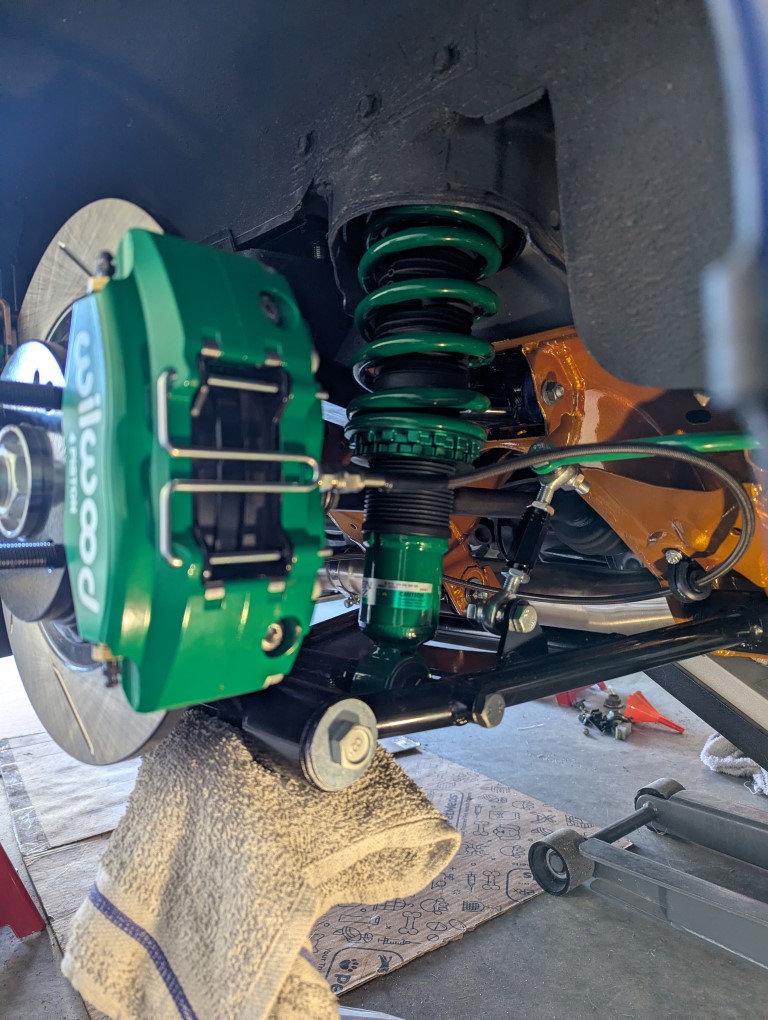
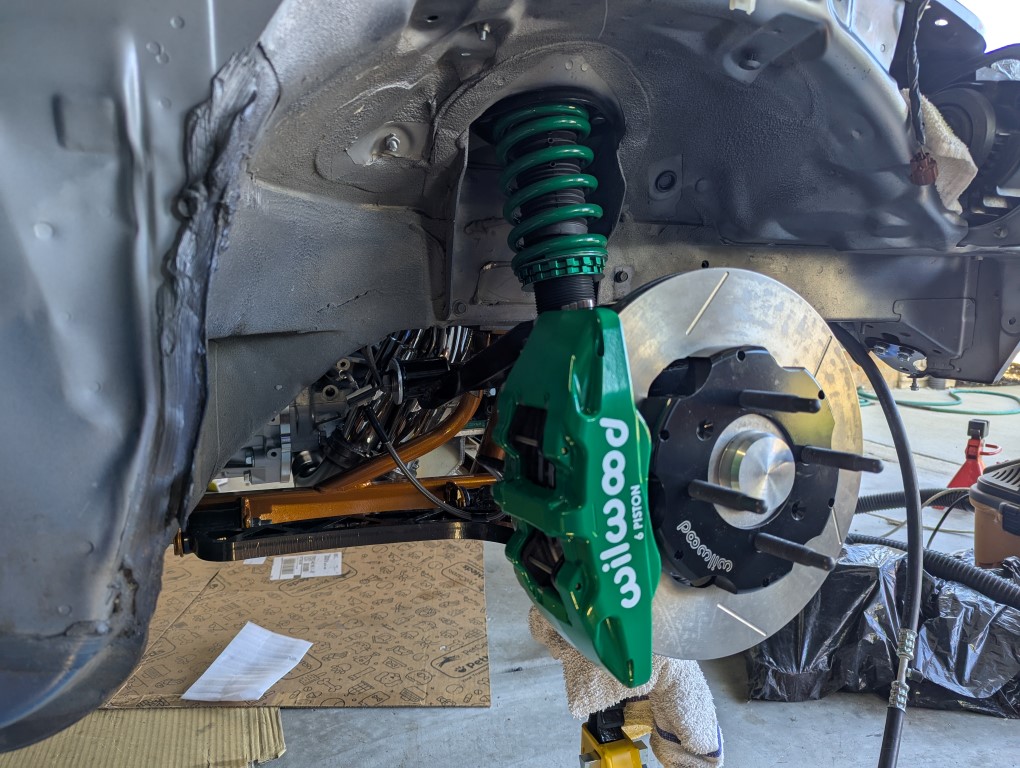
Front 6 Piston Caliper with HEL elongated brake lines due to the additional steering angle supported by the Destroy or Die setup.
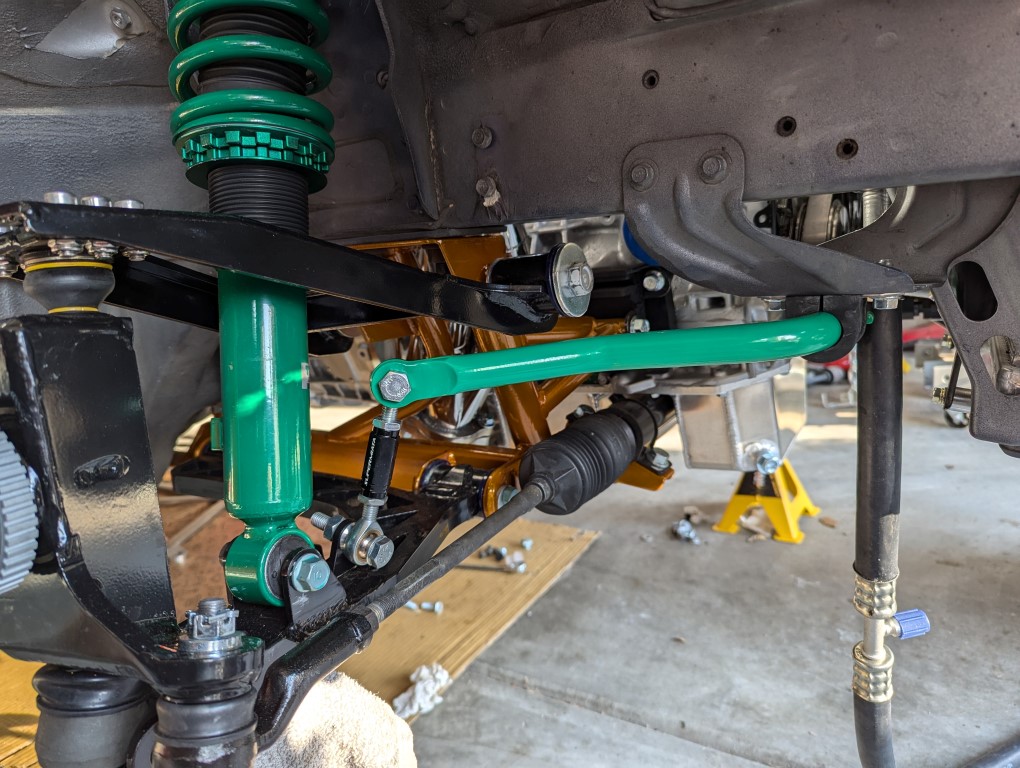
Front Right Corner setup complete with the SuperMiata end links.
Here are pictures of the soft lines.
HEL custom soft line that runs front to rear attached to the Chase Bays soft line kit.
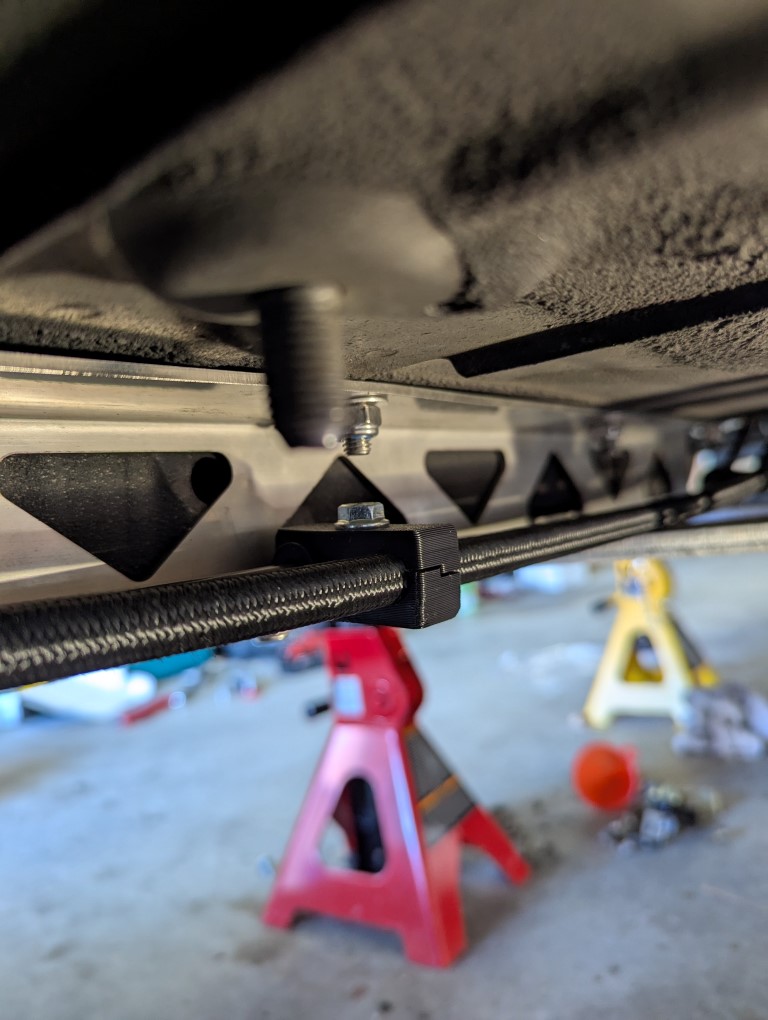
HEL custom fuel line under the car with these nifty FLF nylon brackets that work great with the FM frame rails!
I had HEL add 13mm OD rubber grommets to the brake lines that allowed me to use this stepped nylon bracket. I ordered the 11/13mm bracket https://finishlinefactory.com/produc...ose-separator/
Her is a pick under the car of the bracket and fuel line in the front. Had to use an AN to quick connect adapter to use the OEM connector. I'm a little worried about that connection not leaking. We'll see.
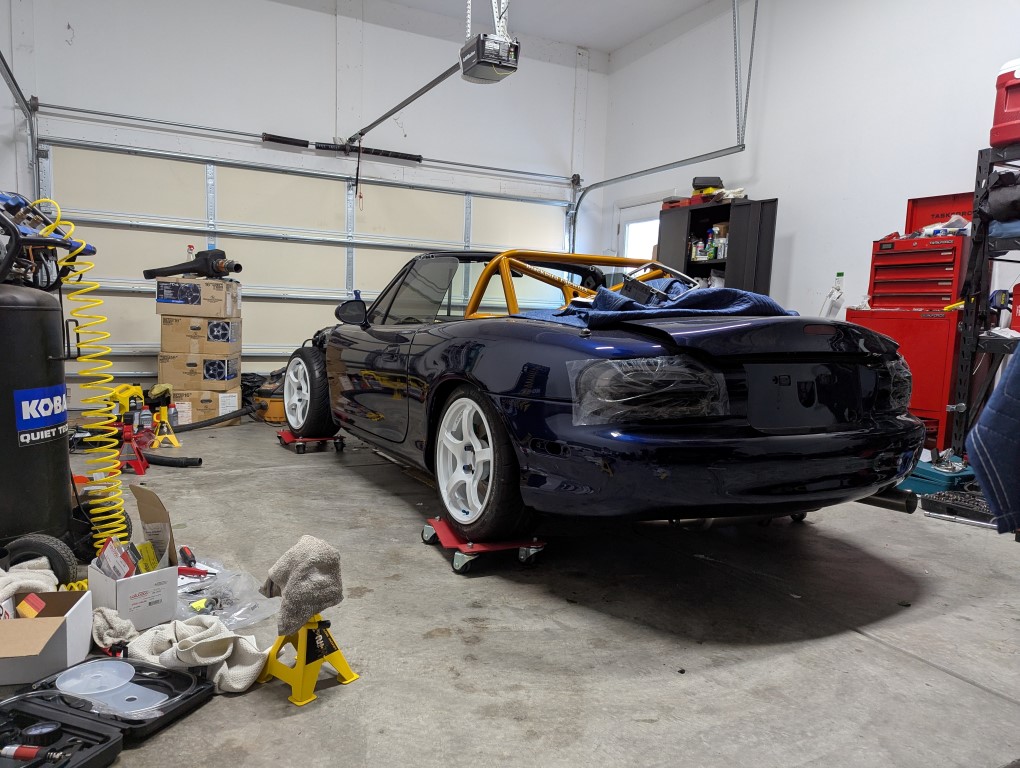
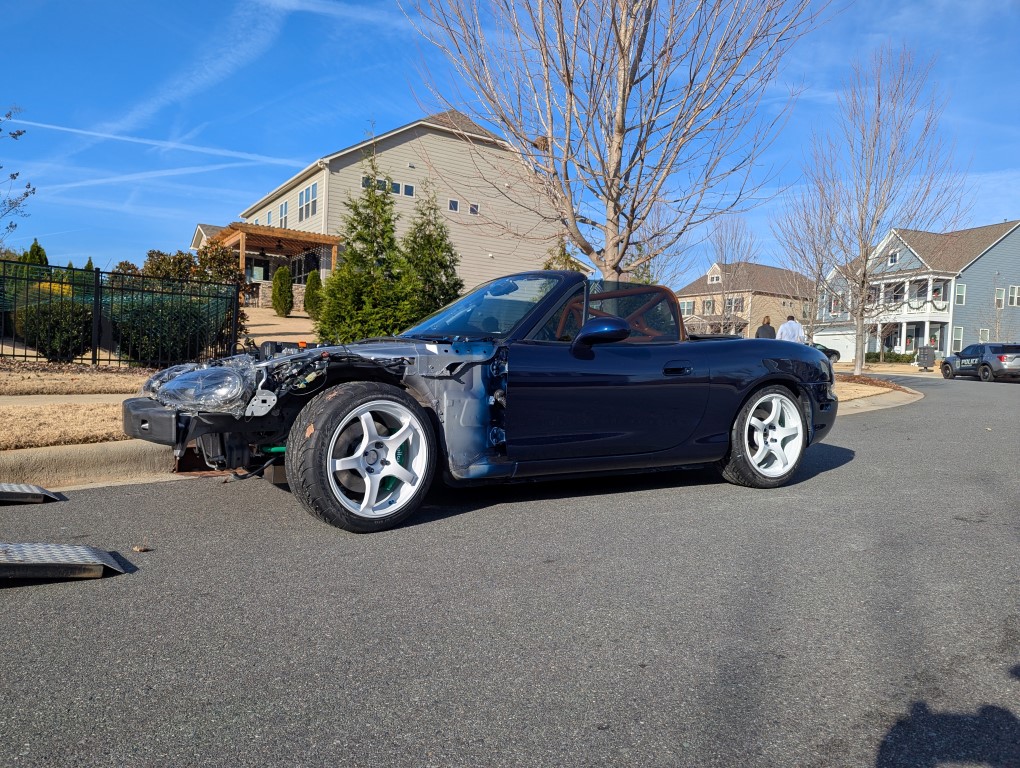
So two weeks ago (Dec 1)... My car finally it a pretty big milestone. I was able to finally take it off jack stands as the underside was 100% complete.
The car sits far lower than I thought it would with the coilovers adjusted to be fairly high....
Here's a pic of the Advan TC4 wheels with titanium lugs (16 x 8 + 38).
And here is the final update, After finishing all the work, and getting the wiring plugged in with the grounds attached. I was able to check and see if the car would attempt to turn over. Turning the key on, I got dash lights, rear brake lights were working. Rear trunk leds were working. But the car would not even attempt to turn over. I grabbed my laptop, tried to connect to the Haltech, and the PC could not find the ECU. I'm thinking the ECU isn't getting any power. This was essentially my biggest fear. Do all of the work per the instructions and then "nothing".
Electrical is not something I enjoy, and I could chase gremlins forever. So because I needed to extend a bunch of my front wires for the wire tuck and because I had my headlights retrofitted with BiXenon HIDs that have their own wiring, I opted to find a local auto wiring place, and just have them work it. My hope is when the car comes back, it's all wired up and working and we can then throw the tune on and finish putting everything back together.
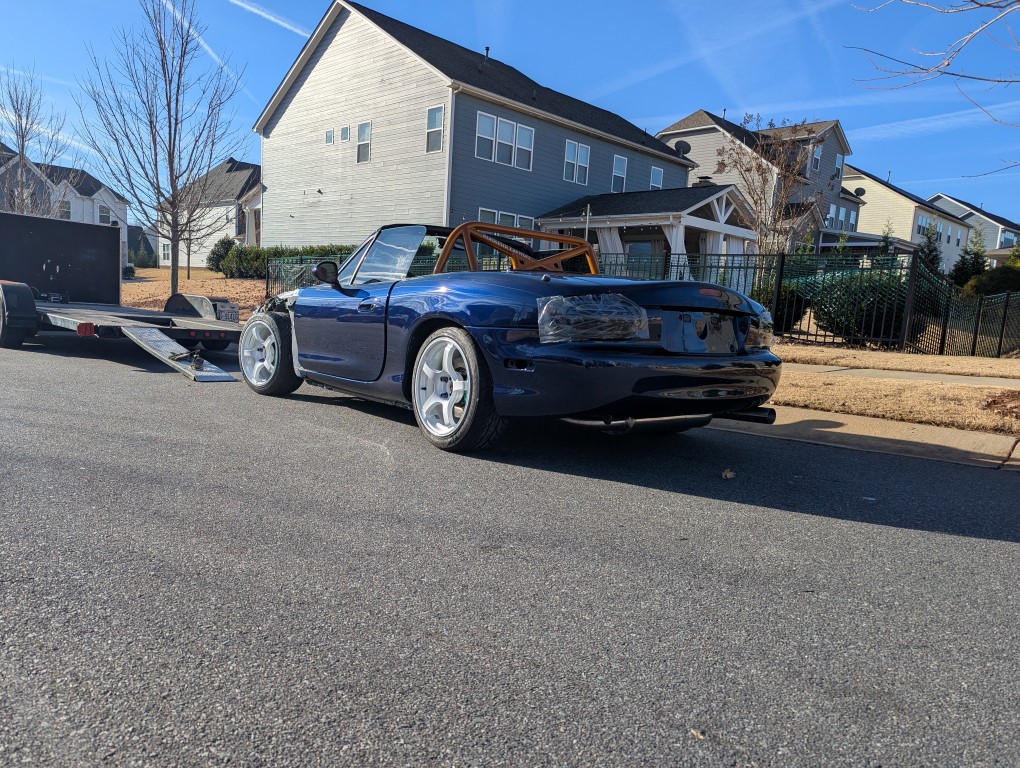
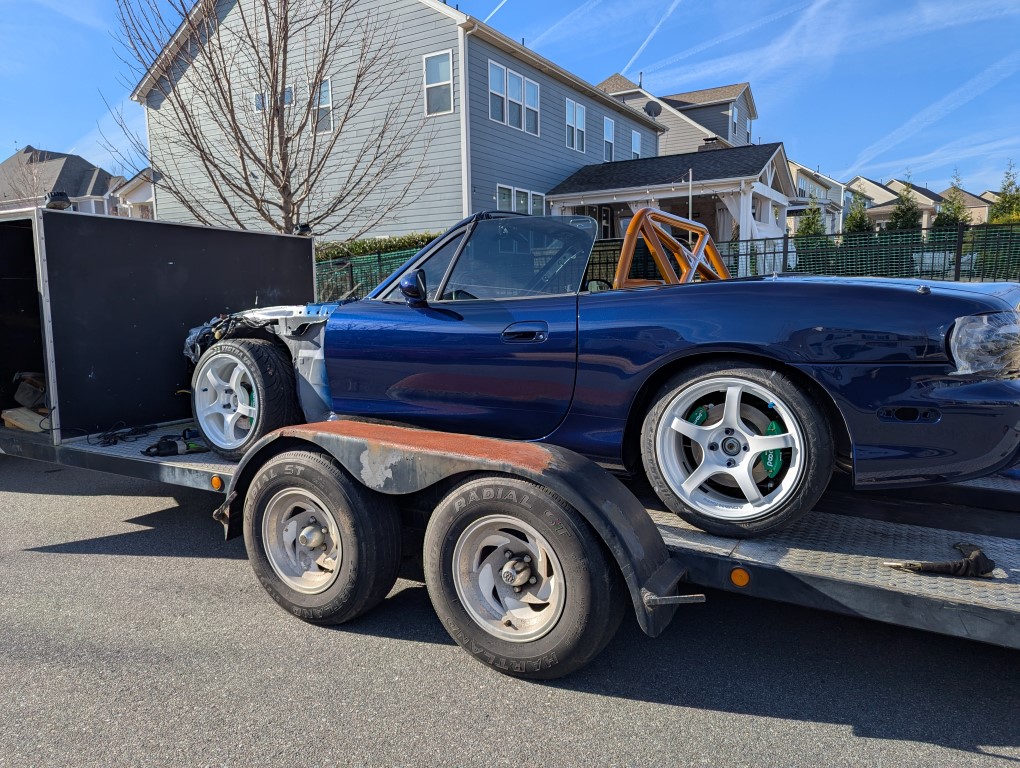
So as of yesterday (Dec 14), my car left on a trailer to the wiring place.
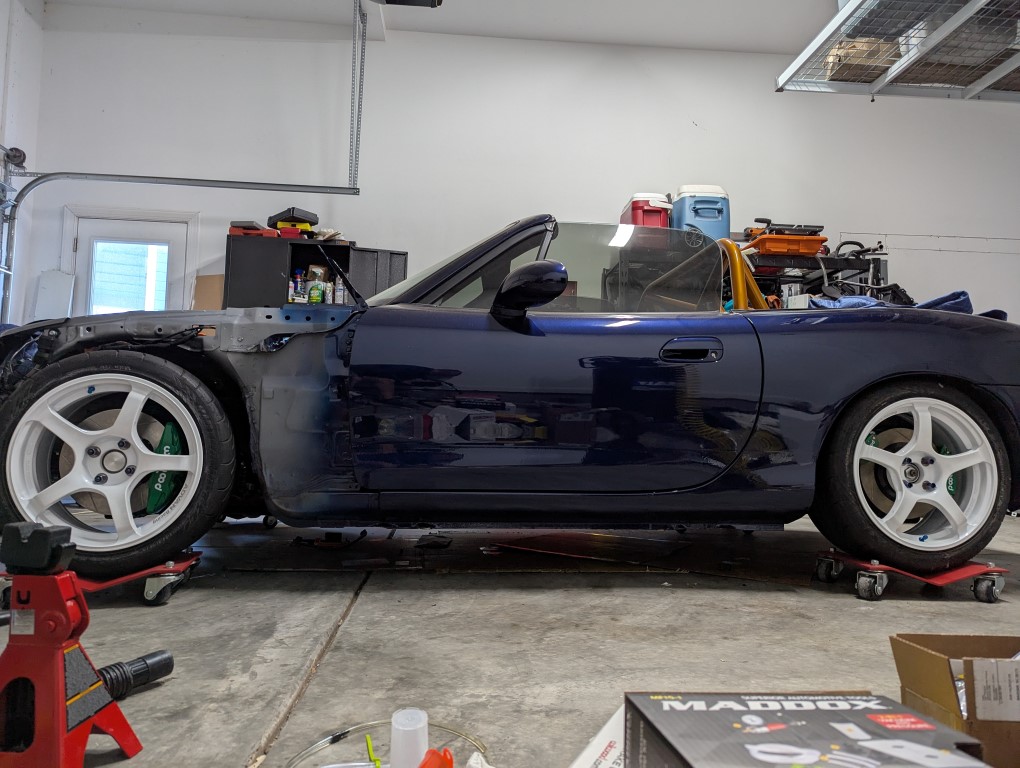
I ended up raising the coilovers to the highest they could go. I am pretty sure I have less than 1/4 of an inch left of adjustment. This is about as high as they can go. The hub center to fender is about 12 inches. So these knuckles really do lower the car quite a bit.
Picture of the coilovers and how high they are set
Car on the street before being loaded on the trailer
And finally on the trailer off to the wiring shop where it will spend Christmas. Hopefully come the new year, I'll be able to hear it fire up!!!
You've got a lot of faith in that "wiring place", I would have maybe tried a few basic checks to see if starter is getting 12v at the motor and solenoid, that part at least has nothing to do with Haltech. Unless that haltech harness controls starter now. I've only done the Hondata installs.
Also, how preloaded are those springs with the collars that high? You might have to get some coilovers with adjustable lowers to avoid high preload issues
Yea, I was going to do some checks, but in the end, there were other wiring updates that needed to be done (finish the wire tuck, wire the new headlamps). So it just made sense to have him do it all. I'm not sure what you mean by "faith". I guess I don't see much risk. In the end, I wish I had the cash to just remove the entirety of the oem harness and go 100% custom, to clean it up, but that's a bit more than I can afford right now.
As for the pre-load, you might be right. I'm not sure how much travel the shock has and I didn't check spring length before and after. So my ride might be a bit stiffer than I prefer. But I'm not too concerned "right now". This suspension was always meant to be a temp solution. My plan is to put it on air, so I can drive at a comfortable height for our roads here, and then have it sit lower when parked.
Heads up on the Chase Bay manual brake kit, I've seen the push rod adapter (the L bracket connecting the pushrod to the pedal) bend with hard track use. It leads to having almost no brakes. It really needs to be a clevis like the OEM setup.
Heads up on the Chase Bay manual brake kit, I've seen the push rod adapter (the L bracket connecting the pushrod to the pedal) bend with hard track use. It leads to having almost no brakes. It really needs to be a clevis like the OEM setup.
Really? Are you sure it bent or was it did it just loosen itself. Because, yes, that is a concern. The brake rod is tightened, loosened by a hex nut but there is no 2nd nut to lock it in place. I plan to add something to keep that tension. It'll also help strengthen that bolt if bending is an issue.
The user I personally talked to bent two of ends (circled below) before switching to a Honed Development kit. The first one survived a few weekends as he was learning the car. The 2nd one bent within a weekend of use. I think Chase Bay's decision to develop a kit that doesn't drill the brake pedal was a foolish one.
This car is so clean, thanks for the updates. I gotta ask give the quality of the other parts, why the choice of Tein?
Ha! Legit question... not only did I go with Tein.. but i went with Tein Basis (not even the monotubes) haha
My long term plan is air... I know the stigma about air and performance. With this being more a daily driver, but my commitment to build to be able to perform, I kind of waffled. Then I saw the video with Cody Miles (time attack champion) and his success on air shows that air can perform. Maybe not 10 out of 10 in performance, but well enough to compete. So for my needs, I just needed to know that air can perform. Now Cody drifts on air, and if you look, there are quite a bit of drifters on air. The ability with the 4p management to control pressure using height sensors is key. So that is the long term goal. Bagged setup with height sensors for the best possible performance that works well on street.
So Tein is just a temp solution, and the reason I chose Tein as my temp solution is because of the name cache (i'll be able to sell it later) and the green! Love the green!
Sorry long answer to a simple question
Emilio.. have you had any conversations with airlift about their performance suspension for the NA / NB platform? That would be the best option, but they don't have a miata kit.
The user I personally talked to bent two of ends (circled below) before switching to a Honed Development kit. The first one survived a few weekends as he was learning the car. The 2nd one bent within a weekend of use. I think Chase Bay's decision to develop a kit that doesn't drill the brake pedal was a foolish one.
That's quite concerning. I almost bought this kit during black friday. Has Chase Bays not updated their design to fix this, or is it a problem that ultimately has no fix?


 1
1


 So I planned to use the FM dual caliper bracket, but had clearance issues. The angle of attachment would required a fairly decent amount of notching. And I was really not comfortable with notching the bracket and sacrificing strength. So I ended up ordering a 2nd pair of brackets (for the caliper only and then cutting and clearancing the 2 caliper bracket. So the original dual caliper bracket will only be used for the parking brake and then the standalone bracket for the calipers using the 2nd pair of mounting holes. Someday I'd love to find a way to cleanly mount a hydro hand brake with a locking mechanism to act as a drift lever as well as parking brake. But that will be much further down the road, if ever.
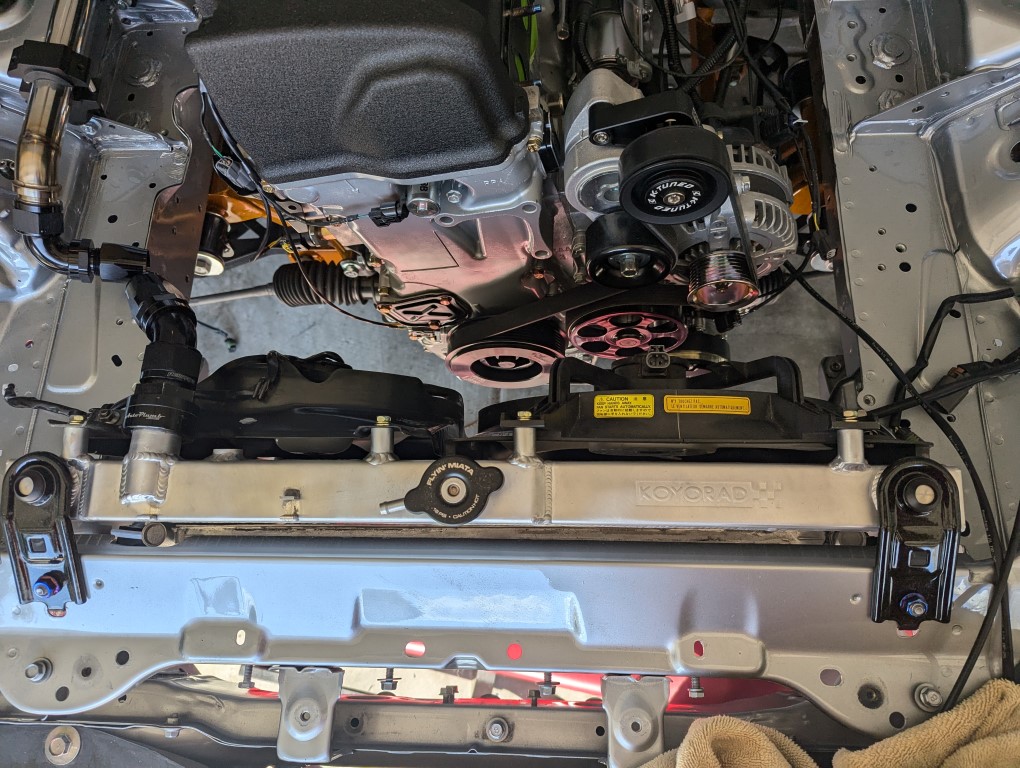
 \
\