Nothing to see here, just project Sisyphus, move along
 01-29-2015, 04:17 PM
#721
Elite Member
Thread Starter
iTrader: (37)

Join Date: Apr 2010
Location: Very NorCal
Posts: 10,441
Total Cats: 1,899
Hablando del diablo...
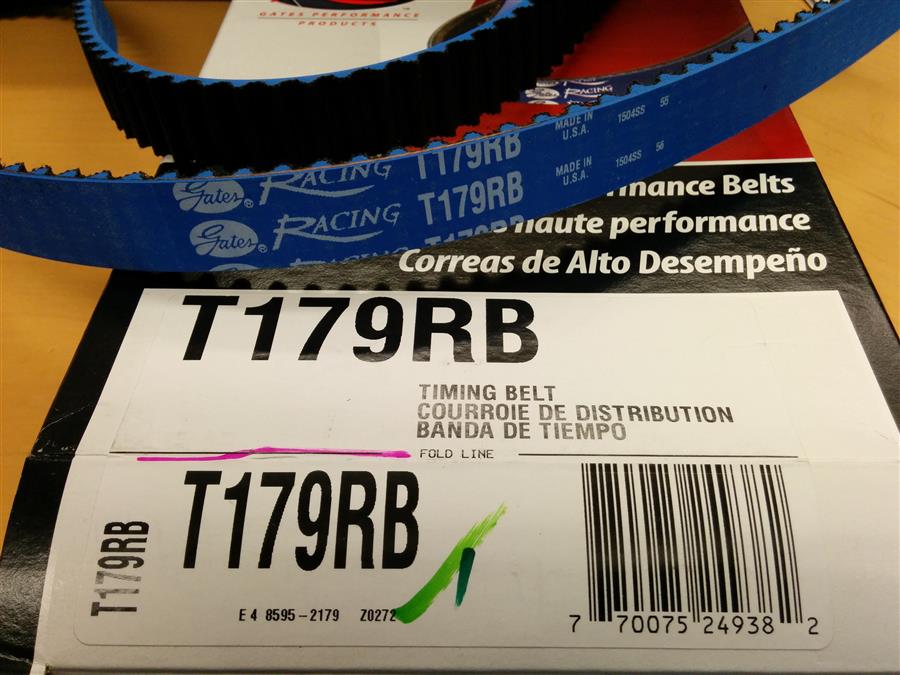
�Nuevo cintur�n azul!
�Nuevo bomba de agua! (Thats the end of my spanish for today)
It even came with a thermostat gasket, how nice of them.
More stuff should turn up tomorrow, I should probably go pick up a gallon of acetone and see who sells VHT locally.
Anyone actually use primer/color/clear on a block or have you guys just shot color? I can't remember what I did for my FE but I know it was all VHT and its held up great so far.

Reply
 0
0

0

 01-29-2015, 04:20 PM
#723
Elite Member

Join Date: Oct 2013
Location: Cedar City, UT
Posts: 2,764
Total Cats: 951
I do not recommend the clear unless it is a 2 pak expensive can of it. My diff has already started to yellow and I prepped the **** out of it, put tons of coats down, and used a decently nice 2 pak.
Reply
0
0
 01-29-2015, 05:19 PM
#725
Elite Member
Thread Starter
iTrader: (37)
Join Date: Apr 2010
Location: Very NorCal
Posts: 10,441
Total Cats: 1,899
My coworkers surprised me with that one morning. BecauseMiata.
Good to know, I will keep this in mind. I'm not sure I used clear when I did my truck. The last time I used clear was on my intake manifold and I'm sure we all remember how that turned out...
Sadly, not enough of these around these days :(
Sadly, not enough of these around these days :(
Reply
0
0
01-30-2015, 06:49 PM
#726
Elite Member
Thread Starter
iTrader: (37)
Join Date: Apr 2010
Location: Very NorCal
Posts: 10,441
Total Cats: 1,899
Hey, all the ARP studs are Made in the USA so I got that going for me 
I just realized I can't paint the block until I get the pan on, and I can't put the pan on until it has extra holes added. I was going to have Gesso weld up some threaded bungs in the pan like we did with the last one, but it would probably help if I gave him the pan...
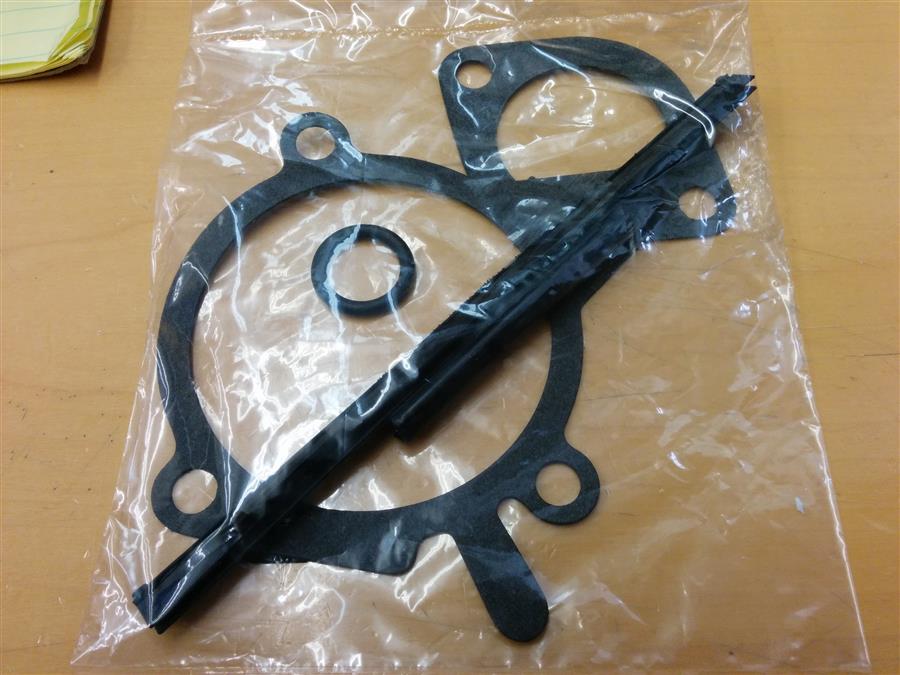
Anyway, big pack of gaskets showed up today. I'll probably try to make some progress this weekend by installing the oil and water pumps, and maybe the rear main carrier if I can get my torque wrench between the back of the block and the stand.
I was going to clear the exposed aluminum on the pump, but maybe I'll just leave it alone now.
I just realized I can't paint the block until I get the pan on, and I can't put the pan on until it has extra holes added. I was going to have Gesso weld up some threaded bungs in the pan like we did with the last one, but it would probably help if I gave him the pan...
Anyway, big pack of gaskets showed up today. I'll probably try to make some progress this weekend by installing the oil and water pumps, and maybe the rear main carrier if I can get my torque wrench between the back of the block and the stand.
I was going to clear the exposed aluminum on the pump, but maybe I'll just leave it alone now.
Reply
0
0
01-31-2015, 02:01 AM
#727
Elite Member

Join Date: Mar 2007
Location: Santa Clara, CA
Posts: 5,166
Total Cats: 855
IMHO if you're gonna paint the block you should do it with as little stuff on it as possible. I didn't bother to paint mine, so it's still a mix of old factory paint and surface rust... whatever.
--Ian
Reply
0
0
01-31-2015, 09:03 AM
#728
Cpt. Slow
iTrader: (25)
Join Date: Oct 2005
Location: Oregon City, OR
Posts: 14,192
Total Cats: 1,136
Yeah, I just painted Mobius's block with absolutely nothing on. Wipe some grease on the oil filter surface, and put a bolt in the 2 oil holes. Lock your stand diagonally, and paint one side at a time.
Reply
0
0
 02-01-2015, 10:22 PM
#731
Elite Member
Thread Starter
iTrader: (37)
Join Date: Apr 2010
Location: Very NorCal
Posts: 10,441
Total Cats: 1,899
So some paint happened:
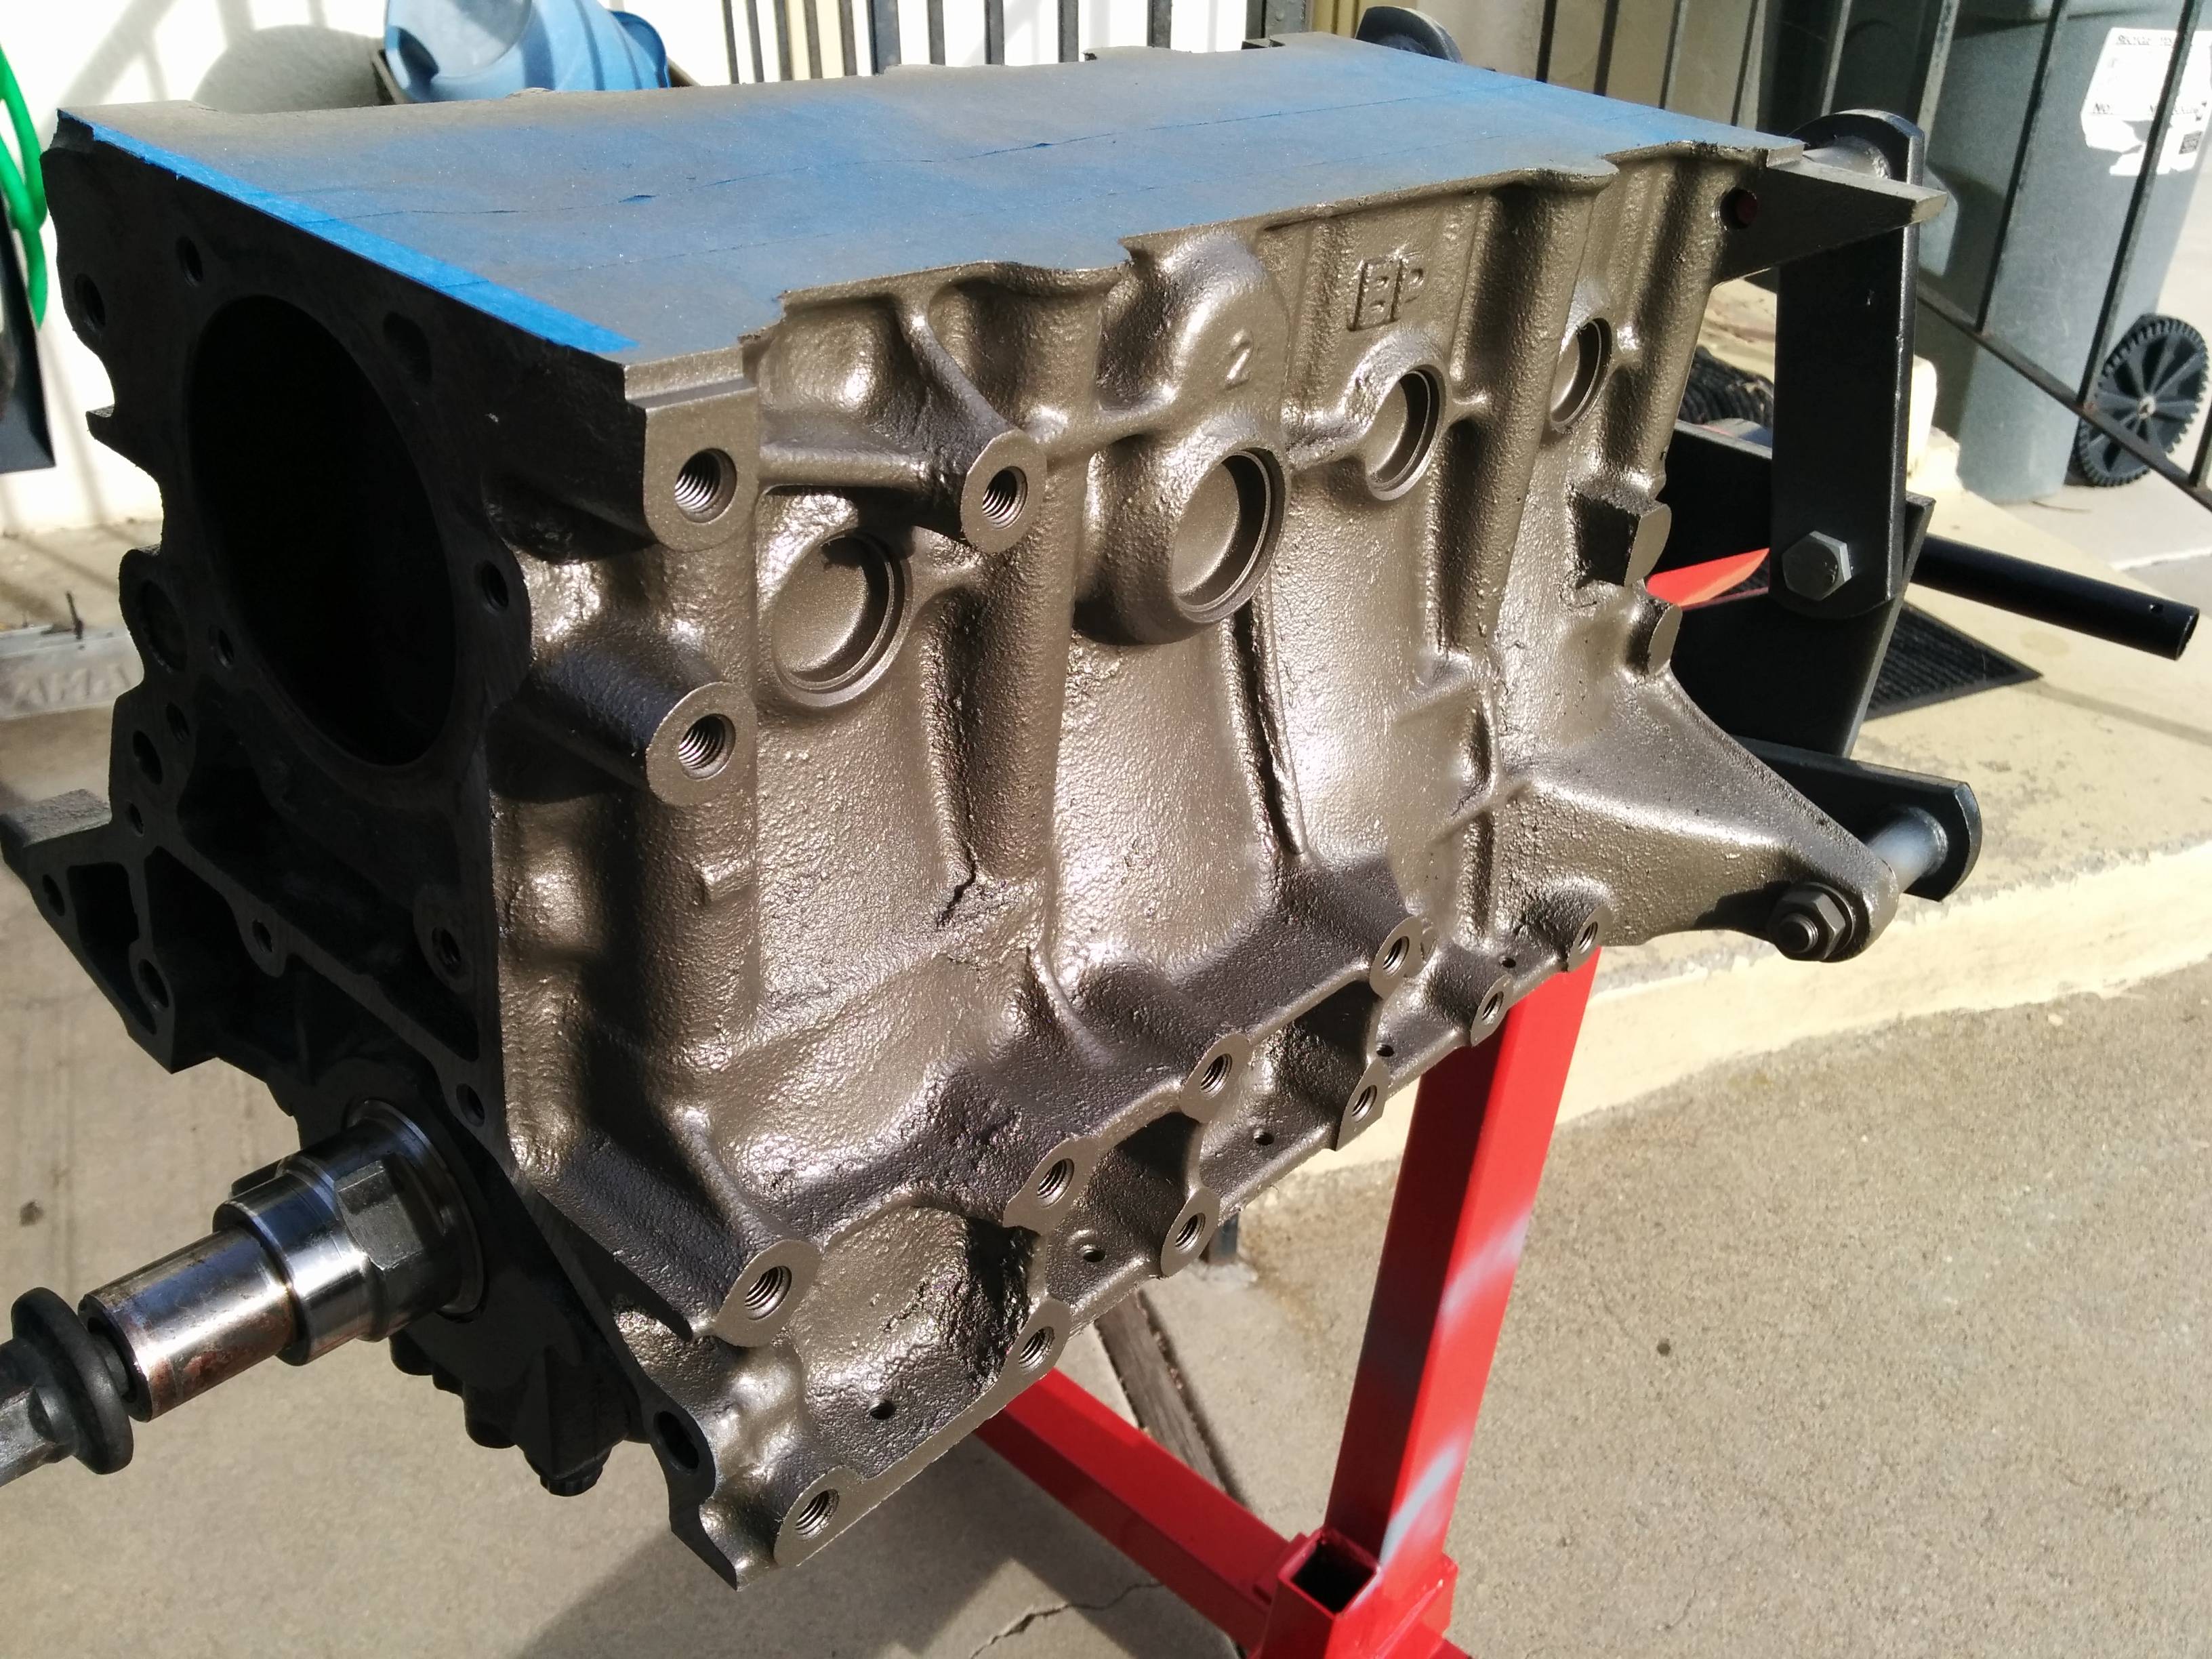
That is Dupli-Color DE1651 Ceramic Cast Coat Iron Engine Paint. Underneath that is VHT SP148 Engine Enamel Light Gray Primer, because thats what I had lying around, probably left over from when I did my Ford. I was really hoping it would be darker, but it'll do. Hopefully it holds up well. Obviously I've unmasked most of the block in that shot, I didn't paint it with the bottom end open like that
I started wiping down the gasket surfaces with acetone and suddenly a bunch of things happened...
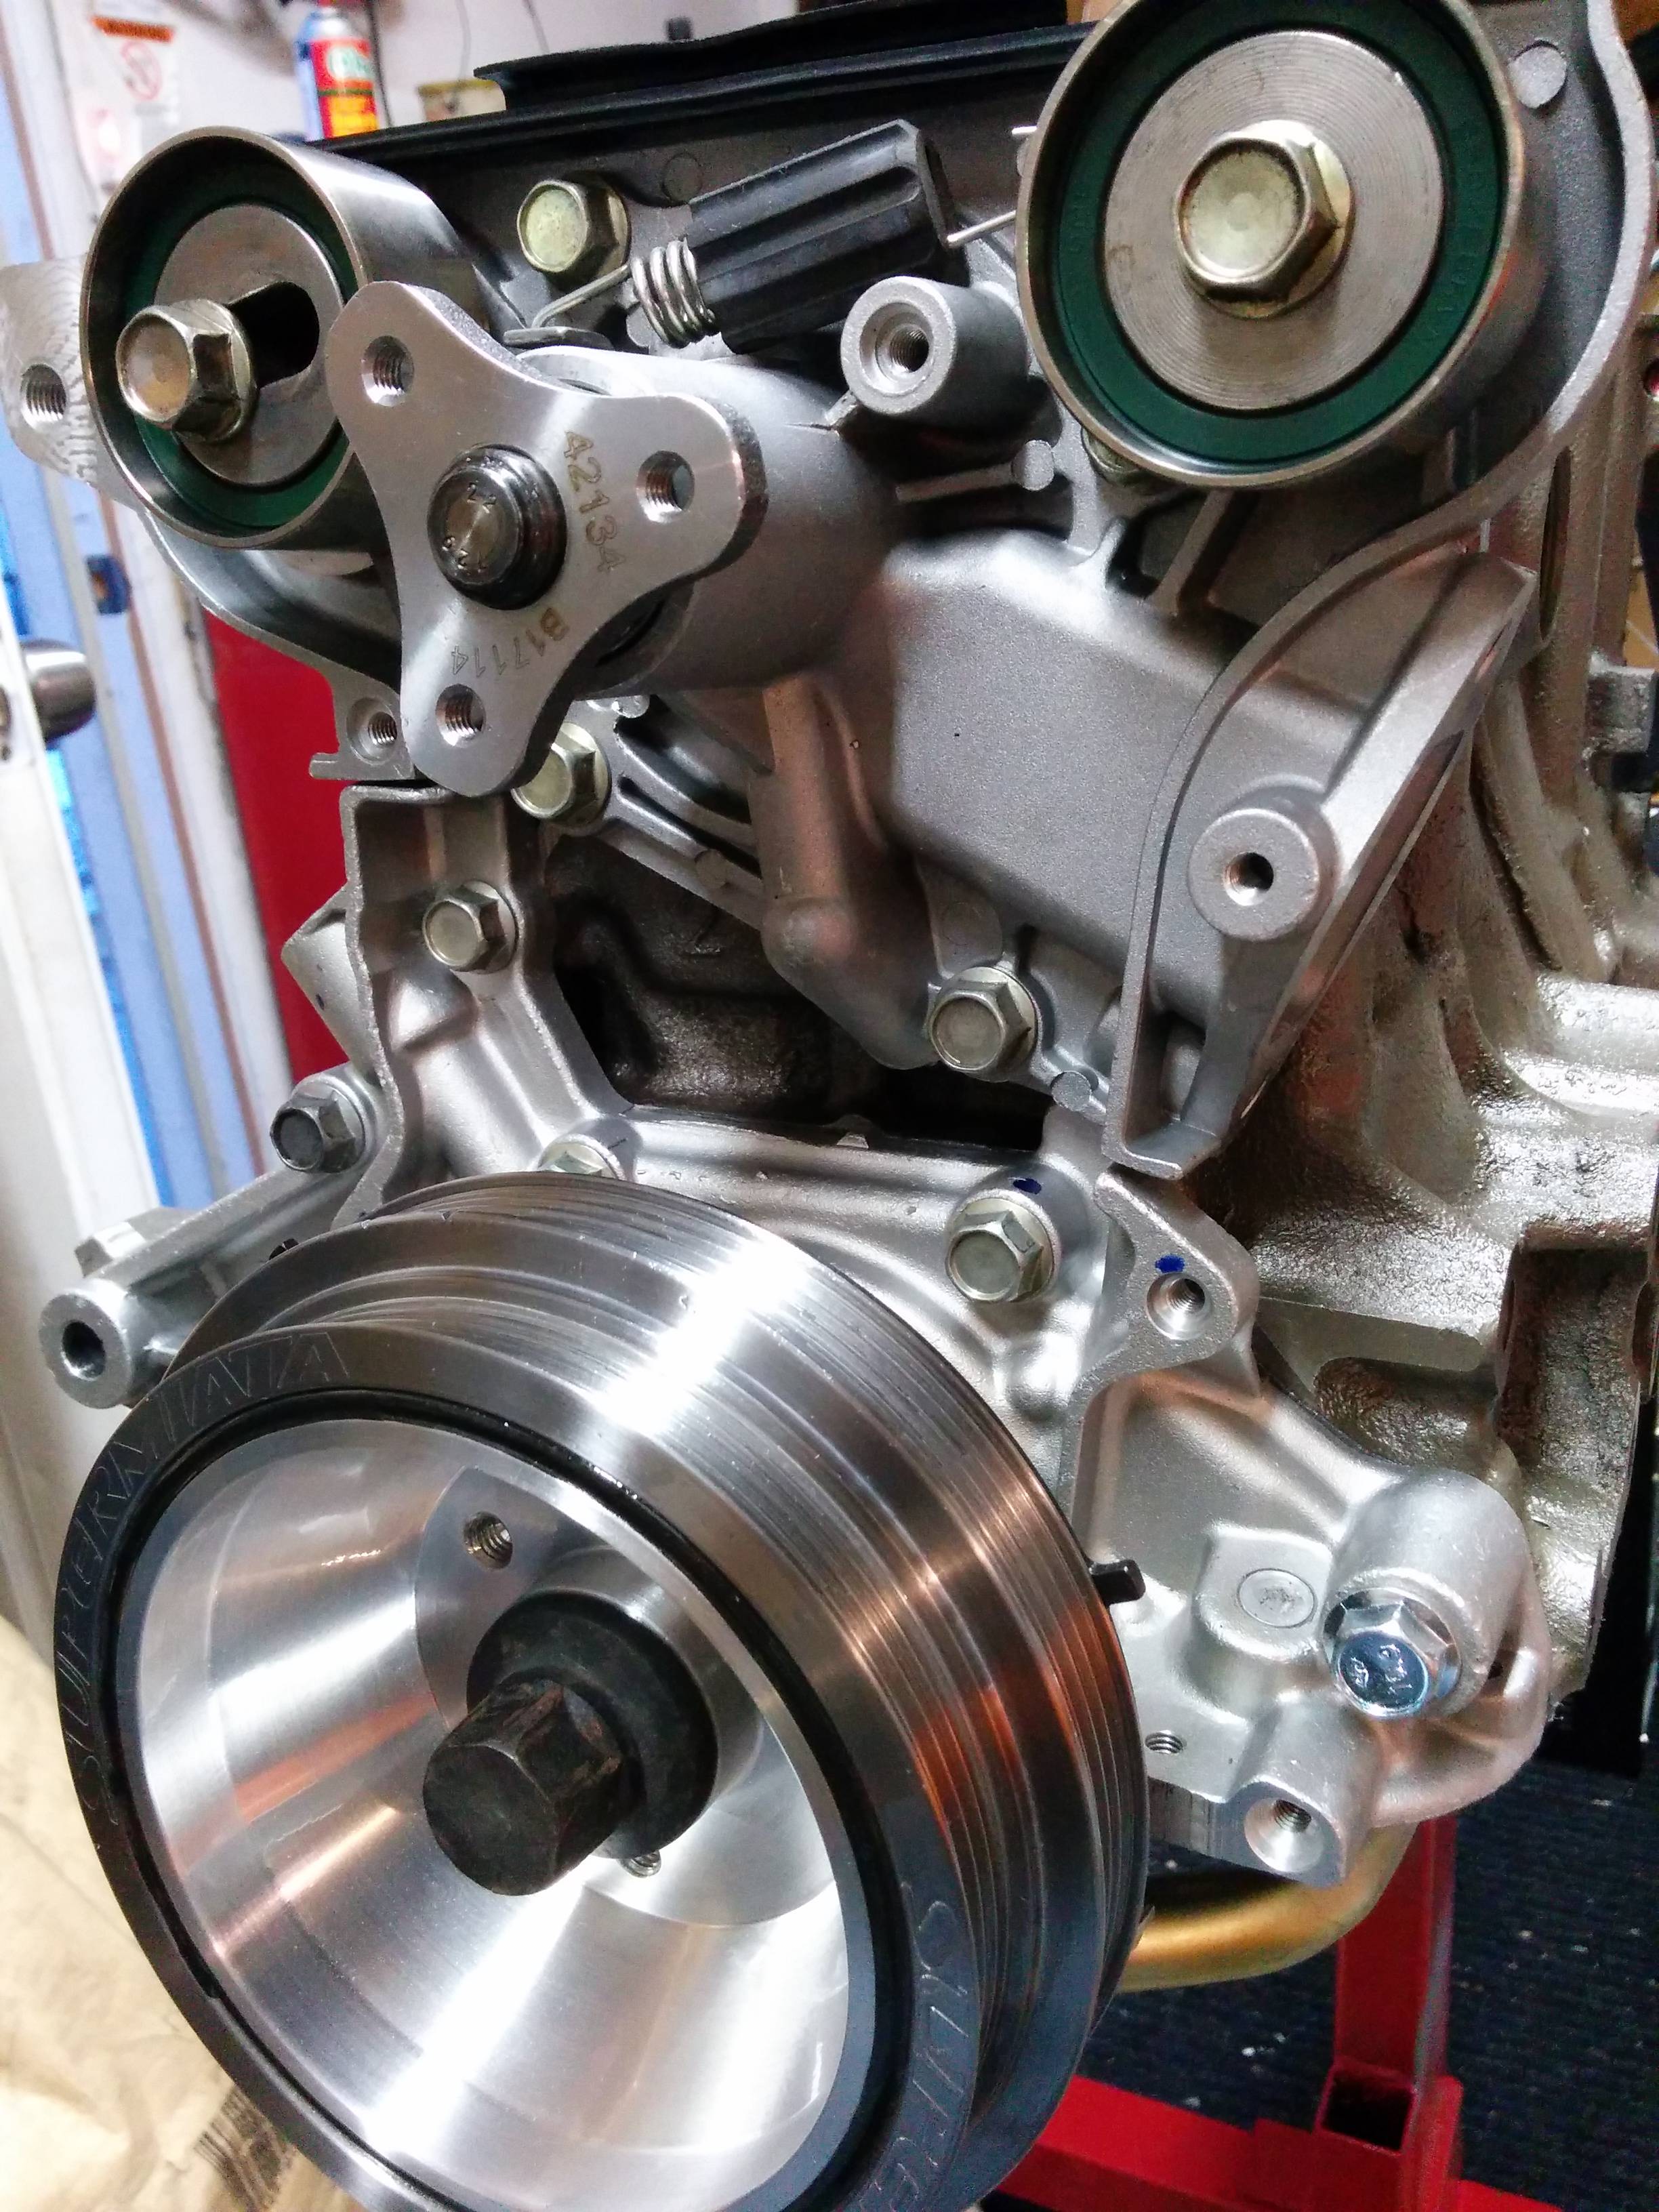
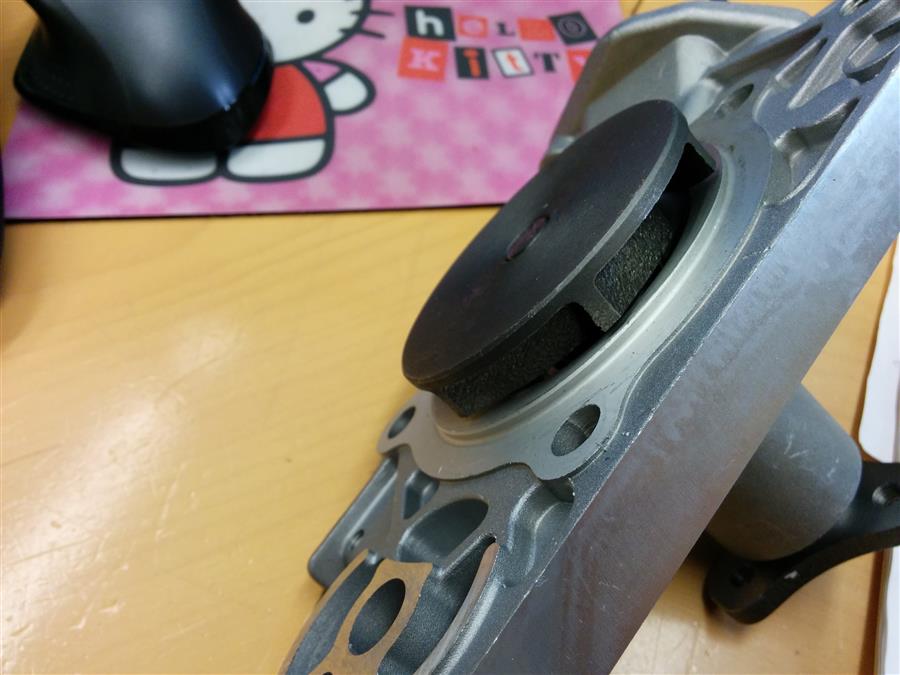
Boundary oil pump, Gates fancy impeller water pump, front main, rear main carrier (no main yet) most of the timing set, Supermiata harmonic damper, and the oil cooler/warmer.
Supermiata damper AND Boundary pump? Yes, I'm a belt and suspenders kind of guy. Do it once, do it right.
Fancy Boundary pump #341: street/strip (aka High Flow Pump) with +1 shim.
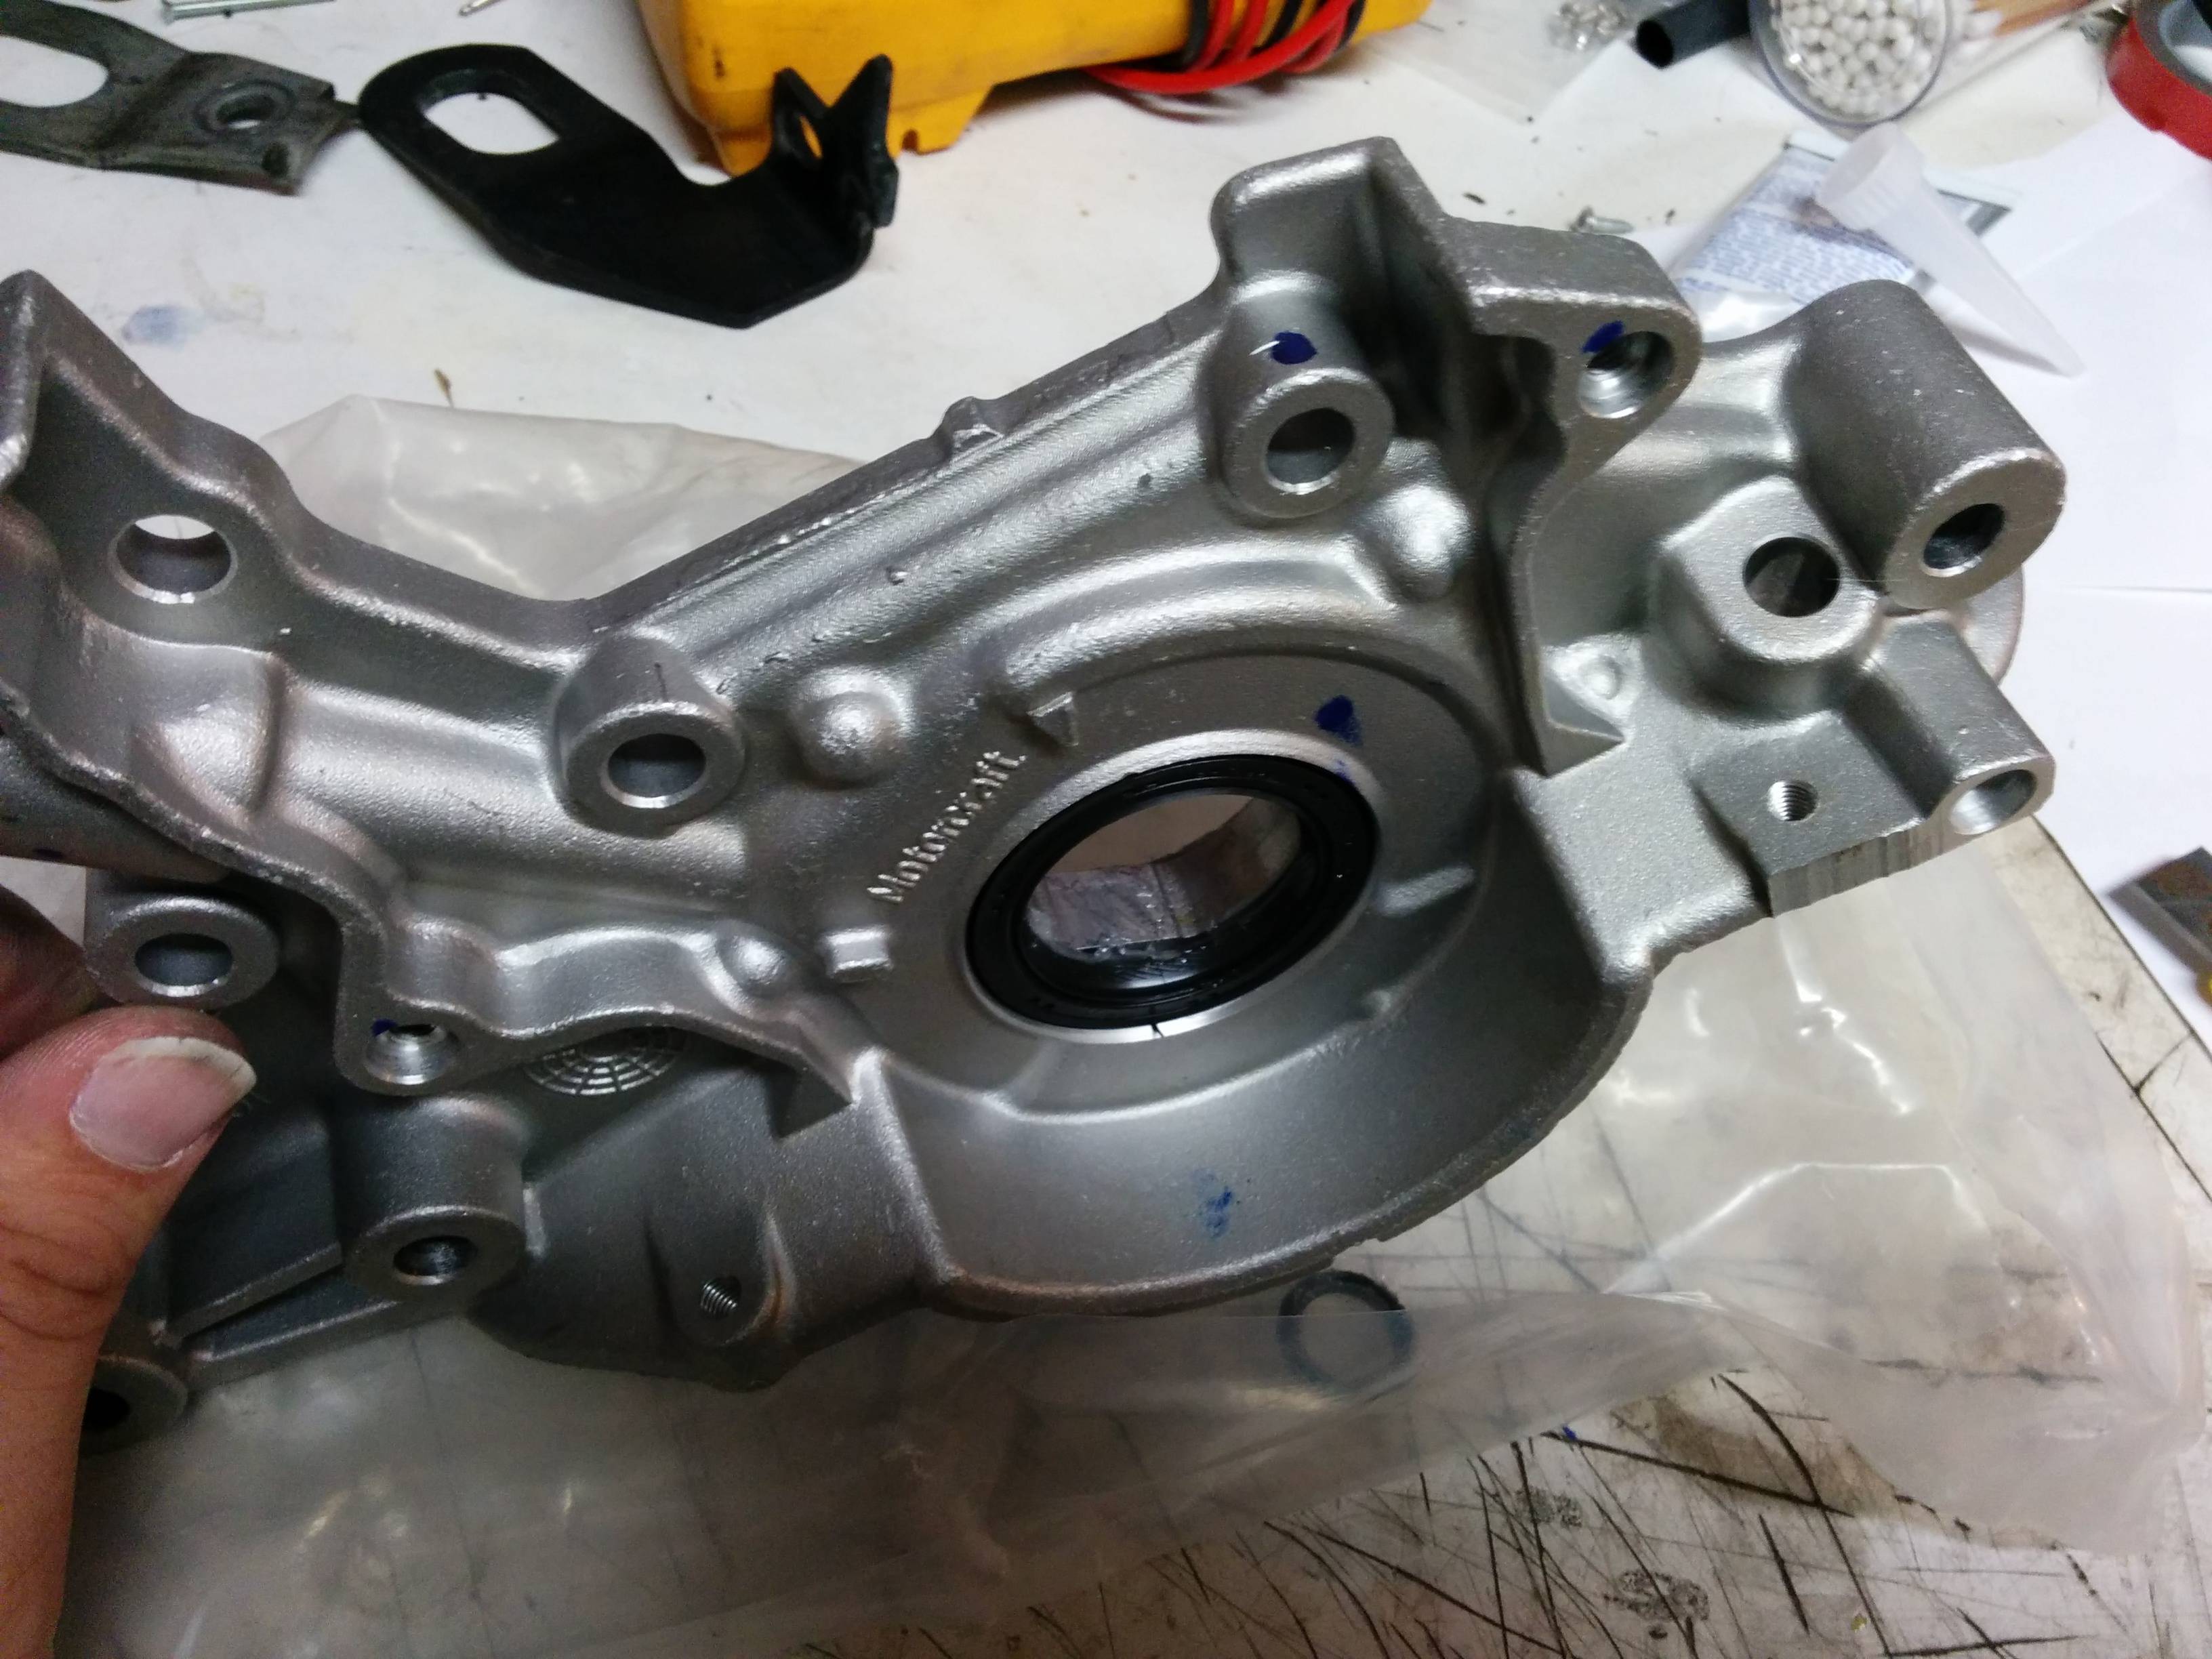
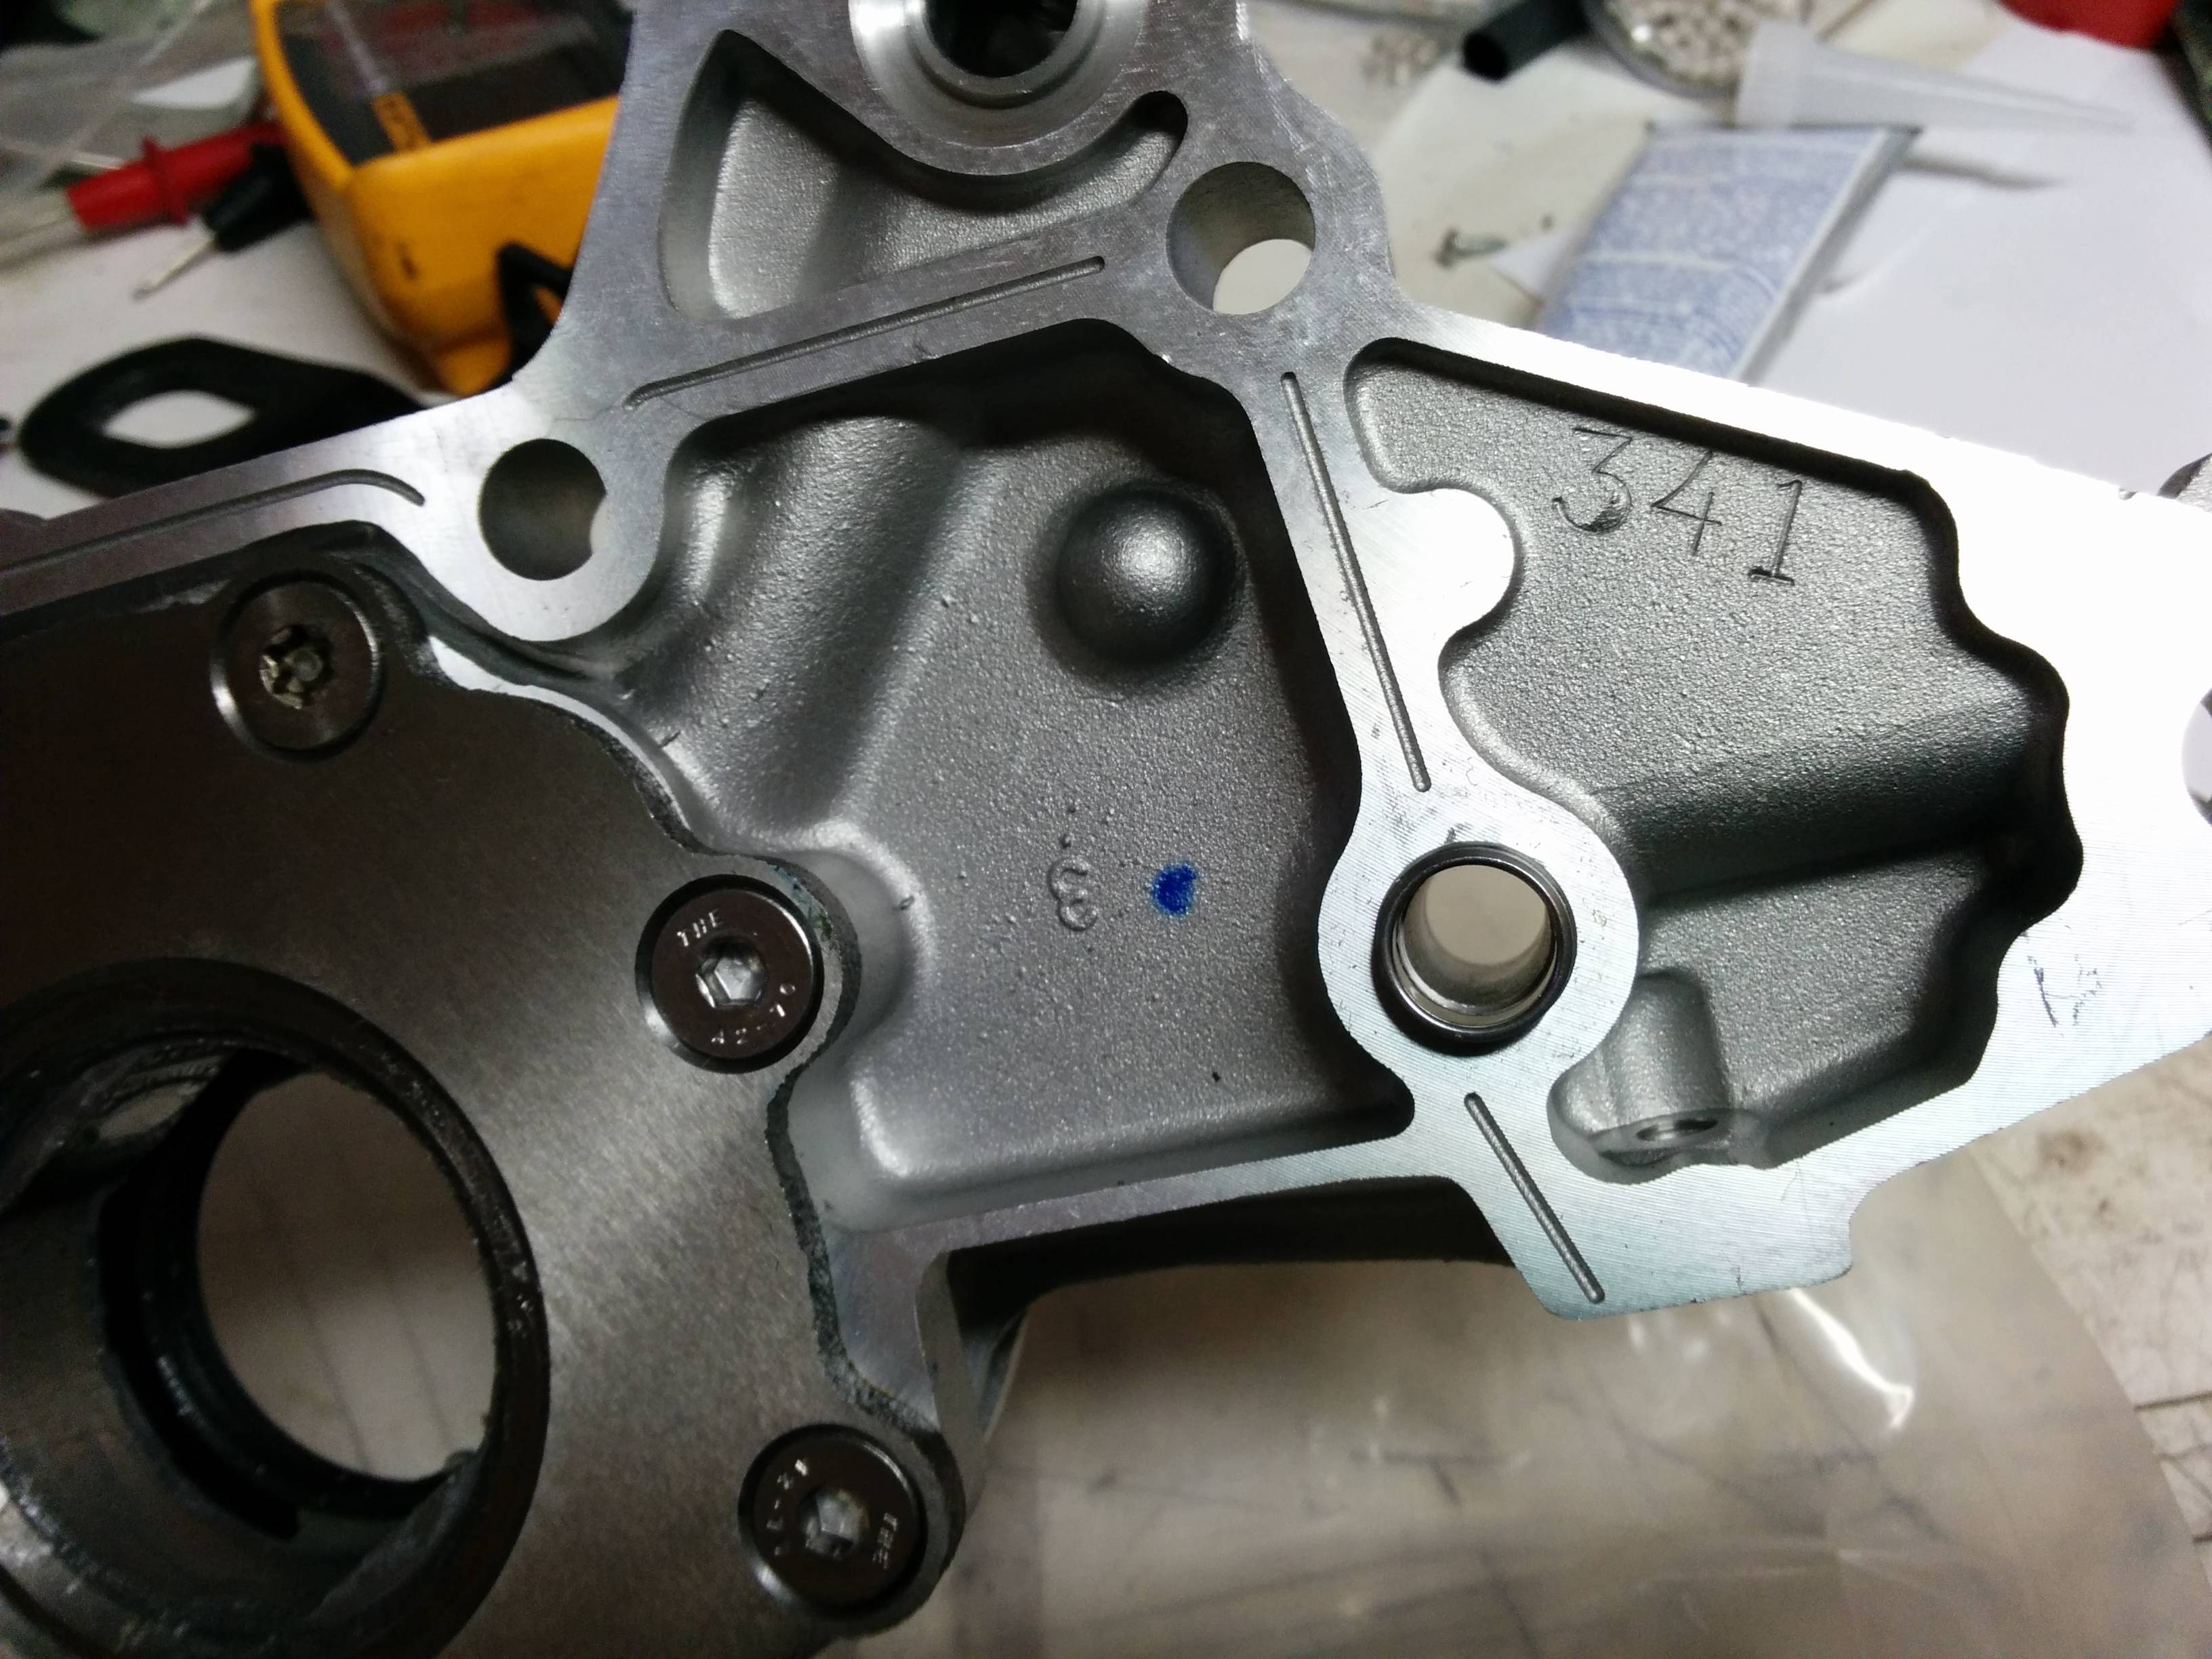
Front main was already installed in the pump. It made the installation only slight more challenging as I had to run the end of a zip tie around the seal while pressing it onto to crank to get it to pop on without flipping inside out and disgorging the tension spring. Also in the bottom of the image you can see the block to pump O-Ring. Sharp eyes will notice something missing...
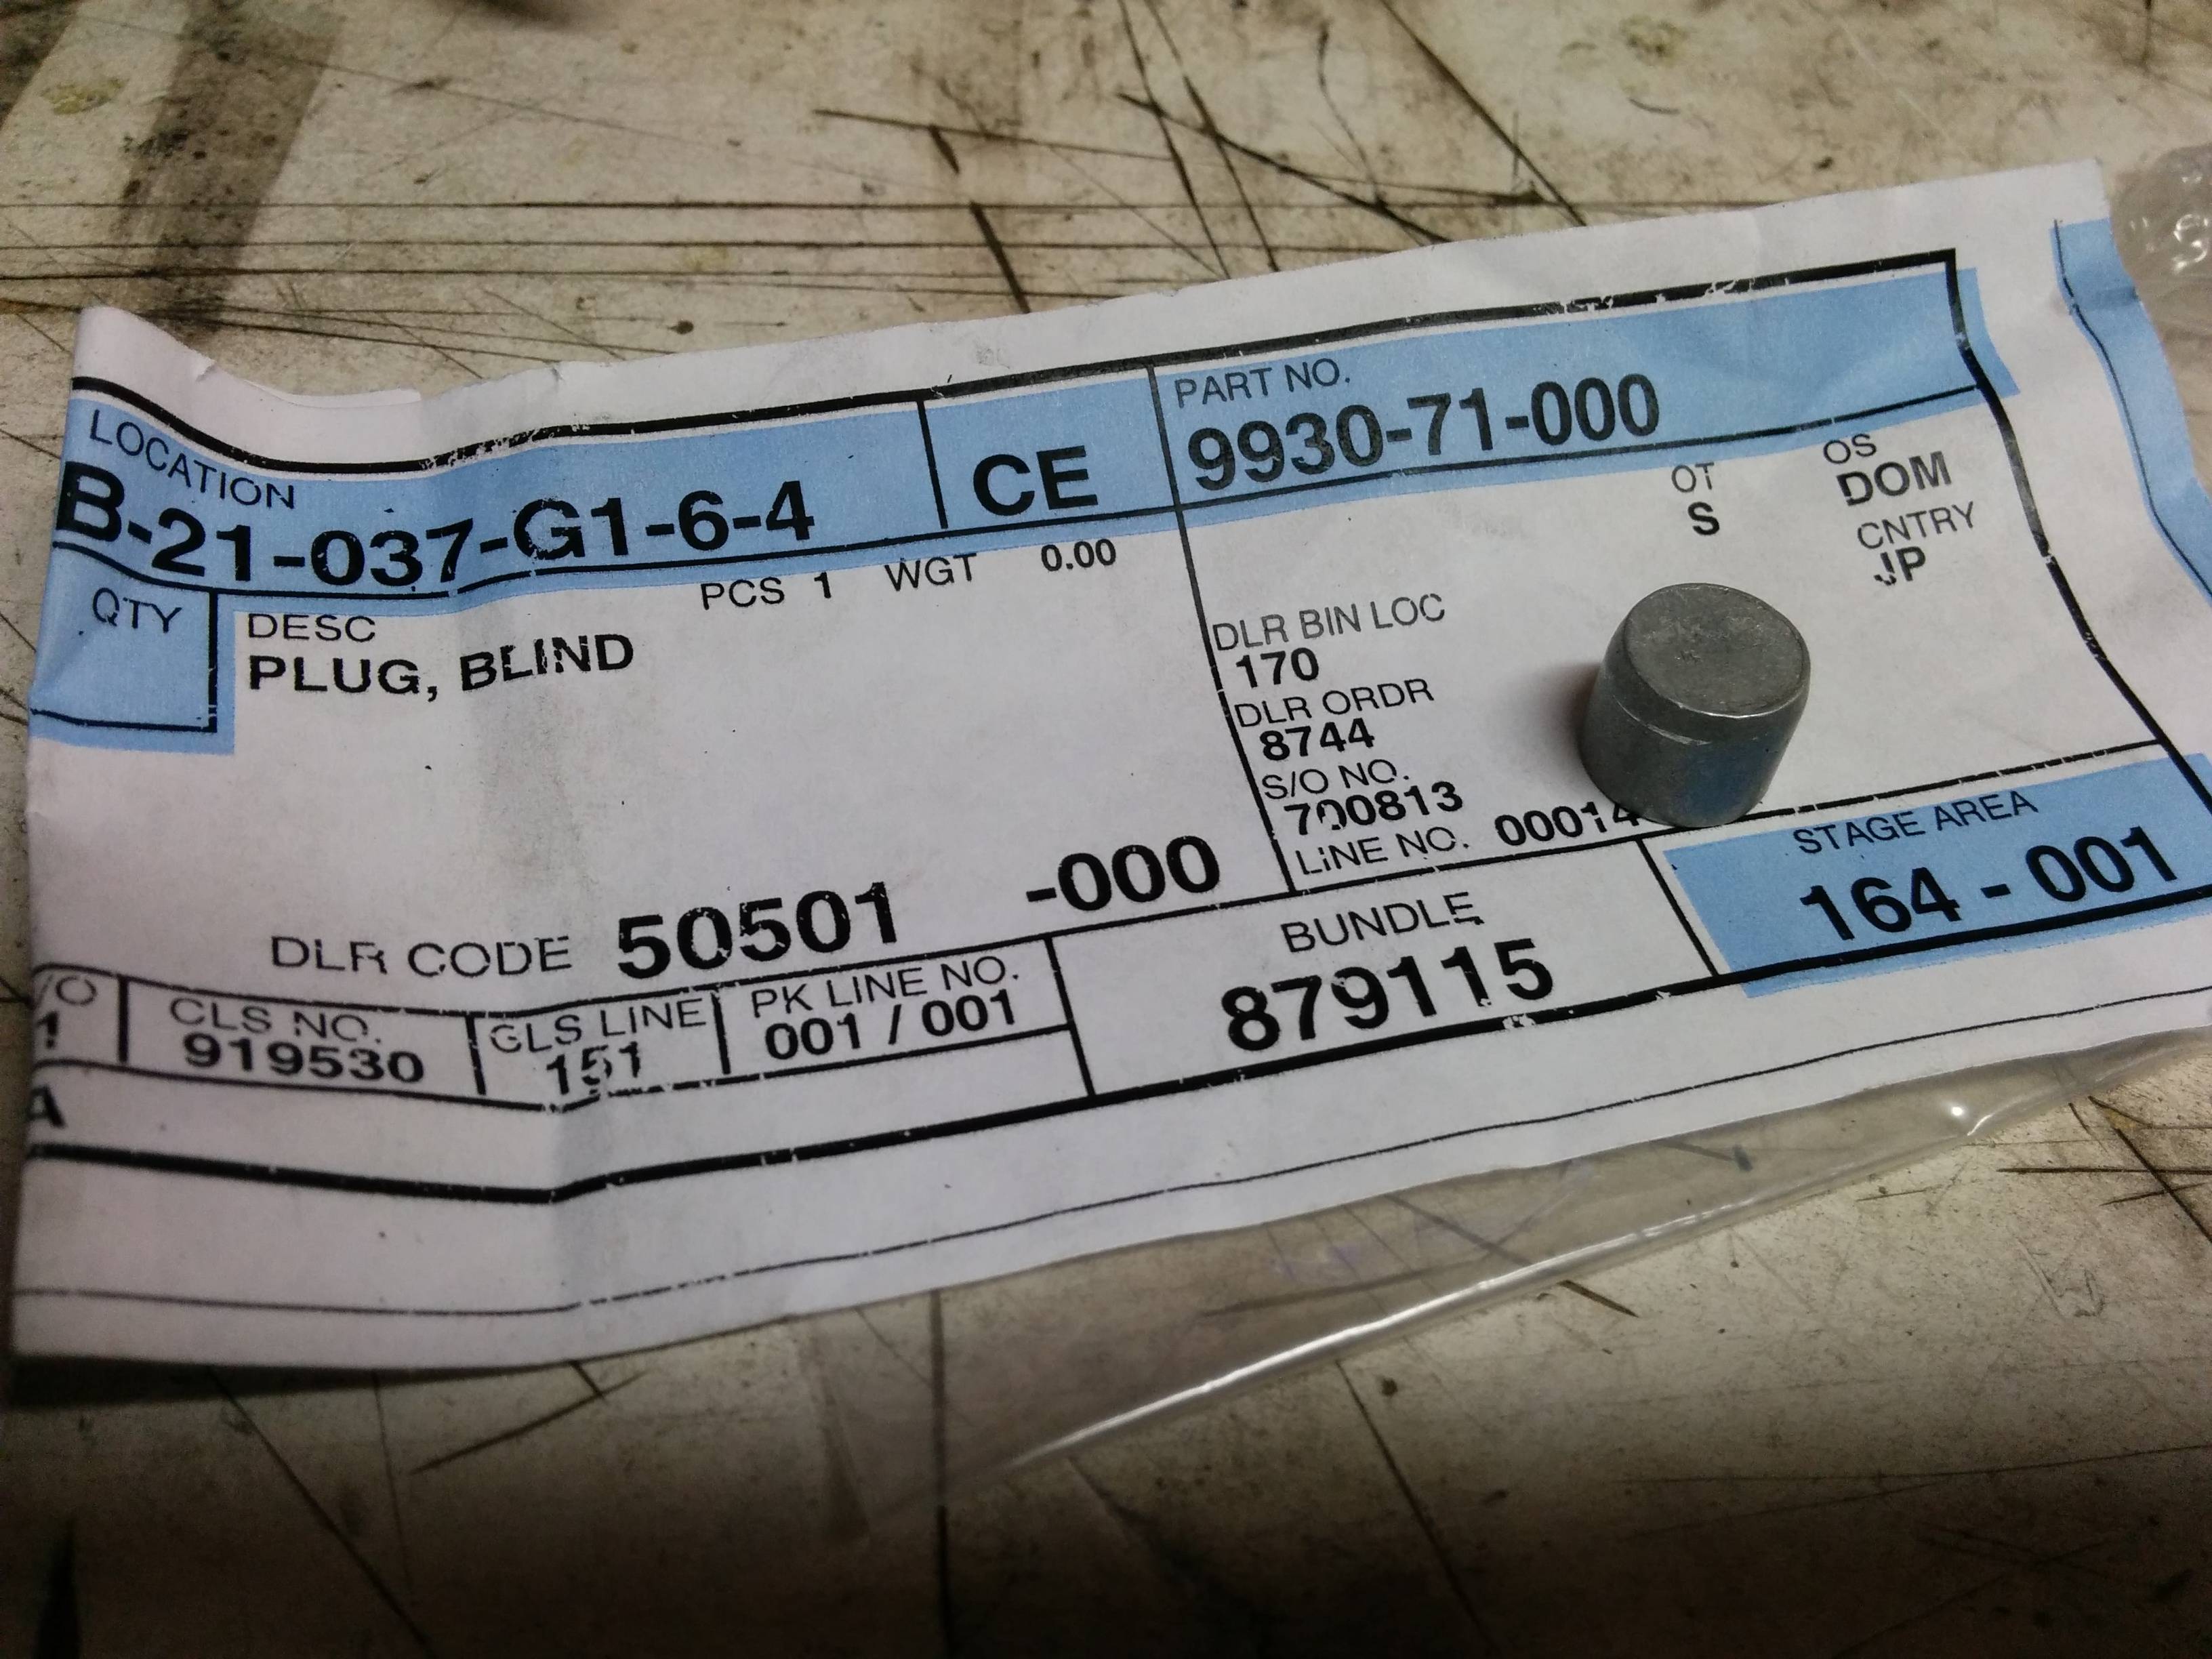
That would be this little ******. It plugs the hole where the FWD dipstick tube goes through the pump body. I put a very small amount of superblack in the bore and then drove that little bastard into its new home. The sealer was probably unneeded as it took quite a bit of whacking to get it flush with the pump body. Aggressive hammering on a very expensive pump will definitely make you pucker.
About the Supermiata damper... I chose to go with the 4T wheel because I am not smart and I know my stock ECU and the MS3 are already set up for it. The thing that impressed me about the timing wheel is that there is literally no way to put it on incorrectly. As long as you can get all 8 tiny little screws in there you are golden. The threaded holes could have been a little clener, but a quick blast with some brake cleaner cured that little issue. I installed the screws with blue loctite.
I'd also like to point out that the damper is not installed all the way. Its slipped on to the crank about 1/4" and its held in place by the bolt. I just wanted to see what it looked like on there.
I'm also not dead set on re-installing the oil heater/cooler. its on there now but it could easily come off again. In the future I see myself installing an oil cooler on this engine and I feel like the fewer things jacking with my oil supply, the better. I'm also not married to my oil temp/pressure sender sandwich plate. Need to figure out how I'm going to do all this moving forward. I need to find someone who has done this and go stalk their build thread.
That is Dupli-Color DE1651 Ceramic Cast Coat Iron Engine Paint. Underneath that is VHT SP148 Engine Enamel Light Gray Primer, because thats what I had lying around, probably left over from when I did my Ford. I was really hoping it would be darker, but it'll do. Hopefully it holds up well. Obviously I've unmasked most of the block in that shot, I didn't paint it with the bottom end open like that
I started wiping down the gasket surfaces with acetone and suddenly a bunch of things happened...
Boundary oil pump, Gates fancy impeller water pump, front main, rear main carrier (no main yet) most of the timing set, Supermiata harmonic damper, and the oil cooler/warmer.
Supermiata damper AND Boundary pump? Yes, I'm a belt and suspenders kind of guy. Do it once, do it right.
Fancy Boundary pump #341: street/strip (aka High Flow Pump) with +1 shim.
Front main was already installed in the pump. It made the installation only slight more challenging as I had to run the end of a zip tie around the seal while pressing it onto to crank to get it to pop on without flipping inside out and disgorging the tension spring. Also in the bottom of the image you can see the block to pump O-Ring. Sharp eyes will notice something missing...
That would be this little ******. It plugs the hole where the FWD dipstick tube goes through the pump body. I put a very small amount of superblack in the bore and then drove that little bastard into its new home. The sealer was probably unneeded as it took quite a bit of whacking to get it flush with the pump body. Aggressive hammering on a very expensive pump will definitely make you pucker.
About the Supermiata damper... I chose to go with the 4T wheel because I am not smart and I know my stock ECU and the MS3 are already set up for it. The thing that impressed me about the timing wheel is that there is literally no way to put it on incorrectly. As long as you can get all 8 tiny little screws in there you are golden. The threaded holes could have been a little clener, but a quick blast with some brake cleaner cured that little issue. I installed the screws with blue loctite.
I'd also like to point out that the damper is not installed all the way. Its slipped on to the crank about 1/4" and its held in place by the bolt. I just wanted to see what it looked like on there.
I'm also not dead set on re-installing the oil heater/cooler. its on there now but it could easily come off again. In the future I see myself installing an oil cooler on this engine and I feel like the fewer things jacking with my oil supply, the better. I'm also not married to my oil temp/pressure sender sandwich plate. Need to figure out how I'm going to do all this moving forward. I need to find someone who has done this and go stalk their build thread.
Reply
0
0
02-01-2015, 11:31 PM
#732
Elite Member
Join Date: Mar 2007
Location: Santa Clara, CA
Posts: 5,166
Total Cats: 855
So some paint happened:
I'd also like to point out that the damper is not installed all the way. Its slipped on to the crank about 1/4" and its held in place by the bolt. I just wanted to see what it looked like on there.
I'm also not dead set on re-installing the oil heater/cooler. its on there now but it could easily come off again. In the future I see myself installing an oil cooler on this engine and I feel like the fewer things jacking with my oil supply, the better. I'm also not married to my oil temp/pressure sender sandwich plate. Need to figure out how I'm going to do all this moving forward. I need to find someone who has done this and go stalk their build thread.
Note that unless you get creative, you'll probably need to retain the oil/water heat exchanger as a spacer if nothing else. Sandwhich plates generally don't fit directly against the block because the ribbing is in the way.
I didn't go into a lot of detail on the oil stuff in my build thread, but I have:
- Stock heat exchanger used as a spacer (no water plumbed to it)
- Mocal thermostat sandwich plate (the one FM uses, although I bought it from Summit)
- Stock filter
I then have a pair of -10 AN fittings in the Mocal sandwich plate (FM supplies -8s, but IMHO that's not big enough), and braided stainless lines going to a -10 cooler mounted on the FM brackets (attaches via the steering rack bolts).
At one point I had a remote filter adapter installed as well, and mounted the filter on the firewall. I took this out, mainly because I wanted the space for the ABS pump when I was transplanting ABS into the car.
At the moment I don't have an oil temp sender installed, although I do have an inline -10 AN male/female fitting with a 1/8 NPT hole in it, which is intended for this purpose. I couldn't find a spare sender for my oil temp gauge when I was putting the motor together, so I decided I'd fix that later.
Digging through my spare shots of the motor before I put it in, I found one of the oil setup:
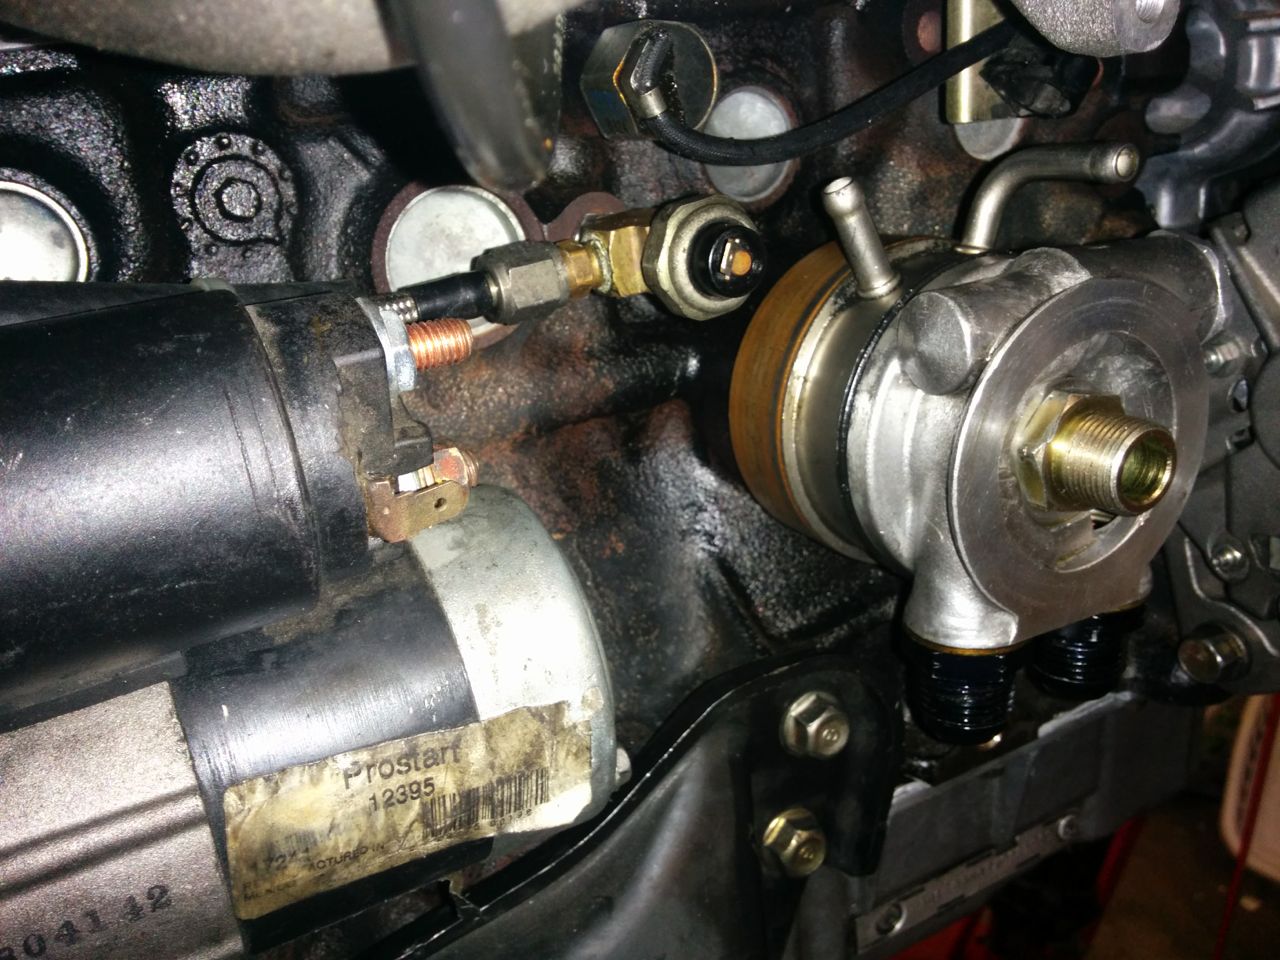
The AN fittings are black and camouflaged against the block.
--Ian
Reply
0
0
02-02-2015, 12:41 AM
#733
Cpt. Slow
iTrader: (25)
Join Date: Oct 2005
Location: Oregon City, OR
Posts: 14,192
Total Cats: 1,136
Bets on who's engine finishes first? Yours or Mobius? I put paint on his Friday, but haven't touched it since. Rotating assembly isn't even going out for balancing until tomorrow. ATI damper here. I'm very excited that you've called it a giant PITA to install!
Reply
0
0
02-02-2015, 11:15 AM
#735
Cpt. Slow
iTrader: (25)
Join Date: Oct 2005
Location: Oregon City, OR
Posts: 14,192
Total Cats: 1,136
I have the ATI damper here in front of me. It has the lower timing sprocket built into it, and yes, requires you to pull it off to perform a timing belt change. I'm assuming 949's is similar.
I'd suggest using the best belt money can buy (gates racing) to avoid having to replace it any time soon.
However, the internet's very first picture from the back of a 949 pulley from the OP would be really helpful...
I'd suggest using the best belt money can buy (gates racing) to avoid having to replace it any time soon.
However, the internet's very first picture from the back of a 949 pulley from the OP would be really helpful...
Reply
0
0
02-02-2015, 11:18 AM
#736
Elite Member
Thread Starter
iTrader: (37)
Join Date: Apr 2010
Location: Very NorCal
Posts: 10,441
Total Cats: 1,899
Thanks for the pics Ian! I'll take a look 
That's not even a bet, smart money is on Mobius.
It looks like you will have to remove the damper to do it. The damper is not on all the way yet, but I'll try to poke my nose in there and let you know.
That was my logic as well. Blue belt is in my box o'parts.
What's it worth to you?
That's not even a bet, smart money is on Mobius.
Reply
0
0
02-02-2015, 01:03 PM
#737
Elite Member
Join Date: Mar 2007
Location: Santa Clara, CA
Posts: 5,166
Total Cats: 855
And yes, the TB pulley is integral, so you need a third hand to hold the TB up, teeth engaged with the pulley. Then for some reason when I put mine on this time the woodruff key got cocked and the pulley was machining it as I wrenched it down. There's also an intricate dance of which bolts and plastic covers need to be installed before the pulley, and which ones afterwards.
Anyway, it's a PITA to install, but I haven't blown up an oil pump yet, so...

--Ian
Reply
0
0
02-02-2015, 01:09 PM
#738
Elite Member
Thread Starter
iTrader: (37)
Join Date: Apr 2010
Location: Very NorCal
Posts: 10,441
Total Cats: 1,899
Haha, I got in on the first group buy for the Supermiata Damper specifically so I wouldn't have to 1.) deal with the ATI dance and 2.) buy a Boundary pump. Then magically a pump fell in my lap. I didn't complain much
Reply
0
0
02-02-2015, 01:57 PM
#739
Elite Member
Join Date: Mar 2007
Location: Santa Clara, CA
Posts: 5,166
Total Cats: 855
The car makes 25 psi of oil pressure at idle! Of course, that's with straight 30 weight in it, it'll probably go down with real oil.--Ian
Reply
0
0


