
Why we can't have nice things (slowly building a sport touring nb)


Thread Starter
Junior Member
iTrader: (1)
Joined: Jan 2016
Posts: 179
Total Cats: 29
From: Los Angeles
Build log for my '99. I'm trying to put together a reliable, well-mannered street car that I can take to casual autocross/open track days, use as a daily, and take on long road trips. A stock Miata would definitely fit the bill, but I would also like to be able to pass minivans on the freeway. The build is intended to be very generic. Certainly not the most exciting project, but I'm not looking to spend time/money on unproven mods when there is so much documentation available for these cars.
I've had the car for over a year and progress has been slow. "Maintenance before mods" has been my approach, but whenever I get the car running well and set my eyes on an upgrade, like clockwork something new breaks and I have to allocate time and resources repairing it.
Background:
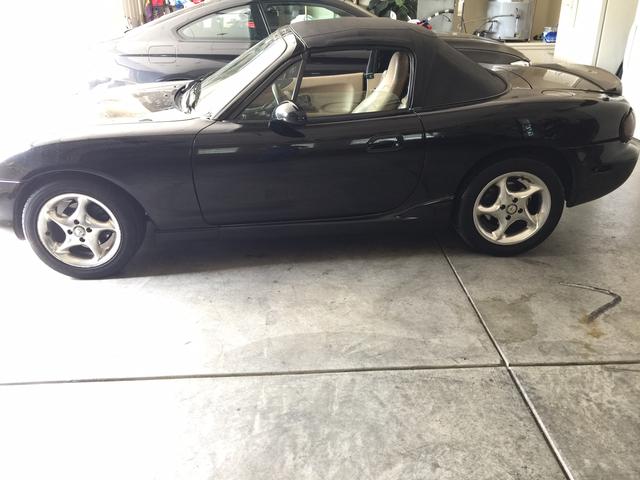
In April of 2015 I sold my Yamaha FZ6 because I needed a slightly more practical vehicle. I wanted as close to the motorcycle experience as I could get with 4 wheels, so I decided to pick up a convertible. I also needed something that wouldn't cost too much more than I had gotten for my bike, so a miata was the natural choice.
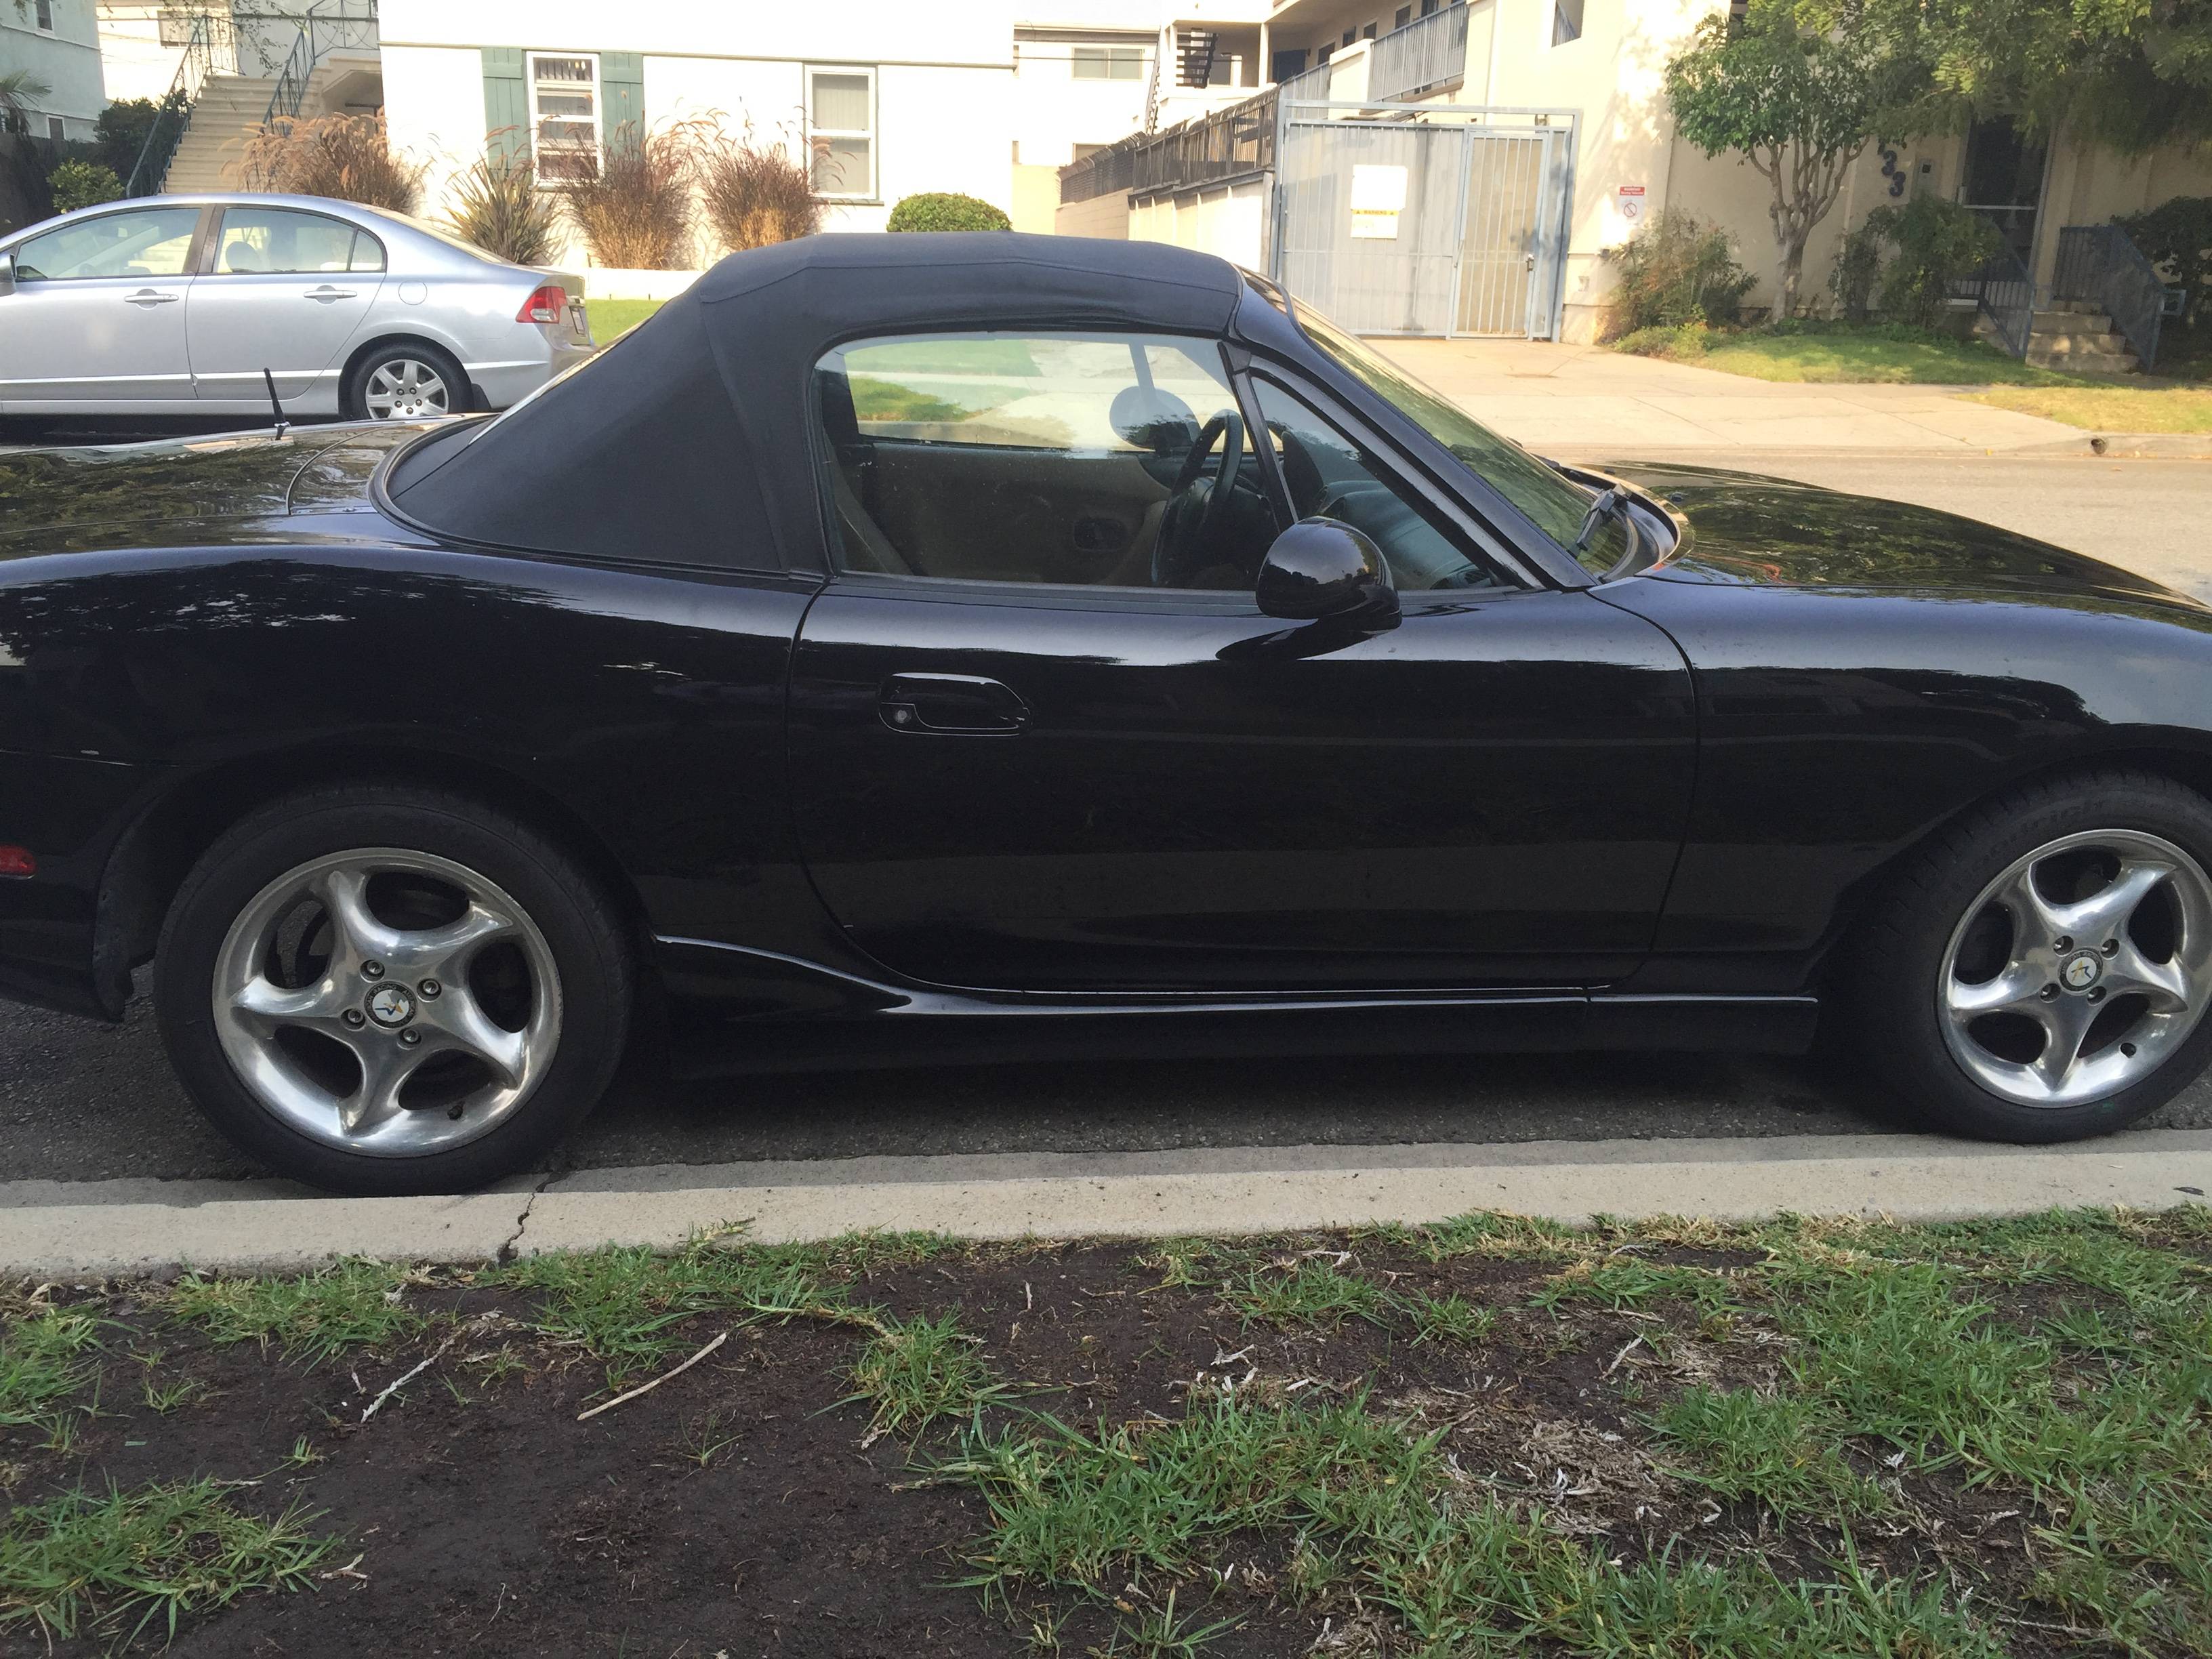
After about a month of searching, I found this black and tan 1999 on Craigslist. It wasn't a good deal, or in particularly good condition, but I got excited and bought it.
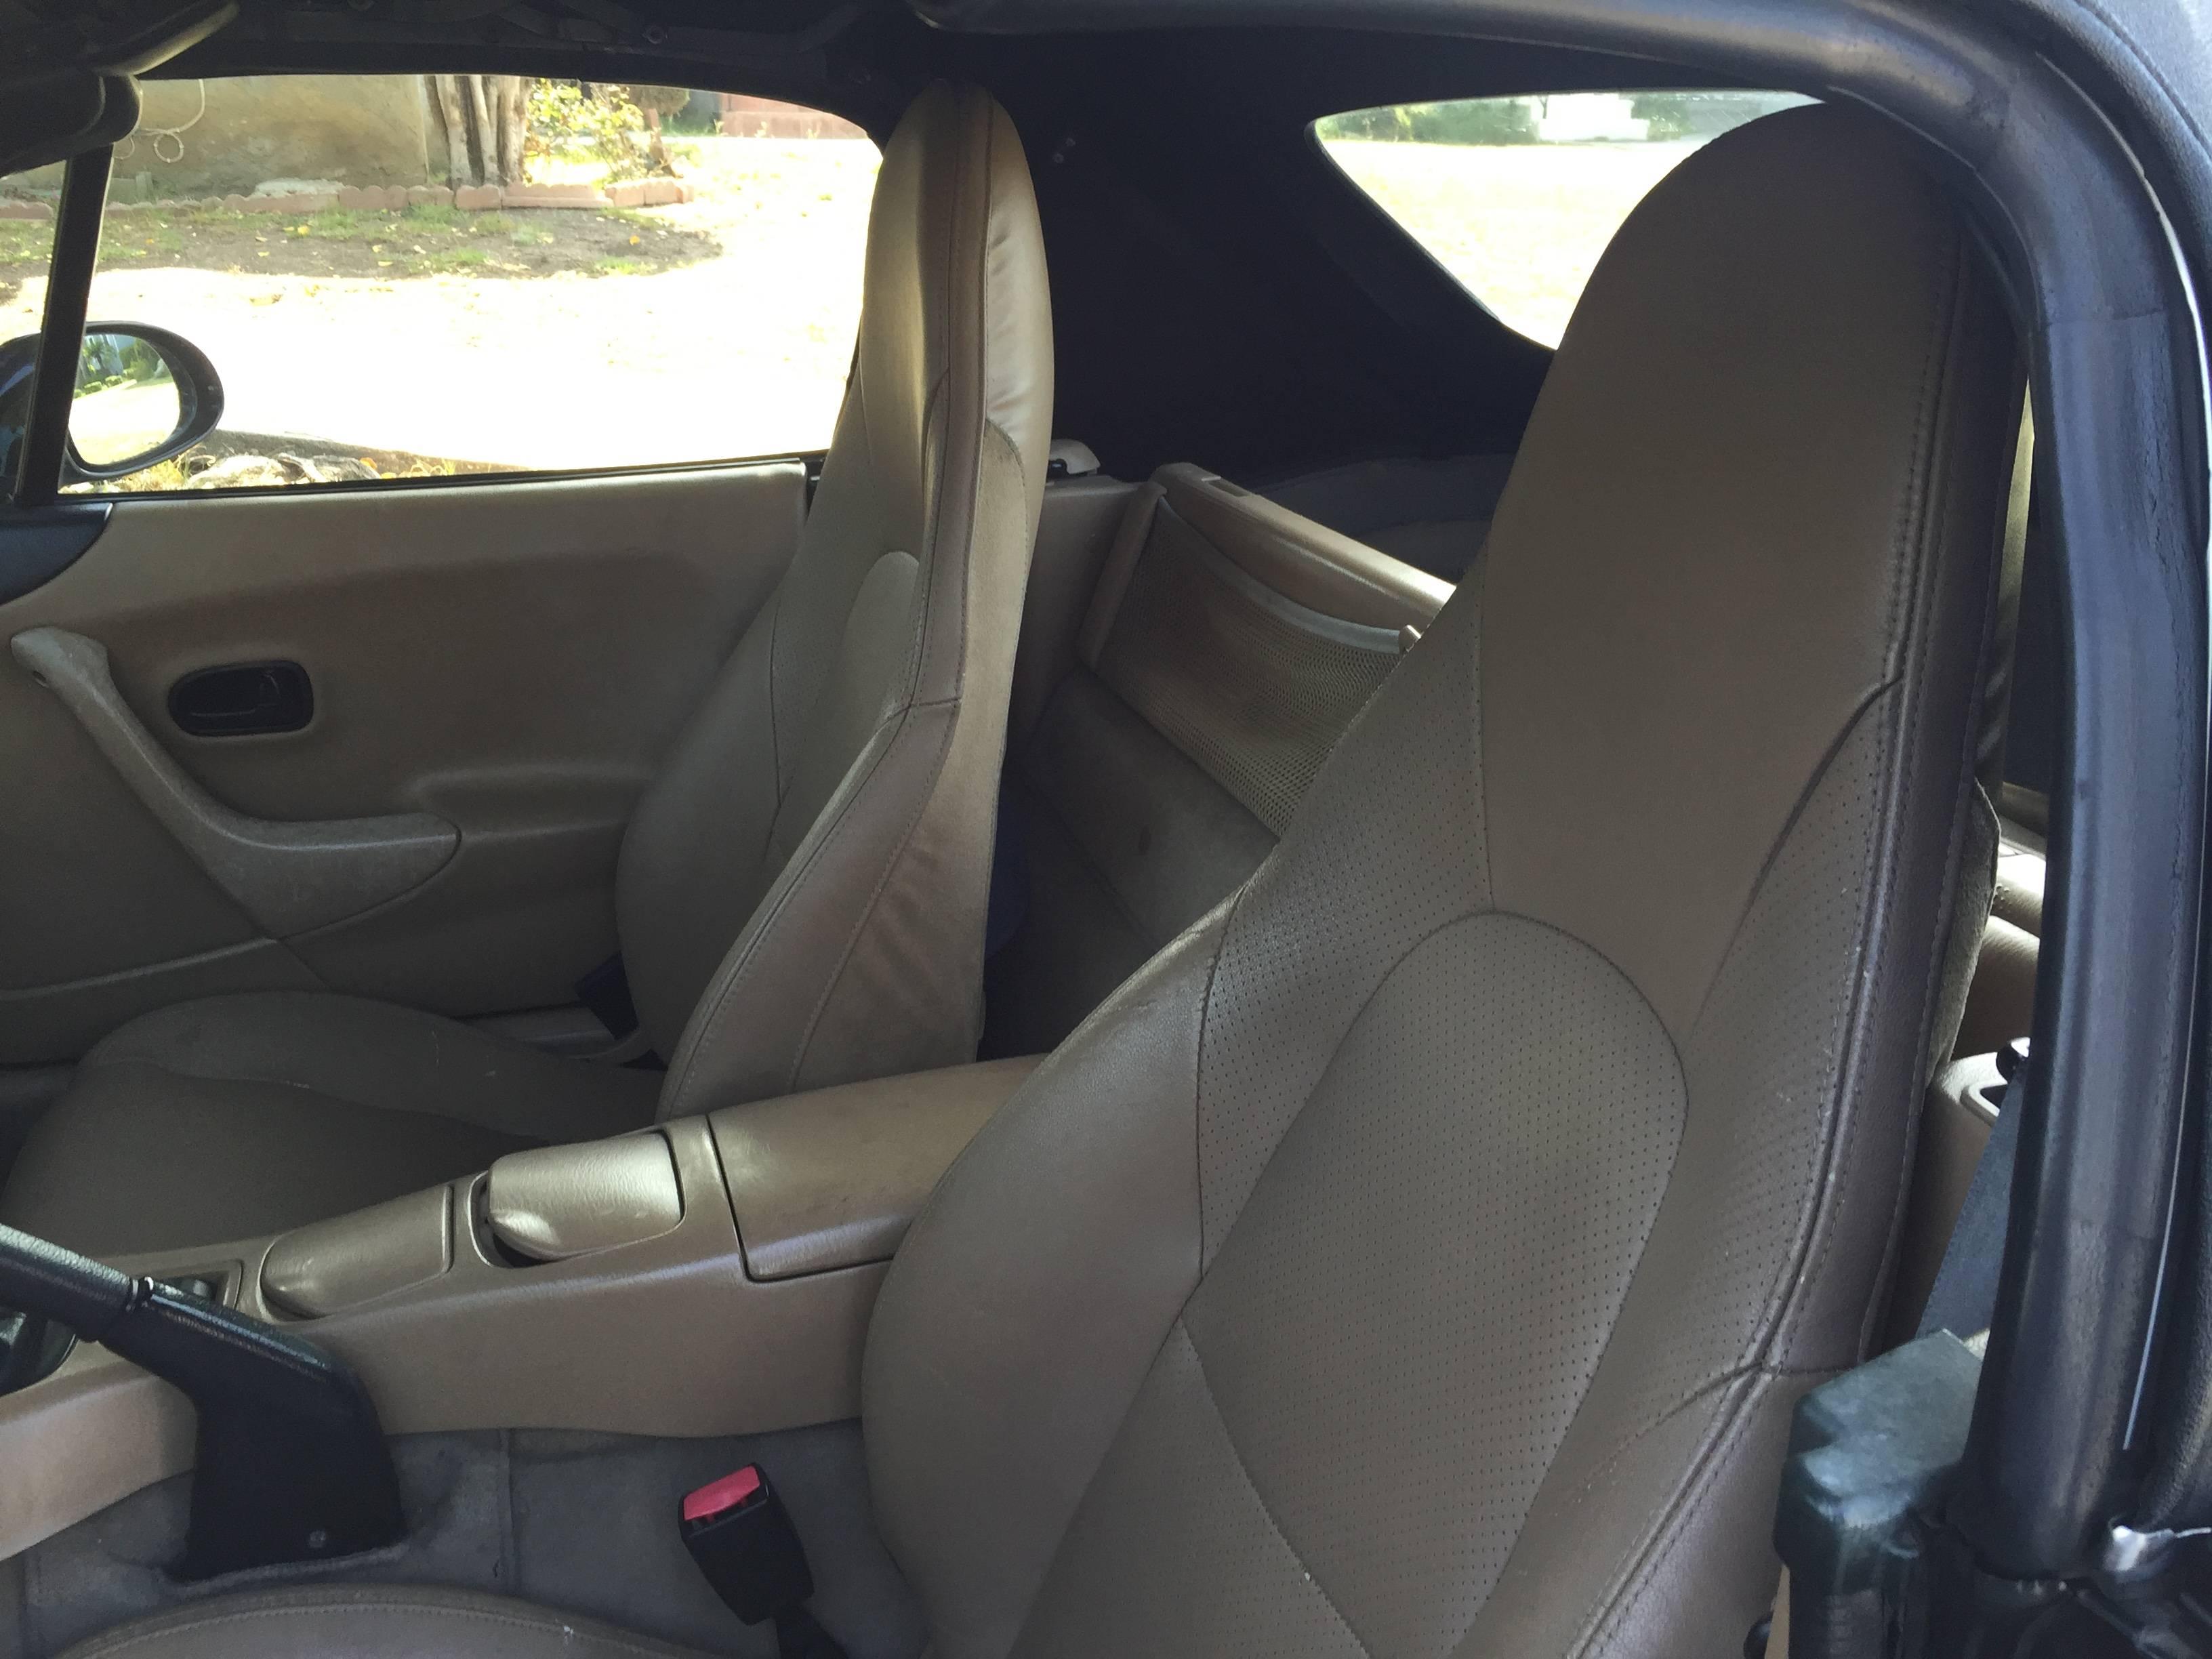
It had a few issues.
At the time, my plans for the car were the following:
1. Fix oil leak(s)
2. Replace front and rear bumpers, trunk lid, tail light (all damaged)
3. Suspension
4. Wheels/tires
5. Power
I brought it to a shop immediately after buying it for a timing belt service. After getting the bill I quickly figured out that I would need to learn to DIY as much as possible in the future.
I lucked out and picked up a used rear bumper with matching paint from a junkyard. Unfortunately, everything else was put on hold as the oil leak returned. I ended up chasing it off/and on for almost a year. It turned out that the CAS plug was leaking, the new front seal was also weeping oil, and so was that damn o-ring gasket behind the oil cooler.
More to come when I dig out some pictures.
I've had the car for over a year and progress has been slow. "Maintenance before mods" has been my approach, but whenever I get the car running well and set my eyes on an upgrade, like clockwork something new breaks and I have to allocate time and resources repairing it.
Background:
In April of 2015 I sold my Yamaha FZ6 because I needed a slightly more practical vehicle. I wanted as close to the motorcycle experience as I could get with 4 wheels, so I decided to pick up a convertible. I also needed something that wouldn't cost too much more than I had gotten for my bike, so a miata was the natural choice.
After about a month of searching, I found this black and tan 1999 on Craigslist. It wasn't a good deal, or in particularly good condition, but I got excited and bought it.
It had a few issues.
At the time, my plans for the car were the following:
1. Fix oil leak(s)
2. Replace front and rear bumpers, trunk lid, tail light (all damaged)
3. Suspension
4. Wheels/tires
5. Power
I brought it to a shop immediately after buying it for a timing belt service. After getting the bill I quickly figured out that I would need to learn to DIY as much as possible in the future.
I lucked out and picked up a used rear bumper with matching paint from a junkyard. Unfortunately, everything else was put on hold as the oil leak returned. I ended up chasing it off/and on for almost a year. It turned out that the CAS plug was leaking, the new front seal was also weeping oil, and so was that damn o-ring gasket behind the oil cooler.
More to come when I dig out some pictures.
Reply
 0
0

0
Thread Starter
Junior Member
iTrader: (1)
Joined: Jan 2016
Posts: 179
Total Cats: 29
From: Los Angeles
At the beginning of last summer I took the car for a first road trip to Joshua Tree. It made it there and back, but the temperature gauge would start to creep towards H when driving uphill at freeway speeds. I moved my front license plate up and out of the mouth and removed the grill that the previous owner had installed and called it good.
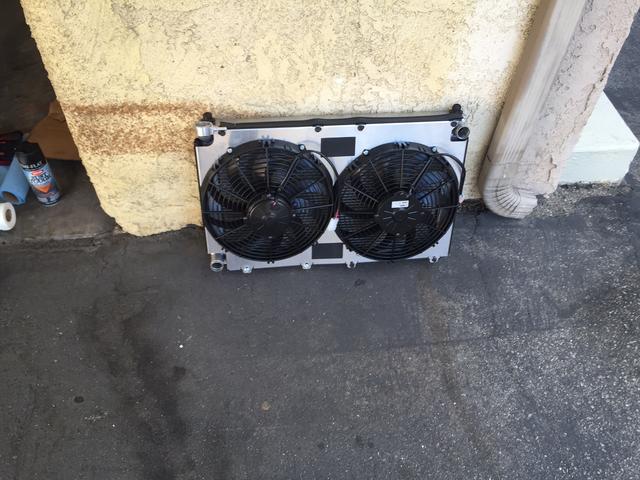
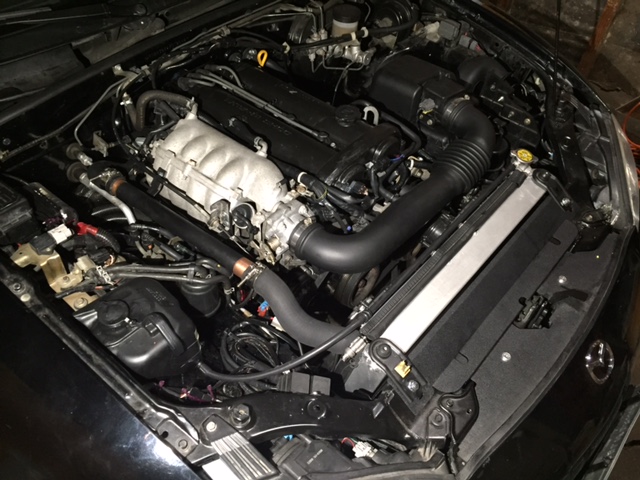
Next trip was to Death Valley in August. Unsurprisingly, it overheated. I bought an OBD2 dongle before the trip and it was getting over 230. Luckily we were able to limp home during the night when it was cooler. The thermostat and water pump had been changed during the timing belt service I paid for shortly after buying the car. Fans worked properly. Radiator was an OEM style but looked new enough that it had to have been replaced recently. I decided to just overhaul the whole system because I wanted to boost it anyway.
Bought and installed the following:
FM crossflow radiator
FM spal fans + shroud
All new hoses (including those horrible two that attach to the oil cooler)
Reroute kit with new thermostat
I also bought an OEM undertray, as my car didn't come with one. Installing that turned out to be the worst part, as I discovered that the animal of a previous owner snapped off 6 of the undertray fastening bolts. There wasn't enough thread to grab with vice grips so I had to drill them all out. The first one took about 3 hours. Thankfully, my neighbor walked over and asked what I was doing. When I explained, he just laughed and said hold on. In a few minutes he was back with his welder and he attached studs to the snapped bolts. Took all of 10 minutes. I put the tray on and threw some nuts to hold in place. Good as new.
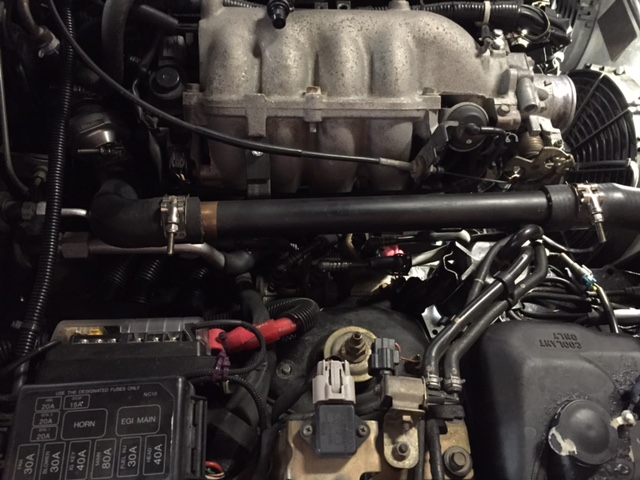
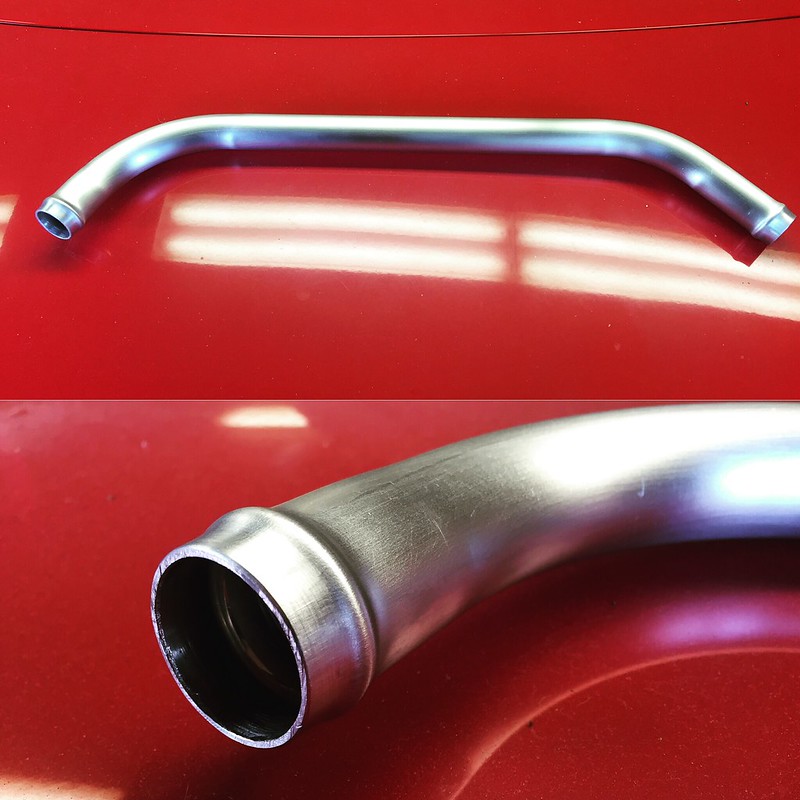
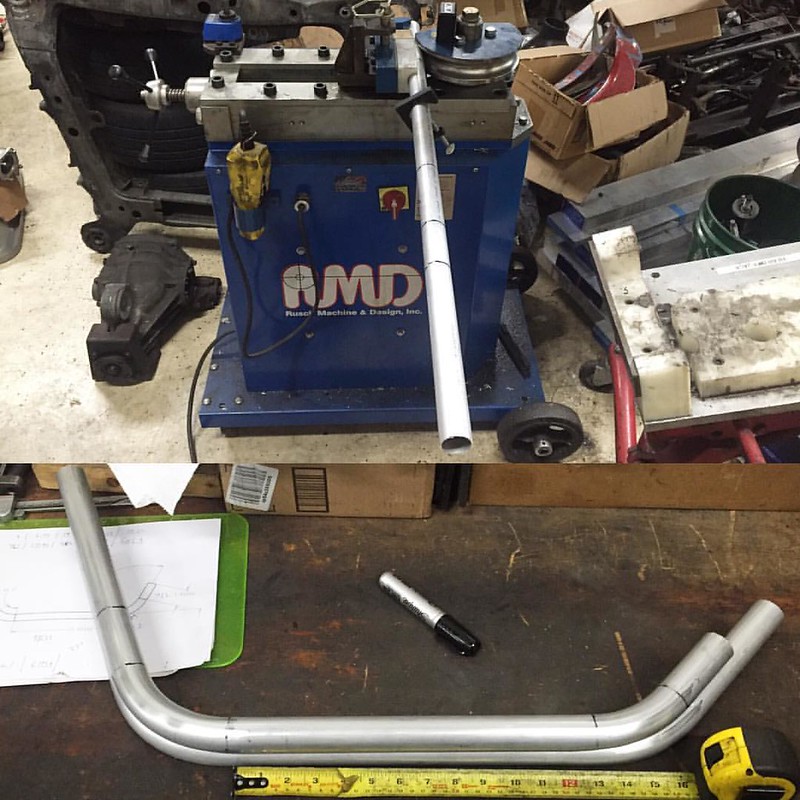
He also helped me make this hardline for the upper radiator hose with some copper pipe and solder. I really didn't like the long floppy hose that came with the reroute kit:
I put in a radiator "cooling panel" from GarageStar. It's ducting effectiveness is dubious at best and the price was high, but it really looks slick.
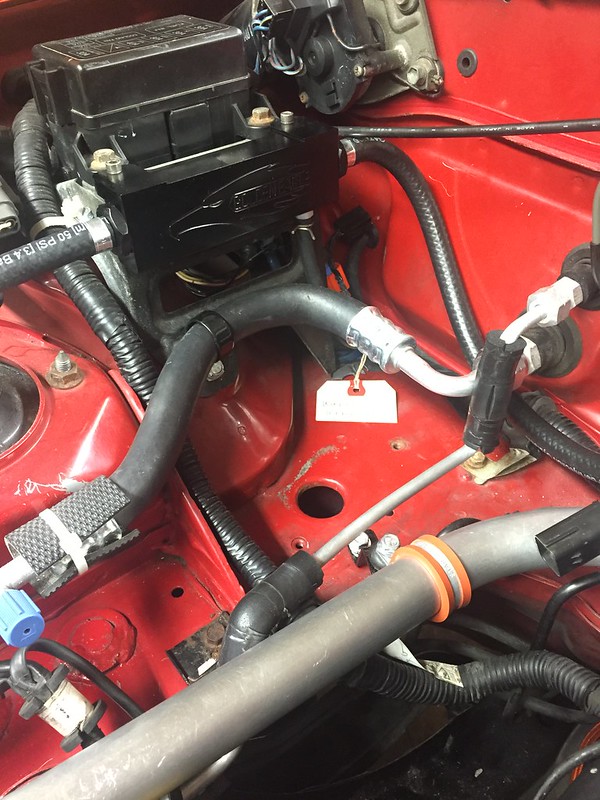
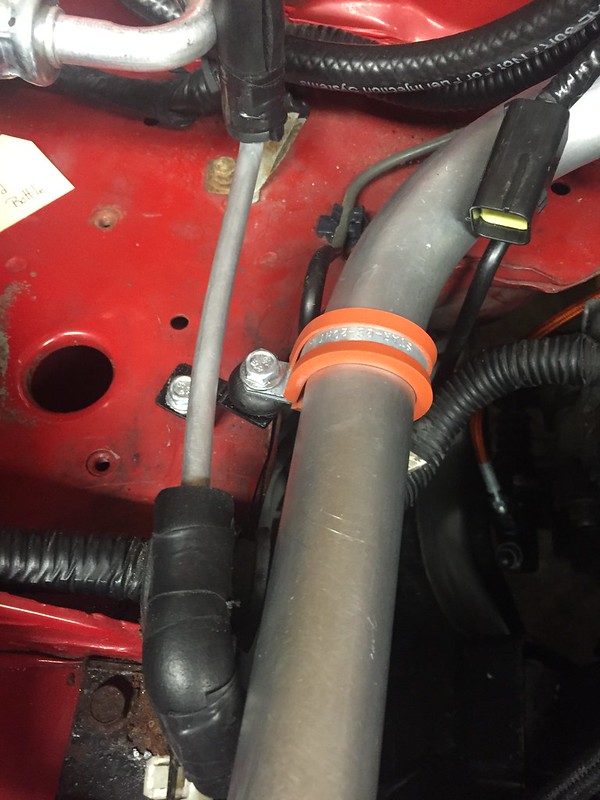
I had small coolant leaks off and on for about a month, including at that short length of rubber hose connecting the hardline to the radiator in the picture. I ended up replacing it with a much better fitting bend, and switched all my worm-drive hose clamps to t-bolt style. No more leaks, and no more overheating. Certainly not the cheapest way to go about things, and overkill for a stock miata but I am hoping that with my power goals (220 hp or less), I won't have to be concerned with cooling ever again.
Next trip was to Death Valley in August. Unsurprisingly, it overheated. I bought an OBD2 dongle before the trip and it was getting over 230. Luckily we were able to limp home during the night when it was cooler. The thermostat and water pump had been changed during the timing belt service I paid for shortly after buying the car. Fans worked properly. Radiator was an OEM style but looked new enough that it had to have been replaced recently. I decided to just overhaul the whole system because I wanted to boost it anyway.
Bought and installed the following:
FM crossflow radiator
FM spal fans + shroud
All new hoses (including those horrible two that attach to the oil cooler)
Reroute kit with new thermostat
I also bought an OEM undertray, as my car didn't come with one. Installing that turned out to be the worst part, as I discovered that the animal of a previous owner snapped off 6 of the undertray fastening bolts. There wasn't enough thread to grab with vice grips so I had to drill them all out. The first one took about 3 hours. Thankfully, my neighbor walked over and asked what I was doing. When I explained, he just laughed and said hold on. In a few minutes he was back with his welder and he attached studs to the snapped bolts. Took all of 10 minutes. I put the tray on and threw some nuts to hold in place. Good as new.
He also helped me make this hardline for the upper radiator hose with some copper pipe and solder. I really didn't like the long floppy hose that came with the reroute kit:
I put in a radiator "cooling panel" from GarageStar. It's ducting effectiveness is dubious at best and the price was high, but it really looks slick.
I had small coolant leaks off and on for about a month, including at that short length of rubber hose connecting the hardline to the radiator in the picture. I ended up replacing it with a much better fitting bend, and switched all my worm-drive hose clamps to t-bolt style. No more leaks, and no more overheating. Certainly not the cheapest way to go about things, and overkill for a stock miata but I am hoping that with my power goals (220 hp or less), I won't have to be concerned with cooling ever again.
Reply
0
0


Thread Starter
Junior Member
iTrader: (1)
Joined: Jan 2016
Posts: 179
Total Cats: 29
From: Los Angeles
Next project after the cooling system overhaul was putting in a high output alternator. My alt was on its last leg so I had it rewound by a local shop. Afterwards it was easily able to keep up with the current draw from the spal fans turning on. I also put in a secondary fuse panel. The idea here was to have a place to easily and neatly tap power for aftermarket accessories. I put in Morimoto 4500k HIDs powered by a relay and sourced from the new panel. In the future I'd like to put in LED fogs, an air horn and a power inverter.
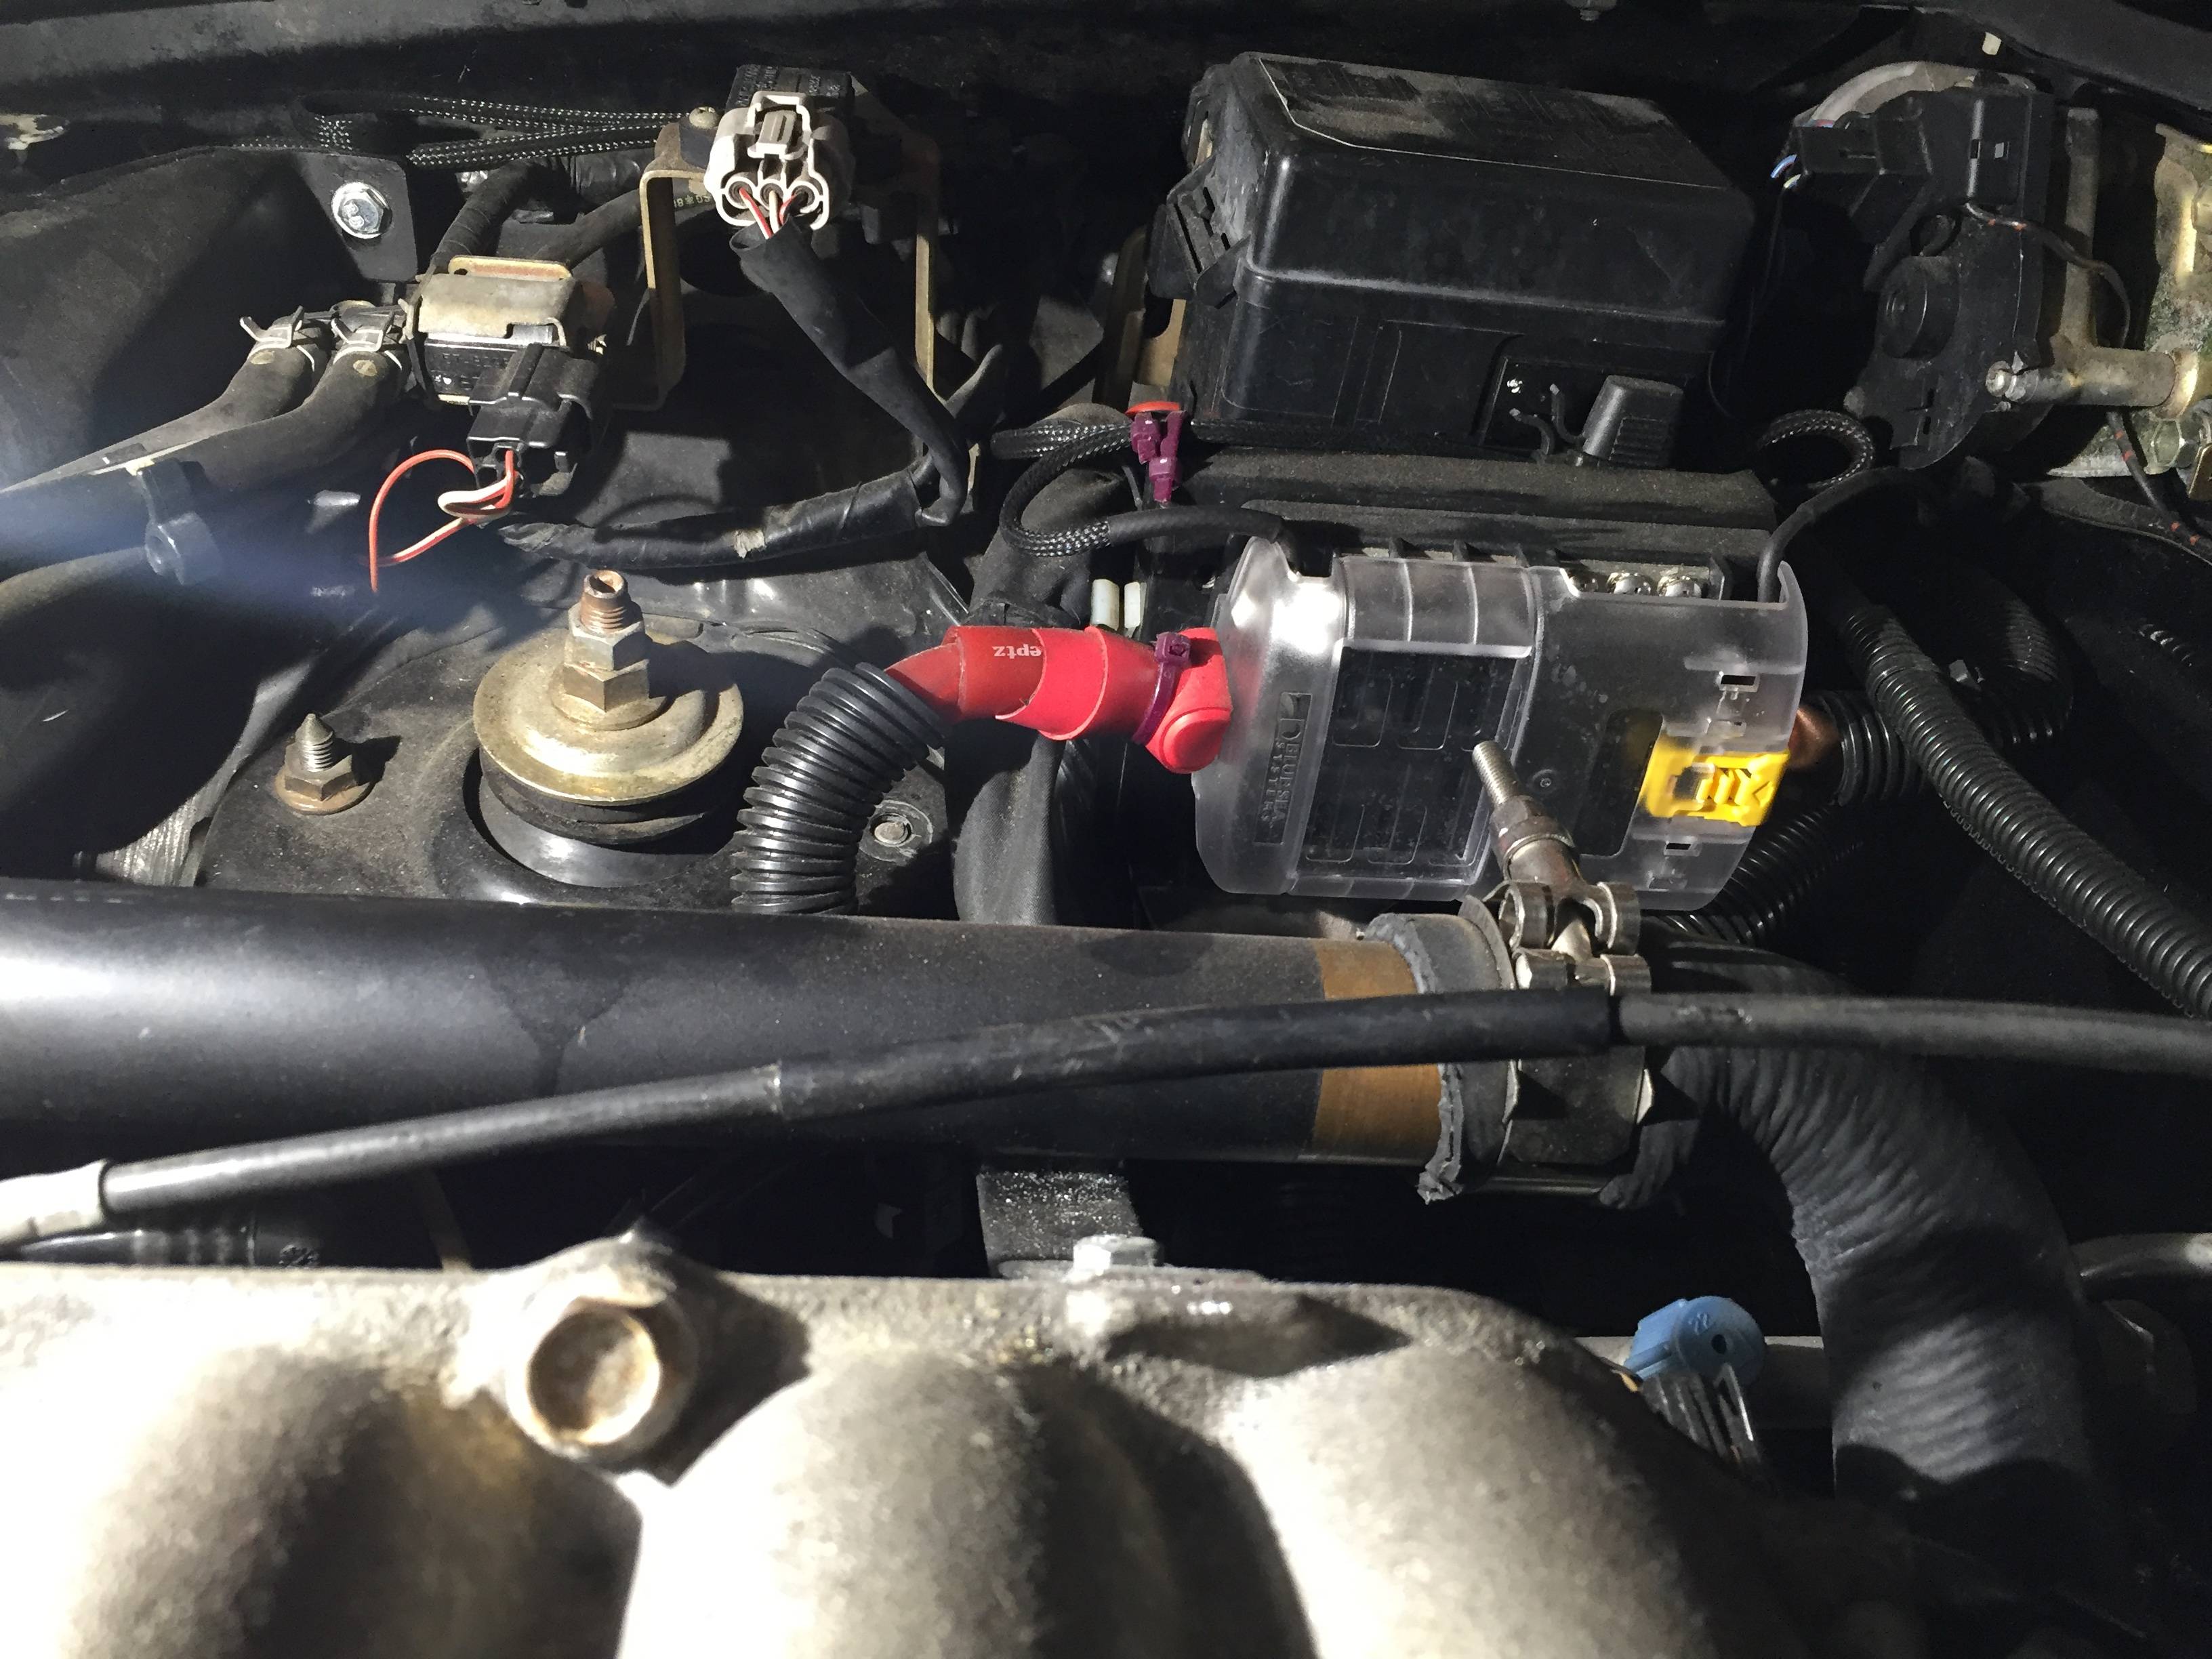
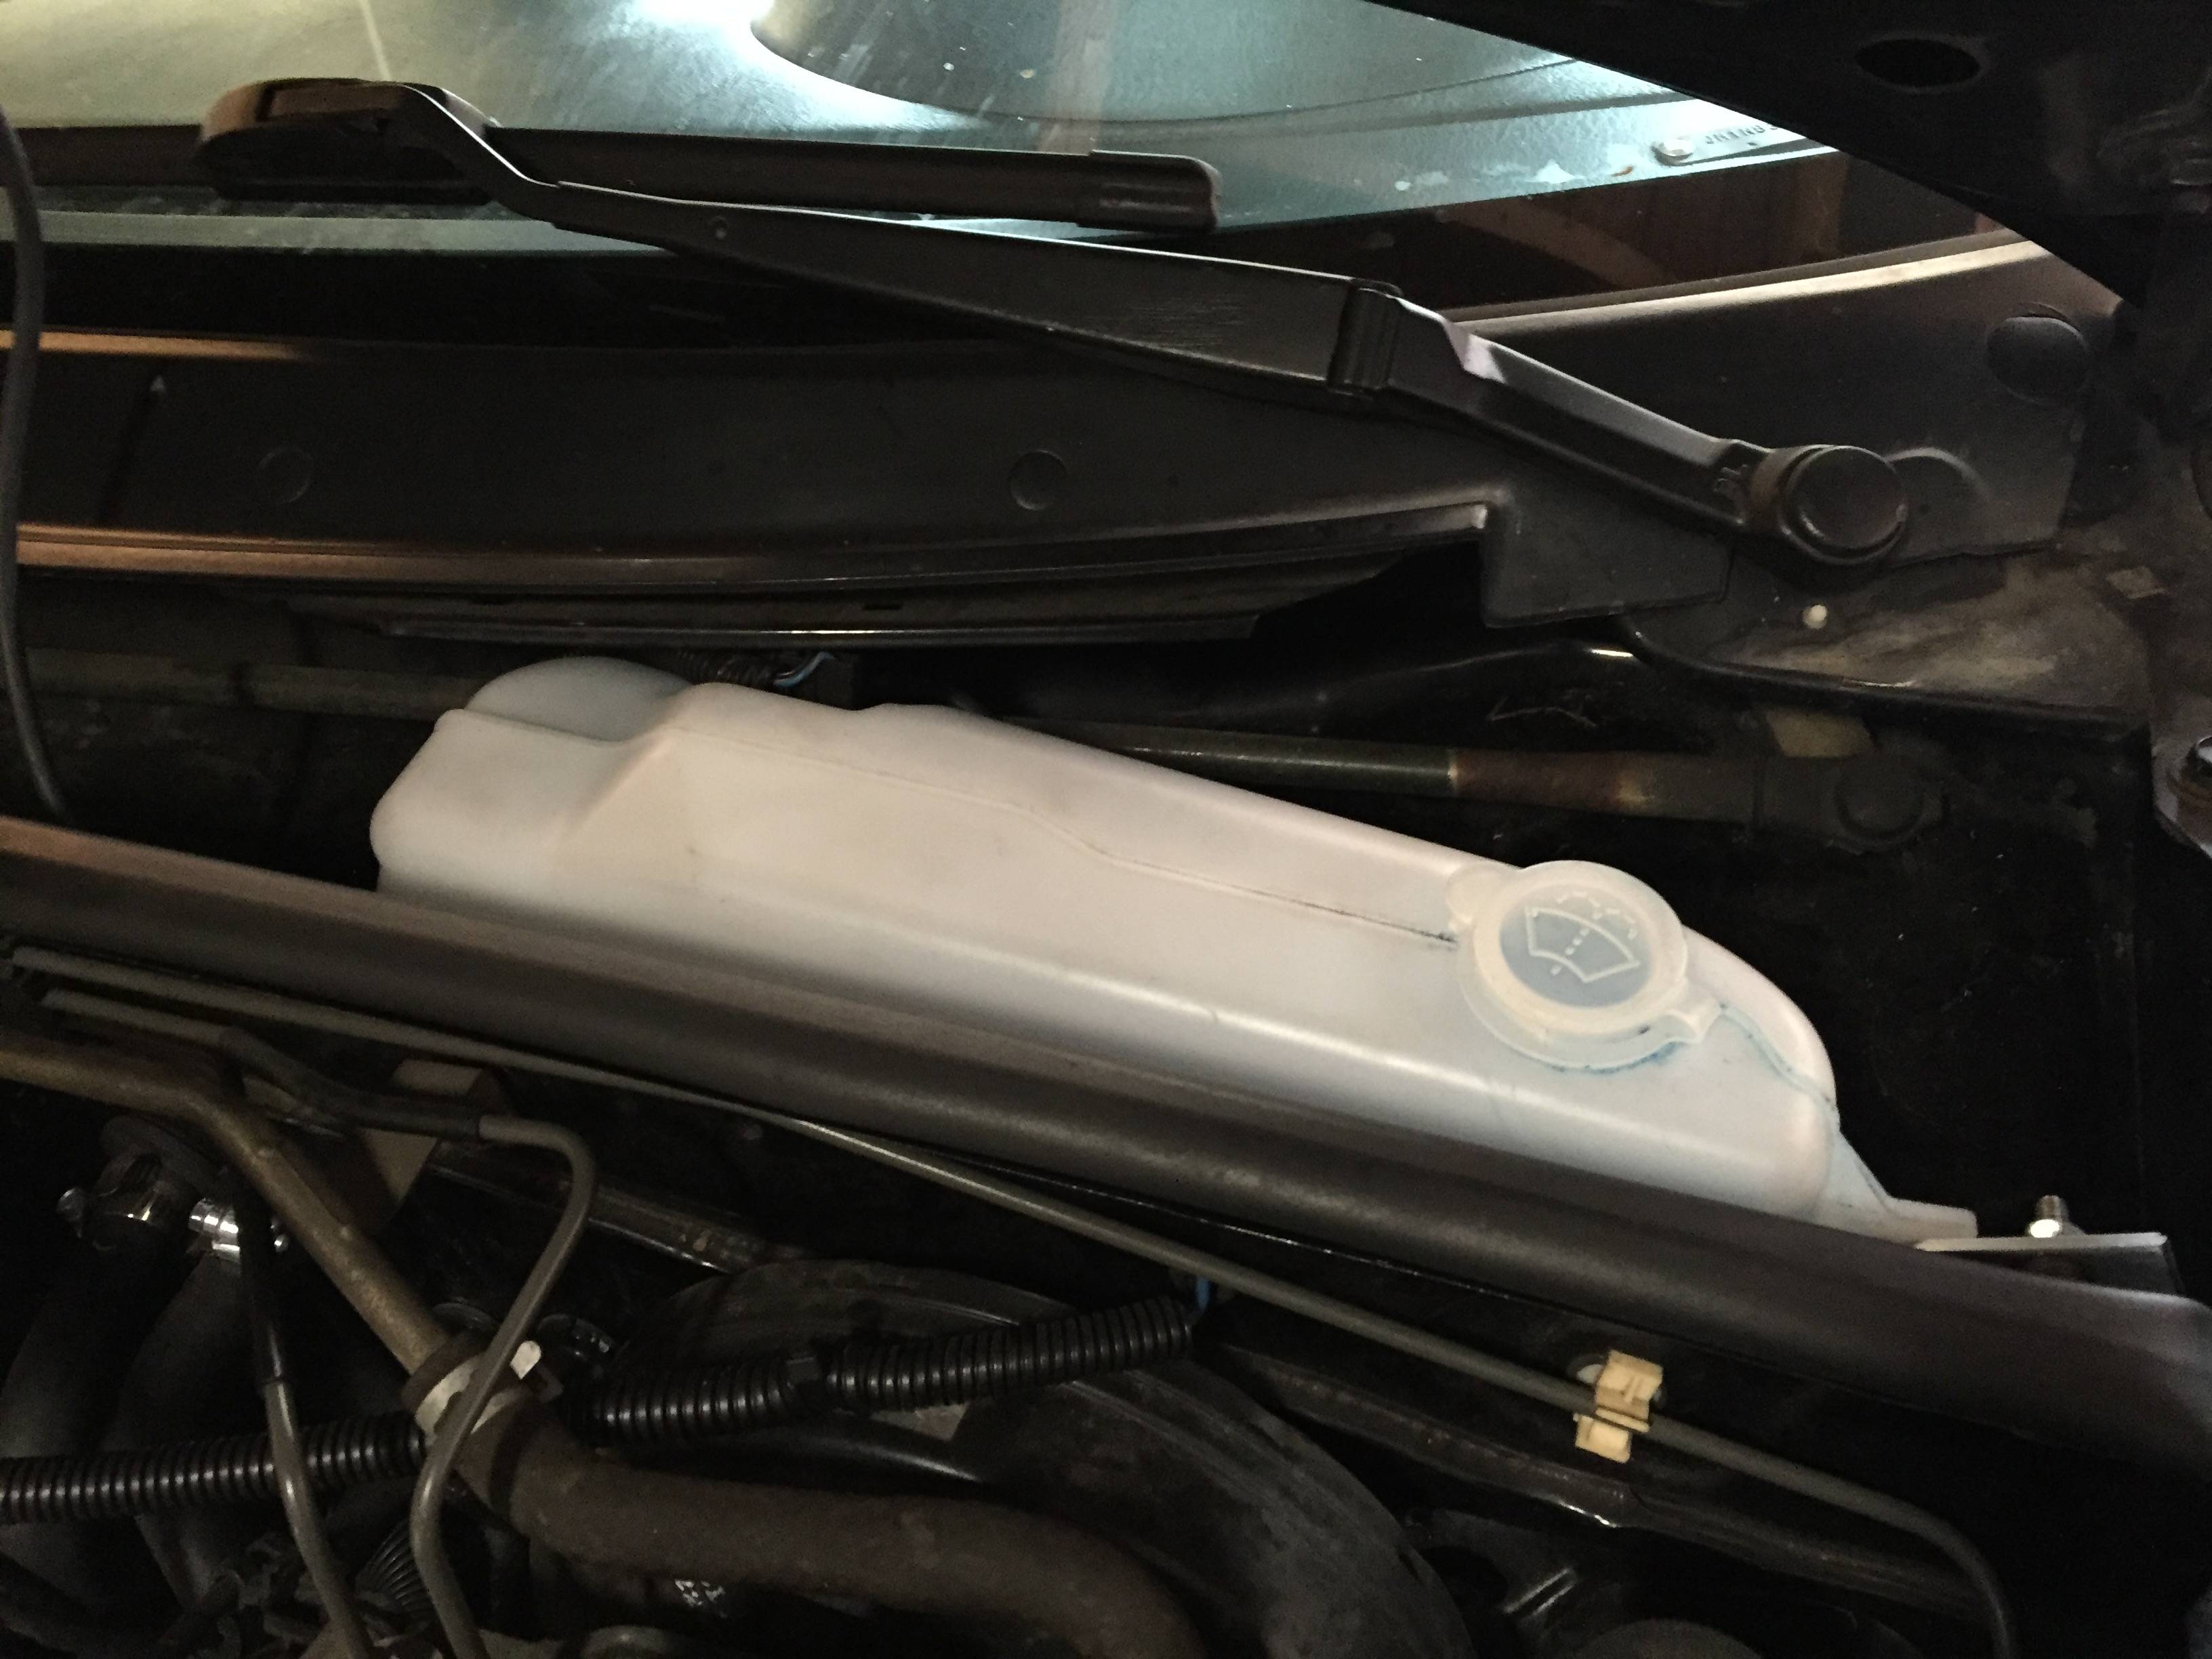
I relocated my washer fluid reservoir with the Cappuccino bottle. Totally worth it for $45. Mounted it with some misc junk I had in the garage.
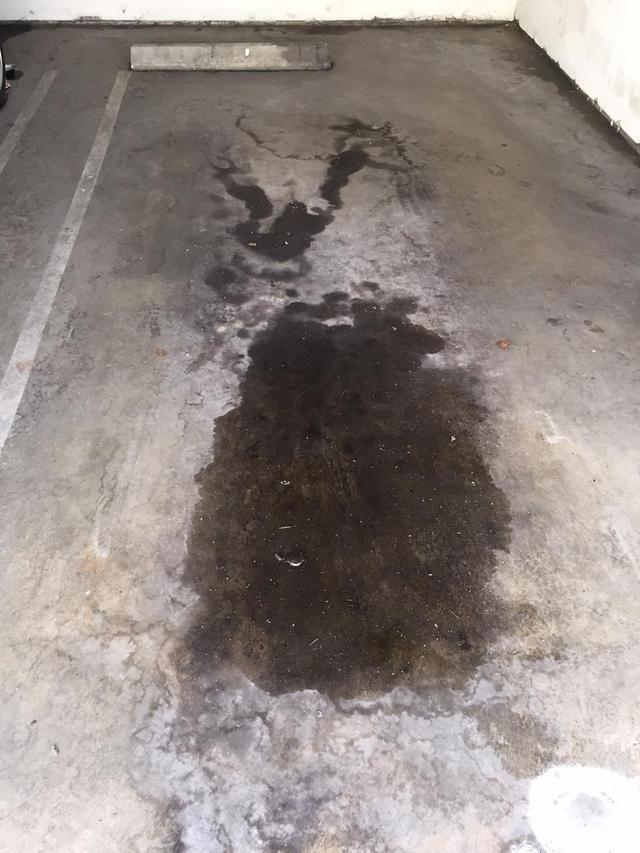
Shortly after that, the gf and I planned a trip up to the bay area. Before we left, I checked the tire pressure, and topped off the oil. I had a couple slow leaks, but it was down a whole quart which really surprised me. We left and stopped to get coffee about a mile from our house. My gf pointed out that something smelled bad while we waited in the drive through. Then the battery light came on. I popped the hood and there was oil everywhere. Total massacre. Alternator belt was soaked, and she was smelling burning oil.
Turned around and drove the car back home. I jacked up the car to have a quick look and more oil poured out of the dipstick tube hole at the oil pan. The dipstick tube had come loose. My working theory is that the tube popped loose before I checked the oil level and made it look like it was low. So I overfilled by a quart. This then caused my small leak at the front crank seal to become a large leak.
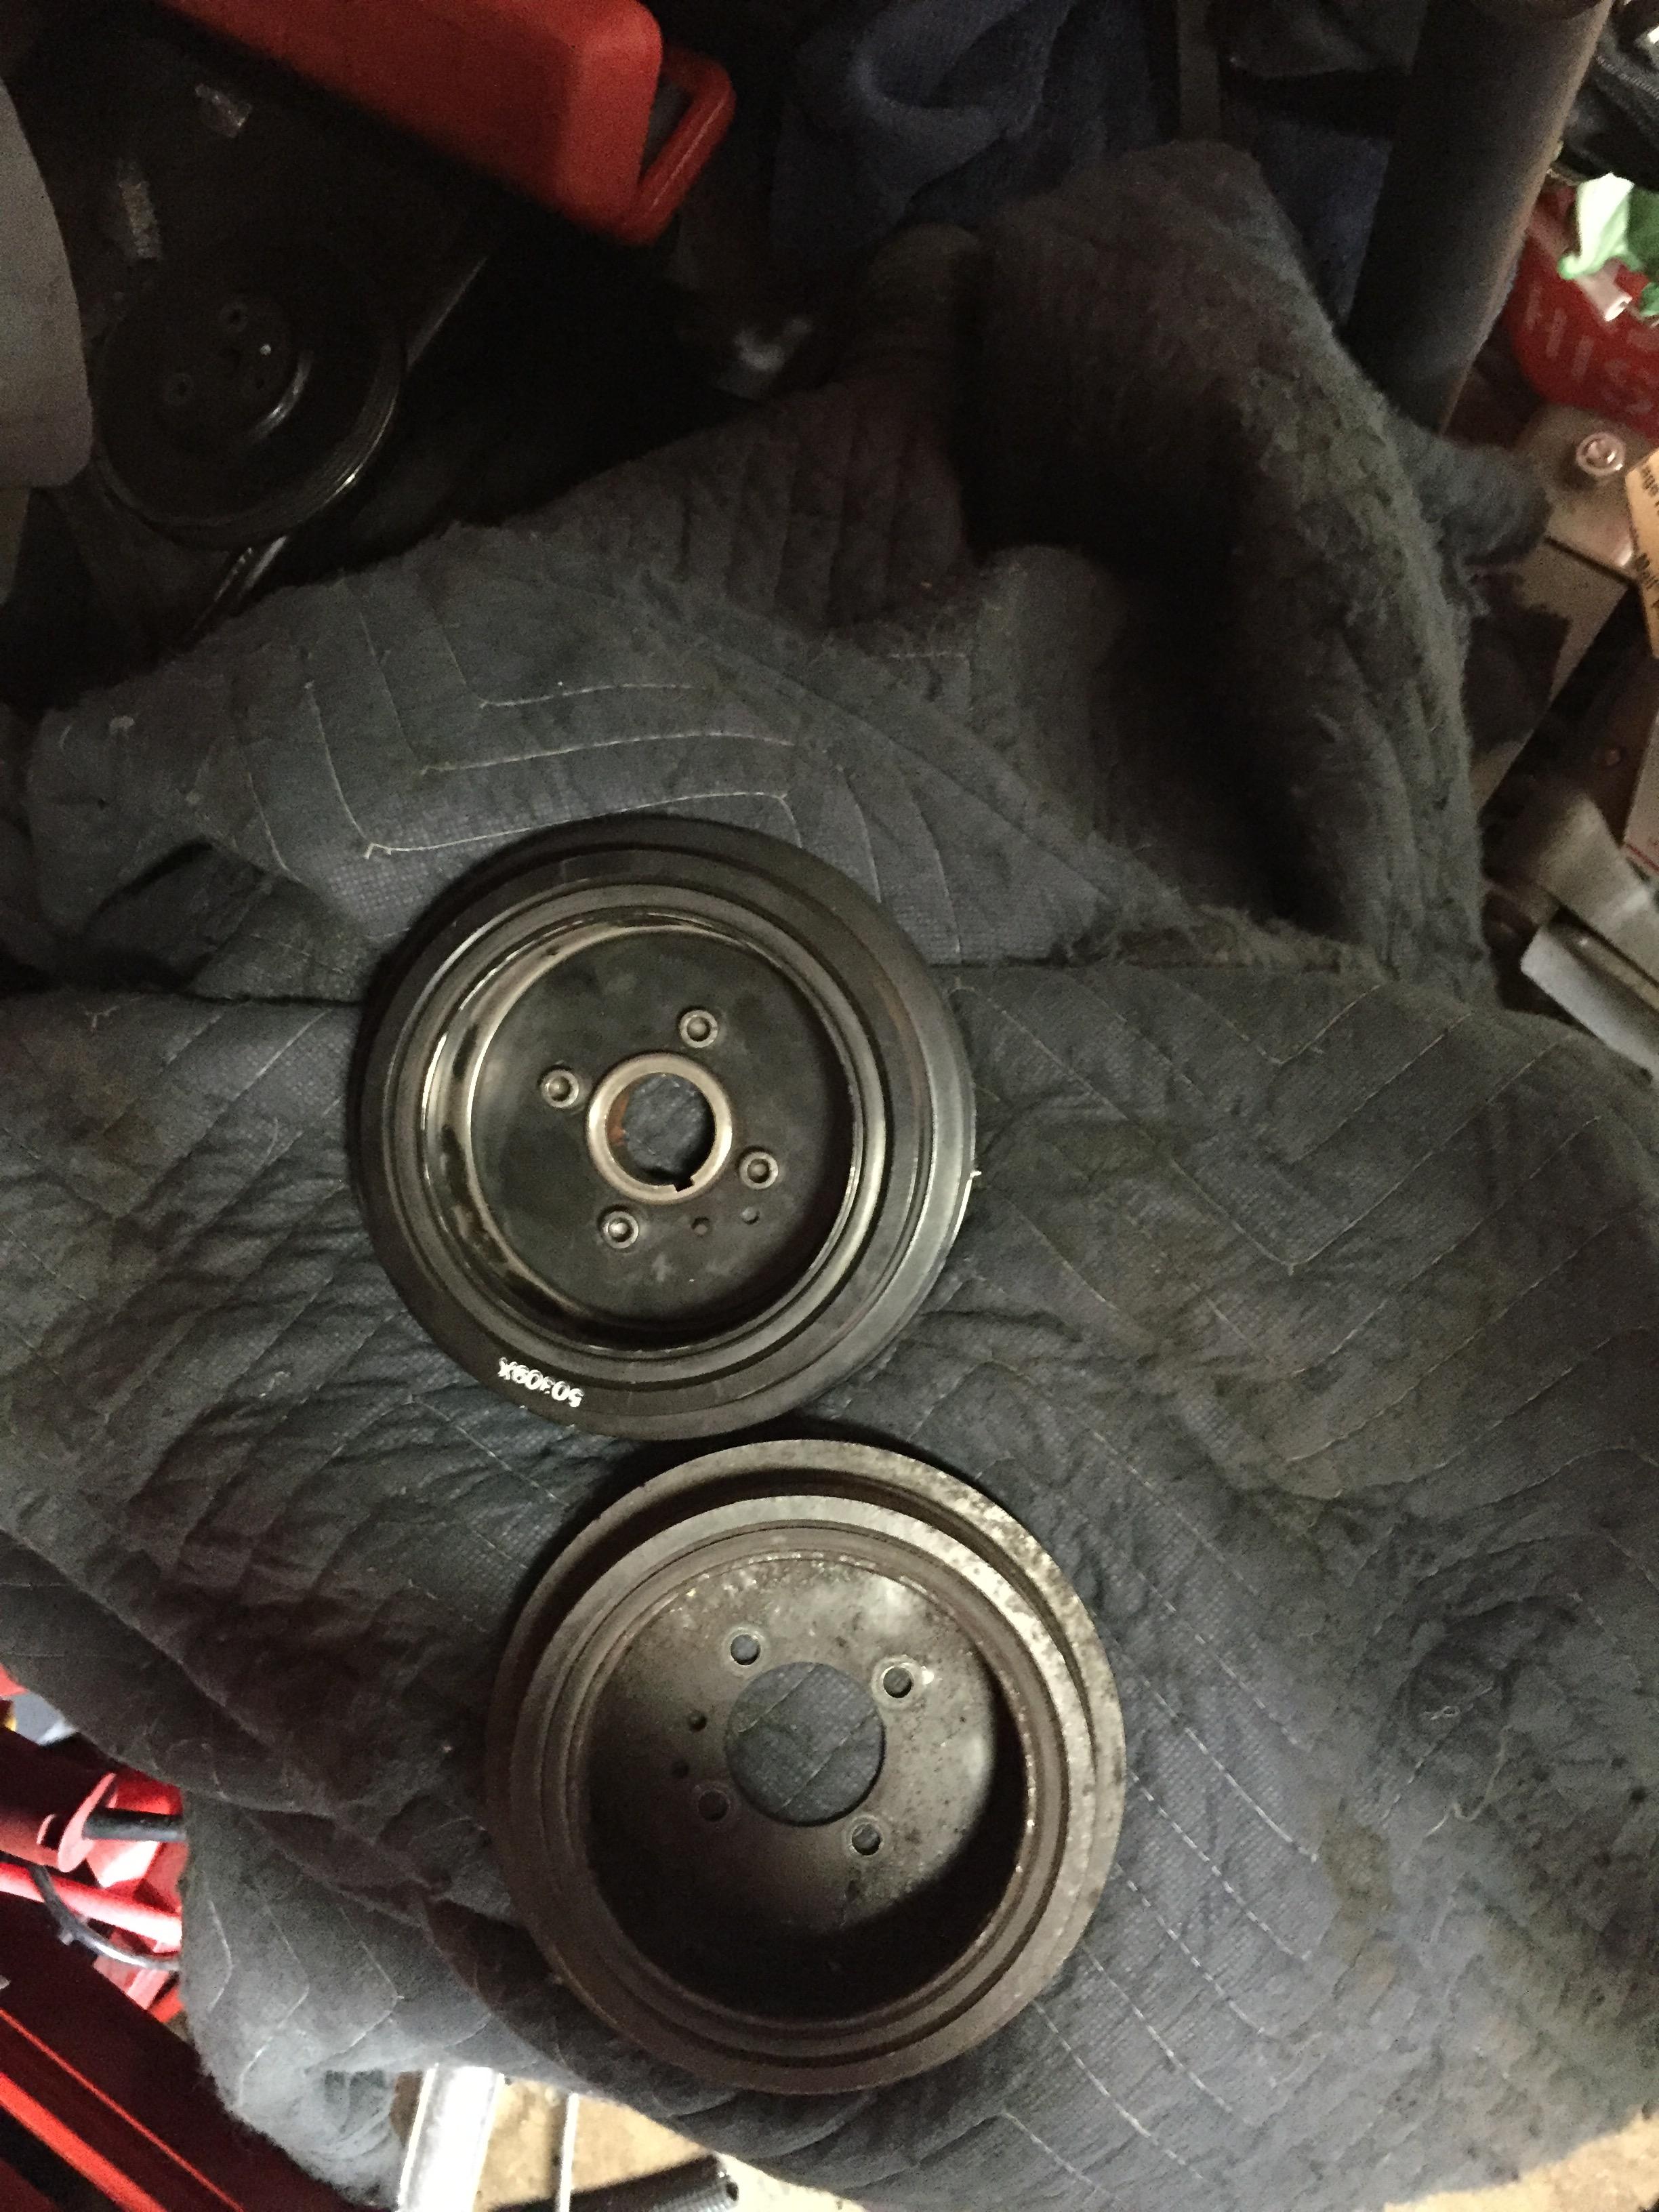
Ended up doing a timing belt job for the first time, since the belt got soaked. I also replaced the crank pulley which had started to wobble a bit and the plastic timing covers which were totally warped from oil exposure.
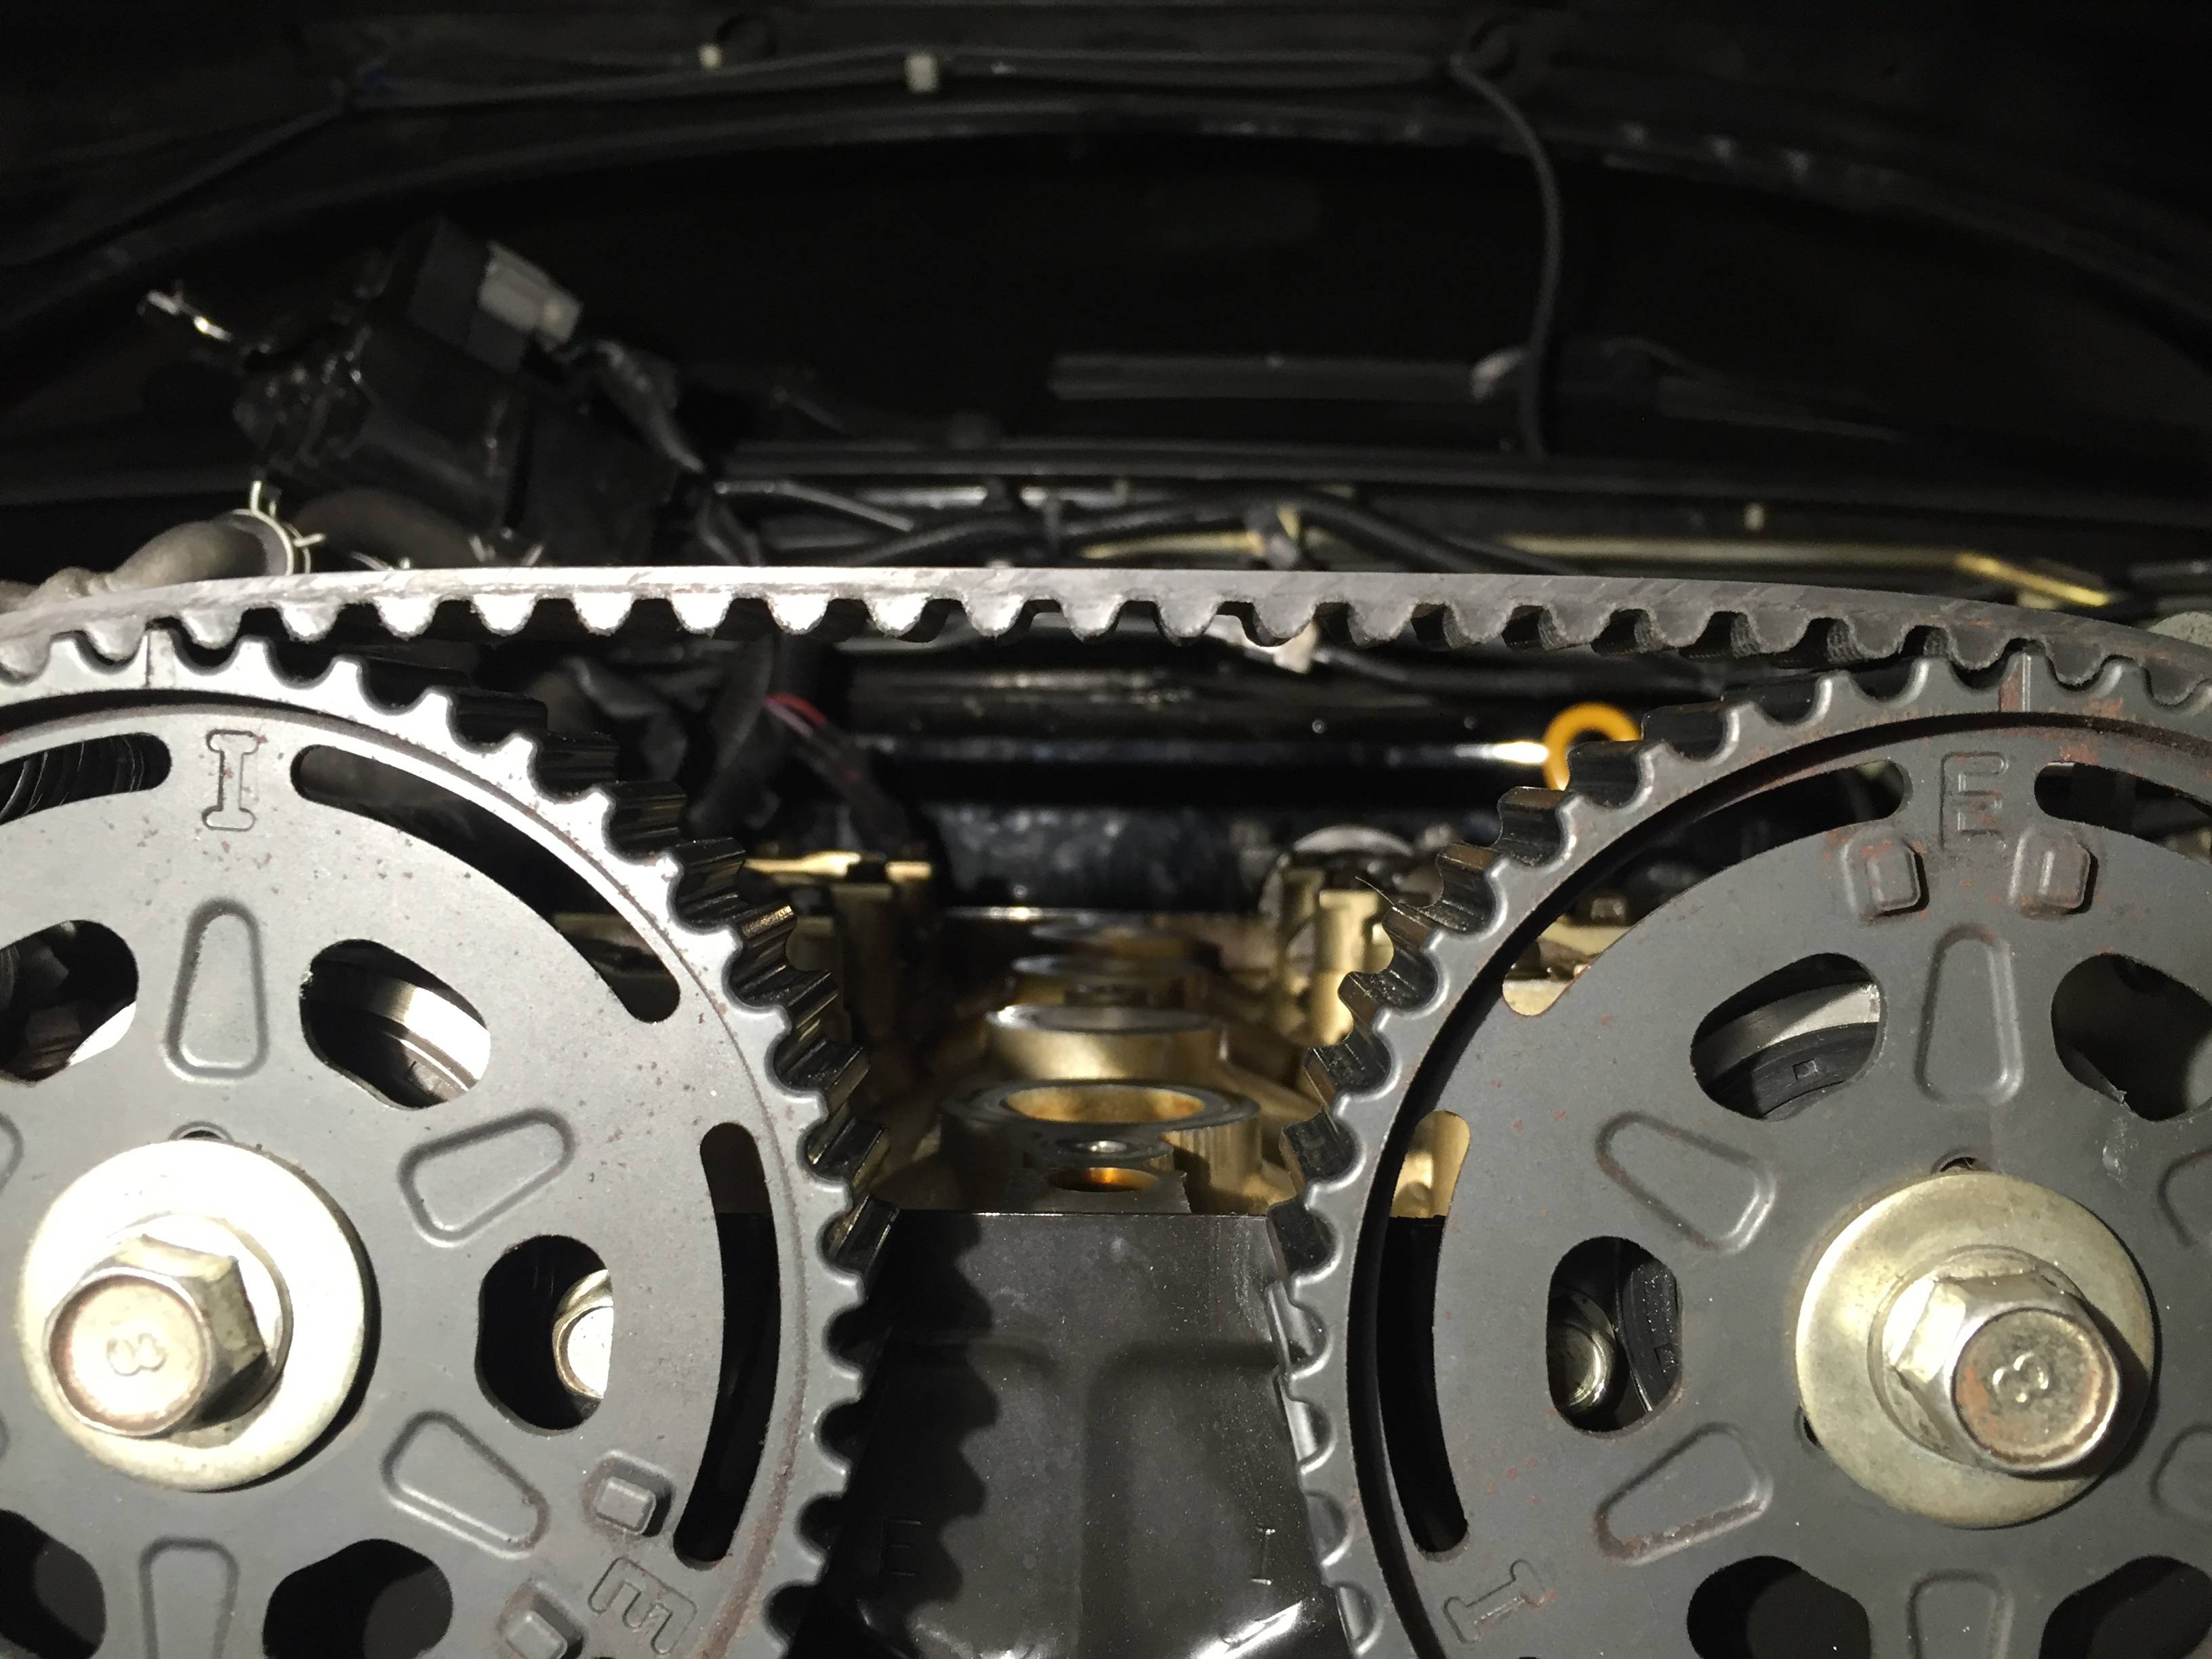
I bought some nice12.9 grade hex-head 10 mm fasteners for the crank pulley. I've read through a bunch of threads on here about these breaking so I figured I would upgrade them now just in case. Torqued them to spec with my inch-pound wrench.
And we're now pretty much caught up to the present. I'm working on the suspension currently.
Last edited by tenthe; Aug 15, 2016 at 12:07 PM.
Reply
0
0
Thread Starter
Junior Member
iTrader: (1)
Joined: Jan 2016
Posts: 179
Total Cats: 29
From: Los Angeles
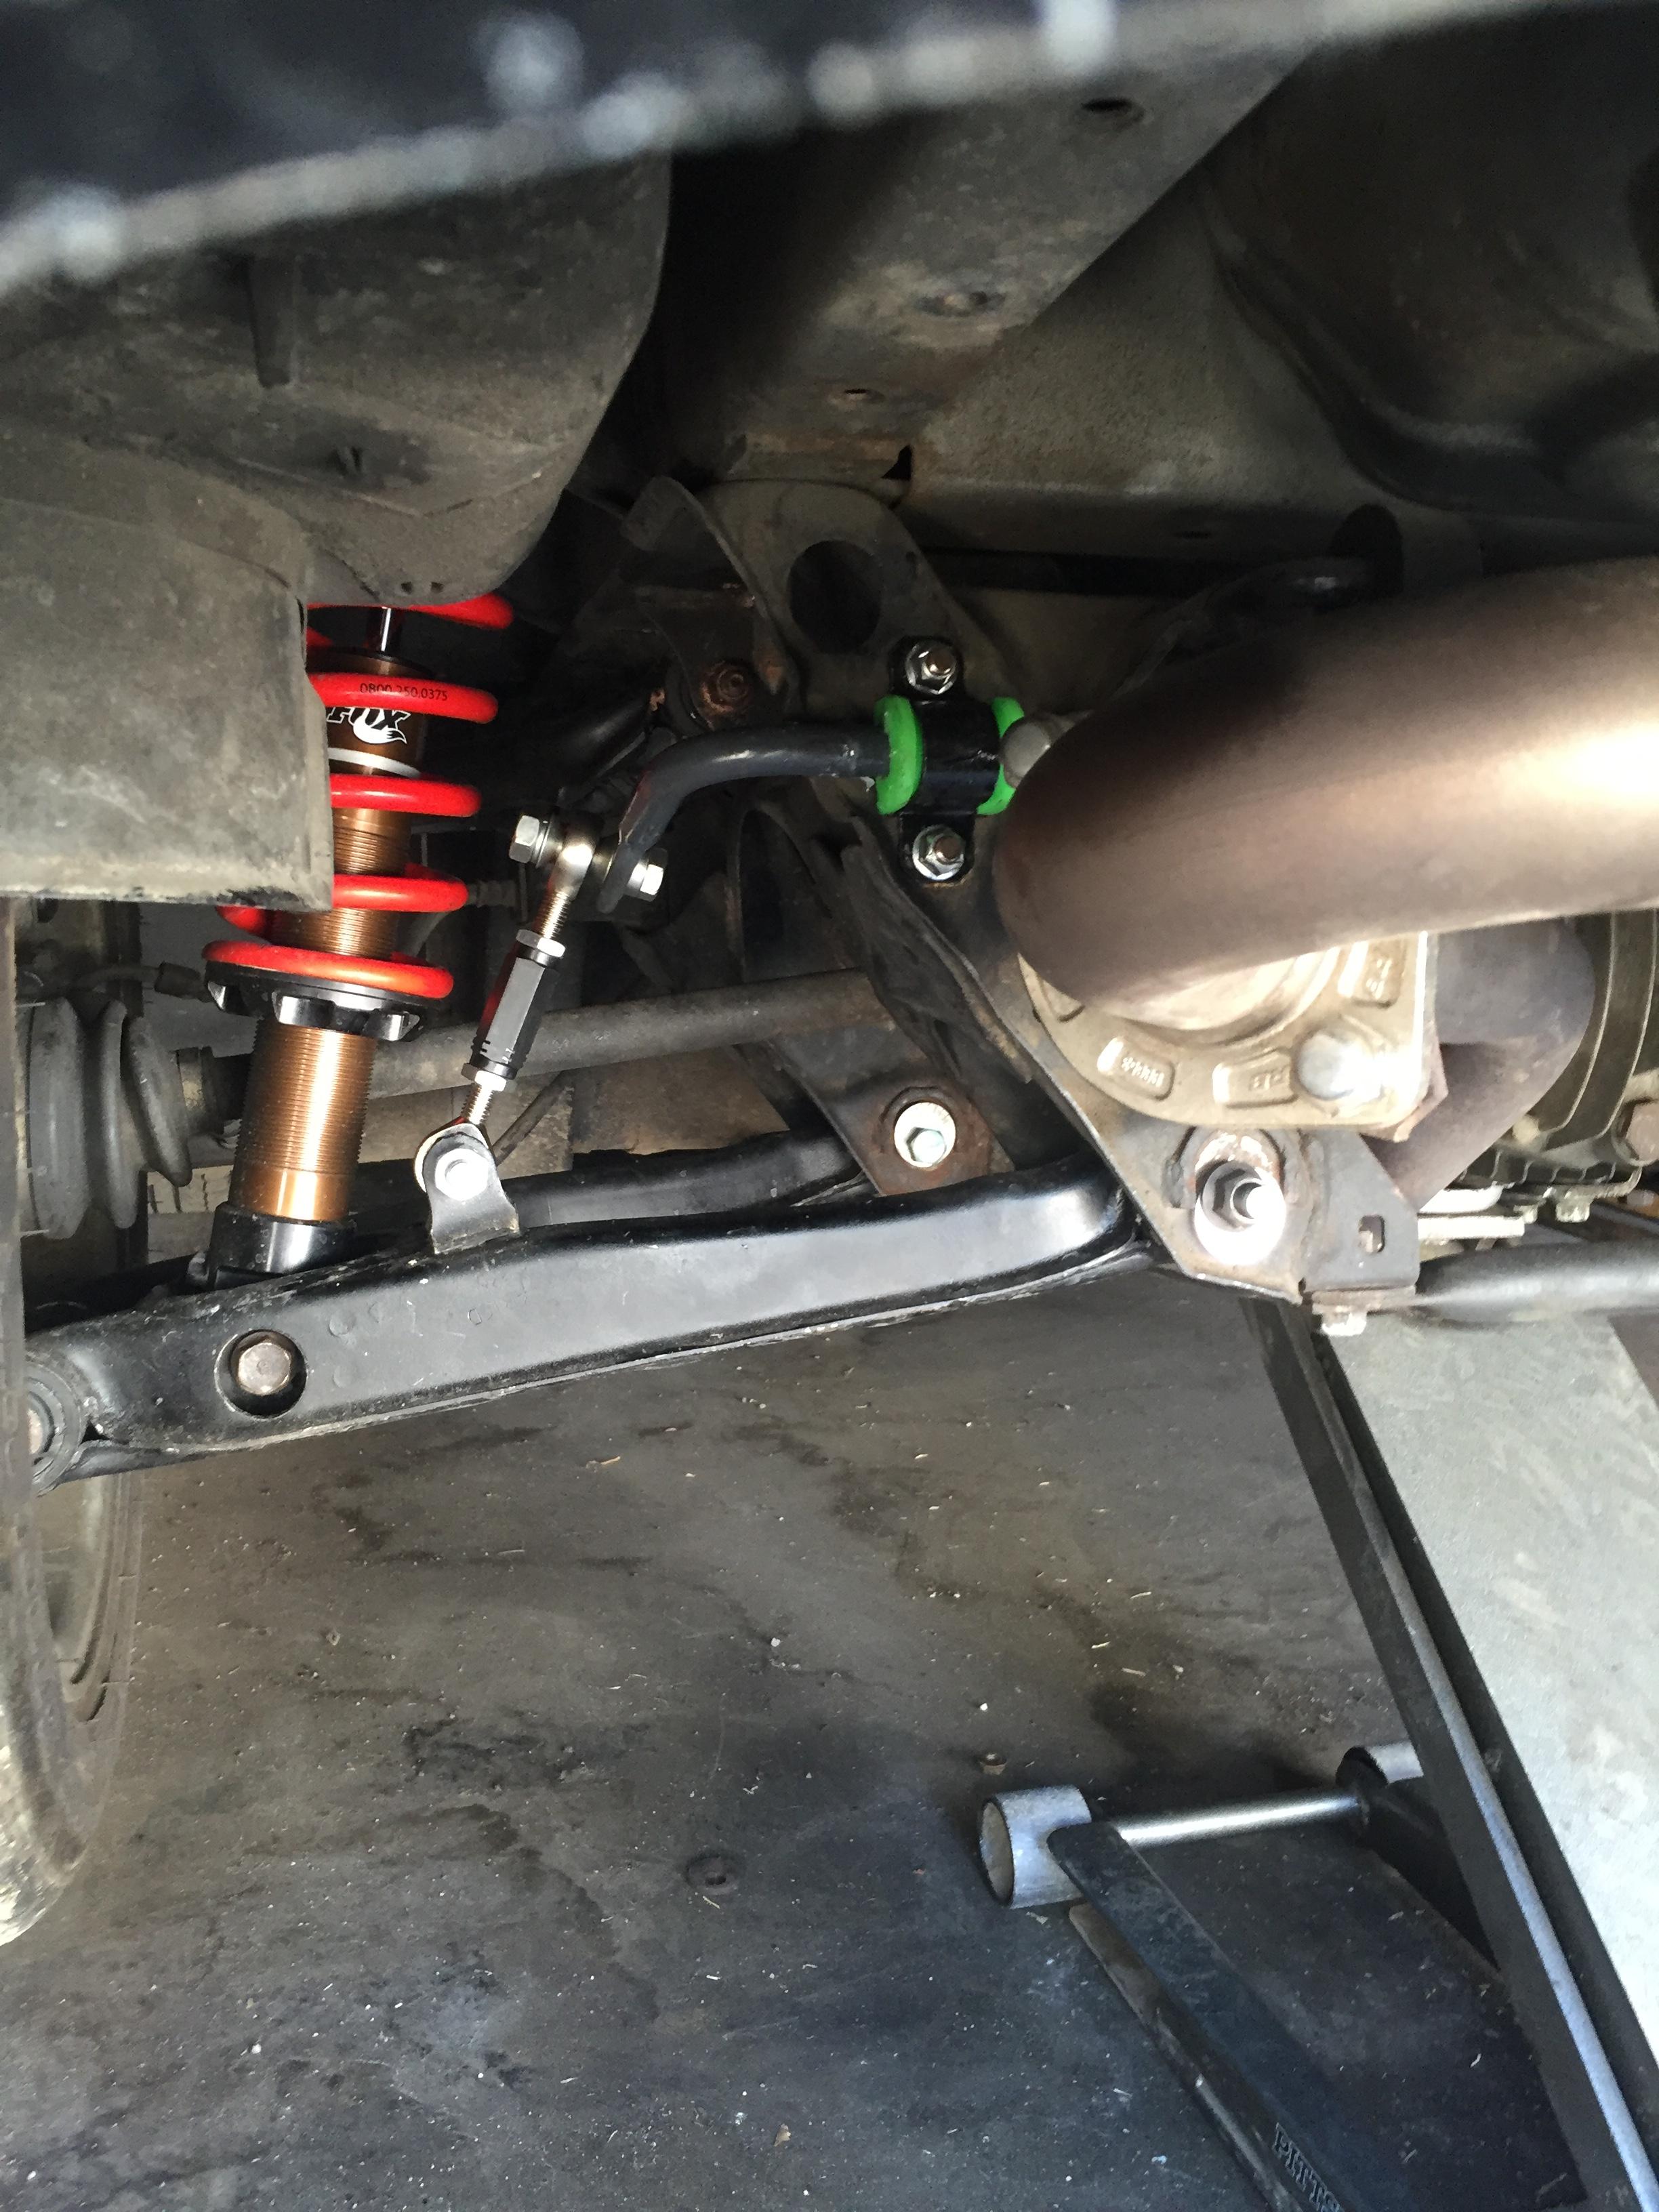
Forgive me MT.net, for I have sinned.
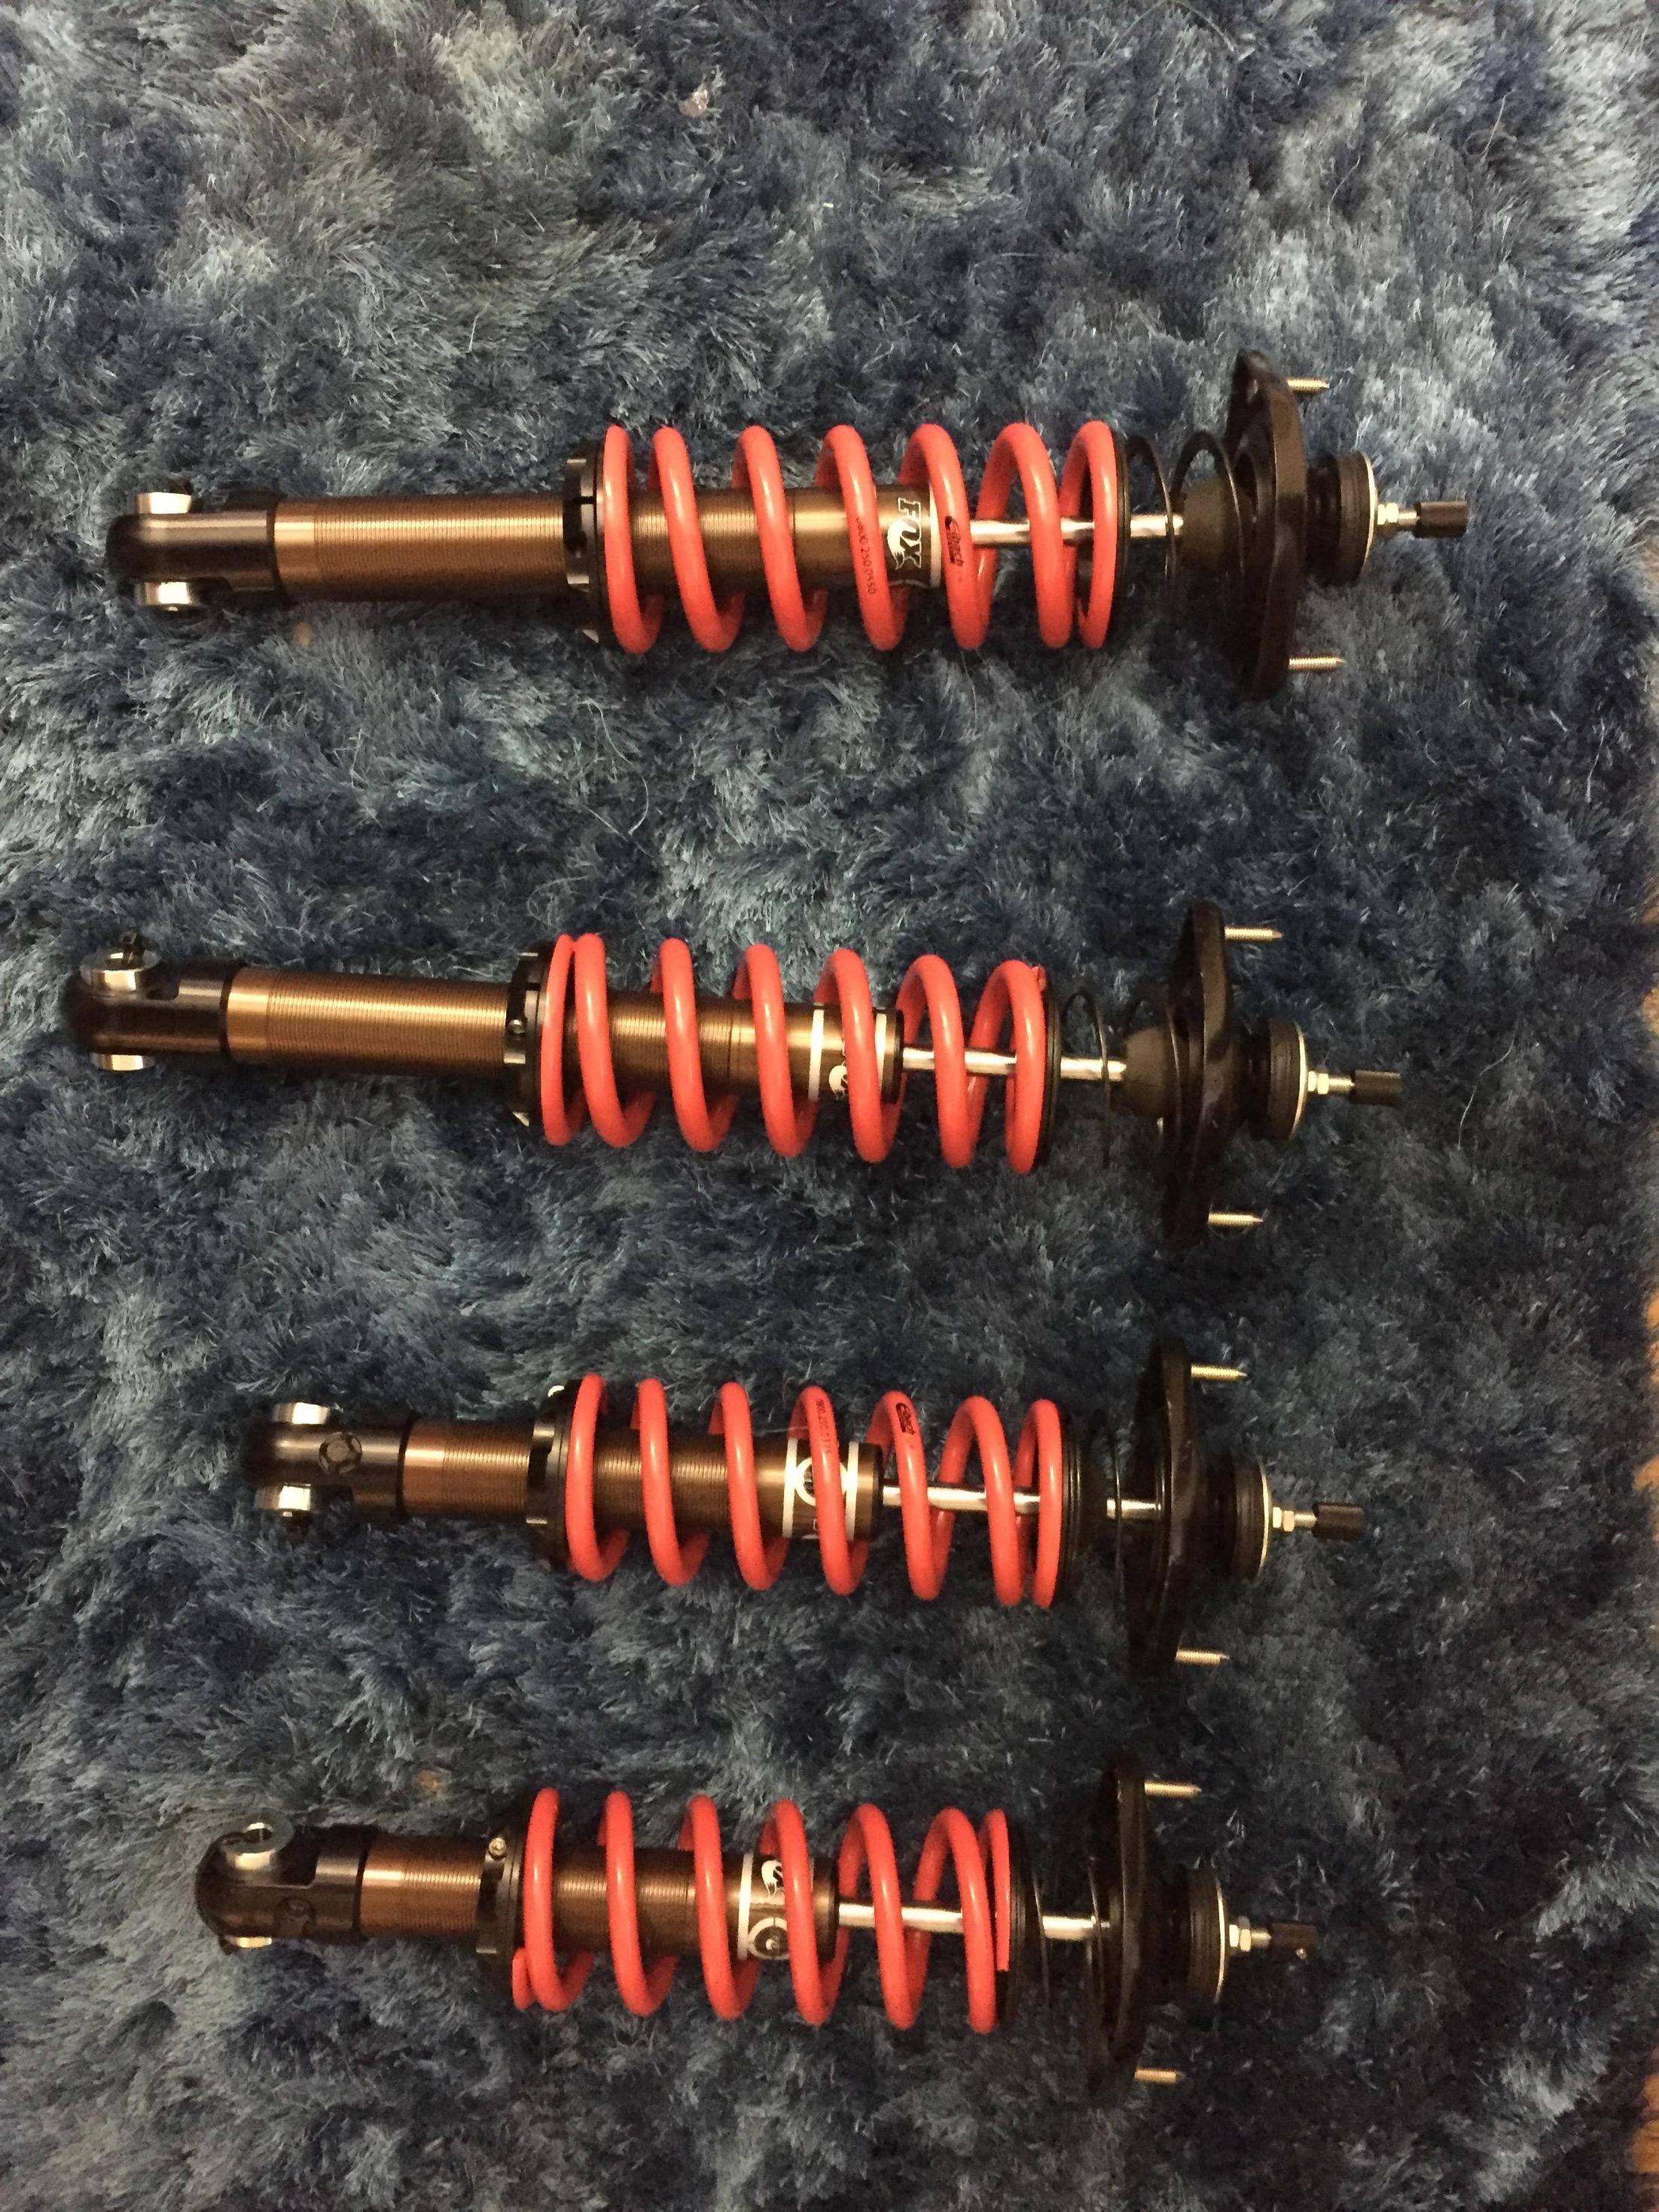
I spent a lot of time deciding between the Fox and Xidas coilovers and ultimately went with the Fox. It wasn't an easy call and honestly both of them offer performance which far exceeds my driving skill so I'm sure either would've been more than adequate for my purposes.
Heres what I'm attempting to install:
FM Fox 550 F / 375 R
IL Motorsports Rubber control arm bushings
Racing Beat 1.125 front sway
5X Racing 14 mm rear sway (same as stock MSM but adjustable)
949 endlinks
949 lug nuts (because bling)
New oem ball joints, tie rod ends
Should be a bit of an improvement over 130k blown Showas.
Reply
0
0
Thread Starter
Junior Member
iTrader: (1)
Joined: Jan 2016
Posts: 179
Total Cats: 29
From: Los Angeles
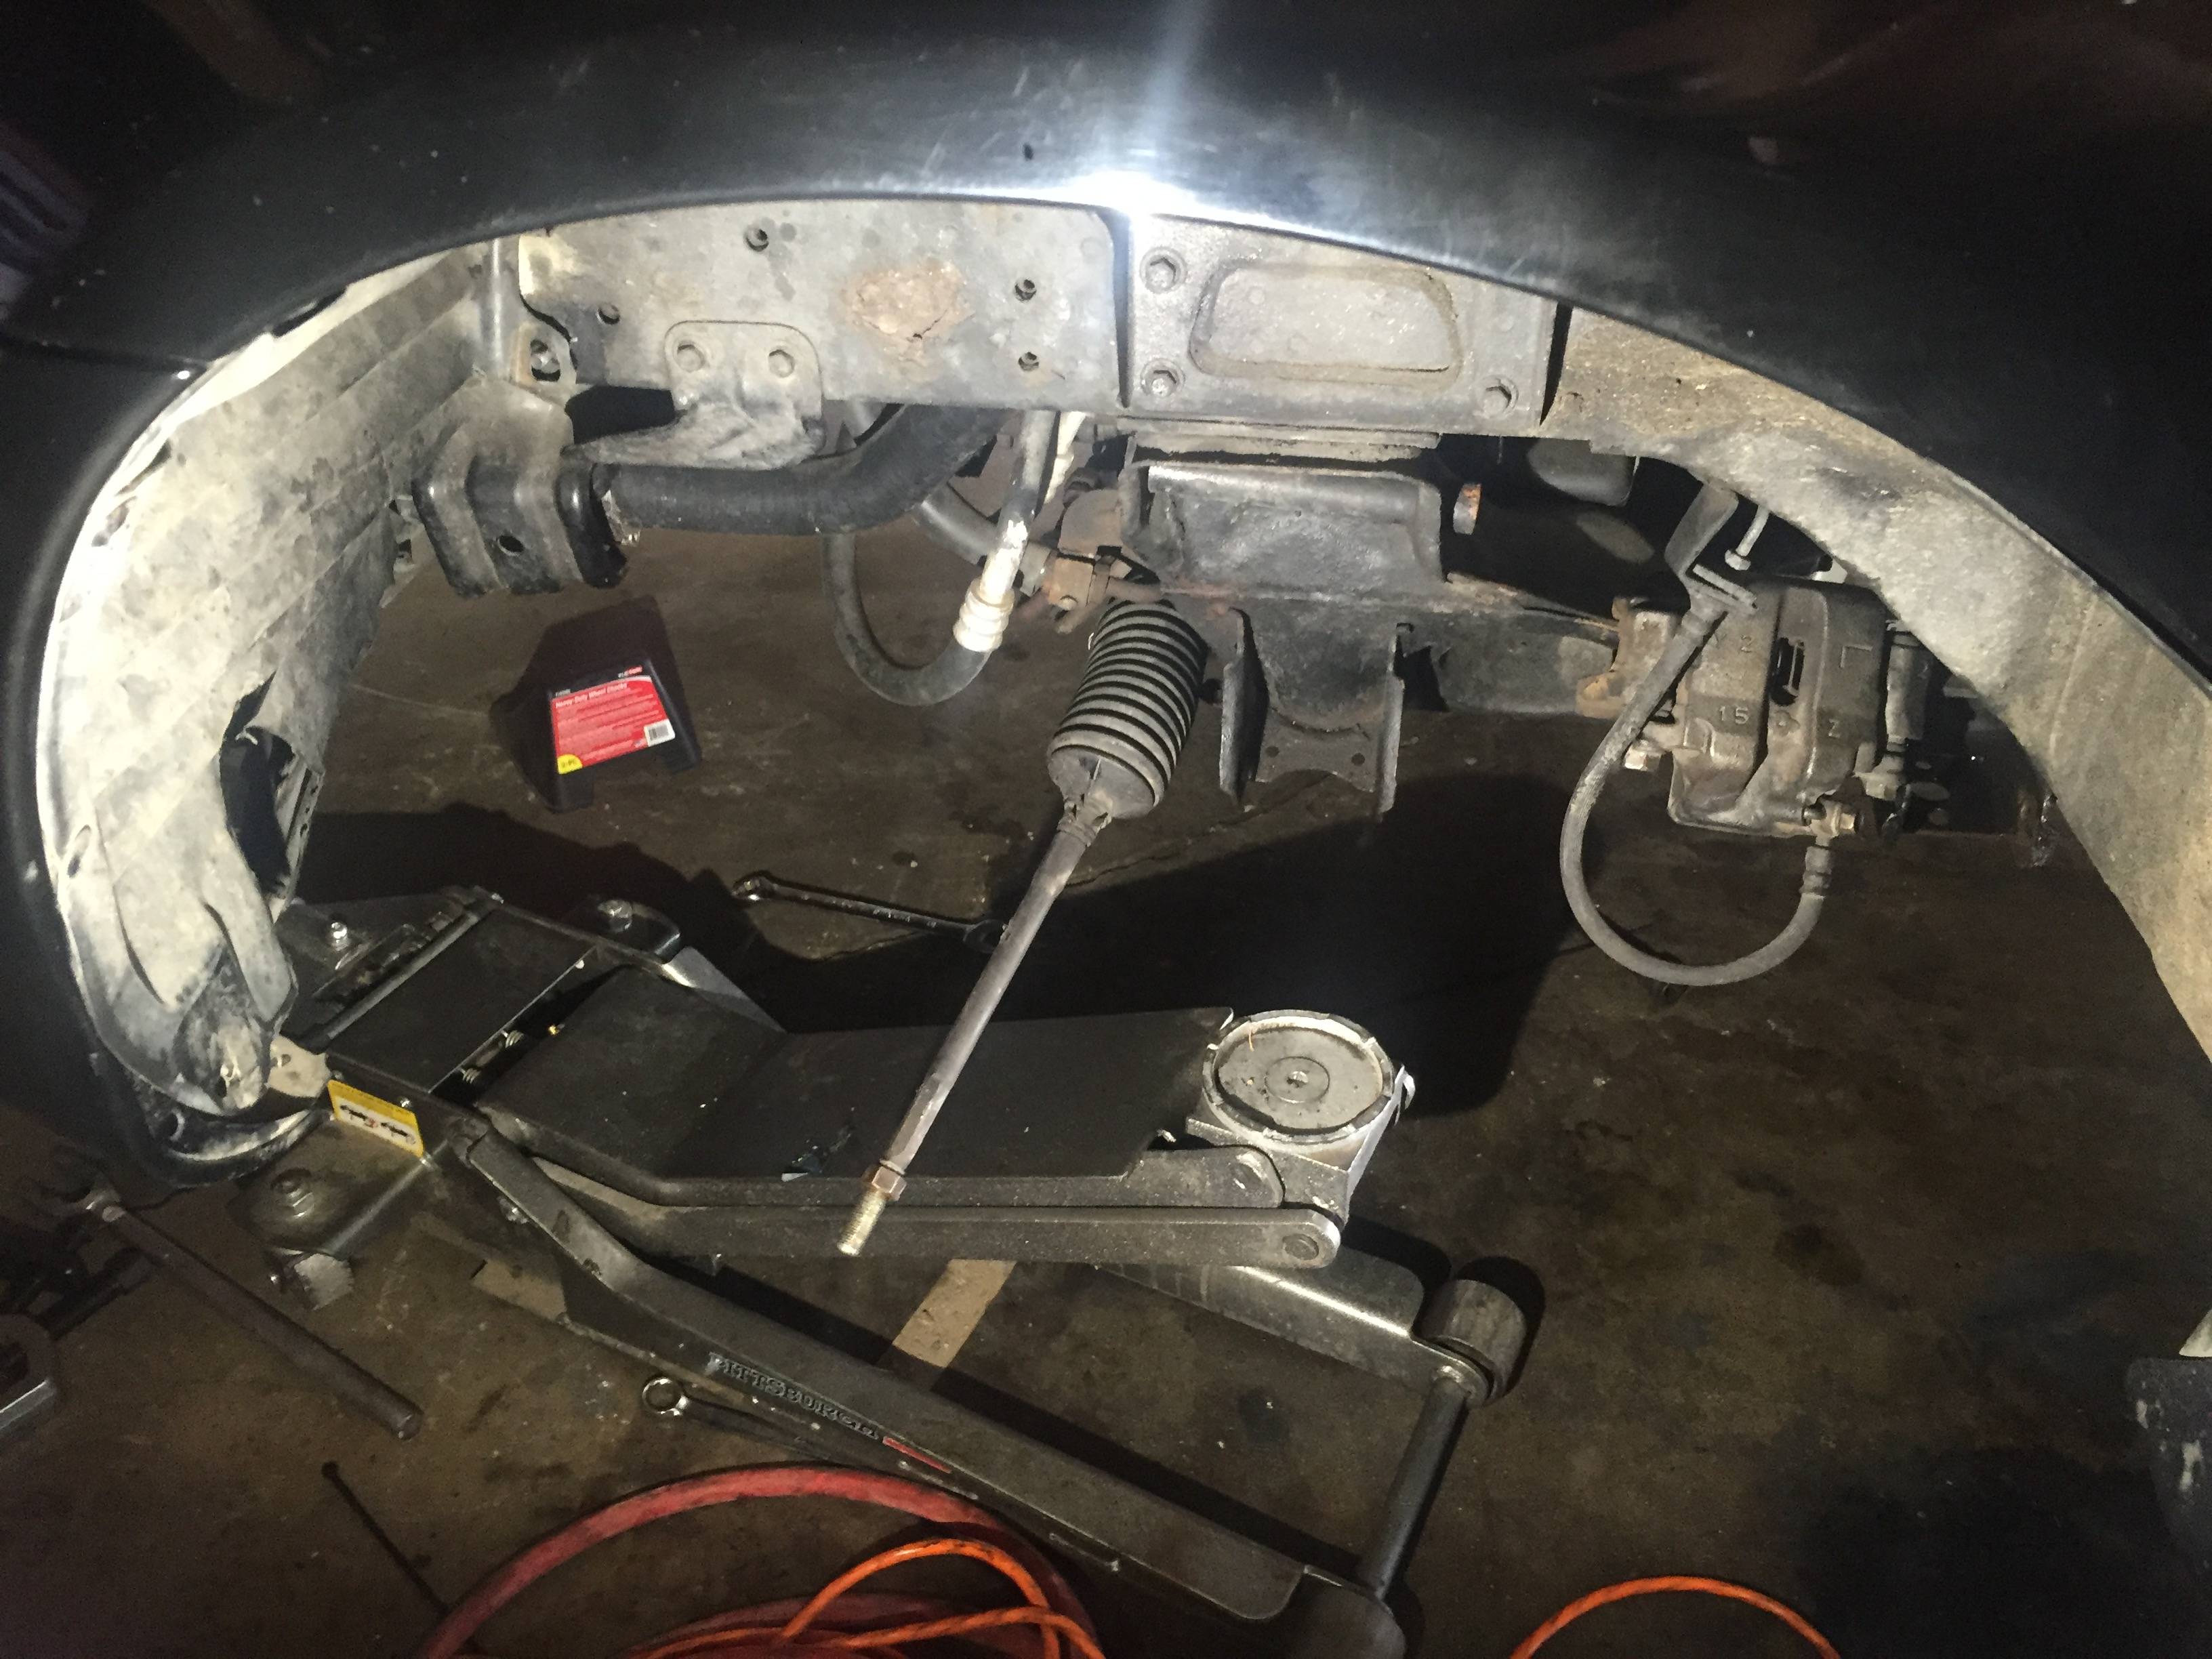
Had a great day in the garage, 3/4 done. Got the first coilover in this morning, drivers rear. I did the passenger rear afterwards within a couple hours, then reassembled the driver front. Started on the last corner but it was getting late and I didn't want to annoy the neighbors with ball joint hammering noises. It's amazing how much of a difference having the right tools makes. Last weekend I picked up the harbor freight air impact and a set of long handle wrenches. 10/10, together they made this job so much easier. My air compressor was an impulse buy and I regretted it a bit, but this project totally made it worthwhile.
Reply
1
1
Thread Starter
Junior Member
iTrader: (1)
Joined: Jan 2016
Posts: 179
Total Cats: 29
From: Los Angeles
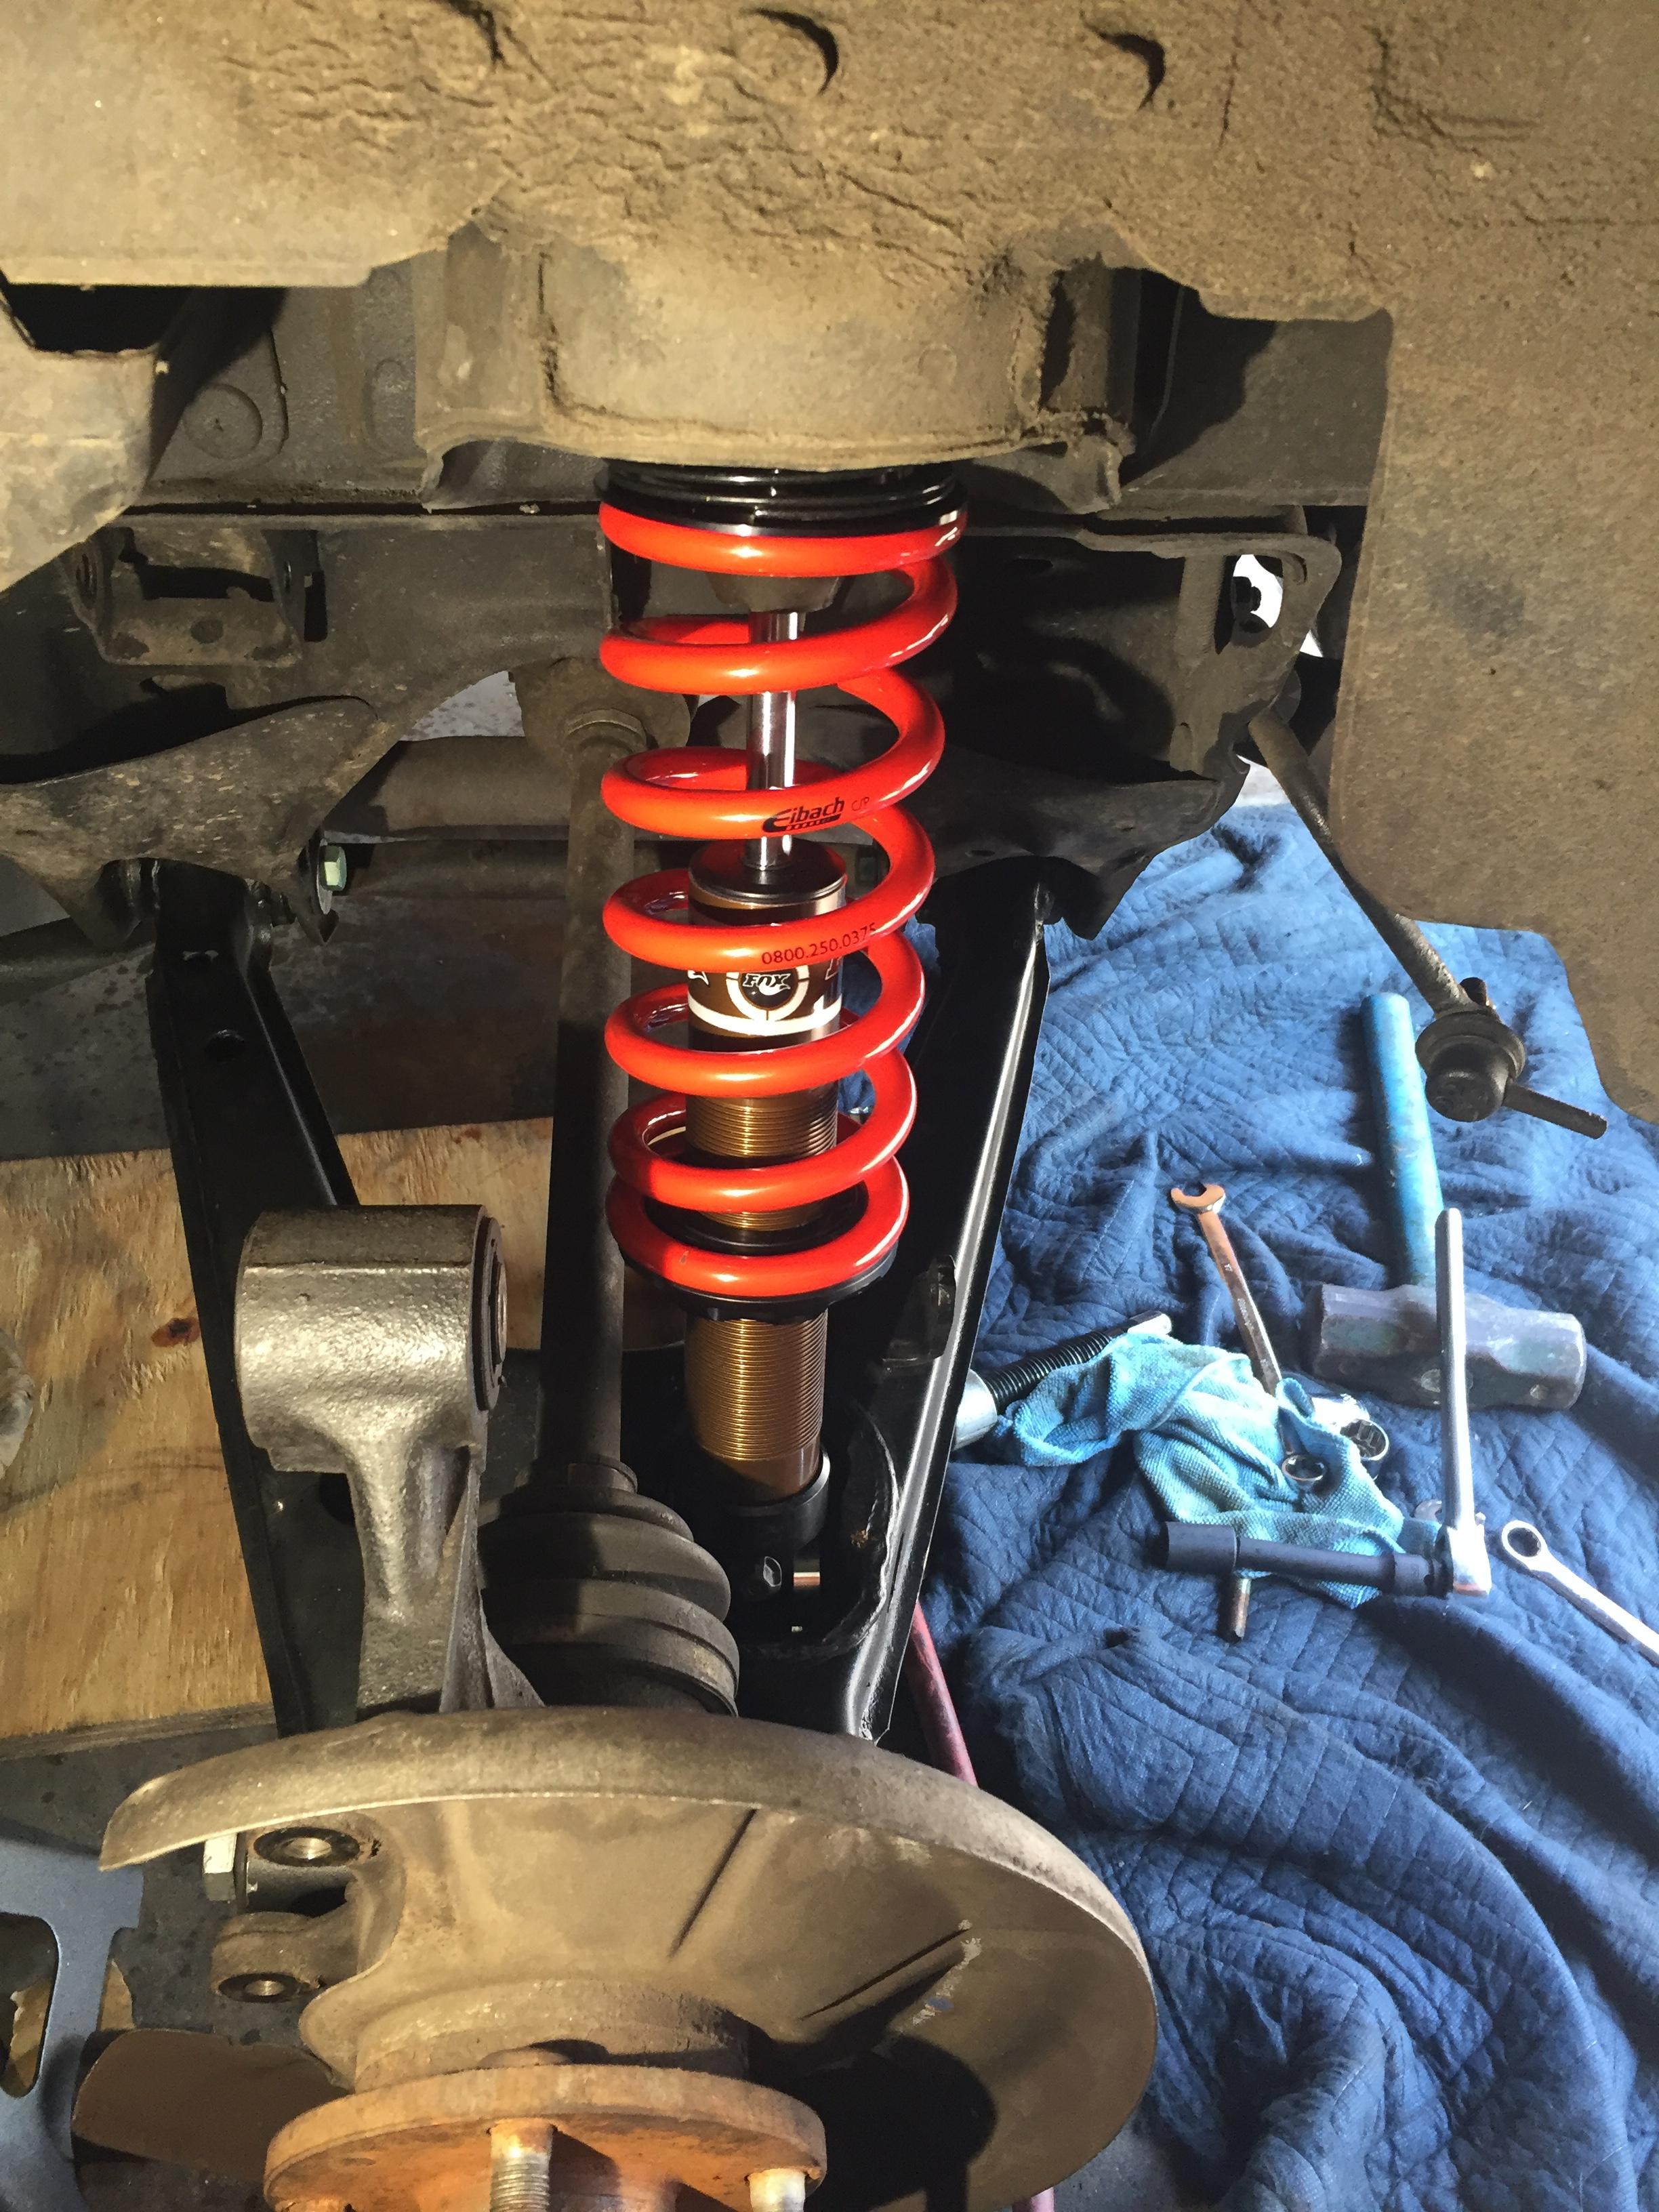
Done with the install! I set the ride height way too high just to see what it felt like. I'm sitting pretty at about 14 F, 14.5 R. Took it for an alignment at the closest shop so I can actually drive it around. I haven't had time to put my sway bars back on yet, but even with no bars and this ride height the foxes are hilariously good. Speed bumps, drainage ruts, mid-corner pot holes, the car just doesn't care. Granted, this is the first time I've driven the car with an actual functioning suspension, but I'm impressed how well these things tolerate a 1 inch lift.
I'm going to get the swaybars on this weekend, drop it down to a more sane 13F, 13.5F and get the alignment tweaked.
I'm going to get the swaybars on this weekend, drop it down to a more sane 13F, 13.5F and get the alignment tweaked.
Last edited by tenthe; Aug 25, 2016 at 04:28 PM.
Reply
0
0
Thread Starter
Junior Member
iTrader: (1)
Joined: Jan 2016
Posts: 179
Total Cats: 29
From: Los Angeles
I had some time Tuesday evening to play with the ride height again. I took it down to 13 F, 13.5 R as planned. I also made sure to loosen all the bolts going through bushings and retorque them at the new height with the car's weight applied. I left the alignment bolts alone, however. The alignment is getting adjusted this Saturday.
Reply
1
1

Junior Member
Joined: Jan 2007
Posts: 230
Total Cats: -23
Nice project. I'm equally torn on the XIDA vs Fox. Fortunately, I've got time to decide. Mine is a 80% street car (bumpy, windy country mountain roads), 10% auto-x and 10% HPDE on skinny wheels and skinny sticky tires (feels > grip).
I've noticed with virtually all pre-formed hoses, whether silicone or rubber, is that the original ends are tighter than the middles, even when you cut a straight section of hose. So when making up custom radiator hoses by cutting pre-formed hoses, you end up with potentially sloppy fitting connections at your new ends. I hate the long coolant return hose in the M-tuned coolant reroute kit so I made my own hard pipe out of aluminum. Had to try a couple different hoses to get one that fit the radiator neck decently after cutting. Then I clamped it down hard with Murray constant-tension hose clamps, which I generally like better than T-bolts in this application. I haven't really pushed my cooling system yet but no leaks so far fingers crossed!

Reply
2
2
Thread Starter
Junior Member
iTrader: (1)
Joined: Jan 2016
Posts: 179
Total Cats: 29
From: Los Angeles
Nice project. I'm equally torn on the XIDA vs Fox. Fortunately, I've got time to decide. Mine is a 80% street car (bumpy, windy country mountain roads), 10% auto-x and 10% HPDE on skinny wheels and skinny sticky tires (feels > grip).
I've noticed with virtually all pre-formed hoses, whether silicone or rubber, is that the original ends are tighter than the middles, even when you cut a straight section of hose. So when making up custom radiator hoses by cutting pre-formed hoses, you end up with potentially sloppy fitting connections at your new ends. I hate the long coolant return hose in the M-tuned coolant reroute kit so I made my own hard pipe out of aluminum. Had to try a couple different hoses to get one that fit the radiator neck decently after cutting. Then I clamped it down hard with Murray constant-tension hose clamps, which I generally like better than T-bolts in this application. I haven't really pushed my cooling system yet but no leaks so far fingers crossed!
I've noticed with virtually all pre-formed hoses, whether silicone or rubber, is that the original ends are tighter than the middles, even when you cut a straight section of hose. So when making up custom radiator hoses by cutting pre-formed hoses, you end up with potentially sloppy fitting connections at your new ends. I hate the long coolant return hose in the M-tuned coolant reroute kit so I made my own hard pipe out of aluminum. Had to try a couple different hoses to get one that fit the radiator neck decently after cutting. Then I clamped it down hard with Murray constant-tension hose clamps, which I generally like better than T-bolts in this application. I haven't really pushed my cooling system yet but no leaks so far fingers crossed!
That hard line is really nice, well done. Did you use a pipe bender? The lips on the ends look awesome, how was that done? And how are you supporting it? Mine bolts to the intake manifold in 2 places, at the 2 holes near the back and behind the throttle cable bracket. I will look into those worm drive clamps if I need to replace any in the future.
Reply
0
0
Thread Starter
Junior Member
iTrader: (1)
Joined: Jan 2016
Posts: 179
Total Cats: 29
From: Los Angeles
I put this on last night. Say what you want about Raceland, but they make a hell of a luggage rack. Light, sturdy and it looks pretty sharp.
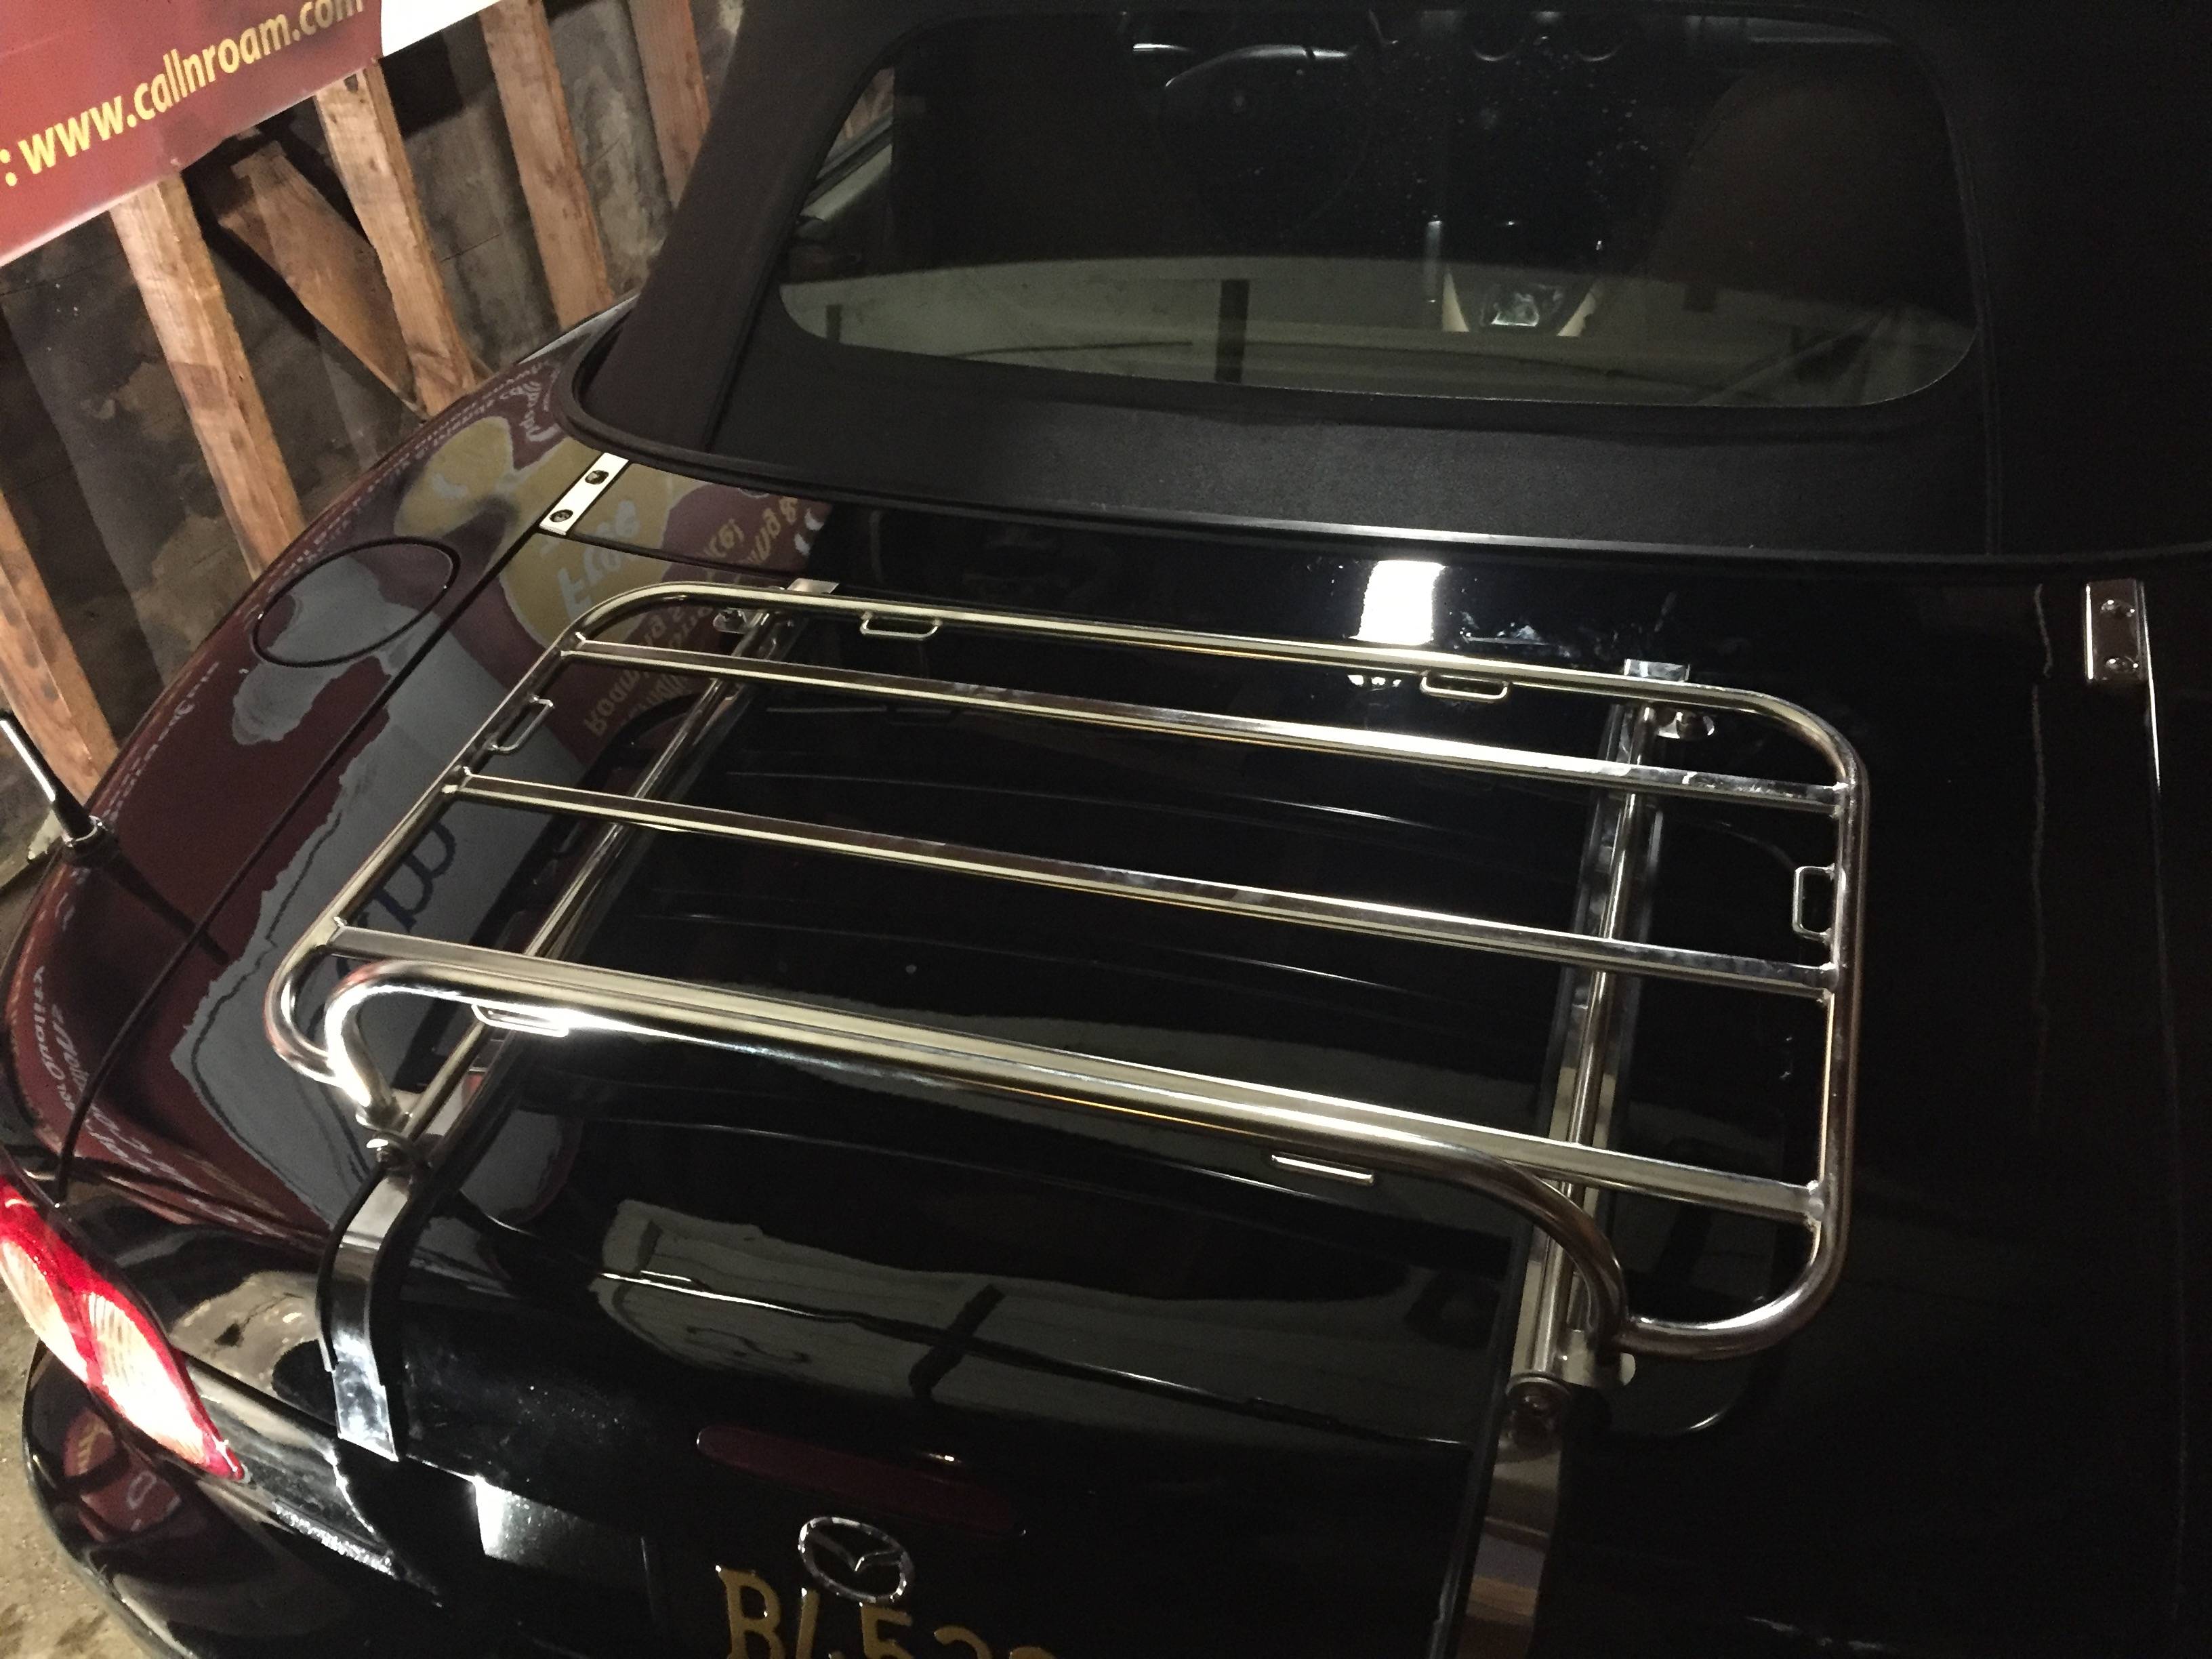
I polished the trunk lid before I put the rack on. Need to do the rest of the car, it's been about a year and I've scratched it up quite a bit with all the work I've been doing on it. Bumping it with wrenches, or my zipper, etc. I think ill do it one panel at a time rather than spending a whole day in the garage.
I really want a tan cloth top, but my current one is in great condition so its difficult to justify the expense. Heres what I have left on my list before I begin the power mods:
Tan top
FM frame rails and butterfly brace
6UL 15x8
Roll bar (maybe)
Big brake kit (or SS lines and the NB sport brakes)
Leaning towards the frame rails first, since they're cheapest.
Reply
0
0
Junior Member
Joined: Jan 2007
Posts: 230
Total Cats: -23
That hard line is really nice, well done. Did you use a pipe bender? The lips on the ends look awesome, how was that done? And how are you supporting it? Mine bolts to the intake manifold in 2 places, at the 2 holes near the back and behind the throttle cable bracket. I will look into those worm drive clamps if I need to replace any in the future.

Pipe is secured with a high-temp rubber-coated P-clamp. I don't have a stock intake manifold so that wasn't an option for me but I still needed to support the pipe so it didn't droop under the weight of the water running through it. You just need to be careful as there has to be enough compliance to accommodate the relative motion of the engine. I've got the stiffer rubber Mazda Comp mounts and an upper HPI "engine torque damper" mount that connects to the shock tower so that helps along with the rubber hoses at both ends.
Reply
0
0
Thread Starter
Junior Member
iTrader: (1)
Joined: Jan 2016
Posts: 179
Total Cats: 29
From: Los Angeles
That's really clean, great work.
I got my front sway bar in, along with the racing beat brace hardware. Need to torque the end links and put on the rear bar tomorrow. Didn't have much time in the garage because we had to take our cat to the vet.
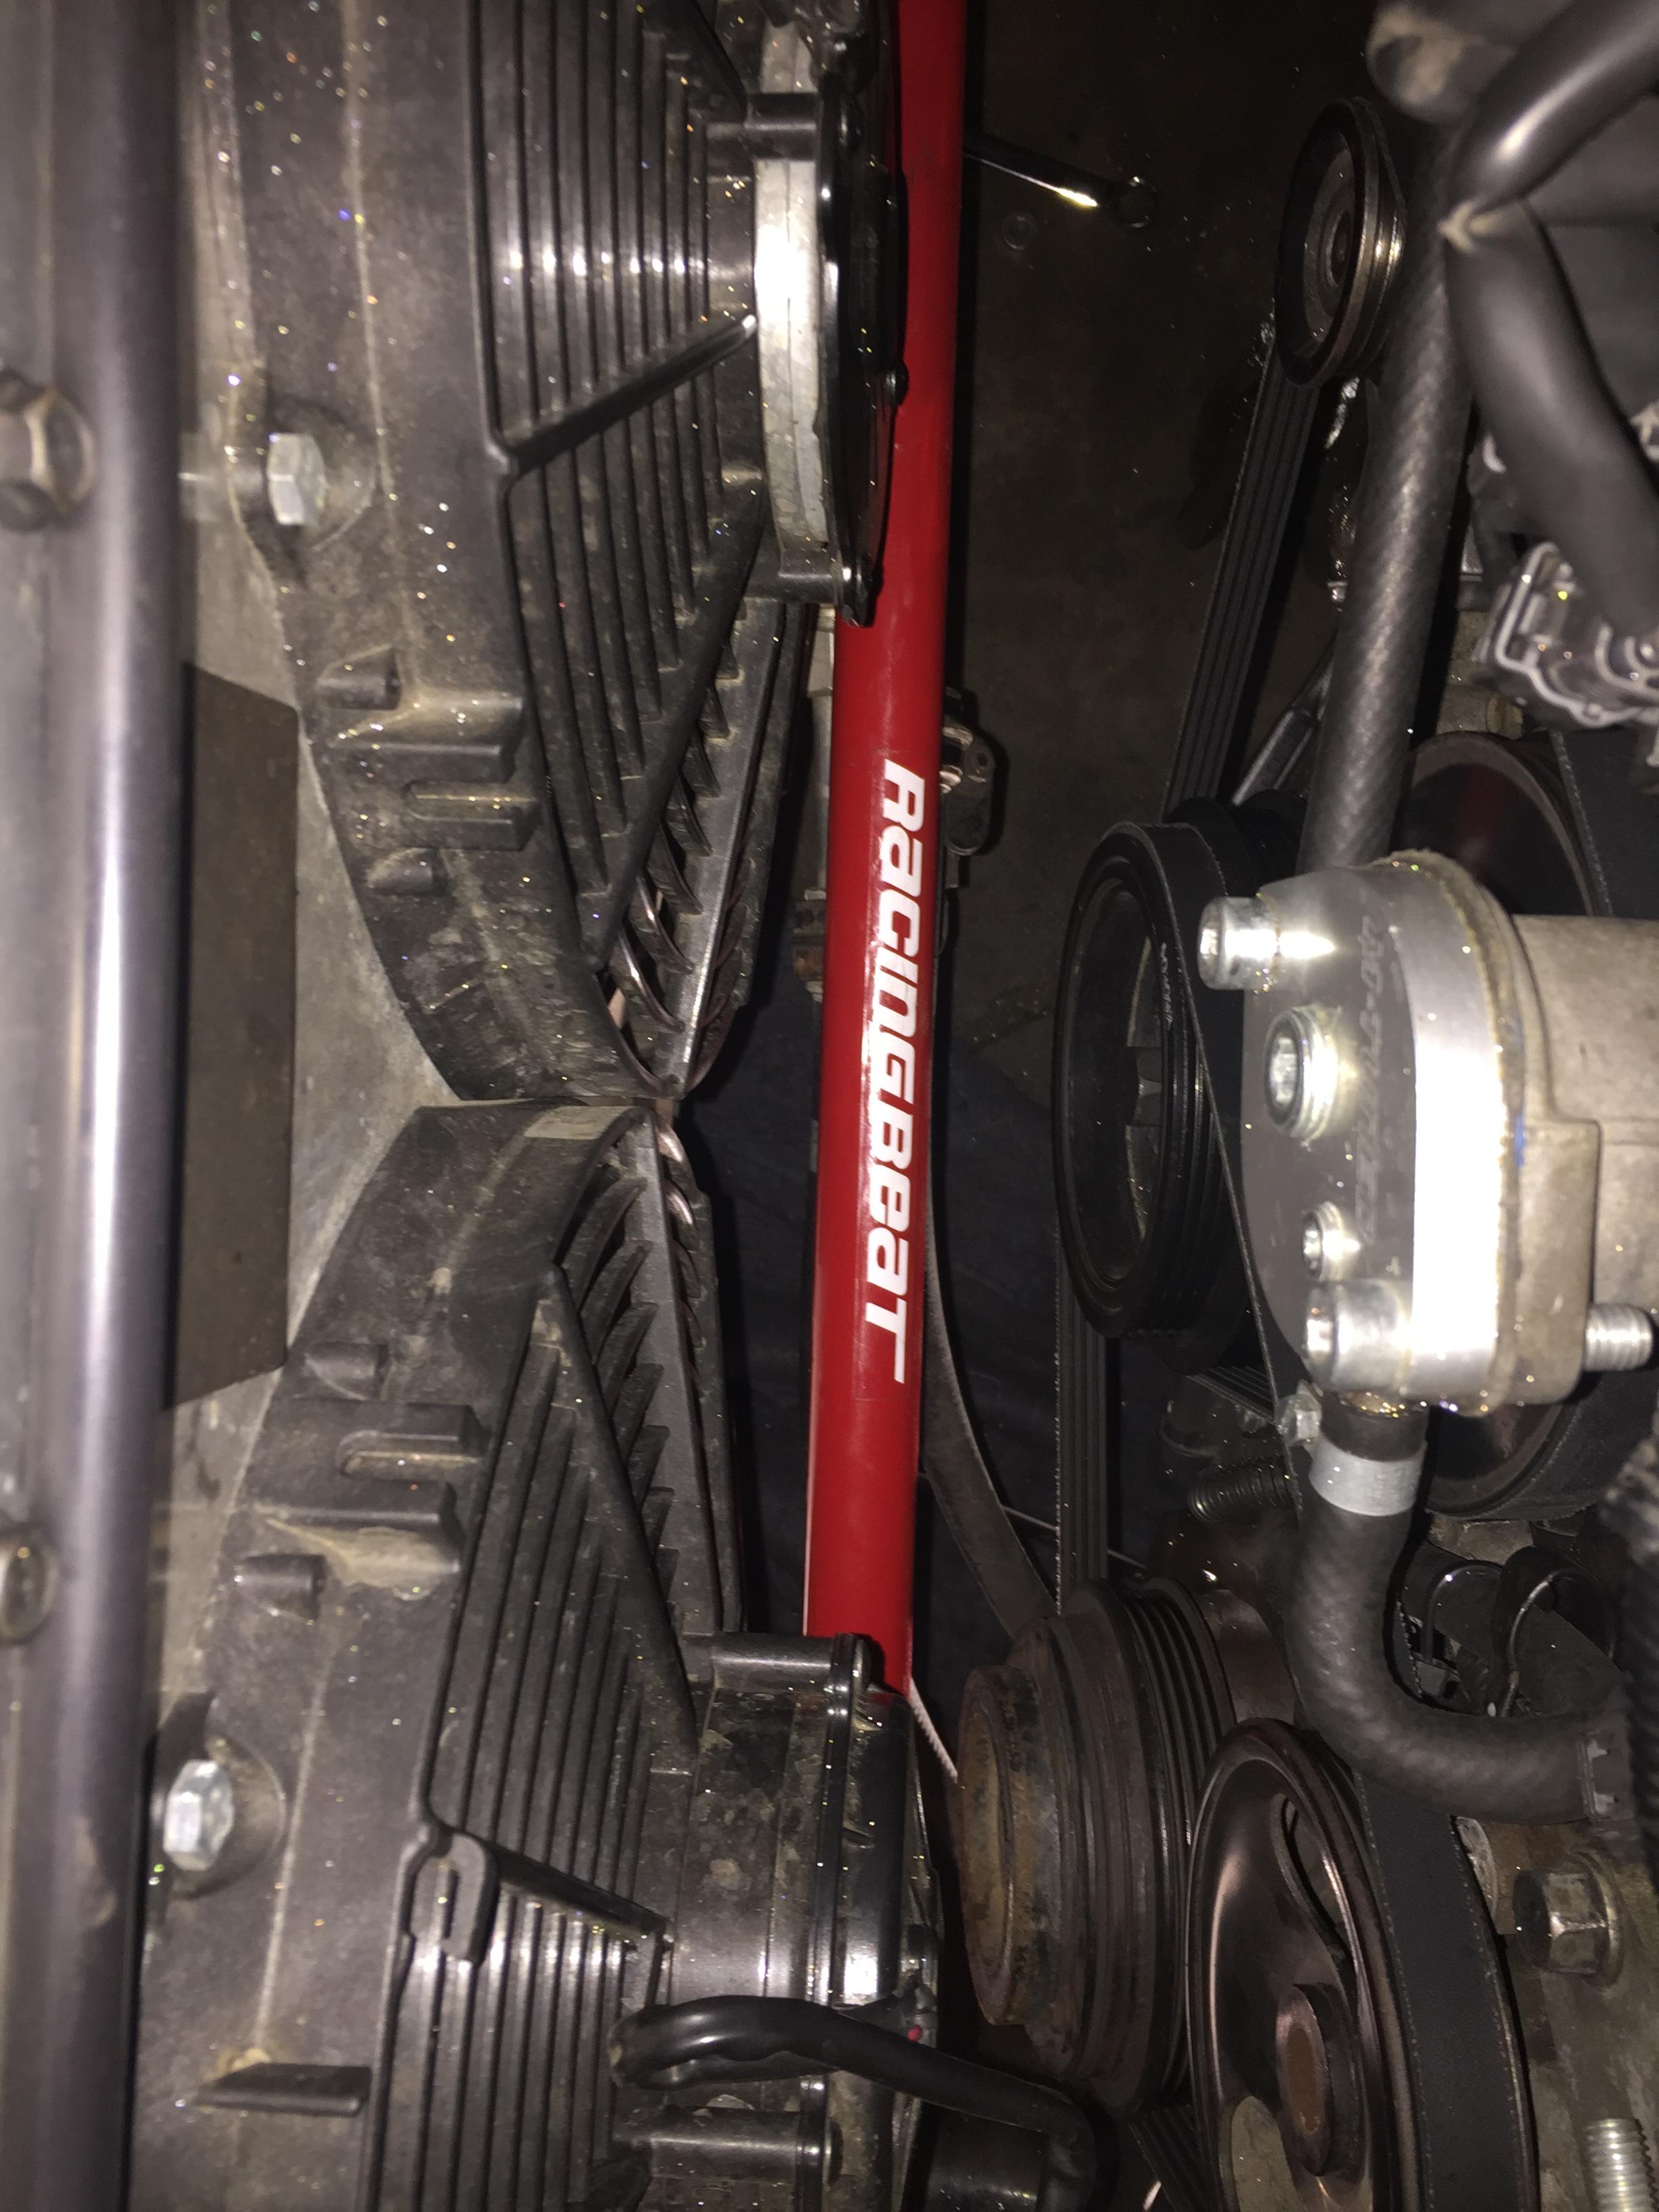
I got my front sway bar in, along with the racing beat brace hardware. Need to torque the end links and put on the rear bar tomorrow. Didn't have much time in the garage because we had to take our cat to the vet.
Reply
0
0


Thread Starter
Junior Member
iTrader: (1)
Joined: Jan 2016
Posts: 179
Total Cats: 29
From: Los Angeles
Kind of like that, but without the exocet, huge tires, or that degree of off-roading! Honestly I just want to see what it looks like/ how it drives, then potentially put it on for more ground clearance when we go to national parks with dirt/gravel roads.
Though, I just bought new wheels so I could hang onto the old ones and put huge tires on them.
Though, I just bought new wheels so I could hang onto the old ones and put huge tires on them.
Reply
0
0


