
Diy CXracing intercooler *56k warning*


Thread Starter
Elite Member
iTrader: (7)
Joined: Jan 2007
Posts: 1,731
Total Cats: 4
From: Renton Washington
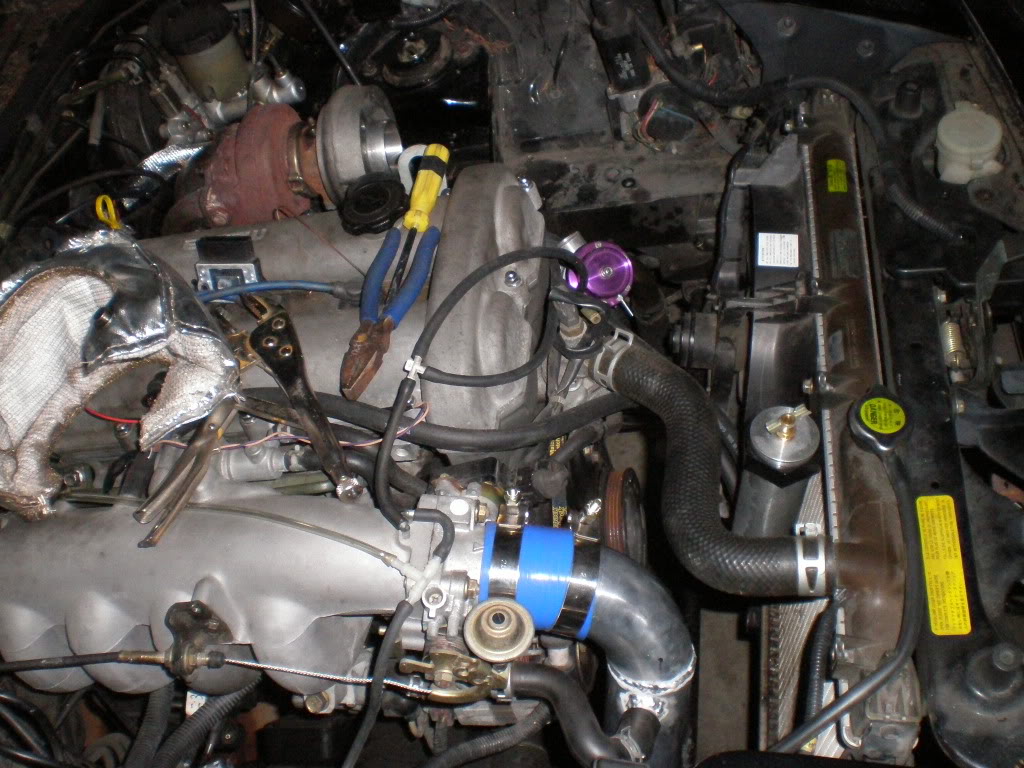
I wanted to get rid of my old intercooler setup because
1. It was ugly
2. It rubbed on the belts sometimes
3. hot side recieved higher temperatures due to passing in front of the fan.
Tools required...
1. Safety glasses
2. Ear plugs/muffs
3. Protective clothing for welding
4. A chop saw or some way to cut the pipe
5. Welder and filler rod (also stainless steel brush to clean aluminum)
6. Dremel with sand paper ends/cut off wheel
7. Brain
Tools helpful...
1. Table vice to hold pipes in position
2. Sharpie pen to mark pipes where to cut
3. Music to rock out to while your fabbin.
Material list...
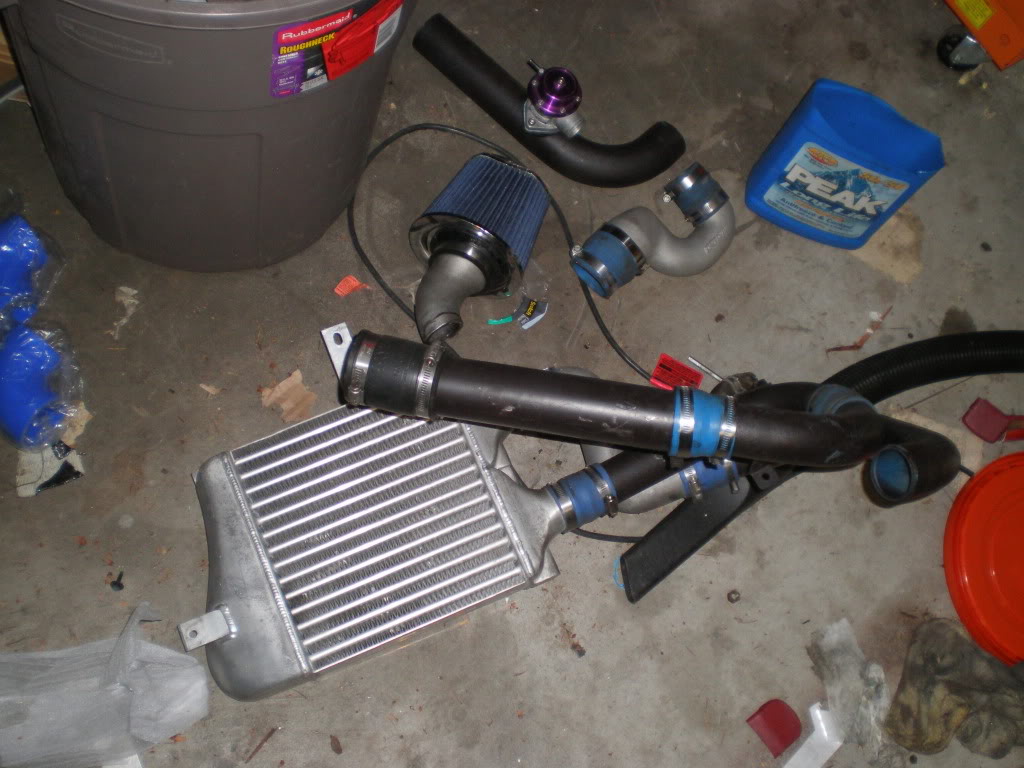
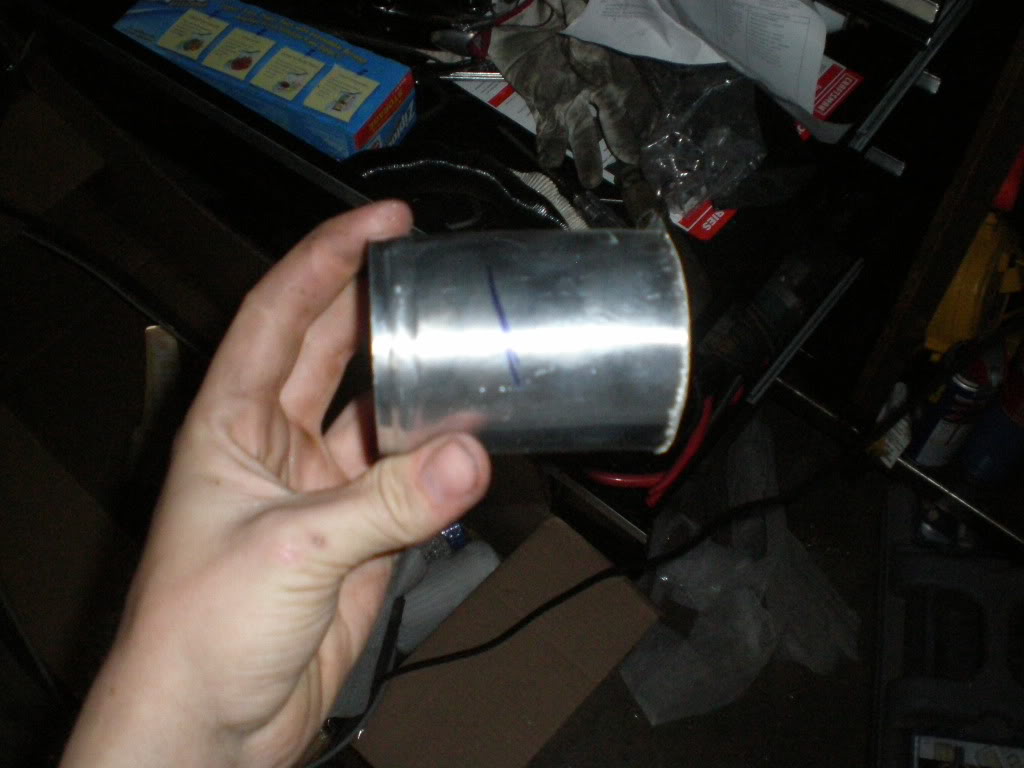
1. CXracing intercooler kit off ebay CXRacing Intercooler + Piping Kit ACURA RSX TSX MIATA:eBay Motors (item 190310932189 end time Jun-06-09 18:49:07 PDT) 150$
2. Flat bar to mount intercooler = scrap
3. Pipe pieces = scrap
4. Extra flapper wheel/ sanding/ cut off disks = 15$ (for the whole kit)
You assume all risks and i will not be held liable for you screwing up your car if you do
This writeup was done on a car without A/C or PS. Im pretty sure it could be done with PS but the intercooler mounts to the AC brackets.
Anyway...
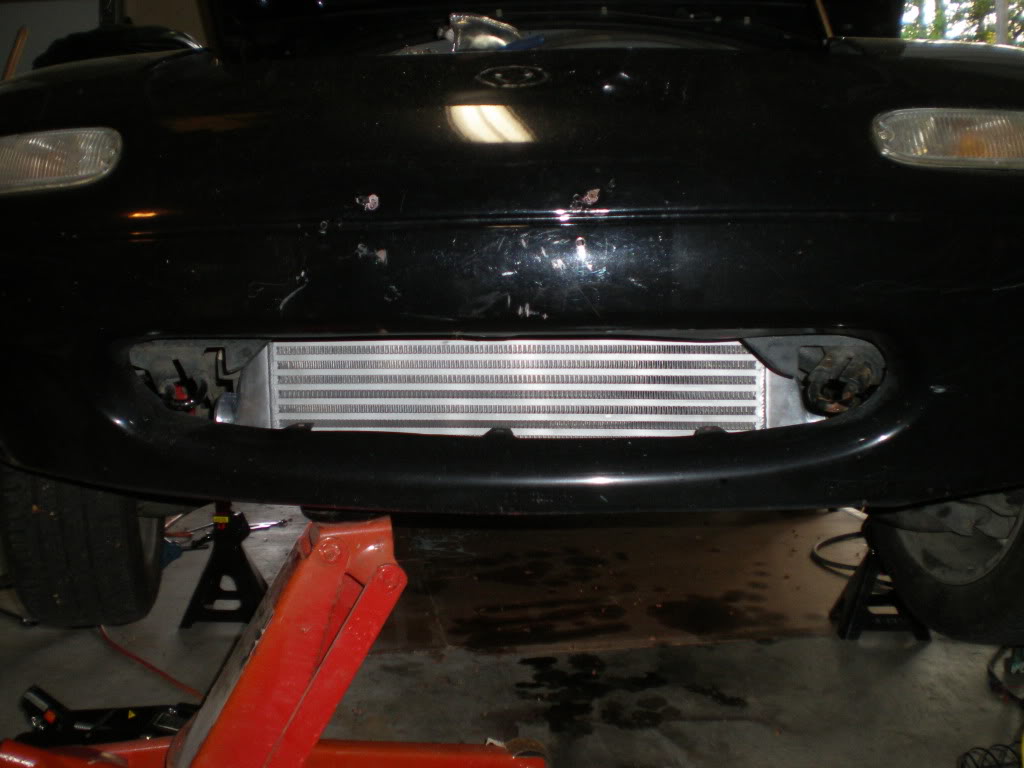
First i cut off some of the condensor bracket so that my intercooler would sit up as high as possible.
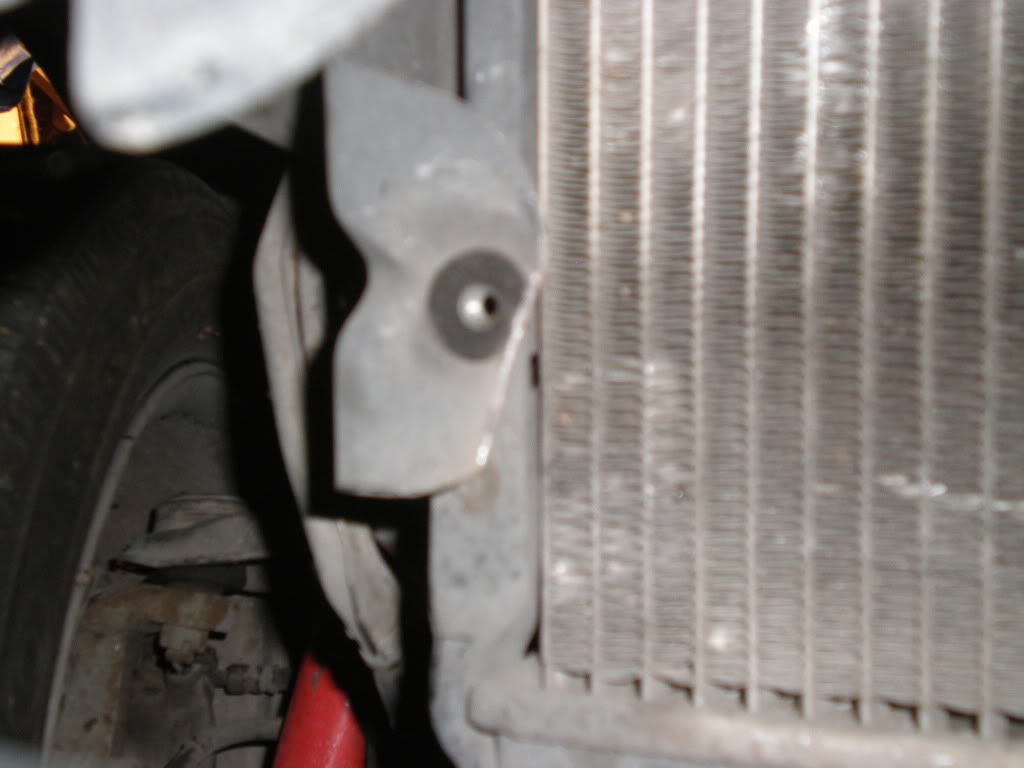
Then i marked where my holes were and welded 2 brackets on the end with a slight angle (to match the angle of the radiator)
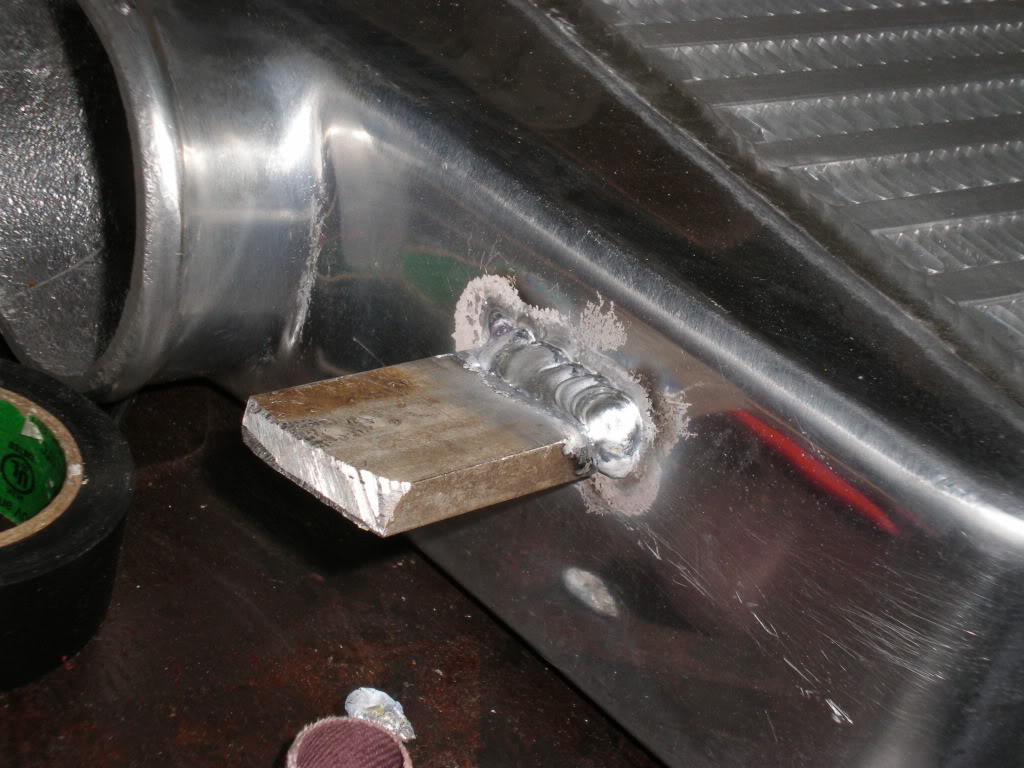
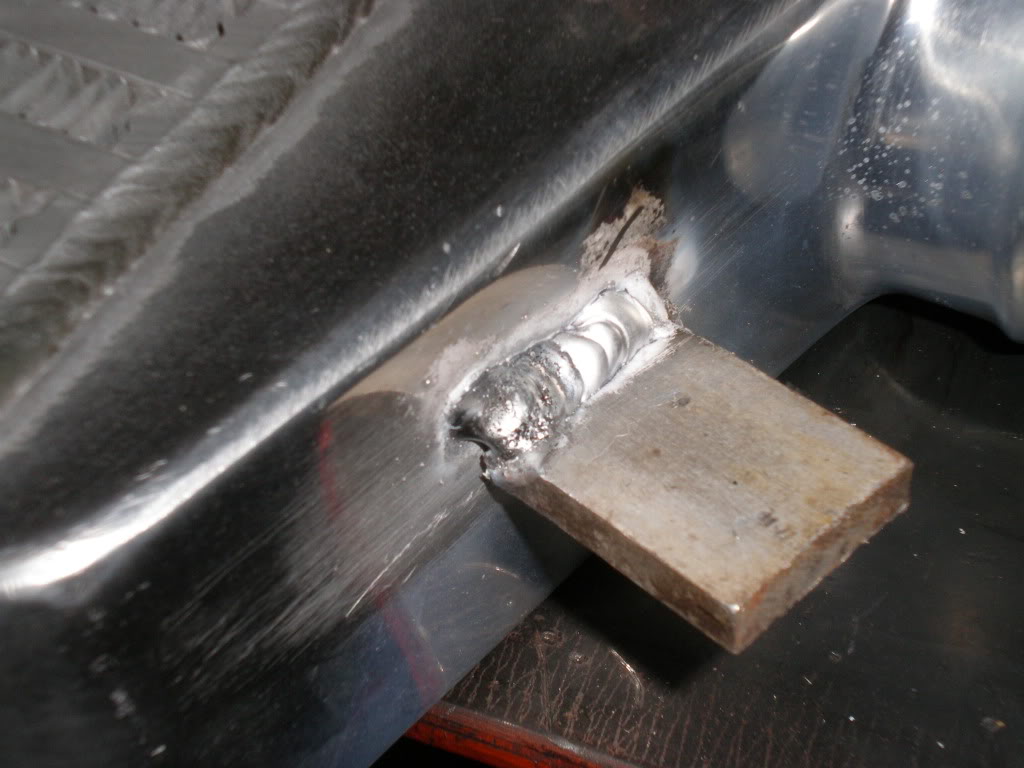
I marked out where the holes were and drilled them out
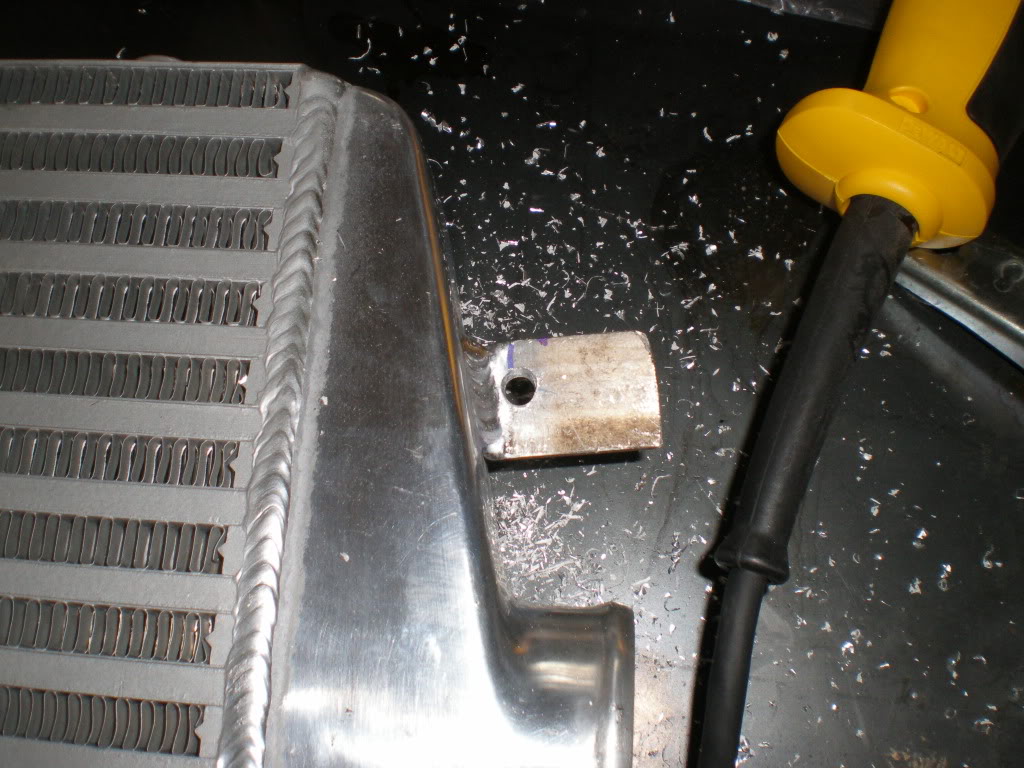
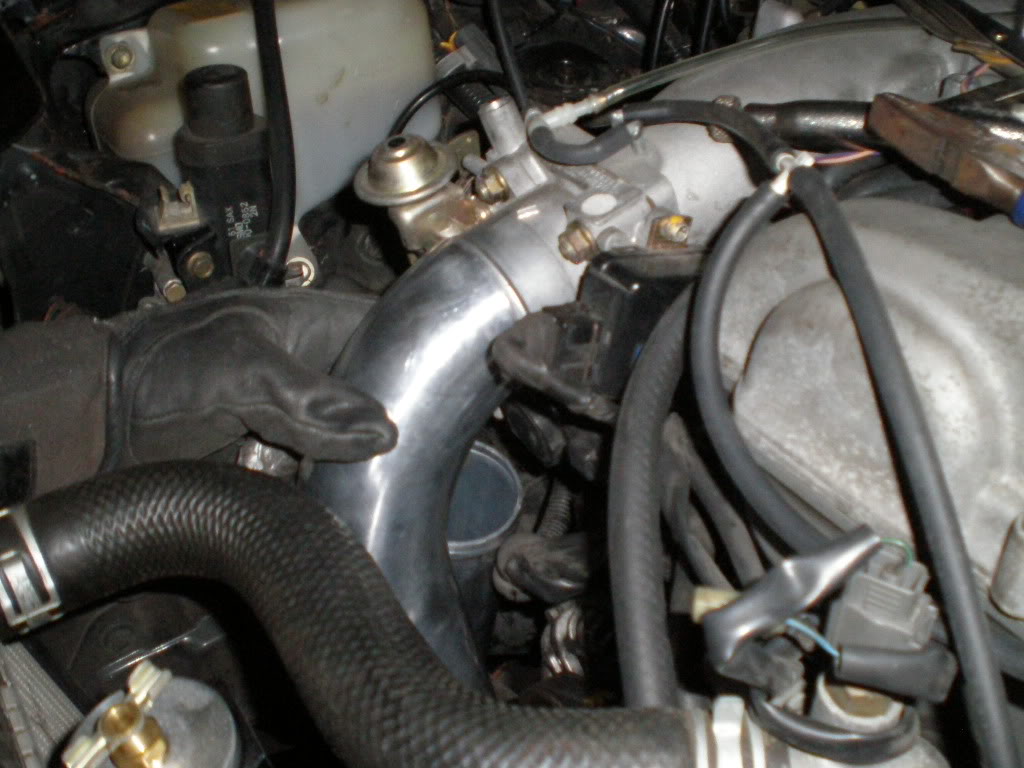
Heres what it looks like from the front
And where the bracket ties in

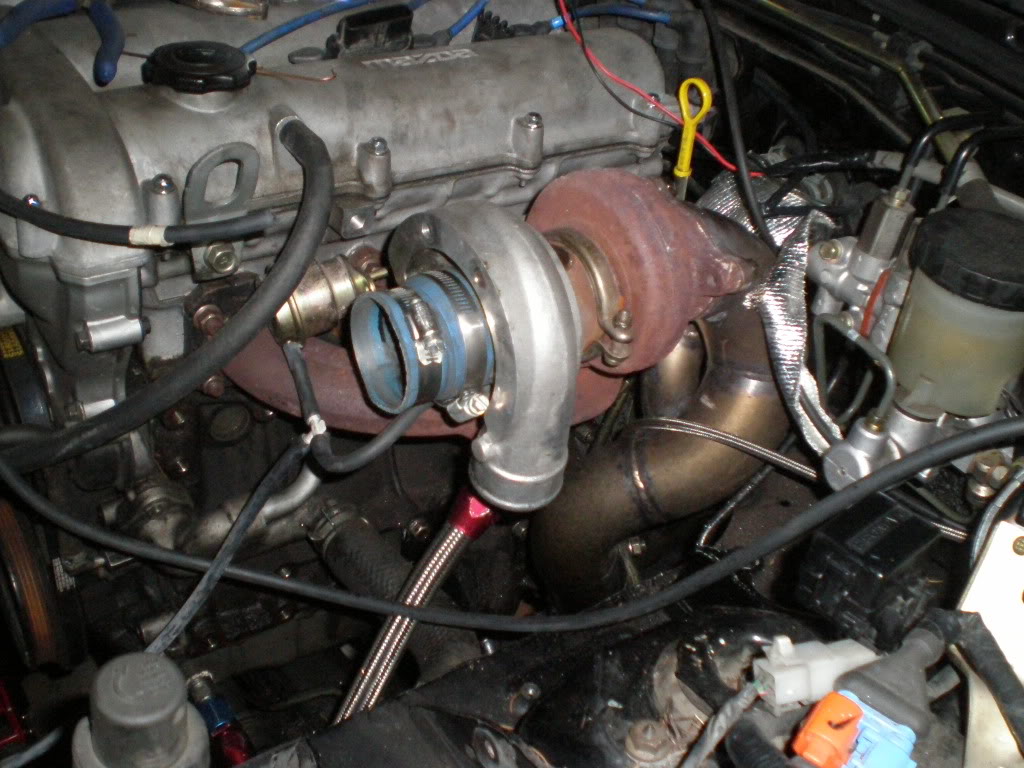
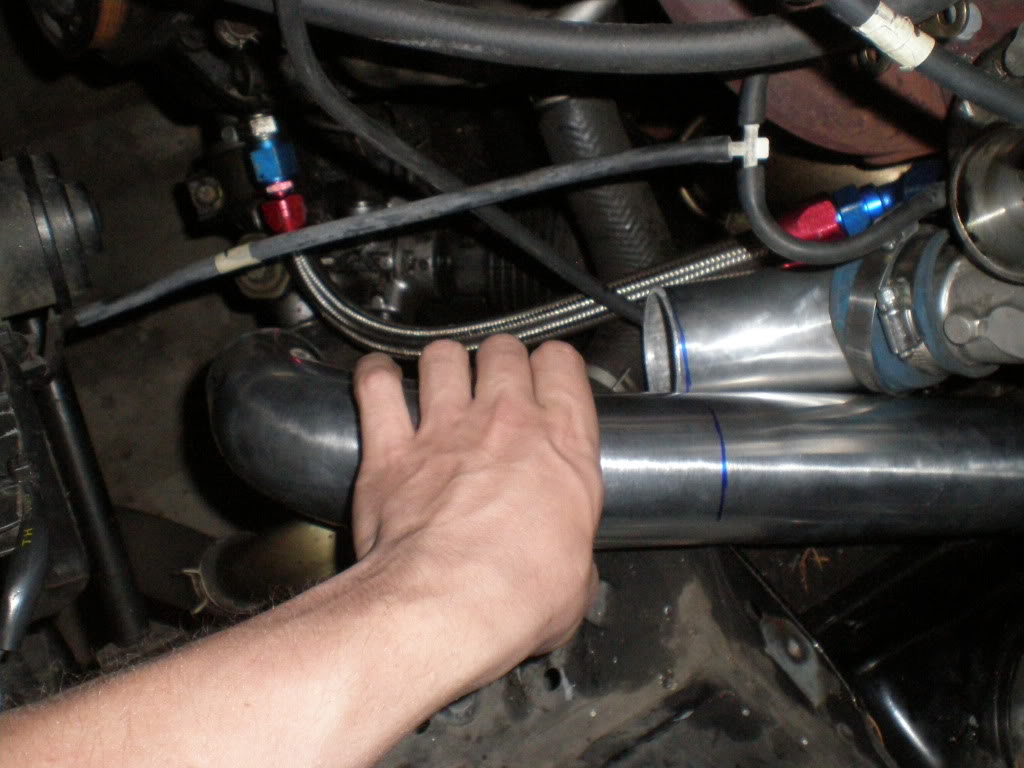
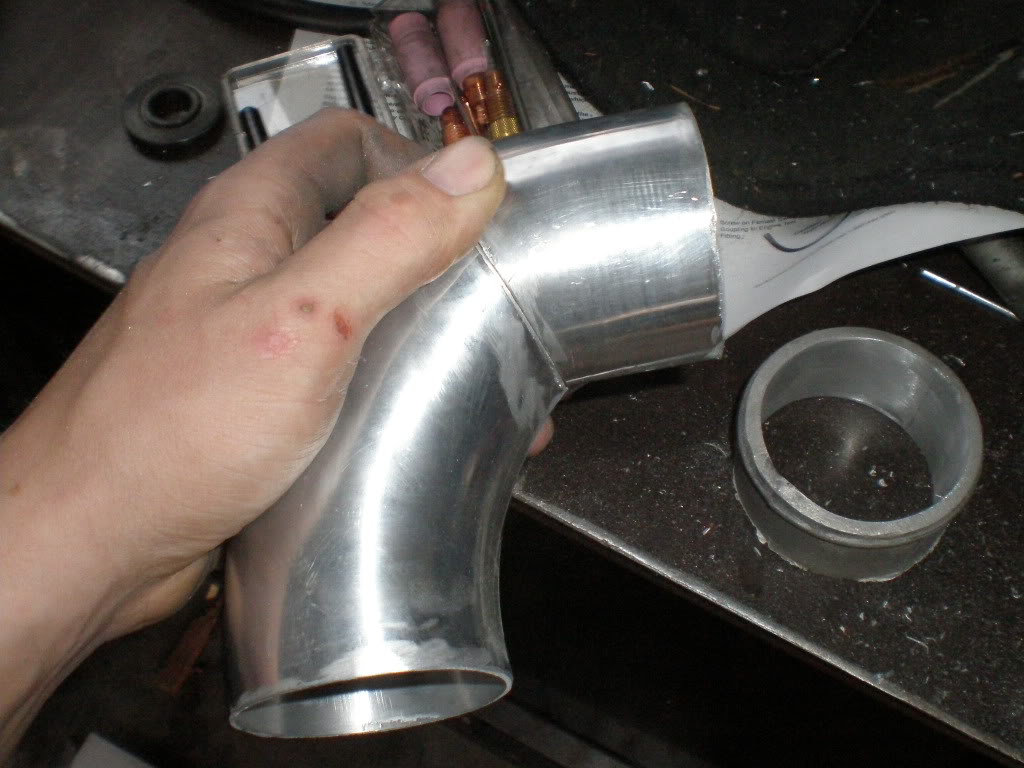
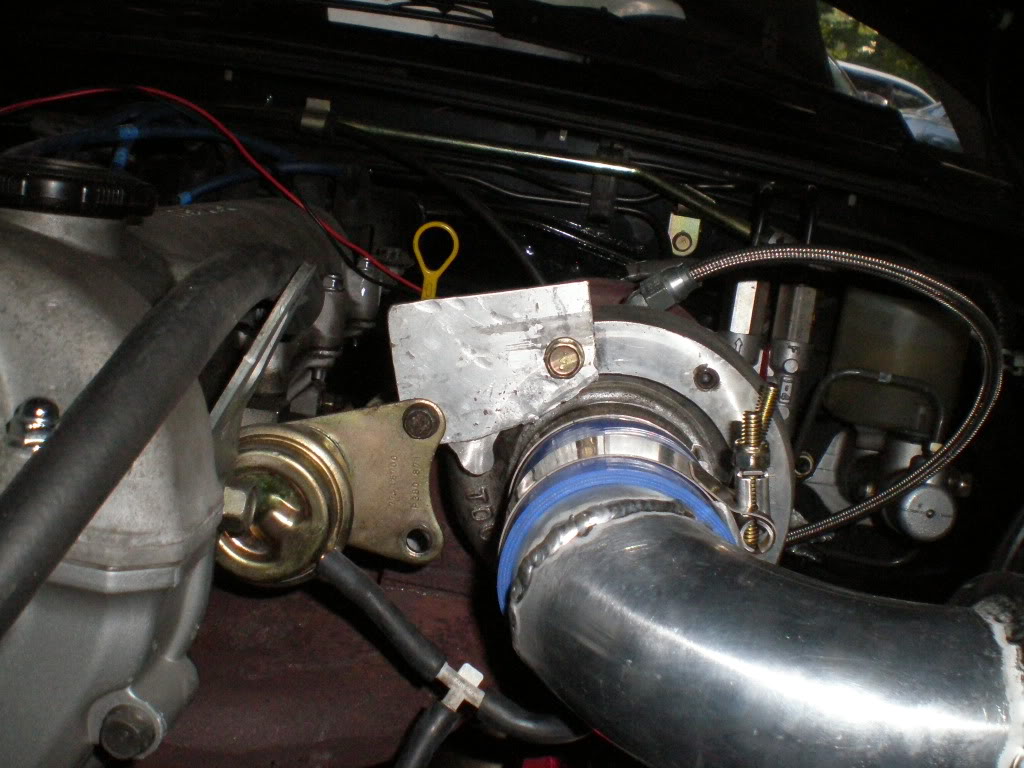
Next i clocked my turbo down using a rubber mallet. It ended up being over a 90 so that the pipe would clear. (Be careful! Get some pliers to compress the snap ring while you beat on it)
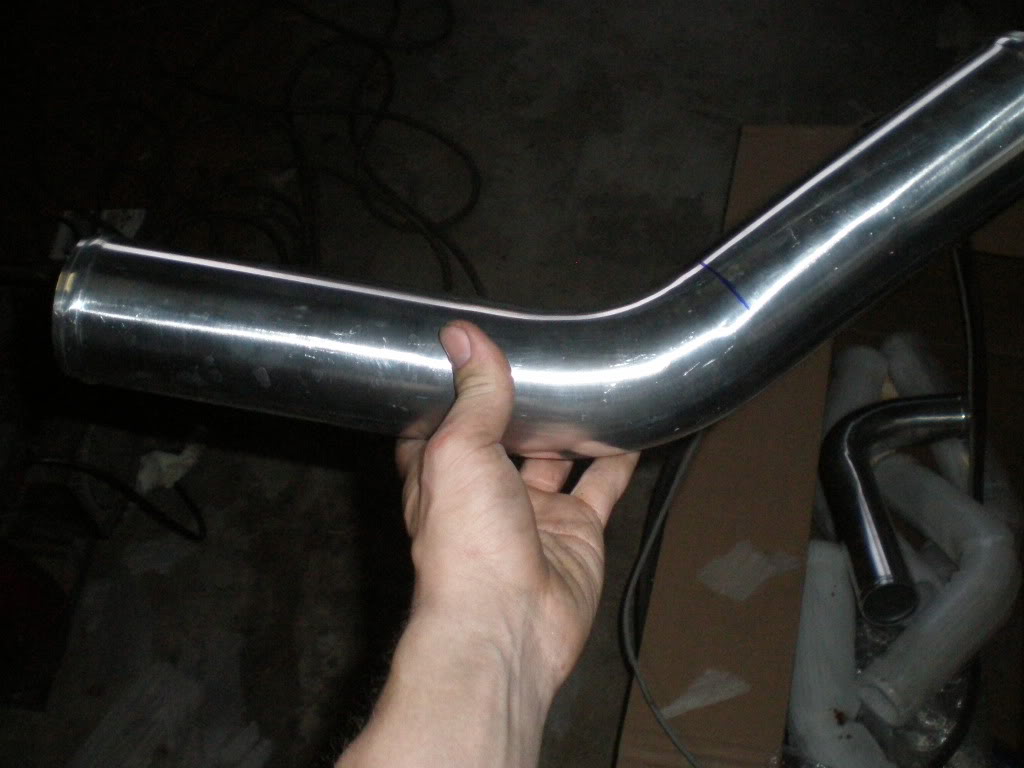
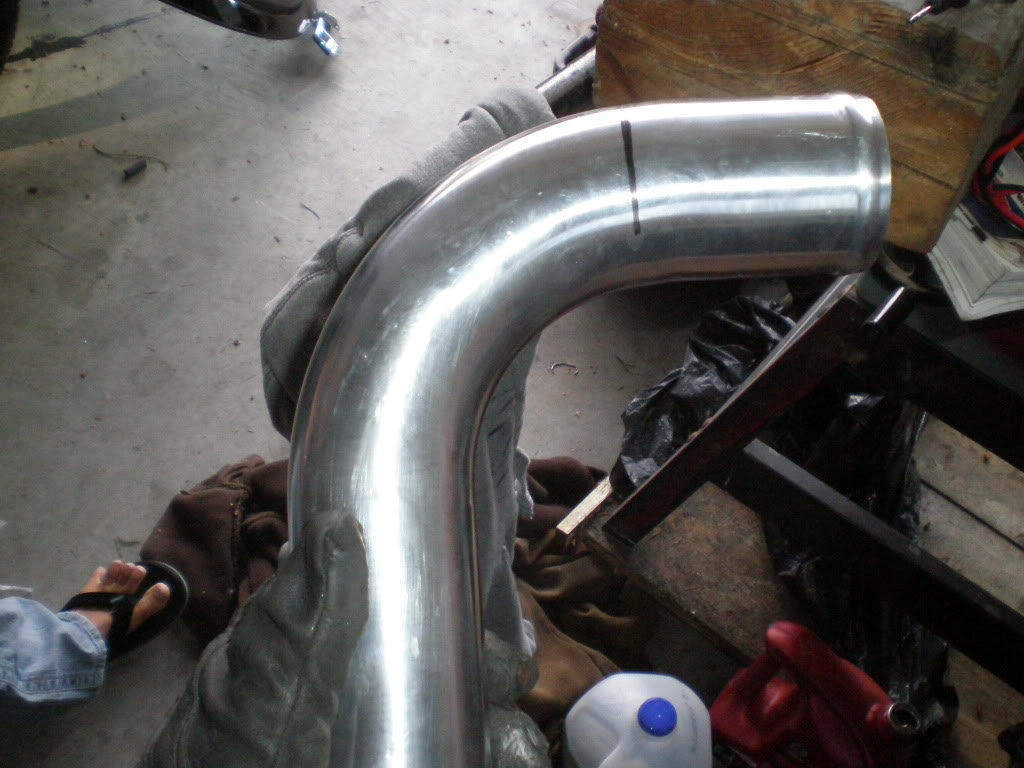
Grab one of your 90's and mark out your first cut from the turbo. This one had to be cut shorter or else it would hit the coolant return hose.
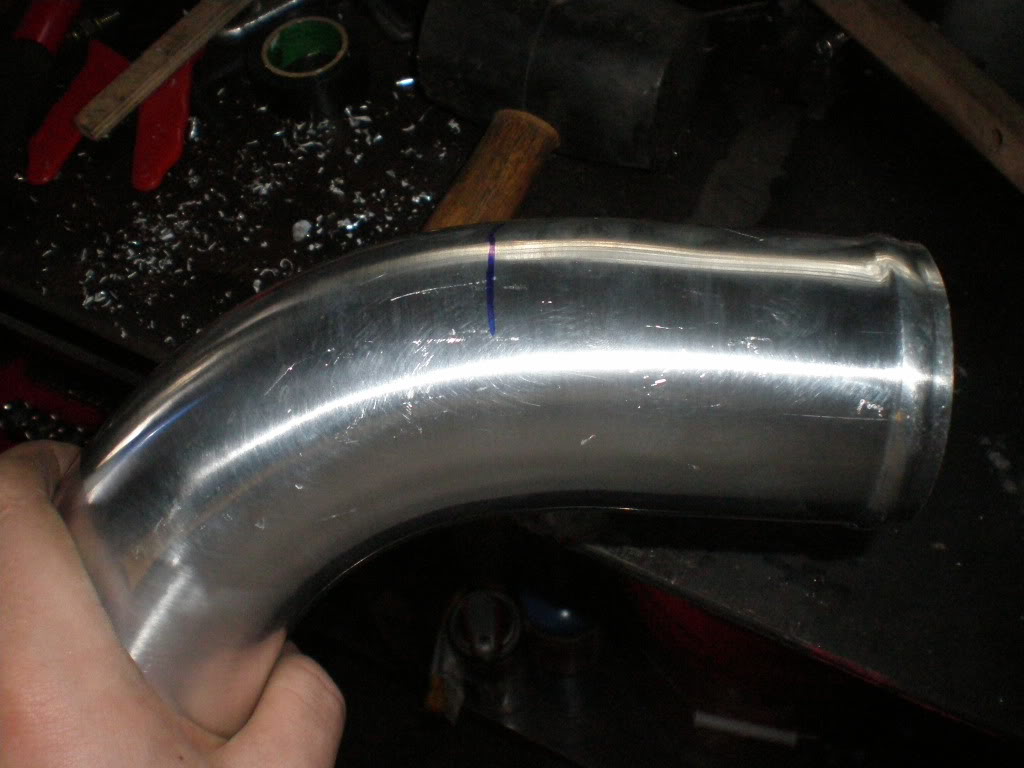
Next move further along and mark your next cut. You will want to angle this cut slightly as this is where it starts to go south

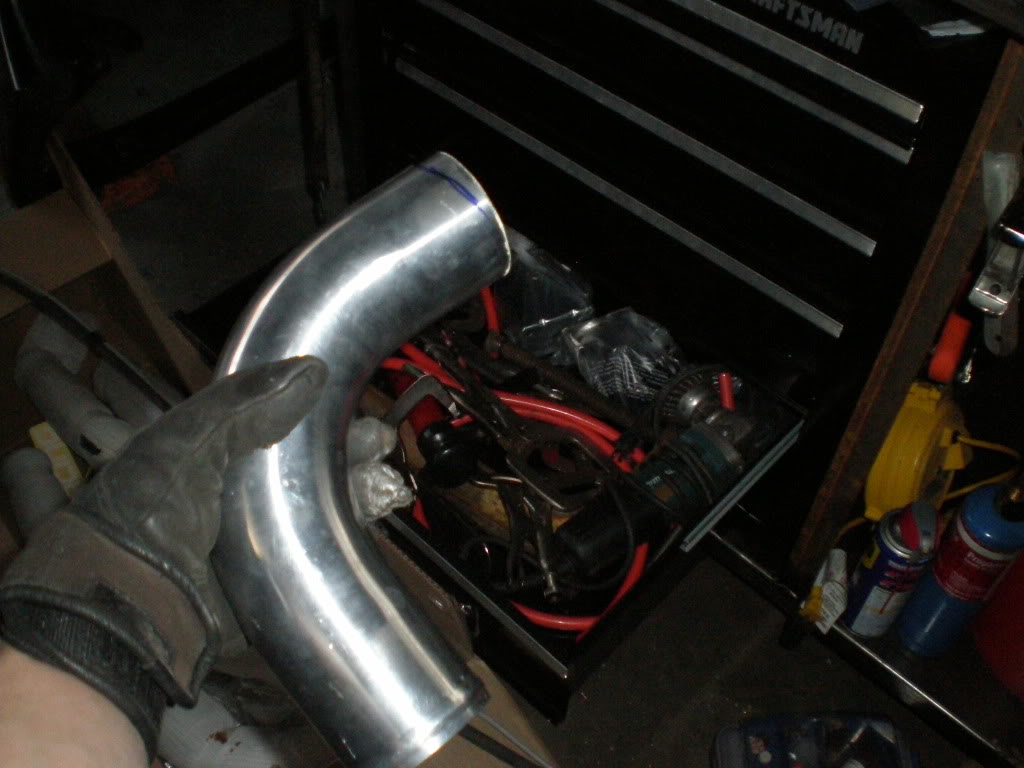
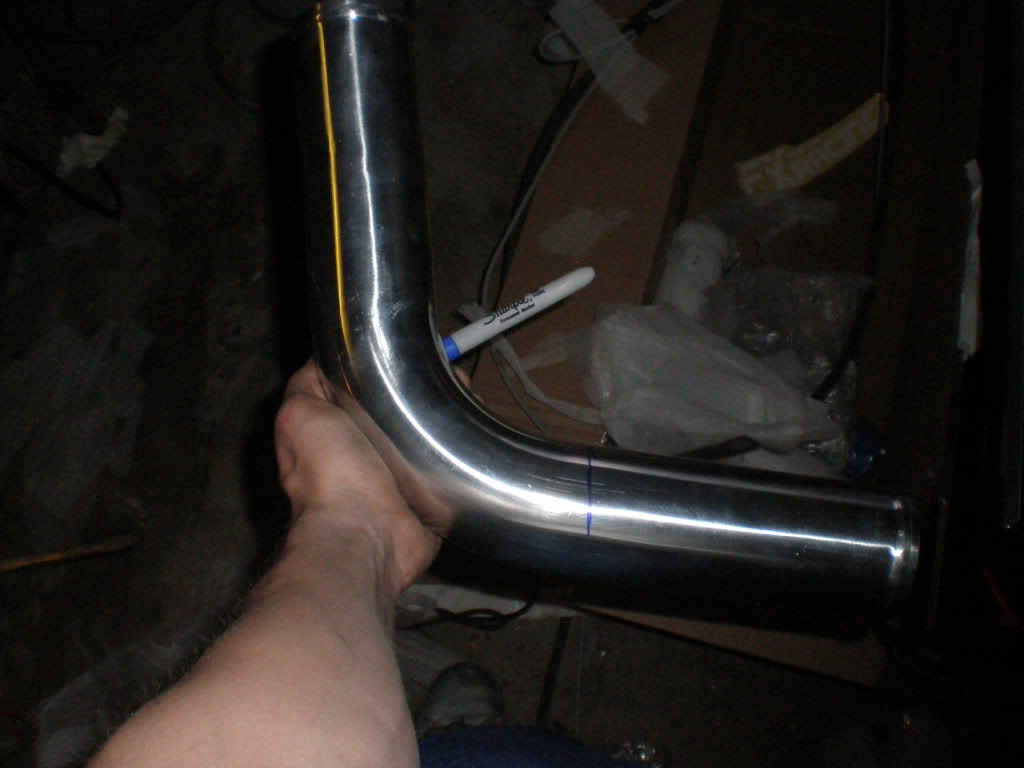
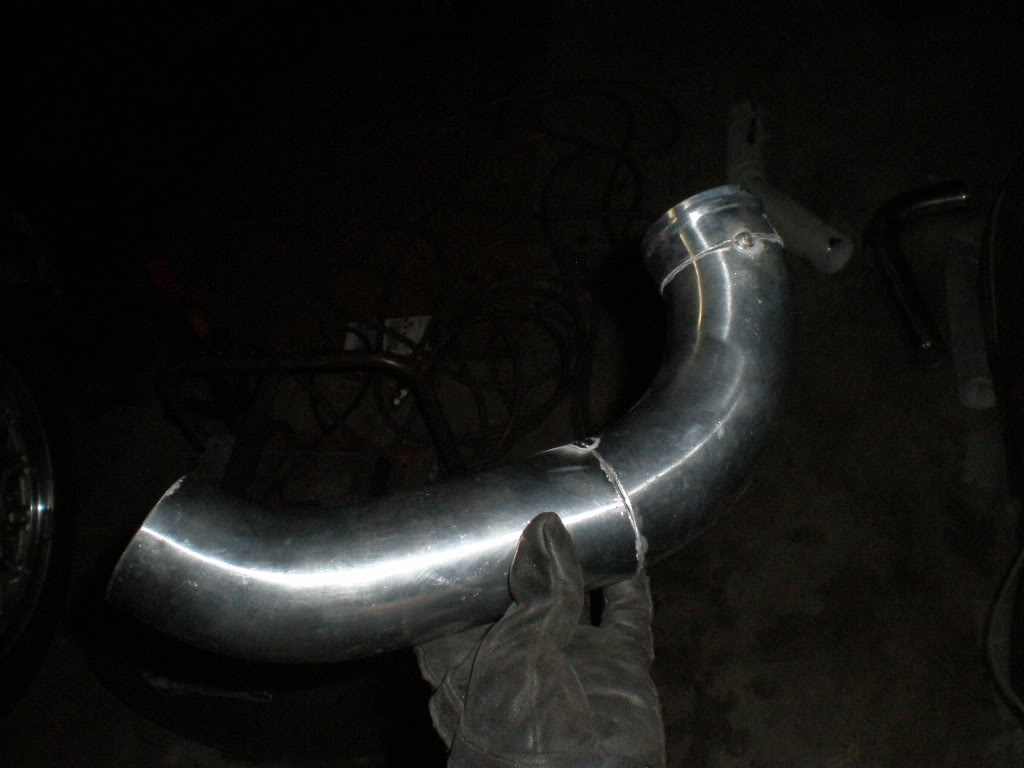
Grab another 90 and mark out where you want it to land on as this will turn down. Be sure to get the right angle you want so that its verticle or a little over for an easier transition ( i had to cut it twice before i got it right )
See?
Got it tacked on now for the intercooler side
Grab one of your 45's and chop it off right at the end of the bend
Grab your 75 and chop it so that its heading straight up ( you will have to shorten this piece )
Mark it cut it
There it is in position
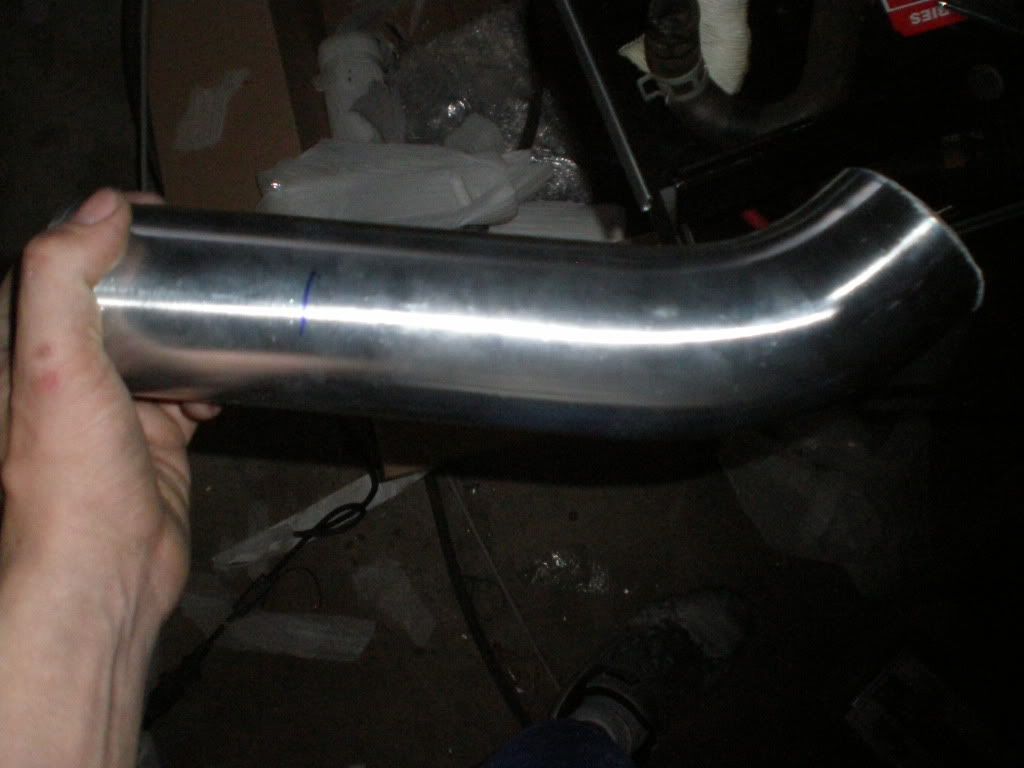
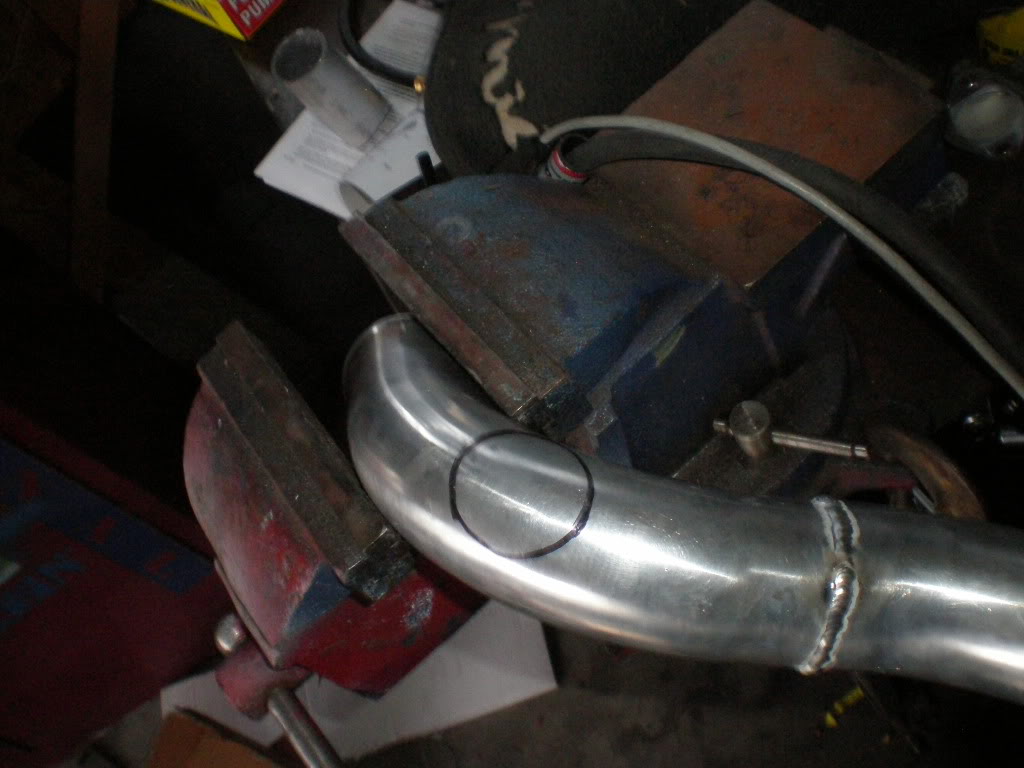
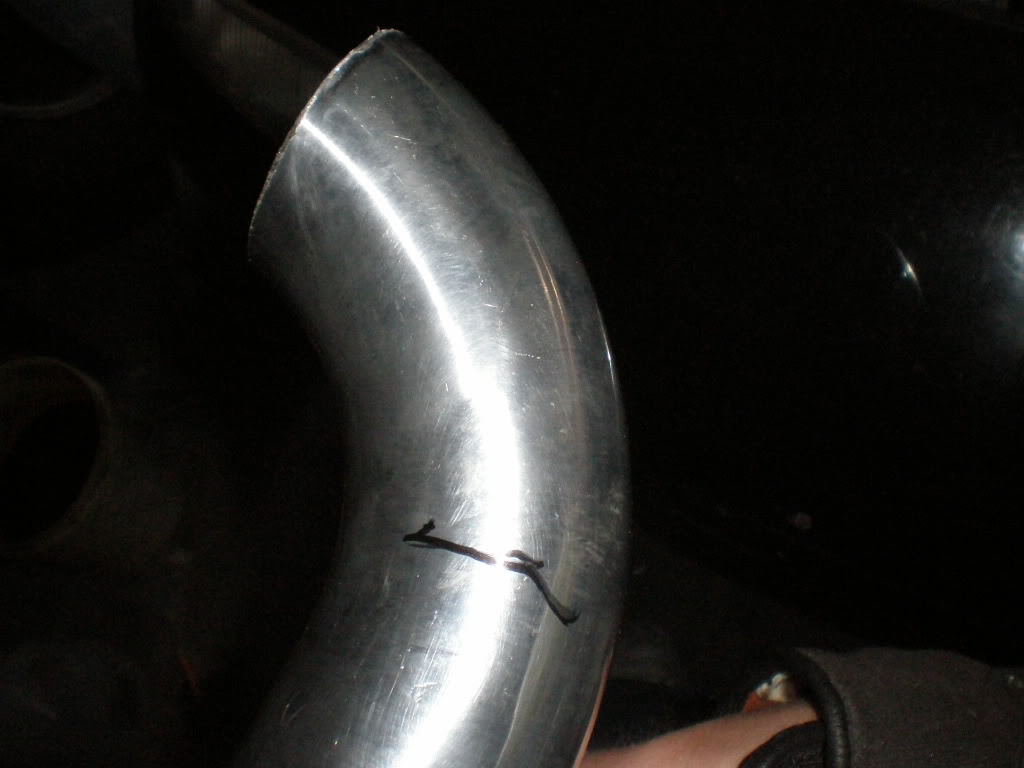
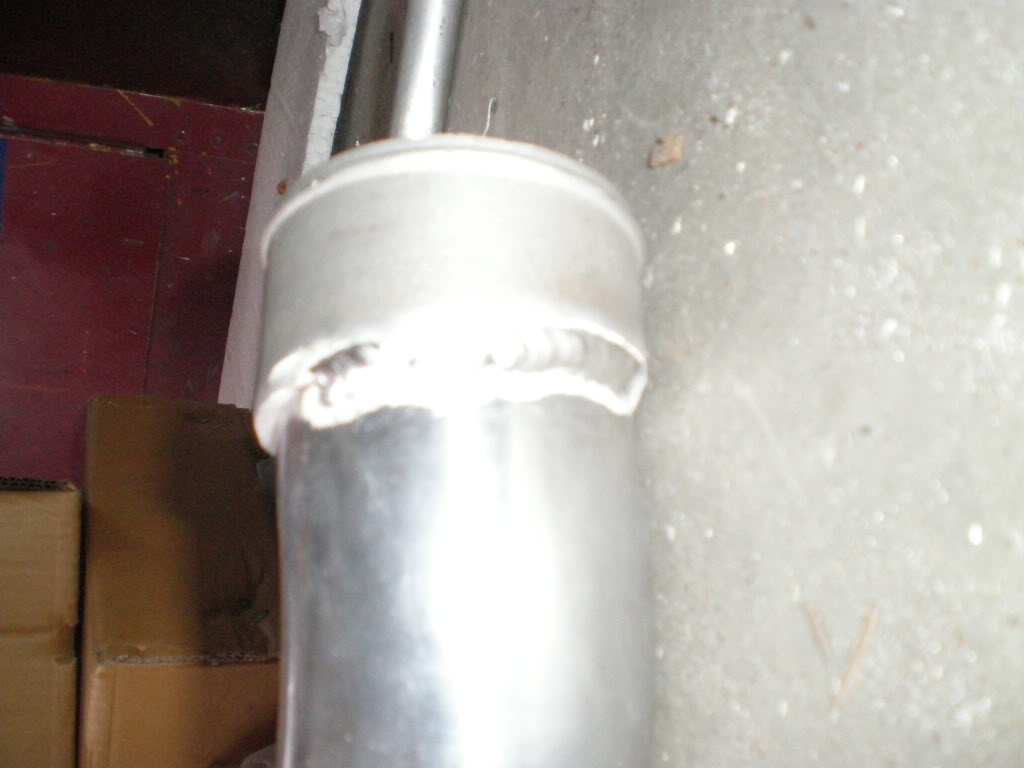
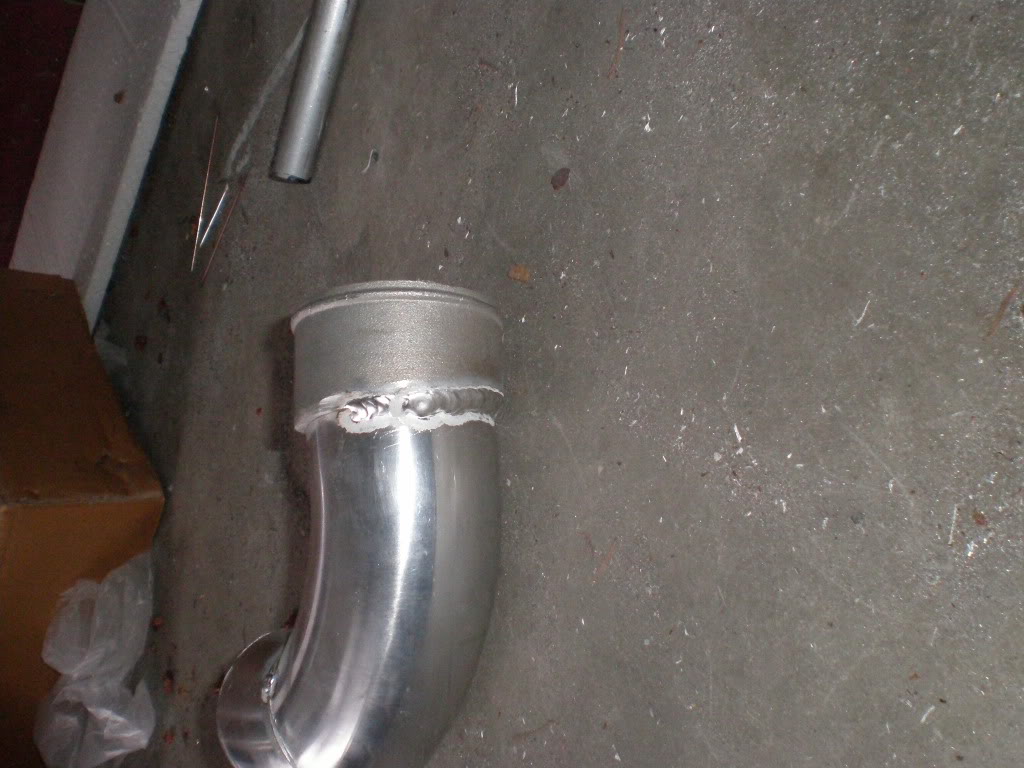
Take one of your drops and cut a very small section so that it will be beaded. Make sure you angle this cut as close as possible to the upper pipe so that there in line. ( i actually grabbed a longer pipe so that it was safer/easier to cut)
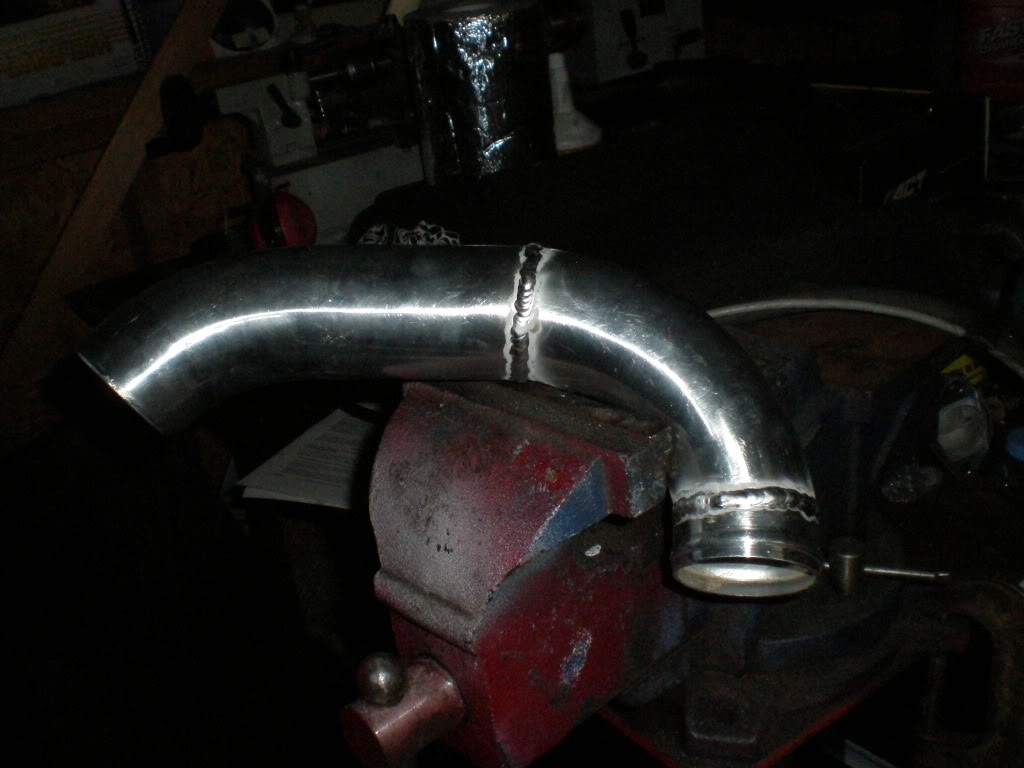
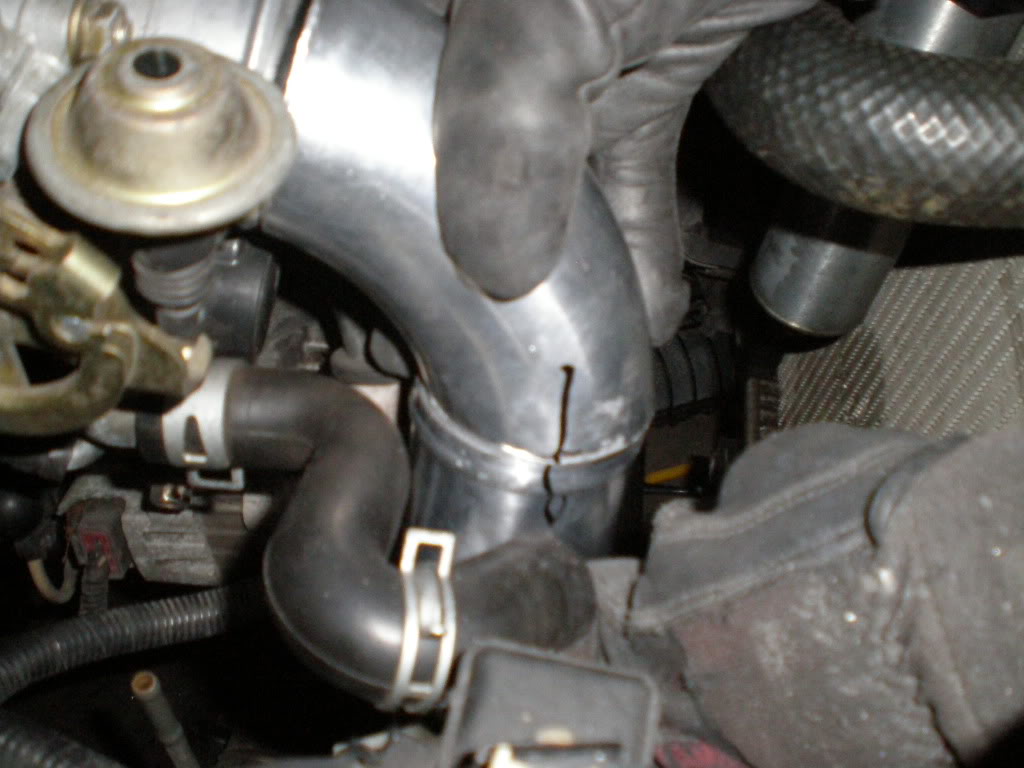
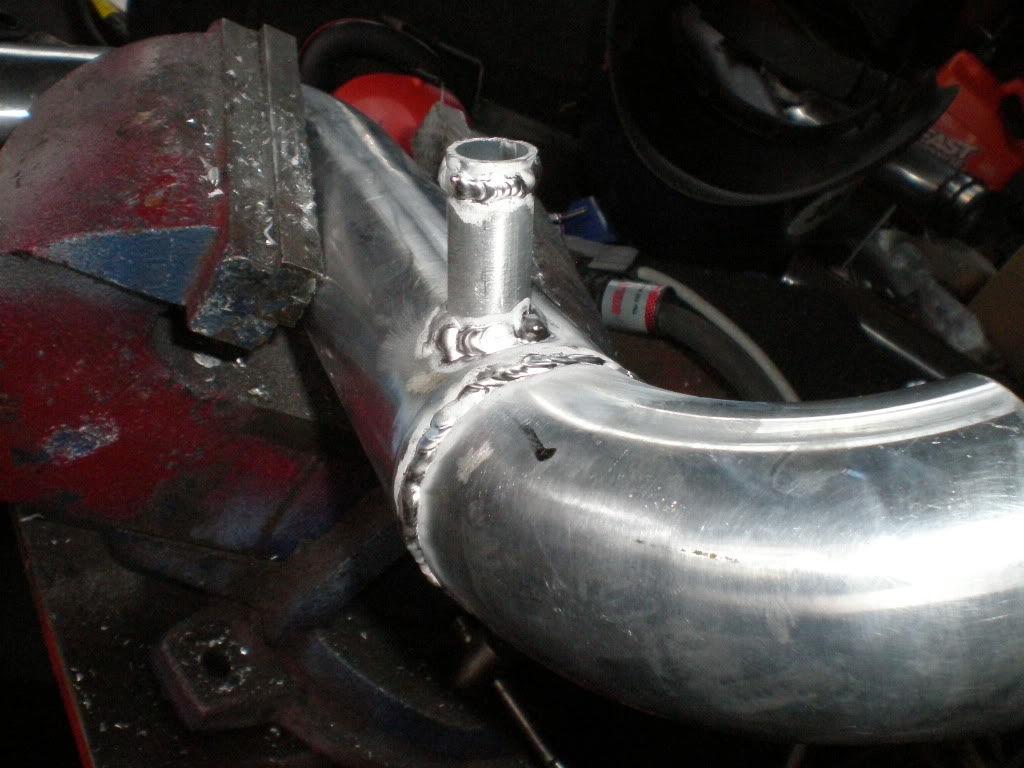
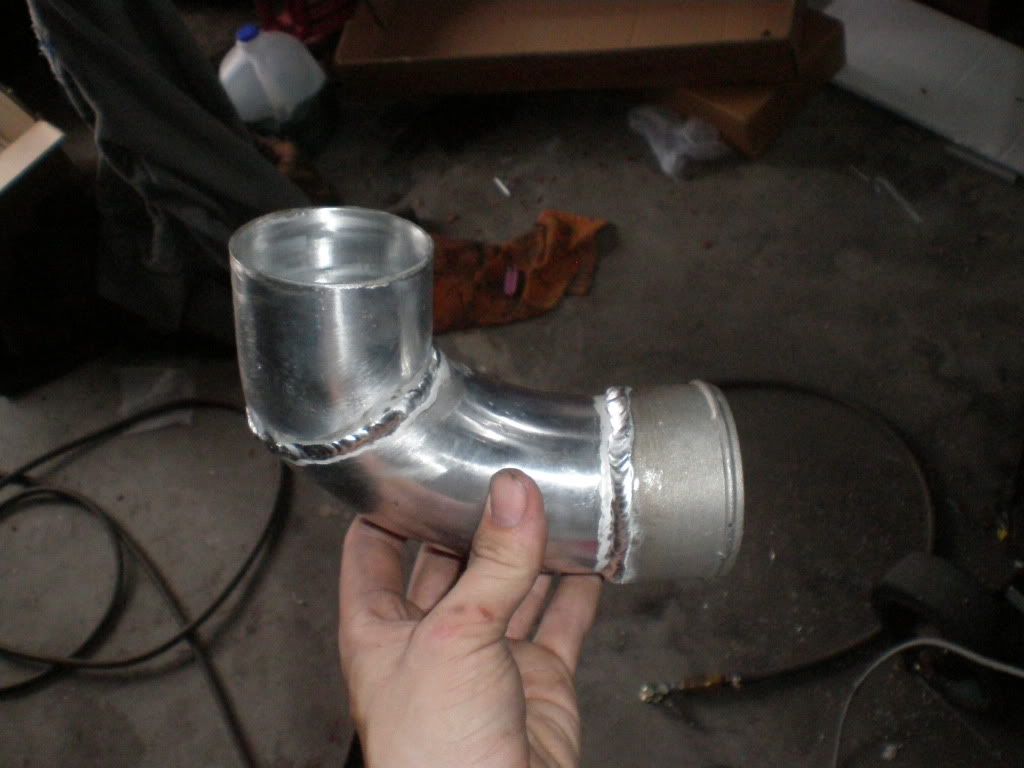
All tacked togethor
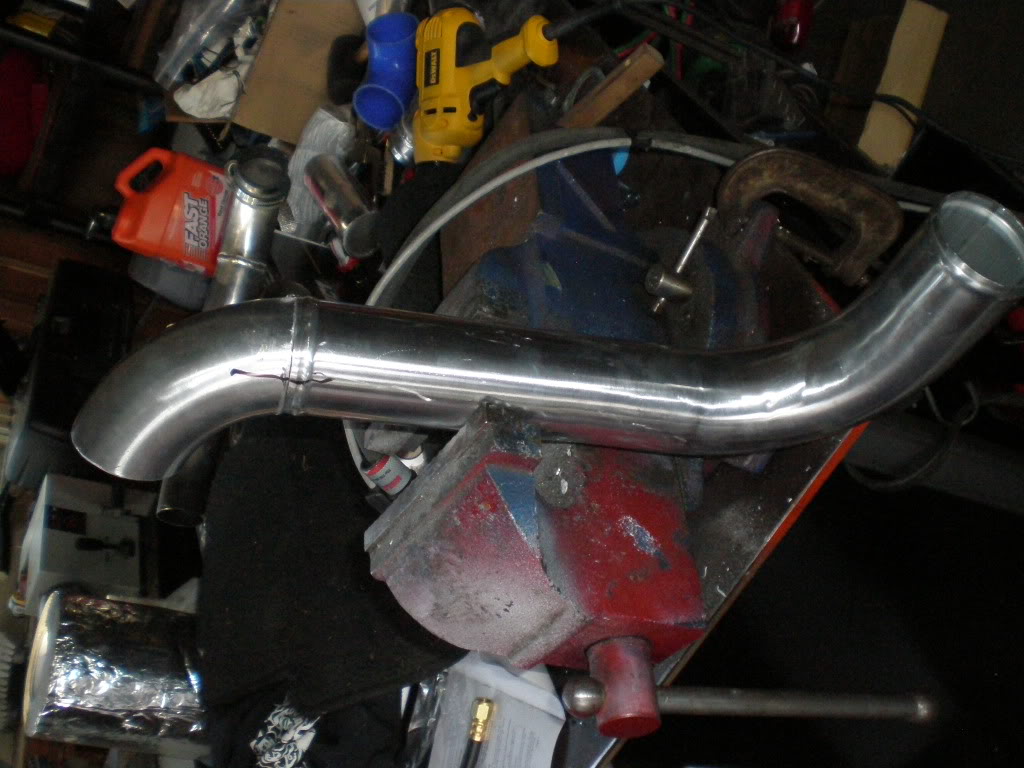
This is the last test fit before welding
Ready for the heat!
Welds
close up
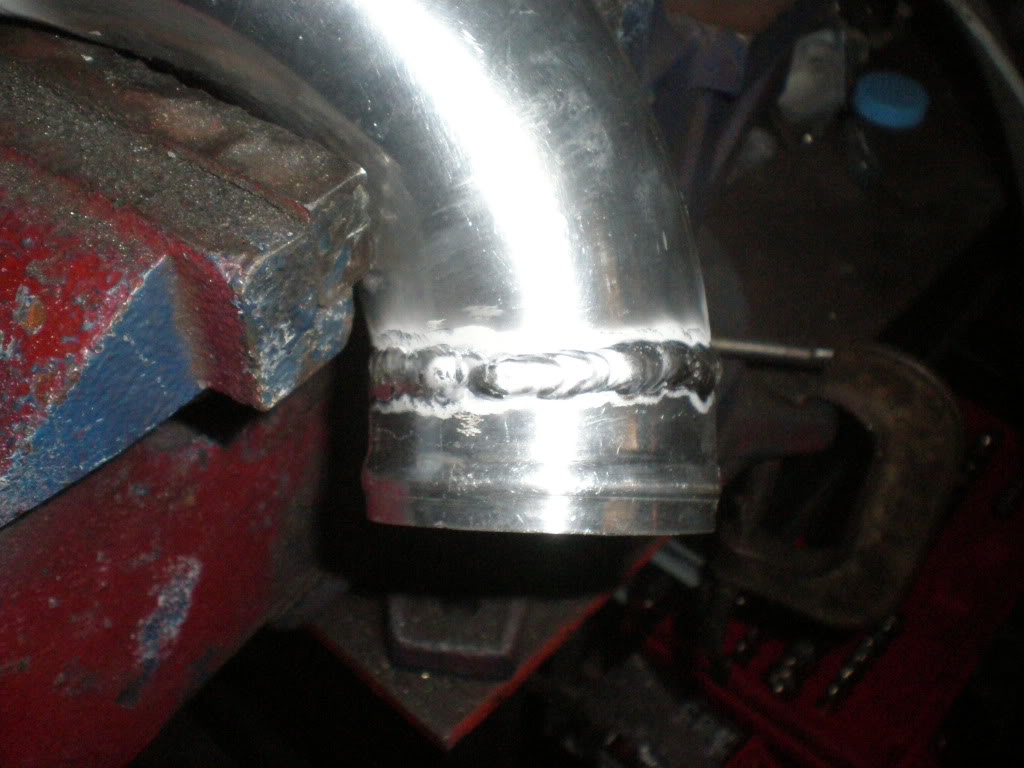
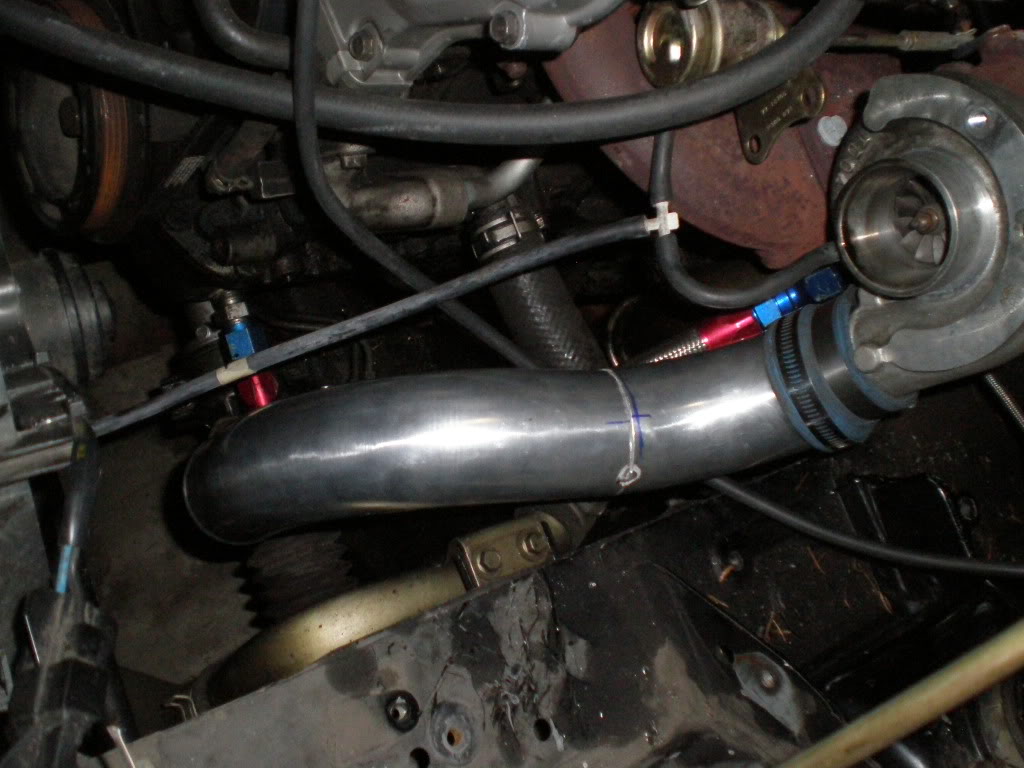
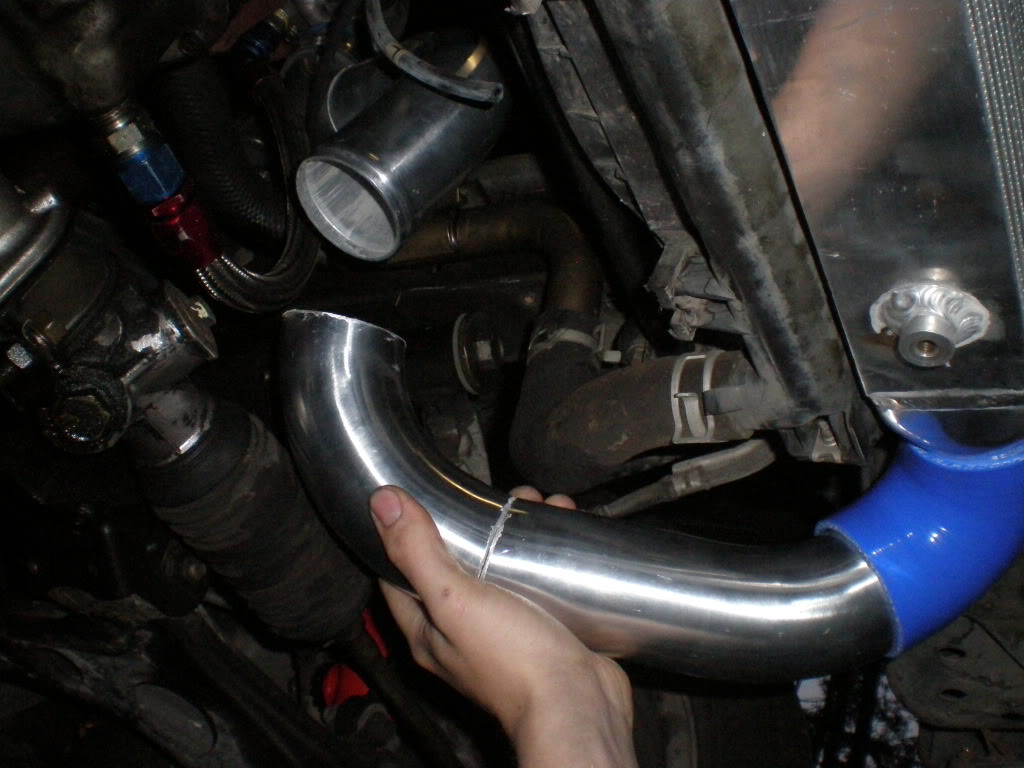
Other pipe
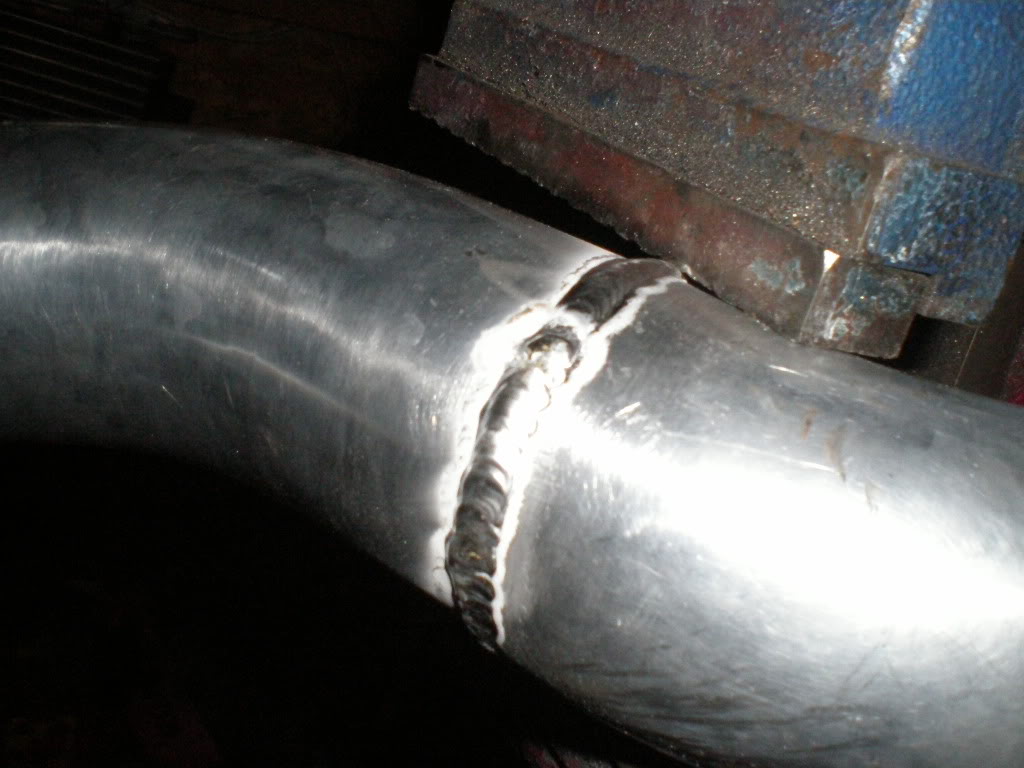
All done

Hot side is all done. Tomorrow at work im gonna make the BOV flange as well as the small pipe for the IAC.
1. It was ugly
2. It rubbed on the belts sometimes
3. hot side recieved higher temperatures due to passing in front of the fan.
Tools required...
1. Safety glasses
2. Ear plugs/muffs
3. Protective clothing for welding
4. A chop saw or some way to cut the pipe
5. Welder and filler rod (also stainless steel brush to clean aluminum)
6. Dremel with sand paper ends/cut off wheel
7. Brain
Tools helpful...
1. Table vice to hold pipes in position
2. Sharpie pen to mark pipes where to cut
3. Music to rock out to while your fabbin.
Material list...
1. CXracing intercooler kit off ebay CXRacing Intercooler + Piping Kit ACURA RSX TSX MIATA:eBay Motors (item 190310932189 end time Jun-06-09 18:49:07 PDT) 150$
2. Flat bar to mount intercooler = scrap
3. Pipe pieces = scrap
4. Extra flapper wheel/ sanding/ cut off disks = 15$ (for the whole kit)
You assume all risks and i will not be held liable for you screwing up your car if you do
This writeup was done on a car without A/C or PS. Im pretty sure it could be done with PS but the intercooler mounts to the AC brackets.
Anyway...
First i cut off some of the condensor bracket so that my intercooler would sit up as high as possible.
Then i marked where my holes were and welded 2 brackets on the end with a slight angle (to match the angle of the radiator)
I marked out where the holes were and drilled them out
Heres what it looks like from the front
And where the bracket ties in
Next i clocked my turbo down using a rubber mallet. It ended up being over a 90 so that the pipe would clear. (Be careful! Get some pliers to compress the snap ring while you beat on it)
Grab one of your 90's and mark out your first cut from the turbo. This one had to be cut shorter or else it would hit the coolant return hose.
Next move further along and mark your next cut. You will want to angle this cut slightly as this is where it starts to go south
Grab another 90 and mark out where you want it to land on as this will turn down. Be sure to get the right angle you want so that its verticle or a little over for an easier transition ( i had to cut it twice before i got it right )
See?
Got it tacked on now for the intercooler side
Grab one of your 45's and chop it off right at the end of the bend
Grab your 75 and chop it so that its heading straight up ( you will have to shorten this piece )
Mark it cut it
There it is in position
Take one of your drops and cut a very small section so that it will be beaded. Make sure you angle this cut as close as possible to the upper pipe so that there in line. ( i actually grabbed a longer pipe so that it was safer/easier to cut)
All tacked togethor
This is the last test fit before welding
Ready for the heat!
Welds
close up
Other pipe
All done
Hot side is all done. Tomorrow at work im gonna make the BOV flange as well as the small pipe for the IAC.
Reply
 0
0

0


Very nice build, NW turbo's FTW!
Question:
Answer:
(so TIG)
And the question should technically be MIG or TIG, as there are wire feed TIG's as well, in some ways they're a little easier (point and shoot) but can't be nearly as pretty if you're good with a filler rod.
Question:
Answer:
Welder and filler rod
And the question should technically be MIG or TIG, as there are wire feed TIG's as well, in some ways they're a little easier (point and shoot) but can't be nearly as pretty if you're good with a filler rod.
Reply
0
0
Looks good. Surely beats paying out the *** for a prebuilt kit, when you can do this for under $200 (or whatever you paid). I wish a had a MIG or TIG machine for myself, I would be welding all kind of stuff. Actually, I may buy myself one for my birthday.
Reply
0
0

I did somehow miss his "welder and filler rod" part of the post..
Reply
0
0


Reply
0
0
Thread Starter
Elite Member
iTrader: (7)
Joined: Jan 2007
Posts: 1,731
Total Cats: 4
From: Renton Washington
Sorry i guess i should of clarafied. Im using a Miller TIG Welder - Dynasty 200 DX AC/DC TIG/Stick with 4043 filler rod.
Reply
0
0

Thread Starter
Elite Member
iTrader: (7)
Joined: Jan 2007
Posts: 1,731
Total Cats: 4
From: Renton Washington
So i finished the piping today at 7 but had to get ready to see The Hangover. BTW that movie is hilarious and i highly reccomend seeing it.
Anyway back to the intercooler. I went to Central Welding to pick up up some more supplies and saw some drill attachments that would be great. Added 10$ to the tab.
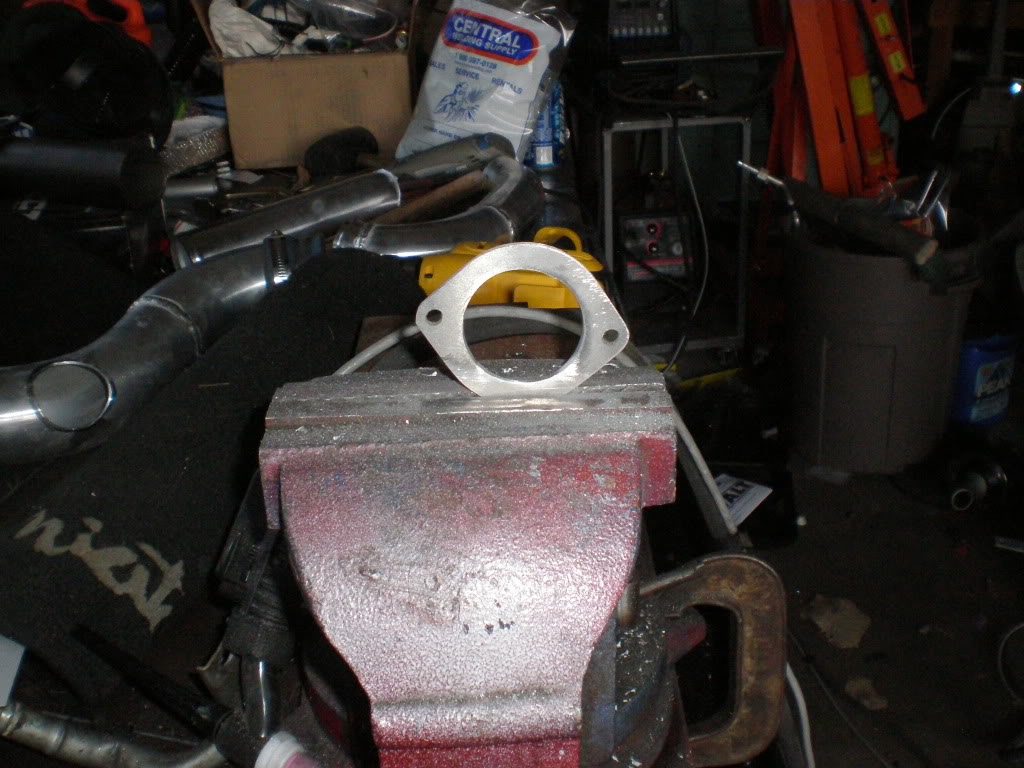
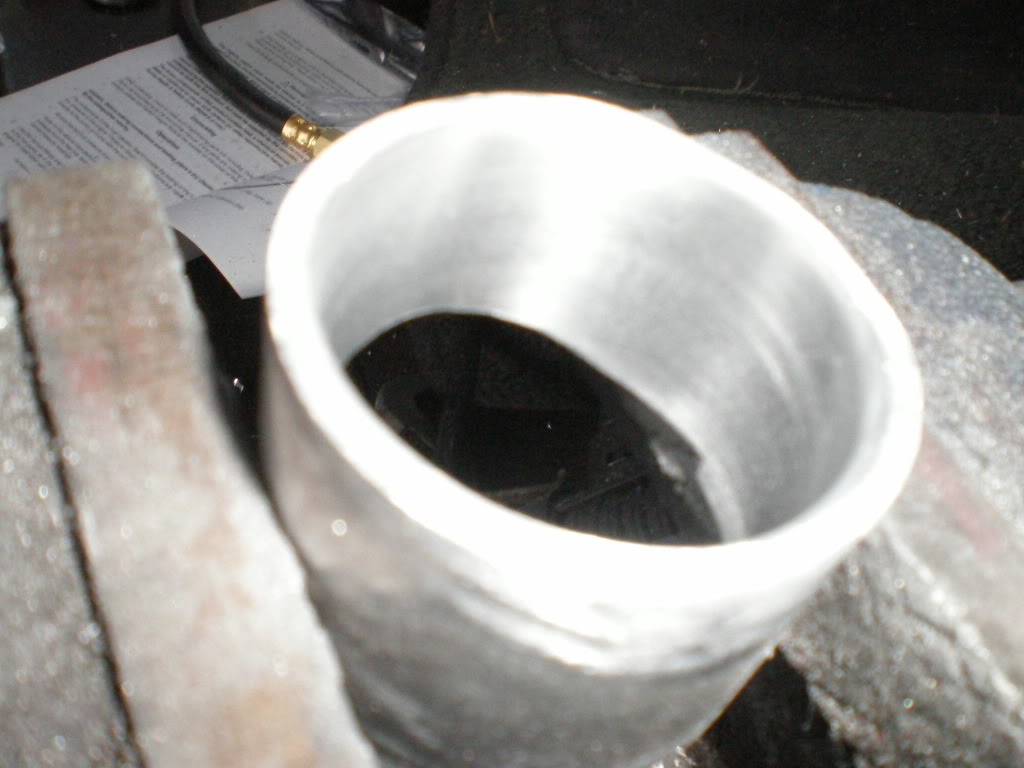
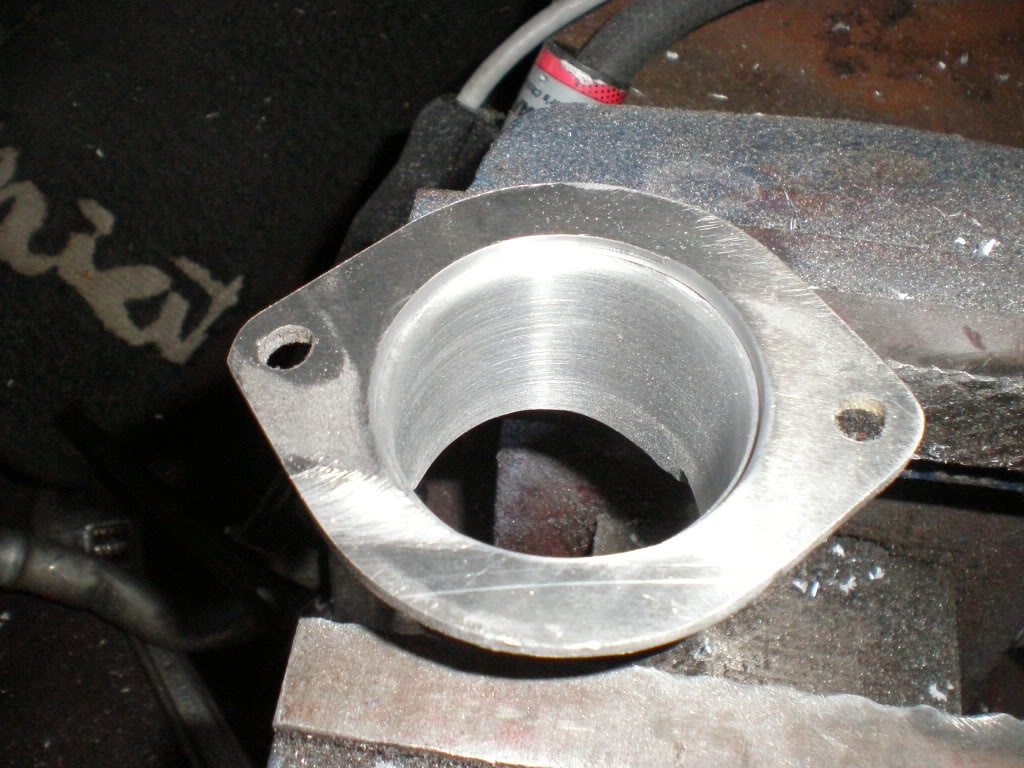
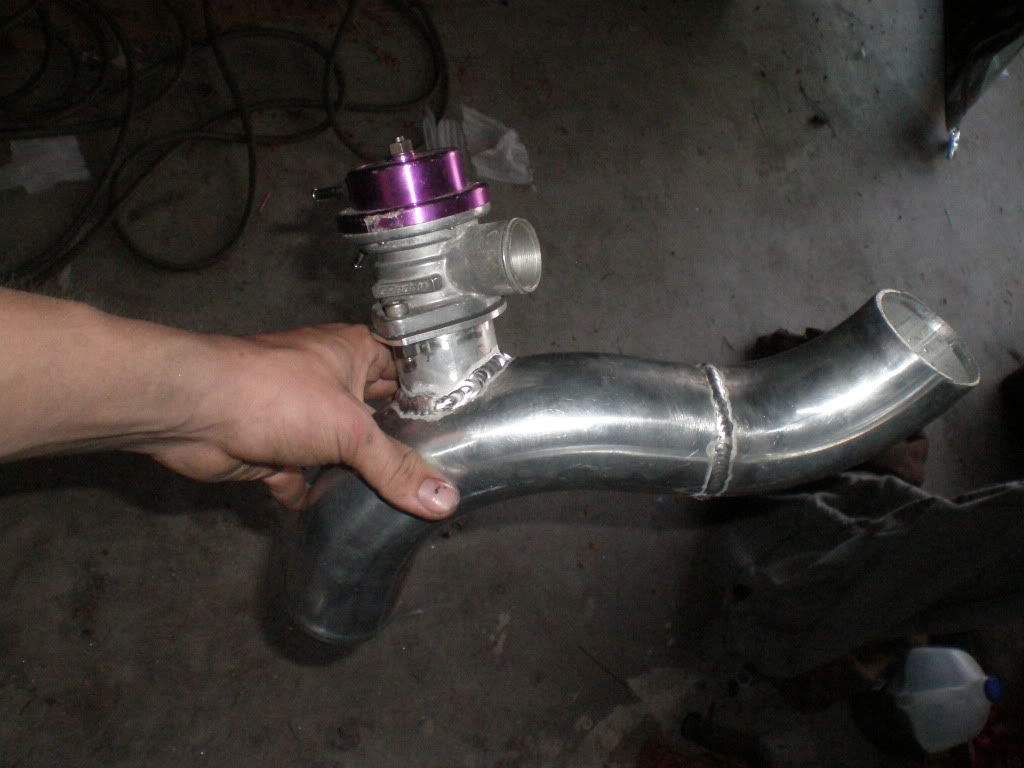
Got my boss to cut out the flange on the CNC router
I marked where i wanted the BOV
Started drillin holes around the perimeter
I used one of the drill bit sanding attachements to sand it nice and smooth

I used a hole saw at work to make a nice fit
Sanded the flange nice and smooth
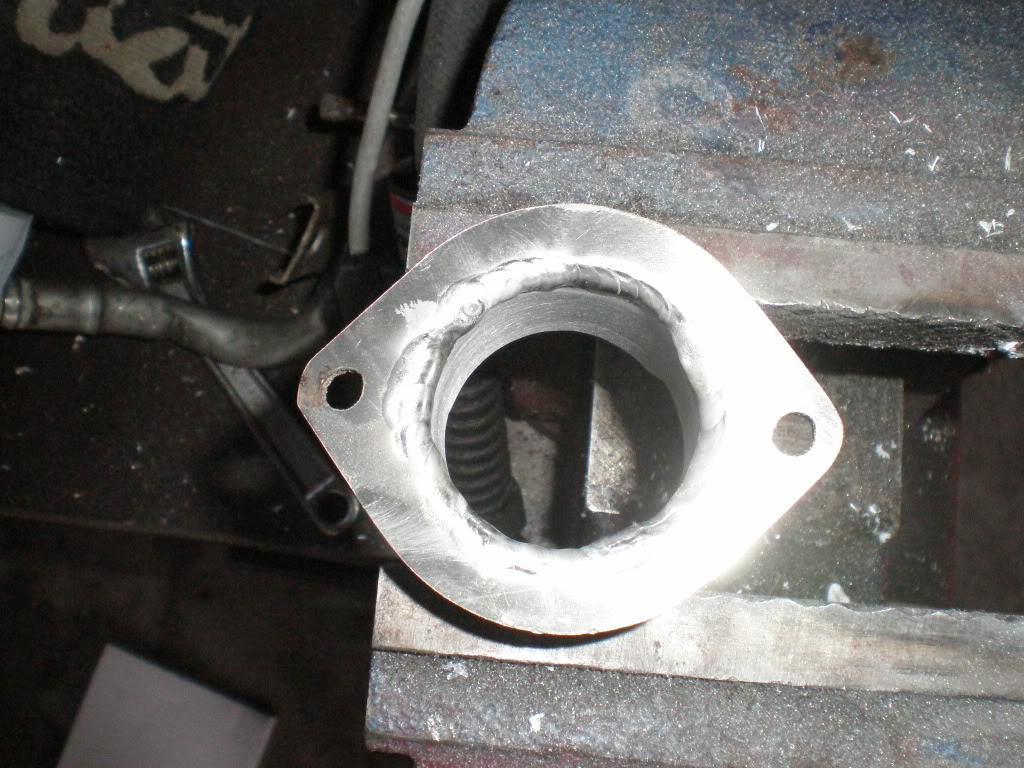
Cut the pipe shorter so it wouldnt sit too high

That drill sander works wonders
Test fit
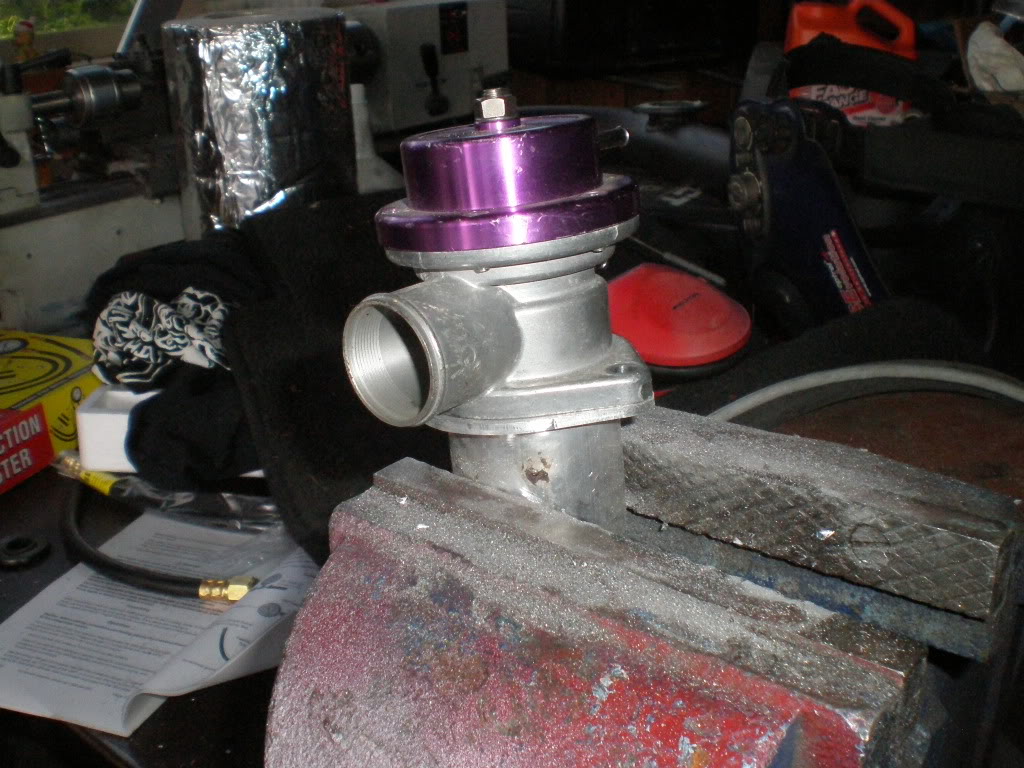
Welded
What the BOV looks like mounted
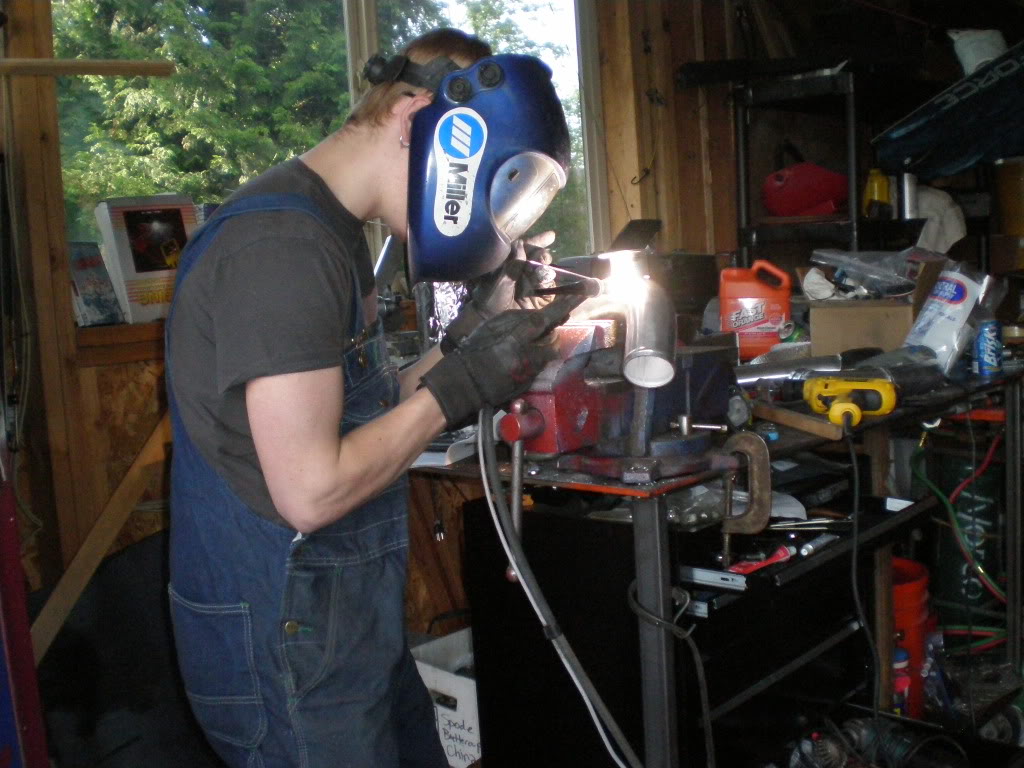
Heres me welding. Im not a hillbilly; those are my work clothes and they keep me nice and cool in the hot shop.
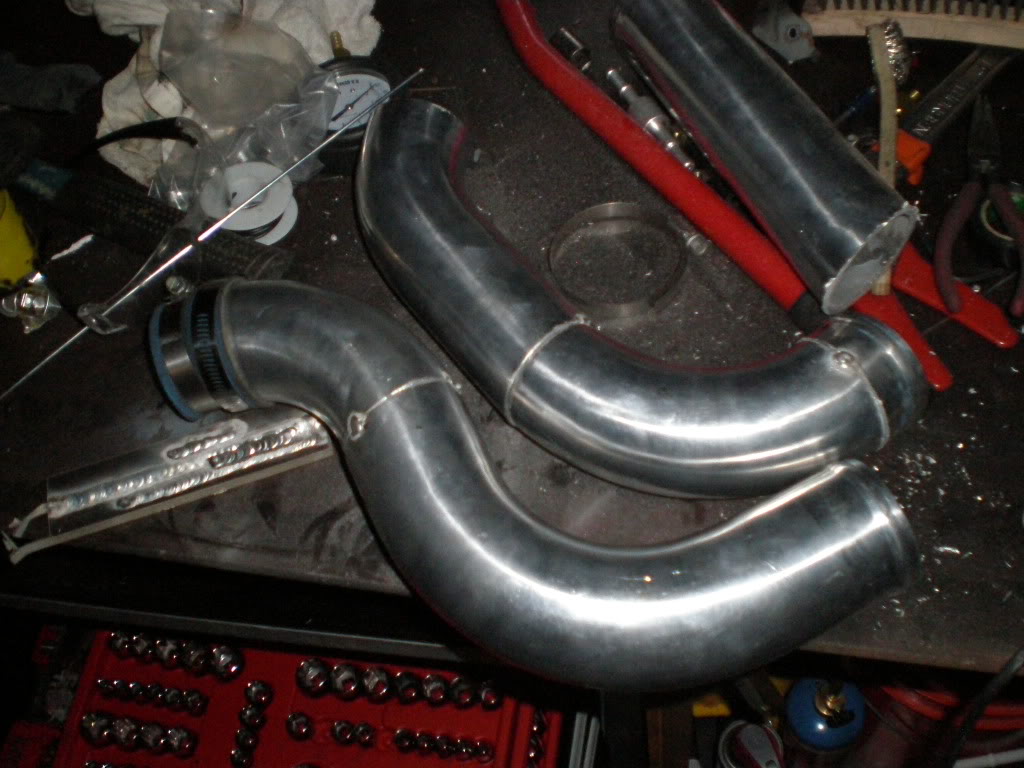
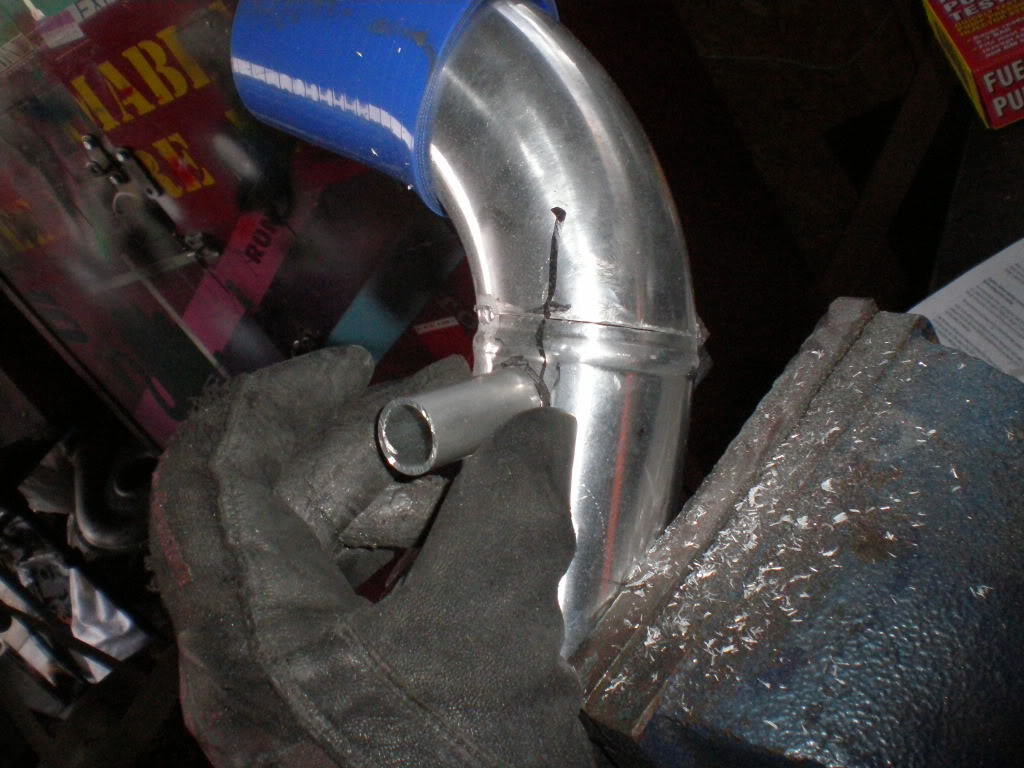
Okay now on to the cold side piping. Grab one of your 90's and mount it on with the shorter side to the intercooler. No cutting required for this piece. Grab another 90 and cut it short and leave the bend all there.
Heres the only uncut piece of this piping kit
Under side
figureing out where to cut .
Marked it out and cut it
I decided to make the cold side 1 piece so theres the fit up and marked the line
All tacked togethor
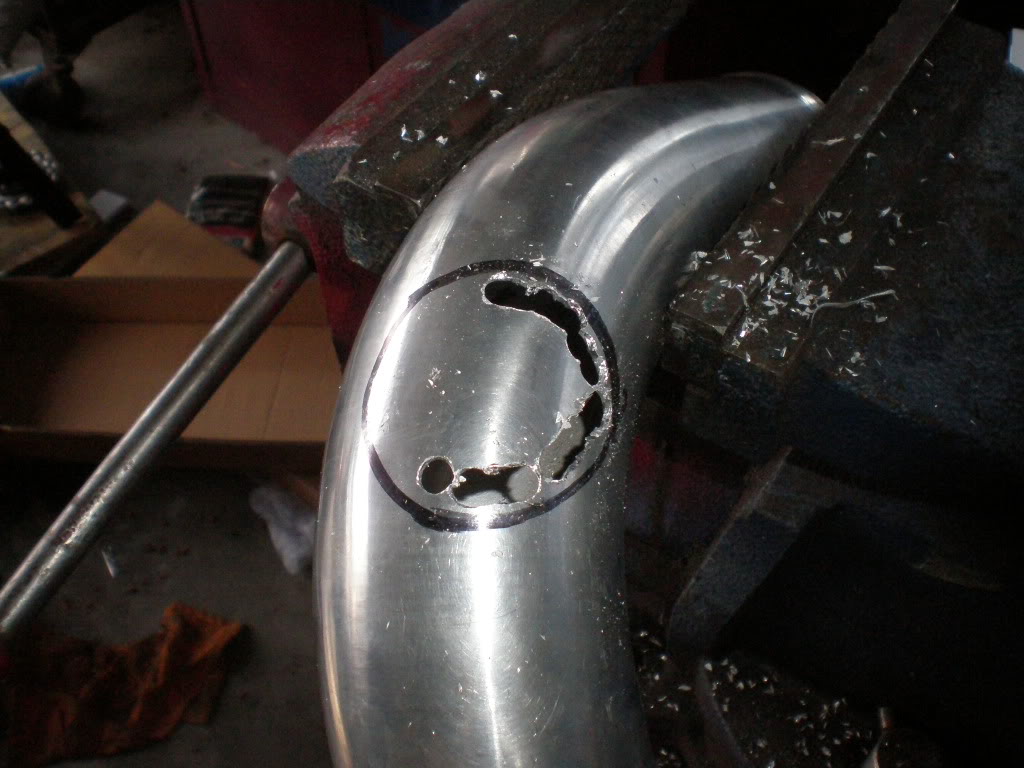
Marked the hole for the IAC valve
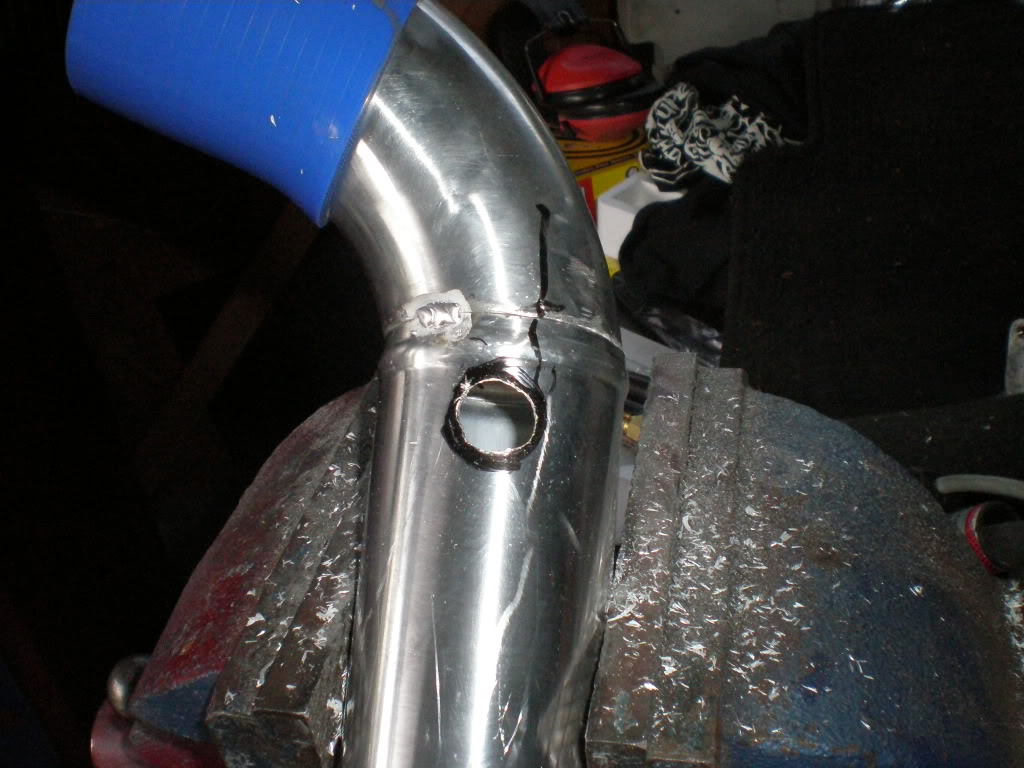
Took some 3/4" OD tube and test fitted it
Got it tacked on
Last fitup before final welding.
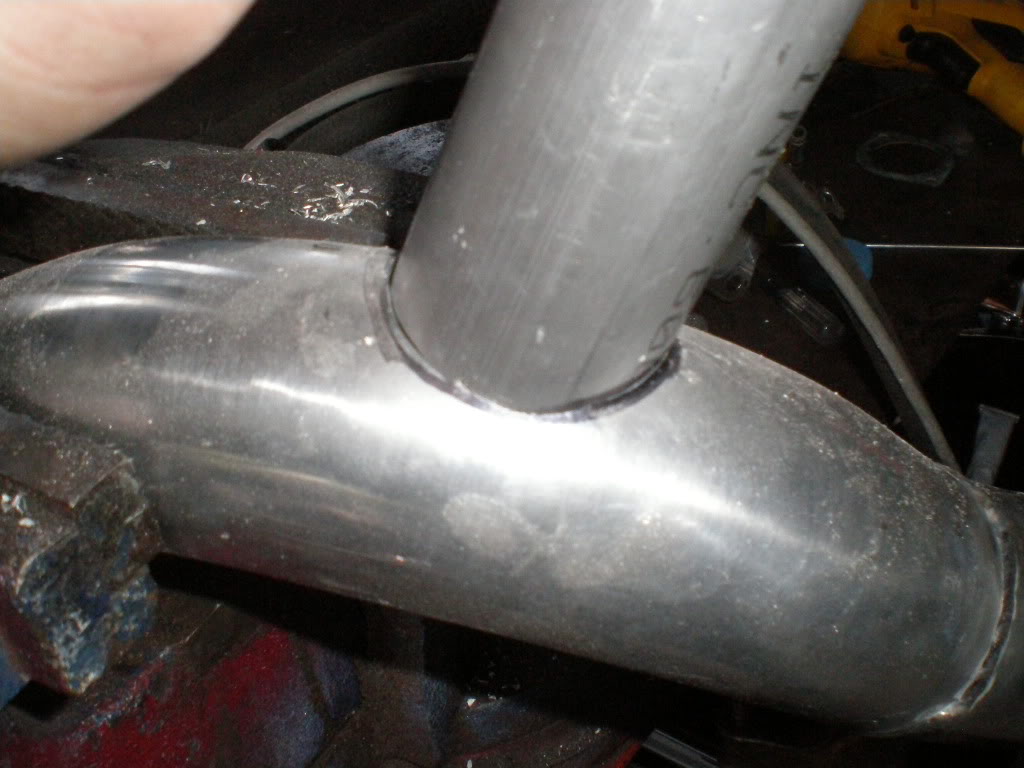
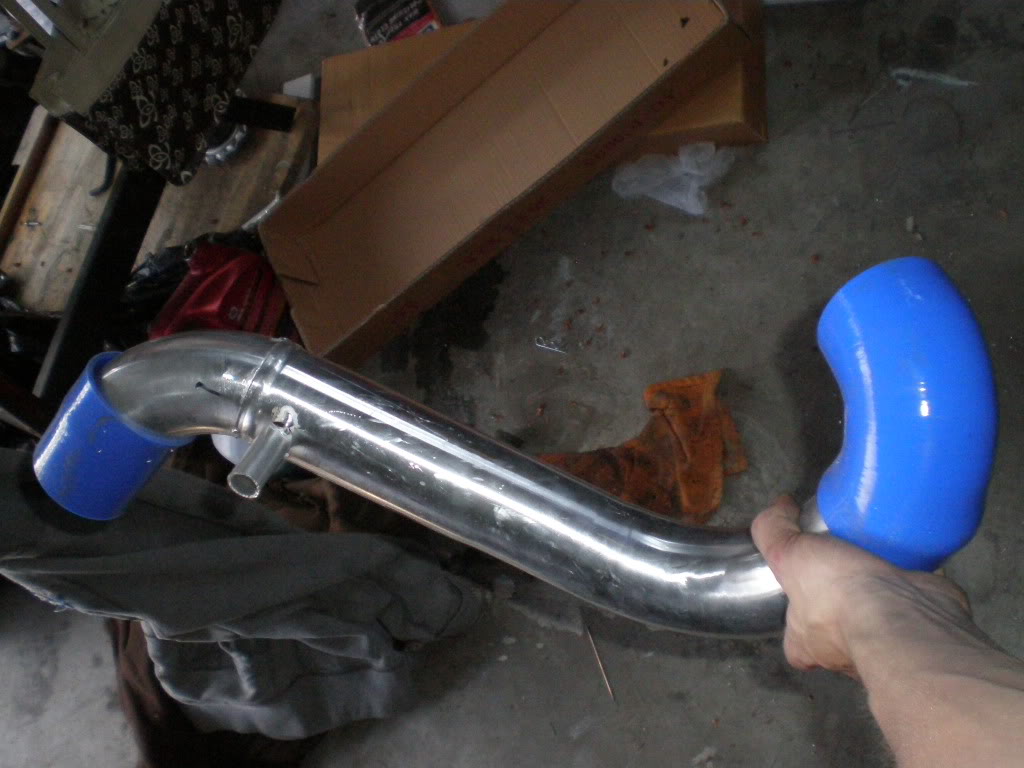
All welded up, Notice the beading on the IAC valve. It wouldnt be a tight fit without it.
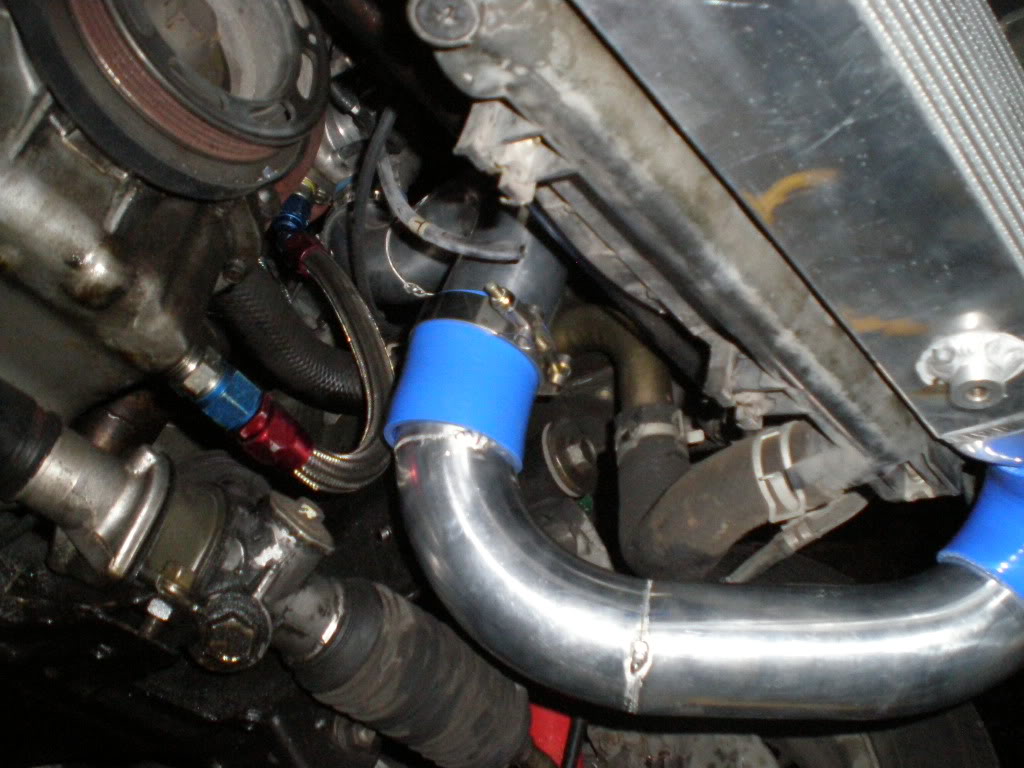
Heres what the BOV looks like mounted on the hot side
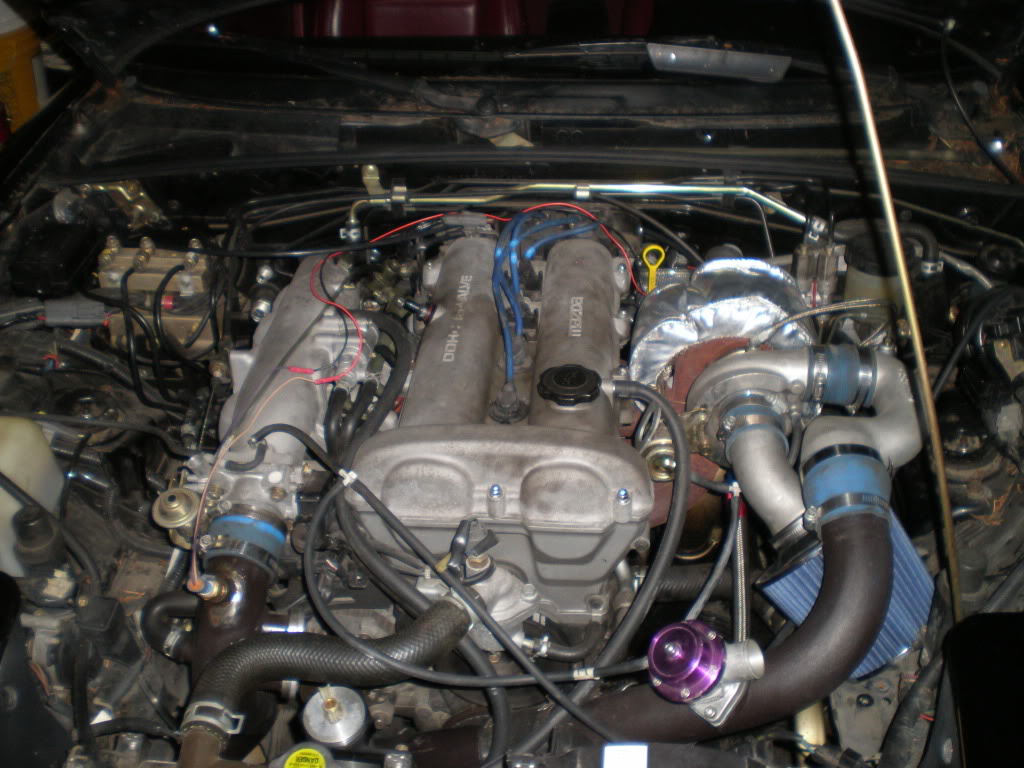
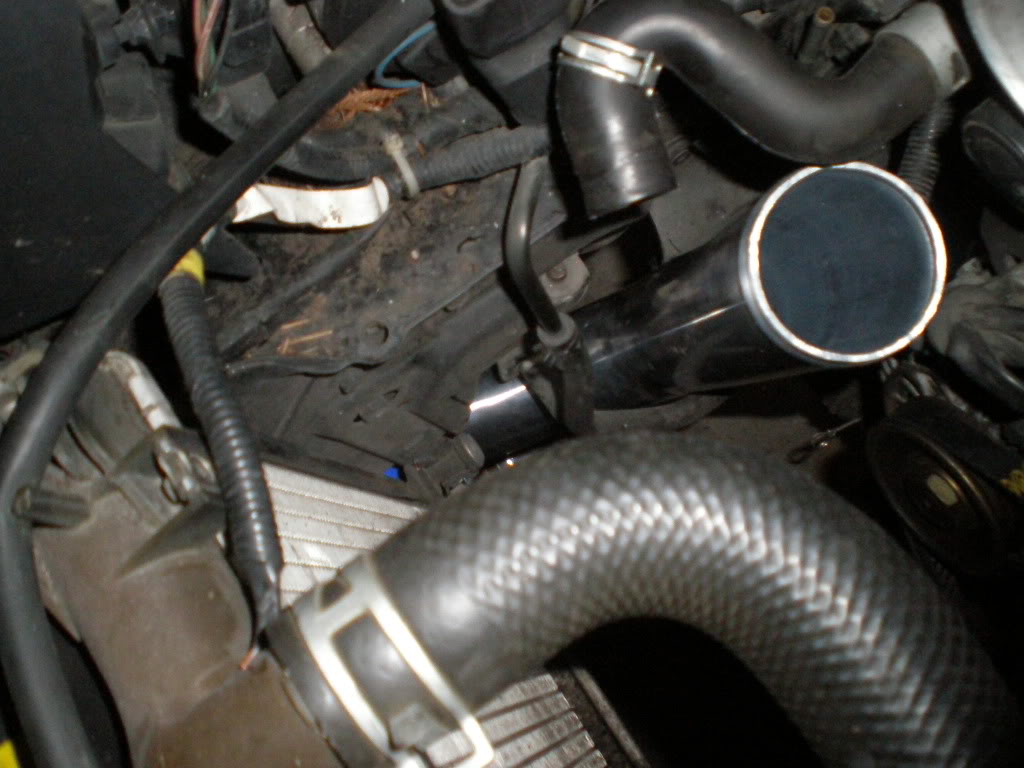
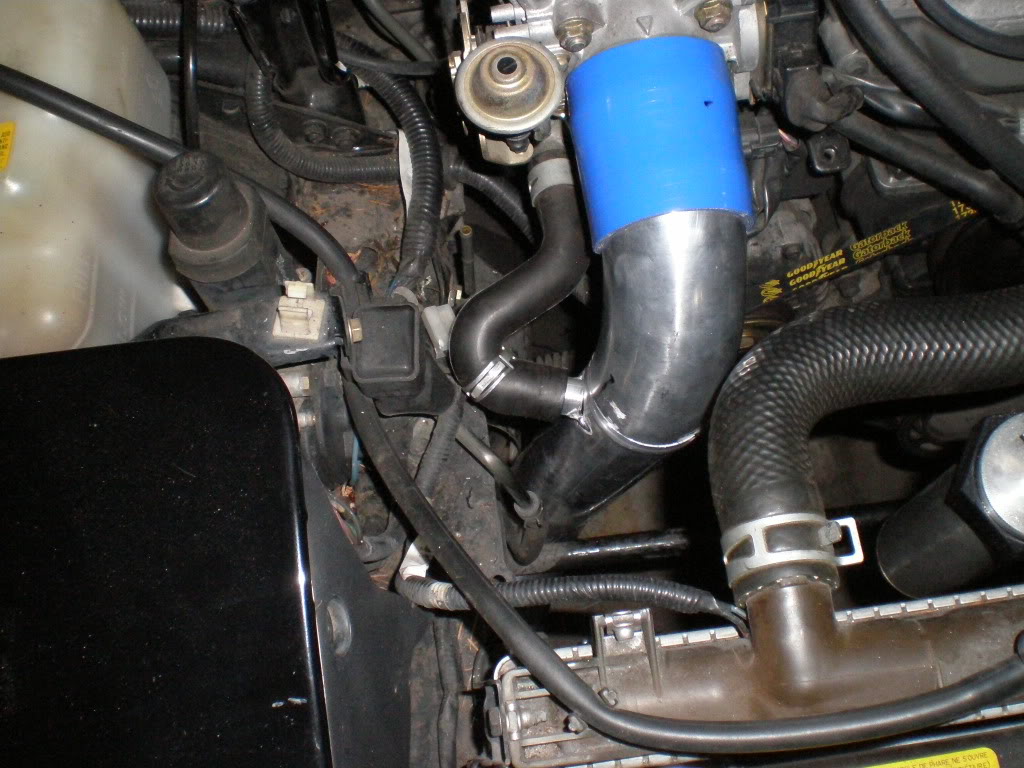
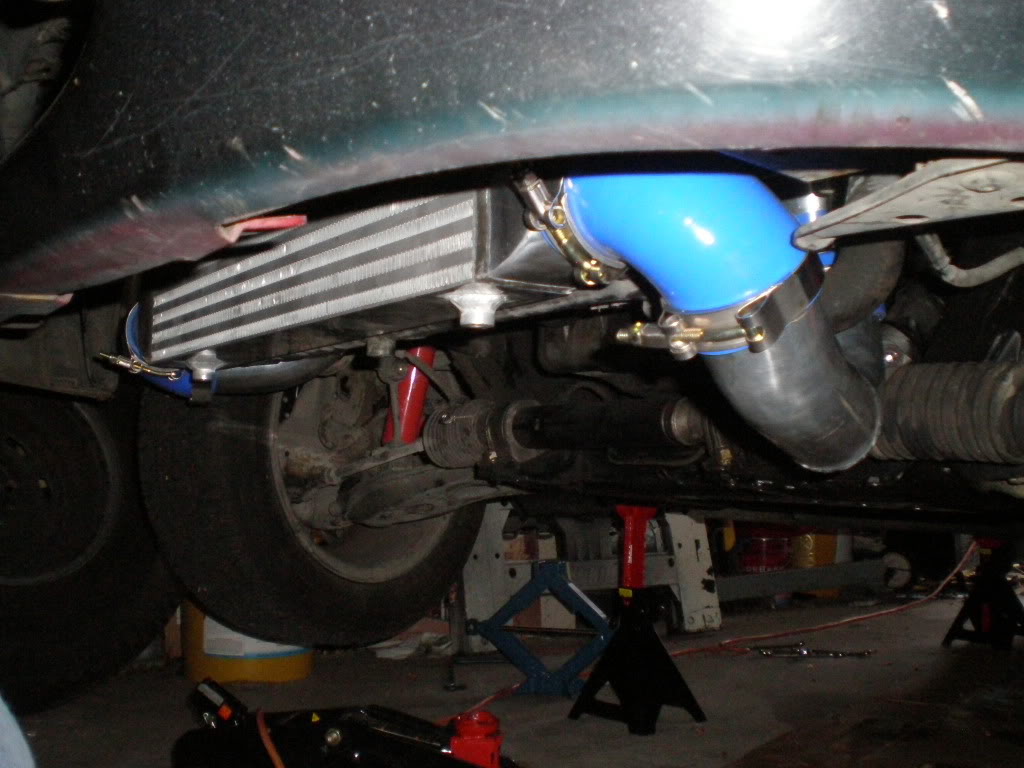
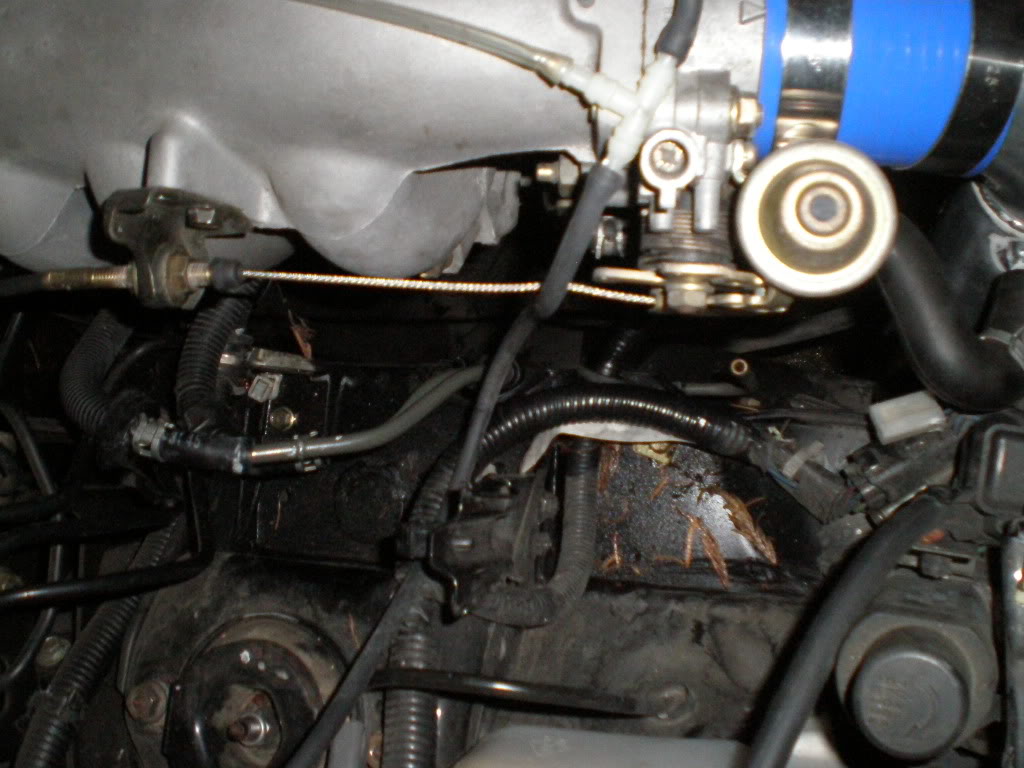
All done with the intercooler. Just need to get an IAT bung welded on and fab a bracket so that the wastegate has something to clamp too
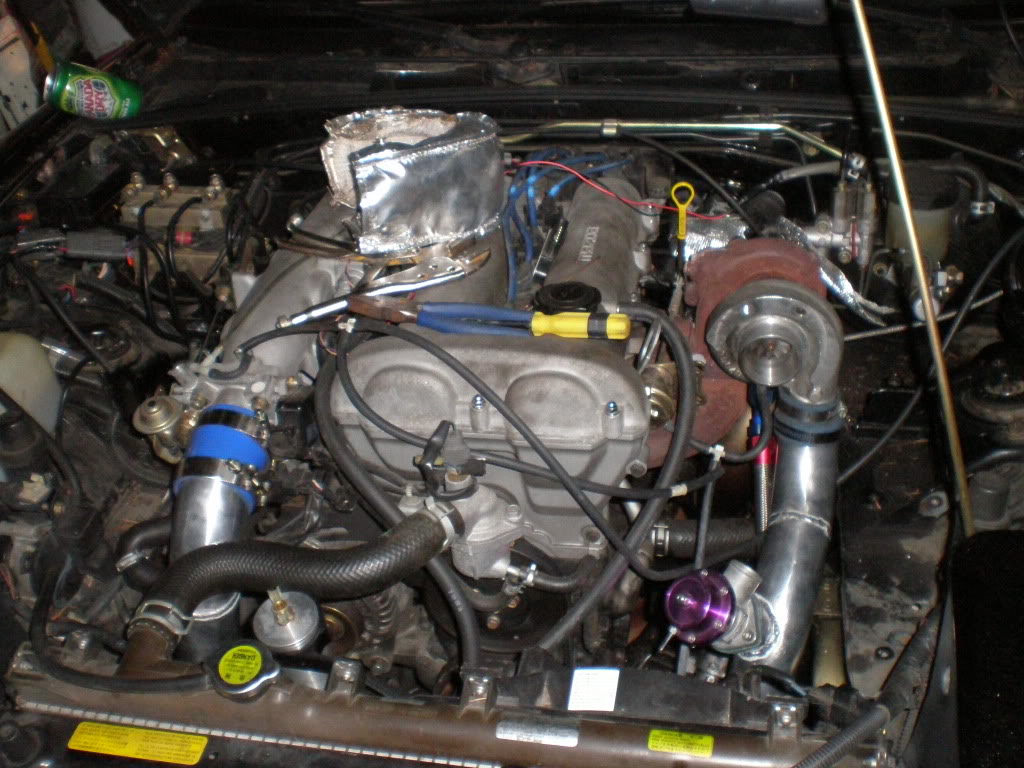
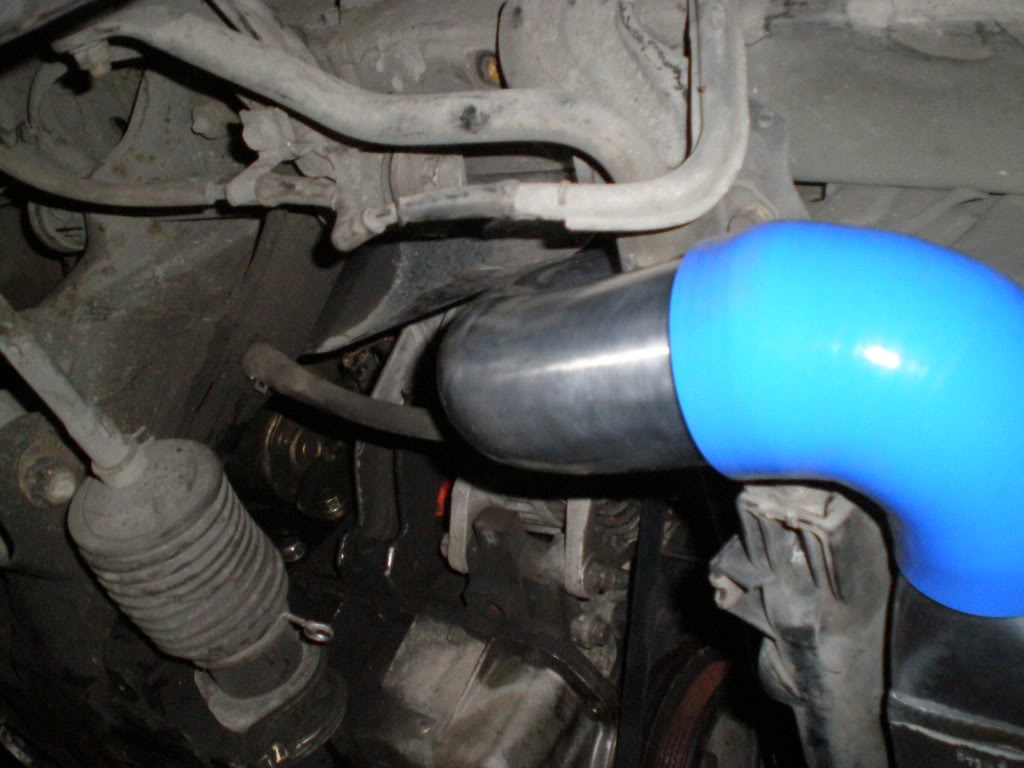
Overall it took about 5 hours to do for my first time. I have 3 pipes i didnt use. Also i didnt use lots of the couplers and T-bolts. When i take the turbo off again im going to weld a piece of 2 1/2" aluminum over it so i can actually get the right coupler and a T-bolt around it. I must say that my engine bay looks much better/cleaner. I got a K&N air filter coming in the mail to compliment my new piping. The old one i smashed down so it would fit.
Notes...
I used a abrasive chop saw (used for cutting steel) and would of made much better cuts using a band saw or a chop saw with a carbide blade.
Tack everything togethor first and test fit prior to final weldout.
"Takes just as long to do it right as it does to do it wrong" -My father
I used a water hose to spray inside of all the pipes before final connection to get all the aluminum shavings out.
Overall i spent approx 170$ for a full intercooler kit and was very easy (although welding for some might be a problem)
Enjoy!
Anyway back to the intercooler. I went to Central Welding to pick up up some more supplies and saw some drill attachments that would be great. Added 10$ to the tab.
Got my boss to cut out the flange on the CNC router
I marked where i wanted the BOV
Started drillin holes around the perimeter
I used one of the drill bit sanding attachements to sand it nice and smooth
I used a hole saw at work to make a nice fit
Sanded the flange nice and smooth
Cut the pipe shorter so it wouldnt sit too high
That drill sander works wonders
Test fit
Welded
What the BOV looks like mounted
Heres me welding. Im not a hillbilly; those are my work clothes and they keep me nice and cool in the hot shop.
Okay now on to the cold side piping. Grab one of your 90's and mount it on with the shorter side to the intercooler. No cutting required for this piece. Grab another 90 and cut it short and leave the bend all there.
Heres the only uncut piece of this piping kit
Under side
figureing out where to cut .
Marked it out and cut it
I decided to make the cold side 1 piece so theres the fit up and marked the line
All tacked togethor
Marked the hole for the IAC valve
Took some 3/4" OD tube and test fitted it
Got it tacked on
Last fitup before final welding.
All welded up, Notice the beading on the IAC valve. It wouldnt be a tight fit without it.
Heres what the BOV looks like mounted on the hot side
All done with the intercooler. Just need to get an IAT bung welded on and fab a bracket so that the wastegate has something to clamp too
Overall it took about 5 hours to do for my first time. I have 3 pipes i didnt use. Also i didnt use lots of the couplers and T-bolts. When i take the turbo off again im going to weld a piece of 2 1/2" aluminum over it so i can actually get the right coupler and a T-bolt around it. I must say that my engine bay looks much better/cleaner. I got a K&N air filter coming in the mail to compliment my new piping. The old one i smashed down so it would fit.
Notes...
I used a abrasive chop saw (used for cutting steel) and would of made much better cuts using a band saw or a chop saw with a carbide blade.
Tack everything togethor first and test fit prior to final weldout.
"Takes just as long to do it right as it does to do it wrong" -My father
I used a water hose to spray inside of all the pipes before final connection to get all the aluminum shavings out.
Overall i spent approx 170$ for a full intercooler kit and was very easy (although welding for some might be a problem)
Enjoy!
Reply
0
0


Someday i'm going to drive down to renton and sbk is going to weld my intercooler piping with his fancy schmancy tig =P
The difference between his CXracing IC setup and mine is that i've got 200% more couplers holding everything together.
The difference between his CXracing IC setup and mine is that i've got 200% more couplers holding everything together.
Reply
0
0
Thread Starter
Elite Member
iTrader: (7)
Joined: Jan 2007
Posts: 1,731
Total Cats: 4
From: Renton Washington
even though the intercooler piping is done i figured id remake my intake piping with the leftovers.
I took the last 75 i had and cut it off right after the bend. Then i took one of the leftover drops from a previous cut that had some bend on it and cut them
Took the original greddy tube and chopped it off at the very end so the air filter can clamp on it
It was ****** hot so i dropped it
All welded up
At this point everything was good to go and i turned the key and started IMMIDIATELY whcih was sweet. But my old fuel map was tuned on 7psi of fuel now im at 65. I turned off the car turned the key to the ON position to change the table back to stock.. I heard some hissing and smelled fuel. I turned off the car and holy **** my fuel feed line busted off.
Probably dumped 2 cups of fuel on the ground atleast. Went to shucks and got some hose clamps and double clamped that hose so no more bursting.
I made quick wastegate bracket from some scrap aluminum i had laying in the back.
Reply
0
0


Thread
Thread Starter
Forum
Replies
Last Post
Zaphod
MEGAsquirt
47
Oct 26, 2018 11:00 PM
StratoBlue1109
Miata parts for sale/trade
21
Sep 30, 2018 01:09 PM


