
2001 NB Godspeed Radiator Install


Thread Starter
Junior Member
Joined: Oct 2007
Posts: 345
Total Cats: 0
From: AC, NJ
OK, Since nobody else seemed willing, I played guinea pig. Turns out, it's not very easy... My apologies on writing this as I am tired. Also sorry not a lot of pictures.
First starting, everything went well following what everyone else is doing.
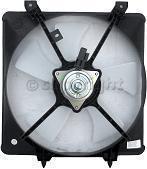
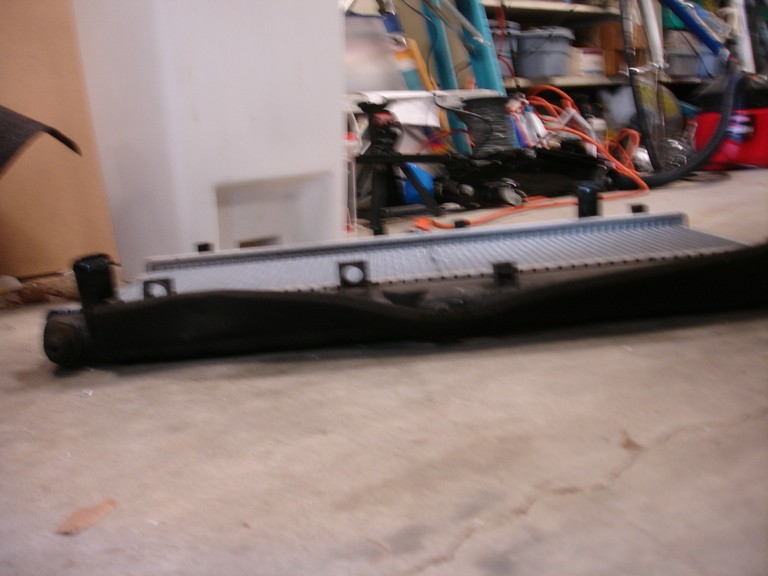
Removed intake for room, take off the rad brackets, disconnect fan wiring, coolant piping, etc. Remove the radiator. Take the fans off. It's all quite similar to NA install to this point. Now this is where it starts to get sketchy. The coolant fan does not have mounting holes at the bottom for screws, nor does it have the required length to drill holes for screws. If you don't know what it looks like, let me show you this poor stock photo.
The A/C fan goes on okay with just the drilling.
Ok now we have the A/C fan on, and the coolant fan is half on (top bolts only). Suggestions are welcome for attaching those peg like bottoms to the radiator.
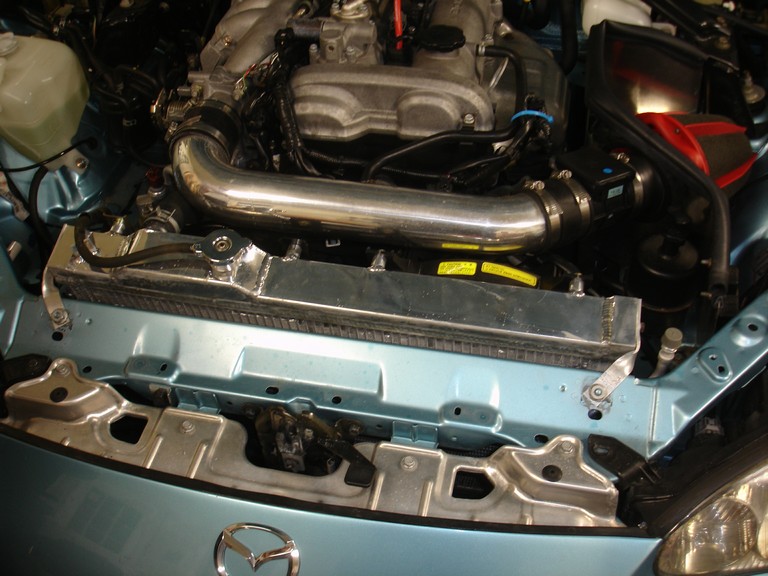
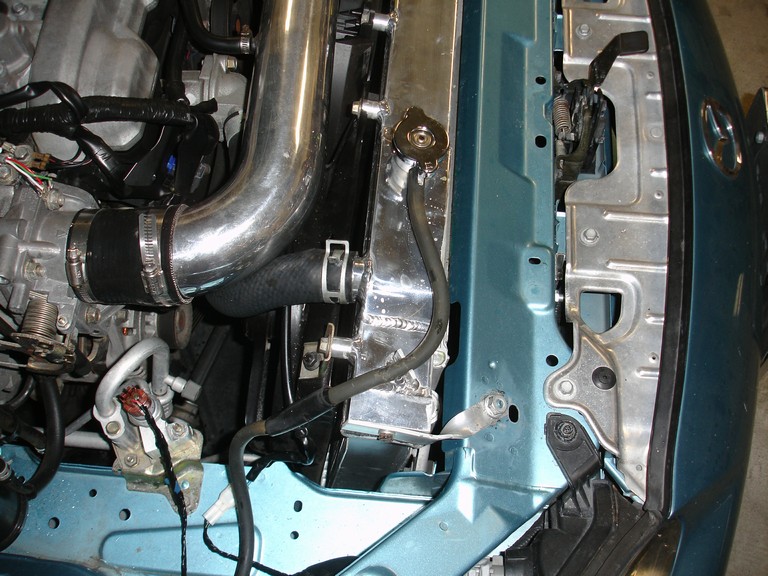
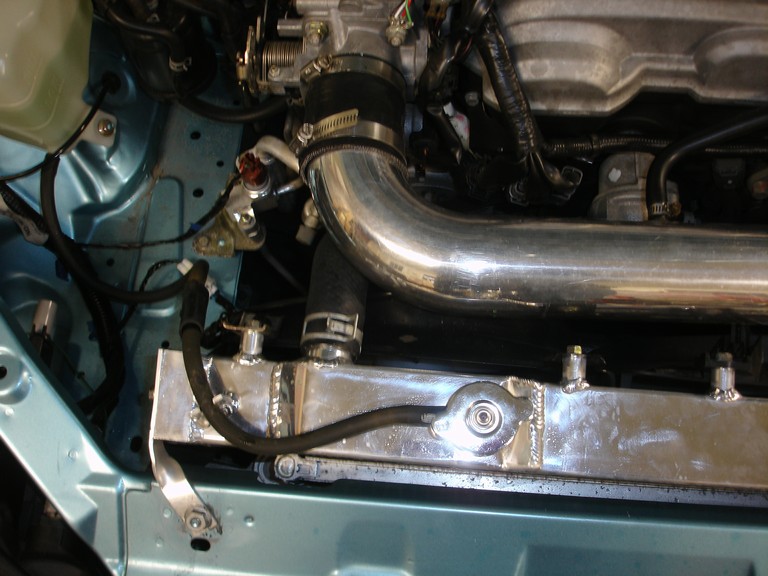
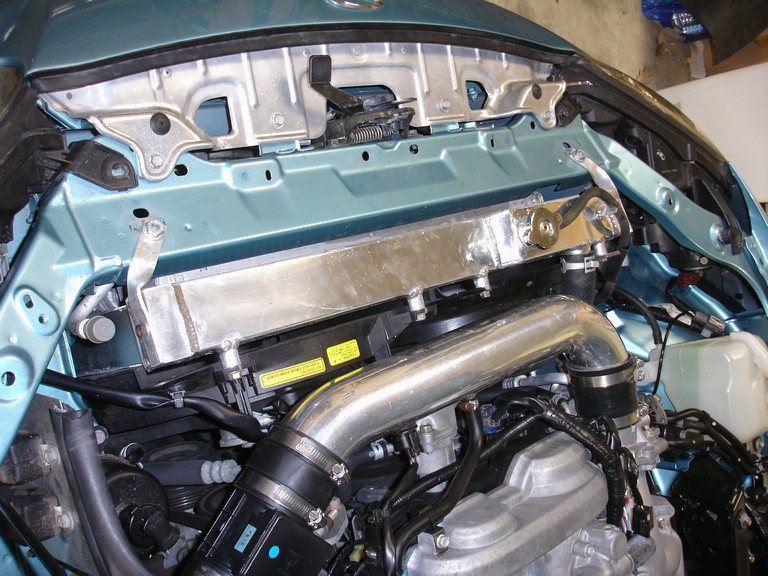
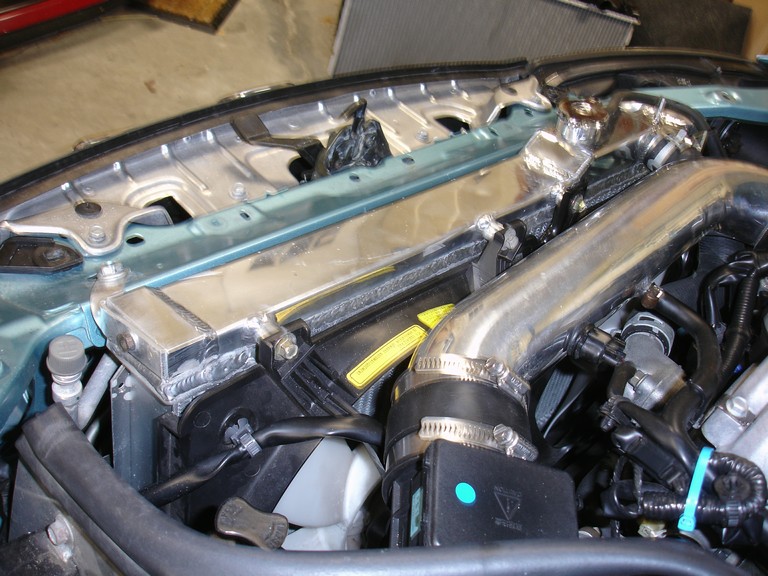
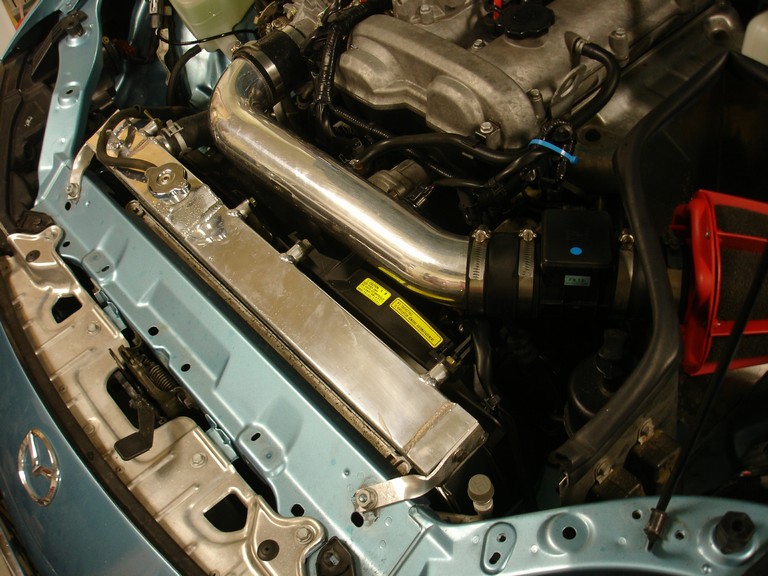
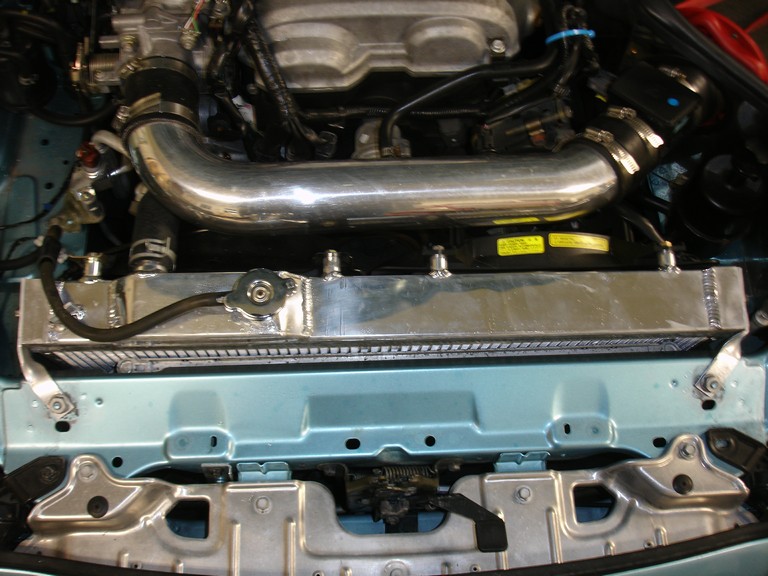
Go ahead and slide the thing down. You will have to move some AC hard lines (I think thats what they are), on the right side. Massage is down into its new home. It will get stuck on the right side, you will have to pull the top towards the front of the car, while pushing it down. This clears the ledge its getting stuck on below the radiator. Now everything seems to look good right?
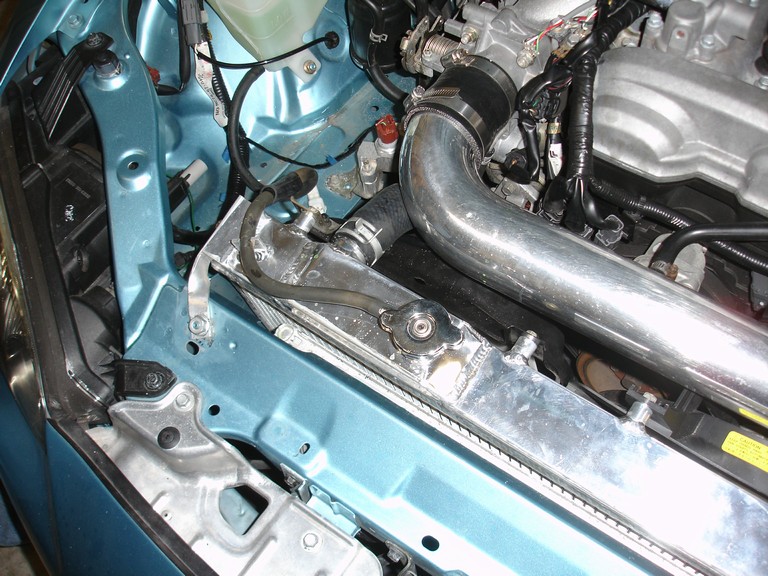
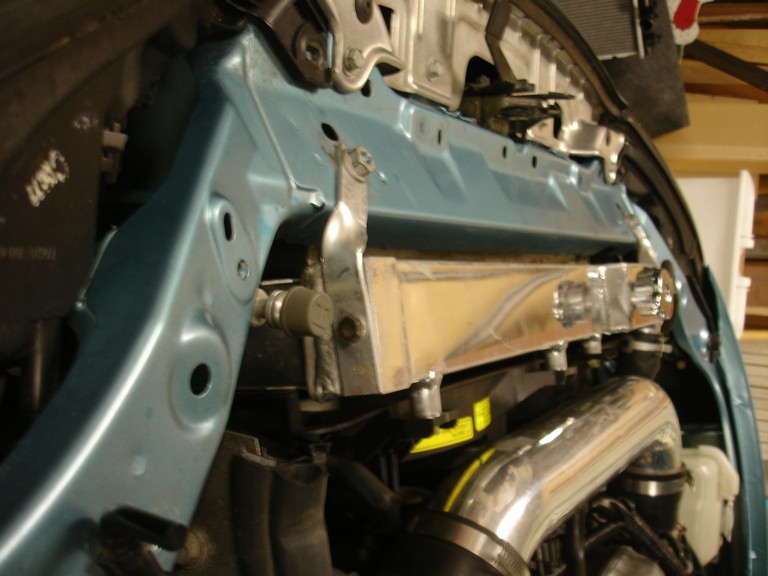
Time to make some brackets. I bought a small strip of aluminum, and bent the **** out of it until it properly fits. I think you NA guys had to do this too? Anyway, they ended up looking okay. Just bent them, and drilled holes. They are very stiff, so it won't be going anywhere.
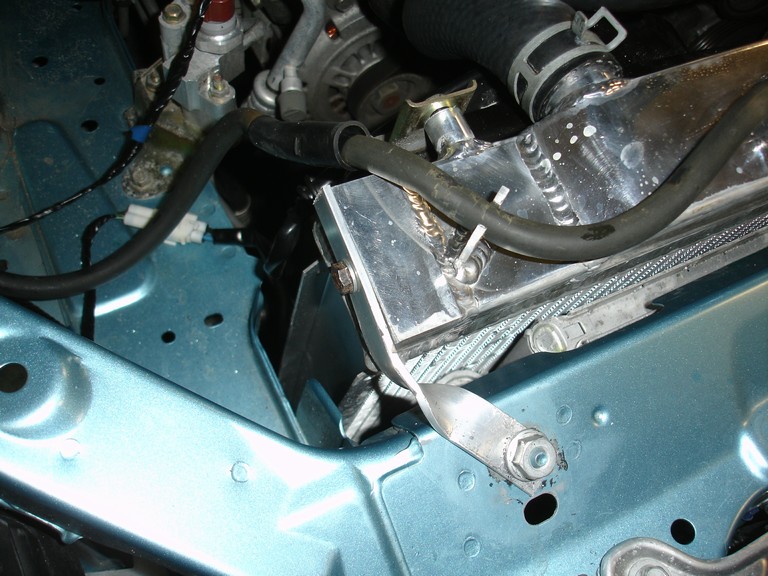
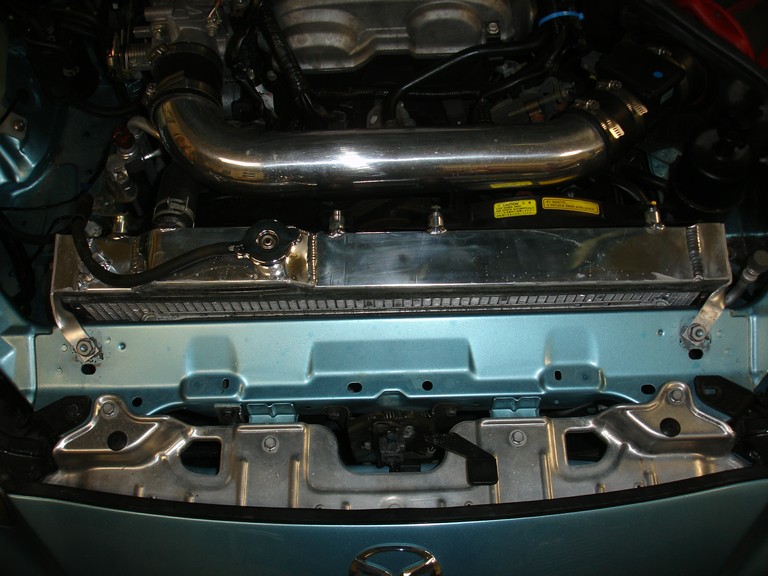
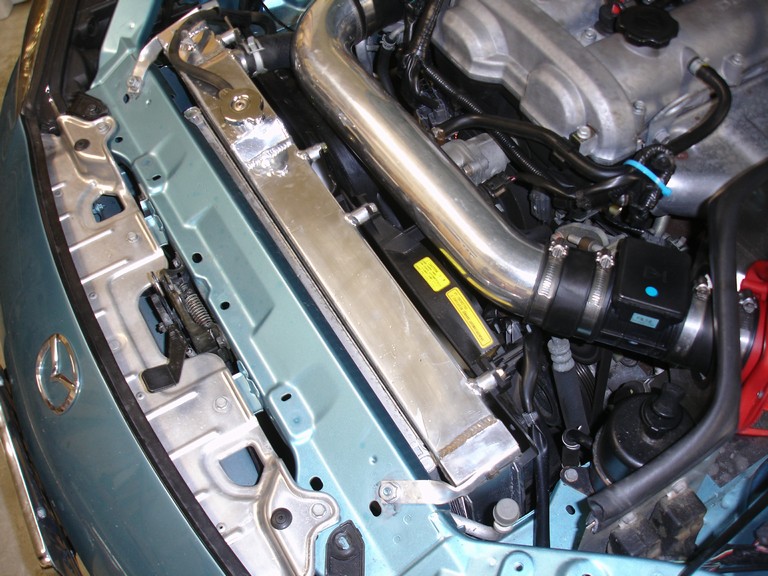
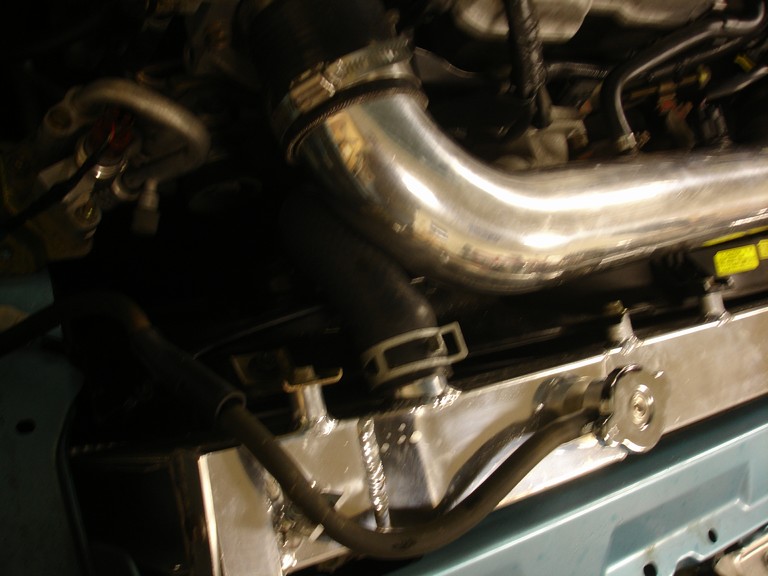
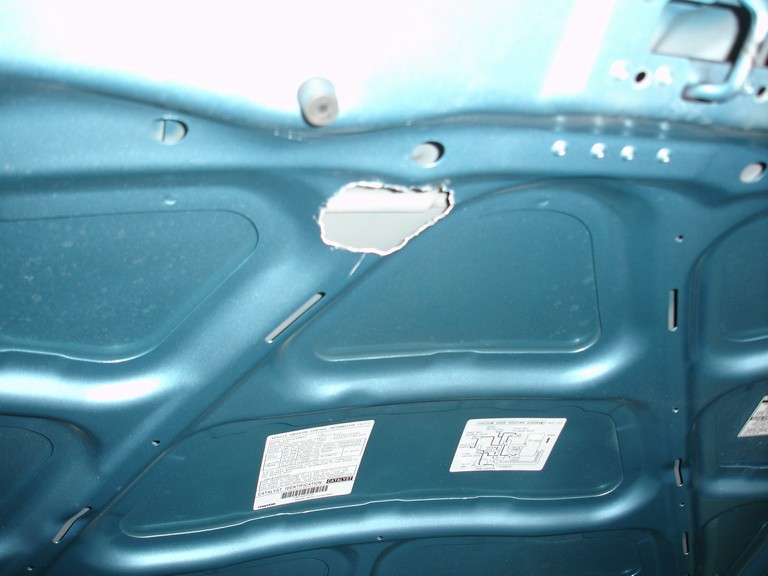
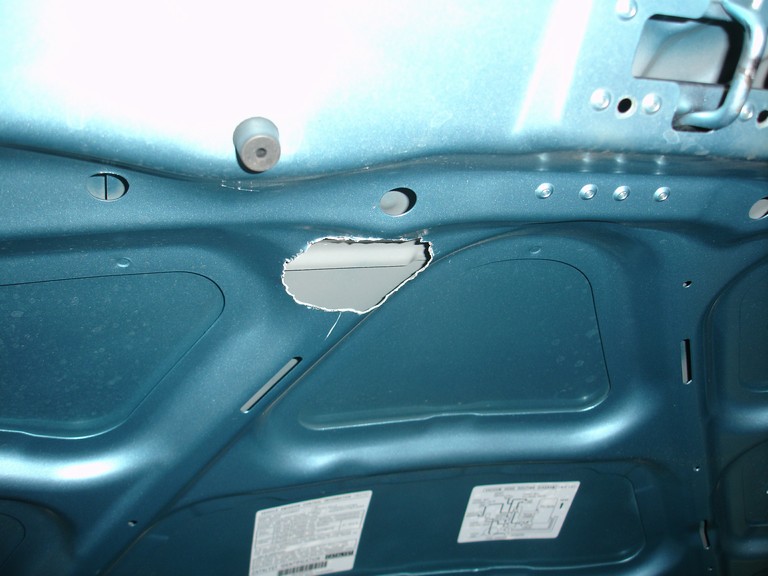
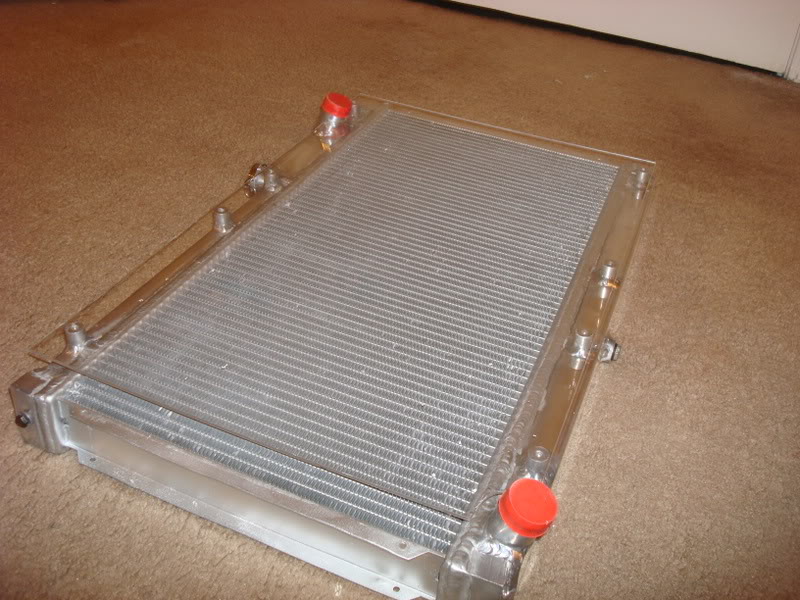
This is pretty easy compared to what I'm about to do... I closed the hood to check fit, and because of the fact the radiator cap is relocated to the left side rather than center, the hood won't close. This is when you cry. The brackets where the radiator is supposed to mount do not seem to be able to be bent in any way. The AC condenser (?) is sitting on the bracket also, so if you were to somehow bend it, you would be removing the mount for that. While I'm mentioning the bracket, let me mention that the stock radiator has two of what i call 'pegs'. These pegs sit into the bracket, thats how its mounted below. Notice that your godspeed doesn't have these? I know. Mine is just sitting on the brace. It doesn't seem to want to go anywhere, even without the brackets. See pictures below about that.
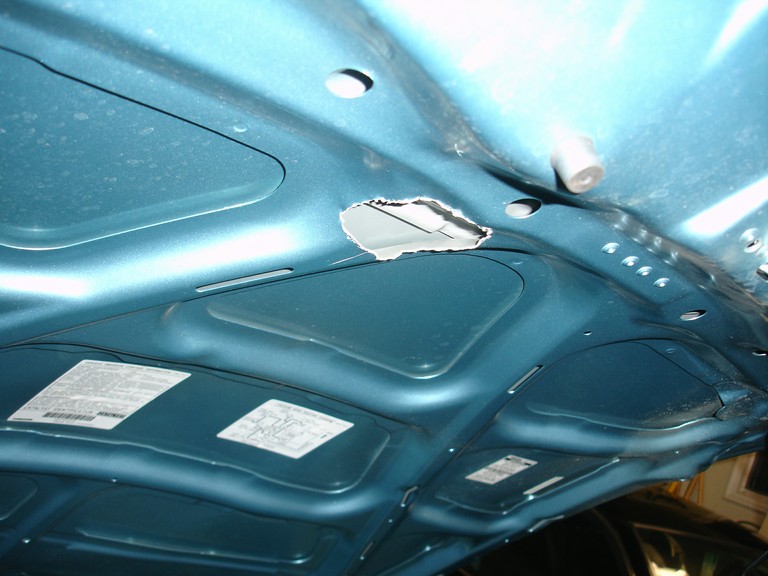
So all I could do now was cut the hood. So I began by drilling holes in my beloved miata, then used snips to cut out a hole. I wish it was easy as it was to type, however there is not much more to say about it. Just make sure you cut it in the right place.
I cut it out, and the hood now shuts. Filled with coolant, all that good stuff. Started car, went for drive, everything seems to be fine. I'm still not sure if it was worth it.
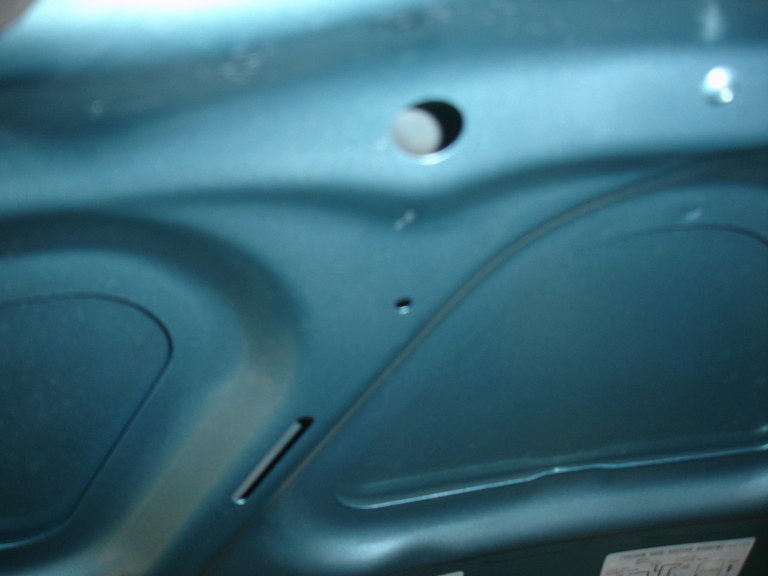
Anything else I'm leaving out since im sleep typing, please ask. Here are some fun pictures, use your imagination for captions.

First starting, everything went well following what everyone else is doing.
Removed intake for room, take off the rad brackets, disconnect fan wiring, coolant piping, etc. Remove the radiator. Take the fans off. It's all quite similar to NA install to this point. Now this is where it starts to get sketchy. The coolant fan does not have mounting holes at the bottom for screws, nor does it have the required length to drill holes for screws. If you don't know what it looks like, let me show you this poor stock photo.
The A/C fan goes on okay with just the drilling.
Ok now we have the A/C fan on, and the coolant fan is half on (top bolts only). Suggestions are welcome for attaching those peg like bottoms to the radiator.
Go ahead and slide the thing down. You will have to move some AC hard lines (I think thats what they are), on the right side. Massage is down into its new home. It will get stuck on the right side, you will have to pull the top towards the front of the car, while pushing it down. This clears the ledge its getting stuck on below the radiator. Now everything seems to look good right?
Time to make some brackets. I bought a small strip of aluminum, and bent the **** out of it until it properly fits. I think you NA guys had to do this too? Anyway, they ended up looking okay. Just bent them, and drilled holes. They are very stiff, so it won't be going anywhere.
This is pretty easy compared to what I'm about to do... I closed the hood to check fit, and because of the fact the radiator cap is relocated to the left side rather than center, the hood won't close. This is when you cry. The brackets where the radiator is supposed to mount do not seem to be able to be bent in any way. The AC condenser (?) is sitting on the bracket also, so if you were to somehow bend it, you would be removing the mount for that. While I'm mentioning the bracket, let me mention that the stock radiator has two of what i call 'pegs'. These pegs sit into the bracket, thats how its mounted below. Notice that your godspeed doesn't have these? I know. Mine is just sitting on the brace. It doesn't seem to want to go anywhere, even without the brackets. See pictures below about that.
So all I could do now was cut the hood. So I began by drilling holes in my beloved miata, then used snips to cut out a hole. I wish it was easy as it was to type, however there is not much more to say about it. Just make sure you cut it in the right place.
I cut it out, and the hood now shuts. Filled with coolant, all that good stuff. Started car, went for drive, everything seems to be fine. I'm still not sure if it was worth it.
Anything else I'm leaving out since im sleep typing, please ask. Here are some fun pictures, use your imagination for captions.
Reply
 0
0

0
only one comment. you're not going to want to have those aluminum strips directly connecting the car to the radiator. The factory put rubber grommets in the original mounting hardware for shock/vibration damping. Granted, they are going into a substantial part of the radiator, but still.
Reply
0
0
Thread Starter
Junior Member
Joined: Oct 2007
Posts: 345
Total Cats: 0
From: AC, NJ
Yeah I noticed that the stock one would be allowed to vibrate a bit. Maybe I make larger holes on the car side, and put rubber in it or something. Who knows, but I'll see about it. Is it crucial?
Reply
0
0
You should have taken pictures of your bottom brackets. I still think you could have bent them instead of of cutting the hood up. Glad i'll be able to just modify my lower brackets. Strange that mazda went to welded brackets instead.
What do you mean you don't even know if it was worth it, you're not even turbo yet and it's winter.
What do you mean you don't even know if it was worth it, you're not even turbo yet and it's winter.
Reply
0
0

great work man, sorry i wasnt able to find anyone to test fit one on, i was supposed to this weekend but my guy had to go to atlanta, but we will try it next weekend
few things i would do different
1. use a fan shroud and run slim fans (this is strictly just my prefernece, not a superior way of doing it)
here is my shroud build so far (waiting on fans)
2. just put a rubber washer in between the radiator support and your cuztom fabbed bracket on the top
3. try to beat the hood in vs cutting it, but whatever works, thanks for being a pioneer
otherwise, great work man, thanks for making the effort, you just moved up a notch in my book, so your at notch one, lol
but yes, please pics of bottom mounts
Reply
0
0

Joined: Jun 2005
Posts: 19,338
Total Cats: 574
From: Fake Virginia
make sure you cram some weather stripping into the space in front of the radiator all the way around the perimeter so air doesn't go around your new big core
Reply
0
0
Thread Starter
Junior Member
Joined: Oct 2007
Posts: 345
Total Cats: 0
From: AC, NJ
I'm going to make something interesting to help the air flow into it better, rather than around. Probably from the body to rad, rather than from AC to rad.
Reply
0
0


Thread
Thread Starter
Forum
Replies
Last Post
StratoBlue1109
Miata parts for sale/trade
21
Sep 30, 2018 01:09 PM
stoves
Suspension, Brakes, Drivetrain
5
Apr 21, 2016 03:00 PM


