
Another NRG Wheel Install


Thread Starter
Newb
Joined: Apr 2009
Posts: 13
Total Cats: 0
From: Santa Barbara CA
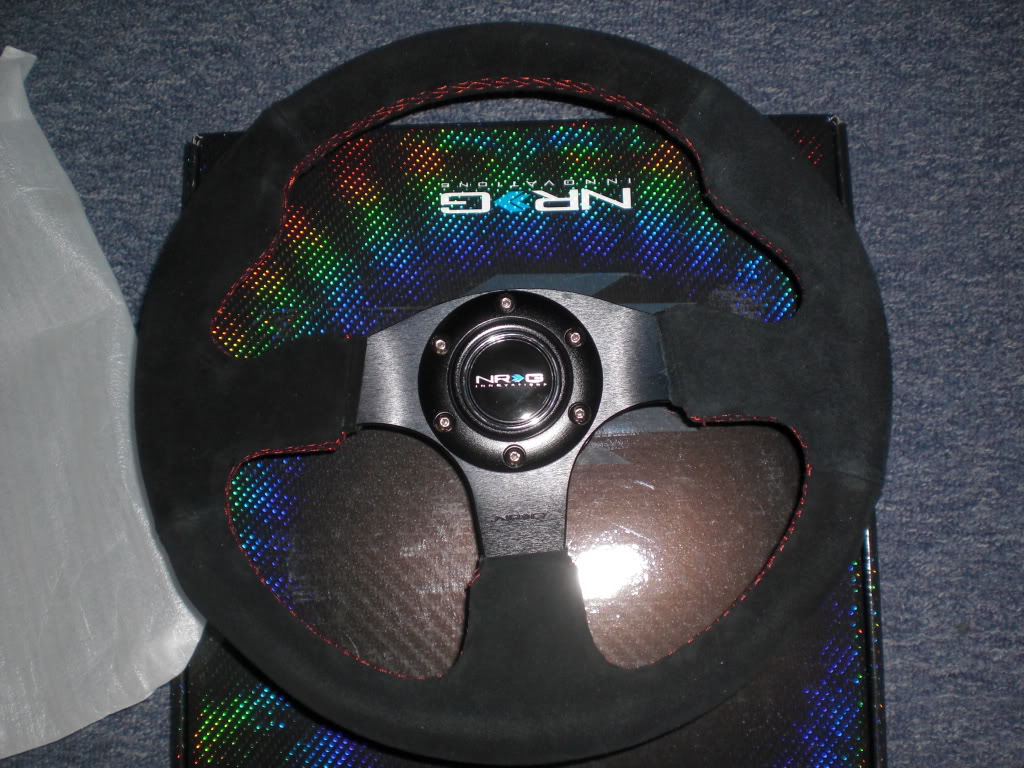
So the first mod on the Miata has been done, installing a smaller steering wheel so I fit a bit better in such a tiny car. With the factory airbag and wheel in place I could barely fit my hand between the wheel and my left leg when it was poised over the clutch pedal. So I'm going manly and using a 320mm wheel (about 12.5") wheel on a car with manual steering. Since I was upgrading I decided that the best way to do it would be to go all out so I sourced a nice alcantara wheel from NRG along with the 1" Mazda hub adapter and their series 2.0 quick release. Everything bolted together great right out of the pretty shiny boxes.
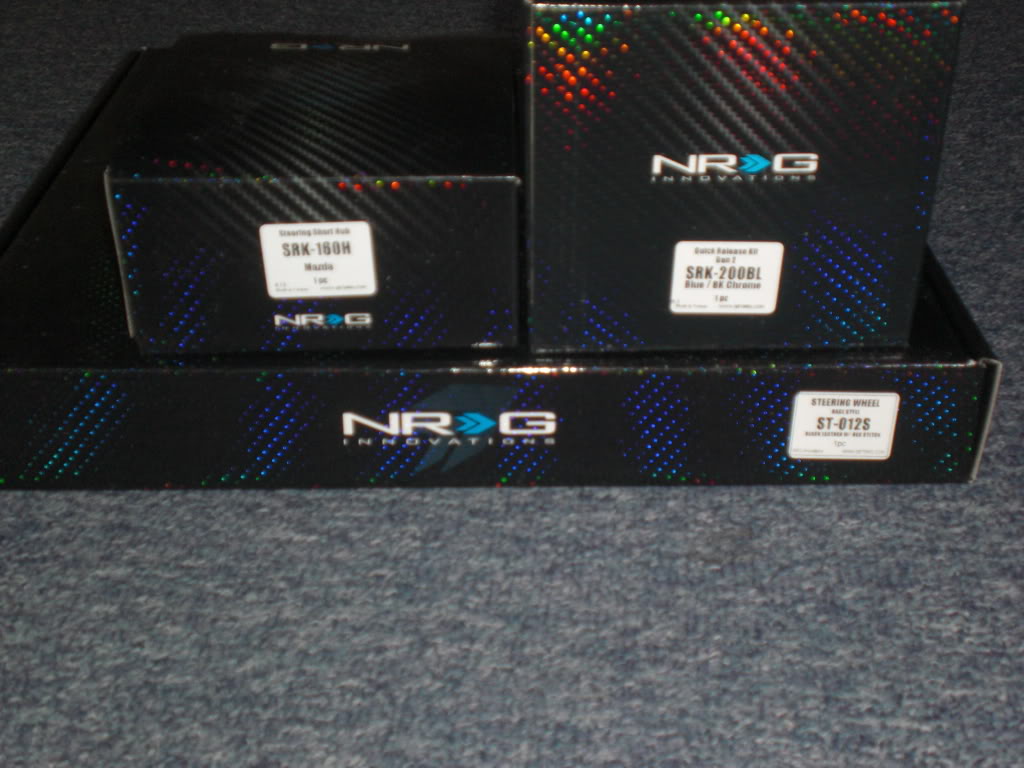
This is what the parts looked like once test assembled.

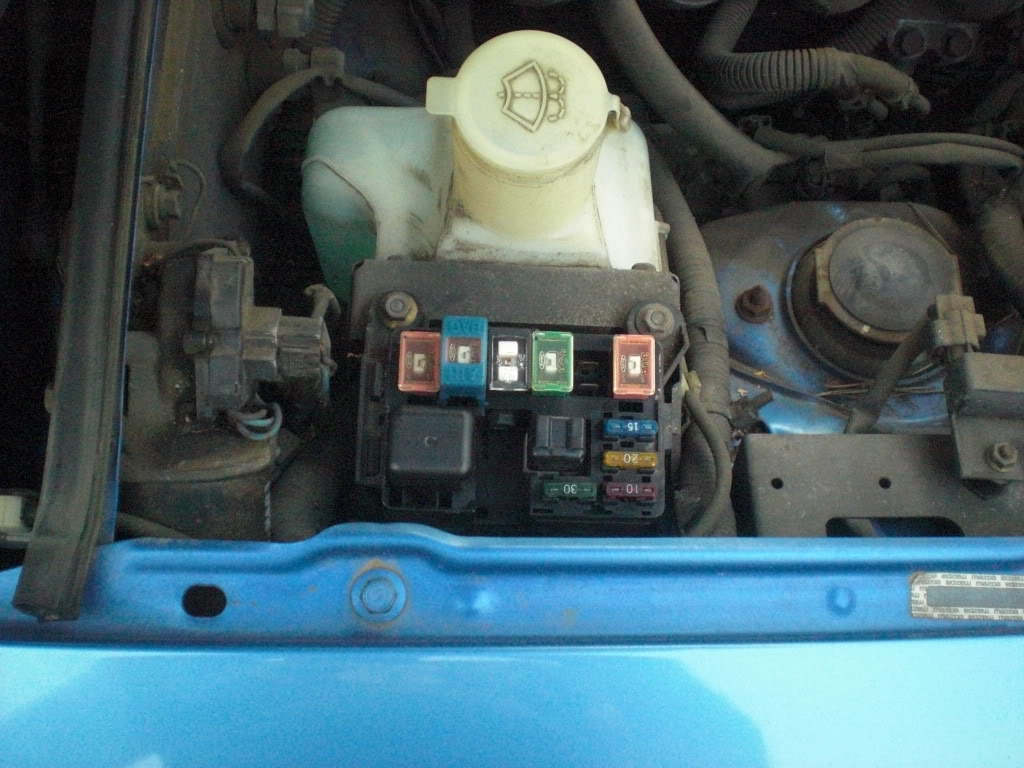
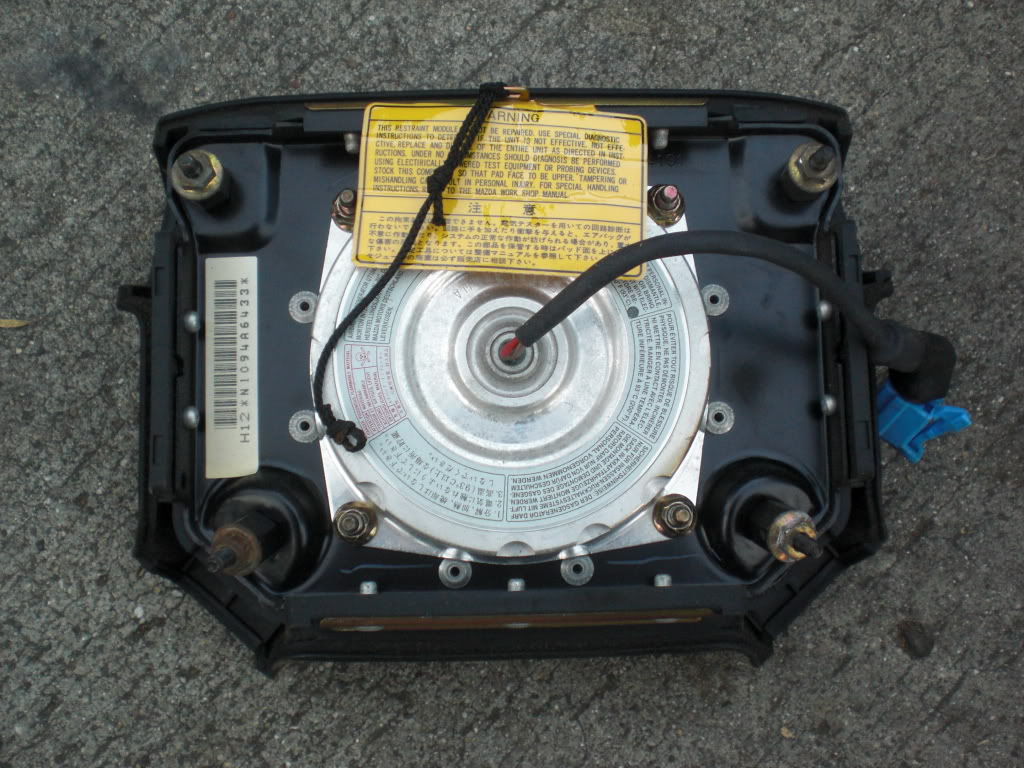
Now onto the install. First things first airbags can be dangerous to work on so before anything else I pulled the fuse for the air bag so it would not have power. Then while removing the bolts and disconnecting the wiring I made sure to stay behind the wheel as much as I could so if it did go off I was not in it's way. No drama ensued during removal and the wheel can be put back in at any time without much issue.
However did I figure out which fuse was for the airbag?
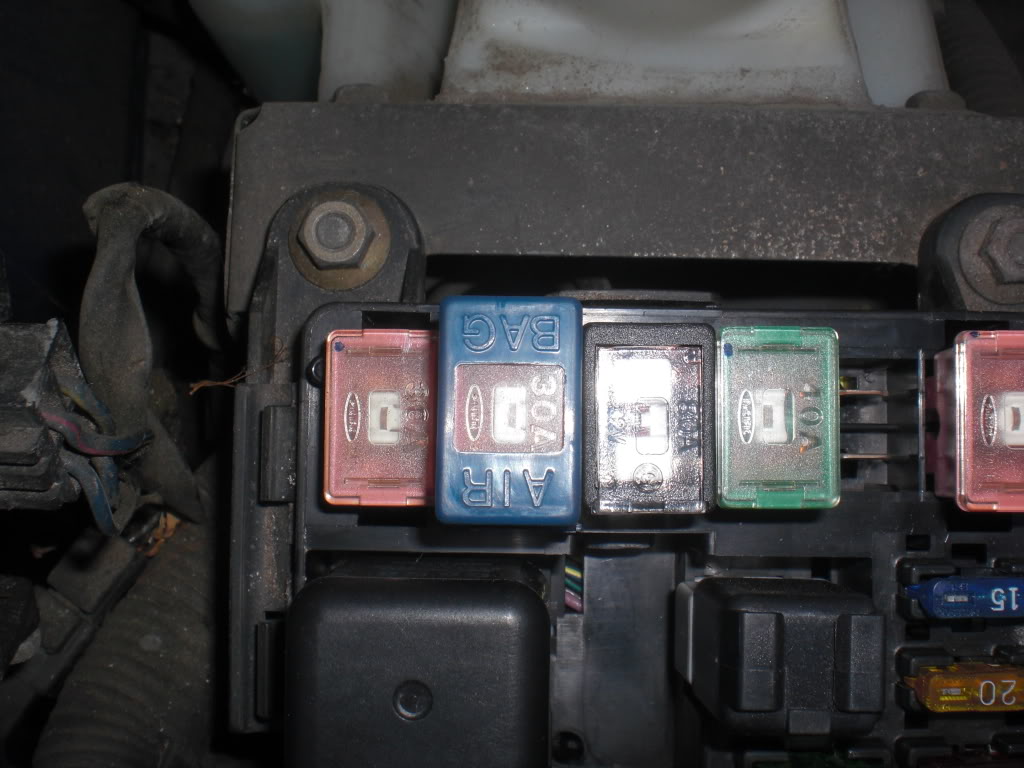
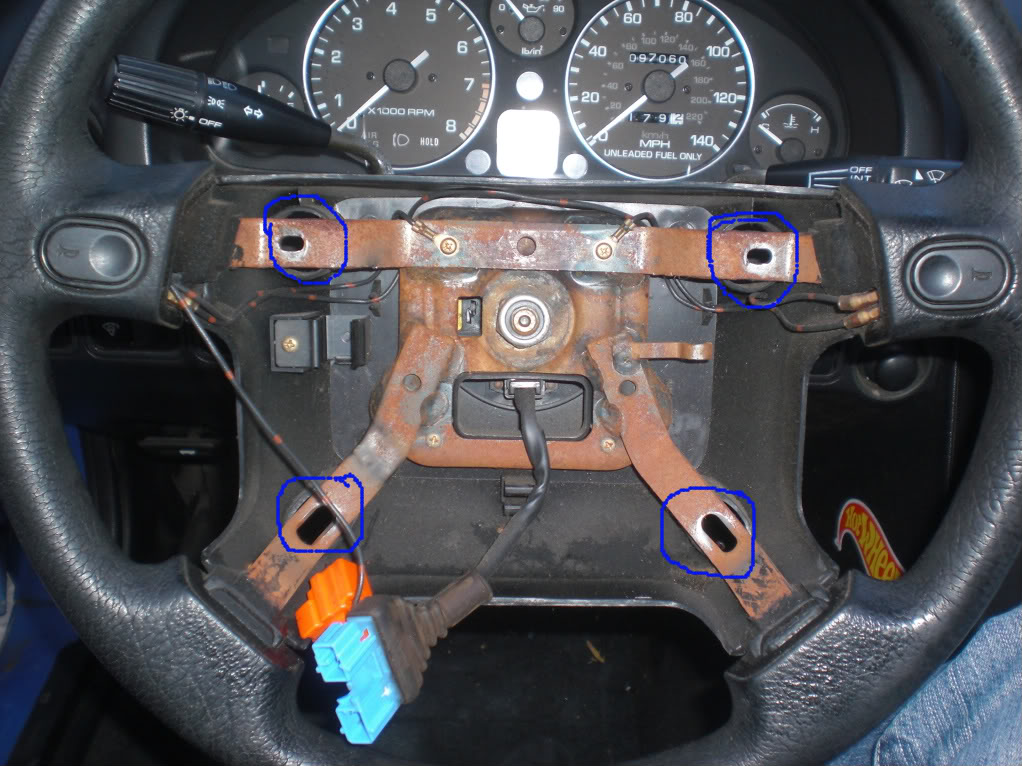
Only 4 10mm nuts hold the airbag to the wheel, the trick was the lower two are angled not straight front to back like the two on top. You can see this where the wheel is angled at the bottom and also by the angle from the back of the airbag.
It's kinda like holding a live grenade wrapped in a hot air balloon.
Next was removing the cent nut on the steering wheel itself, which the 21mm lug wrench from my old Stang worked wonders for.
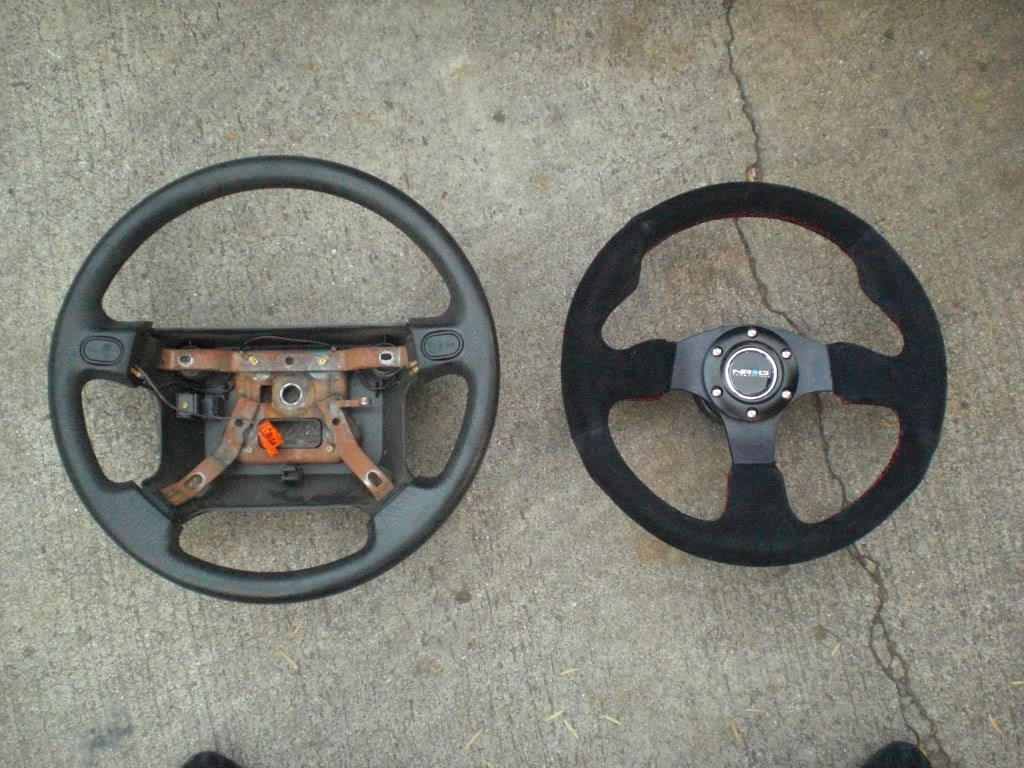
Once the wheel was out you can see the difference between the new and old.
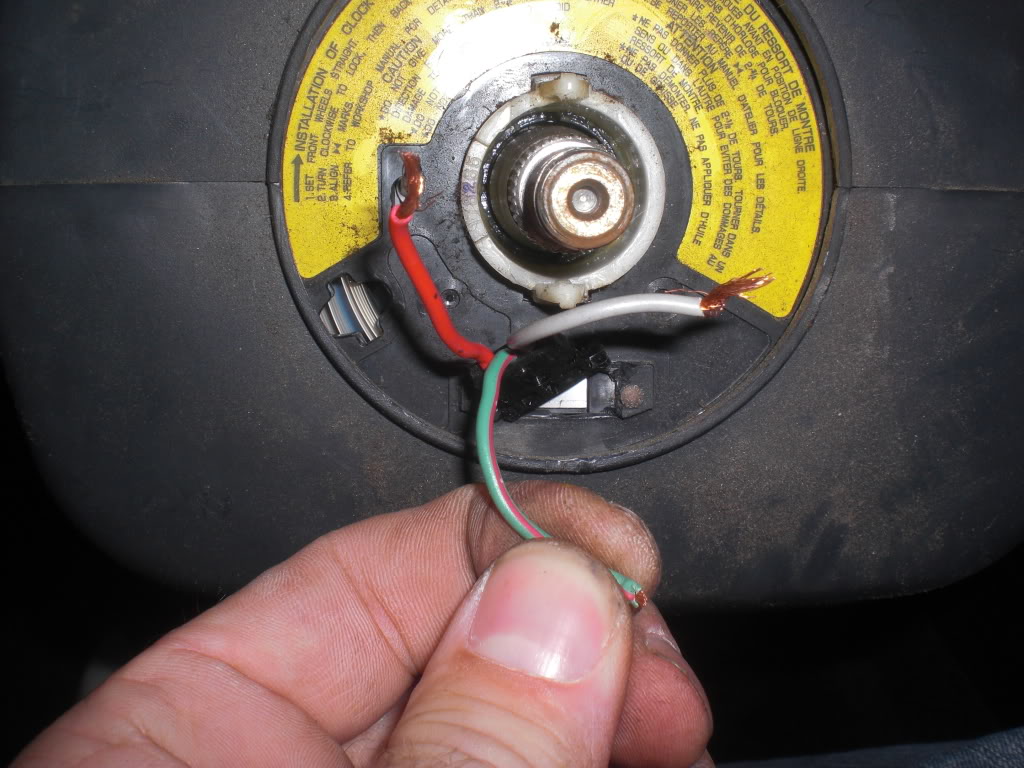
Here is the only 3 wires I had to deal with, and also the only pic I have before installing the hub. This is after I used a large pair of pliers to crush the plastic wire guide which was riveted to the clock spring. I just smashed the outside of it and bent the wires back to I didn't have to cut my brand new hub adapter. The red and gray wires get spliced together with a 3ohm resistor to make the air bag computer think there is still a good air bag there, that way the passenger airbag is still functional. The green with a red stripe is the horn power button which I just stripped about an inch of insulation off of and taped so it would rub on the back of the adapter hub where the horn gets it's power from. You can see the clock spring has an arrow that points up and you have to make sure that stays oriented that way to not mess with the pretension on the turn signal cancel springs.
After taping the wires down out of the way it was just a simple matter of sliding the hub onto the splines and tightening the 21mm nut back down. Didn't get a pic of just the hub because I was busy triple checking that the hub was aligned correctly so the wheel would not be off center. I do have a pic of the quick release base partially installed because I had to install and uninstall it a few times because one of the horn wires in the base was grounding out when tightening the base down. Added some extra electrical tape to the spade terminal covers and no problems. (Yes the hub is off center, as the wheel turned and locked while I was tightening the nut. That is why you double check the alignment before tightening up the nut.)
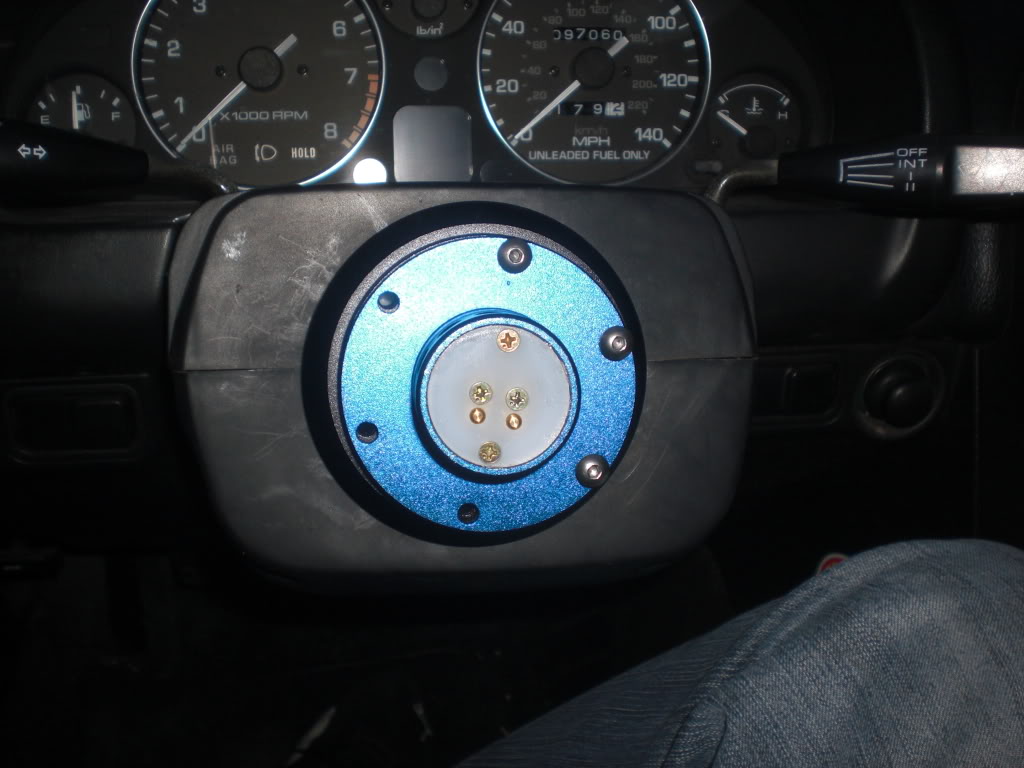
And finally a pic of the installed piece.

Been driving on it for a few days now and it is perfect. No slop at all, the wheel will only go on and lock in the correct orientation so you don't have to worry about parking with the wheels turned, and I can leave the top down all day without worrying about my nice wheel being jacked.
This is what the parts looked like once test assembled.
Now onto the install. First things first airbags can be dangerous to work on so before anything else I pulled the fuse for the air bag so it would not have power. Then while removing the bolts and disconnecting the wiring I made sure to stay behind the wheel as much as I could so if it did go off I was not in it's way. No drama ensued during removal and the wheel can be put back in at any time without much issue.
However did I figure out which fuse was for the airbag?
Only 4 10mm nuts hold the airbag to the wheel, the trick was the lower two are angled not straight front to back like the two on top. You can see this where the wheel is angled at the bottom and also by the angle from the back of the airbag.
It's kinda like holding a live grenade wrapped in a hot air balloon.
Next was removing the cent nut on the steering wheel itself, which the 21mm lug wrench from my old Stang worked wonders for.
Once the wheel was out you can see the difference between the new and old.
Here is the only 3 wires I had to deal with, and also the only pic I have before installing the hub. This is after I used a large pair of pliers to crush the plastic wire guide which was riveted to the clock spring. I just smashed the outside of it and bent the wires back to I didn't have to cut my brand new hub adapter. The red and gray wires get spliced together with a 3ohm resistor to make the air bag computer think there is still a good air bag there, that way the passenger airbag is still functional. The green with a red stripe is the horn power button which I just stripped about an inch of insulation off of and taped so it would rub on the back of the adapter hub where the horn gets it's power from. You can see the clock spring has an arrow that points up and you have to make sure that stays oriented that way to not mess with the pretension on the turn signal cancel springs.
After taping the wires down out of the way it was just a simple matter of sliding the hub onto the splines and tightening the 21mm nut back down. Didn't get a pic of just the hub because I was busy triple checking that the hub was aligned correctly so the wheel would not be off center. I do have a pic of the quick release base partially installed because I had to install and uninstall it a few times because one of the horn wires in the base was grounding out when tightening the base down. Added some extra electrical tape to the spade terminal covers and no problems. (Yes the hub is off center, as the wheel turned and locked while I was tightening the nut. That is why you double check the alignment before tightening up the nut.)
And finally a pic of the installed piece.
Been driving on it for a few days now and it is perfect. No slop at all, the wheel will only go on and lock in the correct orientation so you don't have to worry about parking with the wheels turned, and I can leave the top down all day without worrying about my nice wheel being jacked.
Reply
 0
0

0

Pretty nice install, looks real good.
The only thing I hate about having a small steering wheel is that I can't see my oil pressure and water temp gauge, and the top of the speedometer and tach are blocked too.
Other than that it feels great, but I think I'm gonna grab a Nardi 360mm.
The only thing I hate about having a small steering wheel is that I can't see my oil pressure and water temp gauge, and the top of the speedometer and tach are blocked too.
Other than that it feels great, but I think I'm gonna grab a Nardi 360mm.
Reply
0
0
Thread Starter
Newb
Joined: Apr 2009
Posts: 13
Total Cats: 0
From: Santa Barbara CA
Like I said, I needed the extra leg room from the smaller wheel. It is in the way a little for me, but I can see the very top of the tach, oil pressure gauge, and speedo over the top of the wheel so it isn't too bad. Only thing completely blocked is the turn signal indicators.
Reply
0
0

Junior Member
Joined: Oct 2008
Posts: 88
Total Cats: 0
firstly, that is a wonderful installation. i will definitely be picking one of those up for myself. second, what is the best way to take care of the suede so that it lasts
third, ow much did all of that run you/
third, ow much did all of that run you/
Reply
0
0
Thread Starter
Newb
Joined: Apr 2009
Posts: 13
Total Cats: 0
From: Santa Barbara CA
For now I am just making sure I don't leave the wheel in the sun and will start reading up on how to care for the suede. Thanks for the heads up kotomile.
I found a screaming deal on mine, but the whole setup can usually be found for about 275-300.
I found a screaming deal on mine, but the whole setup can usually be found for about 275-300.
Reply
0
0

Thread
Thread Starter
Forum
Replies
Last Post
stoves
Suspension, Brakes, Drivetrain
5
Apr 21, 2016 03:00 PM


