
Quick Radiator Shroud

Thread Starter
Elite Member
iTrader: (33)
Joined: Jan 2007
Posts: 2,522
Total Cats: 36
From: Newnan, GA
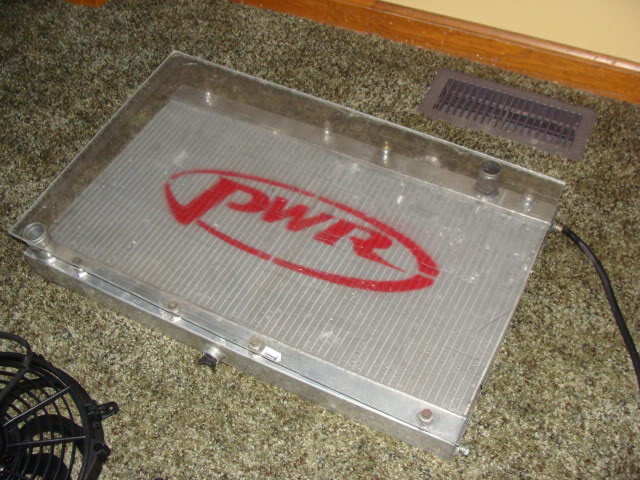
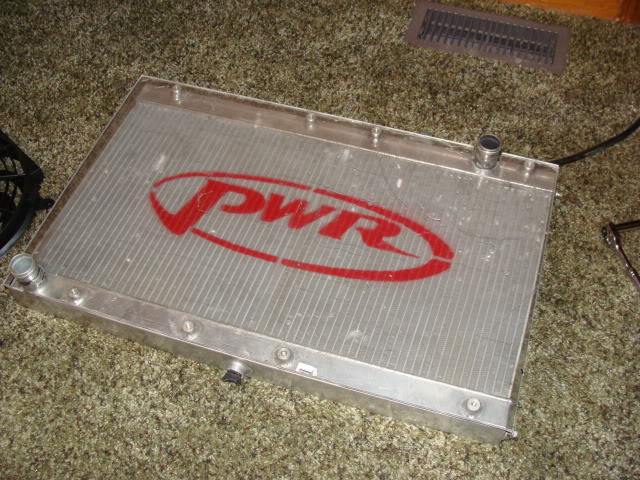
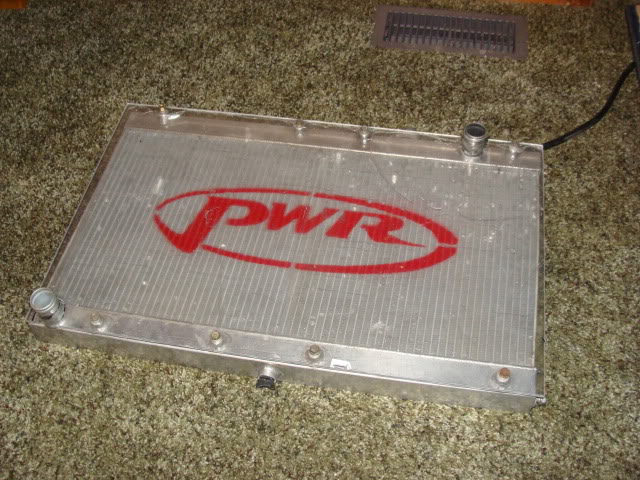
I know people have posted various pictures of their shrouds, and there's been a debate as to what works better, etc., but I don't remember a thread that shows one being made (not that it's that hard to do). With my PWR radiator and FM front sway, I was space limited, so here's what I made today:
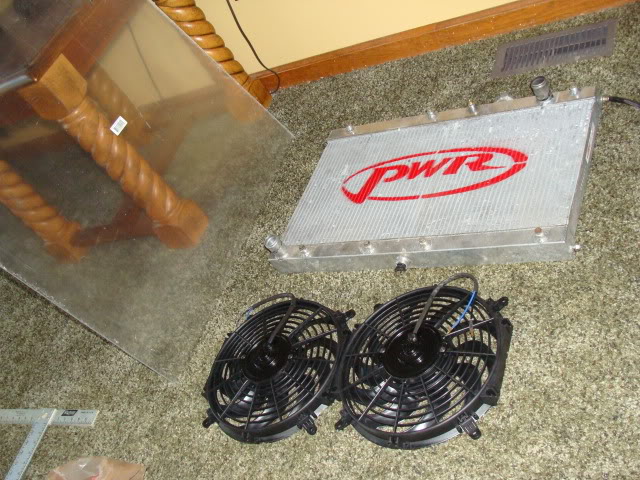
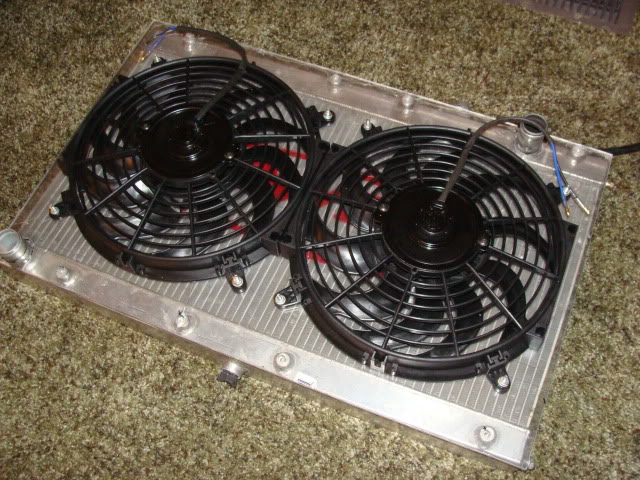
Started with plexi from Home Depot, 1/4" thick (about $40), (2) 12" slim fans from SiliconeIntakes.com, and my PWR.
Made some measurements, marked the plexi, pulled out the table saw, and cut it down to size:
Used a powered hand saw and made the cutouts for the inlet and outlet tubes (my cuts were just a tad rough, thought I had the right blade the first time. Oops):
Then drilled holes for the mounting bolts (I also cracked the plexi a little during this step, but it's ok, it's still structurally sound at the end of all this) :
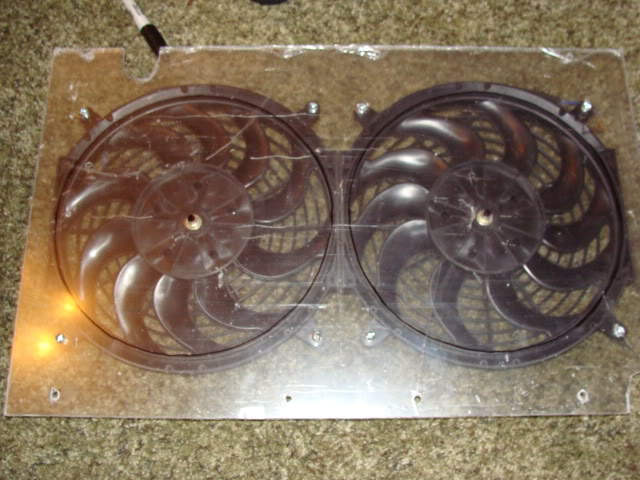
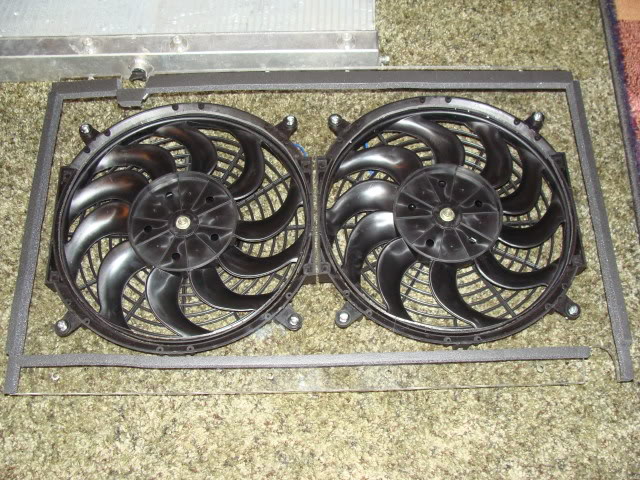
Then I drilled holes and mounted the fans:
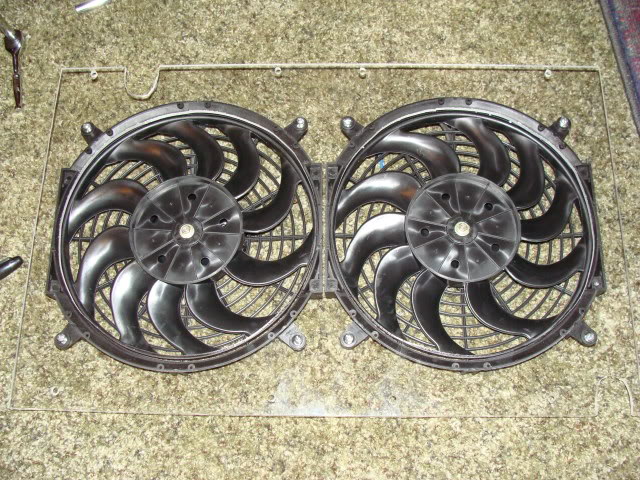
Then I traced the outlines of the outer diameter of the fan blades:
Hand saw again and removed all the clear protective plastic and:
Remounted the fans:
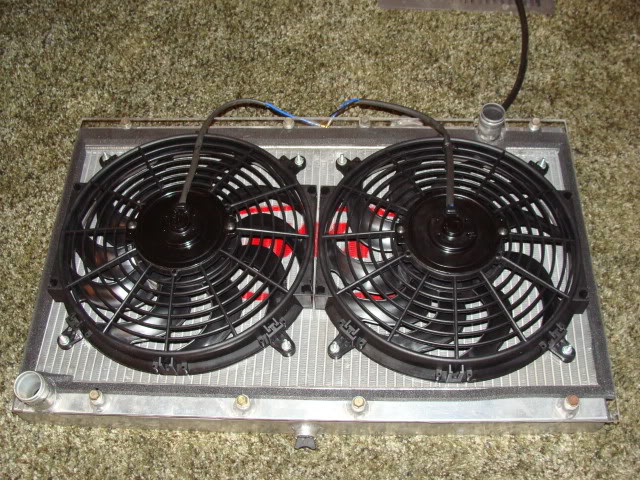
Applied weather stripping:
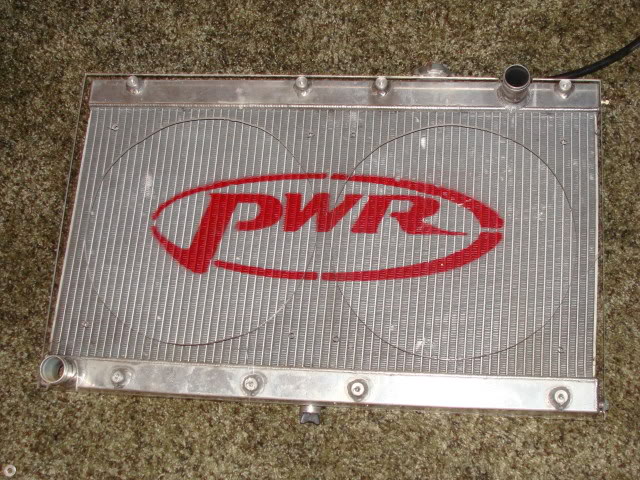
Finished. Sturdy as hell and will put all the airflow through the fans.
It took maybe 2 hours to do, if I did it again I could probably do it in less time, but I spent a lot of time checking measurements and bolt hole placement. I could definitely not crack it the next time around either, that was the result of drilling a bolt hole and the plexi being uneven when the drill broke through. Other than that, it went well.
Hope this helps someone out.
Started with plexi from Home Depot, 1/4" thick (about $40), (2) 12" slim fans from SiliconeIntakes.com, and my PWR.
Made some measurements, marked the plexi, pulled out the table saw, and cut it down to size:
Used a powered hand saw and made the cutouts for the inlet and outlet tubes (my cuts were just a tad rough, thought I had the right blade the first time. Oops):
Then drilled holes for the mounting bolts (I also cracked the plexi a little during this step, but it's ok, it's still structurally sound at the end of all this) :
Then I drilled holes and mounted the fans:
Then I traced the outlines of the outer diameter of the fan blades:
Hand saw again and removed all the clear protective plastic and:
Remounted the fans:
Applied weather stripping:
Finished. Sturdy as hell and will put all the airflow through the fans.
It took maybe 2 hours to do, if I did it again I could probably do it in less time, but I spent a lot of time checking measurements and bolt hole placement. I could definitely not crack it the next time around either, that was the result of drilling a bolt hole and the plexi being uneven when the drill broke through. Other than that, it went well.
Hope this helps someone out.
Last edited by RotorNutFD3S; Mar 23, 2009 at 12:58 AM.
Reply
 0
0

0


Nice job Eric, let me know how that foam holds up as that's what I intend to use.
https://www.miataturbo.net/forum/t15465/
https://www.miataturbo.net/forum/t15465/
Reply
0
0

Hey, NICE radiator.
Better shrouding technique. It localizes the cooling effect unlike a funnel shroud which draws through the whole thing of course, but I'm sure you're aware of that. It shouldn't be a prob with a PWR anyhow, and certainly a LOT slimmer.
Better shrouding technique. It localizes the cooling effect unlike a funnel shroud which draws through the whole thing of course, but I'm sure you're aware of that. It shouldn't be a prob with a PWR anyhow, and certainly a LOT slimmer.
Reply
0
0
Thread Starter
Elite Member
iTrader: (33)
Joined: Jan 2007
Posts: 2,522
Total Cats: 36
From: Newnan, GA
I'm working on it as fast as I can! A guy locally is cutting me a spacer for my "holy grail" coolant reroute this week. lol If he gets it to me when he said he would, then the engine/trans should go in this weekend. Then it's waiting for the differential and injectors to return. Gotta get my cat from Enthuza as well. So close...
Thanks! FWIW, I've used this stuff before for a shroud, just the generic stuff from HD. After a while it will harden some and shrink a tad, and you might lose a little bit of sealing, but not enough to worry about, unless you're really OCD about it. I doubled up on the sides as the core is a little deeper than the endtanks. You'll be adding a couple of layers if you still have goals of 1" off the surface unless you find some thicker stripping than I did (I bought the thickest stuff they had in stock). The plexi on miy shroud is only 1/2" off the endtanks, maybe 5/8"-3/4" off the core.
Yep. Top, bottom, and sides. It's the gray stuff that goes all the way around the edge of the plexi. 
Thanks. Yup, after reading numerous threads this seems to be an accepted method for those that are working with limited space between radiator and sway bar. I never had a problem with coolant temps before, but figured that doing this is a good idea after adding a larger intercooler and a/c condenser.
Nice job Eric, let me know how that foam holds up as that's what I intend to use.
https://www.miataturbo.net/forum/t15465/
https://www.miataturbo.net/forum/t15465/
Thanks. Yup, after reading numerous threads this seems to be an accepted method for those that are working with limited space between radiator and sway bar. I never had a problem with coolant temps before, but figured that doing this is a good idea after adding a larger intercooler and a/c condenser.
Reply
0
0

Very nice. I did the same thing with ABS. Make sure you have a switch of some sort to toggle the second fan; my car idles at 184 with a 180 thermostat with only one fan on.
Reply
0
0
Thread Starter
Elite Member
iTrader: (33)
Joined: Jan 2007
Posts: 2,522
Total Cats: 36
From: Newnan, GA
Thanks Sav. Your thread was the primary reason I tackled the project this weekend. I was searching and reading all the arguments in the various threads on here about shrouding and your thread was pretty much the most recent one, so I said "F- it" and made it. lol
That's pretty impressive though. What are your cruise temps like? Any issues as some people are claiming they create?
As for the operation, I think I want to run the OEM setup (so the 2nd fan comes on with the a/c) but also have a switch to control the 2nd fan manually. Is that what you're doing?
That's pretty impressive though. What are your cruise temps like? Any issues as some people are claiming they create?
As for the operation, I think I want to run the OEM setup (so the 2nd fan comes on with the a/c) but also have a switch to control the 2nd fan manually. Is that what you're doing?
Reply
0
0

It seems to be designed for both fans to be used concurrently. Is that your intention?
If not, single fan operation may draw a significant volume of air backwards through the idle fan.
If not, single fan operation may draw a significant volume of air backwards through the idle fan.
Reply
0
0
Thread Starter
Elite Member
iTrader: (33)
Joined: Jan 2007
Posts: 2,522
Total Cats: 36
From: Newnan, GA
At the same time (correct me if I'm wrong here) the area in front of the radiator is high pressure and the area behind it is low pressure. There's no way the air can flow backwards. But I'm definitely not claiming to have a lot of knowledge in air/fluid flow. lol
So the argument goes...

I say if it shows an improvement or doesn't hurt anything, it stays. If it causes problems, it goes.
Reply
0
0
If that were the case, the OEM fans would be doing the same thing, and I'm pretty sure that's not the case. They're not shrouded in this exact manner, but their shrouding does pretty much cover up most of the open space outside of the direct fan blade area.
At the same time (correct me if I'm wrong here) the area in front of the radiator is high pressure and the area behind it is low pressure. There's no way the air can flow backwards. But I'm definitely not claiming to have a lot of knowledge in air/fluid flow. lol
At the same time (correct me if I'm wrong here) the area in front of the radiator is high pressure and the area behind it is low pressure. There's no way the air can flow backwards. But I'm definitely not claiming to have a lot of knowledge in air/fluid flow. lol
Reply
0
0


I just drilled a bunch of plexiglass (acrylic) for a model I built at work. After I cracked my first few holes, one of the machinists took a standard drill bit to a grinder and put a tiny flat on the cutting edge of the bit. This keeps the bit from getting 'pulled through' when it penetrates the far side. I also placed a block of wood underneath the spot I was drilling. Those two things took me from cracking every hole I drilled (even being very careful, reverse drill, etc) to not cracking a single one. I drilled about 30 holes in a row with no cracks. It was beautiful.
Anyway, I did my fan shroud the same way but with 1/8" black ABS; it is very easy to fabricate with.
Anyway, I did my fan shroud the same way but with 1/8" black ABS; it is very easy to fabricate with.
Reply
0
0
Reply
0
0


