

Brake ducting

Thread Starter

Joined: Oct 2005
Posts: 15,239
Total Cats: 1,417
From: Oregon City, OR
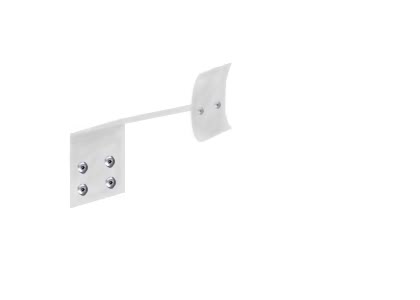
Anyone have a good idea on how to mount these pipes?
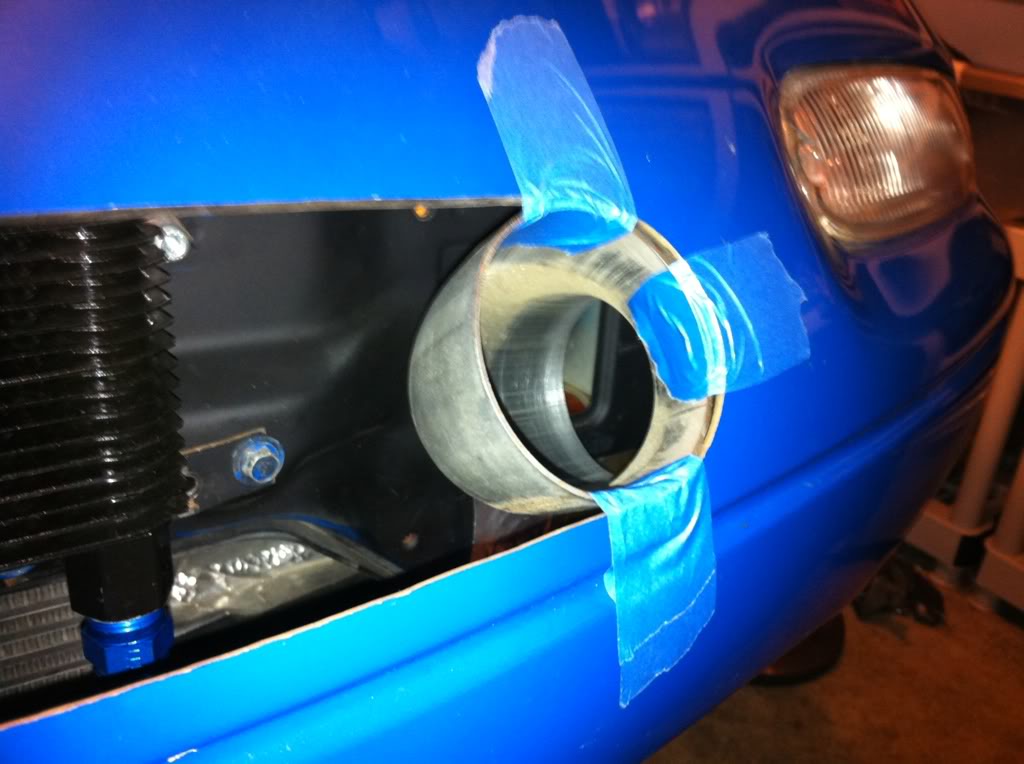
And no, I'm not going to just use the tape.
Anything I can think of is either too ugly or too complicated. I'm sure there's an easy way, just can't think of it.
Also, we have a large amount of rain here in Oregon, will this be a horrible idea, seeing as though these ducts are aimed up slightly? My other option is something like this:
But that requires buying the NACA ducts, something I don't want to have to do. These pipes were already in my parts bin.
Reply
 0
0

0

weld to a flange and then rivet/bolt to the bumper cover? You could also make a nice little duct for your oil cooler in the process.
edit: And by flange I mean one which backs that entire opening. Close of the sides creating a channel to the oil cooler. Powder coat black. Donezo.
The only thing you'd see are some rivets on the out bumper cover.
-Zach
edit: And by flange I mean one which backs that entire opening. Close of the sides creating a channel to the oil cooler. Powder coat black. Donezo.
The only thing you'd see are some rivets on the out bumper cover.
-Zach
Reply
0
0
Thread Starter
Joined: Oct 2005
Posts: 15,239
Total Cats: 1,417
From: Oregon City, OR
No access to welder. I am considering riveting small "L" shaped brackets to mimic the job of the tape in the pictures above. Hidden on the outside of the pipe and inside of the bumper obviously. Not very ideal or pretty though.
Reply
0
0

Elite Member

Joined: Jul 2005
Posts: 2,502
Total Cats: 146
From: Anacortes, WA
You need an air dam. Either a factory one or the Touge run one have proper vents that can be adapted to brake ducts with some ingenuity and limited tools.
https://www.miataturbo.net/showthrea...ghlight=bbundy
Bob
https://www.miataturbo.net/showthrea...ghlight=bbundy
Bob
Reply
0
0

Band clamp several 90* brackets to it and rivet them to the bumper from the inside? That's the easiest homedepot remedy I can think of... or break out the JB weld...
Reply
0
0

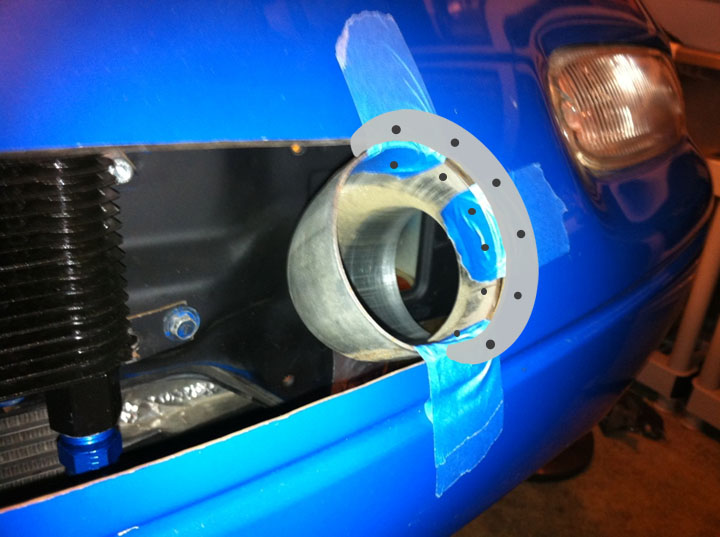
This is what I was thinking, no welding required. Just rivets. I was thinking you could do it with some strap aluminum or steel.
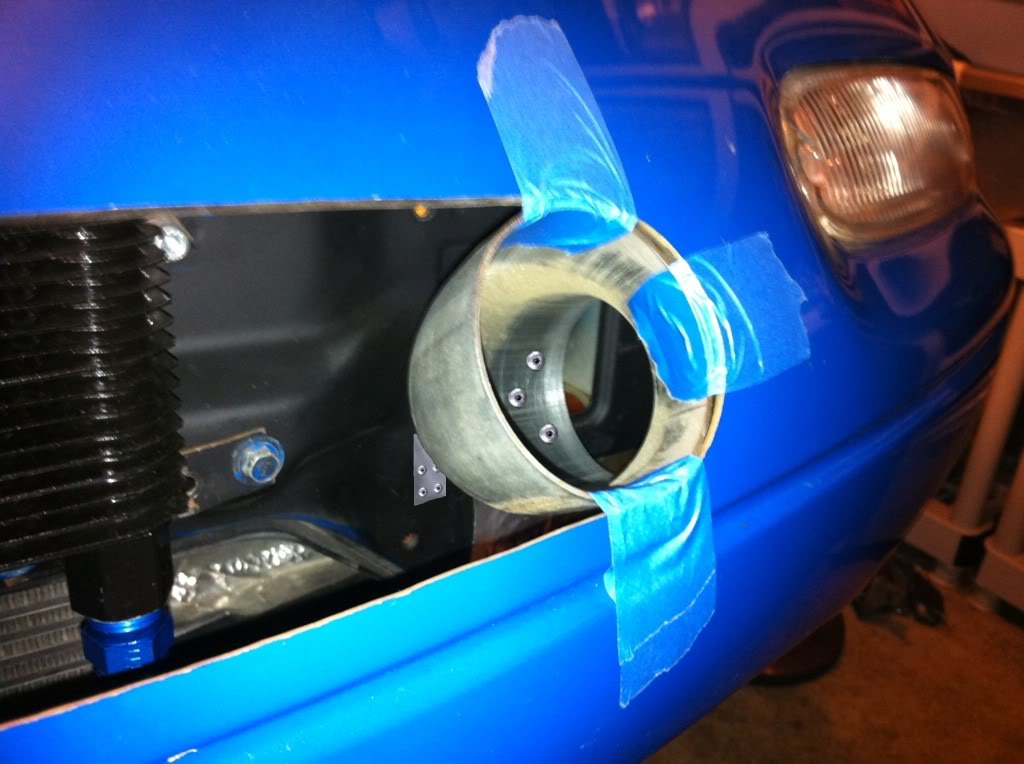
If the pictures dont make sense let me know and I will try and explain better. I think it could work pretty good and there wouldnt be any holes in your bumper cover.
Ryan
If the pictures dont make sense let me know and I will try and explain better. I think it could work pretty good and there wouldnt be any holes in your bumper cover.
Ryan
Reply
0
0

Those pipes look heavy. Are they steel?
Suggest you get some aluminum flanged air ducts from Aircraft Spruce, make a thin aluminum backing plate, and rivet it all together.
Aircraft Spruce Duct Flanges
Use some aluminum sheet/flashing, 0.065" should be fine, and make a backing plate. Rivet the backing plate to the bumper:

Attach the air duct to the backing plate:
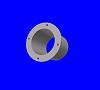
Paint it or leave au-natural.
Lighter solution, and no welding. Besides, rivets are cool.
Suggest you get some aluminum flanged air ducts from Aircraft Spruce, make a thin aluminum backing plate, and rivet it all together.
Aircraft Spruce Duct Flanges
Use some aluminum sheet/flashing, 0.065" should be fine, and make a backing plate. Rivet the backing plate to the bumper:
Attach the air duct to the backing plate:

Paint it or leave au-natural.
Lighter solution, and no welding. Besides, rivets are cool.
Reply
0
0

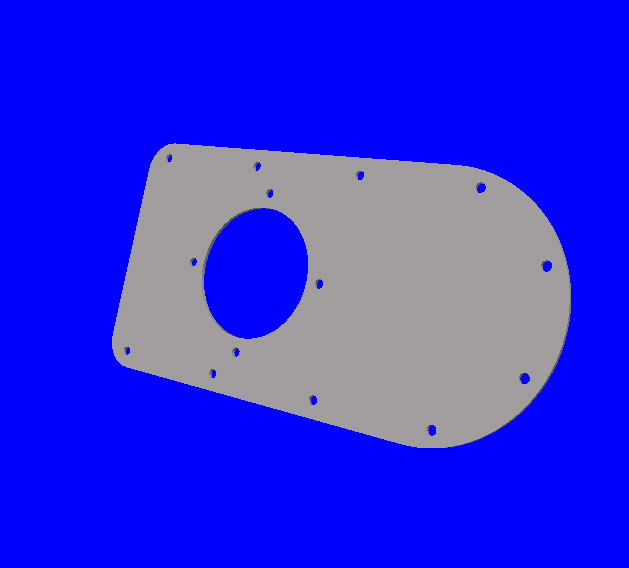
Buy a pvc drain flange of the right size glue the pipe to the flange and mount the flange to the under side of the bumper using rivets from the out side functional and cheap. You can buy flanges very similar to the lower picture above for like $4 at home depot.
Reply
0
0

Heavy aluminum flashing in a partial circle flange, with tabs bent along the inside radius to rivet to the outside of the mouth of the inlet. Flange could attach inside or outside the bumper cover, but outside might offer better resistance to the air pressure.
Reply
0
0

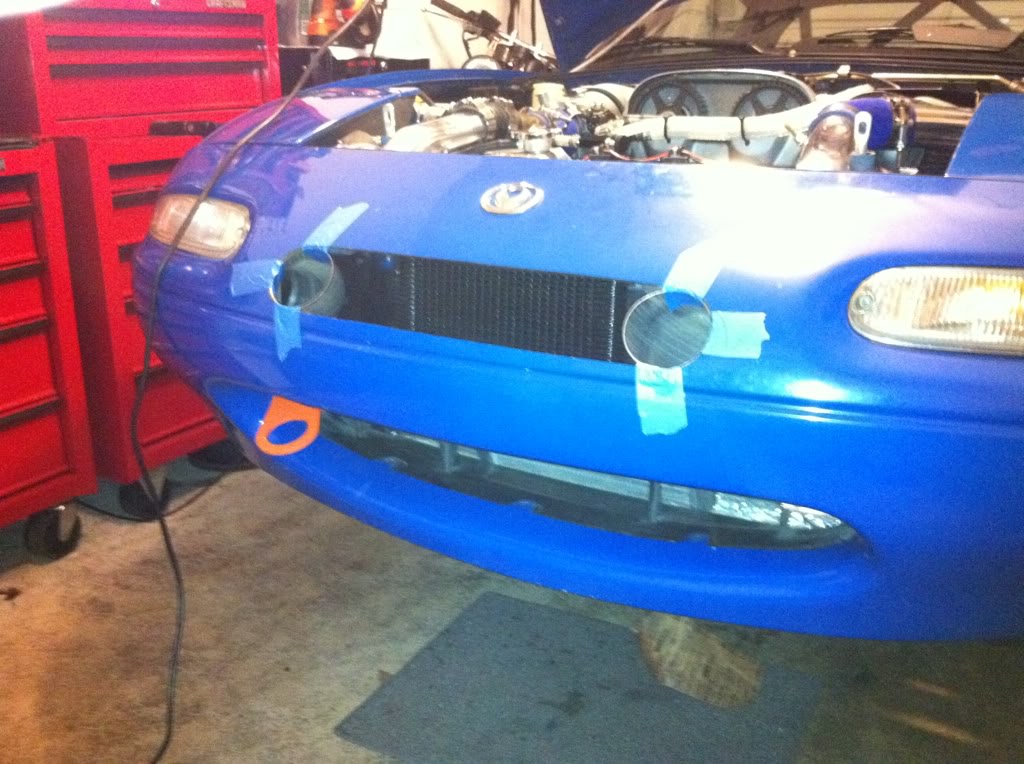
Am I the only one who thinks the tubes should be mounted in the lower hole? I would think the length of the tubing would make a difference. By installing them lower it would allow you to make better shouting in the upper hole. Having the holes lower will also give better air flow as well.
Have a great day,
Jared
Have a great day,
Jared
Reply
0
0
Thread Starter
Joined: Oct 2005
Posts: 15,239
Total Cats: 1,417
From: Oregon City, OR
Meh, the upper hole has to go down a bit to the upper a-arm, the lower hole has it going up a bit to the a-arm.
Bob, I'm definitely getting an air dam soon, my other option is a 3" HD lip with two of these in there:
http://www.summitracing.com/parts/AAF-ALL42140/
HD is apparently not carrying the classic black edging anymore, only stuff I found was brown and had stakes built in instead of holes to hammer stakes through. I need to try Lowes.
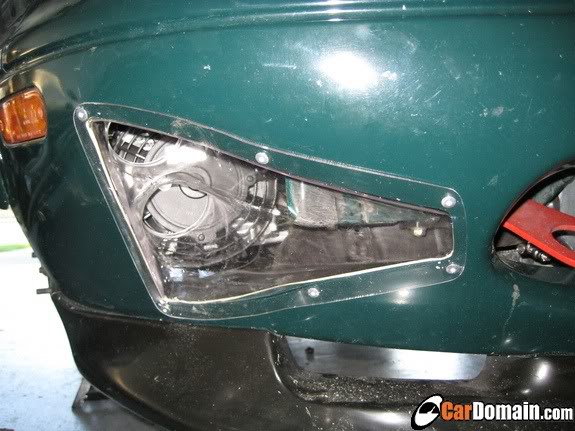
Honestly if I wanted to cut a hole I'd like to do something like the picture of the green car I posted, which is $100 in vents.
I like RyanRaduechel's solution, it doesn't involve cutting the bumper since these are fairly temporary until I do get some proper ducts on an air dam or buy some.
These are steel pipes, fairly heavy yes, but its what I have for now. They'll be painted black for looks/rust.
Thanks all, this gives me some stuff to think about and work on.
Bob, I'm definitely getting an air dam soon, my other option is a 3" HD lip with two of these in there:
http://www.summitracing.com/parts/AAF-ALL42140/
HD is apparently not carrying the classic black edging anymore, only stuff I found was brown and had stakes built in instead of holes to hammer stakes through. I need to try Lowes.
Honestly if I wanted to cut a hole I'd like to do something like the picture of the green car I posted, which is $100 in vents.
I like RyanRaduechel's solution, it doesn't involve cutting the bumper since these are fairly temporary until I do get some proper ducts on an air dam or buy some.
These are steel pipes, fairly heavy yes, but its what I have for now. They'll be painted black for looks/rust.
Thanks all, this gives me some stuff to think about and work on.
Reply
0
0

What I'm wondering is how you mount these without interference at full lock. I was gonna put mine in the lower hole, and I tried a bunch of placements for the hoses...when I turned the wheel they would hit the control arm.
Or maybe I just suck.
Or maybe I just suck.
Reply
0
0
Thread Starter
Joined: Oct 2005
Posts: 15,239
Total Cats: 1,417
From: Oregon City, OR
Look at 949's 11" brake product. His picture shows his ducting, zip tied about an inch past the sway bar end link, not directly to the turning spindle. Somethings wrong if you're at full lock on the track.
Reply
0
0

Zip-ties to the sway works for me - but I bought the kit with aluminum feed shrouds that bolt to the spindle.
1 thing I HAVE to add, and soon, is a screen to prevent rubber marbles getting blown into the rotor - I don't want the crap to catch fire on me, I have enough flames already, don't need the real ones.
1 thing I HAVE to add, and soon, is a screen to prevent rubber marbles getting blown into the rotor - I don't want the crap to catch fire on me, I have enough flames already, don't need the real ones.
Reply
0
0


__________________


Reply
0
0
Thread Starter
Joined: Oct 2005
Posts: 15,239
Total Cats: 1,417
From: Oregon City, OR
The rest of the pictures here:
http://www.supermiata.com/forum/show...28&postcount=5
http://www.supermiata.com/forum/show...28&postcount=5
looks like that last zip tie around the plastic engine shroud is to keep from tire rub?
Ducting comes in tomorrow, I'll be doing something similar, although I don't have room on either side of my mouth opening. Not enough to make it turn 90* to go over to the sway bar at least.
Reply
0
0


