

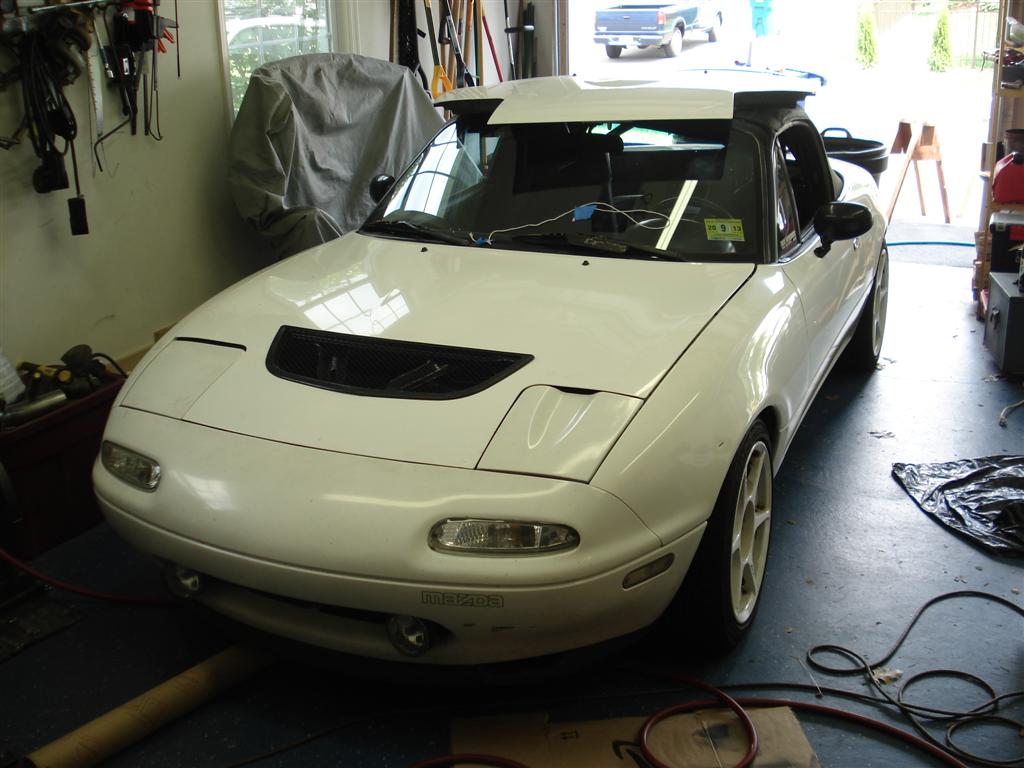
EVO Extractor hood vent on Miata


Thread Starter
Junior Member
iTrader: (5)
Joined: Oct 2011
Posts: 400
Total Cats: 23
From: San Diego, CA
Reply
 0
0

0


Thread Starter
Junior Member
iTrader: (5)
Joined: Oct 2011
Posts: 400
Total Cats: 23
From: San Diego, CA
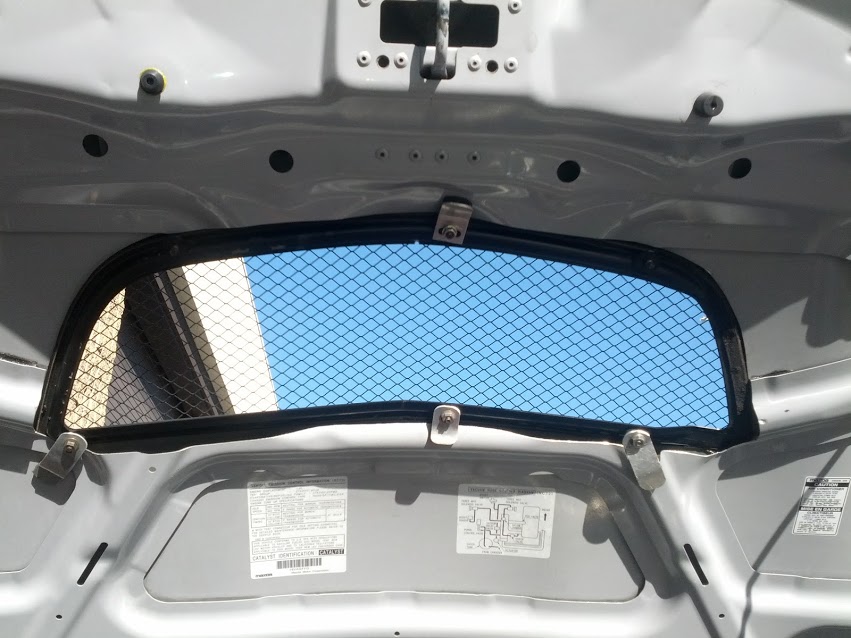
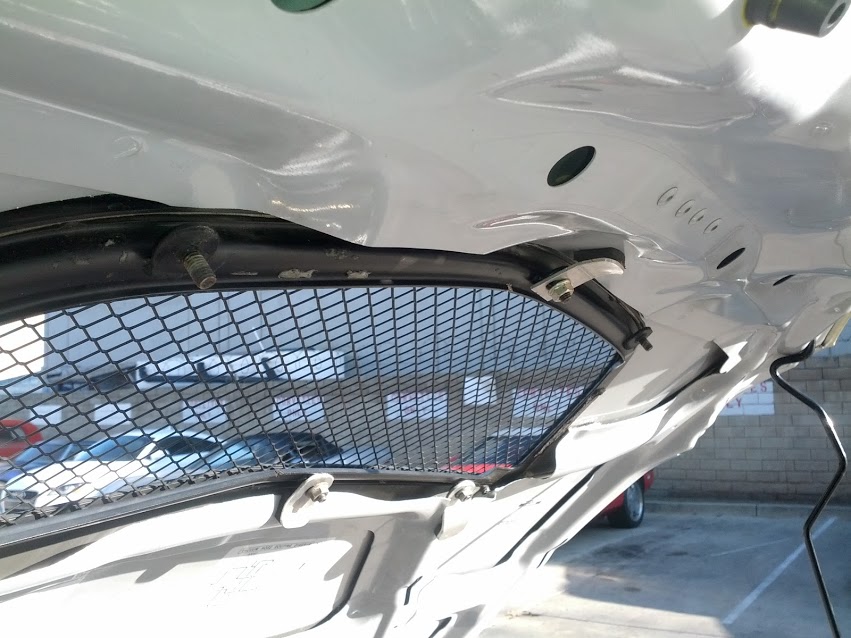
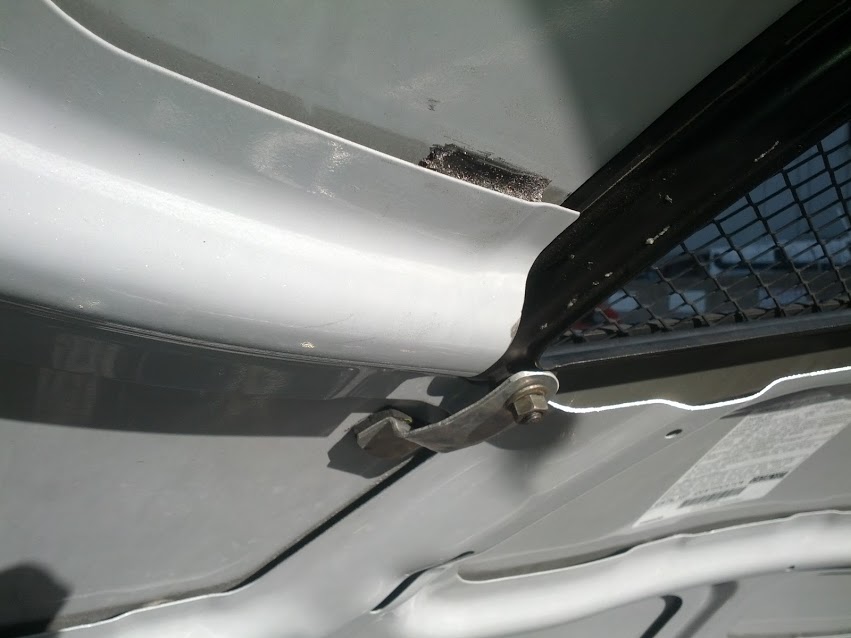
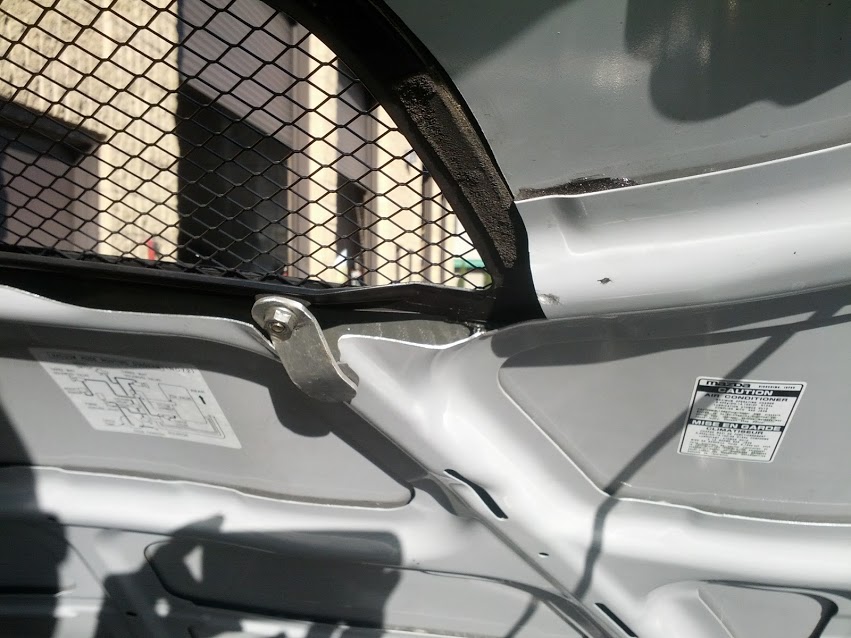
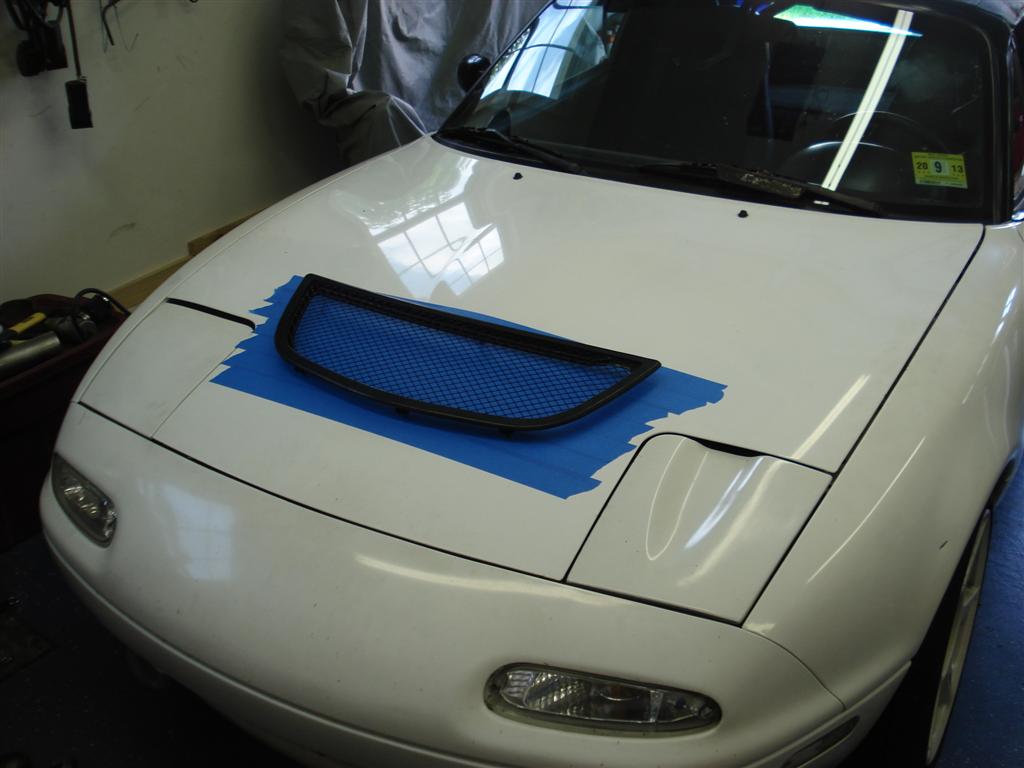
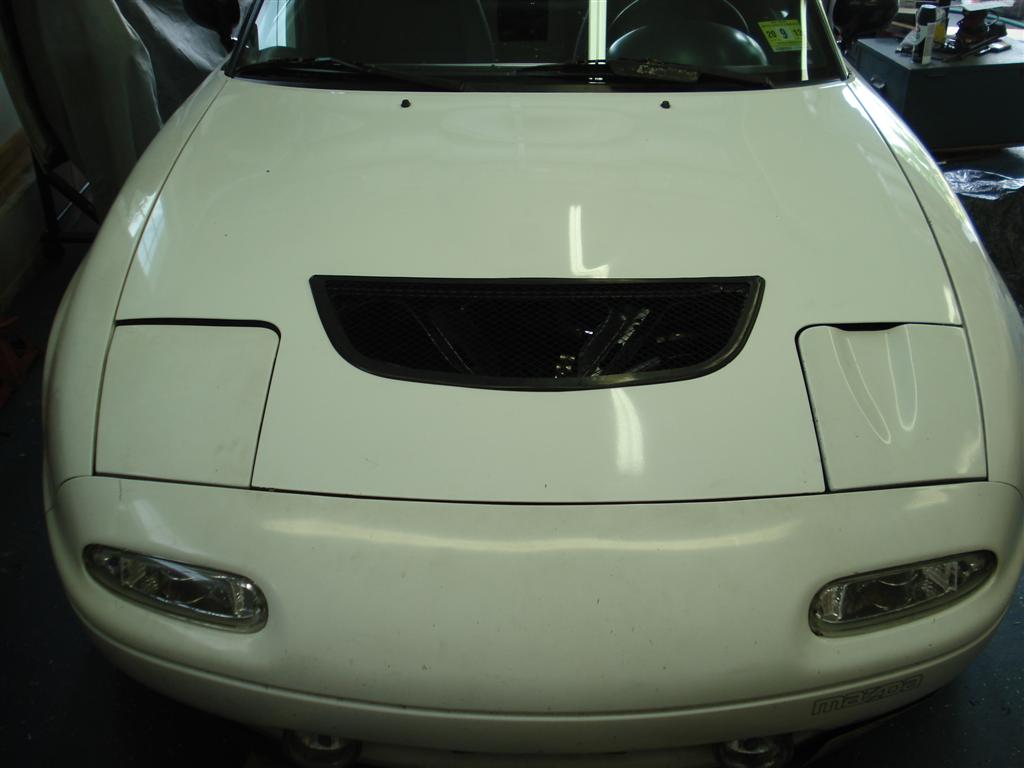
As seen in the first and second picture, there are 6 non equally spaced studs that are attached to the vent. I fabricated 4 aluminum brackets and bent them to contour the hood where they were at. I then glued with yellow 3M a piece of rubber to the brackets to act as feet pads between them and the hood. As you can see I didn't even bother using two studs from the front. It hasn't fallen off yet 
Reply
0
0

Junior Member
Joined: Nov 2010
Posts: 167
Total Cats: 2
From: Chicagoland
Looks nice. I just can't decided gt500 or Evo. Cost is same $70. I do like the way the Evo one attaches has studs. Gt500 just snaps in?? which I think could be a pain in the *** to attach. Any ideas or comments between the two?
Reply
0
0
This velcro from 3M is rated to 220 degrees. Might help mounting either one.
Reply
0
0
Evo. The Gt500 vent is way too wide, it's also hard plastic and cannot flex.
Reply
0
0
the adhesive holding up to temperature on a track in the middle of summer would be my only concern. Wouldn't want it melting while out there. I know everything else under my hood is a million degrees when I'm done with a session.
Reply
0
0
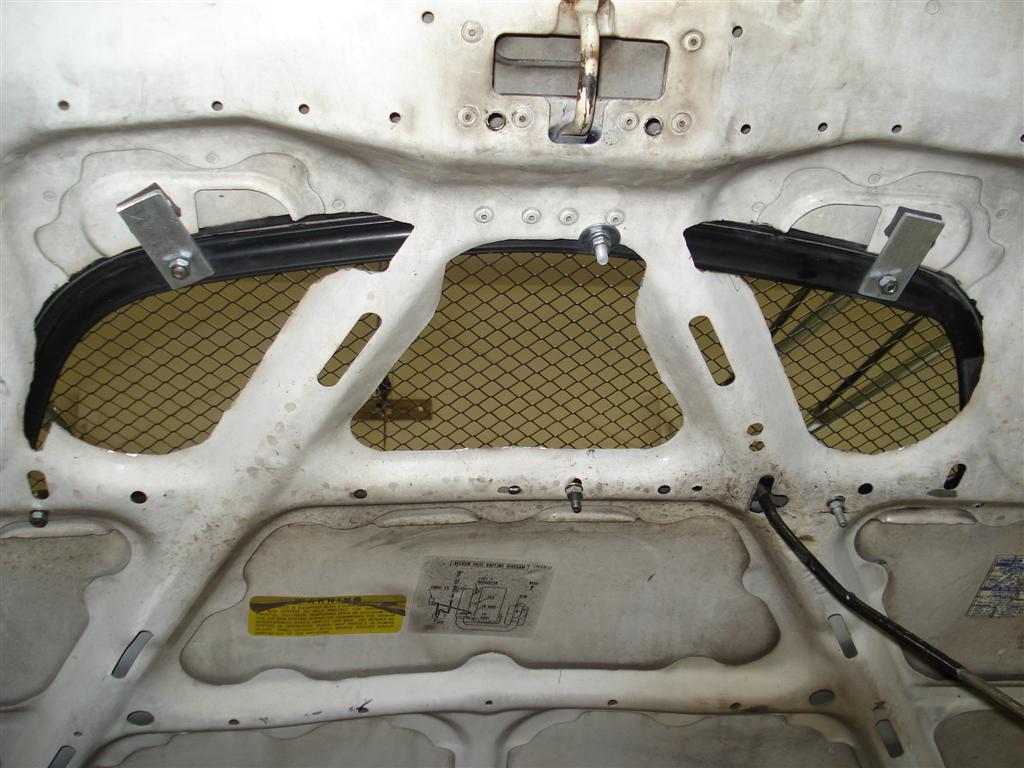
I did find a spare NA white hood and a vent.
I left the bracing because it left me material to directly bolt the vent onto, and the NA hood does not have the extra area for stiffness that the NB hood has due to the popup headlights. I may cut out the obvious bracing and weld in some smaller aluminum tubes.
I did have to extend 3 of the 6 studs so they would protrude thru the bracing and have enough thread for a washer and locknut.
Lots of cutting with my angle grinder and dremel. About 16 hours.
Thanks slmhofy for this idea and thread!
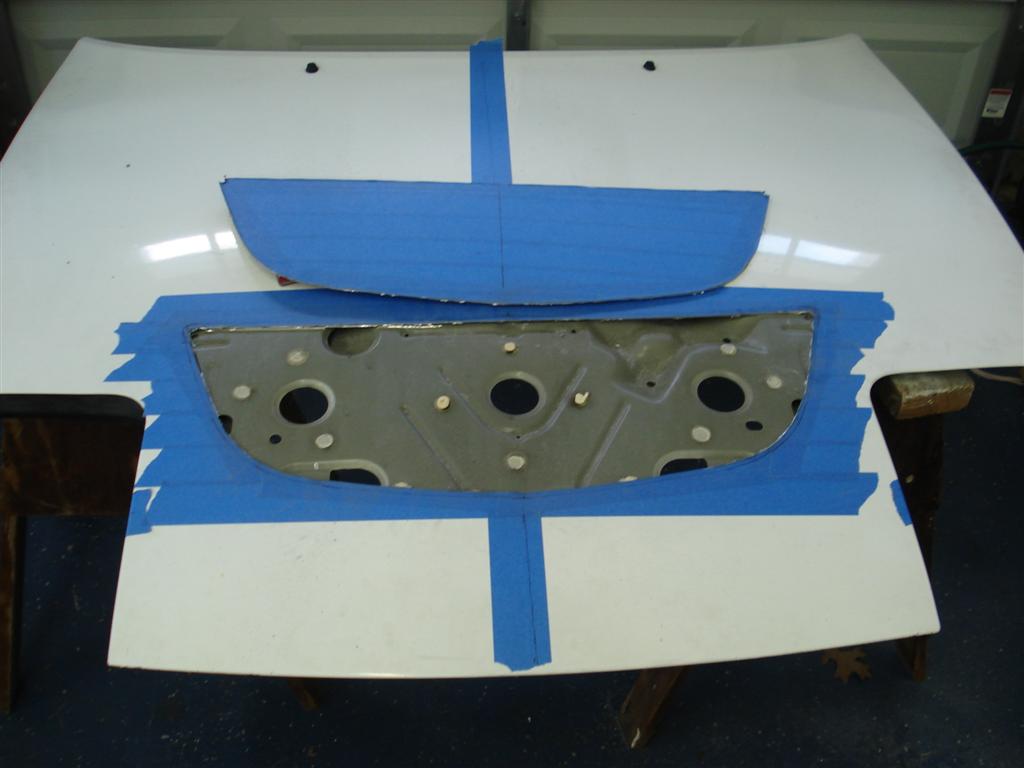
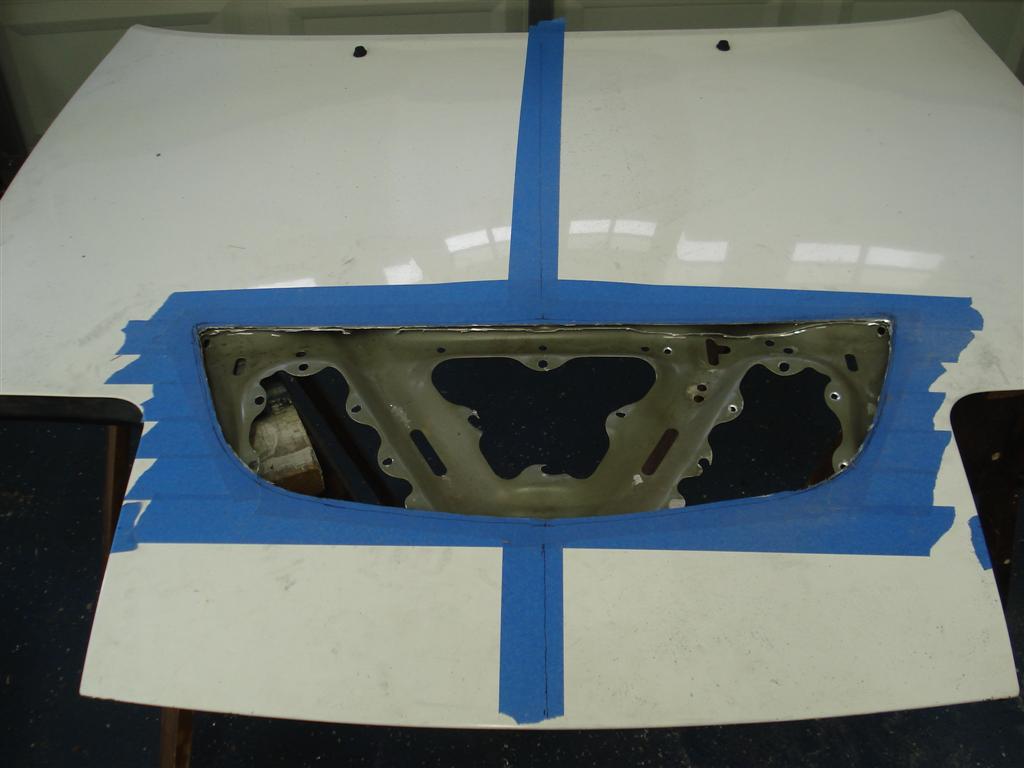
Reply
0
0
Thread Starter
Junior Member
iTrader: (5)
Joined: Oct 2011
Posts: 400
Total Cats: 23
From: San Diego, CA
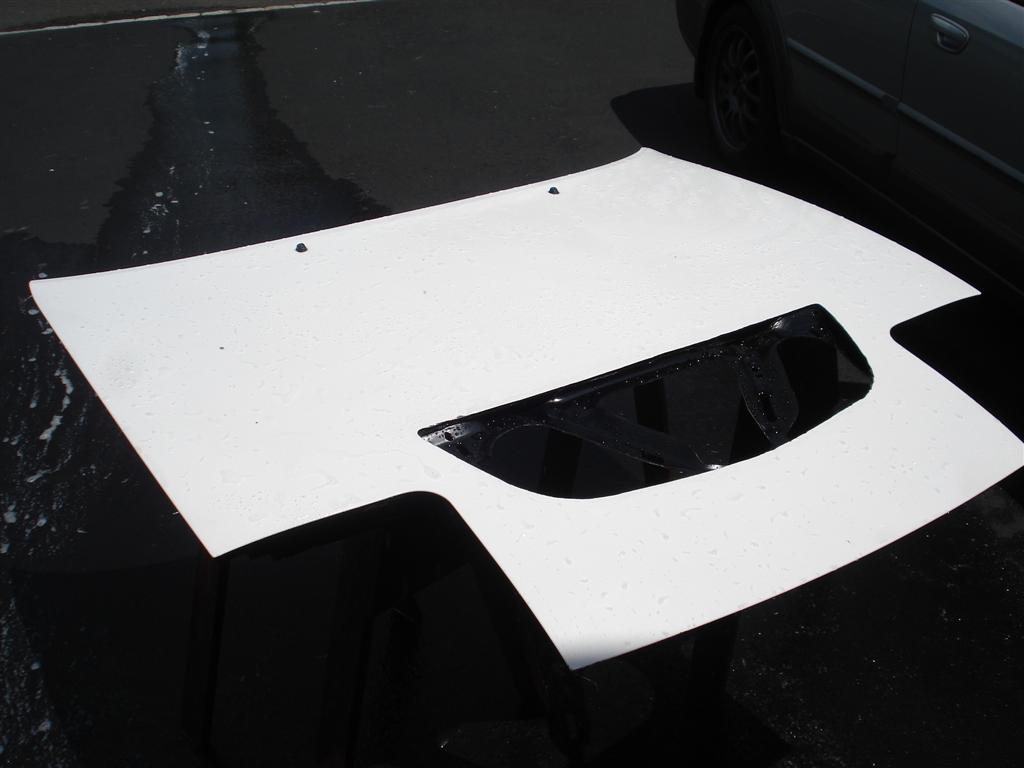
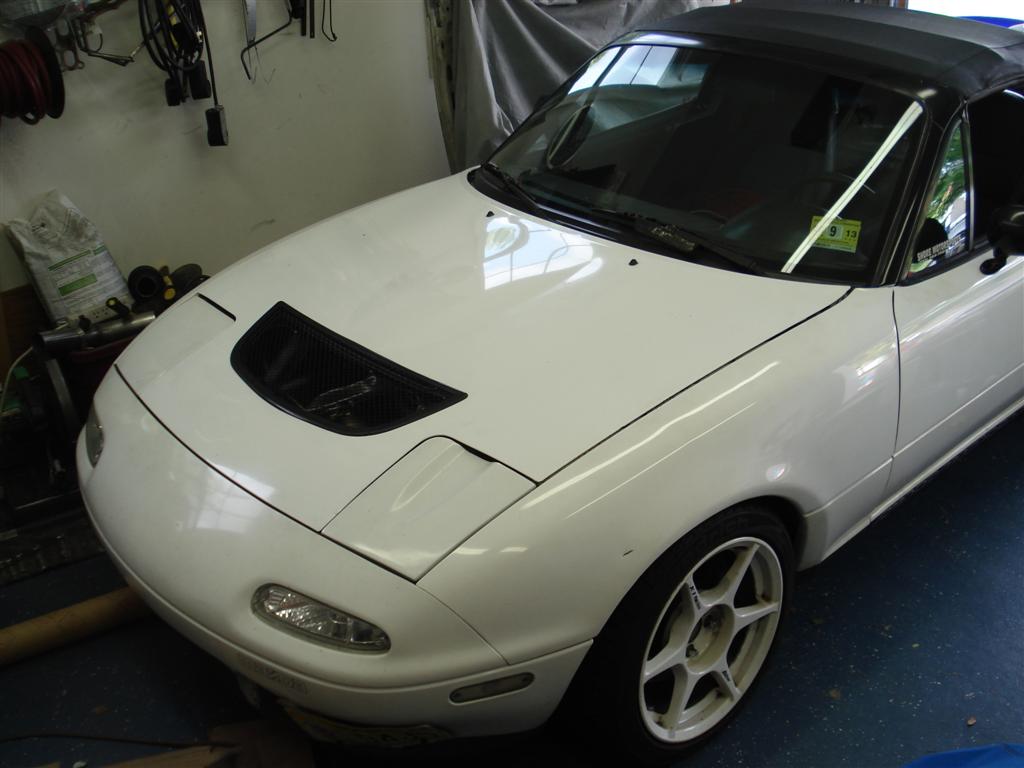
UGHH!! Black and white always looks so sick! I like a lot.
And it looks like it still provides a pretty good amount of support from between the vent and the corner cut outs for the lights.
Is this your KL car?
And it looks like it still provides a pretty good amount of support from between the vent and the corner cut outs for the lights.
Is this your KL car?
Reply
0
0
Thanks! Yeah there still is the thick support that border the edge, intact between the edge of the vent and the headlight lid cutouts. The hood is still very stiff. Yes, this is my KL car. I only gots the one.
Reply
0
0


Woah bro, granted lots of measuring, but with angle grinder the cutting itself should take... half an hour..
Vent looks good though!

Last edited by ThePass; Jun 1, 2014 at 11:19 PM.
Reply
0
0
Thanks, it works well. Lots of heat waves blocking my view when I stop.
Cutting the top most layer out with a .045" cutoff wheel on my angle grinder took 5 minutes tops. The lower layers were maybe 8 minutes because of the depth.
It took an hour or two to draw a symmetric hole on the masking tape. If I were intelligent I would have Faroed the thing at work (I had all winter) and made a template with the mounting holes but I didn't, so I did it old school. Laying it on the tape and drawing a sharpie line around it, and cutting .200" on the inside of the sharpie line. The majority of the time was dremeling the corners trying to figure out why it wasn't laying flat. Making it pretty n' such. Then I had to buff out the overspray from painting the area black, etc. My hood is now whiter than the rest of the car...time to buff the rust I guess.
It took me two days, and I work about 8 hours a day. I am probably the slowest worker though. Crazy where the time goes.
Reply
0
0

Thread
Thread Starter
Forum
Replies
Last Post
Frank_and_Beans
Supercharger Discussion
13
Sep 12, 2016 08:17 PM


