

BP + KMiata BMW ZF6 Pictorial Thread (500whp+ drivetrain ITT)


Thread Starter

Joined: Nov 2006
Posts: 15,442
Total Cats: 2,106
From: Sunnyvale, CA
My last project on Acamas was a BMW ZF6 swap. I don't think I have seen a big documentation thread on that swap, so this is that. I tried to write this while I was doing the swap, so you could use this as supplementary instructions as well.
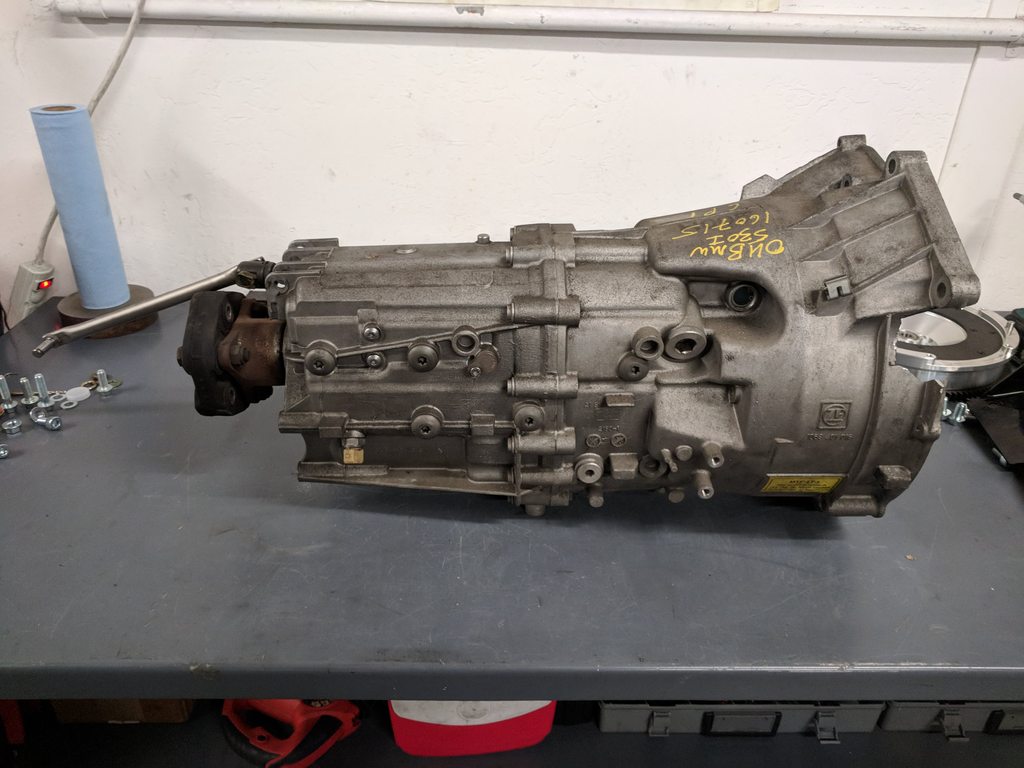
From the beginning, prepping the trans. My box came from a 2004 530i, about $600 from a local dismantler.I ordered a fresh release bearing and steel pivot pin from Bimmerworld and an ACT clutch and disc from David at KMiata. Everything else was included with the kit, save for the exhaust which was custom-built.
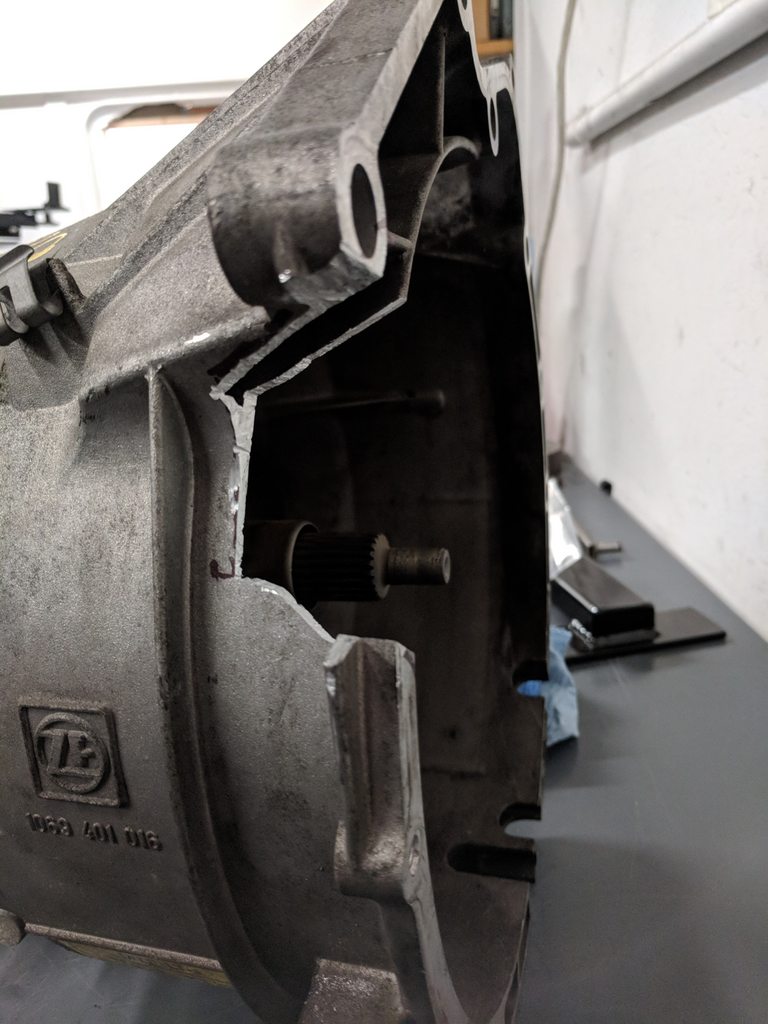
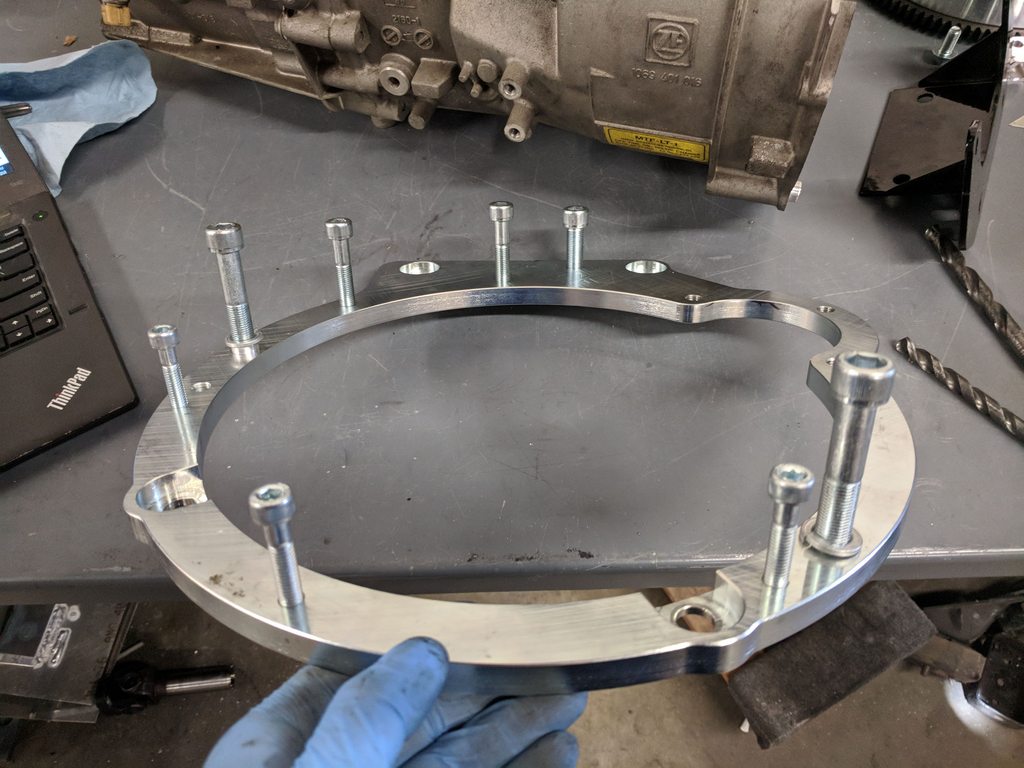
I started with trans prep. In order to clear the Miata starter, the BMW trans has to be notched. Marking the trans for the notch starts with installing the two dowel pins in the adapter plate and bolting the trans up.
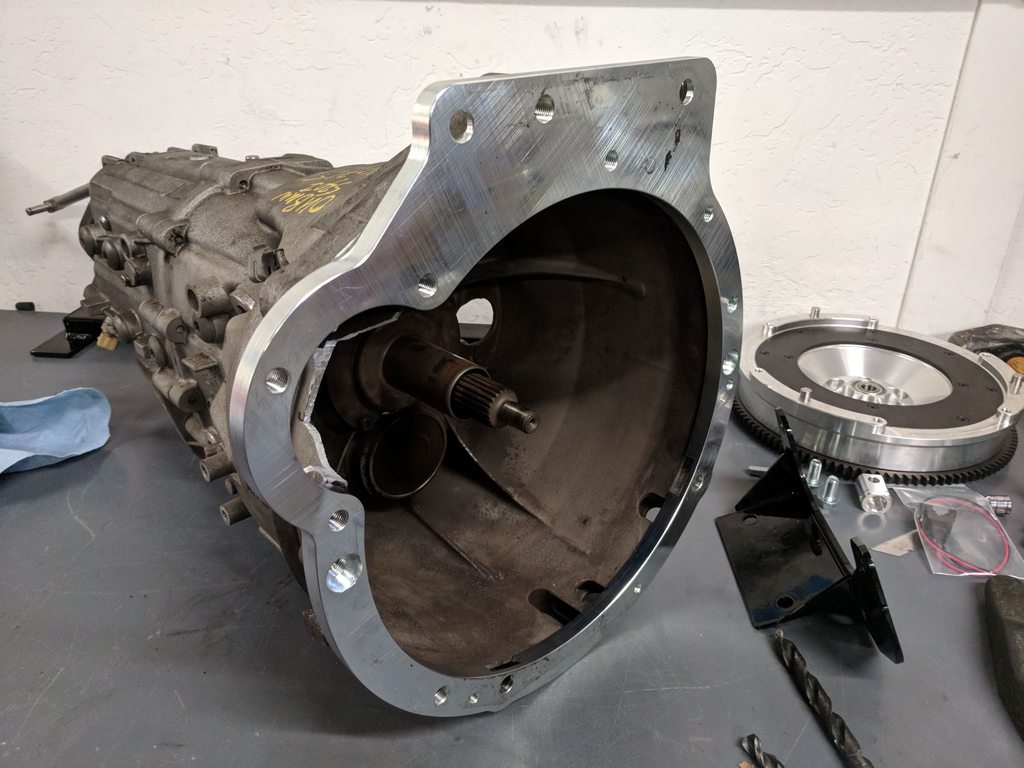
The starter bolts into the adapter plate from the engine side, which is opposite of how Mazda does it, so the threads in the starter motor have to be drilled out. I used a ~0.400"-ish drillbit (I think I had a Z drill bit laying around which was 0.413"). You don't want to go too large here or else the starter location gets sloppy. Mark, cut, test fit, repeat ad nauseum until it fits. Go slow, you only get one shot.
Once this is done, the adapter can get bolted into the car. The adapter should be located on the OEM dowels entirely. I ran into a small interference issue with the bolt that retains the factory transmission spacer/shim/thing, so getting that located along with the adapter plate can be a bit of a bear. There are four M12 bolts (19mm head) that go in from the trans side, and two M10 bolts that go in from the engine side (these run through the OEM dowel pins).
Next thing is the starter. It bolts up to the adapter plate using two M10 bolts from the engine side. The bolts are different lengths and the starter mounting boss heights are different as well. Make sure these bolts don't sit proud of the adapter plate on the transmission side or else they will foul the transmission.
More trans prep. The shift linkage is (obviously) different between an E60 5-series and the Miata, so the old shift linkage comes off. The OEM selector joint also gets swapped for the KMiata one, which rotates the shifter so it's centered in the car. Very nice detail there. I installed the new shifter linkage with the trans out of the car as well since access is very tight once the trans is installed.
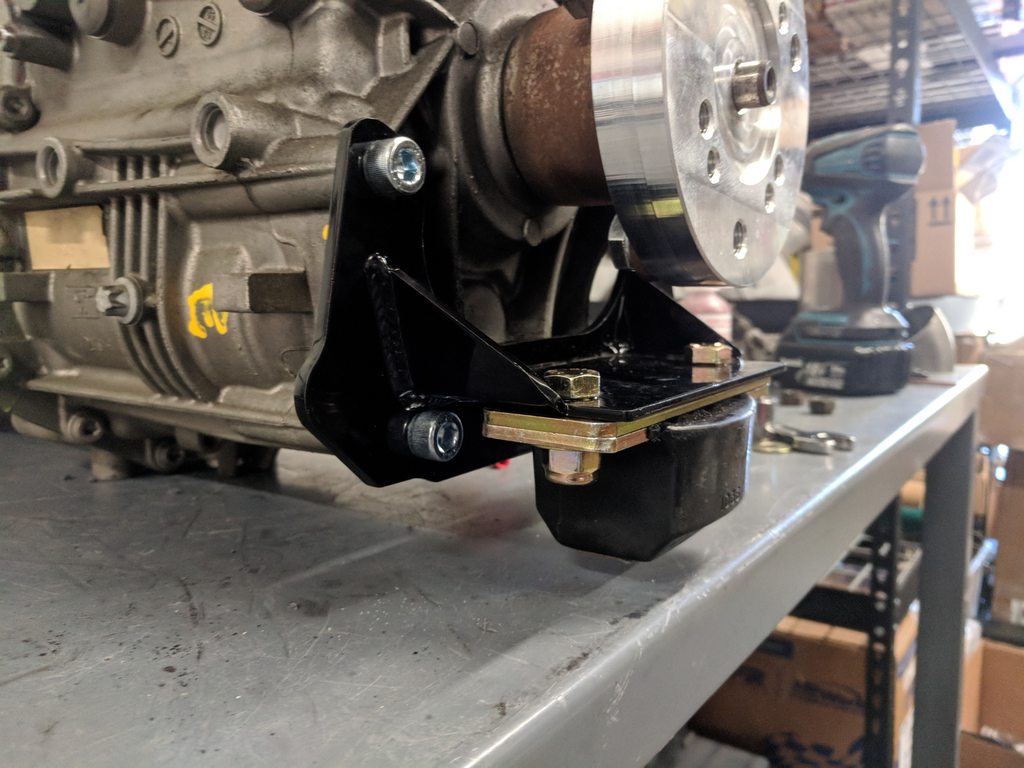
The OEM trans mount and its mounting plate gets unbolted and replaced with the KMiata mount.
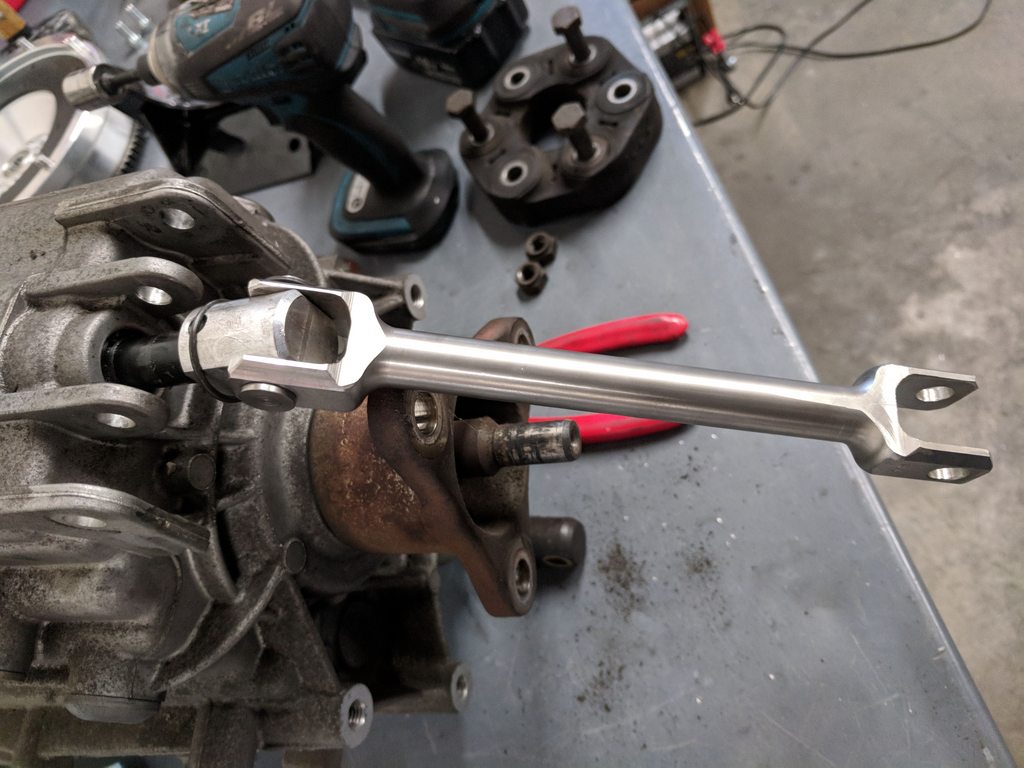
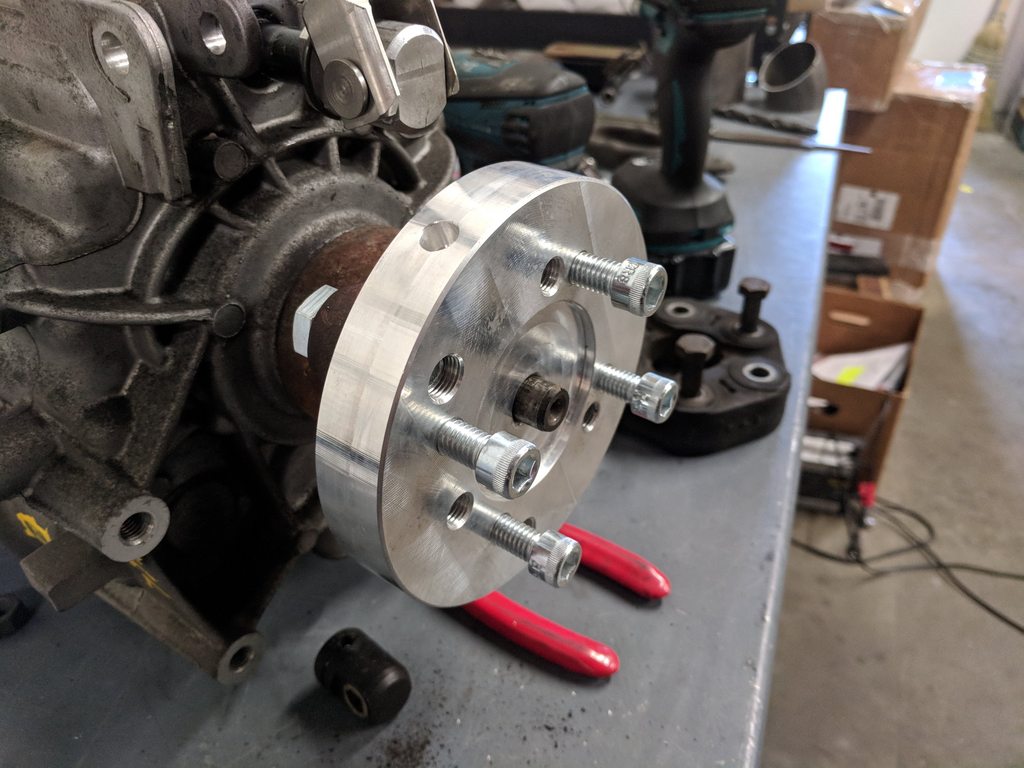
The driveshaft adapter should also be bolted up now. Pretty straightforward.
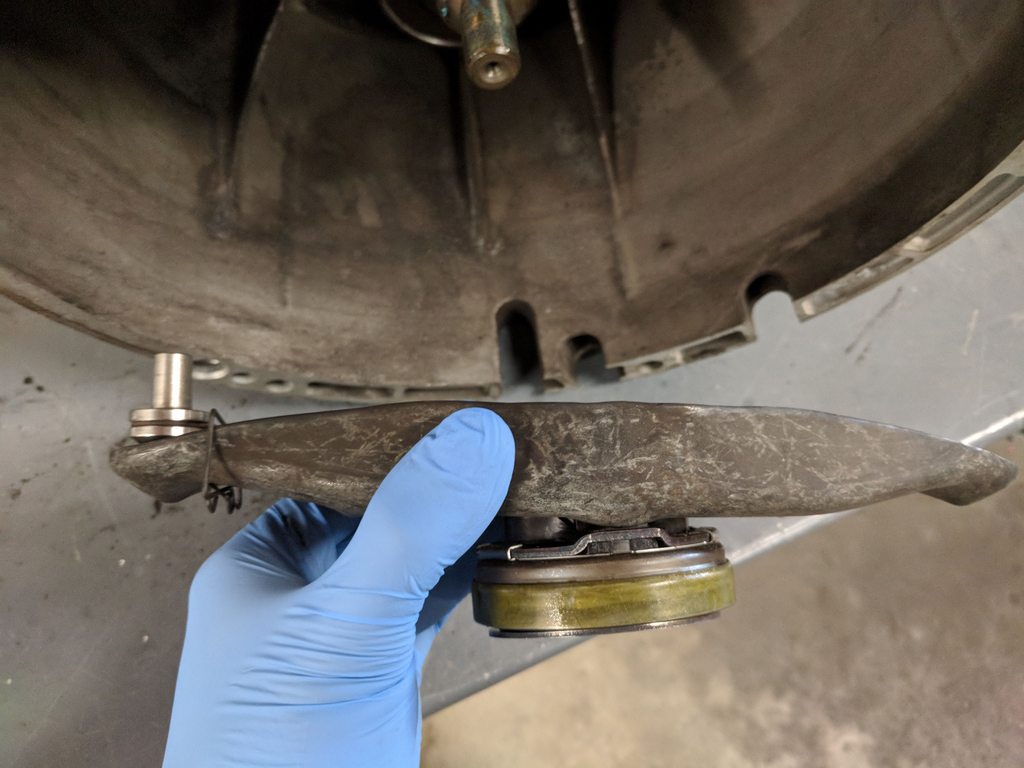
Finally, the new release bearing and Rogue pivot pin are installed. The old plastic pin just pops out, I used a punch and hammer and tapped it out. The steel pin just rests in the same place. Leave the slave cylinder uninstalled for now. The bleed procedure requires that it be uninstalled during bleeding.
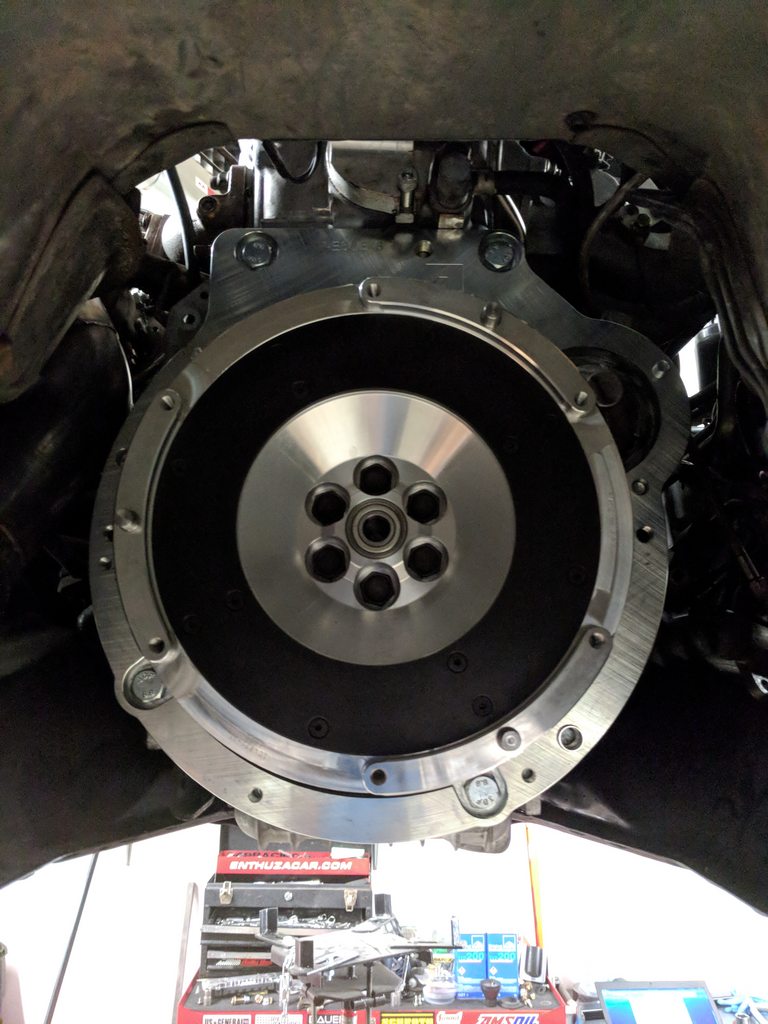
Last is the KMiata flywheel and ACT clutch, same procedure as an OEM clutch/flywheel.
Installing the trans is the same process as installing a 5 or 6sp. The motor has to be tipped backwards to get enough clearance to line everything up, so get that done before you start or you'll struggle forever with it.
The trans is held in with eight bolts. They are all different sizes and in different places, and I am so used to the 11 bolts of the Miata trans that I made myself a cheat sheet to make sure I got them all installed:
� Three M8s at 9pm, 7pm, 5pm.
� Two M10s at 11pm, 12pm*
� Three M12s at 4pm, 10pm, 1am*
� 12pm and 1am are very difficult to access. Do not attempt without 3/8" u-joint, at least 36" of extension.
Once this is done, it's time to get the frame rails installed. Pull your seats out, pull up the carpets for clearance, get yourself some good safety goggles (goggles, not glasses, ask me how I know). Location is important on the frame rails, so make sure you read the instructions. On my NB2, I had to cut two of the mounting studs for the factory butterfly brace out of the way. The hole that is right above the trans mounting plates is not used, so don't get cute and try to mark/drill it from the top only to find out it fouls the trans crossmember like I did.
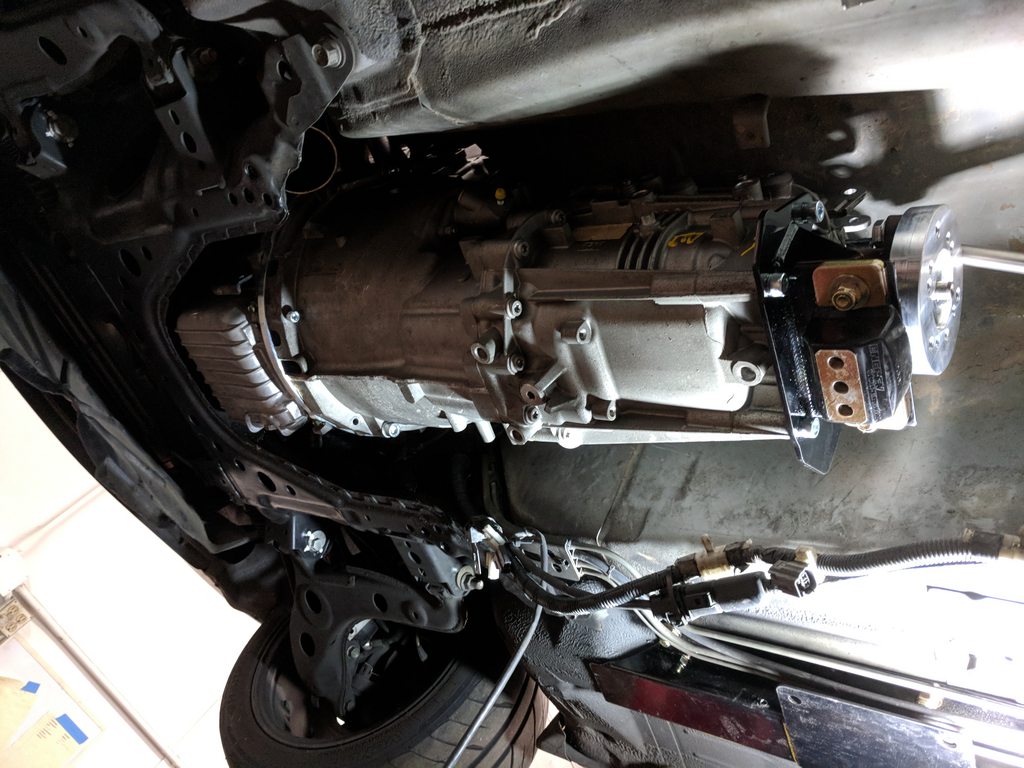
Once the frame rails are up, the trans crossmember can go into place. The poly mount supplied with the kit is a great option for weekend or race cars, but the NVH was pretty wild IMO. trans crossmember setup is adapted from the V8R T56 kit, so the poly mount can be swapped for an OEM-style F-body T56 mount.
Once the trans is fully bolted up, the shifter can go in. Assemble per the instructions and connect from the bottom. Finish with the driveshaft.
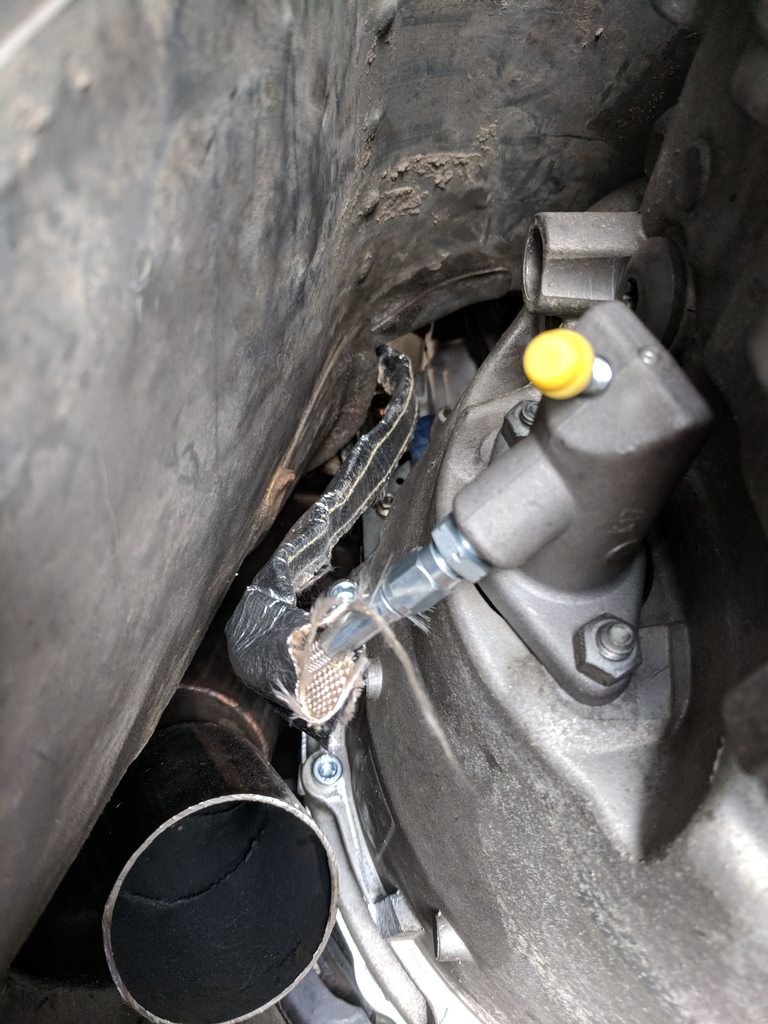
On to the home stretch Up to the top for clutch bits. The OEM master comes out and the adapter bracket for the new Wilwood master goes in. There is a little trimming to be done around the firewall, but 30 seconds with a rotary tool and it's done. The new clutch line goes straight from the master to the slave, which is now right above the exhaust. I ran that entire line through some Thermotec sleeve as a precaution.
Bleeding the slave is no joke. You really do need to have it off the trans to properly bleed it. David's instructions have a great step-by-step for this process, and I would suggest following them to the letter. Once it�s bled, you can install it.
All in all, this swap was pretty �easy�. If you can pull your own transmission, you can install this kit. Kudos to David for making it happen.
From the beginning, prepping the trans. My box came from a 2004 530i, about $600 from a local dismantler.I ordered a fresh release bearing and steel pivot pin from Bimmerworld and an ACT clutch and disc from David at KMiata. Everything else was included with the kit, save for the exhaust which was custom-built.
I started with trans prep. In order to clear the Miata starter, the BMW trans has to be notched. Marking the trans for the notch starts with installing the two dowel pins in the adapter plate and bolting the trans up.
The starter bolts into the adapter plate from the engine side, which is opposite of how Mazda does it, so the threads in the starter motor have to be drilled out. I used a ~0.400"-ish drillbit (I think I had a Z drill bit laying around which was 0.413"). You don't want to go too large here or else the starter location gets sloppy. Mark, cut, test fit, repeat ad nauseum until it fits. Go slow, you only get one shot.
Once this is done, the adapter can get bolted into the car. The adapter should be located on the OEM dowels entirely. I ran into a small interference issue with the bolt that retains the factory transmission spacer/shim/thing, so getting that located along with the adapter plate can be a bit of a bear. There are four M12 bolts (19mm head) that go in from the trans side, and two M10 bolts that go in from the engine side (these run through the OEM dowel pins).
Next thing is the starter. It bolts up to the adapter plate using two M10 bolts from the engine side. The bolts are different lengths and the starter mounting boss heights are different as well. Make sure these bolts don't sit proud of the adapter plate on the transmission side or else they will foul the transmission.
More trans prep. The shift linkage is (obviously) different between an E60 5-series and the Miata, so the old shift linkage comes off. The OEM selector joint also gets swapped for the KMiata one, which rotates the shifter so it's centered in the car. Very nice detail there. I installed the new shifter linkage with the trans out of the car as well since access is very tight once the trans is installed.
The OEM trans mount and its mounting plate gets unbolted and replaced with the KMiata mount.
The driveshaft adapter should also be bolted up now. Pretty straightforward.
Finally, the new release bearing and Rogue pivot pin are installed. The old plastic pin just pops out, I used a punch and hammer and tapped it out. The steel pin just rests in the same place. Leave the slave cylinder uninstalled for now. The bleed procedure requires that it be uninstalled during bleeding.
Last is the KMiata flywheel and ACT clutch, same procedure as an OEM clutch/flywheel.
Installing the trans is the same process as installing a 5 or 6sp. The motor has to be tipped backwards to get enough clearance to line everything up, so get that done before you start or you'll struggle forever with it.
The trans is held in with eight bolts. They are all different sizes and in different places, and I am so used to the 11 bolts of the Miata trans that I made myself a cheat sheet to make sure I got them all installed:
� Three M8s at 9pm, 7pm, 5pm.
� Two M10s at 11pm, 12pm*
� Three M12s at 4pm, 10pm, 1am*
� 12pm and 1am are very difficult to access. Do not attempt without 3/8" u-joint, at least 36" of extension.
Once this is done, it's time to get the frame rails installed. Pull your seats out, pull up the carpets for clearance, get yourself some good safety goggles (goggles, not glasses, ask me how I know). Location is important on the frame rails, so make sure you read the instructions. On my NB2, I had to cut two of the mounting studs for the factory butterfly brace out of the way. The hole that is right above the trans mounting plates is not used, so don't get cute and try to mark/drill it from the top only to find out it fouls the trans crossmember like I did.
Once the frame rails are up, the trans crossmember can go into place. The poly mount supplied with the kit is a great option for weekend or race cars, but the NVH was pretty wild IMO. trans crossmember setup is adapted from the V8R T56 kit, so the poly mount can be swapped for an OEM-style F-body T56 mount.
Once the trans is fully bolted up, the shifter can go in. Assemble per the instructions and connect from the bottom. Finish with the driveshaft.
On to the home stretch Up to the top for clutch bits. The OEM master comes out and the adapter bracket for the new Wilwood master goes in. There is a little trimming to be done around the firewall, but 30 seconds with a rotary tool and it's done. The new clutch line goes straight from the master to the slave, which is now right above the exhaust. I ran that entire line through some Thermotec sleeve as a precaution.
Bleeding the slave is no joke. You really do need to have it off the trans to properly bleed it. David's instructions have a great step-by-step for this process, and I would suggest following them to the letter. Once it�s bled, you can install it.
All in all, this swap was pretty �easy�. If you can pull your own transmission, you can install this kit. Kudos to David for making it happen.
Reply
 10
10

10


Thread Starter
Joined: Nov 2006
Posts: 15,442
Total Cats: 2,106
From: Sunnyvale, CA
It would, but the hiccup is that it would have to be a swivel, since the other end of that line is a banjo fitting. As-is, it doesn't sit close enough to the exhaust to be a concern, and the little bit of heat sleeve negates any issues.
Reply
0
0

Thread Starter
Joined: Nov 2006
Posts: 15,442
Total Cats: 2,106
From: Sunnyvale, CA
It's actually not as bad as I expected it to be. If you have a small footwell, you might be able to make my standard upper downpipe work. No matter what, you'll have to build a custom lower downpipe with a flex joint that will clear the new trans crossmember.
Reply
0
0
Supporting Vendor

Joined: Sep 2012
Posts: 635
Total Cats: 322
Looks good, thanks for posting this. Nice to see a trans in this car that will easily handle the power.
He has one of our diff mounting kits installed.
He has one of our diff mounting kits installed.
__________________
KPower Industries
Home of the original KMiata Swap

K24 NC swap is coming in 2024! Learn more
info@kpower.industries
Follow us on Facebook and Instagram
KPower Industries
Home of the original KMiata Swap
K24 NC swap is coming in 2024! Learn more
info@kpower.industries
Follow us on Facebook and Instagram
Reply
0
0

Junior Member
Joined: Mar 2017
Posts: 197
Total Cats: 7
From: Manassas,VA
@Savington wondering if you would be able to provide some assistance with my ZF6 swap i am having issues with? https://www.miataturbo.net/suspensio...stions-110190/
I appreciated this thread getting to where I am now.
I appreciated this thread getting to where I am now.
Reply
0
0

Thread
Thread Starter
Forum
Replies
Last Post
KMiata
Suspension, Brakes, Drivetrain
236
Nov 30, 2018 11:37 AM


