

DIY bad ass transmission mount


Thread Starter
Newb
Joined: Nov 2009
Posts: 11
Total Cats: -3
From: Roseburg OR
Congratulations you've turbocharged your miata. Too bad you still can't race it because it shifts like ****. It's time to fix that.
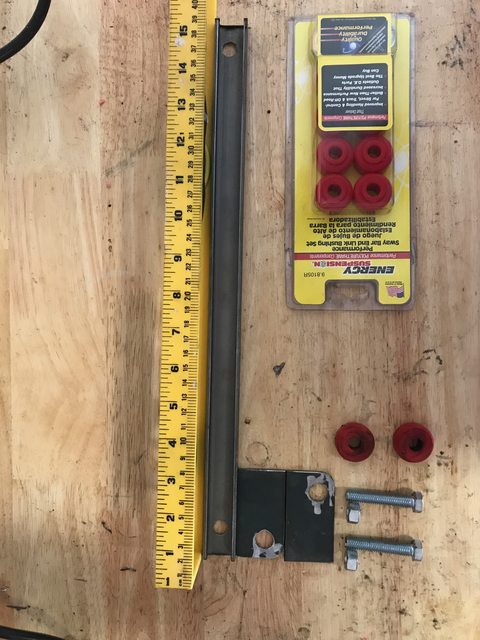
First, the parts list:
- steel C channel I guesstimated on size. See the picture below (optionally you can use angle stock instead)
- steel flat bar. I guesstimated on size. See the picture below
- some nuts and bolts. I got 3/8" ones because they were cheap at home depot. Get bolts that are like 2" long
- energy suspension endlink bushing pack. Autozone has them for cheap. Amazon has them here: http://amzn.to/2rOz3pe
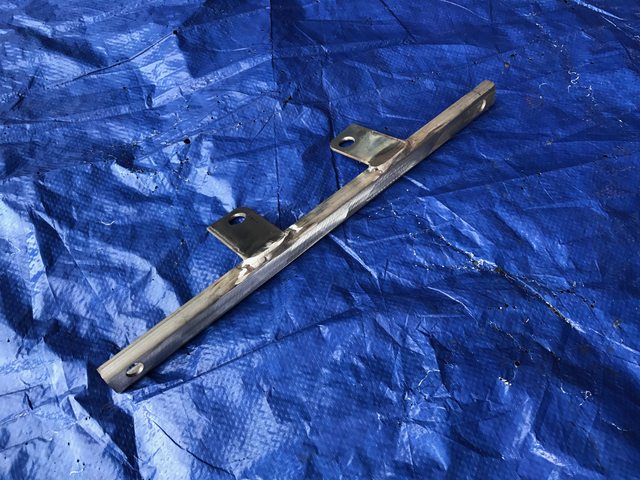
Here is a picture of all the parts:
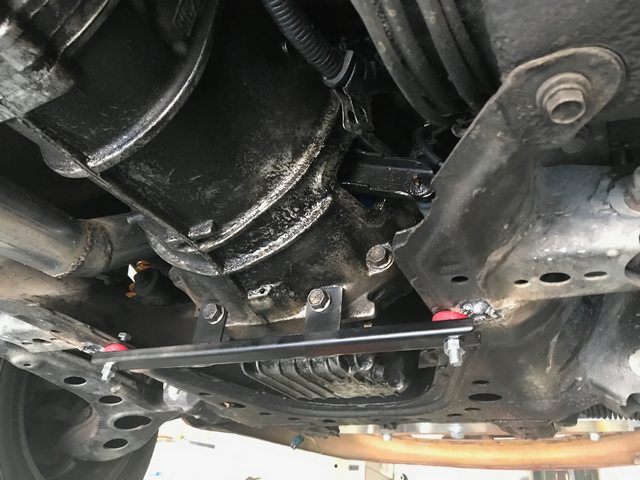
So you've got all of your parts. Now you're ready to get started. The first thing we need to do is get under the car and drill some holes. Look at this picture:
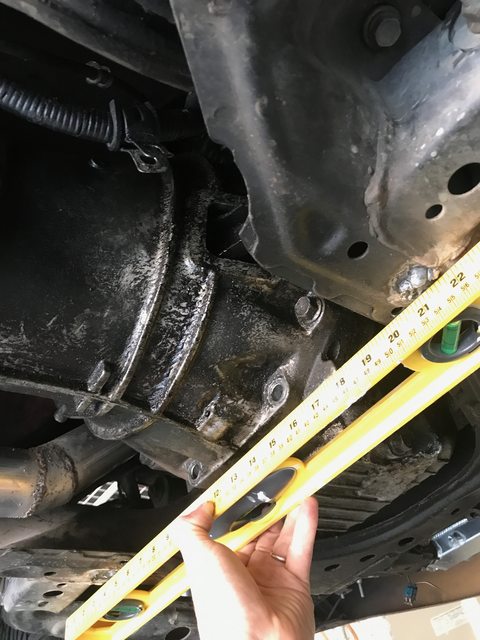
Notice how I've drilled some holes even with the rear of my transmission on thebody subframe of the car. (near the 6" mark on the left side of my yard stick and the 20" on the right). These need to be big enough to drop your bolts down through.
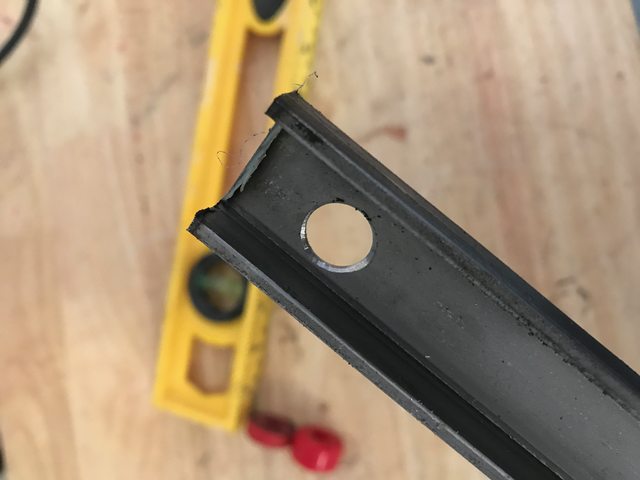
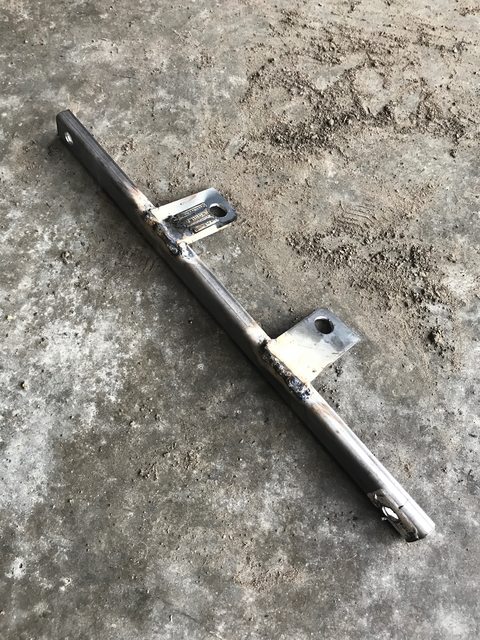
Next, cut a piece of C channel to approximately 15 1/4" long, you can see that in this picture already done:
Drill some holes in the ends of the C channel, hold it up to your holes that you drilled under the car and make them line up. Something like this:
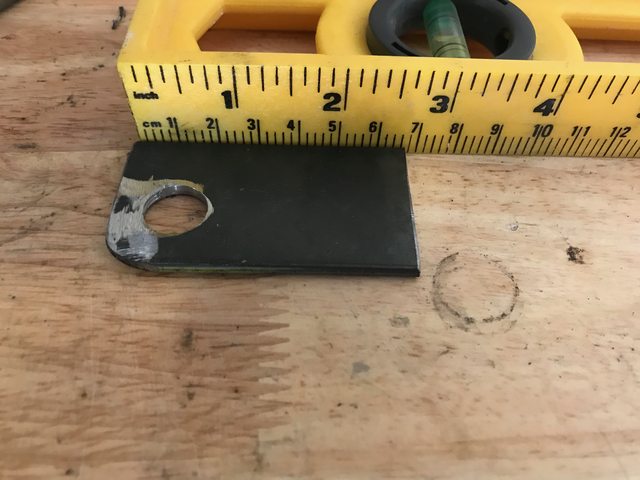
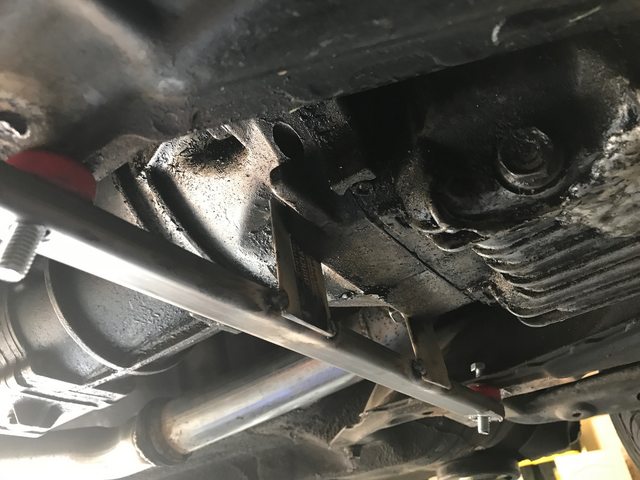
Next, cut 2 pieces of flat bar to about 2 1/2" long. Grind the edge round (it needs to sit next to the transmission when you're done, you'll see.) Drill a hole in the corner towards the edge that you rounded, and drill it a bit larger than your bottom transmission bolts:
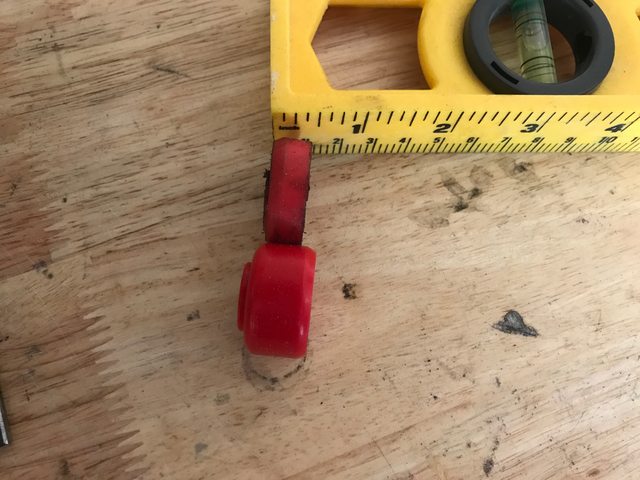
Next, cut down 2 of your energy suspension bushings. You don't need full thickness bushings because this is a ******* racecar and you are going to drive it like one. They should look like this:
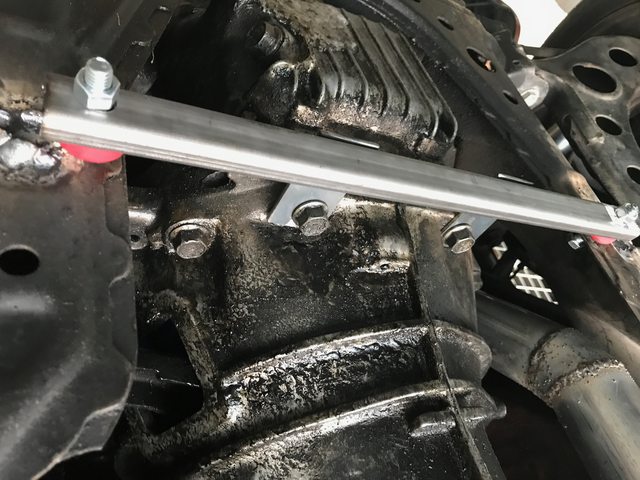
Now you have everything you need to start mocking things up in place. Drop your bolts down, slide your bushings on to them, slide your C channel up on to the bolts, and loosely bolt the pieces of flat bar in place.
Now tack weld the flat bar tabs in place. If you don't have a welder, I recommend using angle iron instead of C channel, and bolting your flat bars to the angle iron instead:
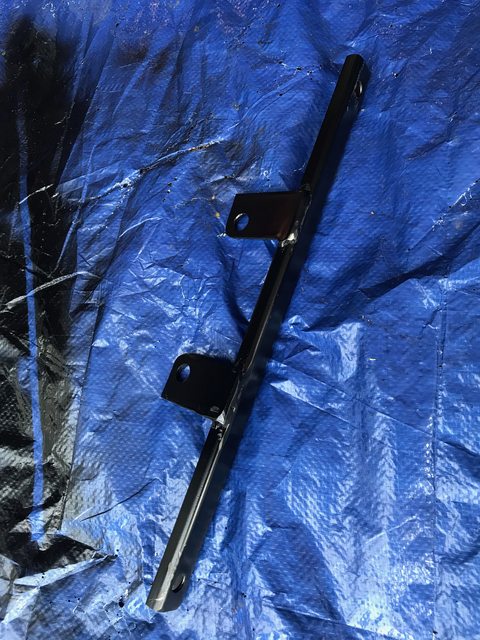
Now, pull the whole thing apart, and weld the **** out of your bar.
Grind it smooth
Paint it!~
Now bolt the whole thing in to place. Tighten it like crazy!
Now go powershift 3rd gear! Enjoy
First, the parts list:
- steel C channel I guesstimated on size. See the picture below (optionally you can use angle stock instead)
- steel flat bar. I guesstimated on size. See the picture below
- some nuts and bolts. I got 3/8" ones because they were cheap at home depot. Get bolts that are like 2" long
- energy suspension endlink bushing pack. Autozone has them for cheap. Amazon has them here: http://amzn.to/2rOz3pe
Here is a picture of all the parts:
So you've got all of your parts. Now you're ready to get started. The first thing we need to do is get under the car and drill some holes. Look at this picture:
Notice how I've drilled some holes even with the rear of my transmission on the
Next, cut a piece of C channel to approximately 15 1/4" long, you can see that in this picture already done:
Drill some holes in the ends of the C channel, hold it up to your holes that you drilled under the car and make them line up. Something like this:
Next, cut 2 pieces of flat bar to about 2 1/2" long. Grind the edge round (it needs to sit next to the transmission when you're done, you'll see.) Drill a hole in the corner towards the edge that you rounded, and drill it a bit larger than your bottom transmission bolts:
Next, cut down 2 of your energy suspension bushings. You don't need full thickness bushings because this is a ******* racecar and you are going to drive it like one. They should look like this:
Now you have everything you need to start mocking things up in place. Drop your bolts down, slide your bushings on to them, slide your C channel up on to the bolts, and loosely bolt the pieces of flat bar in place.
Now tack weld the flat bar tabs in place. If you don't have a welder, I recommend using angle iron instead of C channel, and bolting your flat bars to the angle iron instead:
Now, pull the whole thing apart, and weld the **** out of your bar.
Grind it smooth
Paint it!~
Now bolt the whole thing in to place. Tighten it like crazy!
Now go powershift 3rd gear! Enjoy
Last edited by CamH; Jun 7, 2017 at 07:31 PM.
Reply
 0
0

0

Also, did you try the normal solution of stiffer motor mounts first?
Reply
0
0


Thread Starter
Newb
Joined: Nov 2009
Posts: 11
Total Cats: -3
From: Roseburg OR
Reply
-3
-3

You've solidly mounted your transmission, that oversized hole is no where near large enough to let the bushing do it's job plus you need one on the bottom to sandwich the mount.
I give this about 5k miles before those studs snap off or you go insane from the vibration.
I give this about 5k miles before those studs snap off or you go insane from the vibration.
Reply
0
0

Junior Member
Joined: May 2010
Posts: 88
Total Cats: 0
Carbing Transmission Brace For Mazda Miata MX5 NA | REV9
There used to be several braces made similar. There are plenty of threads, all ancient, about both pros and cons.
There used to be several braces made similar. There are plenty of threads, all ancient, about both pros and cons.
Reply
0
0


Former Vendor

Joined: Dec 2006
Posts: 281
Total Cats: 18
From: SoCal
Reply
0
0
Junior Member
Joined: May 2010
Posts: 88
Total Cats: 0
http://www.mossmotors.com/graphics/p...ns/904-645.pdf
Moss Motors had a knock-off of the Carbing. Also NLA. None of these are difficult to fabricate. All NLA for a reason...
Moss Motors had a knock-off of the Carbing. Also NLA. None of these are difficult to fabricate. All NLA for a reason...
Reply
0
0

I'm skeptical, only for this reason- I once used grade 8 bolts to make new jet ski engine mounts. My mount was extremely similar to this one. They lasted 4 hours, maybe less. Snapped all 4 3/8" grade 8 bolts. My ski makes like 60-70 hp.
Nice write up though, I certainly don't think you should be docked cats for that.
MiataTurbo - Where so many good ideas get beaten to death by a gang of ruthless facts.
Nice write up though, I certainly don't think you should be docked cats for that.
MiataTurbo - Where so many good ideas get beaten to death by a gang of ruthless facts.
Reply
1
1

The theory is, you don't want more than 4 attachment points to the drivetrain, unless designed to work together. Basically, if the engine mounts and diff mounts are really soft, but this transmission mount is really stiff, then the transmission mount is taking most of the load. Same goes for using delrin diff mounts but stock engine mounts. The stiffer mount takes much more load than the softer one (same theory as suspension springs, the car rolls about axis, and the stiffer spring increases load more than the softer one for a given displacement). If all mounts are equal stiffness and torquing of the drivetrain loads them all equally, then this is an effective way to constrain the drivetrain. As long as it's not taking away a degree of freedom that is intentional (not that I think there would be). If it were me, I would do stiffer engine and diff mounts, but I can see why this would be attractive from an effort and cost standpoint. I'm not a fan of the PPF overall, I think it'd be more effective with a fully mounted diff, a transmission mount, and stiffer frame rails.
Reply
2
2
Former Vendor
Joined: Dec 2006
Posts: 281
Total Cats: 18
From: SoCal
"NOTE: This chassis brace ties engine/gearbox rigidly to the unibody for maximum performance. This is a serious performance modification, trading smooth ride for max power. Every vibration in the drivetrain will be felt in the cockpit, and you need to seriously consider this before you install this kit."
They probably stopped making it due to liability issues.
Reply
0
0
Thread Starter
Newb
Joined: Nov 2009
Posts: 11
Total Cats: -3
From: Roseburg OR
Just some random notes based on people's feedback:
- This brace does not noticeably increase NVH due to the bushing usage. I have tried the same brace with no bushings and the NVH is awful. Use the bushings if you do this, it works and the bushings do their job very well.
- The miata in the pictures in the original post is the 3rd turbo miata I've done this on and I have not had any issues breaking bolts or mounts. This is working in conjunction with your motor mounts, PPF mounts, etc so isn't doing all the work on its own
- This does not seem to help a whole lot with wheel hop, I recommend adding some additional solid mounts to your PPF in the rear of the car if you want help with that. I think it's just too far from the diff to help much (edit: thinking about this some more, it would be a bit like adding stiffer motor mounts to try to fix what is a transmission mount issue
 )
)
Last edited by CamH; Jun 5, 2017 at 08:34 PM.
Reply
0
0


Reply
0
0

Senior Member
Joined: Aug 2014
Posts: 779
Total Cats: 264
From: North Carolina
Your bushings only work in one direction... compression. Since the transmission deals with torsion, if the brace has any effect at high torque loads, one will always transmit vibrations through the bolt under tension to the unibody. Also, agreed on the 6 points of contact. You're moving loads from a point designed to take it (motor and diff mounts) to somewhere else.
Cheap way to make your driveline move less? Yes. Right way? Not really. It's probably fine.
Cheap way to make your driveline move less? Yes. Right way? Not really. It's probably fine.
Reply
0
0


