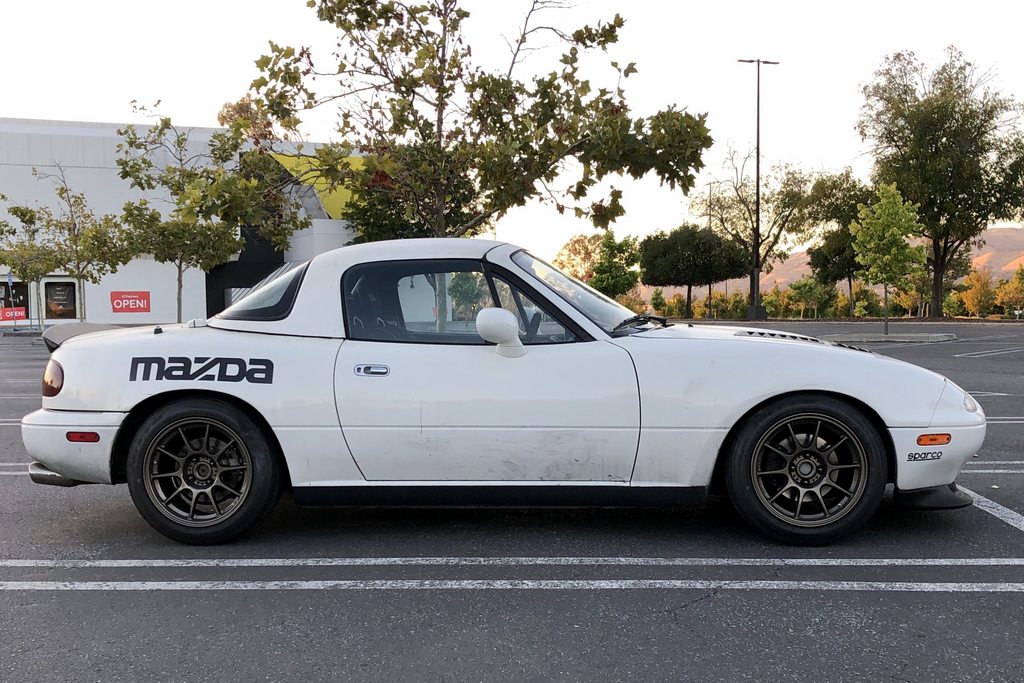
Miata
 12-01-2020, 01:28 AM
#1
Junior Member
Thread Starter

Join Date: Jul 2020
Posts: 58
Total Cats: 10
I've posted most of this on Instagram, but I like posting on forums so I'm gonna post it here to bc it's a more cohesive way of documenting my progress with the car. I'm going to be backposting from when i got the car in May 2020 to the time of posting (December 2020). I started seriously considering buying a Miata around December 2019, and I found one that looked like a good deal in May, sold my GTI, and bought this thing.
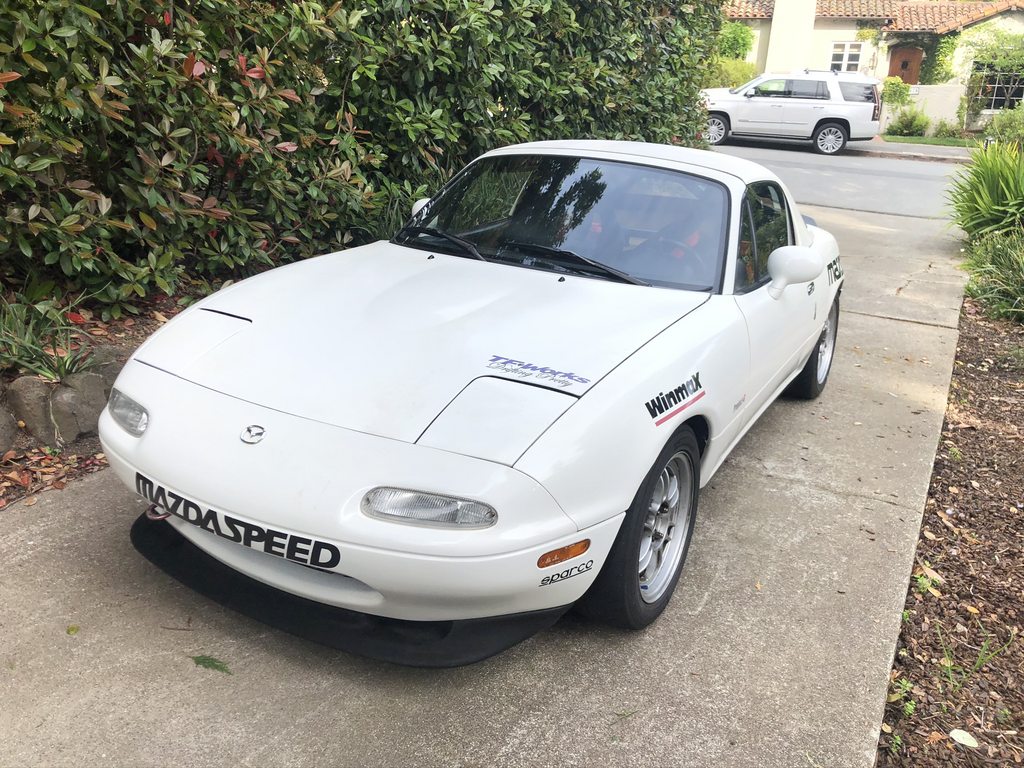
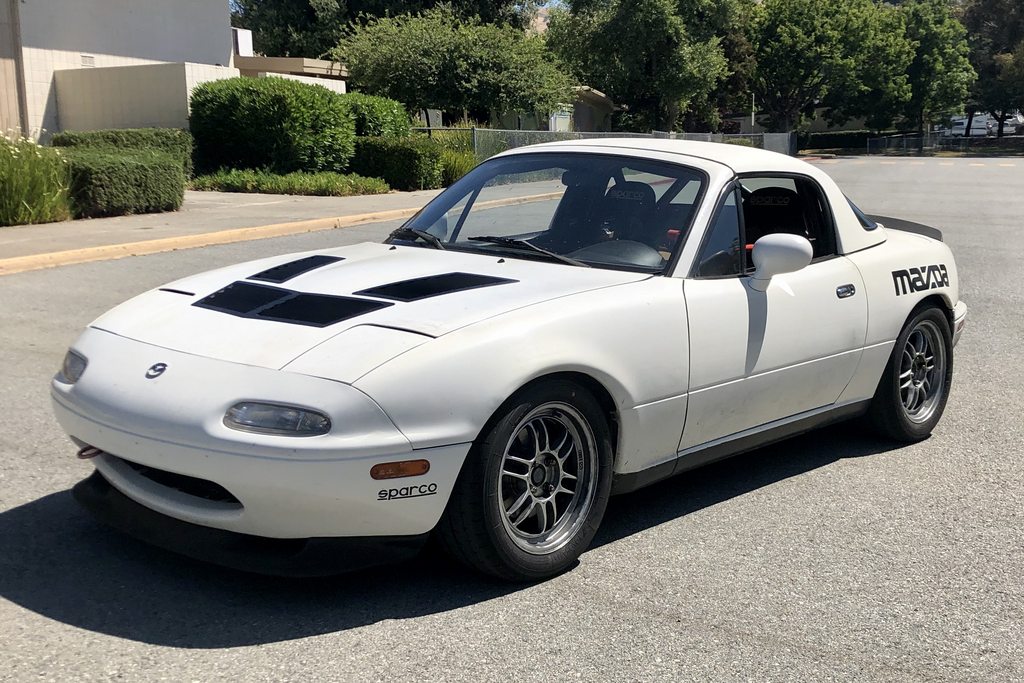
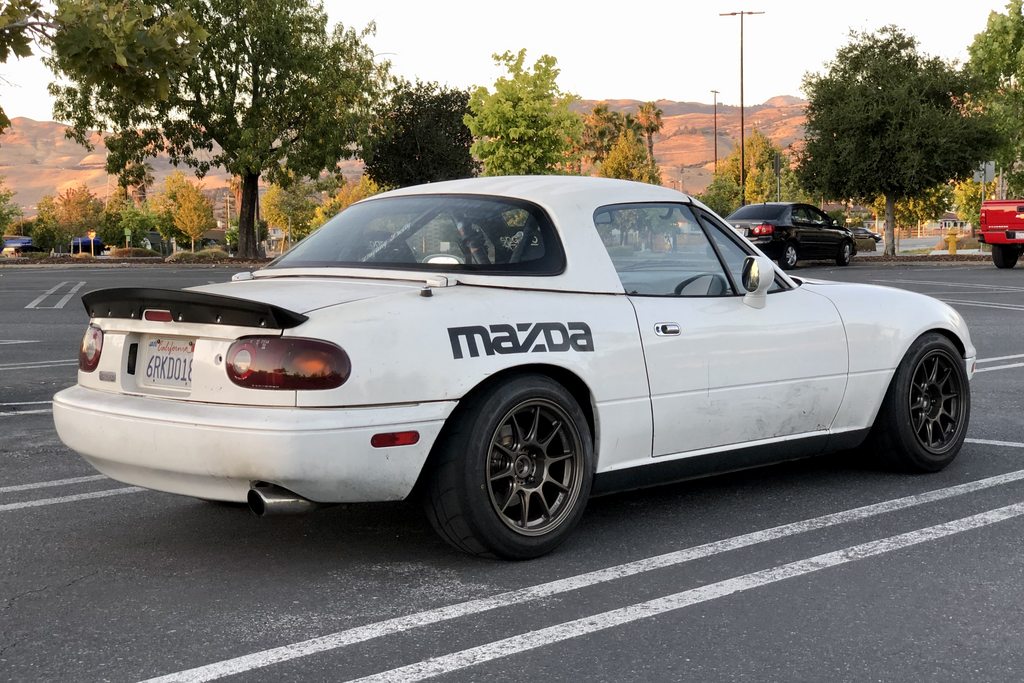
This is how the car looked like when I first checked it out. Advertised as a built motor by Indotech Motorsports in Arcadia with forged internals and overbored to 1.9L. Koni Yellows with Flyin Miata lowering springs, hardtop, RFP1, Sparco Rev seats driver and passenger side, harnesses, HardDog roll bar. The paint is absolute garbage so I wouldn't worry about it if I picked up rock chips or something at the track. Seemed like a good track car to pick up since the quarantine was starting and I've wanted a Miata for a little bit. The thinking was that the car was in good enough condition that I wouldn't need to do much to it and I could just take it to the track and learn to drive.
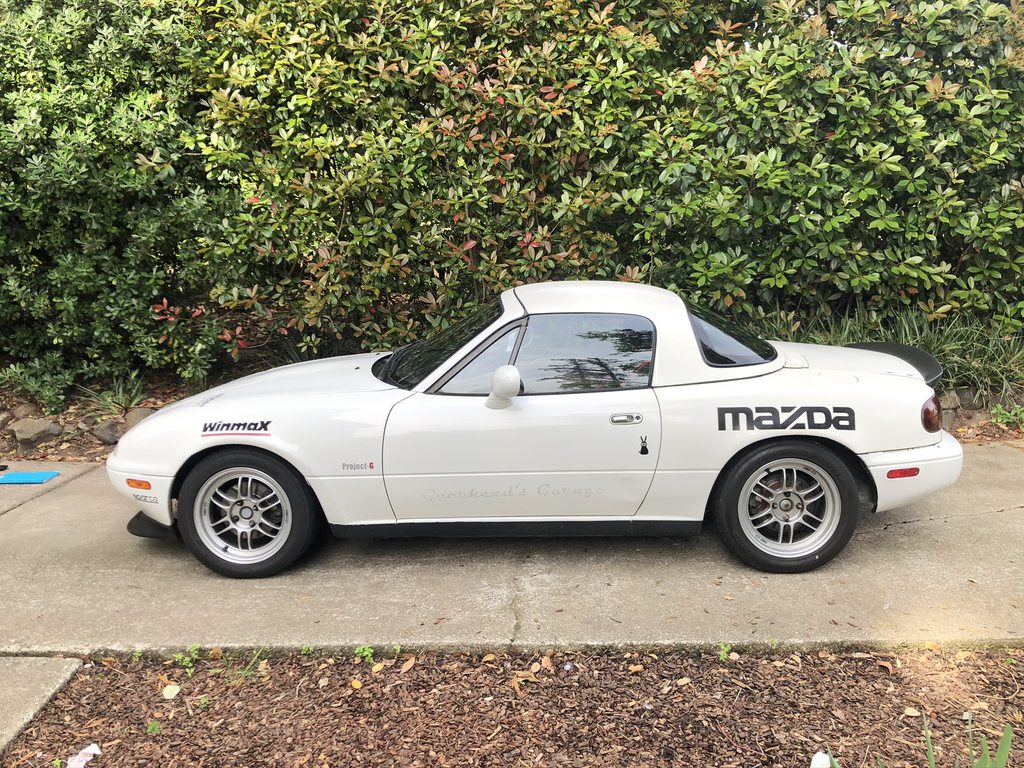
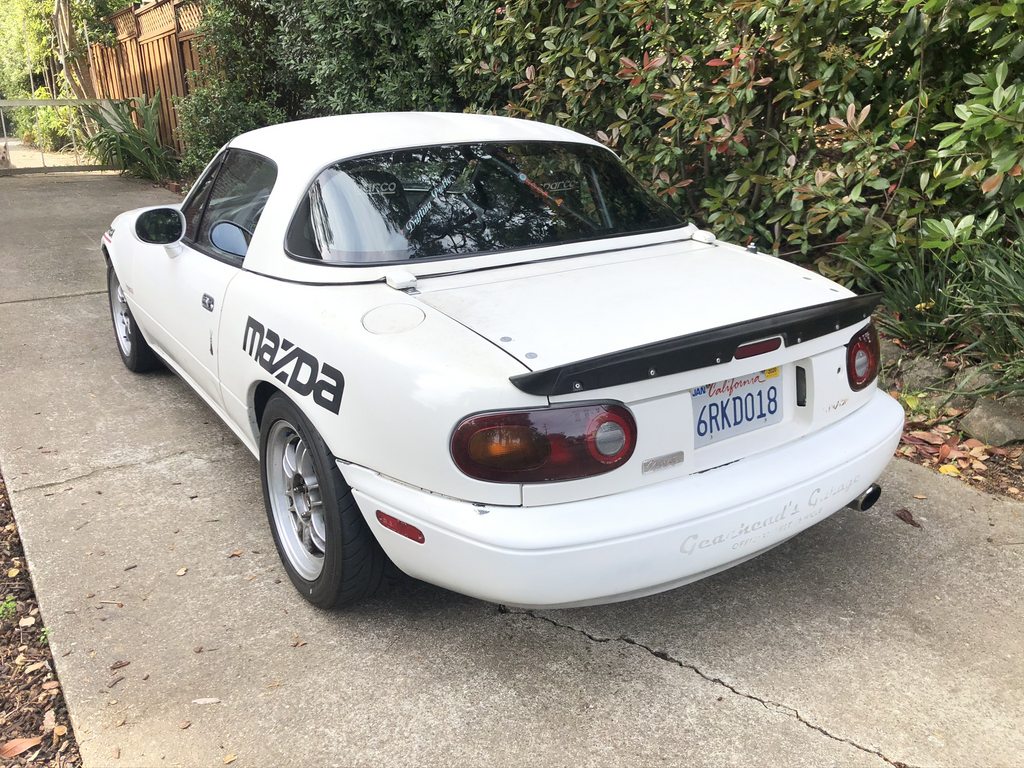
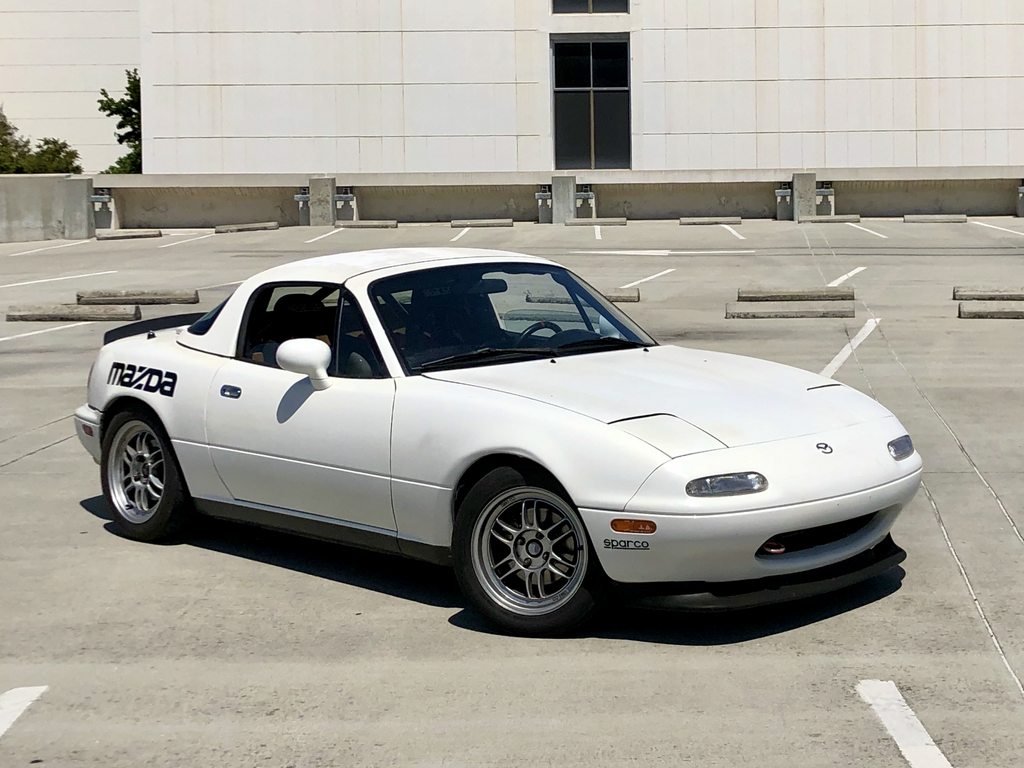
After bringing the car home, I destickered it a bit and it looks like this now
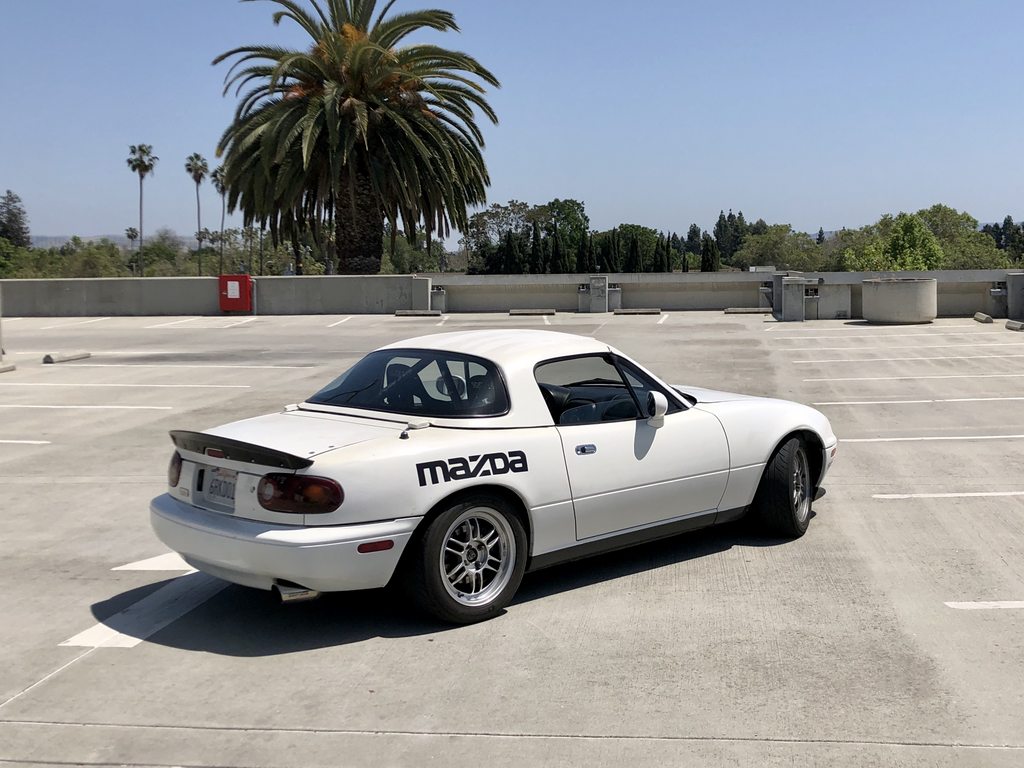
This is how the car looked like when I first checked it out. Advertised as a built motor by Indotech Motorsports in Arcadia with forged internals and overbored to 1.9L. Koni Yellows with Flyin Miata lowering springs, hardtop, RFP1, Sparco Rev seats driver and passenger side, harnesses, HardDog roll bar. The paint is absolute garbage so I wouldn't worry about it if I picked up rock chips or something at the track. Seemed like a good track car to pick up since the quarantine was starting and I've wanted a Miata for a little bit. The thinking was that the car was in good enough condition that I wouldn't need to do much to it and I could just take it to the track and learn to drive.
After bringing the car home, I destickered it a bit and it looks like this now
Last edited by chuckieho; 12-01-2020 at 02:31 AM.

Reply
 0
0

0
12-01-2020, 01:43 AM
#2
Junior Member
Thread Starter
Join Date: Jul 2020
Posts: 58
Total Cats: 10
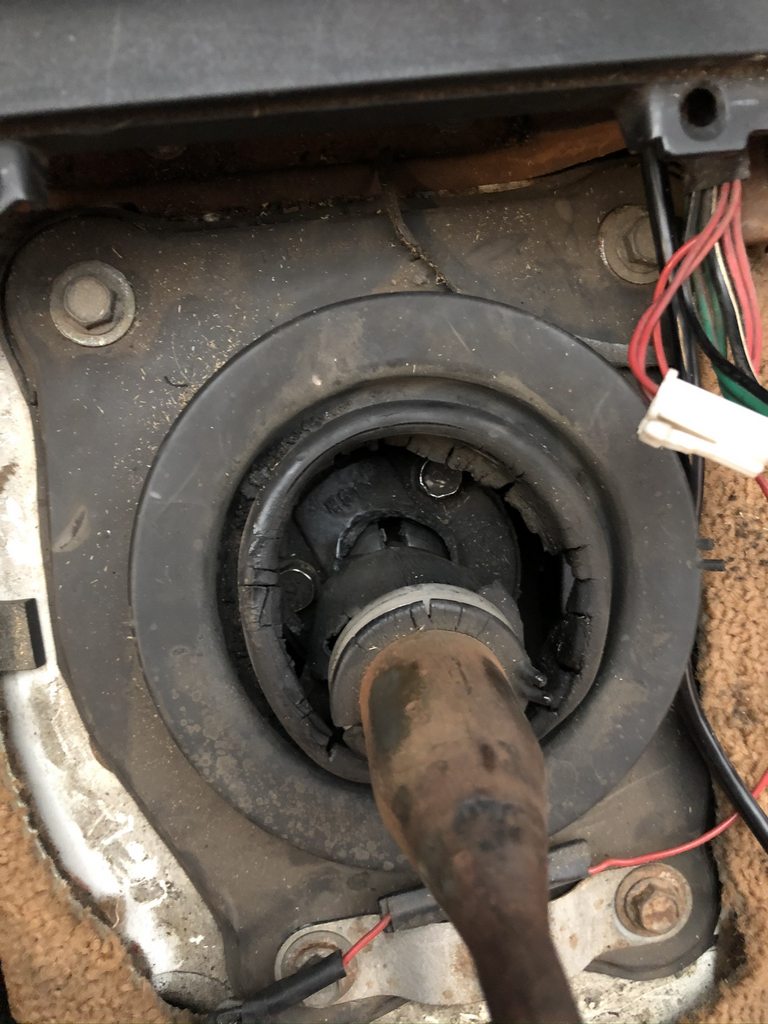
Drove the car around and felt that shifter always got hot after a couple miles, so i took the center console off and found that the shifter boot was completely disinegrated. Replaced with a 5x Racing brass bushing and OEM upper and lower boots.
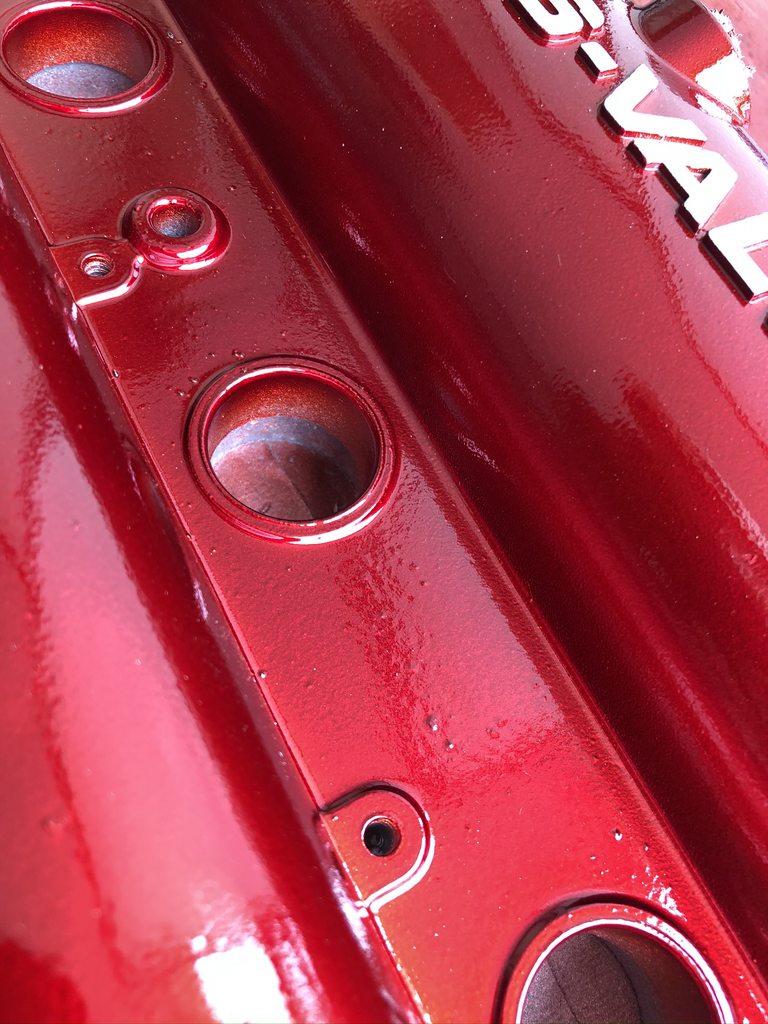
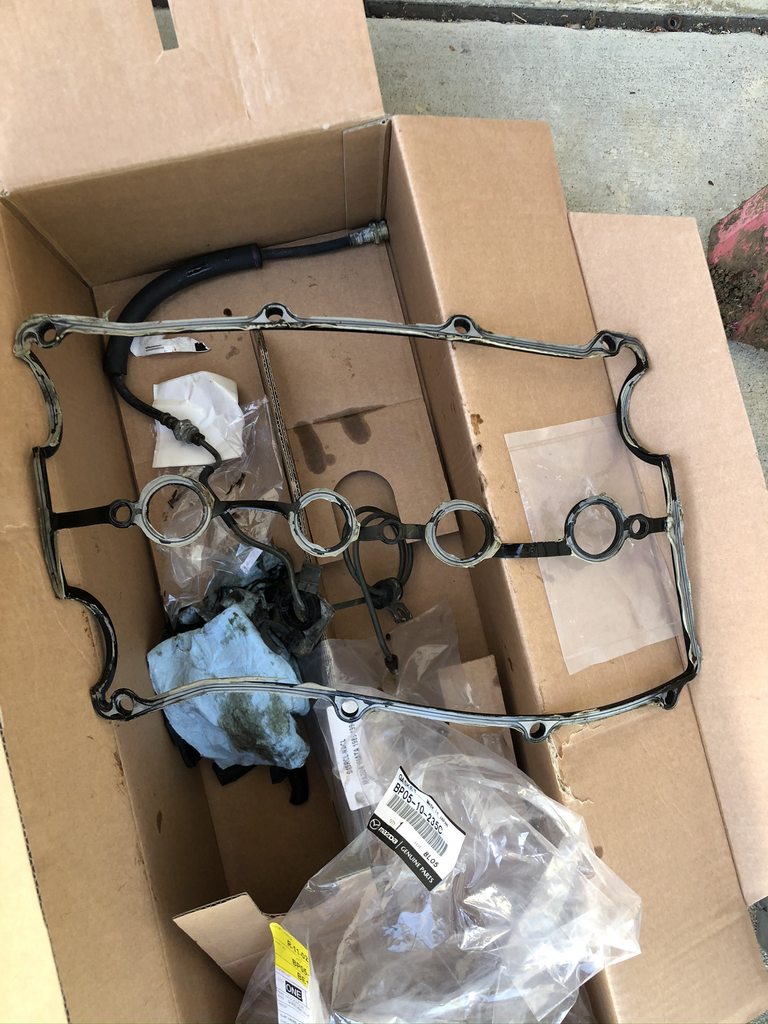
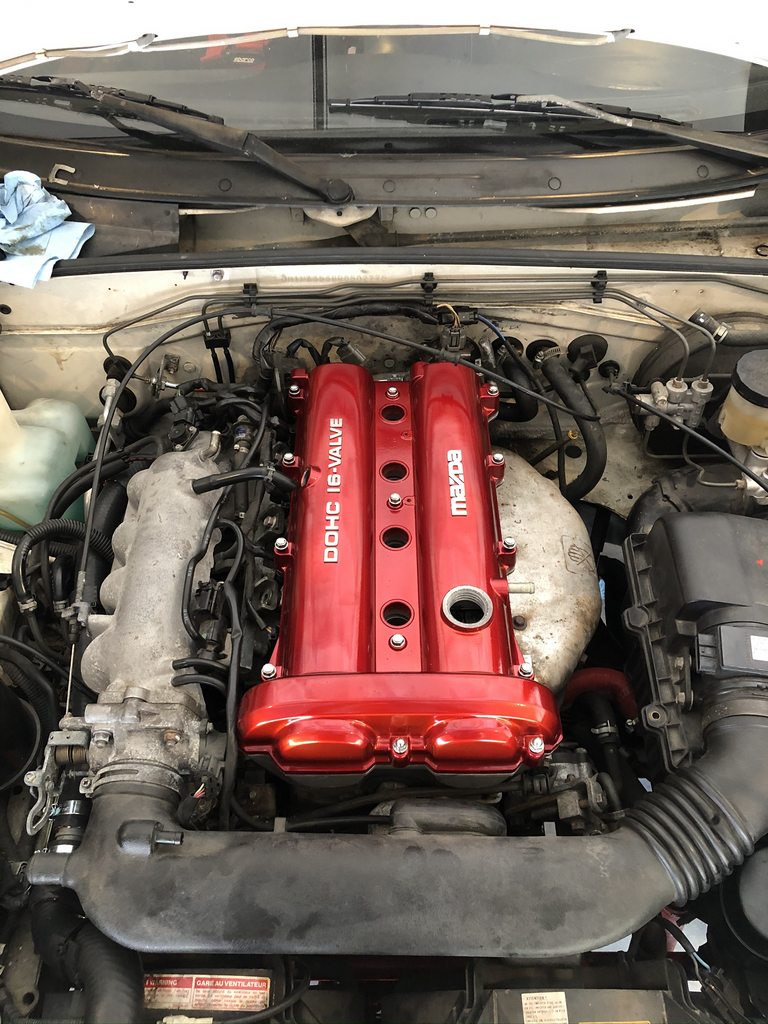
I was also given a second valve cover with the car since the one installed had a crack over the cam gears. Not a huge issue, but I was given one that was crack-free. I took that opportunity to paint it red bc rasekor. Duplicolor Metalcast Red Anodized.
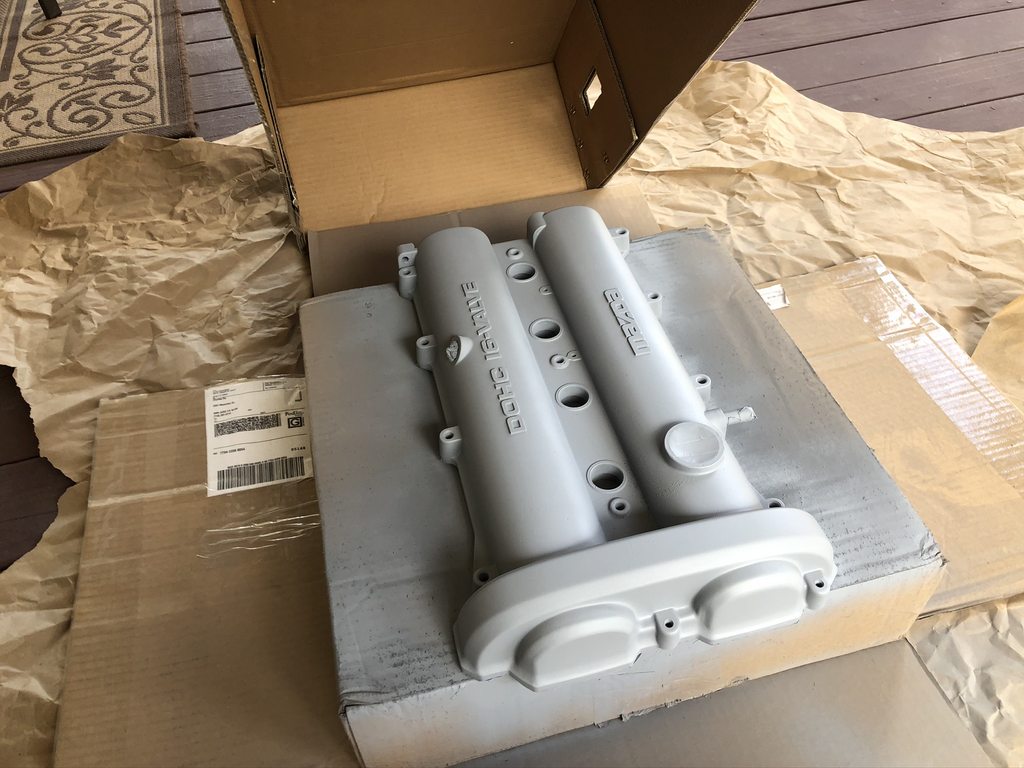
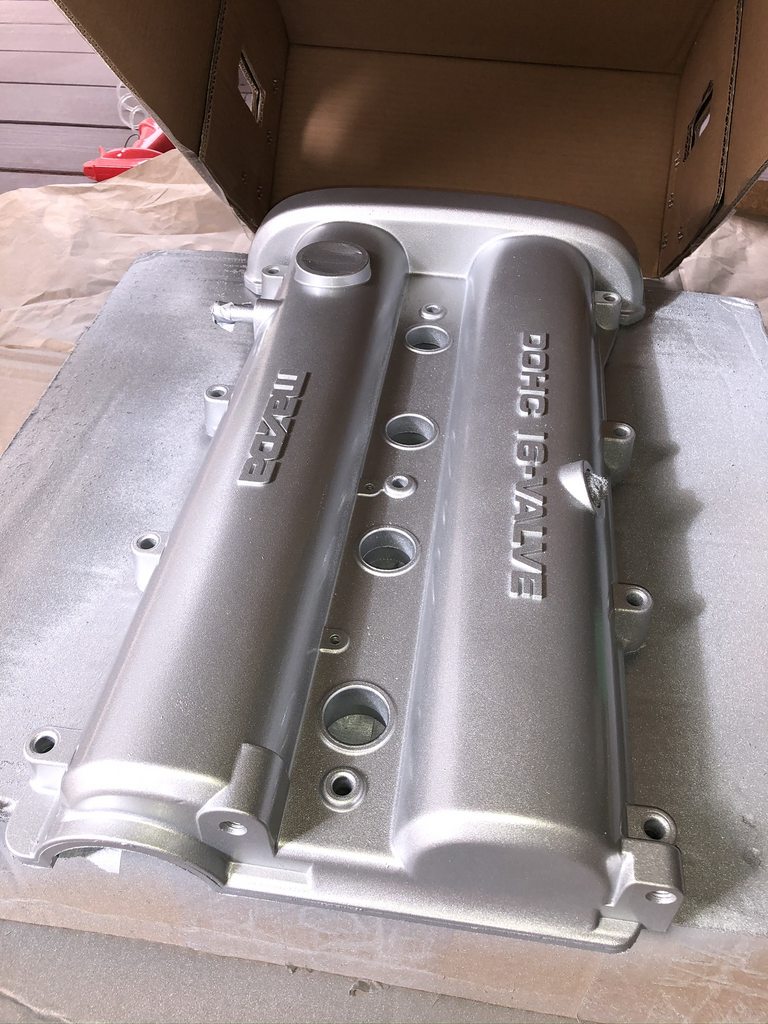
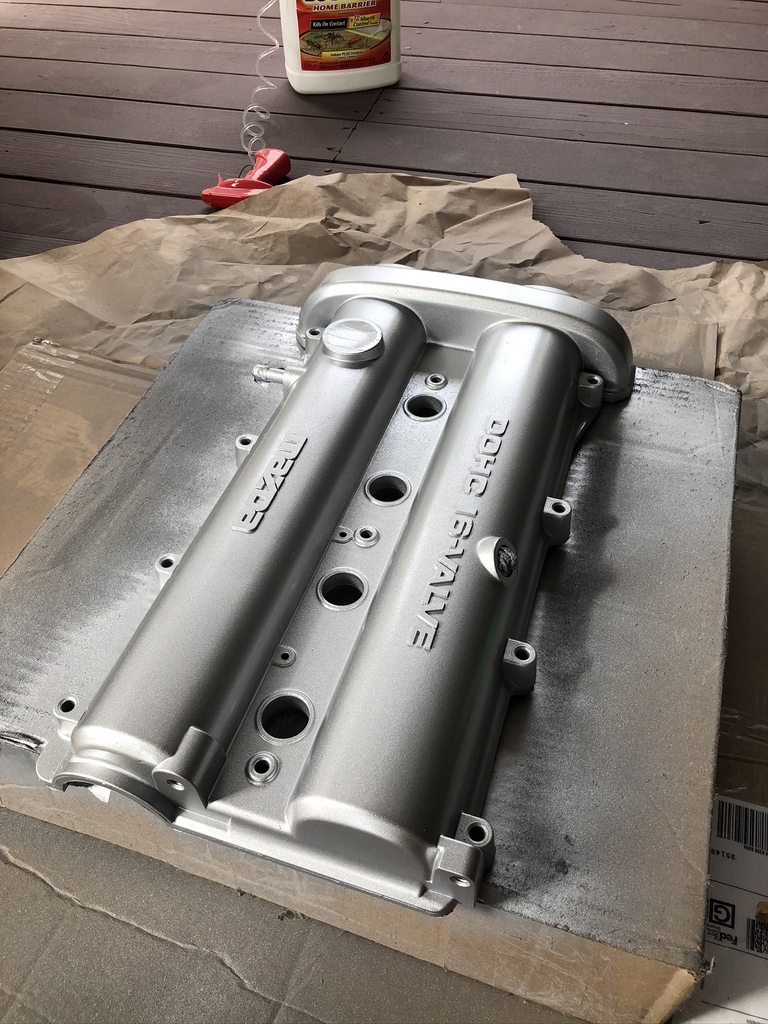
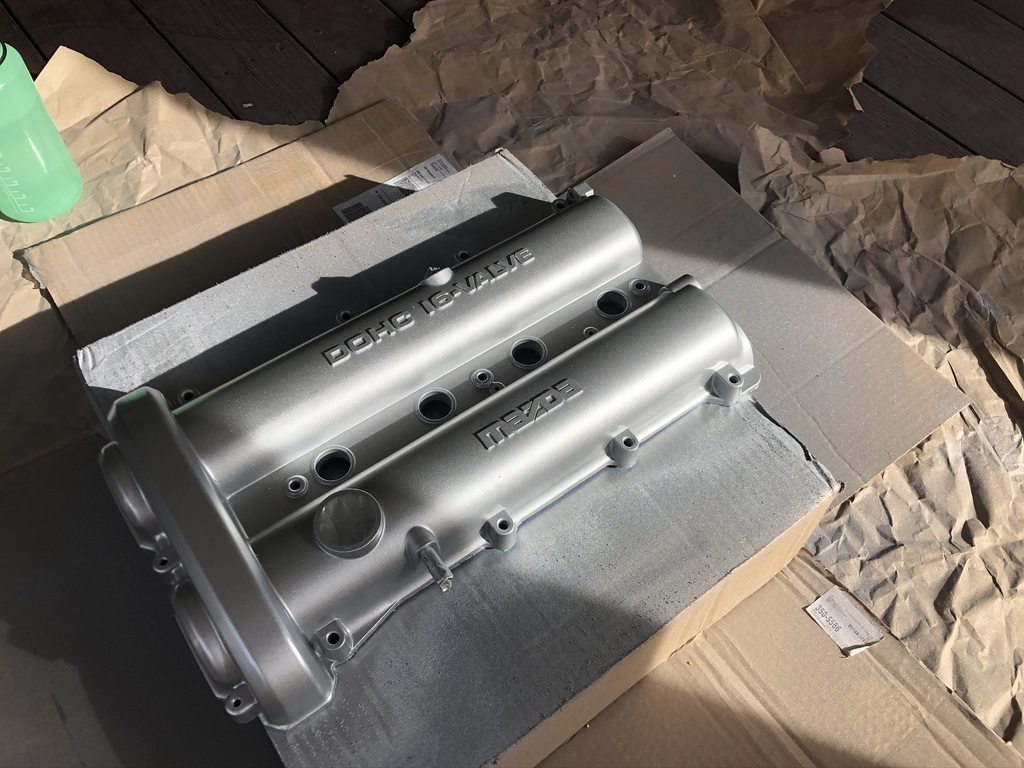
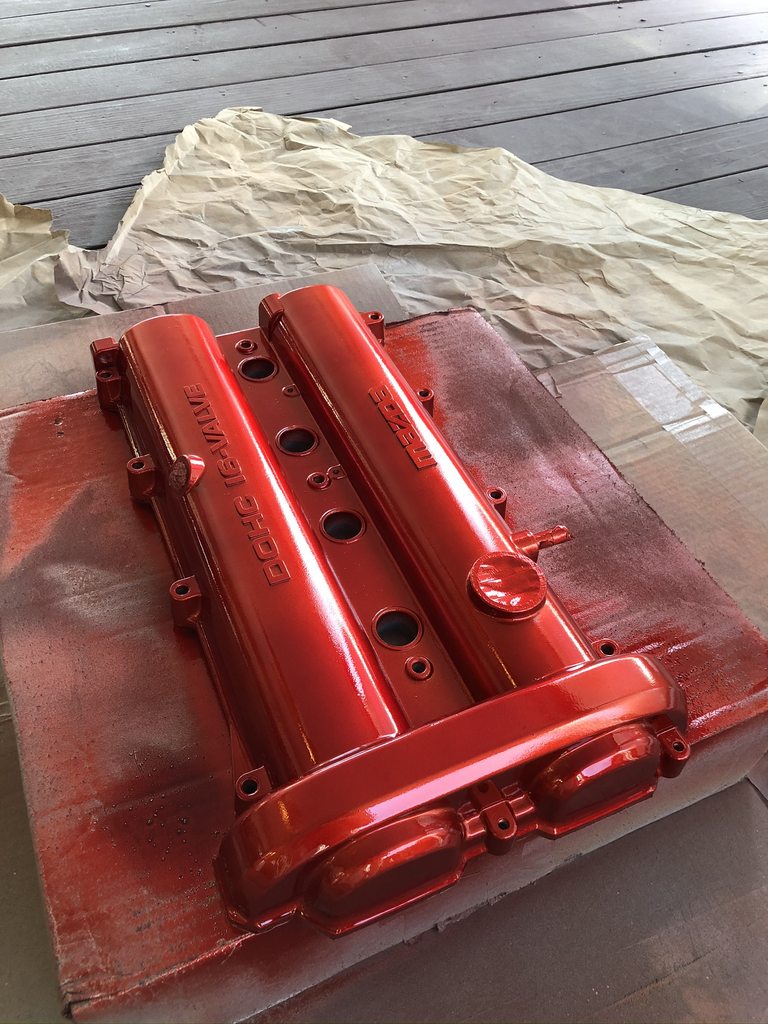
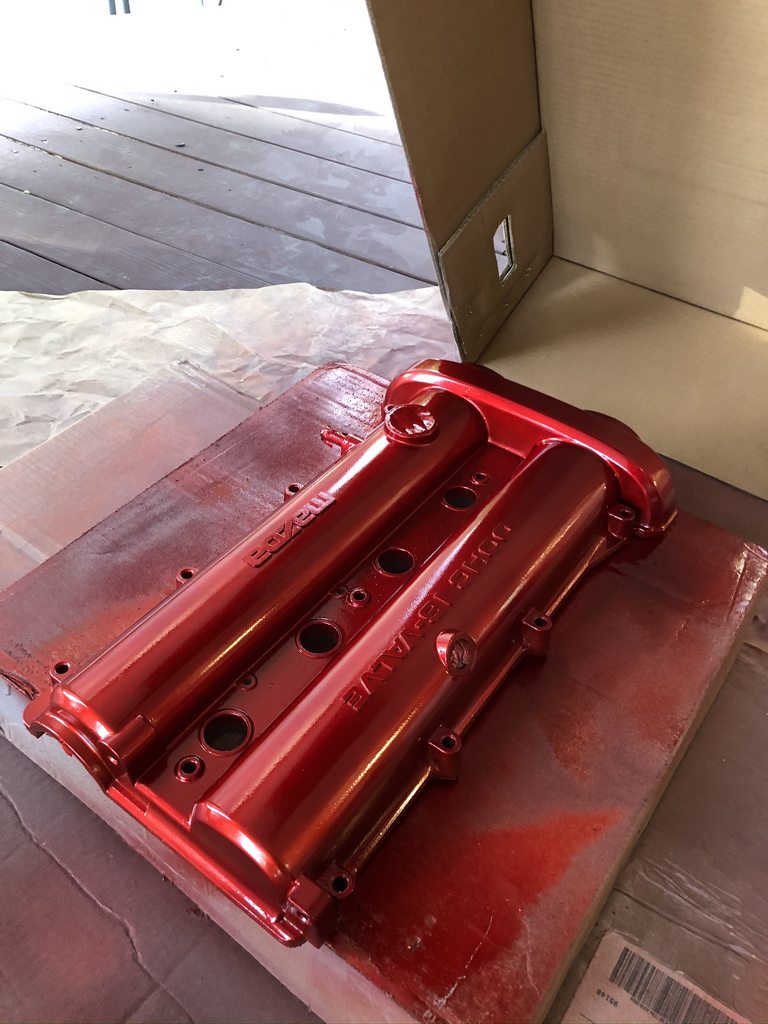

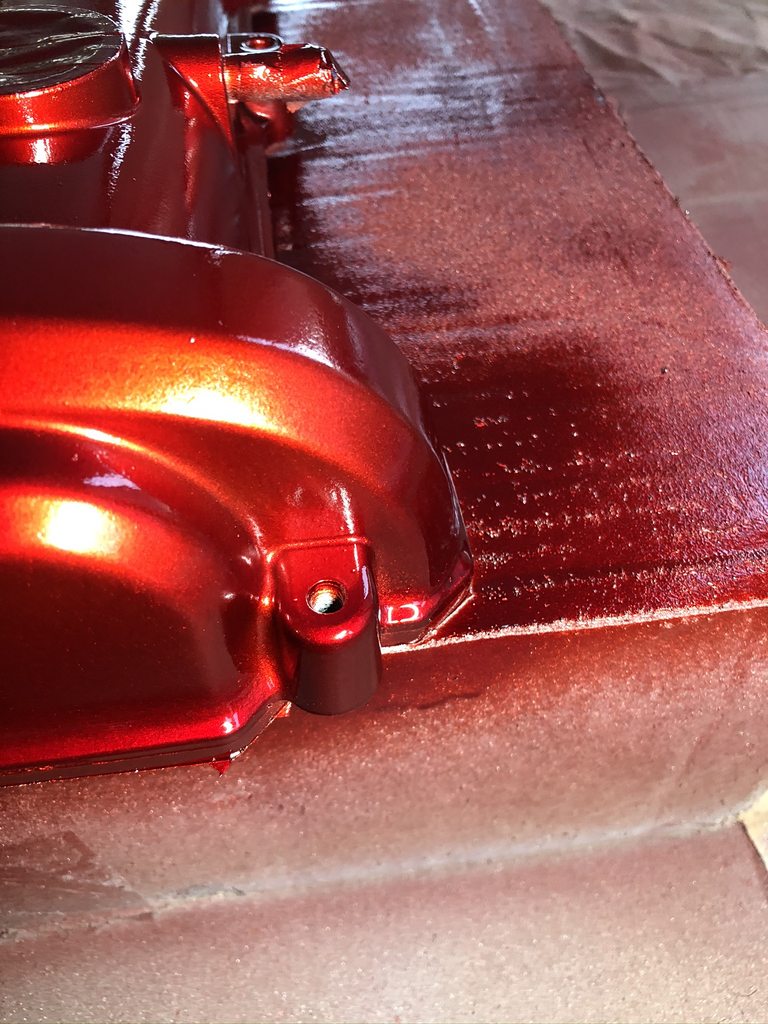
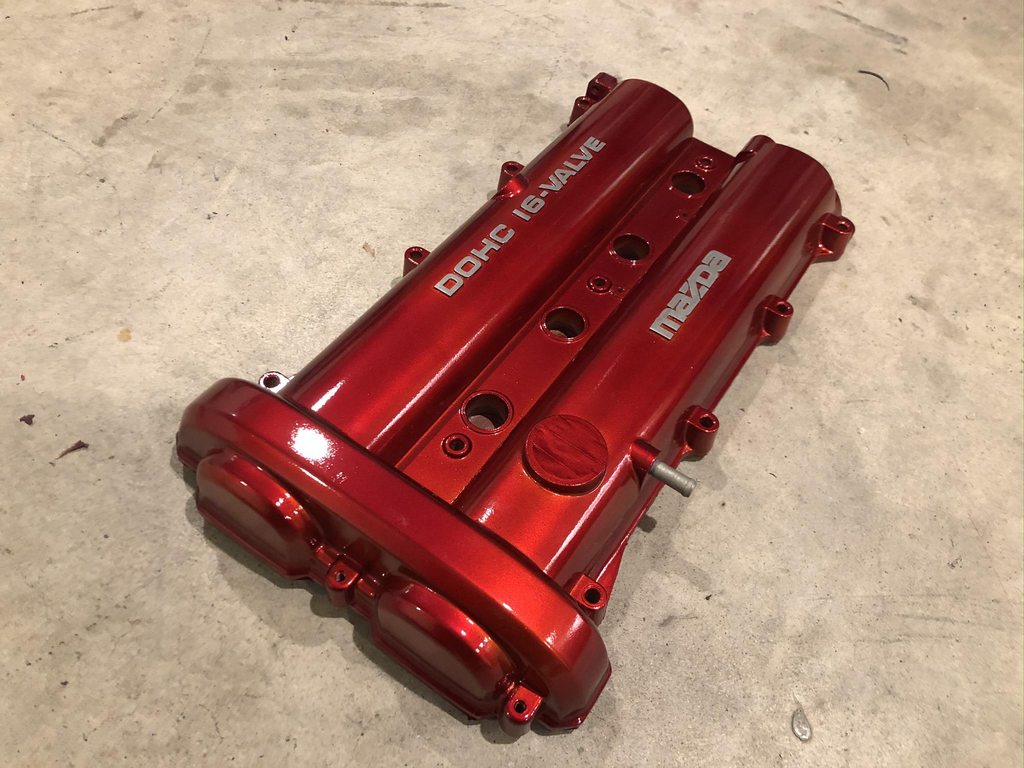
Pretty happy with the results, but I got a bit of contaiminates in the middle and I guess I touched the cover at one point so there was a bit of paint missing, but it was small enough to not notice unless you were looking for it. I painted this outside without any real covering or anything shielding it from dust so Im happy that this was all that happened.
I was also given a second valve cover with the car since the one installed had a crack over the cam gears. Not a huge issue, but I was given one that was crack-free. I took that opportunity to paint it red bc rasekor. Duplicolor Metalcast Red Anodized.
Pretty happy with the results, but I got a bit of contaiminates in the middle and I guess I touched the cover at one point so there was a bit of paint missing, but it was small enough to not notice unless you were looking for it. I painted this outside without any real covering or anything shielding it from dust so Im happy that this was all that happened.
Reply
0
0
12-01-2020, 01:58 AM
#3
Junior Member
Thread Starter
Join Date: Jul 2020
Posts: 58
Total Cats: 10
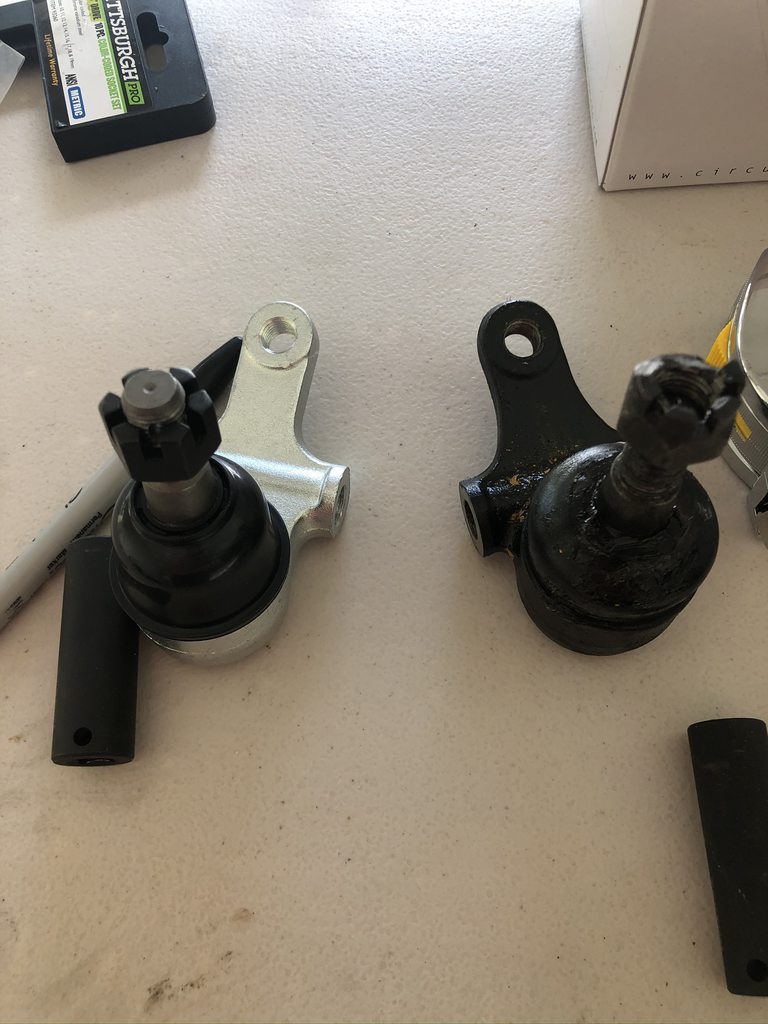
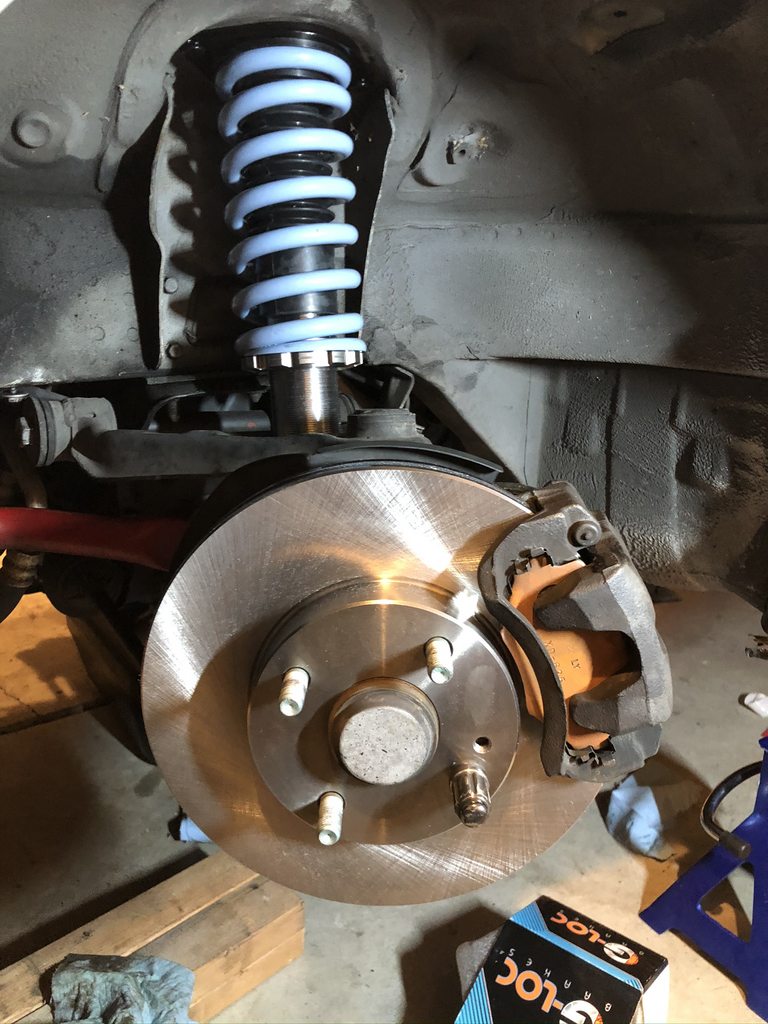
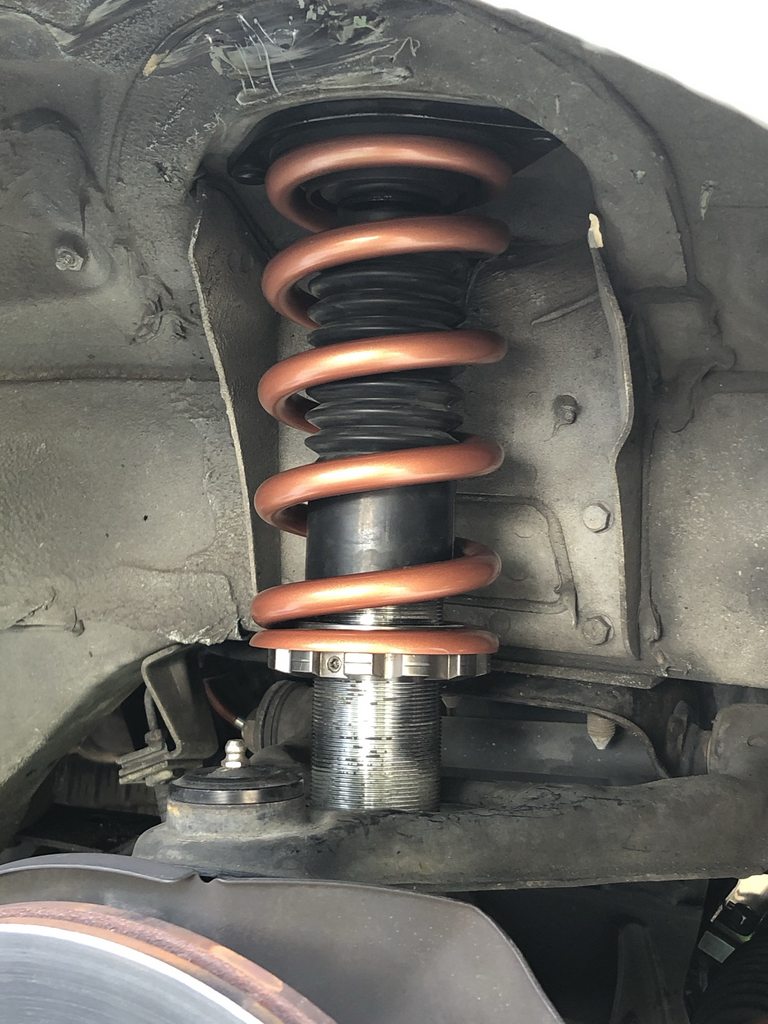
Went on a bit of a shopping spree, Friend suggested that I should get some Gears Racing coilovers from Circuitsports so I picked those up in conjunction with CircuitSports Extended Lower Ball Joints and R-Package tie rod ends. I also found that the upper ball joints were in pretty rough shape so I got a set of Supermiata uppers.
Difference in shock length between Koni Yellow and Gears
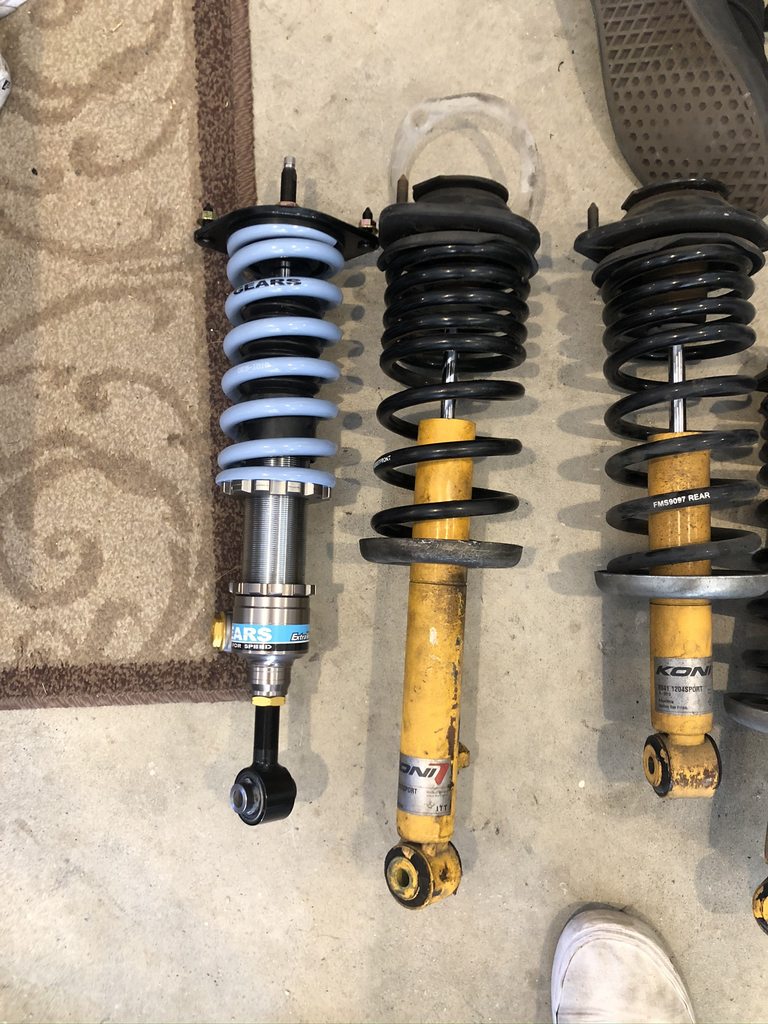
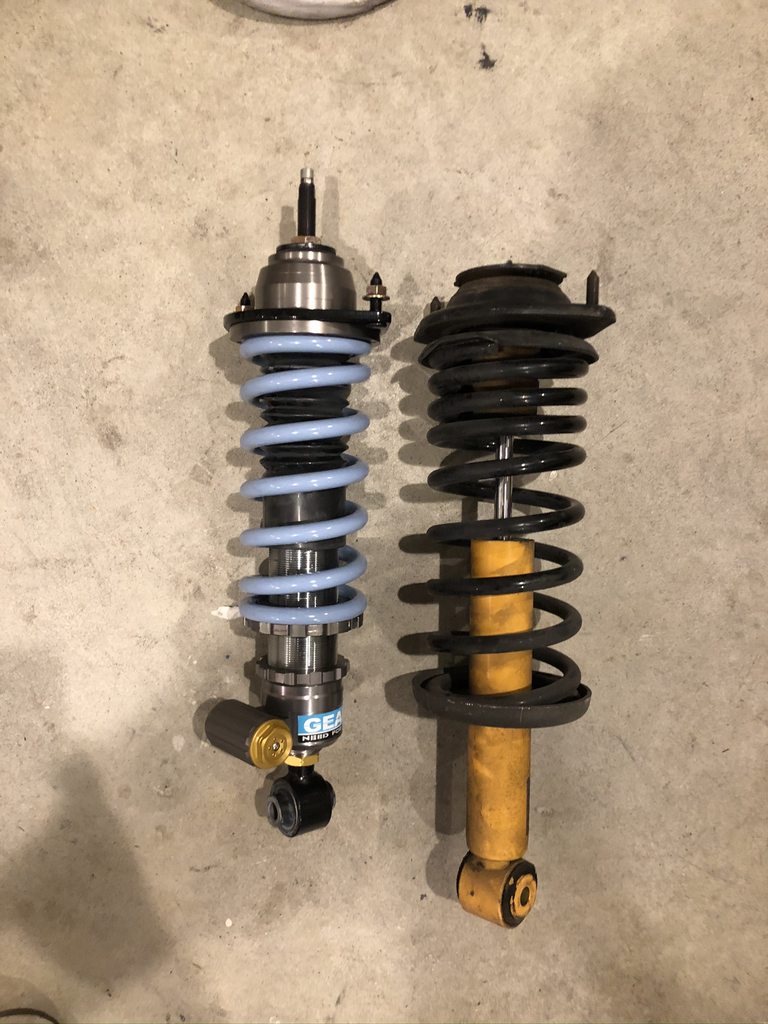
Difference in shock length between Koni Yellow and Gears
Reply
0
0
12-01-2020, 02:26 AM
#4
Junior Member
Thread Starter
Join Date: Jul 2020
Posts: 58
Total Cats: 10
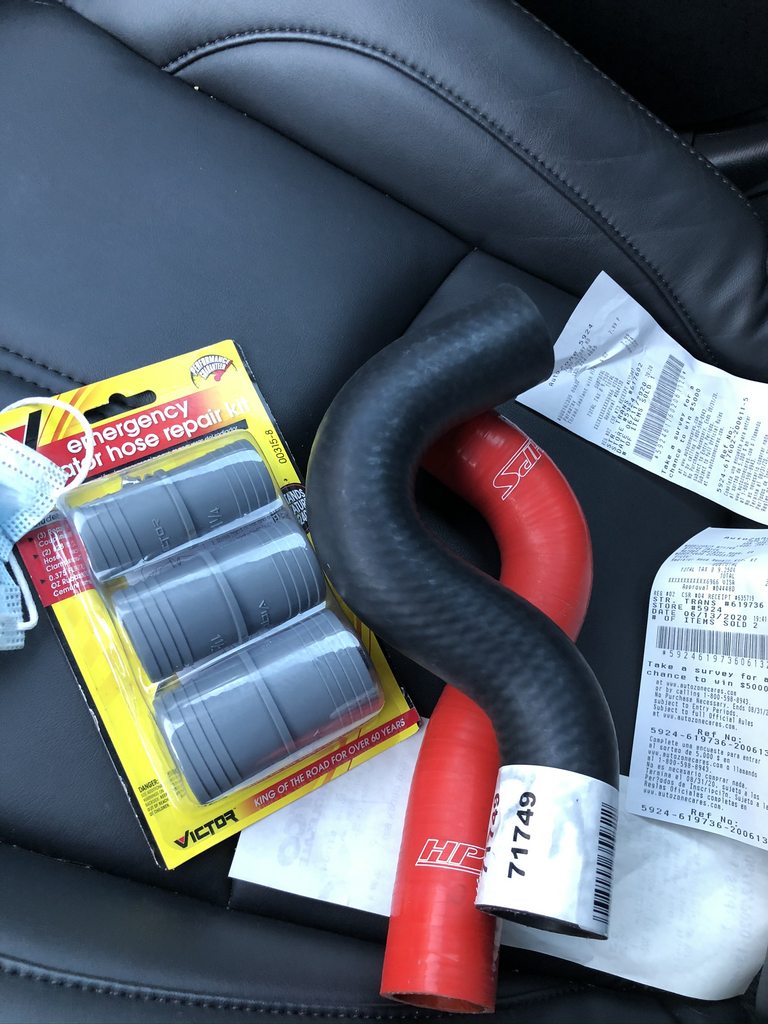
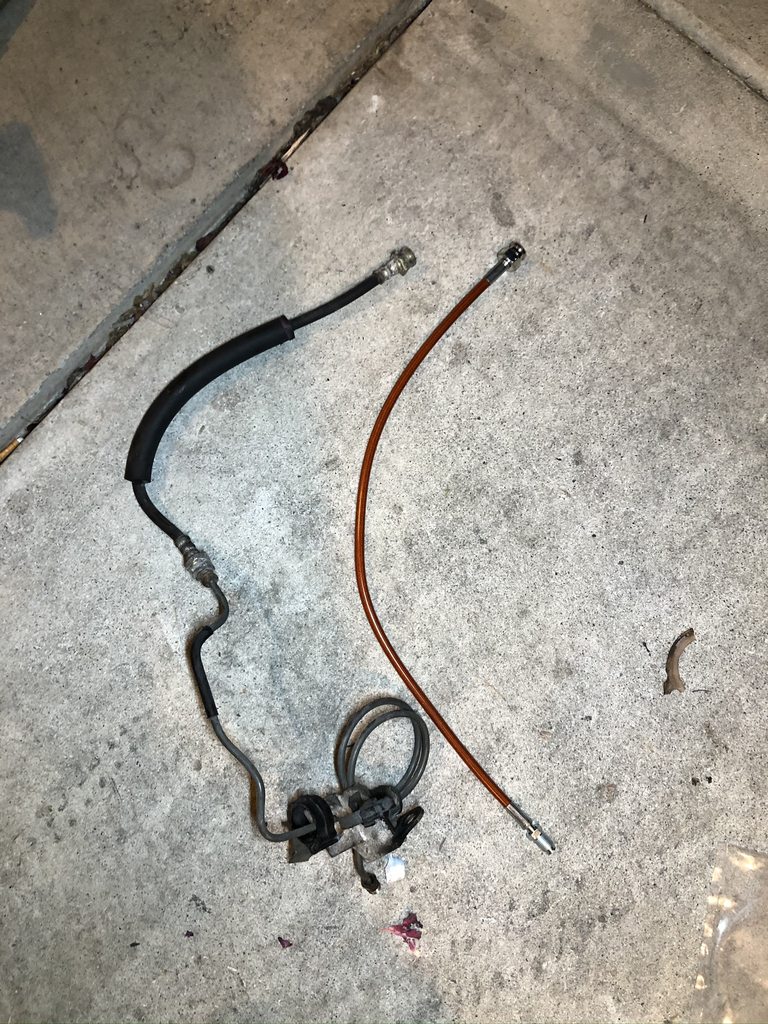
Scope creep on the supermiata site means i ended up with a new set of Gloc R10/R8 pads and Centric rotors, new primary and secondary clutch cylinders since the ones on the car started leaking, a ss braided clutch line, and a coolant reroute from flying miata.
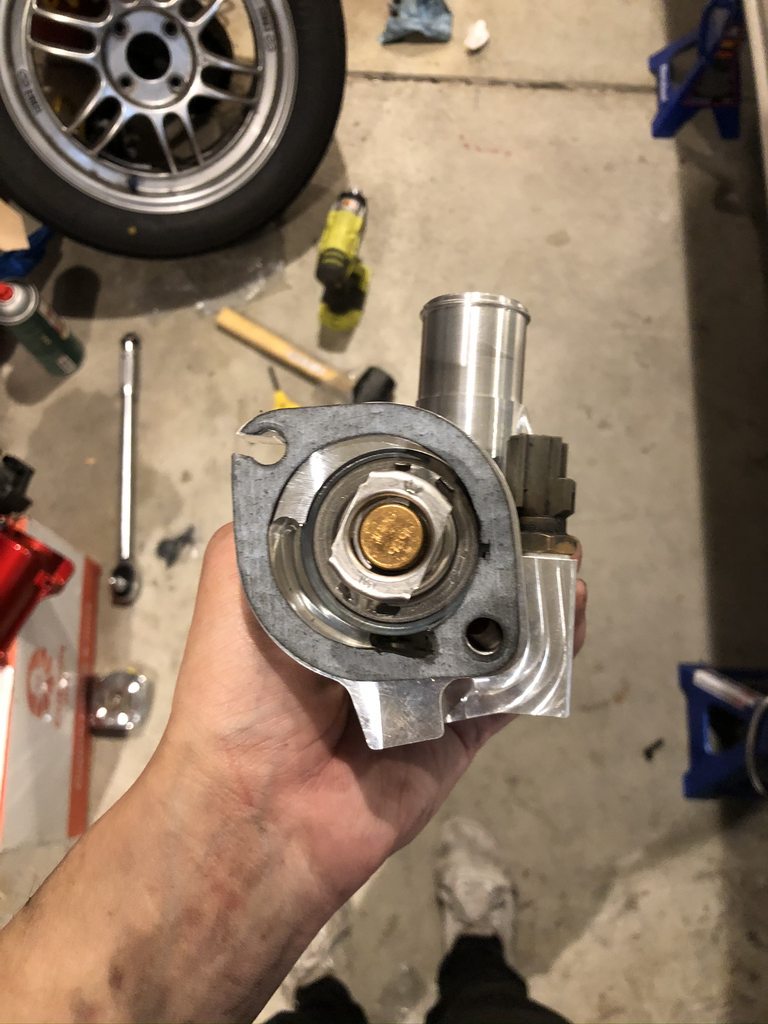
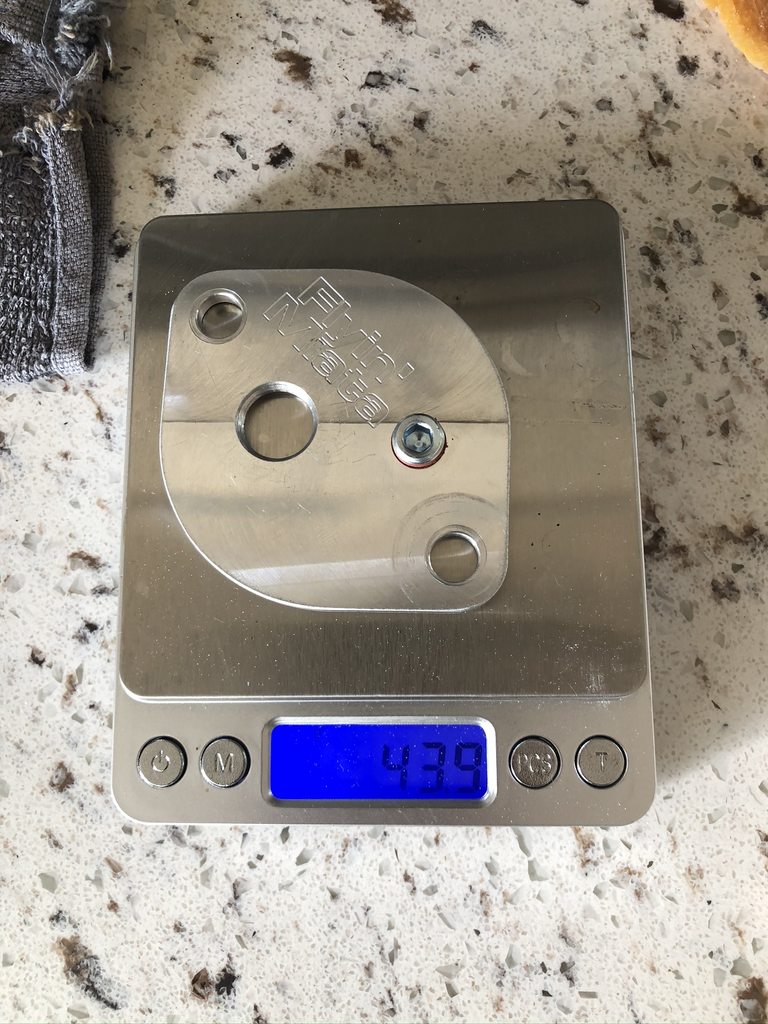
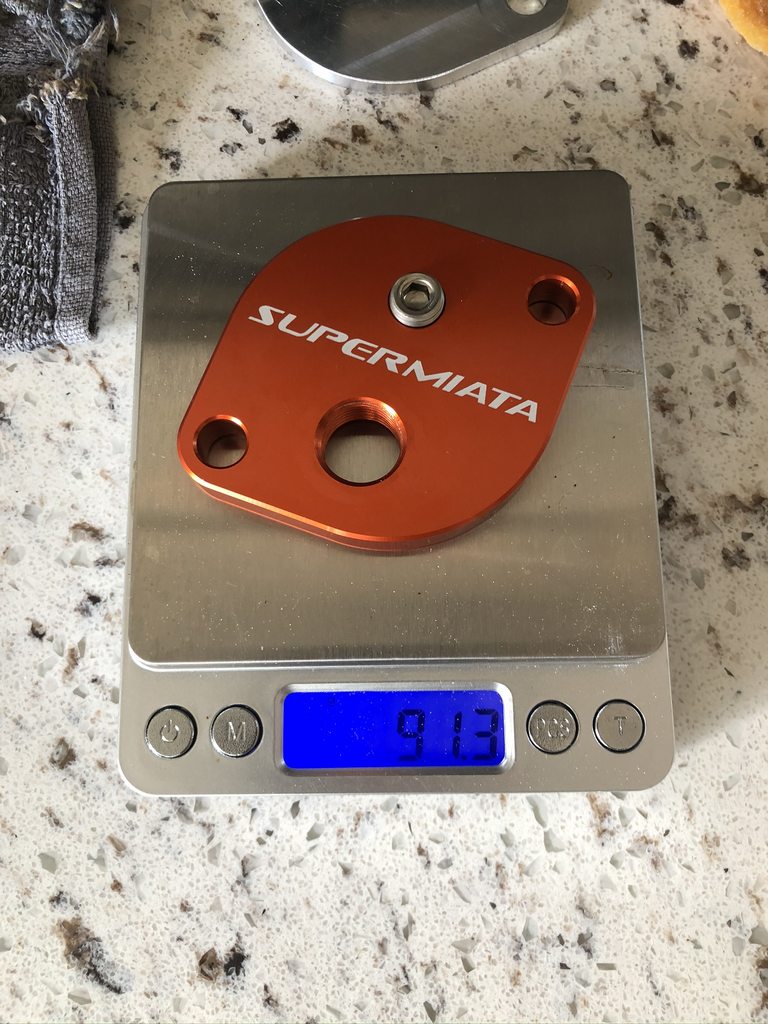
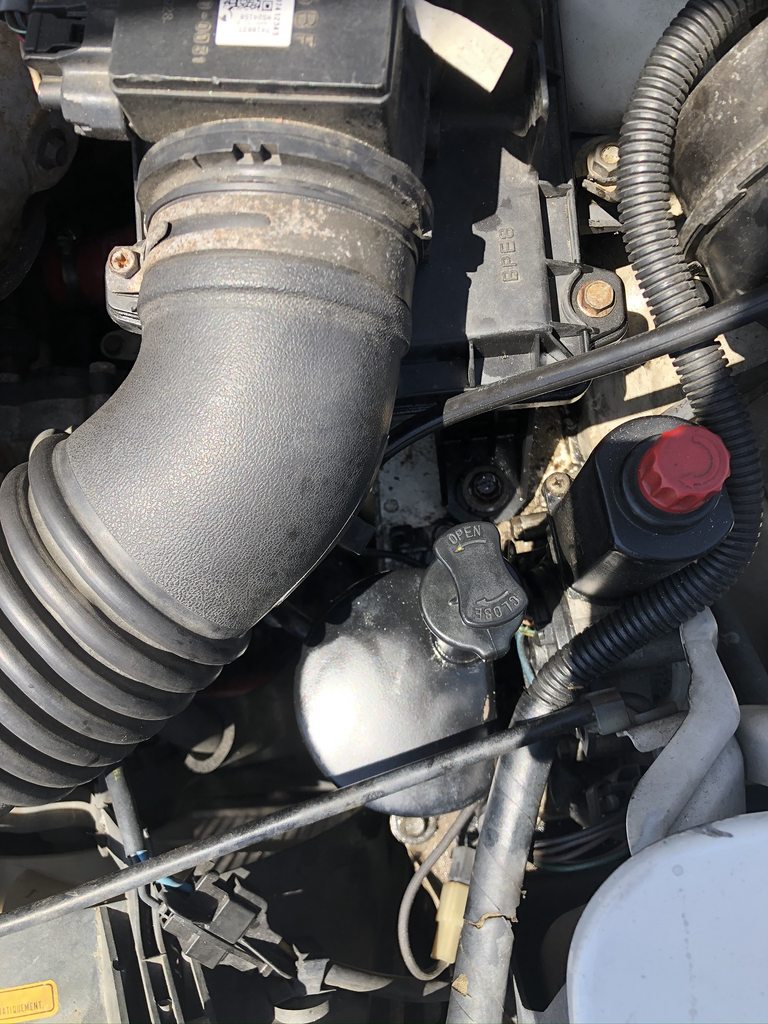
Flyin Miata's coolant neck blockoff plate is too thin and the threads for the fan switch plug were messed up on delivery, and I couldn't save it with a tap so I just got the Supermiata blockoff plate. There would have been around 1.5 full revolutions in the flying miata plate, its just too thin.
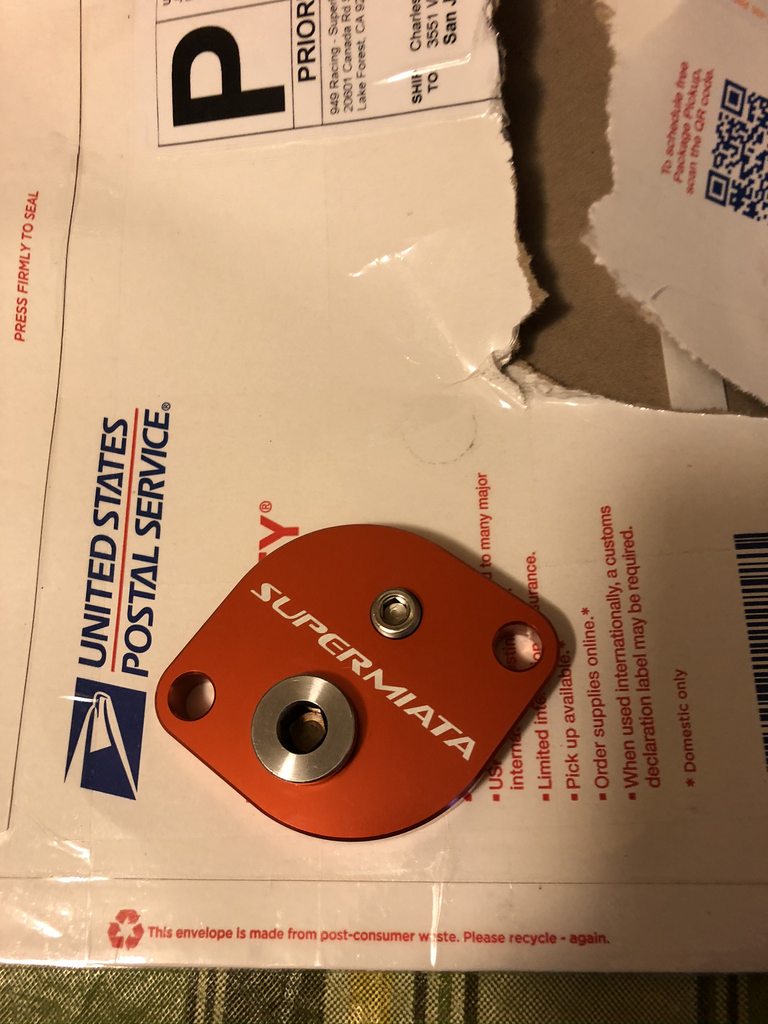
Thickness comparison between the unfinished flying miata plate and the orange supermiata plate.
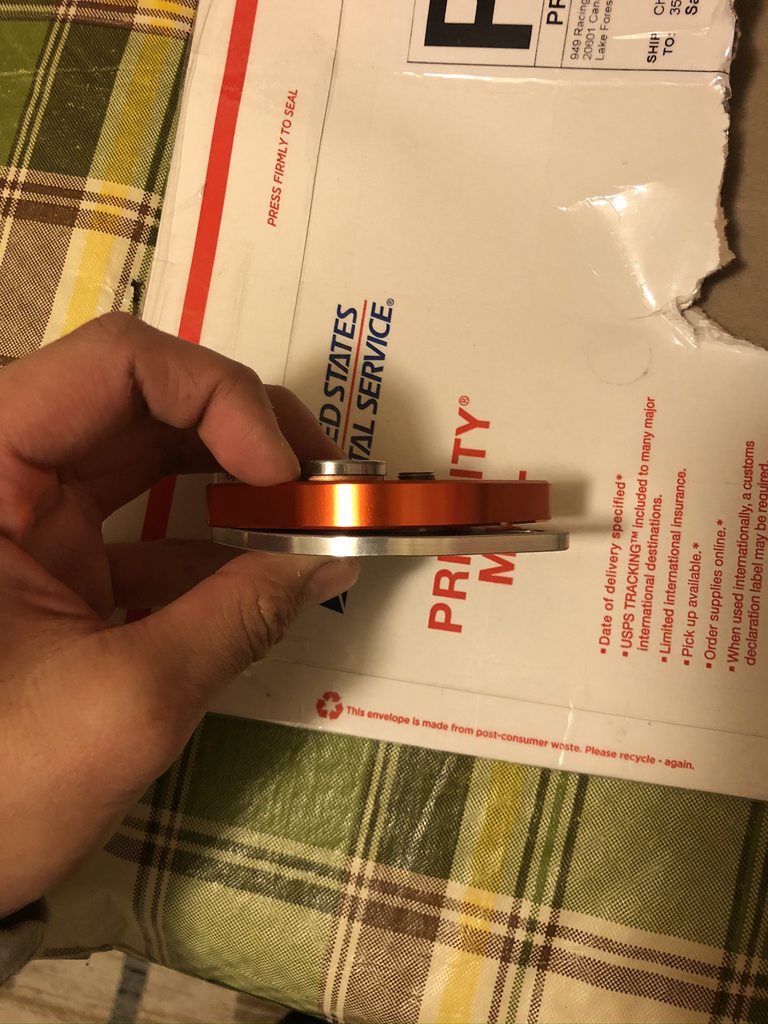
With only a 47.4g difference between the two, I'm not sure why Flyin miata decided to go with such a thin plate. The same 1/8" NPT plug was used in both plates for comparison
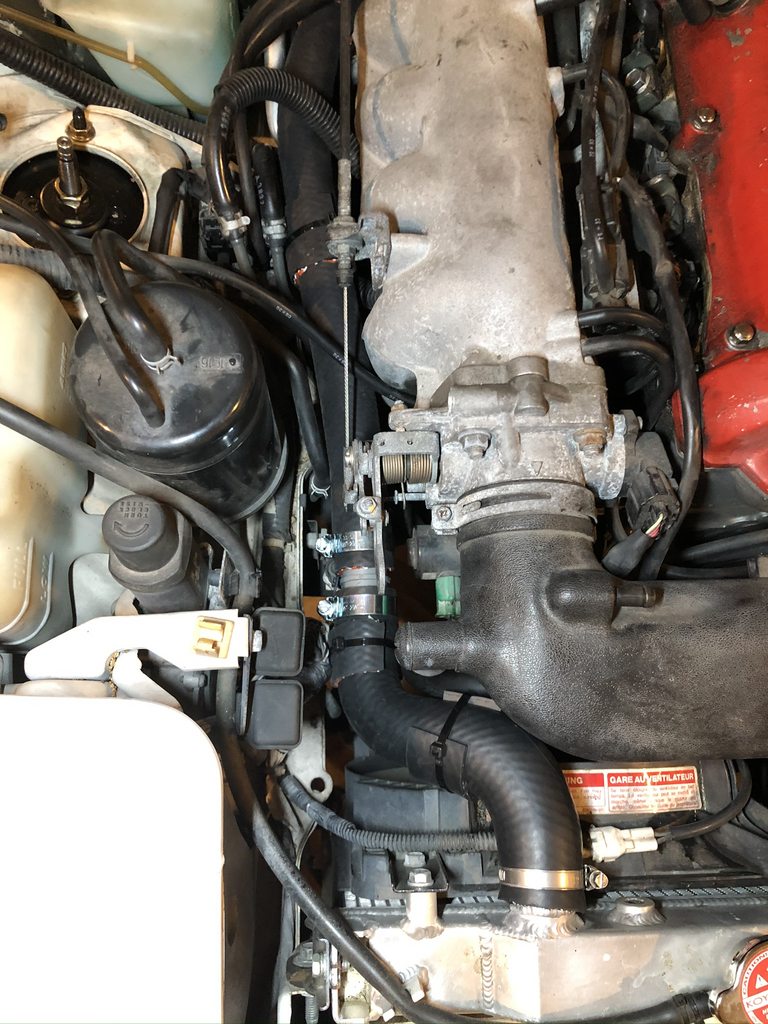
Used a piece of S shaped hose to clear the intake.
Flyin Miata's coolant neck blockoff plate is too thin and the threads for the fan switch plug were messed up on delivery, and I couldn't save it with a tap so I just got the Supermiata blockoff plate. There would have been around 1.5 full revolutions in the flying miata plate, its just too thin.
Thickness comparison between the unfinished flying miata plate and the orange supermiata plate.
With only a 47.4g difference between the two, I'm not sure why Flyin miata decided to go with such a thin plate. The same 1/8" NPT plug was used in both plates for comparison
Used a piece of S shaped hose to clear the intake.
Last edited by chuckieho; 12-01-2020 at 02:40 AM.
Reply
0
0
12-01-2020, 02:44 AM
#5
Junior Member
Thread Starter
Join Date: Jul 2020
Posts: 58
Total Cats: 10
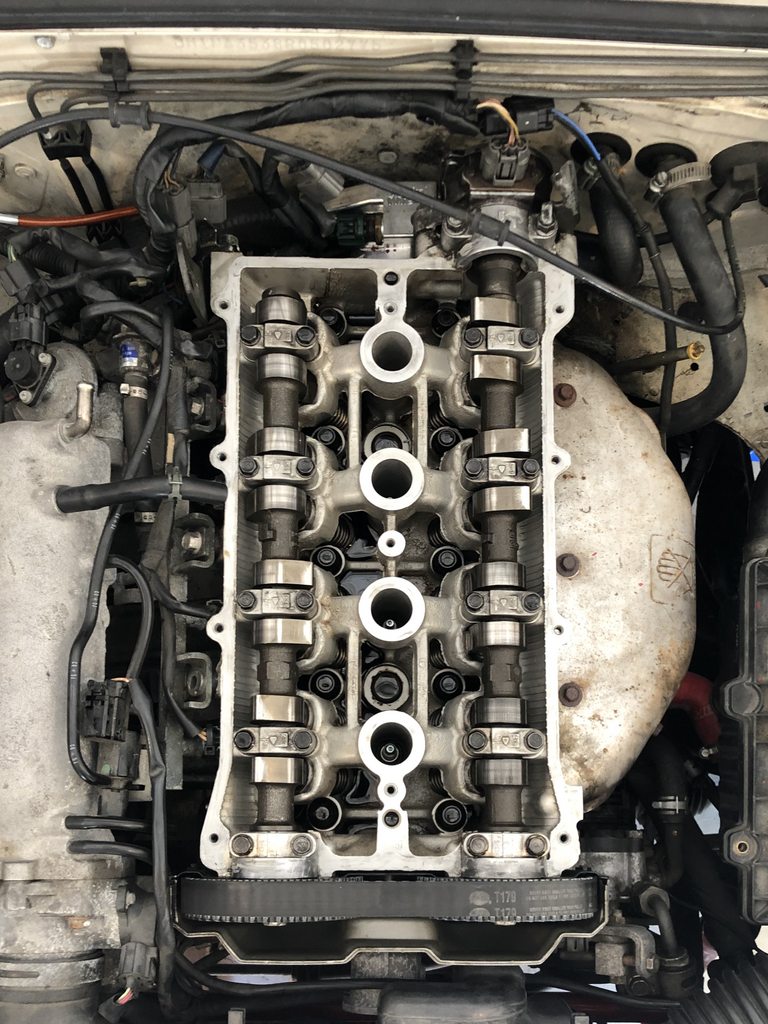
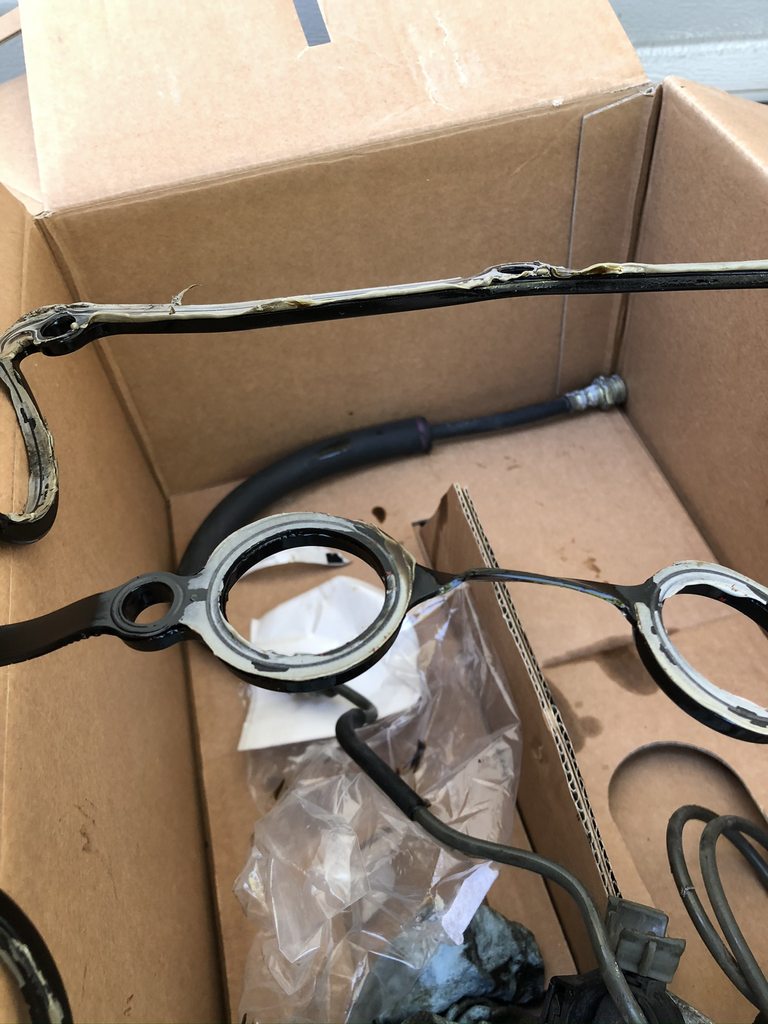
Finally got around to installing the new valve cover, and this is where the troubles start for this car. The valve cover has been leaking for a long time now, and the motor is covered in oil. I haven't been super worried about this since its obviously leaking from the valve cover and its an easy fix. When I pull it off though, the entire valve cover gasket is coated in a layer of RTV. This seemed weird to me since there isn't any info online suggesting that RTV should be used anywhere other than the corners where the CAS is and the cam seals. At the moment I shrugged this off and moved on with a new gasket and the appropriate amounts of RTV in the right locations, but little did I know that this was a warning for the troubles I'd find down the road.
Valvetrain is incredibly clean still, previous owner was changing oil either every 3k miles or 3 months so it stayed clean.
RTV the world
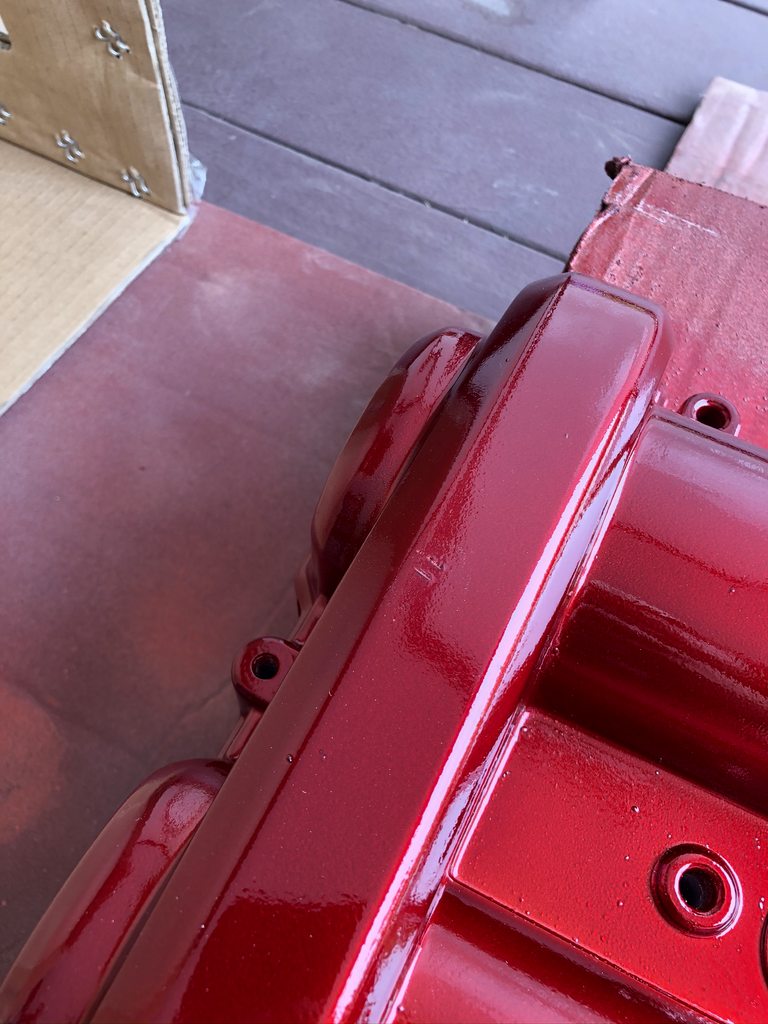
Painted valve cover installed
Valvetrain is incredibly clean still, previous owner was changing oil either every 3k miles or 3 months so it stayed clean.
RTV the world
Painted valve cover installed
Reply
0
0
12-01-2020, 03:05 AM
#6
Junior Member
Thread Starter
Join Date: Jul 2020
Posts: 58
Total Cats: 10
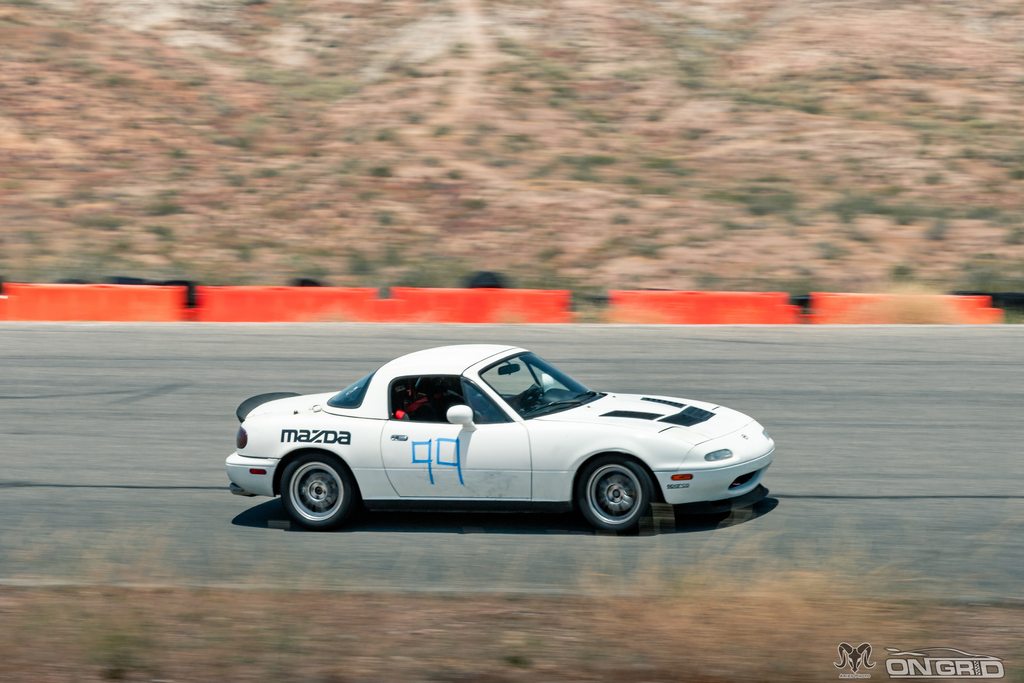
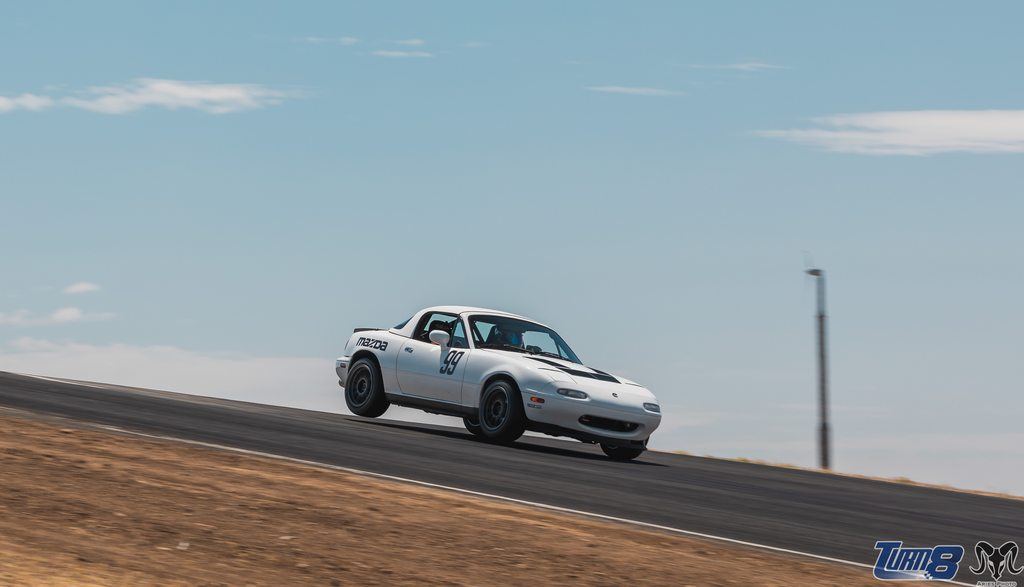
It was time for my first track day with the car so I took the car to Trackspec Autosports in Fremont, CA to have them install the upper ball joint, Trackspec Motorsports (the two companies are not related, btw) hood vents, a set of tires, and an alignment. I didn't do much tire research, and since Trackspec was experienced than I was with track cars I asked for a set of good 200TW tires. They suggested 205/50R15 A052 and I blindly said "sure" without even researching them at all (mistake btw, don't do that). I have 15x7 RPF1, which meant the tires looked absolutely comical on the wheels. In their defense, I didn't tell them I had 7" wheels so that was pretty much on me
Supermiata Race alignment
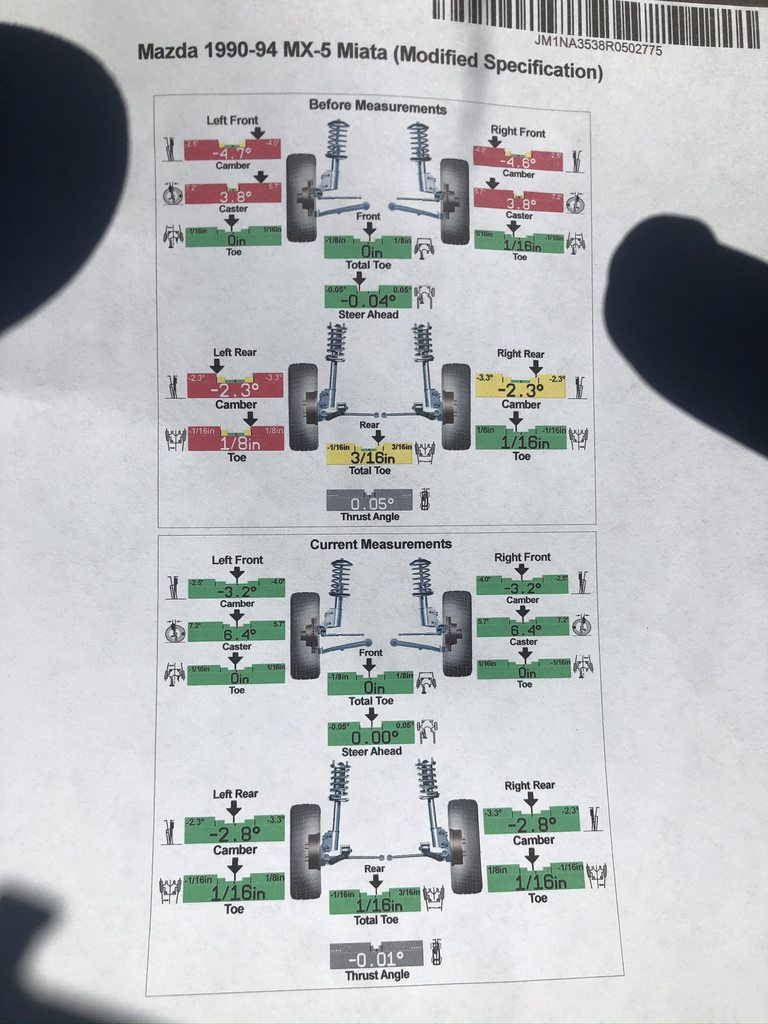
I also had a friend 3D print me a visor blanking plate with a hook to hold my steering wheel when it was off.

This brings us to June 2020
Supermiata Race alignment
I also had a friend 3D print me a visor blanking plate with a hook to hold my steering wheel when it was off.
This brings us to June 2020
Last edited by chuckieho; 12-02-2020 at 02:06 AM. Reason: date
Reply
0
0


 12-01-2020, 09:59 PM
#10
Junior Member
Thread Starter
Join Date: Jul 2020
Posts: 58
Total Cats: 10
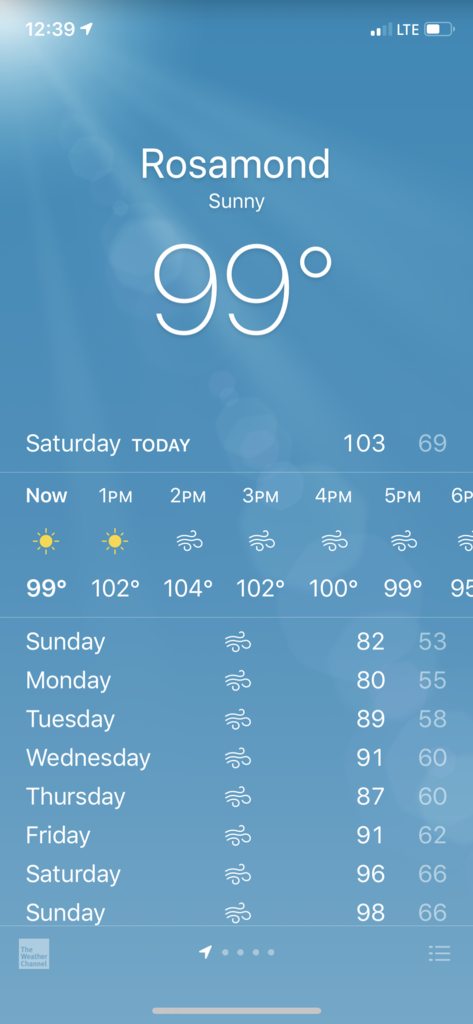
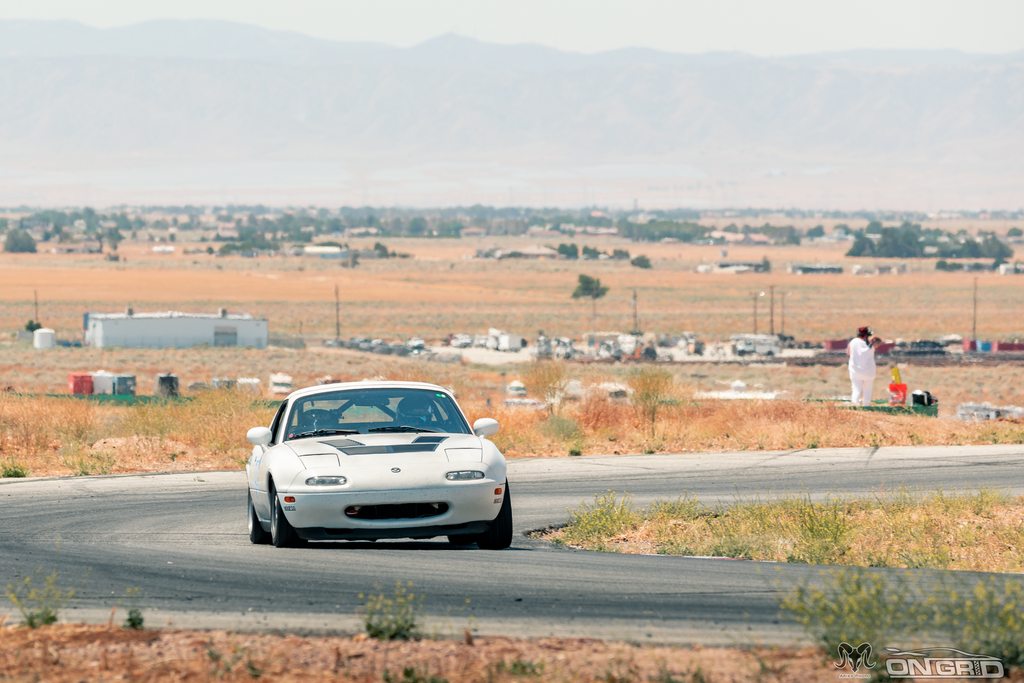
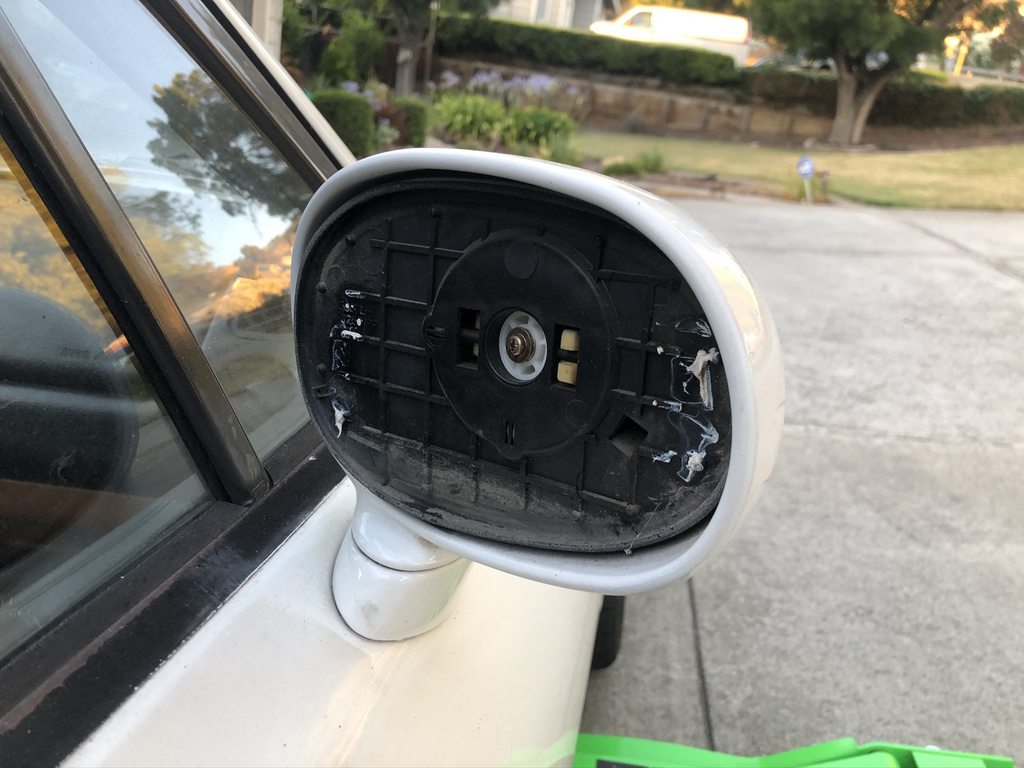
First track day with this car was with OnGrid at Streets of Willow in Rosamond. Ambient temps reached 107 according to my friend's speed3, it was stupid hot out. Mechanically, the car seemed like it did relatively well with no real issues even through all 5 sessions. The only issue that popped up on the day was that the power steering fluid was puking out the top of the reservoir. I also somehow lost my passenger side mirror glass in the middle of a session so that was interesting. We also took a group photo of all the Mazdas FR cars for a promo pic for the new Apex Time Attack series.
Handling-wise, the car was definitely not what I wanted it to be. This was the first time I have driven an RWD car at that point, and it was a completely different experience from my GTI. The tires were waaaaaay too grippy for my skill level, and A052 is known for not being very communicative. That, coupled with my 10k/8k springs and Racing Beat tubular race front sway bar and Racing Beat solid 16mm rear bar, the car was super oversteer biased. The worst part was that I wouldn't know that that was happening until it was too late since I wasn't used to driving the car. I didn't spin that day, but it was definitely a handful to try and keep the car under me. Changes were to be made to give me a little bit easier of a car to drive
This brings us to July 2020
Last edited by chuckieho; 12-02-2020 at 02:14 AM. Reason: date
Reply
0
0
12-02-2020, 02:03 AM
#11
Junior Member
Thread Starter
Join Date: Jul 2020
Posts: 58
Total Cats: 10
After I got home, I realized that I actually did have a couple of problems with the car, but at surface level nothing super serious. The oil dipstick tube was leaking oil as well as the CAS. Theoretically, both of those are relatively easy fixes with just a couple of new o rings, but as I got into them I kept finding RTV places where RTV shouldn't have been. Coating of RTV on the dipstick tube as well as RTV that was stuck on the CAS because so much was used on the head. I'm starting to wonder if IMS really knows what they're doing.

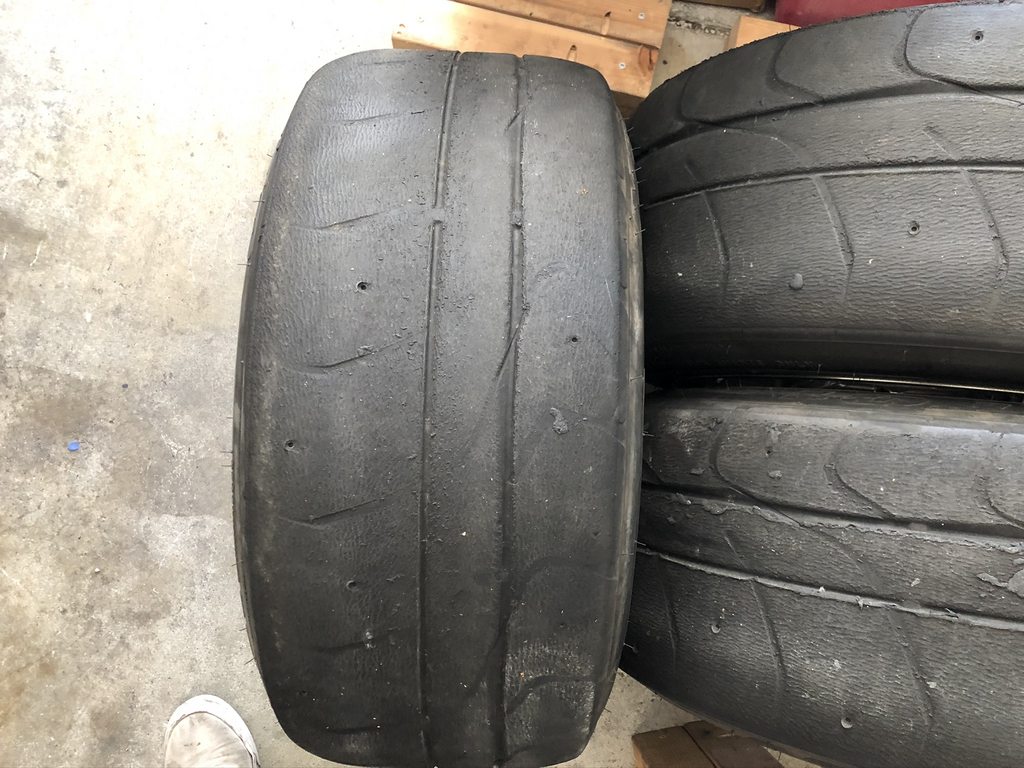
I also got a set of Konig Dekagram in 15x9ET35, and put a set of NT01 I got for cheap from @_slowboi on Instagram.

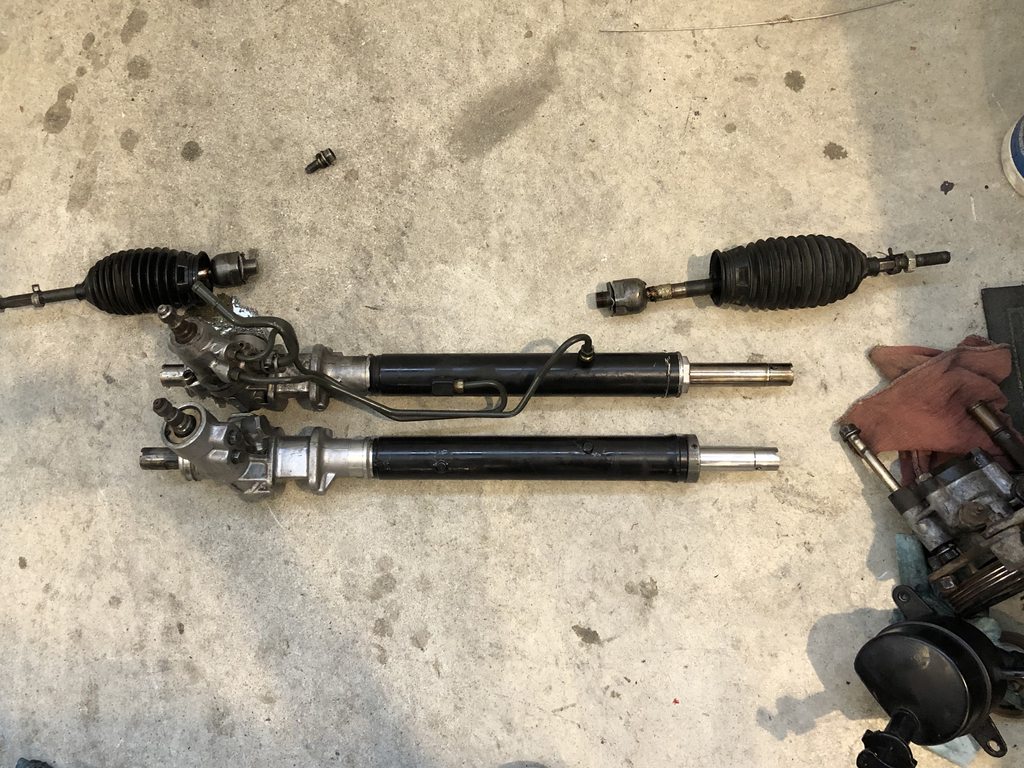
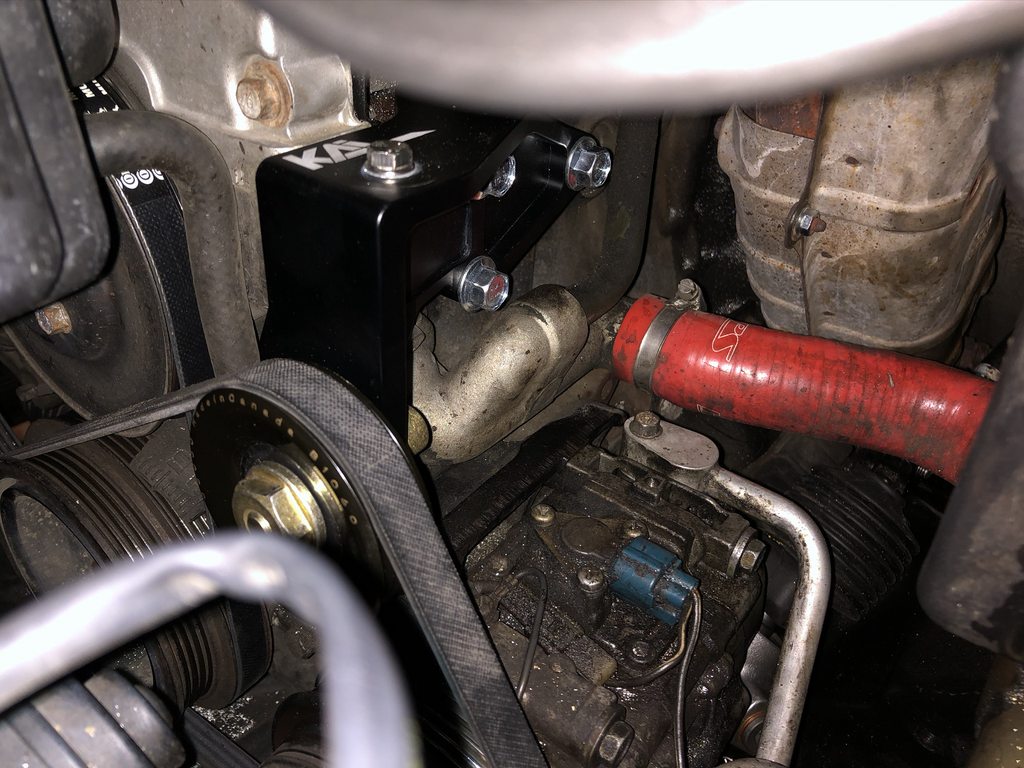
Also installed a depowered rack so that I wouldn't have to deal with power steering fluid anymore, a set of 5x racing steering rack spacers, and a KAI power steering delete pulley.
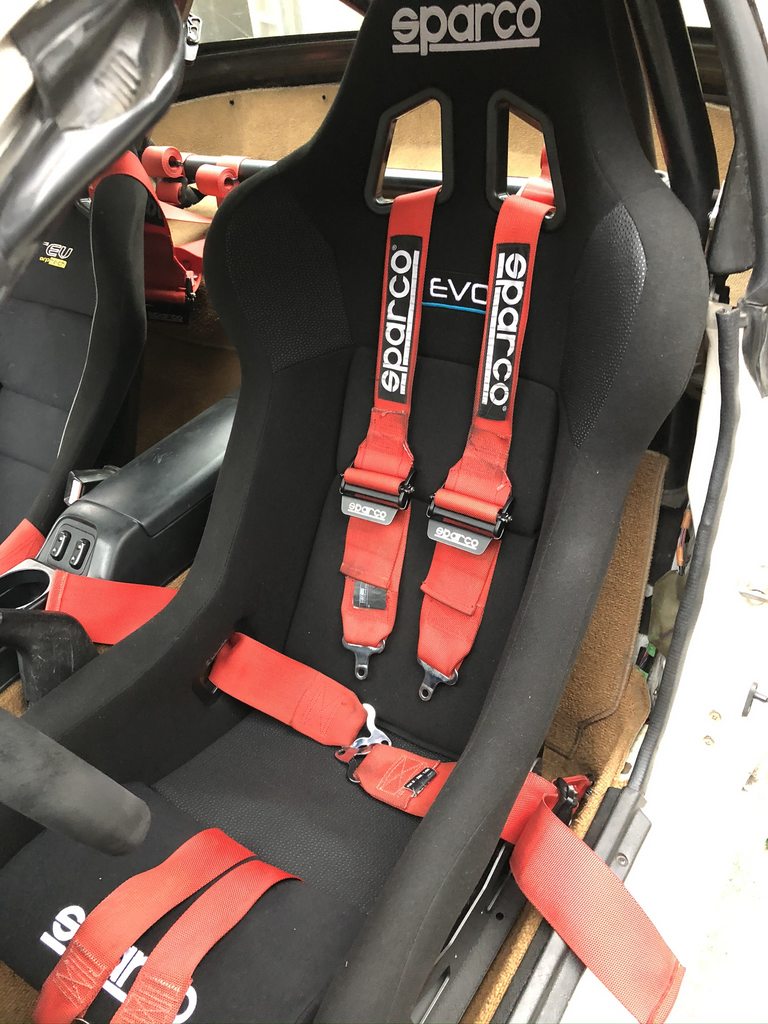
I also installed a new seat, a Sparco Evo with some PCI adjustable seat mounts because the Sparco Rev technically fit, but the Evo fit way better. I was able to get lower in the car and be a lot more comfortable.
I don't have any pics of it, but I picked up a stock rear swaybar from a friend for free to try and reduce the tailhappiness nature of the car.
This brings us to August 2020
I also got a set of Konig Dekagram in 15x9ET35, and put a set of NT01 I got for cheap from @_slowboi on Instagram.
Also installed a depowered rack so that I wouldn't have to deal with power steering fluid anymore, a set of 5x racing steering rack spacers, and a KAI power steering delete pulley.
I also installed a new seat, a Sparco Evo with some PCI adjustable seat mounts because the Sparco Rev technically fit, but the Evo fit way better. I was able to get lower in the car and be a lot more comfortable.
I don't have any pics of it, but I picked up a stock rear swaybar from a friend for free to try and reduce the tailhappiness nature of the car.
This brings us to August 2020
Last edited by chuckieho; 12-02-2020 at 02:36 AM.
Reply
0
0
12-02-2020, 02:22 AM
#12
Junior Member
Thread Starter
Join Date: Jul 2020
Posts: 58
Total Cats: 10
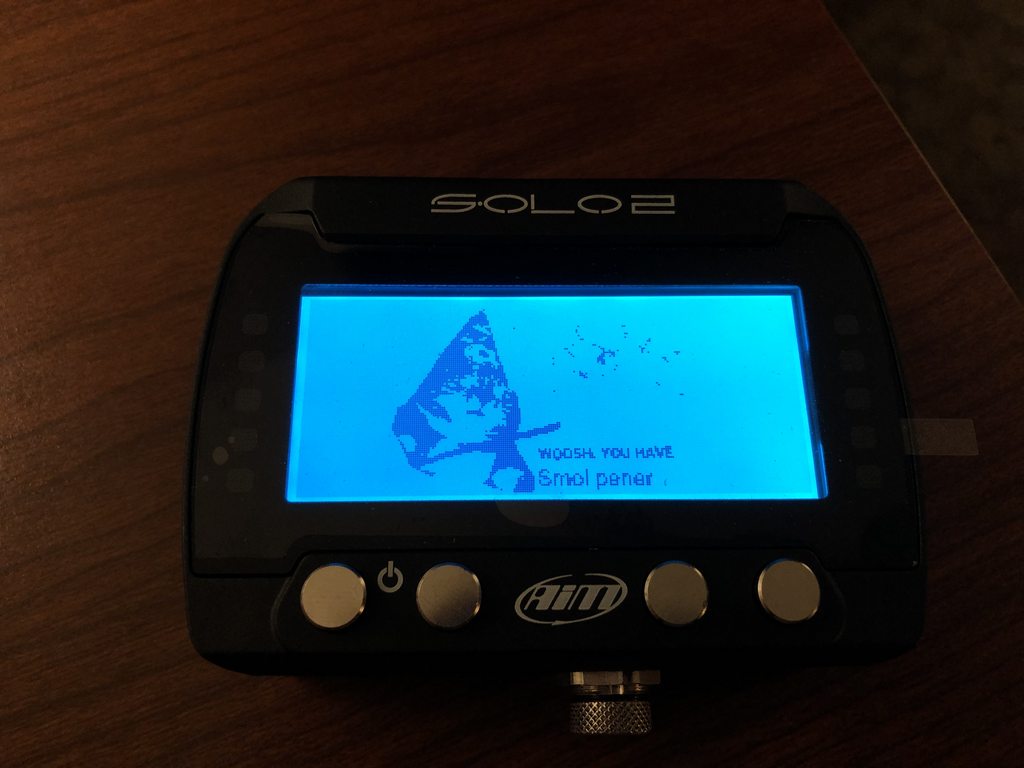
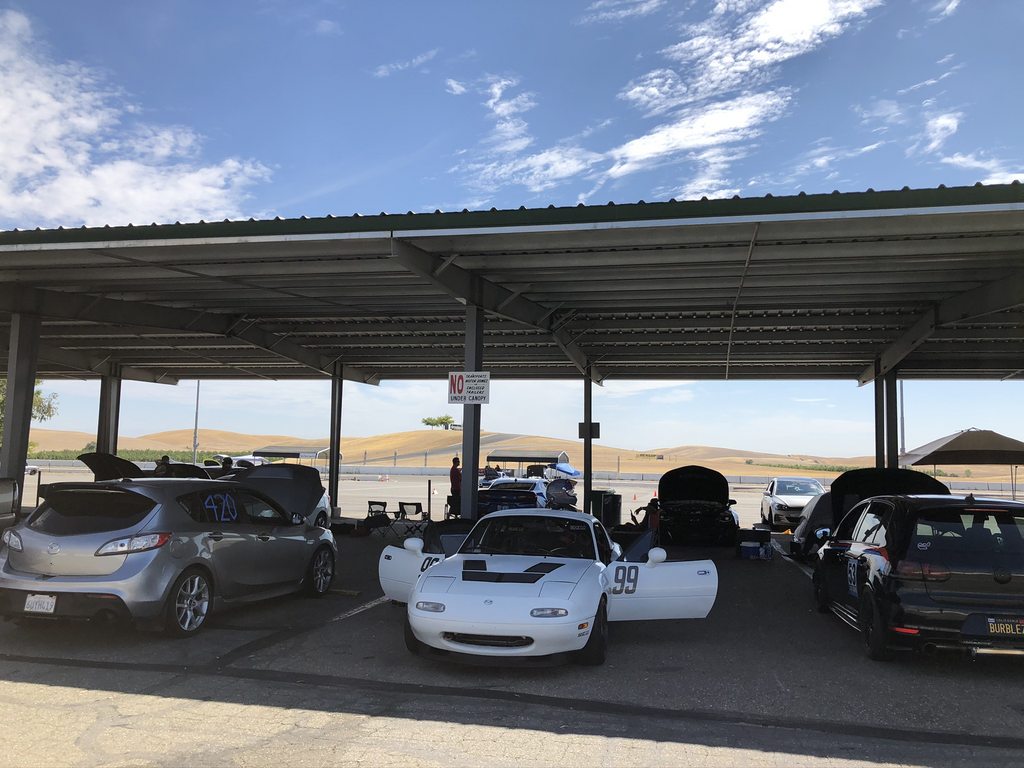
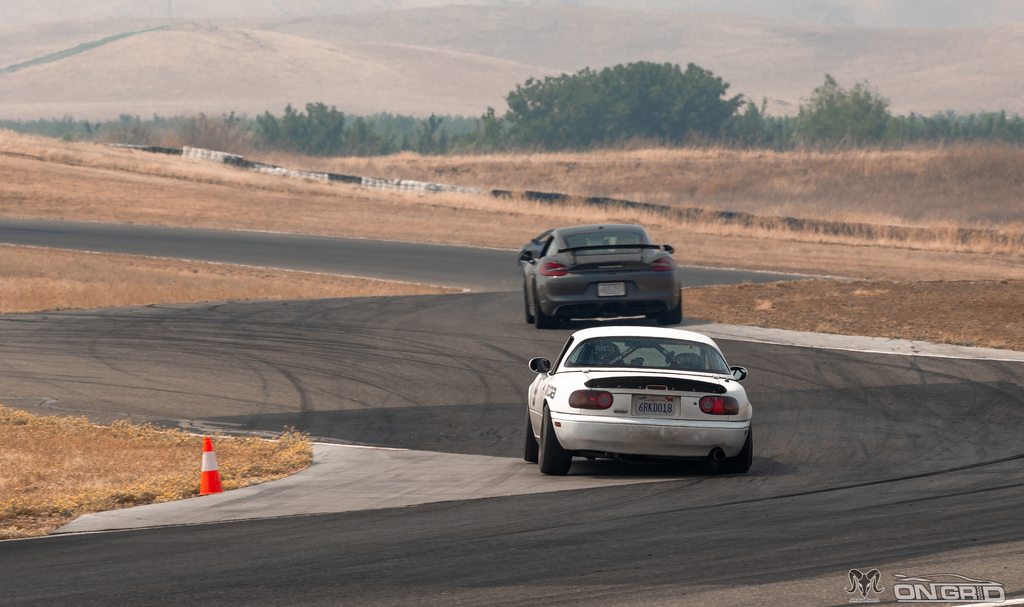
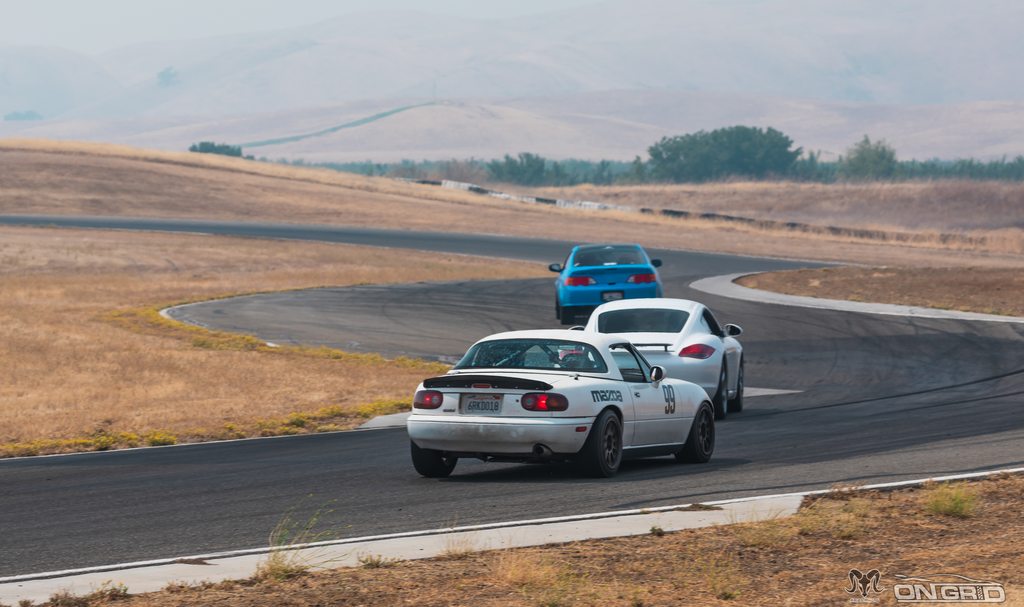
Time for the next track day, this time with a new track organization called Turn8 at Thunderhill East. Their signature is that they have an open pit session at the end of the day where you can run as much as you want for 2h with ~25 cars on track at a time. Got myself an Aim Solo 2 since I kinda expected to be doing this more often now and 10Hz GPS timing would be nice as opposed to my 1Hz phone GPS for TrackAddicts.
Got a friend to cut me some numbers, turns out they're on a reflective vinyl which is pretty cool.
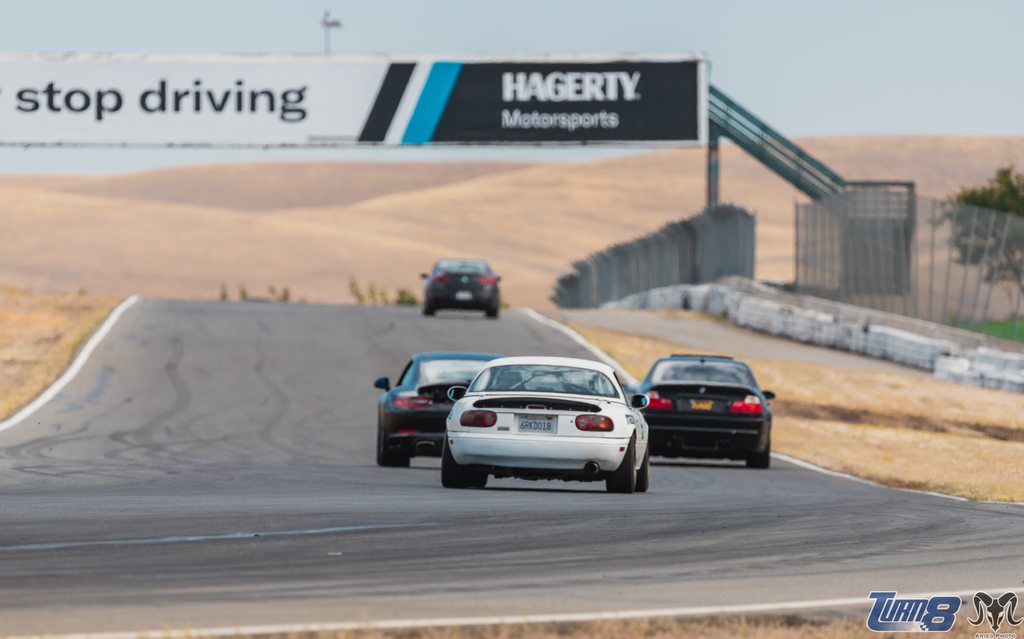
With the stock rear swaybar, the car was a lot easier to drive and it didn't feel like it was gonna kill me with every turn. Even then, I was still only able to run a 2:14.609 but my GoPro only recorded my 2:15.349 lap.
Got a friend to cut me some numbers, turns out they're on a reflective vinyl which is pretty cool.
With the stock rear swaybar, the car was a lot easier to drive and it didn't feel like it was gonna kill me with every turn. Even then, I was still only able to run a 2:14.609 but my GoPro only recorded my 2:15.349 lap.
Last edited by chuckieho; 12-02-2020 at 02:38 AM.
Reply
0
0
12-02-2020, 02:32 AM
#13
Junior Member
Thread Starter
Join Date: Jul 2020
Posts: 58
Total Cats: 10
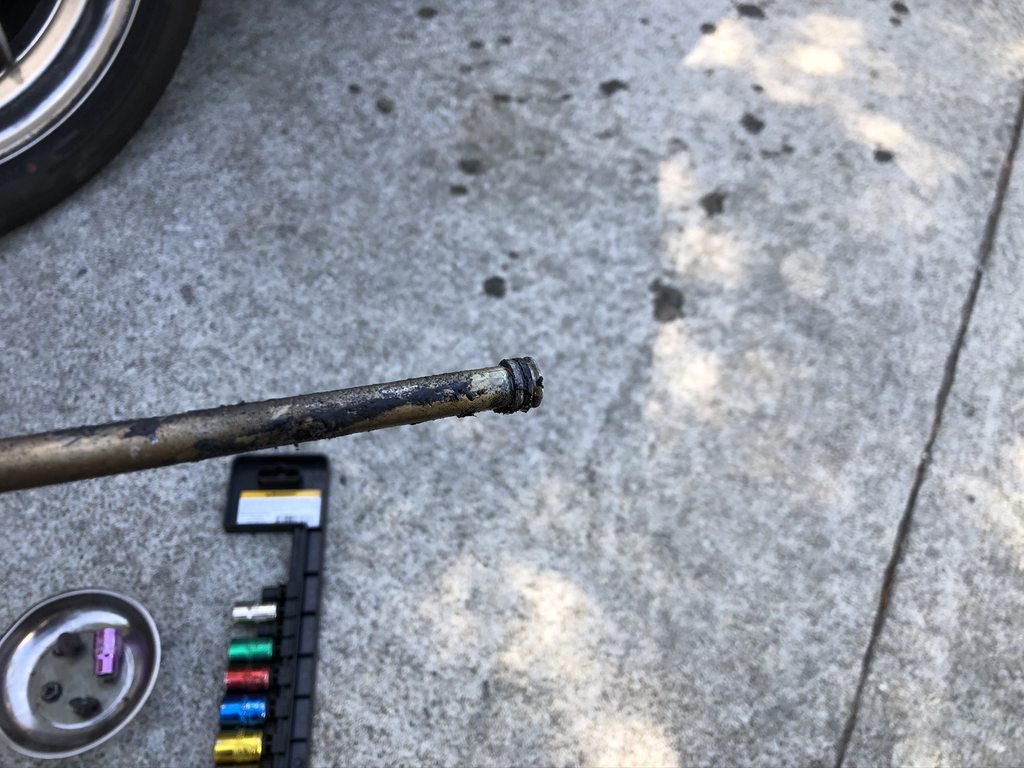
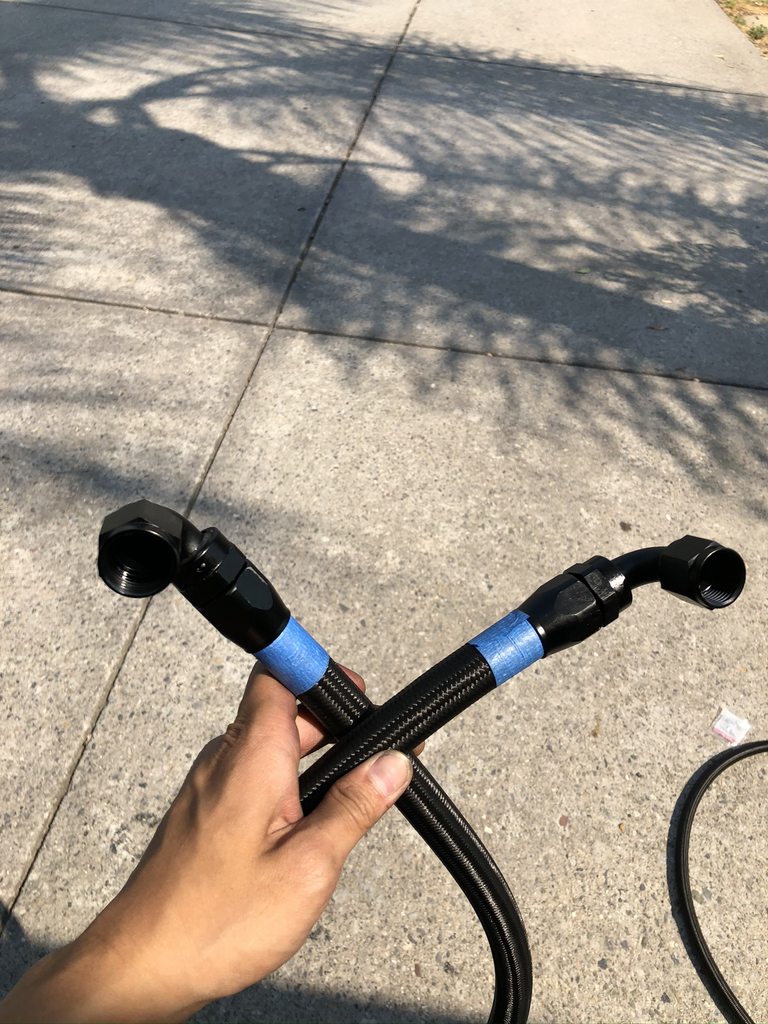
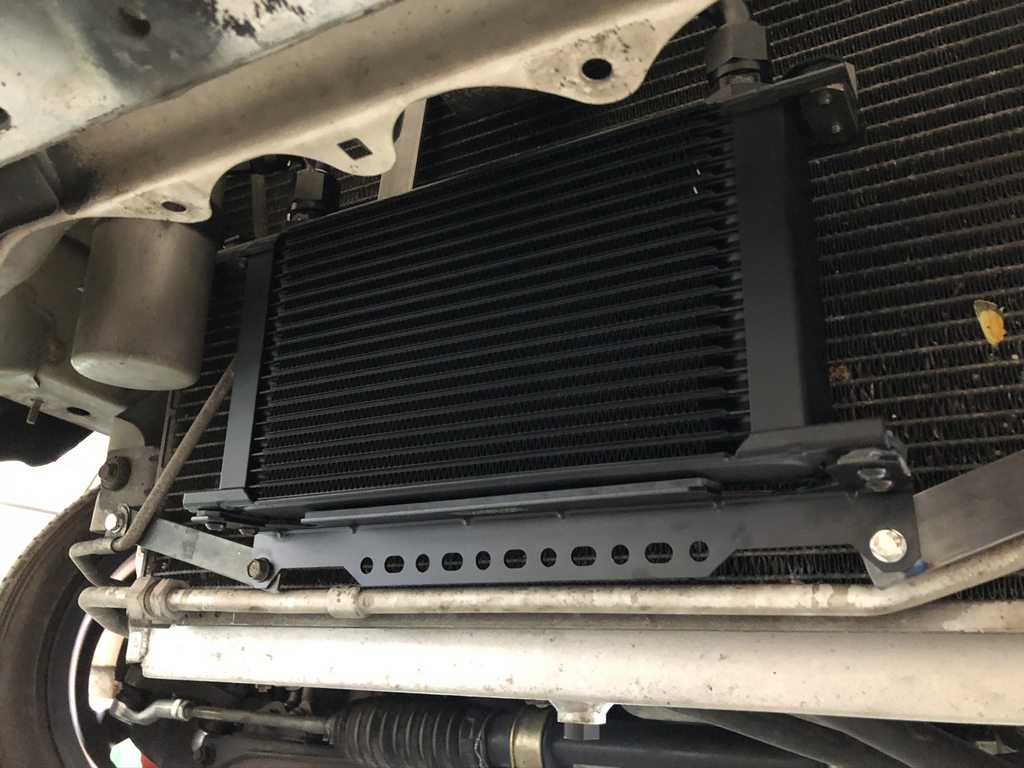
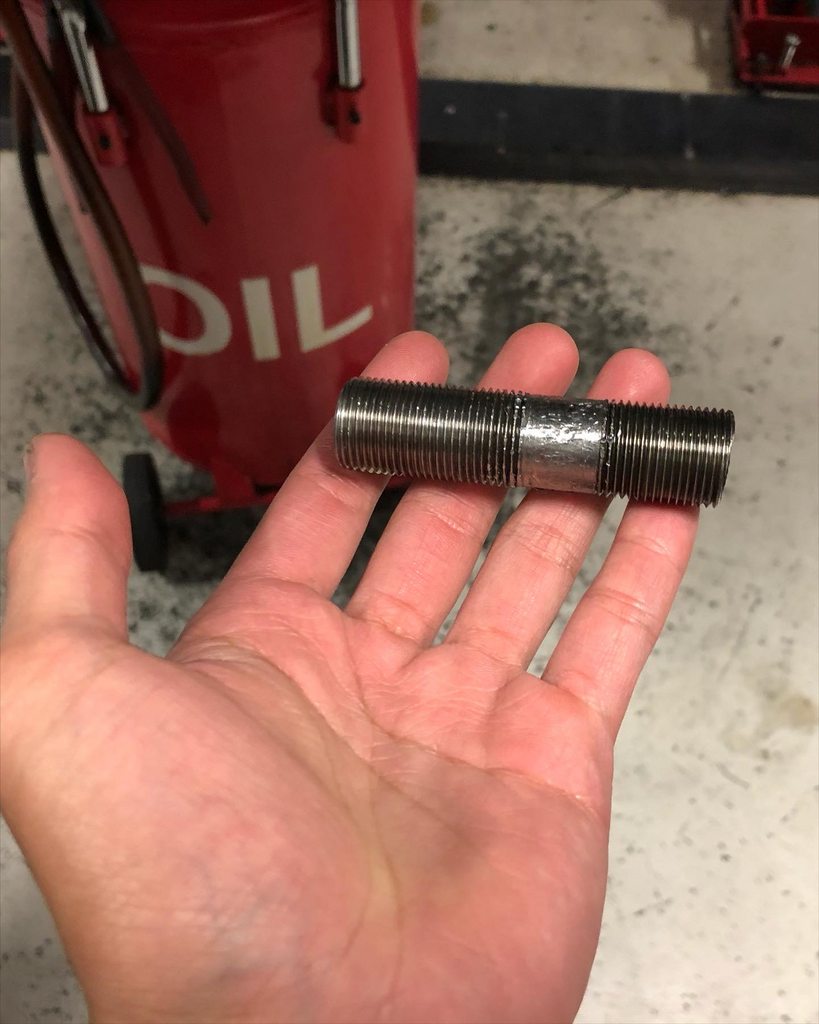
So far, every single track day I've been at has been over 100*F, so I figured an oil cooler wouldn't hurt. Pieced together a kit using a Setrab 6 series 19 row cooler (no clue why i sized it this large, I prob got lost in the sauce on the internet and decided I needed the largest cooler ever), Vibrant fittings and lines, and a CircuitSports thermostatic oil sandwich plate. I at first couldn't get the sandwich plate on, so when I took the car to Trackspec again for them to double-check something, I asked them to take a look at the oil cooler and see what was going on. Turns out IMS had hacked off a bit of the oil filter stud for some reason, making it too short for the sandwich plate adapter to grab a hold onto. Also, the cut was nowhere near square so I'm really not sure what IMS is doing over there. The oil filter was only held on by like 3 full revolutions which had always seemed strange to me, but I didn't question it since I thought that was normal. Apparently, that's not normal. Replaced the stud with an uncut one and all was well.
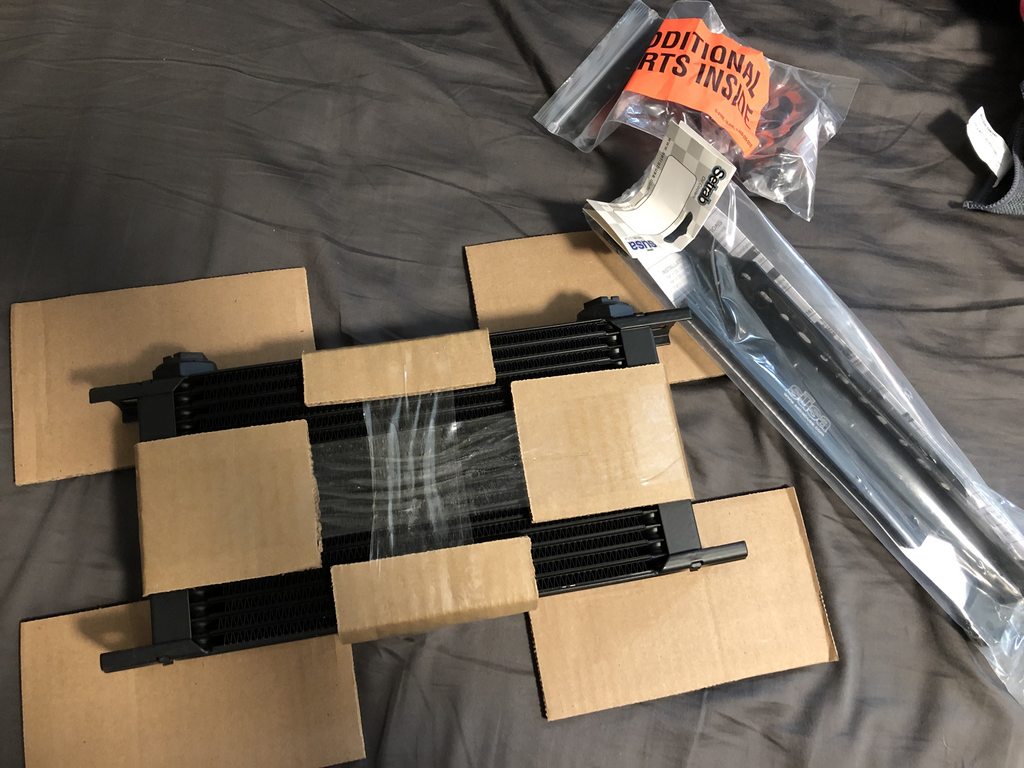
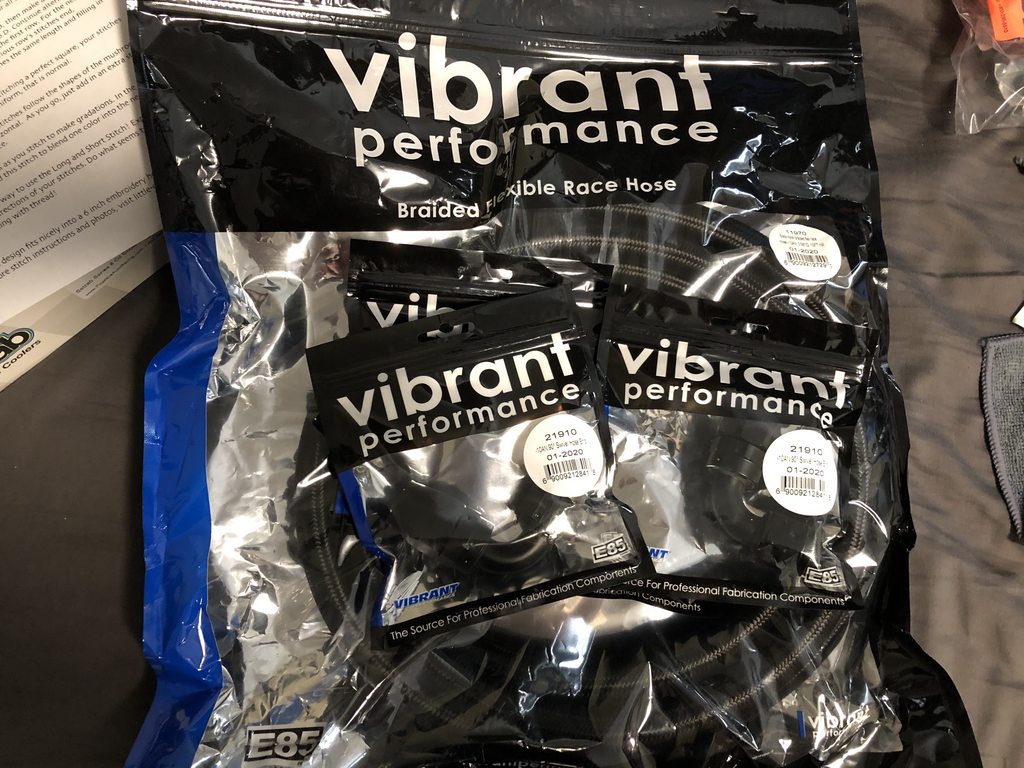
First time making AN lines
Had my neighbor and friend help me weld up some captive nuts.
Oil filter stud cut crookedly
First time making AN lines
Had my neighbor and friend help me weld up some captive nuts.
Oil filter stud cut crookedly
Reply
0
0
12-02-2020, 03:10 AM
#14
Junior Member
Thread Starter
Join Date: Jul 2020
Posts: 58
Total Cats: 10
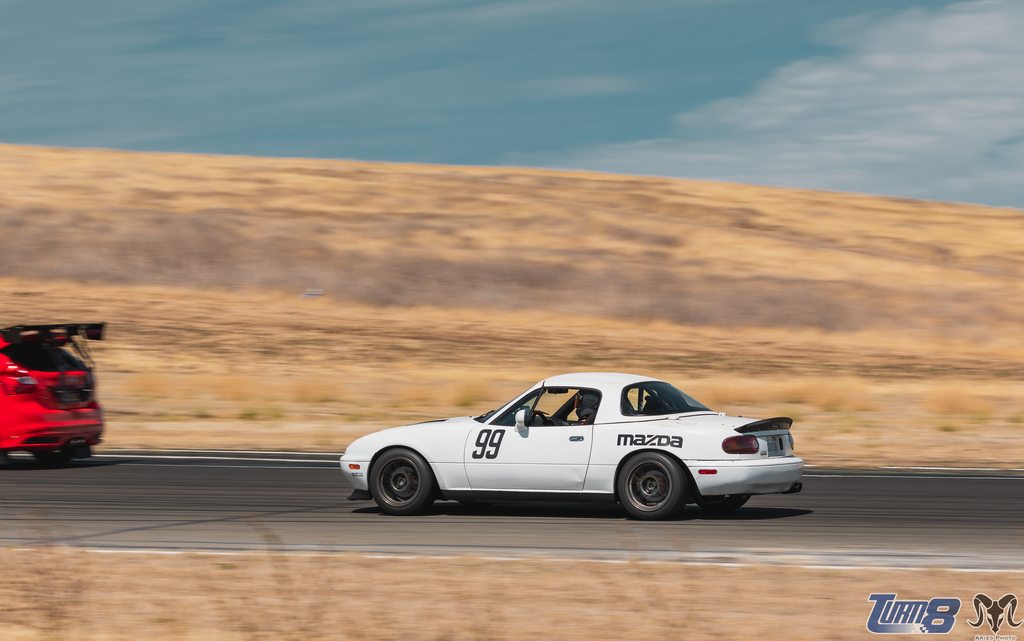
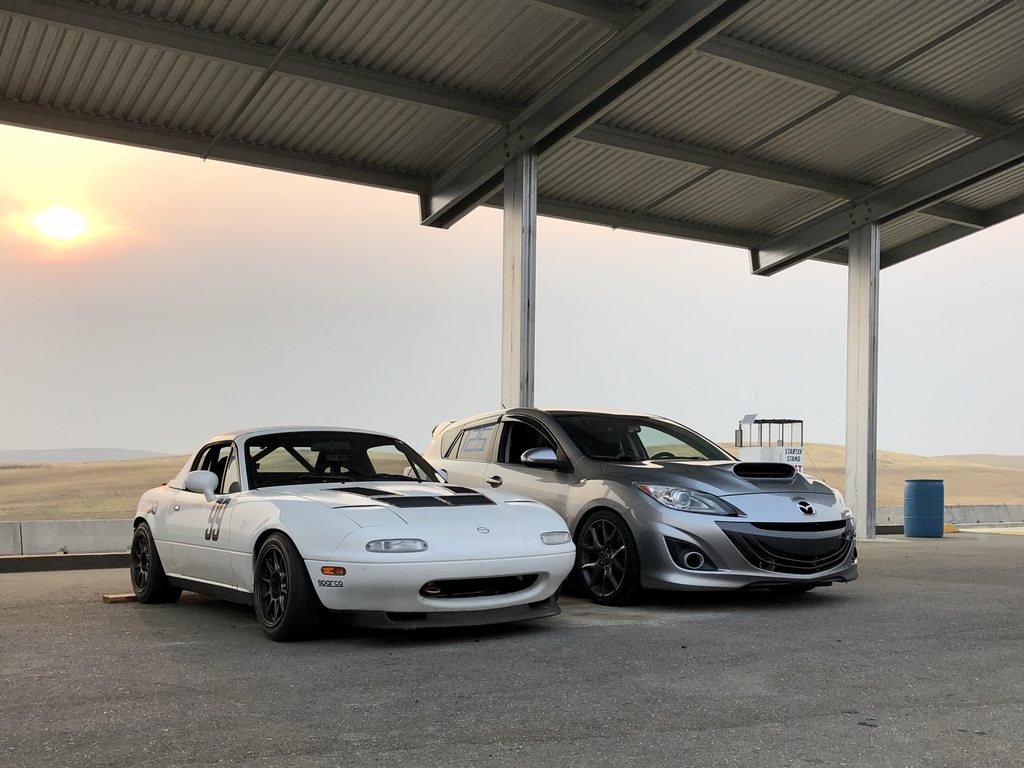
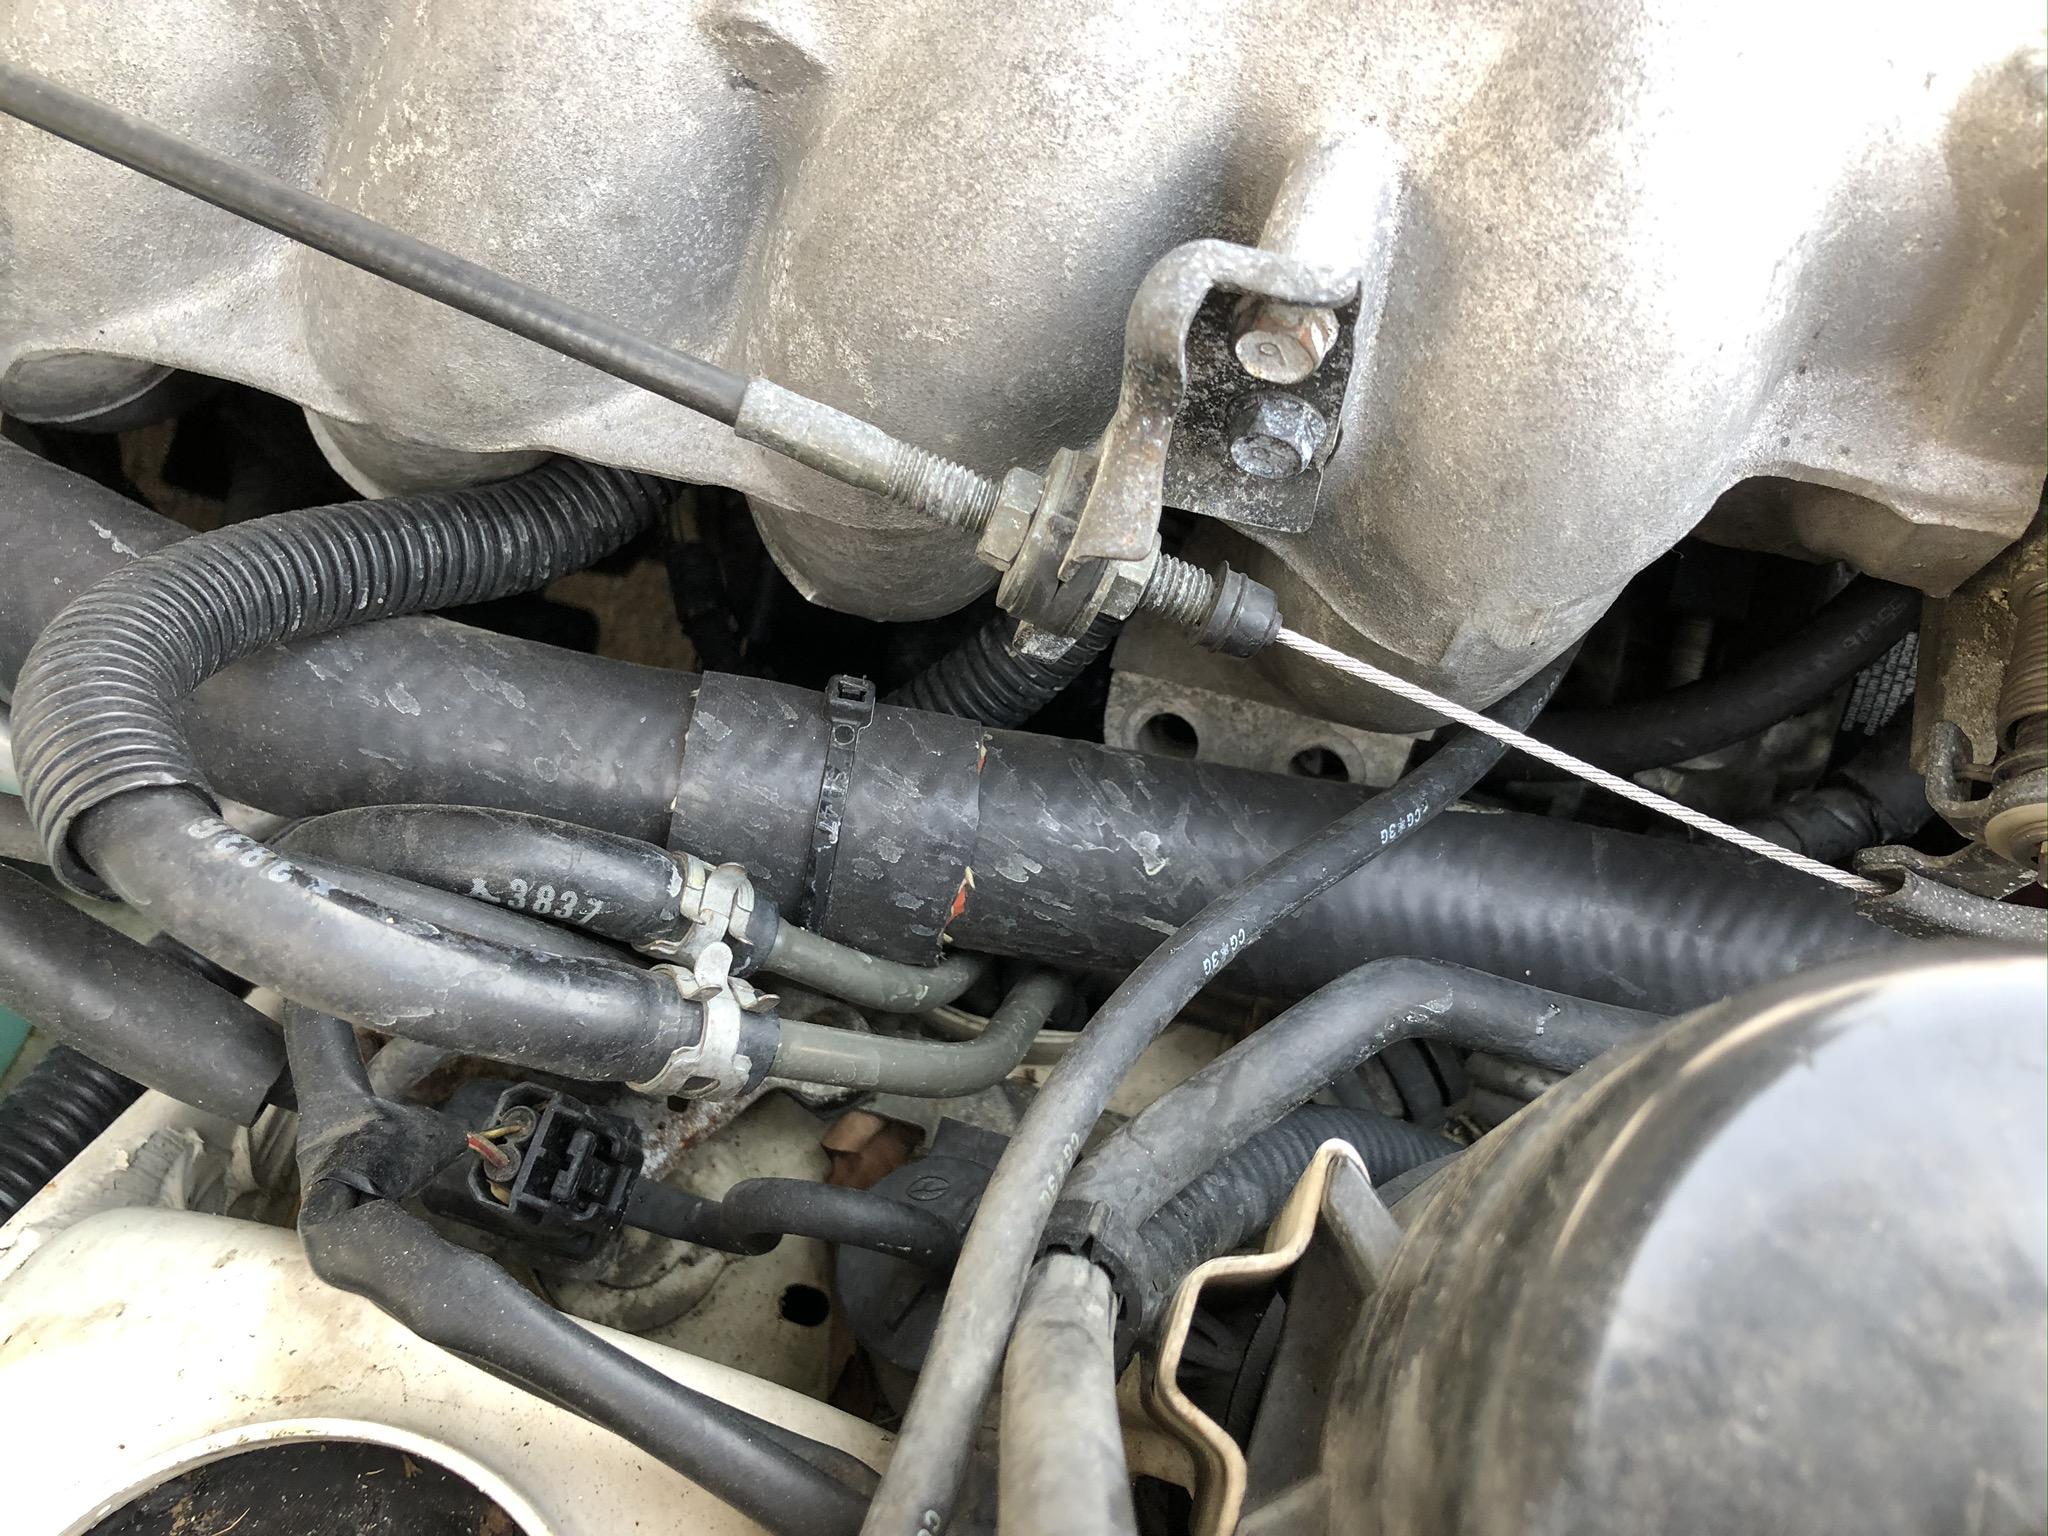
Another track weekend, this time a double header weekend consisting of Thunderhill East with NCRC on Saturday, and then Thunderhill West on Sunday with OnGrid. This weekend was particularly exciting since it was the first time I would be repeating a track, meaning I didn't have to completely learn it from scratch. The car ran pretty well for both of the 2 days, but I noticed that there was liquid on my windshield after a session, so I checked it out and there was coolant that was spraying up through my hood and onto my windshield. My coolant overflow was also empty too, which was concerning, but my stock temperature gauge had not moved at all past center during any of my sessions on track so I wasn't too concerned. I refilled it with some distilled water and kept running session after session.
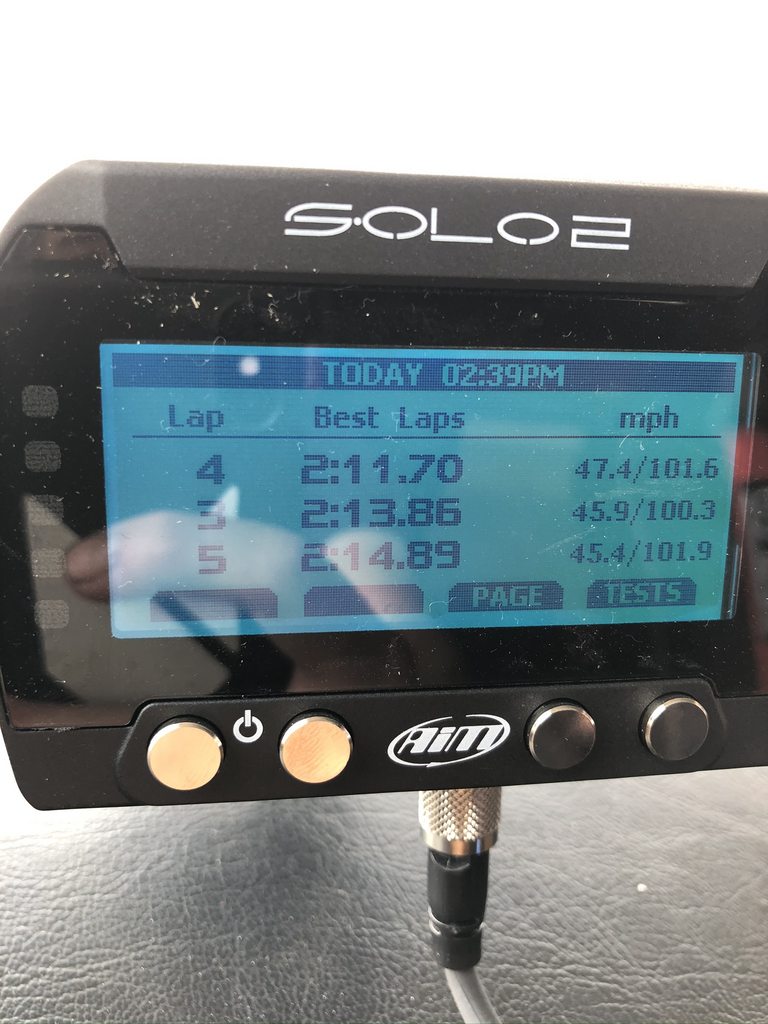
Was able to put in a 2:11.702 at East, and a 1:31.608 my first time at West.
Side Note: The mosquitoes at Willows, CA around this time of year are brutal. I was waiting for my food INSIDE at Black Bear Diner and in the 15 minutes I sat, I picked up 22 mosquito bites. Maybe I'm just a mosquito magnet and unlucky, but good god I was so miserable.
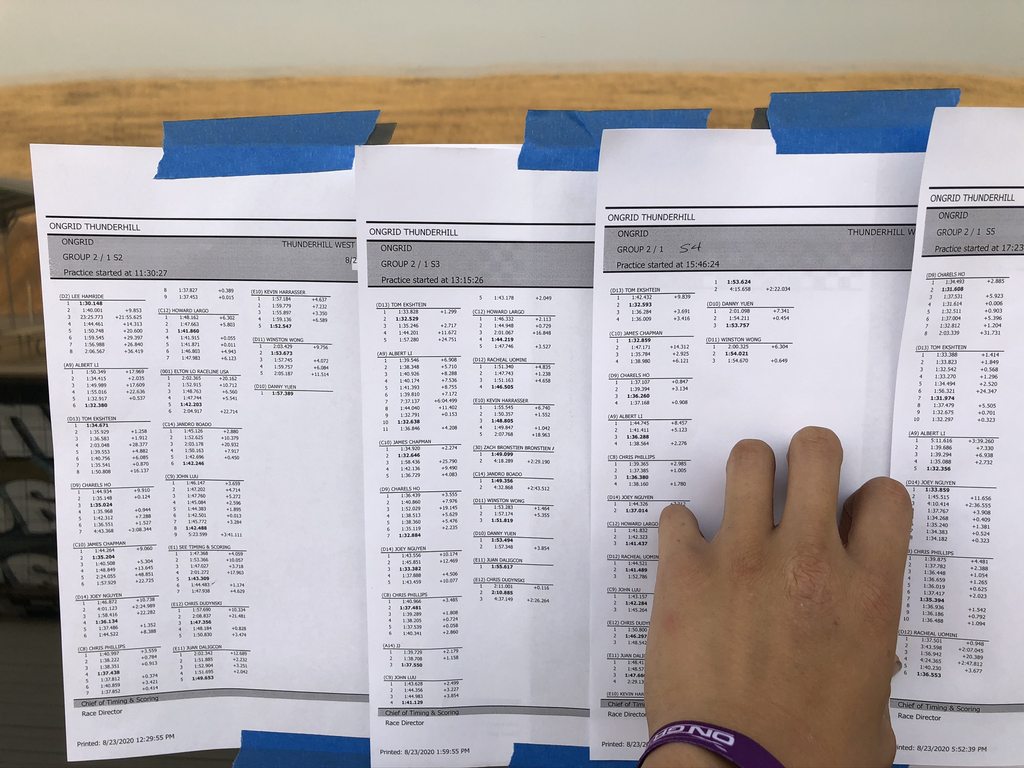
Top of the Group 1/2 leaderboard with a 1:31.608
Coolant on my hood vents and engine bay

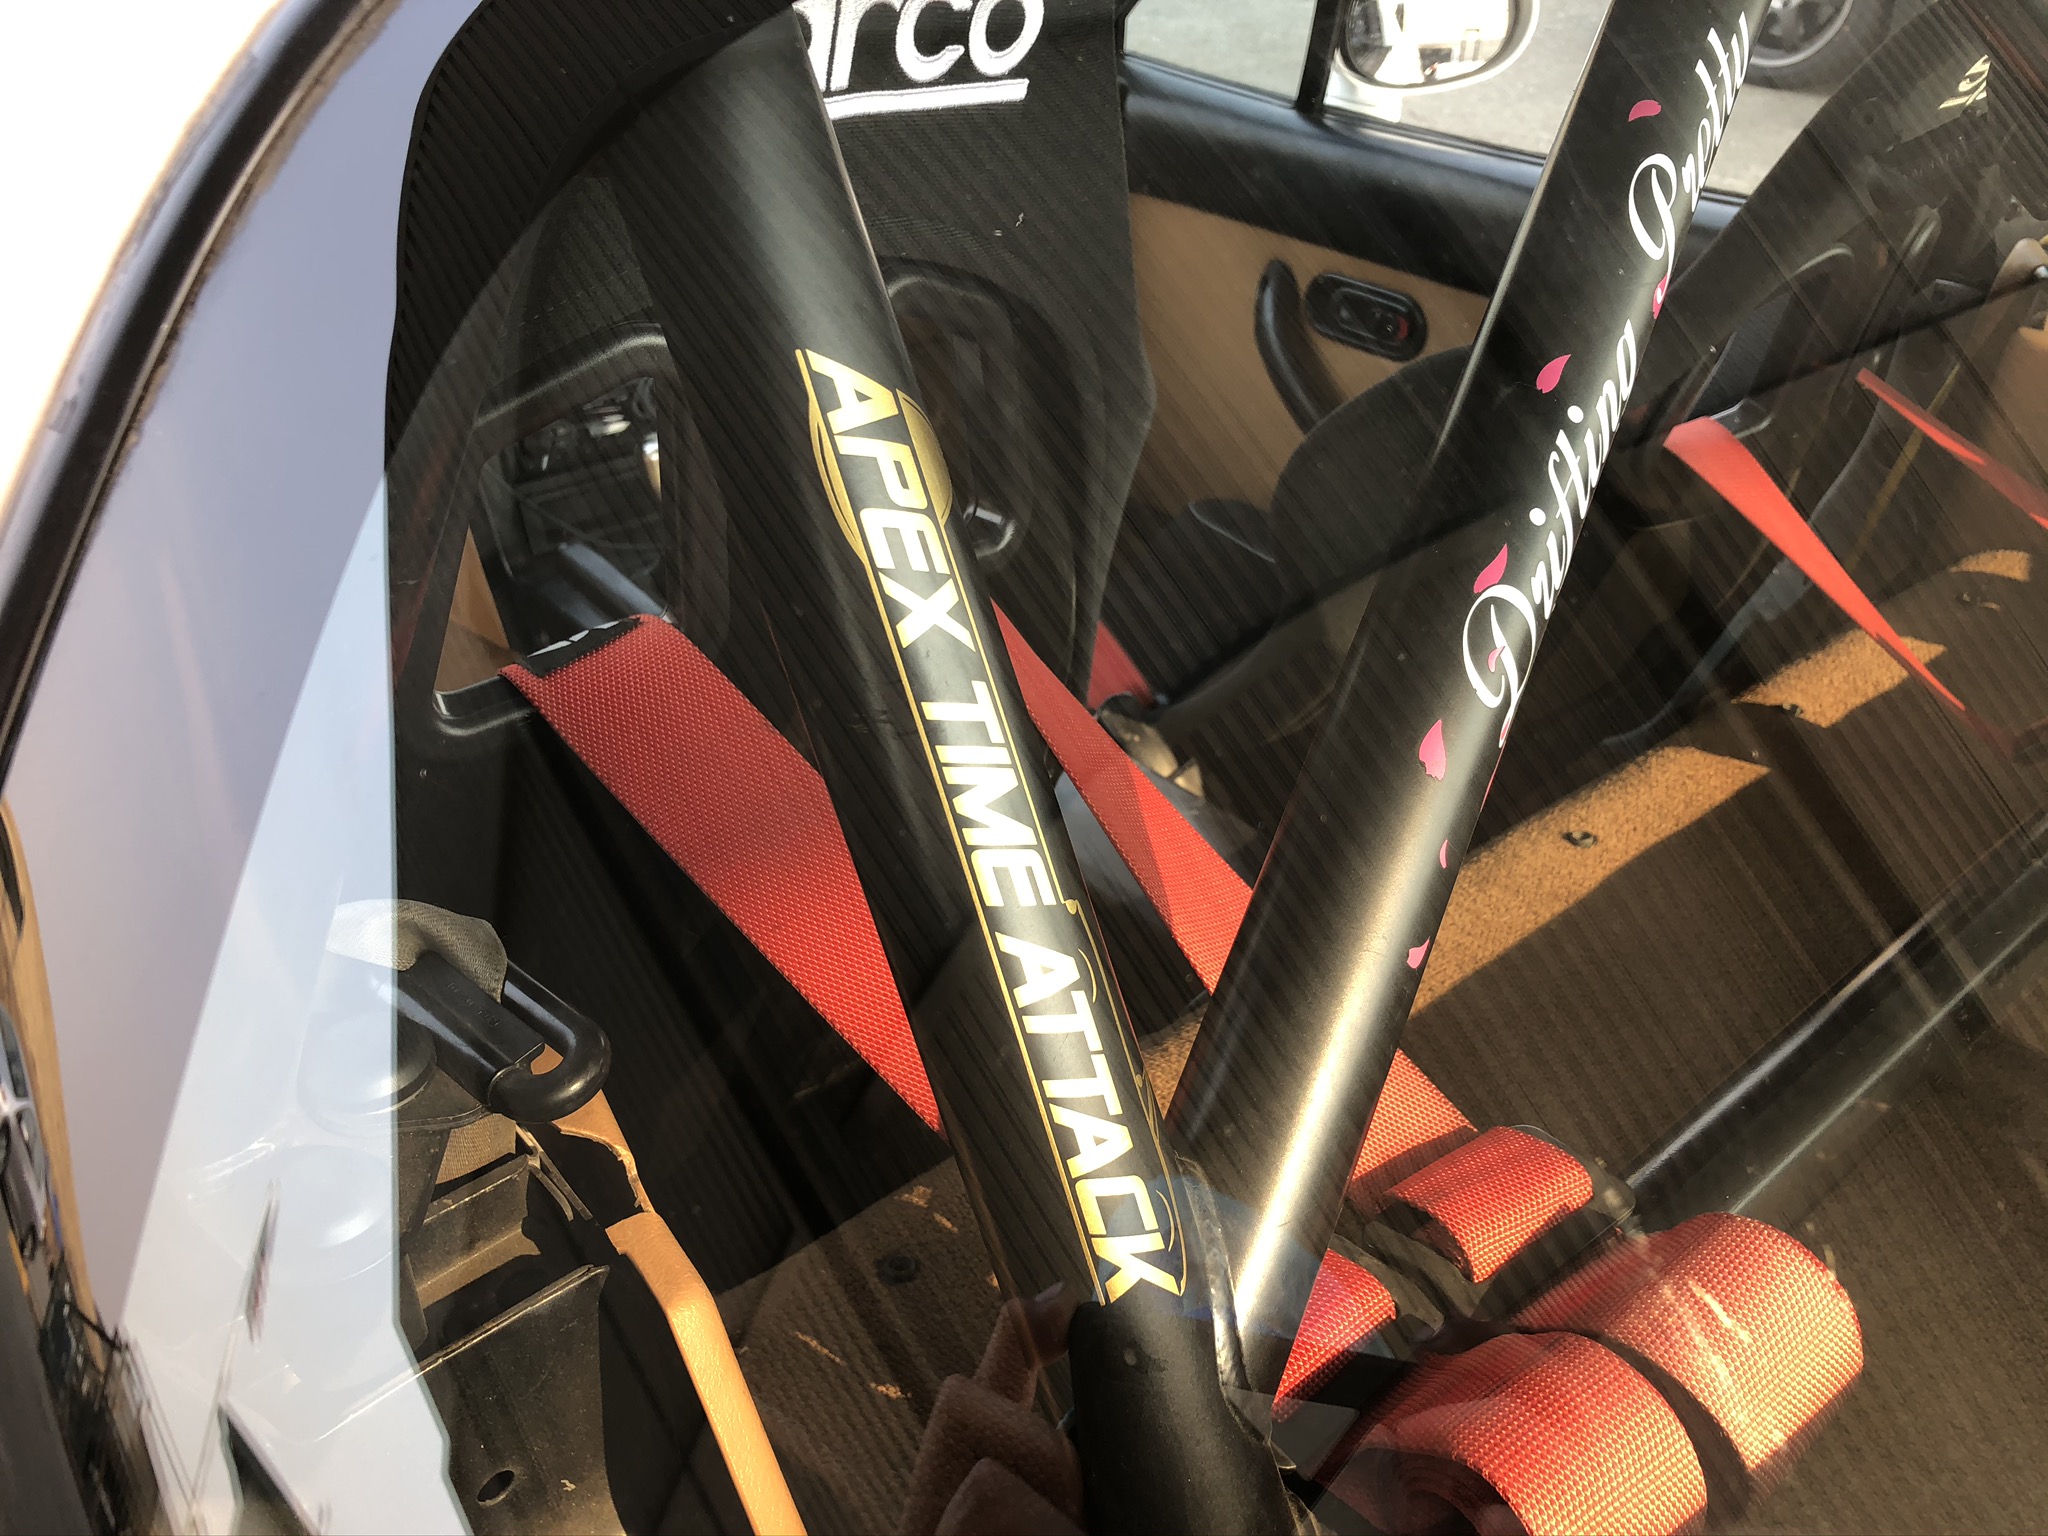
Also a sweet Apex Time Attack sticker went on the rollbar
Was able to put in a 2:11.702 at East, and a 1:31.608 my first time at West.
Side Note: The mosquitoes at Willows, CA around this time of year are brutal. I was waiting for my food INSIDE at Black Bear Diner and in the 15 minutes I sat, I picked up 22 mosquito bites. Maybe I'm just a mosquito magnet and unlucky, but good god I was so miserable.
Top of the Group 1/2 leaderboard with a 1:31.608
Coolant on my hood vents and engine bay
Also a sweet Apex Time Attack sticker went on the rollbar
Reply
0
0
12-02-2020, 03:27 AM
#15
Junior Member
Thread Starter
Join Date: Jul 2020
Posts: 58
Total Cats: 10
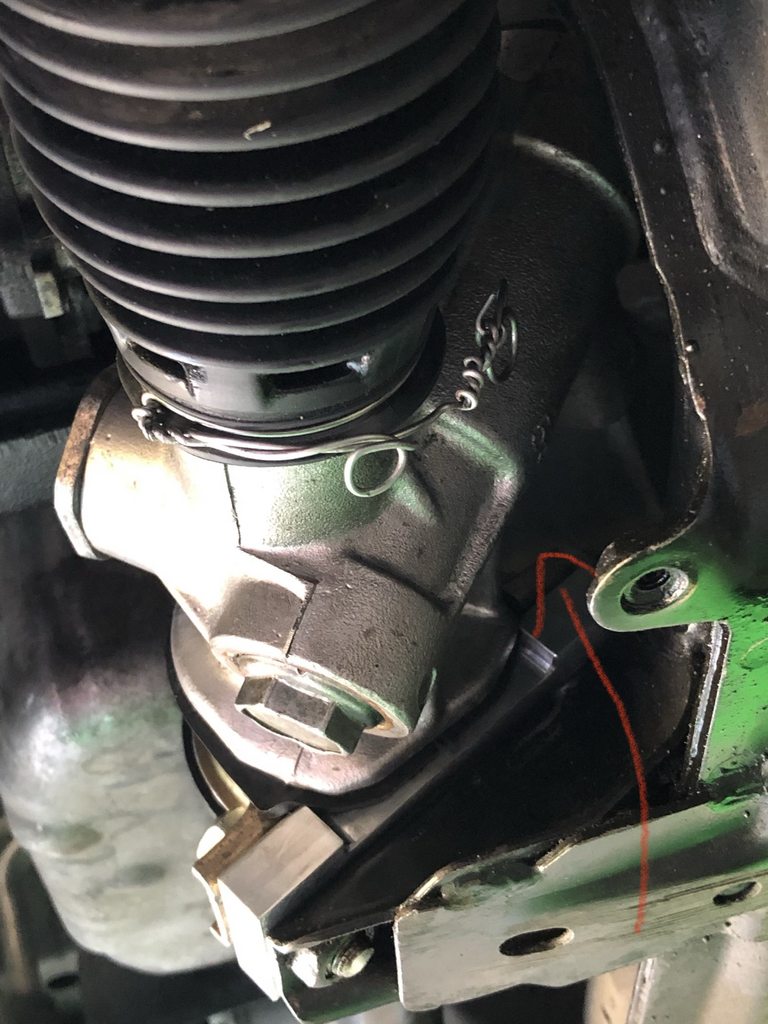
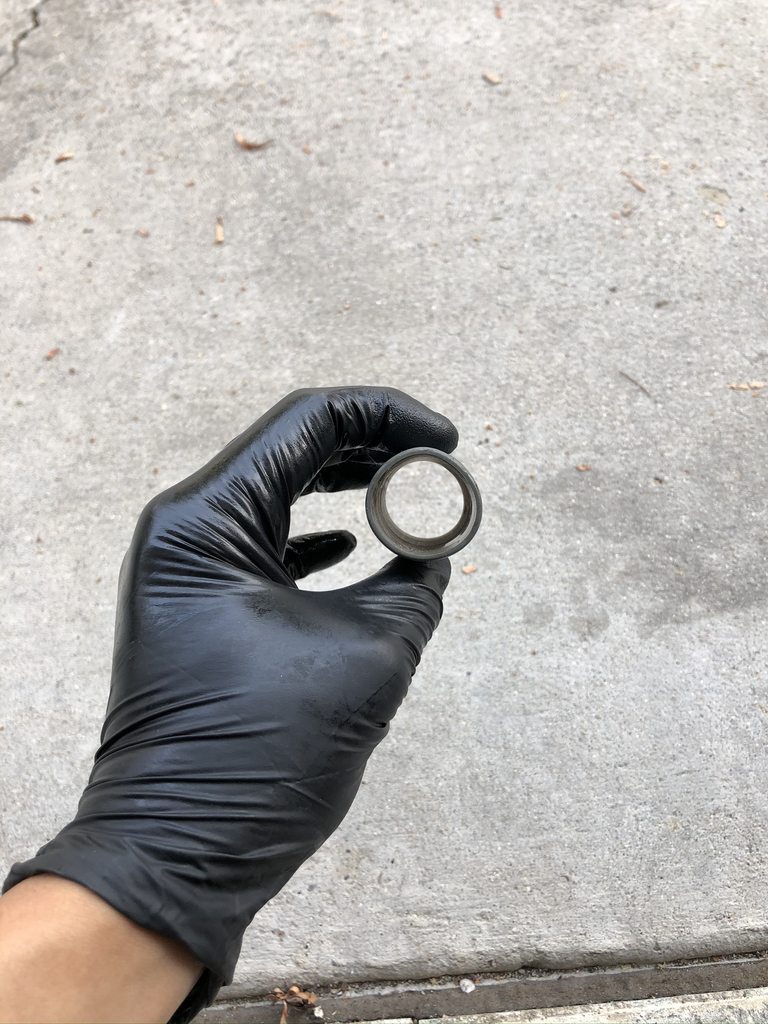
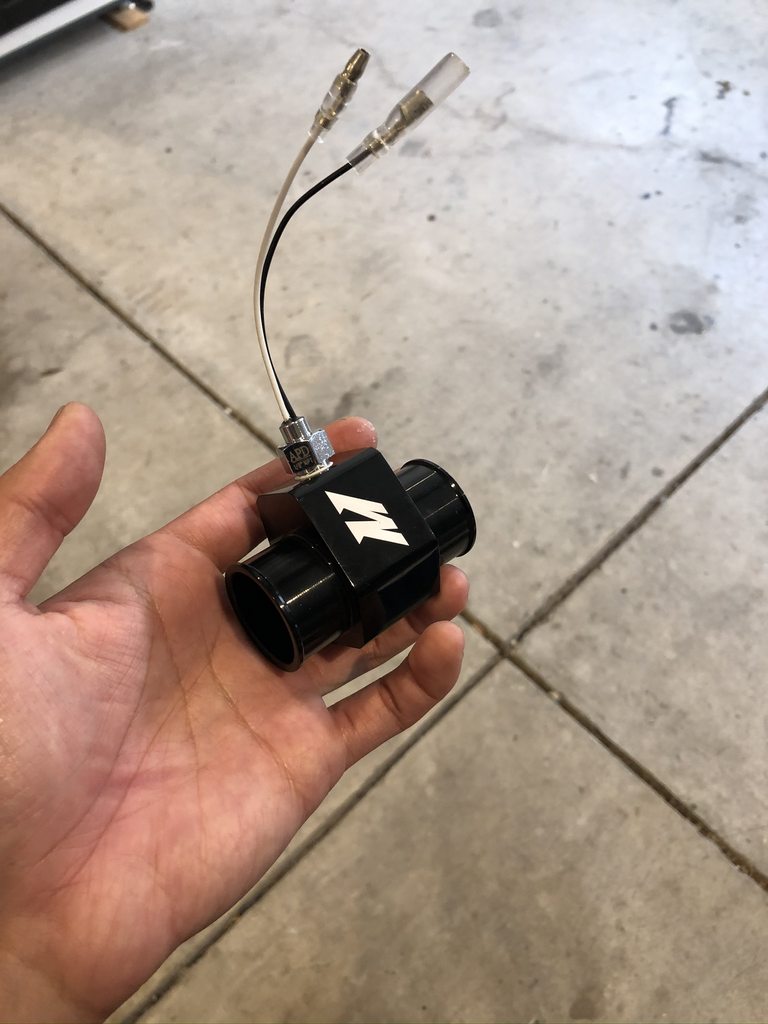
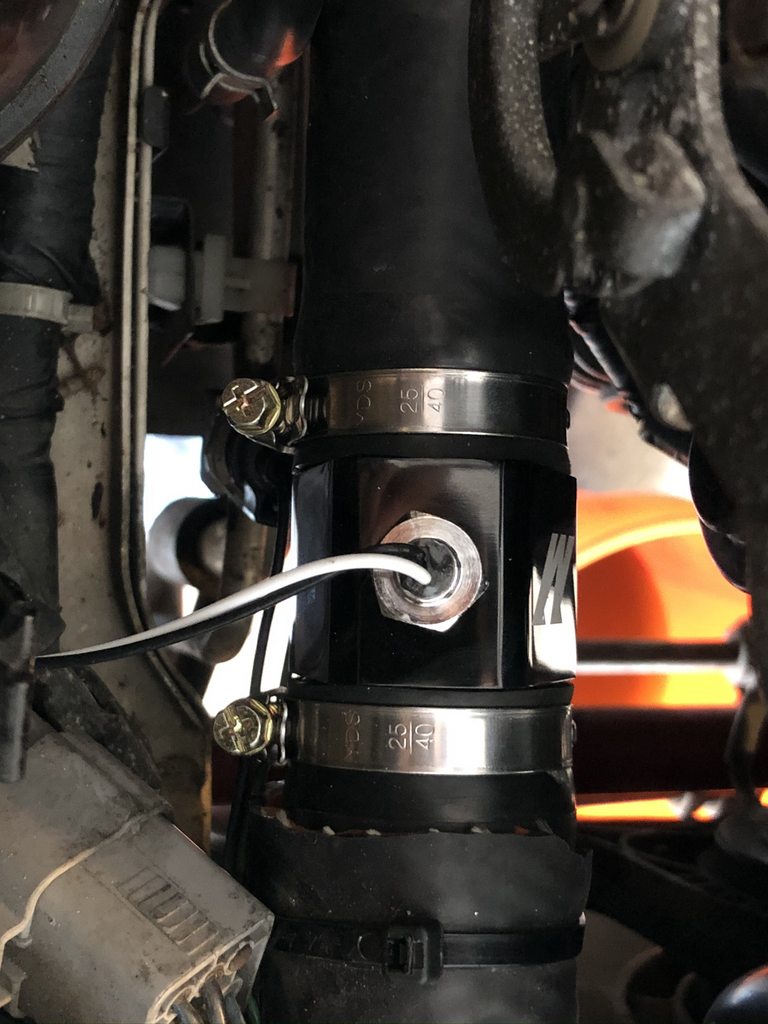
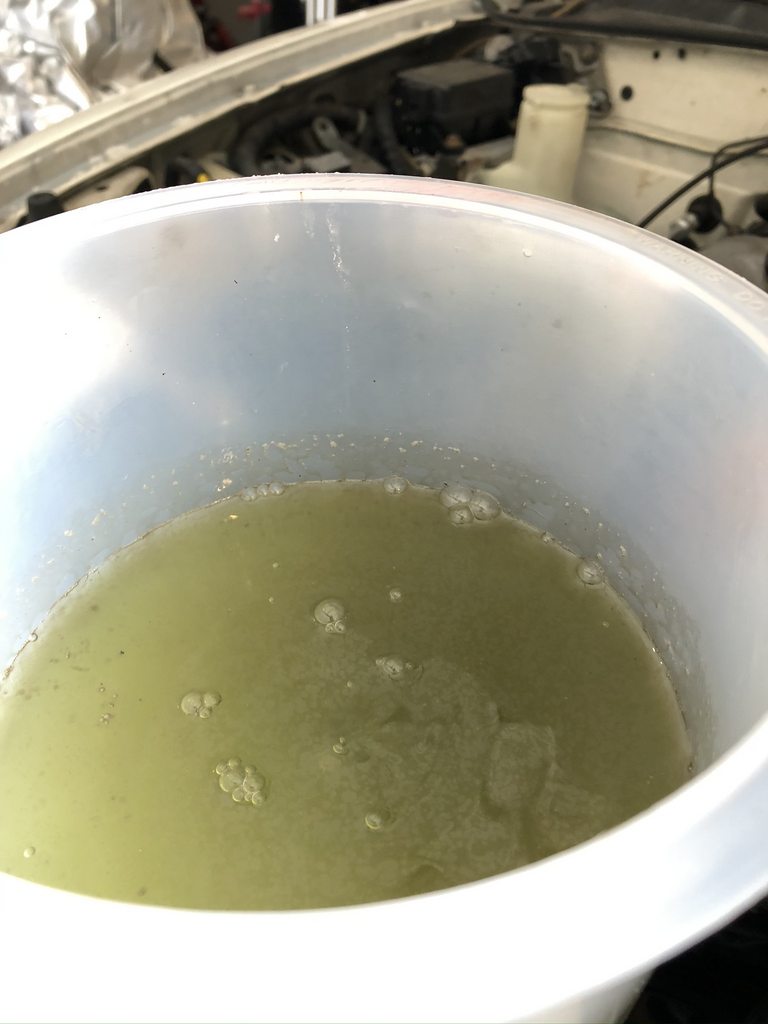
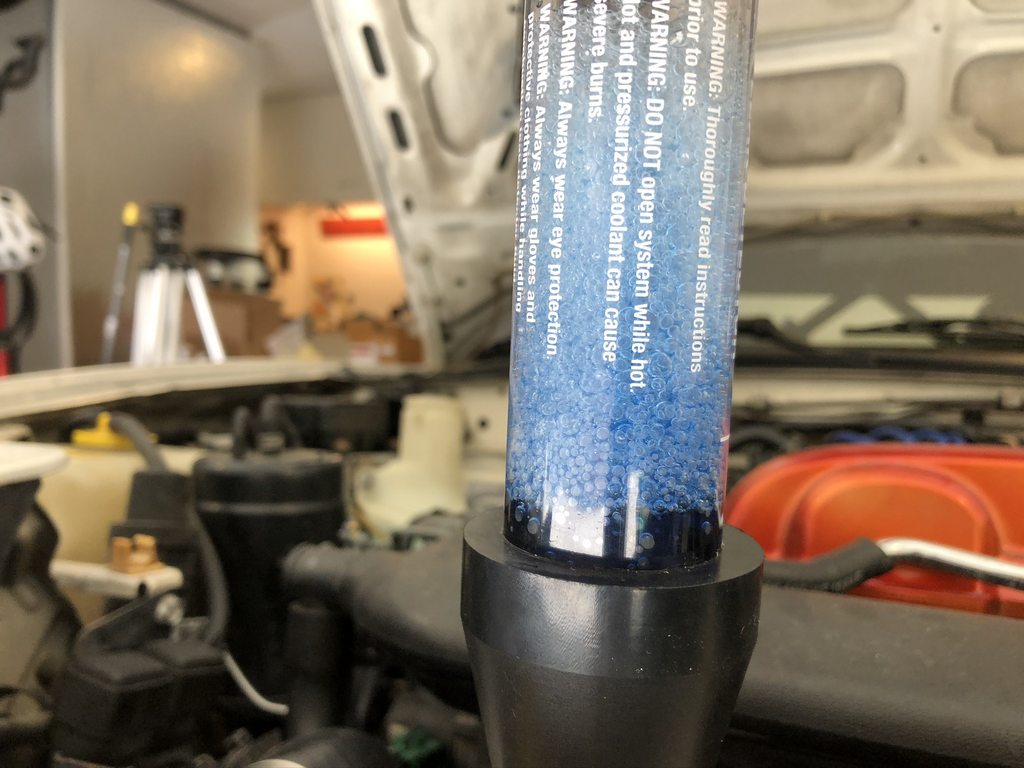
Found that the coolant leak was from my coupler for the coolant reroute S hose and the main one, so I got a metal mishimoto one since I wanted too incorporate a temp sensor as well. Turns out that the plastic piece had ovalized or something so metal would probably be a good next step. As I was bleeding the coolant out, I noticed that there was some kind oily residue in there, little did I know that this was the start of my troubles and stress. I rented a block tester from Autozone, and tested the thing for about 45min, but the testing fluid never turned green so I assumed that it was good, filled it back up, and pretended not to care. (I totally cared and couldn't stop thinking about it)
Reply
0
0
12-02-2020, 03:39 AM
#16
Junior Member
Thread Starter
Join Date: Jul 2020
Posts: 58
Total Cats: 10
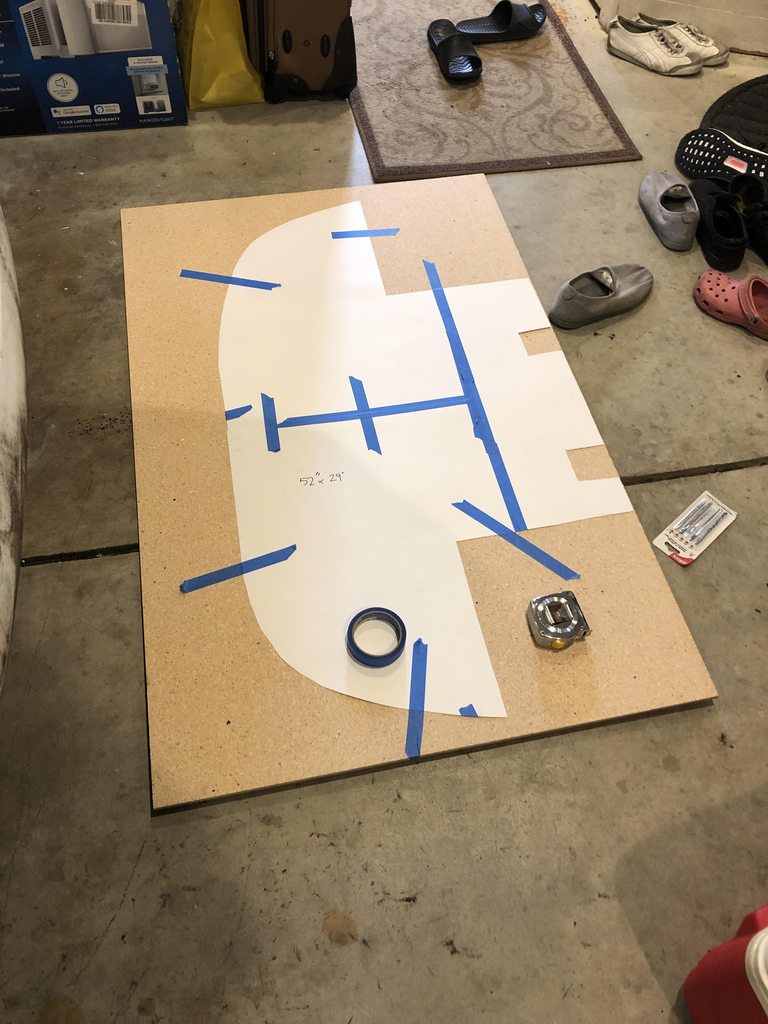
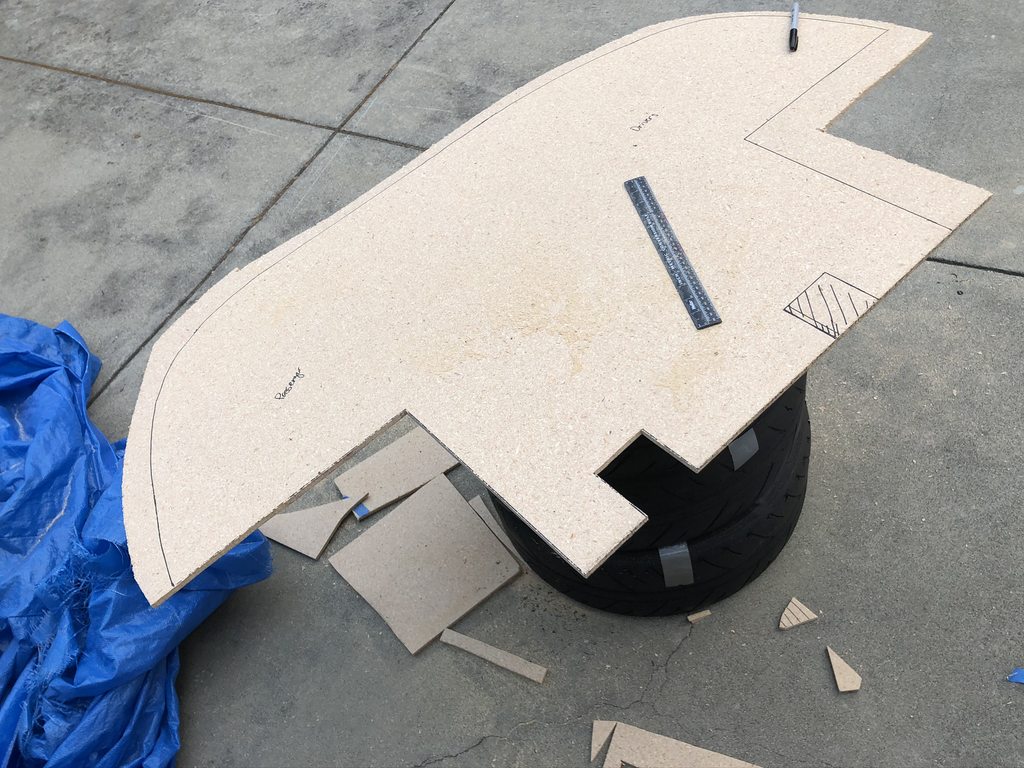
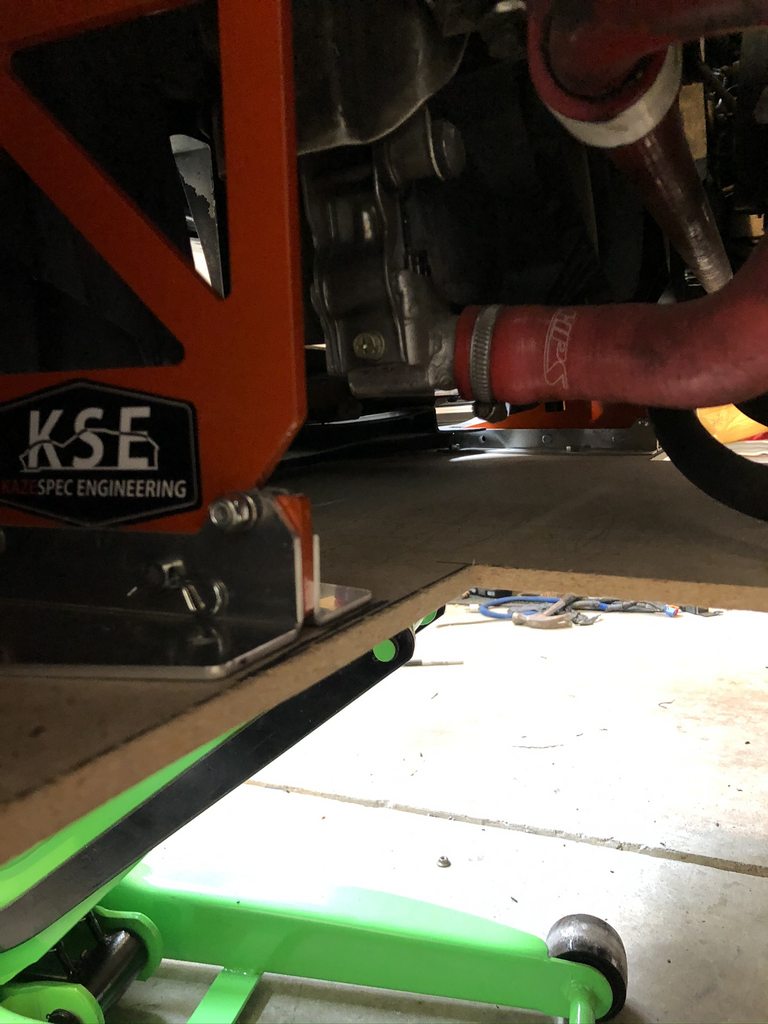
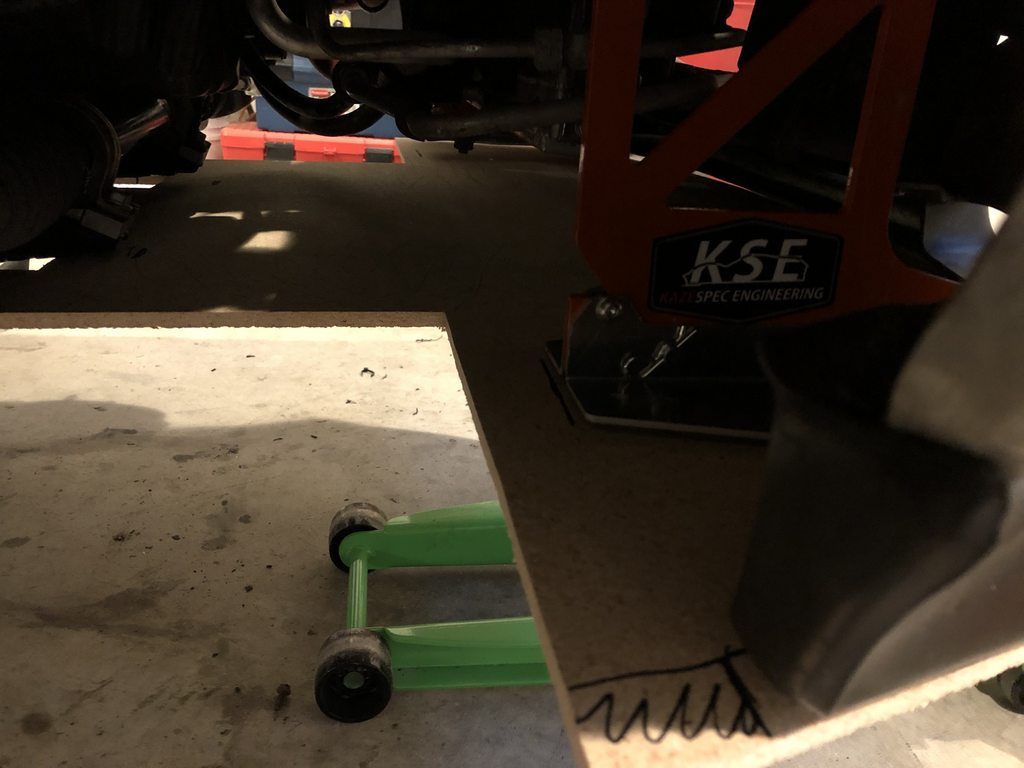
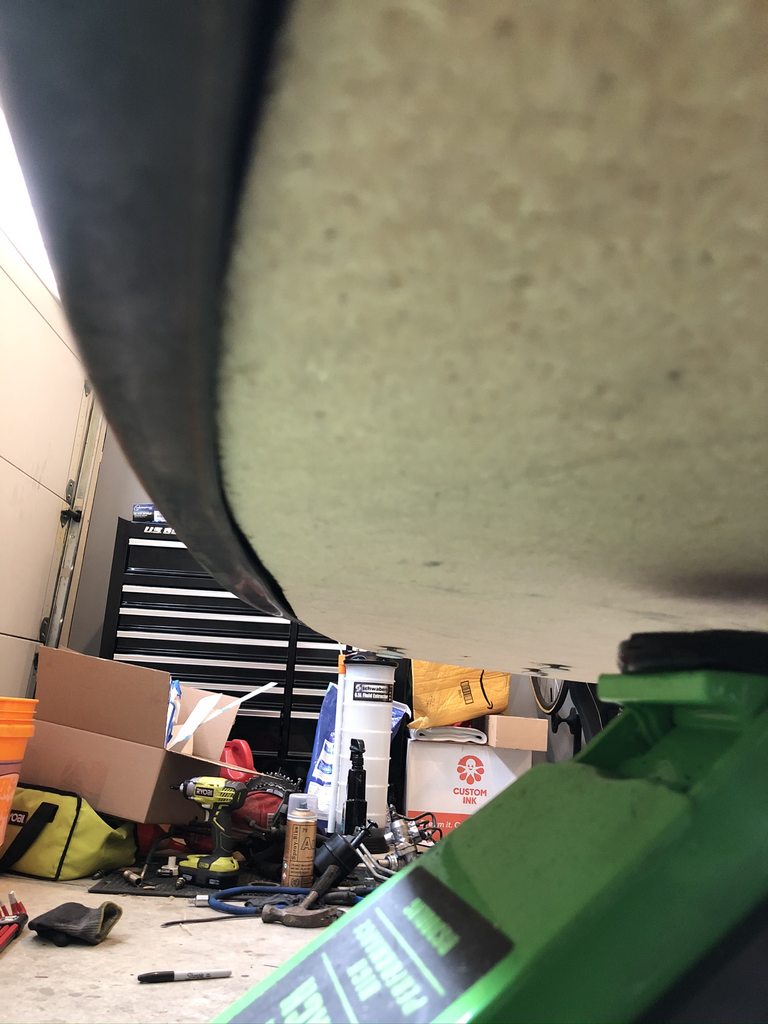
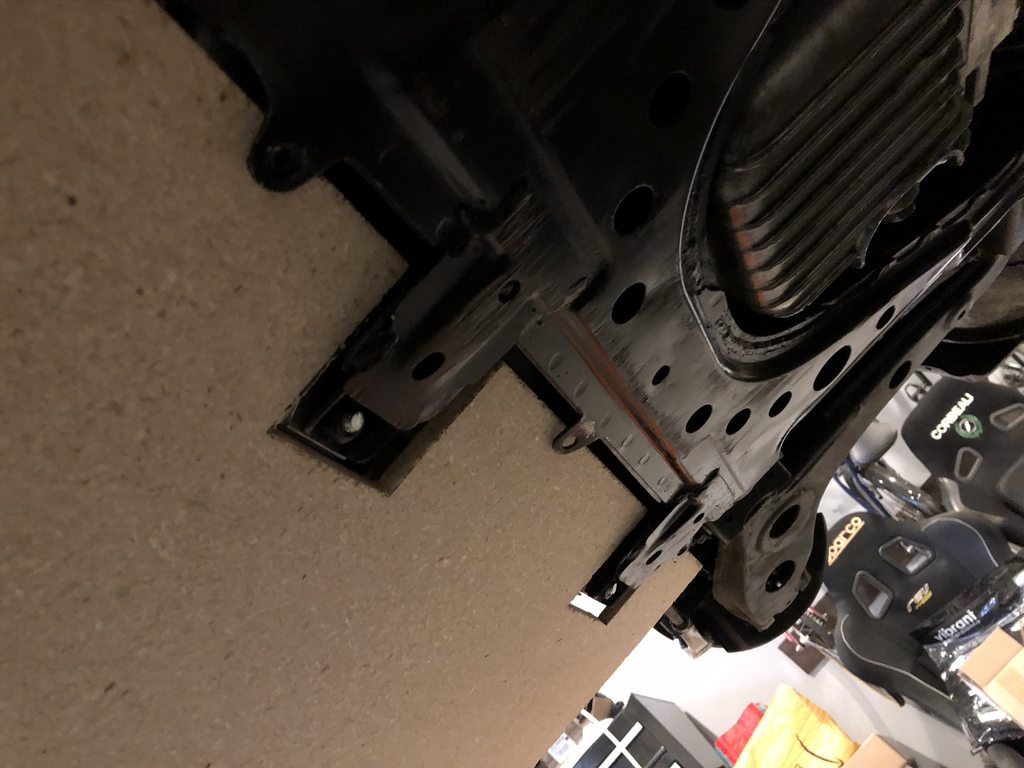
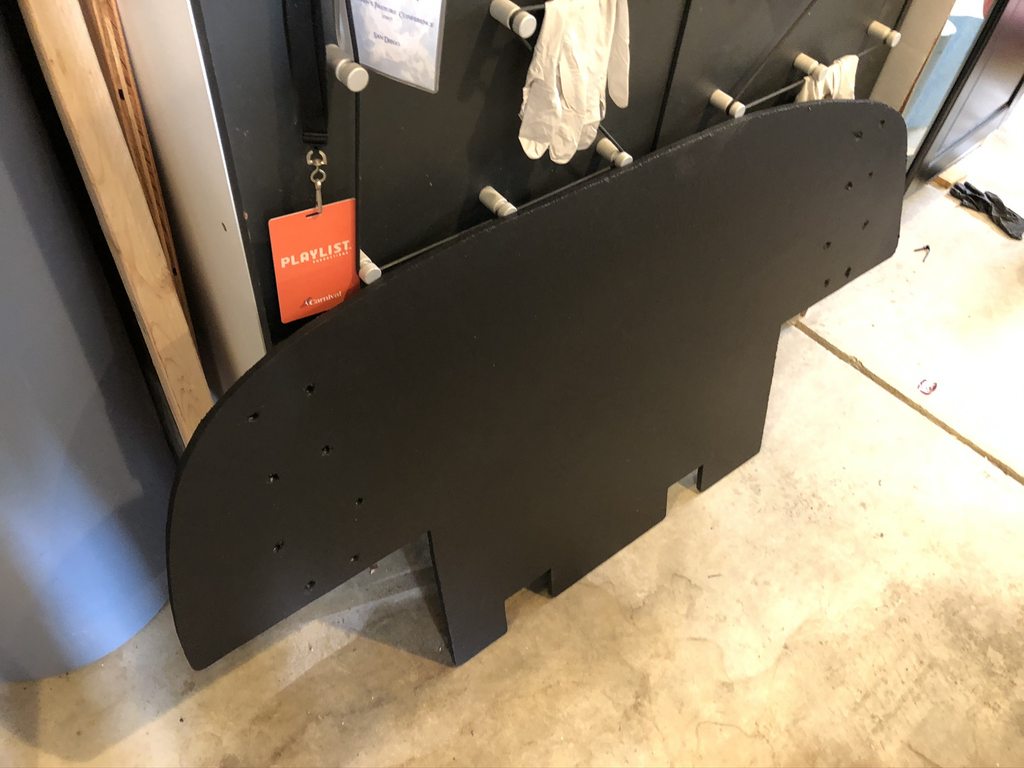
For some reason I thought I should replace my undertray with a bigger one so I picked up a set of Kazespec street splitter mounts. Decided that the ~$35 for a sheet of birch plywood was too expensive so I picked up a $8 sheet of MDF and like $30 worth of bedliner to coat it with to protect from the elements, I'm not a very smart man. Traced out an ouline of my GV lip and tried to make it go all the way back to the subframe. I also had to trim the lip a bit to get the thing to fit since I had it as high as it would go since I didn't want it to actually be a splitter. Again, I don't really know why I embarked on this portion of my journey, but I'm committed at this point so here we go.

Reply
0
0
12-02-2020, 04:03 AM
#17
Junior Member
Thread Starter
Join Date: Jul 2020
Posts: 58
Total Cats: 10
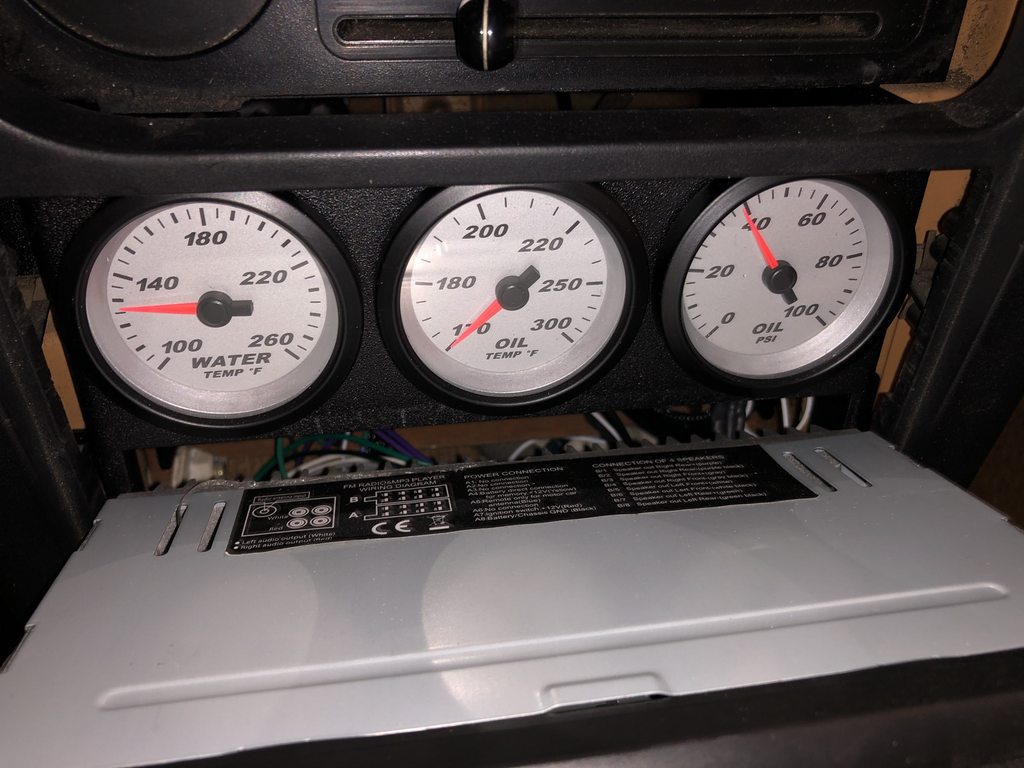
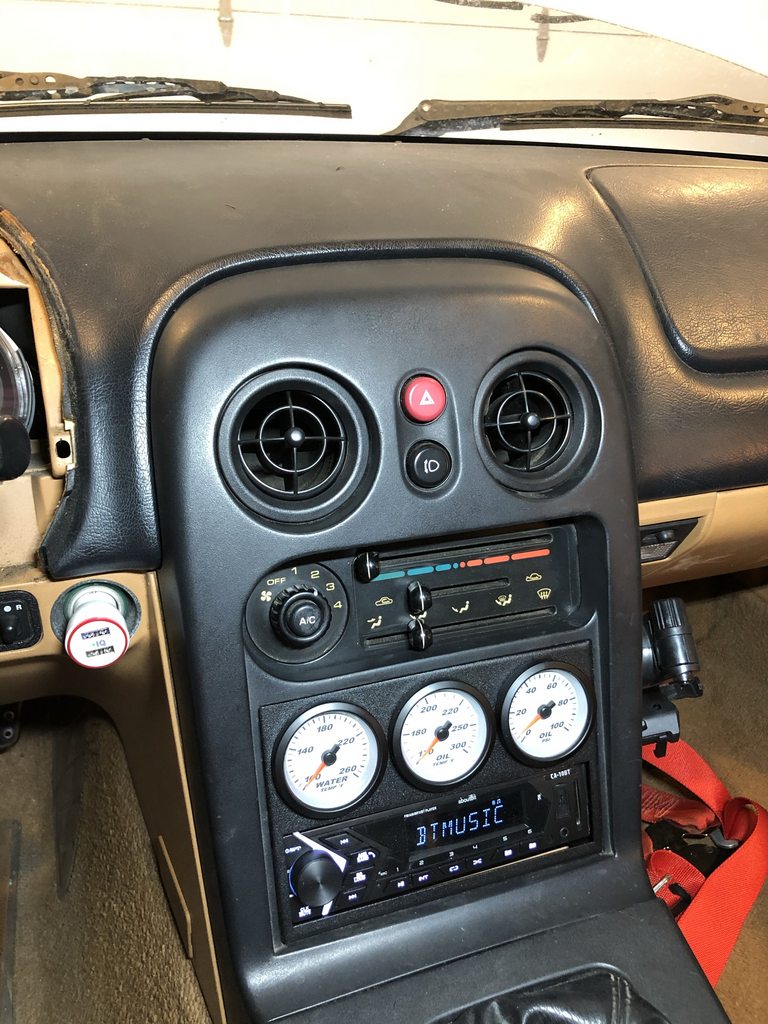
So I've had my oil pressure sender and my oil temperature sensor installed since I put the oil cooler on but they haven't been hooked up. I also just put in my coolant temperature sensor, so I guess I should actually set up the gauges so I can utilize them. Got a set of Marshal SCX gauges as well as a DDM gauge panel from Track Dog Racing. I still drive to the track in this car so retaining the radio was pretty important. My single DIN radio wasn't even close to fitting in the slot, and the slot was like 1/4" off the single DIN standard size, so I just took an angle grinder to the plastic surround of the radio and jammed it in there. I'm probably going to regret it when I need to take it out, but that's a problem for future me.
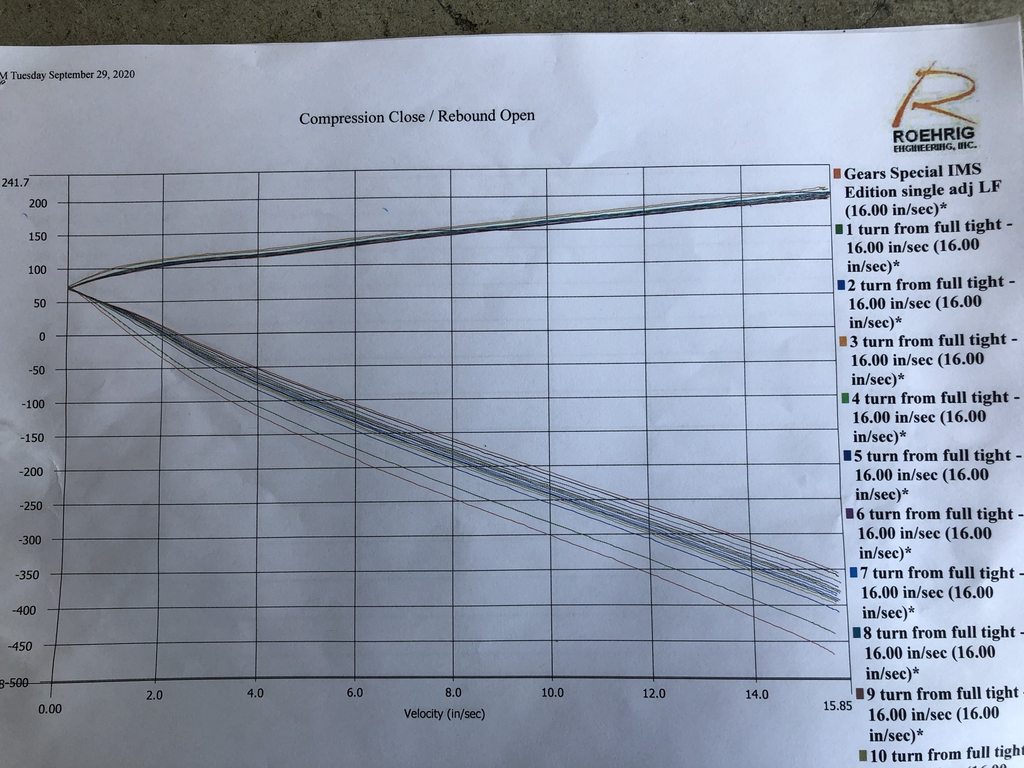
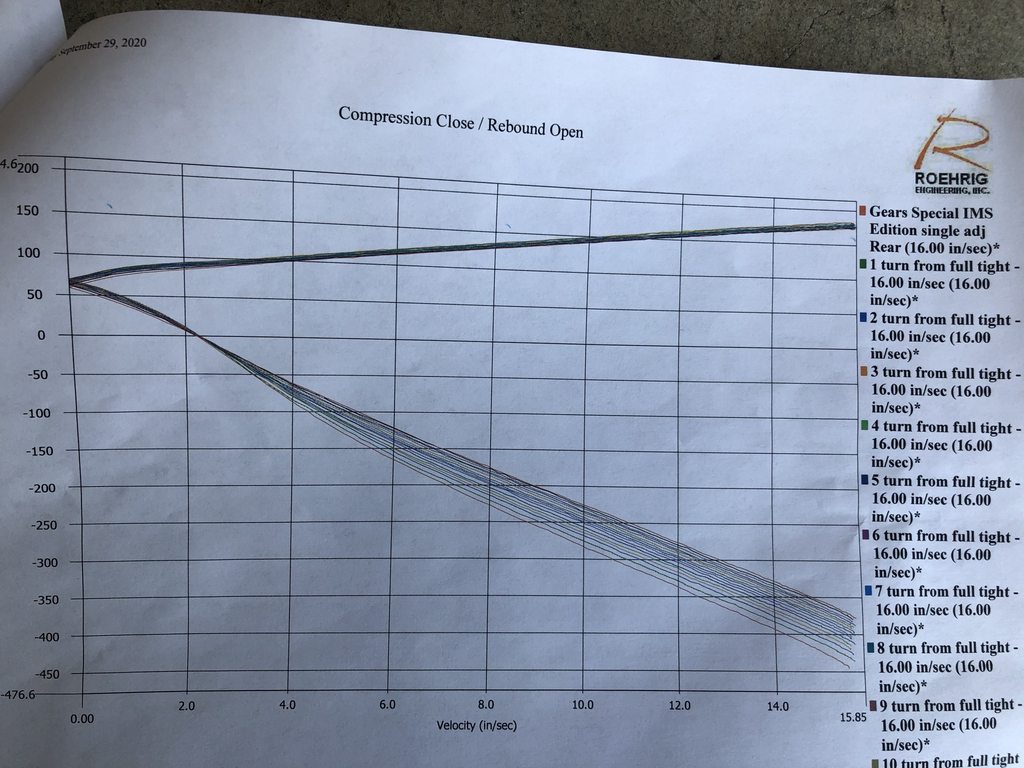
My car was also still exhibiting oversteer tendencies, so I picked up a set of 12k swift springs from Annex Suspension for the front to balance out the car a little more. While I was there, I got my Gears shocks dynod, and I'm honestly not too happy with the results. Barely any digression, and not much capacity to handle any stiffer setups.
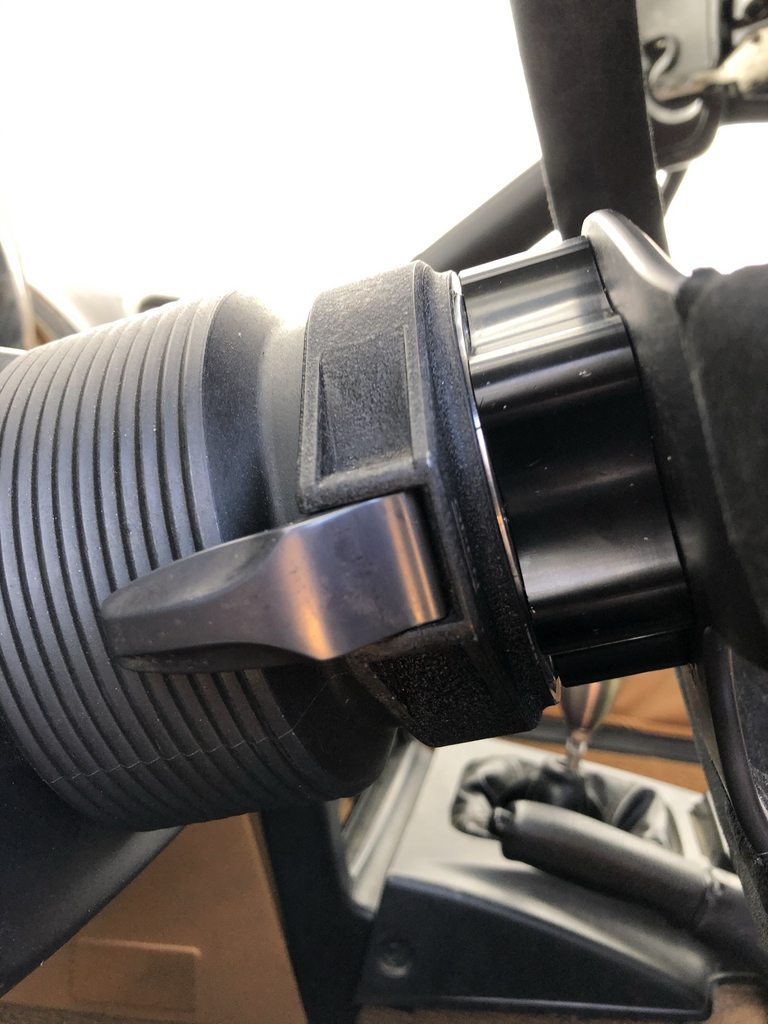
I wanted my steering wheel to be a little bit closer to me, but I liked the shape of my wheel/too broke to buy another one after I bought this, so I picked up a 1" steering wheel spacer off of Advance Autosports. I had to trim the bolts a bit since the Bell Works QR can't have any exposed bolt past the adapter. This put the wheel in a much better position for me.
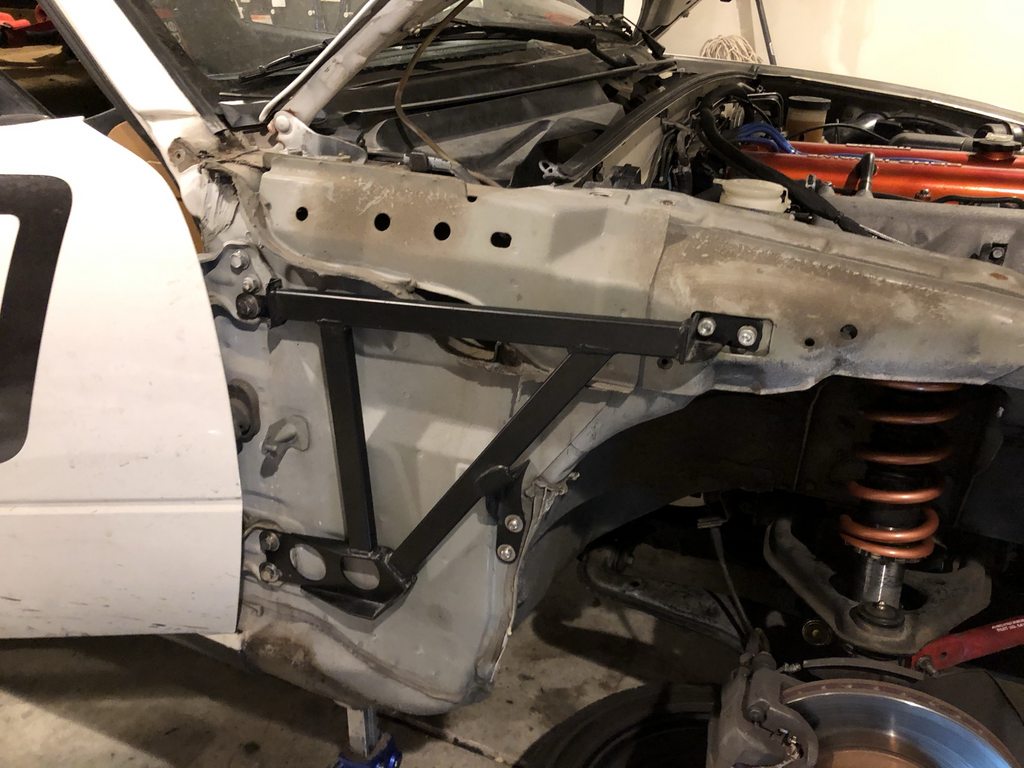
Found a set of Garage Star fender braces for relatively cheap since the guy I bought them off of "upgraded" to Paco arms. He said he couldn't feel any difference. His loss, my gain I guess. I also picked up a set of Garage Star frame rails. 3/16 holes aren't useable as 1 is under the front seat rail hump so you can't get a bolt or wrench/socket on there to tighten it, and 2 are behind the rear bulkhead so they're just completely useless. I have the rails as far forward as they can go, and matching the orientation that they have on their website so Im pretty sure the holes are drilled in the wrong place. The combination of the two chassis stiffeners coupled with the stiffer front springs completely changed how the car handled.
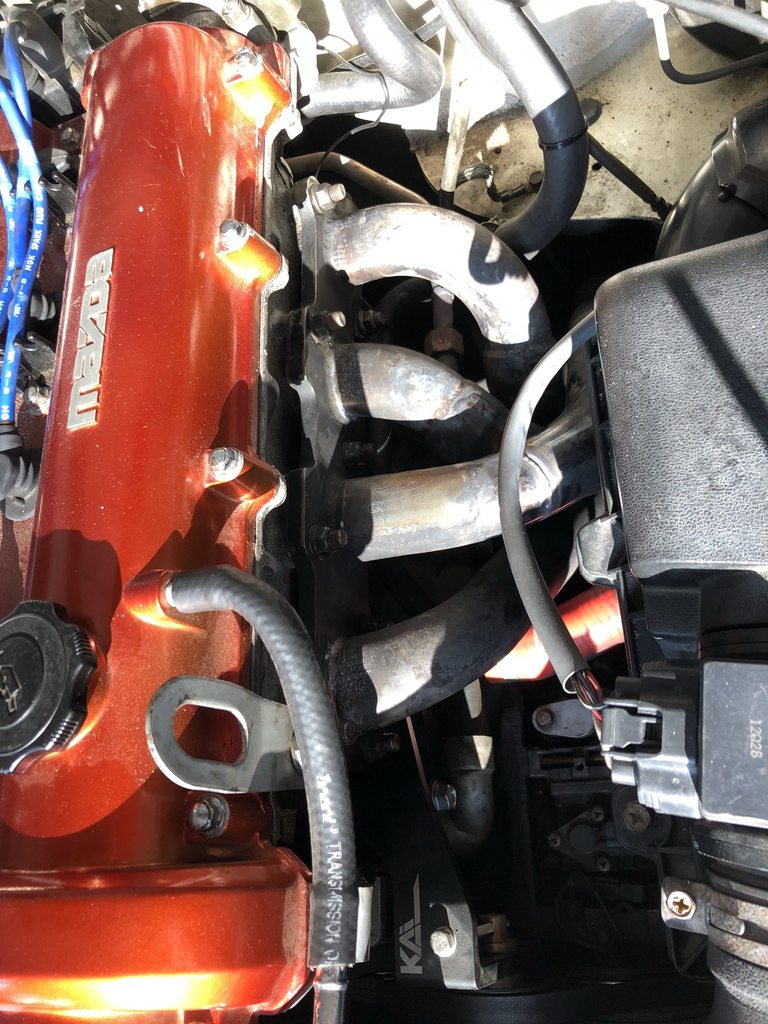
I got a set of Jackson Racing CARB legal headers off @_slowboi, so I visited Twibs415 at All Automotive Mountain view to help me install them since I was lazy.
My car was also still exhibiting oversteer tendencies, so I picked up a set of 12k swift springs from Annex Suspension for the front to balance out the car a little more. While I was there, I got my Gears shocks dynod, and I'm honestly not too happy with the results. Barely any digression, and not much capacity to handle any stiffer setups.
I wanted my steering wheel to be a little bit closer to me, but I liked the shape of my wheel/too broke to buy another one after I bought this, so I picked up a 1" steering wheel spacer off of Advance Autosports. I had to trim the bolts a bit since the Bell Works QR can't have any exposed bolt past the adapter. This put the wheel in a much better position for me.
Found a set of Garage Star fender braces for relatively cheap since the guy I bought them off of "upgraded" to Paco arms. He said he couldn't feel any difference. His loss, my gain I guess. I also picked up a set of Garage Star frame rails. 3/16 holes aren't useable as 1 is under the front seat rail hump so you can't get a bolt or wrench/socket on there to tighten it, and 2 are behind the rear bulkhead so they're just completely useless. I have the rails as far forward as they can go, and matching the orientation that they have on their website so Im pretty sure the holes are drilled in the wrong place. The combination of the two chassis stiffeners coupled with the stiffer front springs completely changed how the car handled.
I got a set of Jackson Racing CARB legal headers off @_slowboi, so I visited Twibs415 at All Automotive Mountain view to help me install them since I was lazy.
Reply
0
0
12-02-2020, 04:17 AM
#18
Junior Member
Thread Starter
Join Date: Jul 2020
Posts: 58
Total Cats: 10
When I was at Twibs415's shop, he pointed out how loose the U-joints on my driveshaft were, so I ordered a Supermiata rebuildable one.

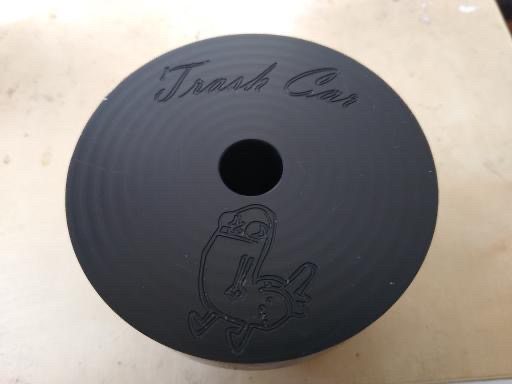
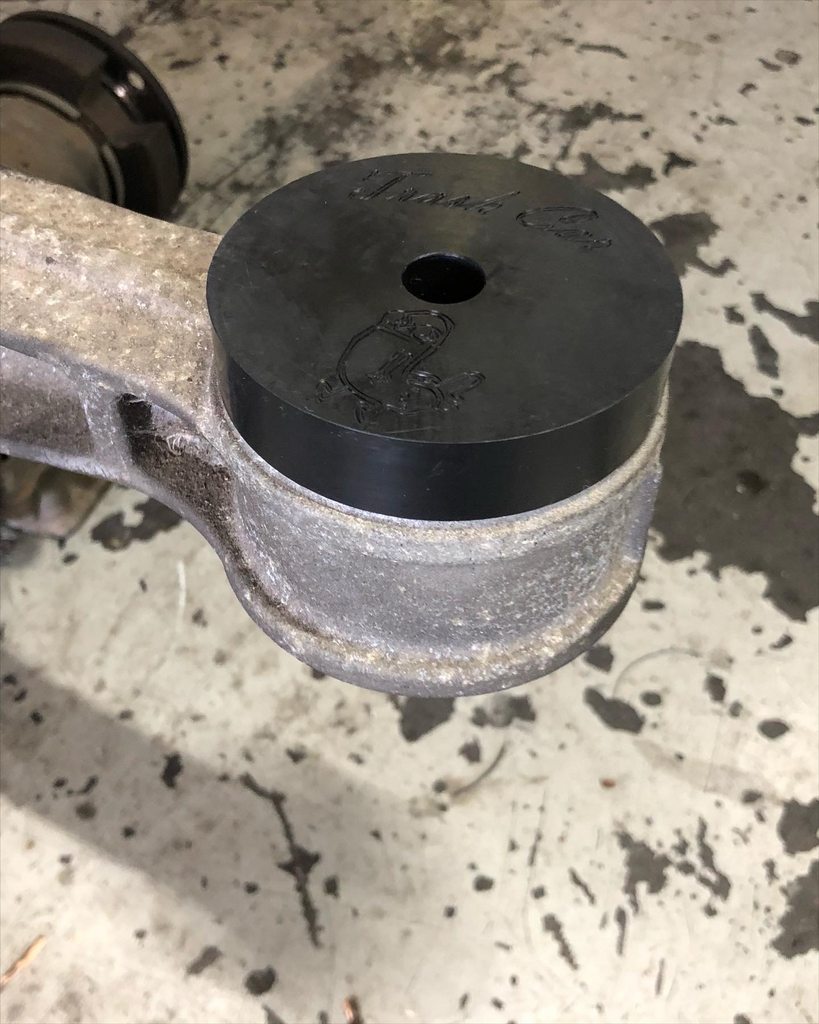
I also had a friend help me machine out some Delrin diff bushings, and since he was learning how to use a new to him CNC, he customized it a bit with my Instagram tag and some vintage memery. Twibs415 helped me install these also since I didn't want to do this myself.
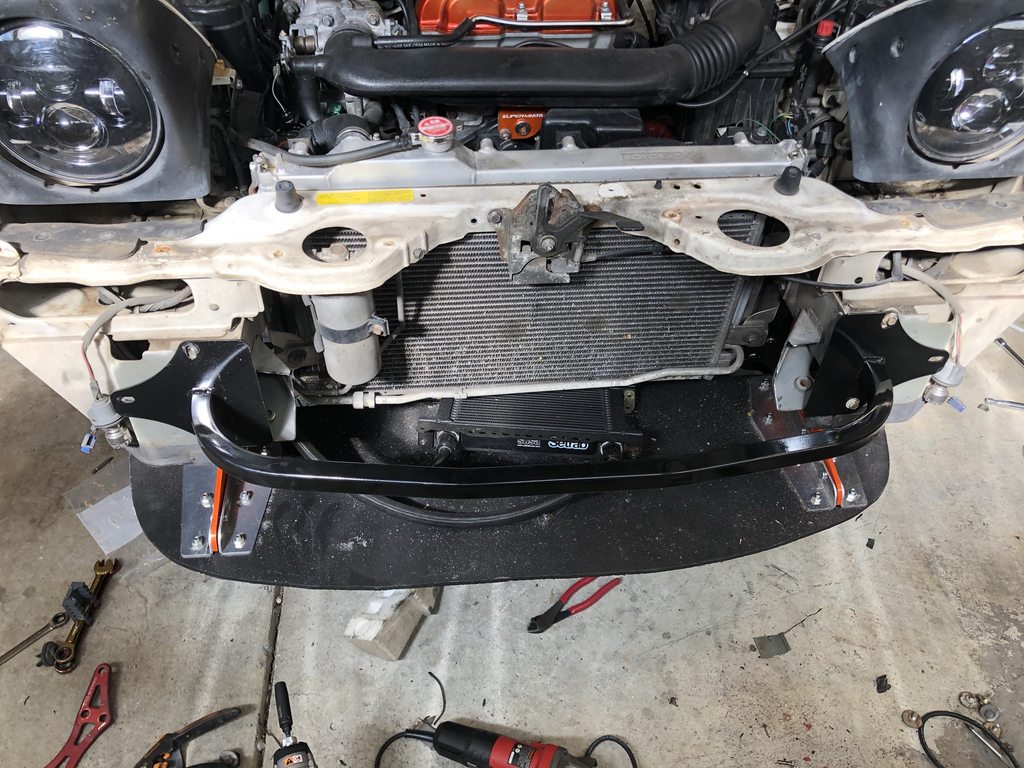
Now that I have temp gauges installed, I was able to confirm that my car was actually overheating and something isn't right. I decided to duct the radiator to see if I just wasn't getting enough airflow to the radiator. I picked up a crash bar from MatRussell122 here, and went on my way to duct my radiator. The crash bar is directional btw. In a huge smooth brain moment, I installed it upside down at first and saw that like half of the holes didn't line up. I just thought it was irregularities between miatas and I would clearance with an angle grinder but my friend pointed out that it could just be upside down. I flipped it around and magically all the holes lined up. It really be how it do sometimes. Twibs also told me to not overcomplicate my ducting, so I did exactly opposite of that and overcomplicated it. I had to clear my tow hook, oil cooler lines, AC lines, and hood latch, so there was a lot of weird cuts I had to make.
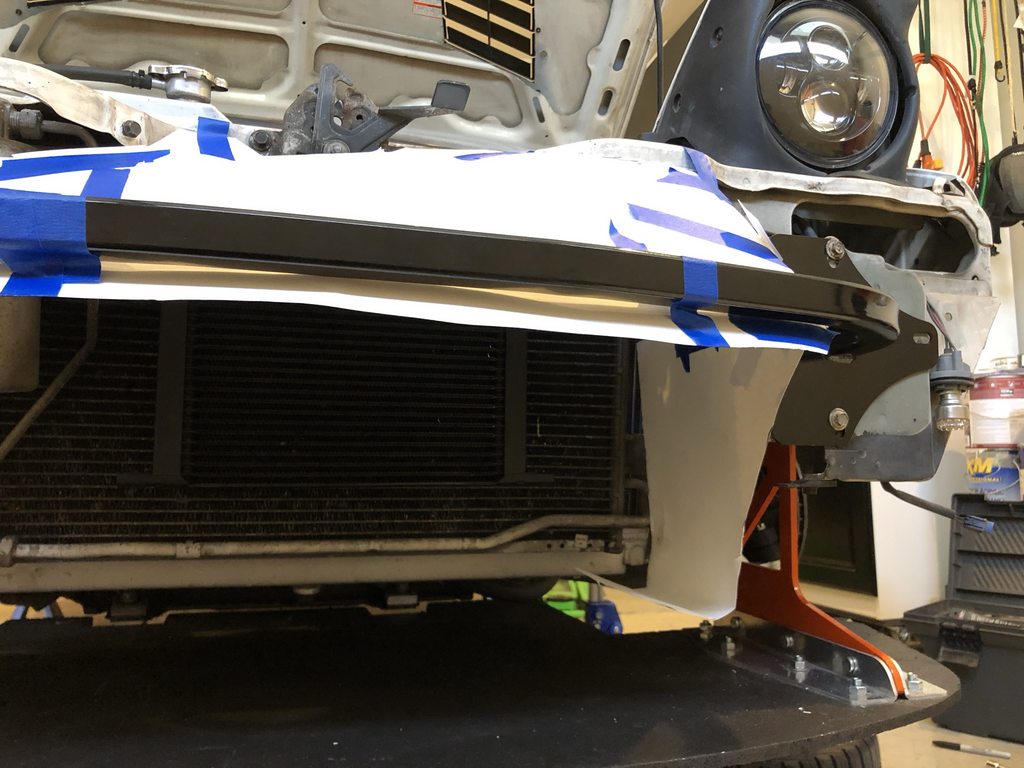
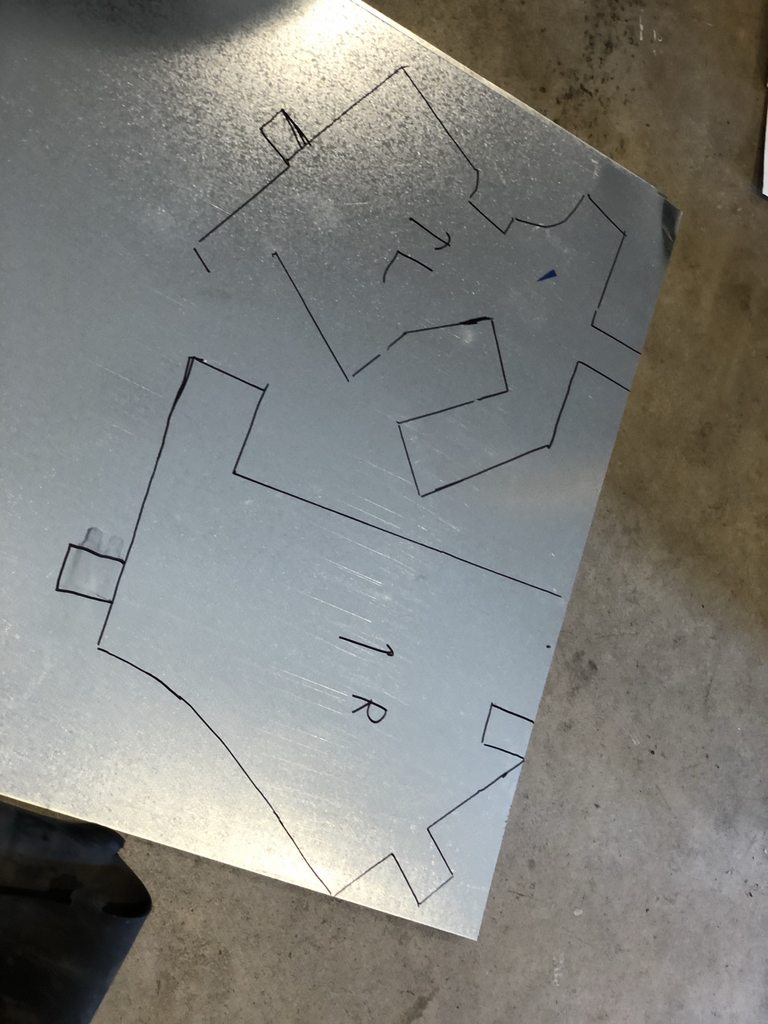
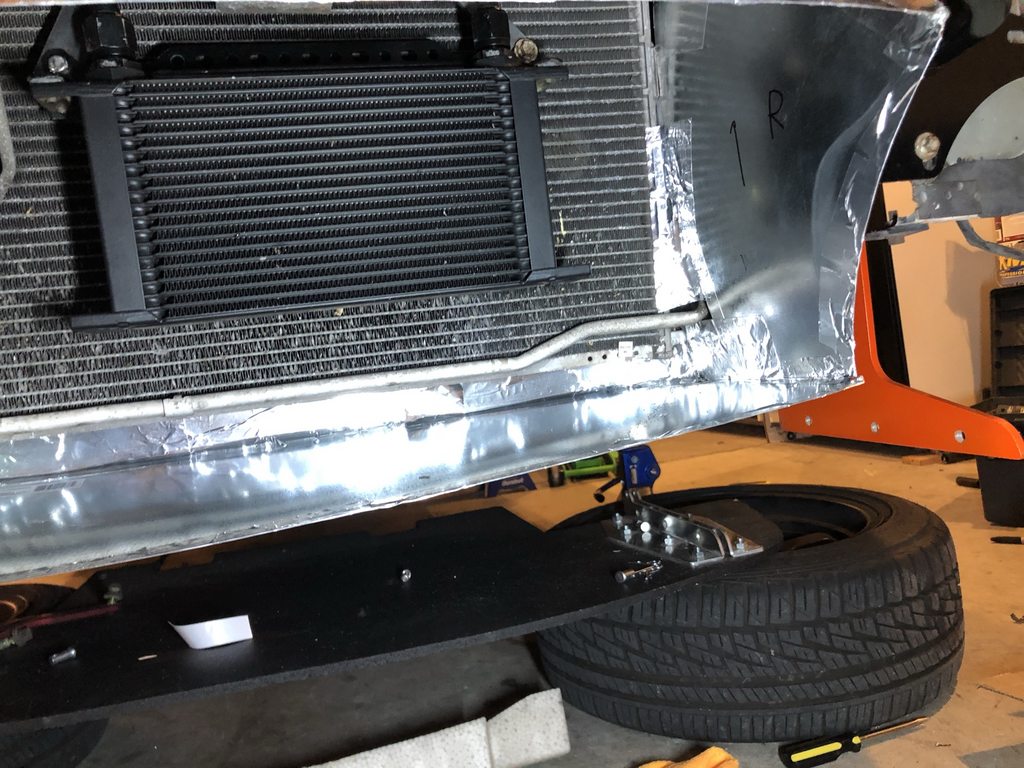
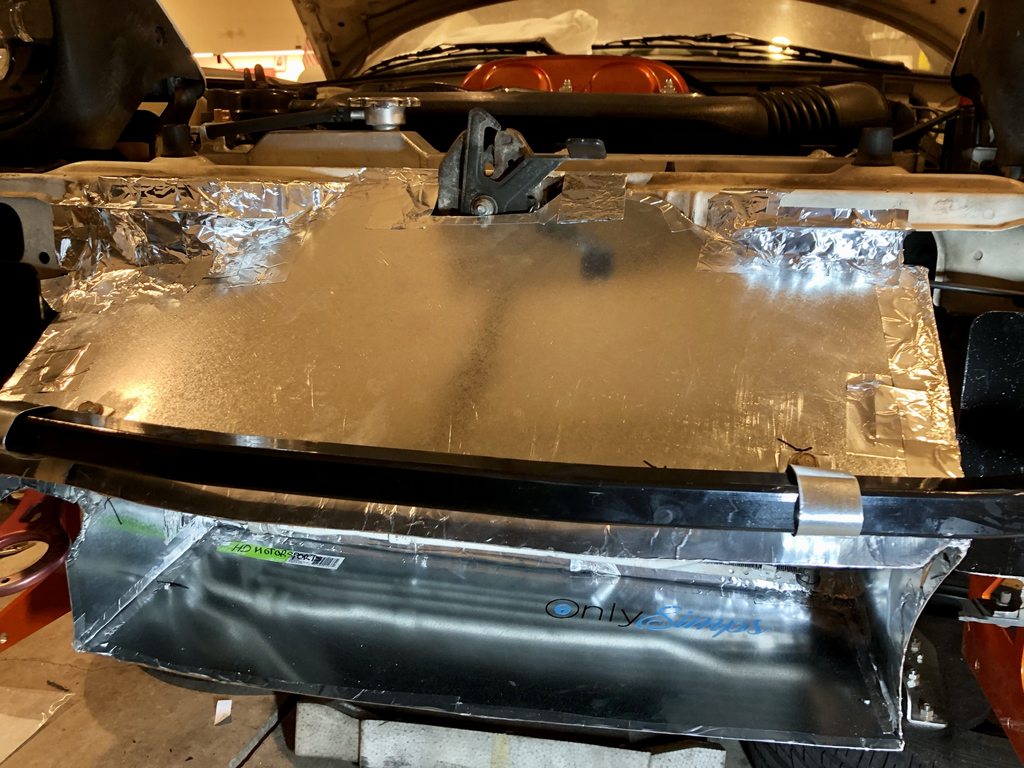
What I lack in elegant design, I compensate for with copious amounts of aluminum tape
This brings us to October 2020
I also had a friend help me machine out some Delrin diff bushings, and since he was learning how to use a new to him CNC, he customized it a bit with my Instagram tag and some vintage memery. Twibs415 helped me install these also since I didn't want to do this myself.
Now that I have temp gauges installed, I was able to confirm that my car was actually overheating and something isn't right. I decided to duct the radiator to see if I just wasn't getting enough airflow to the radiator. I picked up a crash bar from MatRussell122 here, and went on my way to duct my radiator. The crash bar is directional btw. In a huge smooth brain moment, I installed it upside down at first and saw that like half of the holes didn't line up. I just thought it was irregularities between miatas and I would clearance with an angle grinder but my friend pointed out that it could just be upside down. I flipped it around and magically all the holes lined up. It really be how it do sometimes. Twibs also told me to not overcomplicate my ducting, so I did exactly opposite of that and overcomplicated it. I had to clear my tow hook, oil cooler lines, AC lines, and hood latch, so there was a lot of weird cuts I had to make.
What I lack in elegant design, I compensate for with copious amounts of aluminum tape
This brings us to October 2020
Reply
0
0

Thread
Thread Starter
Forum
Replies
Last Post
96morbst
Build Threads
38
12-19-2017 10:00 PM


