11's on the Motor, 9's on the Nitrous


 08-26-2013, 08:26 AM
#149
Elite Member

Thread Starter
iTrader: (2)

Join Date: Aug 2009
Location: Dover, FL
Posts: 3,143
Total Cats: 174
Still leading towards the Darth Vader look, flat black on the inside and gloss on the outside. The only other option is some kind of gray on the inside.
I am going with a partial carpet interior. I will install it on the rear shelf, and maybe the feet area. I started to smooth where I installed the frame rail (from the seat cross member forward) on the driver side. I do not want to put too much time into it. I will do a test paint and see if it is good enough. If it looks ok, I will probably keep it bare. If I do not like it or it takes too long, I will put a small piece of carpet held in place by snaps.
I am going with a partial carpet interior. I will install it on the rear shelf, and maybe the feet area. I started to smooth where I installed the frame rail (from the seat cross member forward) on the driver side. I do not want to put too much time into it. I will do a test paint and see if it is good enough. If it looks ok, I will probably keep it bare. If I do not like it or it takes too long, I will put a small piece of carpet held in place by snaps.
Last edited by miata2fast; 08-26-2013 at 05:27 PM.

Reply
 0
0

0
08-27-2013, 11:01 PM
#150

The second read through of your build after hearing your comments in person allows for a whole new appreciation for the level of detail on your car! You put a lot of time and energy into it and in a unique way. One thing that always throws me off about your car is your skinny front wheels! So not used to seeing them on miatas.
I'm jealous of your meticulous repaint. One day I will do my own...
I'm jealous of your meticulous repaint. One day I will do my own...
Reply
0
0

 08-31-2013, 03:01 PM
#152
Elite Member
Thread Starter
iTrader: (2)
Join Date: Aug 2009
Location: Dover, FL
Posts: 3,143
Total Cats: 174
The second read through of your build after hearing your comments in person allows for a whole new appreciation for the level of detail on your car! You put a lot of time and energy into it and in a unique way. One thing that always throws me off about your car is your skinny front wheels! So not used to seeing them on miatas.
I'm jealous of your meticulous repaint. One day I will do my own...
I'm jealous of your meticulous repaint. One day I will do my own...
For kicks and giggles, and in an attempt to go a tad faster, I pulled the front sway bar. Holy Scary ******* **** Bat Man. I will never drive it again without it.
Thanks Brother. I was supposed to work on it today, but damn this couch is comfy.
I bought some parts. I will reveal soon.
Reply
0
0
09-09-2013, 10:44 AM
#153
Elite Member
Thread Starter
iTrader: (2)
Join Date: Aug 2009
Location: Dover, FL
Posts: 3,143
Total Cats: 174
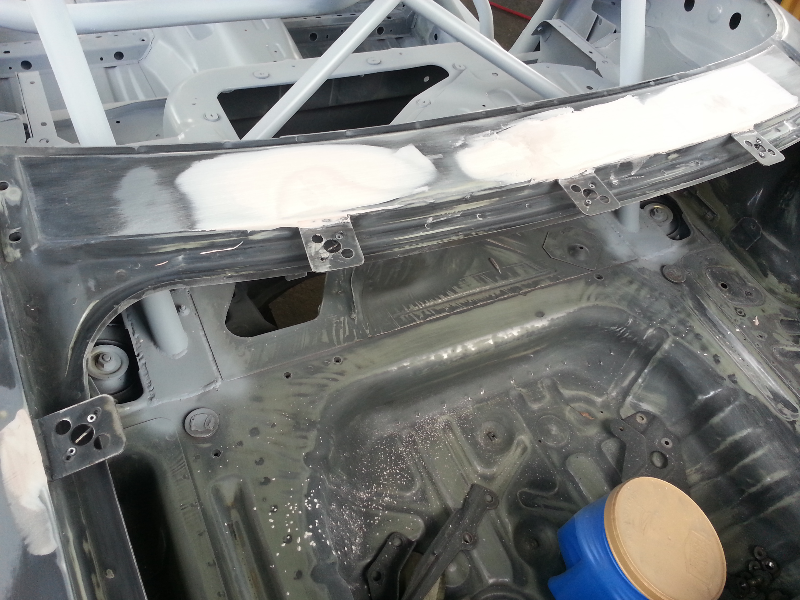
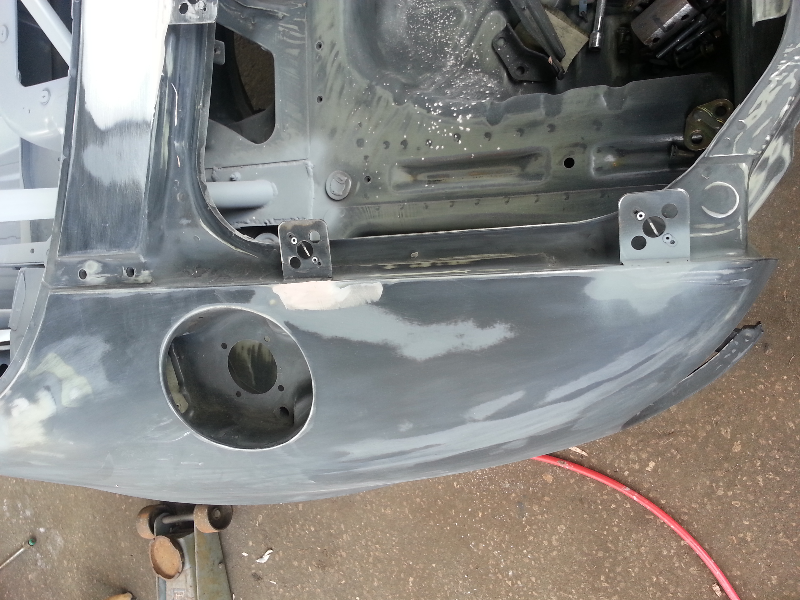
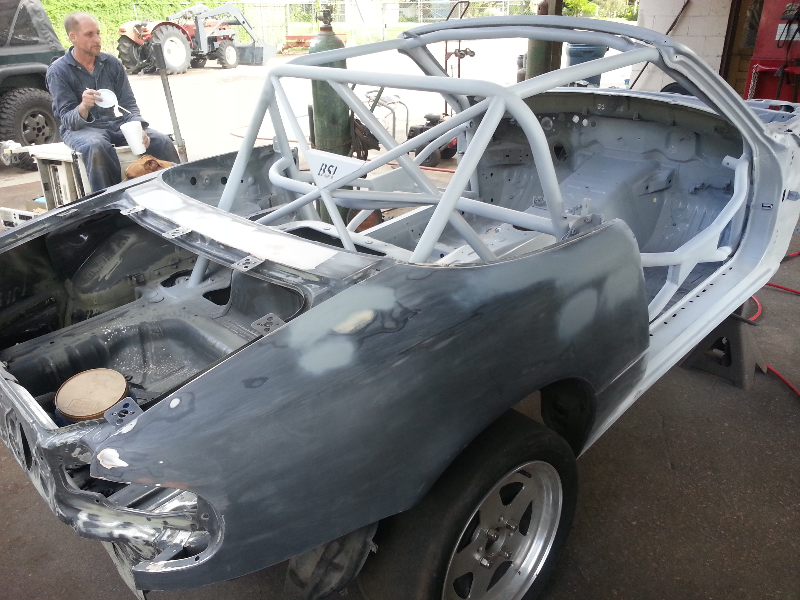
Got most of the body work done on the chassis and a coat of primer on everything. .
.
It revealed a few areas that still need work, but I am getting close to taking it to the paint booth to do the flat black portion.
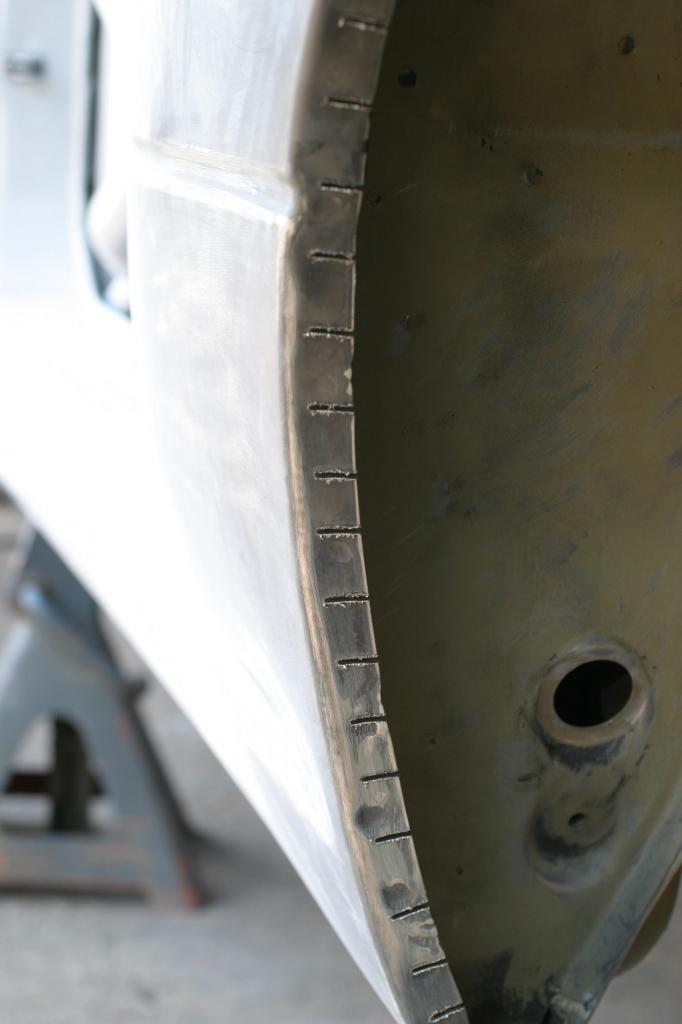
Before I primed it yesterday, I went ahead and rolled the rear fenders. This is how I have always done it. This way prevents the fender from distorting and pulling out. I do not want to alter the exterior sheet metal in any way. It does require a bit of body work because it caused the wheel well opening to be slightly bumpy. I did not get a good after shot of the lip rolled. My camera is on its last leg.
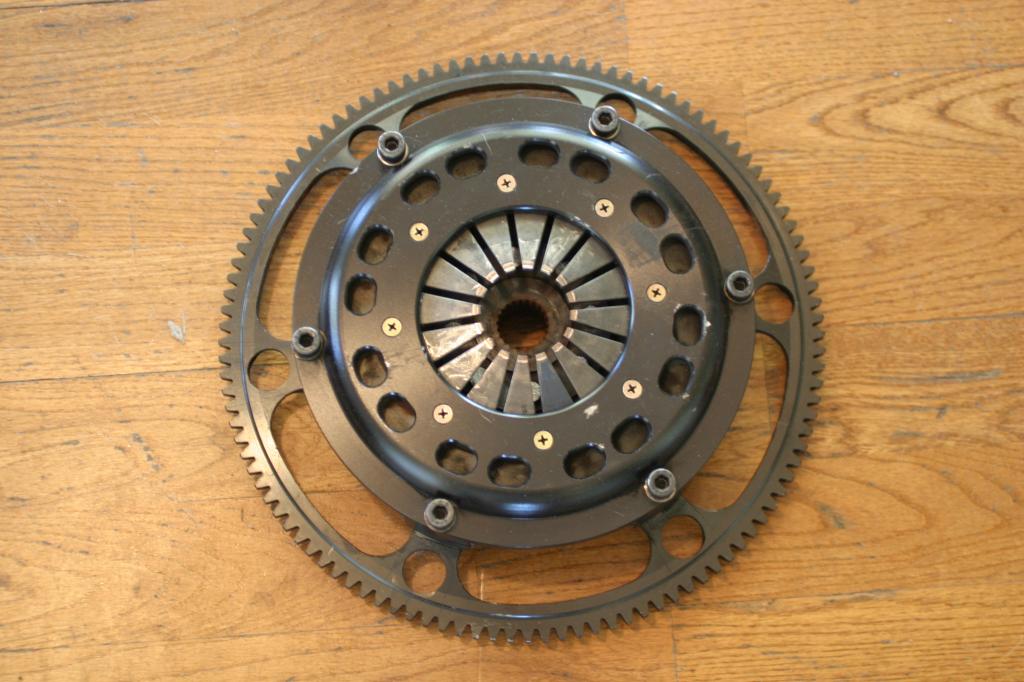
I found this 949 twin disc locally. It needs a rebuild.
 .
. It revealed a few areas that still need work, but I am getting close to taking it to the paint booth to do the flat black portion.
Before I primed it yesterday, I went ahead and rolled the rear fenders. This is how I have always done it. This way prevents the fender from distorting and pulling out. I do not want to alter the exterior sheet metal in any way. It does require a bit of body work because it caused the wheel well opening to be slightly bumpy. I did not get a good after shot of the lip rolled. My camera is on its last leg.

I found this 949 twin disc locally. It needs a rebuild.

Last edited by miata2fast; 09-09-2013 at 01:16 PM.
Reply
0
0
09-09-2013, 10:52 PM
#154
Before I primed it yesterday, I went ahead and rolled the rear fenders. This is how I have always done it. This way prevents the fender from distorting and pulling out. I do not want to alter the exterior sheet metal in any way. It does require a bit of body work because it caused the wheel well opening to be slightly bumpy. I did not get a good after shot of the lip rolled. My camera is on its last leg.
Reply
0
0

 09-10-2013, 04:31 PM
#158
Elite Member
Thread Starter
iTrader: (2)
Join Date: Aug 2009
Location: Dover, FL
Posts: 3,143
Total Cats: 174
Actually, I am going to wait till I have some of the body parts on the car. The shop is starting to get really cluttered with big parts. When I have much of that stuff back on the car, will I start buying other big parts.
Last edited by miata2fast; 09-15-2013 at 07:28 PM.
Reply
0
0
09-15-2013, 07:24 PM
#159
Elite Member
Thread Starter
iTrader: (2)
Join Date: Aug 2009
Location: Dover, FL
Posts: 3,143
Total Cats: 174
I pretty much did body work till delirium set in this weekend. I keep finding little problems in my body work on the main chassis, but I am down to fixing the rear wheel well openings to correct the slight saw tooth affect from rolling the fenders.
I am now perfecting the front fenders and doors before I dive into the daunting task of perfecting the hardtop and trunk lid. Fiberglass work is involved, and that just scares me. I am finding it challenging to square up the trunk lid just right, and there are all kinds of issues with the top.
Also, I am starting to think more seriously on how I want to secure the hood. Still leaning towards retaining the hinges, but am not sure if I want to latch it with dzus fasteners, or another method.
Reply
0
0


