Ian's 99 build thread
 10-19-2016, 07:45 PM
#702
Elite Member

Thread Starter
Join Date: Mar 2007
Location: Santa Clara, CA
Posts: 5,172
Total Cats: 856
So TK came over and helped me get the radiator in. Turns out it went in really easily from the top, even though the shop manual says to do it from the bottom. Ah well, sometimes it takes a second pair of eyes to notice these things.  I think part of it is that I'd taken out more than is normally required to do the radiator because I needed to get the water pump.
Forgot to take any more photos, but it's all back together now. Koyo warned that some of the factory parts might require notching to fit with the thicker radiator, but I had no such issues. Clearance is tight, but it all fits. Drove the car to work today, so far so good.
--Ian
I think part of it is that I'd taken out more than is normally required to do the radiator because I needed to get the water pump.Forgot to take any more photos, but it's all back together now. Koyo warned that some of the factory parts might require notching to fit with the thicker radiator, but I had no such issues. Clearance is tight, but it all fits. Drove the car to work today, so far so good.
--Ian

Reply
 0
0

0


 10-23-2016, 09:50 PM
#706
Elite Member
Thread Starter
Join Date: Mar 2007
Location: Santa Clara, CA
Posts: 5,172
Total Cats: 856
So in my never-ending quest to upgrade my brakes instead of actually learning how to use them properly, I picked up some 3" Singular ducts from TSE a week or so ago, put them in today. I had the original 2" TSE ducts in before (now in the classifieds). Old:
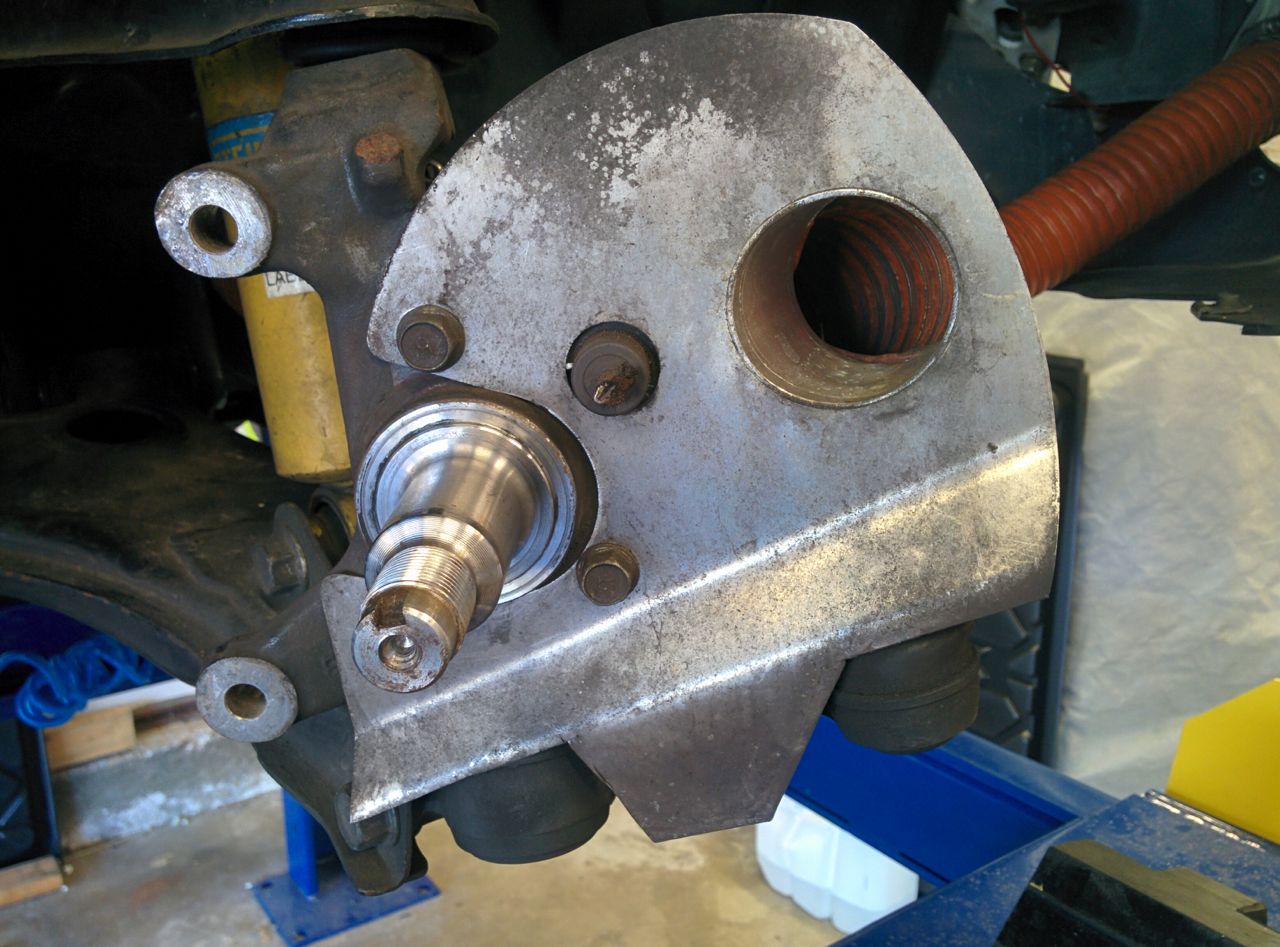
Shiny new ones!
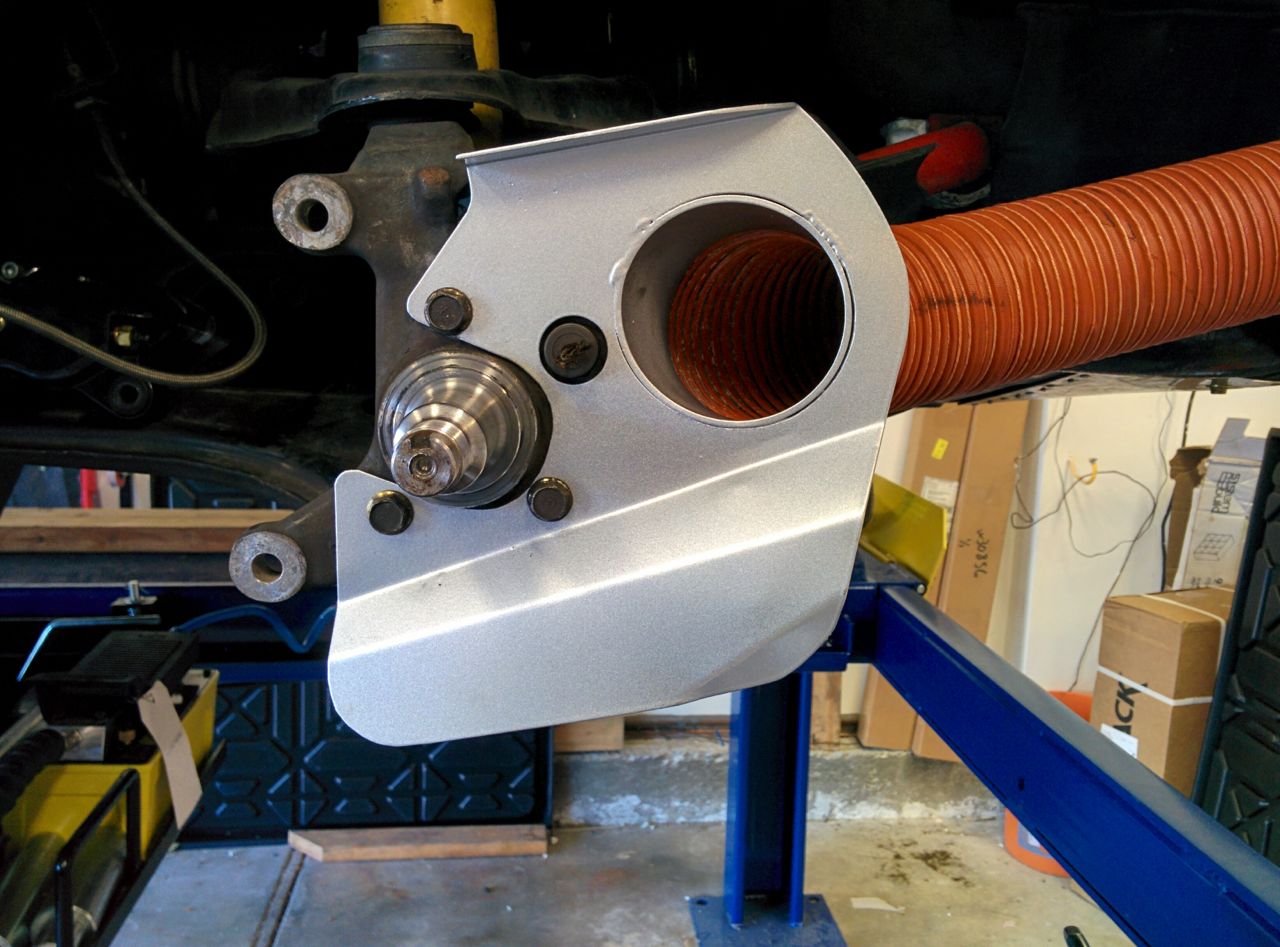
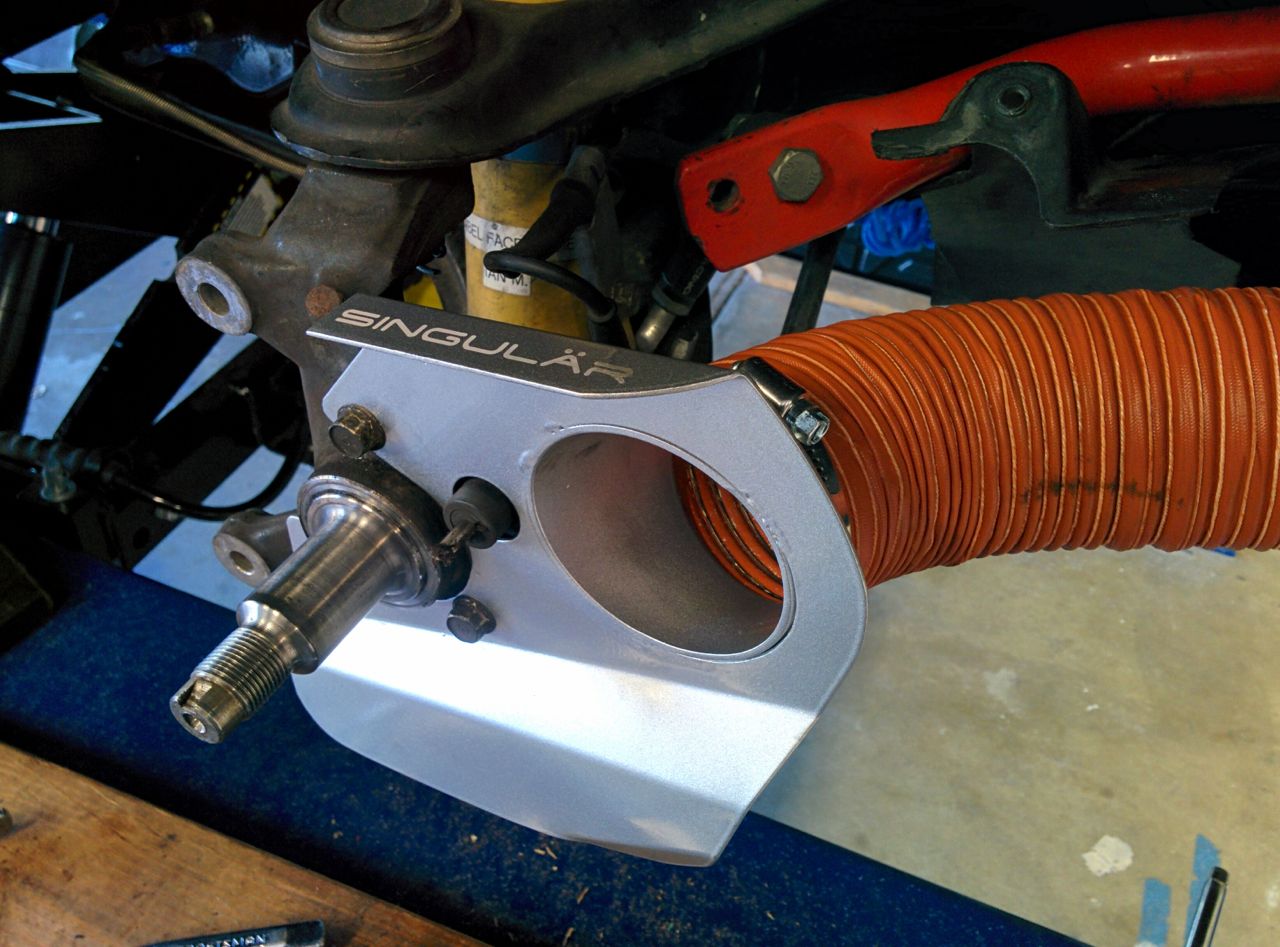
Routing the 3" hoses to the nose is tricky. I'm using the dealer-installed fog light holes, so they need to go inboard, around the tire, and into the nose. The intercooler hoses, under tray, and, radiator, and power steering lines also share this space, and finding enough room to run a 3 inch brake duct hose through wasn't trivial.
Passenger side wasn't too bad, although I did have to whack some more of the under tray off:
Shots of the clearance with the tire all the way to the left. This is at full droop -- need to double check it at ride height as well, but I think it should be OK:
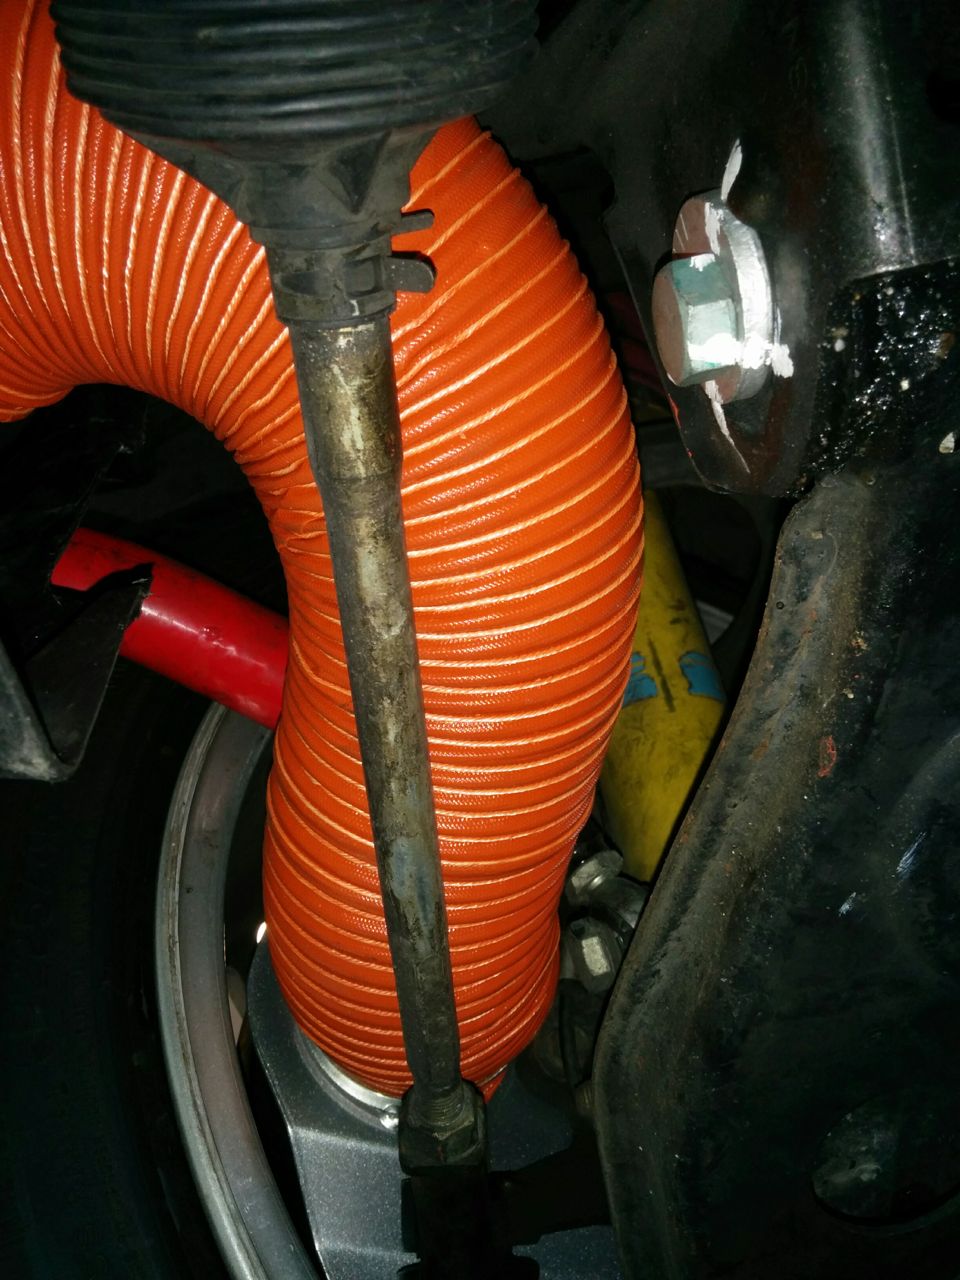
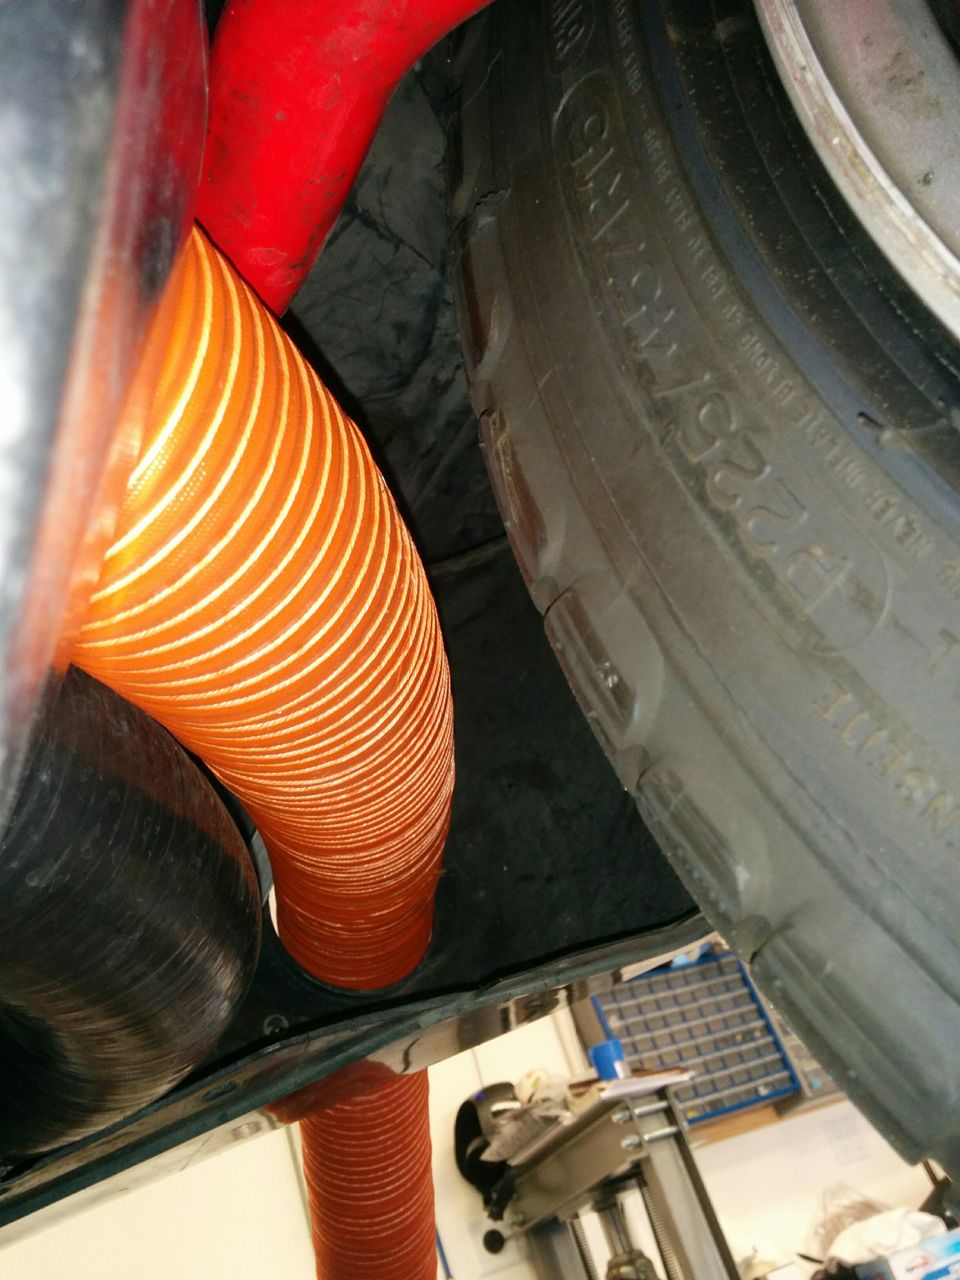
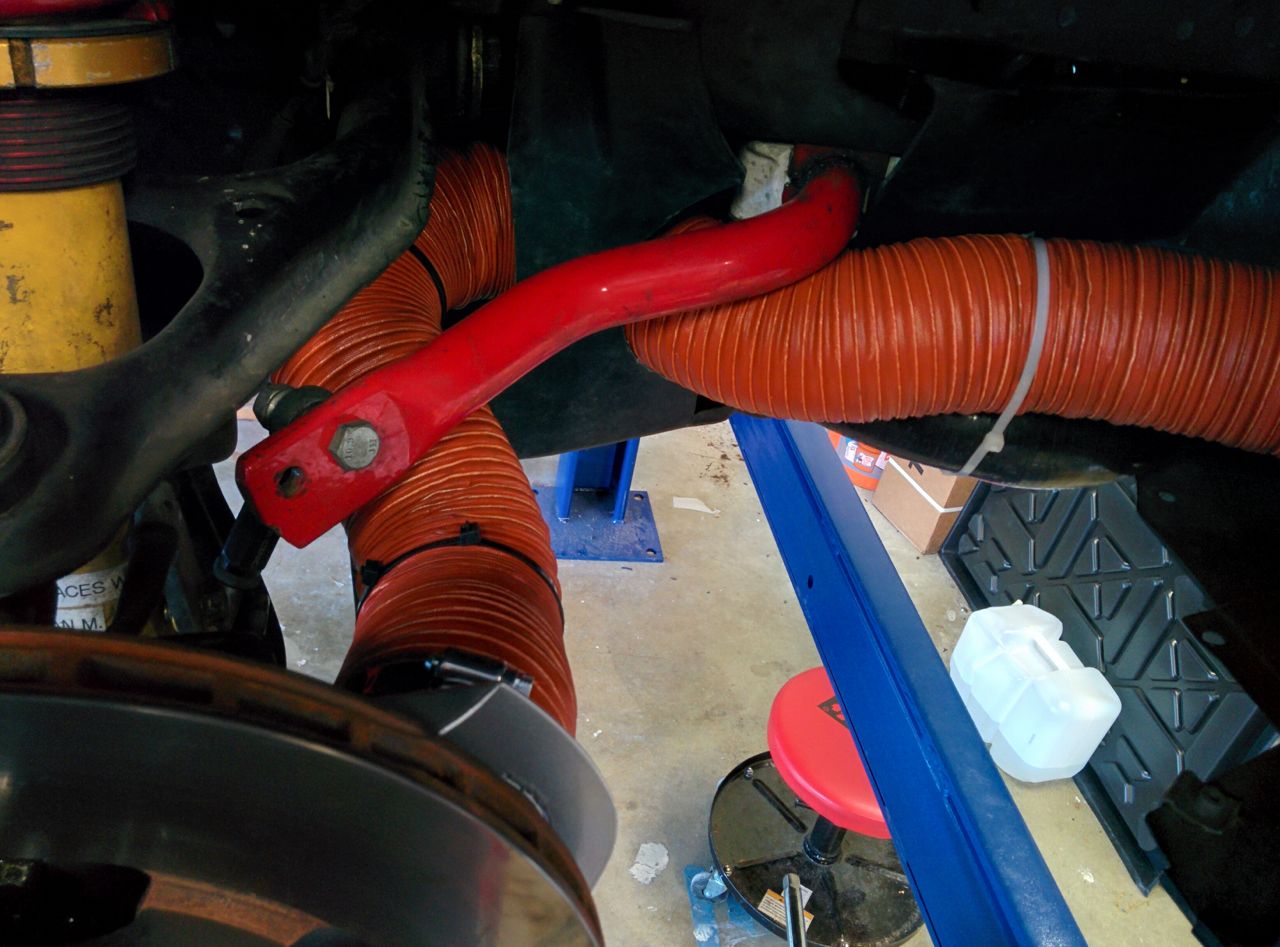
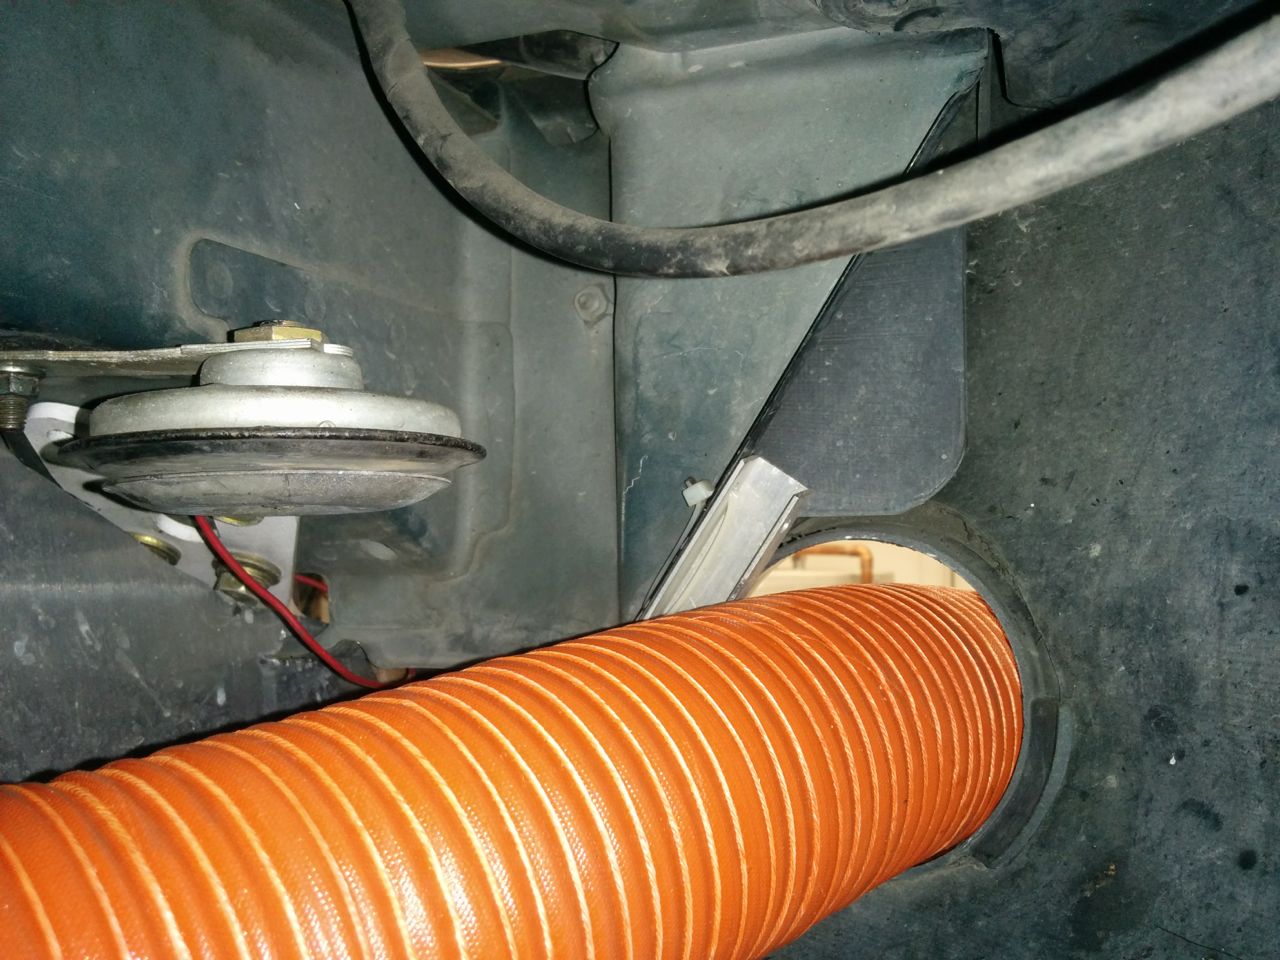
Driver's side was trickier, there was a hole, but it was really too small. Wound up pulling off the intercooler hose to run the line, then reattaching it. This may slice through the duct hose over time, so I may need to do something else.
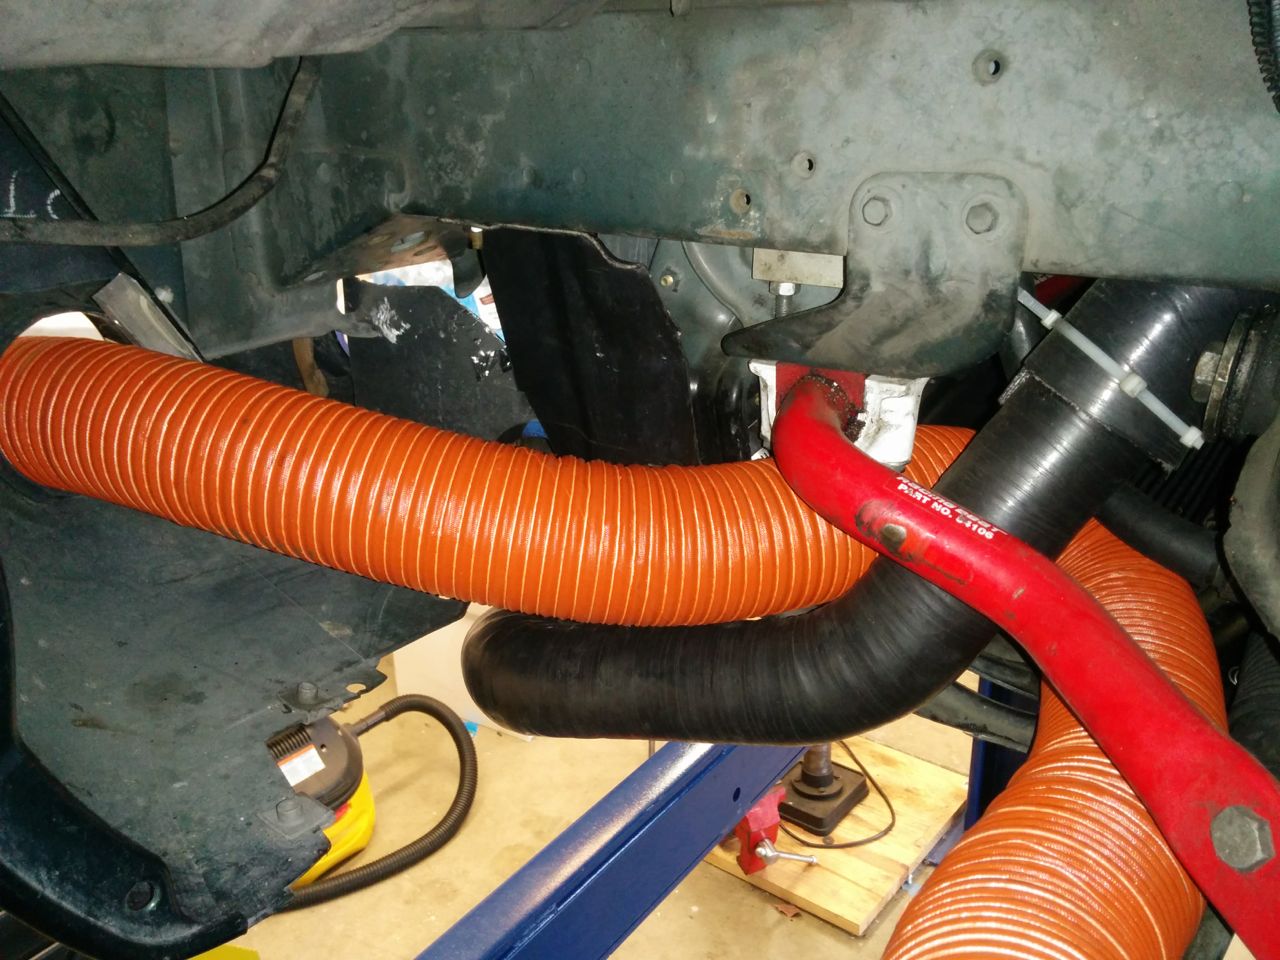
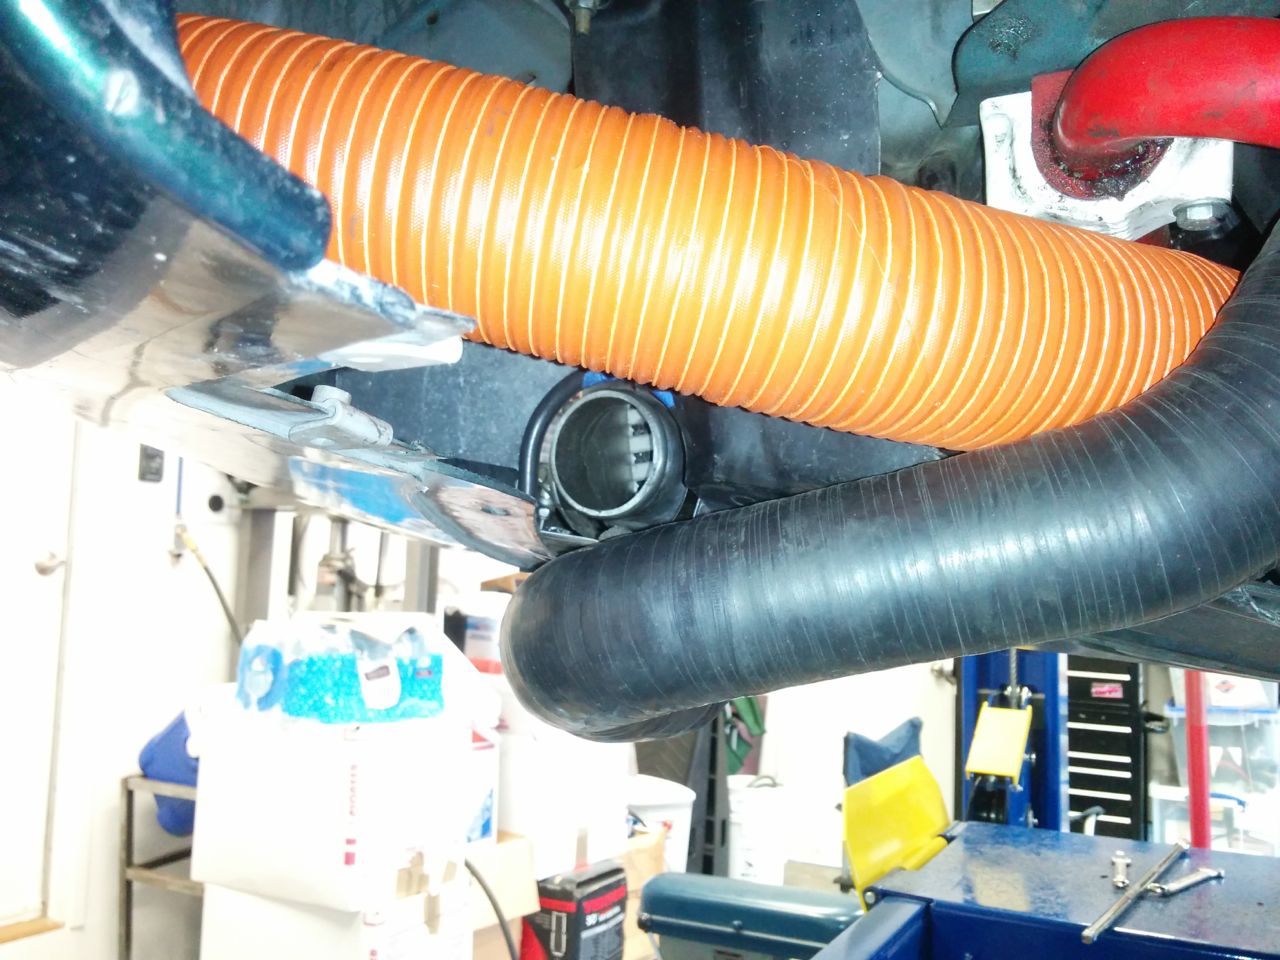
And all done for the mounting/routing:
I still need to figure out how to attach them to the bumper cover. For the old ones, I used Home Depot Racing brackets -- some half-inch aluminum U-channel with holes drilled in it, a 2" PVC coupler, and a bunch of zip ties. I haven't decided what I'm doing for the 3" ones. The fog light holes are 3.5" in diameter, ideally I'd like to come up with some kind of funnel adapter to force all that air into the brake ducts.
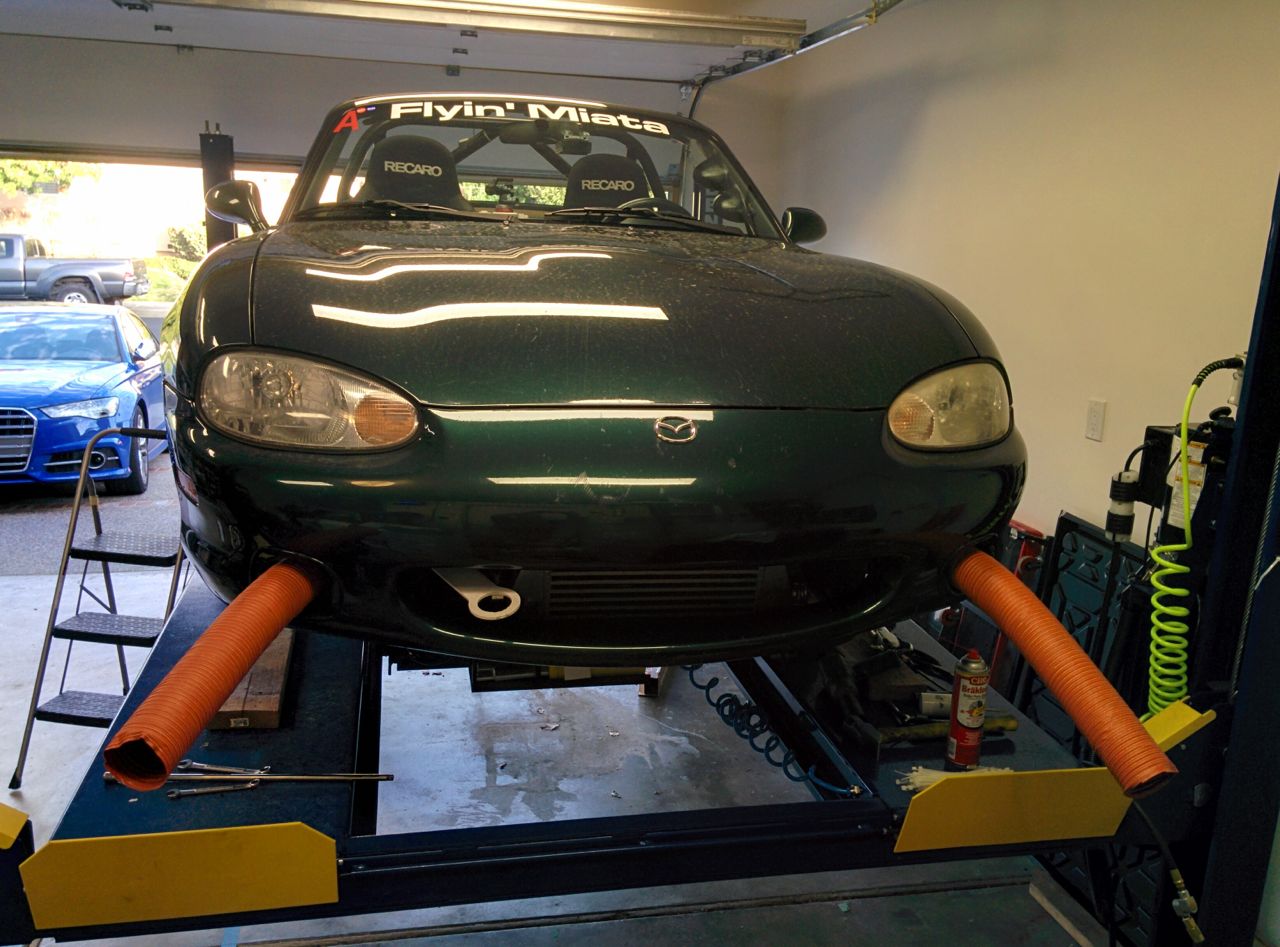
Hm. Either the car has grown antennae, or it's the new Trackspeed Engineering 3" curb feeler kit!
--Ian
Shiny new ones!
Routing the 3" hoses to the nose is tricky. I'm using the dealer-installed fog light holes, so they need to go inboard, around the tire, and into the nose. The intercooler hoses, under tray, and, radiator, and power steering lines also share this space, and finding enough room to run a 3 inch brake duct hose through wasn't trivial.
Passenger side wasn't too bad, although I did have to whack some more of the under tray off:
Shots of the clearance with the tire all the way to the left. This is at full droop -- need to double check it at ride height as well, but I think it should be OK:
Driver's side was trickier, there was a hole, but it was really too small. Wound up pulling off the intercooler hose to run the line, then reattaching it. This may slice through the duct hose over time, so I may need to do something else.
And all done for the mounting/routing:
I still need to figure out how to attach them to the bumper cover. For the old ones, I used Home Depot Racing brackets -- some half-inch aluminum U-channel with holes drilled in it, a 2" PVC coupler, and a bunch of zip ties. I haven't decided what I'm doing for the 3" ones. The fog light holes are 3.5" in diameter, ideally I'd like to come up with some kind of funnel adapter to force all that air into the brake ducts.
Hm. Either the car has grown antennae, or it's the new Trackspeed Engineering 3" curb feeler kit!
--Ian
Reply
0
0
10-24-2016, 12:17 AM
#708
Former Vendor
iTrader: (31)

Join Date: Nov 2006
Location: Sunnyvale, CA
Posts: 15,442
Total Cats: 2,100
Reply
0
0
10-24-2016, 01:48 AM
#709
Elite Member
Thread Starter
Join Date: Mar 2007
Location: Santa Clara, CA
Posts: 5,172
Total Cats: 856
Visiting Home Depot Racing again for some kind of plumbing adapter is a possibility.
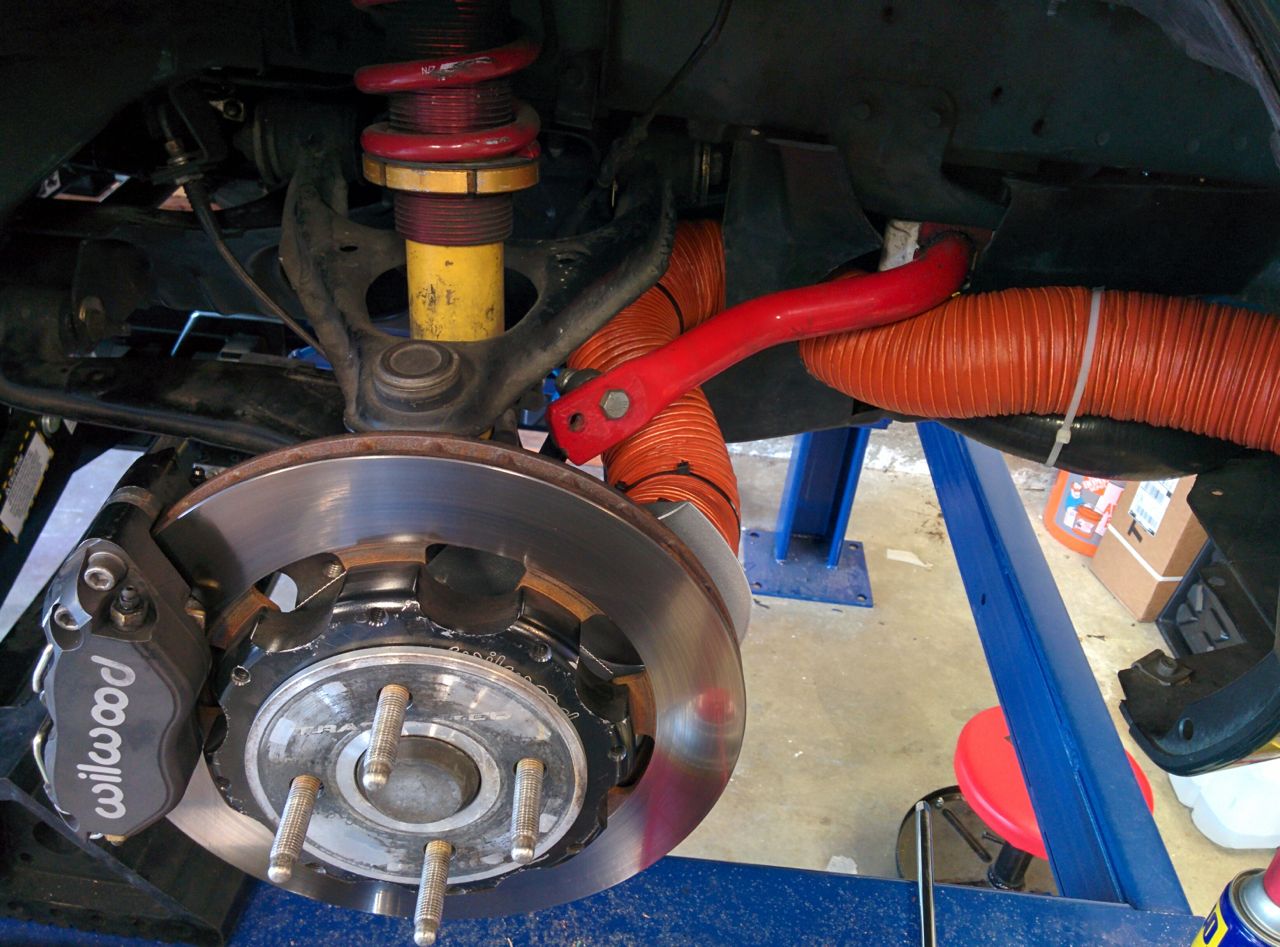
When I put the TSE flanges on, I didn't have ABS, and it was possible to get the bolts into the upright while the hub was still on the car. With ABS the tone ring blocks the bolts, so the hubs have to come off. Since I had them off I took a few photos (forgot about them until now). I think I have an OEM hub on the driver's side, and an aftermarket one on the passenger, but neither of them have the scary machining on the stud mounting points. OTOH, both of them are looking a bit crusty. I never did any kind of repacking on them:
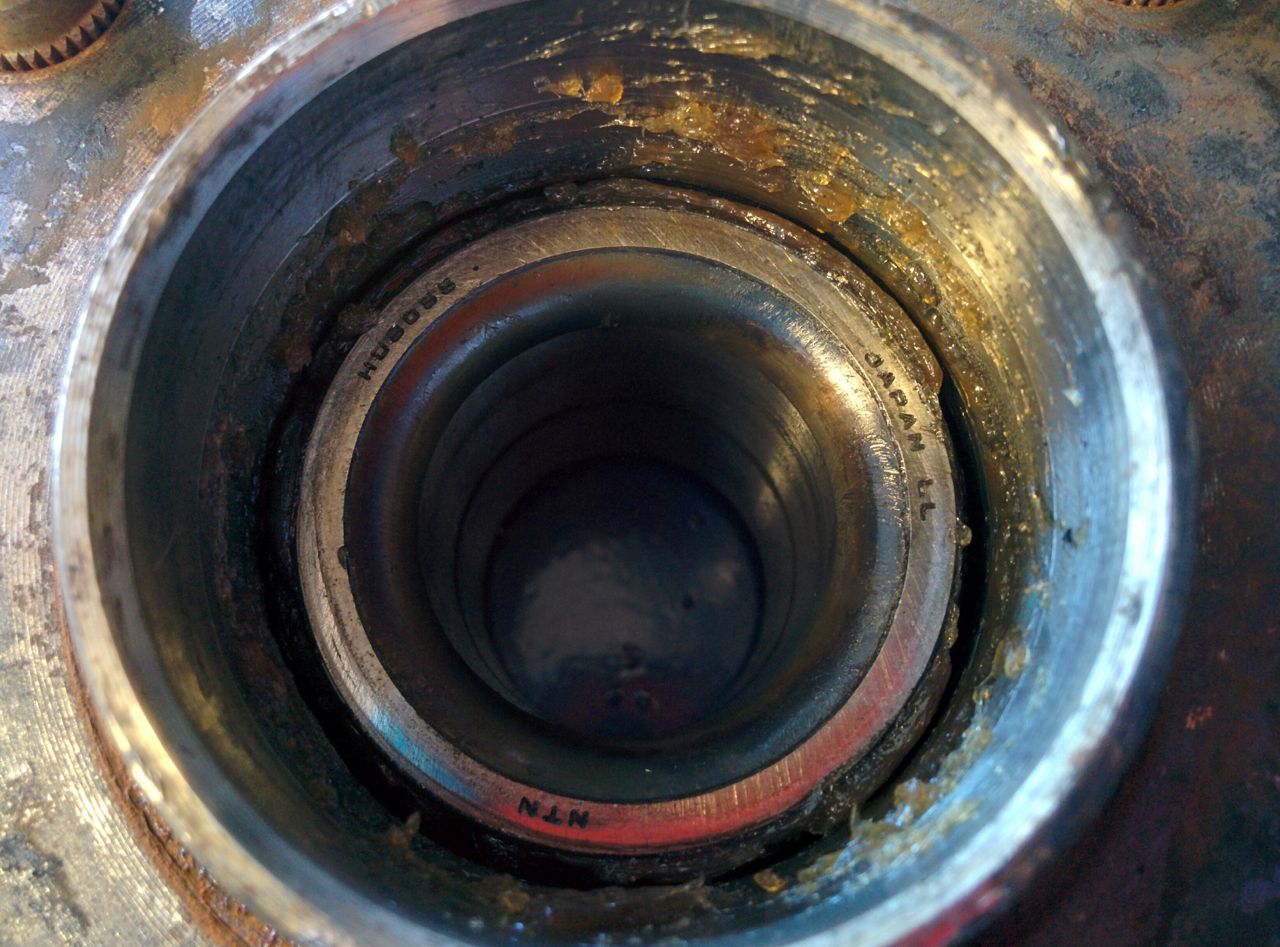
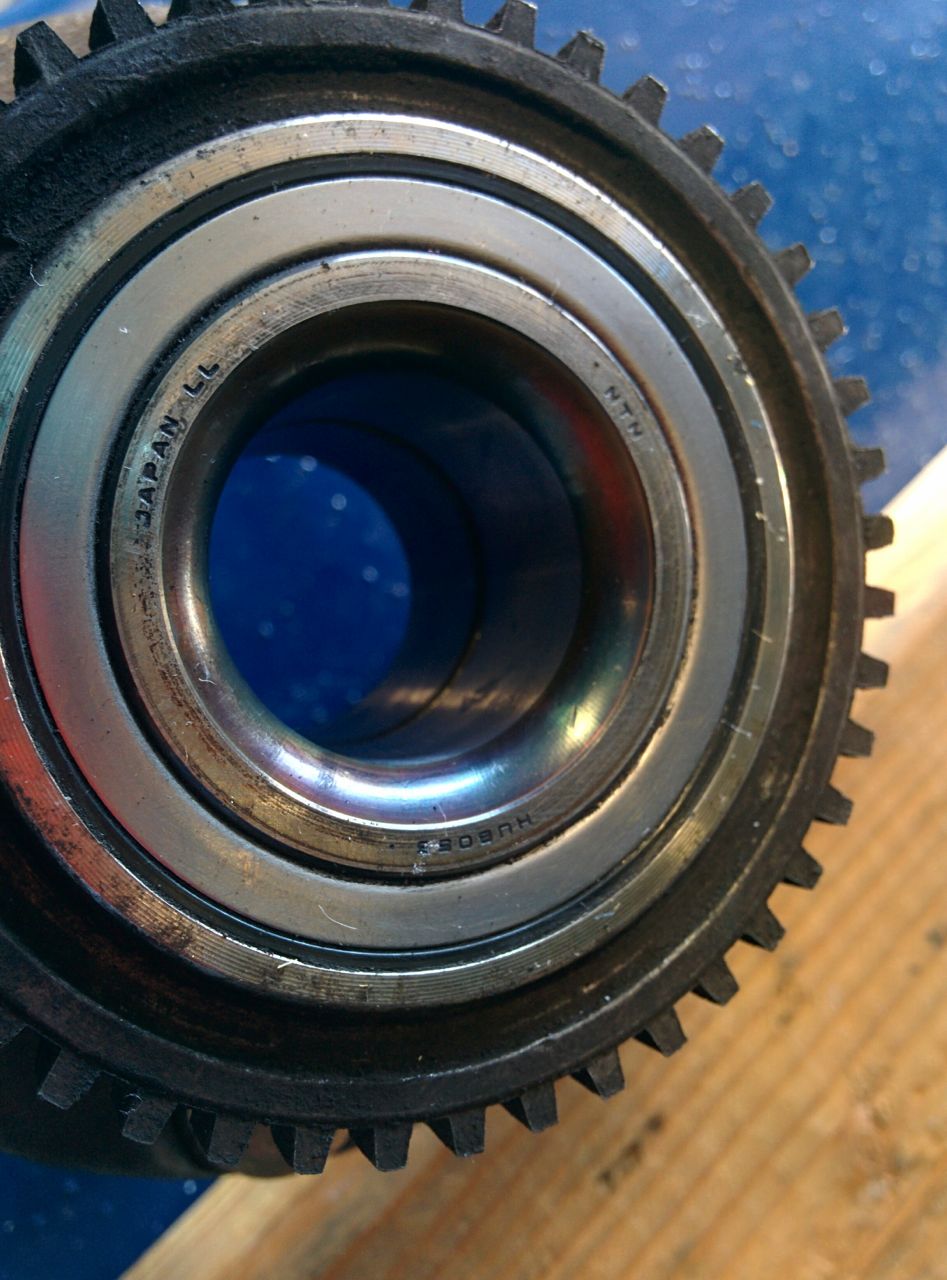
The radiuses bit on the inner race appears to be blue/purple instead of shiny metal -- any thoughts on why? Also, that inner race is a lot more reluctant to spin with my fingers than the outer one.
Maybe it's time to replace these?
--Ian
Reply
0
0
10-24-2016, 01:32 PM
#710
Elite Member
iTrader: (37)

Join Date: Apr 2010
Location: Very NorCal
Posts: 10,441
Total Cats: 1,899
Purple = hot.
I've done a couple sets of hubs now both for myself and others, and I've never seen discoloration on the race like that. I'm no expert but if I had to guess I'd say you caught them just in time. Pull them apart and I bet you'll find some galling on the ***** and races.
They are cheap enough that I'd replace them with a new set repacked with Dominator. If the old ones still look ok (no galling) and you want to be cheap, repack one with Dominator and keep it in the spares box. But I know you aren't cheap, so just buy 3 new hubs. Just my
Reply
0
0
10-24-2016, 02:06 PM
#713
Elite Member
Thread Starter
Join Date: Mar 2007
Location: Santa Clara, CA
Posts: 5,172
Total Cats: 856
--Ian
Reply
0
0
10-24-2016, 09:58 PM
#714
Elite Member
Thread Starter
Join Date: Mar 2007
Location: Santa Clara, CA
Posts: 5,172
Total Cats: 856
Track event in a little over 2 weeks -- Oak Tree Mazda doesn't have any in stock, they'll take a week to get them, and they want a lot for them. I'm not inclined to play aftermarket parts roulette with the crazy Timkin hubs ordering from RockAuto, so I called up FM and ordered 2 of their "blueprinted" hubs. After I mentioned the SM weekend of fail thread, they went and checked the hubs in the stockroom, machining is good. So not cheap, but cheaper than losing a wheel in turn 8 (3.0 mile Thunderhill course).
--Ian
Reply
0
0
10-24-2016, 10:35 PM
#715
Elite Member
iTrader: (2)
Join Date: May 2008
Location: Portland, Oregon
Posts: 3,468
Total Cats: 365
You need to put some sacrificial silicone hose sleeving over the duct hose where it is going to rub on the undertray, like you did with the intercooler hose. IMO. I'd put some between the intercooler hose and duct hose as well, as those parts are going to move against each other, and inevitably chafe.
NB2 nose would make your life simpler.
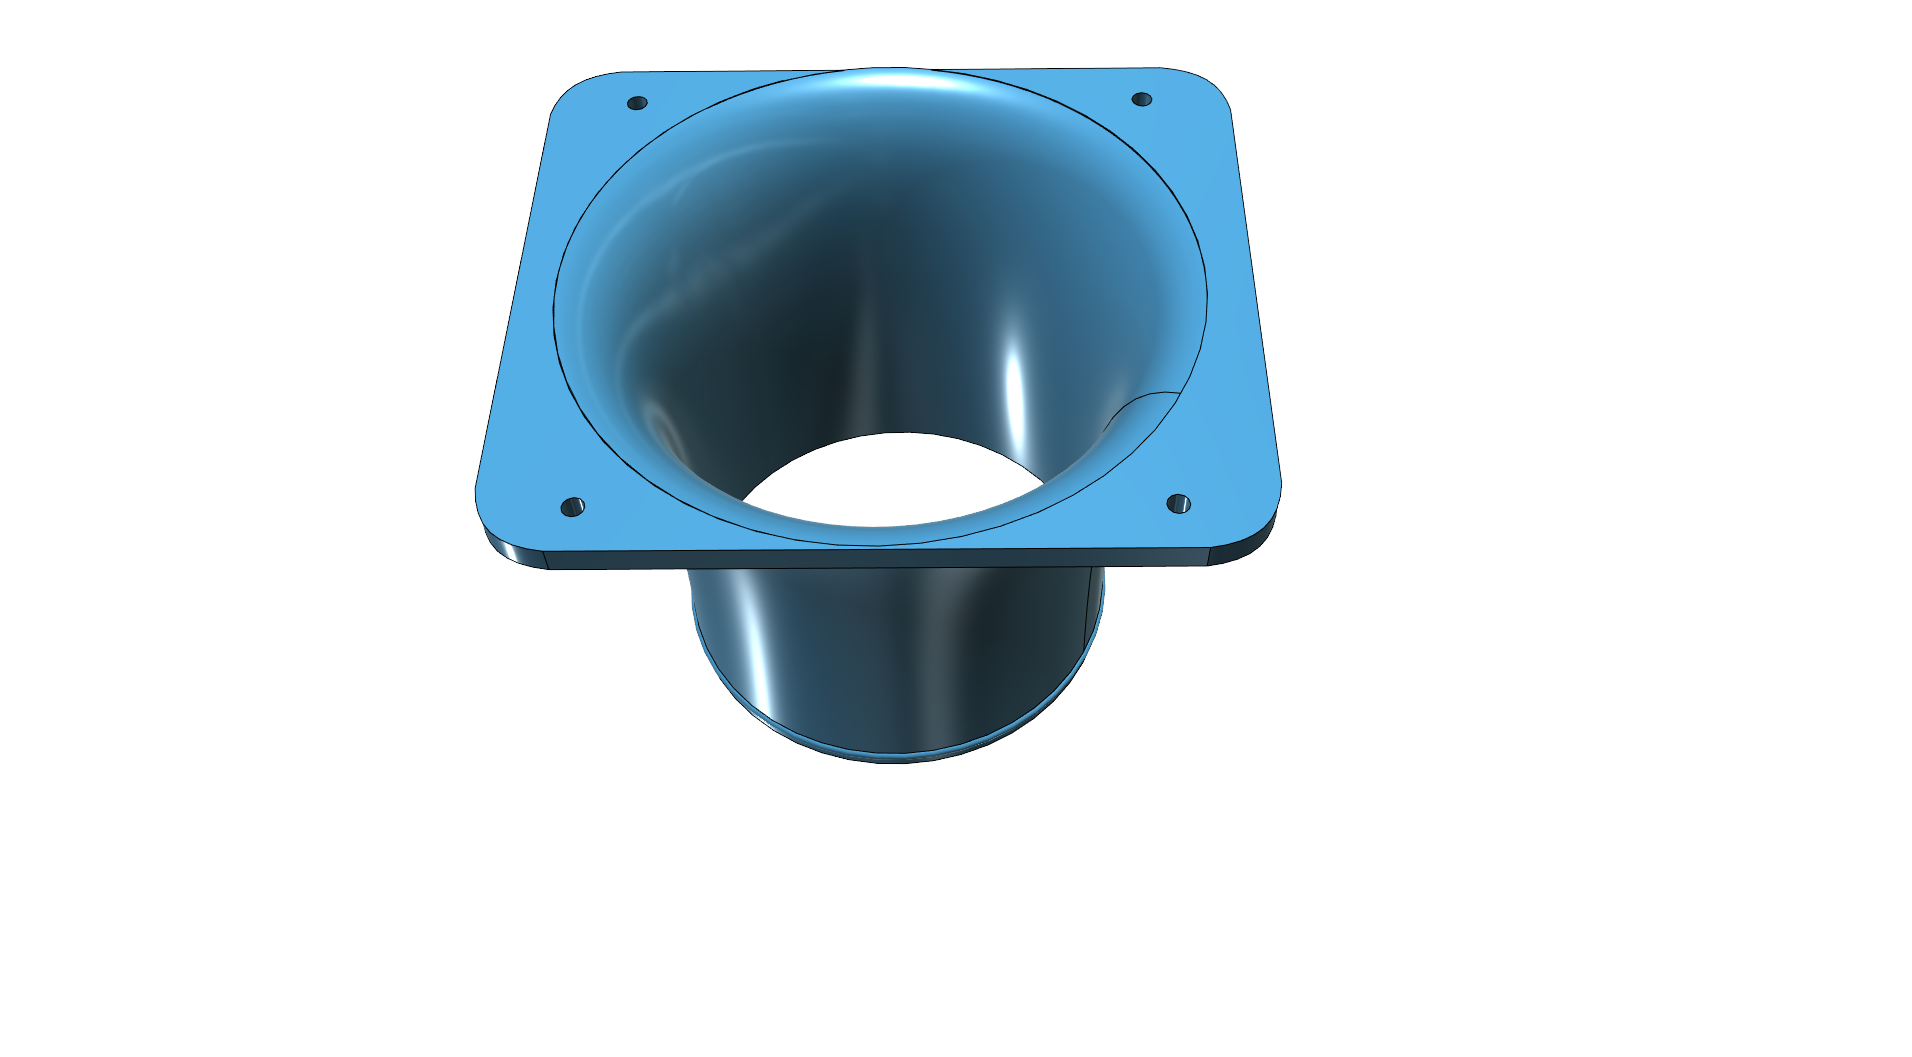
Aidan is hopefully printing out some brake ducts I designed for me to test fit onto my car. They're 3"->2.5", because NB2 mounting, but I can put something together for your situation, create a 3.5 -> 3" velocity stack. Drill through the bumper and bolt and you're done. Let me know what size you want the square mounting flange to be. And let me test mine first, if they crumple because too thin, that obviously has to be fixed.

NB2 nose would make your life simpler.
Aidan is hopefully printing out some brake ducts I designed for me to test fit onto my car. They're 3"->2.5", because NB2 mounting, but I can put something together for your situation, create a 3.5 -> 3" velocity stack. Drill through the bumper and bolt and you're done. Let me know what size you want the square mounting flange to be. And let me test mine first, if they crumple because too thin, that obviously has to be fixed.
Reply
0
0
10-25-2016, 01:56 AM
#716
Supporting Vendor

iTrader: (1)
Join Date: Sep 2010
Location: Lake Forest, CA
Posts: 7,956
Total Cats: 1,008
aidan, keep in mind that mine is the 2.5" kit.
That being said, I'm sure they've got a 3.5 to 2.5 reducer.
Thinking about this a bit more, might go with the 2.5" anyway and clamp the hoses onto it. The home depot 2.5" reducer is quite a lot larger than 2.5" OD, so I had to spend some quality time shaving it down a lot for the hose to fit.
That being said, I'm sure they've got a 3.5 to 2.5 reducer.
Thinking about this a bit more, might go with the 2.5" anyway and clamp the hoses onto it. The home depot 2.5" reducer is quite a lot larger than 2.5" OD, so I had to spend some quality time shaving it down a lot for the hose to fit.
Reply
0
0
10-25-2016, 06:52 AM
#717

Originally Posted by codrus
I'm not inclined to play aftermarket parts roulette with the crazy Timkin hubs ordering from RockAuto, so I called up FM and ordered 2 of their "blueprinted" hubs.
- If you order studs from them with the hubs, they send Camaro studs, which are slightly larger.
- Even though the hubs were NTK from Japan, the stud holes were undersized. This is an issue people have intermittently seen in aftermarket hubs, and even pressing in the correct Miata ARP studs would require considerable violence.
I called ARP for their recommendation, and reamed the holes to their spec prior to installing the Miata ARP studs.
Turns out no hubs are 100% safe :(
Reply
0
0
10-25-2016, 12:08 PM
#718
Elite Member
Thread Starter
Join Date: Mar 2007
Location: Santa Clara, CA
Posts: 5,172
Total Cats: 856
Two things on the FM hubs:
- If you order studs from them with the hubs, they send Camaro studs, which are slightly larger.
- Even though the hubs were NTK from Japan, the stud holes were undersized. This is an issue people have intermittently seen in aftermarket hubs, and even pressing in the correct Miata ARP studs would require considerable violence.
I called ARP for their recommendation, and reamed the holes to their spec prior to installing the Miata ARP studs.
Turns out no hubs are 100% safe :(
Thanks for the heads up on the hole diameter, I will check that when they arrive.
--Ian
Reply
0
0
10-27-2016, 11:52 PM
#719
Elite Member
Thread Starter
Join Date: Mar 2007
Location: Santa Clara, CA
Posts: 5,172
Total Cats: 856
One or two people have asked about the pressure sensors I used in various data gathering exercises, so I'm posting the part #s here for future reference.
For manifold backpressure, I used a Freescale 7 bar MAP sensor, MPX5700AP. http://www.mouser.com/Search/Product...y841-MPX5700AP
For downpipe back pressure and compressor outlet pressure I used a Freescale 4 bar MAP sensor, MPX6400A. http://www.mouser.com/Search/Product...-MPXH6400AC6T1 I think this is the same 4 bar MAP sensor that DIYautotune sells, but this one comes bare instead of on a board, and only costs $7. It's surface mount which means it's kind of a pain to solder to, though.
For fuel pressure, I used a Measurement Specialties 100psi transducer, M3031-300-100-P-3-N-1. http://www.mouser.com/Search/Product...031000005100PG Hm, when I bought it, Mouser would sell you them in singletons, now there's a minimum order quantity of 20.
--Ian
Reply
0
0
10-28-2016, 12:02 AM
#720
SADFab Destructive Testing Engineer

iTrader: (5)
Join Date: Apr 2014
Location: Beaverton, USA
Posts: 18,642
Total Cats: 1,866
I'm a big fan of the ebay pressure transducers for non critical systems. Data logging, etc.
Pressure transducer or sender, 100 psi, stainless steel, for oil,fuel,air,water | eBay
I even have a 1000psi one for brakes.
Pressure transducer or sender, 100 psi, stainless steel, for oil,fuel,air,water | eBay
I even have a 1000psi one for brakes.
Reply
0
0


