94 AbsurdFlow/ARTech GT2871R build
 09-03-2013, 12:48 PM
#1
Junior Member
Thread Starter
iTrader: (3)

Join Date: Apr 2010
Location: Cary, NC
Posts: 494
Total Cats: 6
So I have been super lazy and never got around to making a build thread my first time around but figured since I have pretty parts this time people might actually wanna see some of it. Or point out things that suck. Either way I will have something to entertain me at work since I am surprisingly slow after the long weekend.
Car: 1994 miata with maybe 185k? I dont remember. Solid drivetrain, not so solid interior but I planned on gutting it anyways so i didnt care. Pretty much bought it and put it on jack stands within a week and started ripping stuff out
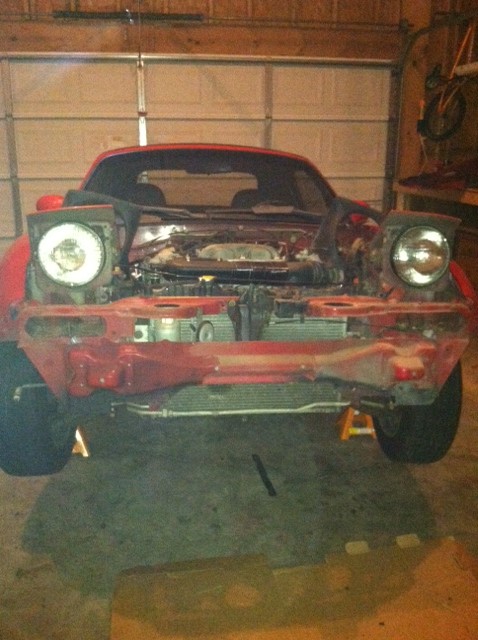
Got rid of PS/AC right away, emissions junk, then started on the interior.
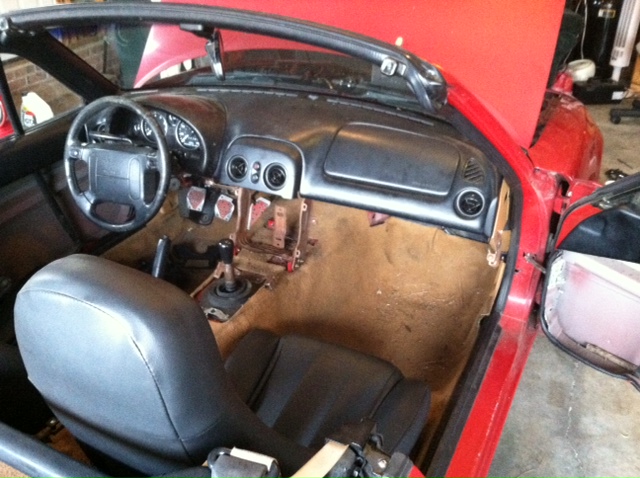
Originally went with cutting the dash and pulling all the HVAC/radio etc but got bored and ended up ripping it all out when I put in my new seats.
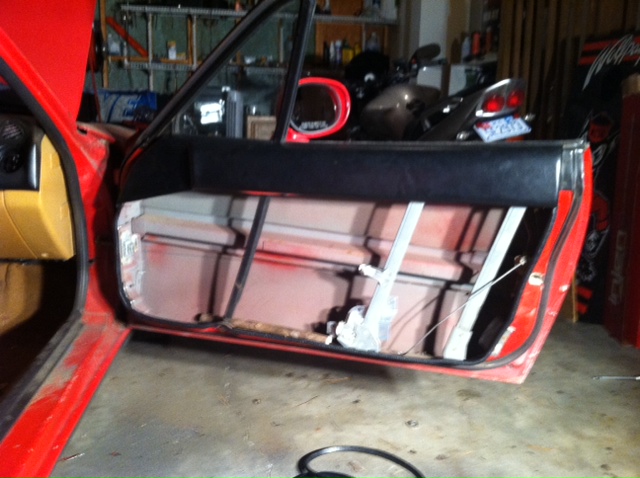
gutted the doors, ended up removing the center track also once I realized i didnt need it to keep the windows secure when they are in.
Then I remembered I had a credit card..so i spent way too much money too fast. Oh well
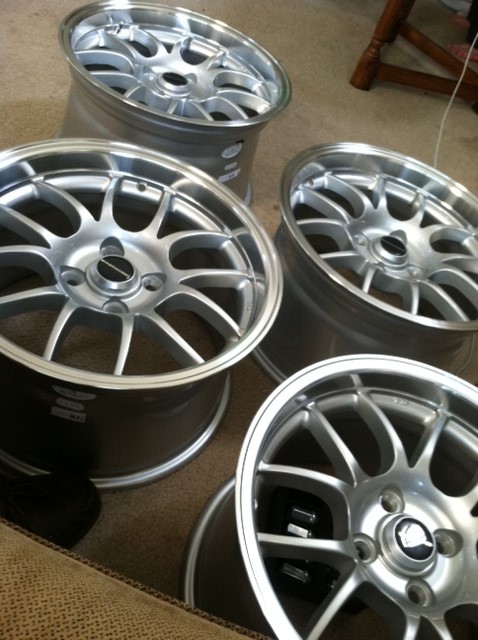
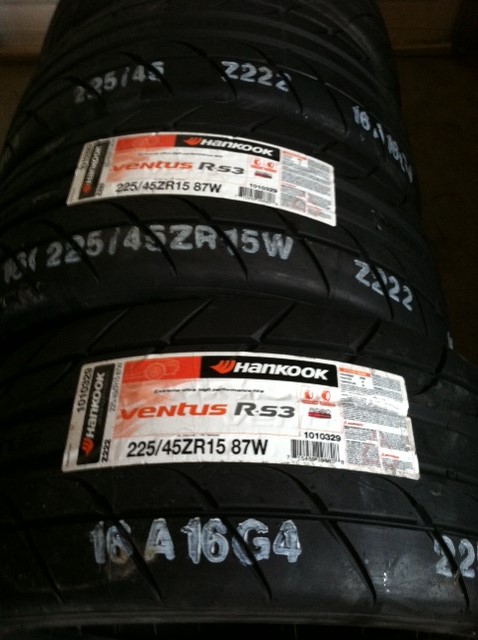
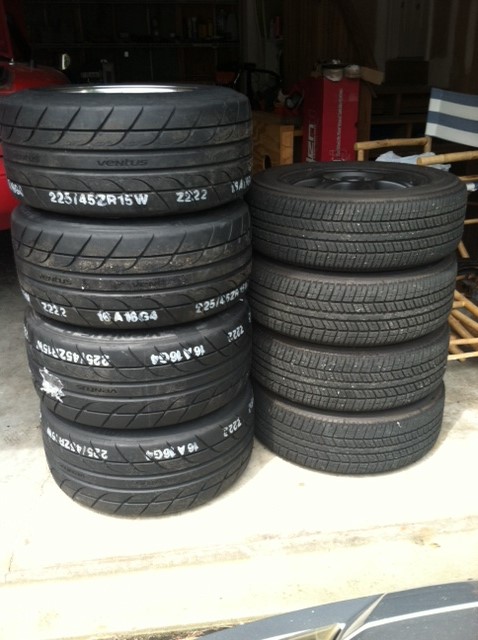
I was pretty excited when I stacked them up to compare. Calculating differences is not as powerful as finally seeing it in person.
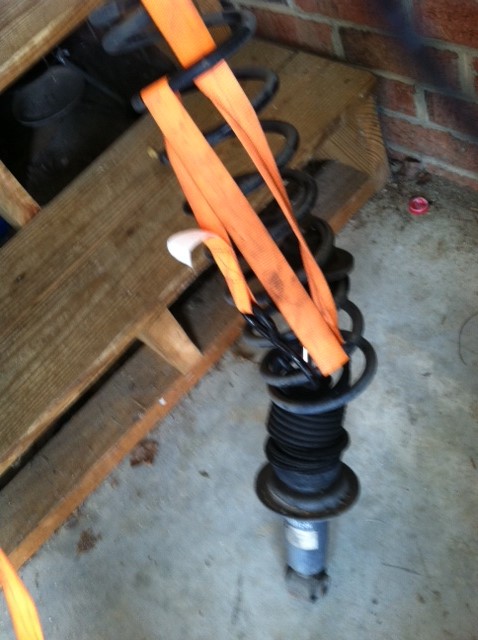
swapped out my suspension using my patented "damnit i cant quite rip this out by hand..what is within arms reach of me? oh hey this might work" method. It worked.

Before

After
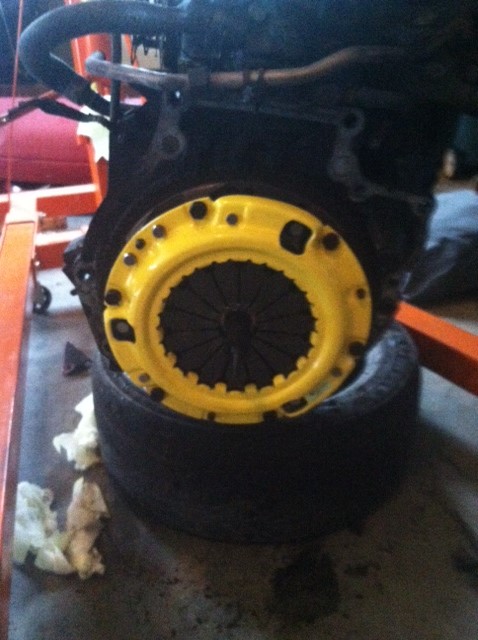
Upgraded my clutch to a ACT unit, I had one in my last car and once i got used to the pedal feel I actually liked how snappy and quick it was so I went with the same setup again.
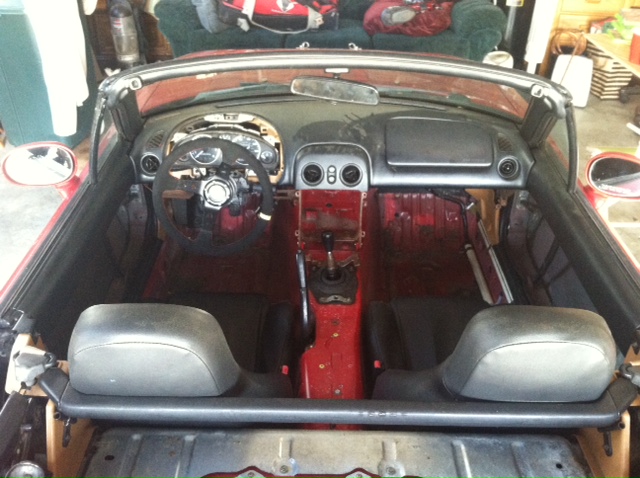
New seats came in
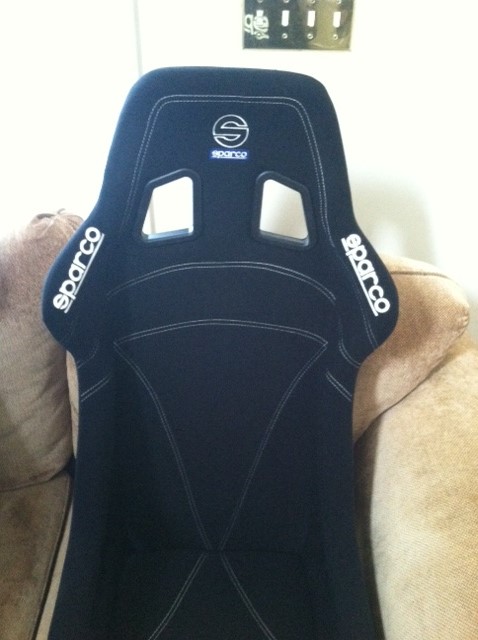
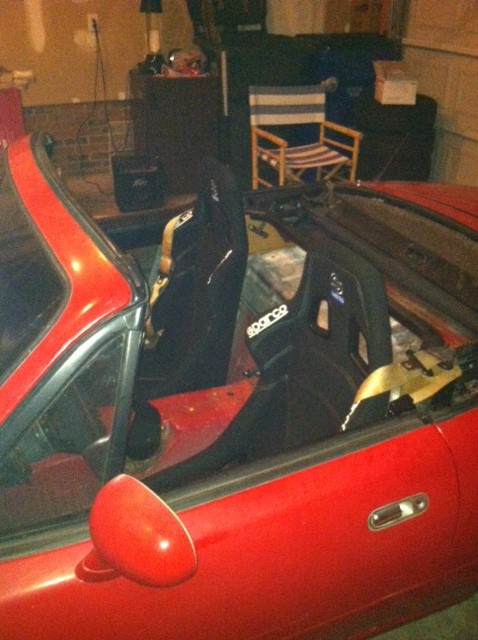
They fit pretty well, I ended up bolting them straight to the floor to maximize clearance for my helmeted head once I get a roll bar in. Might sharpie the Sparco logo out, looks a little ricey but as I mentioned already, I am lazy so I may never get around to it.
Then it got fun when I made a purchase from GeneSplicer. He was enjoyable to deal with, great correspondence efforts via email, answered all my questions and is apparently the devil because he mentioned he took credit card, so i was unable to resist the temptation and I bit the bullet. This is what actually started my spending spree.... But in all seriousness, thanks for the stuff GeneSplicer!
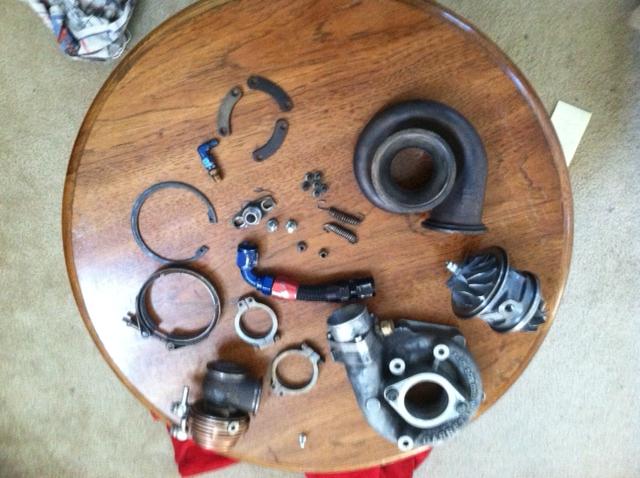
Went with a full 3" exhaust from ARTech, looks great and I cant wait to hear it.
Went to install it and realized I still needed to come up with a modified mixing manifold/water pump inlet so I was going to go with the flip/plug/tap etc method but my aluminum rad with stock fan didnt allow that. Ended up cutting out a section, grinding, JBwelding back together, capping the old heater core hardline (turns out a quarter is almost a perfect fit, JB welded over it all, drilled hole for old water line nipple, drilled out old hole and ground the casting to be round to accept a rubber hose to mate to the trimmed hardline.
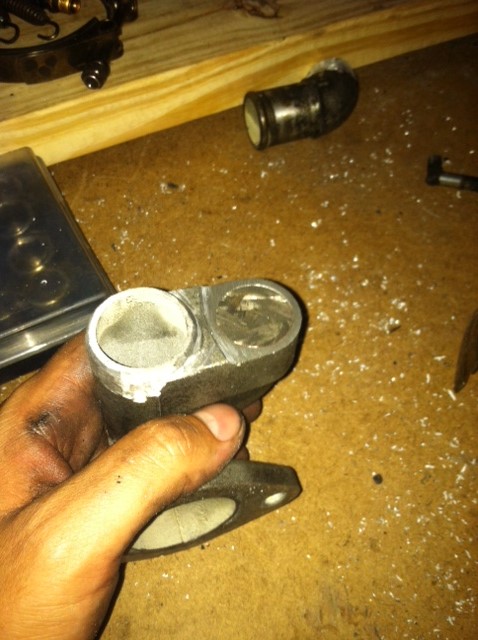
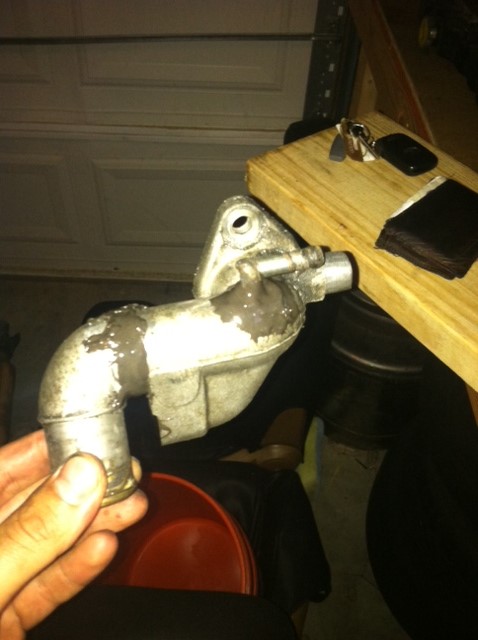
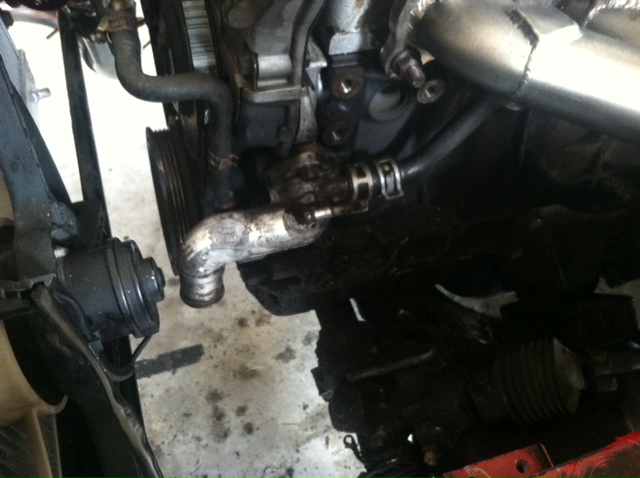
Turned out pretty good, I might still need to modify the old elbow for the lower rad hose to tuck it closer but I am waiting to finish my IC piping first.
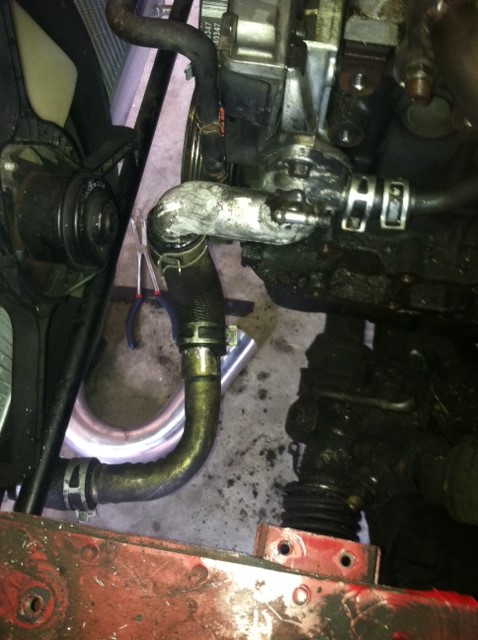
Now I have clearance for the turbo, nothing hitting or rubbing
That is where I am up to now. Not pictured is boring stuff like EGR blockoff plates, Cheap IC/Piping, PS looped lines etc. Waiting on some silicone couplers for IC piping, fitting for the oil pan, oil/water lines, v-band clamps for the exhaust, and I should be done with the hotside stuff. Only things left after that are swapping injectors, hooking up WBo2, boost gauge, plugging in MS and I should be able to start it up. Went with a MS2 this time instead of the MS1 I had on my previous build so I'm expecting there to be some updates and changes I will have to learn but I barely remember setting it up the first time so I will basically be relearning it all anyways. Going to try to get the injectors/sensors done this week while I wait for parts.
Car: 1994 miata with maybe 185k? I dont remember. Solid drivetrain, not so solid interior but I planned on gutting it anyways so i didnt care. Pretty much bought it and put it on jack stands within a week and started ripping stuff out

Got rid of PS/AC right away, emissions junk, then started on the interior.

Originally went with cutting the dash and pulling all the HVAC/radio etc but got bored and ended up ripping it all out when I put in my new seats.

gutted the doors, ended up removing the center track also once I realized i didnt need it to keep the windows secure when they are in.

Then I remembered I had a credit card..so i spent way too much money too fast. Oh well


I was pretty excited when I stacked them up to compare. Calculating differences is not as powerful as finally seeing it in person.
swapped out my suspension using my patented "damnit i cant quite rip this out by hand..what is within arms reach of me? oh hey this might work" method. It worked.


Before

After
Upgraded my clutch to a ACT unit, I had one in my last car and once i got used to the pedal feel I actually liked how snappy and quick it was so I went with the same setup again.

New seats came in


They fit pretty well, I ended up bolting them straight to the floor to maximize clearance for my helmeted head once I get a roll bar in. Might sharpie the Sparco logo out, looks a little ricey but as I mentioned already, I am lazy so I may never get around to it.
Then it got fun when I made a purchase from GeneSplicer. He was enjoyable to deal with, great correspondence efforts via email, answered all my questions and is apparently the devil because he mentioned he took credit card, so i was unable to resist the temptation and I bit the bullet. This is what actually started my spending spree.... But in all seriousness, thanks for the stuff GeneSplicer!


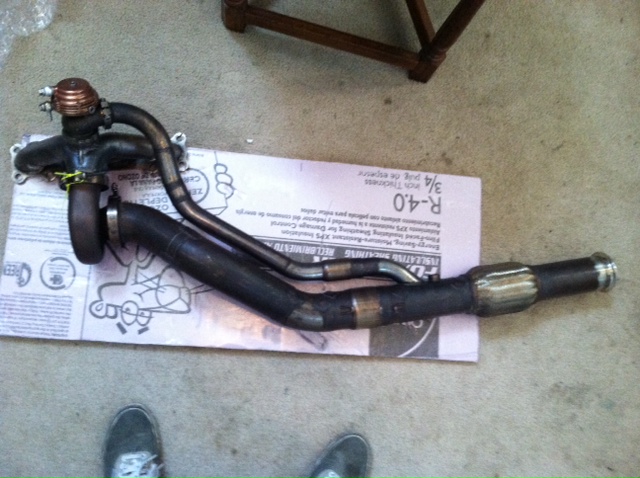
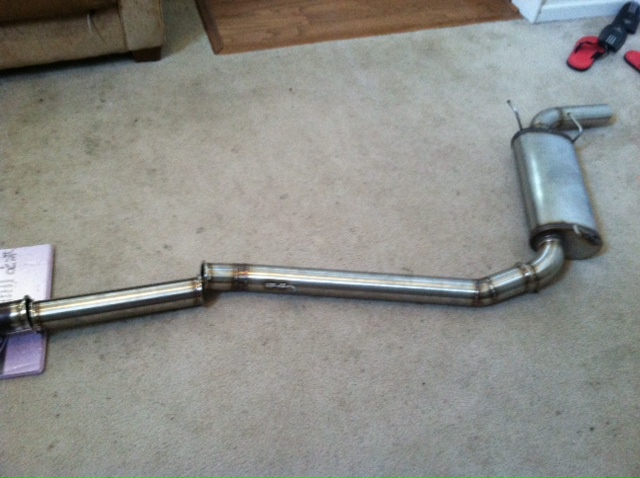
Went with a full 3" exhaust from ARTech, looks great and I cant wait to hear it.

Went to install it and realized I still needed to come up with a modified mixing manifold/water pump inlet so I was going to go with the flip/plug/tap etc method but my aluminum rad with stock fan didnt allow that. Ended up cutting out a section, grinding, JBwelding back together, capping the old heater core hardline (turns out a quarter is almost a perfect fit, JB welded over it all, drilled hole for old water line nipple, drilled out old hole and ground the casting to be round to accept a rubber hose to mate to the trimmed hardline.


Turned out pretty good, I might still need to modify the old elbow for the lower rad hose to tuck it closer but I am waiting to finish my IC piping first.

Now I have clearance for the turbo, nothing hitting or rubbing

That is where I am up to now. Not pictured is boring stuff like EGR blockoff plates, Cheap IC/Piping, PS looped lines etc. Waiting on some silicone couplers for IC piping, fitting for the oil pan, oil/water lines, v-band clamps for the exhaust, and I should be done with the hotside stuff. Only things left after that are swapping injectors, hooking up WBo2, boost gauge, plugging in MS and I should be able to start it up. Went with a MS2 this time instead of the MS1 I had on my previous build so I'm expecting there to be some updates and changes I will have to learn but I barely remember setting it up the first time so I will basically be relearning it all anyways. Going to try to get the injectors/sensors done this week while I wait for parts.

Reply
 0
0

0
09-03-2013, 01:36 PM
#2
Elite Member
iTrader: (13)

Join Date: Dec 2006
Location: Taos, New mexico
Posts: 6,606
Total Cats: 566
Sweet build and some nice parts you are throwing on this thing.
I'm VERY concerned with the use of JB weld on a vital coolant line though. That could make a big mess of the track you are on as well as end with a fubard engine if it lets loose.
There are lots of things I use jb weld for, but that would not be one of them Just my .02. Good luck with the build!
I'm VERY concerned with the use of JB weld on a vital coolant line though. That could make a big mess of the track you are on as well as end with a fubard engine if it lets loose.
There are lots of things I use jb weld for, but that would not be one of them Just my .02. Good luck with the build!
Reply
0
0
09-03-2013, 01:55 PM
#3
Junior Member
Thread Starter
iTrader: (3)
Join Date: Apr 2010
Location: Cary, NC
Posts: 494
Total Cats: 6
I briefly debated if the JBWeld should be a concern or not, but I figured since it will be experiencing negative pressure and water temps below the limit of the JBWeld, and little to no stresses (the weight of the lower RAD line isnt much) That I shouldn't be too concerned. I ground down the JBWeld after it cured to check for porosity but it seems to have bonded pretty solid. If others think this should be a concern, let me know and I will look into a welded version, I actually found out my friend has a TIG welder AFTER I finished working on this part but I don't feel like making another part unless this is in fact a potentially weak point of the system.
Last edited by rigidbigelsworth; 09-03-2013 at 02:07 PM.
Reply
0
0
09-03-2013, 01:59 PM
#4
Elite Member
iTrader: (13)
Join Date: Dec 2006
Location: Taos, New mexico
Posts: 6,606
Total Cats: 566
BP engines are notoriously buzzy and emit tons of vibration, especially with stiffer motor mounts (which I would do for sure with a turbo build). Pretty much every case I've ever had where JB weld failed, it was due to vibrations over time.
Reply
0
0
09-03-2013, 02:06 PM
#5
Junior Member
Thread Starter
iTrader: (3)
Join Date: Apr 2010
Location: Cary, NC
Posts: 494
Total Cats: 6
So I can prob slap some duct tape on it and call it a day then right?
looks like I have another project to add to the list. Guess I get to brush up on my (terrible) TIG welding skills soon..
looks like I have another project to add to the list. Guess I get to brush up on my (terrible) TIG welding skills soon..
Reply
0
0
09-03-2013, 02:14 PM
#6
Elite Member
iTrader: (13)
Join Date: Dec 2006
Location: Taos, New mexico
Posts: 6,606
Total Cats: 566
Duct tape fixes everything. Honestly it's your car, leave it if you truly feel comfortable with it. I know with my experience with JB weld I'd expect that thing to fail 100% for sure, just WHEN it fails is the question.
For most other things I'd say run it, and fix it if it breaks. The problem is, if that thing breaks you will likely end up needing to fix more than just that coolant neck.
For most other things I'd say run it, and fix it if it breaks. The problem is, if that thing breaks you will likely end up needing to fix more than just that coolant neck.
Reply
0
0
09-03-2013, 02:28 PM
#7
Junior Member
Thread Starter
iTrader: (3)
Join Date: Apr 2010
Location: Cary, NC
Posts: 494
Total Cats: 6
Well thanks alot, now im going to be paranoid watching for puddles of water behind me whenever I drive this thing haha. I guess i should look into getting it actually welded. at least for peace of mind at this point.
Reply
0
0
09-03-2013, 03:01 PM
#8

If the surfaces were completely clean/scuffed and it was mixed properly I wouldn't see any serious issues with it. I've mended many broken steering columns, lock housings, and various other things with the intent of it being permanent. I've had it fail on occasion but knew it would as soon as i finished. you just know.
It's not like it's really weight baring. just my opinion.
It's not like it's really weight baring. just my opinion.
Reply
0
0
09-03-2013, 03:09 PM
#9
Junior Member
Thread Starter
iTrader: (3)
Join Date: Apr 2010
Location: Cary, NC
Posts: 494
Total Cats: 6
Yeah i ground down the whole surface to be mated and cleaned it/dried it, even ground in a beveled edge on both surfaces to be mated so there was a channel for the weld bead. I figured that would be sufficient but now I am second guessing myself
Reply
0
0
09-03-2013, 04:09 PM
#10

I am excited that I'll help get this thing running!
I was also unsure of the JBweld although I don't have much experience in torture testing it. Then I got distracted by dem fat tires... are you rolling or pulling fenders?
Nothing wrong with getting to play with some TIG.
What is your MS2 exactly; Brain, Rev, diy?
I was also unsure of the JBweld although I don't have much experience in torture testing it. Then I got distracted by dem fat tires... are you rolling or pulling fenders?
Nothing wrong with getting to play with some TIG.
What is your MS2 exactly; Brain, Rev, diy?
Reply
0
0
09-03-2013, 04:29 PM
#11
Junior Member
Thread Starter
iTrader: (3)
Join Date: Apr 2010
Location: Cary, NC
Posts: 494
Total Cats: 6
It is a Brain MS2. I think I am more excited I don't have to drive to greensboro to have my dad help me since all my friends have Macs and I cant figure out how to get stupid tunerstudios to work on stupid macs. So Win-Win.
I rolled the fenders with a teeball bat even though they didn't seem like they needed it much. I shouldn't have to pull them any. I did get a chance to drive it around with the new suspension/wheels/tires before I pulled the engine etc and it gripped like whoa. There didn't seem to be any rubbing but I could only push it so hard on the streetz.
I rolled the fenders with a teeball bat even though they didn't seem like they needed it much. I shouldn't have to pull them any. I did get a chance to drive it around with the new suspension/wheels/tires before I pulled the engine etc and it gripped like whoa. There didn't seem to be any rubbing but I could only push it so hard on the streetz.
Reply
0
0
09-04-2013, 08:23 AM
#12
Junior Member
Thread Starter
iTrader: (3)
Join Date: Apr 2010
Location: Cary, NC
Posts: 494
Total Cats: 6
So I got my injectors installed last night and when I was tightening the 3 fuel rail bolts, it seemed like it got pretty tight before the plastic retainer/spacers were fully locked in place. It almost seemed like the injectors were longer than they should be. Has anyone else had this problem? This is what I installed
EV14 - 550cc/min Import Long; Mitsubishi Eclipse/Galant 3.8L, 3.0L, 6G75, 6G72 - Import Fuel Injectors - Custom Milled High Performance Impreza WRX and Mazda RX7 Siemens Injectors - 026IMP550X
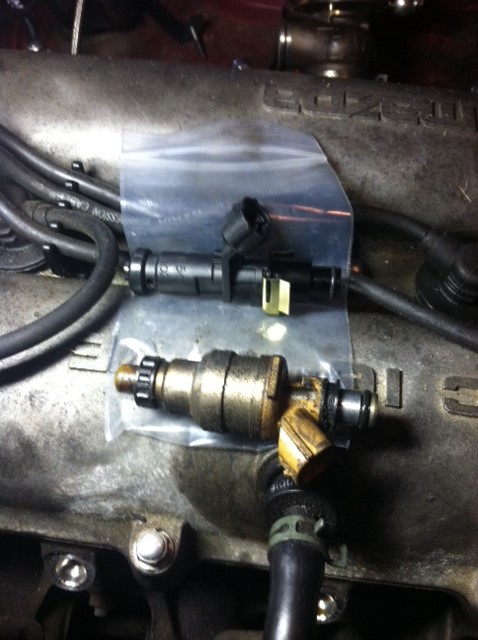
I also noticed the connectors are farther down the body making it a little difficult to attach the plugs. I had to rotate them some which put the front most injector wire under a bit more tension than I would like so I will have to see about getting some more slack in the harness.
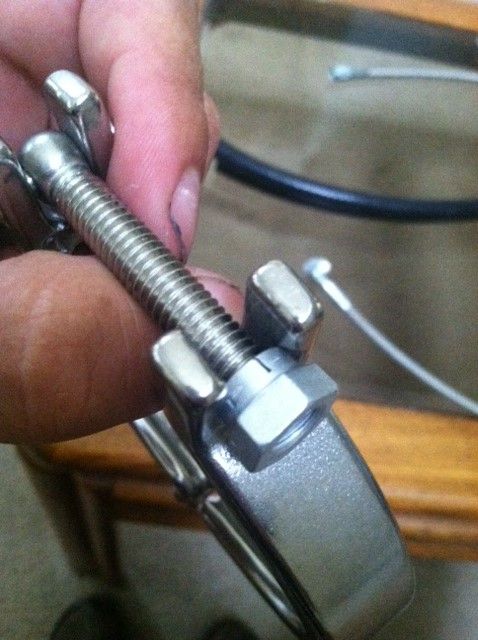
Also, on these vband clamps, would it make more sense to flip the castellated nut around so the ground out bowl shape of the clamp would sort of crush the tabs and make it grab the threaded shaft better? They all came the other way but it doesnt seem like the flat hex portion of the nut would nest inside the bowl shape very well. Thoughts?
EV14 - 550cc/min Import Long; Mitsubishi Eclipse/Galant 3.8L, 3.0L, 6G75, 6G72 - Import Fuel Injectors - Custom Milled High Performance Impreza WRX and Mazda RX7 Siemens Injectors - 026IMP550X

I also noticed the connectors are farther down the body making it a little difficult to attach the plugs. I had to rotate them some which put the front most injector wire under a bit more tension than I would like so I will have to see about getting some more slack in the harness.
Also, on these vband clamps, would it make more sense to flip the castellated nut around so the ground out bowl shape of the clamp would sort of crush the tabs and make it grab the threaded shaft better? They all came the other way but it doesnt seem like the flat hex portion of the nut would nest inside the bowl shape very well. Thoughts?

Reply
0
0
09-04-2013, 10:18 AM
#13
Elite Member

iTrader: (9)
Join Date: Jun 2006
Location: Chesterfield, NJ
Posts: 6,893
Total Cats: 399
What clamp is that?! I assume it's the big clamshell clamp for the 3" vband used on ARTech exhausts. If so, it should have a large thumb nut thing. I would not use that fancy lock nut on that clamp, and if you do, definitely not upside down.
That nut is for a regular vband clamp like in your picture above in the first post...the one that goes on the tial housing for example.
Not recommended, but I have been running my regular ol' 1/4-28 mockup nuts with copper antisieze on my vbands without issue, but I'm a street guy. I had a set of nuts that I used for building/mocking up kits, as it's easy to spin them on with one finger while holding the clamp tight with the other hand...not easy to do with those fancy lock nuts. I had my car together with these mockup nuts, figuring I would install the lock nuts on top of the mockup nuts. I decided to leave them on there alone and see if they loosed up on the street. All are tight so far, I have the fancy lock nuts in a safe place just in case. Those lock nuts tend to gall up and destroy the $$$ vband threads if you aren't careful.
Reply
0
0
 09-04-2013, 11:19 AM
#15
Junior Member
Thread Starter
iTrader: (3)
Join Date: Apr 2010
Location: Cary, NC
Posts: 494
Total Cats: 6
they are the ARTech vband exhaust clamps. Those are the nuts he sent on them to me. I think I remember hustler pointing out using these nuts on his exhaust since his came loose when he tracked it, unless I am remembering wrong I thought he was talking about his exhaust clamps as well, not the turbine housing clamps.
I guess regardless of the nut I use, I didnt like the idea of the nuts digging in to the cupped surface that the nuts will be digging into. Why didn't they just leave it a flat surface like my turbine/wastegate clamps. I debated adding a washer but there has to be some reason they shaped that part the way they did.
I was under the impression JBWeld was pretty tough stuff. I dont have much experience using it other than stuff like IAT bung or oil pan fittings. I guess it is ok to use as a heavy duty sealant like on the oil pan since it is really being held in by the tapped pan wall, not the JB? But if I should be worried about the waterneck failing I guess I need to look into getting one welded.
Sorry I made you waste your coffee 18PSI
Reply
0
0


 09-04-2013, 12:48 PM
#20
Junior Member
Thread Starter
iTrader: (3)
Join Date: Apr 2010
Location: Cary, NC
Posts: 494
Total Cats: 6
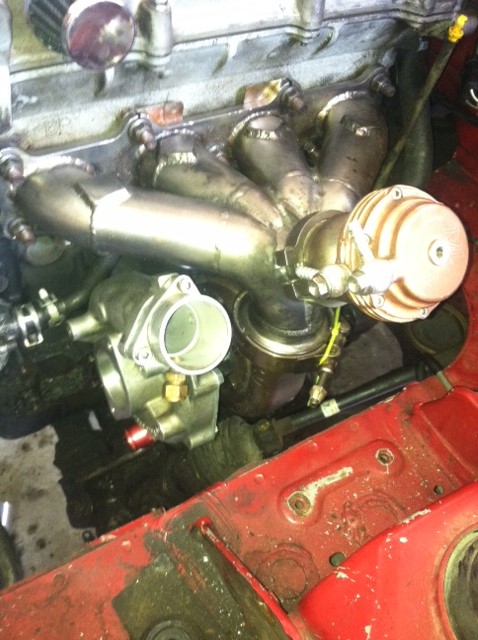
Also, apparently this is the first absurdflow setup I guess originally made for Savington? then passed to who knows, then genesplicer before me so I know things could have changed but does anyone know what PSI springs are in the wastegate? It has a large and a small which both look to be a beige/gold/brown/copper (arent those all pretty much the same color) so I am having trouble identifying them.
I think they are the medium sized one on the bottom left and the large one on the far right.
Wastegate Spring for Tial V38 (MVS) and NEW 44MM (MVR) wastegate : atpturbo.com
What color would you guys call those? Genesplicer led me to believe it was ~15psi but that doesn't match up with the spring rate list below in that link. are they considered copper and brown maybe? or gold and brown?
I know they went to a new color system at some point, why the hell didnt they do that in the first place. All their colors are basically just different tints of each other which makes it even harder to tell when they are covered in soot.
Reply
0
0


