EGR tube / coolant rerout conflict


 11-27-2013, 05:07 PM
#22
Newb

Join Date: Nov 2013
Location: Los Angeles
Posts: 3
Total Cats: 1
This is a very useful set of photos of the EGR re-route to clear the BEGI spacer. Thanks to the OP for posting.
My contribution is to list the specific parts I used & thereby help you find them at Home Depot/Lowes. It is certainly possible to use different ones but this will get you started.
The first thing to note is that the photos above are for an earlier NB than mine. You'll notice the obstructive coil packs which the Begi spacer is designed to clear. Later models(like my '02) do not have the interference of the coil packs but there is some other less intrusive stuff there. I seriously wondered about returning the BEGI spacer because it was not optimally designed for the NB2.The complication of having to extend the sensor conductors is more of a hassle than I realized. The 949 Racing alternative has merit I was unaware of!There is no way to configure the BEGI unit differently to avoid the splicing problem. And yes ,I read you must splice not solder. Either one is tedious at best.
Anyway here are the part numbers:
The CSST is 24" long 1/2" diameter- as recommended (but not used)by the OP.It is :
BrassCraft # CSSD44E-24P.Be careful -the 1/2 refers to the corrugated tube, not necessarily the fittings and there is all manner of potential confusion of pipe vs tube sizes flare/compression,free olives and captive ones -yes really! That is why part numbers help.
The CSSD44E-24P includes a "Safety Plus valve which should be discarded.Pity ,it looks like half the value of the part is in that valve!
I suggest the CSST benefits from having a heat resistant sleeve to cover it-there are lots on EBay. It also needs support(like the OEM EGR tube). The CSST will sag in use and be very hot ,so the sleeve + support may protect parts it accidentally comes to rest on. You need at least 1" i.d. sleeve to slip over the fittings on the end of the CSST.1-1/4" would be best.Choose a sleeve to look 'Factory' to avoid Smog Test issues?You'll need at least 24" to cover the fittings and be sure it is rated for exhaust manifold use.This sleeve avoids having to burn off the yellow coating on the CSST. I was concerned to avoid doing anything to the CSST that may weaken it. Our EGR application is a far more severe useage than it was ever designed for so any caution seems prudent.
If the CSST does eventually leak, the old one can be used as a pattern to fabricate a replacement is s/s or soft copper? Or just regard it as a routine 60,000 mile(??) replacement item and get another CSST .Re-use the old fittings.
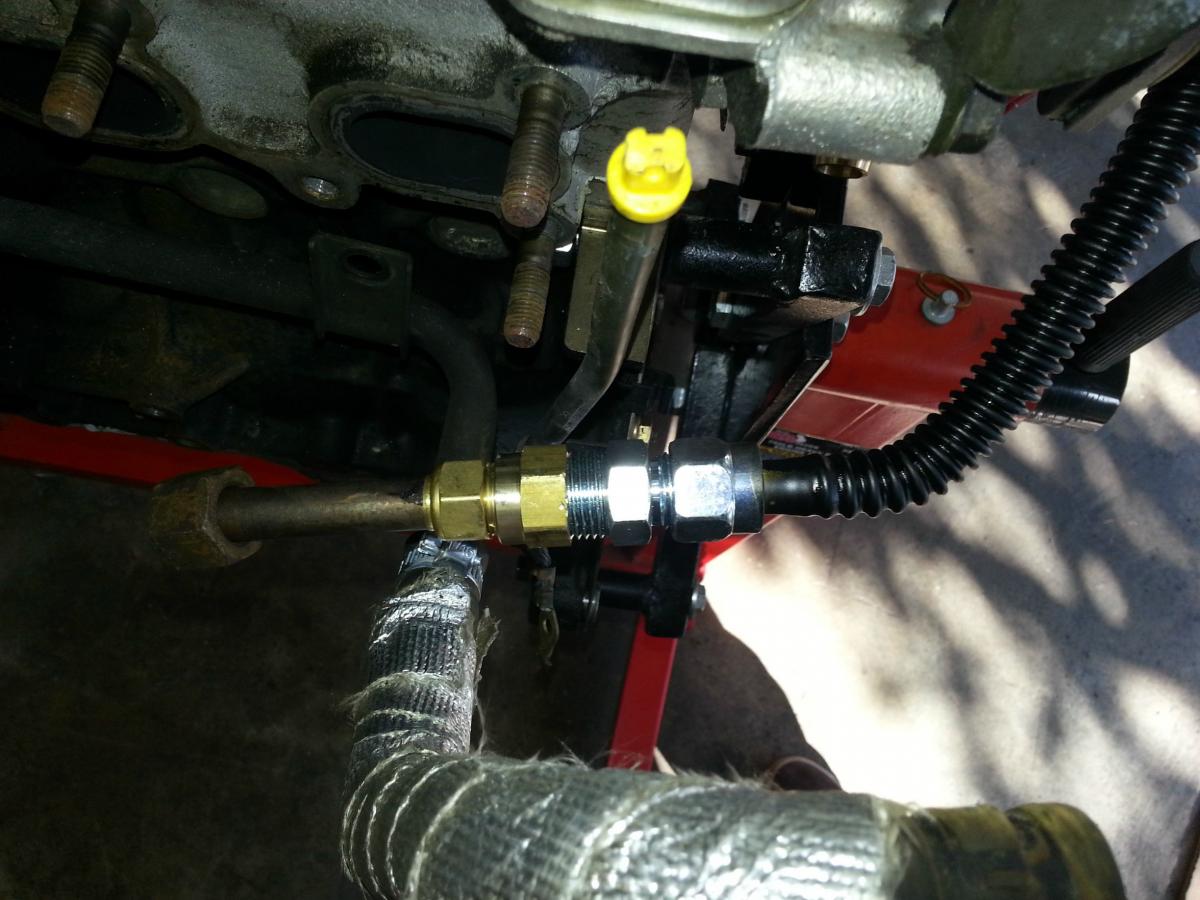
The BrassCraft CSST also comes with a fitting 1/2 flare x 1/2 MIP. You need one of these at each end of the CSST.Then you need to connect this to the stock EGR tube.
The part you need to buy is Watts LFA-218 - this is "1/2"O.D. x 1/2"FIP Compression Coupling". You need 2 - one for each end. Fitting these to the stock EGR pipe is tight! Check the EGR is round by using the shank of a 7/16" drill bit. If you used a hacksaw or cut in a bend it will not fit. Chamfer the leading edge of the egr pipe. Chamfer the i.d. of the captive olive in LFA218. Press carefully -it is easy to distort the thin brass olive &/or damage the threads.
Tip 1:take all your EGR parts to H.D. with you and check fit before you leave the store.
Tip 2:don't buy a bag that has been previously torn open! You never know if the contents are correct.
Tip 3: be gentle cutting the stock EGR tube.A dremel with a new cutting wheel is a good 'surgical' tool to use -hacksaw is difficult to control .
I have no idea how the previous poster used a compression fitting on cut CSST even using an insert inside the CSST.Yes, he says he hacked the ends(=fittings?)off !
It did make me think that using soft copper pipe(the type for refrigeration) may be easier then using CSST because the fittings are easier to fit/find. I guess 5/8" type L soft copper would be the best size ? You can buy it in 10 ft coils.
I hope this helps others who do the reroute in future.
My contribution is to list the specific parts I used & thereby help you find them at Home Depot/Lowes. It is certainly possible to use different ones but this will get you started.
The first thing to note is that the photos above are for an earlier NB than mine. You'll notice the obstructive coil packs which the Begi spacer is designed to clear. Later models(like my '02) do not have the interference of the coil packs but there is some other less intrusive stuff there. I seriously wondered about returning the BEGI spacer because it was not optimally designed for the NB2.The complication of having to extend the sensor conductors is more of a hassle than I realized. The 949 Racing alternative has merit I was unaware of!There is no way to configure the BEGI unit differently to avoid the splicing problem. And yes ,I read you must splice not solder. Either one is tedious at best.
Anyway here are the part numbers:
The CSST is 24" long 1/2" diameter- as recommended (but not used)by the OP.It is :
BrassCraft # CSSD44E-24P.Be careful -the 1/2 refers to the corrugated tube, not necessarily the fittings and there is all manner of potential confusion of pipe vs tube sizes flare/compression,free olives and captive ones -yes really! That is why part numbers help.
The CSSD44E-24P includes a "Safety Plus valve which should be discarded.Pity ,it looks like half the value of the part is in that valve!
I suggest the CSST benefits from having a heat resistant sleeve to cover it-there are lots on EBay. It also needs support(like the OEM EGR tube). The CSST will sag in use and be very hot ,so the sleeve + support may protect parts it accidentally comes to rest on. You need at least 1" i.d. sleeve to slip over the fittings on the end of the CSST.1-1/4" would be best.Choose a sleeve to look 'Factory' to avoid Smog Test issues?You'll need at least 24" to cover the fittings and be sure it is rated for exhaust manifold use.This sleeve avoids having to burn off the yellow coating on the CSST. I was concerned to avoid doing anything to the CSST that may weaken it. Our EGR application is a far more severe useage than it was ever designed for so any caution seems prudent.
If the CSST does eventually leak, the old one can be used as a pattern to fabricate a replacement is s/s or soft copper? Or just regard it as a routine 60,000 mile(??) replacement item and get another CSST .Re-use the old fittings.
The BrassCraft CSST also comes with a fitting 1/2 flare x 1/2 MIP. You need one of these at each end of the CSST.Then you need to connect this to the stock EGR tube.
The part you need to buy is Watts LFA-218 - this is "1/2"O.D. x 1/2"FIP Compression Coupling". You need 2 - one for each end. Fitting these to the stock EGR pipe is tight! Check the EGR is round by using the shank of a 7/16" drill bit. If you used a hacksaw or cut in a bend it will not fit. Chamfer the leading edge of the egr pipe. Chamfer the i.d. of the captive olive in LFA218. Press carefully -it is easy to distort the thin brass olive &/or damage the threads.
Tip 1:take all your EGR parts to H.D. with you and check fit before you leave the store.
Tip 2:don't buy a bag that has been previously torn open! You never know if the contents are correct.
Tip 3: be gentle cutting the stock EGR tube.A dremel with a new cutting wheel is a good 'surgical' tool to use -hacksaw is difficult to control .
I have no idea how the previous poster used a compression fitting on cut CSST even using an insert inside the CSST.Yes, he says he hacked the ends(=fittings?)off !
It did make me think that using soft copper pipe(the type for refrigeration) may be easier then using CSST because the fittings are easier to fit/find. I guess 5/8" type L soft copper would be the best size ? You can buy it in 10 ft coils.
I hope this helps others who do the reroute in future.
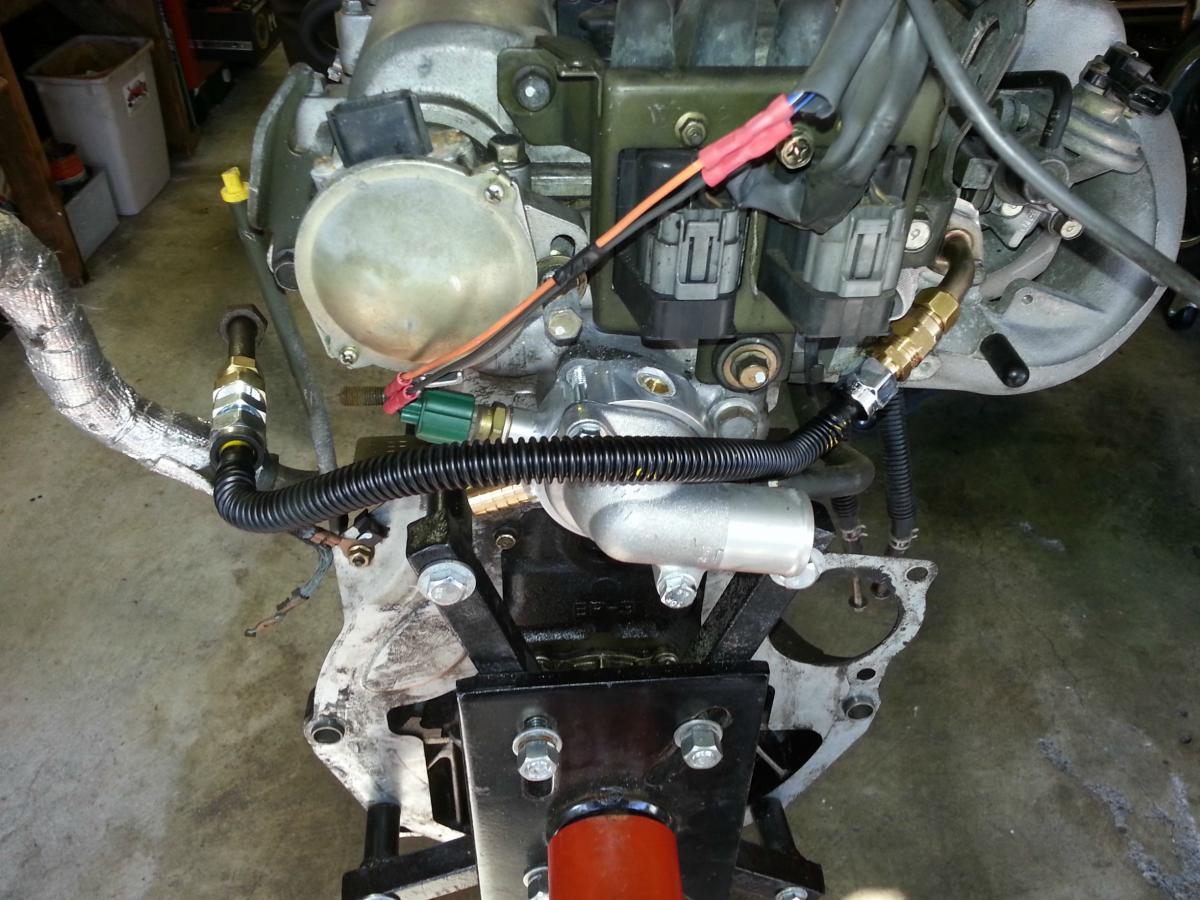
Buried in one of the threads on here was a post about someone using Corrugated Stainless Steel Tubing(CSST) for the egr tube to be able to route it past the thermostat cover on the back of the head.
My attempt at the same idea... I cut the egr tube at both ends and used compression fittings to thread onto the 1/2" egr tube. I painted over the plastic coating with high temp engine paint to try and hide the bright yellowness of it a little bit. I am hoping the plastic covering won't melt under the paint but only one way to find out.
Brasscraft Procoat 1/2" diameter 18" length:
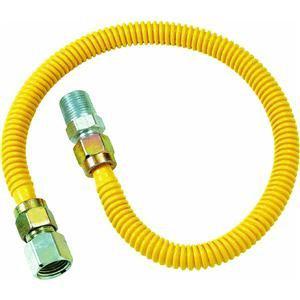
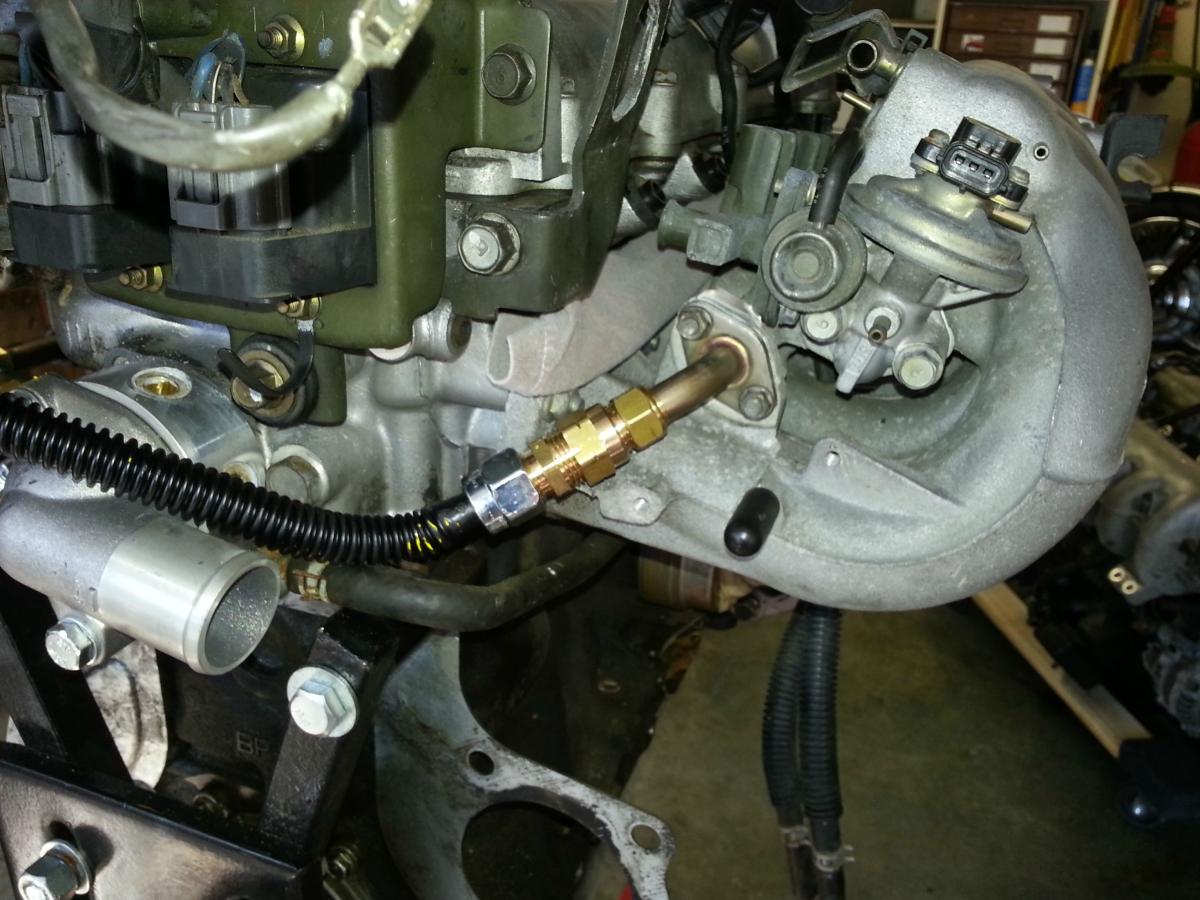
Last edited by michele's miata; 12-09-2013 at 10:38 PM. Reason: better parts found

Reply
 1
1

1
11-27-2013, 09:03 PM
#23

Heat shock tests tend to cause cracking at the joining of the PCB and the lead/pin. Most of these tests ran pretty wild temperatures like -65*C to 125*C (others ran a more realistic 0-100*C). We are talking about 1000+ heat cycles and there was no indicators of loss of electrical connection in the heat cycle tests.
I would say its safe to say that a good solder joint (engine bay or not) is going to last you over 3 years if you drove your car every day. The Fujitsu article has some conclusions that I think may interest you.
Reply
0
0
12-08-2013, 12:04 PM
#24
Newb
Join Date: Nov 2013
Location: Los Angeles
Posts: 3
Total Cats: 1
The problem of needing to extend the wiring harness is more severe on the 01+(?) cars because there are 3 conductors(not 2) and the wire is finer and rather fragile.It is easy to sever the wires with a standard crimp tool. The harness is quite short and once cut ,you have 6 crimps to make in a very confined space.If your crimps fail or have intermittent failure/high resistance it will cause all sorts of problems because that temperature sensor is a primary signal source for the ECU.
It would be much better to have a proper harness extension with a mating plug/socket on each end. A good use for a junk yard wiring loom- if you could find it with the correct connectors?
There is also a better part than the Brasscraft item listed above-48" long and without the expensive(& redundant) safety valve.It is cheaper too.
The part number is :CSSD54-48P.
Last edited by michele's miata; 12-16-2013 at 12:08 AM. Reason: better part
Reply
0
0
07-09-2017, 12:58 AM
#25
Newb

Join Date: Feb 2010
Location: Hayward, Ca
Posts: 26
Total Cats: 2
This post just saved my Californian Smog having ***! Used a 12" pipe instead of the longer sizes. Cut the egr tube in the middle. Left the exhaust side long and cut the intake side short enough to still allow the compression fitting. Covered it in 2 layers of 2" design engineering exhaust wrap from O'Reilly and ran it under the coolant reroute in almost the same stock location. Covered my *rear of head coolant to oil cooler* hose in a reflective protective sleeve and the heater coolant hose from my begi space in the same sleeve also from O'Reilly.
Last edited by mauisurf2003; 07-09-2017 at 11:57 AM.
Reply
0
0

Thread
Thread Starter
Forum
Replies
Last Post


